Got an old iMac that needs a boost? Cloning your old hard drive to an SSD can breathe new life into your aging device. This process is not only cost-effective but also easy to do. In this blog, we’ll provide a step-by-step guide on how to clone your iMac HD to an SSD.
By the end of this blog post, you’ll be able to upgrade your iMac’s hard drive to an SSD, making it run smoother, faster, and more efficiently. So, are you ready to learn how to make your old iMac feel like new again? Let’s get started!
Preparation
If you’re looking to clone your iMac HD to an SSD, there are a few things you’ll need to do to prepare before getting started. First, make sure you have the right equipment on hand. You’ll need your iMac, the SSD you want to clone to, and a USB to SATA adapter cable.
Once you have these items, you’ll need to format your SSD so that it’s ready for the cloning process. To do this, open Disk Utility on your iMac and select the SSD. From there, click on the “Erase” tab and select “Mac OS Extended (Journaled)” as the format.
Finally, give your SSD a name and click “Erase” to complete the process. With your SSD properly formatted, you’re now ready to clone your iMac HD.
Check your iMac specs and compatibility
Before you buy any new software or hardware for your iMac, it’s important to check your computer’s specs and compatibility to ensure everything runs smoothly. Start by looking at your iMac’s model and year to confirm it’s capable of handling the latest software and hardware releases. You can find this information by clicking on the Apple logo in the top left corner of your screen and selecting “About This Mac.
” From there, you’ll be able to see your iMac’s model identifier, processor, memory, and storage capacity. Make sure these specs meet the minimum requirements for the software or hardware you’re interested in. Additionally, check for compatibility with your iMac’s operating system and any other connected devices.
Don’t forget to back up all your files and data before installing any new software or hardware. With a little preparation, you can avoid compatibility issues and ensure a smooth and hassle-free experience with your iMac.

Prepare the SSD and ensure it’s compatible
Before installing a new SSD, it’s important to prepare it properly and ensure it’s compatible with your system. Firstly, make sure you have the correct size of the SSD, as some laptops or desktops may require a specific size. Additionally, back up any important data as you’ll need to clone your existing hard drive to the SSD.
Once you’ve done this, format the SSD using a program such as Disk Management or Disk Utility, selecting the correct file system for your operating system. It’s important to note that not all SSDs are compatible with all systems, so ensure you check the manufacturer’s specifications before purchasing. Overall, taking the time to properly prepare and ensure compatibility will result in a smoother and more efficient installation process.
Create a bootable drive
If you’re looking to transfer your iMac’s hard drive to a solid-state drive (SSD), the process is straightforward, and you can do it yourself. The easiest way to do this is by creating a bootable drive. First, you’ll need to obtain a USB flash drive with at least 16GB of storage space and download the software needed to create the bootable drive.
Next, you’ll need to connect the SSD to the iMac using an adapter and use the bootable drive to clone the hard drive to the SSD. This will create an exact copy of your iMac hard drive, including all of your files, operating system, and programs. Once the cloning process is complete, simply replace your old hard drive with the new SSD, and you’re good to go! Remember to back up your data before starting the process and follow all instructions carefully.
With a bit of patience and the right tools, transferring to an SSD can deliver a significant performance boost and prolong the life of your iMac.
Download the cloning software and install it
Once you’ve decided to clone your hard drive, the first step is to download and install the cloning software. There are many options available, but it’s best to choose a reliable and trusted program for this important task. Once you have the software, the next step is to create a bootable drive.
This will allow you to start up your computer with the cloning software loaded and ready to use. To create a bootable drive, you’ll need a USB flash drive with enough storage space to hold the cloning software. Follow the instructions provided by your cloning software to create the bootable drive.
Once you’ve created the bootable drive, you’re ready to begin the cloning process. Make sure to backup all important data before starting the process to avoid any data loss. By taking the time to properly set up your cloning software, you can ensure a successful and stress-free cloning process.
Create a bootable drive using the software
Creating a bootable drive is a simple and effective way to start your computer when faced with issues such as a corrupted operating system. To do this, you will need a USB drive with enough storage capacity and a reliable bootable USB creation software. There are several software options available to choose from, such as Rufus, YUMI, and Windows USB/DVD Download Tool.
To create a bootable drive, you need to first download and install the software of your choice on your computer. Next, connect the USB drive to your computer and launch the software. Choose the ISO file of the operating system you want to install and select the USB drive as the target device.
The software will then format the USB drive and copy the files needed to make it bootable. Once completed, the USB drive will be ready for use as a bootable device to fix any computer issues or to install a new operating system. By following this simple process, you can create a reliable and effective bootable drive that can help you get back on track when things go wrong.
Connect the SSD to iMac
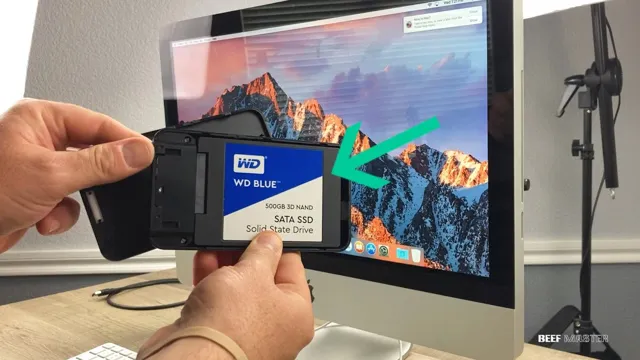
If you’re looking to upgrade your iMac’s hard drive to a solid-state drive (SSD) and transfer all your files, programs, and settings to the new drive, cloning your hard drive is the way to go. The process involves making an exact copy of your iMac’s hard drive onto the SSD so that everything remains just as it was before, only much faster. To clone your iMac hard drive to an SSD, first, you need to connect the SSD to your iMac.
Depending on the type of SSD you have, you can connect it to your iMac either through a USB port or a Thunderbolt port. If you’re using a USB cable, plug one end of the cable into the SSD and the other end into an available USB port on your iMac. If you’re using a Thunderbolt cable, plug one end into the SSD and the other into the Thunderbolt port on your iMac.
Once you’ve connected the SSD to your iMac, you’re ready to start the cloning process.
Open your iMac and connect the SSD
After purchasing a new SSD for your iMac, the next step is to connect the SSD to the iMac. It’s important to ensure that you have the correct tools and follow the proper steps to avoid damaging your iMac or SSD. Begin by shutting down your iMac and unplugging all the peripherals from the back.
Place the iMac on a clean, flat surface and use the necessary tools to release the display panel. Once the display panel is off, locate the hard drive cable and disconnect it from the motherboard. Gently remove the hard drive and replace it with the new SSD.
Secure the SSD in place and reattach the hard drive cable. Finally, reattach the display panel and any other peripherals that were removed earlier. It’s that simple! Your iMac is now ready to use the new SSD – enjoy the faster, more efficient performance it provides.
Clone the HD to SSD
If you’re looking to upgrade your iMac’s storage by switching from an HD to an SSD, you might be wondering how to transfer all your data without losing anything. The good news is that you can easily clone your HD to the new SSD using a variety of software options, both paid and free. One popular choice is Carbon Copy Cloner, which allows you to create a bootable backup of your HD and transfer it to the new SSD.
Another option is SuperDuper!, which provides a simple interface and great performance. Whatever software you choose, make sure that you have enough space on the new SSD and a backup of your important data in case anything goes wrong. Once you’ve successfully cloned your HD, you can enjoy the speed and performance benefits of the new drive without losing any of your files or settings.
So don’t hesitate to make the switch and breathe new life into your iMac!
Select the source and target drives in the software
When it comes to upgrading your computer’s hard drive or simply making a backup, cloning your HD to SSD is a great option. The first step in this process is to select the source and target drives in the software. Most cloning software will guide you through this step, but it’s important to double-check that you’ve selected the correct drives before continuing.
Once you’ve completed this step, the software will begin copying all of the data from your old hard drive to the new SSD. This can take some time, depending on the amount of data you have, so be sure to be patient and let the software complete the process. Once the cloning is complete, you should be able to access all of your files and data on the new SSD, just as you did on your old hard drive.
Cloning your HD to SSD can greatly improve the speed and performance of your computer, making it well worth the time and effort.
Start the cloning process
To clone a hard drive to a solid-state drive (SSD) can be made quite easily with the right software and a few simple steps. Before starting the process, make sure to backup all essential data. Then plug in the SSD via a USB port and install a cloning tool, such as Clonezilla or EaseUS.
Once installed, open the tool and clone the original HD to the new SSD. This copying process can take some time, depending on the size and speed of the drives involved. Afterward, restart the computer and set the BIOS to boot from the new SSD.
The clone should now be available to use. Cloning HD to SSD has several advantages, including faster boot time, improved processing speed, and more efficient power consumption. It also provides an affordable alternative to buying a new computer.
With just a few simple steps, you can transfer all your essential data and settings onto the new SSD in no time.
Verify the cloned SSD
So, you’ve successfully cloned your iMac HD to SSD! Congratulations! But before you start using your new SSD, it’s important to verify that the cloning process was successful. One way to do this is to make sure that your computer recognizes the SSD as the primary boot device. To check this, restart your computer and hold down the Option key.
This will bring up the boot manager, and you should see the SSD listed as an option. If it is, select it and make sure that your computer boots up correctly. Another way to verify the cloned SSD is by checking the storage capacity.
The cloned SSD should have the same storage capacity as your iMac HD if the cloning process was successful. If everything checks out, then congratulations again! You can now enjoy a faster and more efficient computing experience with your new SSD.
Restart your iMac with the new SSD
Now that your iMac has been restarted with the new SSD, it’s time to verify that the cloning process was successful. To do this, you’ll need to open up the “System Preferences” on your computer. From there, click on “Startup Disk” and look for the cloned SSD in the list of available disks.
If it’s listed, then that means the cloning process was successful and your iMac is now using the new SSD as its primary storage device. However, if the cloned SSD doesn’t appear in the list, then you may need to restart your computer and try again. It’s also worth checking to make sure that the cloned SSD is properly connected to your iMac and that all of the cables are securely attached.
With these steps completed, you can now rest easy knowing that your iMac has a new and improved SSD, ready to handle all of your computing needs with lightning-fast speed.
Ensure everything is working properly
After you’ve cloned your SSD, the next step is to verify that everything is working correctly. This is an essential step to ensure that your new drive is reliable and ready to use. To verify your cloned SSD, you need to check if the files and data were copied correctly and if there are no issues with the operating system.
You can do this by accessing your cloned drive’s data and comparing it to the original drive’s data. Check for any missing files or folders, and make sure everything is in its proper place. It’s also essential to check if your operating system is working correctly by booting up from the new SSD.
If your system boots up smoothly without any error messages, then you’ve successfully cloned your drive, and it’s ready to use. Make sure to take a backup of your original drive before cloning, just in case anything goes wrong. By following these steps, you can ensure that your cloned SSD is working efficiently and correctly.
Conclusion
In conclusion, cloning your iMac HD to an SSD is like copying your favorite book onto a new, shiny cover – it keeps all the same words and story, but just makes for a faster, smoother reading experience. So go ahead, give your iMac the upgrade it deserves and clone that HD to an SSD!”
FAQs
What tools do I need to clone my iMac HD to SSD?
You will need an external hard drive, a SATA to USB adapter, and a cloning software such as Carbon Copy Cloner or SuperDuper.
Can I clone my iMac HD to SSD without losing data?
Yes, cloning your iMac HD to SSD will copy all your data and settings to the new drive, so you won’t lose anything.
How long does it take to clone an iMac HD to SSD?
The time it takes to clone an iMac HD to SSD depends on the size of your data and the speed of your computer, but it can take anywhere from a few hours to a day.
Do I need to format my SSD before cloning my iMac HD?
No, most cloning software will automatically format your SSD to make it compatible with your iMac.
Can I continue to use my iMac while it’s being cloned to an SSD?
While it’s technically possible, it’s not recommended as it can slow down the cloning process and potentially cause errors. It’s best to let the cloning process run uninterrupted.