So you want to install a GPU on your SSD? Good news! It’s a simple process that can be done in just a few steps. But before we dive into the how-tos, let’s first address the why. Having a dedicated graphics card can greatly enhance your computer’s performance, especially when it comes to gaming or video editing.
As for installing it on your SSD, this is all about making use of the speedy storage drive to improve load times and overall system responsiveness. Think of it like swapping out your compact car’s engine for a high-performance one. Ready to get started? Let’s go over the steps to make it happen.
Check Compatibility
“Installing a GPU to an SSD can improve performance, but compatibility is key. Before installation, ensure that your GPU is compatible with your motherboard’s PCIe slot. If not, you may need to upgrade your motherboard or choose a different GPU.
Additionally, make sure your SSD has enough capacity to store the necessary drivers and software for the GPU. Once compatibility is confirmed, physically install the GPU in its designated PCIe slot and connect the necessary power cables. Finally, ensure that your computer’s BIOS is up to date and configure it to recognize the new hardware.
With proper compatibility and installation, you can enjoy improved graphics performance and faster load times for your favorite games and applications.”
Verify that your GPU and SSD are compatible
When it comes to upgrading your PC, it’s crucial to ensure that all the components are compatible with each other. Two of the essential components that you need to check for compatibility are your GPU and SSD. Both components are crucial for ensuring that your PC performs optimally.
Therefore, it’s essential to verify compatibility before purchasing any one of them. In general, most modern GPUs are compatible with most modern SSDs. However, it’s still necessary to check the specifications of both components to ensure that they’ll function correctly together.
You can check your GPU’s specifications to see if it supports the same PCIe slot as your SSD. Additionally, make sure to review your SSD’s read and write specifications to ensure that the GPU doesn’t become a bottleneck. By taking the time to check compatibility, you can help ensure that your PC upgrade doesn’t result in unforeseen problems down the line.
Prepare your System
So, you’ve just bought a new graphics card, and you’re excited to install it on your system, but you’re not quite sure how to go about it. Well, the first thing you need to do is prepare your system. Before starting the installation process, make sure to backup important files on your SSD.
You don’t want to lose any data if something goes wrong during the installation. Next, check if your system’s motherboard has a slot for your new GPU and make sure the GPU fits the slot perfectly before proceeding. Also, ensure that your power supply unit has enough wattage to support the new graphics card.
Once you’ve prepared your system, you can now open up your computer, carefully insert the new GPU into the PCIe slot, and secure it with the appropriate screws. After that, connect the power cables from your power supply unit to the GPU, and lastly connect your monitor to the GPU ports. Follow these few simple steps, and you can confidently say you’ve installed your new graphics card correctly, and ready to enjoy the latest games and graphics-intensive applications.
Shut down your computer and disconnect all cables
Preparing your system is an essential step before performing any maintenance or repair work on your computer. The first thing you should do is shut it down and disconnect all cables from the power outlet, including the monitor, keyboard, mouse, ethernet and power cables. This is a crucial step to ensure that there is no electrical current running through your system, which can be potentially dangerous.
Once your computer is off, you can proceed to clean it up and check for any dust or dirt build-up. It is also important to ensure that you have all the necessary tools and equipment you need, such as a Phillips screwdriver, canned air, and a clean cloth before starting any work. This step is imperative as it will help you avoid any unnecessary delays while working on your computer.
By taking the time to prepare your system correctly, you can prevent any damage to your computer, and ensure that your work is smooth and hassle-free.
Remove Old GPU
So, you’ve decided to upgrade your computer’s graphics by installing a new GPU and you need to know how to do it. First, you need to remove your old GPU by shutting down your computer and unplugging it. Then, remove the screws or clips holding the GPU in place and gently remove it from the PCIe slot.
Be sure to take note of the type of PCIe slot your old GPU was using, as this will be important when installing your new GPU. Now that you have removed your old GPU, it is time to install your new one. If you have an SSD, you may be wondering how to install your GPU to it.
The good news is that GPUs do not need to be installed directly to your SSD. Instead, they are installed into the PCIe slot on your motherboard, which allows them to communicate with your computer’s processor, memory, and storage. To install your new GPU, first, locate the appropriate PCIe slot on your motherboard.
Depending on the type of GPU you are installing, you may need to remove any covers or brackets that are blocking the slot. Then, carefully insert your new GPU into the slot, making sure it is firmly seated and the notch lines up with the locking mechanism. Finally, secure the GPU in place with screws or clips and connect any necessary power cables.
That’s it! With your new GPU installed, you can now enjoy better graphics performance in your favorite games and applications. Keep in mind that the process of installing a GPU may vary depending on the specific model and manufacturer, so be sure to consult the instructions that came with your new GPU for more detailed guidance.
Uninstall old GPU
Uninstalling an old GPU is essential if you want to upgrade to a new one. The process of removing an old graphics processing unit is relatively simple and straightforward. First, you need to turn off your computer and disconnect it from any power source.
Next, remove the screws that hold the old GPU in place and gently remove the card from its slot. Be careful not to touch the sensitive parts or the connectors while doing this. Once you have removed the old GPU, you can install the new one by aligning it with the appropriate slot and screwing it in place.
It is essential to ensure that you install the new GPU correctly to avoid any damage to your computer. Overall, removing an old GPU will allow you to install a new one that can enhance your computer’s performance and graphics capabilities.
Insert the New GPU
If you want to upgrade your PC’s graphics performance, you’ll need to install a new GPU. Here’s how to do it. First, shut down your computer and unplug it from the power source.
Next, locate your current graphics card and carefully remove it from its slot. Make sure to release any retainers or screws that are holding it in place before pulling it out. Then, take your new GPU and align it with the slot, making sure the connectors face towards the back of the computer.
Gently push down on the card until it clicks into place, and secure it with any retainers or screws that came with it. Finally, plug in any necessary power cables, and turn your computer back on. Congratulations, you’ve successfully installed a new GPU to your SSD, and are now ready to enjoy improved graphics performance in your favorite games!
Insert the new GPU into your system
Inserting a new GPU into your system can be an exciting yet daunting task, but fear not! With a little bit of know-how, you can easily get it done. The first step is to turn off your computer and unplug it from the power source. Next, open up your computer case and locate the PCIe slot where your GPU will go.
Carefully insert the GPU into the slot, making sure it is firmly in place and screwed in securely. Double-check all the connections and ensure that the power cables are connected to the GPU and power supply properly. Once everything is securely in place, put the computer case back together and turn it on.
Your computer should detect the new GPU, and you can install the necessary drivers to get it up and running. With your new GPU installed, you can enjoy smoother and faster gaming, improved video editing, and better overall performance in all your graphics-intensive applications. Don’t forget to take care of your old GPU; it may still have some value, and you could sell it to offset the cost of your new one.
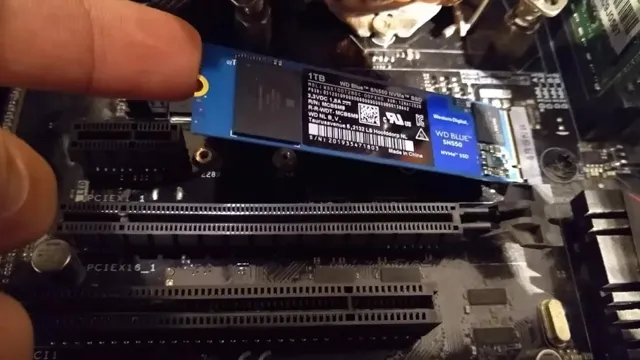
Prepare the SSD
If you’re wondering how to install your GPU to your SSD, the first step is to prepare the SSD itself. Firstly, ensure that your SSD has the necessary SATA ports and cables needed to connect it to your motherboard. Once this is confirmed, you’ll need to format your SSD to ensure it’s ready to receive data.
This involves creating a partition on your SSD and formatting it in a supported file system such as NTFS or exFAT. You can accomplish this with a dedicated program like Windows Disk Management or third-party utilities like EaseUS Partition Master. It’s essential to do this correctly to avoid any data loss or corruption while transferring your files to the SSD.
Once your SSD is formatted, you can proceed with connecting it to your motherboard and installing drivers necessary for GPU and SSD interoperability. By following these steps, you’ll be sure to enjoy faster load times and improved overall system performance.
Unbox the SSD and verify that it is in working condition
When you receive your new SSD, the first thing you should do is unbox it and check that it is in working condition. Before installing it in your computer, you need to prepare the SSD by formatting it to the correct file system. This process differs depending on the operating system you use, but generally involves selecting the SSD in the disk management tool and formatting it to NTFS or another compatible file system.
Once you have formatted the SSD, you can clone your existing hard drive or install a fresh operating system onto it. Cloning your existing drive will copy all of your data and settings to the new SSD, whereas a fresh install will require you to reinstall all of your programs and transfer your data over manually. Before installing the SSD, make sure that your computer has an available slot for it and that any necessary mounting hardware is included.
Once installed, you can enjoy faster boot times and improved performance in all of your applications. Just make sure to keep your operating system and important files backed up regularly to prevent data loss in case of a hardware failure. In conclusion, preparing your new SSD involves unboxing and verifying its functionality, formatting it to the correct file system, and installing it in your computer.
By following these steps, you can enjoy the benefits of faster performance and improved reliability. Just remember to keep your data backed up to avoid any potential data loss.
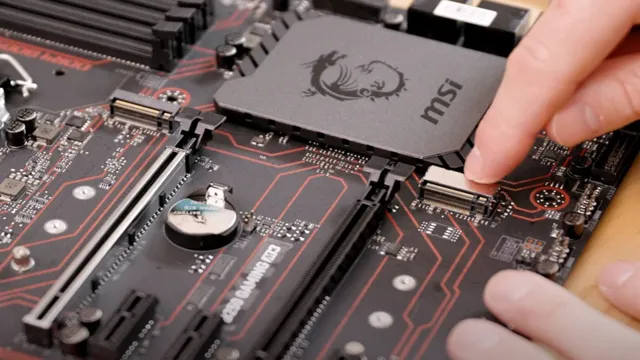
Connect the SSD to your System
When it comes to installing a GPU to an SSD, there are a few steps you have to follow to make it work. First, you need to make sure that your SSD is compatible with your GPU and your system. Next, you’ll want to ensure that your SSD is connected to your system’s motherboard via a PCIe slot, which is usually located near the GPU slot.
It’s crucial to remember to switch off your system before connecting and installing anything to avoid any damage to your hardware. After that, you can carefully plug in your GPU to the PCIe slot, ensuring you attach it correctly and securely. Once the GPU is in place, you can now connect it to your SSD using its connectors.
Reboot your computer to ensure that everything is working correctly. And that’s how you install a GPU to your SSD! Just remember to be careful, as this process can involve some delicate handling and attention to detail.
Connect the SSD to your motherboard using a SATA cable
Connecting your solid-state drive (SSD) to your motherboard is an essential part of upgrading your system’s storage capacity. To get started, you’ll need to connect the SSD to your motherboard using a SATA cable. First, locate the SATA port on your motherboard and connect one end of the cable to it.
Then, connect the other end of the cable to the SSD. Make sure to align the connector pins correctly and firmly push it in until it clicks into place. It’s crucial to handle the SSD with care and avoid static electricity by grounding yourself properly before touching any components.
Once connected, your system will detect the SSD, and you can configure it as an additional storage device. With faster read and write speeds, your system will experience improved performance and faster boot-up times. Keep in mind that improper installation could lead to data loss, so it’s crucial to follow the manufacturer’s instructions carefully.
With your SSD connected securely, you’re ready to take advantage of your system’s increased storage capacity and improved performance.
Install SSD Drivers
If you’re wondering how to install your graphics card to your SSD, the first step is to ensure that you have the necessary drivers installed. Installing SSD drivers can be a bit tricky, but it’s essential for optimal performance. The process varies depending on the manufacturer of your SSD, but in general, you can usually download the drivers from the manufacturer’s website.
Once downloaded, you can simply run the installer and follow the prompts. Some SSDs also come with their own proprietary software, which can help optimize performance even further. It’s important to note that many newer operating systems automatically detect and install the necessary drivers for your SSD, so you may not need to do anything at all.
However, if you’re experiencing slow performance or other issues, it’s worth checking to see if you have the latest drivers installed. So, to ensure a smooth and speedy gaming experience, make sure to keep your SSD drivers up to date.
Install SSD drivers to your system
Installing SSD drivers to your system is crucial to maximize the performance of your solid-state drive. The installation process starts with identifying the make and model of your SSD and downloading the appropriate drivers from the manufacturer’s website. Once the download is complete, run the setup file and follow the on-screen instructions to install the drivers.
It is essential to reboot the computer after the installation to ensure that all changes have taken effect. Installing SSD drivers can significantly improve the overall speed and stability of your computer by optimizing the communication between the drive and the system. The drivers enable the operating system to communicate with the SSD and utilize its full potential, resulting in faster boot and load times, smoother performance, and less system hangs and crashes.
In addition, some SSD drivers offer advanced features such as disk encryption, power management, and error correction, which can enhance the security and reliability of your data storage. In conclusion, installing SSD drivers is a simple yet critical step in maximizing the benefits of your solid-state drive. By downloading and installing the appropriate drivers, you can ensure that your system communicates with the SSD effectively and efficiently, unlocking its full potential and providing you with a faster, more stable, and secure computing experience.
So, next time you upgrade to an SSD, don’t forget to install its drivers too!
Reinstall the Cables and Test the Setup
When it comes to installing a GPU to an SSD, the first step is to ensure that all the necessary cables are properly connected. Begin by unplugging all cables from the computer and removing the case cover. Then, locate the slot where the GPU will be installed and carefully insert it into the slot, ensuring that it is aligned correctly.
Once the GPU is inserted, it’s time to reconnect the power cables. Make sure that the power cables are connected to the power supply and both the GPU and SSD. When everything is properly connected, it’s time to power on the computer and test the setup.
Open the BIOS and ensure that the computer can detect both the GPU and SSD. If everything is working properly, you’re ready to start gaming with your upgraded computer setup! Remember to always follow proper safety protocols when working with computer components to avoid damage to both yourself and the hardware. By following these steps, you will have successfully installed your GPU to your SSD and ensured that everything is set up and ready to go.
Reconnect all cables and turn on your computer to verify and test the setup
After carefully replacing the parts in your computer, it’s time to put everything back together. The next step is to reinstall all the cables and turn on your computer to test if everything is working properly. This process can be a bit overwhelming, but it is necessary to ensure that your computer is in good condition.
Take your time and double-check the connections to avoid any errors. Once the cables are plugged in, turn on your computer and see if it boots up properly. If it does, then proceed to check if all the peripherals are working correctly.
From the mouse to the keyboard, make sure that everything is connecting as intended. Don’t forget to check all the ports and make sure that they are properly functioning as well. By reconnecting all the cables and testing the setup, you can ensure that your computer is back to its optimal state.
Keep in mind that proper cable management can help improve airflow and prolong the lifespan of your computer components. Keyword used: Reinstall cables.
Conclusion
Well, I hate to break it to you, but installing a GPU onto an SSD is quite impossible. It’s like trying to fit a square peg into a round hole. However, if you want to upgrade your GPU or install it into your computer, I recommend doing some research and following the manufacturer’s instructions carefully.
As for your SSD, keep it snugly in its spot and enjoy the lightning-fast speeds it brings to your computing experience.”
FAQs
What tools do I need to install my GPU to my SSD?
You will need a Phillips screwdriver, a grounding strap, and possibly a bracket to secure the GPU in place.
Can I install my GPU to my SSD without any previous technical knowledge?
It is recommended that you have some technical knowledge before attempting to install your GPU to your SSD. However, there are many online resources and tutorials available that can help you with the process.
Do I need to update my drivers after installing my GPU to my SSD?
Yes, you will need to install the appropriate drivers for your GPU in order for it to function properly with your SSD.
Is it recommended to use thermal paste when installing my GPU to my SSD?
Yes, it is important to apply thermal paste to the GPU before installing it to the SSD. This helps to transfer heat away from the GPU and maintain optimal performance.