Category: How to

How to

  • SSD Reset Guide: Step-by-Step Instructions on How to Prepare Your SSD for Windows Reset

    When it comes to resetting your Windows device, it’s crucial to prepare your SSD. Doing so can save you from potential data loss and ensure that the reset process goes smoothly. But where do you even begin? Don’t worry, we’ve got you covered.

    In this blog post, we’ll walk you through the steps you need to take to prepare your SSD for a Windows reset. From backing up your important files to disabling BitLocker, we’ll cover everything you need to know to ensure a seamless reset experience. So, grab a cup of coffee, sit back, and let’s get your SSD ready for the ultimate reset.

    Backup Important Data

    If you’re planning to reset Windows on your SSD, the very first thing you need to do is backup your important data. This is crucial to ensure that you don’t lose any important files or documents during the reset process. You can either use an external hard drive, cloud storage, or even a USB stick to backup your files.

    Once you’ve backed up your data, you can move on to resetting your SSD by going to the Windows settings, click on “Update & Security” and then “Recovery”. From there, click on “Get started” under “Reset this PC”. It’s important to note that resetting your SSD will erase all data and installed programs, so make sure you have backed up everything you need before proceeding.

    By following these steps, you can easily prepare your SSD for a Windows reset while ensuring that your important data is safe and secure.

    Save files to external drive or cloud storage

    Backing up your important data is crucial to avoid the possibility of losing it. One way to do this is by saving files to an external drive or cloud storage. An external drive is a portable storage device that can be connected to your computer via a USB port.

    It provides a backup of your data and allows you to take it with you wherever you go. On the other hand, cloud storage is an online service that allows you to save your files to a remote server. This is a convenient way to access your files from anywhere, as long as you have an internet connection.

    You can also share your files with others and collaborate on projects. However, it’s important to choose a reliable cloud storage provider and ensure that your data is encrypted and secure. Whether you choose to use an external drive or cloud storage, backing up your important data is essential to protect it from accidental loss or damage.
    how do i prepare my ssd to reset windows

    Reset SSD to Factory Settings

    If you’re preparing to reset Windows on your computer, it’s a good idea to reset your SSD to factory settings as well. This will ensure that your drive is clean, and any data that may have been left behind from previous installations is wiped clean. To reset your SSD to factory settings, you can use the manufacturer’s software or third-party software.

    Some manufacturers such as Samsung provide dedicated software like Samsung Magician for managing their drives. The software will allow you to securely erase the data on the drive and restore it to the original state. Third-party software like CCleaner is also a popular choice.

    Once you have downloaded and installed the software, select the drive you want to clean and follow the prompts. Be sure to back up any important files on the drive before initiating a wipe. Overall, resetting your SSD to factory settings will give you peace of mind knowing that your drive is clean and ready for a fresh Windows install.

    Access BIOS settings

    If your SSD is acting up or you simply want to start fresh, resetting it to its factory settings is a good option. But how do you access the BIOS settings to make this happen? Well, it depends on your specific computer’s make and model, but in general you will need to restart your computer and press a certain key to enter the BIOS setup screen. This key is usually displayed on the screen during startup, but if not, you can try F2, F10, or DEL.

    Once you are in the BIOS setup screen, use the arrow keys to navigate to the “Reset to Factory Default” or similar option and follow the prompts to reset your SSD. Keep in mind that this process will erase all data on the drive, so make sure you have backed up any important files beforehand. With a little tech know-how, accessing the BIOS and resetting your SSD can be a simple and effective solution.

    Use Reset Tool or Command Prompt

    If you’re experiencing issues with your SSD and want to start fresh, resetting it to its factory settings can be an effective solution. There are two ways you can do this: by using a reset tool or by using Command Prompt. The reset tool allows you to completely wipe your drive and reinstall your operating system without needing any special technical knowledge.

    On the other hand, using Command Prompt allows you to access advanced settings to manually reset your SSD. Although using Command Prompt requires a bit more technical expertise, it can be useful for those who want complete control over the reset process. Whichever method you choose, make sure to back up your important data before resetting your SSD to avoid losing any crucial files.

    With a fresh start, your SSD should work like new again, allowing you to enjoy faster speeds and better performance.

    Format SSD for Clean Install

    If you want to reset your Windows operating system, you must prepare your SSD by formatting it first. This process involves deleting all data and partitions on the drive to start fresh, which will allow you to perform a clean install of Windows. To begin, ensure that you have backed up all important data and applications as this process will erase everything on your SSD.

    Once you have backed up everything important, find the proper tools to format your SSD. Windows 10 users can use their installation media to format their SSD, while other users may need to download third-party software. After obtaining the necessary tools, boot your computer from the installation media or third-party software and begin the formatting process.

    Follow any on-screen instructions to partition your drive and set it up for a clean installation of Windows. In conclusion, formatting your SSD is a crucial step to take before resetting your operating system, so be sure to remember to back up everything important and follow the proper steps to ensure a successful installation.

    Select SSD in Windows Installation Process

    When you are installing Windows onto a new SSD, it is important to format the drive first. This will ensure that the operating system has a clean slate to work with and can operate at its maximum potential. To format the SSD, simply select it during the Windows installation process and choose to perform a custom installation.

    From there, you will have the option to format the drive before installing the operating system. It is important to note that formatting the SSD will delete any existing data on it, so be sure to back up any important files beforehand. By formatting the SSD before installing Windows, you will ensure that the operating system operates smoothly and efficiently for the life of your computer.

    So, don’t forget to format your SSD for a clean install!

    Prepare and Format Partition

    When it comes to setting up a new SSD for a clean install, formatting is an essential step in the process. First, you’ll need to prepare the partition by deleting any existing partitions and creating a new one. Then, you can format the SSD to ensure that all data is erased, and the drive is ready to be used as a clean slate.

    It’s best to use the NTFS file system for your SSD, as it is optimized for modern hardware and offers better performance than other file systems. Keep in mind that formatting will erase all data on the drive, so be sure to back up any important files before proceeding. Once the formatting is complete, you can install the operating system and any necessary drivers to get your computer up and running smoothly.

    By properly preparing and formatting your SSD, you can ensure a clean and efficient installation experience.

    Install Windows

    Preparing an SSD for a Windows reset is a fairly straightforward process. Firstly, make sure you have an external drive or cloud storage solution for backing up all your important files. You don’t want to lose any important data.

    Once you’ve taken this important step, you’re ready to go. Insert the SSD into your computer either as a secondary drive or as the main one if you’re replacing your existing one. Next, boot up your PC and head over to the BIOS or UEFI settings where you need to check for the SATA mode and ensure it’s set to AHCI.

    Once you’ve made this change, save and exit and restart the computer. You’ll now need to install Windows as normal, which will differ depending on the version of Windows you’re installing. Finally, once you’ve completed the installation, reinstall all your necessary drivers and software.

    Congratulations! You have now successfully reset Windows on your SSD.

    Following Windows Installation Steps

    Installing Windows can seem like a daunting task, but it doesn’t have to be. The first step is to gather all necessary materials, including a Windows installation disc or USB drive, a product key, and a backup of all important files. Once everything is in place, insert the installation disc or plug in the USB drive and restart the computer.

    Press the appropriate key to enter the boot menu and select the installation media. From there, follow the on-screen prompts to select language and keyboard preferences, enter the product key, and choose the installation options, such as partitioning the hard drive. It’s important to pay attention to each step to ensure a smooth installation process.

    Once all settings have been confirmed, sit back and wait while Windows installs. Some installations may take a while, so be patient. Remember to backup all important files and have the product key ready to enter when prompted.

    With these simple steps, installing Windows can be a breeze.

    Activation and Updates

    One of the first steps when setting up a new computer is installing the Windows operating system. This process can vary depending on your device and if you have a physical installation disc or a digital license. If you have a disc, simply insert it into your computer and follow the prompts to install Windows.

    If you have a digital license, you’ll need to create installation media and then boot from that media to install Windows. Once Windows is installed, you’ll need to activate it with a product key. This key is typically found on a sticker on the device or in the confirmation email if you purchased a digital license.

    Regular updates are also important to keep your system running smoothly. Windows 10 offers automatic updates, but you can also manually check for updates in the settings menu. Ensuring that your Windows is installed correctly and up-to-date can make a big difference in your computer’s performance.

    Conclusion

    In conclusion, preparing your SSD to reset Windows is like a chef prepping their ingredients before cooking a meal. You want to make sure your SSD is clean and ready to handle the fresh installation of Windows, much like you would want your kitchen to be clean and organized before cooking a dish. So, take some time to wipe your SSD clean and make sure all your important data is backed up, that way you can enjoy a smooth and hassle-free reset process.

    Bon appétit!”

    FAQs

    What is the process to prepare an SSD to reset Windows?
    To prepare an SSD for resetting Windows, you need to first back up all your important files. Then, go to the Settings app and select the ‘Update & Security’ option. From there, click on the ‘Recovery’ tab and select ‘Get started’ under the ‘Reset this PC’ option. Follow the on-screen instructions to complete the process.

    Can I reset Windows on an SSD without losing my data?
    Yes, you can reset Windows on an SSD without losing your data by selecting the ‘Keep my files’ option during the reset process. This will remove all the installed applications and settings, but your personal files will be preserved.

    Is it necessary to format an SSD before resetting Windows?
    No, formatting an SSD is not necessary before resetting Windows. The reset process will wipe out all the data on the partition where Windows is installed, so there’s no need to format the drive beforehand.

    What should I do if my SSD is not showing up during Windows reset?
    If your SSD is not showing up during Windows reset, you should check if its connection is secure. Also, ensure that the drive is properly recognized in the BIOS settings. If the problem persists, you may need to update your system drivers or contact the manufacturer for assistance.
  • Effortlessly Partition Your SSD for Optimal Linux Experience: Step-by-Step Guide

    If you’re new to Linux and want to install it on a solid-state drive (SSD), you may be wondering how to partition it for optimal performance. Fortunately, partitioning an SSD for Linux is not as complicated as it may seem. In this blog, we’ll discuss the basics of partitioning your SSD for Linux, including the benefits of doing so and some best practices to keep in mind.

    By the end of this article, you’ll have a good understanding of how to partition your SSD and set up your Linux installation for optimal performance. So, let’s dive in!

    Backup Important Data

    If you’re planning to partition your SSD to put Linux, it’s crucial to backup your data first. This is because partitioning involves dividing the hard drive into separate sections, which could result in data loss if not done correctly. To backup your important data, you can use an external drive or cloud storage service to securely store your files.

    Make sure to transfer all your essential data, including documents, photos, videos, and music. Once you’ve backed up your data, you can proceed with partitioning your SSD. The process involves using partitioning tools such as GParted, Disk Utility, or fdisk to create a separate partition for Linux.

    It’s important to note that you should allocate sufficient space for Linux, typically between 20GB to 30GB, depending on your needs. After partitioning your SSD, you can then install Linux onto the new partition and enjoy dual-booting your computer.

    Save important files to an external drive or cloud storage

    Are you one of those people who store important files and documents on your computer’s hard drive? While it may seem convenient, it’s not exactly the best idea. Computers can crash, get stolen, or even get lost. If any of these unfortunate events happen, you could lose all your important files, including cherished photos, important documents, personal information, and everything in between.

    That’s why it’s crucial to back up your data. One of the best ways to back up your files is by using an external drive or cloud storage. An external drive is a device that can be plugged into your computer’s USB port.

    You can transfer files onto the external drive, and it keeps a copy of your files separate from your computer’s hard drive. Cloud storage is another option. It’s an online storage service that allows you to upload your files to a secure website.

    This is an excellent option for those who may need to access their files from different devices or locations. Overall, backing up your data is a small investment compared to the potential loss of your valuable information. Don’t wait until it’s too late; start backing up your files today!

    how do i partition my ssd to put linux

    Download Linux ISO

    If you’re looking to partition your SSD to put Linux, the first step is to download a Linux ISO file. You can find these files easily by doing a quick search online, and they typically come in a variety of different flavors depending on your needs. Once you’ve downloaded the file, you’ll need to create a bootable USB drive using a tool like Rufus or Unetbootin.

    From there, you’ll be able to boot into the Linux environment and begin the installation process. During installation, you’ll be given the option to partition your SSD. It’s important to read the instructions carefully and make sure you understand what you’re doing, as partitioning can have serious consequences if done incorrectly.

    With some patience and attention to detail, however, you should be able to partition your SSD successfully and start using Linux in no time.

    Choose a Linux distribution and download it from a trusted source

    If you’ve decided to switch to Linux, the first step is to choose a Linux distribution and download it from a trusted source. There are many distributions to choose from, each with its own unique features and benefits. Some of the most popular distributions include Ubuntu, Fedora, and Debian.

    When downloading a Linux ISO, it’s important to make sure that you download it from a official source to avoid any malware or security issues. You can also check the integrity of the ISO file by verifying its checksum. Once you’ve downloaded the ISO file, you can burn it to a USB or DVD and install it on your computer.

    Remember to back up your important files before installing Linux, as the installation process will wipe your hard drive. With a little bit of research, you can easily find the Linux distribution that’s right for you and start enjoying the benefits of a free and open-source operating system.

    Create a Bootable USB Drive

    If you want to install Linux on your SSD, the first step is to create a bootable USB drive. To do this, you will need a USB flash drive with a capacity of at least 4GB and a program to create a bootable drive, such as Rufus or Etcher. Once you have downloaded and installed the program, plug in your USB drive and open the program.

    Select the ISO file of the Linux distribution you want to install and choose the USB drive as the target device. Before clicking the start button, make sure that all the data on the USB drive is backed up, as the process will erase everything on the drive. Once the process is finished, you will have a bootable USB drive that you can use to install Linux on your SSD.

    When booting from the USB drive, you may have to change the boot order in your BIOS settings to prioritize the USB drive over the SSD. With a reliable and easy-to-use program, creating a bootable USB drive is a quick and painless process that will allow you to partition your SSD and install your favorite Linux distribution.

    Use a tool like Rufus to create a bootable USB drive with the Linux ISO

    To install Linux on your computer, you’ll need to create a bootable USB drive with the Linux ISO. Rufus is a fantastic tool that simplifies this process. To get started, connect your USB drive to your computer and launch Rufus.

    In Rufus, select the USB drive you want to use and then browse for the Linux ISO you downloaded. Choose the appropriate settings for your installation, such as the file system and boot type, and then click on the “Start” button. Rufus will then begin to create your bootable USB drive.

    This process typically takes a few minutes, so be patient and don’t disconnect your USB drive during this time. Once Rufus has finished, you’ll have a bootable USB drive that you can use to install Linux on your computer. With Rufus, you no longer have to worry about complicated installation procedures – it’s all simplified with just a few clicks!

    Boot into Linux Live Environment

    When it comes to installing Linux on your SSD, partitioning the drive is an important step. One way to do this is by booting into a Linux live environment, which requires creating a bootable USB drive with a Linux distribution like Ubuntu or Fedora. Once you’ve created your USB drive, restart your computer and select the USB drive from the boot menu.

    This will load the Linux live environment, allowing you to use tools like GParted to create partitions on your SSD. Before you start partitioning, make sure you have backed up all your important data, as partitioning can wipe your drive clean. GParted is a user-friendly tool that lets you customize your partitions and allocate space as per your needs.

    Once you’ve created your Linux partition, you can install the Linux distribution of your choice and start using it right away! Remember to choose the right partition while installing, and you’re good to go. By partitioning your SSD, you will be able to fully utilize your drive and make the most of your Linux installation.

    Insert the USB drive into your computer and boot it up, selecting the USB drive as the boot option

    If you’re interested in trying out a new operating system on your computer without committing to a full installation, booting into a Linux Live Environment is a great option. To do this, you’ll need to insert a USB drive with the Linux Live distribution into your computer and select it as the boot option. This means that when you turn on your computer, it will start up using the Linux environment on the USB drive instead of your usual operating system.

    Once you’re in the Linux Live Environment, you can explore all of the features and apps without affecting your existing system or files. This is a great way to test out new software, troubleshoot problems, or simply experiment with a different user interface. Just make sure that you select the USB drive as the boot option before starting up your computer, and you’ll be able to access the Linux Live Environment with ease.

    Begin the Installation Process

    If you’re planning on putting Linux on your SSD, the first thing you need to do is to partition it. Partitioning your SSD involves dividing it into separate sections or partitions where you can install the operating system. The easiest way to do this is to use the partitioning tool during the installation process.

    Most Linux distributions, such as Ubuntu and Debian, include a partitioning tool that allows you to create partitions manually or automatically. When using the automatic mode, the installer will automatically create partitions for the root file system (where the operating system will be installed) and a swap partition (used to free up memory on your system). You can customize the partition sizes based on your needs, but keep in mind that you’ll need at least 20 GB of space for the operating system.

    By following these steps, you’ll be able to partition your SSD and get started with installing Linux in no time!

    Follow the installation prompts until you reach the partitioning step

    If you’re ready to install a new operating system on your computer, congratulations! It’s always exciting to start fresh with upgraded software. The first step to getting started with the installation process is to follow the prompts until you reach the partitioning step. This is the point where you will decide how to allocate space on your hard drive for the new operating system.

    Depending on your preferences, you may choose to allocate more or less space to certain programs or files. This decision will impact the performance of your computer, so it’s essential to think through your options carefully. The good news is that the installation process will guide you through each step so that you can make informed choices.

    By continuing to follow the prompts, you’ll be on your way to a fresh start with a new operating system in no time!

    Partition the SSD

    If you want to install Linux on your SSD, the first step is to partition the drive. Partitioning means dividing the SSD into different sections or partitions, each of which can be used for a different purpose. To partition your SSD, you can use a tool like GParted, which is included with many Linux distributions.

    Once you have GParted open, select your SSD from the list of available drives and choose “New Partition Table.” This will wipe the SSD clean, so make sure to backup any important data first. Then select the unallocated space on the SSD and create a new partition for Linux.

    Most Linux experts recommend making multiple partitions: one for the root partition, one for the home partition, and one for swap. The root partition holds the operating system’s files, while the home partition is where your personal files are stored. Swap space is like extra RAM and can improve performance when your computer is low on memory.

    By partitioning your SSD, you can keep your Linux installation organized and optimized for your needs.

    Choose the SSD as the installation destination and create partitions for the root, swap, and home directories

    Partitioning the SSD to allocate space for the root, swap, and home directories is an essential step in the installation process. It allows for optimal performance and organization of your system. First, choose the SSD as the installation destination in the setup process.

    Then, create partitions for the root directory, which is where system files are stored; the swap directory, which acts as virtual memory; and the home directory, where personal files are stored. It’s crucial to allocate enough space to each partition and to regularly back up the home directory to prevent data loss. By partitioning the SSD, you can optimize your system for speed and efficiency while also ensuring that your files are safe and secure.

    So, take your time when partitioning and consider the needs of your system to create a stable and effective partitioning plan.

    Complete the Installation

    If you’re ready to put Linux on your SSD, the first thing you’ll need to do is partition it accordingly. This process can seem intimidating at first, but it’s actually pretty straightforward once you understand the basics. The main thing to keep in mind is that you’ll need at least two partitions: one for the root file system and one for the swap space.

    The root partition will hold your operating system and files, while the swap partition is used for virtual memory. To create these partitions, you’ll need to use a partitioning tool like GParted, which is often included with Linux distributions. Once you’ve launched GParted, you’ll simply need to select your SSD, create the partitions you need, and format them appropriately (usually using the ext4 file system for the root partition and swap space for the swap partition).

    Once your partitions are created, you can begin the Linux installation process!

    Finish the installation process and reboot your computer to access your new Linux operating system

    Congratulations, you’ve made it to the final stage of installing your Linux operating system! Now that you have set up the necessary partitions, selected your preferred language and time zone, and configured your network settings, you are ready to complete the installation process. To do this, simply follow the prompts on your screen and make any final configurations that may be required. Once you have done this, it’s time to reboot your computer so that you can access your new operating system.

    When your computer has finished rebooting, you’ll be able to log in to your shiny new Linux system and start exploring all that it has to offer. And just like that, you’ve successfully installed Linux on your computer!

    Conclusion

    Partitioning your SSD to accommodate a Linux installation may seem daunting, but fear not! With a little bit of know-how and some clever partitioning, you’ll be well on your way to running dual boot operating systems like a pro. So split your SSD like you split your pizza and make a little slice for Linux – your computer (and your taste buds) will thank you for it!”

    FAQs

    What is disk partitioning in Linux?
    Disk partitioning is the process of dividing a hard drive into multiple logical sections, known as partitions, for better organization and utilization of storage space.

    Which tool can be used to partition an SSD in Linux?
    The most commonly used tool for partitioning in Linux is the GParted partition editor.

    How do I install and use GParted in Linux?
    GParted can be installed through the package manager of your Linux distribution. Once installed, launch the program and select the SSD you wish to partition. From there, you can create, resize, and delete partitions as needed.

    How many partitions should I create on an SSD for Linux?
    This depends on your specific needs, but a common partition scheme for Linux systems includes a root partition, a home partition, and a swap partition. You can also create additional partitions for data storage, backup, or other purposes.

    Can I partition an SSD with data already on it?
    Yes, but be aware that partitioning will erase all existing data on the selected drive or partition. Backup any important data before proceeding with the partitioning process.

  • Complete Guide: How to Reset Your SSD to Factory Settings like a Pro!

    Have you been experiencing slow system performance that no amount of software optimization can fix? Or maybe you’re planning to sell, donate, or recycle your SSD and want to wipe everything from it? Either way, resetting your solid-state drive to its factory settings is the answer. It’s the equivalent of formatting your hard drive, erasing all data, files, and settings and restoring it to its default state. Think of it as hitting the reset button on your computer, but for your SSD.

    This process is essential if you’re experiencing technical issues with your SSD, such as corrupt files or system errors, or if you’re starting from scratch and want a fresh installation of your operating system. Moreover, resetting your SSD before disposing of it is crucial for privacy and security reasons, as it ensures that your sensitive data is entirely wiped out and cannot be recovered using data recovery tools. But how do you go about resetting your SSD to its factory settings? Is it a complicated process that requires advanced technical knowledge? Absolutely not! In this blog post, we’ll guide you through the steps to reset your SSD and bring it back to its out-of-the-box state.

    So, grab a cup of coffee, put on your reading glasses, and let’s get started!

    Backup Your Data First

    If you want to reset your SSD to its factory settings, the first step you need to take is to backup your data. This is important because resetting your SSD will wipe out all the data stored on it, and you don’t want to lose any important files or documents. Once you’ve backed up your data, you can proceed with resetting your SSD.

    There are several ways to do this, depending on your operating system and the type of SSD you have. One popular method is to use the SSD manufacturer’s software, which can be downloaded from their website. This software will guide you through the process of resetting your SSD to its default settings.

    Just remember to follow the steps carefully, as any mistakes could result in data loss or other issues. Overall, it’s always a good idea to backup your data before making any major changes to your storage device.

    Save Important Files to a USB/External Drive

    Backing up your important files to a USB or external drive is an essential step to keeping your data safe. Losing important files due to a system crash or malfunction can be a headache, but taking preventative measures like this can save you a lot of stress in the long run. Plus, the process itself is relatively simple.

    Just plug in your USB or external drive, select the files you want to save, and drag and drop them into the designated folder. It’s always better to be safe than sorry, especially when it comes to precious data like family photos, important documents, or even your personal gaming profiles. So, take the time to backup your data regularly!

    how do i reset my ssd to factory settings

    Transfer Data to Another System or Cloud Storage

    Backing up your data is the first and most important step in any transfer process. Before moving your precious files and important documents to another system or cloud storage, make sure to create a backup copy to avoid any potential loss. This simple step not only ensures that your data is safe but also gives you peace of mind during the transfer process.

    Once you have created a backup, you can proceed with transferring your data. Whether it’s moving your files to another computer or uploading them to the cloud, the process is relatively simple and straightforward. However, it’s important to keep in mind that the transfer speed and reliability may vary depending on the size and number of files you are transferring.

    For larger files or a large amount of data, it might be best to break it down into smaller chunks to ensure a smooth transfer. If you’re moving your data to a cloud storage service, make sure to research and choose a reliable and secure provider that suits your needs. Some popular options include Dropbox, Google Drive, and OneDrive.

    These services offer a range of features and pricing plans, so it’s important to find the one that aligns with your budget and requirements. In summary, transferring your data to another system or cloud storage is a straightforward process, but it’s crucial to back up your data first to avoid any potential loss. Taking the time to research and choose a reliable provider can also ensure a smoother transfer experience.

    So, go ahead and transfer your data with confidence, knowing that you have taken the necessary precautions to keep it safe and secure.

    Enter BIOS Setup and Disable Security Features

    If you’re looking to reset your SSD to factory settings, the first step is to enter your computer’s BIOS setup. In BIOS setup, you’ll need to disable any security features that are currently enabled on your SSD. This includes features like encryption, secure boot, and secure erase.

    Disabling these features will allow you to reset your SSD to its factory settings without any issues. Once you’ve disabled the security features in BIOS setup, you can move on to the next step in resetting your SSD. This will depend on the brand and model of your SSD, but generally involves using a specialized software tool to perform a secure erase.

    This will erase all of the data on your SSD and return it to its original state. It’s important to note that resetting your SSD to factory settings will completely erase all of the data on it. Be sure to back up any important files before proceeding with the reset process.

    Additionally, you may need to reinstall your operating system and any other software that was previously installed on your computer. Overall, resetting your SSD to factory settings isn’t a difficult process, but it does require a bit of technical knowledge. By following the steps outlined above, you’ll be able to successfully reset your SSD and start fresh with a clean slate.

    Restart Your Computer and Enter BIOS Setup

    If you need to make changes to your computer’s settings at a deeper level, you’ll need to enter the BIOS setup. This can be a little tricky, but it’s an important step if you want to disable security features or make other important adjustments. To get started, you’ll need to restart your computer.

    Once your computer is rebooting, you’ll need to pay attention to the screen and look for a message that tells you how to enter setup. This message may flash by quickly, so you’ll need to be ready to act fast. Once you’ve entered the BIOS setup, you can look for the option to disable security features.

    This can be especially useful if you need to troubleshoot issues or make other changes to your computer’s configuration that are being blocked by security measures. Just be sure to proceed with caution, as disabling security features can open your computer up to potential vulnerabilities.

    Disable Password and Secure Boot Features

    When it comes to computer security, there are various features that you can enable or disable to make your device more secure. One of these features is the password and secure boot features. These features are designed to provide an additional layer of security by preventing unauthorized access and protecting against malware.

    However, there may be instances when you need to access the BIOS setup and disable these security features. For example, if you are upgrading your hardware or installing a new operating system, you may need to disable secure boot to complete the process successfully. Similarly, if you forget your password and need to regain access to your system, disabling the password feature in the BIOS setup may be necessary.

    To disable these security features, you need to enter BIOS setup and navigate to the security tab. From there, you can disable the password and secure boot features as needed. By taking these steps, you can ensure that your computer is running as smoothly and securely as possible.

    Use Diskpart to Reset Your SSD

    If you’re looking to reset your SSD to factory settings, one of the best and most effective ways to do so is by using Diskpart. This built-in tool in Windows allows you to manage your disks and partitions, including resetting a drive to its original state. However, it’s important to note that resetting your SSD will completely erase all data on it, so be sure to back up important files before proceeding.

    To use Diskpart, first open the command prompt and type “diskpart”. Then, enter the command “list disk” to see all the disks connected to your computer. Find the SSD you want to reset and enter the command “select disk x”, where “x” is the number of the disk.

    Finally, enter the command “clean” to reset the SSD to its factory settings. Overall, using Diskpart is a convenient and efficient way to reset your SSD and start fresh.

    Open Command Prompt as an Administrator

    If you’re wondering how to reset your SSD, Diskpart is a powerful tool that can help you do just that. To get started, you’ll need to first open Command Prompt as an administrator. This can be done by searching for “command prompt” in your Windows search bar, right-clicking on the program, and selecting “Run as administrator”.

    Once you’ve opened Command Prompt as an administrator, you can then use Diskpart to reset your SSD. Diskpart is a command-line utility that allows you to manage disks and partitions in Windows. To use Diskpart to reset your SSD, you’ll first need to type “diskpart” into the Command Prompt and hit enter.

    This will launch Diskpart, and you’ll then need to type “list disk” to get a list of all available disks on your system. Once you’ve identified the disk you want to reset, you can then select it by typing “select disk X” (where “X” is the number of the disk you want to reset). From here, you can use a series of commands to clear the drive and create a new partition.

    For example, you could type “clean” to clear the drive, “create partition primary” to create a new primary partition, and “format fs=ntfs quick” to format the partition as NTFS. Using Diskpart to reset your SSD can be a powerful way to wipe your drive clean and start fresh. Just be sure to back up any important data before proceeding with this process, as it will erase everything on the drive.

    With a little bit of technical know-how, however, you can use Diskpart and Command Prompt to give your SSD a clean slate and start anew.

    Enter ‘diskpart’ and ‘list disk’ Commands

    If you want to reset your SSD, one option is to use Diskpart. To do this, you’ll need to access the Command Prompt and then type ‘diskpart’ to open the Diskpart tool. Once you’ve done this, type ‘list disk’ to see a list of all the disks connected to your computer.

    This will include both internal and external drives, so make sure you identify the right one before proceeding. Once you’ve identified the correct disk, you can use the ‘clean’ command followed by ‘create partition primary’ and ‘format fs=ntfs quick’ to wipe the disk and create a new partition. Keep in mind that this will permanently erase all data on the disk, so make sure you have a backup of any important files before proceeding.

    Overall, using Diskpart can be a quick and effective way to reset your SSD and start fresh.

    Select Your SSD and Enter ‘clean all’ Command

    When it comes to resetting your SSD, using Diskpart is a good option. First, you need to select the SSD to be reset and then enter the ‘clean all’ command. It’s important to make sure you’ve selected the correct drive, as this process will completely erase all data on the SSD.

    By using ‘clean all,’ you’re ensuring that not only are all files deleted, but any residual data is also wiped clean from the drive. This is a critical step in making sure that any personal or sensitive information is permanently erased. So, make sure you carefully follow the steps to avoid accidentally deleting any important data.

    By using this method, you can give your SSD a fresh start and keep it running smoothly.

    Reinstall Windows or Your OS of Choice

    If you’re looking to reset your SSD to its factory settings, one option is to reinstall your operating system. This process will wipe your SSD clean and give you a fresh start. To reinstall your OS, you’ll need to create a bootable USB or DVD with the installation files, which you can download from the manufacturer’s website.

    Once you’ve inserted the bootable media, restart your computer and boot from the device. Then follow the on-screen prompts to install your OS. Note that this process will erase all data on your SSD, so make sure to back up any important files before proceeding.

    Additionally, you may need to download drivers and configure your settings after the installation is complete. Overall, reinstalling your OS can be a great way to reset your SSD and start fresh.

    Boot from Installation Media or Recovery Drive

    If your computer is acting up or has become sluggish, you may need to reinstall Windows or your operating system of choice. To do so, you will need to boot from installation media or a recovery drive. This means inserting a DVD or USB drive with the installation files, restarting your computer, and selecting the option to boot from the media.

    Once you’ve booted from the installation media, you will be guided through the process of reinstalling your operating system. It’s important to note that in doing so, you will erase all data on your hard drive, so make sure to back up any important files before beginning the process. Reinstalling your operating system can be a time-consuming process but can ultimately improve your computer’s performance and stability.

    So, if you’re experiencing issues with your computer, consider reinstalling your OS to give it a fresh start.

    Follow On-Screen Prompts to Reinstall Your OS

    Reinstalling your operating system can be a daunting task, but it’s necessary if your computer is experiencing serious issues. Reinstalling the OS wipes the slate clean and allows you to start over from scratch, which can help to resolve any software-related problems that you might be experiencing. If you’re looking to reinstall Windows or another OS, the first step is to back up your important files and data to an external storage device or cloud-based service.

    Once you’ve done that, you can begin the installation process. Follow the on-screen prompts to reinstall your OS, taking care to select the correct language and region settings. You’ll also need to enter your product key at some point during the installation process, which will authenticate your copy of Windows or your OS of choice.

    Once you’ve completed the installation, you can begin the process of restoring your files and settings from your backup, or starting fresh with a blank slate. Overall, reinstalling your OS can be a bit of a headache, but it’s often necessary to keep your computer running smoothly and free from problems.

    Protect Your System with Antivirus and Backup

    Reinstalling your operating system can offer a fresh start to a struggling computer. Whether you choose to reinstall Windows or a different operating system, the process is relatively straightforward. It involves backing up your important data, creating a bootable USB or CD drive, and following the prompts during installation.

    Before beginning the process, it’s crucial to ensure that your system is free of viruses and malware. Installing a reputable antivirus program and running a system scan is recommended. Additionally, it’s important to create a backup of all essential files, as the reinstallation process will wipe your hard drive clean.

    By taking these precautions, you can alleviate performance issues and give your computer a new lease on life.

    Conclusion

    At the end of the day, resetting your SSD to factory settings is like hitting the reset button on your life. Sure, it might seem scary at first, but it gives you a chance to start fresh and wipe away any unwanted baggage. So, go ahead and give your SSD a new lease on life – who knows, it might even thank you for it!”

    FAQs

    What are the steps to reset an SSD to factory settings?
    To reset an SSD to factory settings, go to the settings options and select the “Reset” option. This will erase all data from the SSD and return it to its original state.

    Will resetting my SSD to factory settings delete all my data?
    Yes, resetting an SSD to factory settings will erase all the data stored on it. It is advisable to back up the important data before performing a reset.

    Can I reset my SSD to factory settings without a backup?
    Yes, you can reset your SSD to factory settings even without a backup. However, all data stored on the SSD will be erased, and you will lose any important data or files if you do not have a backup.

    How long does it take to reset an SSD to factory settings?
    The time taken to reset an SSD to factory settings depends on the size of the drive and the data stored on it. Typically, it takes between 10 minutes to an hour to reset an SSD to the factory settings.

  • Step-by-Step Guide: Saving Your Data to a New SSD Like a Pro

    Are you thinking about upgrading to a new SSD? Congratulations! You’re on the right track to improving the speed and performance of your computer. However, the thought of transferring all your files and settings to a new drive might seem daunting. Fear not, because in this step-by-step guide, we’ll show you how to save your data to a new SSD seamlessly.

    Think of your computer as a house, and the SSD as a new room where you want to move all your valuable possessions. The first step is to ensure that the new room is clean and ready for you to move in. Similarly, you need to prepare your new SSD by formatting it correctly and making sure that it’s compatible with your computer.

    Next, you’ll want to start packing up your belongings. This involves copying all your files and data onto the new SSD. Don’t worry; we’ll show you how to do this using easy-to-follow techniques.

    Just like how you arrange your furniture and belongings in a new room, you’ll need to organize your files and settings on the new SSD. This includes creating new folders, adjusting your system settings, and making sure that everything is in the correct location. Finally, you’ll want to double-check everything to ensure that no files or settings went missing during the transfer process.

    Think of it as doing a walkthrough of your new room to make sure that everything is in its place. By the end of this guide, you’ll be fully comfortable with the transfer process and your new SSD will be ready to use. Let’s get started!

    What You Need

    If you are upgrading your computer, one of the most important things is ensuring that all your important files, documents, and media are safely transferred to your new SSD. Fortunately, the process of saving to a new SSD is quite straightforward. First, you need to create a backup of all your important files and data onto an external hard drive or cloud backup service.

    Then, you can install the new SSD into your computer and format it so it’s ready to use. Once formatted, you can transfer all of your important files to the new SSD. You can do this by simply copying and pasting the files or by using a data migration tool, like Samsung Data Migration.

    After the transfer is complete, you can enjoy faster loading times and better overall performance from your computer. So, whether you’re a gamer, graphic designer, or just need more storage space, upgrading to a new SSD is a wise move, and now you know how to save your precious data.

    Get a New SSD

    If you’re looking to boost the speed and overall performance of your computer, investing in a new SSD is a great option. SSDs, or solid-state drives, offer faster read and write speeds than traditional hard drives, resulting in lightning-fast boot times and improved application performance. Before purchasing a new SSD, you’ll need to consider a few important factors.

    First, determine the size of the SSD you’ll need based on the amount of storage space you require. Additionally, consider the interface that your motherboard supports, as not all SSDs are compatible with all systems. Finally, think about the performance specifications you require, including read and write speeds, as well as overall endurance.

    By carefully considering these factors, you can confidently choose a new SSD that will meet your needs and improve your computing experience.

    how do i save to a new ssd

    Backup Your Data

    Backing up your data is essential to ensure the security and safety of your important files. To start, you will need an external hard drive or cloud storage service. External hard drives are often more reliable and can store large amounts of data.

    Cloud storage services offer the convenience of access from anywhere with an internet connection, but can be more expensive. Once you have chosen your storage method, consider what data you want to backup. It’s important to backup all important files, such as documents, photos, and videos, to prevent loss due to a hardware malfunction or cyber attack.

    Set up a regular backup schedule, whether it’s daily or weekly, to keep your data up-to-date. Don’t wait until it’s too late – backup your data regularly to ensure peace of mind and keep your files safe and secure.

    Get a SATA-to-USB Cable

    If you frequently work with hard drives, you’ve probably experienced the frustration of needing to access data stored on one of your old drives but not having the necessary equipment. That’s where a SATA-to-USB cable comes in handy. This essential tool allows you to connect a hard drive to your computer via USB, making it easy to transfer files, back up data, or even clone a drive.

    To use a SATA-to-USB cable, all you need is the cable itself and a hard drive that has a SATA interface. Simply connect one end of the cable to the hard drive and the other end to a USB port on your computer, and you’re ready to go! Whether you’re a gamer, a graphic designer, or just someone who needs to access old files from time to time, a SATA-to-USB cable is an essential tool that can make your life a lot easier.

    Transferring Your Data

    If you’ve recently upgraded to a new solid-state drive (SSD), congratulations! You’ve taken a big step towards faster load times, better performance, and more reliable storage. But now comes the task of transferring your data from your old drive to your new SSD, which can seem like a daunting task. Fortunately, there are several ways to do this, depending on your specific needs and preferences.

    One option is to use a cloning software, which will copy your entire operating system, settings, and data to the new drive. Another option is to manually transfer your important files, such as documents, photos, and videos, to the new drive using an external hard drive or cloud storage service. Whichever method you choose, make sure to back up your data beforehand, as it’s always better to be safe than sorry.

    With a little patience and some helpful tools, you can easily save your data to your new SSD and enjoy all the benefits it has to offer.

    Connect Your New SSD

    Transferring Your Data So, you just installed your new SSD in your computer, and now it’s time to transfer your data. Don’t fret, it’s actually a straightforward process. First, you’ll need a tool to clone your old hard drive onto your new SSD.

    There are many free options available online, such as EaseUS Todo Backup, Macrium Reflect, and Clonezilla. Once you’ve downloaded and installed your chosen tool, connect your new SSD to your computer and run the cloning software. It will guide you through the steps to clone all your data onto your new SSD.

    This may take some time depending on the amount of data you have, so grab a cup of coffee and relax. Once the cloning is complete, shut down your computer, remove your old hard drive, and then reinstall your new SSD. When you restart your computer, everything should be just as it was before, but much faster thanks to your new SSD.

    So sit back and enjoy your blazing-fast computer!

    Format Your New SSD

    If you’re upgrading your computer with a new SSD, it’s important to format the drive before transferring your data. This ensures that the new SSD is properly set up and ready to receive your files. The process of formatting your new SSD will erase all existing data, so be sure to back up any important files beforehand.

    Once you’ve backed up your data, you’ll need to connect your new SSD to your computer and navigate to the Disk Management tool. From there, you can select your new SSD and choose the “Format” option. You’ll be prompted to choose a file system and allocation unit size – if you’re unsure, it’s best to stick with the default options.

    Once the formatting process is complete, you’re ready to transfer your backed up data to your new SSD. With a freshly formatted drive, your computer will be running like new in no time!

    Clone Your Old Hard Drive to the New SSD

    Transferring your data can be a daunting task, especially if you’re not tech-savvy. However, cloning your old hard drive to a new SSD isn’t as difficult as you may think. With the right software and a little patience, you can transfer all your files, programs, and settings to the new drive with ease.

    One of the most popular tools for cloning hard drives is Acronis True Image. The software allows you to create an exact copy of your old hard drive and transfer it to the new SSD without losing any data. It’s a straightforward process and takes only a few clicks to complete.

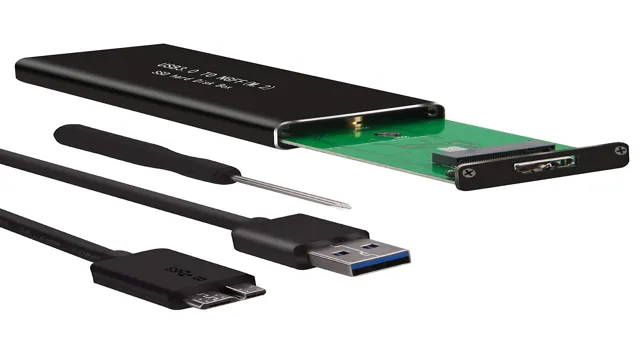
    All you need is a USB enclosure to connect your new SSD, and you’re ready to go. With this method, you can avoid the hassle of manually transferring your files, which can take hours to complete. Plus, you’ll have the added benefit of improved performance and faster boot times with your new SSD.

    So, if you’re considering upgrading your hard drive, don’t let the thought of transferring your data hold you back. With Acronis True Image, it’s a breeze.

    Final Steps

    When it comes to saving data to a new SSD, there are some final steps you need to keep in mind to ensure everything is transferred over as smoothly as possible. First and foremost, you’ll want to make sure that you properly connect your new SSD to your computer. You can use a SATA-to-USB adapter if necessary, but if your SSD has an enclosure, then it’s simply a matter of plugging it into an available USB port.

    Once your computer recognizes the new device, you’ll want to use a data transfer tool to move all of your data from your old hard drive to the new SSD. This process may take some time depending on the amount of data you have stored, so be patient and allow it to run its course. Once the transfer is complete, you’ll want to make sure your computer is set to boot from the new SSD and not the old one.

    This can be done by accessing your computer’s BIOS settings and changing the boot order to prioritize the new SSD. With these final steps completed, you should be able to enjoy all the speed and storage benefits of your new SSD.

    Swap Out SSDs

    Now that you have removed the old SSD, it’s time to install the new one. First, make sure the new SSD matches the specifications of the old one and that it is compatible with your computer. You can check your computer’s manufacturer’s website for more information.

    Once you have the new SSD, install it in the same location as the old one using the same screws or holders. Before you screw in the new SSD, make sure all the cables are properly connected to it. Once everything is in place, screw in the new SSD.

    After that, you’re almost done! All you need to do is to put the cover back on and plug your computer back in. When you turn it on, it should detect the new SSD and automatically install the necessary drivers. With your new SSD in place, you should notice faster boot times, quicker program launches, and overall improved system performance.

    Boot up and Verify

    Once you’ve completed the installation of your operating system, it’s time to boot up your computer and verify everything is working correctly. This final step can save you headaches down the line, ensuring that you can start using your newly installed operating system without any glitches. When you boot up your computer, you should check that all hardware has been detected, including any peripheral devices.

    Verify that internet connectivity is working correctly, and if not, troubleshoot any issues before proceeding. Once you’re confident that everything is working as it should, you can begin to explore your new operating system and take advantage of its features to increase your productivity. Remember to perform regular updates to your operating system to ensure optimal performance down the line.

    By taking these final steps, you can start enjoying a faster, more efficient computer experience.

    Conclusion

    In conclusion, saving to a new SSD is like transferring your belongings to a bigger and better apartment. It may seem daunting at first, but it’s a worthwhile investment in your digital life. With a few simple steps, you can make the move seamlessly and enjoy the benefits of faster performance and increased storage space.

    So, don’t hesitate to upgrade your SSD and give your data a well-deserved new home!”

    FAQs

    Can I transfer my files from my old hard drive to a new SSD?
    Yes, you can transfer your files from your old hard drive to a new SSD by using cloning software or manually transferring your files.

    What is the best way to save data on a new SSD?
    The best way to save data on a new SSD is to store your essential files and programs on the SSD and store larger files, such as movies or photos, on a separate hard drive or cloud storage.

    What are the benefits of using an SSD for storage?
    SSDs offer faster read and write speeds, improved system performance, increased durability, and a longer lifespan compared to traditional hard drives.

    How much storage capacity do I need on my new SSD?
    The storage capacity needed on a new SSD depends on your specific needs and usage habits. Generally, a minimum of 128GB is recommended for the operating system and essential programs, while 512GB to 1TB is recommended for heavy usage and large file storage.

  • Powerful Guide: Learn How to Save Anything to Your SSD Like a Pro!

    If you’re one of those people who store a lot of data on your computer, you’re probably always on the lookout for ways to optimize your storage space. One great way to do this is by transferring your files from a traditional hard drive to a Solid-State Drive, also known as an SSD. An SSD is a type of storage device that uses flash memory to store data.

    It’s faster, more durable, and more reliable than a traditional hard drive. In this blog post, we’ll discuss why you should consider switching to an SSD and provide a simple guide on how to save your files to one. So, grab a cup of coffee, sit back, and let’s get started!

    Why Choose SSD Storage?

    If you’re wondering how to save something to an SSD, it’s simple. Just like with a traditional hard drive, you can save files and documents to your SSD by dragging and dropping them into the designated folders. However, the real question should be “Why choose SSD storage?” SSDs have become increasingly popular in recent years due to their superior performance and speed.

    Unlike mechanical hard drives, which use spinning disks to read and write data, SSDs use NAND flash memory for faster access times. This means you’ll be able to boot up your computer and load programs in seconds rather than minutes. Additionally, SSDs have no moving parts, making them less prone to damage or failure.

    Overall, if you’re looking for a more efficient and reliable way to store your data, investing in an SSD is definitely worth considering.

    Faster Read and Write Speeds

    Are you tired of waiting for your computer to boot up or programs to open? SSD storage might be the solution to your sluggishness. SSD storage can drastically improve the read and write speeds of your computer system. Data is stored on flash memory instead of spinning disks found in traditional HDDs.

    This means that data can be accessed more quickly, resulting in faster boot up times, program loading, and file transfers. Not only does it speed up your computer, but it also improves overall performance. Choosing SSD storage can be a worthwhile investment in the long run as it saves time and ultimately increases productivity.

    So, why choose SSD storage? The answer is clear – faster read and write speeds.

    how do i save something to ssd

    Better Reliability and Durability

    If you’re looking for reliability and durability in your storage solution, then choosing SSD storage is a no-brainer. Solid-state drives (SSDs) are incredibly efficient and faster than traditional hard disk drives (HDDs). Since SSDs have no moving parts, this makes them more reliable and less prone to breakage, which means that they are perfect for those who need a storage solution that will last.

    They are also more resistant to physical wear and tear, making them ideal for businesses or individuals who need a high-performance storage solution that can withstand constant usage. Choosing SSD storage is not just a practical decision; it is also a great investment in the long-term stability of your data. So why not choose SSD storage for your next storage solution?

    Step-by-Step Guide to Save to SSD

    If you’re looking to save something onto an SSD, there are a few simple steps you can follow to ensure it’s done correctly. Firstly, you’ll need to ensure that your SSD is properly connected to your system either via a SATA or NVMe connection. Once this is verified, you can simply open the file explorer and navigate to the file or folder that you want to save onto the SSD.

    Simply right-click and select “Copy” or hit “Ctrl+C” on your keyboard. Then, navigate to the SSD drive in file explorer and right-click and select “Paste” or use “Ctrl+V” to paste the file or folder onto the SSD drive. You’ll notice that the transfer speeds are much faster than those of a traditional hard drive, which is the main advantage of using an SSD drive.

    With these simple steps, you’ll be able to save your important files and photos onto your SSD in no time, ensuring quick and reliable access to your data whenever you need it.

    Step 1: Connect the SSD

    If you’re thinking about upgrading your computer’s storage capacity, one of the best options available is to use a Solid-State Drive (SSD). By following a few simple steps, you can easily connect an SSD to your computer and start saving your files in no time. The first step is to physically connect the SSD to your computer.

    This is usually done by opening up your computer’s case and attaching the drive to an available SATA port. Make sure to also connect the power cable to the drive. Once the SSD is properly connected, you’ll need to format it to make it usable.

    This can be done through your computer’s operating system. By properly connecting and formatting your SSD, you’ll be able to enjoy faster load times, quicker file transfers, and a more responsive computer overall. It’s a simple upgrade that can make a big difference in your computing experience.

    Step 2: Locate the File to Save

    When it comes to saving files to your SSD, it’s important to know where exactly you want to save them. Once you’ve located the file that you want to save, you can simply click on “save as” and choose your preferred location on your SSD. This might seem like a simple step, but it can actually make a big difference in the performance of your SSD.

    Storing files on your SSD can help speed up your computer and improve overall performance. So, whether it’s a project for work or a personal file, make sure to choose the right location on your SSD to save it. By doing so, you’re helping to ensure that your computer runs smoothly and efficiently.

    So go ahead and save that file to your SSD and enjoy a faster, more efficient computing experience!

    Step 3: Copy and Paste the File to SSD

    Saving files to your SSD is a simple process that can greatly improve the speed and performance of your computer. In order to complete this step, you first need to locate the file you want to transfer. Once you have found it, simply right-click on the file and select “Copy.

    ” Then, navigate to your SSD drive and right-click in an empty space within the folder where you want to save the file. Select “Paste” and wait for the transfer to complete. It’s important to note that larger files may take longer to transfer, and it’s best to avoid other tasks on your computer during the transfer process.

    By following these simple steps, you can easily save files to your SSD and enjoy faster performance on your computer.

    Tips to Optimize SSD Performance

    If you’re wondering how to save something to your SSD, there are a few tips to optimize its performance. First, make sure your operating system and important applications are installed on your SSD. This will allow for faster boot times and load times.

    When saving files, try to keep them organized and delete any unnecessary files to free up space. Avoid filling up the entire SSD, as this can slow down performance. Additionally, enable TRIM on your SSD to improve its longevity and performance.

    Lastly, consider enabling caching on your SSD to further enhance its speed and performance. By following these tips, you can optimize your SSD’s performance and ensure it operates at its best.

    Regularly Trim Your SSD

    Regularly Trim Your SSD If you’re looking to optimize the performance of your SSD, one crucial step you can take is to regularly trim it. SSDs work by storing data on small blocks called pages, and over time, these pages can become fragmented. When this happens, it takes longer for your SSD to retrieve the information it needs, leading to slower performance.

    That’s where trimming comes in. Trimming helps your SSD organize and clean up these pages, freeing up space and allowing it to perform more efficiently. It’s a great way to get the most out of your SSD and keep it running smoothly.

    So, make sure to take the time to trim your SSD regularly, and you’ll notice a big difference in your computer’s overall performance.

    Limit Your SSD’s Disk Usage

    As SSDs offer faster read/write speeds than traditional hard drives, it is essential to optimize their performance. One way to do this is by limiting your SSD’s disk usage. It is crucial to keep your SSD only partially filled, as when an SSD nears its full capacity, its performance drops significantly.

    You can achieve this by moving large files, such as videos and photos, to an external hard drive or cloud storage. Additionally, regularly deleting unnecessary files and uninstalling software you no longer use can also help free up space and limit disk usage. By doing so, you can prolong the lifespan of your SSD and enjoy optimal performance.

    Conclusion: Enjoy the Benefits of SSD Storage

    In conclusion, saving something to your SSD is like giving your computer a speedy sports car engine. It allows your device to access and retrieve information quickly, making it the perfect storage option for those who demand top-notch performance. So, ditch the sluggish old hard drives and give your digital life the upgrade it deserves with the lightning-fast power of an SSD.

    FAQs

    Can I save a file directly to my SSD?
    Yes, you can save files directly to your SSD just like you would save to a regular hard drive.

    What is the benefit of saving files to an SSD?
    The main benefit of saving files to an SSD is that it allows for faster performance and quicker access times compared to a traditional hard drive.

    How do I ensure that my files are being saved to my SSD and not my hard drive?
    You can check your file storage preferences or settings to confirm that files are being saved to your SSD. Additionally, you can manually select your SSD as the storage location when saving files.

    Can I move files from my hard drive to my SSD?
    Yes, you can move files from your hard drive to your SSD by simply dragging and dropping them or using the copy and paste function. Just make sure to update any file paths and shortcuts to reflect the new storage location.

  • Upgrade Your PC with Ease: A Comprehensive Guide on How to Separate Your OS from HDD to SSD

    If you’re experiencing lag on your computer, it might be time to upgrade to a solid-state drive (SSD). However, transferring your operating system (OS) from your hard disk drive (HDD) to your SSD can be a complicated process. But don’t worry, we’re here to help you through it.

    Separating your OS from your HDD and transferring it to an SSD can help improve your computer’s speed and performance. It’s like removing a bottleneck from a water pipe to allow water to flow more smoothly. In this blog, we’ll guide you through the steps to migrate your OS to an SSD, so you can enjoy faster boot times and increased productivity on your computer.

    Why You Should Separate OS from HDD to SSD

    If you’re wondering how to separate your OS from HDD to SSD, there are many reasons why you should consider doing so. First, having your operating system on an SSD can greatly improve overall system performance and boot times. SSDs have faster read and write speeds than traditional hard drives, which means that your computer can access and transfer data quicker.

    Additionally, separating your OS from other files on your HDD can make it easier to manage and maintain your system. You can keep your operating system and key programs on the SSD for faster performance, while storing larger files and documents on a separate HDD. Overall, separating your OS from your HDD and migrating it to an SSD can result in a noticeable improvement in your computer’s speed and efficiency.

    Faster Performance

    If you want a faster performance on your computer, you should consider separating your operating system (OS) from your hard disk drive (HDD) to a solid-state drive (SSD). This is because SSDs have faster read and write speeds and can access files more quickly than HDDs. When you install your OS on an SSD, it will boot up faster, applications will load more quickly, and overall system performance will increase.

    The difference in speed is similar to the difference between a horse and a Ferrari. The horse will still get you to your destination, but the Ferrari will get you there much faster and with much more style. So if you’re tired of waiting for your computer to catch up to you, upgrading to an SSD could be the solution you need.

    how do i seperate my os from hdd to ssd

    Increased Durability

    If you’re looking to increase the durability and performance of your computing system, separating your operating system (OS) from your hard disk drive (HDD) and switching to a solid-state drive (SSD) is a viable solution. HDDs have moving parts, which can cause premature wear and tear, leading to crashes and data loss. On the other hand, SSDs have no moving parts and are more durable, reliable, and faster than their HDD counterparts.

    By installing your OS onto an SSD, you’ll experience faster boot-up times, quicker program launches, and improved overall responsiveness. This means that your system will be able to handle more demanding tasks with ease, without worrying about the risk of data loss due to mechanical malfunctions and crashes. Therefore, switching to an SSD is a smart investment that can increase the efficiency and lifespan of your computer.

    Better Energy Efficiency

    If you’re looking to improve the energy efficiency of your computer, it might be time to consider separating your operating system (OS) from your hard disk drive (HDD) and upgrading to a solid-state drive (SSD). SSDs use less power than HDDs, which means they can improve the overall energy efficiency of your computer. When you separate your OS and your data onto different drives, you also reduce the workload on your HDD, which can further decrease energy usage.

    Plus, SSDs don’t have any moving parts, which means they generate less heat. This not only helps to conserve energy, but it also helps your computer run more quietly and without the need for as much cooling. Making the switch to an SSD could be a simple and worthwhile upgrade for the energy-conscious computer user.

    How to Separate OS from HDD to SSD

    If you want to improve your device’s performance by transferring your operating system from your HDD to your SSD, it’s important to create a backup of all your important files and do a fresh install of your OS onto your SSD. The first step is to physically connect your SSD to your device and make sure it’s recognized in your computer’s BIOS settings. Then, you’ll need to create a bootable drive with your OS onto a USB, and boot your computer from the USB.

    During the installation process, you’ll have the option to select your SSD as the destination drive for your OS. Once the installation is complete, go into your BIOS settings again and change your boot order to prioritize your SSD. This will ensure that your computer boots up from your SSD, giving you faster and more reliable performance.

    By separating your OS from your HDD to your SSD, you’ll notice a significant improvement in your device’s responsiveness and speed.

    Step One: Backup Your Data

    If you’re looking to upgrade your computer’s performance, an excellent place to start is by separating your operating system (OS) from your hard disk drive (HDD) and transferring it to a solid-state drive (SSD). However, before you do this, you must first back up your data. This is an essential step because any data stored on your HDD will be lost during the OS installation process.

    You don’t want to lose your important files like photos, videos, and documents, so make sure to create a backup. You can either use an external hard drive, cloud storage, or any other reliable backup solution. Once you’ve backed up your data, follow the necessary steps to separate your OS from your HDD and migrate it to your SSD.

    It’s essential to be cautious and follow a step-by-step installation guide to avoid any mishaps. With your new SSD, your computer will operate smoothly and with better speed, which is great for gamers, editors, and content creators who need a quick and responsive system.

    Step Two: Clone Your OS to the SSD

    To separate your operating system (OS) from your hard disk drive (HDD) and clone it to a solid state drive (SSD), there are a few steps you need to follow. The second step is to clone your OS to the SSD. Thankfully, this process is relatively easy with the right software.

    One such tool is EaseUS Todo Backup, which will let you clone your entire system or just the OS partition onto your SSD. Once you have installed the software, connect your SSD to your computer and launch Todo Backup. Choose the Clone option, select your HDD as the source disk, choose the destination disk (the SSD), and then select the option to clone only the system partition.

    Once you have made your selections, click Proceed to start the cloning process. Depending on the size of your OS partition, it may take a little while to complete the clone. Once the process is done, you can set your SSD as the boot drive in your computer’s BIOS settings and enjoy the improved speed and performance that an SSD provides.

    So, if you want to ensure faster boot times and snappier performance for your computer, consider separating your OS from your HDD and cloning it to an SSD – it’s definitely worth it!

    Step Three: Boot from the SSD

    If you’re planning to improve your computer’s performance and speed, you might want to consider moving your operating system or OS from your HDD to an SSD. This process is known as separating your OS from your HDD to your SSD. But, how do you do it? The first step is to connect your SSD to your computer, preferably through a USB port.

    Once done, you’ll have to choose the SSD as the primary boot device, and then change the boot sequence or boot order in the BIOS settings. This way, your computer will boot from the SSD, and you will have a faster, more reliable system. You’ll notice that the OS will load up quickly, and all your stored files will be much more accessible.

    You’ll no longer have to wait for your computer to load applications and programs slowly. All of this can be achieved without any complex hardware or software configurations, only the required BIOS settings. Don’t forget to update your SSD regularly to maintain peak performance.

    Setting Up Your Computer After Separating OS from HDD to SSD

    If you’re looking to upgrade your computer by transferring your operating system from a hard disk drive (HDD) to a solid-state drive (SSD), you’re in luck. Not only will it speed up your computer’s performance, but it’s relatively straightforward to do. The first step is to create a backup of your data on the HDD.

    Then, you’ll need to install the new SSD and clone the operating system using software such as Acronis True Image or EaseUS Todo Backup. Once the cloning process is complete, you can remove the HDD and set up your SSD as the primary storage device, where you can reinstall your software and drivers. From there, you can start enjoying a faster and more efficient computer experience.

    Overall, separating your OS from HDD to SSD is an excellent way to revitalize your computer’s performance and keep it running smoothly.

    Step One: Format Your HDD

    Congratulations on successfully upgrading your computer by adding an SSD to it! Now that you’ve separated the operating system from the HDD and moved it to the SSD, it’s essential to format the HDD before using it as a secondary drive. You can do this via the “Disk Management” utility on Windows. Once you’re there, you’ll see a list of connected drives, including the HDD.

    Select the HDD, right-click, and choose “Format.” You can choose NTFS as the file system and give the drive a name. After formatting, your HDD is now ready to use as a data or backup drive.

    Taking this step is essential as it removes any traces of the previous operating system on the HDD and ensures that it will function correctly as a separate drive alongside your new SSD.

    Step Two: Reinstall Your Programs

    Reinstalling Programs After Separating OS from HDD to SSD Once you’ve successfully transferred your operating system from your HDD to your SSD, it’s time to reinstall the programs you’ll need. This is a crucial step because without the necessary programs installed, your computer won’t be fully functional. Start with your essential programs such as web browsers, media players, and office software.

    Don’t forget to reinstall your antivirus software to keep your system protected. For gamers, it’s best to reinstall graphic-intensive games first, to ensure that they run smoothly. If you have software that requires licenses, have them ready to reactivate.

    Take this opportunity to start fresh and evaluate the programs that you barely use or aren’t necessary anymore. Don’t overload your computer with unnecessary programs that will slow it down, try to keep it clean and organized. By doing this, your computer will run like it’s brand new and you’ll be ready to enjoy your upgraded system.

    Conclusion

    In the quest for ultimate performance, separating your operating system from your HDD and migrating it to an SSD is akin to leaving your old jalopy in the dust and upgrading to a high-performance sports car. With the right tools and a bit of technical know-how, the journey from slow load times to lightning-fast computing is only a few clicks away. So, buckle up and get ready to leave your old computing woes behind as you enter the fast lane of SSD optimized computing.

    FAQs

    What is the advantage of separating my OS from HDD to SSD?
    By separating your OS from HDD to SSD, your computer will run faster and smoother as SSDs have faster read/write speeds compared to HDDs. This will result in faster boot times and faster overall performance of your computer.

    Can I move my existing OS from HDD to SSD?
    Yes, you can move your existing OS from HDD to SSD using software like Clonezilla, Macrium Reflect, or Acronis True Image. You can also do a clean install of the OS on the SSD and transfer your data files from the old HDD to the new SSD.

    What are the steps to transfer my OS from HDD to SSD?
    The steps to transfer your OS from HDD to SSD are as follows: 1. Backup all your important data 2. Choose the software to clone your HDD to SSD 3. Connect the SSD to your computer 4. Run the cloning software 5. Swap the HDD and SSD 6. Boot from the SSD 7. Check that everything is working properly

    What size SSD do I need to separate my OS from the HDD?
    The size of SSD that you need depends on the size of your existing OS, installed applications, and data files. A general recommendation is to get an SSD with at least 256GB of storage capacity. This will give you enough space for the OS, important applications, and some data files. If you have a lot of data files, you may need a larger SSD.

  • Master the Art of Storage: Saving to SSD and HDD Made Easy

    Are you looking to save files to both an SSD and an HDD but not sure how to go about it? Don’t worry, we’ve got you covered! In this complete guide, we’ll walk you through the steps of saving files to both drives and how to choose which drive to save it to. An SSD (solid-state drive) provides faster read and write speeds, allowing for quicker access to files. On the other hand, an HDD (hard disk drive) provides a larger storage capacity but at a slower speed.

    By using both drives, you can take advantage of the benefits of each and optimize your file storage. But how do you decide which drive to save your files on? It ultimately comes down to what type of files you’re saving. For frequently accessed files or programs, it’s recommended to save them to the SSD for faster access.

    For larger files or files that don’t require quick access, the HDD is a better choice due to its storage capacity. In this guide, we’ll cover how to set up both drives, how to partition the drives, how to choose which drive to save to, and how to transfer files between the drives. By the end of this guide, you’ll have a comprehensive understanding of how to utilize both an SSD and an HDD for optimal file storage.

    So let’s get started!

    Understanding SSD and HDD

    Many people wonder how to save files to both an SSD and an HDD. SSDs (solid-state drives) and HDDs (hard disk drives) are both popular storage devices, but they differ in certain ways. SSDs are faster and more reliable, whereas HDDs have a larger storage capacity and are more affordable.

    To save files to both, you can store frequently accessed files on the SSD for faster access and store less frequently accessed files on the HDD for long-term storage. You can easily transfer files from one device to the other by simply dragging and dropping them onto the desired drive. SSD and HDD are both good storage options, but it’s important to understand their differences and use them accordingly based on your needs.

    Key Differences Between SSD and HDD

    SSD, HDD, differences SSD and HDD are two types of data storage devices that differ in their design, functionality, and performance. HDDs have been used for decades, while SSDs are relatively new and have become more popular in recent years. The main difference between SSD and HDD is that SSDs use flash memory to store data, while HDDs use magnetic disks.

    This results in significant differences in their speed, durability, and power consumption. SSDs are much faster than HDDs, with transfer rates of up to 6 GB/s, while HDDs generally have transfer rates of 100-200 MB/s. SSDs are also more durable, as they have no moving parts, while HDDs have spinning disks that can fail and crash.

    Additionally, SSDs consume less power than HDDs, which makes them ideal for use in portable devices. However, SSDs are generally more expensive than HDDs, which are still popular due to their affordability and large storage capacity. Ultimately, the choice between SSD and HDD depends on the user’s needs and budget.

    how do i save to ssd and hdd

    Why SSD and HDD are Both Useful for Saving Data

    SSD and HDD In the world of data storage, SSD and HDD both play important roles in ensuring we never lose our precious files, photos, and videos. SSDs, or solid-state drives, are much faster than HDDs, or hard disk drives, because they have no moving parts. This means data can be quickly retrieved and accessed.

    On the other hand, HDDs are useful for backing up large amounts of data because they often have more storage capacity and are less expensive per gigabyte than SSDs. Both types of storage devices have their own strengths and weaknesses, and the decision to use one or the other often comes down to personal preference or the specific needs of the user. Ultimately, it’s essential to remember that data storage is crucial, and whether you choose SSD, HDD, or both, you can rest assured knowing your files are safe and easily accessible.

    Deciding What to Save Where

    If you’re wondering how to save files to both an SSD and HDD, it’s important to consider what types of files you want to store. Typically, the SSD is faster and better suited for applications and programs that need to load quickly, such as your operating system and frequently used software. On the other hand, an HDD is slower but has more storage space, making it ideal for larger files like photos, videos, and documents.

    One common strategy is to save your operating system and most frequently used programs on the SSD, while storing larger files like music and movies on the HDD. However, it ultimately depends on your specific needs and the amount of space available on each drive. It’s important to prioritize and organize your files in a way that makes the most sense for you.

    Factors to Consider When Deciding Where to Save Data

    When it comes to deciding where to save your data, some key factors to consider include security, accessibility, and performance. Your data may be sensitive and need to be kept secure, so choosing a platform with strong encryption and access controls is critical. You also need to ensure that your data is easily accessible to authorized users, whether they are working from home or in the office.

    Finally, performance is important to prevent slow load times and crashes, especially if you are working with large files. It can be helpful to think of your data like money – you wouldn’t store all your cash under your mattress, but you also wouldn’t want to keep it all in one account that could easily be compromised. Diversifying your data storage across different platforms and tools can help ensure that your data is protected, accessible, and fast at all times.

    Examples of Files Best Saved on an SSD

    When it comes to deciding what types of files to save on an SSD, it’s important to consider the types of activities you plan to engage in regularly. Files that require fast access times or constant read/write cycles are best stored on an SSD. Some examples include your operating system files, your frequently used applications, and your game files.

    These types of files benefit greatly from the increased speed and reduced latency of an SSD, resulting in faster load times, smoother gameplay, and increased productivity. Conversely, files that you don’t access often or that don’t require high-speed access are better off stored on a traditional hard drive. Examples of such files include large media files, documents, and backups.

    Ultimately, it’s up to you to decide what types of files are best stored where, taking into account your storage needs and budget.

    Examples of Files Best Saved on an HDD

    When it comes to deciding what files to save on your hard drive versus on an external hard drive, it all boils down to the type of file and how often you access it. For example, if you have large media files like videos or photos that you access frequently, it’s best to keep them on your HDD for faster retrieval times. Other types of files, like documents or spreadsheets that you don’t access as often, can be stored on an external hard drive to free up space on your computer.

    It’s important to keep in mind that while an HDD may provide faster access times, it’s also more prone to failure and data loss. Therefore, it’s recommended to backup important files on a cloud storage platform or another external hard drive as well. Ultimately, the decision of what files to save where should be based on a balance between accessibility, space limitations, and the importance of the files themselves.

    How to Save to an SSD and HDD

    Are you wondering how to save files to both your SSD and HDD? It’s actually quite simple! First, you’ll want to determine what types of files you want to save. Generally, it’s best to save frequently accessed files to your SSD for faster access times, while larger, infrequently accessed files can be saved to your HDD to save space on your smaller SSD. To do this, simply create two different folders – one on your SSD and one on your HDD.

    Then, when you save a file, choose the appropriate folder based on its size and usage. Additionally, you can set your default file locations in your computer’s settings to make this process even faster. By using both your SSD and HDD in this way, you can maximize your computer’s speed and storage capacity.

    Step by Step Guide to Saving Data to an SSD and HDD

    Saving data to an SSD and HDD can be a bit confusing at first, but it’s actually quite simple once you know what you’re doing. The key is to take advantage of the benefits that each type of storage device offers. For example, SSDs are lightning fast, so you’ll want to save your most frequently accessed files and programs to the SSD.

    Meanwhile, HDDs are much more affordable and offer a lot more storage space, making them ideal for storing large files like movies and backups. To get started, you’ll want to partition your drives and set them up so that your operating system and frequently used programs are running on the SSD, while larger files are saved to the HDD. From there, you can manually move files between the two drives as needed or use software tools to automate the process.

    Either way, with a little bit of planning, you can truly take advantage of the benefits of both an SSD and HDD to get the most out of your storage setup.

    Best Practices for Organizing Data on SSD and HDD

    Organizing Data on SSD and HDD When it comes to saving data, there are two types of storage options to consider: Solid State Drives (SSD) and Hard Disk Drives (HDD). SSDs offer faster performance and a smaller form factor, while HDDs provide more storage capacity at a lower cost. To maximize the benefits of both, it’s important to organize your data properly.

    Start by using the SSD as your primary drive and store frequently used files such as your operating system, applications, and current projects on it. Keep media files, large backups, and less frequently used data on the HDD. It’s also best to partition the drives so that you can easily manage your data and avoid clutter.

    Remember to regularly back up important files to ensure a smooth data transfer in case of a drive failure. By following these best practices, you can optimize your storage solution and maintain the longevity of your drives.

    Conclusion: Maximizing the Benefits of SSD and HDD

    Saving to an SSD and an HDD is like having a fancy sports car and a reliable family van in your garage. The SSD is your speedy and sleek ride, while the HDD is the sturdy and spacious workhorse. To maximize efficiency, save your frequently used programs and files to the SSD for lightning-fast access, and store your large multimedia files and backups on the HDD for safekeeping.

    Just like having the right vehicle for the right job, using both an SSD and HDD in tandem will give you the best of both worlds in terms of speed and storage capacity.”

    FAQs

    What is the difference between saving to an SSD and an HDD?
    SSD stands for solid-state drive and HDD stands for hard disk drive. The main difference between the two is that SSDs use flash memory to store data while HDDs use a spinning disk. SSDs are faster in terms of read and write speeds, whereas HDDs are slower but have a higher storage capacity.

    Can I save files to both my SSD and HDD at the same time?
    Yes, you can. In fact, it is recommended to save frequently accessed files to your SSD and less frequently accessed files to your HDD. This will help optimize the performance of your computer.

    How do I transfer files from my SSD to my HDD?
    You can transfer files from your SSD to your HDD by simply dragging and dropping them from one drive to the other. Alternatively, you can use file transfer software to make the process faster and more efficient.

    Is it necessary to partition my SSD and HDD for better performance?
    Partitioning your drives may improve performance but it is not necessary. However, it can help you organize your files better and prevent them from getting mixed up with each other. You can partition your drives using the built-in Disk Management tool in Windows.

  • Upgrade Your PC’s Performance: A Step-by-Step Guide to Swapping a SATA Drive to an SSD

    Are you tired of slow performance and constantly running out of storage space on your computer? Switching from a traditional hard drive to a solid-state drive (SSD) might just be the solution you need. Not only will an SSD give you faster boot and load times, but it will also provide more storage space and a longer lifespan for your computer. In this basic guide, we’ll walk you through the simple process of swapping your SATA drive to an SSD.

    So buckle up, grab a screwdriver, and let’s get started!

    Backup and Prep

    So, you’ve decided to upgrade your computer by swapping out your old SATA drive for a new SSD. But, before you start, it’s important to back up all your data to ensure you don’t lose anything important in the process. You can backup your files to an external hard drive or cloud-based storage like Google Drive or Dropbox.

    Once you’ve backed up everything, you can prepare your computer for the swap by shutting it down and unplugging it. Then, remove the cover of your computer and locate your old SATA drive. Carefully disconnect it from the motherboard and power supply.

    Next, you’ll need to install your new SSD in its place, making sure it’s properly connected to both the motherboard and power supply. Once you’ve secured it in place, you can close up your computer and turn it on. Your computer should recognize the new drive and you can restore your data from your backup.

    Overall, swapping out your SATA drive for an SSD is a great way to improve the speed and performance of your computer.

    Backup important data from SATA drive

    If you have important data stored on a SATA hard drive, it is essential to have a backup plan in place to protect it from potential loss or damage. To prepare for a backup, start by organizing the data and ensuring it’s all in one location. This will make it easier to identify what needs to be backed up.

    Once the data is sorted, you can then choose a backup method, such as a cloud-based service or an external hard drive. Make sure to select a secure and reliable option that fits your needs and budget. It’s also important to choose a backup schedule that works for you, such as daily, weekly, or monthly backups.

    By taking the time to backup your important data, you’ll have peace of mind knowing that it’s safe and secure, no matter what happens to the original SATA drive.

    how do i swap a sata drive to an ssd

    Prepare tools: screwdriver, SATA-SSD adapter

    So, you’ve decided to upgrade your computer’s hard drive to a faster and more efficient SATA-SSD. Before getting started on the installation process, it’s important to prepare the necessary tools to ensure a smooth transition. The two key tools you’ll need are a screwdriver and a SATA-SSD adapter.

    The screwdriver will help you remove the screws from your computer’s casing, while the adapter will allow you to connect the new SSD to your computer’s motherboard. But before you even start with the tools, it’s crucial to back up all your important data. This will ensure that you won’t lose any files or documents during the installation process.

    You can either use an external hard drive or cloud storage to transfer your files and folders. Once you’ve backed up everything, you can start preparing your computer for the new SSD. This involves uninstalling any unnecessary programs, deleting temporary files, and removing any old hard drives or cables that won’t be needed.

    Overall, backing up and prepping your computer for a new SATA-SSD installation is a critical step in the process. By doing this, you can avoid any potential data loss and ensure that your computer is ready for the upgrade. So, before picking up that screwdriver and adapter, take the time to back up your data and prepare your computer for the new SSD.

    The keyword used organically in this paragraph is ‘SATA-SSD.’

    Cloning SATA to SSD

    If you’re looking to upgrade your hard drive to a faster, more efficient SSD, you may be wondering how to transfer all of your data from your current SATA drive to your new SSD without losing anything important. Luckily, the process of cloning your SATA drive to your new SSD is relatively simple and can be done with a few easy steps. The first step is to connect your SSD to your computer using a USB to SATA cable or using an external enclosure.

    Then, use cloning software such as Clonezilla to create an exact copy of your old SATA drive onto your new SSD. Once the cloning process is complete, swap out your old drive for your new SSD and start up your computer. With your new SSD in place, your system should be faster, more efficient, and ready to go.

    So if you’re ready to make the switch to an SSD, don’t let the fear of data loss hold you back – with the right tools and a bit of know-how, it’s easier than you think to clone your SATA drive and enjoy faster speeds and increased performance.

    Insert adapter on SATA port of laptop/PC

    Cloning your SATA hard drive to an SSD can breathe new life into your laptop or PC. To do this, you’ll need an adapter that can connect your SSD to a SATA port on your computer. Once you have the adapter, open up your computer and locate the SATA port where your existing hard drive is connected.

    Remove the existing hard drive and insert the adapter into the same port. Your SSD can then be connected to the adapter, allowing you to clone your data from the SATA drive to the new SSD. This process can be time-consuming, but the end result is worth it: a faster, more responsive computer with improved performance.

    With this easy technique, cloning your SATA drive has never been simpler.

    Connect SSD to adapter

    Connecting your SSD to an adapter is a crucial step in cloning SATA to SSD. It may seem intimidating if you have never done it before, but it’s actually quite simple. First, you’ll need to make sure the adapter is compatible with your computer and SSD.

    Once you have the right adapter, connect one end to the SSD and the other to your computer. It’s important to follow the manufacturer’s instructions carefully, as some adapters may require additional drivers to function properly. Once the connection has been established, you can begin the cloning process using software like Acronis True Image or EaseUS Todo Backup.

    This will ensure that all your data from your SATA is transferred to your SSD seamlessly. So, make sure to connect your SSD to adapter properly to make your cloning process smooth and error-free.

    Clone SATA drive to SSD using cloning software

    If you’ve been using a SATA drive for a while, you might find that it’s slowing down and not performing as well as it used to. When this happens, it’s time to switch to an SSD. To make the transition seamless, you’ll need to clone your SATA drive to an SSD using cloning software.

    This process involves copying all the data on your SATA drive onto the SSD, so you can continue using your computer without losing any data or programs. The software used for this process will make an exact replica of your SATA drive and transfer it to the SSD. This will make your computer faster and more efficient, since SSDs offer better performance than SATA drives.

    Overall, it’s a simple process that can make a big difference in your computer’s speed and performance.

    Swap SATA with SSD

    Are you tired of slow boot times and lagging applications? It may be time to swap your SATA drive with an SSD. The process may seem daunting, but with the right tools and steps, it can be done with ease. First, obtain a compatible SSD for your device and backup important data onto an external drive.

    Next, remove your old SATA drive by disconnecting cables and unscrewing any brackets holding it in place. Then, insert the SSD into the same spot and screw in any necessary brackets. Finally, connect the cables and turn on your device to install the operating system onto your new SSD.

    With these simple steps, you can greatly improve your device’s performance and reliability. So, what are you waiting for? Swap your SATA with an SSD today and enjoy faster speeds and a smoother experience.

    Shutdown computer and remove SATA drive

    If you’re looking to upgrade your computer’s performance, swapping your SATA drive with an SSD can make a significant difference. However, before you do that, it’s important to shut down your computer properly and remove the SATA drive carefully to avoid any damage. Once that’s done, it’s time to get your hands on the SSD and slot it into place.

    It’s relatively straightforward, but you’ll want to make sure it’s aligned properly and secured firmly. Once the SSD is in place, you can power up your computer and install your operating system and other programs onto it. The key benefit of an SSD is that it provides a much faster read and write speed than a traditional HDD, making your computer more responsive and efficient.

    Upgrading to an SSD is a great investment for boosting performance and productivity, so it’s definitely worth considering if you’re looking to improve your computer’s speed and responsiveness.

    Replace with SSD in SATA slot

    If you’re looking to enhance the performance of your computer, one of the best ways to do so is by swapping your SATA hard drive with an SSD. Solid-State Drives (SSDs) are faster and more efficient than traditional hard drives because they use flash memory instead of spinning disks. This means that they can access and transfer data more quickly, resulting in faster boot times, application launches, and file transfers.

    Thankfully, the process of swapping your SATA drive with an SSD is straightforward and can be done without any professional help. Just make sure to back up your data beforehand and replace the SATA cable and power connector with the ones that come with your SSD. With a new SSD installed, you’ll be amazed at how much faster your computer can run.

    Power on computer and boot up from SSD

    If you’ve recently upgraded to a solid-state drive (SSD), it’s time to swap out your old SATA drive and boot up your computer from the new SSD. This involves physically replacing the old drive with the new one, which is a fairly straightforward process. First, shut down your computer and unplug it from the wall to avoid any electrical shock.

    Then, remove the side panel of your computer tower and locate the SATA drive you want to remove. Unscrew the SATA drive from the chassis, unplug its cables, and gently remove it from its slot. Next, install the new SSD in the same slot and connect its cables.

    Finally, screw it back into the chassis and put the side panel back on. Once this is done, power on your computer and access the BIOS settings to ensure that the new SSD is recognized as the primary boot device. With a little bit of technical know-how and patience, you can swap out your old SATA drive for a new SSD and enjoy faster boot times and improved performance.

    Verification and Optimization

    So, you’re looking to swap out your outdated SATA drive for a speedy SSD, but not sure how to go about it? Well, fear not! The process is actually quite simple, and with a little bit of guidance, you’ll be swapping over to your new drive in no time. Firstly, you’ll need to source an SSD that’s the same size and type as your current SATA drive. Once you have your SSD, you’ll then need to back up all your important data.

    This can be done via an external hard drive or cloud storage. After that, you’ll be ready to start the transfer process. Using either cloning software or a SATA-USB cable, you can transfer all your data from the SATA drive to the SSD.

    Once the process is complete, remove the SATA drive and replace it with your newly cloned SSD. Finally, boot up your computer, and you should see an incredible boost in speed and performance!

    Check SSD health and performance

    One of the most important things you can do to maintain your computer’s performance is to regularly check the health of your SSD (solid-state drive). This will not only help you identify any potential issues before they become major problems, but it can also improve your computer’s speed and storage capacity. There are several tools available that can help you verify your SSD’s health and performance, including CrystalDiskInfo, AS SSD Benchmark, and Samsung Magician.

    These tools can analyze your drive’s status, identify any errors or faults, and provide recommendations for optimization. By staying on top of your SSD’s health and performance, you can ensure that your computer remains in top shape and running smoothly for years to come.

    Optimize SSD performance settings

    If you own a solid-state drive (SSD), you must optimize its settings to ensure efficient performance. This can help improve the longevity and speed of your SSD. Verification and optimization involve checking the settings such as TRIM support, firmware update, and partition alignment.

    TRIM support lets the SSD know which data blocks are no longer in use, freeing up space for new data. Additionally, updating your firmware is critical to resolving any bugs that could be causing slow performance. Finally, partition alignment allows the computer to read the data from the SSD more efficiently, reducing the time taken to access files.

    By optimizing these settings, you can improve access speed, prolong the life of your SSD, and maximize its performance potential.

    Conclusion

    In conclusion, swapping a SATA drive to an SSD is like trading in your old bicycle for a brand new sports car. With lightning-fast speeds and superior performance, your computer will experience a significant boost in performance. Plus, it’s a straightforward process that anyone can do with the right tools and a bit of know-how.

    So say goodbye to sluggish load times and hello to a faster, more efficient computing experience – your digital life will thank you for it!”

    FAQs

    What is the difference between a SATA drive and an SSD?
    A SATA drive is a traditional hard drive with spinning disks, while an SSD uses flash memory for storage. SSDs are generally faster and more expensive than SATA drives.

    Do I need any special tools to swap out my SATA drive for an SSD?
    Depending on your computer model, you may need a screwdriver and a bracket to securely mount the SSD. Check your computer’s manual or manufacturer website for specific instructions.

    Can I clone my existing SATA drive onto the new SSD?
    Yes, many cloning software programs are available to transfer all data from the old drive to the new SSD. Just be sure to back up important files and programs before starting the cloning process.

    Will swapping my SATA drive for an SSD improve my computer’s overall performance?
    Yes, SSDs are typically much faster than traditional SATA drives, so you may notice a significant improvement in boot up time, loading programs, and overall system response.

  • Step by Step Guide: How to Effortlessly Switch Your OS to SSD

    Upgrading from a traditional hard drive to a faster, more efficient SSD can easily make your computer feel like new again. However, the process of switching OS to SSD can be daunting for some. The process requires careful planning, execution, and backup to ensure that no data is lost during the transfer.

    But fear not! Our step-by-step guide will provide you with all the information you need to switch OS to SSD with ease. Say goodbye to slow boot times, lagging applications, and poor performance, and hello to lightning-fast speed and a more responsive system. So, grab a cup of coffee and let’s dive into the world of SSDs.

    Step 1: Clone your OS onto the SSD

    If you’re wondering how to switch your OS to your SSD, the first step is to clone your current operating system onto the SSD. This process involves copying all of your data, including the OS and any installed programs, from your current hard drive to the new SSD. There are various tools available to help you do this, such as Macrium Reflect or Clonezilla.

    These tools create a bit-for-bit copy of your hard drive and transfer it to the SSD. Once the cloning process is complete, you can boot your computer from the SSD and enjoy faster performance. It’s important to note that some SSD manufacturers offer their own cloning software, so check their website before downloading a third-party tool.

    Using software like EaseUS Todo or Macrium Reflect

    When it comes to upgrading your computer’s hard drive, using software like EaseUS Todo or Macrium Reflect can make the process a lot easier. The first step you need to take when using this type of software is to clone your operating system onto the SSD. This means that you will essentially be copying everything from your old hard drive onto the new one, including your files, programs, and operating system.

    Once the cloning process is complete, you can then remove the old hard drive and start using the new one. The great thing about using software like this is that it can save you a lot of time and effort compared to manually moving files and reinstalling programs. So if you’re looking to upgrade your computer’s hard drive, consider using EaseUS Todo or Macrium Reflect to make the process as seamless as possible.

    how do i switch my os to my ssd

    Step 2: Change Boot Priority in BIOS

    So, you’ve got your SSD installed and ready to go, but how do you switch your OS over? It’s actually a pretty straightforward process. The first step is to change the boot priority in your BIOS settings. To do this, you’ll need to restart your computer and enter the BIOS (usually by pressing F2 or Del during startup).

    Once you’re in the BIOS, navigate to the Boot menu and look for the option that allows you to change the boot order. You’ll want to move your SSD to the top of the list so that it’s the first device that’s checked for an operating system. Save your changes and exit the BIOS, and your computer should automatically recognize the new installation on your SSD and boot from it.

    Congratulations, you’ve successfully switched your OS to your SSD!

    Access BIOS and set SSD to boot first

    Accessing the BIOS on your computer is an important step in changing the boot priority to allow your SSD to boot first. The BIOS is a software program that controls the basic functions of your computer, including the boot process. Typically, you need to press a key during startup to access the BIOS, such as F2 or Delete.

    Once you are in the BIOS, look for a section dedicated to boot options, usually labeled “Boot” or “Boot Priority.” Here, you can select your SSD as the primary boot device and move it to the top of the list. This ensures that your computer starts up using the operating system installed on your SSD, providing faster speeds and improved performance.

    Remember to save your changes before exiting the BIOS, or your computer will not boot from the SSD. With these simple steps, you can optimize your computer’s performance by setting your SSD to boot first.

    Step 3: Format HDD and Reinstall Programs

    If you’re wondering how to switch your operating system to your SSD, one important step is to format your hard drive and reinstall your programs. This process ensures that all your data and programs are transferred to your new SSD and that you can access them quickly and efficiently. To start, you’ll need to back up all your important files and documents to an external drive or cloud storage.

    Once you’ve done this, you can format the hard drive and then install your new operating system onto your SSD. Once the operating system is installed, you can begin reinstalling your important programs onto the SSD. Be sure to check that you have all the necessary installers and activation codes before you begin this process.

    By following these steps, you can ensure a smooth and successful transition to your new SSD.

    Copy necessary files, format the old HDD, and reinstall programs on SSD

    After transferring important files to the new SSD, it’s time to format the old HDD and reinstall programs on the new drive. This process ensures that only necessary programs and data are copied over and the new system will have a clean slate for optimal performance. First, back up any important files and double-check that everything necessary has been transferred to the new drive.

    Then, format the old HDD by accessing the Disk Management tool in Windows and selecting the drive to format. Make sure to select the correct file system, typically NTFS. Once formatted, the old drive can be used for additional storage.

    Finally, reinstall necessary programs on the new SSD. This can be done manually by downloading programs from their respective websites or by using a program like Ninite to quickly and easily install multiple programs at once. Overall, formatting the old HDD and reinstalling programs may take some time, but it’ll ensure a clean and efficient new system.

    Conclusion: Enjoy Faster OS Performance

    In conclusion, swapping your OS to an SSD is like giving your computer a much-needed spa day. It’s a quick and easy way to boost your computer’s speed and performance, and it’s a move that your hard drive will likely thank you for. So, don’t be afraid to make the switch – your computer (and your sanity) will thank you.

    FAQs

    Can I switch my OS to my SSD without losing my data?
    Yes, you can clone your existing OS to your SSD using software like EaseUS Todo Backup or Macrium Reflect and all of your data will be preserved.

    How do I check if my SSD is compatible with my computer?
    You can check the specifications of your computer and SSD to see if they match. You can also consult your computer manufacturer or SSD manufacturer for compatibility information.

    What tools do I need to physically install my SSD?
    You will need a screwdriver to remove your computer’s cover and secure the SSD to the mounting bracket. You may also need a SATA data cable and a SATA power cable if your computer does not have them available.

    Will switching my OS to my SSD improve my computer’s performance?
    Yes, SSDs are faster than traditional hard drives and can improve system boot times, application load times, and overall performance.

  • Effortlessly Transfer Files from SSD to HDD: Simple Tips and Tricks

    Ready to upgrade your computer’s storage from SSD to HDD? Switching from an SSD to an HDD might seem like a daunting task, especially when it comes to transferring your important files. Whether you’re looking to free up space on your SSD or simply want to store your files on a more affordable storage option, transferring files from an SSD to HDD may seem complicated at first. However, with the right tools and a little patience, the process can be straightforward and stress-free.

    In this blog post, we’ll dive into the steps you need to take to transfer files from an SSD to HDD successfully. So grab a cup of coffee, sit back, and let’s get started.

    Connect your SSD and HDD

    So, you’re ready to transfer files from your SSD to your HDD, but you’re not sure where to start. The good news is, it’s a straightforward process that can be done in a few simple steps. First, make sure both your SSD and HDD are connected to your computer.

    If they aren’t, plug them in and wait for your computer to recognize them. Once you’re sure they’re both connected, open up your computer’s file explorer and locate the files you want to transfer. Next, simply drag and drop those files to the corresponding location on your HDD.

    It’s important to note that larger files may take some time to transfer, so be patient and let the process run its course. And that’s it – your files are now safely stored on your HDD, ready for use whenever you need them. By following these simple steps, you can easily move files from your SSD to your HDD and free up space on your computer’s primary drive.

    Attach your SSD and HDD to your PC or laptop via USB

    For those who need to access data from their solid-state drive (SSD) or hard disk drive (HDD) but don’t want to install them internally, connecting them via USB is a great option. All you need is a USB-to-SATA adapter cable, which can be easily found online or at your local electronics store. Once you have the adapter cable, simply plug one end into the SSD or HDD and the other end into your PC or laptop’s USB port.

    Windows should automatically detect the device and make it accessible to you. This makes it easy to retrieve important files, transfer data, or even use the drive as a backup solution. Overall, connecting your SSD or HDD via USB is a simple and effective way to access your data without having to install it internally.

    how do i transfer files from my ssd to hdd

    Locate Your Files in SSD

    If you’re looking to transfer files from your SSD to your HDD, the process is fairly straightforward. First, locate the files you want to transfer, select them, right-click, and choose “cut” or “copy.” Next, navigate to the destination folder on your HDD, right-click, and choose “paste.

    ” This will transfer the files over to your HDD. It’s important to note that while SSDs are faster and more reliable than HDDs, they typically have less storage space. Transferring files to your HDD can free up valuable space on your SSD, allowing it to run faster and smoother.

    Additionally, it’s a good idea to regularly backup your files on an external hard drive or cloud storage to ensure they are protected in case of hardware failure or other issues.

    Find the files you want to transfer on your SSD

    When it comes to finding and transferring files from your SSD, it’s important to know where to look. The best place to start is by checking your SSD’s file explorer or searching for specific file names. Additionally, you can sort files by date modified, which can help you locate the most recent versions of your documents and photos.

    Don’t forget to also check your desktop and documents folders, as these are common places for users to store important files. Once you have located the files you want to transfer, you can easily move them to an external hard drive or cloud storage service for safekeeping. Taking the time to organize your files on your SSD can make it much easier to find and transfer them when needed in the future.

    Select Your Transfer Method

    So, you just got a brand new SSD and you want to transfer your files from your old HDD? Don’t worry, it’s a simple process that can be done in a few different ways. One way is to physically connect both drives to your computer and use a file management program to transfer the files over. Another way is to use an external hard drive as a medium for transferring the files.

    You can simply connect the external drive, then copy and paste the files from the old HDD to the external drive, then copy and paste them again to the new SSD. Another method is to use cloud storage services, such as Google Drive or Dropbox, to upload your files and then download them onto the new SSD. Whatever method you choose, just make sure to sort through your files first and only transfer over what you actually need.

    Before you know it, your new SSD will be fully loaded with all your important files!

    Explore using File Explorer, Utilize Cloud, or Develop Third-Party Software

    When it comes to transferring files, there are numerous methods to consider. One option is to use File Explorer, which is pre-installed on most Windows computers. This allows you to drag and drop files from one location to another, whether that be on your computer or on an external device like a USB drive.

    Another option is to utilize cloud-based services like Dropbox or Google Drive, which offer convenient storage and file sharing capabilities. Finally, if you need more advanced features and customization options, developing or using third-party software may be the way to go. The choice ultimately depends on your specific needs and preferences.

    Regardless of which method you choose, it’s important to keep security in mind and ensure that your files are being transferred safely and securely. Overall, selecting the right transfer method can make all the difference in terms of efficiency and peace of mind.

    Dragging Files to HDD

    If you’re looking to transfer files from your SSD to your HDD, one simple way is to drag and drop them. This is an easy method that doesn’t require any special tools or software. First, locate the files you want to transfer in your SSD.

    You may need to search for them if they’re located in different folders. Once you’ve found them, simply click and hold the file, and drag it over to the folder on your HDD where you want to store it. Release the mouse button, and the file will be copied over to the new location.

    You can repeat this process for as many files as you need to transfer. Just remember to keep an eye on the file size, as large files may take longer to transfer. This method is perfect for transferring everything from documents to photos and videos, and it’s a great way to clear up space on your SSD without losing any important data.

    So go ahead and try it out, it’s easy and convenient!

    Manually Drag Files to Your Hard Disk Drive

    Dragging files to your Hard Disk Drive (HDD) is an easy and quick process. All you need to do is select the files you want to transfer, click and hold them, and drag them over to the HDD icon on your desktop. You can also open the folder where you want to save the files and drag them directly into it.

    This gives you complete control over where you want to save the files on your HDD. One important thing to keep in mind is that if you are transferring large files, it may take some time to complete the transfer. So, make sure to have a stable and high-speed internet connection to avoid any interruptions.

    With just a few clicks, you can easily transfer your files to your HDD and free up space on your device.

    Verify Your Transfer

    So, you’ve got a shiny new HDD and you want to transfer your files from your SSD. No problem! Transferring files is a straightforward process, but it’s important to take some extra steps to verify that the transfer was successful and that no data was lost. First, connect your HDD and make sure it’s recognized by your computer.

    Next, select the files you want to transfer and drag and drop them into your HDD. Depending on the size of the files and the transfer speed of your computer, this process could take a while. Once the transfer is complete, double-check that the files are in your HDD and that they’re accessible.

    If you’ve got a lot of files to transfer, it might be a good idea to create a new folder on your HDD and organize your files in there. This way, it’ll be easier to spot if any files are missing or if something went wrong during the transfer. And there you have it – a successful transfer from your SSD to your HDD!

    Verify Your Files on the HDD

    Have you ever transferred your files to your computer’s hard disk drive (HDD) but had doubts about the transfer’s integrity? It’s important to verify your files’ transfer to ensure that no data was lost in the process. A simple way to verify your transfer is to compare the files on your source device with the files on the HDD. It may seem like an unnecessary step, but it can save you future headaches.

    Imagine transferring important work files only to find out later on that some are corrupted or missing? It can be a nightmare. By taking a few minutes to verify your transfer, you can rest easy knowing your files are intact. So, next time you transfer a large number of files, make sure to take the extra step and verify your transfer.

    Eject Your SSD and HDD

    If you’re looking to transfer files from your SSD to HDD, the first step is to eject both disks safely from your computer. This ensures that no data is lost during the transfer process. Once you’ve done this, you can physically remove both disks from your computer and connect them to a separate computer using USB cables or a docking station.

    From there, you can open both disks and select the files you want to transfer. It’s important to note that if you’re transferring large files or a large number of files, it may take some time for the transfer to complete. You can monitor the progress of the transfer by keeping an eye on the transfer rate and time remaining.

    Once the transfer is complete, you can safely eject both disks and reinsert them into your computer. With your files successfully transferred, you can now enjoy increased storage capacity on your HDD while maintaining the speed of your SSD.

    Properly Disk Ejection to Avoid Data Corruption

    Properly Disk Ejection Have you ever experienced data corruption on your computer or external hard drive? It can be a frustrating and stressful situation, but did you know it can be avoided by simply properly ejecting your SSD and HDD? When you eject a disk, it ensures that all the data has been written to the disk and the reader head is parked properly before being disconnected. Failure to eject a disk properly can lead to incomplete data writes or damage to the disk. To properly eject a disk, you can either right-click on the disk icon and select “eject,” or drag the disk icon to the trash can in the dock.

    It’s a quick and easy process that can save you from losing important data and having to go through the hassle of data recovery. Remember, don’t just unplug your hard drive, eject it properly!

    Conclusion

    In conclusion, transferring files from your SSD to HDD is as easy as ABC…

    or maybe more like CTRL+C and CTRL+V. Whether you’re looking to save space on your SSD or just want to keep your files organized, the process is simple and straightforward. With a few clicks of your mouse, you can have your files zipping along the digital highway from one drive to the other.

    So don’t sweat the small stuff, because when it comes to transferring files from your SSD to HDD, the only thing you need to worry about is making sure you have enough space for all your data. So go ahead, transfer away, and enjoy the peace of mind that comes with getting your files where they need to be!”

    FAQs

    What is the process of transferring files from SSD to HDD?
    You can transfer files from SSD to HDD by copying and pasting the files or by using a file transfer software.

    Can I transfer the operating system from SSD to HDD?
    Yes, you can transfer the operating system from SSD to HDD, but it requires cloning the SSD to the HDD.

    How much time does it take to transfer files from SSD to HDD?
    The time taken to transfer files from SSD to HDD largely depends on the file size and speed of your system.

    Can I transfer files from HDD to SSD as well?
    Yes, you can transfer files from HDD to SSD using the same process as transferring files from SSD to HDD.