Author: David L. Lynn

  • SATA3 SSD: Revolutionize Your Computing Experience with Blazing Fast Speeds

    If you’re in the market for a new solid-state drive (SSD), then you might have heard of SATA3 SSDs. These drives are the latest and greatest in storage technology, providing the ultimate in speed, reliability, and performance. But what exactly is a SATA3 SSD, and what makes it so special? In this ultimate guide, we’ll dive deep into the world of SATA3 SSDs, exploring everything from what they are and how they work, to their benefits and drawbacks, and the best brands and models to choose from.

    So, whether you’re a gamer, a creative professional, or simply looking for a faster way to store and access your data, this guide has got you covered. Let’s start with the basics: what is a SATA3 SSD, and how does it differ from other types of SSDs?

    What is SATA3 SSD?

    SATA3 SSDs offer faster data transfer speeds than their predecessors, SATA1 and SATA The term “SATA” stands for Serial Advanced Technology Attachment and refers to the interface used to connect storage devices like hard drives and SSDs to a computer’s motherboard. By upgrading to a SATA3 SSD, you’ll benefit from faster boot times, shorter application load times, and improved overall system performance.

    SATA3 SSDs typically come in sizes ranging from 128GB to 2TB, making them a great option for both personal and business use. While SATA3 SSDs can be more expensive than traditional hard drives, the increased performance and reliability they offer can make them well worth the investment, especially for power users and gamers. Plus, with newer technologies like NVMe becoming more widely available, SATA3 SSDs may become more affordable in the future.

    Overall, if you’re looking to upgrade your computer’s storage system, a SATA3 SSD is definitely worth considering.

    An overview of SATA3 and SSD technology

    SATA3 SSD Solid-state drives, or SSDs, are becoming increasingly popular in the computer industry due to their many advantages over traditional hard drives. One of the most important features of an SSD is its speed. It can transfer data at a much faster rate than a regular hard drive, which makes it perfect for work that requires a lot of data transfer.

    SATA3 is the latest version of the Serial Advanced Technology Attachment interface. SATA interfaces are used in most modern computers to connect hard drives and other storage devices to the motherboard. SATA3 SSDs use the latest SATA interface and can reach transfer speeds up to 6Gbps.

    This means that data can be transferred at an incredibly fast speed, making the computer much faster and more efficient. With a SATA3 SSD, your computer can boot up in seconds and load applications in a flash. Overall, SATA3 SSD technology is an excellent choice for those looking to increase the speed and performance of their computer.
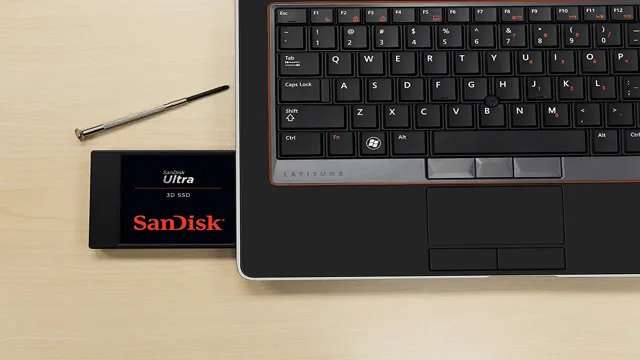
    sata3 ssd

    Benefits of SATA3 SSD

    SATA3 SSDs are a game-changer when it comes to computer storage. These solid-state drives are faster and more reliable than traditional hard drives, making them an excellent choice for gamers, professionals, and casual users alike. One of the biggest benefits of SATA3 SSDs is their lightning-fast data transfer speeds.

    They offer read and write speeds up to six times faster than conventional hard drives, resulting in snappier boot times, quicker application load times, and faster file transfers. This means you can spend less time waiting and more time doing what you love on your computer. Additionally, SSDs are more durable than traditional hard drives as they don’t have any moving parts that can fail or break down over time.

    This results in greater reliability and longer-lasting storage for your precious data. Overall, if you’re looking to upgrade your computer’s storage, a SATA3 SSD is an excellent choice that will future-proof your hardware for years to come.

    Faster boot and application loading times

    If you’re looking to upgrade your computer’s speed, a SATA3 SSD is a great option. With its fast read/write speeds, you’ll notice a significant improvement in your boot and application loading times. No more waiting around for your computer to start up or for programs to open! Plus, with a SATA3 SSD, you’ll have faster access to all your files and documents.

    It’s like having a sports car for your computer – everything just runs faster and smoother. And the best part? It’s easy to install – simply swap out your old hard drive for the new SATA3 SSD and you’re good to go. Don’t get left in the slow lane – upgrade to a SATA3 SSD today and feel the difference in speed and performance!

    Increased system responsiveness

    If you’re tired of your computer struggling to keep up with your demands, it may be time to upgrade to a SATA3 SSD. One of the biggest benefits of this technology is increased system responsiveness. With an SSD, your computer will be able to boot up quickly and launch applications almost instantly.

    You won’t have to wait around for ages while your computer loads, which will make your overall computing experience much more enjoyable. Additionally, SATA3 SSDs use less power and run cooler than traditional hard drives, which means your system will be more reliable and have a longer lifespan. So, if you’re looking for a simple way to improve your computer’s performance, switching to a SATA3 SSD is definitely worth considering.

    A more reliable data storage solution

    SATA3 SSD When it comes to data storage solutions, reliability should always be a top priority. One option that has gained popularity in recent years is the SATA3 SSD. This type of solid-state drive offers numerous benefits over traditional HDDs, including faster boot times, quicker application launches, and improved overall system performance.

    Plus, since SSDs have no moving parts, they are less prone to mechanical wear and tear, making them more durable and reliable in the long run. With its advanced technology and enhanced features, the SATA3 SSD is definitely worth considering for those who need a more dependable data storage solution. So why not give it a try and experience the difference for yourself?

    How to choose a SATA3 SSD

    When it comes to choosing a SATA3 SSD, there are a few important factors to consider in order to get the best performance out of your device. One of the main things to look for is the read and write speeds of the drive, as these will have a big impact on the overall speed and responsiveness of your computer. You should also consider the capacity of the drive, as well as the brand and reputation of the manufacturer.

    Additionally, it’s important to make sure that the SATA3 SSD is compatible with your computer’s motherboard, as not all devices will work with all drives. By taking these factors into account and doing your research, you can find a SATA3 SSD that provides great performance and reliability, and that suits your specific needs and preferences. So if you’re looking to upgrade your computer and want to get the most out of your storage device, consider investing in a high-quality SATA3 SSD.

    Considerations when selecting an SSD

    When selecting an SSD, it’s important to consider a variety of factors so that you get the right one for your needs. If you’re looking for a SATA3 SSD specifically, then you’re in luck because they’re quite common and offer some great advantages over other types. First of all, they offer much faster read and write speeds than traditional hard drives, which is an important consideration if you need to access large files quickly.

    Additionally, SATA3 SSDs are more durable and reliable than older models, which makes them a great choice for anyone who wants a long-lasting storage solution. When choosing a SATA3 SSD, it’s important to consider factors like storage capacity, price, and manufacturer reputation. Some popular brands for SSDs include Samsung, Kingston, and Crucial, among others.

    Ultimately, the right SSD for you will depend on your specific needs and budget, so be sure to do your research before making a purchase.

    Comparing speed, capacity, and price

    When it comes to choosing the right SATA3 SSD, there are three main factors to consider: speed, capacity, and price. Speed is a crucial consideration as it determines how quickly your computer can access and transfer data. Capacity, on the other hand, refers to the amount of data that SSD can store.

    Lastly, price is an obvious factor as it impacts your budget for the upgrade. To choose the right SSD, consider your specific needs. If you need a larger capacity, it may be worth paying more for a higher-end model.

    Likewise, if you do a lot of data transfer or use your computer for gaming, speeding up your storage can improve your overall experience. Ultimately, it’s about finding a balance between your needs and your budget. So, weigh the pros and cons of different SATA3 SSDs and choose one that suits your requirements the best.

    Installation and Maintenance

    If you’re looking to upgrade your computer’s storage performance, then a SATA3 SSD is an excellent choice. Installing an SSD is relatively easy, and it can significantly improve boot times and application load times. First, you need to locate the SATA ports on your motherboard and plug in the SSD.

    Next, you’ll need to ensure that the BIOS settings are correct for the SSD to be recognized properly. Once you have completed the installation, it’s important to keep your SATA3 SSD maintained to ensure its longevity. One of the most crucial aspects of maintaining your SSD is keeping the firmware up to date.

    The firmware updates often contain bug fixes, security updates, and performance enhancements. You should also ensure that your system’s drivers are up to date, as outdated drivers can negatively impact SSD performance. To keep your SATA3 SSD performing optimally, it’s crucial to minimize writes to the drive.

    You can do this by moving high-write applications like web browsers and media editing software to a different drive. Finally, it’s also best practice to perform regular backups to ensure that your data remains safe.

    Step-by-step guide to installing a SATA3 SSD

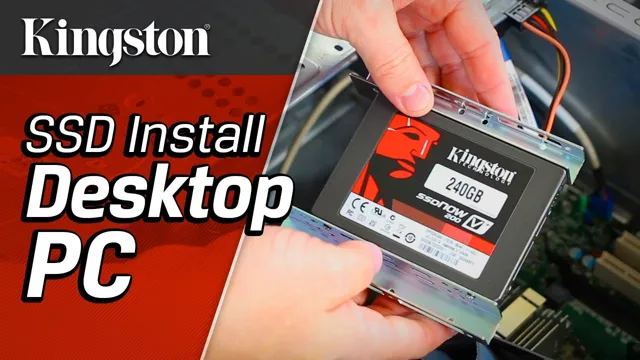
    Upgrading to a SATA3 SSD can dramatically improve the performance of your computer, but many people are hesitant to attempt the installation themselves. Fortunately, it’s not as difficult as it may seem, and following a few simple steps can greatly simplify the process. First, make sure your computer is powered off and unplugged before opening the case.

    Locate the SATA connectors on your motherboard and insert the SSD into an available slot. Secure it with the screw provided, connect the SATA and power cables, and then replace the case cover. To ensure optimal performance, it’s important to keep your SSD clean and free of dust or debris, as well as to regularly check for firmware updates.

    With these basic steps, you can take advantage of the benefits of a SATA3 SSD and enjoy faster load times and better overall system performance.

    Tips for maintaining optimal SSD performance

    When it comes to maximizing the performance of your SSD, installation and maintenance are key factors. First and foremost, make sure to follow the manufacturer’s instructions carefully when installing your SSD. This includes properly connecting cables and updating firmware, if necessary.

    Additionally, regular maintenance can help prevent performance degradation over time. This includes running disk checks and ensuring that your operating system and drivers are up to date. It’s also important to avoid overfilling your SSD, as this can lead to slower performance.

    Finally, don’t forget to backup your data regularly and consider using software that can optimize your SSD’s performance automatically. By taking these steps, you can ensure that your SSD delivers optimal performance for years to come.

    Conclusion

    In conclusion, a SATA3 SSD is like a supercharged sports car for your computer. It allows for lightning-fast data transfer speeds and quick access to your files, making your computing experience smoother and more efficient. If you want to upgrade your current setup, an SSD is the way to go – trust us, your computer will thank you.

    FAQs

    What is a SATA3 SSD?
    A SATA3 SSD is a type of solid-state drive that uses the SATA3 interface to connect to a computer’s motherboard. It offers faster read and write speeds compared to traditional hard drives.

    Can a SATA2 interface be used with a SATA3 SSD?
    Yes, a SATA3 SSD can be used with a SATA2 interface, but this will limit the SSD’s performance to the slower SATA2 speeds.

    What are some benefits of using a SATA3 SSD?
    Some benefits of using a SATA3 SSD include faster boot times, faster application load times, and improved overall system responsiveness.

    How do I know if my computer supports SATA3?
    You can check your computer’s specifications or consult with the manufacturer to see if your computer supports SAT
    Additionally, you can check the motherboard manual to see if it supports SATA3.
  • SSD vs HDD: Uncovering the Speed Difference – The Ultimate Breakdown

    When it comes to storage devices for your computer or laptop, you’re faced with the decision of getting an SSD or HDD. While both serve the same purpose, they differ in their speed, performance, and price. In this blog post, we’re going to dive into the speed comparison between SSD and HDD to help you make an informed decision.

    Imagine walking a mile on a road that’s still under construction and another that’s smooth and well-paved. That’s the difference between an SSD and HDD. One is slower and prone to bumps and glitches, while the other is smooth and fast.

    Which one will you choose for your computer? Keep reading to find out!

    What is an SSD?

    How fast is an SSD compared to an HDD? Well, it’s no secret that solid-state drives (SSDs) are significantly faster than the traditional hard disk drives (HDDs) that we’re all familiar with. While HDDs rely on a spinning disk and read/write head to access data, SSDs store data on interconnected flash-memory chips, meaning there are no moving parts. This difference in hardware leads to a significant performance advantage for SSDs, allowing them to access and transfer data at much faster speeds than HDDs.

    In fact, SSDs are known to be up to 10 times faster than HDDs, making them ideal for applications that require quick boot-up times and speedy file transfers. So, if you’re looking for a boost in your PC’s performance, upgrading to an SSD is definitely worth considering.

    Definition and Characteristics

    An SSD, or solid-state drive, can be defined as a type of storage device that uses NAND-based flash memory to store data and retrieve it quickly. Unlike traditional hard disk drives (HDDs), which use spinning disks to read and write data, SSDs have no moving parts and instead rely on integrated circuits to perform these operations. This makes them faster, more reliable, and also more expensive than HDDs.

    Some common characteristics of SSDs include their durability, shock-resistance, low power consumption, and silent operation. They are widely used in consumer electronics such as laptops, tablets, and smartphones, as well as in enterprise-level applications such as servers and data centers. Overall, SSDs offer a great combination of speed and reliability that make them a go-to choice for many users looking to improve their computing experience.

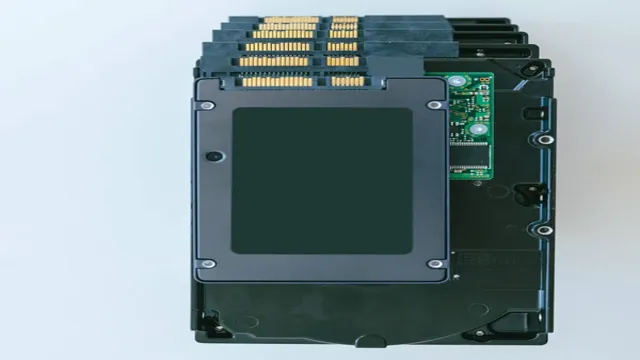
    how fast is ssd to hdd

    Different Types of SSDs

    An SSD, or Solid State Drive, is a type of storage device that uses flash memory to store and access data. Unlike traditional hard drives, SSDs have no moving parts, which can make them faster and more reliable. There are a variety of SSD types to choose from, each with different strengths and weaknesses.

    SATA SSDs are the most common type and are compatible with most computers. PCIe SSDs connect directly to your computer’s motherboard and can offer faster speeds than SATA SSDs. NVMe SSDs are the fastest type and are designed for high-performance applications like gaming and video editing.

    They connect to your computer’s PCIe slot and can offer significantly faster speeds than other types of SSDs. Regardless of what type of SSD you choose, upgrading to an SSD can be a great way to improve the performance of your computer.

    What is an HDD?

    “How fast is SSD compared to HDD?” Well, let’s start with what an HDD is. An HDD, or hard disk drive, is a type of storage device that uses spinning magnetic disks to store and retrieve data. It’s been around for a while and is still commonly used today because it’s cheap and can hold a lot of data.

    However, in terms of speed, an SSD (solid-state drive) is the clear winner. An SSD uses flash memory to store and retrieve data, which means there are no moving parts and everything happens much faster. In fact, an SSD is typically 5-10 times faster than an HDD, which is why they’re becoming more and more popular.

    That being said, an HDD still has its place in certain situations, such as when you need a lot of storage space but don’t necessarily need lightning-fast speeds.

    Definition and Characteristics

    An HDD, which stands for Hard Disk Drive, is a type of storage device used to save and retrieve digital data on a computer. It is made up of platters coated in magnetic material that rotate at high speeds while read/write heads move across them to access the stored data. This technology has been around for decades and is known for its cost-effectiveness and high storage capacity.

    An HDD can hold a large amount of data ranging from several gigabytes to terabytes, making it ideal for users who require a lot of storage space. However, it is not as fast as the SSD or Solid State Drive when it comes to accessing or transferring data. Due to its mechanical nature, it takes more time to retrieve data from different parts of the disk, resulting in slower overall performance.

    Nevertheless, it remains a popular choice for everyday users and businesses looking for a reliable and affordable storage solution. If you’re on a tight budget and need a lot of storage, an HDD might be your best bet.

    Different Types of HDDs

    An HDD, or hard disk drive, is a type of computer storage device that stores and retrieves digital information using magnetic storage. There are different types of HDDs available, each with unique qualities and capabilities. One of the most common types of HDD is the SATA (Serial Advanced Technology Attachment) drive, which offers high speed and greater storage capacity.

    Another popular option is the SAS (Serial Attached SCSI) drive, which is known for its reliability and high performance. If you’re looking for the ultimate in storage space, an enterprise-class HDD may be the way to go. These drives are designed with multiple platters and offer extremely high capacity.

    Regardless of which type of HDD you choose, it’s important to keep in mind that these drives are vulnerable to damage from physical shocks or drops. So, if you plan to use an HDD for your important data, be sure to back up your files regularly and handle it with care.

    Speed Comparison

    If you’re wondering how fast SSDs are compared to traditional hard disk drives (HDDs), the answer is significantly faster. SSDs have no moving parts, which allows them to access data much more quickly and efficiently than HDDs. In fact, an SSD can read and write data up to 10 times faster than an HDD, making them a popular choice for those who need speedy performance.

    SSDs are also more reliable than HDDs as they are less prone to physical damage caused by drops and shocks. So, if you want to speed up your computer and have better performance, upgrading to an SSD is a smart choice. While they may be more expensive than HDDs, their speed and durability make them well worth the investment in the long run.

    Read and Write Speeds of SSD

    SSD, read and write speeds SSD or solid-state drive is a popular choice for data storage. SSDs are known for their high read and write speeds, which are significantly faster than traditional hard drives. The read speed of an SSD is how fast data can be accessed from the drive, while the write speed is how fast data can be written to the drive.

    In a speed comparison between a traditional hard drive and an SSD, the latter can read and write data at a much faster rate. This is because SSDs have no moving parts, which means they can provide instant access to data. With an SSD, applications load almost immediately, and files transfer at lightning speeds.

    In terms of read speed, SSDs can read data at a rate of up to 3,500 megabytes per second (MB/s). In comparison, a traditional hard drive can only read data at a rate of up to 200 MB/s. Similarly, for write speed, SSDs can write data at a speed of up to 3,300 MB/s, while a traditional hard drive can only write data at a speed of up to 150 MB/s.

    This means that SSDs are ideal for tasks that require fast access to data, such as video editing or gaming. In conclusion, SSDs are the go-to choice for those who require high read and write speeds from their storage drives. They offer significantly faster access to data than traditional hard drives, making them ideal for a wide range of tasks, from gaming to video editing.

    With data transfer speeds of up to 3,500 MB/s, SSDs provide a smoother and faster performance, ultimately boosting the productivity and efficiency of your computer.

    Read and Write Speeds of HDD

    When it comes to the read and write speeds of hard disk drives (HDD), there are a few things to keep in mind. The first is that the speed of an HDD is measured in revolutions per minute (RPM). Generally, the higher the RPM, the faster the drive can read and write data.

    However, other factors such as the density of the platters and the cache size can also come into play when determining the speed of an HDD. In comparison to solid-state drives (SSD), HDDs tend to have slower read and write speeds, but they are also more affordable. This is because SSDs have no moving parts and can access data much faster than HDDs.

    That being said, for everyday tasks and storage needs, an HDD can still be a reliable and cost-effective option. It’s important to note that the read and write speeds of an HDD can also be affected by fragmentation. Fragmentation occurs when data is not stored in a contiguous block, and instead, is scattered across different areas of the disk.

    This can slow down the read and write speeds of the drive, as it requires more seeking and loading time to access the data. Overall, the read and write speeds of an HDD can vary depending on several factors, but they can still be a viable option for those on a budget or with less demanding storage needs. It’s important to consider all factors when choosing a storage solution that fits your needs and budget.

    Conclusion

    In the race between SSD and HDD, there’s no question that SSD is the Usain Bolt of the technology world. With faster boot and load times, smoother multitasking, and improved overall performance, SSDs leave their spinning HDD counterparts in the dust. So, if you want to keep up with the lightning-fast speed of modern computing, it’s time to upgrade to an SSD.

    Your computer will thank you (and so will your patience).”

    FAQs

    What is the difference in speed between SSD and HDD?
    SSDs are significantly faster than HDDs. In fact, the read and write speeds of an SSD can be up to 10 times faster than an HDD.

    How much faster is an SSD than an HDD in terms of boot time?
    The boot time of an SSD is much faster than that of an HDD. While an HDD may take up to a minute to boot, an SSD can boot in as little as 10 seconds.

    Can an SSD make my computer faster overall, or just during certain tasks?
    Yes, an SSD can make your computer faster overall. This is because data is retrieved from an SSD much faster than from an HDD, so everything from booting up your computer to opening files and programs will be faster.

    How does the speed of an SSD compare to that of a traditional HDD when working with large files?
    SSDs are much faster than traditional HDDs when working with large files. This is because large files take longer to retrieve from an HDD’s slower spinning disks, while an SSD’s non-moving parts can retrieve data much faster.

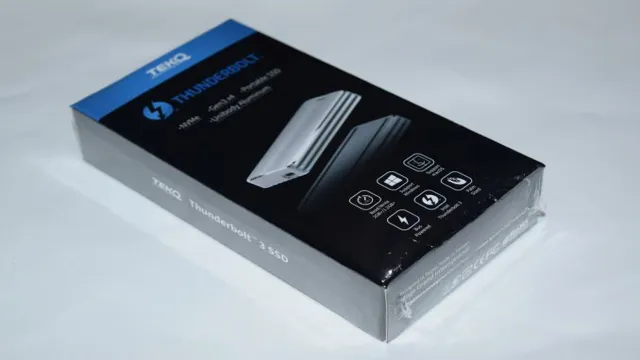
  • Revolutionize Your Data Transfer Speeds with Thunderbolt 3 External SSD

    Are you in the market for an external SSD and wondering which connection to go for? Well, look no further because Thunderbolt 3 external SSDs have taken the tech industry by storm. With their superior speed and performance, it’s no surprise why these SSDs are becoming the go-to option for many tech enthusiasts and professionals. Thunderbolt 3 technology boasts lightning-fast data transfer speeds of up to 40 Gbps, making file transfers quicker and more efficient than ever before.

    Compared to USB 0, which has a maximum speed of 5 Gbps, Thunderbolt 3 is almost eight times faster! This increased speed not only saves time but also increases productivity and workflow. In addition to their incredible speed, Thunderbolt 3 external SSDs are also reliable and durable.

    They are designed to withstand long hours of use and can handle large amounts of data without slowing down. Plus, they have a longer lifespan compared to traditional hard drives, which are prone to mechanical damage. Another advantage of Thunderbolt 3 external SSDs is their versatility.

    They can accommodate multiple devices, including laptops, desktops, and even mobile devices. This means you can transfer data between devices with ease without having to worry about compatibility issues. In conclusion, choosing a Thunderbolt 3 external SSD is a wise investment if you want exceptional speed, durability, and reliability.

    And with more and more devices becoming Thunderbolt 3 compatible, it’s clear that this technology is here to stay. So, make the right decision and choose a Thunderbolt 3 external SSD for your tech needs.

    High-Speed Performance

    If you’re in need of high-speed performance for your computer, a thunderbolt 3 external SSD is definitely worth considering. This type of portable storage device can transmit data at lightning-fast speeds, making it perfect for professionals who work with large files on a regular basis. The Thunderbolt 3 connection allows for a maximum transfer rate of up to 40Gbps, which is significantly faster than a standard USB connection.

    This means that you can transfer files, back up your computer, and even edit high-resolution videos in real-time without any lag or delay. Plus, because it’s an SSD, you don’t have to worry about any moving parts or potential damage from drops or bumps, making it a reliable and durable option for anyone on-the-go. So if you’re looking to enhance the performance of your computer, a thunderbolt 3 external SSD might just be the solution you’ve been searching for.

    Transfer Large Files in Seconds

    When you need to transfer large files quickly and efficiently, you want high-speed performance. No one likes to wait around for hours while their file slowly ticks its way across the internet. That’s where high-speed transfer technology comes in.

    With advanced algorithms and intelligent routing, these tools can move data at breakneck speeds, ensuring that your files are uploaded or downloaded quickly and without delay. Whether you’re sending work files, videos, or photos, a high-speed transfer tool can make the process painless and stress-free. So why wait around for slow transfers when you can harness the power of high-speed performance and get your files where they need to go in seconds?

    thunderbolt 3 external ssd

    Boost Computer Speeds

    Are you tired of waiting for your computer to load every time you turn it on? Slow computers can be frustrating, but there are ways to boost your computer’s speed and performance. One simple step is to uninstall unused programs or files that take up valuable space and slow down your computer. You can also try updating your operating system and drivers regularly to ensure that your computer runs smoothly.

    Another way to improve your computer’s speed is to add more RAM, which allows your computer to handle more data at once. Additionally, clearing your browser cache and optimizing your browser settings can improve page loading times. By making these adjustments to your device, you can optimize its performance and get high-speed results every time you use it.

    Compatibility with Thunderbolt 3 Devices

    If you’re in the market for a high-speed storage solution, a thunderbolt 3 external SSD might be just what you need. One of the great things about Thunderbolt 3 is that it offers unparalleled compatibility with a wide range of devices. That means you can use your Thunderbolt 3 SSD with everything from laptops to desktop computers to professional workstations.

    Whether you’re a graphic designer, video editor, or gamer, Thunderbolt 3 can help you work faster and more efficiently. So if you’re looking for a storage solution that can keep up with your demanding workflows, be sure to consider a Thunderbolt 3 external SSD. With lightning-fast read and write speeds, you’ll be able to transfer files in no time, making your workday less stressful and more productive.

    Works with Mac and PC

    Thunderbolt 3 Devices Compatibility If you’re a proud owner of a Thunderbolt 3 device, you may be wondering whether it will work with both Mac and PC systems. The good news is that Thunderbolt 3 devices are compatible with both Mac and PC systems, making these devices versatile and useful for anyone with multiple devices. Thunderbolt 3 ports offer fast data transfer speeds and support 4k displays, making them ideal for professional content creators who need to transfer and edit large files quickly.

    As long as both the device and your computer have Thunderbolt 3 ports, you can connect them easily and enjoy fast data transfer speeds. This compatibility has made Thunderbolt 3 a popular choice among consumers and professionals alike. So if you’re looking for a fast and reliable way to transfer large files between devices, Thunderbolt 3 devices are definitely worth considering.

    Connect to Multiple Devices

    If you’re looking for a way to connect multiple devices to your computer with Thunderbolt 3, you’re in luck. Thunderbolt 3 is a highly versatile standard that allows you to connect up to six devices simultaneously. This means that you can connect multiple monitors, external hard drives, audio interfaces, and other peripherals to your computer easily and quickly.

    Plus, the Thunderbolt 3 ports are also compatible with USB-C devices, making it easier to connect your older USB devices as well. So, whether you’re a video editor, musician, or gamer, Thunderbolt 3 can help you connect all of your devices seamlessly and efficiently, without the need for multiple cables and adapters. And with Thunderbolt 3, you can rest assured that you’re getting high-speed data transfer, blazing-fast charging, and stunning visual performance, making it the ideal choice for anyone looking for a truly seamless computing experience.

    Portable Design

    A thunderbolt 3 external SSD is a must-have for professionals who demand high-speed data transfer and maximum portability. With its compact design, you can take your storage everywhere with ease. It’s like carrying a bulky hard drive, but lighter, faster, and more reliable.

    Thunderbolt 3’s lightning-fast speed delivers up to 40Gbps of data transfer, making it the fastest external storage media ever created. This incredible speed can save you time, money, and give you peace of mind. You can store and transfer large files in a matter of seconds, making it perfect for video editors, graphic designers, and other creatives who need quick access to large files.

    What’s more, thunderbolt 3 external SSDs offer additional features such as daisy-chaining, allowing you to connect multiple devices to your computer through one port. Overall, a thunderbolt 3 external SSD is an excellent investment for anyone who values portability and speed.

    Small and Lightweight

    One of the biggest advantages of small and lightweight devices is their portable design. Whether you’re on the go, traveling, or just need to move your device from place to place, a small and lightweight device is incredibly convenient and easy to carry around. This is especially important in today’s fast-paced world where mobility is key.

    Nobody wants to be weighed down by a bulky, heavy device that’s difficult to lug around. Small and lightweight devices are perfect for people who are always on the move. They’re easy to pack, take up less space, and won’t weigh you down.

    So whether you’re a student, a professional, or just someone who likes to stay connected while on the go, a small and lightweight device is the perfect solution for your needs. They’re portable, convenient, and easy to use, making them a great choice for anyone who values mobility and flexibility. Invest in one today and experience the freedom and convenience of a truly portable device! The main keyword here is “portable design”.

    Perfect for On-the-Go Creative Professionals

    As the world gets more mobile, creative professionals need gear that can keep up with their on-the-go lifestyle. This is where portable design truly comes into play. Whether you’re a graphic designer, a photographer, or a videographer, having a portable setup can be a game-changer.

    With the right tools, you can work from anywhere, stay productive, and never let your creative flow get interrupted. The versatility of portable design is astounding – it can range from small but mighty laptops to tablets that you can draw on, from handheld cameras to compact microphones. The beauty of it all is that you can choose which tools work best for your needs and preferences.

    Plus, with so many portable design options out there, there’s no shortage of ways to customize your setup. So, if you’re a creative professional on-the-go, don’t hesitate to explore the world of portable design – it’s the perfect way to take your work with you, wherever you go.

    Top Thunderbolt 3 External SSDs on the Market

    If you are looking for lightning-fast data transfer speeds, thunderbolt 3 external SSDs should be on your radar. These portable solid-state drives deliver exceptional performance, making them ideal for content creators, gamers, and power users who demand only the best. One of the top thunderbolt 3 external SSDs you should consider is the Samsung Portable SSD X

    With read speeds of up to 2,800MB/s and write speeds of up to 2,300MB/s, this drive can handle even the most demanding applications with ease. Another option worth checking out is the LaCie Rugged SSD Pro. It sports a rugged design that can withstand drops, dust, and water, and boasts impressive read and write speeds of up to 2,800MB/s.

    Other notable thunderbolt 3 external SSDs include the Glyph Atom Pro, OWC ThunderBlade, and Seagate FireCuda Gaming SSD. No matter which one you choose, you can rest assured you will be getting superior performance and lightning-fast speeds for all your data transfer needs.

    Conclusion

    Thunderbolt 3 external SSDs are like superheroes of the digital world – lightning-fast, reliable, and always ready for action. They combine the power of Thunderbolt 3 technology with the speed and portability of SSD storage, making them the ultimate choice for professionals and enthusiasts alike. Whether you need to store and transfer large files, edit videos on the go, or simply want to boost your computer’s performance, a Thunderbolt 3 external SSD is the lightning bolt that will electrify your digital life!”

    FAQs

    What is a thunderbolt 3 external SSD?
    A thunderbolt 3 external SSD is a high-speed storage device that connects to your computer using Thunderbolt 3 technology, providing fast transfer speeds and reliable storage for your data.

    What are the benefits of using a thunderbolt 3 external SSD?
    A thunderbolt 3 external SSD offers faster data transfer rates, higher performance, and increased durability when compared to traditional hard drives. It is also portable, making it easy to transfer large files between devices.

    How do I connect a thunderbolt 3 external SSD to my computer?
    To connect a thunderbolt 3 external SSD, simply plug the cable into the Thunderbolt 3 port on your computer or device. The device will automatically be detected and you can begin using it immediately.

    Can I use a thunderbolt 3 external SSD with my MacBook Pro?
    Yes, thunderbolt 3 external SSDs are fully compatible with MacBook Pro computers that have Thunderbolt 3 ports. This allows for quick and easy file transfers between your MacBook and the external drive.

    How fast are thunderbolt 3 external SSDs?
    Thunderbolt 3 external SSDs can reach data transfer speeds of up to 40 Gbps, which is up to four times faster than USB 3.1 Gen 2 and up to eight times faster than USB 3.0. This makes them ideal for transferring large files, video editing, and other data-intensive tasks.

  • Maximize Your Computer’s Performance with ease: Step-by-Step Guide on How to Install a 500GB SSD PCIe

    Are you in the market for a new storage upgrade for your computer? A PCIe SSD is a great choice, providing lightning-fast speeds and plenty of space for all of your files. But when it comes to installation, it can be a bit daunting. That’s why we’ve put together a step-by-step guide to help you install a 500GB PCIe SSD with ease.

    Think of it like putting together a puzzle – each step builds upon the next until you have a fully functional and fast storage solution. We’ll guide you through things like opening up your computer, identifying the correct slot for your SSD, and configuring your storage settings once everything is installed. Even if you’re not a computer whiz, don’t worry – we’ll explain everything in simple terms so that even the most technologically challenged among us can follow along.

    So, grab your screwdriver and let’s get started!

    Check Compatibility and Prepare Your PC

    Installing a 500 gig SSD PCIe in your PC can significantly improve its performance and speed. But before you start the installation process, make sure to check the compatibility of your PC. You can do this by checking your motherboard’s manual or by using software tools like CPU-Z and GPU-Z to determine if your PC has an available M.

    2 PCIe slot and whether it supports NVMe technology. Once you’ve confirmed that your PC is compatible, it’s time to prepare your system. First, make sure to back up all your important data and files to avoid losing any information during the installation process.

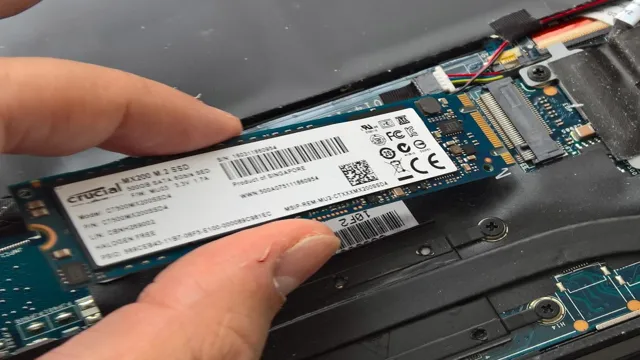
    Then, shut down your PC, disconnect all cables and peripherals, and open the case. Carefully insert the SSD into the M.2 PCIe slot and secure it with the screw provided.

    Close the case, restart your PC, and follow the prompts to finish the installation. With these simple steps, you’ll transform your PC into a speed demon and enjoy faster boot times, quicker application launches, and smoother multitasking.

    Determine if Your PC Supports PCIe SSDs

    If you’re looking to upgrade your PC’s storage, you might be considering PCIe SSDs. But before you go ahead and purchase one, it’s important to determine if your PC actually supports one. The best way to check your compatibility is to consult your motherboard manual or manufacturer’s website.

    Look for information on PCIe versions and check if your motherboard supports the specific version required by the PCIe SSD you’re considering. Additionally, you’ll need to ensure that your PC has an available PCIe slot for the SSD. It’s also important to prepare your PC before installing the SSD, as some motherboards may require BIOS updates or specific drivers for optimal performance.

    By doing your research and preparation beforehand, you’ll be able to upgrade to a PCIe SSD seamlessly and improve your PC’s storage speed and capacity.

    500 gig ssd pcie how to install

    Back Up Your Data Before Installation

    When it comes to upgrading your operating system, it is crucial to back up your data before installation. This is because upgrading can sometimes result in data loss or corruption, and having a backup can ensure that you don’t lose any important files or documents. However, before you even begin the backup process, it is important to check the compatibility of your PC with the new operating system you want to install.

    This involves checking the minimum system requirements of the new OS and comparing them with your PC’s hardware specifications. Once you have confirmed compatibility, you can then prepare your PC by uninstalling any software or drivers that may cause issues during installation. Remember, always backup your data before installation to ensure that you don’t lose important files.

    Open Your PC and Locate PCIe Slot

    If you’re looking to upgrade the storage capacity of your PC, a PCIe SSD is a great choice. Installing a 500 gig PCIe SSD is fairly easy, but the process does require opening up your computer. Once you’ve done that, you’ll need to locate the PCIe slot on your motherboard.

    It’s usually located near the bottom of the board and is marked with a latch or clip. You’ll need to release the clip and gently insert the PCIe SSD into the slot, ensuring that it’s properly aligned. Once you’ve done that, you can use the screw that came with your PCIe SSD to secure it to the case.

    After that, you’ll need to boot up your computer and install drivers if necessary. With a 500 gig PCIe SSD installed, you’ll enjoy lightning-fast read and write speeds that will greatly improve the performance of your PC.

    Turn off Your PC and Disconnect All Cables

    When upgrading or installing a new component in your PC, one of the first steps is to turn off your PC and unplug all cables. You don’t want any electrical activity going on in the system while you’re doing your upgrade. Once you’ve done that, it’s time to open your PC and locate the PCIe slot.

    This slot is where you will insert your new component. It’s typically a long, narrow slot located on the motherboard. PCIe stands for Peripheral Component Interconnect Express, and it’s a high-speed serial expansion bus standard.

    The PCIe slot can be used for a variety of components, including graphics cards, sound cards, and network cards. Once you’ve located the slot, you can move on to installing your new component. Be sure to follow the instructions provided with your component to ensure proper installation and avoid any damage to your system.

    Remove the Side Panel and Identify PCIe Slots

    To install a new PCIe card, the first step is to open your PC’s side panel. This can be achieved simply by locating the screws at the back of your computer and unscrewing them. Once you have removed the panel, you should be able to see the internal components of your PC, including the PCIe slots.

    These slots are rectangular in shape with a small latch on one end. In order to install a new PCIe card, you need to identify an empty PCIe slot. These slots are usually located near the outer edge of the motherboard, and are usually marked with “PCIe” or “PCI Express”.

    You should avoid using slots that are already in use, as this can cause compatibility issues or reduce the overall performance of your system. It’s important to note that not all PCIe slots are created equal – some are faster than others, and may be better suited for certain types of devices. For example, a graphics card may benefit from being installed in a faster PCIe x16 slot, whereas a sound card may work fine in a slower x1 slot.

    You should consult your motherboard manual or manufacturer’s website to determine which slots are best for your needs. Once you have identified an empty PCIe slot, you can simply insert the card into the slot until it clicks into place. If you are installing a large card, you may need to remove an adjacent metal bracket in order to accommodate it.

    Once the card is securely in place, you can replace the side panel, plug in any necessary cables, and power on your computer. Congratulations – you’ve successfully installed a new PCIe card!

    Insert and Secure the PCIe SSD

    If you’re looking to boost your computer’s storage capacity, a 500 gig SSD PCIe can be an excellent addition. But how do you go about installing it? The first step is to determine where the PCIe slot is on your motherboard. Once you’ve located it, you’ll need to unscrew the backplate and insert the SSD into the slot.

    Make sure it’s seated correctly and securely before you move on to the next step. Next, you’ll want to screw the backplate back on to hold the SSD in place. Once you’ve secured the SSD, you can turn your computer back on and check that it’s been recognized by your system.

    With these simple steps, you’ll have a larger and faster storage capacity than ever before. So go ahead and take the plunge – your computer (and your storage needs) will thank you for it!

    Remove the PCIe Slot Cover and Insert the SSD

    Now that you’ve taken off the PCIe slot cover, it’s time to insert and secure your brand-new PCIe SSD. The good news is, this step isn’t too complicated and can be completed relatively quickly. Begin by locating the PCIe slot on your motherboard and removing any protective covers or shields.

    Then, carefully insert the PCIe SSD into the slot at a slight angle, ensuring both the gold connectors and the notches line up. Push it down firmly until it clicks into place. If it’s difficult to push in, don’t try to force it – you might be inserting it incorrectly, or the slot may not be compatible with your particular SSD.

    Once it’s in, secure the SSD to the case using screws or clips to make sure it’s firmly in place. With that, you’re all set to move on to the next step. By following these simple instructions, you’ll have your brand-new PCIe SSD up and running in no time!

    Secure the SSD with the Screw Provided

    When it comes to installing a PCIe SSD, it’s important to secure it properly with the screw provided. The PCIe slot on your motherboard may come with a screw already in place, but if not, you’ll need to use the screw that came with your SSD. First, insert the SSD into the slot, making sure it’s lined up correctly with the slot.

    Then, use the screw to secure the SSD in place. This will ensure that the SSD stays firmly connected to the motherboard and doesn’t wiggle around, which could cause data transfer issues or even damage to the SSD. So don’t forget to take this extra step to ensure a secure installation of your new SSD.

    Close Up and Power On Your PC

    When it comes to upgrading your PC, one of the most effective options is installing a 500 gig SSD PCIe. But how exactly do you go about doing that? First, ensure your PC is turned off and unplugged. Then, carefully open up the casing and locate the PCIe slot on the motherboard.

    Gently plug in the SSD, securing it in place with a screw. Close up the casing again and plug your PC back in. Now, it’s time to power on your PC and ensure everything is working properly.

    Your system should detect the new SSD and you’ll be able to start using it in no time. It’s an easy upgrade that can make a significant difference in the speed and performance of your computer.

    Replace the Side Panel and Reconnect Cables

    After successfully installing new hardware, it’s important to close up your PC properly. First things first, replace the side panel and secure it in place with the screws or latches. Make sure it’s flush with the rest of the case and properly aligned so that all the ports and buttons are accessible.

    Next, reconnect any cables that were unplugged during the installation process, making sure you double-check that everything is plugged in securely. The last thing you want is to power up your PC and discover a loose cable causing a malfunction. Once everything is put back together, it’s time to power on your computer and see how everything is working.

    It’s always a good idea to keep an eye out for any error messages and to test out all the hardware functions to ensure that everything is in tip-top shape. With a little bit of patience and a lot of attention to detail, you can successfully upgrade your PC and enjoy all the benefits of having a more powerful machine.

    Power on Your PC and Configure the PCIe SSD

    If you’re ready to power on and configure your PCIe SSD, make sure your PC is fully closed up and all connections are secure. Once everything is in place, hit the power button, and you’re ready to go. From there, you’ll need to access the BIOS or UEFI firmware settings to configure your SSD.

    Make sure the PCIe slot that the SSD is using is set to boot from in the BIOS/UEFI settings. You may also want to check that the SSD is showing up in the SATA or NVMe controller settings to ensure it’s recognized properly. Once these things have been confirmed, you’re good to go with using your new SSD in your system.

    So, don’t be afraid to dive in and give it a go – your system will thank you for it!

    Conclusion

    So there you have it, installing a 500 gig SSD PCIe drive in your PC is easier than ever. With just a few simple steps, you can upgrade your system to lightning-fast speeds and increase your storage capacity. Whether you’re a gamer, a graphic designer, or just a dedicated computer user, this upgrade is a must-have for anyone looking to boost their performance.

    So why wait? Install your new SSD PCIe drive today and experience a whole new level of computing power!”

    FAQs

    What is PCIe and why is it important for installing a 500 gig SSD?
    PCIe (Peripheral Component Interconnect Express) is a high-speed serial computer expansion bus standard used for connecting various components inside a computer. It’s important for installing a 500 gig SSD because it provides fast data transfer speeds and enables the SSD to perform at its full potential.

    What are the steps to install a 500 gig SSD using PCIe?
    First, shut down your computer and unplug all cables. Open the case and locate the PCIe slot(s) on the motherboard. Insert the SSD into the slot and secure it with a screw. Connect the power and data cables to the drive, and then close the case. Finally, boot up your computer and follow the on-screen instructions to initialize the drive.

    Can any computer support a 500 gig SSD with PCIe?
    Not all computers are compatible with PCIe SSDs. To check if your computer supports a 500 gig SSD with PCIe, you need to check the motherboard specifications to see if it has PCIe slots available. You also need to check if the computer’s BIOS firmware supports the use of PCIe SSDs.

    What are the advantages of using a 500 gig SSD with PCIe over a traditional hard drive?
    A 500 gig SSD with PCIe is much faster than a traditional hard drive. It provides faster boot times, improves overall system responsiveness, and can significantly reduce loading times for large files and applications. Additionally, PCIe SSDs have no moving parts, making them more durable and less likely to fail than traditional hard drives.

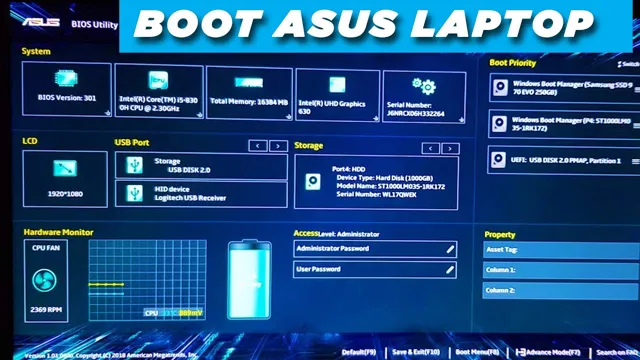
  • Unlocking the Power of ASUS BIOS: A Step-by-Step Guide to Booting from External SSD

    Have you ever found yourself stuck with limited storage or slow boot times on your ASUS laptop? One solution is to use an external SSD to not only increase storage capacity but also improve your device’s performance. However, if you’re wondering how to boot your ASUS BIOS from an external SSD, you’re in the right place. In this blog, we’ll guide you through the process and help you make the most of your external SSD.

    So, let’s dive in and learn how to boot ASUS BIOS from an external SSD!

    Check your BIOS version

    If you’re looking to boot from an external SSD on your Asus computer, the first step should always be to check your BIOS version. Updating your BIOS to the latest version can often result in better compatibility with external devices and improved performance overall. To check your BIOS version, restart your computer and press the key required to access the BIOS screen (usually F2 or Del).

    Once you’re in the BIOS, look for the version number listed on the main menu or in the system information section. If your version is outdated, you can usually find the latest version on the Asus website. Just be sure to follow all instructions carefully and don’t interrupt or power off your computer during the update process.

    Once your BIOS is up-to-date, you should have a much easier time booting from your external SSD.

    Enter BIOS settings on startup

    When it comes to tinkering with your computer, accessing the BIOS settings is crucial to changing critical system settings. Before you dive in, it’s vital to know what version of BIOS you currently have installed. Checking the BIOS version can be done by entering the BIOS settings on startup.

    To do this, restart your computer and immediately press the key that corresponds with your computer’s BIOS settings, which is often F2 or Delete. Once inside the BIOS settings, navigate to the Main or System Information screen, and there you will find your BIOS version. Knowing your current BIOS version is essential to determining whether you need to update it or not.

    So take the time to check your BIOS version before making any significant changes to your system.

    asus bios how to boot frommexterbal ssd

    Select Boot device priority

    If you want to boot from an external SSD on your Asus computer, the first thing you need to do is navigate to the BIOS settings. You can access this by pressing the designated button during startup, which is usually F2 or Delete. Once you’re in the BIOS, find the “Boot” section and look for the “Boot Device Priority” option.

    This will show you the current order in which your computer is trying to boot from different devices. To prioritize your external SSD, simply move it to the top of the list. You can usually do this by selecting the device and pressing the “+” key, or by dragging and dropping it to the first position.

    Once you’ve saved your changes and exited the BIOS, your computer should automatically boot from the external SSD next time you start it up. Just make sure you have the SSD properly connected and formatted beforehand. With these simple steps, you can easily boot from your external SSD and enjoy faster read and write speeds than your internal hard drive.

    Connect external SSD to your ASUS computer

    If you’re looking to connect an external SSD to your ASUS computer, one important step you’ll need to take is selecting the boot device priority. This is necessary in order for your computer to recognize and boot up from the external SSD rather than the internal hard drive. To do this, you’ll need to access your computer’s BIOS settings.

    Restart your computer and press the key to enter the BIOS setup (usually F2 or Delete). Once inside, look for the boot device priority setting and select the external SSD as the first priority. Save your changes and exit the BIOS setup.

    Now, when you restart your computer, it should boot up from the external SSD. Remember, selecting the correct boot device priority is crucial for successful external SSD use on your ASUS computer.

    Reboot and enter BIOS again

    After successfully entering BIOS, the next step is to select the boot device priority. This is where you’ll decide which device the computer should boot from first. By default, the computer will try to boot from the hard drive, but you can change this order to prioritize devices like USB or DVD drives.

    This can be particularly helpful if you’re trying to boot from an installation disk or USB drive for a new operating system. To change the boot device priority, navigate to the Boot menu in BIOS and locate the Boot Device Priority option. Highlight this option and use the + and – keys to change the order of the devices.

    Once you’ve adjusted the priority, save the changes and exit BIOS. Your computer will now attempt to boot from the first device in the priority list. Remember that as you install more devices or change your setup, you may need to update the boot device priority again in the future.

    Keep this in mind when troubleshooting computer issues or setting up a new system.

    Configure Boot option #1

    If you’re looking to boot from an external SSD on your ASUS BIOS, you’ll need to configure the boot option properly. The first step is to access the BIOS setup by pressing the appropriate key (usually F2 or Delete) during the boot-up process. Then, navigate to the Boot tab and look for the Boot Option Priorities section.

    Here, you can specify the boot order for your devices. To boot from an external SSD, select it from the list and move it to the top of the boot order. This will ensure that your computer looks for an operating system on the external SSD before searching for one on any other device.

    Once you’ve made these changes, be sure to save and exit the BIOS setup. Now, the next time you boot up your computer with the external SSD connected, it should automatically boot from the external SSD. With this simple configuration, you’ll be able to boot from external SSD on your ASUS BIOS without any trouble.

    Enable Boot menu

    If you’re experiencing boot issues, configuring boot option #1 might help solve your problem. First, you need to access the boot menu, which can usually be done by pressing a key while your computer is booting up. The key to press varies depending on your device, so it’s best to look up the instructions for your specific model.

    Once you’ve successfully accessed the boot menu, look for the option to configure the boot order. This will list the devices your computer checks for bootable operating systems in the order you specify. To set a specific device as boot option #1, simply move it to the top of the list.

    This will ensure that your computer checks that device first before moving on to other options. By configuring boot option #1 properly, you can potentially save yourself the trouble of facing boot issues in the future.

    Select external SSD as first boot option

    When using an external SSD as your primary boot drive, it’s crucial to set it as the first boot option in your computer’s BIOS settings. Otherwise, your system will continue to boot from the internal drive, resulting in slower performance and reduced storage space. Configuring the boot option #1 is a simple process that involves accessing your computer’s BIOS settings, selecting the boot section, and rearranging the boot order to prioritize the external SSD.

    Once you’ve saved and exited the BIOS, your computer will automatically boot from the external SSD, ensuring faster load times and better overall performance. Don’t forget to regularly back up your system to avoid any data loss due to unexpected failures. By making your external SSD the primary boot option, you can enjoy improved speed and efficiency, making your computing experience more seamless and enjoyable.

    Save and exit BIOS settings

    After making changes to your BIOS settings, it’s important to save and exit in order for the changes to take effect. This involves finding the “Save and Exit” option in the BIOS menu and selecting it. Additionally, in order to configure the boot option #1 you will want to navigate to the “Boot” section of the BIOS menu.

    Here, you can choose the device that you want to boot from first when starting up your computer. Whether you prefer to boot from a USB drive or your hard drive, this is an important step to ensure that your computer starts up smoothly and efficiently. Make sure to save any changes before exiting the BIOS menu in order to avoid losing your settings.

    By taking the time to properly configure your BIOS boot options, you can enjoy a faster and more streamlined experience on your computer.

    Restart your computer and boot from external SSD

    If you’re looking to boot from an external SSD on your Asus computer, the first step is to enter the BIOS setup. To do so, restart your computer and press the key that corresponds to the BIOS setup (usually F2 or Delete). Once you’re in the BIOS setup, navigate to the Boot tab and look for the option to change the boot order.

    Here, you want to make sure that the external SSD is at the top of the list, so that the computer will boot from it before any other drive. Save your changes and exit the BIOS setup. When you restart your computer, it should now boot from the external SSD automatically.

    If it doesn’t, you may need to adjust the BIOS settings further or check that the SSD is properly connected to your computer. By following these steps, you should be able to easily boot from an external SSD on your Asus computer and enjoy faster speeds and improved performance.

    Conclusion

    In conclusion, booting from an external SSD on your Asus BIOS may seem like a daunting task, but with the right steps, it can be accomplished with ease. Think of it like a circus tightrope act – with a bit of balance and concentration, you too can navigate your way across the BIOS tightrope and achieve external SSD booting success! So, gear up and get ready to strike a balance between functionality and style with your Asus BIOS and external SSD combo. Happy booting!”

    FAQs

    What is BIOS and how does it work on ASUS laptops?
    BIOS stands for Basic Input/Output System, and it is a firmware that interfaces between the computer hardware and operating system. On ASUS laptops, BIOS controls the hardware settings, system time, and boot sequence.

    Can I boot from an external SSD on an ASUS laptop?
    Yes, you can boot from an external SSD on an ASUS laptop if you have enabled the option in BIOS settings. Go to the Boot menu and select the external SSD as the primary boot device.

    How do I enter BIOS settings on an ASUS laptop?
    You can enter BIOS settings on an ASUS laptop by pressing a specific key during boot-up, usually F2, Delete, or Esc. Refer to your laptop manual for the exact key.

    What should I do if my ASUS laptop does not recognize the external SSD during boot-up?
    If your ASUS laptop does not recognize the external SSD during boot-up, try checking the connection, verifying the boot order in BIOS settings, updating the BIOS firmware, or enabling the UEFI boot mode. You can also consult ASUS support for further assistance.

  • Unleash Lightning-Fast Speeds: A Comprehensive Guide to Building Your Own Computer with SSD!

    Building a new computer with SSD can be a daunting task, but it doesn’t have to be. With technology advancing at a breakneck pace, upgrading your computer to include a solid state drive (SSD) is the smartest choice you can make. SSDs are a game-changer in terms of speed and can improve your computer’s overall performance significantly.

    In this comprehensive guide, we will explore everything you need to know about building a new computer with an SSD. From understanding the benefits of an SSD, choosing the right type of SSD, to installing the SSD, and transferring the data, we have got you covered. We will start by discussing the basics of what an SSD is, and why it’s essential to have one in your computer.

    Afterward, we will delve into the specifics of choosing the right type of SSD for your computer and guiding you on how to install it. Building a new computer with an SSD may seem like an intimidating process, but it is worth getting your hands dirty, as it will make your computer blazing fast. Considering the advantages of an SSD, the guide will help you navigate throughout the entire process with ease and efficiency, so you can build a system that will last for years to come.

    So, let’s get started and learn how to build your dream computer with an SSD!

    Choose Your Processor and Motherboard

    Building a new computer can be both an exciting and daunting task. One of the most important decisions to make is choosing the appropriate processor and motherboard. The processor is essentially the brain of the computer, responsible for executing instructions and processing data, while the motherboard connects all the essential components of the computer together.

    When selecting a processor, it’s important to consider factors such as the number of cores, clock speed, and cache, as these can greatly impact performance. Popular processors include those from Intel and AMD, with options ranging from budget-friendly to high-end. Similarly, motherboards come in different sizes, features, and price points.

    It’s important to choose a motherboard that is compatible with your chosen processor and has the necessary features such as the number of RAM slots, expansion slots, and input/output options. When building a new computer with an SSD, it’s important to ensure your processor and motherboard are compatible with the SSD’s form factor, such as M.2 or SATA.

    Taking the time to carefully select the right processor and motherboard can greatly improve the overall performance of your new computer.

    Compare AMD and Intel CPUs

    When it comes to choosing between AMD and Intel CPUs, there are a lot of factors to consider. Both companies offer a wide variety of processors, but they have significant differences in terms of performance, compatibility, and price. When you’re looking at processors, the most important thing to consider is what you’ll be using it for.

    If you’re a gamer or a power user who needs a lot of processing power, AMD’s Ryzen CPUs offer unbeatable performance and value. On the other hand, if you’re looking for a CPU that’s efficient and will work seamlessly with other products in your system, Intel’s CPUs are a great option. When it comes to motherboards, you’ll want to make sure you choose one that’s compatible with your CPU.

    AMD CPUs use AM4 sockets, while Intel CPUs use LGA 1151 or 1200 sockets. Additionally, make sure you pay attention to things like chipset, RAM compatibility, and PCIe slots when choosing a motherboard. Overall, when it comes down to choosing a CPU and motherboard, it all comes down to what you need and your budget.

    building new computer ssd how to

    Consider Compatibility with Your SSD

    When building a computer with an SSD, it’s important to consider compatibility with your hardware. That starts by choosing the right processor and motherboard. Your processor should be powerful enough to handle the demands of your workload while also being compatible with the SSD.

    Additionally, you want to make sure your motherboard has the right connections and support for your SSD. Some motherboards may require a special adapter for certain types of SSDs, so it’s important to do your research before making a purchase. Overall, taking the time to consider compatibility when choosing your processor and motherboard can save you time and hassle in the long run.

    Make sure to do your research and choose components that will work seamlessly with your SSD for optimal performance and reliability.

    Select the Right SSD for Your Needs

    When building a new computer, choosing the right solid-state drive (SSD) is critical for a smooth and efficient experience. With so many options on the market, it can be overwhelming to determine which SSD will best suit your needs. One important factor to consider is the size of the drive – you’ll want to ensure that it has enough storage capacity for all of your software, documents and media files.

    Another important factor to consider is the read and write speeds, as faster speeds will result in faster boot times and quicker data transfer. Additionally, consider the endurance rating, or the number of times the SSD can write and erase data before its performance begins to degrade. Choosing the right SSD for your needs may take some research, but the payoff is a faster, more efficient computer.

    NVMe vs. SATA: Which Interface Is Right for You?

    When it comes to selecting the right SSD for your needs, the choice between NVMe and SATA interfaces can be confusing. NVMe is the newer, faster option while SATA is the more established, reliable interface. If you’re an average user, SATA will likely be more than sufficient for your needs.

    On the other hand, if you’re a heavy gamer or use intensive programs, NVMe may be worth considering due to its faster read and write speeds. However, it’s important to consider whether your system’s motherboard supports NVMe before making the switch. Ultimately, the choice between NVMe and SATA depends on your specific needs and budget.

    Consider Capacity and Price Per Gigabyte

    When it comes to selecting the right SSD for your needs, it’s important to consider both capacity and price per gigabyte. Capacity refers to the amount of storage that the SSD can hold, while price per gigabyte refers to how much you’ll pay for every gigabyte of storage. It’s easy to get caught up in the excitement of having a high-capacity SSD, but it may not always be necessary.

    If you only use your computer for basic tasks, a smaller SSD may be sufficient. On the other hand, if you work with large files or frequently use resource-intensive programs, a larger SSD with a lower price per gigabyte may be a better option. Ultimately, it’s about finding a balance between capacity and price per gigabyte that suits your needs and budget.

    Read Reviews and Benchmarks

    If you’re in the market for a new SSD but don’t know where to start, reading reviews and benchmarks is key. Not only will you get a better understanding of the different brands and models available, but you’ll also be able to see how they compare in terms of performance, price, and other important factors. Plus, by reading reviews and benchmarks, you can make an informed decision based on the experiences of others who have already purchased and used the SSD you’re considering.

    So whether you’re looking for a high-end model for gaming and content creation or a budget-friendly option for everyday use, reading reviews and benchmarks is the best way to ensure you select the right SSD for your needs.

    Assemble Your Build

    Building a new computer with an SSD can be a daunting task, but with the right knowledge and tools, it can be a fun and rewarding experience. Before you start assembling your build, make sure to have all the necessary components, including the motherboard, CPU, RAM, power supply, case, and of course, the SSD. It’s important to ensure that all the components are compatible with each other to avoid any compatibility issues.

    Once you’ve gathered all the components, it’s time to start assembling your build. Begin by installing the CPU onto the motherboard, followed by the RAM. Connect the power supply to the motherboard and any other peripherals, such as the graphics card.

    Finally, install your SSD into the designated slot and secure it into place. Remember to consult the manufacturer’s instructions for proper installation techniques, as they may vary depending on the brand. With these steps, you’ll be well on your way to assembling a new computer with an SSD that’s efficient and speedy.

    Installation Tips for Your SSD and Other Components

    When it comes to building your own computer, assembling all the components correctly is crucial for ensuring it runs smoothly. One important component that many people tend to overlook is the SSD or solid-state drive, which can greatly improve your computer’s performance. To install an SSD, you’ll need to first carefully open the computer case and locate the drive bay for the SSD.

    Once you’ve inserted the SSD into the bay, you can secure it with screws and connect the SATA cable to both the drive and the motherboard. Make sure that you connect the SSD to the right SATA port to enable fast transfer speeds. Additionally, when assembling other components such as the CPU, GPU, and RAM, it’s important to follow the manufacturer’s instructions carefully to avoid damaging any of the components.

    This ensures that your build is stable and runs efficiently. By taking these installation tips into consideration, you’ll be well on your way to building a solid and reliable computer.

    Do’s and Don’ts of Building a PC

    When it comes to assembling your PC build, there are a few simple guidelines to follow to ensure that everything runs smoothly. First and foremost, before beginning, make sure that you have an organized workspace with all your parts at hand. This will make the process much easier and more efficient.

    Secondly, start with your motherboard, as this is the foundation of your build. Carefully install your processor and RAM before mounting the motherboard into your case. It’s important to read your motherboard manual thoroughly to ensure that you’re installing everything correctly.

    After mounting your motherboard, install your power supply, hard drive, and any other necessary components, such as a graphics card or optical drive. Lastly, make sure to tidy up your cables and double-check that everything is securely fastened before turning on your PC for the first time. By following these simple steps, you’ll be on your way to a successful PC build.

    Install the Operating System and Software

    If you’re building a new computer and want to use an SSD, the next step after installing the hardware is to install the operating system and necessary software. Before installing, make sure to have a copy of the operating system available on a USB drive or CD. Insert the installation media into the computer and restart it.

    You may need to press a key during startup to access the boot menu and select the installation media. From there, follow the instructions to install the operating system. Once the operating system is installed, you can begin installing necessary software such as web browsers, media players, and virus protection.

    It’s important to keep your software up to date to ensure optimal performance and security. By installing the operating system and necessary software, your newly built computer will be ready for use. Remember to keep both your operating system and software up to date to maintain the health and efficiency of your system.

    Step-by-Step Guide to Installing Windows or Linux

    Installing an operating system like Windows or Linux can seem like a daunting task, but with the right guidance, it’s actually fairly simple. One of the first steps is to gather all the necessary hardware, including a computer or laptop, a USB drive or DVD for the installation files, and the product key for the operating system. Once everything is in order, simply insert the USB drive or DVD and follow the on-screen prompts to boot from it.

    From there, it’s a matter of selecting the partition or drive to install the operating system on, entering the product key, and waiting for the installation to complete. Once that’s done, it’s time to install any necessary drivers or software to make sure the system is fully functional. By following these steps, anyone can successfully install a new operating system and get their computer up and running in no time.

    Optimizing Your SSD for Peak Performance

    When it comes to optimizing your SSD for peak performance, installing the operating system and software is a crucial step. By installing the operating system on your SSD rather than a traditional hard drive, you can take advantage of the faster read and write speeds, which will result in a snappier and more responsive system overall. Additionally, installing your frequently used software on the SSD can also help to speed up load times and reduce wait times.

    When installing the OS and software, be sure to follow best practices, such as minimizing the number of startup items, disabling unnecessary services, and keeping the system up to date with the latest security patches and updates. By taking these steps, you can ensure that your SSD is performing at its best and delivering the speed and performance you need for your daily computing tasks.

    Conclusion

    Congratulations, you’ve successfully built yourself a new computer with an SSD! With your lightning-fast storage, you can now launch programs and load files quicker than a cheetah running a marathon. You’ve overcome the bottleneck of traditional hard drives and entered a new era of computing. So sit back, relax, and bask in the glory of your new machine.

    Just don’t forget to back up your data, or you may be singing a different tune. Happy computing!”

    FAQs

    What are the benefits of using an SSD in a new computer build?
    Using an SSD can speed up boot times, improve overall system performance, and provide faster access to files.

    Can I use my current HDD in conjunction with an SSD in a new computer build?
    Yes, you can use both an SSD and HDD in a new computer build. You can install the operating system and frequently used applications on the SSD for better performance, and use the HDD for storing larger files and less-frequently used programs.

    How do I clone my current operating system to the new SSD?
    You can use cloning software such as EaseUS Todo Backup or Samsung Data Migration to clone your current operating system to the new SSD. Make sure to back up important data before proceeding with the cloning process.

    What factors should I consider when choosing an SSD for my new computer build?
    Capacity, speed, and reliability are important factors to consider when choosing an SSD for a new computer build. Look for reputable brands and read reviews to ensure you are getting a high-quality, reliable SSD.

  • Powerful Performance Boost: A Comprehensive Guide to Upgrading Your M.2 SSD!

    If you’re looking to boost your computer’s performance without breaking the bank, upgrading your M.2 SSD is the way to go. With today’s technology, Solid State Drives (SSDs) provide faster boot times, quicker application launches, and overall snappier performance than traditional Hard Disk Drives (HDDs).

    Upgrading your M.2 SSD is a simple and affordable process that can significantly improve your computer’s performance. Whether you’re a gamer looking for faster load times or a content creator needing quicker access to large files, upgrading your M.

    2 SSD can make a noticeable difference. In this blog, we’ll cover everything you need to know about upgrading your M.2 SSD, from choosing the right size and speed to installing and cloning your old drive.

    We’ll also discuss the different types of M.2 SSDs available, including NVMe and SATA, and the important factors to consider before making a purchase. So, if you’re ready to take your computer’s performance to the next level, let’s dive into the world of M.

    2 SSDs and discover the best ways to upgrade your system.

    Why Upgrade Your M.2 SSD?

    Upgrading your M.2 SSD can make a huge difference in the performance of your computer. If you’re wondering how to upgrade your M.

    2 SSD, it’s actually quite simple. First, you’ll need to determine if your computer supports an M.2 SSD.

    If it does, you’ll need to purchase a new M.2 SSD that is compatible with your system. Once you have the new M.

    2 SSD, you’ll need to backup your data and install the new drive. Installing a new M.2 SSD can be done by opening up your computer and inserting the new drive into the proper slot.

    Once the new drive is installed, you can transfer your data back onto the new drive. Upgrading your M.2 SSD can speed up your computer, increase its storage capacity, and make it more reliable.

    So, if you’re looking for a quick and easy way to improve your computer performance, upgrading your M.2 SSD is definitely worth considering.

    Faster Performance

    Upgrading your M.2 SSD can make a huge difference in your PC’s overall performance. If you’re tired of waiting for your computer to boot up or for programs to load, it might be time to invest in a new high-speed M.

    2 SSD. By upgrading to a faster M.2 drive, you can reduce load times and boost the overall performance of your system.

    The new generation of M.2 SSDs can provide read and write speeds in excess of 3000MB/s, which is significantly faster than traditional hard drives. Additionally, the latest M.

    2 SSDs come with features like NVMe and DRAM cache that enable even faster transfer speeds. With an upgraded M.2 SSD in your system, you’ll be able to enjoy faster boot times, faster application launch times, and much-improved overall system responsiveness.

    So, if you want to take your PC’s performance to the next level, upgrading to a high-speed M.2 SSD should definitely be on your to-do list!

    how to upgrade your m.2 ssd

    Increased Storage Capacity

    Upgrading your M.2 SSD can be a game-changer if you need increased storage capacity. M.

    2 SSDs are known for their incredible speed, but their storage capacity has been limited in the past. With new technology, however, upgrading your M.2 SSD can give you the ability to store even more data than before.

    This is great news for gamers, content creators, and anyone who needs to store large files. Imagine having the ability to store your entire gaming library or video editing projects on one SSD. It’s not only convenient, but it also frees up space on your computer’s hard drive.

    With the increased storage capacity of M.2 SSDs, you can also expect faster load times and quicker access to your files. This is due to the fact that M.

    2 SSDs use a different connection type than traditional hard drives, which allows for faster data transfer rates. By upgrading your M.2 SSD, you can experience lightning-fast speeds and increased storage, making your computer run more efficiently overall.

    In conclusion, if you’re someone who needs more storage space and wants to improve your computer’s overall performance, upgrading your M.2 SSD is a great option. With increased storage capacity and faster load times, you’ll be able to work or play without any interruptions.

    Improved Reliability

    If you’re looking to improve the reliability of your computer’s storage system, upgrading your M.2 SSD is a smart choice. M.

    2 SSDs offer faster speeds and improved performance compared to traditional hard drives, making them a popular choice among tech enthusiasts. But beyond just speed, M.2 SSDs also offer improved reliability.

    With no moving parts, M.2 SSDs are less prone to physical damage and data loss. Plus, they use less power and generate less heat than traditional hard drives, which can also improve their reliability and lifespan.

    So if you want a more reliable and efficient storage solution, consider upgrading to an M.2 SSD.

    How to Upgrade Your M.2 SSD?

    If you’re looking to upgrade your computer’s M.2 SSD, you’re in luck! It’s a relatively simple process that can provide a significant boost in performance. First, you’ll need to determine which M.

    2 SSD is compatible with your computer. Check your computer’s documentation or do some quick research to find out the specifics. Once you’ve found a compatible SSD, it’s time to prepare for the upgrade.

    Make sure you have all the necessary tools (usually just a screwdriver) and create a backup of your data, just in case. Next, turn off your computer and locate the M.2 SSD slot.

    Remove the old SSD by unscrewing it and gently lifting it out of the slot. Then, insert the new SSD and secure it with the screw. Finally, turn your computer back on and transfer your data back onto the new SSD.

    Voila! You now have a faster, more efficient system thanks to your new M.2 SSD.

    Prepare Your System

    Upgrading your M.2 SSD can be an excellent way to boost your system’s overall performance. However, before you can start the process of upgrading your SSD, you need to prepare your system.

    Firstly, it’s essential to back up all your important data to an external device to avoid losing it during the upgrade process. Then, you need to find the correct M.2 SSD that will work with your computer, taking into account factors such as form factor, read and write speeds, and storage capacity.

    Once you have the right SSD, you need to ensure your BIOS is up to date, allowing it to recognize the new hardware. You should also make sure your computer’s drivers and firmware are up to date to ensure optimal performance. Finally, it’s a good idea to clear out any unused programs or files that are taking up space on your computer, thus freeing up storage and improving overall performance.

    With these essential steps taken care of, you’re ready to upgrade your M.2 SSD and enjoy the performance boost it provides!

    Select and Purchase a New M.2 SSD

    Upgrading your computer’s M.2 SSD can greatly improve its speed and overall performance. Before selecting and purchasing a new M.

    2 SSD, it’s important to consider factors such as capacity, speed, and compatibility with your system. One useful tool to use is the CrystalDiskMark benchmark test, which can help determine the read and write speeds of different SSD options. Once you’ve selected a new SSD, the next step is to transfer your data from the old SSD to the new one.

    This can be done using cloning software such as Acronis True Image or Macrium Reflect. After cloning the old SSD to the new one, you’ll need to swap out the drives in your computer. This can vary depending on the type of computer you have, so be sure to consult your manufacturer’s instructions or seek professional assistance if necessary.

    With a new M.2 SSD installed, you should notice a significant improvement in your computer’s speed and performance, making it well worth the investment.

    Clone Your Existing Drive Data

    Upgrading your M.2 SSD is a great way to improve the overall performance of your computer. The first step is to clone your existing drive data to ensure that you don’t lose anything important during the process.

    There are a few different tools you can use to do this, including software that comes with your SSD or third-party options that you can download online. Once you have your data backed up, you can then remove your old SSD and install the new one. Make sure to follow all of the necessary steps carefully, including configuring settings specific to your computer, such as the boot order.

    Once everything is set up, you should notice a significant improvement in the speed and responsiveness of your system. Don’t forget to properly dispose of your old SSD by wiping it clean or physically destroying it to protect your data from identity theft or other security risks. With a little time and effort, upgrading your M.

    2 SSD can breathe new life into your computer and make it feel like new again.

    Install Your New M.2 SSD

    So, you’ve decided to give your computer an upgrade by installing a brand new M.2 SSD – smart move! But if you’re wondering how to go about it, we’re here to help. First things first, you’ll need to check if your computer’s motherboard supports M.

    2 SSDs. Most modern motherboards do, but it’s always best to double-check to avoid wasting money on a component that won’t work. Once you’ve confirmed compatibility, you can remove your old storage device, insert the new SSD into the M.

    2 slot on the motherboard, secure it in place with screws, and then configure it to your liking. Keep in mind that you may need to adjust your BIOS settings or reinstall your operating system to get the full benefits of your new M.2 SSD.

    But once everything is up and running, you can enjoy lightning-fast data transfer speeds and significantly improved performance. So go ahead and take the plunge – your computer (and your productivity) will thank you!

    Verify and Accommodate for Any Changes

    If you’re thinking of upgrading your M.2 SSD, there are a few things you need to keep in mind. First and foremost, you need to verify that your computer is compatible with the new SSD.

    Check the specs of your motherboard and make sure it supports the type of SSD you’re looking to upgrade to. Once you’ve verified compatibility, you can start the installation process. However, it’s important to accommodate for any changes that may occur during the upgrade process.

    This may include updating drivers or reinstalling your operating system. Additionally, you should consider backing up your data before proceeding with the upgrade, just in case anything goes wrong. By taking these steps, you can ensure a smooth and successful upgrade process for your M.

    2 SSD.

    Conclusion

    In conclusion, upgrading your M.2 SSD is a breeze with just a few simple steps. It’s like giving your computer a much-needed spa day – rejuvenating and upgrading its speed and efficiency.

    So go ahead, swap out that old drive and revamp your computer to perform at its absolute best. After all, your computer deserves to feel like royalty too!”

    FAQs

    What is an M.2 SSD and how is it different from a regular SSD?
    An M.2 SSD is a solid-state drive that is designed to be used in smaller devices, such as laptops and tablets. It is different from a regular SSD in that it connects directly to the motherboard, allowing for faster transfer speeds and more efficient use of power.

    Can you upgrade the M.2 SSD in your laptop?
    Yes, if your laptop has an M.2 SSD, it can usually be upgraded with a larger or faster SSD. However, you should check with the manufacturer or a professional to ensure compatibility and proper installation.

    How do you transfer data from your old SSD to a new M.2 SSD?
    There are a few ways to transfer data, including using a cloning software, manually copying files, or using an external hard drive as a middleman. It is important to make sure all important data is backed up before attempting the transfer.

    What are the benefits of upgrading to an M.2 SSD?
    Upgrading to an M.2 SSD can result in faster boot and load times, increased battery life, and better overall performance. It can also provide more storage capacity and a smaller physical footprint in your device.

  • Step-by-Step Guide: Hassle-Free Data Migration from HDD to SSD

    Step-by-Step Guide: Hassle-Free Data Migration from HDD to SSD

    If you’re seeking a significant improvement in the performance of your computer, you may want to consider migrating from HDD to SSD. SSDs (Solid State Drives) have been proven to enhance the speed and efficiency of your computer dramatically. An upgrade such as this can be a bit daunting for those who don’t have technical knowledge of hardware.

    But fear not! This quick guide will give you all the information you need to know about making the switch from HDD to SSD. Think of your computer’s storage as a library, with the HDD as an old-school librarian and the SSD as a modern, highly efficient one. The SSD is capable of reading and retrieving data at an incredibly faster rate compared to the HDD.

    This means that your computer can access and load data in much less time. No more staring at a blank screen for minutes while waiting for your computer to start up or your applications to load. Making the transition from HDD to SSD is one of the most significant hardware upgrades you can make in terms of performance.

    You will start to love your computer all over again as you experience lightning-fast boot and load times. The process may seem intimidating, but with a little bit of research and preparation, it can be straightforward and manageable. Stay tuned for the next part of the blog to get an in-depth understanding of the steps involved in migrating from HDD to SSD.

    Back Up Data from HDD

    So, you’ve decided to upgrade your computer’s hard drive to a solid-state drive (SSD). Congrats! But now comes the question: how do I data migrate my HDD to an SSD? The process is relatively simple and involves backing up your data onto an external drive or cloud storage, cloning your HDD onto the new SSD, then transferring your data back onto the SSD. There are a variety of software options available to help you clone your drive, such as EaseUS Todo Backup, Acronis True Image, and Macrium Reflect.

    Additionally, many SSD manufacturers provide their own cloning software. It’s important to note that when you clone your drive, all data, including the operating system, will be transferred to the new drive. So, be sure to have your product key ready to reactivate Windows or any other programs you may have.

    Once the cloning process is complete, you can remove the old HDD and install the new SSD, and you should be good to go with faster speeds and improved performance.

    Use a Backup Tool to Protect Valuable Data

    Backing up your important data from your hard disk drive (HDD) is essential to protect it from any unfortunate incidents such as hardware failure or virus attacks. It’s always better to be prepared to face any calamity than to suffer the loss of valuable data. Fortunately, there are many backup tools available that can efficiently safeguard your data.

    These tools are designed to automate the backup process and make it easy for you to create a secure backup of your data on external drives or cloud storage. Using a dedicated backup tool will give you peace of mind knowing that your data is protected and easily recoverable in case something goes wrong. With the increasing amount of personal and confidential data stored on our computers, it’s crucial to take the necessary steps to ensure their safety, and backing up your data is the first and most important step in this direction.

    So, if you haven’t already backed up your data, now is the time to invest in a reliable backup tool and secure your data for the future.

    how do i data migrate my hdd to a ssd

    Save Data to External Drive or Cloud Storage

    Backing up your data is crucial to ensure that you don’t lose your important files. One way to do this is by saving your data to an external drive or cloud storage. This process involves transferring your data from your hard drive to another storage device or a server via the internet.

    External drives are more affordable and have a larger storage capacity than cloud storage. You can store your files on an external drive and keep it in a safe place. However, it could get damaged or lost, so it’s essential to have a backup plan.

    Cloud storage, on the other hand, is more convenient since you can access your data anywhere with an internet connection. It’s also more secure since it’s protected by encryption and firewalls. However, you’ll need to pay a subscription fee for more storage space.

    In conclusion, regardless of which method you choose, backing up your data is a must. It’s better to be safe than sorry, as you never know when a problem may occur.

    Preparing SSD for Data Migration

    If you’re upgrading from a traditional hard disk drive (HDD) to a solid-state drive (SSD), you’re likely excited about the performance boost you’re about to experience. But before you can start using your new SSD, you need to perform a data migration from your old HDD. The good news is that you don’t need any special skills, tools, or knowledge to get the job done.

    The easiest way to migrate your data is to use a cloning tool, which creates an exact copy of your HDD on your SSD. There are several cloning tools available online, but it’s important to choose one that’s suitable for your specific operating system. After downloading and installing the cloning tool, connect your SSD to your computer, then follow the instructions to clone your HDD.

    Once the cloning process is complete, your SSD will be ready to use, and you can start enjoying its faster speeds and improved performance. Remember to securely dispose of your old HDD to protect your sensitive information.

    Clone HDD to SSD Using Disk Cloning Software

    When it comes to upgrading your computer’s hard drive, migrating the data from your HDD to an SSD is a popular choice. Before starting the disk cloning process, you need to ensure that your SSD is in the right condition for data migration. First, verify that your SSD is physically connected to your system.

    Check your computer’s manual for instructions on how to install an SSD if it is not yet installed. Once connected, use a drive health monitoring tool to check the SSD’s health status to ensure it is in optimal condition. It is critical to ensure that your SSD has enough storage capacity to accommodate your existing HDD’s data to avoid data loss during the transfer process.

    You can then proceed with using disk cloning software to migrate the data from your HDD to your SSD seamlessly. Remember to use high-quality disk cloning software to guarantee the most efficient and successful transfer of data.

    Clean Install the Operating System on SSD

    When you’re upgrading your computer with a new SSD, it’s essential to prepare it for data migration properly. First, make sure to create a backup of all the important files on your old hard drive. Next, check the manufacturer’s website for any firmware updates or tools specific to the SSD.

    Then, ensure that the drive is properly formatted to match your computer’s operating system. Once you’ve completed these steps, you’re ready to begin transferring your files to the new SSD and installing the operating system. Remember, always back up your files before making any changes to your system.

    By taking the time to properly prepare your SSD for migration, you’ll ensure a smooth transition to the new drive and enjoy faster speeds and increased system performance.

    Final Steps in Data Migration

    If you’re wondering how to data migrate your HDD to a SSD, there are a few final steps to take before completing the transfer. First, make sure you’ve backed up any important data and double-checked that all necessary files have been transferred over to the new SSD. Next, you’ll need to properly format the HDD to avoid any issues with the new storage setup.

    This can usually be done through your computer’s settings or disk management tools. Finally, it’s a good idea to optimize your new SSD’s performance by updating drivers, disabling any unnecessary background programs, and running a few system maintenance tasks. By taking these steps, you can ensure a smooth transition to your new SSD and enjoy faster, more reliable storage for all your data.

    Disconnect HDD and Connect SSD

    Now that you’ve successfully cloned your HDD onto your new SSD using your chosen software, it’s time to complete the final steps of the data migration process. Disconnect your old HDD and connect the new SSD in its place. This is a crucial step as you don’t want your computer booting from the old drive.

    Ensure you’ve transferred all of your important data before uninstalling your old HDD to prevent any potential data loss. Once that’s done, it’s time to power on your computer and start your system as usual. You should now be able to see your new SSD listed as your primary hard drive in your computer’s BIOS settings.

    You can also verify this by checking the storage settings in Windows. Congratulations! You’ve now migrated your system to a lightning-fast SSD, and you’re ready to experience the benefits of faster boot times and quicker application load times.

    Configure SSD as Boot Drive in BIOS Settings

    When it comes to data migration, configuring your Solid State Drive (SSD) as the boot drive in the BIOS settings is the final crucial step to ensure a successful migration. First, access the BIOS menu by restarting your computer and pressing the key designated to enter the BIOS settings, which can vary depending on the brand of your computer. Once you are in the BIOS menu, navigate to the boot options and select the SSD as your primary boot device.

    It is important to ensure that the SSD is listed before any other drive in the boot order. This will ensure that your computer will attempt to boot from the SSD first, giving you faster boot times and overall performance. Make sure to save your changes before exiting the BIOS menu and restarting your computer.

    With your SSD now set as the boot drive, you can enjoy the benefits of faster boot times and better system performance.

    Benefits of an SSD

    If you’re upgrading to a faster and more reliable storage option, migrating your data from your HDD to an SSD is a necessary process. The benefits of an SSD are immense, ranging from faster boot and load times to improved durability and energy efficiency. To migrate your data from your HDD to your new SSD, there are various methods you can use.

    You can use a clone tool such as EaseUS Todo Backup, which allows you to replicate your entire HDD to your new SSD. Another option is to use Windows 10’s built-in system image tool to create a backup of your HDD and restore it to your new SSD. Whatever method you choose, make sure to back up your data beforehand and double-check that your SSD has enough storage space for all your files and programs.

    With a smooth data migration process, you can quickly experience the benefits of an SSD and improve your computer’s overall performance.

    Fast Performance and Improved Load Times

    If you’re considering upgrading your computer’s storage, one option you should definitely consider is getting an SSD (Solid State Drive). Not only do SSDs offer faster performance than traditional HDDs (Hard Disk Drives), but they also improve load times for applications and files. That means if you’re someone who needs your computer to run quickly and efficiently, whether you’re a gamer or just a busy professional, an SSD is definitely worth investigating.

    And, because SSDs have no moving parts, they’re more durable and reliable than HDDs, making them less likely to suffer from physical damage or wear and tear. So, if you’re looking for a storage solution that will offer you fast performance and improved load times, an SSD is definitely worth considering.

    Reduced Energy Consumption and Noise Levels

    An SSD can offer numerous benefits over a traditional hard drive, and one of the most significant advantages is the reduced energy consumption and noise levels. SSDs don’t have any moving parts, which means there’s no mechanical energy required to read and write data constantly. As a result, SSDs consume up to 80% less energy than HDDs, leading to lower electricity bills and a greener computing experience.

    Additionally, since there’s no noise produced by spinning disks and whirring motors, an SSD provides a quieter computing experience. It’s an excellent option for people who are sensitive to noise or work in a quiet environment. Overall, SSDs offer a more sustainable, energy-efficient, and silent alternative to traditional hard drives, and investing in an SSD can be a smart decision in the long run.

    Conclusion

    In conclusion, migrating data from a HDD to a SSD is like moving from a quaint country cottage to a sleek urban penthouse. It may seem daunting at first, but with the right tools and guidance, the transition can be seamless and rewarding. So grab your moving boxes, prepare for a speed boost, and welcome to your new high-tech abode!”

    FAQs

    What is data migration?
    Data migration is the process of transferring data from one storage device to another storage device or a different format.

    How do I prepare my HDD for data migration to SSD?
    You need to clean up unwanted files, uninstall unneeded applications, run disk cleanup and disk defragmenter before starting the migration process.

    What software can I use for data migration from HDD to SSD?
    There are different software available such as EaseUS Todo Backup, Acronis True Image, Macrium Reflect, and Samsung Data Migration Software that can be used for data migration.

    Is data migration to SSD complicated?
    No, it is not complicated. It can be done by following some simple steps and using appropriate software that will guide you through the process.

    What are the benefits of data migration from HDD to SSD?
    Data migration to SSD can significantly improve the performance of your computer, as SSDs are faster and more reliable than HDDs. It also reduces power consumption and offers more storage capacity.

  • Unleash Your Processor’s Potential with Adata Legend 840 512GB: The Ultimate Upgrade for Your PC

    Do you want a top-of-the-line SSD that can provide lightning-fast performance and reliability? Look no further than the ADATA Legend 840. This SSD is designed to meet the demands of the most demanding computer users, with its cutting-edge technology and enhanced performance capabilities. The ADATA Legend 840 is a high-performance solid-state drive that is capable of delivering lightning-fast read and write speeds.

    With sequential read speeds of up to 560MB/s and write speeds of up to 520MB/s, this SSD is ideal for users who need quick access to their data and applications. The drive uses the latest NAND flash memory technology, which provides exceptional durability and long-term reliability. It also comes with built-in error correction and wear leveling features, which help to prolong the life of the SSD and prevent data loss.

    One of the standout features of the ADATA Legend 840 is its enhanced data security features. The drive comes with 256-bit AES encryption, which helps to protect your data from unauthorized access. It also supports TRIM, which optimizes the performance of the SSD by clearing unused data blocks.

    In conclusion, if you are looking for a top-of-the-line SSD that can deliver exceptional performance, reliability, and data security, the ADATA Legend 840 is definitely worth considering. With its cutting-edge technology and enhanced features, it is a solid investment for any computer user who wants the best possible performance from their hardware.

    Fastest Transfer Speeds in a 512GB Capacity

    Looking for the fastest transfer speeds in a 512GB capacity? Look no further than the ADATA XPG SPECTRIX S40G RGB SSD. With a read speed of up to 3,500MB/s and a write speed of up to 3,000MB/s, this SSD allows for lightning-fast file transfers, boot times, and application launches. Its capacity of 512GB provides ample space for storing everything from large video files to multiple operating systems.

    Plus, its RGB lighting adds a fun, customizable touch to your setup. Whether you’re a gamer looking for smooth loading times or a creative professional in need of speedy file transfers, the ADATA XPG SPECTRIX S40G is a top contender. So why settle for slower speeds when you can have the best with the ADATA Legend 840 512GB?

    Speed Up Your Gaming and Productivity

    Are you tired of slow transfer speeds while gaming or working? Look no further than a 512GB capacity drive with the fastest transfer speeds on the market. With its lightning-fast performance, you can enjoy seamless gameplay and increased productivity without the frustration of waiting for files to transfer. Imagine the ability to quickly transfer large files, launch applications instantly, and have multiple programs running in the background without any lags.

    This high-capacity drive not only maximizes storage space, but also optimizes speed and performance, making it perfect for gamers and professionals alike. Upgrade your gaming and work experience today with the fastest transfer speeds in a 512GB capacity drive.

    adata legend 840 512gb

    Upgrade Your Laptop or Desktop with Ease

    If you’re looking to upgrade your laptop or desktop, you’ll want to pay attention to the latest storage options. And the good news is that there’s a new player on the block that’s making waves with its fast transfer speeds and spacious 512GB capacity. This option is none other than the NVMe SSD, an innovative storage device that provides lightning-fast read and write speeds, allowing your system to boot up and data to be transferred at an unprecedented pace.

    So, if you’re tired of waiting around for your music, videos, and files to load, the NVMe SSD might just be the upgrade you’ve been looking for. With 512GB of storage space, you’ll have plenty of room to store all your important documents, photos, and videos, without having to worry about running out of space anytime soon. So why not take your laptop or desktop to the next level with an NVMe SSD today?

    Reliable and Durable with Advanced Features

    The ADATA Legend 840 512GB SSD is a reliable and durable storage device that provides advanced features to enhance your computing experience. This SSD boasts a powerful controller and high-quality NAND flash memory, allowing for lightning-fast read and write speeds that make accessing your files a breeze. Additionally, the Legend 840 has TRIM support, which increases the lifespan of the drive and ensures consistent performance over time.

    What’s more, the SSD also features AES 256-bit encryption, which keeps your data secure from unauthorized access. With its robust construction and advanced features, the ADATA Legend 840 512GB SSD is an excellent choice for anyone who wants a dependable and high-performance storage solution that can keep up with their demands.

    Dynamic SLC Caching Technology

    When it comes to data storage, reliability and durability are crucial factors. That’s why Dynamic SLC Caching Technology is becoming increasingly popular in the industry. It’s a technology that ensures high quality performance by utilizing advanced features.

    What sets it apart is the dynamic nature of the cache, which automatically adjusts to meet the demands of the workload. This means that frequently used data is stored in the cache, resulting in faster retrieval times. The advanced features of Dynamic SLC Caching Technology ensure that data is written to the cache quickly and efficiently.

    It reduces the number of write operations to the flash storage, which prolongs the life of the drive. This means that you can rely on your storage drive to maintain its performance over time. Bursty workloads and heavy data demand are no problem for Dynamic SLC Caching Technology, which makes it an ideal choice for enterprise-level systems.

    Overall, Dynamic SLC Caching Technology is an impressive technology that ensures high-speed performance and reliability by utilizing advanced features. The dynamic nature of the cache ensures that frequently used data is always within reach, which results in faster data retrieval. It’s a technology that businesses can rely on to meet the demands of their specific workloads and requirements, making it an ideal choice for enterprises.

    The bottom line is that Dynamic SLC Caching Technology is a game-changing solution for data storage, increasing productivity and providing a reliable and durable option for businesses.

    AES 256-Bit Encryption for Extra Security

    If you’re looking for added security for your data, AES 256-bit encryption provides an advanced level of protection. This military-grade encryption technology has become the gold standard in data security today. It uses a complex algorithm that makes it practically impossible to crack, ensuring that your sensitive data remains secure, even if someone gains access to your computer or network.

    With AES 256-bit encryption, you can rest assured that your data is safe from hackers and cybercriminals. Additionally, this encryption technology includes advanced features such as key management and access controls, which make it customizable to fit your specific security needs. This type of encryption is reliable and durable, making it the go-to choice for corporations and individuals who require added protection for their sensitive data.

    Overall, AES 256-bit encryption provides a peace of mind that your data is safe and secure.

    LDPC ECC Technology for Enhanced Data Integrity

    LDPC ECC technology is a cutting-edge solution that greatly enhances data integrity and reliability. This advanced technology is designed to address the challenges of data transmission, ranging from bit errors to packet losses that reduce the overall quality of communication. With LDPC ECC, data is transmitted in a way that ensures maximum accuracy, even when facing adverse conditions, such as interference or attenuation.

    This technology utilizes a sophisticated error correction code that is highly effective at correcting errors, while keeping the data loss to a minimum. By using LDPC ECC technology, data can be transmitted over long distances, and even through hostile environments, without compromising the overall quality of communication. With its advanced features, LDPC ECC technology is an excellent choice for businesses and organizations that rely heavily on data communication, such as telecommunications, healthcare, and finance.

    So, if you’re looking for a reliable and durable solution to enhance your data integrity, look no further than LDPC ECC technology.

    Get the Most Out of Your System

    If you’re looking to get the most out of your system, the ADATA Legend 840 512GB is an excellent choice. This high-performance solid-state drive (SSD) is designed to take your computing to the next level. With lightning-fast read and write speeds, the ADATA Legend 840 can help you to achieve faster boot times, faster application load times, and improved overall system responsiveness.

    This SSD also features a durable and reliable design, making it a great investment for those who need a drive that can stand up to heavy usage. With 512GB of storage capacity, this drive has plenty of space for all of your important files, applications, and media. Whether you’re a gamer, content creator, or just looking for a reliable SSD for your everyday computing needs, the ADATA Legend 840 512GB is an excellent choice that won’t disappoint.

    Free Download of the SSD Toolbox and Migration Utility

    If you’re looking to maximize the potential of your solid-state drive (SSD), then look no further than the free SSD toolbox and migration utility offered by the manufacturer of your device. These powerful tools allow you to optimize your SSD’s performance, monitor its health, and transfer your data to a new drive with ease. With the SSD toolbox, you can update your firmware, enable monitoring features, and see detailed information about your drive’s performance, while the migration utility simplifies the process of moving your operating system and files to a new SSD.

    This will not only boost your system’s speed and responsiveness but also give you peace of mind knowing that your data is secure. So, take advantage of these valuable resources and get the most out of your SSD.

    3-Year Warranty for Peace of Mind

    If you’re planning to invest in a new system, there’s nothing more important than peace of mind. That’s why we offer a 3-year warranty that covers any issues that may arise with your system. With our comprehensive warranty, you can rest assured knowing that you’re covered for any malfunctions or defects.

    We want to ensure that you get the most out of your system, which is why we offer this guarantee to all of our customers. Our high-quality systems are designed to last, but in the rare case that something does happen, we’ve got you covered. So why wait? Invest in a new system today and enjoy the added peace of mind that comes with our 3-year warranty.

    Upgrade Your Computer with ADATA Legend 840 512GB SSD

    Looking to upgrade your computer’s speed and performance? Look no further than the ADATA Legend 840 512GB SSD. With lightning-fast read and write speeds and a massive storage capacity, this solid-state drive is the perfect choice for anyone looking to boost their computer’s performance. And with its durable design and built-in error correction, you can be confident your data is safe and secure.

    Whether you’re a gamer, graphic designer, or just looking to increase your productivity at work, the ADATA Legend 840 512GB SSD is a game-changing upgrade that’s sure to make a noticeable difference. Don’t settle for sluggish performance any longer – upgrade to ADATA Legend 840 512GB SSD today!

    Conclusion

    In summary, the ADATA Legend 840 512GB is not just any ordinary SSD. With a massive storage capacity, lightning-fast speeds, and a stylish design, it truly lives up to its name as a legendary piece of technology. Add in its robust durability and compatibility with nearly any device, and you have a drive that can handle anything thrown its way.

    So if you’re looking for the ultimate storage solution that doesn’t compromise on performance or style, the ADATA Legend 840 512GB is the clear choice. It’s not just an SSD, it’s a legend.”

    FAQs

    What is the storage capacity of Adata Legend 840 512GB?
    The Adata Legend 840 has a storage capacity of 512GB.

    What is the read and write speed of the Adata Legend 840 512GB?
    The Adata Legend 840 has a read speed of up to 560 MB/s and a write speed of up to 530 MB/s.

    Is the Adata Legend 840 512GB compatible with both Windows and Mac?
    Yes, the Adata Legend 840 512GB is compatible with both Windows and Mac operating systems.

    What interface does the Adata Legend 840 512GB use for data transfer?
    The Adata Legend 840 512GB uses a SATA III 6Gb/s interface for data transfer.

  • Unveiling the Mystery: Why Does Your Internal HDD Keep Disconnecting?

    Have you ever experienced the frustration of your internal HDD disconnecting unexpectedly? It’s a common problem that can occur for a variety of reasons, from software issues to hardware malfunctions. But don’t worry, in this blog post, we’ll help you troubleshoot the problem and get your HDD up and running again. Think of us as a detective investigating the mystery of your HDD disconnects – we’ll be exploring the possible suspects and clues to help you solve this perplexing issue.

    So, let’s dive in and start the investigation!

    Check cable connections

    If your internal HDD (hard disk drive) keeps disconnecting, one common culprit could be loose or faulty cable connections. The cables connecting the HDD to the motherboard or power supply may become loose over time, especially if your computer is moved around frequently or if the cables are not securely fastened. In some cases, the cables themselves may be damaged or worn, which can cause intermittent disconnections.

    To check for cable issues, first turn off and unplug your computer, then carefully open the case and inspect the cables leading to your HDD. If you notice any loose or damaged connections, try reseating or replacing the affected cables. This simple solution may be all you need to stop your HDD from disconnecting and causing frustrating data loss or device malfunction.

    Ensure power and data cables are securely connected to HDD

    When your computer starts acting up, the cause could be as simple as a loose cable connection. It’s always a good idea to check the power and data cables that connect your hard disk drive (HDD) to your computer. These cables can become loose over time, causing intermittent problems or even complete system failure.

    So, if your computer is running slowly, freezing, or not starting up at all, check the cables first. Simply unplug and replug them to ensure a secure connection. It’s an easy solution that could save you time and money on costly repairs down the track.

    Remember, prevention is better than cure. Taking just a few minutes to check your cable connections can help keep your HDD functioning smoothly and prevent future headaches.

    internal hdd keeps disconnecting

    Replace cable if damaged or loose

    If you’re experiencing connection issues with your electronics, it may be time to check your cable connections. It’s important to make sure that your cables are plugged in securely and aren’t damaged. If you notice any signs of fraying or wear and tear on your cables, it’s crucial to replace them to avoid any potential hazards or disruptions in your connectivity.

    Loose or damaged cables can affect signal strength and cause interference, resulting in poor picture or sound quality. Don’t take any chances when it comes to the safety and performance of your electronics. Check your cables regularly and make sure to replace them if you notice any issues.

    Remember, a little maintenance can go a long way in keeping your technology running smoothly.

    Scan for malware or viruses

    If your internal HDD keeps disconnecting from your computer, it could be a sign of malware or a virus. These malicious programs can interfere with your computer’s operation and cause various issues, including disconnecting your hard drive. To address this problem, you should run a malware scan or virus scan on your system.

    You can use a reliable antivirus program or Windows Defender to perform a full system scan and identify any threats. If a virus or malware is detected, you should quarantine or remove it immediately to prevent further damage. Additionally, you can take steps to prevent future infections by keeping your antivirus software up to date and avoiding suspicious websites or downloads.

    Run antivirus/malware software to detect any threats

    One of the most crucial things you can do to protect your computer from online threats is running antivirus/malware software. Viruses and malware are programs created by hackers to infiltrate your system, steal your data, corrupt your files, and, in worst cases, ransom your computer. To avoid such attacks, you need to install a reliable antivirus/malware program that detects and removes these threats from your system.

    Scanning your computer regularly can help detect any malicious files that may have entered your system while browsing the internet or downloading files. Keep your antivirus/malware updated and schedule regular scans to ensure maximum computer security. Protecting your sensitive information and personal data is essential in this digital age, and scanning for malware or viruses can be your first line of defense in achieving this.

    So, don’t wait until it’s too late, run a virus scan today and protect your system from potential threats.

    Quarantine or delete detected threats

    When it comes to online security, scanning for malware or viruses should be a top priority. Malicious software can sneak onto your devices in many ways, such as through email attachments, downloads, or even from visiting certain websites. A good antivirus program will help detect and isolate any threats, and give you the option to either quarantine or delete them.

    Quarantine means isolating the infected files so they can’t harm your computer while deletion means removing it altogether. It’s important to stay vigilant, as new threats are always emerging and evolving. By regularly scanning your devices, you can catch any potential problems early and protect your personal and professional data.

    Don’t take any chances when it comes to your online safety – invest in a reliable antivirus program and keep your devices secure.

    Update drivers

    If you’re experiencing issues with your internal HDD frequently disconnecting, there could be several reasons why this is happening. One potential culprit is outdated or malfunctioning drivers. Drivers are software programs that enable your computer to communicate with different components, including your HDD.

    If your drivers are outdated or malfunctioning, this can lead to compatibility issues and instability, causing your HDD to disconnect. To solve this problem, you can try updating your drivers either manually or automatically using a third-party driver updater tool. Keep in mind that not all driver updater tools are reliable, so it’s essential to do your research before downloading any software.

    Additionally, you can visit the manufacturer’s website and download the latest drivers for your HDD manually. By updating your drivers, you can improve the stability of your system and prevent your internal HDD from disconnecting in the future.

    Check for and install any available updates for HDD drivers

    Updating your Hard Disk Drive (HDD) drivers can be crucial for the overall performance of your computer. It’s important to check for updates regularly to ensure you are running the latest and most efficient drivers. Updating your HDD drivers can improve system stability, reduce errors, and increase performance.

    The process for updating your HDD drivers will depend on your operating system and the specific driver you are updating. Windows operating systems have a built-in utility called Device Manager that allows you to update drivers for individual devices. For instance, if you’re using a Windows 10 operating system, you can go to the Device Manager, locate your HDD driver, and check for updates.

    If there are updates available, you can choose to install them. However, if you’re not confident about how to update drivers, it’s always best to seek professional help. By keeping your HDD drivers updated, you can ensure your computer is running smoothly and efficiently.

    Check power settings

    If your internal HDD keeps disconnecting, you may want to check your power settings. Sometimes, the settings can be set to turn off the device after a certain amount of time, causing it to disconnect. To prevent this, go to your computer’s power settings and look for the option that controls the behavior of the disk drive.

    Make sure that it’s set to keep the drive running, or to turn it off only after an extended period of inactivity. This should help prevent your internal HDD from disconnecting and ensure that your data stays safe. If changing the power settings doesn’t solve the issue, it could be a sign of a more serious problem with the disk or the computer itself, and you may need to seek professional help to diagnose and fix the issue.

    Adjust power settings to prevent HDD from going into sleep mode

    When it comes to maximizing the life of your hard disk drive (HDD), preventing it from going into sleep mode can be a crucial step. By default, many computers are set to put the HDD into sleep mode after a certain period of inactivity to save power. However, this can cause wear and tear on the HDD and potentially shorten its lifespan.

    To prevent this, you can adjust your power settings to keep the HDD running continuously. To check your power settings on a Windows computer, go to the Control Panel and click on Power Options. From there, you can adjust the settings for when the computer goes to sleep or when the HDD goes to sleep.

    By tweaking these settings, you can ensure that your HDD stays awake and running smoothly for longer. So take a few minutes to check and adjust your power settings today to maximize the lifespan of your HDD.

    Consider replacing HDD

    If you’re experiencing issues with your internal HDD repeatedly disconnecting from your computer, it may be time to consider a replacement. Internal HDDs are known to fail and cause a multitude of problems, including disconnecting from the computer, slow speed, and even data loss. Upgrading to a newer, more reliable internal HDD can solve these issues and provide better performance overall.

    Look for an internal HDD with a high RPM (revolutions per minute) speed and sufficient storage capacity for your needs. Don’t let a failing internal HDD cause you any more frustration – invest in a replacement and enjoy smoother functioning and peace of mind.

    If issue persists, consider getting a new HDD

    If you have been encountering persistent problems with your HDD, it could be an indication that it is time to replace it. An HDD, also known as a hard disk drive, is a crucial component in your computer system that stores all important files and programs. Over time, an HDD can fail due to several reasons, such as physical damage, overheating, or even a software malfunction.

    If you have tried all troubleshooting methods to fix your HDD but still face issues like slow loading times, frequent crashes, or corrupted files, it is time to consider replacing it with a new one. Replacing an HDD is an effective solution to rectify any hardware issues and also improve the overall performance of your system. A new HDD with more capacity and better speed can make it easier to store and retrieve data.

    Before you replace the HDD, it is essential to back up all your important data to prevent any data loss during the replacement process. Once you have backed up all your data, consult a professional or do research on the kind of HDD that is compatible with your system. In conclusion, when your HDD gives you persistent problems, it is an indication to replace it.

    Upgrading your HDD can substantially enhance your system’s performance. Ensure that you back up all your crucial data before replacing the HDD, and always acquire professional assistance if needed. By following the guideline above, you can maintain the efficiency of your system and prevent any potential data loss.

    Conclusion

    In the world of technology, disconnections can be an unfortunate reality. As frustrating as it may be, an internal HDD that keeps disconnecting could be caused by a variety of issues such as loose connections, faulty cables, or even software conflicts. However, fear not! With patience and some troubleshooting, you’ll likely get to the root of the problem and have your storage back up and running in no time.

    So keep calm, carry on, and start diagnosing!”

    FAQs

    Why does my internal HDD keep disconnecting?
    There could be several reasons for this, including a loose connection, outdated drivers, a failing HDD, or problems with the power supply. It’s best to troubleshoot the issue to determine the root cause.

    How can I check if my HDD is failing?
    There are several tools and software available that can check the health of your HDD, such as CrystalDiskInfo or the built-in Windows Disk Check tool. These tools can help you determine if your HDD is failing and needs to be replaced.

    Can a faulty power supply cause my internal HDD to disconnect?
    Yes, a faulty power supply can cause issues with your HDD, such as disconnecting or not being recognized by your computer. It’s important to make sure your power supply is functioning properly and providing enough power to your HDD.

    Do I need to replace my internal HDD if it keeps disconnecting?
    Not necessarily. It’s important to troubleshoot the issue first and determine the cause. If it’s a loose connection or outdated drivers, those can be easily fixed. However, if the HDD is failing, it will need to be replaced.