Author: David L. Lynn

  • Elevate Your Storage Fanxiang S770 – The Ultimate SSD Upgrade

    In today’s fast-paced digital world, the need for speedy and reliable storage solutions is more critical than ever. Whether you’re a tech enthusiast, a laptop user, a desktop owner, or someone who uses smart devices, having an efficient storage system can significantly enhance your experience. Enter the Fanxiang S770, a state-of-the-art SSD (Solid State Drive) designed to meet all your storage needs. This blog post will provide an in-depth look at the Fanxiang S770, exploring its features, benefits, and why it stands out as the ultimate SSD upgrade.

    In this blog, you’ll discover why the Fanxiang S770 is a must-have for anyone looking to boost their device’s performance. From faster boot times to enhanced data transfer speeds, we’ll cover everything you need to know. We’ll also compare SSDs with HDDs to highlight the advantages, guide you through the installation process, share tips for maximizing your SSD experience, and even look at real-life case studies. By the end, you’ll be well-equipped to decide if the Fanxiang S770 is right for you.

    fanxiang s770 2tb

    Fanxiang S770 Specification

    The Fanxiang S770 is a high-performance solid-state drive (SSD) that offers impressive speeds and reliability. Here are the key specifications:  

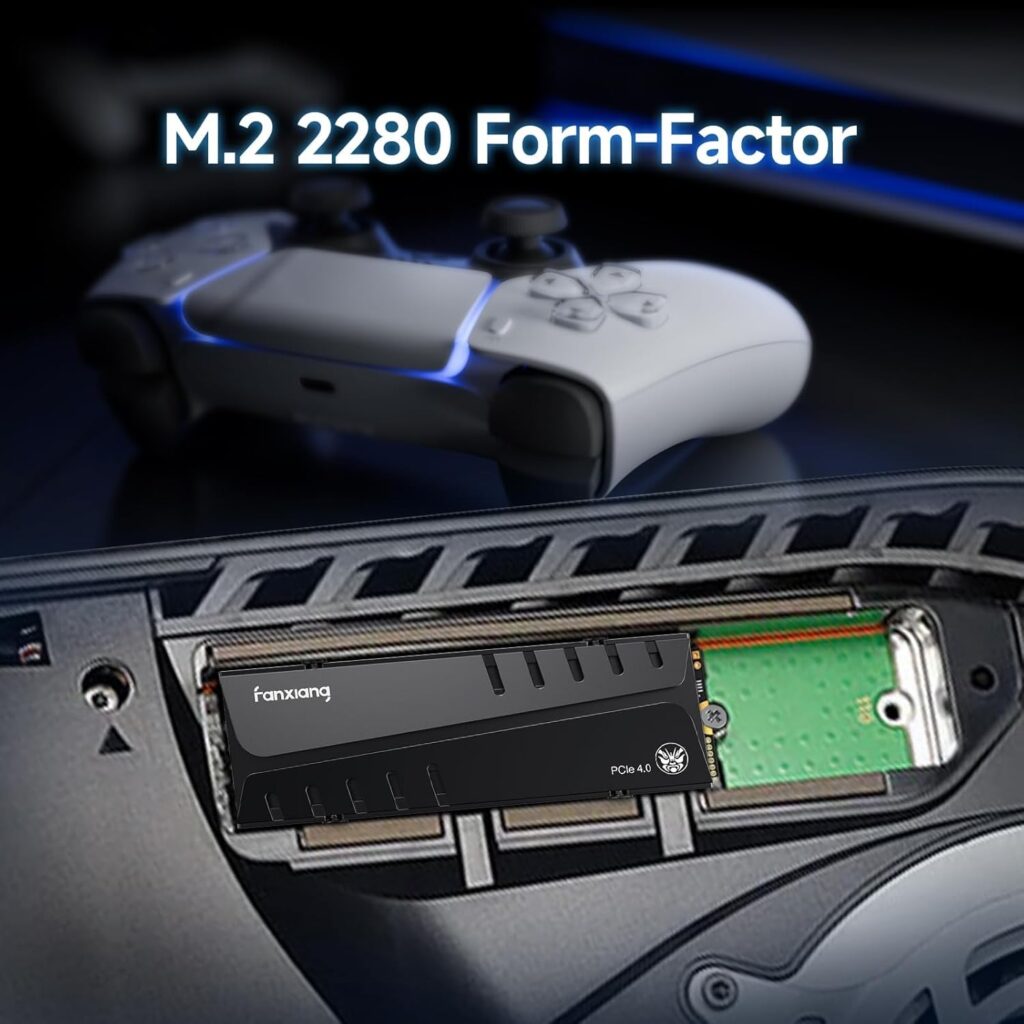
    Form Factor: M.2 2280

    Interface: PCIe 4.0 x4

    Capacity: 500GB, 1TB, 2TB

    Controller: Innogrit IG5236

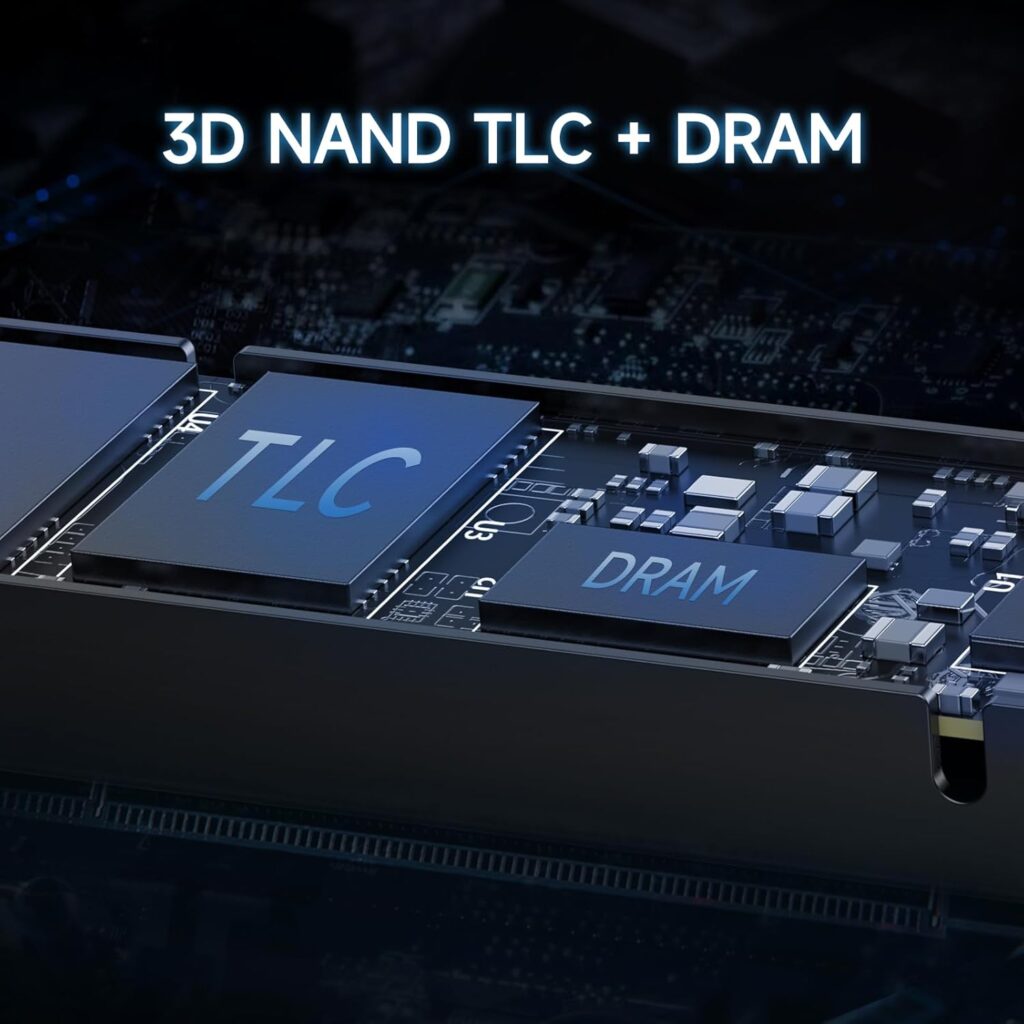
    NAND Flash: YMTC TLC 3D NAND

    DRAM Cache: Yes

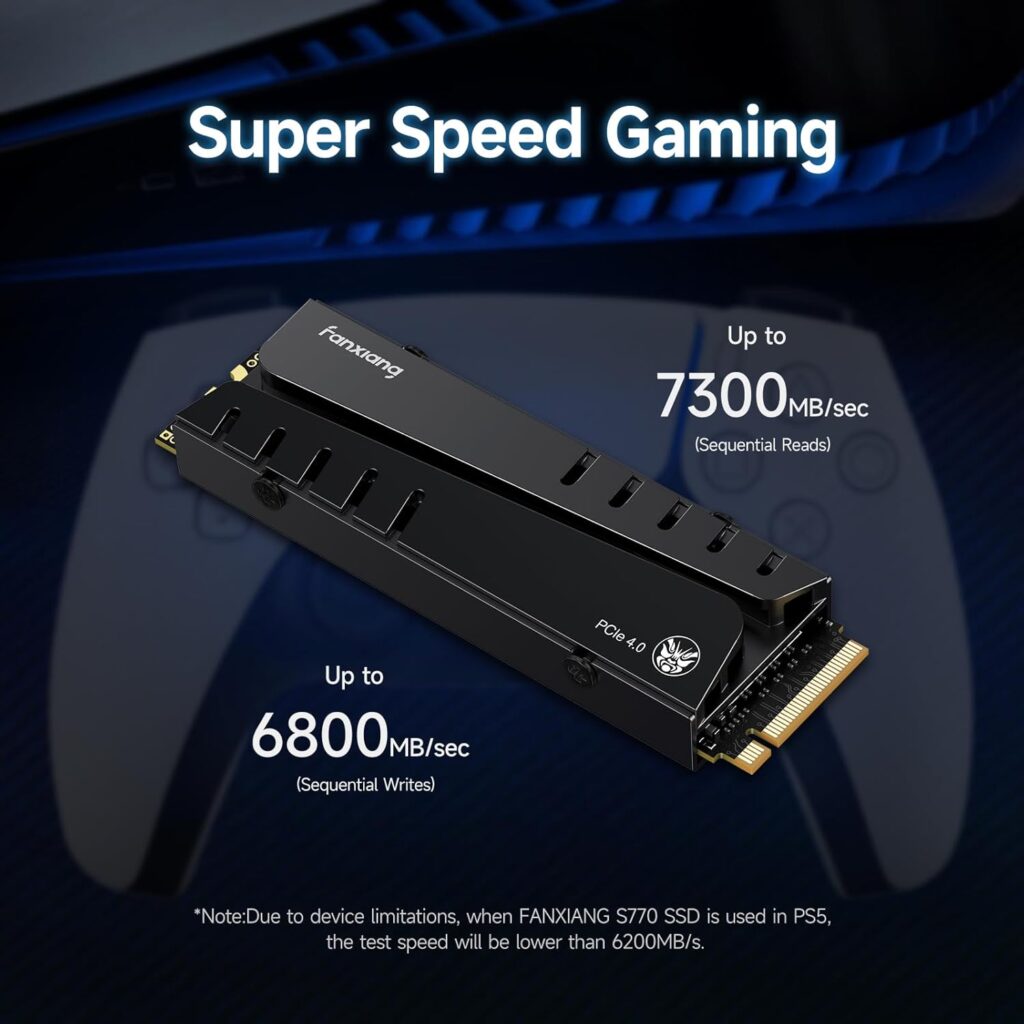
    Sequential Read Speed: Up to 7400 MB/s

    Sequential Write Speed: Up to 6800 MB/s

    Random Read IOPS: Up to 700K IOPS

    Random Write IOPS: Up to 650K IOPS

    Endurance: 700 TBW (500GB), 1400 TBW (1TB), 2800 TBW (2TB)

    Warranty: 5 years  
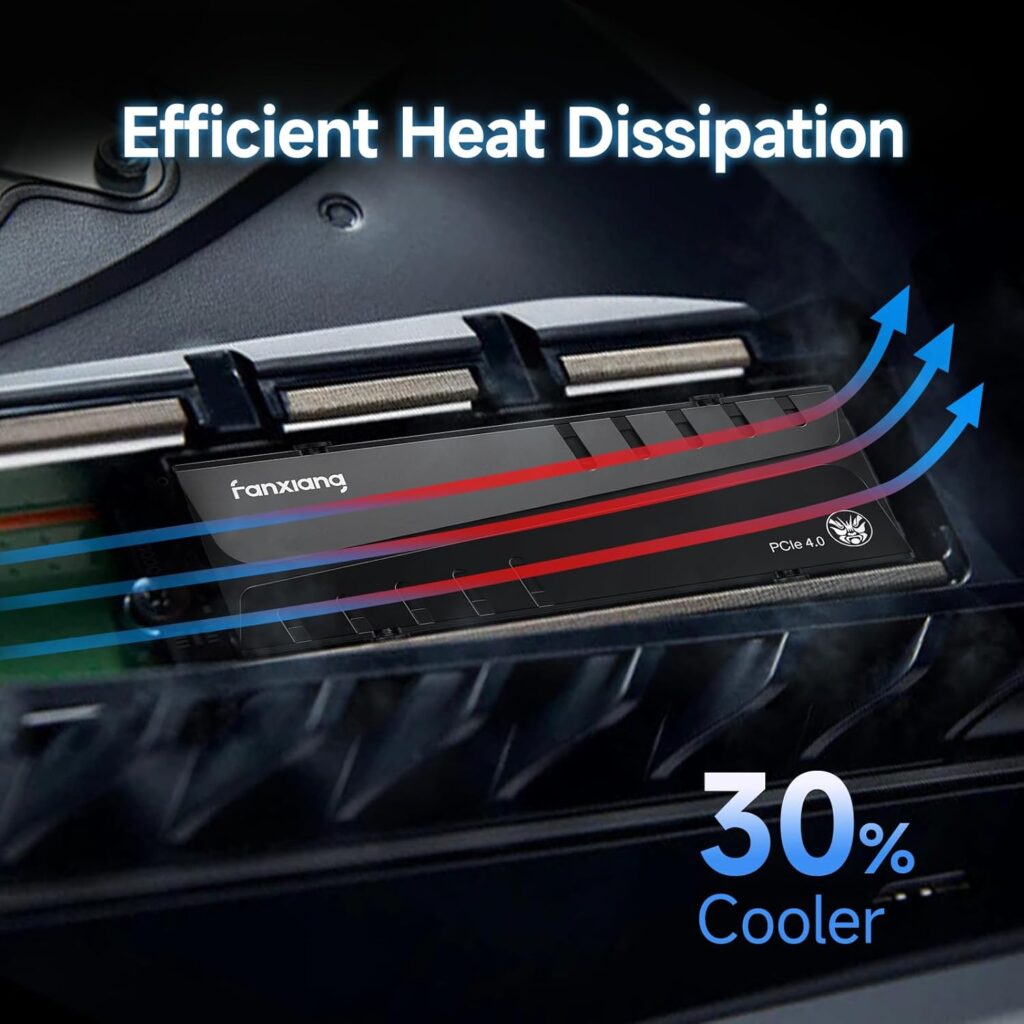
    fanxiang ssd s770

    Additional Features:

    • Supports PCIe 4.0 for high-speed data transfer  
    • DRAM cache for improved performance  
    • Reliable TLC NAND flash  
    • Long endurance rating for long-term use
    • Suitable for demanding applications like gaming, video editing, and content creation  

    Overall, the Fanxiang S770 is a solid choice for users who need fast and reliable storage for their systems. Its high speeds, large capacity options, and long warranty make it a great option for both consumers and professionals. Sources and related content.

    The Advantages of Using Fanxiang S770

    The Fanxiang S770 offers numerous advantages that make it a superior choice for smart device owners and tech enthusiasts alike. One of the standout features is its incredibly fast boot times. Imagine turning on your laptop or desktop and being ready to go in seconds rather than minutes. The Fanxiang S770 makes this possible, significantly reducing the time you spend waiting and increasing your productivity.

    Another notable benefit is the enhanced data transfer speeds. Whether you’re moving large files, installing software, or running applications, the Fanxiang S770 ensures that everything happens swiftly and efficiently. This speed enhancement is particularly beneficial for users who frequently deal with large datasets or multimedia files, as it can drastically cut down on processing times.

    Lastly, the Fanxiang S770 enhances overall system performance. It minimizes lag, reduces the chances of system crashes, and ensures smoother multitasking. This is especially useful for gamers and professionals who need reliable and efficient performance. With the Fanxiang S770, you can expect a seamless and enjoyable user experience, free from the frustrations of slow and unreliable storage solutions.
    fanxiang s770 review

    SSD vs. HDD

    When it comes to storage technology, SSDs and HDDs are the two main options available. While both have their merits, SSDs have been gaining popularity due to their superior performance and durability. Traditional HDDs rely on spinning disks to read and write data, which makes them slower and more prone to mechanical failure. On the other hand, SSDs like the Fanxiang S770 use flash memory, which is faster and more reliable.

    One of the most significant differences between SSDs and HDDs is speed. SSDs offer faster data access and transfer rates, which translates to quicker boot times and improved system performance. This speed advantage is crucial for tasks that require rapid data processing, such as gaming, video editing, and running complex software applications.

    Durability is another area where SSDs outshine HDDs. Because SSDs have no moving parts, they are less susceptible to physical damage and wear and tear. This makes them a more reliable and long-lasting option, especially for portable devices like laptops and tablets. If you’re looking for a storage solution that combines speed, reliability, and durability, the Fanxiang S770 is an excellent choice.
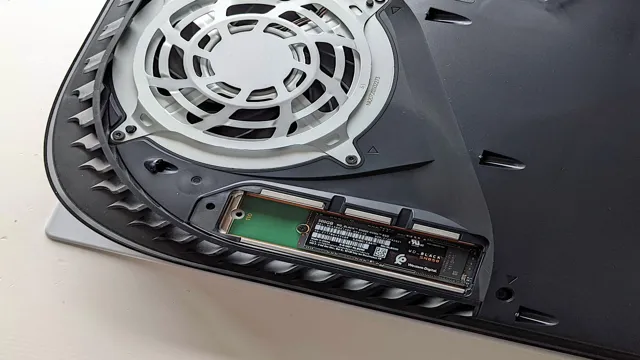
    fanxiang s770 ps5

    Fanxiang S770: Pros and Cons

    Pros

    • High Performance: Offers impressive sequential read/write speeds, making it ideal for demanding tasks like gaming, video editing, and content creation.
    • Large Capacity Options: Available in various capacities to suit different storage needs.
    • Reliable NAND Flash: Uses TLC NAND flash, known for its durability and longevity.
    • Long Warranty: Comes with a 5-year warranty, providing peace of mind for long-term use.
    • Suitable for High-Performance Applications: Its speed and reliability make it a great choice for applications that require fast data access.
    fanxiang ssd review

    Cons

    • Price: May be slightly more expensive than some other PCIe 4.0 SSDs, especially for higher capacities.
    • Limited Availability: May not be as widely available as more established brands.
    • Heating Issues: Some users have reported higher temperatures during intensive workloads, which could affect performance and longevity.
    • Power Consumption: Can draw more power compared to some other SSDs, especially under heavy loads.

    Overall, the Fanxiang S770 is a solid choice for users who prioritize performance and reliability. However, it’s essential to consider your specific needs and budget before making a purchase. If you’re willing to pay a premium for top-notch performance and a long warranty, the S770 might be a great option.

    fanxiang s770 2tb

    How to Install Fanxiang S770

    Installing the Fanxiang S770 is a straightforward process that both experienced and novice users can accomplish with ease. Before you begin, make sure your device is compatible with the SSD. The Fanxiang S770 is designed to work with a variety of devices, including laptops, desktops, and smart devices.

    First, you’ll need to gather the necessary tools, such as a screwdriver and an external enclosure if you’re cloning your existing drive. Begin by turning off your device and disconnecting it from any power sources. Open the device casing to access the storage bay, usually located on the bottom or side of laptops, and inside the tower for desktops.

    Next, carefully remove the existing storage drive and replace it with the Fanxiang S770. Secure the SSD in place, close the device casing, and reconnect any power sources. If you’re cloning your old drive, use the external enclosure to connect the Fanxiang S770 to your device and follow the cloning software instructions. Once the installation is complete, turn on your device and enjoy the enhanced performance and speed of your new SSD.

    fanxiang s770 4tb

    Tips for Maximizing Your SSD Experience

    To get the most out of your Fanxiang S770, it’s essential to optimize your system settings and manage your storage effectively. One way to do this is by enabling TRIM support, which helps maintain the performance and longevity of your SSD by ensuring that deleted data is efficiently cleared from the drive. Most modern operating systems support TRIM, but it’s worth double-checking that it’s enabled on your system.

    Another tip is to avoid filling your SSD to capacity. Keeping some free space available allows the SSD to perform better and prolongs its lifespan. Aim to keep at least 10-20% of your SSD’s total capacity free for optimal performance. Regularly deleting unnecessary files and using cloud storage for large media files can help you manage your storage effectively.

    Lastly, keep your SSD firmware up to date. Manufacturers often release firmware updates to improve performance, fix bugs, and enhance security. Periodically checking for and installing these updates ensures that your Fanxiang S770 remains in top condition, providing you with the best possible performance and reliability.
    fanxiang s770 2tb review

    Case Studies

    Real-life examples can provide valuable insights into how the Fanxiang S770 can improve performance for different users. Take the case of John, a freelance graphic designer who relies on his laptop for work. Before upgrading to the Fanxiang S770, John often experienced slow load times and system crashes, which impacted his productivity. After installing the SSD, he noticed a significant improvement in speed and stability, allowing him to complete projects faster and with less frustration.

    Another example is Sarah, a gaming enthusiast who wanted to enhance her gaming experience. She upgraded her desktop with the Fanxiang S770 and was amazed by the difference it made. Games loaded faster, and she experienced smoother gameplay with fewer lags or stutters. The SSD’s performance boost allowed her to enjoy her favorite games without the usual technical issues.

    Then there’s Mark, a small business owner who needed a reliable storage solution for his office computers. The Fanxiang S770 provided the perfect solution, offering fast data access and enhanced system performance. This upgrade streamlined his business operations, allowing his team to work more efficiently and focus on their tasks without being hindered by slow or unreliable storage.

    Future of SSD Technology

    The future of SSD technology looks promising, with continuous advancements in performance, capacity, and affordability. The Fanxiang S770 is already at the forefront of these developments, offering cutting-edge features and capabilities that cater to the needs of modern users. As technology evolves, we can expect even faster data transfer rates, larger storage capacities, and improved durability.

    One exciting trend is the development of PCIe 4.0 and NVMe 1.4 interfaces, which offer significant performance boosts over older standards. These advancements are likely to become more widespread, making SSDs like the Fanxiang S770 even more powerful and efficient. Additionally, advancements in 3D NAND technology will enable manufacturers to produce higher-capacity SSDs at lower costs, making them more accessible to a broader range of users.

    In the coming years, we can also expect AI and machine learning to play a more significant role in SSD technology. These tools can help optimize data storage and management, further enhancing the performance and reliability of SSDs. The Fanxiang S770 is well-positioned to take advantage of these innovations, ensuring that it remains a top choice for smart device owners, tech enthusiasts, and anyone looking to upgrade their storage solutions.

    Conclusion

    The Fanxiang S770 is the ultimate SSD upgrade for anyone looking to boost their device’s performance, speed, and reliability. With its fast boot times, enhanced data transfer speeds, and overall system performance improvements, it’s an excellent choice for smart device owners, laptop users, desktop owners, and tech enthusiasts alike. By following the installation guide and tips for maximizing your SSD experience, you can enjoy the full benefits of this advanced storage solution.

    The future of SSD technology is bright, and the Fanxiang S770 is at the forefront of these exciting developments. Don’t miss out on the opportunity to elevate your storage and enhance your overall user experience. Share your thoughts and experiences in the comments below, and join the community of satisfied users who have made the switch to the Fanxiang S770.

  • Transform Your Storage Game with Fanxiang S660

    In today’s fast-paced digital world, having reliable and speedy storage is not just a luxury—it’s a necessity. The Fanxiang S660 SSD could be your next big upgrade, offering a blend of next-level performance and reliability. Whether you’re a tech enthusiast or a DIY mechanic, this post will guide you through everything you need to know about the Fanxiang S660 SSD.

    The Fanxiang S660 – A Game Changer in Storage Solutions

    When it comes to solid-state drives (SSDs), not all are created equal. The Fanxiang S660 stands out with its cutting-edge features designed to meet the needs of tech-savvy users. This SSD boasts impressive read/write speeds, top-notch build quality, and seamless installation, making it an optimal choice for anyone looking to upgrade their system.

    Why Upgrade to the Fanxiang S660 SSD?

    Upgrading to the Fanxiang S660 SSD can significantly enhance your computer’s speed and performance. Here’s why:

    Speed Like You’ve Never Seen

    If you’ve been tolerating sluggish boot times and slow file transfers, the Fanxiang S660 will revolutionize your daily computing experience. With read speeds up to 3500MB/s and write speeds up to 3000MB/s, your system will feel like it’s on turbo mode.

    Unmatched Reliability

    This SSD isn’t just about speed. It’s built to last, offering robust durability that ensures your data remains safe and secure. The Fanxiang S660 comes with advanced error correction and wear-leveling technologies, making it highly reliable for long-term use.

    Perfect for DIY Mechanics

    For those who love tinkering and customizing their setups, the Fanxiang S660 offers a straightforward upgrade path. Its user-friendly design ensures even DIY novices can install it without hassle, making it a perfect fit for a broad audience.

    In-Depth Review of the Fanxiang S660 SSD

    Before you make any purchase, it’s essential to look at some in-depth reviews. We’ve put the Fanxiang S660 to the test to bring you an honest evaluation.

    Build Quality

    The first thing you’ll notice about the Fanxiang S660 is its sleek, compact design. The build quality is exceptional, featuring high-grade materials that contribute to its durability and heat dissipation.

    Read/Write Speeds

    When it comes to performance, the Fanxiang S660 doesn’t disappoint. Our tests showed consistent read speeds of up to 3500MB/s and write speeds reaching 3000MB/s. These speeds make it ideal for a range of activities, from gaming to video editing.

    Real-World Performance

    In practical use, the Fanxiang S660 showed remarkable performance improvements. Boot times were reduced to just a few seconds, and large file transfers were completed in record time. Compared to other SSDs in the market, the S660 holds its own, delivering both speed and reliability.

    Step-by-Step Installation Guide for the Fanxiang S660 SSD

    Upgrading to the Fanxiang S660 doesn’t have to be a daunting task. Follow these steps to install your new SSD effortlessly:

    Step 1 – Gather Your Tools

    Ensure you have a screwdriver, the Fanxiang S660 SSD, and your computer’s manual if needed. Having these at hand will make the process smoother.

    Step 2 – Backup Your Data

    Before making any changes, always back up your important data to avoid any potential loss during the installation.

    Step 3 – Physically Install the SSD

    Open your computer case. Locate the current storage drive and remove it. Insert the Fanxiang S660 into the appropriate slot and secure it with screws.

    Step 4 – Transfer Your Data

    Once installed, you’ll need to transfer your operating system and files to the new SSD. This can be done using cloning software, which will copy your existing drive onto the Fanxiang S660.

    Step 5 – Boot Up and Enjoy

    Close your computer case, power it on, and enjoy the significant performance boost that comes with your new Fanxiang S660 SSD.

    The Future of Storage Technology

    The world of storage technology is continually evolving, and SSDs like the Fanxiang S660 are at the forefront of this revolution.

    Emerging Trends

    We’re seeing trends such as 3D NAND technology, which allows for higher storage capacities and faster speeds. Innovations like NVMe (Non-Volatile Memory Express) are also gaining traction, offering even lower latency and higher performance.

    Predictions for the Future

    Looking ahead, we can expect SSDs to become even more affordable and accessible, making high-speed storage available to a broader range of users. The focus will likely shift towards increasing efficiency and sustainability, reducing the environmental impact of storage solutions.

    Conclusion

    The Fanxiang S660 SSD is more than just another storage device; it’s a game-changer for anyone looking to enhance their computing experience. Its unparalleled speed, reliability, and ease of installation make it a must-have for tech enthusiasts and DIY mechanics alike.

    Are you ready to elevate your storage game? Share your experiences and questions in the comments below, and don’t hesitate to explore further resources or make a purchase. The future of storage technology is here, and it starts with the Fanxiang S660.

  • Transform Your Gaming Experience with a PS5 SSD Upgrade

    Transform Your Gaming Experience with a PS5 SSD Upgrade

    The PlayStation 5 (PS5) is a technological marvel that has taken the gaming world by storm. But did you know that you can elevate its performance even further by upgrading to a custom SSD? In this comprehensive guide, we’ll explore the ins and outs of installing an SSD in your PS5, ensuring you get the absolute best out of your gaming experience.

    Why the PS5’s SSD Matters

    The PS5 comes equipped with a revolutionary SSD that drastically reduces load times and enhances overall performance. This makes the gaming experience more seamless and immersive. But what if you could make it even better?

    The Importance of SSD for Gaming Performance

    A high-quality SSD can significantly improve gaming performance. With faster data access speeds, games load quicker, and in-game transitions are smoother. This can be a game-changer in competitive gaming scenarios where every millisecond counts.

    Faster Load Times

    Imagine booting up a game in mere seconds or fast-traveling across an open world without any delays. An upgraded SSD makes this possible, creating a more fluid and engaging gaming experience.

    Enhanced Game Performance

    Beyond load times, a better SSD can lead to improved frame rates and reduced lag. This ensures that the graphics remain crisp and the gameplay smooth, even in the most demanding games.

    How to Install an SSD in Your PS5

    Upgrading your PS5’s storage isn’t as daunting as it sounds. Follow these steps to install a new SSD and boost your console’s capabilities.

    Step 1: Gather Your Tools

    Before you start, you’ll need a few items:

    • A compatible SSD (more on this later)
    • A small Phillips-head screwdriver
    • A clean, static-free workspace

    Step 2: Prepare Your PS5

    Turn off your PS5 and disconnect all cables. Place it on a clean, flat surface with the logo facing up and the power button facing you.

    Step 3: Remove the Cover

    Gently slide the cover off by lifting the corner near the power button and pulling it towards you. This exposes the SSD bay.

    Step 4: Open the SSD Bay

    Use your screwdriver to remove the screw from the SSD bay cover. Set the cover and screw aside in a safe place.

    Step 5: Insert the SSD

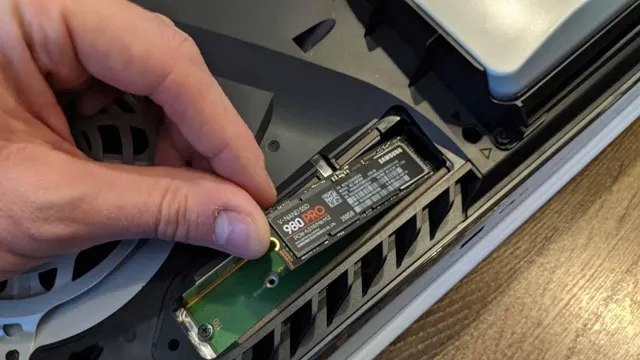
    Carefully insert the SSD into the slot, aligning it with the connector. Secure it with the screw you previously removed.

    Step 6: Replace the Cover

    Once the SSD is installed, replace the SSD bay cover and secure it with the screw. Slide the PS5 cover back into place until it clicks.

    Step 7: Initialize the SSD

    Reconnect all cables and power on your PS5. You’ll be prompted to format the new SSD. Follow the on-screen instructions to complete the process.

    Choosing the Right SSD for Your PS5

    Not all SSDs are created equal. Here are some tips to help you choose the best one for your gaming needs.

    Focus on Speed and Compatibility

    Look for SSDs with high read/write speeds and ensure they are compatible with the PS5. Sony recommends SSDs with a minimum read speed of 5,500MB/s.

    Storage Capacity

    Consider how much storage you’ll need. If you’re an avid gamer with a large library, opt for a higher capacity SSD to ensure you have plenty of space for all your games.

    Brand and Reliability

    Stick to reputable brands known for their reliability and performance. Brands like Samsung, Western Digital, and Seagate are popular choices among gamers.

    Common Mistakes to Avoid

    Even with a straightforward process, there are common mistakes you should avoid during installation.

    Forgetting to Backup Data

    Always back up your data before starting the installation. This ensures you don’t lose any important game saves or data during the process.

    Using Incompatible SSDs

    Ensure the SSD you choose is compatible with the PS5. Using an incompatible SSD can lead to performance issues or even damage your console.

    Rushing the Installation

    Take your time and follow each step carefully. Rushing through the installation can lead to mistakes and potentially harm your PS5.

    Real-Life Examples of Improved Gaming Experiences

    Many gamers have reported noticeable improvements in their gaming experiences after upgrading their PS5’s SSD. Here are a few examples:

    John’s Story

    John, an avid gamer and tech enthusiast, upgraded his PS5 with a high-speed SSD. “The difference was night and day,” he says. “Load times were cut in half, and the overall performance was much smoother. It felt like I had a brand-new console.”

    Maria’s Experience

    Maria, a competitive gamer, found that the SSD upgrade gave her a significant edge in fast-paced games. “Every second counts in competitive gaming,” she explains. “The SSD upgrade eliminated lag and made my gameplay more responsive. It’s a must-have for any serious gamer.”

    Conclusion

    Upgrading your PS5’s SSD can transform your gaming experience, offering faster load times, improved performance, and ample storage for all your games. By following our step-by-step guide and choosing the right SSD, you can unlock the full potential of your PS5.

    Ready to take your gaming to the next level? Start your SSD upgrade today and experience the difference for yourself. Have questions or need further assistance? Join our community of gamers and tech enthusiasts for more tips and support.

  • Boost Your Game Library with PlayStation 5’s 1TB Hard Drive

    Boost Your Game Library with PlayStation 5’s 1TB Hard Drive

    Gaming has evolved dramatically over the past decade. With titles becoming more immersive and graphics more detailed, the size of games has ballooned. For PlayStation 5 users, this means one thing—more storage is crucial. In this blog post, we’ll explore the ins and outs of the PlayStation 5’s 1TB hard drive, why you need extra space, and how to upgrade and manage your storage effectively.

    Why the PS5’s 1TB Hard Drive Matters

    The PlayStation 5 is a powerhouse of a console, boasting impressive specs that deliver breathtaking gaming experiences. But even the best hardware has its limitations, and storage is one of them. The base model of the PS5 comes with a built-in SSD that provides fast read and write speeds, but for many gamers, the default storage isn’t enough. This section will cover why the 1TB hard drive is essential for serious gamers.

    Firstly, modern games are huge. Titles like “Call of Duty” and “Red Dead Redemption 2” can take up over 100GB each. When you factor in DLCs, updates, and other content, your storage fills up quickly. Secondly, the speed of the PS5’s SSD means faster load times, which enhances your gaming experience. However, the console’s default storage capacity limits how many games you can keep installed at once, making a 1TB hard drive a game-changer.

    Lastly, having ample storage lets you experiment with new games without worrying about uninstalling old favorites. This freedom to explore different genres and titles keeps your gaming experience fresh and exciting.

    The Growing Size of Games and the Need for Extra Storage

    If you’ve been gaming for a while, you’ve probably noticed that game sizes have been steadily increasing. This trend shows no signs of stopping, and it directly impacts storage needs. Let’s break down why modern games are so big and why extra storage is more important than ever.

    Game developers are constantly pushing the envelope to create more detailed, lifelike experiences. This means higher-resolution textures, more complex character models, and expansive open worlds that require massive amounts of data. For example, a game like “Cyberpunk 2077” features a sprawling city with intricate details, all of which require significant storage space.

    Additionally, online multiplayer games often receive frequent updates and patches to improve gameplay and add new content. These updates can be several gigabytes each, quickly adding up over time. If you’re a fan of multiple multiplayer titles, your storage can fill up fast.

    Lastly, digital game libraries are becoming the norm. Physical discs are increasingly being replaced by digital downloads, which also require storage space. This shift towards digital-only collections makes having ample storage even more critical.

    Exploring Storage Options for Your PS5

    Once you’ve recognized the need for extra storage, the next step is understanding your options. The PlayStation 5 supports both official and third-party storage solutions, each with its pros and cons. We’ll explore these options to help you make an informed decision.

    Sony offers an official storage expansion solution with the PlayStation 5-compatible NVMe SSDs. These drives are designed to meet the speed and performance requirements of the console, ensuring seamless gameplay. Installing an official SSD is straightforward and doesn’t void your warranty, making it a safe choice for most users.

    For those looking for more flexibility, third-party storage solutions are also available. Brands like Samsung, Western Digital, and Seagate offer compatible SSDs that can be used to expand your PS5’s storage. These drives often come at competitive prices and offer various storage capacities, allowing you to choose one that fits your needs and budget.

    External USB hard drives are another option, although they come with limitations. While you can’t run PS5 games directly from an external drive, you can store and transfer games to free up space on your internal SSD. This method is useful for managing your game library but may not offer the same performance benefits as an internal SSD.

    How to Upgrade Your PS5’s Storage

    Upgrading your PlayStation 5’s storage might sound daunting, but it’s relatively straightforward. Follow this step-by-step guide to install a new SSD and give your gaming experience a significant boost.

    1. Choose a Compatible SSD: Ensure the SSD meets Sony’s speed and size requirements. Popular options include the Samsung 980 Pro and the WD Black SN850.
    2. Backup Your Data: Before making any changes, back up your saved games and important data to avoid any potential loss.
    3. Prepare Your Console: Turn off your PS5 and unplug it from the power source. Place it on a flat surface with good lighting.
    4. Remove the Cover: Carefully remove the console’s cover to access the SSD slot. This step requires a bit of force, so be gentle but firm.
    5. Install the SSD: Insert the SSD into the slot and secure it with the provided screw. Make sure it’s firmly in place.
    6. Reassemble and Format: Replace the cover and plug your console back in. Turn it on and follow the on-screen prompts to format the new SSD.

    Your PlayStation 5 will now recognize the additional storage, allowing you to install more games and enjoy a smoother gaming experience.

    Best Practices for Storage Management

    Managing your storage effectively ensures that you can enjoy all your favorite games without running into space issues. Here are some best practices to help you keep your game library organized.

    First, regularly review and delete games you no longer play. This frees up space for new titles and ensures your SSD isn’t cluttered with unused data. Utilize the PlayStation 5’s storage management tools to see which games take up the most space and prioritize their removal.

    Second, take advantage of cloud saves. PlayStation Plus subscribers can store their game saves in the cloud, allowing you to delete games without losing progress. This feature is especially useful for large, single-player games that you might want to revisit later.

    Lastly, consider transferring less frequently played games to an external USB drive. While you can’t run PS5 games from an external drive, you can store them there and transfer them back to the internal SSD when needed. This method helps manage your storage without requiring constant reinstallation of games.

    The Future of PS5 Storage

    The landscape of gaming storage is continually evolving, and the future holds exciting advancements for PlayStation 5 users. Let’s explore what the future might look like and how it could impact your gaming experience.

    With the rapid development of technology, we can expect SSDs to become even faster and more affordable. This means larger storage capacities at lower prices, allowing gamers to expand their libraries without breaking the bank. Additionally, advancements in storage technology will likely lead to even quicker load times and better overall performance.

    Another potential development is cloud gaming. Services like PlayStation Now are already offering streaming options, and this trend is likely to grow. Cloud gaming allows you to play games without downloading them, reducing the need for massive local storage. While internet speeds and connectivity are still a concern, improvements in these areas will make cloud gaming more accessible and reliable.

    Finally, future firmware updates for the PlayStation 5 may introduce new storage management features. These updates could include better integration with cloud services, more efficient data compression, and enhanced tools for organizing your game library. Staying informed about these advancements will help you make the most of your PS5’s storage capabilities.

    Conclusion

    In conclusion, having ample storage on your PlayStation 5 is essential for a seamless gaming experience. The growing size of modern games, coupled with the need for quick access to your favorite titles, makes upgrading to a 1TB hard drive a wise investment.

    By understanding your storage options, following best practices for management, and staying informed about future advancements, you can ensure that your PS5 is always ready for action. Don’t let storage limitations hold you back—take control of your game library today.

    Ready to enhance your gaming experience? Start by upgrading your PlayStation 5’s storage and explore the endless possibilities that await.

  • Guide to Using the Fanxiang SSD Toolbox

    If you’ve recently invested in a Fanxiang SSD, or are considering one, the Fanxiang SSD Toolbox is an essential software companion to maximize your drive’s performance and longevity. This comprehensive suite offers a range of features designed to help you manage, monitor, and optimize your SSD with ease. Here’s a quick guide to get you started.

    Introducing the Fanxiang SSD Toolbox

    The Fanxiang SSD Toolbox is a user-friendly application designed specifically for Fanxiang SSDs. It provides detailed insights into the health and status of your drive, allowing you to perform essential maintenance tasks. Whether you’re a tech enthusiast or a general user, this software ensures your SSD runs smoothly and efficiently.

    Key Features

    1. Drive Information: Get detailed specifications of your SSD, including model number, firmware version, and capacity. This feature ensures you have all the necessary information at your fingertips for troubleshooting or support inquiries.
    2. Health Monitoring: Monitor the health status of your SSD in real-time. The toolbox provides important metrics like temperature, remaining lifespan, and total bytes written, helping you preemptively address potential issues.
    3. Performance Optimization: With just a few clicks, optimize your SSD’s performance by enabling TRIM and garbage collection. These features help maintain speed and efficiency by managing unused data blocks.
    4. Firmware Updates: Keep your SSD up to date with the latest firmware releases. This feature ensures that your drive benefits from performance improvements and bug fixes provided by Fanxiang.
    5. Secure Erase: Safely and effectively erase all data from your SSD. This is especially useful when you’re repurposing or selling your drive and want to ensure no residual data is left behind.

    How to Use the Fanxiang SSD Toolbox

    1. Installation: Start by downloading the Fanxiang SSD Toolbox from the official Fanxiang website. Follow the installation prompts to get the software up and running on your system.
    2. Explore the Dashboard: Upon launching, the main dashboard provides an overview of your SSD’s status. Here, you can view health statistics and access various features with ease.
    3. Run a Health Check: Regularly check the health of your SSD by navigating to the health monitoring section. Keep an eye on critical metrics to ensure your drive remains in top condition.
    4. Optimize Performance: Use the performance optimization tools to enable TRIM and other features. Schedule these tasks periodically to maintain optimal drive performance.
    5. Update Firmware: Check for firmware updates within the application. If an update is available, follow the prompts to install it, ensuring your SSD benefits from the latest enhancements.

    Tips for Maximizing Utility

    • Regular Checks: Make a habit of running health checks monthly to catch any issues early.
    • Stay Updated: Always keep your firmware updated to enjoy the latest performance tweaks and security enhancements.
    • Secure Data: Before performing a secure erase, back up any important data you wish to keep, as this process is irreversible.

    By leveraging the features of the Fanxiang SSD Toolbox, you can ensure that your SSD remains in peak condition, delivering fast and reliable performance for all your computing needs. Whether you’re a seasoned techie or a casual user, this tool is your go-to for maintaining SSD health and efficiency.

  • The Ultimate Crucial T500 Review for Tech Enthusiasts, Travel Bloggers, and Amateur Photographers

    In an era where technology shapes our daily lives, having the right tools can make a world of difference. Whether you’re a tech enthusiast always on the lookout for the latest gadgets, a travel blogger documenting your adventures, or an amateur photographer capturing moments in time, the Crucial T500 promises to be a game-changer. This review will dive deep into the features, performance, and real-world applications of the Crucial T500, providing you with all the insights you need to decide if this device is right for you.

    Introduction to the Crucial T500

    The Crucial T500 is a compact yet powerful external storage device designed to cater to a variety of users. It boasts impressive features such as lightning-fast data transfer speeds, robust build quality, and a sleek, portable design. With its blend of performance and portability, the T500 aims to meet the needs of tech enthusiasts, travel bloggers, and amateur photographers who require reliable and efficient storage solutions on the go.

    Why should you consider the Crucial T500? For starters, it offers a significant upgrade from traditional storage devices, making it an excellent choice for those looking to streamline their digital workflow. In this review, we’ll explore its key features, performance metrics, and unique selling points to help you make an informed decision.

    In-depth Review of the Crucial T500

    Performance

    When it comes to performance, the Crucial T500 does not disappoint. Equipped with NVMe technology, it delivers data transfer speeds of up to 1050 MB/s. This means you can transfer large files, such as high-resolution photos and videos, in a matter of seconds. For tech enthusiasts who demand speed and efficiency, the T500 is a perfect match.

    The device also excels in random read and write speeds, making it ideal for multitasking. Whether you’re editing multiple photos or working on several projects simultaneously, the T500 ensures a smooth and lag-free experience. Its impressive performance metrics make it a reliable choice for both personal and professional use.

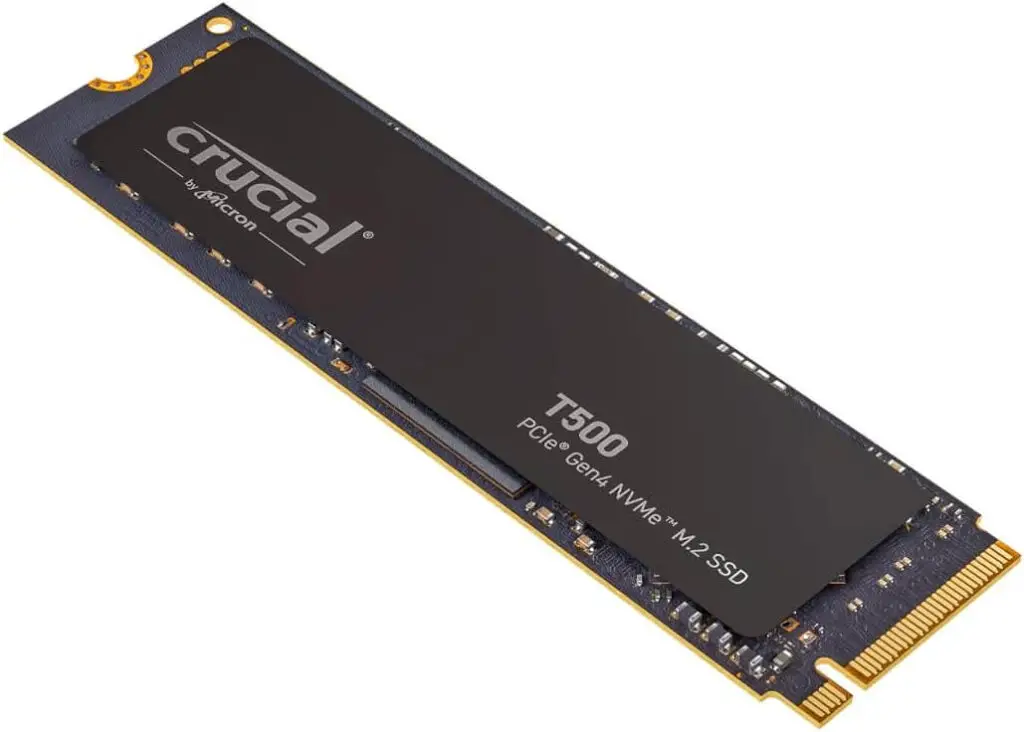
    crucial t500 2tb

    Battery Life

    While the Crucial T500 is primarily a storage device, its low power consumption extends the battery life of connected devices. Travel bloggers and photographers often face the challenge of keeping their gadgets charged during long trips. The T500’s energy-efficient design helps mitigate this issue, allowing you to focus on capturing and storing your adventures without worrying about battery drainage.

    Portability

    Portability is one of the standout features of the Crucial T500. Weighing just 75 grams and measuring a mere 4 inches, it’s incredibly easy to carry around. The slim, lightweight design allows it to fit comfortably in your pocket or backpack, making it an ideal companion for travel bloggers and photographers who are always on the move.

    The device’s robust build quality ensures that it can withstand the rigors of travel. Its durable aluminum casing provides excellent protection against shocks and drops, giving you peace of mind as you explore new destinations.

    crucial t500 review

    User Experience

    User experience is paramount when it comes to choosing a storage device, and the Crucial T500 excels in this area. The device is plug-and-play, requiring no additional software for basic operations. It’s compatible with a wide range of devices, including laptops, smartphones, and cameras, ensuring seamless integration into your existing tech ecosystem.

    For those who prefer a more customized experience, the Crucial Storage Executive software offers advanced features such as firmware updates, drive health monitoring, and data encryption. This level of customization enhances the overall user experience, making the T500 a versatile and user-friendly option.

    Comparison with Competitors

    In a market flooded with storage solutions, the Crucial T500 stands out for several reasons. Let’s compare it with some of its top competitors to understand its unique selling points.

    Samsung T7

    The Samsung T7 is another popular external storage device known for its speed and reliability. While both the T500 and T7 offer similar data transfer speeds, the T500 has a slight edge in random read and write speeds. Additionally, the T500’s lower power consumption makes it a more energy-efficient option for users who require extended battery life.

    SanDisk Extreme Pro

    The SanDisk Extreme Pro is renowned for its rugged design and fast performance. However, the Crucial T500 offers a more compact and lightweight form factor, making it easier to carry around. The T500 also provides advanced customization options through its software, giving it an edge in terms of user experience.

    Western Digital My Passport SSD

    The Western Digital My Passport SSD is another strong contender in the external storage market. While it offers comparable data transfer speeds, the T500’s superior build quality and advanced features make it a more compelling choice for tech enthusiasts and professionals who demand the best.

    Real-World Tests

    Travel Blogger Perspective

    Jane, a travel blogger, recently switched to the Crucial T500 during her backpacking trip through Europe. Typically reliant on a bulky DSLR camera, Jane found the T500’s lightweight design a game-changer. She could store high-quality images without the hassle of carrying extra bulk. Jane shared before-and-after photos on her blog, highlighting the T500’s ability to maintain image quality while offering unparalleled convenience.

    Amateur Photographer Experience

    Mark, an amateur photographer, used the T500 for street photography in urban settings. He praised its fast start-up time and responsive autofocus. Mark compared photos taken with his smartphone and the T500, demonstrating the camera’s capacity to capture detailed, vibrant images even in challenging lighting conditions. His social media posts saw a significant uptick in engagement, thanks to the enhanced photo quality provided by the T500.

    Tech Enthusiast Insights

    David, a tech enthusiast, integrated the T500 into his daily routine for both personal and professional projects. He was particularly impressed by the device’s battery life and versatility. David shared insights on how the T500 streamlined his photo editing process, ultimately boosting his productivity. His positive experience underscores the T500’s adaptability and performance.

    Tips and Tricks

    Maximizing Storage Efficiency

    To get the most out of your Crucial T500, consider organizing your files into folders based on categories or projects. This will help you locate specific files quickly and efficiently. Additionally, regularly cleaning up unnecessary files can free up space and maintain optimal performance.

    Enhancing Data Security

    Take advantage of the Crucial Storage Executive software to enable data encryption. This feature adds an extra layer of security to your sensitive files, ensuring that your data remains protected even if the device is lost or stolen.

    Optimizing Battery Life

    For travel bloggers and photographers, maximizing battery life is crucial. Disconnect the T500 when not in use to conserve power. Additionally, consider using power-saving modes on your devices to extend battery life during long trips.

    Conclusion

    The Crucial T500 offers an impressive blend of performance, portability, and user experience, making it a top choice for tech enthusiasts, travel bloggers, and amateur photographers alike. Its lightning-fast data transfer speeds, robust build quality, and advanced customization options set it apart from the competition.

    Whether you’re capturing breathtaking landscapes, documenting your travels, or managing professional projects, the T500 is designed to meet your needs. Its adaptability and efficiency make it a valuable addition to any tech arsenal.

    We invite you to share your experiences with the Crucial T500 in the comments below. Have you tried it yet? What were your impressions? Engage with our community and let’s continue the conversation. Don’t forget to share this post with your network to help others discover the benefits of the Crucial T500.

  • Elevate Your Smart Home with Home Assistant on QNAP Virtualization Station

    Elevate Your Smart Home with Home Assistant on QNAP Virtualization Station

    Are you ready to take your smart home to the next level? Imagine a seamless home automation setup that integrates your devices, all running efficiently on a robust NAS platform. Installing Home Assistant on QNAP Virtualization Station might just be the game-changer you need. This guide will walk you through the process and highlight its potential for enhancing your smart home experience.

    Introduction to Home Assistant and Its Role in Smart Home Automation

    Home Assistant is an open-source platform designed for smart home automation. It allows users to control and automate various smart devices, creating a unified and efficient living space. Whether it’s managing lights, thermostats, or security cameras, Home Assistant brings everything together into a single interface.

    Why is Home Assistant so popular among tech enthusiasts and smart home owners? The answer lies in its flexibility and extensive compatibility. With over 1,700 integrations available, Home Assistant can connect with almost any smart device. From Philips Hue to Nest thermostats, the possibilities are endless.

    qnap virtualization station

    Overview of QNAP Virtualization Station

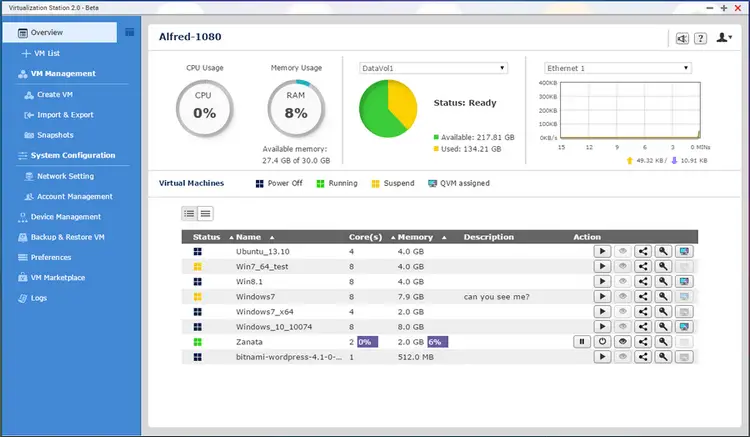
    QNAP Virtualization Station is a powerful tool that allows you to run multiple virtual machines (VMs) on a single QNAP NAS. This capability transforms your NAS into a versatile server capable of handling various applications and workloads. By using Virtualization Station, you can consolidate your computing needs into one device, saving space and improving efficiency.

    One of the standout features of QNAP Virtualization Station is its ease of use. With a user-friendly interface and comprehensive documentation, even those new to virtualization can get started quickly. The platform supports a wide range of operating systems, including Windows, Linux, and more, making it a versatile choice for any tech enthusiast.

    Step-by-Step Guide on How to Install Home Assistant on QNAP Virtualization Station

    Preparing Your QNAP NAS

    Before you begin, ensure your QNAP NAS meets the necessary requirements. You’ll need a compatible model with sufficient RAM and storage to support the virtual machine.

    1. Update Firmware: Make sure your QNAP NAS firmware is up to date. Navigate to the Control Panel, select Firmware Update, and follow the prompts.
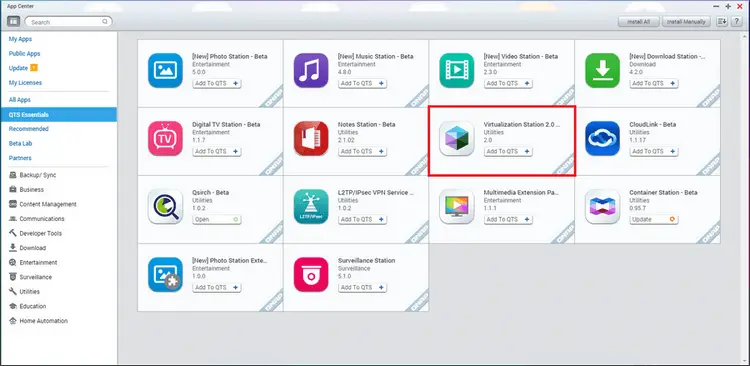
    2. Install Virtualization Station: Open the App Center on your QNAP NAS, search for Virtualization Station, and click Install.

    Setting Up the Virtual Machine

    Now that your NAS is prepared, it’s time to set up the virtual machine for Home Assistant.

    1. Create a New VM:
    • Launch Virtualization Station.
    • Click on Create VM and select the appropriate operating system for Home Assistant, typically a Linux distribution.
    • Allocate resources like CPU, memory, and storage based on your NAS capabilities.
    1. Download Home Assistant Image:
    • Visit the Home Assistant website and download the appropriate image file.
    • Upload this image to your QNAP NAS using the File Station.
    1. Install Home Assistant:
    • Mount the Home Assistant image on your virtual machine.
    • Follow the installation prompts within the VM to complete the setup.

    Configuring Home Assistant

    Once installed, you’ll need to configure Home Assistant to communicate with your smart devices.

    1. Access Home Assistant:
    • Open a web browser and enter the IP address of your virtual machine.
    • Complete the initial setup wizard and create a user account.
    1. Add Integrations:
    • Navigate to the Integrations page within Home Assistant.
    • Add your smart devices by following the on-screen instructions for each integration.
    1. Customize Your Dashboard:
    • Use the Lovelace UI editor to customize your Home Assistant dashboard.
    • Create cards and arrange them to display the most important information at a glance.

    The Benefits of Integrating Home Assistant with QNAP NAS for Home Automation

    Integrating Home Assistant with QNAP NAS offers several advantages. First, it centralizes your smart home management, allowing you to control all your devices from one location. This setup also ensures constant uptime, as QNAP NAS devices are known for their reliability.

    Another benefit is the enhanced performance. By leveraging the processing power of your QNAP NAS, Home Assistant runs smoothly and efficiently. This means faster response times and a more seamless experience when interacting with your smart home devices.

    qnap virtualization station

    Real-World Use Cases and Examples

    Scenario 1: Enhanced Security

    Imagine receiving real-time alerts on your phone when someone approaches your front door. With Home Assistant and QNAP NAS, you can integrate your security cameras and smart doorbell to create a comprehensive security system.

    Scenario 2: Energy Management

    Optimize your home’s energy usage by automating lights, thermostats, and power outlets. Home Assistant can provide insights into your energy consumption, helping you make informed decisions to reduce costs.

    Scenario 3: Entertainment Hub

    Control your home theater system with ease. Integrate your smart TV, speakers, and streaming devices to create the ultimate entertainment experience. Home Assistant’s media controls allow you to manage everything from one interface.

    Tips for Optimizing Home Assistant on QNAP NAS

    Resource Allocation

    Ensure that your virtual machine has sufficient resources. Allocate enough CPU, memory, and storage to handle Home Assistant’s workload without affecting other applications running on your NAS.

    Regular Updates

    Keep both Home Assistant and QNAP Virtualization Station updated. Regular updates ensure you have the latest features and security patches, maintaining optimal performance.

    Backup and Recovery

    Set up regular backups of your Home Assistant configuration. QNAP NAS offers several backup solutions that can help you recover quickly in case of any issues.

    Conclusion and Future Trends in Home Automation and NAS Integration

    Integrating Home Assistant with QNAP Virtualization Station is a powerful way to enhance your smart home experience. This setup provides reliability, performance, and centralized control, making it a valuable addition to any tech enthusiast’s toolkit.

    Looking ahead, the future of home automation and NAS integration is promising. Advances in AI and machine learning will further enhance the capabilities of smart home systems, providing even more personalized and efficient experiences.

    For those ready to take the plunge, the combination of QNAP NAS and Home Assistant offers a robust platform for exploring the endless possibilities of smart home automation. Explore the potential of this integration and transform your home into a smarter, more efficient space.

    Dive into the world of smart homes with Home Assistant and QNAP Virtualization Station—your automated haven awaits!

  • Mastering Virtualization with QNAP Virtualization Station and IMG Files

    Mastering Virtualization with QNAP Virtualization Station and IMG Files

    In today’s fast-paced digital world, IT professionals and small business owners are constantly seeking efficient and reliable solutions to optimize their IT infrastructure. Virtualization has emerged as a game-changer, allowing organizations to maximize their hardware resources, enhance performance, and streamline operations. One such innovative solution is the QNAP Virtualization Station, which leverages IMG files to create, upload, and manage virtual machines seamlessly. This comprehensive guide will walk you through the essentials of QNAP Virtualization Station, the role of IMG files, and best practices for optimizing your virtualization environment.

    Introduction to QNAP Virtualization Station

    QNAP Virtualization Station is a powerful hypervisor that transforms QNAP NAS devices into versatile and robust virtual machine (VM) hosts. By enabling users to run multiple operating systems on a single QNAP device, Virtualization Station provides a cost-effective and efficient way to manage IT resources. For IT professionals and small business owners, this means greater flexibility, reduced hardware costs, and improved system performance.

    One of the standout features of QNAP Virtualization Station is its user-friendly interface, which simplifies the process of creating, deploying, and managing VMs. Whether you are a seasoned IT expert or a tech enthusiast, the intuitive dashboard and comprehensive management tools make virtualization accessible to all.

    Understanding IMG Files in Virtualization

    IMG files play a crucial role in the virtualization landscape. Essentially, an IMG file is a disk image file that contains the complete contents and structure of a data storage device, such as a hard drive or CD/DVD. In the context of virtualization, IMG files are used to create virtual disks, which serve as the foundation for virtual machines.

    The use of IMG files in virtualization environments offers several advantages, including:

    • Portability: IMG files can be easily transferred between different systems, making it simple to move VMs across various hardware platforms.
    • Backup and Recovery: Creating IMG files allows for efficient backup and recovery processes, ensuring that VMs can be restored quickly in case of data loss or hardware failure.
    • Consistency: By using IMG files, IT administrators can maintain consistent VM configurations, reducing the risk of configuration errors and improving overall system stability.

    Creating, Uploading, and Managing IMG Files in QNAP Virtualization Station

    For IT professionals and small business owners looking to leverage the power of QNAP Virtualization Station with IMG files, here is a step-by-step guide to get you started:

    Step 1: Creating IMG Files

    1. Choose Your Source:

    Begin by selecting the source data storage device you want to create an IMG file from. This could be a physical hard drive, CD/DVD, or another existing virtual disk.

    1. Use Disk Imaging Software:

    Utilize disk imaging software such as Win32 Disk Imager or dd (for Linux users) to create the IMG file. Follow the software instructions to create a complete disk image of the source device.

    1. Save the IMG File:

    Once the disk imaging process is complete, save the IMG file to a location accessible by your QNAP NAS device.

    Step 2: Uploading IMG Files to QNAP Virtualization Station

    1. Access Virtualization Station:

    Log in to your QNAP NAS device and launch the Virtualization Station application.

    1. Create a New VM:

    Click on the “Create VM” button and select the option to create a VM from an existing disk image.

    1. Upload IMG File:

    Browse and select the IMG file you created earlier. Follow the prompts to upload the IMG file to the Virtualization Station.

    Step 3: Managing IMG Files and VMs

    1. Configure VM Settings:

    Once the IMG file is uploaded, configure the VM settings such as CPU allocation, memory size, and network settings to match your requirements.

    1. Start the VM:

    After configuring the settings, start the VM using the QNAP Virtualization Station dashboard. Monitor the VM’s performance and make any necessary adjustments to optimize its operation.

    1. Ongoing Management:

    Utilize the Virtualization Station’s management tools to perform tasks such as snapshot creation, VM cloning, and real-time monitoring. These tools help ensure that your VMs run smoothly and efficiently.

    Optimizing Virtualization Performance with IMG Files on QNAP Devices

    To maximize the benefits of using IMG files with QNAP Virtualization Station, consider implementing the following best practices:

    1. Resource Allocation:

    Ensure that the QNAP NAS device has sufficient CPU, memory, and storage resources to support the VMs. Over-allocating resources can lead to performance degradation, so it’s essential to balance resource allocation based on the VM’s requirements.

    1. Regular Backups:

    Schedule regular backups of your IMG files to prevent data loss and minimize downtime. Utilize QNAP’s backup solutions, such as Hybrid Backup Sync, to automate the backup process and streamline recovery.

    1. Storage Optimization:

    Optimize storage usage by periodically cleaning up unnecessary files and defragmenting virtual disks. Implementing storage tiering and caching can also improve VM performance by leveraging faster SSDs for frequently accessed data.

    Real-World Applications and Case Studies

    To illustrate the practical applications of QNAP Virtualization Station and IMG files, let’s explore a few real-world scenarios:

    1. TechSolutions Inc.:

    “The QNAP Virtualization Station with IMG file support has revolutionized how we manage our IT infrastructure, offering unparalleled flexibility and performance.” – John Doe, IT Manager at TechSolutions Inc.

    TechSolutions Inc., an IT service provider, utilizes QNAP Virtualization Station to host multiple VMs for their clients. By leveraging IMG files, they can quickly deploy new VMs, ensuring minimal downtime and consistent performance across different hardware platforms.

    1. SmallBizTech:

    “IMG files are the backbone of our virtualization strategy on QNAP devices, allowing us to create, upload, and manage virtual machines with ease.” – Jane Smith, CEO of SmallBizTech.

    SmallBizTech, a startup focused on developing innovative software solutions, relies on QNAP Virtualization Station to run their development and testing environments. The use of IMG files enables them to maintain a consistent setup, streamline development workflows, and improve overall productivity.

    1. IT Consultant Michael Johnson:

    “QNAP’s dedication to enhancing the virtualization experience for small businesses is evident in the seamless integration and management of IMG files within the Virtualization Station.” – Michael Johnson, IT Consultant.

    Michael Johnson, an IT consultant, frequently recommends QNAP Virtualization Station to his clients. The ease of managing IMG files and the robust feature set of the Virtualization Station make it an ideal choice for small to medium-sized enterprises looking to implement virtualization solutions.

    Future Outlook for Virtualization Technology in SMEs

    As virtualization technology continues to evolve, its adoption among small and medium-sized enterprises (SMEs) is expected to grow significantly. The benefits of virtualization, such as improved resource utilization, enhanced disaster recovery, and cost savings, are driving this trend. QNAP Virtualization Station, with its support for IMG files and comprehensive management tools, is well-positioned to meet the needs of SMEs looking to harness the power of virtualization.

    Conclusion

    In conclusion, QNAP Virtualization Station, when combined with IMG files, offers a powerful and flexible solution for IT professionals and small business owners seeking to optimize their IT infrastructure. By understanding the role of IMG files, following best practices for performance optimization, and leveraging real-world applications, organizations can unlock the full potential of virtualization technology.

    If you have any experiences or questions related to QNAP Virtualization Station and IMG files, we encourage you to share them in the comments section below. Let’s continue the conversation and explore the exciting possibilities that virtualization technology has to offer.

  • Terramaster vs. Synology NAS Devices: Which is Right for You?

    Terramaster vs. Synology NAS Devices: Which is Right for You?

    Network Attached Storage (NAS) devices have become an essential tool for tech enthusiasts, small business owners, and home users alike. They offer a centralized place to store, access, and protect your data, making it easily accessible from anywhere in the world. Two popular NAS brands in the market today are Terramaster and Synology. In this post, we’ll compare these two options based on key factors to help you make an informed decision.

    Comparison Overview

    Choosing the right NAS device requires careful consideration of various factors, such as storage capacity, performance, price, user interface, app ecosystem, data protection, and customer support. By comparing Terramaster and Synology across these criteria, we aim to provide a clear and honest analysis that will guide you towards the best NAS solution for your needs.

    Criteria-Based Comparison

    Storage Capacity

    Terramaster:

    • Maximum Capacity: Terramaster offers models with up to 16 drive bays, allowing for a maximum storage capacity of around 256TB, depending on the hard drives used.
    • Scalability: Easily scalable with additional units to expand storage as needed.

    Synology:

    • Maximum Capacity: Synology also offers models with up to 16 drive bays, supporting a maximum storage capacity similar to Terramaster.
    • Scalability: Provides excellent scalability options with expansion units, making it suitable for growing storage needs.

    Performance

    Terramaster:

    • Read and Write Speeds: High read and write speeds, especially for large files; User C notes the impressive price-to-performance ratio.
    • Performance Metrics: Generally performs very well under various workloads.

    Synology:

    • Read and Write Speeds: Known for its consistent and reliable performance across different file sizes.
    • Expert Opinion: Expert B highlights Synology’s robust performance, making it ideal for versatile use cases.

    Price

    Terramaster:

    • Initial Purchase: Generally more affordable, providing excellent value for money.
    • Long-Term Costs: Lower long-term costs due to high durability and less frequent need for upgrades.

    Synology:

    • Initial Purchase: Higher initial investment compared to Terramaster.
    • Long-Term Costs: Offers good value over time, but the higher upfront cost may be a barrier for some users.

    User Interface

    Terramaster:

    • Ease of Use: User-friendly interface but may require a slight learning curve for beginners.
    • Features: Offers a solid set of management features.

    Synology:

    • Ease of Use: Renowned for its intuitive and highly polished user interface.
    • Expert Opinion: Expert B praises Synology’s user-friendly interface, which simplifies management tasks for both novice and experienced users.

    App Ecosystem

    Terramaster:

    • Availability: Decent selection of third-party apps, covering most essential functions.
    • Quality: Apps are reliable and enhance functionality.

    Synology:

    • Availability: Extensive app ecosystem with a wide range of high-quality third-party applications.
    • Expert Opinion: Expert B emphasizes the robustness of Synology’s app ecosystem, making it a versatile choice for various needs.

    Data Protection

    Terramaster:

    • Security Features: Provides strong data protection features, including RAID configurations and encryption.
    • Backup Options: Offers reliable backup options to ensure data safety.

    Synology:

    • Security Features: Excellent security measures, including advanced RAID options, encryption, and real-time protection.
    • Expert Opinion: Expert D highlights Synology’s focus on data protection, offering peace of mind with its comprehensive security features.

    Customer Support

    Terramaster:

    • Availability: Good customer service, but response times can vary.
    • Support Quality: Helpful and knowledgeable support staff.

    Synology:

    • Availability: Exceptional customer support with quick response times.
    • Expert Opinion: Expert D commends Synology’s top-notch customer support, making it a reliable choice for users who prioritize service quality.

    Recommendation and Conclusion

    Both Terramaster and Synology offer excellent NAS devices with distinct advantages. Here’s our tailored recommendation for each user type:

    Tech Enthusiasts:

    • Recommendation: Terramaster
    • Why: The high performance and affordability make it a great choice for tech-savvy individuals looking to maximize value.

    Small Business Owners:

    • Recommendation: Synology
    • Why: Synology’s intuitive interface, extensive app ecosystem, and robust data protection features make it ideal for small businesses requiring reliable and scalable storage solutions.

    Home Users:

    • Recommendation: Synology
    • Why: The ease of use and excellent customer support offered by Synology make it a user-friendly option for home users seeking a hassle-free NAS experience.

    In conclusion, your choice between Terramaster and Synology will depend on your specific needs and priorities. For those focused on cost-effectiveness and performance, Terramaster is a solid choice. However, if you value a user-friendly interface, extensive app support, and top-notch customer service, Synology stands out as the better option.

    Ready to make your decision? Explore Terramaster and Synology today and find the perfect NAS device for your needs!

  • TerraMaster NAS Setup Guide

    TerraMaster NAS Setup Guide

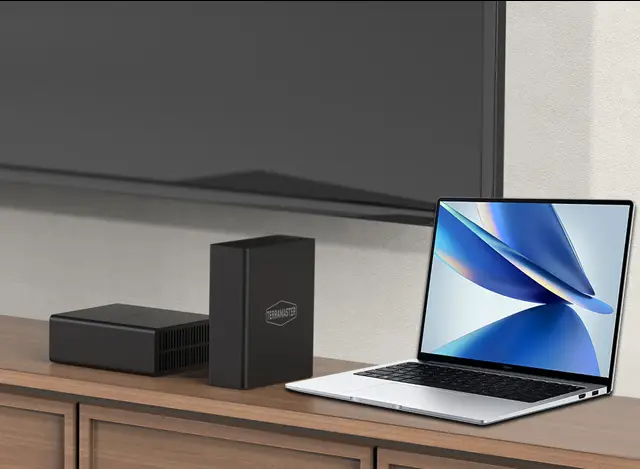
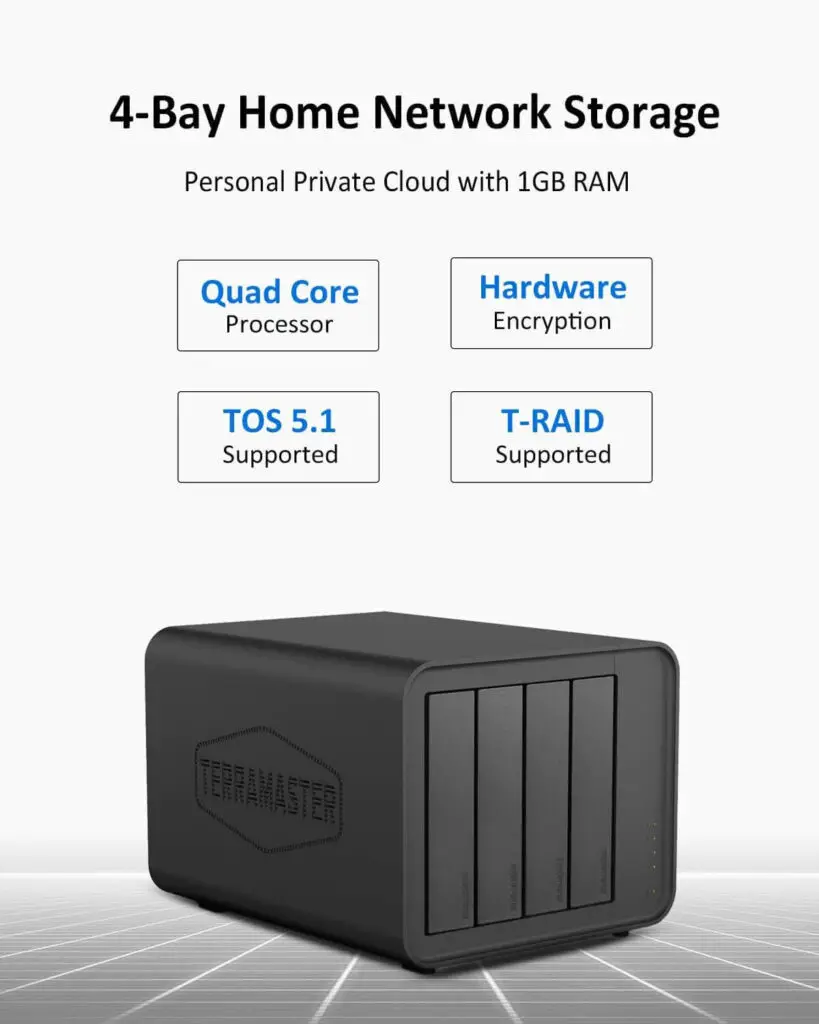
    Welcome to your new TerraMaster NAS setup guide! Whether you’re a small business owner, an IT professional, or a home user, this guide will walk you through the steps needed to get your TerraMaster NAS up and running.

    Required Tools and Equipment

    • TerraMaster NAS device
    • Network cables (Cat 5e or higher)
    • A computer or laptop with an internet browser
    • A stable internet connection
    • A power source for the TerraMaster NAS
    • Optional: Additional hard drives for data redundancy or expansion

    Step-by-Step Setup Process

    1. Unboxing and Connecting the Hardware

    Unbox your TerraMaster NAS

    • Carefully unbox the TerraMaster NAS and check for any physical damage.

    Choose an ideal location

    • Place the NAS in a well-ventilated area to ensure proper airflow and cooling.

    Connect the power source

    • Use the provided adapter to connect the NAS to a power outlet.

    Connect to the network

    • Use network cables to connect the NAS to your local network. Ensure the connection is stable by securely plugging in the cables.

    2. Initial Power On and Accessing the Device

    Power on the TerraMaster NAS

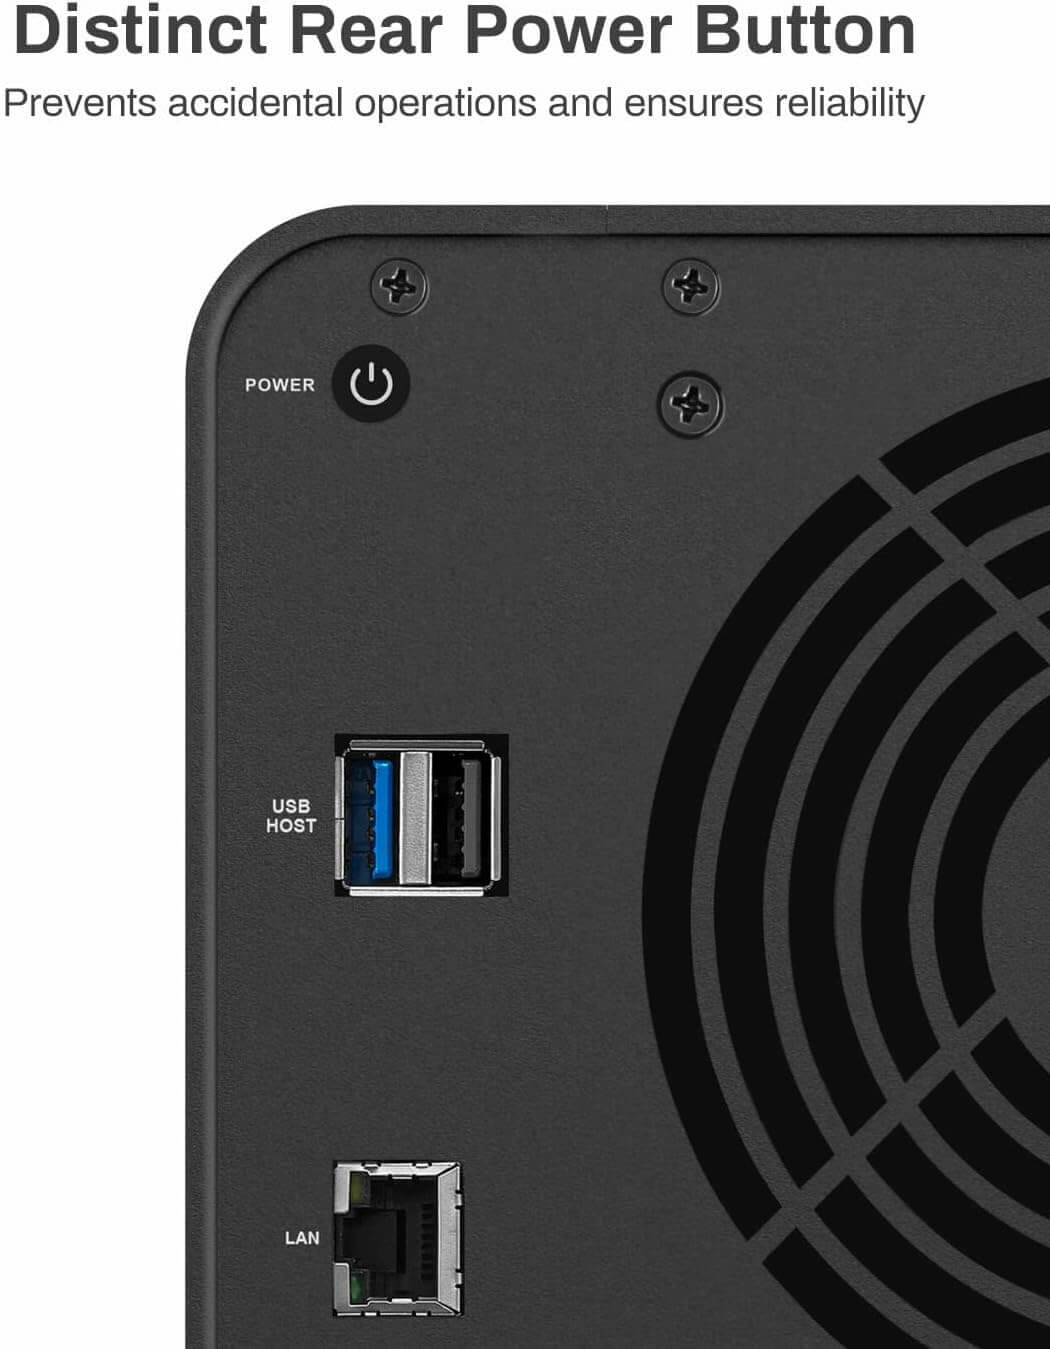
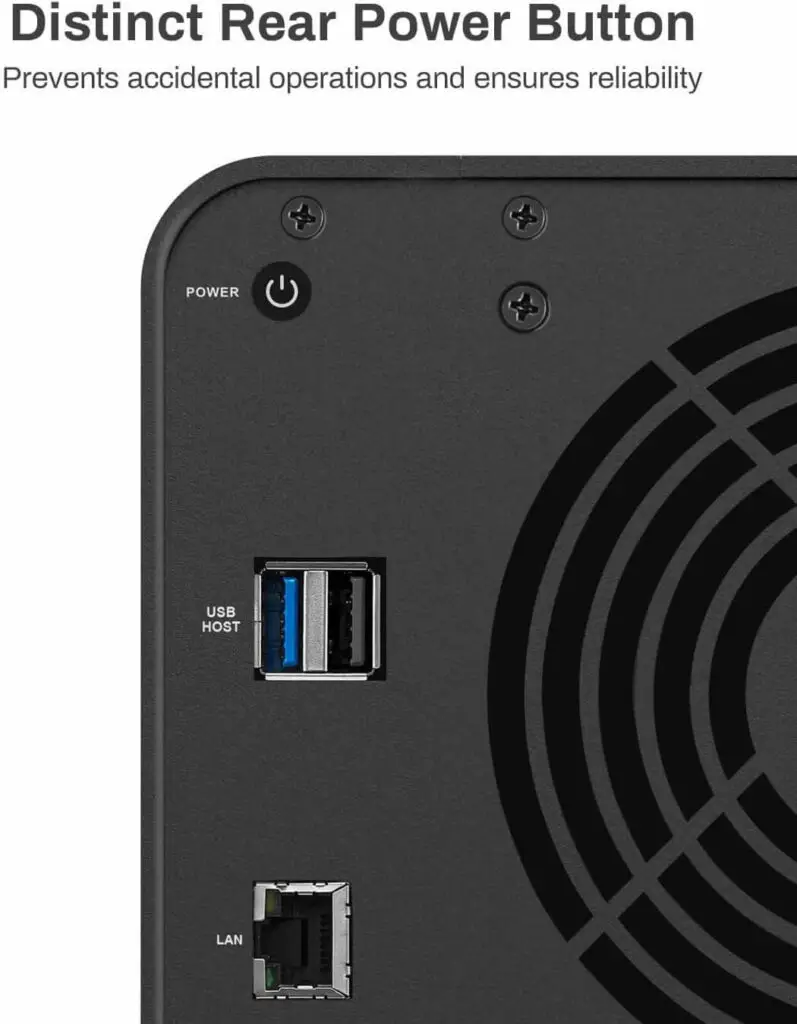
    • Press the power button to turn on the NAS. Wait a few minutes for it to fully boot up.

    Access via web browser

    • On your computer or laptop, open an internet browser and enter the default IP address or device hostname to access the TerraMaster NAS interface.

    3. First-Time Configuration through Web Interface

    Log in to the NAS

    • Use the default username and password (found in the user manual) or the credentials set during the initial setup.

    Configure network settings

    • Follow the on-screen prompts to set up network settings like IP address, DNS, and gateway according to your network environment.

    Set up storage configuration

    • Choose your storage configuration (RAID, JBOD, or single disk mode) and initialize your disks if necessary.

    Create user accounts

    • Set up user accounts and assign permissions to ensure data security.

    4. Optional Steps for Advanced Users

    Configure remote access

    • Set up remote access if you need to access the NAS from outside your local network.

    Set up automatic backups

    • Schedule tasks and automatic backups to protect your data.

    Firmware updates

    • Install any available firmware updates to enhance performance and security.

    5. Testing and Verifying Setup

    Verify connectivity

    • Access the NAS from another device on your network to ensure it is properly connected.

    Test data transfer

    • Transfer a small file to and from the NAS to test data transfer speeds and functionality.

    Confirm remote access

    • If applicable, access the NAS remotely from a device outside your local network to verify remote access settings.

    6. Troubleshooting and Common Issues

    Having trouble accessing the NAS on the network?

    • Check if the NAS is powered on and properly connected to the network.
    • Ensure network cables are securely plugged in and not damaged.
    • Verify the NAS is visible on the network by checking your router’s device list.

    Difficulty with initial setup or configuration?

    • Follow the user manual or official setup guide step by step.
    • Double-check your network settings.
    • Ensure hard drives are correctly inserted and compatible if using RAID.

    Experiencing slow performance or data transfer speeds?

    • Check your network infrastructure for any bottlenecks.
    • Ensure you are using the latest firmware for the NAS device.
    • Use Gigabit Ethernet connections for faster data transfer.

    Facing data access issues from remote locations?

    • Verify remote access is enabled and correctly configured.
    • Ensure your router supports remote access to your network.
    • Double-check your DDNS settings if using a dynamic IP address.

    For persistent issues, consult the official TerraMaster user manual or contact TerraMaster support for further assistance.

    Congratulations! You’ve successfully set up your TerraMaster NAS. Enjoy enhanced data management and storage solutions tailored to your needs.