
Welcome to your new TerraMaster NAS setup guide! Whether you’re a small business owner, an IT professional, or a home user, this guide will walk you through the steps needed to get your TerraMaster NAS up and running.
Required Tools and Equipment
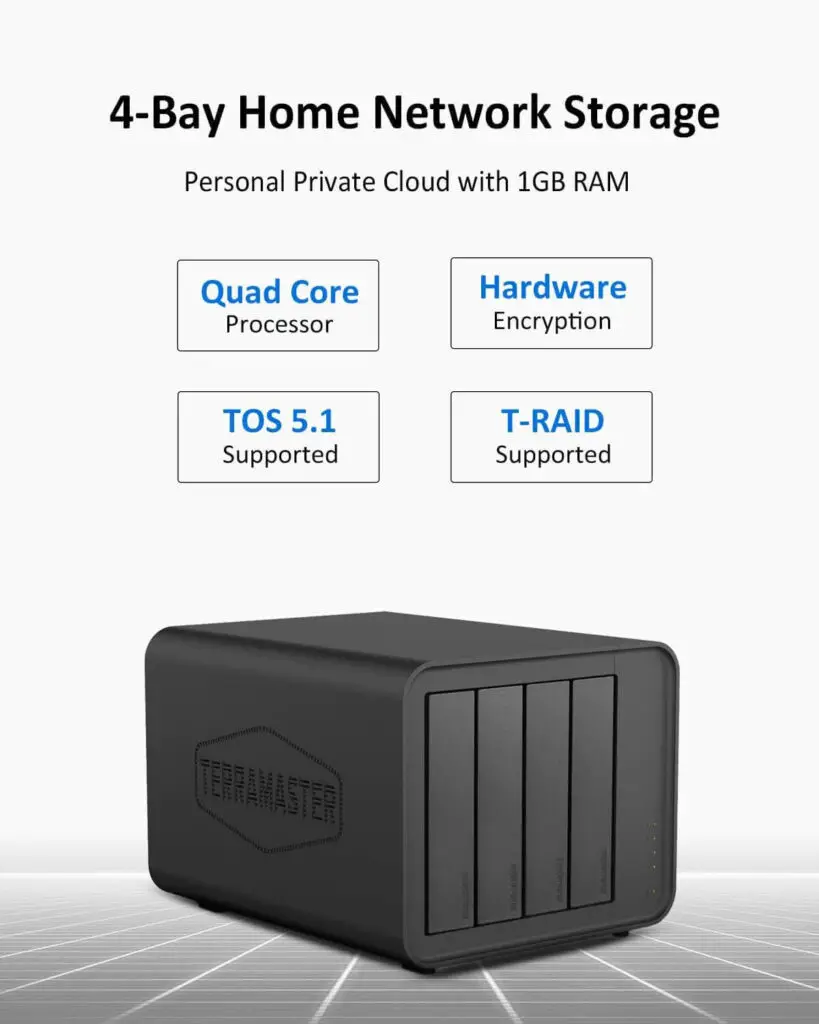
- TerraMaster NAS device
- Network cables (Cat 5e or higher)
- A computer or laptop with an internet browser
- A stable internet connection
- A power source for the TerraMaster NAS
- Optional: Additional hard drives for data redundancy or expansion
Step-by-Step Setup Process
1. Unboxing and Connecting the Hardware
Unbox your TerraMaster NAS
- Carefully unbox the TerraMaster NAS and check for any physical damage.
Choose an ideal location
- Place the NAS in a well-ventilated area to ensure proper airflow and cooling.
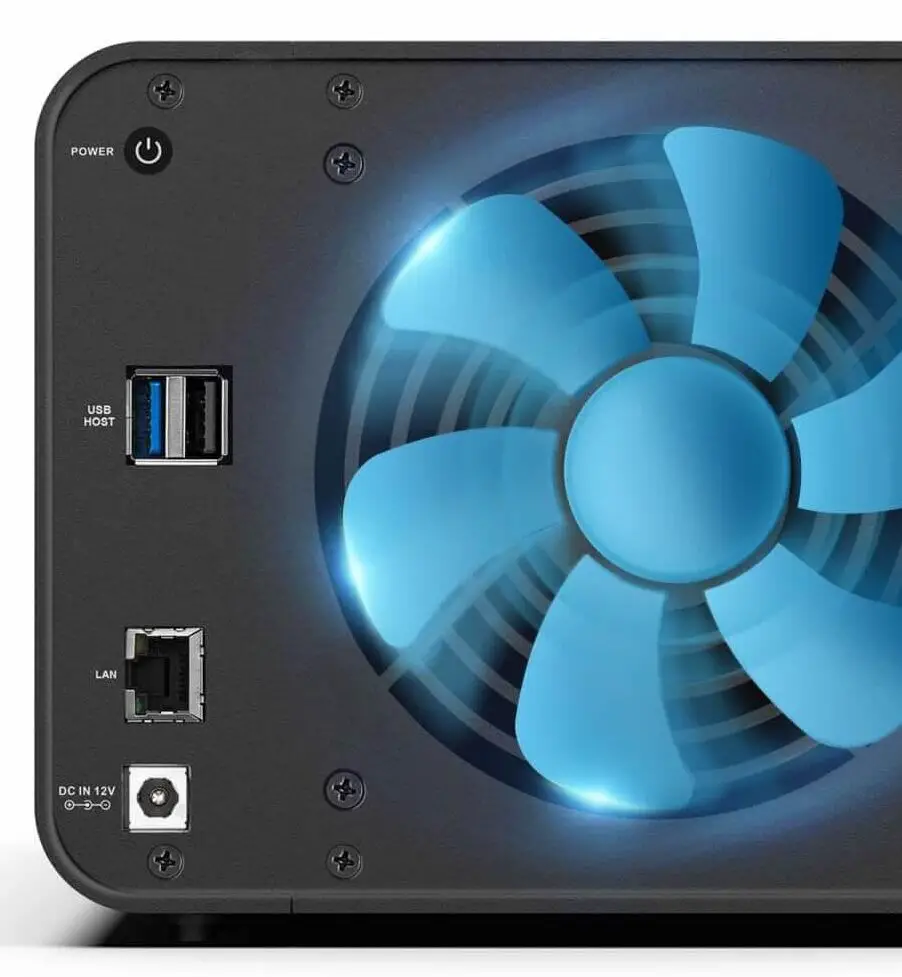
Connect the power source
- Use the provided adapter to connect the NAS to a power outlet.
Connect to the network
- Use network cables to connect the NAS to your local network. Ensure the connection is stable by securely plugging in the cables.
2. Initial Power On and Accessing the Device
Power on the TerraMaster NAS
- Press the power button to turn on the NAS. Wait a few minutes for it to fully boot up.
Access via web browser
- On your computer or laptop, open an internet browser and enter the default IP address or device hostname to access the TerraMaster NAS interface.
3. First-Time Configuration through Web Interface
Log in to the NAS
- Use the default username and password (found in the user manual) or the credentials set during the initial setup.
Configure network settings
- Follow the on-screen prompts to set up network settings like IP address, DNS, and gateway according to your network environment.

Set up storage configuration
- Choose your storage configuration (RAID, JBOD, or single disk mode) and initialize your disks if necessary.
Create user accounts
- Set up user accounts and assign permissions to ensure data security.
4. Optional Steps for Advanced Users
Configure remote access
- Set up remote access if you need to access the NAS from outside your local network.
Set up automatic backups
- Schedule tasks and automatic backups to protect your data.
Firmware updates
- Install any available firmware updates to enhance performance and security.
5. Testing and Verifying Setup
Verify connectivity
- Access the NAS from another device on your network to ensure it is properly connected.
Test data transfer
- Transfer a small file to and from the NAS to test data transfer speeds and functionality.
Confirm remote access
- If applicable, access the NAS remotely from a device outside your local network to verify remote access settings.
6. Troubleshooting and Common Issues
Having trouble accessing the NAS on the network?
- Check if the NAS is powered on and properly connected to the network.
- Ensure network cables are securely plugged in and not damaged.
- Verify the NAS is visible on the network by checking your router’s device list.
Difficulty with initial setup or configuration?
- Follow the user manual or official setup guide step by step.
- Double-check your network settings.
- Ensure hard drives are correctly inserted and compatible if using RAID.
Experiencing slow performance or data transfer speeds?
- Check your network infrastructure for any bottlenecks.
- Ensure you are using the latest firmware for the NAS device.
- Use Gigabit Ethernet connections for faster data transfer.
Facing data access issues from remote locations?
- Verify remote access is enabled and correctly configured.
- Ensure your router supports remote access to your network.
- Double-check your DDNS settings if using a dynamic IP address.
For persistent issues, consult the official TerraMaster user manual or contact TerraMaster support for further assistance.
Congratulations! You’ve successfully set up your TerraMaster NAS. Enjoy enhanced data management and storage solutions tailored to your needs.