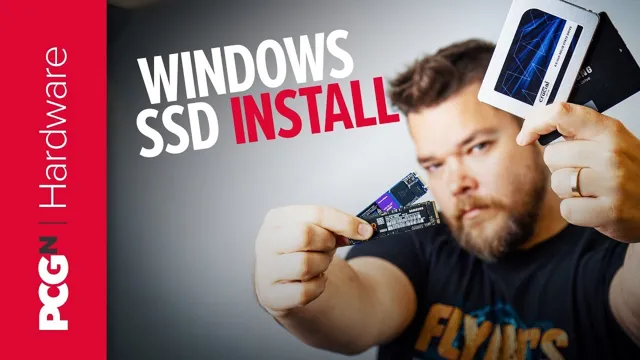
Upgrading to an SSD can be an excellent way to rejuvenate your old Windows 7 computer’s performance. While most of us tend to upgrade to a new machine, an SSD upgrade can give your older computer a new lease of life. Moving Windows 7 to SSD may sound like a daunting task, but it’s not as complicated as it seems.
Besides, it’s a cost-effective way to boost your PC’s speed and overall performance. In this blog, we’ll show you how to transfer your operating system from your current hard drive to an SSD without losing any data. Keep reading to find out how to make this upgrade and reap its many advantages.
Check System Requirements
If you’re planning to move Windows 7 to a new SSD, it’s important to check your system requirements beforehand. You’ll need to make sure that your computer is compatible with the new SSD and has the necessary hardware and software specs for a smooth transfer. Your system should have at least 2GB of RAM, a high-speed CPU, and sufficient storage space for the new SSD.
You’ll also need to have a Windows 7 installation disc or USB drive, as well as a cloning software that can reliably copy your existing system to the new SSD. It’s important to do your research and carefully follow the instructions provided by the manufacturer to avoid any data loss or compatibility issues during the transfer. By taking these precautions and ensuring that your system meets the necessary requirements, you can successfully move Windows 7 to a new SSD and enjoy faster performance and improved reliability.
Ensure that your computer and SSD meets necessary requirements
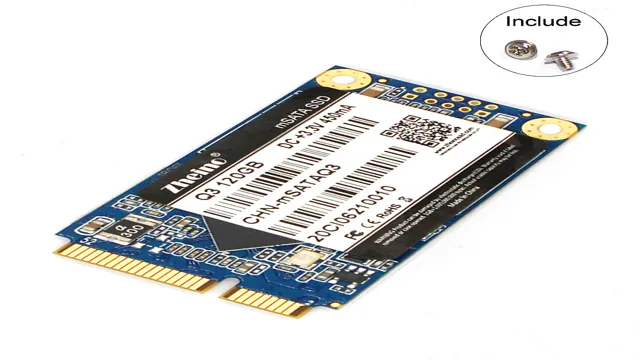
Before installing an SSD on your computer, it is crucial to check whether your system meets the necessary requirements. The most important factor to consider is the SATA interface, which should be compatible with the SSD you want to install. Most SSDs work well with SATA III interface, but some models may require a higher version for better performance.
You should also check the motherboard compatibility and whether you have enough space to fit the drive. Additionally, the capacity of your PSU should be large enough to support the new SSD. Before making any purchase, ensure that you thoroughly research the system requirements of the SSD you want to install to avoid any compatibility issues.
By checking the system requirements, you ensure that the SSD performs at its full potential and provides the necessary speed boost, making your computer faster and more efficient overall. Remember, a little research goes a long way in ensuring a hassle-free and satisfying upgrade.

Create a Backup Image
If you need to move your Windows 7 operating system to a new SSD, you’ll want to create a backup image of your current system. This will ensure that all of your files and settings are transferred over seamlessly. To do this, you can use a program like Macrium Reflect or Acronis True Image to create a backup image of your entire system.
These programs will allow you to select the source drive (your existing hard drive) and the destination drive (your new SSD), and will then create an exact copy of your entire system on the new drive. Once the backup is complete, you can then remove your old hard drive, install your new SSD, and boot up your computer as if nothing has changed. This process is a great way to quickly and easily upgrade your system without having to reinstall all of your programs and settings from scratch.
Just be sure to backup all of your files before starting, to ensure that nothing important is lost in the process.
Save all your files in an external drive and create a backup image of your Windows 7
Creating a backup image of your Windows 7 system may seem like a tedious task, but it’s crucial to protect your valuable files and data from potential loss or damage. To begin, you’ll need an external hard drive with enough space to store your backup files. Once you’ve connected your external drive, go to the Control Panel and select “Backup and Restore.
” From there, select “Create a system image” and choose the destination for your backup image. Windows will then begin the process of creating the backup image, which may take up to an hour or more depending on the size of your system files. Once complete, you can be confident that your important files and data are safe and you have a backup in case of any system failures or crashes.
Remember to update your backup image regularly to keep it current and protect your data from any potential loss or corruption.
Create a Windows 7 Installation Media
If you’re looking to move Windows 7 to a new SSD, the first step is to create installation media. This is crucial as it will allow you to install Windows 7 on the new SSD. To create installation media, you can download the Windows 7 USB/DVD Download Tool from Microsoft.
Once downloaded, open the tool and select the ISO file of Windows 7 that you previously downloaded. Next, choose the USB drive or DVD that you want to use as installation media and click on ‘Begin copying.’ The tool will automatically format the drive and copy the Windows 7 files onto it.
Once the process is complete, you will have a bootable USB or DVD that you can use to install Windows 7 on your new SSD. Remember to backup all your important files before proceeding with the installation to avoid data loss. With the installation media, moving Windows 7 to a new SSD should be a breeze.
Create an installation media using a USB or DVD drive
Creating an installation media using a USB or DVD drive is essential if you want to install Windows 7 on a new computer or upgrade your existing operating system. To create a Windows 7 Installation Media using a USB drive, you will need a USB flash drive with a minimum of 4GB storage, and a Windows 7 ISO file that can be downloaded from Microsoft’s website. Once you have both, insert the USB drive into your computer, and open the Windows 7 USB/DVD Download tool.
Select the ISO file, choose USB device from the installation media type, and select your USB drive. Click on the ‘Begin copying’ button, and wait for the tool to create the installation media. Creating a DVD installation media is similar but requires a blank DVD and a DVD burner installed on your computer.
With the DVD inserted, simply select DVD as the installation media type, and follow the on-screen instructions. Regardless of the method you choose, remember to backup any important data before installing Windows 7 as doing so will erase everything on your computer’s hard drive.
Install SSD and Boot from Installation Media
If you’re wondering how to move Windows 7 to a new SSD, one of the first things you’ll need to do is install the SSD into your computer and boot from your installation media. This can be done by shutting down your computer, unplugging it from the wall and opening up the case, then locating the SSD slot on your motherboard and securing the SSD in place. Once it’s secured, you’ll need to connect the necessary cables and boot from your installation media, which can be a USB drive or DVD with your Windows 7 installation files on it.
From there, you can follow the on-screen prompts to install Windows 7 onto your new SSD. It’s important to note that migrating your existing Windows installation to the new SSD is a separate process that you can do after the initial installation is complete. By installing your new SSD and following these steps, you can enjoy faster boot times and improved overall performance in your computer.
Open your computer and install the new SSD. Boot from the installation media
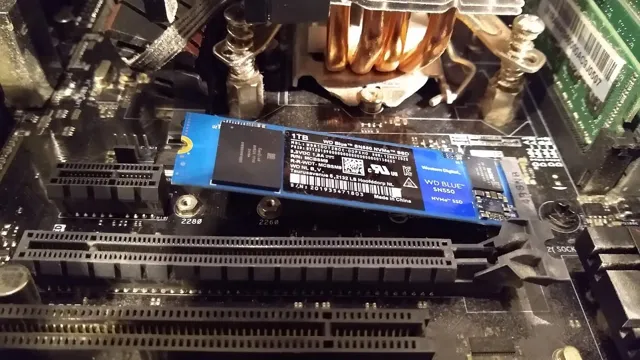
If you’re looking to speed up your computer’s performance, installing an SSD is the way to go. To get started, open up your computer and install the new SSD. Make sure to connect all the necessary cables and screws.
Once you’ve installed the SSD, it’s time to boot up from the installation media. This is usually a USB drive or DVD that contains the operating system that you plan to install on your new SSD. To boot from the installation media, you’ll need to change the boot order in your BIOS settings.
This will ensure that your computer boots from the installation media instead of the old hard drive. Once you’ve successfully booted from the installation media, you can begin installing the operating system on your new SSD. Remember, installing an SSD is a great way to boost your computer’s speed and performance, but it’s important to properly install and configure it for the best results.
Choose Custom Installation
If you’re trying to move Windows 7 to a new SSD, the first step is to choose the custom installation option. This will allow you to select which drive you want to install the operating system on, and gives you other options to customize your installation. During the process, you’ll need to select the new SSD as the destination for the operating system, and make sure to format it if necessary.
Once you’ve completed the installation, you should be able to boot into Windows from your new SSD. It’s important to note that moving an operating system to a new drive can be a complex process, and it’s always a good idea to back up your data and create a recovery plan before attempting any major changes to your system.
Choose the custom installation option and select your SSD as the destination for your installation.
If you want to install a new operating system on your computer, it is important to choose the custom installation option and select your SSD as the destination for your installation. This will ensure that the operating system is installed on your chosen drive, in this case your SSD, rather than on your old hard drive or a different location. Choosing the custom installation option allows you to select exactly where and how the operating system is installed, providing you with more control and customization.
By choosing your SSD as the destination for your installation, you will benefit from faster boot-up times and improved overall system performance. So, when installing a new operating system, remember to choose the custom installation option and select your SSD as the destination for the installation to optimize your computer’s performance.
Install Windows and Restore Backup
If you’re wondering how to move your Windows 7 operating system to a new SSD, the process is simpler than you might think. First, you’ll need to install Windows onto your new SSD. You can do this either by using a fresh copy of Windows or by cloning your existing system onto the new drive.
Once Windows is installed, you can restore your backup files from an external hard drive or other source. It’s important to note that you’ll need to install all your applications and drivers manually after restoring your backup, so be sure to have those on hand before starting the process. By following these steps, you can enjoy the increased speed and performance of your new SSD without losing any of your important files or settings.
Install Windows 7 on your new SSD. Restore the backup image that you have created to your new drive
If you have recently purchased a new SSD for your computer, then you should definitely consider reinstalling Windows This will give your computer a fresh start and improve its overall performance. The first step is to create a backup image of your current Windows installation using a reliable backup software.
Once you have done this, you can proceed to install Windows 7 on your new SSD. This can be done by inserting the installation disk or USB drive and following the on-screen instructions. Once Windows 7 is installed, you will need to restore the backup image that you created earlier.
This can be done by using the same backup software and selecting the backup image that you want to restore. Once the restore process is complete, your computer will be restored to its previous configuration, but with the added benefits of your new SSD. Overall, this process might take some time, but it is well worth the effort as it can significantly improve the speed and performance of your computer.
Update and Install Drivers
If you’re looking to upgrade your computer’s hard drive, one question that might come up is “how do I move Windows 7 to a new SSD?” It’s a relatively simple process, but there are a few steps you need to follow in order to do it correctly. Firstly, you’ll need to clone your existing hard drive onto the new SSD – there are a number of software programs that can help you do this, such as Macrium Reflect or Acronis True Image. Once you’ve successfully cloned the hard drive, you need to ensure that your SSD is set as the boot drive in your computer’s BIOS.
You can do this by rebooting your computer, entering the BIOS setup menu, and then selecting the new SSD as the primary boot device. Finally, you’ll need to update and install any necessary drivers for your new SSD. This can typically be done via the manufacturer’s website or the Windows Device Manager.
By following these steps, you should be able to move Windows 7 onto a new SSD with minimal hassle!
Update and install all necessary drivers for your new SSD to function properly.
When you install a new SSD in your computer, it’s important to update and install all necessary drivers for it to operate optimally. Drivers are software that help your hardware communicate with your operating system. You may need to visit the website of your SSD manufacturer to download the latest drivers specifically made for your SSD model.
Make sure you download the appropriate drivers for your operating system. Drivers for Windows 10 may not be compatible with Windows 7 or After downloading the drivers, it’s important to install them correctly.
The installation process may vary depending on your operating system, but it usually involves double-clicking on the downloaded driver file and following the on-screen instructions. If your computer has outdated drivers or missing drivers, your SSD may experience slower speeds and other performance issues. Updating and installing drivers is a crucial step to ensure the best performance of your new SSD.
Conclusion
Moving Windows 7 to a new SSD can feel like a daunting task, but like any good adventure, the journey is worth it when you reach your destination. With the right tools and a bit of patience, you can improve your computer’s speed and performance while enjoying the satisfaction of a job well done. So, grab your mouse and keyboard, strap on your tech-savvy boots, and get ready to embark on your very own SSD migration adventure! Happy trails!”
FAQs
What is the process for moving Windows 7 to a new SSD?
The process involves creating a system image of your current Windows 7 installation and restoring it onto the new SSD using a cloning software.
What cloning software can I use to move Windows 7 to a new SSD?
There are several cloning software options available, including Clonezilla, Macrium Reflect, and Acronis True Image.
Do I need to activate Windows 7 again after moving it to a new SSD?
No, as long as you are using the same computer and not making any major hardware changes, you should not need to reactivate Windows 7.
Can I move Windows 7 to a larger SSD than my current one?
Yes, you can move Windows 7 to a larger SSD, but you will need to ensure that the new SSD has enough space to accommodate your current system image and any additional files or programs you want to add.
Is it possible to move Windows 7 to a new SSD without losing any data?
Yes, creating a system image and restoring it onto the new SSD will effectively transfer all of your data and settings to the new drive, so you should not lose any data during the process.
