Installing a solid-state drive into your computer can be a game-changer, especially if you’ve been using a traditional hard drive. A Samsung SSD is a great choice for upgrading your system, as it offers fast read and write speeds, durability, and reliability. However, if you’re new to the process of installing hardware components, you might be feeling a bit apprehensive.
Don’t worry, though – with the right guidance, it’s easy to install a Samsung SSD into your computer. In this blog post, we’ll walk you through the steps so you can get started. Let’s dive in!
Preparation
Before installing a Samsung SSD, there are a few things you need to keep in mind to ensure a smooth installation process. Firstly, you need to choose the right SSD based on the capacity and type you require. Ensure that the SSD is compatible with your computer’s motherboard, so it fits properly.
Additionally, you should backup your data, so that you don’t lose any valuable information in case of data loss during the installation process. Finally, you need to gather the necessary tools for the installation, which includes a screwdriver and an antistatic wristband, anti-static mat or work table to avoid any electrostatic discharge while handling the SSD. By preparing beforehand, you can ensure a seamless Samsung SSD installation experience, and enjoy faster boot times and improved overall system performance.
Check your computer compatibility
Before diving into any software installation or update, it is essential to ensure that your computer system meets the minimum requirements. This preliminary check will save you time and effort in the long run by avoiding compatibility issues. The first step is to read the system requirements provided by the vendor.
These include the necessary RAM, processor speed, operating system, and graphics card specifications. Additionally, you can run a system diagnostic tool to assess your system’s capacity and identify any potential hardware or driver issues that may hinder the installation process. Neglecting this step may lead to a suboptimal user experience, program crashes, or worse, system breakdown.
Therefore, taking the extra time to prepare and verify your computer’s compatibility with the software you intend to install will lead to a streamlined and efficient installation process.
Back up your important data
When it comes to protecting your important data, preparation is key. It’s essential to have a plan in place before disaster strikes. There are a few things you can do to prepare yourself and ensure you’re ready to back up your data.
First, identify the data that’s most important to you. This could include family photos, important work documents, or personal financial information. Once you know what you need to protect, you can choose the appropriate backup solution.
There are many different options available, from cloud storage to external hard drives. It’s important to find a solution that works for you and fits your budget. Remember, the cost of losing your valuable data is much higher than the cost of backing it up.
By taking the time to prepare and choose the right backup solution, you can protect yourself and your data from potential disasters.
Installation
If you’re looking to upgrade your computer’s storage, installing a Samsung SSD is a great place to start. First, make sure you turn off and unplug your computer before starting. Next, open up your computer’s case and locate the hard drive bay.
If you’re replacing an old hard drive, disconnect all cables and remove it from the bay. Then, slide the Samsung SSD into the bay and connect all cables securely. Make sure to check the orientation of the connectors, as they may be different from your old hard drive.
Finally, close up your computer’s case and power it back on. You should see your new Samsung SSD listed as a storage option. Congratulations, you’ve successfully installed a Samsung SSD in your computer!
Open the computer case
If you’re ready to install new hardware or upgrade existing components in your computer, you’ll need to open the computer case first. This may seem daunting if you haven’t done it before, but it’s an essential step in upgrading your system. First, make sure to turn off and unplug your computer.
Then, locate the screws holding the side panel in place, which are typically on the back and/or side of the case. Once you remove these screws, slide the panel off and set it aside. You should now have access to the internal components of your computer, such as the motherboard and hard drive.
Take care not to touch any of these components unless necessary, as they are sensitive and delicate. With the case open, you can now install your new hardware, such as a graphics card or additional RAM. Just be sure to follow the manufacturer’s instructions carefully to ensure a successful installation.
Overall, opening the computer case is a straightforward process that is essential for any hardware upgrades or maintenance.
Locate the hard drive bay
“Locating the hard drive bay” Are you looking to install a new hard drive into your computer but don’t know where to start? The first step is to locate the hard drive bay, which is where the hard drive will be installed. It may be located in different places depending on the type of computer you have, but it’s typically found near the bottom of the case. The hard drive bay usually has metal brackets for holding the hard drive in place, so look for a space with those brackets.
If you’re still having trouble finding it, try consulting the manual for your computer or doing a quick online search. Once you’ve located the hard drive bay, you can move on to installing the hard drive and enjoying the benefits of increased storage space!
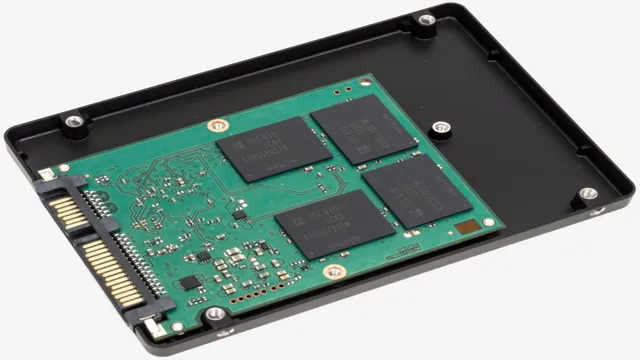
Install the SSD
If you’re looking to give your computer a speed boost, installing an SSD is a great way to do it. To get started, you’ll need to make sure you have the right tools for the job. You’ll need a screwdriver, some screws (typically included with your SSD), and possibly a mounting bracket or caddy if your computer doesn’t already have one.
Once you have everything you need, you can begin the installation process. First, shut down your computer and unplug it from the wall. Open up the case to access the hard drive bays.
Remove the screws holding your current hard drive in place (if you have one) and slide it out of the slot. Take your SSD and insert it into the same slot, then secure it with the screws provided. Finally, reconnect any cables you may have disconnected and close up the case.
When you power on your computer, it should now recognize the new SSD and boot up faster than ever before. Just make sure to properly dispose of your old hard drive if you’re not planning on using it anymore.
Configuration
If you’re wondering how to install a Samsung SSD in your system, don’t worry, it’s not as complicated as it might seem. The first step is to make sure that your computer supports the type of SSD you’re planning to install. You’ll need to check the specifications of your motherboard or consult with a technician to ensure that it’s compatible.
Once you’ve got that sorted, you’ll need to power down your system and disconnect all cables and peripherals. Then, you can open up your casing and locate the hard drive bays. Remove the existing hard drive and slot in your new Samsung SSD.
Secure it in place with screws and reconnect the cables. Power up your system and check that the drive is being recognized in the BIOS. Finally, you can install your operating system and any other software using the installation media provided.
With these simple steps, you can enjoy faster boot times and increased performance with your new Samsung SSD.
Initialize the SSD
When initializing an SSD, there are a few things you need to configure before you can start using it. The first step is to connect the SSD to your computer, either directly or through an enclosure. Once it’s connected, you’ll need to make sure it’s recognized by your operating system.
If it’s not, you may need to update your drivers or change your BIOS settings. Once your computer recognizes the SSD, you’ll need to format it. This will erase any existing data on the drive and prepare it for use.
To format the drive, you can use the built-in disk management tool in Windows or a third-party tool if you prefer. After formatting the drive, you’ll want to ensure that it’s running at its optimal performance. This can be done by enabling TRIM.
TRIM is a command that allows an operating system to inform an SSD which blocks of data are no longer considered in use and can be wiped internally. Enabling TRIM can help to improve the SSD’s performance and lifespan.
In order to enable TRIM, you’ll need to make sure your operating system supports it and then enable it through the command prompt or a third-party tool.In conclusion, initializing an SSD may seem daunting at first, but it’s actually quite simple. By following these steps, you’ll be able to configure your SSD and ensure that it’s running at its optimal performance. So go ahead and give your SSD the love and care it deserves, your computer (and your data) will thank you for it.
Set the SSD as the boot drive
If you are upgrading your computer with a solid-state drive (SSD), you might want to set it as the boot drive. This means that it will be the primary drive that your computer uses to start up. To do this, you need to access your computer’s BIOS settings and change the boot order.
You can usually do this by pressing a key (e.g. F2, Delete, or Esc) when your computer starts up.
Once you are in the BIOS settings, navigate to the boot order section and move the SSD to the top of the list. This will ensure that your computer looks for the operating system on the SSD before checking any other drives. Setting the SSD as the boot drive can significantly improve your computer’s startup time and overall performance.
So, if you want to get the most out of your new SSD, make sure to follow these steps and set it as your boot drive.
Conclusion
Installing a Samsung SSD is a breeze – it’s like giving your computer a performance boost on steroids. With a few simple steps and the right tools, you’ll be cruising on the fast lane with lightning-fast boot times and load speeds that will make your head spin. So go ahead, unleash the power of your Samsung SSD and elevate your computing experience to new heights.
Who said upgrading is hard? Not us.”
FAQs
What are the benefits of installing a Samsung SSD?
Installing a Samsung SSD can improve overall system performance, increase data transfer speeds, and reduce boot and load times.
How do I physically install the Samsung SSD?
To physically install the Samsung SSD, turn off and unplug your computer, open the case, locate an available SATA power connector and data cable, and connect them to the SSD. Secure the SSD in place with screws and close the case.
How do I install the Samsung SSD software and drivers?
To install the Samsung SSD software and drivers, download and install the Samsung Data Migration software from the Samsung website. Follow the prompts to clone the data from your old drive to the new SSD and install necessary drivers.
How do I ensure my Samsung SSD is set up for optimal performance?
To ensure your Samsung SSD is set up for optimal performance, enable the AHCI (Advanced Host Controller Interface) mode in the BIOS, disable disk defragmentation, and ensure TRIM is enabled. Check for firmware updates regularly and keep your drivers up to date.