
Do you have an ever-growing collection of music on your SSD but find yourself wanting even more options? Look no further than Amazon Music, a streaming service that offers millions of songs and playlists at your fingertips. But how do you get Amazon Music from your SSD? It’s easier than you might think. With a few simple steps, you can listen to your favorite tunes without taking up any additional storage space on your device.
Plus, Amazon Music has a vast range of exclusive content, making it a must-have for music lovers. Read on to discover how to easily access Amazon Music from your SSD.
Introduction
Looking for a way to get your music library from your SSD to Amazon Music? With Amazon’s cloud-based music service, you’ll be able to stream your music from anywhere and on any device. First, open the Amazon Music app on your computer, then click on “Upload.” From there, you can select the folder on your SSD where your music is stored and begin the upload process.
Amazon Music supports a wide range of file formats, including MP3 and FLAC, so you should have no trouble getting your music into the service. Once your music has finished uploading, you can access it from any device that has the Amazon Music app installed. Getting your music library into Amazon Music may take a bit of time, but the end result is a seamless listening experience that you can enjoy from anywhere.
Why transfer Amazon Music to SSD?
If you are an avid Amazon Music user, you may have wondered why you should transfer Amazon Music to SSD (solid-state drive). Let me tell you, it can enhance your overall music experience. SSD’s are faster compared to traditional hard drives, and they read and write data at lightning speed.
When you transfer Amazon Music to SSD, you can expect faster load times and smoother playback, ensuring that your music never skips a beat. You will also have the benefit of faster music searches and better overall performance. Plus, transferring your music to SSD frees up space on your primary hard drive, providing more storage for other essential files.
Overall, transferring Amazon Music to SSD can be beneficial for anyone looking to get more out of their music experience.
Step-by-Step Guide
If you’re looking to get music from your SSD onto Amazon Music, it’s a pretty straightforward process. First, make sure your music files are saved onto your SSD. Then, open up the Amazon Music app and select “Upload Your Music” from the “My Music” menu.
From there, you can choose which folder or files you want to upload, and Amazon Music will automatically start adding them to your account. Keep in mind that there is a limit to how much music you can upload for free, but with Amazon Prime, you can upload up to 100,000 songs. Once your music is uploaded, you can access it from any device that has the Amazon Music app installed.
So if you want to listen to your favorite tunes on the go, simply download the app on your phone or tablet and start streaming!
Step 1: Connect the SSD and transfer music files
When it comes to transferring music files, moving them to an SSD can help provide a faster and smoother experience. The first step in this process is to connect the SSD to your computer. You can do this by using a USB cable and plugging it into an available port.
Once you have successfully connected the SSD, you can begin transferring your music files. It’s important to remember that the transfer speed will depend on the amount and size of the files being transferred, as well as the speed of your computer. It’s best to transfer files in smaller batches to avoid overwhelming your computer.
Once all the files have been transferred, you can disconnect the SSD and start enjoying your music on the faster and more reliable SSD. By following these simple steps, you can make the transition to using an SSD for your music files effortless and straightforward.
Step 2: Download and install Amazon Music on your PC
To get started with Amazon Music on your PC, you need to download and install the application. Here’s a step-by-step guide to help you do that: Open your web browser and go to the Amazon Music website.
Click on the “Download” button.
Once the download is complete, locate the installation file on your PC and double-click on it to start the installation process. Follow the on-screen instructions to complete the installation.
Once the installation is complete, launch the Amazon Music application and sign in with your Amazon account details to start listening to your favorite songs and playlists. It’s that simple! With Amazon Music installed on your PC, you’ll be able to enjoy unlimited music, ad-free listening, and high-quality audio streams at your fingertips.
So why wait? Download and install Amazon Music today and start jamming!
Step 3: Select the music folder on SSD as your Amazon Music library
After transferring your music files from your old computer to your new SSD, the next step is to set up the Amazon Music library on your new device. This process is crucial because it will ensure that all your favorite tunes are accessible whenever you feel like listening to them. To start, open the Amazon Music app on your computer and go to the Preferences tab.
Click on the Change button under the Manage Your Music Library option, then select the location of your music folder on your SSD. This step will automatically import the music files from your selected folder into your Amazon Music library. Once the import is complete, you can start streaming your favorite tunes on your newly upgraded device.
Remember to select the correct folder on your SSD to avoid any confusion and ensure that all your music files are synced correctly. This way, you can enjoy an uninterrupted music experience on your newly upgraded device.
Tips & Tricks
Are you an avid Amazon Music user with a vast music collection stored on your SSD? If so, here’s how you can get your favorite tunes playing on Amazon Music in just a few simple steps. Firstly, open the Amazon Music app and navigate to the settings option. From there, select the “Import music to your Library” button.
This will launch a window where you can select your SSD drive and tick the music files you wish to import. Once you’re satisfied with your selection, hit the “Import Selected” button and watch as Amazon Music does the rest of the work for you. Within minutes, your Amazon Music Library should be updated with all the music files you imported.
So kick back, relax, and enjoy your favorite tunes on Amazon Music from your SSD drive. It’s that easy!
Use a high-speed SSD for better performance
If you’re looking to get better overall performance from your computer, then using a high-speed SSD is a great solution. Unlike traditional hard drives, SSDs (solid-state drives) don’t have any moving parts, which means that they can run much faster and more efficiently. This is especially crucial if you use your computer for things like video editing or gaming, as these tasks require quick access to large amounts of data.
With an SSD, you’ll be able to open files and applications faster, and your computer will run much smoother overall. Plus, with a high-speed SSD, you’ll also be able to transfer files to other devices much quicker. So if you’re looking to get the most out of your computer, consider upgrading to a high-speed SSD today.
Organize your music files for easier management
Organizing your music files can be a daunting task, especially if you have a vast collection of songs. However, it’s essential to keep them in order for easier management and accessibility, whether it’s for personal or professional use. One tip is to start by categorizing your music files according to genre or artist.
Putting them in folders named after these categories will make it easier to find them when you’re in the mood for a specific type of music. Another helpful tip is to name your files and folders correctly, so you know what’s in them without having to open each one. For instance, use a consistent naming convention, such as “Artist – Song Title” for individual files, and “Genre – Artist” for folder names.
This helps to avoid confusion and saves time when searching for a particular song. Remember to keep your files organized regularly, as new songs will come in over time. By adopting these tips, you can make your music files more manageable, and you’ll be able to enjoy your favorite tunes more easily.
Conclusion
In conclusion, getting music from an SSD on Amazon Music is like finding buried treasure. The SSD provides lightning-fast access to your music library and with Amazon Music’s handy search and sorting functions, you can easily find the songs you’re looking for. So go ahead, fire up your SSD and get ready to rock out!”
FAQs
How do I download music from Amazon Music to my SSD?
To download music from Amazon Music to your SSD, first ensure that your SSD is connected to your computer. Then, open the Amazon Music app or website and navigate to the album or song you want to download. Click on the “Download” or “Save” button and select your SSD as the destination for the download.
Can I transfer music from my Amazon Music account to my SSD?
Yes, you can transfer music from your Amazon Music account to your SSD. To do so, log in to your Amazon Music account and select the songs or albums you want to transfer. Then, click on the “Download” or “Save” button and select your SSD as the destination for the transfer.
How much storage do I need on my SSD to store music from Amazon Music?
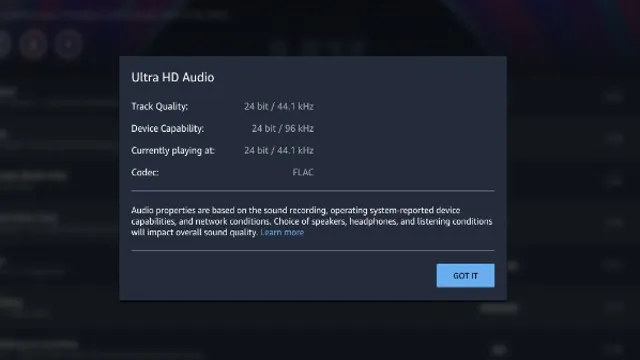
The amount of storage you need on your SSD to store music from Amazon Music depends on the size of the music files you are downloading. A typical MP3 music file is around 3-6 MB, while a high-quality FLAC file can be up to 50 MB. To estimate the amount of storage you need, multiply the number of songs you want to download by the average file size and add a bit of extra space for metadata and other files.
Is it possible to play music directly from my SSD?
Yes, it is possible to play music directly from your SSD. To do so, you will need a media player software that can access the files on your SSD. There are many free and commercial media players available that can play music files, including Windows Media Player, VLC Media Player, and iTunes. Simply open the media player and navigate to the folder on your SSD where your music is stored.