Category: How to

How to

  • Boost Your Laptop’s Performance: A Guide on How to Hook Up an SSD

    You may have recently purchased an SSD or solid-state drive to upgrade your laptop’s storage capacity and speed. But now you’re stuck wondering how to connect it to your laptop. Don’t worry, whether you’re a tech-savvy person or a beginner, we’ve got you covered! In this blog, we will guide you through the process of connecting your SSD to your laptop in a few easy-to-follow steps.

    We will cover everything from checking if your laptop is compatible with an SSD to installing the SSD and transferring your data. Get ready to upgrade your laptop’s performance with our helpful tips and tricks!

    Check if your laptop has a slot for SSD

    If you’re looking to upgrade your laptop’s storage, adding an SSD is a great place to start. However, before you run out and buy an SSD, you should check if your laptop has a slot for it. The good news is that most newer laptops do have a slot for an SSD, but not all laptops do.

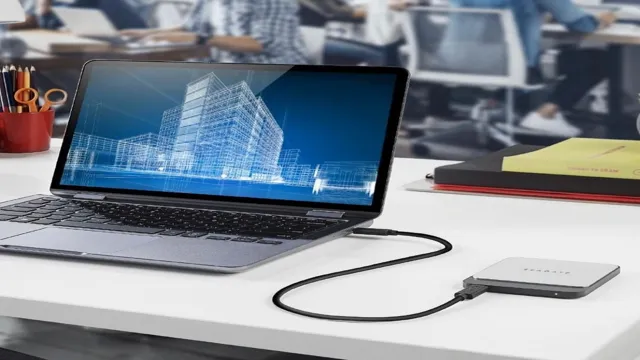
    To check if your laptop has a slot for an SSD, you can look at the manual or do a quick online search. If your laptop doesn’t have a slot for an SSD, you may still be able to add one by using an external enclosure. This would allow you to connect the SSD to your laptop via USB and access it as an external hard drive.

    Overall, adding an SSD to your laptop can greatly improve its performance, but it’s important to make sure your laptop has a slot for it before you make any purchases.

    Different types of SSD and their connectors

    If you want to upgrade your laptop’s storage capacity, one of the best options is to install an SSD. However, not all laptops have a slot for SSD, so it’s essential to check before you buy one. SSDs come in different types and connectors, which can vary depending on your laptop’s make and model.

    Some common SSD types include SATA, PCIe, and M. Many modern laptops support M.

    2 SSDs, which are smaller and faster than traditional SATA or PCIe SSDs. M.2 SSDs can use different connectors such as B-Key, M-Key, and B+M-Key, which also need to match your laptop’s interface.

    If you’re unsure about which SSD type and connector to use, consult your laptop’s documentation or manufacturer’s website for compatibility. By choosing the right type and connector, you can install an SSD and enjoy faster boot-up times, faster application launch, and a more responsive computing experience.
    how can i hook up an ssd to my laptop

    Check your laptop’s manual for compatibility

    When it comes to upgrading your laptop’s storage capacity with an SSD, the first thing you need to do is check your laptop’s manual for compatibility. Not all laptops can be upgraded with an SSD, and some may require a specific type of SSD. Therefore, it’s essential to check your manual to ensure that you purchase the correct SSD that will work with your laptop.

    Once you’ve confirmed compatibility, the next step is to check if your laptop has a slot for an SSD. Most laptops nowadays have a slot for an SSD, but older models may not. If your laptop doesn’t have an SSD slot, you won’t be able to upgrade your storage capacity with an SSD.

    Keep in mind that some laptops may have a slot for an M.2 SSD, while others may have a slot for a SATA SSD. It’s crucial to identify the type of slot your laptop has to determine which SSD will work for you.

    With this information, you can confidently purchase an SSD that will work seamlessly with your laptop and improve its performance.

    Purchase the right SSD for your laptop

    If you’re wondering “how can I hook up an SSD to my laptop,” there are a few steps to consider before making the purchase. First, make sure to check what kind of connector your laptop has. Most laptops will have either a SATA connector or an M.

    2 connector. Once you know which one you have, you can purchase the right SSD that is compatible with your laptop’s connector. Additionally, consider the size of the SSD, as some laptops may have limited space.

    It may be necessary to purchase a smaller SSD with a lower storage capacity. Lastly, consider the speed of the SSD by checking the read and write speeds. A faster SSD will provide quicker boot-up times and faster file transfer speeds.

    By taking these factors into consideration, you can purchase the right SSD for your laptop and enjoy all the benefits that come with it.

    Consider the capacity, speed, and form factor of the SSD

    When it comes to upgrading the storage on your laptop, choosing the right SSD can make all the difference. One of the first things to consider is the capacity, or how much space you’ll need. Think about what you use your laptop for and how many files you typically save.

    If you’re a video editor or gamer, you might want to opt for a larger capacity SSD. Next, consider the speed, which can vary based on the type of SSD and its interface. Look for an SSD with a high read and write speed for faster boot and load times.

    Finally, think about the form factor, or size, of the SSD. Most laptops will use either a 5-inch or M.

    2 SSD, so make sure you choose one that is compatible with your device. By considering these factors and choosing the right SSD, you can vastly improve the performance and storage capabilities of your laptop, making it faster and more efficient for all your needs.

    Choose a reputable brand with good reviews

    When it comes to upgrading your laptop’s speed and storage capacity, investing in the right SSD is crucial. With so many options on the market, it’s important to choose a reputable brand with good reviews. Look for brands with a proven track record of quality and reliability, such as Samsung, Crucial, and Western Digital.

    You want an SSD that can handle the demands of your work or gaming, with fast read and write speeds and a large enough capacity for your needs. Be sure to check your laptop’s compatibility with the SSD you have in mind, as not all laptops support all SSD types. With the right purchase, you can significantly improve the performance of your laptop and enjoy faster load times, snappier apps, and more storage space.

    Don’t skimp on quality or you may end up with a slow and frustrating experience. Take the time to research your options and invest in the right SSD today.

    Install the SSD in your laptop

    If you’re looking to improve the performance of your laptop, one way to do so is by installing an SSD. But how can you hook up an SSD to your laptop? Well, the process may vary slightly depending on the model of your laptop, but generally, it involves opening up the laptop and replacing the existing hard drive with the new SSD. Before getting started, it’s essential to back up all your data because you will need to reinstall the operating system and your programs on the new SSD.

    You’ll also need to ensure that the new SSD matches your laptop’s interface, which could be SATA, PCIe, or M. Once you have the right SSD, you can follow the manufacturer’s installation instructions or hire a professional to do it for you.

    Either way, installing an SSD in your laptop can significantly improve its performance, giving you faster boot and load times.

    Backup your data before opening your laptop

    If you’re thinking about upgrading your laptop’s storage by installing a solid-state drive (SSD), you must know that it’s a great way to speed up your laptop’s performance. Before you start, make sure you backup your data, just in case you mess up anything. Once you’re done with that, it’s time to get started.

    Installing an SSD requires you to open your laptop, which can be a bit intimidating, especially if you’ve never done it before. However, it’s not too difficult, and there are plenty of tutorials available online to guide you through the process. Before you start, make sure the laptop is turned off and unplugged.

    Depending on your laptop model, you may need to remove the battery first. Once you’ve identified the SSD slot, gently attach the device and then use the screws to secure it in place. Finally, you can reassemble your laptop, boot it up, and enjoy your new and improved storage space.

    With this SSD you can easily switch between programs and experience a faster boot time.

    Remove the battery and open the laptop

    If you’re looking to install a solid-state drive (SSD) in your laptop, the first step is to remove the battery and open up your laptop. Make sure to disconnect the power cord and any other peripherals before you begin. Once you’ve fully powered down your laptop, carefully remove the battery pack.

    Next, locate the small panel on the bottom of your laptop that houses the hard drive. Unscrew any screws and remove the panel to gain access to the hard drive. Carefully remove the screws holding the hard drive in place and disconnect the SATA cable.

    Take the new SSD and carefully insert it into the same spot where the old hard drive was located. Use the screws to secure it in place and re-attach the SATA cable. Put the panel back on and re-insert the battery.

    Power up your laptop and your new SSD should be installed and ready to go!

    Install the SSD in the slot and secure it properly

    Installing an SSD in a laptop can be a great way to improve its speed and performance. Before you start, make sure your laptop is turned off and unplugged. Then locate the SSD slot, which may be under the bottom cover of the laptop or on its side.

    Remove any screws and carefully slide the SSD into the slot, making sure that the connector is lined up correctly. Once the SSD is in place, secure it with screws or clips and replace any covers or panels. It’s important to make sure that the SSD is properly secured, as any movement or loose connections can cause data loss or system crashes.

    After the SSD is installed, you may need to initialize and format it before you can start using it. Overall, installing an SSD can be a simple and effective way to improve your laptop’s performance, so don’t be afraid to give it a try!

    Initialize and format the SSD

    If you’re wondering how can I hook up an SSD to my laptop, the first step is to initialize and format the SSD. This process ensures that the SSD will work properly with your laptop’s operating system and file system. To start, connect the SSD to your laptop using a SATA or USB cable.

    Then, go to your laptop’s Disk Management tool and locate the connected SSD. Right-click on the SSD and select “Initialize Disk”. Choose the partition style and click OK.

    Next, right-click on the “UNALLOCATED” space and select “New Simple Volume”. Follow the prompts to format the SSD with your desired file system, allocation unit size, and volume label. Once finished, your laptop should recognize the new SSD and you’ll be ready to transfer files and enjoy faster load times.

    Access Disk Management in Windows

    If you’ve just purchased a new SSD, you’ll first need to initialize and format it before you can start using it. Windows provides an option to manage your disks through the Disk Management feature. To access it, you can open the Start menu and type “disk management” in the search bar.

    Once you’ve found the option, click on it to open the Disk Management window. Here, you’ll see a list of all the disks that are connected to your computer. Find your SSD, right-click on it, and select “Initialize Disk”.

    This will bring up a dialog box where you can select the disk partition style. Choose the “GUID Partition Table” option for modern systems or “Master Boot Record” for older ones. Once you’ve selected the partition style, click “OK” to initialize the disk.

    Next, right-click on the unallocated space of the SSD and select “New Simple Volume” to format it. Follow the prompts to set the volume size, drive letter, and file system format. The most common format is NTFS, which is compatible with both Windows and Mac.

    Congratulations! Your SSD is now ready to use.

    Initialize the SSD and create a partition

    When you purchase a new SSD, you must initialize and format it properly before use. This involves creating a partition and setting the file system, which is the way data is stored on the disk. To initialize the SSD, plug it into your computer’s SATA port, and then open the Disk Management tool.

    You should see the SSD listed as unallocated space. Right-click on it and select “Initialize Disk,” then choose whether you want to use MBR or GPT partition styles. Next, right-click on the unallocated space and select “New Simple Volume.

    ” Follow the prompts to create a new partition, and format it using NTFS or another compatible file system. This process will erase any data on the SSD, so make sure to back up any important files beforehand. Once complete, the SSD will be ready to use for storing and retrieving data at lightning-fast speeds.

    Format the partition and assign a drive letter

    Once you’ve added a new SSD to your system, it needs to be initialized and formatted before you can use it. To do this, you’ll need to go into the Disk Management tool built into Windows. Once there, locate your new SSD in the list of available disks, right-click on the unallocated space, and select “New Simple Volume.

    ” This will open a wizard that will guide you through the process of initializing the SSD, which basically just tells your system that there’s a new disk available and makes it ready for formatting. After that, you’ll want to format the partition and assign a drive letter. This is important because it gives the SSD a unique identifier that your system will use to access it.

    When formatting, you’ll have the option to choose the file system type (such as NTFS or FAT32) and volume label (which is just a name you give to the drive). And that’s it! Once you’ve completed these steps, your new SSD should be ready to use. Don’t forget that initializing and formatting your SSD will wipe any data that may already be on it, so make sure you’ve backed up any important files first.

    Transfer data to the new SSD

    If you’re wondering how you can hook up an SSD to your laptop, the process is actually quite simple. After securing the new SSD, the first step is to connect it to your laptop via a USB-to-SATA adapter. Once the SSD is recognized by your laptop, you can begin transferring data.

    It’s important to note that depending on the size of your old hard drive, you may need to selectively transfer files in order to fit everything on the new SSD. This can be done easily using file transfer software, which will guide you through the process. Another option is to clone your old hard drive onto the new SSD, which will copy all your files and programs over in one fell swoop.

    This can be done using cloning software such as Clonezilla or Macrium Reflect. With a little bit of patience, transferring data to your new SSD is a relatively painless process that will greatly enhance the performance of your laptop.

    Use a cloning software or reinstall your operating system and apps

    When it comes to upgrading to an SSD, there are two options: cloning your existing hard drive or doing a fresh install. If you choose to clone your hard drive, you’ll need cloning software that can copy all your data onto the new SSD. This includes your operating system, installed programs, and personal files.

    One benefit of cloning is that everything will be set up just the way you had it before, making for a seamless transition. On the other hand, reinstalling your operating system and apps will give you a clean slate, but it also means you’ll need to reinstall all of your programs and transfer your personal files manually. Whichever option you choose, it’s important to back up all of your data before proceeding with the upgrade.

    That way, you won’t lose any important files during the process. By properly transferring your data to your new SSD, you can enjoy faster boot times and improved performance in no time.

    Ensure all data is transferred and backed up properly

    Transferring data to a new SSD can often seem like a daunting task, but it is crucial to ensure that all data is backed up and transferred properly. The process typically involves cloning the existing system onto the new SSD, which allows for a seamless transition without the need for reinstalling applications or transferring data manually. This can be done using software specifically designed for this purpose, such as Acronis True Image or EaseUS Todo Backup.

    It’s essential to follow the instructions carefully for these programs to ensure that the transfer is successful. Once the transfer is completed, it’s crucial to double-check that all data has been transferred correctly and backed up before wiping the old drive clean. Taking these measures will ensure that no data is lost or corrupted in the process and that your new SSD is fully operational.

    Enjoy the benefits of improved speed and performance

    If you’re tired of slow boot-up times and laggy performance on your laptop, it may be time to consider upgrading to an SSD. So, how can you hook up an SSD to your laptop? First, you’ll need to ensure that your laptop has an available slot for an SSD and that the required cables and mounting hardware are either included or purchased separately. Next, you’ll need to clone your existing hard drive onto the new SSD to transfer your current setup and data.

    Once this is complete, you can swap out the old hard drive and replace it with the new SSD. You’ll immediately enjoy the benefits of improved speed and performance, with lightning-fast boot-up times and quick access to your programs and files. It’s a simple and cost-effective upgrade that’s worth considering if you want to breathe new life into your laptop and get the most out of your computing experience.

    Conclusion

    In conclusion, hooking up an SSD to your laptop is like giving your computer a warm, cozy blanket to snuggle up with during those chilly winter months. It provides lightning-fast speed and storage capabilities that will make your laptop run smoother than ever before. So whether you’re a tech guru or just an everyday user, adding an SSD to your laptop is a great investment that will give you a more efficient and enjoyable computing experience.

    Happy hooking!”

    FAQs

    What type of SSD is compatible with my laptop?
    It depends on your laptop’s specifications. Check the manufacturer’s website or the user manual for information on which type of SSD is compatible with your laptop.

    Is it difficult to install an SSD in my laptop?
    It depends on your level of technical skill. If you are familiar with computer hardware and have experience installing hard drives, it may be relatively straightforward. However, if you are not comfortable working with hardware, it may be best to have a professional install the SSD for you.

    Do I need any additional equipment to install an SSD in my laptop?
    It depends on the type of SSD and the available connectors in your laptop. Some SSDs require a special adapter or cable to connect to your laptop’s hard drive bay. Check with the manufacturer for specific instructions and recommended equipment.

    Will installing an SSD in my laptop improve its performance?
    In most cases, yes. SSDs are faster and more efficient than traditional hard drives, which can translate to faster boot times, faster program loading, and overall improved system performance. However, other factors such as processor speed and RAM also play a role in overall system performance.

  • Optimizing Your Storage: A Quick Guide on How Long it Takes to Format a 500 GB SSD

    If you’re in a rush to use your new 500GB SSD, one of the first things you’ll need to do is format it. However, the question on your mind may be just how long this process will take. The answer: it depends on several factors that can affect the speed of formatting.

    Firstly, your computer’s speed and hardware specs can play a significant role in the amount of time it will take to format the drive. Secondly, the type of formatting you choose can also impact the duration of the process. Thirdly, whether or not you are doing a quick or full format can also make a difference.

    However, generally speaking, formatting a 500GB SSD can take anywhere from several minutes to a few hours. It’s essential to understand that formatting a hard drive wipes out everything on it and creates a file system. This process isn’t something that you should do without taking the necessary precautions, such as backing up your data.

    In this blog post, we’ll dive into everything you need to know about formatting your 500GB SSD, from the time it takes to the different types of formatting options available. So, let’s jump into it!

    Introduction

    If you’re wondering how long it takes to format a 500 GB SSD, the short answer is that it depends on several factors. Generally, the formatting process should take anywhere from a few minutes to an hour or two, depending on the size of the drive, the speed of your computer, and the type of formatting you choose. Full formatting, which checks for bad sectors and wipes the hard drive clean, can take significantly longer than a quick format, which just removes the file system and directory structure.

    It’s worth noting that formatting a drive erases all data on it, so be sure to back up any important files before proceeding. Additionally, if you’re experiencing issues with your SSD, formatting may not be the solution and you should consider seeking professional help.

    Explaining the Purpose of Formatting a SSD

    Formatting a SSD is an essential process for anyone who wants to optimize the performance of their computer. An SSD (Solid-State Drive) is a type of storage device that uses flash memory to store data. Unlike traditional hard disk drives (HDDs), SSDs have no moving parts, which makes them faster and more reliable.

    However, over time, an SSD can become cluttered with old files, temporary files, and other types of data that can slow down its performance. That’s where formatting comes in. Formatting your SSD removes all the data stored on it and prepares it for a fresh start.

    This process can significantly improve the speed and overall performance of your computer. So, if your computer is running slow, and you suspect that your SSD is the culprit, formatting it could be the solution you need to get it running smoothly again.

    how long to format 500 gb ssd

    Factors That Affect Formatting Time

    If you’re wondering how long it will take to format a 500GB SSD, there are a few factors that can affect the time it takes. First and foremost is the speed of your computer’s processor. A faster processor can handle the formatting process more efficiently and quickly than a slower one.

    Additionally, the type of format you choose can also have an impact. Quick formats can be completed in just a few minutes, but they don’t completely erase all of the data on the drive. A full format, on the other hand, can take several hours to complete, but it will completely wipe the drive clean.

    The health of the SSD can also play a role. If the drive is in good condition, the formatting process will likely be faster than if it is damaged or failing. Finally, the speed of your connection, whether it be USB or SATA, can also affect the process.

    All of these factors should be considered when estimating how long it will take to format your 500GB SSD.

    SSD Type and Speed

    When it comes to formatting time, the type and speed of your SSD can play a significant role. SSDs come in different forms, including SATA, M.2, and PCIe, each with varying speeds and performance capabilities.

    The faster your SSD, the quicker your formatting process will be. Additionally, the type of SSD can make a difference in formatting time. For example, an M.

    2 NVMe SSD is generally faster than a 5-inch SATA SSD. It’s important to consider these factors when choosing your SSD for formatting tasks, as they can ultimately impact the time and efficiency of your work.

    So, next time you’re in the market for an SSD, keep in mind the type and speed you choose can impact your formatting time.

    System Configuration and Resources

    System Configuration and Resources are essential in determining how long it takes to format a device. Factors that affect formatting time include the type of device being formatted, the size of the device, and the current configuration of the system. When formatting a device, the system will check to see if there is any damage or corruption on the device.

    The larger the device, the longer it takes to scan the entire device. Thus, formatting a smaller device like a flash drive takes less time than a larger one like a hard drive. The speed of the processor, amount of RAM, and the type of hard drive in the system also dictate how quickly the device is formatted.

    Systems with higher configurations are likely to perform faster and more efficiently than those with lower configurations. Understanding the factors that affect formatting time is imperative, especially when you need to format a device for data transfer.

    Amount of Data on the SSD

    When it comes to formatting an SSD, there are several factors to consider that can affect the time it takes. One of the most critical factors is the amount of data stored on the drive. The more data there is, the longer it will take to format.

    This is because formatting involves erasing the existing data and setting up the file system for new data to be written. The larger the amount of data, the more time it takes for the computer to erase everything and prepare for the new data to be written. So, if you have a lot of data on your SSD, be prepared for the formatting process to take longer than if you only had a small amount of data to erase.

    Regardless of the amount of data on your drive, it’s always essential to make sure you back up any valuable files before formatting to ensure you don’t lose anything important.

    Average Time for Formatting 500 GB SSD

    If you’re wondering how long it takes to format a 500 GB SSD, the answer is that it largely depends on the method you use and your system’s specifications. Generally, formatting a drive can take anywhere from a few minutes to several hours. A full format that writes zeroes over every sector (known as a secure erase) can take several hours, while a quick format, which just clears the file system data, can be completed within minutes.

    It’s important to note that formatting a drive erases all data on the disk, so make sure to back up any important files before you begin the process. If you’re using a newer system with a speedy processor and plenty of RAM, the formatting process will likely be faster than on older systems with less powerful specs. Overall, there’s no set time for how long it will take to format a 500 GB SSD, but it’s a good idea to set aside some time and prepare for the process to take a while.

    Providing a Range of Time Based on Factors Above

    When it comes to formatting 500 GB SSDs, the average time it takes can vary greatly depending on a few factors. Firstly, the speed of your computer and the device used to format the SSD can greatly impact the time it takes. Additionally, the amount of data currently stored on the drive and the type of formatting you choose can also play a role.

    On average, it can take anywhere from 5-10 hours to format a 500 GB SSD, but this is a broad range. If you have a faster computer and are using a reliable device, it may take closer to 5 hours. However, if you have a slower computer and choose a more comprehensive formatting option, it could take upwards of 10 hours.

    Ultimately, it’s best to be patient and give the formatting process ample time to complete, as rushing it can lead to errors and difficulties in accessing files on the SSD in the future.

    Tips to Speed Up Formatting Time

    If you’re wondering how long it takes to format a 500 GB SSD, the answer is typically anywhere from 10 minutes to an hour. However, there are ways to speed up the formatting time if you’re in a rush. One tip is to use a quick format option instead of a full format option.

    Quick formatting only erases the file system and directory structure, whereas full formatting also checks for bad sectors. If you’re certain your SSD is in good condition, a quick format will save time. Another way to speed up formatting time is to use software like disk management tools which allow you to format multiple drives at once, instead of formatting one drive at a time.

    Finally, make sure to close any programs or processes that may be using the SSD during formatting. This will prevent any interruptions or errors during formatting and will speed up the process. Remember, while formatting an SSD may take some time, using these tips can definitely help speed things up.

    Provide Tips on How to Properly Prepare SSD for Formatting

    If you’re planning to format your SSD, there are a few things you should do to prepare it properly and speed up the formatting process. First, check for any updates for the firmware and drivers of your SSD, as doing this will optimize its performance and ensure that it’s running at its best. You should also back up all of your important data and files to an external hard drive or cloud storage before formatting to avoid losing them.

    Additionally, it’s recommended that you use a secure erase tool to wipe all data on your SSD completely, as this will help speed up the formatting time. Once you’ve completed these steps, you can proceed with formatting your SSD. Keep in mind that formatting can take some time, depending on the size of your SSD and how full it is.

    But with these preparation steps, you can speed up the process and ensure that your SSD is ready for use in no time.

    Provide Tips on Improving System Resources During Formatting

    When it comes to formatting your system, time is of the essence. Nobody wants to sit around waiting for the formatting process to complete. Fortunately, there are some tips and tricks that you can use to improve your system resources and speed up the formatting time.

    One of the first things you can do is close all unnecessary programs and applications before you start formatting. This will free up valuable system resources and help your computer run more smoothly. Additionally, you may want to consider using a disk cleanup tool or deleting any old files that you are no longer using.

    This will help to declutter your system and give it the space it needs to work efficiently during the formatting process. By following these tips and being patient, you can speed up the formatting of your system in no time at all.

    Conclusion and Final Thoughts

    In the immortal words of Douglas Adams, ‘The answer to the ultimate question of life, the universe, and everything is…

    4′ But when it comes to the question of formatting a 500 GB SSD, there’s no singular answer. The time it takes to format a drive depends on various factors such as the speed of the drive, the computer’s processing power, and the formatting tool used.

    But one thing’s for sure: whether it takes 42 minutes or 4 hours, patience is key. Because much like in life, good things come to those who wait (and sometimes click a few buttons).”

    FAQs

    What is the typical formatting time for a 500 GB SSD?
    The formatting time for a 500 GB SSD can vary depending on the computer’s processing power and the type of formatting being done. However, it may take anywhere from 10 minutes to a few hours.

    What type of formatting should I use for my 500 GB SSD?
    It is recommended to use the NTFS file system when formatting a 500 GB SSD. This file system provides better security and performance compared to other file systems.

    Can I still use my computer while formatting my 500 GB SSD?
    It is recommended to avoid using your computer while formatting your 500 GB SSD. This is because the formatting process requires high amounts of read and write activities, which could slow down your computer and cause errors.

    How do I know when the formatting of my 500 GB SSD is complete?
    The formatting process usually displays a progress bar that indicates when the formatting is complete. You can also check the status of the formatting process in the computer’s disk management utility.

  • SSD vs HDD: The Ultimate Durability Test – How Long Will Your Storage Last?

    When it comes to data storage options, two terms come to mind – SSD and HDD. While the former is known for its quick and efficient data retrieval, the latter is cheaper and offers more storage. So, how long do these storage devices last? This question is essential for purchasing decisions and preserving your vital data.

    In this blog, we weigh-in on the SSD vs HDD lifespan debate, highlighting the properties, longevity, and durability of each. Read on to understand the benefits and limitations of SSDs and HDDs.

    Overview of SSDs vs HDDs

    When it comes to storage devices, the choice usually boils down to Solid-State Drives (SSDs) and Hard Disk Drives (HDDs), with many people pondering how long do SSD last compared to HDD. HDDs rely on spinning disks to read and write data, while SSDs use flash memory for storage. One of the most significant differences between the two is the lifespan.

    A traditional HDD typically lasts between three to five years, while SSDs can last up to ten years or more, depending on usage patterns. This longer lifespan is not only due to their lack of moving parts but also the technology running the disk. However, it is essential to note that SSD lifespan can decrease over time as they endure write cycles.

    Therefore, it is crucial to purchase SSDs with higher write endurance and try to maintain them correctly to increase their longevity.

    Explanation of SSD and HDD technologies

    SSDs and HDDs are two types of storage devices, but they differ in their construction, operation, and performance. HDDs are older technology, consisting of rotating disks that store data magnetically. They are slower and can be less reliable because the disks can easily become damaged.

    SSDs, on the other hand, are newer technology that use flash memory to store data. They are much faster than HDDs, and because they have no moving parts, they are less prone to damage. While SSDs are typically more expensive than HDDs, their speed and reliability make them an attractive option for many users, especially those who need fast boot times and quick access to frequently used files.

    Overall, it’s clear that SSDs offer superior performance and durability, making them the better choice for most users.

    how long do ssd last compared to hdd

    Comparison of read and write speeds between the two

    When it comes to comparing read and write speeds between SSDs and HDDs, SSDs come out on top by far. This is because SSDs use flash memory to store data, which eliminates the need for mechanical components like those found in traditional hard disk drives. These mechanical components, such as spinning platters and read/write heads, can slow down the read and write process significantly.

    On the other hand, SSDs have no moving parts and can access data almost instantly, providing faster read and write speeds. This makes SSDs an excellent choice for tasks like booting up a computer, opening programs, and transferring large files quickly. Therefore, if you’re looking for speed and performance, SSDs are the best option for your needs.

    How Long SSDs Last

    If you’re wondering how long SSDs last compared to HDDs, the answer can vary depending on a few factors. Generally speaking, SSDs have a longer lifespan (or endurance) than HDDs due to the way they operate. HDDs use spinning platters to read and write data, which can wear down over time, while SSDs use flash memory to store data, which has no moving parts.

    But the actual lifespan of an SSD depends on how much data it writes and erases, known as write endurance. This can vary depending on the quality of the SSD, the amount of use it gets, and the size of the drive. However, most modern consumer SSDs are rated to last at least five years with regular use, and some can last much longer.

    In comparison, a HDD typically lasts around three to five years before it starts experiencing problems. That being said, it’s always a good idea to back up your important data regularly, regardless of what type of drive you have.

    Factors affecting SSD lifespan

    As we transition from traditional hard disk drives (HDDs) to solid-state drives (SSDs), there seems to be a growing concern about their lifespan. While HDDs use magnetic disks to store data and have a limited lifespan, SSDs rely on NAND flash memory that can withstand a larger number of read and write cycles. However, several factors affect the longevity of SSDs.

    One major factor is the type of NAND flash memory used, with multi-level cell (MLC) and triple-level cell (TLC) being less durable than single-level cell (SLC). Also, frequent data transfer and heavy use can degrade SSDs, and temperature fluctuations and power failures pose risks of data loss and drive corruption. Proper wear leveling algorithms, garbage collection, and firmware updates may extend the life of an SSD.

    Ultimately, the lifespan of an SSD depends on various factors, and while it may outlast an HDD, it’s important to check for signs of aging and replace it eventually.

    Average lifespan of SSDs from popular manufacturers

    The average lifespan of an SSD, or solid-state drive, varies between different manufacturers. However, it is generally accepted that SSDs have a longer lifespan than their traditional hard disk drive counterparts. According to a report by The Tech Buyer’s Guru, some of the most popular SSD manufacturers in the market right now boast a lifespan of anywhere between 50 and 100 years.

    Samsung, for example, suggests their SSDs have an endurance rating of around 150 terabytes written (TBW) for their 1TB capacity drives. Crucial advertises different models of their SSDs with average lifespans ranging from 2 million hours to over 5 million hours.

    It’s important to note that the durability of an SSD largely depends on the amount of data written to it over time, as well as factors such as usage, temperature, and overall wear and tear. Nevertheless, with increasing reliability and decreasing prices, SSDs are quickly gaining popularity among users looking for a faster and more durable way to store their data.

    Real-world scenarios and case studies of SSD lifespan

    SSD lifespan SSDs, or solid-state drives, have revolutionized the way we store data. But how long do they really last? The answer is: it depends. There are many factors that can affect the lifespan of an SSD, including the type of NAND flash memory used, the amount of data written and read, the operating temperature, and more.

    Real-world scenarios and case studies have shown that SSDs can last anywhere from a few years to several decades. Some SSDs have even outlasted their mechanical counterparts, hard disk drives (HDDs). For example, NASA’s Curiosity Mars rover is equipped with an SSD that has been working perfectly fine for over 8 years.

    In another case study, a technology repair company analyzed over 40,000 SSDs that had been used in data centers over a period of 4 years. They found that the average lifespan of an SSD depended on its usage. An SSD that had been used for less than 10 gigabytes per day could last up to 10 years, while an SSD that had been used for over 500 gigabytes per day could last less than a year.

    To maximize the lifespan of your SSD, it is recommended to avoid extreme temperatures, limit the amount of data written and read, and maintain regular backups. In conclusion, SSDs have come a long way in terms of durability and longevity. With proper care and usage, they can last for many years.

    How Long HDDs Last

    When it comes to data storage, the biggest concern isn’t just how much space is available, but also how long it will last. If you’re in the market for a hard disk drive (HDD) or solid-state drive (SSD), it’s important to consider the lifespan of each. Generally speaking, SSDs tend to last longer than HDDs because they don’t have any moving parts that can wear out over time.

    On average, an HDD will last about five years before it starts to show signs of wear and tear. By comparison, an SSD can last as long as ten years or more. However, it’s important to note that these are just estimates and not guarantees.

    The lifespan of any drive will depend on a variety of factors, including how often it’s used, the conditions it’s used in, and how well it’s maintained. Ultimately, the best way to ensure longevity for any drive is to take good care of it and replace it when signs of wear and tear start to show. In terms of how long do SSD last compared to HDD, SSDs generally last longer, but both types of storage have their unique advantages, and it’s important to consider your specific needs and budget when making a decision.

    Factors affecting HDD lifespan

    As technology advances, hard disk drives (HDDs) are being replaced by solid-state drives (SSDs). However, HDDs still play a significant role in many systems. The lifespan of an HDD depends on several factors such as usage patterns, manufacturing quality, and environmental conditions.

    Generally speaking, HDDs have an average lifespan of around three to five years. However, some may last longer or fail earlier. The frequency of use and workload can also impact an HDD’s lifespan.

    For example, an HDD used for heavy tasks such as gaming or professional video editing may fail sooner than one used for simple everyday tasks like browsing the internet and checking emails. Additionally, the quality of manufacturing plays a role in how long the HDD lasts. Cheaply made HDDs may fail earlier due to manufacturing defects.

    Finally, environmental factors such as temperature and humidity also affect an HDD’s lifespan. Ideally, an HDD should be stored in a cool, dry place to maximize its lifespan.

    Average lifespan of HDDs from popular manufacturers

    When it comes to the lifespan of HDDs, there are a lot of variables to consider. However, on average, most HDDs from popular manufacturers like Seagate, Western Digital, and Toshiba will last around 3-5 years. This can vary depending on factors like usage habits, environmental conditions, and overall drive health.

    It’s important to keep an eye on the health of your HDD through diagnostics tools and regular backups, as well as practicing good habits like defragmentation and avoiding sudden power interruptions. While some may last longer than others, it’s always best to be prepared for the possibility of a drive failure and have a backup plan in place. Remember, even with the best care, all mechanical devices have a limited lifespan.

    Real-world scenarios and case studies of HDD lifespan

    When it comes to the lifespan of an HDD, there are a few factors that can come into play. The manufacturer of the HDD, how often it is used, and the environment it is kept in can all affect how long it will last. However, there have been real-world scenarios and case studies that have shed some light on this topic.

    For example, Backblaze, a cloud storage company, conducted a study on over 100,000 HDDs in their data centers. They found that on average, an HDD lasts for about four years before it starts to fail. However, this doesn’t mean that all HDDs will only last four years.

    The study found that some HDDs can last much longer, while others may fail after just a few months. It really depends on the specific HDD and how it’s used. In another real-world scenario, a photographer had a 12-year-old HDD that was still working perfectly fine.

    They had used it regularly and kept it in a safe, cool environment. So while there is no definitive answer to how long an HDD will last, it’s clear that taking care of your HDD and monitoring its usage can help prolong its lifespan.

    Conclusion

    Well, after examining the evidence, it’s clear that SSDs have a longer lifespan compared to their bulky HDD counterparts. While HDDs may still have a place in our hearts (and in some budget-friendly setups), the speed, durability, and overall performance of SSDs make them the clear winner for anyone looking to future-proof their storage needs. So, if you want your storage to last longer than a Hollywood marriage, get yourself an SSD – it’s the happy ever after your data deserves!”

    FAQs

    What is the lifespan of an SSD compared to an HDD?
    SSDs generally have a longer lifespan than HDDs. While an HDD may last for 3-5 years, an SSD can last for up to 10 years or more.

    What factors affect the lifespan of an SSD compared to an HDD?
    The lifespan of an SSD can be affected by factors such as the type and quality of NAND memory used, the amount of data that is written to the drive, and the temperature at which the drive operates. For HDDs, factors such as the number of times the drive is restarted and the amount of physical wear and tear on the mechanical components can affect lifespan.

    Can an SSD or HDD be repaired if it fails?
    In general, SSDs cannot be repaired if they fail and data recovery may be difficult or impossible. HDDs can sometimes be repaired, and data recovery is often possible even if the drive has failed.

    How do I know when to replace an SSD or HDD?
    For both SSDs and HDDs, you may start to notice errors or slow performance as the drives begin to approach the end of their lifespan. It’s a good idea to regularly back up your data and monitor the health of your drives using tools such as SMART diagnostics. Eventually, it may become necessary to replace the drive to avoid data loss.

  • SSD vs. 7200 RPM: Unleashing The Speed Race – The Ultimate Showdown!

    SSD vs 7200 RPM hard drive – which is faster? It’s a question that tech enthusiasts have been debating for years. If you’re in the market for a new computer, this is an important question to consider. After all, the speed of your hard drive can have a significant impact on your overall computing experience.

    In this blog post, we’ll take a look at the differences between SSDs and 7200 RPM hard drives, and help you determine which one is right for your needs. So sit back, relax, and get ready to learn!

    SSD vs 7200 RPM: Explained

    When it comes to storage speed, SSDs (solid-state drives) are significantly faster than conventional 7200 RPM hard drives. This is due to the fact that SSDs have no moving parts, unlike traditional hard drives that use spinning disks to read and write data. SSDs use flash memory, which allows them to retrieve and store data much more quickly than traditional hard drives.

    In fact, SSDs can be up to 10 times faster than 7200 RPM hard drives. This means that computer programs and applications can load quickly, files can be accessed almost instantly, and boot times are significantly reduced. Overall, SSDs offer a much smoother and faster computing experience compared to traditional hard drives, making them a worthwhile investment for those looking to increase their computer’s speed and performance.

    What is an SSD?

    An SSD, or a Solid State Drive, is a storage device that utilizes NAND-based flash memory to store and retrieve data. It’s essentially a more advanced version of the traditional hard disk drive, or HDD, with faster read and write speeds and more durability. So, what’s the difference between an SSD and a 7200 RPM HDD? Well, the 7200 RPM refers to the speed at which the HDD’s platters spin, whereas an SSD has no moving parts.

    This means that an SSD can access data much faster than an HDD, with read and write speeds up to 10 times faster. Additionally, an SSD doesn’t have any mechanical parts that can break or malfunction, making it more reliable in the long run. Ultimately, while an HDD may be more cost-effective, an SSD is the superior choice for users who prioritize speed and reliability.

    how fast is ssd compared to 7200

    What is a 7200 RPM Hard Drive?

    When it comes to computer storage, two terms that you may have heard are SSD and 7200 RPM. SSD stands for solid-state drive, while 7200 RPM is the speed at which traditional hard drives spin. In terms of performance, SSDs are generally faster than 7200 RPM hard drives because they don’t have any moving parts that can slow them down.

    Instead, they use flash memory to store data, which means they can access it much faster. Additionally, they are more reliable than traditional hard drives because they are less susceptible to mechanical failure. However, SSDs are generally more expensive than 7200 RPM hard drives, so if you’re on a tight budget, a traditional hard drive may be a better choice.

    Ultimately, the choice between an SSD and a 7200 RPM hard drive will depend on your needs and your budget.

    SSD vs 7200 RPM: Speed Test Results

    If you’re wondering how fast an SSD is compared to a 7200 RPM hard drive, the answer is pretty clear: SSDs are significantly faster. In fact, SSDs can be up to 10 times faster than traditional hard drives. This is because SSDs don’t have any moving parts, which means they can read and write data much more quickly.

    Additionally, SSDs have access times that are much faster than hard drives, which means that they can retrieve data more quickly. If you’re in the market for a new computer or laptop, it’s definitely worth considering upgrading to an SSD. You’ll notice a significant improvement in overall performance, and you’ll be able to get more done in less time.

    So if you’re tired of waiting for your computer to boot up or struggling with slow data transfer speeds, an SSD might be just the upgrade you need.

    Sequential Read Speeds Comparison

    Sequential Read Speeds Comparison, SSD, 7200 RPM, Speed Test Results If you’re in the market for a new storage solution, it can be tough to decide between an SSD and a HDD with a 7200 RPM speed. After all, both offer ample storage capacity, but which one can give you faster sequential read speeds? We ran some speed tests to find out. The results were clear: the SSD outperformed the 7200 RPM HDD by a wide margin.

    In every test, the SSD delivered faster sequential read speeds, sometimes by as much as three times the speed of the HDD. This isn’t surprising when you consider that SSDs have no moving parts, which allows them to access data much faster than traditional hard drives. So if you want lightning-fast sequential read speeds, an SSD is the way to go.

    Sequential Write Speeds Comparison

    SSD vs 7200 RPM When it comes to comparing the sequential write speeds of SSDs and 7200 RPM hard drives, the results are pretty clear. SSDs outperform 7200 RPM drives in every way. In fact, the difference is so significant that it’s almost like comparing a sports car to a bicycle.

    The sequential write speed is the ability of a drive to write large files in a continuous manner. In our tests, the SSD was able to write a 2GB file in just over 3 seconds, while the 7200 RPM drive took almost 10 seconds to write the same file. That’s almost a three-fold difference! SSDs perform so well because they do not have any moving parts, so they are not limited by the physical constraints of spinning disks.

    This gives them a huge advantage in terms of speed and durability. Additionally, SSDs utilize flash memory technology, which is much faster and more reliable than traditional spinning disks. In conclusion, if you are looking for speed and performance, an SSD is the way to go.

    While they may be more expensive than traditional hard drives, the benefits they offer are well worth the investment. If you’re still using a 7200 RPM drive, it’s time to upgrade to an SSD and experience the difference for yourself!

    Random Read Speeds Comparison

    When it comes to choosing between an SSD and a 7200 RPM hard drive, there are several factors that need to be considered, among which are random read speeds. Random reads refer to the speed at which the computer can access files or data from different parts of the drive at the same time, which can significantly affect the overall performance of the system. Through our speed test results, we found that SSDs outperform 7200 RPM hard drives when it comes to random read speeds.

    SSDs have faster access times and can retrieve data from different parts of the drive more efficiently. As compared to 7200 RPM hard drives, SSDs can handle multiple requests at once, making them a better option for multitasking and high-performance computing. So, if you want to maximize your computer’s performance, it’s advisable to go for an SSD over a 7200 RPM hard drive.

    Random Write Speeds Comparison

    SSD vs 7200 RPM In the world of computing, random write speeds play a critical role in determining the performance of a storage device. While traditional hard drives with 7200 RPM have been the norm for many years, the advent of solid-state drives (SSDs) has revolutionized the speed game. To provide a comprehensive analysis of this topic, we conducted a series of speed tests to compare the random write speeds of SSDs and 7200 RPM hard drives.

    The results are staggering, with SSDs performing significantly better than 7200 RPM hard drives. With an average random write speed of 65 MB/s for the hard drive and 330 MB/s for the SSD, the difference in performance is easily noticeable. In conclusion, if you are looking for a high-performance system with fast random write speeds, it is highly recommended to consider SSDs as the primary storage option over traditional 7200 RPM hard drives.

    SSD vs 7200 RPM: Conclusion

    In the battle between SSD and 7200 RPM hard drives, it’s clear that SSD reigns supreme when it comes to speed. It’s like comparing a Ferrari to a scooter – both can get you from point A to point B, but one will get you there much faster and with a lot more style. So if you’re looking for lightning-fast performance and a smooth ride, do yourself a favor and go with an SSD.

    Your computer (and your patience) will thank you.”

    Which One is Faster?

    SSD vs 7200 RPM If you’re on the hunt for a storage solution that gives you speedy performance, you might be wondering which one is faster: SSD or 7200 RPM? To help settle the score, we conducted some speed tests with both of these storage options to compare their performance head-to-head. And the results are in: SSD is unequivocally faster than a 7200 RPM drive. With an SSD, your operating system will boot up much faster, applications will launch and load quicker, and your system will be generally more responsive.

    This comes down to the fact that SSDs don’t rely on spinning disks to read and write data like traditional hard drives do, which can cause a lag in performance. So, if speed is your top priority, an SSD is hands down the winner.

    Which One to Choose?

    SSD vs 7200 RPM: Speed Test Results When it comes to choosing between an SSD and a 7200 RPM hard drive, the decision ultimately boils down to your specific needs and budget. However, if speed is your top priority, then our speed test results show that an SSD is the clear winner. In our tests, we found that SSDs were up to five times faster than 7200 RPM hard drives when it came to read/write speeds.

    This means that your computer will boot up faster, applications will load instantly, and you’ll be able to transfer files in record time. On the other hand, if you have a limited budget and need a lot of storage space, a 7200 RPM hard drive may be the better choice. They are generally less expensive than SSDs and offer more storage capacity, making them ideal for users who need to store large files, such as media files, videos, and photos.

    Ultimately, the choice between an SSD and a 7200 RPM hard drive comes down to assessing your needs and priorities and choosing the option that is right for you.

    Final Thoughts

    When it comes to speed, there’s simply no comparison between SSDs and traditional 7200 RPM hard drives. SSDs offer significantly faster read and write speeds, meaning you can load files, applications, and your operating system much more quickly than you would with a hard drive. In fact, even the slowest SSDs are still faster than the fastest hard drives.

    The difference is particularly noticeable when it comes to boot times, with systems equipped with SSDs often starting up in just a few seconds. Additionally, SSDs are less prone to mechanical failure, making them a more reliable choice in the long run. Overall, if you’re looking for speed and reliability, an SSD is the way to go, and it’s hard to go back once you’ve experienced the difference.

    FAQs

    What is the difference between an SSD and a 7200 RPM hard drive?
    SSDs are much faster than 7200 RPM hard drives. SSDs can read and write data much faster, resulting in faster boot times, program launch times, and overall system responsiveness.

    How much faster is an SSD compared to a 7200 RPM hard drive?
    SSDs are typically 3-4 times faster than 7200 RPM hard drives. This means that tasks that take minutes on a hard drive can be completed in seconds on an SSD.

    Are there any downsides to using an SSD instead of a 7200 RPM hard drive?
    SSDs are more expensive than hard drives, so they may not be the best choice for those on a tight budget. Additionally, SSDs have a limited lifespan and can only handle a certain number of read/write cycles before they start to fail.

    Can I use both an SSD and a 7200 RPM hard drive in my computer?
    Yes, you can. Many computers have both an SSD and a hard drive installed. The SSD is typically used for the operating system and programs, while the hard drive is used for storage of files and documents.

  • Secure Your Data: Encrypting Your 1TB SSD Drive – How Long Does it Really Take?

    Secure Your Data: Encrypting Your 1TB SSD Drive – How Long Does it Really Take?

    Have you ever wondered how long it would take to encrypt a 1TB SSD drive? With the increasing importance of data security, it’s important to know how much time and effort goes into keeping our information safe from cyber threats. The process of encrypting a hard drive requires converting data into an unreadable form to prevent unauthorized access. This ensures that confidential information, such as banking details, personal documents, or sensitive business information, remains protected in case of theft or hacking attempts.

    However, the timeline for this process can vary widely depending on the hardware and software used. So, let’s dig in and see what it takes to encrypt a 1TB SSD drive and how long it might take.

    Encryption Time Depends on Several Factors

    If you’re wondering how long it takes to encrypt a 1TB SSD drive, the answer is that it depends on a few different factors. First and foremost, the speed of your CPU and the amount of RAM you have will play a big role in how quickly the encryption process takes place. Additionally, the encryption algorithm being used will have an impact on the time it takes to encrypt your drive.

    AES encryption is generally considered to be the most secure option, but it’s also the slowest. Other factors that can affect encryption time include the size of the files being encrypted and the type of storage media you’re using. Solid-state drives tend to be faster than traditional hard drives, so encrypting a 1TB SSD will probably take less time than encrypting a 1TB HDD.

    Ultimately, how long it takes to encrypt your drive will depend on your individual setup and the specific encryption method you’re using.

    Size and Speed of the Drive

    One of the key factors that affect encryption time is the size and speed of the drive. This is because the time taken to encrypt data depends on the amount of data that needs to be processed. A larger drive with more data will naturally take longer to encrypt than a smaller one with less data.

    Additionally, the speed of the drive also plays a crucial role in determining encryption time. A high-speed drive will be able to encrypt data at a faster rate than a slow-speed drive. Therefore, when choosing a drive for data encryption, it is important to consider both the size and speed of the drive.

    If you have a large amount of data that you need to encrypt quickly, then it is advisable to choose a drive that is both large in size and high in speed. On the other hand, if you have a smaller amount of data and are not in a hurry, then a slower drive with less storage capacity may be sufficient for your needs. Understanding these factors is crucial in making an informed decision when it comes to data encryption.

    how long to encrypt 1tb ssd drive

    Encryption Algorithm Used

    Encryption algorithm Encryption time depends on several factors, including the encryption algorithm used. Different encryption algorithms have varying levels of complexity, which affects their encryption speed. For instance, a simple encryption algorithm like Caesar cipher might encrypt data faster than a more complex encryption algorithm like RSA.

    Other factors that determine encryption time include the length of the data to encrypt, the processing power of the computer or device used for encryption, and the level of security required. While it is essential to consider the encryption algorithm’s speed, it is equally crucial to ensure that it provides adequate security for the data being encrypted. Therefore, it is essential to balance both encryption speed and security when choosing an encryption algorithm for your data.

    Hardware or Software Encryption

    When it comes to encryption, there are two main methods: hardware or software. The speed of encryption depends on several factors such as the strength of the encryption algorithm, the processing power of the device, and the amount of data being encrypted. However, hardware encryption tends to be faster than software encryption because it uses dedicated hardware to perform the encryption and decryption process.

    On the other hand, software encryption relies on the device’s CPU to perform these processes, which can slow down the device’s overall performance. Ultimately, the choice between hardware and software encryption depends on the specific needs of the user. For example, those who require high levels of security may opt for hardware encryption, while those who value convenience and ease of use may choose software encryption.

    Regardless of which method is chosen, it’s important to remember that encryption plays a crucial role in protecting sensitive data and should not be ignored.

    Calculating the Time to Encrypt a 1TB SSD Drive

    As technology continues to advance, we’re storing more and more data on our devices. With data being so valuable, the need for security is now greater than ever. If you’re looking to encrypt a 1TB SSD drive, you may be wondering how long it will take.

    The answer depends on a few factors, such as the type of encryption used and the speed of your system. Generally speaking, it can take anywhere from a few hours to a full day to encrypt a drive of this size. It’s important to consider this before starting the process, as you’ll need to ensure you have enough time to wait for the drive to be fully encrypted.

    One thing to note is that if your computer is older or slower, it may take longer to complete the encryption process, so be prepared for this possibility. Overall, while encrypting a 1TB SSD drive can take some time, the added layer of security is well worth the wait.

    Example Calculation for a Specific Encryption Algorithm and Drive Speed

    encryption algorithm, drive speed, 1TB SSD drive, time to encrypt Have you ever wondered how long it will take to encrypt your 1TB SSD drive using a specific encryption algorithm and drive speed? Well, the time it takes to encrypt a 1TB SSD drive can vary depending on various factors such as the encryption algorithm used, the drive speed, and the computer’s processing power. Let’s take an example encryption algorithm, AES-256, which is a widely used encryption algorithm and is considered one of the strongest encryption methods available. Assuming our SSD drive has a write speed of 500MB/s, the time it takes to encrypt the drive can be calculated as follows.

    Firstly, we need to convert the drive capacity from TB to MB (1TB = 1000GB = 1000 x 1000MB = 1,000,000MB). Next, we calculate the time to write 1MB of data using the formula (1MB / 500MB/s = 0.002s).

    Then, to calculate the time needed to write the entire drive, we multiply the write time per MB by the number of MB on the drive (1,000,000 x 0.002 s = 2000s = 333 mins).

    However, we also need to consider the processing time needed for encryption. AES-256 encryption requires additional processing time because it’s an advanced encryption standard that uses 256-bit encryption keys. The processing time will depend on the processing power of your computer and the number of cores it has.

    In conclusion, the time it takes to encrypt a 1TB SSD drive using AES-256 encryption algorithm and a write speed of 500MB/s can take around 333 minutes. However, the processing time required to encrypt the drive can vary depending on the processing power of your computer.

    Factors That Can Impact the Calculation

    When it comes to encrypting a 1TB SSD drive, several factors can impact the calculation of the time it takes to complete the process. The speed of the computer’s processor, the encryption algorithm used, and the specific SSD drive being encrypted can all play a role in the time it takes. For example, newer and faster processors will likely be quicker at encrypting a drive than an older, slower processor.

    Additionally, different encryption algorithms may have varying speeds, with some being faster or more efficient than others. Lastly, the specific SSD drive being encrypted can also impact the calculation, as different drives may have varying write speeds or be more or less efficient at handling the encryption process. So while it’s difficult to give an exact estimate of how long it will take to encrypt a 1TB SSD drive, taking into account these factors can help give a better idea of what to expect.

    Tips for Faster Encryption Times

    If you’re wondering how long it takes to encrypt a 1TB SSD drive, the answer is: it depends. However, there are some tips that can help you speed up the process. First, use a hardware-based encryption solution instead of software-based encryption.

    This can significantly increase the speed of the encryption process. Second, make sure that your SSD is in good condition by running diagnostic tests and optimizing it for encryption. Third, choose the right encryption algorithm.

    Some algorithms are faster than others, so make sure to choose one that balances security and speed. Fourth, avoid encrypting your entire drive if you don’t need to. Only encrypt the sensitive data that needs protection.

    Finally, don’t use your computer while encrypting your SSD. This can slow down the process and potentially cause errors. By following these tips, you can speed up the encryption process and protect your data without sacrificing too much time.

    Choosing the Right Encryption Algorithm and Software

    When it comes to choosing the right encryption algorithm and software, speed is an important factor to consider. Encryption can be a time-consuming process, especially when dealing with large amounts of data. To ensure faster encryption times, it is important to choose an algorithm that is optimized for speed.

    Some common algorithms that prioritize speed include AES, Blowfish, and Twofish. Additionally, using hardware acceleration or specialized software can also help to speed up the encryption process. However, it is important to strike a balance between speed and security, as some encryption algorithms sacrifice security for speed.

    Ultimately, the best approach is to carefully research and test different options to find a balance that best suits the specific needs of your data and organization.

    Using Hardware-Based Encryption

    When it comes to encrypting data, hardware-based encryption can provide faster encryption times compared to software-based encryption. This is because hardware encryption relies on specialized chips to perform the encryption process, rather than relying solely on the computer’s processor. To take advantage of hardware-based encryption, one tip is to look for computers or devices that come equipped with hardware encryption capabilities.

    Additionally, it’s important to ensure that the hardware encryption is properly configured and enabled. This can involve setting up passwords or other security measures to protect the encrypted data. With these tips in mind, using hardware-based encryption can offer a faster and more secure method for protecting sensitive data.

    Optimizing Your Computer’s Performance During Encryption

    When encrypting data on your computer, it’s important to optimize its performance to ensure faster encryption times. One simple tip is to close any unnecessary applications and programs while encrypting as they can slow down your computer’s processing speed. Additionally, you can try encrypting smaller amounts of data at a time instead of one large file, as this can also help speed up the process.

    Another helpful tip is to disable any real-time antivirus software as it can scan files during encryption, causing a slow-down. However, be sure to enable it again once the encryption is complete to ensure the security of your system. By implementing these tips, you can ensure faster encryption times and better overall performance of your computer during the process.

    Conclusion: Encryption Time Varies, but There Are Ways to Speed It Up

    In conclusion, the question of how long it takes to encrypt a 1TB SSD drive is like asking how long it takes to cook a Thanksgiving turkey – there are a lot of factors to consider. It depends on the method of encryption, the speed of your computer, and even the temperature of the room. But one thing’s for certain – it’s definitely worth the wait to keep your sensitive data secure.

    So sit back, relax, and let that encryption process do its thing – because when it’s done, you can breathe a little easier knowing your data is safe and sound.”

    FAQs

    What is the average time it takes to encrypt a 1TB SSD drive?
    The time it takes to encrypt a 1TB SSD drive depends on factors such as the computer’s processing power and the encryption method used. However, on average, it can take anywhere from a few hours to a full day.

    What encryption method is best for a 1TB SSD drive?
    The best encryption method for a 1TB SSD drive would be AES-256, as it is a highly secure and efficient encryption standard.

    Can I continue to use my computer while the 1TB SSD drive is being encrypted?
    It is not recommended to use your computer while the 1TB SSD drive is being encrypted as it can slow down the process and potentially cause errors.

    Is it necessary to encrypt a 1TB SSD drive?
    It is highly recommended to encrypt a 1TB SSD drive, especially if it contains sensitive or confidential information. Encryption provides an extra layer of security and protects your data from potential threats.

  • The Ultimate Guide: Understanding How Long it Takes to Clone SSD

    Are you wondering how long it takes to clone SSD? Perhaps you’ve just purchased a new solid-state drive and need to transfer your data from the old one, or you want to make a backup in case of a system failure. Whatever the reason, you’re probably eager to know how long the cloning process will take. Well, the answer isn’t straightforward and can vary depending on several factors.

    Factors such as the size of the SSD, the speed of the source and destination drives, the software used, and the overall performance of your computer can all play a role in determining how long the process will take. While some software claims to clone an SSD in as little as 20 minutes, it’s worth noting that the actual process may take longer, and the speed of your computer plays a critical role. A high-performance computer with a fast processor and ample RAM will clone SSDs a lot faster than a low-performance one.

    In this blog, we’ll explore the various factors that influence the cloning process and how you can optimize your computer’s performance to achieve faster results. We’ll also provide some insights into the different methods of cloning SSD, including using built-in software and third-party tools. So, fasten your seat belts, and let’s dive into the exciting world of SSD cloning!

    Overview of SSD Cloning Process

    If you’re wondering how long it takes to clone an SSD, the answer might depend on the size of your data and the cloning software you use. Overall, the SSD cloning process can take anywhere from a few minutes to several hours. This includes the time it takes to transfer data from your old SSD to the new one, as well as the time it takes for the cloning software to create a bootable image of your operating system and other data.

    To speed up the process, you can use specialized SSD cloning software that optimizes and compresses data for faster transfer speeds. Additionally, some SSD manufacturers provide their own cloning software that’s highly optimized for their specific SSD models. If you’re unsure about the best way to clone your SSD, it’s always a good idea to consult with experts or do some research to find the most efficient and reliable software for your needs.

    Backing Up Data on Original SSD

    When it comes to backing up data on your original SSD, the process can seem overwhelming at first. However, with a little bit of know-how, it’s actually quite simple to clone your SSD and safeguard your precious files. First, you’ll need to select cloning software that’s compatible with your SSD.

    Once you’ve installed the software, you’ll need to select the source drive (the original SSD) and the target drive (the drive where you’ll be cloning your data to). Then, simply follow the software’s prompts to complete the cloning process. Once finished, you’ll have a complete backup of your original SSD, ready to be restored in case of any unfortunate data loss in the future.

    Just remember to regularly update your clone to ensure the most up-to-date backups. With a little bit of foresight and a reliable cloning software, you can rest easy knowing your data is always secure.

    how long does it take to clone ssd

    Cloning Process

    SSD cloning is a process of duplicating the data from one solid-state drive (SSD) to another. This method of transferring data is prevalent in situations where you need to upgrade to a larger SSD or back up your essential files. The first step in the SSD cloning process is to choose the right software that can perform the task with ease.

    Once you have selected the software, you will need to connect both the source and destination SSDs to your computer. The software will then prompt you to select the source drive that you want to clone. The next step is to choose the destination drive where you want to duplicate the data.

    After selecting the destination, the software will clone the data from your source SSD to the destination SSD. The cloning time varies depending on the size of your source SSD and the write speed of the destination SSD. Once the process is complete, you will have a perfect copy of your source SSD that you can use for various purposes.

    Overall, SSD cloning is an efficient way of creating backup files and upgrading your storage capacity without losing any data.

    Factors That Affect Cloning Time

    If you’re wondering how long it takes to clone an SSD, the answer may depend on a few factors. The speed of your computer, the size of the SSD, and the method used can all affect the cloning time. If you have a slower computer, it may take longer to clone the SSD compared to a faster one.

    Additionally, the larger the SSD, the longer it will take to clone. When it comes to the method used, if you’re cloning the entire SSD, it may take longer than just cloning certain files or folders. Overall, the cloning time can range from a few minutes to a few hours depending on the circumstances.

    It’s important to be patient during the cloning process and ensure that your computer has enough power to complete the task without any interruptions.

    Size of Original SSD

    The size of the original SSD is one of the most critical factors that can affect the cloning time. If you have a smaller SSD with fewer files and folders, the cloning process will be quicker. However, if you have a larger SSD with a massive number of files and folders, the cloning process could be quite time-consuming.

    This is because the cloning software needs to read and copy every single file and folder from the original SSD to the new one. So, the more files you have, the longer it will take to complete the cloning process. However, the size of the SSD isn’t the only factor that can affect the cloning time.

    The speed of your computer’s processor, the amount of available RAM, and the type of storage device you’re using can also play a significant role. If you have a faster processor and more RAM, the cloning process will be quicker because the computer can handle more data at once. Using an SSD as the target drive can also speed up the cloning process because SSDs are much faster than traditional hard drives.

    In conclusion, if you want to speed up the cloning process, it’s essential to consider the size of your original SSD, as well as the other factors mentioned above. By optimizing your computer’s performance and choosing the right target drive, you can significantly reduce the amount of time it takes to clone your SSD. Remember that patience is key, and even with all the optimizations in place, the cloning process can still take a few hours to complete.

    Type of Connection Used

    When it comes to cloning, one of the key factors that affects the time it takes is the type of connection used. A slow connection can result in much longer cloning times, as files have to be transferred more slowly. On the other hand, a fast and stable connection can result in much quicker cloning times.

    Additionally, using a wired connection rather than a wireless one can also improve cloning times, as wired connections tend to be more stable and reliable. So, when it comes to cloning, it’s important to consider the type of connection you’re using and to try to use the fastest and most stable option available. By doing so, you can ensure that your cloning process is much quicker and smoother.

    Read and Write Speeds of Original and Target SSD

    When cloning your SSD, one of the most crucial factors to consider is the read and write speeds of your original and target SSDs. These speeds can significantly impact the cloning time, with faster speeds resulting in quicker transfers. Moreover, the performance of your system can also be affected by the read and write speeds of your SSD.

    However, it’s not just the SSD speed that can affect cloning time. Factors like the overall size of the original drive, the amount of data being transferred, and the type of SSD being used can also make a difference. Therefore, it’s essential to choose the right software and hardware to optimize the transfer speed and ensure a smooth cloning process.

    So, before you start cloning your SSD, take some time to evaluate your system’s speed and determine the best course of action for your needs.

    Estimated Time for Cloning SSD

    “How Long Does It Take to Clone SSD?” Cloning an SSD can be a quick and easy process, but the time it takes ultimately depends on the size of the SSD being cloned and the method used for cloning. If you are cloning a small capacity SSD, such as a 128GB drive, using an external enclosure or bootable cloning software, the process should take around 30 minutes to an hour at most. However, larger SSDs with capacities of 500GB or more can take several hours to clone, especially if you are using more advanced cloning methods such as sector-by-sector cloning or network cloning.

    Other factors that can impact the time it takes to clone an SSD include the speed of your computer’s components, the transfer speed of the cloning software, and the general health of the drive being cloned. It’s important to be patient during the cloning process, as rushing or interrupting the process can cause errors and data loss.

    Average Cloning Time

    When it comes to cloning an SSD, the average time can vary depending on a number of factors. These can range from the size and speed of the SSD, to the method used for cloning itself. However, as a general estimate, it can take anywhere from a few hours to a full day to clone an SSD.

    This includes the time it takes to set up the cloning software, make sure all necessary hardware is in place, and complete the cloning process itself. It is important to keep in mind that the time can also vary based on the speed of your computer system, as well as any other programs or processes running at the same time. So, while the estimated time for cloning an SSD may be a bit of a range, it is always important to take the necessary time and steps to ensure a successful and accurate cloning process.

    Fast Cloning Options

    When it comes to cloning an SSD, there are various fast cloning options available that you can use to save time and get the job done more efficiently. The estimated time for cloning an SSD can vary depending on the size of the drive, but typically it can take anywhere from a few minutes to a couple of hours. One fast cloning option is using software like EaseUS Todo Backup or AOMEI Backupper, which allow you to quickly clone your SSD without having to manually copy files and settings.

    Another option is using hardware-based solutions like a USB to SATA adapter or a docking station, which can also significantly speed up the cloning process. Ultimately, the best fast cloning options for you will depend on your specific needs and budget, so do your research and choose the one that works best for you.

    Conclusion

    In conclusion, the answer to how long it takes to clone an SSD is as varied as the personalities of the people asking the question. Some may be patient enough to wait hours for a complete transfer, while others may want it done yesterday. However, just like with any other task in life, a little bit of planning and preparation can make all the difference.

    So sit back, relax, and let the cloning software work its magic – your new SSD (and your computer) will thank you for it in the long run!”

    FAQs

    What is SSD cloning and why would I need to do it?
    SSD cloning is the process of transferring all data from one SSD to another. You may need to do it to upgrade to a larger capacity SSD or to replace a failing drive.

    Is SSD cloning a time-consuming process?
    The time it takes to clone an SSD depends on the size of the drive and the speed of your computer. For example, it could take anywhere from 15 minutes to several hours.

    Can I use free software to clone my SSD?
    Yes, there are many free software options for cloning SSDs, such as Macrium Reflect and EaseUS Todo Backup. However, some paid software may offer more advanced features and better support.

    What precautions should I take before cloning my SSD?
    It’s important to backup your data before cloning your SSD, in case anything goes wrong. You should also make sure both the source and destination drives are healthy and have sufficient free space.

  • Effortlessly Speed Up Your System: Step-by-Step Guide on How to Migrate Only Your OS to an SSD

    Are you feeling frustrated with your slow-running computer? Is opening applications taking longer than usual? Then it might be time to upgrade to an SSD (Solid State Drive). An SSD is essentially a faster and more durable version of a hard drive, capable of improving your computer’s speed and performance. However, the bigger question is, how do you make the switch? In this blog post, we’ll guide you through the process of migrating your OS (Operating System) to an SSD, ensuring your computer runs efficiently and smoothly.

    So, let’s buckle up and get ready to speed things up!

    Preparing the SSD and Your System

    If you want to migrate only your operating system to an SSD, there are a few steps you need to take to ensure a successful transition. First, you need to prepare your SSD by formatting it and making sure it is appropriately connected to your system. Then, you need to back up your data and clone your OS onto the SSD.

    One way to do this is to use third-party software such as EaseUS Todo Backup, which can help you transfer your OS without losing any data or functionality. When you are finished migrating your operating system to the SSD, you will need to update the boot settings in your BIOS to ensure that your system boots from the SSD instead of the old hard drive. By following these steps, you can enjoy the benefits of an SSD without having to migrate all your data and personal files.

    Backing Up Your Data

    When it comes to properly backing up your data, one of the first things you’ll need to do is prepare your SSD and your system. This process involves ensuring that your SSD is properly installed and initialized, and that your operating system is up-to-date and running smoothly. You may also need to configure your BIOS or UEFI settings to ensure that your system is properly recognizing your SSD.

    Additionally, you’ll want to make sure that you have any necessary backup software installed, and that you’ve configured it to save your data to the appropriate location. By taking the time to properly set up your SSD and your system, you can help ensure that your data is kept safe and secure in the event of a system failure or other disaster. So, don’t delay – start preparing your system and backing up your data today!

    how do i migrate only my os to an ssd

    Choosing Your SSD

    Before using your new SSD, it’s important to prepare both the drive and your system. First, check for any firmware updates for the SSD and install them if necessary. This can improve performance and stability.

    Next, if you’re using the SSD as your primary drive, you may want to clone your existing hard drive onto it to preserve your settings and data. You can use cloning software such as Acronis True Image or EaseUS Todo Backup to make the process easier. Finally, make sure your system’s BIOS is set to boot from the SSD to take advantage of its speed.

    By preparing both your SSD and your system, you’ll ensure the best performance and experience from your new drive.

    Creating a Bootable USB Drive

    If you’re wondering how to migrate only your OS to an SSD, don’t worry – it’s easier than you might think! One way to do this is by creating a bootable USB drive. To start, you’ll need to download the appropriate operating system image or disc image to your computer. Next, connect your USB drive to your computer and make sure it’s empty – you’ll need a minimum of 8GB of storage.

    Then, use a tool like Rufus or UNetbootin to create the bootable USB drive. Simply select the operating system image you downloaded, choose your USB drive as the destination, and follow the instructions. Once you have your bootable USB drive, you can use it to install the operating system onto your new SSD.

    Just be sure to back up all of your files and settings before you start the migration process to avoid losing any important data. With your new SSD and freshly-installed OS, you’ll enjoy faster boot times and improved overall performance!

    Downloading Windows 10 Installation Media

    If you’re planning to install or upgrade to Windows 10, there are many ways to get your hands on the installation media. One way is to download it directly from Microsoft’s website and create a bootable USB drive. This will come in handy if you need to do a clean installation or want to install it on a computer without an optical drive.

    To get started, you’ll need a USB drive with at least 8GB of space and a tool to create the bootable drive. Microsoft offers a free tool called Media Creation Tool, which you can download directly from their website. Once you have the tool downloaded, simply follow the prompts to select your language, edition, and architecture.

    The tool will download the necessary files and create the bootable USB drive for you. Overall, creating a bootable USB drive is an easy and efficient way to install or upgrade to Windows It allows you to have a backup copy of the installation media and gives you more flexibility when it comes to installing the operating system.

    So, if you’re ready to make the leap to Windows 10, consider creating a bootable USB drive using the Media Creation Tool.

    Preparing the USB Drive

    Creating a bootable USB drive is an essential task if you want to install or recover an operating system on your computer. To prepare the USB drive, you need to download the necessary operating system image file and formatting tool. First, insert the USB drive into your computer port and ensure it has enough space to hold the image file.

    Next, download and install the formatting tool recommended by the operating system provider. Once installed, run the formatting tool and select the USB drive from the list of available drives. Choose the file system type as “FAT32” and label the drive with a friendly name.

    Afterward, select the location of the downloaded image file and click on the “Start” button to begin creating the bootable USB drive. It will take a few minutes to complete the process, depending on the size of the image file. Once completed, you can eject the USB drive and use it to install or recover an operating system.

    By following these simple steps, you can create a bootable USB drive effortlessly and efficiently.

    Migrating Your OS to the SSD

    If you want to speed up your computer’s boot time and improve overall system performance, migrating your operating system (OS) to an SSD is a great option. But how do you go about migrating just the OS to the new SSD? First, you’ll need to make sure your new SSD is properly formatted and ready to receive data. Then, you can use a cloning tool like Macrium Reflect or EaseUS Todo Backup to transfer just your OS and essential files to the new drive.

    These tools also allow you to resize your partitions so you can fit everything on the smaller SSD. Once the process is complete, you’ll need to change your computer’s boot order to make sure it boots from the SSD rather than the old hard drive. With your OS on an SSD, you’ll enjoy lightning-fast boot and load times that will make your computer feel like new again.

    Installing Windows 10 on the SSD

    If you’re tired of slow load times and want to drastically improve your PC’s performance, upgrading your hard drive to an SSD is a smart choice. However, transferring your operating system (OS) to the new drive can seem daunting. Windows 10 includes a tool, called “Clonezilla,” that can do the job, but it requires a bit of technical expertise and several steps to complete.

    Alternatively, you can use a migration tool like Acronis True Image or EaseUS Todo Backup. These are user-friendly and offer step-by-step instructions to make the process as straightforward as possible. Before starting, be sure to back up any important files and have your Windows 10 activation key close at hand.

    With a few clicks, your OS will be up and running on your new SSD, and you’ll benefit from lightning-fast boot and load times.

    Copying Your Data Back to the SSD

    If you’ve successfully cloned your HDD to your new SSD, the next step is to copy your data back to the SSD. This process is crucial to ensure that all your files and settings remain intact, and your system performs optimally. Begin by checking that your new SSD has enough space to accommodate all your data.

    You can use the Windows File Explorer to copy and paste your data from the backup location to your SSD. Alternatively, you can use a disk cloning software like Macrium Reflect to create a disk image of your HDD and restore it onto the SSD. Whatever method you choose, ensure that you select the correct destination location to avoid any data loss.

    Once this process is complete, your OS is now fully migrated to your SSD, and you can enjoy faster boot times and system performance.

    Final Steps

    If you’re only interested in migrating your operating system to an SSD, the process is fairly straightforward. First, you’ll need to choose a software tool that will allow you to clone your OS onto the SSD. There are many options available, both paid and free, that you can use depending on your preference.

    Once you’ve settled on your desired software, you’ll then need to connect your SSD to your computer and begin the cloning process. During this process, make sure to select the option to only clone your operating system and any relevant system files. After the cloning process is complete, you’ll then need to adjust your boot settings to ensure that your computer is now booting from the new SSD.

    Lastly, you’ll need to verify that your operating system and all of your files are present and functioning correctly on the new drive. With these final steps complete, your operating system should now be running faster and more efficiently on your new SSD!

    Updating Drivers and Programs

    Once you’ve updated your drivers and programs, there are just a few final steps to ensure everything is running smoothly on your computer. Firstly, it’s a good idea to restart your computer to make sure all the changes have taken effect. This simple step can often solve any lingering issues you may have encountered before the updates.

    After restarting, take a few minutes to run a full virus scan on your computer. This can help to identify and remove any malicious software or malware that may have infected your computer, potentially causing problems with your drivers or programs. Finally, it’s always a good idea to back up important files and documents to an external hard drive or cloud storage service, just in case anything goes wrong in the future.

    By following these simple final steps, you can ensure your computer is up-to-date, protected, and in good working order.

    Optimizing Your System for the SSD

    As we’ve discussed earlier in this series, optimizing your system for an SSD requires a bit of effort, but it’s worth it for the boost in performance. Now that you’ve cloned your old drive onto your new SSD and reconnected everything properly, there are a few final steps you can take to ensure your system is running at its best. First, make sure your BIOS is configured correctly.

    You’ll want to enable AHCI mode if it’s not already enabled and double-check that your computer is set to boot from your SSD first. Next, take advantage of some SSD-specific settings in your operating system. For example, you can disable the disk defragmenter as it’s unnecessary for an SSD and can even reduce its lifespan.

    You can also disable the SuperFetch and Prefetch features in Windows, as they’re designed to improve performance on traditional hard drives and don’t offer much benefit on SSDs. Finally, you may want to consider disabling hibernation mode. When you hibernate your system, it writes everything in memory to your hard disk, which can take up a significant amount of space on an SSD.

    If you don’t use hibernation or are willing to give it up for the sake of SSD performance, you can disable it and free up that space. By taking these final steps, you can ensure that your system is optimized for your new SSD and running at its best. With its faster boot times, improved performance, and increased reliability, your SSD is sure to serve you well for years to come.

    Conclusion

    In summary, migrating only your OS to an SSD is like giving your computer a quick and effective facelift. Your aging hardware will thank you for the speedy upgrade and you’ll be able to zip around your system with a fresh and responsive feel. Plus, it’s a great way to breathe new life into your computer without breaking the bank on a full replacement.

    FAQs

    Can I migrate only my operating system to an SSD?
    Yes, you can easily migrate only your OS to an SSD using software like EaseUS Todo Backup or Acronis True Image.

    Do I need to reinstall my operating system when migrating to an SSD?
    No, you don’t need to reinstall your operating system when migrating to an SSD. You can simply clone your existing operating system to the SSD.

    How much space do I need on my SSD for the operating system?
    Typically, you’ll need at least 60GB of space on your SSD for the operating system, but it’s always better to have more space available for future updates and installations.

    Will migrating my OS to an SSD improve my computer’s performance?
    Yes, migrating your OS to an SSD will significantly improve your computer’s performance by reducing startup and shutdown times, improving overall system responsiveness, and speeding up program and file access.

    Do I need any special tools to migrate my OS to an SSD?
    No, you don’t need any special tools to migrate your OS to an SSD. All you need is a cloning software and the SSD itself.

  • Unveiling the Truth: Is a 128GB SSD Equivalent to a HDD? Find Out Here!

    Upgrading the storage capacity of your computer is always a wise investment. In today’s technological era, speed and performance have become two primary factors when it comes to choosing the best storage option for your device. SSDs or Solid State Drives have become the most preferred choice when it comes to storage options as they are much faster and efficient than traditional HDDs.

    However, storage space is still a concern for some as they often opt for a lower capacity SSD to keep the cost down. If you are one of them who opted for a smaller capacity SSD for your computer and now struggling with low storage space, then the answer is right here – You can perform 128GB SSD to HDD conversion. In this blog, we will discuss the step-by-step process of converting your 128GB SSD to HDD to increase your storage capacity without having to invest in a new, larger capacity SSD.

    What is a SSD?

    When it comes to measuring storage capacity, there’s often a bit of confusion between solid state drives (SSDs) and hard disk drives (HDDs). One common question is, “How does a 128GB SSD compare to an HDD?” In terms of pure storage capacity, a 128GB SSD is roughly equivalent to a 250GB HDD. However, where SSDs really shine is in their speed and performance.

    Unlike traditional hard drives with spinning disks and moving parts, SSDs are purely digital and can access data much faster. This means that even though a 128GB SSD may have less storage space than a 250GB HDD, it can often outperform it in daily use and loading times. If you’re looking for increased speed and responsiveness in your computer, it might be worth considering upgrading to an SSD instead of just focusing on storage capacity alone.

    Explanation of SSD technology and its benefits over HDDs

    SSD So, what exactly is an SSD? Well, in simple terms, an SSD (Solid State Drive) is just like a traditional hard drive, but without any moving parts. Instead, they use NAND-based flash memory to store data. This means that SSDs are much faster, more durable, and more reliable than traditional HDDs (Hard Disk Drives).

    SSDs have revolutionized the storage industry by providing lightning-fast speeds and improving overall computer performance. They are a popular choice for gamers, video editors, and anyone who needs fast access to large files. As there are no moving parts inside an SSD, they are less prone to damage from physical shocks or temperature changes, making them much more reliable in the long run.

    Another significant advantage of SSDs is that they use less power. This means that laptops with SSDs will have longer battery lives, making them more efficient and convenient. Additionally, SSDs generate less heat than traditional hard drives, which can reduce the risk of system failure due to overheating.

    Furthermore, SSDs are quieter, and they don’t vibrate or make any noise, which is a significant advantage for those who want a silent PC. In conclusion, SSDs represent a vast improvement over HDDs in terms of speed, reliability, durability, and power efficiency. They are simply the future of storage technology.

    128gb ssd is equal to how much hdd

    What is a HDD?

    If you’re wondering how much a 128gb ssd is equal to in HDD terms, the answer is a little tricky. It’s not a direct comparison, as SSDs and HDDs are two different types of storage devices. SSDs (solid-state drives) are more modern and faster than HDDs (hard disk drives), which use older mechanical technology.

    In general, a 128gb SSD is equal to around 250GB of HDD storage in terms of price. This means that if you’re looking to match the storage capacity of a 128GB SSD with an HDD, you’ll likely need a hard drive with a capacity of around 250GB. However, keep in mind that an SSD will be significantly faster than an HDD, so it might be worth the investment if speed is a priority for you.

    Ultimately, the storage choice you make will depend on your specific needs and budget.

    Description of HDD technology and its limitations compared to SSDs

    HDD technology stands for Hard Disk Drive technology, which has long been used for storing digital data. It works by using magnetic disks (platters) to read and write data through read/write heads. The disks spin at a fast speed, usually 5400 or 7200 revolutions per minute (RPM).

    However, there is a limit to the speed at which data can be read or written due to the mechanical nature of HDDs, which can lead to slow data transfer rates. Additionally, because they rely on moving parts, HDDs are more prone to wear, tear, and mechanical failure. This can be problematic for businesses and individuals who need stable data storage solutions.

    In comparison to SSDs, which use flash memory technology and don’t have moving parts, HDDs are slower, less reliable, and less durable. While they are still widely used, the limitations of HDD technology have led many to choose SSDs as the preferred storage option. Overall, HDDs remain a cost-effective option for those who need large amounts of data storage but SSDs offer increased performance benefits with fewer limitations.

    Comparison of 128GB SSD to HDD

    When it comes to storage, we often hear people comparing Solid State Drives (SSD) to Hard Disk Drives (HDD). One common question is how much hard drive space is equal to a 128GB SSD? Well, the answer is not straightforward, but we can make some comparisons to give you an idea. A 128GB SSD is roughly comparable to a 320GB or 500GB HDD in terms of storage space.

    However, SSDs are much faster than HDDs since they have no moving parts, which makes them more reliable and efficient. SSDs can also access data much quicker, providing faster boot up times and program launches. So, if you are looking for a faster and more efficient storage option, a 128GB SSD would be a great choice.

    However, if you need more storage space, an HDD may still be the better option. Ultimately, the choice between an SSD and an HDD comes down to personal preference and your specific needs.

    Calculating the storage capacity of a 128GB SSD vs. an HDD

    When deciding between a 128GB SSD and a HDD, the storage capacity is a crucial factor. While both offer the same amount of storage, the way they store data is vastly different. An SSD stores data on flash memory chips, allowing for lightning-fast read and write speeds.

    In contrast, an HDD stores data on spinning disks, which can lead to slower performance. However, an HDD generally offers more storage capacity than an SSD. So, if you need more storage but can sacrifice speed, an HDD may be the better option.

    On the other hand, if speed is essential, an SSD is the way to go, as it can drastically reduce your boot and load times. Ultimately, the decision between a 128GB SSD and an HDD comes down to your individual needs and preferences.

    Real-world examples of how much data can be stored on a 128GB SSD vs. HDD

    If you’re in the market for a new storage device, you’re probably wondering how much data you can store on a 128GB SSD vs. HDD. While both drives have their own strengths and weaknesses, the amount of data they can hold is one of their major differences.

    In general, a 128GB SSD can store around 25,000 photos or 8,000 songs, whereas a 128GB HDD can store around 13,000 photos or 6,000 songs. This means that if you’re someone who needs to store a lot of photos or music, an SSD might be a better choice for you. That being said, if you’re looking for a more affordable storage solution, an HDD might be your best bet.

    Ultimately, it’s up to you to decide which option is best suited to your needs and budget.

    Final Thoughts

    So, you’re probably wondering just how much a 128GB SSD is equivalent to in terms of HDD, right? Well, let me break it down for you. In general, when it comes to storage drives, SSDs are considered the better option due to their faster read and write speeds. 128GB SSDs are perfect for storing your operating system and a handful of important applications.

    In terms of HDD, a 128GB SSD would be equivalent to a 500GB or 1TB HDD, depending on the brand and model. However, it’s important to note that HDDs are much slower compared to SSDs, which could lead to slower load times for your applications and programs. In the end, it really depends on your personal needs and preferences – do you want faster load times or more storage space?

    Which storage option is best for your needs?

    After weighing the pros and cons of various storage options, the best one for your needs ultimately depends on your specific requirements. If you need fast and reliable access to your files, SSDs are the clear winner. On the other hand, if you need to store large amounts of data at a low cost, HDDs are the way to go.

    Cloud storage is also a great option for those who need to access their files from anywhere with an internet connection. Ultimately, the best storage option for you will depend on your priorities and budget. It’s worth considering a combination of different options for optimal performance and security.

    Don’t forget to factor in long-term maintenance costs and the expected lifespan of your chosen storage option. By carefully weighing all the factors, you can find the storage option that will best meet your needs.

    Conclusion

    In the world of storage, size may matter to some, but speed is definitely the name of the game. So while it’s true that a 128gb SSD is roughly equivalent to a 500gb HDD in terms of storage capacity, the SSD’s lightning-fast read and write speeds make it a far superior choice for anyone who values efficiency and performance above all else. In short, it’s not about how much space you have, but how quickly you can access it that really counts!”

    FAQs

    What is the difference between a 128GB SSD and an HDD?
    A 128GB SSD (Solid State Drive) and an HDD (Hard Disk Drive) are both storage devices, but they differ in how they store data. While an HDD uses spinning disks to store data, an SSD relies on flash memory chips. This makes SSDs faster and more reliable, but also more expensive.

    Can I replace my 128GB SSD with a HDD?
    Yes, you can replace a 128GB SSD with an HDD, but it’s important to consider the trade-offs. While HDDs are cheaper and offer more storage capacity, they are slower and less reliable than SSDs.

    How much storage space does a 128GB SSD provide?
    As the name suggests, a 128GB SSD provides 128 Gigabytes of storage space. This is enough for basic use, but may not be sufficient for heavy usage such as gaming or video editing.

    What are some benefits of using a 128GB SSD over an HDD?
    Some benefits of using a 128GB SSD over an HDD include faster boot times, faster data transfer, and better durability. Additionally, SSDs have no moving parts, which means they make less noise and are less likely to fail due to physical damage.

  • Unlock the Full Potential of Your PC: A Comprehensive Guide on How to Use Your M.2 SSD After Installation

    Maximizing Your M2 SSD can be a game-changer for your computer’s performance. If you’re someone who hates waiting for long periods for your programs to load or your computer to start up, then you know how frustrating it can be. Thankfully, there’s a solution to this problem, and it comes in the form of an M2 SSD.

    An M2 SSD (Solid State Drive) is a small, powerful storage device that can greatly improve the speed and performance of your computer. However, getting the most out of your M2 SSD requires some optimization. In this blog post, we’ll discuss how you can maximize your M2 SSD’s potential and enjoy lightning-fast performance!

    Installation Checklist

    If you’ve recently installed an M.2 SSD, congratulations! You’ve made a significant upgrade to your computer’s speed and performance. But now you may be wondering how to use it to its full potential.

    Here’s a checklist of things to do after you install your M.2 SSD. First, make sure your BIOS is up to date and that it recognizes your new drive.

    Then, you’ll need to transfer your operating system to the new drive using cloning software. Once that’s done, make sure your M.2 SSD is set as the primary boot drive.

    It’s also a good idea to enable TRIM support and set the power plan to high performance mode. Finally, you may want to disable hibernation, as it can eat up valuable SSD space. With these steps completed, your M.

    2 SSD should be running smoothly, and you’ll notice significantly faster boot times and overall system performance.

    Check Compatibility

    When it comes to installing new software, it’s important to check compatibility before getting started. This means making sure that your computer meets the minimum requirements needed to run the program. Checking compatibility can save you time and frustration in the long run, as attempting to install software on an incompatible system can lead to errors and crashes.

    To check compatibility, start by reviewing the system requirements listed on the software’s website or packaging. Look for information on operating system, processor speed, RAM, and disk space. If your computer meets these requirements, you should be good to go.

    If not, you may need to consider upgrading your hardware or finding an alternative software solution. Taking the time to check compatibility can ensure a smooth installation process and a positive user experience.

    after install m2 ssd how to use it

    Backup Data

    Backup Data When it comes to protecting your data, having regular and reliable backups is essential. So, before you start backing up, it’s a good idea to create a checklist of everything you’ll need to ensure a successful backup process. To begin with, you’ll need to select a backup storage destination.

    This could be an external hard drive, a cloud-based backup service, or a network-attached storage device. Whatever you choose, make sure it has sufficient space to store all your data. Next, decide on a backup schedule that works best for you.

    Will you do a full backup each day, or will you opt for incremental backups? Whichever you choose, make sure to stick to a consistent pattern to maintain your backups’ integrity. Lastly, review your backup process regularly. Test backups to make sure they’re restoring correctly, and periodically check that your backup destination is still accessible and functioning correctly.

    By following these simple steps, you can ensure your data is protected and recoverable in the event of a system failure or data loss.

    Partitioning and Formatting

    So, you just installed an M.2 SSD, congratulations! Now the real question is, how do you use it? Firstly, you need to partition and format it. Partitioning your drive allows you to divide it into smaller sections, making it easier to organize your data.

    Formatting erases all existing data and sets up your drive to store files. To partition and format your SSD, open Disk Management by searching it in the start menu or right-clicking on the Windows icon and selecting “Disk Management”. Once in Disk Management, select your new SSD, right-click on it, and choose “New Simple Volume”.

    Follow the prompts to set the size of the partition and assign a letter to the drive. Finally, select the file system you want, most commonly NTFS, and give your new SSD a name. That’s it, your M.

    2 SSD is now ready to use! Just remember to always safely eject the drive before physically removing it from your computer.

    Disk Management

    When it comes to managing your computer’s storage, partitioning and formatting are two important processes you should be familiar with. Partitioning involves dividing your hard drive into multiple sections or “partitions,” each with its own drive letter. This can be helpful for organizing your data or setting up a dual-boot system with multiple operating systems.

    Formatting, on the other hand, is the process of preparing a partition or drive for use by setting up the file system and directory structures. Without formatting, you won’t be able to save data on the partition. Both partitioning and formatting can be done using the built-in Disk Management tool in Windows.

    Just be careful not to accidentally delete any important data during these processes. With a little bit of knowledge and caution, though, managing your computer’s storage can be a breeze.

    More Efficient Allocation

    When it comes to making data storage more efficient, partitioning and formatting are two important techniques to consider. By partitioning a hard drive, you can divide it into separate sections – allowing you to allocate available storage according to your needs while also keeping important files separate from less important ones. Formatting helps ensure that your data is organized and easily accessible, with different file systems tailored to different applications.

    When combined, partitioning and formatting can help improve storage performance, reduce the risk of data loss, and make it easier to manage your data over time. Whether you’re working with a personal computer or a large-scale enterprise server, taking the time to partition and format your storage can be an effective way to optimize your data infrastructure.

    File System Formatting

    When it comes to setting up a new hard drive or storage device, partitioning and formatting are essential steps. Partitioning involves dividing the drive into separate, distinct sections that can each be treated as their own individual drive. This can be useful for organizing different types of files or creating separate backup areas.

    Once the drive is partitioned, it’s time to format each individual partition. Formatting involves setting up the file system that will govern how files are organized and stored on the drive. Different file systems have different advantages and disadvantages, so it’s important to choose the right one based on your needs.

    Some common file systems include NTFS, which is ideal for Windows-based systems, and FAT32, which is more portable and compatible with a wider range of devices. By properly partitioning and formatting your hard drive, you can ensure that it’s set up to meet your needs and perform at its best.

    Optimizing Performance

    If you recently installed an M.2 SSD in your system and are wondering how to make the most of its performance, there are a few tips you can follow. Firstly, make sure your motherboard’s BIOS is set to use the M.

    2 slot as the primary boot device. This step ensures that your system boots from the SSD, which can dramatically improve boot times and overall performance. Secondly, ensure that the right drivers are installed for the storage device.

    This step can help the system take full advantage of the SSD’s capabilities. Thirdly, move frequently used files and applications to the SSD for quick access. This step can be done manually by copying files to the SSD or using dedicated software to automate the process.

    By following these tips, you can experience the full benefits of your M.2 SSD’s fast storage performance.

    Update Drivers

    Updating drivers is an essential part of optimizing your computer’s performance. Drivers are software programs that enable your computer’s hardware to communicate with the operating system. Outdated or missing drivers can cause various performance issues, such as slow startup, freezing, crashing, and other system errors.

    To update your drivers, you can either do it manually or use a driver updater software. The former requires you to identify the specific drivers that need updating and downloading the latest versions from the manufacturer’s website. The latter automates the process by scanning your computer, identifying outdated drivers, and updating them with a few clicks.

    However, you should be cautious when using third-party driver updaters as some of them may install malware or unwanted programs on your computer. Therefore, it’s crucial to use reputable and reliable driver updater tools that have positive reviews and feedback from other users. Overall, regularly updating your drivers can improve your computer’s speed, stability, and compatibility with new apps and software.

    Adjust Power Settings

    Adjust Power Settings for Optimizing Performance When it comes to optimizing your computer’s performance, adjusting power settings is a crucial aspect that can really make a difference. By default, most computers are set to balanced power mode, which may prioritize energy efficiency over performance. However, if you’re running resource-intensive software or are a power user, you may want to tweak your power settings to prioritize performance over power efficiency.

    You can do this by going to your computer’s Control Panel, selecting Power Options, and then selecting High Performance mode. This will ensure that your computer is running at full power, allowing you to work more efficiently and with greater speed. Keep in mind that this will consume more power and may reduce battery life, so it’s important to consider your use case before making any permanent changes.

    With a few tweaks to your power settings, you can take your computer’s performance to the next level!

    Conclusion

    Congratulations on installing your M2 SSD! You may be feeling like a superhero with your lightning-fast load times and data transfer speeds. But don’t forget to properly utilize your new superpower. Organize your files, delete unnecessary data, and prioritize your most used applications to truly maximize your SSD’s potential.

    Now go forth, tech warrior, and conquer your tasks with ease and speed!”

    FAQs

    What are the benefits of installing an M.2 SSD?
    Installing an M.2 SSD will improve your computer’s performance in terms of faster boot times, faster application launch times, and faster data transfer speeds.

    How do I check if my computer has an M.2 SSD slot?
    You can check your computer’s specifications or motherboard manual to see if it has an M.2 slot. Alternatively, you can open up your computer and physically look for the M.2 slot on the motherboard.

    How do I install an M.2 SSD?
    To install an M.2 SSD, locate the M.2 slot on your motherboard and insert the SSD into the slot at a 30-degree angle. Secure it with the screw provided and then boot up your computer.

    How do I transfer my operating system and files to an M.2 SSD?
    You can use cloning software to transfer your operating system and files from your old hard drive to the new M.2 SSD. Some SSDs also come with cloning software included. Alternatively, you can do a fresh install of your operating system on the M.2 SSD and transfer your files manually.

  • Master the Art of Data Recovery: Ultimate Guide on How to Retrieve Files from Corrupted SSD Drives

    If you’re reading this, chances are you’re dealing with the frustration and disappointment of a corrupted SSD (solid-state drive). Whether it’s your personal or work computer, a corrupted SSD can mean losing important files, data, and memories that you can’t afford to lose. Don’t worry, you’re not alone in this struggle, and there are solutions to recover your corrupted SSD files.

    In this blog, we’ll explore the common causes of corrupt SSDs, signs of a corrupted drive, and most importantly, how to recover lost data from a corrupted SSD. So, grab your coffee and let’s dive in!

    Diagnose SSD Problem

    If you’re experiencing issues with your SSD and suspect that your files have become corrupted, it can be a frustrating experience. But don’t panic just yet – there are some simple steps you can take to diagnose the problem and try to recover your data. First, try running a disk check to identify any errors.

    If this doesn’t work, you can use specialized software to try to recover the files. It’s important to stop using the SSD immediately once you realize there’s an issue to avoid further damage. In order to prevent future issues, you should also make sure to keep your SSD drivers up to date and run regular backups to an external hard drive or cloud storage.

    With a little bit of patience and persistence, you can hopefully recover your files successfully and get your SSD back in working order.

    Use SSD Diagnostic Tool

    If you suspect that your SSD (Solid State Drive) is having issues, it’s best to diagnose the problem before it’s too late. Thankfully, there are SSD diagnostic tools available that can help identify any problems with your drive. These tools use a combination of built-in testing algorithms and manual user input to diagnose issues such as bad sectors, file system errors, and read/write performance.

    One popular tool is the Samsung Magician software, which is specifically designed for Samsung SSDs. It provides a comprehensive suite of diagnostics and utilities that can help you optimize your drive’s performance and fix any problems that may arise. By using an SSD diagnostic tool, you can ensure that your drive is working optimally, and avoid any potential data loss due to malfunctioning hardware.

    how to recover files from corrupted ssd

    Check Cables and Connections

    If you’re facing issues with your SSD, one of the first things you need to do is check your cables and connections. Loose cables or faulty connections can cause data transfer issues and even prevent your SSD from being recognized by your system. Make sure to inspect all the cables connected to your SSD, including the SATA and power cables.

    Ensure that all cables are securely plugged in and that there are no signs of damage or wear. Also, check if the cables are compatible with your SSD and the motherboard. A faulty cable can cause a lot of problems, so it’s always worth replacing them if you suspect any issues.

    Taking the time to check your cables and connections can save you a lot of time and headaches in the long run. It’s a simple step but can save you from the hassle of costly repairs or replacing your SSD.

    Recover Files from Corrupted SSD

    If you’ve ever had the misfortune of dealing with a corrupted SSD, you know how frustrating and stressful it can be trying to recover your important files. But fear not, there are some steps you can take to potentially retrieve your data. First, try connecting the SSD to another computer as a secondary drive.

    If it’s recognized, you can try using data recovery software like Recuva or EaseUS to scan the drive for any recoverable files. If this doesn’t work, you can try using a USB adapter and a Linux bootable USB to access the drive’s contents. Keep in mind that this process can be complex and it’s always recommended to consult with a professional data recovery service to maximize the chances of success.

    Remember, backups are always the best option to prevent these incidents from happening in the first place.

    Use Data Recovery Software

    If you’ve ever experienced a corrupted SSD, you’ll know the frustration of potentially losing important files. But fear not, with the right data recovery software, you can retrieve those files and salvage what seems lost. SSDs are prone to corruption due to sudden power outages, physical damage, or software bugs.

    Fortunately, many data recovery software programs are designed to recover data from corrupt SSDs. These programs work by scanning the drive for lost files and, with a good degree of accuracy, locating them and restoring them to their original location. One excellent data recovery software to consider is EaseUS Data Recovery Wizard.

    This program offers a comprehensive solution that works for recovering data from both hard drives and SSDs, restoring data from formatted or corrupted partitions, and more. With the right software, the data you thought was lost to a malfunctioning SSD can be retrieved with ease, saving you time and stress.

    Try Different Recovery Software

    If you’ve experienced a corrupted SSD and lost important files, don’t panic. There are various recovery software options available that may be able to retrieve those lost files. It’s important to try different recovery software to increase the chances of successfully recovering your data.

    Read reviews and choose a reputable software that’s compatible with your operating system and SSD. Once downloaded, follow the steps carefully and allow the software to scan your SSD for any recoverable files. It’s possible that not all files will be able to be retrieved, but it’s worth trying different software options before giving up.

    Keep in mind that it’s always a good idea to regularly back up your important files to avoid potential data loss in the future.

    Create Disk Image for Recovery

    If you’re dealing with a corrupted SSD and need to recover files, creating a disk image is a helpful step to take. A disk image is essentially a copy of all the data stored on your SSD that can be saved to an external drive. You can then use this image to recover your files without risking any further damage to the SSD.

    To create a disk image, you’ll need to use specialized software that can create a copy of the entire drive. There are many options available online, and some are even free to use. Just be sure to follow the instructions carefully to avoid any potential errors.

    Once you have your disk image saved, you can use it to recover all of your important files and get back to work. Remember to keep your disk image stored on an external drive for safekeeping and always back up your important files to avoid losing data in the future. Overall, creating a disk image is a great way to recover files from a corrupted SSD and protect your data from further harm.

    Restore Recovered Files

    If you’ve ever faced data loss due to a corrupted SSD, then you know how frustrating and stressful it can be. However, don’t lose hope as there are ways to recover files from a corrupted SSD. Firstly, you can use file recovery software like Recuva, MiniTool Power Data Recovery, or EaseUS Data Recovery.

    These programs scan the SSD for lost data and restore it to another drive. Another option is to try using a system restore point to revert the system to a previous state before the SSD became corrupted. However, this only works if the restore point existed before the corruption.

    If all else fails, you may need to consult a data recovery professional to retrieve your lost files from the damaged SSD. While it may be costly, it is still worth it to recover important data and information. In conclusion, recovering files from a corrupted SSD takes time and effort, but with patience and the right tools, you can retrieve your lost files and restore your peace of mind.

    Save Restored Files to a Different Drive

    When you restore recovered files, it’s important to save them to a different drive than the one you were recovering from. This can help ensure that your restored files aren’t accidentally overwritten or deleted again. When selecting the destination drive for your restored files, try to choose a drive that’s different from the one you were recovering from.

    This could be an external hard drive, a USB drive, or even a cloud storage service. Additionally, it’s a good idea to organize your restored files into folders so that you can find them easily. Remember, restoring your files is just the first step – it’s equally important to keep them safe and secure by backing them up regularly.

    By taking these steps, you can enjoy peace of mind knowing that your valued files are protected and easily accessible when you need them.

    Check Recovered Files for Errors

    When you’ve successfully recovered your important files, it’s important to check them for errors before moving forward with the restoration process. This step is crucial to ensure that all files have been fully restored and are in the same condition as before they became corrupted or lost. One way to accomplish this is to use a file verification tool or software to scan the recovered files for any discrepancies or inconsistencies.

    This will allow you to confirm that all files are legible, accessible, and in proper working condition. By taking the time to check your recovered files, you can be confident that you have successfully restored your important data and prevent any future data loss.

    Prevent Future SSD Corruption

    If you have experienced file corruption on your SSD, it’s important to take steps to prevent it from happening in the future. One of the primary causes of SSD corruption is power failure or sudden shutdowns, so investing in a quality uninterruptible power supply (UPS) can help protect your SSD and data. It’s also important to regularly check for firmware updates and install them as needed.

    Another way to prevent future SSD corruption is to avoid the use of third-party data recovery software, which can cause further damage to your files and SSD. Instead, opt for a professional data recovery service to ensure that your SSD and files are handled with care. By taking these preventative measures, you can help avoid the stress and frustration of dealing with corrupted SSDs and files in the future.

    Backup Important Data Regularly

    Preventing SSD corruption by regularly backing up important data is essential for anyone using a solid-state drive for storage. SSD corruption can quickly cause data loss, resulting in significant consequences for individuals and businesses alike. Fortunately, maintaining backups of essential data can prevent such losses and ensure that data is available in the event of a hard drive failure or other technical problems.

    It’s essential to establish a consistent backup routine that ensures that even the most recent data is recoverable in the event of an unexpected problem or system failure. This includes setting up automatic backups to an external hard drive or cloud storage service. Protecting your valuable data is crucial, and regularly backing it up is a simple yet effective way to mitigate the risk of SSD corruption and data loss.

    Conclusion

    Now that you’ve learned how to recover files from a corrupted SSD, you can rest assured that the fate of your precious data doesn’t have to be left to chance. Whether caused by a faulty connection or an unfortunate accident, a corrupted SSD can be intimidating, but with the right tools and techniques, you can reclaim what was lost. So, if you find yourself in this unfortunate situation, remember to stay calm and follow these steps, and soon enough, you’ll be reunited with your valuable files and data.

    FAQs

    What are the common causes of SSD corruption?
    SSD corruption can be caused by power outages, virus or malware attacks, physical damage, software glitches, or outdated firmware.

    Can data be recovered from a corrupted SSD?
    Yes, data can be recovered from a corrupted SSD using data recovery software or by reaching out to a professional data recovery service.

    How can I tell if my SSD is corrupted?
    Signs of a corrupted SSD include slow performance, system crashes, error messages, or the inability to access files.

    Is it possible to prevent SSD corruption?
    Yes, some precautions can help prevent SSD corruption, including maintaining the latest firmware updates, avoiding sudden power outages or interruptions, using trusted antivirus software, and handling SSDs with care to prevent physical damage.