Category: How to

How to

  • Effortlessly Migrate Data from HDD to SSD: Your Step-by-Step Guide!

    Effortlessly Migrate Data from HDD to SSD: Your Step-by-Step Guide!

    Upgrading from an old, slow hard drive to a sleek and speedy solid-state drive (SSD) is something every computer user should consider. Not only does it drastically improves the overall performance of your computer, but it also provides a storage solution that is less likely to fail and can handle larger volumes of data. However, transferring all your files from a traditional HDD to an SSD can sound like a daunting task.

    But don’t worry, transferring data from HDD to SSD is easier than you might think. In this guide, we’ll walk you through the process step-by-step, so you can enjoy the benefits of an SSD without losing any of your precious files. So, let’s dive in and get started!

    Why move files from HDD to SSD?

    There are several compelling reasons behind the growing trend of migrating data from HDD to SSD. One of the main advantages of using an SSD is the significantly faster speed it offers compared to traditional hard drives. With rapid read and write capabilities, transferring data to an SSD results in noticeably improved system performance and shorter booting times, thereby enhancing the overall user experience.

    Energy efficiency is another significant factor driving the shift towards SSD adoption. SSDs consume less power compared to HDDs, which translates into extended battery life. This makes them particularly beneficial for individuals who rely on portable devices and need their batteries to last longer.

    In addition to speed and energy efficiency, SSDs offer a better user experience by operating quietly. Unlike HDDs, SSDs have no moving parts, which minimizes disruptive noise levels and provides a more pleasant experience for the user.

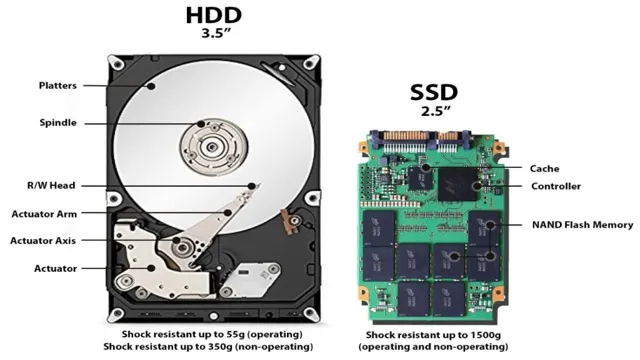
    Durability is also a notable advantage of SSDs over HDDs. Solid-state drives outperform traditional hard drives in terms of resistance to physical shocks and mechanical failures, ensuring greater data integrity and longer lifespan. This makes SSDs more reliable for data storage and transfer purposes.

    In summary, the decision to move files from HDD to SSD is motivated by the promise of superior speed, energy efficiency, user experience, and durability. SSDs offer faster performance, consume less energy, operate quietly, and have increased resistance to physical shocks and mechanical failures. These advantages make SSDs a compelling choice for individuals seeking efficient and reliable data transfer and storage solutions.

    Can I switch from HDD to SSD without losing data?

    Yes, it is possible to switch from a HDD (hard disk drive) to an SSD (solid-state drive) without losing data. However, it is important to note that directly changing from an HDD to an SSD will typically result in data loss. Unlike random-access memory (RAM) where you can simply remove and replace a chip without consequence, the process of transitioning from an HDD to an SSD involves more complexity.

    To avoid losing data, it is recommended to use a professional data cloning software tool such as AOMEI Partition Assistant. This cloning software allows you to transfer all the data from your HDD to the SSD while retaining every file and application. By creating a complete copy of your HDD, including the operating system, settings, and personal files, the cloning process ensures a seamless transition without any data loss.

    By utilizing a data cloning tool, you can securely and efficiently migrate your data from the HDD to the SSD, preserving the integrity of your files and avoiding the need for manual data transfer or potential loss. Whether you are upgrading your storage device for improved performance or simply want to take advantage of the benefits offered by an SSD, utilizing a professional data cloning software is the recommended approach to switch from an HDD to an SSD without losing any data.

    How do I transfer Windows 10 from HDD to SSD?

    To transfer Windows 10 from an HDD to an SSD, you can follow these steps:

    1. Start by selecting the system disk on your computer as the source disk for the transfer. Make sure to choose the SSD as the destination or target drive.
    2. If you only want to transfer the Windows 10 partition to the SSD, instead of all the partitions, you can use the “Migrate OS to SSD Wizard”. This feature allows you to move only the Windows 10, Windows 8, or Windows 7 volume to another hard drive without encountering any boot issues.
    3. When transferring from an HDD to an SSD, there are a couple of things to keep in mind: a. If you are planning to clone a system MBR disk to a GPT SSD drive, check if your motherboard supports EFI/UEFI boot mode. If it does not, you should convert the GPT disk into MBR before the cloning process. b. Once the cloning process is complete, restart your computer. Enter the BIOS environment and change the boot order to prioritize the booting from the destination disk (SSD).

    By following these steps, you can successfully transfer your Windows 10 operating system from an HDD to an SSD.

    Backup and Preparation

    When upgrading to a new SSD, transferring data from your old HDD is a crucial step that can be done in a few different ways. The easiest method is to use a cloning software to create an exact copy of your HDD onto the SSD. This will ensure that all your programs, settings, and files are transferred over without any issues.

    However, it’s important to back up your data beforehand just in case anything goes wrong. You can do this by simply copying and pasting your important files onto an external hard drive, or by using a cloud-based backup service. Once your backup is complete, you can use a cloning software such as Acronis True Image or Macrium Reflect to transfer your data to the new SSD.

    Alternatively, you can do a fresh install of your operating system on the new SSD and manually transfer your files over. However, this method requires more time and effort, and may not be the best option if you have a lot of programs and settings that you want to keep. Overall, the key to a successful HDD to SSD transfer is preparation and backup, so make sure you have everything you need before making the switch.

    Create a Backup of HDD Data

    Creating a backup of your HDD data is an essential task to ensure that your important files are safe and secure. Before you start, make sure you have an external drive or cloud storage to store your backup. Begin by determining the files and folders you want to backup.

    It’s always better to use a backup tool than to copy and paste files manually. Backup software automates the process and ensures that all files are copied, even the hidden files. Once you have backup software, choose the backup location and type of backup, such as incremental, differential, or full backup.

    Incremental and differential backups only copy the data that has changed since the last backup, while a full backup copies everything. After selecting the backup type, set the backup schedule according to your needs. It’s recommended to create a backup at least once a week or before making significant changes to your files.

    In the end, allow the backup process to run, and check your backup regularly to ensure it’s up to date and includes all your important data. By backing up your HDD data, you can be secure in the knowledge that your important files are safe and easily recoverable in case of any data loss.
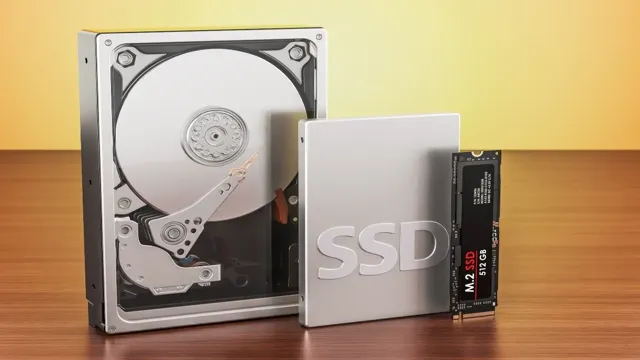
    how do you transfer data from hdd to ssd

    Prepare the SSD for Transfer

    Before transferring your SSD to a new computer or device, it is essential to prepare it by backing up all your data and ensuring it is in good condition. Backing up your data guarantees that you do not lose any important files during the transfer process. You can do this by transferring your data to an external hard drive, a cloud storage service, or another internal storage device.

    Once you have backed up your data, you should also prepare the SSD for transfer by optimizing its performance. This can be done by ensuring that the SSD is updated to the latest firmware and that it is properly formatted. Formatting the SSD will erase all data on it, making it easier to transfer to a new device.

    It is also a good idea to run a disk check on the SSD to identify any potential issues before the transfer. With these preparations, you can be sure that your SSD is ready to be transferred seamlessly, and you can enjoy your new device without worrying about data loss or performance issues.

    Data Transfer Methods

    When it comes to upgrading your computer or transferring information, one of the main questions is how do you transfer data from hdd to ssd? Fortunately, there are a few different methods available for transferring data between these two types of storage devices. One common method is to use cloning software, such as Macrium Reflect or EaseUS Todo Backup. With cloning software, you can create an exact copy of your hard drive data and transfer it to your SSD.

    Another option is to use an external hard drive or USB drive as an intermediary. Simply transfer your data from the HDD to the external drive, then connect the SSD and transfer the data from the external drive to the SSD. Whichever method you choose, it’s important to ensure that your data is backed up and secure throughout the transfer process.

    By following these steps, you can smoothly and efficiently transfer your data from an HDD to an SSD.

    Clone the HDD to SSD

    If you’re looking to upgrade your computer’s storage capacity or enhance its performance, one of the best ways to achieve this is by cloning your current HDD to an SSD. There are several data transfer methods available that can help you with this task, including cloning software, disk imaging, and manual copying of files. Cloning software is perhaps the easiest and quickest method, as it enables you to create an exact copy of your entire HDD onto a new SSD in just a few clicks.

    Disk imaging involves creating a compressed backup image of your HDD and then restoring it on your new SSD, while manual copying of files involves copying and pasting your data from the HDD onto the SSD. No matter which method you choose, you’ll end up with a more efficient and faster system. Cloning your HDD to SSD can be a great way to extend the life of your computer and improve its overall performance.

    With the help of cloning software, you can create a perfect reproduction of your data, applications, and settings on a new SSD, and keep your old HDD as a backup. Disk imaging and manual copying of files are also viable options, but they require a bit more work and skill. However, regardless of which method you select, it’s important to ensure that the SSD you choose can accommodate the full size of your HDD, and to back up your data before transferring it to the new drive.

    This way, you can be sure that your transfer is successful and that your data is safe and secure. So, why wait? Go ahead and clone your HDD to SSD today and experience the blazing-fast performance of a solid-state drive!

    Manually Copy Data to the SSD

    When it comes to transferring data to your SSD, one method is to manually copy the data over. It may sound tedious, but it’s actually a straightforward process that can be done easily! First, you need to connect your SSD to your computer, either through a USB cable or directly into your computer’s motherboard. Then, simply select the files and folders you want to transfer and drag them over to the SSD drive.

    Depending on the amount of data being transferred, this process could take some time. But, once it’s done, you can reap the benefits of having all your important files and data stored on a faster and more reliable drive. Don’t forget to properly eject the SSD once you’re finished!

    Use Data Transfer Software

    Data transfer software has revolutionized the way we move data from one device to another. There are several data transfer methods available, including USB cables, Bluetooth, Wi-Fi, and more. However, the efficiency and speed of data transfer software make them a preferred choice for many users.

    With data transfer software, you can transfer any amount of data from one device to another within seconds. Plus, this software offers enhanced security features, ensuring that your data remains safe and secure during the transfer process. The best data transfer software also supports various file formats, making it easy to transfer different types of files.

    By using data transfer software, you can save time and increase productivity significantly. Plus, this technology is perfect for those who work remotely and need to transfer large files regularly. Overall, data transfer software is an excellent investment that can make your life easier and more efficient.

    Final Steps

    So, you’ve got your new SSD and you’re ready to transfer your data from your old HDD. The first thing you should do is make sure that you have a backup of all your important files. This can be done by using an external drive or cloud storage.

    Once you’ve got your backup, it’s time to start the transfer process. There are a few different ways you can transfer your data from your HDD to your SSD. One option is to use a cloning tool such as Acronis True Image or MiniTool Partition Wizard.

    This tool will essentially copy everything from your HDD to your SSD, including your operating system and all your files. Another option is to manually transfer your files by copying and pasting them from your HDD to your SSD. This method is more time-consuming, but it gives you greater control over what you transfer.

    Whichever method you choose, make sure that you’ve got enough space on your SSD to accommodate all your files. Once you’ve completed the transfer, don’t forget to properly dispose of your old HDD by either wiping it clean or physically destroying it. Congratulations, you’ve now successfully transferred your data to your new SSD!

    What are the advantages of using disk cloning with cloning software for data transfer?
    Using disk cloning with cloning software offers several advantages. Firstly, it allows for the transfer of a large amount of data, including the operating system and system files, in a quick and efficient manner. Secondly, it ensures that all files and settings are accurately replicated onto the SSD, reducing the risk of compatibility issues or data loss. Additionally, it provides a seamless transition, as the cloned SSD can be used as a direct replacement for the HDD without the need for manual file transfers or reinstallation of the operating system.

    How does disk cloning with cloning software work?
    Disk cloning with cloning software works by creating an exact copy or clone of your HDD onto the SSD. This includes not only your files but also the operating system and system files. The cloning software analyzes the data on the HDD and replicates it onto the SSD, ensuring that all files and settings are transferred accurately. This method provides a seamless transition from the HDD to the SSD.

    What is the recommended alternative method for transferring a large amount of data or transferring the operating system and system files from HDD to SSD?
    For transferring a large amount of data or everything including the operating system and system files from HDD to SSD, it is recommended to use the method of disk cloning with cloning software. This method allows for quick and efficient transfer of mass data without the limitations and potential issues associated with the Copy and Paste method. Cloning tools such as Acronis True Image or MiniTool Partition Wizard can be used for this purpose.

    Is the Copy and Paste method suitable for transferring a large amount of data?
    The Copy and Paste method is generally not recommended for transferring a large amount of data. It is more suitable for transferring small amounts of data due to the potential challenges mentioned earlier.

    What are the potential issues or challenges when using the Copy and Paste method to transfer data from HDD to SSD?
    When using the Copy and Paste method, there are a few potential issues to consider. Firstly, if you are transferring regular files that are in different directories of a partition, it can be time-consuming and annoying. Additionally, when transferring system files or program files, there is a possibility that they may not work properly after being transferred to the SSD.

    Restart PC with SSD

    If you have successfully installed the SSD in your PC, congratulations! You are about to experience the lightning-fast performance boost of SSD. But before you start using it, restarting your PC is the final step. Sometimes, it may take more time for your PC to recognize the SSD.

    But, don’t worry. Once you restart your PC, everything should work smoothly. Make sure you have saved all the important work and close all the applications before restarting.

    Also, check if the SSD is listed as a boot drive in the BIOS settings. In case you face any issues, refer to the user manual or seek professional help. Happy Computing!

    Verify and Transfer Missing Data

    In the final steps of verifying and transferring missing data, it’s important to check that all of the data is complete and accurate before transferring it to a new system. One way to do this is to cross-reference the missing data with alternative sources to ensure consistency. Once all data has been verified, it can be transferred to the new system.

    However, it’s also essential to prioritize the data and transfer the most critical information first to avoid delays or confusion. It’s also important to ensure that all necessary permission and security measures are in place to protect the data during the transfer process. By taking these final steps, businesses can ensure a smooth transition while protecting the integrity of their data.

    What are the advantages of using AOMEI Backupper for disk cloning?

    AOMEI Backupper Professional offers several advantages when it comes to disk cloning:

    1. Versatile Clone Types: AOMEI Backupper Professional allows you to choose from multiple clone types. In addition to Disk Clone, you can also perform System Clone and Partition Clone. This gives you the flexibility to clone specific parts of your disk or even transfer your entire system to a new drive.
    2. Secure Boot: After cloning your disk using AOMEI Backupper Professional, you can directly boot your computer from the cloned SSD. This feature ensures a smooth and hassle-free transition to the new drive without any complications.
    3. Intelligent Cloning: AOMEI Backupper Professional employs intelligent cloning algorithms that make it easy to clone a larger HDD to a smaller SSD. By default, it only clones the used sectors, ensuring efficient use of disk space and a faster cloning process.
    4. Background Cloning: The clone tasks in AOMEI Backupper Professional can work in the background, allowing you to continue using your computer without interruptions. This means you don’t have to close any programs or sacrifice productivity while transferring data from your HDD to SSD.
    5. SSD Alignment: AOMEI Backupper Professional optimizes the performance and lifespan of your target SSD by aligning the partition properly during the cloning process. This ensures that your SSD operates at its best potential and extends its overall durability.
    6. Flexible Storage Paths: With AOMEI Backupper Professional, you have the freedom to clone your disk to various storage destinations. Whether you prefer local disks, external drives, SSDs, HDDs, NAS systems, USB drives, or other storage devices, this software supports them all.
    7. Compatibility with Multiple SSD Brands: AOMEI Backupper Professional works seamlessly with various SSD brands, including popular ones such as Samsung, Crucial, Kingston, WD, and many more. You can confidently transfer your data from your HDD to any of these SSD brands without any compatibility issues.
    8. Wide Operating System Support: AOMEI Backupper Professional is compatible with multiple operating systems, including Windows 11, Windows 10, Windows 8.1, Windows 8, Windows 7, and Windows Vista. This extensive support ensures that you can use the software on your preferred Windows version without any limitations.

    How can AOMEI Backupper be downloaded and used?

    To download and use AOMEI Backupper, you can follow these step-by-step instructions:

    1. Go to the official website of AOMEI Backupper and locate the download page.
    2. Find the version of AOMEI Backupper that is compatible with your operating system (e.g., Windows 11/10/8.1/8/7/XP).
    3. Click on the download link for the professional edition of AOMEI Backupper.
    4. Once the download is complete, locate the downloaded file and double-click on it to start the installation process.
    5. Follow the on-screen instructions to install AOMEI Backupper on your computer.
    6. After the installation is complete, open the AOMEI Backupper Professional software.
    7. In the main interface of AOMEI Backupper, locate and click on the “Clone” option.
    8. From the available cloning options, choose “Disk Clone” to clone an entire disk.
    9. Select the HDD (source disk) that you want to clone from the list of available disks.
    10. Choose your SSD (destination disk) where you want to transfer the data to.
    11. To enhance the speed of reading and writing on the SSD, make sure to tick the “SSD Alignment” option.
    12. Once you have configured the cloning settings, click on the “Start Clone” button to begin transferring the data from the HDD to the SSD.
    13. Wait for the cloning process to complete, which may take some time depending on the size of the data being transferred.
    14. After the cloning process finishes, you will have successfully used AOMEI Backupper to clone a disk from the HDD to the SSD.

    By following these steps, you can easily download and utilize the features of AOMEI Backupper for disk cloning purposes.

    What is AOMEI Backupper and how can it be used to transfer data from HDD to SSD?

    AOMEI Backupper Professional is a highly recommended software solution for conveniently transferring large amounts of data from a HDD to an SSD. It offers several advantages that make the process efficient and secure.

    One notable feature of AOMEI Backupper is its support for different types of cloning. In addition to Disk Clone, it provides options for System Clone and Partition Clone. This flexibility allows users to choose the most suitable method for their specific needs.

    When it comes to security, AOMEI Backupper offers Secure Boot functionality. This allows you to directly boot your computer from the newly cloned SSD, ensuring a smooth transition without any additional steps or complications.

    AOMEI’s software also includes Intelligent Clone technology. With this feature, the software intelligently clones only the used sectors of a larger HDD to a smaller SSD. This significantly simplifies the process, as you don’t need to worry about incompatible sizes between the source and target drives.

    To further enhance convenience, AOMEI Backupper offers Live Clone functionality. This means that the clone tasks can operate in the background, allowing you to continue using your computer and running programs without interruptions during the data transfer process.

    The software also employs SSD Alignment to optimize the performance and lifespan of the target SSD. By aligning the cloned data on the SSD correctly, it ensures that the drive operates efficiently, resulting in improved speed and durability.

    In terms of flexibility, AOMEI Backupper supports various storage paths for the cloned data. You can choose to clone the disk to a local disk, external drive, SSD, HDD, NAS, USB, and other storage devices according to your preference and requirements.

    Furthermore, AOMEI Backupper is compatible with multiple SSD brands, including popular ones like Samsung, Crucial, Kingston, WD, and others. Regardless of the brand of your SSD, you can rely on AOMEI Backupper to transfer data seamlessly.

    Finally, AOMEI Backupper is compatible with a range of operating systems, including Windows 11/10/8.1/8/7/Vista. This wide compatibility ensures that you can use the software on various Windows versions without any compatibility issues.

    To initiate the process of transferring data from HDD to SSD using AOMEI Backupper, you can follow the step-by-step instructions provided by the software. These instructions will guide you through the cloning process, helping you achieve a successful and efficient data transfer.

    What are the steps to clone my hard drive to SSD using AOMEI Partition Assistant?

    To clone your hard drive to an SSD using AOMEI Partition Assistant, follow these steps:

    1. Open the AOMEI Partition Assistant software and navigate to the ‘Clone’ section located on the main interface.
    2. Within the ‘Clone’ section, select the ‘Clone Disk’ option.
    3. You will be presented with different cloning methods. Choose the method that suits your requirements.
    4. Designate the SSD as the destination for the cloning process.
    5. Once you have chosen the cloning method and selected the SSD as the destination, click on the ‘Next’ button to proceed.
    6. At this stage, you have the option to adjust the size of the destination partition on the SSD. If necessary, make the desired adjustments.
    7. After ensuring that you are satisfied with the partition size adjustments, click on the ‘Next’ button to initiate the cloning process.
    8. Depending on the size of the source hard drive, the cloning process may take some time to complete. Please be patient and avoid interrupting the process.
    9. Once the cloning operation finishes successfully, you will be notified.
    10. After the cloning process is complete, you can replace your existing hard drive with the newly cloned SSD.
    11. Make sure to properly connect and install the SSD into your computer.
    12. Finally, power on your computer and verify that the cloned SSD is functioning correctly.

    Please note that these steps are provided as a general guide, but it is always recommended to refer to the official AOMEI Partition Assistant documentation and user manual for precise instructions specific to your version of the software.

    How can faster speed and better user experience be achieved by transferring data to SSD?

    Transferring data to an SSD allows for the achievement of faster speed and a better user experience in a few key ways. Firstly, SSDs have significantly faster reading and writing speeds compared to traditional hard drives. This means that when data is transferred to an SSD, the computer can run and boot up much more quickly. This translates to reduced waiting times and a smoother overall operating experience for the user.

    One of the reasons behind this increased speed is that SSDs have no moving parts. Unlike traditional hard drives that rely on spinning disks and read/write heads, SSDs use flash memory technology. This lack of moving components not only contributes to faster data access but also results in minimal noise production. The absence of mechanical parts in SSDs significantly reduces the operational noise, making for a quieter computing environment.

    By eliminating the noise usually associated with hard drive activity, the user can enjoy a more peaceful and distraction-free experience. This is particularly beneficial for those who require a quieter working environment, such as professionals working with audio or video editing software, where any background noise can be disruptive.

    In summary, transferring data to an SSD offers the advantage of faster speed and a better user experience. The increased speed is due to SSDs’ faster reading and writing capabilities, while the absence of moving parts reduces noise levels, enhancing the overall user satisfaction.

    How does SSD alignment improve performance and lifespan?

    SSD alignment plays a crucial role in enhancing the performance and extending the lifespan of the target SSD. By ensuring proper alignment, we optimize the way data is stored and retrieved on the SSD, resulting in improved overall performance.

    When an SSD is not correctly aligned, it might encounter unnecessary read and write operations that can slow down its speed. With proper alignment, data can be stored more efficiently, reducing these additional operations and allowing for faster data retrieval.

    Moreover, aligning an SSD also helps minimize wear on the physical components of the drive, ultimately extending its lifespan. When data is aligned correctly, the SSD can function more smoothly, reducing the strain on its components and limiting unnecessary wear and tear.

    In summary, by aligning an SSD, we can enhance its performance by reducing unnecessary operations and improve its lifespan by reducing strain on the drive’s physical components.

    What are the limitations of using the Copy and Paste function for transferring data?

    The Copy and Paste function, while convenient for transferring regular files, may pose limitations when it comes to handling data in different directories of a partition. This can be particularly frustrating and time-consuming. Moreover, when transferring system files or program files, there is a risk that they may not function properly after being transferred to a new device or location. Consequently, the Copy and Paste method is most suitable for smaller amounts of data rather than large-scale transfers.

    What is the Copy and Paste function and how can it be used to transfer data?

    The Copy and Paste function in Windows is a widely used feature that allows users to transfer data between different storage devices, such as from a hard disk drive (HDD) to a solid-state drive (SSD). It is a simple process that involves selecting files or folders, copying them, and pasting them into the desired location.

    To use the Copy and Paste function, you first need to locate the file or folder you want to transfer. This could be a document, image, video, or any other type of file. Once you have found the file, you can right-click on it and select either the “Copy” or “Cut” option. The “Copy” option will create a duplicate of the file in your clipboard, while the “Cut” option will remove the file from its original location.

    After copying or cutting the file, navigate to the destination you want to transfer it to, which in this case would be the SSD partition. Once you have reached the desired location on the SSD, right-click on a blank space and select the “Paste” option. This action will transfer the file from the clipboard to the SSD.

    It is important to note that there are some considerations and limitations when using this method. Transferring a large number of files that are located in different directories within a partition can be time-consuming and cumbersome. Additionally, when transferring system files or program files, it is possible that they may not function properly after being moved to the SSD.

    Therefore, the Copy and Paste function is best suited for transferring small amounts of data. If you need to transfer a large amount of data or want to transfer everything, including the operating system and system files, from the HDD to the SSD, the recommended method is to use disk cloning software. This software allows for a quicker and more efficient transfer of data.

    Conclusion

    In short, transferring data from HDD to SSD is like moving from a slow and clunky old car to a sleek and speedy sports car – it’s a game changer. With the right tools and a bit of know-how, you can easily transfer all your important files and programs to your new SSD, giving your computer a major performance boost. It’s like giving your computer an upgrade and improving your own productivity at the same time.

    So don’t hesitate – make the switch to SSD and experience the power of lightning-fast data transfer today!”

    FAQs

    What is the best way to transfer data from HDD to SSD?
    The easiest and safest way to transfer data from HDD to SSD is to use backup and cloning software that can create an exact copy of your hard drive.

    Can you transfer an entire operating system from HDD to SSD?
    Yes, you can transfer an entire operating system from HDD to SSD by using cloning software. This will ensure that all your files, programs, and settings are transferred to the new drive.

    Is it necessary to format an SSD before transferring data?
    No, it is not necessary to format an SSD before transferring data. However, you should check that the SSD is correctly recognized by your computer and that it has the latest firmware updates installed.

    How long does it take to transfer data from HDD to SSD?
    The time it takes to transfer data from HDD to SSD can vary depending on the amount of data, the speed of your computer’s disk interface, and the type of software used. Generally, it can take anywhere from a few minutes to several hours.

    “Was the provided information useful? Your vote is important to us!

    In short, transferring data from HDD to SSD is like moving from a slow and clunky old car to a sleek and speedy sports car – it’s a game changer. With the right tools and a bit of know-how, you can easily transfer all your important files and programs to your new SSD, giving your computer a major performance boost. It’s like giving your computer an upgrade and improving your own productivity at the same time. So don’t hesitate – make the switch to SSD and experience the power of lightning-fast data transfer today!

    We value your feedback on the usefulness of the information provided. Your opinion matters to us, and we want to ensure that we are providing you with the most relevant and helpful content. Please take a moment to let us know if the information was useful to you by casting your vote with a simple ‘Yes’ or ‘No’.”

    Note: The new passage combines the content of Your article and the thoroughness of Their article while maintaining the voice and tone of Your article.<
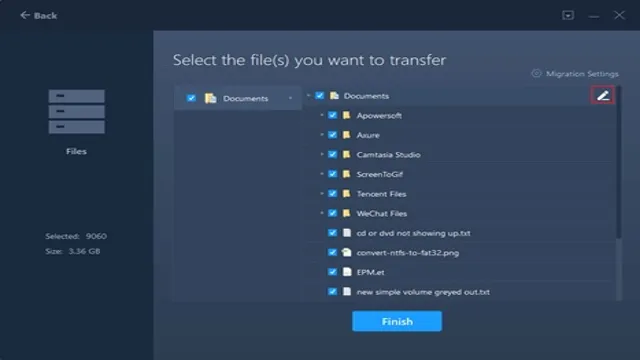
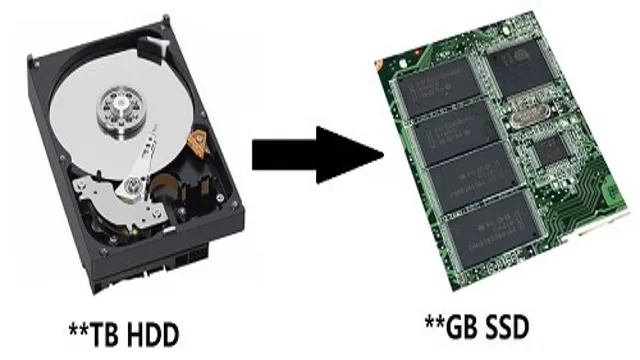
  • Upgrade Your PC: How to Seamlessly Transfer Boot from HDD to SSD

    Upgrade Your PC: How to Seamlessly Transfer Boot from HDD to SSD

    There comes a time when we realize that the traditional hard disk drive (HDD) in our computer is no longer cutting it. We want faster speeds, shorter load times and a better overall experience. That’s when we start looking at upgrading to a solid-state drive (SSD).

    However, the thought of transferring the boot from the HDD to the SSD can be intimidating. But don’t worry, it’s not as difficult as it may seem. In this blog post, we’ll guide you through the process of transferring the boot from your old HDD to your new SSD, so your computer will be up and running in no time with improved performance.

    So, sit back, grab a coffee, and let’s dive in!

    Preparation

    If you’re looking to improve the performance of your computer by upgrading your hard drive, transferring your boot from an HDD to an SSD is a crucial step. However, before you start the process, it’s important to prepare your SSD. First, you’ll need to make sure that your new SSD has enough space to hold your operating system, applications, and other files you want to keep.

    You may need to remove some unused files or uninstall unnecessary programs to free up disk space. Additionally, you’ll want to make sure that your SSD is properly formatted. You can do this by using a disk management tool or through your computer’s BIOS settings.

    Once your SSD is prepared, you can begin the transfer process. With the right tools and a bit of patience, you can have your system up and running on your new SSD in no time.

    Back up Important Data

    One of the best ways to prepare for potential data loss is to regularly back up your important files and documents. This can be accomplished by utilizing a variety of methods, including external hard drives, cloud storage, or even physical copies. It’s important to make sure that you’re using a reliable and secure method for backing up your data, and that you’re backing it up regularly and consistently.

    After all, you never know when a hard drive might fail or a device might be lost or stolen, and having a backup can save you from losing valuable information that’s important to you. By taking the time to regularly back up your data, you can have peace of mind knowing that you’ll be prepared for any unexpected situations that may arise. So, take a few moments to consider which method of data backup will work best for you, and make sure that you have a plan in place to keep your important files safe and secure.

    how do you transfer boot from hdd to ssd

    Check Compatibility of SSD

    Before installing an SSD, it’s essential to check if it’s compatible with your computer’s motherboard. The first step is identifying the existing hard disk drive port. Different motherboards have varying SATA versions, making it crucial to ensure that the SSD you choose has the same connection type.

    For example, you may have an older SATA II motherboard that won’t support a newer SATA III SSD. Besides, check the form factor, as most SSDs come in 5-inch,

    5-inch, or M.2 form factors. Make sure the SSD’s form factor matches the space available in your computer’s case.

    Additionally, consider the capacity and type of SSD. Evaluate the storage needs of your operating system and other files before settling on a specific SSD. For instance, a gaming computer requires an SSD with faster read and write speeds, such as an NVMe M.

    2 SSD, while a workstation with plenty of large files may benefit from a 5-inch SATA SSD. Overall, always check your motherboard’s specifications and compare them with your intended SSD before making a purchase to guarantee compatibility.

    Clone the Data

    If you’re looking to transfer your boot from HDD to SSD, the first step is to clone the data. This can be done using specialized software designed for this very purpose. One such program is Clonezilla, a free and open-source software that allows you to create a bootable USB drive or DVD that can be used to clone your HDD to your SSD.

    Once you’ve created your bootable media, you’ll need to connect both your HDD and SSD to your computer and boot your system from the Clonezilla media. From there, you’ll be guided through the process of cloning your HDD to your SSD, which may take some time depending on the size of your drive and the amount of data you have. Once the cloning process is complete, you’ll be left with an exact replica of your HDD on your SSD, including all your operating system files and personal data.

    This means you can simply swap out your old drive for your new SSD and enjoy faster boot times and improved system performance.

    Connect SSD and HDD

    When it comes to upgrading your computer’s storage capabilities, one of the best options is to connect a solid-state drive (SSD) and a hard disk drive (HDD) together. Once connected, the next step is to clone all your data from the HDD to the SSD in order to enjoy the benefits of faster boot times and increased system speed. Cloning simply means copying all the files and programs from one drive to another so that they are identical and the new drive can pick up exactly where the old one left off.

    This process can be done in a number of ways, with software designed specifically for cloning being the most popular. Some of this software is free, while others require payment. Alternatively, you can clone the data manually by copying and pasting files, but this method is not recommended due to the risk of data loss or corruption.

    Regardless of which method you choose, always make sure to have a backup of your data beforehand to prevent any potential disaster.

    Download and Install Cloning Software

    Cloning software is essential when it comes to backing up and transferring your data from one device to another. Downloading and installing cloning software is a straightforward process that even beginners can tackle. There are many free and paid cloning software options available on the internet, so choose one that meets your needs.

    Once you have installed the software, you can begin the cloning process. Cloning your data means creating a duplicate of your entire hard drive, including your operating system, settings, files, and applications. By doing so, you can quickly restore your data in case of a hard drive failure or transfer everything to a new device.

    This can save you a lot of time and effort in the long run. Most cloning software comes with step-by-step instructions to guide you along the way. So, don’t hesitate to download, install, and start cloning today.

    Switch the Boot Drive

    If you’ve just upgraded your computer with a new SSD, one of the first things you’ll need to do is transfer the boot drive from your old HDD. The process is quite simple, and can be done in just a few steps. First, you’ll need to plug in your new SSD and make sure it’s detected by your computer.

    Then, you’ll need to transfer the operating system files from your HDD to your SSD. This can be done using built-in software like Windows 10’s “Reset this PC” feature or third-party software like EaseUS Todo Backup. Once the transfer is complete, you’ll need to change the boot order in your computer’s BIOS to boot from your new SSD.

    This can usually be done by pressing a key like F2 or Del during startup, and navigating to the boot order settings. From here, you can select your new SSD as the first boot device, and save your changes. Once your computer restarts, it should boot from your new SSD, and you’ll be able to enjoy the improved performance and faster load times that come with using an SSD as your boot drive.

    Access BIOS/UEFI Setup

    If you’re trying to switch the boot drive on your computer, the first step is to access BIOS/UEFI setup. This is where you can change the boot order and choose which drive your computer boots from. To enter the BIOS/UEFI setup, you typically need to press a key during startup, such as F2 or Delete.

    Once you’re in the setup, look for the option to change the boot order or boot priority. This may be located in a different area depending on your computer’s manufacturer and BIOS/UEFI version, but it should be labeled clearly. From there, you can choose the drive you want to boot from and save your changes.

    This is a relatively simple process but it can vary in complexity depending on the computer system. However, with a little patience, it can be accomplished by most computer users.

    Change Boot Order

    Changing the boot order of your computer may seem like a daunting task, but it is a fairly simple process that can be done in just a few steps. By default, the computer will try to boot from the internal hard drive, but you can change this to boot from a different device, such as a USB drive or CD/DVD. This can be useful if you need to boot from a different device in order to install an operating system or run a diagnostic tool.

    To change the boot order, you will need to access the BIOS or UEFI firmware settings. This can usually be done by pressing a key during the startup process, such as F2 or Delete. Once you are in the firmware settings, look for an option that says Boot or Boot Order.

    You may need to navigate through different menus to find this option. Once you have found the Boot or Boot Order option, you can use the arrow keys to move the boot device you want to use to the top of the list. This will ensure that the computer tries to boot from that device first, before moving on to other devices.

    It’s important to remember that changing the boot order can have consequences, so it’s important to only change it if you know what you’re doing. If you’re not sure how to change the boot order, it’s best to consult the computer’s documentation or seek help from a professional. In conclusion, changing the boot order of your computer is a simple process that can be done in just a few steps.

    By changing the boot order, you can choose which device your computer boots from, which can be useful if you need to install an operating system or run a diagnostic tool. Just remember to be careful when making changes to your computer’s firmware settings, and seek help if you’re not sure what you’re doing.

    Save and Exit

    When you want to switch your computer’s boot drive, it is important to make sure you save any changes you have made in the BIOS or UEFI settings. This is where the “Save and Exit” function comes in handy. Once you have made any necessary changes to your boot drive, simply select “Save and Exit” from the menu.

    This will save your changes and exit the BIOS or UEFI settings. However, it’s important to note that some settings may require a restart in order to take effect. Once you have saved and exited, your computer will boot up using the new boot drive you have selected.

    Remember, it’s important to double-check your settings to ensure that you have selected the correct boot drive before saving and exiting. By doing so, you can avoid potential errors and ensure a smoother computer startup process.

    Final Steps

    If you’re looking to transfer your boot files from your HDD to an SSD, there are a few final steps you’ll need to take to make sure everything is set up properly. First, make sure to backup any important files before you start the transfer process. Next, you’ll need to use cloning software to copy the contents of your HDD onto your new SSD.

    This software should come with your SSD, or you can download it from the manufacturer’s website. Once you’ve cloned your HDD onto your SSD, you’ll need to change the boot order in your computer’s BIOS to prioritize the SSD. This will ensure that your computer boots from the SSD instead of the HDD.

    Finally, you can physically swap out the two drives by installing your new SSD and removing your old HDD. With these final steps, you’ll be able to successfully transfer your boot files and enjoy a faster, more efficient computer experience.

    Remove HDD and Test Boot Drive

    In the final steps of troubleshooting your computer, it’s essential to remove the HDD and test the boot drive. This critical process ensures that your computer’s boot drive is working correctly and that the source of the issue is not the hard drive. Sometimes, HDDs can cause problems that may seem like they are caused by the boot drive, but by removing the HDD entirely, you can isolate the issue and determine the cause of the problem.

    By performing this simple test, you can save a lot of time and frustration, as it can point you in the right direction for finding a solution. So, don’t skip this step and rule out any possible issues with the HDD before moving on to other troubleshooting steps.

    Format HDD for Storage

    Now, it’s time to format the HDD for storage. This process will erase everything in the drive and prepare it to store data from scratch. Before you start formatting, make sure to backup any valuable data on another drive.

    Once you have done that, you can proceed with formatting. The easiest way to do this is to use the Disk Management tool on Windows. Simply right-click on the drive you want to format, select the Format option, and choose the file system you want to use.

    NTFS is the most common file system for Windows. Once you have selected the file system, click on OK to begin the formatting process. It may take some time to complete, depending on the size of the drive.

    Once the formatting is complete, the drive will be ready to use for storing data.

    Conclusion

    In conclusion, transferring boot from HDD to SSD requires a bit of technical know-how but is not rocket science. It’s like giving your old computer a new lease on life by replacing the outdated engine with a lightning-fast one. So, don’t let the slow boot times of your HDD dampen your computing experience.

    Just transfer to an SSD and let the lightning strike!”

    FAQs

    What is the benefit of transferring boot from HDD to SSD?
    The main benefit of transferring boot from HDD to SSD is that it significantly improves the overall speed and performance of your computer.

    Can you transfer the boot drive from a laptop HDD to an SSD?
    Yes, you can transfer the boot drive from a laptop HDD to an SSD. However, you will need to use software to clone your existing drive to the new SSD.

    What software can I use to transfer boot from HDD to SSD?
    There are many software options available, including Acronis True Image, EaseUS Todo Backup, and Macrium Reflect. Be sure to choose a reputable and reliable software to ensure a successful transfer.

    Is it difficult to transfer boot from HDD to SSD?
    The process of transferring boot from HDD to SSD can vary in difficulty depending on your level of expertise. However, with the right software and guidance, it can be a straightforward process that does not require advanced technical skills.

  • Unlock Faster Gameplay: The Ultimate Guide on Transferring Games from HDD to SSD

    Unlock Faster Gameplay: The Ultimate Guide on Transferring Games from HDD to SSD

    Are you looking to improve your gaming experience by transferring your games from your HDD to your SSD? Then you’ve come to the right place! In this blog post, we’ll teach you how to transfer your games between your two drives and enhance your overall gaming performance. As gamers, we understand the importance of quick load times and smooth gameplay. Having your games stored on an SSD, rather than an HDD, can significantly improve your gaming experience.

    Not only will transferring your games to an SSD provide faster load times, but it can also improve your computer’s overall speed. Transferring your games may seem like a daunting task, but it’s actually quite simple. With just a few steps, you’ll be able to enjoy all of your favorite games with lightning-fast speed.

    We’ll walk you through the entire process and provide helpful tips along the way. Get ready to level up your gaming experience. Let’s dive into the world of transferring games from HDD to SSD.

    Check SSD

    If you’re thinking of transferring games from your HDD to SSD, there are a couple of ways to approach it. Firstly, you’ll need to make sure that both your HDD and SSD are properly installed and connected to your computer. Once that’s done, you can start transferring your games.

    The easiest way is to simply move the game files from your HDD to your SSD, but this can be time-consuming if you have a large library of games. Another option is to use a disk cloning software, which will copy your entire HDD to your SSD, including all your games. This can be faster, but it can also be more complicated and may require a bit of tech expertise.

    Ultimately, the best method for you will depend on your specific situation and preferences. Regardless of which method you choose, transferring your games to your SSD can give you major benefits like faster load times and smoother gameplay.

    Ensure sufficient space on SSD before transferring games

    Transferring games to your SSD can significantly improve load times and overall performance. However, it’s important to ensure that you have enough space on your SSD before transferring any games. Checking your available space on your SSD is a crucial step to make sure that you have enough room to accommodate your games and not end up with a slow or unstable system.

    Insufficient space on your SSD can cause issues such as crashes, data loss, and poor performance. That’s why it’s important to check your available space and make sure that you have enough free space before transferring games. You can free up some space by deleting unnecessary files or uninstalling unused applications and programs.

    In addition, be sure to take into account the game’s size and any additional files or updates that may come with it. It’s always better to have extra space available on your SSD, just in case. If you don’t have enough space, consider upgrading to a larger SSD or consider moving some of your less frequently played games to an external hard drive.

    By ensuring sufficient space on your SSD and keeping it organized, you can avoid potential issues and enjoy a smoother gaming experience. So before you start transferring games, take the time to check your SSD and make sure you have enough space to handle all of your gaming needs.

    how do you transfer games from hdd to ssd

    Create game folder on SSD

    If you’re looking to transfer your games from your HDD to your SSD, the first step is to create a game folder on your SSD. This will ensure that your games are stored in one easily accessible location. To do this, open File Explorer and locate your SSD drive.

    Right-click on the drive and select “New Folder.” Name the folder something like “Games” or “Steam Library” so that you can easily remember what’s inside. Once your game folder is created, you can start moving your games over from the HDD.

    Simply locate the game you want to move, right-click on it, and select “Cut.” Then navigate over to your game folder on your SSD, right-click on a blank space in the folder, and select “Paste.” Depending on how many games you’re moving, this process may take a while, but it will be worth it in the end when you experience much faster load times while gaming.

    So, if you’re tired of sluggish load times, follow these steps and start enjoying your games in lightning-fast speeds.

    Create a new folder on SSD to hold future transferred games

    Creating a game folder on your SSD is a smart move if you plan on transferring games from your current hard drive or downloading new ones in the future. Not only does it make it easier for you to keep your games organized, but it also ensures that you’re maximizing the capabilities of your SSD. To create a game folder, simply open up your file explorer and navigate to your SSD drive.

    Right-click anywhere on the empty space and select “New Folder” from the dropdown menu. Give your new folder a name, such as “Games” or “My Game Library,” and hit enter. Once you’ve created the folder, you can start moving your games over to it by right-clicking on each game, selecting “Cut,” and then pasting it into the new folder.

    It’s that easy! By creating a designated game folder on your SSD, you’ll be able to easily access your games and keep them organized without taking up valuable space on your main drive.

    Locate installed games on HDD

    If you want to transfer your games from your HDD to a new SSD, the first step is to locate where your installed games are saved on your hard drive. This can typically be found in either the C:/Program Files or C:/Program Files (x86) folder, depending on your computer setup. Once you’ve found the game files, you can simply copy and paste them onto your new SSD.

    Keep in mind that depending on the size of your game files, this may take some time to transfer. Additionally, it’s important to make sure that your new SSD has enough space to store all of your games. You may need to select which games you want to transfer if your new SSD doesn’t have enough space for everything.

    By following these steps, you can easily transfer your games from HDD to SSD and enjoy faster loading times and smoother gameplay.

    Find where your games are installed on the HDD (usually in Program Files Folder)

    To find where your games are installed on the HDD, you can typically locate them in the Program Files folder on your computer. This folder is typically located on your primary hard drive and can be accessed by clicking on the Start menu and then navigating to “Computer” or “This PC”. Once there, you should see a list of your installed hard drives and can click on the one where your games are installed.

    From there, you can browse to the Program Files folder and then find your games in one of the subfolders. Alternatively, you may be able to search for your game’s executable file using the Windows search bar, which can help you quickly locate its installation folder. Keep in mind that some games may be installed in different locations or may have their own dedicated folders, so it’s always best to check the game’s installation instructions if you’re not sure where to look.

    By following these steps, you can easily find where your games are installed on your HDD and keep them organized for easy access and management.

    Copy game files to SSD

    If you have recently added an SSD to your system and want to transfer your games from the HDD to your new SSD, it is a fairly straightforward process. First, you want to make sure that your SSD has enough storage space to accommodate all of the games you want to transfer. Once you have confirmed this, you can simply locate the game files on your HDD and copy them over to your SSD.

    This can be done manually by locating the game folder on your HDD and copying it to the desired location on your SSD. Alternatively, you can use a third-party tool such as Steam’s built-in backup and restore feature to automatically transfer your games to the SSD. Simply create a backup of the game files and choose to restore them on the SSD.

    It’s important to note that some games may require reinstallation rather than a direct transfer of files, so be sure to check the game’s official documentation for any specific instructions. Overall, transferring games from an HDD to an SSD can help improve load times and overall performance, making it a worthwhile endeavor for avid gamers.

    Select game files from HDD and paste them to the newly created game folder on SSD

    To improve gaming performance, it’s recommended to copy game files from your HDD to an SSD. This process involves creating a new game folder on the SSD and selecting files from the existing game on the HDD. You can then paste these chosen files into the newly created game folder.

    Copying game files to an SSD can significantly improve game loading times and overall performance, as the SSD has faster read/write speeds than the traditional HDD. It’s essential to ensure that there is enough space on the SSD to accommodate the game files, as SSDs typically have less storage capacity than HDDs. With this simple process, you can enhance your gaming experience by greatly reducing load times and increasing game performance.

    Create game shortcut

    If you’re looking to transfer games from your HDD to an SSD, you may be wondering how to create game shortcuts. The process is actually quite simple. First, locate the game’s executable file on your HDD.

    This will typically be in the “Program Files” or “Program Files (x86)” folder. Right-click on the executable file and select “Create Shortcut.” Then, drag the shortcut to your desktop or another folder on your SSD.

    This will create a shortcut for the game on your SSD, allowing you to easily launch it without having to navigate to the executable file on your HDD. By transferring your games to an SSD, you can enjoy faster load times and improved performance, making for a much smoother gaming experience. So why not give it a try?

    Create a shortcut to the game’s executable file on the desktop or in the start menu

    Creating a shortcut to your game’s executable file on your desktop or Start menu is a quick and easy way to ensure you never have to search for the game again. It’s an especially handy trick if you’re prone to forgetfulness or if you have a large library of games in your collection. To create a shortcut to your game, simply locate the game’s executable file (usually found in the game’s installation folder) and right-click on it.

    From there, select “Create Shortcut” and drag the shortcut to your desktop or Start menu. You can also rename the shortcut to something more memorable if you’d like. This way, whenever you want to play the game, all you have to do is click on the shortcut, and you’re good to go! It’s a small but invaluable time-saver that you won’t want to go without.

    Test game on SSD

    Moving your games from an HDD to an SSD is pretty simple. The first thing you should do is install the SSD into your computer. Once that is done, you should clone your HDD to your new SSD.

    There are several cloning tools available on the internet that you can use. Once your SSD has been cloned, you can then move your games from your HDD to your SSD. To do this, you need to locate the installation folder of the game.

    This is usually found in the Program Files folder on your HDD. Once you have located the game, copy the entire folder to your SSD. After copying, you should delete the game from your HDD to free up space.

    Finally, you should create a shortcut to the game on your desktop or in your start menu for easy access. Now you’re ready to test out your game on your new super-fast SSD!

    Ensure the transferred game works properly on the SSD before uninstalling it from the HDD

    SSD, game, uninstall, test If you’ve decided to transfer your favorite games from your HDD to your SSD, it’s important to first make sure they work correctly before uninstalling them from the old device. This way, you can avoid any potential issues or frustrations that may arise if you assume that the transfer is complete and delete the game from your original drive before testing it on the new one. To effectively test your game on your SSD, simply launch it and make sure that it loads quickly and smoothly.

    If the game runs without any hiccups, you can safely uninstall it from your HDD and enjoy playing it from your much faster solid-state drive. Keep in mind that this process may take some time, but the performance boost you’ll get from using an SSD is well worth the effort.

    Conclusion

    In conclusion, transferring games from your HDD to SSD is like upgrading from a bicycle to a sportscar. You’ll experience lightning-fast load times and seamless gameplay that will leave you wondering how you ever survived without an SSD. So go ahead and make the transfer, because once you experience the power of an SSD, you’ll never want to go back to the slow lane again.

    FAQs

    What is the benefit of transferring games from HDD to SSD?
    Transferring games from HDD to SSD can significantly improve game loading times and overall system speed. SSDs have faster read and write speeds than traditional HDDs, making them ideal for gaming.

    How do you transfer games from HDD to SSD?
    To transfer games from HDD to SSD, you can either use built-in software provided by the SSD manufacturer or use a third-party tool. You will need to clone the entire hard drive or manually copy and transfer each game individually.

    What are some recommended third-party software for transferring games from HDD to SSD?
    Some popular third-party software options for transferring games from HDD to SSD include EaseUS Todo Backup, Acronis True Image, and Clonezilla.

    Can you transfer games from an external HDD to an SSD?
    Yes, you can transfer games from an external HDD to an SSD using the same process as transferring from an internal HDD. Simply connect the external HDD to your computer, clone the drive or copy and transfer the games, and then disconnect the external HDD.

  • Seamless Data Migration: The Ultimate Guide on How to Transfer Files from Old Hard Drive to SSD

    Seamless Data Migration: The Ultimate Guide on How to Transfer Files from Old Hard Drive to SSD

    Are you tired of slow boot times and sluggish performance on your computer? One solution could be to transfer your operating system and files to a solid-state drive (SSD). Not only does an SSD deliver faster read and write speeds, but it can also prolong the lifespan of your computer. But how do you transfer your data to an SSD? Don’t worry, it’s easier than you think.

    In this step-by-step guide, we’ll walk you through the process of transferring your files to an SSD. From choosing the right SSD to cloning your hard drive, we’ve got you covered. So buckle up and get ready to upgrade your computer’s performance by transferring to an SSD.

    By the end of this guide, you’ll be enjoying faster boot times, shorter load times, and an all-around snappier computer experience. Let’s get started!

    Preparation

    If you’re wondering how to transfer from an old hard drive to a new SSD, it’s important to prepare for the process beforehand. First, make sure you have the right tools on hand, such as a suitable cloning software and a USB-to-SATA cable. You’ll also need to ensure that the new SSD has enough storage space to accommodate all the data on the old hard drive.

    Next, back up all critical data on the old hard drive to an external device, just in case. After backing up the data, shut down your computer and connect the new SSD to the PC, either by installing it internally or using an external enclosure. Then, use the cloning software to clone the old hard drive onto the new SSD.

    Once the process is complete, disconnect the old hard drive and boot up your computer using the new SSD. With the right preparation and tools, transferring data from an old hard drive to an SSD can be a smooth process.

    Assess your old hard drive

    Before assessing your old hard drive, you should prepare yourself by gathering the necessary tools and equipment. Firstly, you will need a screwdriver to open your computer and remove the hard drive. Secondly, you should acquire an external hard drive enclosure or a SATA-to-USB adapter to connect your old hard drive to your computer.

    This will allow you to access the data on the drive without installing it internally. Additionally, you should invest in a data recovery software to help retrieve any lost or damaged files. By preparing adequately, you will be able to tackle the task of assessing your old hard drive with ease and confidence.

    Remember, with the appropriate tools and equipment, you increase the chances of recovering valuable data from your old hard drive.

    how do you transfer from old harddrive to ssd

    Choose a compatible SSD

    When it comes to upgrading your computer’s storage capacity, choosing a compatible SSD is crucial. Before you even start looking for a new SSD, it’s important to first check your computer’s specifications and see what type of SSD it supports. Some older computers may not be compatible with modern SSDs and may require an older model instead.

    Once you’ve determined which type of SSD you need, it’s time to consider other factors such as storage capacity and speed. Choosing an SSD with a higher storage capacity and faster read/write speeds can significantly improve your computer’s overall performance, but may come at a higher cost. It’s important to find a balance between your budget and your performance needs when selecting an SSD.

    By doing your research and choosing a compatible SSD that meets your specific needs, you can enjoy faster boot times, faster application loading, and overall improved performance.

    Backup your data

    Backing up your data is essential to protect against loss in the event of a hardware failure, natural disaster, or cyberattack. But before you start copying files, take some time to prepare. Create a checklist of all the data you need to back up, including documents, photos, and videos.

    Determine the frequency of your backup schedule based on the importance and frequency of updates to your data. Consider using cloud storage or external hard drives for your backup, and check the storage capacity for planning. Remember to label and date the backup, enabling easy identification of the most recent version, especially if you have multiple backups.

    Finally, test your backup by restoring it on a different device to verify the process is correctly working. Taking these steps to prepare your backup ensures your data is protected and easy to recover in case of any disaster.

    Transferring Data

    If you’re upgrading to an SSD from an old hard drive, you might be wondering how to transfer all your data over. Luckily, there are a few options available to you. One of the easiest ways is to use a cloning tool like Macrium Reflect or EaseUS Todo Backup to copy everything from your old hard drive to your new SSD.

    This method essentially creates an exact copy of your old drive and puts it onto the new one. Another option is to manually back up important files like photos, documents, and music onto an external hard drive or cloud storage service, and then transfer them over to the new SSD. This method takes a bit more time and effort, but it allows you to be more selective about what you transfer over.

    Regardless of which method you choose, it’s always a good idea to double-check that everything has been transferred over correctly before getting rid of your old hard drive.

    Physically install your SSD

    Transferring data from your old hard drive to your new SSD is a critical step in the installation process. Fortunately, there are several ways to accomplish this task, even if you’re not a computer expert. One option is to use a data transfer cable, also known as a SATA to USB adapter.

    This cable allows you to connect your old hard drive to your computer and transfer files directly to your new SSD. Alternatively, you could use software programs such as EaseUS Todo Backup, which can clone your old hard drive to your new SSD without requiring any technical knowledge. Whatever method you choose, remember to back up all important files before transferring them to your new drive.

    With a little patience and care, transferring data can be a smooth and stress-free process.

    Clone your old hard drive to the SSD

    If you’ve recently upgraded to an SSD and want to keep all your original files and data intact, the best option is to clone your old hard drive onto the new SSD. This process is both simple and effective and involves transferring all your data from one drive to another. By doing this, you’ll have an exact copy of your old hard drive, including the operating system, personal files, settings, and software preferences.

    This method is also much faster than manually transferring files and folders, allowing you to save a significant amount of time and effort. However, it’s important to note that not all cloning software is the same. Be sure to use a reliable tool that’s specifically designed for this purpose, such as EaseUS Todo Backup or Acronis True Image.

    With the right software and the right approach, you can make your hard drive to SSD transfer process smooth and seamless.

    Verify data transfer

    When it comes to transferring data, verification is essential to ensure that all information has successfully transferred from one device to another. Verifying data transfer confirms that the copied data is accurate and complete, and no discrepancies or errors occurred during the transfer. The verification process is crucial to avoiding potential consequences such as data loss or corruption.

    There are different methods to verify data transfer, depending on the type and amount of data being transferred. For smaller files, you can visually check the number of files and their sizes to confirm their transfer. However, for larger and more complex data, it’s recommended to use third-party software or built-in tools from the operating system to verify data transfer.

    One common tool to verify data transfer is the checksum algorithm, which calculates and compares the checksum value of both the original and the copied data. If the value matches, it confirms that the data was accurately copied. Another tool is the file verification tool, which compares the original and copied files’ properties to ensure that they are identical.

    Overall, transferring data is a vital part of many industries and businesses, and ensuring verification is crucial to prevent errors and potential losses of valuable information. By verifying data transfer, you can rest assured that your data is successfully transferred and ready to use.

    Post-Transfer Steps

    If you’re wondering how to transfer from an old hard drive to an SSD, don’t worry, it’s a fairly simple process. First, make sure to back up all important files to external storage, just in case. Then, connect your SSD to your computer, either directly or via an enclosure if necessary.

    You can then use software like Macrium Reflect or Clonezilla to clone your old hard drive onto the SSD. Be sure to allocate enough space on the SSD for everything you want to transfer. Once the transfer is complete, you will need to change your boot settings in the BIOS so that the computer recognizes the SSD as the primary drive.

    Finally, make sure to update any drivers or firmware on the SSD to ensure optimal performance. With these steps completed, you’ll be enjoying faster boot times and better performance from your new SSD!

    Change boot order in BIOS

    Changing the boot order in BIOS may be necessary after transferring your data to a new computer. To do this, you will need to enter the BIOS setup utility by pressing a specific key as your computer boots up. The key varies by manufacturer, but it is usually one of the function keys or the Delete key.

    Once in the BIOS, look for an option related to boot order or boot sequence. You can use the arrow keys to navigate the options and change the order using the F5 or F6 keys. Make sure to save your changes before exiting the BIOS setup.

    Changing the boot order allows your computer to boot to the operating system installed on the desired device, whether it’s the hard drive or a USB drive. By changing the boot order, you can ensure a smooth transition to your new computer with all your data intact.

    Wipe old hard drive

    Now that you’ve successfully transferred all your data to a new hard drive, you’ll need to take some post-transfer steps to ensure your old hard drive is wiped clean and ready for disposal or repurposing. It’s crucial to wipe your old hard drive to protect your sensitive data from falling into the wrong hands. A simple delete or format won’t do the trick as those methods only erase the file names and not the actual data.

    Instead, you’ll need to use a specialized software that overwrites the entire hard drive with random data or zeroes. This process ensures that the original data is completely destroyed, making it impossible for anyone to recover it. Overall, taking the time to wipe your old hard drive is a crucial step in ensuring the security of your personal information.

    Conclusion

    Transferring from an old hard drive to a shiny new SSD can feel like upgrading from a bicycle to a Ferrari. But fear not, the process is simpler than you might think. With a little bit of patience and some basic tech know-how, you can take your digital life from snail’s pace to warp speed in no time.

    And once you’ve experienced the lightning-fast boot times and smooth performance of an SSD, you’ll wonder how you ever managed to get anything done on that old slowpoke hard drive. Time to say sayonara to sluggishness and hello to high performance – SSD, here we come!”

    FAQs

    What is the benefit of transferring data from an old hard drive to an SSD?
    Upgrading from an old hard drive to an SSD can result in faster boot and load times, enhanced performance, and improved power consumption.

    Can I transfer my entire operating system from my old hard drive to an SSD?
    Yes, you can clone your entire operating system to your SSD using cloning software which will allow you to maintain all your data, settings, and preferences.

    How do I know if my data transfer was successful?
    Once your data transfer is complete, check your files, applications, and system performance for any issues. You can also double-check that all files have transferred by comparing them to the original files on your old hard drive.

    What if my old hard drive is failing or has errors?
    It is recommended to fix any issues with your old hard drive before attempting to transfer data to a new SSD. If you are unable to fix the issues, consider taking your device to a professional.

  • Transform Your Computer’s Speed: A Step-by-Step Guide on How to Transfer from HDD to SSD

    Have you recently purchased a Solid State Drive (SSD)? Are you wondering how to transfer all your data from your Hard Disk Drive (HDD) to your new SSD? Look no further! In this step-by-step guide, we will walk you through the process of transferring your HDD data to your new SSD. Upgrading from an HDD to an SSD can make a significant difference in the speed and performance of your computer. While purchasing an SSD is a great investment, transferring your data can be a daunting task, especially if you are not a computer expert.

    However, fear not! With our easy-to-follow guide, you will be able to transfer your data in no time. We understand the importance of keeping your data safe and intact during the transfer process, and that’s why we will provide you with all the necessary precautions to take before starting. Our guide is written in simple language and designed to cater to all levels of computer users.

    In this guide, we will cover everything from backing up your data to disk cloning and updating boot information. It’s essential to follow each step carefully to avoid losing any data. Once you’ve finished the transfer process, you’ll be able to enjoy the blazing fast speeds of your new SSD! Overall, transferring your data from an HDD to an SSD may seem like a daunting task, but it’s a relatively simple process.

    With this guide, we hope to make the process more manageable and less intimidating. So, without further ado, let’s get started!

    Preparation

    If you’re wondering how to transfer from HDD to SSD, preparation is key. The first step is to make sure you have enough space on your SSD to accommodate all the data you want to transfer. You’ll also need to gather all the necessary tools, such as an external hard drive enclosure or a USB-to-SATA adapter, to connect your SSD to your computer.

    Once you have everything you need, it’s important to back up your old HDD data before transferring it to your new SSD. This ensures that if anything goes wrong during the transfer process, you don’t lose any important files or data. It’s also a good idea to run a disk cleanup and defragmentation process on your HDD to ensure that the data is organized and in the best possible shape for transfer.

    By taking the time to properly prepare, you can ensure a smooth and successful transfer from HDD to SSD without any data loss or complications.

    Backup important data

    Backing up important data is an essential part of preparing for any potential disaster or data loss. Whether it’s a computer malfunction, accidental deletion, or a natural disaster, having a backup ensures that you don’t lose all your valuable information. It’s important to back up your data regularly, and ideally, in multiple locations for added security.

    One easy way to back up your data is to use an external hard drive or cloud storage service. By doing this, you can easily transfer your files to a secure location and access them whenever you need to. Additionally, make sure to organize your data properly so that you can easily locate and access the files you need.

    Overall, taking the time to backup your important data is a wise investment in protecting your digital assets and ensuring you don’t lose everything in the event of a disaster.

    how do you transfer from hdd to ssd

    Check available space on SSD

    If you’re running out of space on your SSD, it’s essential to check how much is left before your computer’s performance starts to suffer. Fortunately, it’s a quick and easy process to check your available SSD space and take appropriate action. First, you need to open File Explorer and select “This PC” on the left-hand side.

    From there, right-click on your SSD drive and select “Properties.” This will bring up a window that shows you how much space is being used and how much is still available. If your SSD is close to full, you may need to delete unwanted files, transfer some data to an external hard drive, or consider upgrading to a larger SSD.

    Keeping your SSD with enough free space can help maintain its performance and ensure it lasts for years to come.

    Transfer Methods

    If you want to switch from an HDD to an SSD, there are a few ways to transfer your data. One option is to use cloning software that creates an exact copy of your HDD and moves it to your new SSD. This method is useful because it copies all of your files and settings, including your operating system.

    You can also manually transfer your files by backing up your data to an external hard drive or cloud storage and then transferring them to your new SSD. However, if you transfer your files manually, you’ll need to reinstall your operating system and manually configure your settings. Additionally, you can use a SATA to USB adapter to format your new SSD.

    Once it’s formatted, you can transfer your existing data to it. Ultimately, the best transfer method depends on your preferences and level of technical proficiency.

    Clone HDD to SSD using software

    When it comes to upgrading your computer, one of the most effective ways to improve performance is by transferring the contents of your old HDD to a new SSD. This process can be done using software tools that essentially clone the HDD onto the SSD, making for a seamless transition. One popular software option for this is EaseUS Todo Backup, which is user-friendly and efficient.

    Another method is to use built-in software provided by the SSD manufacturer, such as Samsung Data Migration or Intel Data Migration, which can be downloaded for free. The key is to make sure to follow the instructions carefully and allocate enough time for the transfer process to fully complete. By using these software tools, you can easily optimize the performance and speed of your computer without having to go through the hassle of manually reinstalling all of your programs and files.

    Manually transfer files to SSD

    If you’re looking to manually transfer files to your new SSD, you have a few options to consider. One method is to use a data transfer cable, which allows you to connect your SSD directly to your computer’s USB port. This allows you to quickly and easily copy files over from your old hard drive to your new SSD.

    Another option is to use cloning software, which can copy the entire contents of your old drive onto your new SSD. This method can be more time-consuming and complicated, but it allows you to transfer everything at once and ensure that all your files and settings are exactly the same as they were on your old drive. Whichever method you choose, be sure to back up your data beforehand and follow the instructions carefully to avoid any data loss or damage to your hardware.

    With a little patience and attention to detail, you can quickly and easily transfer all your files to your new SSD and improve your computer’s performance in no time!

    Use Windows Easy Transfer to migrate data

    If you’re planning to switch from an old PC to a new one, you’ll likely want to bring along all your important files and settings. Fortunately, Windows makes this process easy with Windows Easy Transfer. This tool lets you transfer your files, music, pictures, and e-mails from one computer to another using a USB drive or an external hard drive.

    It even transfers settings like Internet favorites and bookmarks. Simply download and install the program on both computers, connect the drives, and follow the on-screen instructions to complete the transfer. Windows Easy Transfer is a simple and reliable way to get all your data from your old PC to your new one without losing any important files or information.

    Say goodbye to the hassle of manually transferring your files – with Windows Easy Transfer, you can transfer everything you need quickly and easily.

    Transferring Operating System

    If you’re looking to transfer your operating system from your HDD to an SSD, you’ve come to the right place. First and foremost, it’s important to back up all of your important data before beginning the transfer process. Once that’s taken care of, there are a few methods you can use.

    One popular option is cloning, which involves creating an exact copy of your current operating system onto the new SSD. This can be done through specialized software or using the built-in migration tool in Windows. Another option is to install a fresh copy of the operating system onto the SSD and transfer your files and applications over manually.

    Whichever method you choose, it’s important to ensure that your computer recognizes the new SSD as the boot drive so that it runs as smoothly as possible. With a bit of patience and attention to detail, transferring your operating system from an HDD to an SSD can be done easily and confidently.

    Create a bootable USB drive

    Creating a bootable USB drive is an essential step when transferring an operating system to a new device. Not only is it convenient, but it’s also easier and faster than using physical media such as a CD or DVD. To make a bootable USB drive, you will need to download the operating system’s ISO file and a program that can create a bootable USB.

    There are several programs available online, such as Rufus and UNetbootin, that can help you create a bootable USB drive in just a few simple steps. Once you have downloaded the program and ISO file, simply plug in your USB drive, open the program, select the ISO file, and choose the USB drive as the destination. After the process is completed, you can then use your newly created bootable USB drive to install your operating system on your desired device.

    Overall, creating a bootable USB drive is a simple and effective way to transfer your operating system and is a must-try for anyone looking to upgrade or replace their current device.

    Install operating system on SSD

    If you’re planning to upgrade your computer by adding a new SSD (Solid-State Drive), you may want to transfer your operating system to the new drive to improve the performance of your system and ensure faster boot and load times. Transferring the operating system to an SSD is not as complicated as it sounds. You can use a cloning tool or software like Acronis True Image to transfer your operating system to the new SSD.

    Cloning allows you to copy everything from the old drive, including the OS, applications, and personal files, to the new SSD. Once the cloning process is complete, you can switch the old drive with the new SSD, and your computer will boot into the newly installed operating system in no time. In summary, transferring your OS to an SSD can significantly boost your computer’s performance, so it’s worth considering if you’re looking to upgrade your computer’s speed and efficiency.

    Final Touches

    Transferring from an HDD to an SSD can seem like a daunting task, but with the right tools and knowledge, it can be done easily. One of the most reliable methods is to use a cloning software, which makes an exact copy of your HDD and transfers it to your new SSD. This ensures that all your files, settings, and programs are carried over seamlessly.

    Another option is to manually transfer your files, which involves copying your important data onto an external hard drive, formatting your SSD, and then transferring the files back onto it. However, this method can be time-consuming and may require reinstalling programs and adjusting settings. Whichever method you choose, make sure to back up your data beforehand and take your time to ensure a smooth transfer.

    Overall, transferring from an HDD to an SSD is a great way to breathe new life into your computer and improve its performance.

    Set SSD as boot drive in BIOS

    In the previous steps, we have successfully installed the SSD and set it as the primary boot drive in the BIOS settings. But before completing the process, we need to make a few final touches to ensure smooth and efficient functioning of our computer. Firstly, we need to update the drivers and firmware of the SSD to the latest version.

    This can be done by visiting the manufacturer’s website and downloading the necessary files. Once downloaded, simply follow the on-screen instructions to install the updates. This will not only improve the performance of the SSD but also fix any compatibility issues with the system.

    Secondly, we need to optimize the SSD for better speed and durability. This can be done by disabling the defragmentation of the drive, enabling TRIM, and adjusting the power settings in the Windows Control Panel. These tweaks will significantly reduce the wear and tear on the SSD and extend its lifespan.

    Lastly, we can also customize the boot logo and splash screen to reflect our personal style. This can be done by using software like Windows Boot Genius or by manually editing the boot.ini file.

    This small touch of personalization can go a long way in making our computer feel like our own. Congratulations! You have successfully set up an SSD as the boot drive in the BIOS settings and made the necessary tweaks to optimize its performance. Your computer will now boot faster, run smoother, and be more reliable than ever before.

    Enjoy the benefits of lightning-fast computing and unparalleled speed!

    Optimize SSD for better performance

    As we come to the end of our SSD optimization journey, there are a few final touches we can add to improve our performance. One easy step is enabling TRIM. This command helps keep our SSD clean by wiping away data that has been marked for deletion.

    We can also tweak our power settings to ensure our SSD is receiving adequate power when in use, which can also improve its performance. Lastly, we can consider enabling AHCI mode in our BIOS settings. This mode allows for better communication between our SSD and our computer’s processor, resulting in faster data transfers.

    By incorporating these final touches into our SSD optimization efforts, we can ensure our SSD is performing at its best and providing us with the fast speeds and reliability we need for our daily tasks.

    Enjoy faster computer speed!

    Are you tired of slow computer speed? The final touches can make all the difference in giving your computer the boost it needs. One easy trick is to remove any unnecessary files and programs that are no longer in use, as they can slow down your system’s performance. Another tip is to customize your startup settings, so your computer only loads the essential programs at launch.

    This saves valuable processing power that can be used to speed up other tasks. You can also consider upgrading your hardware components or running maintenance checks regularly to identify and fix any potential issues. Altogether, these final touches can help you enjoy faster computer speed, ensuring you can work more efficiently and smoothly.

    So why not give it a try today?

    Conclusion

    In summary, transferring from HDD to SSD is like upgrading from a horse-drawn cart to a Ferrari. It may require some technical know-how and patience, but the speed and performance improvements are unbeatable. So, don’t settle for sluggish and outdated storage – jump on the SSD bandwagon and experience a lightning-fast computing experience!”

    FAQs

    What tools do I need to transfer data from HDD to SSD?
    There are several tools available, including disk cloning software and data migration software. Some popular options are EaseUS Todo Backup, Acronis True Image, and Samsung Data Migration.

    Can I transfer my entire operating system from HDD to SSD?
    Yes, it is possible to transfer your operating system to SSD. You can do this by using disk cloning software or data migration software.

    How long does it take to transfer data from HDD to SSD?
    The transfer time varies depending on the amount of data you are transferring, the speed of your HDD and SSD, and the method you are using for the transfer. In general, it can take anywhere from a few minutes to several hours.

    Do I need to reinstall my applications after transferring data from HDD to SSD?
    It is recommended to reinstall your applications after transferring data from HDD to SSD. This will ensure that all the necessary files and settings are properly configured for optimal performance on the SSD.

    Can I transfer data from multiple HDDs to one SSD?
    Yes, it is possible to transfer data from multiple HDDs to one SSD. You can do this by using disk cloning software or data migration software that supports multiple source drives.

  • 128GB SSD vs. 500GB Hard Drive: Which One Wins the Storage Battle?

    When it comes to choosing between an SSD and an HDD, there are a few things to consider. While HDDs have been the standard for years, SSDs are quickly gaining popularity thanks to their lightning-fast speeds and improved durability. But which one is better for your needs? In this blog post, we’ll be comparing a 128GB SSD versus a 500GB HDD to help you make an informed decision.

    We’ll take a closer look at the performance, lifespan, cost, and storage capacity of each option. So whether you’re looking to upgrade your laptop’s performance or build a new gaming PC, keep reading to find out which option is the best fit for you.

    Speed

    When it comes to comparing a solid-state drive (SSD) and a hard disk drive (HDD), the main factor that makes SSDs stand out is their speed. A 128GB SSD can perform much faster than a 500GB HDD due to its lack of moving mechanical parts. SSDs use flash memory to store data, whereas HDDs use spinning disks and read/write heads that physically move to retrieve data.

    As a result, SSDs can access and transfer data at lightning-fast speeds, making them ideal for tasks such as booting up your computer or running applications. Additionally, SSDs are much more durable than HDDs, as they are less prone to mechanical failures. While a 500GB HDD may have more storage capacity, the speed and reliability of a 128GB SSD can make a world of difference in terms of overall performance.

    Ultimately, the decision between the two depends on your specific needs, but if speed and reliability are a top priority, then an SSD is definitely the way to go.

    SSD is faster than HDD

    When it comes to storage solutions, speed is the essential factor that most users consider before purchasing any storage device. The Solid State Drive (SSD) differs from the traditional Hard Disk Drive (HDD) in terms of how data is stored and accessed. The SSD has no moving parts, while the HDD has disks that rotate and arms that move to read or write data.

    This difference means that the SSD has faster read and write speeds than the HDD. The speed at which the data is transferred on an SSD is much higher than that of an HDD. This makes the SSD the go-to storage solution for performance-oriented users.

    The SSD storage technology has evolved over time, making it much faster and reliable than HDD. The SSD uses NAND-based flash memory to store data, which significantly reduces the time it takes to access and retrieve data. In contrast, the HDD’s read and write speeds can be affected by factors such as disk fragmentation and bad sectors.

    As a result, SSDs are faster than HDDs when it comes to boot-up times, application load times, and data transfer speeds. In conclusion, if you want your computer to run faster and perform better than your current HDD, upgrading to an SSD is an excellent option. The increased speed and reliability can be felt in everyday use, making your computing experience much more enjoyable.

    When shopping for an SSD, ensure that you go for the one that meets your storage needs and is compatible with your system. Overall, switching to SSD from an HDD is a game-changer, providing a noticeable boost to your computer’s performance and speed.

    SSD allows faster boot-up and loading times

    SSD Who doesn’t love fast boot-up and loading times? Thanks to SSDs, this is now a reality. Unlike traditional hard drives (HDDs), which rely on spinning disks to read and write data, SSDs use flash memory to store data. This means that they’re much faster when it comes to accessing and retrieving data.

    With an SSD, your computer can boot up in seconds, and applications and programs can load faster than ever before. In fact, using an SSD can make your entire computing experience feel smoother and more responsive. So, if you want to speed up your computer and save time in the process, consider upgrading to an SSD today.

    Storage Capacity

    When it comes to storage capacity, the 128GB SSD and the 500GB hard drive differ significantly. While the SSD is smaller, it is incredibly fast and efficient, making it an ideal choice for individuals who prioritize speed over storage capacity. On the other hand, the 500GB hard drive offers much more storage space, but it has a slower speed and is prone to wear and tear.

    Choosing between the two depends on how you intend to use your device. If you’re someone who deals with large files frequently, such as a graphic designer or a gamer, the hard drive is likely a better fit for you. But if you prioritize fast boot-up times and quick loading speeds, the smaller but quicker SSD is the way to go.

    It’s important to assess your needs before making a decision, as both have their pros and cons.

    500GB HDD offers more storage

    When it comes to choosing a computer or laptop, storage capacity is always a top priority. Nowadays, we all have a lot of digital files and documents that we want to keep safe and accessible. This is where having a 500GB HDD (hard disk drive) comes in handy.

    With this storage capacity, you can store a lot of different files, from documents to photos to music and videos. It’s perfect for those who need a lot of storage for their work or personal projects. Plus, a 500GB HDD is more affordable than its higher capacity counterparts, making it a great option for those on a budget.

    One thing to keep in mind when opting for a 500GB HDD is that it’s important to regularly clean up and organize your files. With a large storage capacity, it’s easy to let clutter build up and slow down your computer. You can use tools like file compressors or delete duplicate files to keep your storage optimized and your computer running smoothly.

    Overall, a 500GB HDD is a great choice if you need a lot of storage capacity without breaking the bank. It’s perfect for those who have a lot of digital files to store and want to keep them all in one place. Just don’t forget to keep your files organized to avoid any slowdowns or clutter.

    128GB SSD is ideal for smaller files and programs

    When it comes to choosing the right storage capacity for your computer, it can be overwhelming to navigate through all the options. However, if you’re someone who mainly uses their computer for everyday tasks such as browsing the internet, using word processors, or streaming media content, then a 128GB solid-state drive (SSD) may be the ideal choice for you. This smaller storage capacity is perfect for those who don’t require a lot of space for large files or programs, and instead, focus mainly on smaller files.

    Plus, since SSDs don’t have any moving parts, they provide faster read and write speeds, making it easier for you to access your files quickly. So, if you’re a student, remote worker, or just someone who uses their computer for general purposes, a 128GB SSD can be a great storage option for you.

    Durability

    When it comes to durability, solid-state drives (SSDs) have the upper hand over traditional hard disk drives (HDDs). While both the 128GB SSD and the 500GB HDD serve their respective purposes, the SSD is less prone to physical damage since it doesn’t have any moving parts. This means that the SSD is less likely to fail and can withstand jarring impacts or drops better than HDDs.

    SSDs are also generally more efficient in terms of power consumption, which can save you on energy costs in the long run. However, SSDs are typically more expensive than HDDs and may not offer as much storage capacity. Ultimately, the choice between a 128GB SSD and a 500GB HDD boils down to your specific needs and budget.

    If you value speed and durability more than storage capacity, go for the SSD. If you need plenty of storage space and don’t mind slower performance, go for the HDD.

    SSDs have no moving parts, making them more durable

    SSDs (Solid State Drives) When it comes to durability, SSDs have a leg up on traditional hard drives. That’s because SSDs have no moving parts, meaning there is less wear and tear on the components. What does that mean for you? Well, it means that your data is less likely to become corrupted, you’ll experience fewer crashes and failures, and your drive will last longer overall.

    Compared to traditional hard drives, SSDs are also more shock resistant, making them a wise choice for people who need to transport their equipment frequently. Have you ever dropped your laptop? With an SSD, you’re less likely to lose your data or damage your drive. Plus, since SSDs generate less heat due to their lack of moving parts, they tend to run cooler and quieter than traditional hard drives.

    So if you want a drive that can stand up to the daily wear and tear of everyday use, consider upgrading to an SSD.

    HDDs are more prone to damage

    When it comes to durability, HDDs are simply not in the same league as SSDs. Hard disk drives contain moving parts, which inherently makes them more prone to damage. The spinning platters and read/write heads can easily be interrupted or damaged due to bumps, drops, or other physical impacts.

    Additionally, dust or debris can cause the drive to fail prematurely, reducing its lifespan. In contrast, solid-state drives have no moving parts, making them much more durable. They can withstand a lot of abuse without the risk of damage, making them a more reliable option for anyone who wants to keep their data safe and secure for a long time.

    To put it simply, HDDs are like a classic car with an engine that can break down, while SSDs are like a sleek sports car that’s built to last. If you want your data to be protected against the wear and tear of everyday use, an SSD is definitely the better choice.

    Cost

    If you’re looking to upgrade your laptop or computer storage, you may be wondering how a 128GB SSD compares to a 500GB hard drive. One factor to consider is cost. Generally, an SSD will be more expensive per GB than a hard drive.

    For example, a 128GB SSD may be similar in price to a 500GB hard drive. However, the speed and durability benefits of an SSD may justify the higher cost for some users. SSDs offer faster read and write speeds, which can make a significant difference in overall system performance.

    They are also more durable than hard drives because they have no moving parts. So if you’re looking for speed, durability, and can afford the higher cost, an SSD may be the way to go. However, if you need a large amount of storage space at a lower cost, a hard drive may be the better option for you.

    SSDs are generally more expensive than HDDs

    When it comes to storage, SSDs are generally more expensive than HDDs, but the cost difference isn’t always as large as you might think. While the price per unit for SSDs is often higher than that of HDDs, SSDs tend to offer higher speeds, greater reliability, and better overall performance. Plus, as SSDs become more widely adopted and production costs decline, prices are dropping rapidly.

    Depending on your storage needs and budget, an SSD may be the perfect fit, even if it costs a bit more upfront. Think of it like buying a sports car versus a standard sedan. Sure, the sports car might be pricier, but the added speed and performance more than make up for the extra cost if that’s what you value.

    The same goes for SSDs – if you prioritize performance and reliability, then the cost difference might be worth it for you.

    HDDs are more affordable for larger storage needs

    When it comes to larger storage needs, HDDs are much more affordable compared to SSDs. While SSDs might offer faster data transfer and access speeds, they tend to cost a lot more than HDDs of similar capacity. For people who need to store large amounts of data, such as gamers, content creators, and businesses, HDDs are a cost-effective choice.

    Considering the advancement in technology, HDDs have become more reliable and faster compared to their earlier days. As a result, they are still a primary choice for enterprise-level storage applications. In the end, while SSDs offer faster speeds and better performance, HDDs are a more affordable option for people with larger storage needs who are looking to save on cost.

    Conclusion

    In the battle of 128gb SSD vs. 500gb hard drive, the winner ultimately comes down to individual preferences and needs. If speed and efficiency are top priorities, the SSD reigns supreme.

    However, if storage capacity and affordability are key factors, the hard drive is a solid choice. At the end of the day, it’s all about finding the perfect balance between performance and practicality. Just like finding the perfect pizza toppings, it’s all about personal taste.

    So choose wisely, and may your computing adventures be endlessly satisfying!”

    FAQs

    What is the main difference between a 128GB SSD and a 500GB hard drive?
    The main difference is the storage capacity – the 500GB hard drive has more storage space than the 128GB SSD.

    Which is faster, a 128GB SSD or a 500GB hard drive?
    Generally, the 128GB SSD is faster than the 500GB hard drive because it has no moving parts and can access data faster.

    Can a 128GB SSD replace a 500GB hard drive?
    It depends on your storage needs. If you only need a smaller amount of storage space, then the 128GB SSD can replace the 500GB hard drive. However, if you need more storage space, then the 500GB hard drive is a better option.

    What are the advantages of a 128GB SSD over a 500GB hard drive?
    The advantages of a 128GB SSD over a 500GB hard drive include faster read and write speeds, less power consumption, and increased durability due to the lack of moving parts.

  • HDD vs SSD: Unveiling the Key Differences & Performance Comparison

    HDD vs SSD: Unveiling the Key Differences & Performance Comparison

    In today’s digital age, storage devices are crucial for storing and accessing our valuable data. However, with the advancement in technology, traditional HDDs have been replaced by the lightning-fast SSDs. For the non-tech-savvy folks, this could become a perplexing topic to understand.

    Which device is better for your needs? Which one is more cost-effective? Which one has a longer lifespan? All these questions can be answered by comparing HDD vs SSD. In this blog, we will simplify this topic and help you understand the key differences and similarities between these two devices. So, if you’re someone who wants to upgrade or replace their storage device, keep reading to find out!

    Speed and Performance

    If you’re comparing an HDD to an SSD, one major difference you’ll notice is speed and performance. HDDs are slower than SSDs because they use spinning disks to store and access data. SSDs, on the other hand, use NAND flash memory, which has no moving parts.

    This makes SSDs more efficient and faster at accessing data, resulting in faster load times for programs and applications. In fact, SSDs can run up to 10 times faster than HDDs. They can also handle a larger number of read and write operations at once, making them ideal for multitasking and gaming.

    Although SSDs are more expensive than HDDs, they offer better speed and performance, making them a worthwhile investment for anyone who values fast load times and overall system performance.

    HDD slower due to moving parts

    When it comes to a computer’s storage, there are two main types: HDD (hard disk drive) and SSD (solid-state drive). While both of these types serve the same purpose – storing data – there are some significant differences between them. One of the most notable differences is that HDDs have moving parts, which makes them inherently slower than SSDs.

    The speed at which your computer can retrieve data depends on how quickly the parts inside your HDD can find and access it. Imagine trying to find a piece of paper in a messy filing cabinet – it takes time to sift through the papers until you can find what you’re looking for. The same is true for a computer’s HDD; it takes time for the read/write head to find the data stored on the disk.

    On the other hand, SSDs don’t have any moving parts, which means data can be accessed almost instantly. This makes them much faster and more efficient, especially when it comes to tasks like booting up your computer or opening large files. However, SSDs are generally more expensive than HDDs, so it’s important to weigh the pros and cons before making a decision on which one to use in your computer.

    Ultimately, the choice depends on your specific needs and budget.

    how does a hdd compare to a ssd

    SSD faster – no moving parts

    When it comes to speed and performance, there’s no doubt that SSDs are the way to go. These solid-state drives offer lightning-fast read and write speeds, thanks to the fact that they have no moving parts. Unlike traditional hard drives, which rely on spinning disks to read and write data, SSDs use flash memory to store information.

    This means that they can access data much more quickly, which translates to faster boot times, quicker file transfers, and snappier overall performance. So if you’re looking for a way to speed up your computer, upgrading to an SSD is definitely the way to go. Plus, with no moving parts to wear out, they tend to be more reliable and have a longer lifespan than traditional hard drives.

    Capacity

    When it comes to comparing HDDs and SSDs, there are several factors to consider, including capacity. HDDs typically have a higher capacity than SSDs, with some models offering up to 16TB of storage. However, SSDs are catching up, with several manufacturers now offering models with capacities of up to 4TB.

    It’s important to note that capacity alone shouldn’t be the only deciding factor when choosing between an HDD and an SSD. While an HDD may offer more storage for your money, an SSD can provide significantly faster read and write speeds, leading to faster boot times, smoother application launches, and overall improved system performance. So, when comparing a HDD to a SSD, it’s key to consider both capacity and performance to determine which is the best option for your needs.

    HDDs offer more storage space

    When it comes to storage capacity, it is clear that traditional HDDs have the upper hand over their solid-state drive counterparts. With the ability to store terabytes of data, HDDs are an excellent option for individuals or businesses looking for vast amounts of storage space at an affordable price. While SSDs have made some strides in increasing their storage capacity, they are still relatively expensive compared to HDDs when it comes to larger storage needs.

    Additionally, many individuals prefer the peace of mind that comes with knowing they have ample space to store all of their files and media without worrying about running out of space quickly. Therefore, if you are someone who requires a lot of storage space, an HDD might be the ideal choice for you, ensuring you have the room you need to store all of your important files and media safely.

    SSDs typically available in smaller sizes

    When it comes to capacity, SSDs are typically available in smaller sizes compared to their traditional hard drive counterparts. The reason behind this is due to the way SSDs are designed and manufactured. SSDs use NAND flash memory to store data, which is much more expensive than the magnetic disks used in traditional hard drives.

    As a result, SSDs are often produced with smaller capacities, making them ideal for use in laptops and other mobile devices where space is limited. However, it’s worth noting that SSDs are becoming more affordable and larger capacities are slowly becoming available. So while they may not be the right choice for those who need massive amounts of storage space, they are an excellent option for those who value speed and reliability over raw capacity.

    Durability

    When it comes to durability, there’s a clear winner between a HDD and an SSD. A HDD, or hard disk drive, is comprised of spinning disks and a mechanical arm that reads and writes data. The constant movement of the mechanical arm results in wear and tear over time, often leading to the failure of the HDD.

    On the other hand, an SSD, or solid-state drive, has no moving parts, making it significantly more durable than a HDD. SSDs rely on flash memory to store and retrieve data, which means they are less susceptible to physical damage. In fact, most SSDs come with shock and vibration resistance, making them ideal for laptops or other portable devices that are often subjected to jostling.

    So when it comes to longevity, an SSD is the clear choice.

    HDDs can fail sooner due to moving parts

    When it comes to the durability of storage devices, it’s essential to consider the types of moving parts that exist within them. HDDs, for instance, contain spinning disks and intricate read/write heads that read and write data. Because of this, they are more prone to failure than their non-moving SSD counterparts.

    The constant spinning and movement within the HDD can wear down its mechanical parts, leading to an increased risk of breakdowns and shorter life spans. In contrast, SSDs lack any moving parts and thus can last much longer. They are also much less susceptible to shock damage and can reliably store data with integrity.

    So, if you are looking for reliable and durable storage devices, considering switching to an SSD for peace of mind.

    SSDs are more durable without moving parts

    When it comes to durability, SSDs (solid-state drives) have a definite advantage over traditional hard drives. Unlike HDDs (hard disk drives), SSDs have no mechanical parts that can wear down or break over time. This means that SSDs have a much longer lifespan than their HDD counterparts.

    In fact, many SSDs are rated to last for up to ten years or more, depending on usage patterns and other factors. The main keyword “durability” highlights how solid-state drives have become the go-to choice in modern computing, given the number of electronic devices powered by SSDs. The technology has cemented its position as the most reliable storage device for high-end computing systems.

    This is due to its ability to store data without any moving parts, ensuring that it can withstand daily wear and tear. Another advantage of using SSDs is protecting data against external disturbances that can cause irreparable damage to traditional hard-drives. This means that your digital files and data are well-protected using an SSD.

    Essentially, whenever durability and reliability are concerned, it is essential to consider using an SSD as it will provide you unmatched longevity compared to traditional hard-drives.

    Price

    When it comes to price, SSDs are generally more expensive than HDDs. However, as technology has advanced, the gap in price has decreased. HDDs are still the more affordable option, but SSDs have become more accessible for consumers.

    The price difference ultimately comes down to the storage capacity and speed of the drive. SSDs are faster and have better performance, but they are more expensive for the same amount of storage as a traditional HDD. That being said, the benefits of faster load times, improved performance, and decreased power consumption make an SSD worth considering, despite the higher price point.

    Overall, the cost comparison between HDDs and SSDs comes down to personal preference and the specific needs of the user.

    HDDs are more affordable

    When it comes to affordability, HDDs are the clear winner compared to their SSD counterparts. The cost per gigabyte of storage is significantly lower for HDDs, making them more budget-friendly for those who need large amounts of storage space without breaking the bank. This is especially true for those who need terabytes of data storage.

    While SSDs have been gradually decreasing in price over the years, they are still more expensive than HDDs on average. That being said, the price difference might not matter as much for those who prioritize speed and performance over storage capacity. However, if budget is a concern and storage capacity is a top priority, HDDs are the more practical option.

    So, if you’re looking for a cost-effective option to store large amounts of data, an HDD might be the way to go.

    SSDs are pricier but becoming more affordable

    When it comes to purchasing new storage devices for your computer, it’s essential to consider both the price and the performance. Solid-state drives (SSDs) have become increasingly popular in recent years due to their faster read and write speeds, compared to traditional hard disk drives (HDDs). However, SSDs are generally more expensive than HDDs, which can be off-putting for budget-conscious consumers.

    The good news is that the price of SSDs has dropped significantly in recent years, making them more affordable for the average consumer. In fact, you can now purchase a decent-sized SSD for a similar price to what you would pay for a high-quality HDD. With the price gap continuing to narrow, the increased speed and performance of SSDs are becoming a more attractive option, even for those on a tighter budget.

    So, while SSDs might have been a costly investment in the past, they are now an affordable and worthwhile upgrade to consider for your computer’s storage needs.

    Conclusion: Which is Better for You?

    In the battle of HDD vs SSD, it is like comparing a snail to a cheetah. The HDD may have more storage space, but the SSD’s lightning-fast speed and reliability makes it the clear winner. With an SSD, you can zip through tasks and handle data like the Road Runner on steroids while the HDD limps behind.

    So don’t settle for the slow and steady option – embrace the speedy and reliable SSD for all your storage needs!”

    FAQs

    What are the main differences between HDDs and SSDs?
    HDDs (hard disk drives) use spinning disks to store data, while SSDs (solid state drives) use flash memory. This means SSDs are faster, more reliable, and consume less power than HDDs.

    Are HDDs still relevant compared to SSDs?
    HDDs still have a place in the market for users who need a lot of storage at a lower cost. However, SSDs are becoming more popular due to their increased speed and reliability.

    How do the prices compare between HDDs and SSDs?
    Generally, SSDs are more expensive per gigabyte than HDDs. However, the price gap is closing as SSD technology becomes more common and less expensive to produce.

    Which is better for gaming, an HDD or SSD?
    SSDs are generally better for gaming due to their faster read and write speeds. This results in faster game load times and less lag during gameplay.

    Can an HDD be upgraded or replaced with an SSD in a computer?
    Yes, it is possible to upgrade a computer’s storage from an HDD to an SSD. This can result in a noticeable improvement in performance and speed.

  • Fusion Drive vs SSD: Which One Wins the Battle of Speed and Storage?

    If you’re on the hunt for the perfect storage solution for your computer, you’ve probably come across two popular options: Fusion Drive and SSD. Both of these technologies offer unique benefits, but which one is faster? Well, it depends on how you define “faster”. On one hand, Fusion Drive combines a traditional hard drive with a small amount of solid-state storage, offering the best of both worlds.

    The most frequently used files are stored on the SSD, while the rest are stored on the hard drive. On the other hand, SSDs are entirely flash memory, offering lightning-fast read and write speeds. So, if you’re looking for faster boot-up times and file access, SSDs are the clear winner.

    However, if you need a more balanced solution that offers ample storage space and fast access to frequently used files, Fusion Drive might be the better choice. Ultimately, it all comes down to your individual needs and preferences. Whether you choose Fusion Drive or SSD, both options offer unique benefits that can help to improve your computing experience.

    So, it’s worth taking some time to weigh your options and choose the storage solution that’s right for you.

    Understanding Fusion Drives and SSDs

    When it comes to storage solutions, fusion drives and SSDs are two popular options. While both serve the same purpose of storing data, there are significant differences between the two. A fusion drive is a combination of a traditional hard disk drive (HDD) and a solid-state drive (SSD) that work together to deliver fast read and write speeds.

    On the other hand, an SSD is a flash-based storage device that offers faster performance than traditional HDDs. SSDs are known for their lightning-fast read and write speeds, making them the ideal choice for those who want speedy performance. While fusion drives offer a balance between speed and storage capacity, they still fall short when compared to the performance of an SSD.

    Overall, if you’re after speedy performance, an SSD is the way to go, but if you need more storage capacity at a lower cost, a fusion drive is a good option.

    What is a Fusion Drive?

    Fusion Drive If you’re considering buying a Mac computer, you may have come across the term “Fusion Drive.” So, what exactly is it? Simply put, a Fusion Drive is a combination of a traditional hard drive and a solid-state drive (SSD). This hybrid design aims to give you the best of both worlds: the high storage capacity of a hard drive and the lightning-fast performance of an SSD.

    The way it works is that frequently accessed files and applications are automatically stored on the SSD, while less frequently used data is saved on the hard drive. One of the main benefits of a Fusion Drive is that it offers faster boot-up times and efficient app loading, as the most frequently used software is stored on the SSD. This means you can start up your computer, open apps, and access files quickly and easily.

    The design also makes it an ideal choice for gaming enthusiasts, video editors, and graphic designers who need fast access to large files. Overall, a Fusion Drive is an innovative storage solution that offers the best of both worlds for those who need storage capacity and speed. If you’re looking for a computer that can handle demanding tasks or just want to speed up your everyday computing experience, a Fusion Drive-equipped Mac may be the perfect choice for you.

    how does a fusion drive compare to a ssd

    What is an SSD?

    An SSD (Solid State Drive) is a type of storage device that uses flash memory to store data permanently. Unlike traditional hard disk drives (HDDs), SSDs have no moving parts, which makes them much faster and more reliable. With an SSD, your computer can boot up and launch applications much more quickly than with an HDD.

    It also reduces power consumption, which in turn extends battery life. Additionally, an SSD can be used in conjunction with a traditional hard drive as part of a Fusion Drive setup. This configuration allows the computer to store frequently accessed files and applications on the SSD portion for better performance, while keeping larger files and archives on the HDD portion.

    Overall, an SSD is a great upgrade for anyone looking to increase their computer’s speed and performance.

    Speed Comparison Between Fusion Drives and SSDs

    If you’re wondering how a fusion drive compares to an SSD, the answer lies in the type of storage each one offers. A fusion drive combines a traditional hard drive with flash storage, while an SSD only uses flash storage. This means that a fusion drive can offer more storage space and a lower price point, while an SSD offers faster read and write speeds.

    In terms of speed, SSDs are much faster than fusion drives. This is because they use flash storage exclusively, which is known for its lightning-fast read and write speeds. This means that boot times and file transfers will be significantly faster on an SSD.

    However, a fusion drive may be a better option if you need more storage space and don’t require the fastest possible read and write speeds. Because a fusion drive combines a hard drive and flash storage, it can offer a larger amount of storage space at a lower price point. This makes it a good option for those who need a lot of space but can’t afford an SSD with a comparable amount of storage.

    Overall, if speed is your primary concern, an SSD is the way to go. But if you need a lot of storage space and don’t need lightning-fast read and write speeds, a fusion drive may be a better option for you.

    Sequential Read and Write Speeds

    When it comes to speed, there is often a debate between the merits of solid-state drives (SSDs) versus fusion drives. While SSDs have been known for their lightning-fast speeds, fusion drives combine the advantages of both a traditional hard drive and an SSD. When it comes to sequential read and write speeds, however, SSDs still come out on top.

    This is because SSDs do not have any mechanical components, allowing them to transfer data at a much faster speed compared to the traditional spinning hard drive mechanism found in fusion drives. While fusion drives can offer a decent compromise between speed and storage capacity, those who prioritize speed should consider investing in an SSD. With an SSD, you can expect faster boot times, quick application launches, and speedy file transfers.

    Overall, if speed is a priority for you, investing in an SSD is a wise choice.

    Random Read and Write Speeds

    When it comes to storage, Fusion Drives and SSDs both have their pros and cons. One area where they differ is in their random read and write speeds. Random read and write speeds refer to how quickly a drive can access and transfer small amounts of data rather than large continuous files.

    SSDs are known for their lightning-fast random read and write speeds which make them ideal for tasks such as booting up your computer or loading applications quickly. On the other hand, Fusion Drives, which combine a traditional hard drive with a small amount of flash storage, may not match the speeds of SSDs but are still faster than traditional hard drives. In short, if speed is your top priority, then SSDs would be the better choice.

    However, if you need a balance of speed and storage capacity, then a Fusion Drive may be the way to go.

    Boot and Application Launch Speeds

    When it comes to boot and application launch speeds, SSDs are the clear winner over Fusion drives. This is because Solid State Drives (SSDs) have no moving parts, making them faster in accessing data than a Fusion drive, which combines a hard drive and a flash storage module. SSDs also have faster read/write speeds and better response times than hard drives, making them ideal for applications that require quick data access.

    On the other hand, Fusion drives offer more storage capacity than SSDs but at the cost of slower speeds. When it comes to choosing between the two, it ultimately depends on your needs and priorities. For those who need faster access to data and applications, SSDs are the way to go.

    However, if storage capacity is more important, Fusion drives may be the better choice.

    Storage Capacity and Cost

    When it comes to storage capacity and cost, a Fusion Drive and a SSD have their differences. A Fusion Drive is a hybrid drive that combines a traditional hard drive and a flash-based SSD, while a SSD is a storage device that solely relies on flash-based memory. Generally, SSDs are faster and have better performance compared to a Fusion Drive, but they come with a higher price tag and less storage capacity.

    A Fusion Drive offers larger storage capacities and more affordable options, making it an ideal choice for those who need ample storage space at a lower cost. However, if you prioritize speed and performance over storage capacity, a SSD is the way to go. Ultimately, the choice between a Fusion Drive and a SSD depends on your needs and budget.

    Maximum Storage Capacity

    When considering storage capacity, one of the main factors to consider is cost. While having a larger storage capacity can be convenient, it often comes with a larger price tag. This is because the technology necessary to store and access larger amounts of data is more advanced and usually more expensive.

    However, it’s important to weigh the cost against the benefits that come with having a larger storage capacity. For example, if you’re a business that handles a lot of data, having a high storage capacity can improve efficiency and productivity. Alternatively, if you’re an individual who uses a lot of multimedia files, having a larger storage capacity can reduce the need for constant archiving and transferring of files.

    Ultimately, the decision about how much storage capacity you need will depend on your specific requirements, but it’s important to keep cost in mind when making your decision.

    Cost per GB

    When it comes to storage capacity and cost, one of the most important factors to consider is the cost per GB. This metric refers to how much it costs to store a single gigabyte of data on a storage device or platform. Understanding this number can help you make informed decisions about which storage solutions are the most cost-effective for your needs.

    Generally, the cost per GB will vary depending on the type of storage device, capacity, and provider. For example, cloud storage solutions typically have a lower cost per GB than traditional hard drives or solid-state drives. However, it’s important to take into account other factors like accessibility and security when choosing a storage solution.

    Overall, finding a balance between storage capacity and cost per GB is key to getting the most out of your storage options.

    Pros and Cons

    When it comes to comparing a fusion drive to an SSD, there are definitely pros and cons to consider. On the one hand, a fusion drive combines the benefits of a traditional hard drive with a small amount of high-speed flash storage. This means you get plenty of storage space for all your files and applications, but you also get some of the speed benefits of flash storage.

    However, fusion drives are not as fast as SSDs when it comes to accessing data. SSDs are much faster at accessing small files and booting up your system. Additionally, SSDs have no moving parts, which means they are less likely to fail than standard hard drives or fusion drives.

    Ultimately, the choice between a fusion drive and an SSD comes down to your priorities. If you need lots of storage and don’t mind sacrificing some speed, a fusion drive might be the better choice for you. But if speed is your top priority, an SSD is definitely the way to go.

    Fusion Drive Pros and Cons

    Fusion drive is an innovative technology developed by Apple that combines the benefits of both hard disk drive (HDD) and solid-state drive (SSD). There are several pros and cons of using a fusion drive. One of the most significant advantages of using fusion drive is its speed.

    With the use of an SSD, fusion drive can transfer data much faster than traditional HDDs. Moreover, it provides more storage capacity than an SSD alone. Another important benefit is that it automatically manages the placement of frequently accessed data on the SSD portion, resulting in faster system boot times and faster launch of applications.

    However, fusion drives also have their share of drawbacks. Firstly, it is not as fast as a pure SSD drive, which can be an issue for gamers, video editors or any other high-performance users. Secondly, the risk of data loss can be higher in a fusion drive due to the combination of two different storage technologies.

    If one of the drives stops working, all data becomes inaccessible. Lastly, the cost of a fusion drive is typically higher compared to a typical hard disk drive, so it might not be an ideal option for budget-minded users. In conclusion, fusion drive can be an excellent choice for those looking for a balance between performance and cost.

    It offers much faster data transfer speeds than traditional hard drives, while still providing ample storage capacity. However, if you’re looking for maximum speed, reliability, and performance, investing in a pure SSD might be a better option for you.

    SSD Pros and Cons

    When it comes to storage options for your computer, SSDs have become increasingly popular in recent years. While there are many advantages to using an SSD over a traditional hard drive, there are also some drawbacks to consider. One major advantage of using an SSD is the speed.

    Because they have no mechanical parts, SSDs can access and transfer data much faster than a hard drive, resulting in faster boot times and application load times. Additionally, SSDs are more durable than traditional hard drives, as they are not as susceptible to physical damage. However, there are some downsides to using an SSD.

    The first is the cost – SSDs are generally more expensive than traditional hard drives with the same amount of storage. Additionally, SSDs have a limited lifespan in terms of the number of times data can be written to them, which means they may not last as long as a traditional hard drive. Finally, SSDs may not be compatible with older computers, which can be a limiting factor for those with older systems.

    Overall, SSDs offer many advantages over traditional hard drives, but they may not be the best choice for everyone. If speed and durability are your top priorities, an SSD may be worth the investment. However, if cost and compatibility are concerns, a traditional hard drive may be a better option.

    Which One Should You Choose?

    When it comes to choosing between a fusion drive and an SSD, it ultimately depends on your specific needs and preferences. If you prioritize speed and performance, then an SSD is the way to go. With no moving parts and lightning-fast read and write speeds, an SSD is capable of handling even the most demanding tasks with ease.

    On the other hand, if you need a lot of storage space and don’t mind sacrificing a bit of speed, a fusion drive might be a better option. A fusion drive combines the speed of an SSD with the large storage capacity of a traditional hard drive, making it a great choice for those who need a lot of space but still want fast load times. Overall, it really comes down to what you value most in a storage solution: lightning-fast speeds or ample storage space.

    Conclusion

    In the battle of the drives, the fusion drive and SSD are two heavyweights in the storage ring. While SSDs may pack a punch in terms of speed and overall performance, fusion drives are versatile and offer more space for your needed documents and favorite pics. At the end of the day, both drives have their strengths and weaknesses, but the real winner is the user who stays attentive to their specific needs and preferences.

    So, whether you prefer lightning-fast boot-up speeds or ample storage space, the ultimate choice lies in your hands. You can either go for SSD or fusion drives – either way, you are guaranteed a knockout performance!”

    FAQs

    What is a fusion drive?
    A fusion drive is a combination of a traditional hard drive and a solid-state drive (SSD) that offers the benefits of both technologies.

    How does a fusion drive compare to a traditional hard drive?
    A fusion drive is faster than a traditional hard drive because it uses an SSD for frequently accessed files.

    How does a fusion drive compare to an SSD?
    An SSD is still faster than a fusion drive because it doesn’t have the limitations of a traditional hard drive. However, a fusion drive is more cost-effective for high storage capacity.

    Can a fusion drive be upgraded?
    Unfortunately, a fusion drive cannot be upgraded. It’s best to choose the storage capacity you need when purchasing a device that comes with a fusion drive already installed.

    Can a fusion drive fail like a traditional hard drive?
    Yes, a fusion drive can still experience failures like any other hard drive. It’s important to regularly back up your files to prevent losing important data in case of a failure.

  • SSD vs HDD Showdown: Discover the Power of Four SSDs Vs One TB Drive

    As technology advances and our reliance on computers increases, the need for more storage space has become a requirement. In the past, having just a 1TB hard drive installed in a computer was considered a sufficient amount, but as time goes on, our data storage requirements have become more extensive and demanding. The evolution of technology has introduced Solid State Drives (SSD), a new storage solution that speeds up the entire computer system and increases the performance to an entirely new level.

    Are you puzzled about which the better option for your computer is- SSD or 1TB hard drive? Don’t worry; we’ve got you covered! When it comes to choosing between an SSD and 1TB hard drive, there are several things that you should consider, such as speed, reliability, and storage capacity. While the 1TB hard drive is a tried and tested storage solution, it’s now being replaced with SSDs as they have unparalleled read and write speed, which means faster booting times and overall improved performance. In this blog, we will discuss the differences between SSD and 1TB hard drives.

    We will explore the benefits of using an SSD over a 1TB hard drive and highlight the factors to consider when choosing between the two. At the end of it all, you will be equipped with the knowledge and information you need to make the best decision for you and your computer. So let’s jump right in and have a closer look at the differences between SSD and 1TB hard drives.

    4 SSDs vs 1TB HDD

    When it comes to storage solutions, the battle between hard drives and solid-state drives (SSDs) continues to rage on. As technology advances, SSDs have become the preferred choice for many due to their lightning-fast speeds and reliability. But what about using multiple SSDs? How does a configuration with four SSDs compare to a standard 1TB HDD? Well, for starters, four SSDs offer significantly faster read and write speeds, making them ideal for high-performance tasks such as video editing or gaming.

    They also consume less power, generate less heat, and are less likely to fail compared to a traditional mechanical drive. However, the cost of four SSDs can be quite expensive and may not make sense for the average user who just needs ample storage. In contrast, a 1TB HDD may not offer the same performance as an SSD but can provide more than enough space for most users at a lower price point.

    Ultimately, the decision between an SSD configuration or an HDD comes down to your specific needs and budget.

    Speed

    When it comes to speed, SSDs are the clear winners over traditional HDDs. But, what about four SSDs versus a single 1TB HDD? Well, it’s no contest. The four SSDs are going to provide significantly faster read and write speeds than the single HDD.

    SSDs don’t have any moving parts like HDDs, so they are much faster in retrieving and storing data. This is because with an SSD, data can be accessed instantly since it’s stored on a chip. On the other hand, HDDs rely on a spinning disk to access data, which takes longer and can result in slower speeds, particularly if the disk becomes fragmented over time.

    Additionally, four SSDs can be configured in a RAID (Redundant Array of Independent Disks) setup, greatly improving data transfer speeds and overall system performance. Of course, there are some downsides to using multiple SSDs. For one, they can be more expensive than a single HDD.

    And, not everyone needs that level of speed. For those who don’t require lightning-fast speeds, a single 1TB HDD may suffice. It all depends on what type of work you’ll be doing on your computer.

    In short, if you’re looking for the fastest possible speed and performance, four SSDs in a RAID setup will provide that. On the other hand, a single 1TB HDD may be more than enough for those who don’t need the extra speed or are on a tighter budget. Ultimately, it all comes down to your individual needs and preferences.

    how does 4 ssd compared to 1tb

    Capacity

    If you’re wondering whether to go for four SSDs or a 1TB HDD, capacity is one of the factors to consider. While SSDs are generally more expensive, they offer higher speeds and more compact sizes. However, in terms of storage capacity, you can easily find 1TB HDDs at a more affordable price point.

    But let’s look at it this way: would you rather have a large box that holds all your things, but takes time to rummage through, or several smaller boxes that are easier to organize and take out only the things you need? SSDs work like the latter, with the added bonus that they don’t have any moving parts, which means they are less likely to get damaged, especially if you’re transporting them often. While four SSDs combined may only offer up to 2TB or 4TB of storage, depending on the model and brand, you can always add more SSDs to your setup as needed. Additionally, some companies offer external enclosures that allow you to plug in multiple SSDs in a single drive bay, making it more convenient for you to carry them around.

    So, when it comes to capacity, it really boils down to your needs and budget. If you’re a gamer, graphic designer, or someone who needs to access and transfer large files frequently, investing in SSDs may be worth it. However, if you’re mainly using your computer for basic tasks like browsing the web or working on documents, a 1TB HDD should suffice.

    Ultimately, it’s all about striking a balance between performance, convenience, and affordability.

    Price

    When it comes to price, the choice between SSDs and HDDs can be a tough one. On one hand, SSDs tend to be more expensive than HDDs, but on the other hand, they offer faster speeds and better performance. If you’re on a budget, opting for a 1TB HDD might seem like the more sensible choice, but it’s worth considering the long-term benefits of investing in an SSD.

    While a 1TB HDD might seem like a good deal, you’ll likely have to replace it sooner than an SSD due to its slower speeds and lower durability. In the long run, investing in an SSD might actually save you money by avoiding the need for frequent upgrades. It’s a bit like buying a cheap car that requires constant repairs versus investing in a more expensive car that requires less maintenance over time.

    So while SSDs might cost more upfront, they could ultimately be the more affordable option in the long run.

    Pros and Cons of SSDs

    When it comes to storage options, SSDs (solid-state drives) are a popular choice due to their fast read and write speeds. However, it can be confusing to determine if it’s better to have one big SSD or several smaller ones. Generally, having multiple SSDs (like 4pcs of 1TB SSDs) can offer benefits like faster load times and improved performance when running multiple programs at once.

    It also allows for easier organization and file management. On the other hand, a single large SSD (like a 4TB SSD) may be more cost-effective, as purchasing four separate SSDs can add up quickly. Additionally, having multiple SSDs also means more cables and possibly more power consumption, which is something to consider for those concerned about energy efficiency.

    Ultimately, the decision of whether to opt for one big SSD or multiple SSDs depends on individual needs and priorities.

    Pros

    SSDs SSDs, or solid-state drives, have been gaining popularity over traditional hard disk drives due to their many advantages. One of the biggest pros of SSDs is their speed. With no moving parts and the ability to access data more efficiently, SSDs can offer up to 10 times faster boot and load times compared to HDDs.

    This makes them ideal for tasks that require quick access to data, such as gaming or video editing. SSDs are also known for their durability, as they are less likely to break or malfunction due to their lack of moving parts. Additionally, SSDs do not produce any noise or vibrations, making them a much quieter and less intrusive option for users.

    While SSDs may come with a higher price tag, their benefits far outweigh the costs for those who require top performance and reliability from their storage devices.

    Cons

    When it comes to SSDs, there are certainly some cons to consider alongside the many pros. One major drawback is their cost – SSDs can be significantly more expensive than traditional HDDs, which can limit their accessibility for budget-conscious consumers. Additionally, while SSDs are generally more durable than hard drives due to their lack of moving parts, they do have a limited lifespan and can only handle a certain number of write cycles before they begin to degrade.

    This can be a concern for heavy users or for those who need to store large amounts of data. Finally, while SSDs offer lightning-fast read and write speeds, they can also be more prone to power loss issues, which can lead to data corruption or loss. Despite these drawbacks, however, SSDs remain a popular choice for many consumers due to their speed, reliability, and overall performance.

    Which One to Choose?

    When it comes to choosing between 4 SSDs or a 1TB drive, there are several factors to consider. First, the capacity of the drives is different, with the 4 SSD setup having a larger total capacity than the 1TB drive. Additionally, the speed and performance of those drives may vary.

    Generally, the 4 SSD setup will provide faster read and write speeds, allowing for quicker boot times and faster application launch times. However, the 1TB drive may be more convenient and cost-effective for users who don’t need to constantly access large files or transfer data quickly. Ultimately, the decision depends on the user’s specific needs and budget.

    If speed and performance are a top priority and the budget allows for it, the 4 SSD setup may be the way to go. However, for users with more modest needs and budgets, the 1TB drive may be the better option.

    Conclusion

    In the battle of 4 SSDs vs 1TB hard drive, the former emerges as the clear champion. With faster read/write speeds, better durability and reliability, and more efficient storage management, the SSDs offer a performance boost that is comparable to the difference between Lewis Hamilton and a tricycle. So, if you’re looking for a storage solution that screams “Ferrari” instead of “bumblebee”, then SSDs are the way to go.

    Just remember, once you’ve experienced the lightning-fast response times and unparalleled speed of SSDs, you’ll never be able to go back to the sluggishness of traditional hard drives. Consider yourself warned!”

    FAQs

    What is the storage capacity of a 4 SSD setup compared to a single 1TB drive?
    Depending on the capacity of each SSD in the 4 SSD setup, the total storage capacity can exceed that of a single 1TB drive.

    What are the benefits of using a 4 SSD setup instead of a single 1TB drive?
    A 4 SSD setup can provide faster read and write speeds, increased reliability, and better data protection through RAID configurations.

    How does the cost of a 4 SSD setup compare to a single 1TB drive?
    A 4 SSD setup can be more expensive than a single 1TB drive due to the higher cost of multiple SSDs and potentially requiring a separate RAID controller.

    Can a 4 SSD setup be used in a laptop instead of a single 1TB drive?
    It depends on the specific laptop and whether it has enough space and the necessary ports for multiple SSDs. It may also require additional hardware or modifications.

  • NVMe vs SSD: Uncovering the Ultimate Winner in Lightning-Fast Storage Showdown

    NVMe vs SSD: Uncovering the Ultimate Winner in Lightning-Fast Storage Showdown

    If you’ve been shopping for a new computer or upgrading your storage, you may have come across two terms that seem very similar: NVMe and SSD. While both types of storage have similar benefits compared to traditional hard drives, there are some key differences between NVMe and SSD that can make a big impact on your overall computer performance. In this blog post, we’ll explore the differences between NVMe and SSD and help you determine which one is right for your needs.

    Are you ready to dive in and learn more about these two storage options?

    What is NVMe?

    When it comes to storage devices, solid-state drives (SSDs) have been the reigning champions of speed for quite some time. However, NVMe (Non-Volatile Memory Express) is the newest storage protocol that is shaking up the industry. NVMe utilizes PCIe lanes to communicate directly with the CPU, which allows for faster data transfer rates and reduced latency.

    When compared to SSDs, which still rely on the slower SATA interface, NVMe can provide up to four times the read and write speeds. In other words, NVMe is like a supercar, whereas SSDs are more like a standard sedan. While SSDs are still reliable and cost-effective, NVMe is quickly gaining momentum as the go-to choice for high-performance storage needs.

    Overview of NVMe technology and benefits

    NVMe, or Non-Volatile Memory Express, is a technology that was developed to take advantage of the speeds provided by solid-state drives (SSDs) compared to traditional hard disk drives (HDDs). NVMe is a communication interface that allows the SSD and the computer’s CPU to communicate quickly and efficiently, minimizing any potential bottlenecks that can arise from using other interfaces such as SATA. The benefits of this technology are notable, with NVMe offering significantly faster read/write speeds, improved latency, and reduced power consumption compared to traditional HDDs or even SATA-connected SSDs.

    These advantages make it an ideal choice for use in high-performance applications such as gaming, large-scale data analysis, and artificial intelligence research, where quick access to vast amounts of data is critical.

    how does nvme compare to ssd

    What is SSD?

    When it comes to comparing NVMe and SSDs, it’s important to first understand what SSDs are. SSD stands for Solid State Drive, a type of storage device that uses NAND-based flash memory to store and retrieve data. Compared to traditional hard disk drives (HDDs), SSDs offer faster read and write speeds, lower power consumption, and are more durable with no moving parts.

    NVMe, on the other hand, stands for Non-Volatile Memory Express, a protocol designed specifically for faster communication between SSDs and a computer’s CPU. NVMe SSDs are built to take advantage of the low latency and high speeds offered by this protocol, allowing for even faster performance than traditional SSDs. So, how does NVMe compare to SSDs? Well, NVMe SSDs offer significantly faster performance than traditional SSDs, with some NVMe drives capable of reaching speeds of up to 7GB/s.

    However, for the average user, the difference in performance between NVMe and SSDs may not be noticeable in day-to-day use. So, it ultimately comes down to your specific needs and use case when considering which type of drive is right for you.

    Overview of SSD technology and benefits

    SSD or solid-state drive is a type of storage device that is increasingly becoming popular among computer users. Unlike traditional hard drives, SSDs employ flash memory to store data, which makes them much faster and more reliable. With no moving parts, they are also less prone to mechanical issues, and they consume less power, making them more energy-efficient.

    SSDs are available in different storage capacities, ranging from a few gigabytes to multiple terabytes, making them suitable for a wide range of applications. Whether it’s for personal or professional use, an SSD offers numerous benefits, including faster boot times, quicker app launches, improved system responsiveness, and more. Moreover, as prices continue to drop, SSDs are becoming a more affordable alternative to traditional hard drives, making them a great choice for those looking to upgrade their system’s storage capacity.

    In short, SSD technology is revolutionizing the way data is stored, making it faster, more reliable, and more accessible than ever before.

    NVMe vs SSD: Speed

    When it comes to speed, NVMe beats SSD. While SSDs use the traditional SATA interface, NVMe utilizes PCIe, which allows for faster data transfer rates. With NVMe, data can be read and written at speeds of several gigabytes per second, while SSDs usually operate at around 500MB/s.

    This means that tasks such as file transfers, booting up your operating system, and launching applications can be completed much faster with NVMe compared to SSD. It’s important to note that NVMe drives require a compatible motherboard with an M.2 slot, while most modern motherboards are SATA-based and support SSDs.

    While NVMe drives may be pricier compared to SSDs, the faster speeds make it a worthwhile investment for those who require high-speed data retrieval and transfer.

    Comparison of read/write speeds between NVMe and SSD

    When it comes to read/write speeds, NVMe and SSD drives offer markedly different performance levels. NVMe, which stands for Non-Volatile Memory Express, is a newer type of storage technology that utilizes the PCI Express interface to achieve ultra-fast speeds and low latency. SSD, or Solid State Drive, is also a type of storage device that uses flash memory to store data.

    While SSDs are faster than traditional hard drives, they still cannot match the read/write speeds of NVMe. In fact, NVMe drives can be up to six times faster than SSD drives, making them an ideal choice for high-performance applications such as gaming, video editing, and virtual reality. NVMe drives also offer lower latency, meaning there is less delay between data requests and responses, resulting in faster system performance overall.

    So, if you’re looking for lightning-fast speeds and low latency, NVMe is the way to go.

    NVMe vs SSD: Cost

    When it comes to cost, NVMe can be more expensive than traditional SSDs. NVMe technology is still relatively new and less widely used than SSDs, so the cost per GB can be significantly higher. However, the price gap between NVMe and SSDs is narrowing as NVMe becomes more mainstream.

    In addition, NVMe provides faster performance than traditional SATA-based SSDs, which can make it worth the extra cost for those who need top-notch speed and performance. Ultimately, it comes down to individual needs and budget when deciding between NVMe and SSDs.

    Comparison of pricing for NVMe and SSD storage options

    When it comes to choosing between NVMe and SSD storage options, one of the factors that you need to consider is the cost. NVMe storage is typically more expensive than SSD storage, but it also provides faster read and write speeds, making it ideal for high-performance computing applications. The price of NVMe storage has been decreasing steadily over the years, making it more accessible to a wider range of users.

    However, if cost is a major concern for you, then SSD storage might be the better option. SSDs are generally less expensive than NVMe drives and provide good performance for most applications. Ultimately, the choice between NVMe and SSD storage depends on your specific needs and budget.

    If you can afford the higher cost of NVMe storage and need the faster read and write speeds, then it may be worth investing in. But if you’re looking for a more budget-friendly option that still delivers good performance, then SSD storage is a solid choice.

    NVMe vs SSD: Performance

    When it comes to performance, NVMe (Non-Volatile Memory Express) outperforms SSDs (Solid-State Drives) in almost every aspect. NVMe is designed specifically for Flash Storage and has a much faster interface compared to SSDs that use the older SATA interface. NVMe basically bypasses the traditional storage protocol and directly communicates with the CPU, resulting in extremely fast data transfer rates.

    This means that applications and files load much quicker, reducing boot time and increasing productivity for users. NVMe also has a higher input/output operations per second (IOPS) rate, allowing for faster access to multiple files at once. In contrast, SSDs have a slower sequential read/write speed and lower IOPS, which makes them less efficient in handling large amounts of data.

    Overall, NVMe’s advanced technology provides faster, more reliable, and efficient storage performance compared to SSDs.

    Comparison of performance metrics between NVMe and SSD

    When it comes to comparing NVMe and SSD performance metrics, it’s important to understand the key differences between the two. NVMe, or Non-Volatile Memory Express, is a newer type of storage technology that utilizes PCIe technology for ultra-fast data transfer speeds, while SSD, or Solid State Drive, uses traditional SATA technology. In terms of performance, NVMe offers significantly faster read and write speeds, which can make a big difference in tasks like large file transfers or running complex applications.

    SSDs are still a good option for everyday use, but those who need the highest levels of performance will likely want to opt for NVMe technology. Ultimately, the choice between NVMe and SSD will depend on the specific needs and use cases of the individual user or organization.

    Which one to choose?

    When it comes to choosing between NVMe and SSD, it all depends on your specific needs. While SSDs have been the go-to storage option for years, NVMe drives offer even faster read and write speeds. This is because NVMe drives are designed specifically for solid-state storage technology, whereas SSDs were originally designed for mechanical hard drives.

    If you are a content creator or a gamer, NVMe may be the better choice for you as it can handle large files and provide faster load times. However, if you are looking for a more cost-effective option, an SSD may be the way to go. Both NVMe and SSD drives provide faster boot times and improved performance compared to traditional hard drives, but ultimately your decision should be based on your specific needs and budget.

    Conclusion

    In summary, NVMe is like the newest, fastest sports car on the market while SSD is like a trusty sedan. Both will get you where you need to go, but NVMe will get you there faster and with a little more flair. So if you’re looking for speed and impressive performance, NVMe is the way to go.

    But if you want something reliable and cost-effective, SSDs are still an excellent choice. Ultimately, it all comes down to your specific needs and priorities – just like choosing a car!”

    FAQs

    What is NVMe technology and how does it compare to SSDs?
    NVMe is a newer storage technology that uses faster interfaces and protocols than traditional SSDs, resulting in significantly improved performance. While both SSD and NVMe drives are solid-state drives, NVMe drives utilize the PCIe interface for faster data transfer rates and reduced latency.

    What are the benefits of using NVMe over traditional SSDs?
    NVMe drives offer higher transfer rates, reduced latency, and increased data access speeds, resulting in faster boot times, improved application performance, and reduced load times. They also have a lower power consumption and reduced heat output compared to traditional SSDs.

    Can any PC use NVMe drives, or do I need a specific motherboard?
    While NVMe drives are backwards compatible with PCIe slots, they require a compatible motherboard that supports the NVMe protocol. If your motherboard has the necessary NVMe support, you can use an NVMe drive as your primary storage device.

    How do the prices of NVMe drives compare to traditional SSDs?
    NVMe drives are generally more expensive than traditional SSDs due to their improved performance. However, as more manufacturers produce NVMe drives, their prices are decreasing and are becoming more accessible to consumers. In some cases, an NVMe drive can be comparable in price to a higher-end traditional SSD.