Category: How to

How to

  • Step-by-Step Guide: How to Transfer Windows 10 to a New SSD Easily

    Step-by-Step Guide: How to Transfer Windows 10 to a New SSD Easily

    Moving Windows 10 to a new SSD may seem like a daunting task, but it’s actually a fairly simple process. Upgrading to an SSD can greatly improve your computer’s speed and performance, and with the right tools and steps, you can easily transfer your operating system to your new drive. Plus, who doesn’t love the feeling of a snappy computer? It’s like upgrading from a bicycle to a sports car.

    In this guide, we’ll walk you through the process of moving Windows 10 to a new SSD, step by step. Whether you’re upgrading your current computer’s drive or starting fresh with a new build, we’ve got you covered. We’ll cover everything from the tools you’ll need, to the exact steps you’ll need to take to migrate your data, to ensure minimal downtime and a smooth transition.

    So, if you’re looking to upgrade your computer’s performance and take advantage of the benefits of an SSD, keep reading to learn how to migrate Windows 10 to your new drive seamlessly. It’s time to say goodbye to sluggish load times and hello to lightning-fast computing.

    Backup Your Data

    If you are planning to upgrade your computer’s storage by moving your Windows 10 operating system to a new SSD, it is crucial that you backup all of your data beforehand. The process of transferring your Windows 10 operating system can be complicated and may result in the loss of your important files if you are not careful. Backing up your data ensures that you have a copy of everything in a safe location before you begin the transfer process.

    There are several methods to back up your data, including using an external hard drive, cloud storage, or a backup software. Once you have made a backup of your data, you can proceed with the Windows 10 transfer process to your new SSD with confidence, knowing that all of your important files are safely stored away. Remember, it’s always better to be safe than sorry, so take the time to backup your data before attempting any type of computer upgrade or transfer.

    Copy Files to External Drive

    Backing up your data is essential in ensuring that all your important files are safe and secure in case of unforeseen circumstances. One way to do this is by copying files to an external drive. External drives are portable and can store a large amount of data, making it an ideal backup solution.

    To get started, connect your external drive to your computer and wait for it to be recognized. Next, locate the files that you want to backup and drag and drop them to the external drive. You can also use backup software to automate the process and schedule regular backups.

    Remember to always keep your external drive in a safe and secure location to avoid any loss or damage. By regularly backing up your data to your external drive, you can ensure that you will always have a copy of your important files when you need them.
    how do i move windows 10 to a new ssd

    Create a System Image Backup

    Backing up your data is crucial in today’s world where technology is an essential part of our daily lives. One of the ways to create a backup is by creating a system image backup. A system image backup is a copy of the entire operating system including all of your settings, files, and programs.

    This backup is particularly useful in scenarios where you experience hardware failure or malware attacks. Creating a system image backup is a straightforward process on Windows All you need to do is go to the Control Panel, and under the System and Security section, select Backup and Restore.

    From there, select Create a System Image and follow the prompts. It is recommended that you create the system image backup on an external hard drive for safe keeping. By doing so, you can be rest assured that your data is safe in case of any unforeseen circumstances.

    Don’t forget to update the system image backup regularly to reflect changes to your system. Overall, creating a system image backup is a smart move towards ensuring the safety and security of your data.

    Clone Your Existing Drive

    If you’re looking to upgrade your computer’s hard drive, one of the first steps is to copy the existing drive to the new SSD. This is also a great way to transfer your operating system, software, and data to a new computer. The process of cloning a drive is relatively straightforward and can be done using various cloning software available online.

    Some SSD manufacturers may even provide free cloning software that you can use. You’ll need to connect both drives to your computer, select the source drive and the destination drive, and then initiate the cloning process. Once the cloning process is complete, you’ll need to change the boot order in your BIOS to boot from the new SSD.

    With the right software and a bit of patience, cloning your existing drive can save you time and effort when upgrading to a new SSD or computer.

    Download Cloning Software

    Cloning your existing drive is an essential process when you need to upgrade or replace your hard drive. The process involves copying the entire content of your old hard drive to a new one, ensuring that all your files, programs, and operating system remain intact. You can perform this task efficiently by using cloning software specifically designed for this purpose.

    This software creates an exact duplicate of your old hard drive, including all files and folders, without any data loss. One such software is EaseUS Todo Backup, which is an intuitive and user-friendly clone software that ensures reliable and efficient data backups. Cloning your drive ensures that you don’t have to start from scratch when setting up your new computer, and it saves you the hassle of reinstalling every program you had on your old hard drive.

    So, if you’re planning to replace or upgrade your hard drive, be sure to download cloning software and make the process easy and seamless.

    Attach New SSD through USB

    If you’re looking to upgrade your computer’s storage capacity, adding a new SSD is an excellent option. And, rather than replacing your existing drive, you can attach the new SSD through USB and clone your data over. This ensures that everything remains intact, including your operating system and any software programs you’ve installed.

    Cloning your drive is a simple process that involves using specialized software to create an exact copy of your existing drive and transfer it to the new SSD. Once complete, you’ll be able to boot from the new SSD and enjoy faster load times and improved system performance. So, whether you’re a gamer, content creator, or just need more storage space, attaching a new SSD through USB and cloning your drive is a cost-effective and straightforward way to upgrade your computer.

    Clone old Drive onto New Drive

    Cloning your old drive onto a new one can be a time-saving solution for transferring all the data and settings from your existing hard drive to a new one in a hassle-free way. This process is essential when upgrading your storage device or shifting to a newer version of the operating system. By using cloning software, you can simply copy your existing hard drive to the new one and avoid the slow and tedious process of reinstalling the operating system and other software.

    With the help of a cloning tool, you can have an exact replica of your old drive, including files, folder structures, operating system settings, and personal preferences. Some popular cloning software applications include Macrium Reflect, EaseUS Todo Backup, and Acronis True Image. These tools make the process of transferring data from the old to the new drive a breeze and enable you to get back to work quickly.

    So, if you want to save time and effort in transferring all your data from an old drive to a new one, consider cloning your existing drive using one of these trusted tools.

    Install New SSD and Boot Up

    If you’re looking to upgrade your computer’s speed and performance, installing a new SSD can be a game-changer. However, the thought of moving your Windows 10 operating system to a new drive can be daunting. Thankfully, it’s not as complicated as it seems.

    First, connect the new SSD to your computer and make sure it’s recognized in the BIOS. Next, use a cloning software like Macrium Reflect or Clonezilla to copy your current Windows 10 system to the new SSD. Once the cloning process is complete, shut down your computer, disconnect the old drive, and boot up using the new SSD.

    Your computer should now be running Windows 10 with all your files and programs intact. Just remember to keep your old hard drive handy for backup purposes. By following these steps, you can easily move your Windows 10 operating system to a new SSD and enjoy faster speeds and improved performance.

    Shut Down and Disconnect Power Cord

    If you’re looking to upgrade your computer’s storage capacity and performance, installing a new solid-state drive (SSD) can be a great solution. But before you get started, it’s crucial to shut down your computer and disconnect the power cord to avoid any potential damage to your system. Once you’ve done that, you can begin the process of installing your new SSD and booting up your computer.

    First, you’ll need to locate where your old hard drive is, remove it, and replace it with your new SSD. Once you’ve completed the physical installation, you’ll need to turn your computer back on and ensure that it recognizes your new drive. From there, you can transfer your files and programs over to your new SSD for optimal performance.

    With a little bit of know-how and the right tools, upgrading your computer’s storage capacity and performance can be a breeze.

    Insert New SSD into Drive Slot

    Installing a new SSD into your drive slot is a great way to increase the speed and performance of your computer. First, make sure you have the proper tools for the job, including a screwdriver and an anti-static wristband. Once you’ve gathered your materials, shutdown your computer and unplug all cables.

    Open your computer case and locate the drive bays, which are typically located near the bottom of the case. Slide the new SSD into an empty slot and secure it with screws. After securing the SSD, reconnect all cables and power on your computer.

    Your computer should recognize the new SSD, and you may need to configure it in your system BIOS. With your new SSD installed, you’ll notice faster boot times and quicker application load speeds. So, take the plunge and upgrade your computer’s performance today!

    Boot Up and Check BIOS Settings

    boot up, BIOS settings, SSD installation Before installing a new SSD, it’s essential to boot up your computer and check the BIOS settings. By doing so, you can ensure that your system supports the new SSD and confirm that all the necessary settings are in place. To access the BIOS, restart your computer and press the key to enter the BIOS setup menu.

    Once there, navigate to the boot order settings and ensure that the new SSD is set as the primary boot device. You should also check the SATA mode settings to ensure that they are set to the appropriate mode for your new SSD. Once you’ve confirmed that all the necessary settings are in place, you can proceed with the installation of your new SSD.

    Following these steps will help ensure a smooth installation process and prevent any potential issues that may arise from incorrect BIOS settings.

    Conclusion

    Moving Windows 10 to a new SSD is like giving your computer a brand new pair of shoes. Not only does it improve the overall performance and speed, it also adds a little pep in your system’s step. So, don’t let your computer drag its feet any longer, give it the upgrade it deserves and start strutting into the future with your new and improved SSD.

    FAQs

    Why would I want to move Windows 10 to a new SSD?
    Moving Windows 10 to a new SSD can improve overall system speed and performance, as well as increase storage capacity on your computer.

    What do I need to move Windows 10 to a new SSD?
    You will need a new SSD, a SATA-to-USB cable, cloning software, and a screwdriver to physically install the new SSD.

    Can I move Windows 10 to a new SSD without reinstalling all my programs and files?
    Yes, you can use cloning software to transfer your existing operating system and files to the new SSD without the need for a fresh installation of Windows 10.

    What is the easiest way to move Windows 10 to a new SSD?
    Using a cloning software such as Acronis True Image or EaseUS Todo Backup can simplify the process of moving Windows 10 to a new SSD, as the software guides you through the steps necessary for cloning your existing system to the new SSD.
  • Upgrade Your PC’s Performance: A Step-by-Step Guide on How to Migrate to an SSD

    If you’re tired of your computer running slow and constantly freezing, then it’s time for an upgrade. Migrating to an SSD (Solid State Drive) is the perfect way to breathe new life into your old computer. Not only will it increase your computer’s speed, but it will also improve its performance.

    In this blog, we will dive into the world of SSDs, explore the benefits of upgrading to an SSD, and give you the basics on how to migrate to an SSD. So, sit back, relax, and let’s get started!

    Benefits of an SSD

    If you’re wondering how do I migrate to an SSD, the good news is that it’s not as complicated as it may seem. In fact, there are several benefits to making the switch. An SSD, or solid-state drive, is known to be faster than a traditional hard drive.

    This means your computer will boot up quicker, programs will load faster, and files will transfer more smoothly. Additionally, because an SSD has no moving parts, it is less prone to breaking down. If you’re worried about losing your data during the migration process, don’t be.

    There are software tools available to help you transfer your files and settings seamlessly. With all these advantages, it’s easy to see why so many people are choosing to switch to an SSD.

    Faster boot and load times

    If you’re tired of long load and boot times on your computer, it’s time to consider getting an SSD. Unlike traditional hard drives, an SSD operates without any moving parts, allowing it to access and transfer data at lightning-fast speeds. This means that your computer will start up faster, applications will launch quicker, and files will load without any delays.

    The benefits of an SSD go beyond just speed- it also makes your computer run quieter and cooler, and is less prone to damage from drops or bumps. Overall, upgrading to an SSD can make a noticeable difference in the performance of your computer, and is definitely worth the investment. So why wait? Get an SSD today and enjoy faster boot and load times like never before!

    how do i migrate to an ssd

    Improved system performance overall

    If you’re looking to improve the performance of your computer, one of the most effective upgrades you can make is switching to a solid-state drive (SSD). The benefits of an SSD are numerous, including faster boot times, quicker file transfers, and improved overall system responsiveness. Because SSDs have no moving parts, they are less prone to mechanical failures and can access data much more quickly than traditional hard drives.

    This means that your computer can handle multiple tasks and applications more efficiently, and you’ll experience less lag and slowdowns even when you’re running intensive programs. So if you’re tired of waiting for your computer to catch up to you, upgrading to an SSD could be just what you need to give it a serious speed boost.

    Increased storage capacity

    One of the major benefits of upgrading to an SSD is the increased storage capacity. With traditional HDDs, you might have to compromise on capacity for speed, but SSDs offer both. They come in a variety of sizes, ranging from just a few gigabytes to multiple terabytes.

    You can choose the one that best fits your needs and budget. And did you know that SSDs store data in microchips instead of moving parts, which means not only is it faster and more efficient, but also more reliable? Plus, with no mechanical parts, SSDs are less prone to damage and can withstand a greater number of shocks and vibrations. All these benefits make SSDs a clear winner over HDDs when it comes to increasing your storage capacity and ensuring the safety of your data.

    So why not upgrade your storage to an SSD and experience faster speeds, increased reliability, and more capacity?

    Choosing an SSD

    If you’re looking to migrate to an SSD, there are a few things you need to consider. First and foremost, you’ll want to make sure you have enough space on your SSD to accommodate all your important data. You’ll also want to choose an SSD with a high enough capacity to meet your needs.

    When choosing an SSD, it’s important to consider factors like read and write speeds, as well as the type of NAND flash memory used. There are two main types of NAND flash memory: SLC and TLC. SLC is typically faster and more reliable, but also more expensive.

    TLC is slower and less reliable, but more affordable. Ultimately, you’ll need to weigh the pros and cons of each type of memory to determine which one is best for your needs. Overall, migrating to an SSD can greatly improve your computer’s performance and speed, so it’s definitely worth considering if you’re looking to boost your productivity and efficiency.

    Consider capacity and cost

    When choosing an SSD, it’s important to consider both capacity and cost. If you need a lot of storage space for your files, photos, and videos, then you may want to look for SSDs with higher capacity options. However, it’s important to keep in mind that higher capacity SSDs typically come with a higher cost as well.

    When determining the best choice for your needs, you want to find the right balance between capacity and cost. More expensive SSDs may offer faster speeds and better performance, but it’s also crucial to think about how much you’re willing to spend. Ultimately, the best SSD for you will depend on your budget and storage needs.

    Compatibility with your system

    When it comes to choosing an SSD, compatibility with your system is crucial. You want to ensure that the SSD is compatible with your motherboard and chipset, as well as any other components in your computer. This can save you a lot of hassle and frustration down the line.

    One thing to consider is the form factor of the SSD. There are different sizes of SSDs available, and you want to make sure that you choose one that will fit in your computer. Another consideration is the interface of the SSD.

    There are different types of interfaces, including SATA, PCIe, and NVMe. You’ll want to choose one that is compatible with your computer’s interface. If you’re not sure what you need, do some research or consult with a professional to ensure that you choose an SSD that is compatible with your system.

    Ultimately, choosing the right SSD can improve the overall performance of your computer and make it run more smoothly. So, take the time to consider your options and choose one that fits your needs.

    Read reviews and ratings

    When it comes to choosing an SSD, reading reviews and ratings is crucial. There are so many options on the market, and it can be overwhelming knowing which one to choose. Reading reviews from real people who have purchased and used a particular SSD can give you insight into its performance, reliability, and any potential issues to be aware of.

    Make sure to read a variety of reviews from different sources to get a well-rounded view of the product. Pay attention to any common themes or issues mentioned by multiple reviewers. Ratings can also be helpful in quickly comparing products and narrowing down your options.

    When looking at ratings, remember to consider factors such as price, capacity, and speed to find the SSD that best fits your needs. By using reviews and ratings, you can make a more informed decision when it comes to choosing the right SSD for you.

    Backing up important data

    If you’re planning to switch to an SSD, it’s essential to back up all of your important data first. There are several ways to do this, depending on your preferences and the amount of data you have. You could use an external hard drive or a cloud-based backup service like Google Drive or Dropbox.

    Another option is to create a system image using built-in tools like Windows Backup and Restore or third-party software like Macrium Reflect. Once you’ve backed up your data, you can proceed with the migration process, which involves transferring your operating system, programs, and files to the new SSD. This can also be done using software tools such as Clonezilla or Samsung Data Migration.

    It’s crucial to follow the instructions carefully to ensure a successful migration without losing any data. In summary, backing up your data is a necessary step when migrating to an SSD, and there are various methods to choose from. By taking the time to back up your data, you can ensure a smooth transition to your new SSD without any unexpected hassles.

    Choosing a backup method

    When it comes to backing up important data, there are a number of methods available to choose from. Some people prefer to use an external hard drive, while others opt for cloud-based solutions. Both options have their pros and cons, so it’s important to consider what’s best for your specific needs.

    External hard drives are a great option for those who are looking for a physical backup that they can easily access. They’re also a good choice for those who want to back up large amounts of data, as they tend to offer more storage space than cloud-based solutions. On the other hand, cloud-based solutions offer the convenience of being able to access your data from anywhere with an internet connection.

    They’re also generally more secure than external hard drives, as the data is stored on secure servers rather than on a physical device that could be lost or stolen. Ultimately, the choice of backup method will depend on your personal preferences and needs, as well as the amount and importance of the data that you need to back up.

    Transferring files to the new SSD

    When transferring files to your new SSD, it’s essential to back up important data to ensure nothing is lost during the process. You don’t want to risk losing your critical documents, cherished photos, or treasured music files. Backup options include external hard drives, cloud storage, and file transfer software.

    An external hard drive provides a convenient and reliable option for backing up your data. You can also store your files on cloud-based storage services such as Google Drive, Dropbox, or OneDrive. File transfer software such as EaseUS Todo PCTrans can transfer files directly from your old hard drive to your new SSD.

    Whichever method you choose, it’s crucial to ensure you have a complete backup of all your files. By doing so, you’ll have peace of mind knowing your data is safe during the transfer process and can access your files without any worries.

    Installing the new SSD

    If you’re looking to upgrade your computer’s storage to an SSD, it’s important to know that the process involves more than just swapping out the hardware. Before installing your new SSD, you’ll need to migrate your operating system and other important files from your old hard drive to the new one. Fortunately, there are several options for doing so.

    One option is to use cloning software, which creates an exact copy of your old hard drive on the new SSD. This is a quick and easy option, but it may not work if your old hard drive is larger than your new one. Another option is to manually transfer your files to the new drive using an external hard drive or cloud storage service.

    This method can take longer, but it allows you to pick and choose which files to transfer. Whichever method you choose, make sure to back up your files beforehand and follow proper safety precautions when working with computer hardware. With a little patience and know-how, you’ll be enjoying faster load times and improved performance on your new SSD in no time.

    Opening your computer case

    Opening your computer case is an essential step in installing a new SSD. First, make sure to power off your computer and disconnect all the cables. Then, locate the screws holding the case in place and carefully unscrew them.

    Once you open the case, it’s crucial to be gentle with the internal components, as they can be easily damaged. Before handling anything, ground yourself by touching metal on the case. Next, locate your current hard drive and remove it from its slot.

    Then, carefully insert the new SSD into the same slot and reconnect any cables necessary. Secure the SSD in place with screws, close the case, and reattach all the cables. Power on your computer and check to ensure that the SSD is correctly recognized by the system.

    By following these steps, you can successfully install a new SSD and optimize your computer’s performance.

    Removing the old hard drive

    Now that we’ve removed the old hard drive, it’s time to install the new SSD. First, we need to make sure that the SSD is compatible with our computer. Check the specifications of both the computer and the SSD to ensure they are a match.

    Once we have confirmed that, we can begin the installation process. Before we physically install the SSD, we need to connect it to the computer. Depending on the type of SSD you have, you may need to use a special adapter or cable.

    Once the SSD is connected, boot up the computer and enter the BIOS to ensure that the computer recognizes the new drive. Assuming everything is working as it should, it’s time to physically install the SSD. Open up the computer case and locate the mounting bracket for the SSD.

    Carefully mount the SSD in the bracket, making sure it’s secure. Then, connect the necessary cables and close up the computer case. Congratulations, you have successfully installed a new SSD! Now, all you need to do is install your operating system and other necessary software on the SSD, and you should notice a significant improvement in your computer’s speed and performance.

    Make sure to properly dispose of your old hard drive and backup your data before making any changes to your computer’s hardware.

    Installing the new SSD

    So you’ve decided to upgrade your computer with a brand-new SSD, congratulations! Now that you’ve got your hands on the shiny new drive, it’s time to install it. First things first, shut down your computer and unplug the power cable. You don’t want any electrical surges to damage your new SSD or your computer.

    Once everything is powered down, open up your computer case and find the current hard drive. You’ll want to disconnect it from any cables and remove it from its slot. Then, carefully slide your new SSD drive into the same slot and reconnect all the cables you unplugged earlier.

    Once you’ve done that, secure the SSD with the necessary screws and close up your computer. And, just like that, you’re done! Your computer should now recognize the new SSD as the primary drive. With your new SSD installed, you should enjoy faster boot times, quicker application load times, and better overall performance.

    Finalizing the installation

    If you’re looking for a way to boost your computer’s performance, migrating to an SSD is a great option. But now that you’ve physically installed the SSD, what’s next? The final step is to perform the migration process. One way to do this is to use cloning software that will copy your existing hard drive’s contents to the new SSD.

    Some popular cloning software options include EaseUS ToDo Backup, Acronis True Image, and Clonezilla. Once you’ve selected a cloning software and followed the steps to migrate to your new SSD, you should then remove the old hard drive from your computer and replace it with the SSD. Finally, you’ll need to configure your BIOS to recognize the new SSD as your boot device.

    You can do this by accessing your BIOS settings and changing the boot order to prioritize the SSD over your old hard drive. In summary, migrating to an SSD requires more than just installing the hardware. You’ll need to use cloning software, remove the old hard drive, and configure your BIOS to recognize the new SSD.

    Once these steps are complete, you’ll be set with a faster and more efficient computer.

    Updating drivers and firmware

    The final step in installation is updating drivers and firmware, which ensures that your system is up-to-date and running smoothly. Drivers are essentially software that allow your hardware to communicate with the operating system. Firmware, on the other hand, is software that is embedded in the hardware itself and controls its functionalities.

    Make sure to check for updates on both your drivers and firmware before proceeding. Updating these components can help you avoid bugs and compatibility issues, as well as improve your system’s performance and security. It’s like getting a tune-up for your car – periodic updates keep everything running smoothly and prevent issues down the road.

    So take the time to update your drivers and firmware and enjoy a seamless computing experience.

    Verifying performance and storage capacity

    As we near the end of our installation process, it’s crucial to verify the performance and storage capacity of our system. This step ensures that we have correctly configured all the components and can proceed without any glitches. First, we need to check the performance by running a series of tests that simulate real-world usage scenarios.

    This allows us to identify any bottlenecks or problems that may arise under heavy loads. We also need to verify that the storage capacity is sufficient for our needs. This includes checking the amount of available space on our drives and ensuring all data is being appropriately stored and managed.

    By finalizing these checks and making any necessary adjustments, we can ensure that our system is running smoothly and ready for action.

    Conclusion

    In conclusion, making the switch to an SSD is a fantastic idea for anyone looking to boost their computer’s speed and performance. It may seem daunting at first, but with the right tools and a little bit of patience, anyone can migrate their current system to an SSD in no time. So don’t let sluggish load times and slow boot speeds hold you back any longer – migrate to an SSD and see the difference for yourself!”

    FAQs

    What are the benefits of migrating to an SSD?
    By migrating to an SSD, you can expect faster boot and load times, improved system responsiveness, and the ability to run more resource-intensive applications.

    Is it difficult to migrate to an SSD?
    It depends on your technical skills and the tools you have available. There are many migration tools available that can simplify the process for you, but if you’re not comfortable with technology, it’s recommended to seek professional assistance.

    Can I clone my existing hard drive onto an SSD?
    Yes, you can use a cloning tool to copy your entire existing hard drive onto the SSD. This will ensure that all your existing data and programs are accessible on the new drive without the need to reinstall everything from scratch.

    Do I need to reinstall my operating system when migrating to an SSD?
    It is recommended to do a fresh install of your operating system on the new SSD to ensure optimal performance. However, cloning your existing hard drive is also an option if you need to preserve all your existing data and programs.

  • Maximizing Storage Space: Simple Steps to Move Games from SSD to HDD

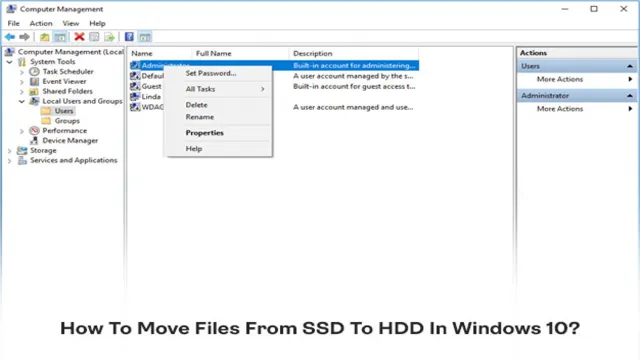
    Do you have a gaming SSD that is running out of space? Well, it’s time to free up some room by moving games from your SSD to your HDD in Windows. This will not only save you storage space but also increase the lifespan of your SSD. It’s frustrating when you have to delete games just to install new ones.

    With limited space, it’s a common issue many gamers face. But, fear no more, as moving games to your HDD is a straightforward process that can be done in just a few steps. With our guide, we will walk you through the process of moving games from your SSD to HDD in Windows.

    We will also provide you with tips on how to organize your game library efficiently to ensure quick and easy access to your favorite games. So, let’s begin freeing up space without compromising the quality of your gaming experience. Follow along with us on our journey to learn how to move your games to HDD and optimize your gaming setup.

    Step 1: Locate game files on your SSD

    Moving games from an SSD to an HDD can help free up space and improve the performance of your computer. The first step in this process is to locate the game files on your SSD. Many games will default to being installed on the SSD, so you’ll need to find the game’s installation folder.

    This can usually be found in the “Program Files” folder or the “Program Files (x86)” if you’re on a 64-bit system. Once you’ve located the game files, you can then move them to your HDD. Simply copy the files to the desired location on your HDD and then delete the original files from your SSD to free up space.

    However, it’s important to note that some games may require certain files to remain on the SSD in order to function properly, so it’s best to research your specific game before making any changes. Overall, moving games to an HDD is a simple process that can greatly improve the performance of your computer.

    Use file explorer or Steam to find game files

    If you’re looking to locate game files on your SSD, there are a few ways to do it. One way is to use your file explorer to search for the game files. Simply navigate to the folder where your games are stored and look for the game you want to find.

    If you’re a Steam user, you can also use the Steam client to find your game files. Just open Steam, navigate to your library, and right-click on the game you want to locate. Then select “Properties” from the drop-down menu and navigate to the “Local Files” tab.

    From there, you’ll be able to find the directory where your game files are stored. With these simple steps, you can easily locate and access your game files on your SSD.

    how to move games from ssd to hdd

    Step 2: Copy game files to HDD

    Now that you have your HDD ready, it’s time to move your games. Start by copying the files from your SSD to the HDD. This process can take some time, so be patient and make sure you have enough space on your HDD before you begin.

    To do this, simply open the folder where your game is installed, select all the files, and copy them over to the new location on your HDD. You may also want to create a new folder on your HDD specifically for your games to keep them organized and easy to find later. Remember, transferring the game files may not be enough to move your saves and settings, so make sure to check the game’s documentation or online support to ensure you don’t accidentally lose any progress.

    Once you’ve moved all your games to the HDD, you can uninstall them from the SSD to save space and improve your computer’s performance. Overall, moving your games to an HDD can be a time-consuming process, but it’s well worth it to free up space on your SSD and improve your computer’s speed and functionality.

    Use drag-and-drop or copy-paste methods

    When it comes to copying game files to your HDD, there are two easy methods you can choose from – drag-and-drop or copy-paste. Both of these methods are incredibly user-friendly and don’t require any technical skills. With drag-and-drop, you can simply open up two separate windows – one for your HDD storage and one for your source storage (CD, DVD, or external drive).

    Navigate to your game files in the source storage, click and hold on the file, and drag it over to the HDD window. Once you’ve placed the file in the correct directory, you’re done! Alternatively, copy-pasting is just as simple and doesn’t require any fancy maneuvers. Find the game files you want to transfer, right-click on them and select “copy.

    ” Then navigate to the correct folder on your HDD and right-click again, this time selecting “paste.” You can repeat this process for all the files until everything you need has been transferred over to your HDD. Remember to take your time during this step to ensure everything is done correctly.

    Rushing may lead to missing files or making mistakes that could cause issues later on. By using these easy drag-and-drop or copy-paste methods, transferring game files to your HDD has never been easier. Now, sit back, relax, and let the copying process begin!

    Step 3: Delete game files from SSD

    Moving games from SSD to HDD is a great way to free up space on your faster storage drive and keep your gaming library organized. Once you’ve transferred your games to your HDD, you’ll want to delete the game files from your SSD to avoid taking up unnecessary space. To do this, you can simply navigate to the folder where your game files are stored on your SSD and delete them.

    It’s important to note that you’ll want to double-check that you’re deleting the correct files, as you don’t want to accidentally delete important system files. If you’re not sure which files to delete, you can always consult online resources or seek the guidance of a tech-savvy friend. With a little bit of know-how, transferring and deleting game files can be a breeze.

    So go ahead and clear out some space on your SSD, your hard drive (and your wallet) will thank you for it!

    Free up space on your SSD

    To free up space on your SSD, one effective step to take is to delete unnecessary game files. These files can take up a significant amount of space and contribute to slower performance on your system. Deleting game files may seem daunting, especially if you have invested a lot of time and effort into a game, but it is a necessary step to keep your SSD running smoothly.

    Consider deleting games that you have completed or no longer play frequently. You can also move game files to an external hard drive if you wish to keep them for future use. By removing redundant game files, you’ll be surprised by how much space you can free up on your SSD, giving your system a much-needed boost in performance and storage capacity.

    Step 4: Create a symbolic link

    After transferring your games to your HDD, the next step is to create a symbolic link between the original game files on your SSD and the new location on your HDD. This will allow your computer to access the game files from your HDD as if they were still on your SSD, even though they are physically stored elsewhere. To do this, you will need to use the Command Prompt.

    First, open Command Prompt as an administrator. Then, type “mklink /D [path to SSD game folder] [path to HDD game folder]” and press enter. This will create a symbolic link from your SSD game folder to your new HDD game folder.

    Once this is done, you can test if it works by running the game from the new location on your HDD. This process may take some time, but it will save you a lot of storage space on your SSD and keep your computer running smoothly.

    Trick your computer into thinking games are still on SSD

    Now that we’ve identified the games that need to be moved back to the SSD and moved them there, it’s time to trick our computer into thinking they are still on the HDD. This is where symbolic links come in handy. Symbolic links are a way to create a shortcut in one directory that points to another directory.

    By creating a symbolic link from the original game folder on the HDD to the new game folder on the SSD, your computer will still be able to find all the necessary files and run the game smoothly. This tricking of the computer into thinking the games are still on the HDD is essential because some games store critical information in the install directory, and if the game is not where it thinks it is, it may not run correctly. Creating a symbolic link is straightforward, and there are many online tutorials available to guide you through the process.

    Once you’ve created the symbolic link, you can check that everything is working smoothly by running the game and ensuring that there are no error messages or significant performance issues. With this step completed, you can finally enjoy seamless gaming from your SSD without losing any installed games from your HDD.

    Step 5: Start the game from your HDD

    If you wish to save some space on your SSD, then you can definitely move games from your SSD to your HDD. To start off, you need to first check if you have enough space on your HDD. Once you ensure that the HDD has enough free space to accommodate the game, you can easily move the game from your SSD to your HDD.

    You would need to navigate to the game folder in your SSD and then copy and paste it to the desired location on your HDD. After the transfer is complete, you can simply start the game from your HDD by locating the game application on your new destination. Follow these simple steps and enjoy your game from your HDD without compromising on your SSD space.

    Enjoy faster loading times on your HDD

    Once you’ve installed your game on your external HDD, it’s important to start the game from the HDD rather than your system’s internal drive. This is because your HDD has faster loading times, which means you’ll be able to play your game without any annoying lags or delays. Starting your game from your internal drive will defeat the purpose of installing it on your external HDD in the first place.

    Simply navigate to your game on your external HDD, click on it, and enjoy faster loading times and smoother gameplay. It might seem like a small detail, but it can make a big difference in your overall gaming experience. Trust us, you’ll notice the difference right away!

    Conclusion

    Congratulations, you’re now a pro at moving games from SSD to HDD! With this newfound knowledge, you’ll have plenty of space on your SSD for all your favorite games, and still be able to keep your computer running as fast as ever. So, go forth and enjoy your games, without any worries about storage space or lag. And remember, transferring games is as easy as 1-2-3: locate your game files, cut and paste them onto your HDD, and create a shortcut to your desktop.

    It’s like playing a game – once you know the rules, you’ll never lose!”

    FAQs

    What is the benefit of moving games from SSD to HDD?
    Moving games from SSD to HDD can free up valuable SSD space, allowing for faster overall system performance. It also allows for larger game libraries to be stored on a single hard drive.

    Can all games be moved from SSD to HDD?
    Yes, but the process may differ depending on the platform on which the game is installed. Most popular game clients, such as Steam and Origin, have built-in features for transferring game files between drives.

    How do I move a game from SSD to HDD on Steam?
    To move a game from SSD to HDD on Steam, right-click on the game in your library and select Properties. Go to the Local Files tab and click on Move Install Folder. Select the destination drive and click on Move Folder.

    What precautions should I take before moving games from SSD to HDD?
    It is recommended to back up your game files before moving them to a different drive. Also, make sure that the destination drive has enough storage space to accommodate the game files. It is also advisable to close any running games before initiating the transfer.

  • Effortlessly transfer your files to Samsung SSD T7 with these easy steps

    Are you looking for a fast and reliable way to transfer your files to your Samsung SSD T7? Say goodbye to the hassle of slow transfers and unreliable connections! With the Samsung SSD T7, you can easily transfer large amounts of data quickly and efficiently. Whether you’re a photographer, videographer, or just someone who needs to store a lot of files, the Samsung SSD T7 is the perfect device for you. With its sleek, compact design and lightning-fast transfer speeds, the Samsung SSD T7 is the ultimate solution for those who need to transfer files quickly and efficiently.

    But how do you go about transferring your files to your new SSD? Don’t worry, it’s easy! There are several ways to transfer files to your Samsung SSD T7, and we’re here to guide you through it. In this blog post, we’ll cover everything from the basics of transferring files to more advanced methods, such as using third-party software. We’ll explore the different options available to you, including USB-C and USB-A connections, and give you step-by-step instructions on how to get your files onto your new SSD.

    So, sit back, grab a cup of coffee, and get ready to learn how to transfer your files to your Samsung SSD T You’ll be up and running in no time, with faster transfer speeds and more reliable storage than ever before. Let’s get started!

    Check compatibility of devices

    If you’re looking to transfer files to your Samsung SSD T7, the first step is to check compatibility with your device. The T7 is designed to work with a variety of computers, including Windows PCs, Macs, and Android mobile devices. However, it’s always a good idea to double-check that your device meets the necessary requirements.

    For example, you’ll need a USB Type-C port or adapter in order to connect the T7 to your computer or phone. Additionally, you should ensure that your device’s operating system is supported (e.g.

    Windows 7 or higher, Mac OS X 10 or higher, Android 1 or higher).

    By confirming these details ahead of time, you can avoid any potential issues and ensure a smooth transfer process. Once you’ve confirmed compatibility, transferring files to the T7 is a breeze – simply connect it to your device, drag and drop your files, and you’re done!

    Ensure your computer and SSD are compatible

    When upgrading a computer, it’s important to check whether your computer and SSD are compatible. Compatibility issues can lead to wasted time and money, as well as potential damage to your devices. To ensure compatibility, you should check the specifications of both your computer and the SSD you plan to install.

    Look for factors such as the type of interface, the size of the SSD, and whether it’s compatible with your operating system. One way to ensure compatibility is to consult with a computer technician, who can help you identify any potential issues and recommend appropriate solutions. By taking the time to check compatibility, you can avoid frustrating and potentially costly issues down the road.

    So before you make any changes to your computer, be sure to do your research and ensure compatibility between your devices.

    how to transfer files to samsung ssd t7

    Connect the SSD to your Computer

    If you have just purchased a Samsung T7 SSD, the next step is to connect it to your computer so that you can start transferring files. The first thing you need to do is check whether your computer has a USB-C port or not. If it does not have a USB-C port, you will need to get a USB-C to USB-A cable to connect the SSD to your computer.

    Once you have the cable, connect it to the SSD and then connect the USB-A end of the cable to your computer. Your computer will detect the SSD and you can start transferring files immediately. It’s worth noting that depending on the size and number of files you want to transfer, it may take a little bit of time to complete the transfer.

    However, once you’ve transferred your files to the T7 SSD, you can rest assured they will be safe and secure, thanks to the drive’s excellent encryption and password protection features. With its fast read and write speeds, the T7 SSD is an excellent investment for anyone looking to store or transfer large amounts of data quickly and securely.

    Use the provided USB cable to connect the SSD to your computer

    When you receive a new SSD, the first thing you need to do is connect it to your computer. To do this, locate the provided USB cable and plug one end into the SSD and the other end into a USB port on your computer. Make sure to use a USB

    0 port for faster transfer speeds. If your computer doesn’t have any free USB ports available, you may need to use a USB hub. Once the SSD is connected, your computer should automatically detect it and install any necessary drivers.

    If not, you may need to manually install the drivers from the manufacturer’s website. Now that your SSD is connected, you can begin transferring files and experiencing faster read and write speeds. Just remember to safely eject the SSD from your computer before unplugging it to avoid any potential data loss.

    Formatting the SSD

    If you want to transfer files to your Samsung T7 SSD, the first thing you need to do is format the drive. This is an essential step, as formatting your SSD will erase any existing data on it and prepare it for the transfer process. To format the T7 SSD, you can either use Samsung’s software or your computer’s built-in formatting tool.

    If you’re using Windows, simply connect your T7 to your computer and go to “This PC”. Then, right-click on the T7 drive and select “Format”. For Mac users, you can use the “Disk Utility” app and follow the prompts to format your T

    Once your drive is formatted, you can transfer your files to it by simply dragging and dropping them into the T7 drive on your computer. It’s that easy! With your T7 now formatted and ready for use, you can enjoy its lightning-fast transfer speeds and reliable storage.

    Format the SSD to suit your needs; exFAT is recommended for cross-platform compatibility

    If you’re planning on using an SSD for storage, it’s important to format it in a way that suits your needs. One of the most popular formats for cross-platform compatibility is exFAT. This format allows your SSD to be used on both Windows and macOS systems, as well as on other devices like cameras and gaming consoles.

    It also supports larger file sizes, making it ideal for storing large media files. However, it’s important to note that exFAT is not preferred for use as a boot drive. Other formats like NTFS and HFS+ may be better suited for that purpose.

    Ultimately, the choice of format depends on how you plan on using the SSD. It’s important to research and choose the format that best meets your specific needs. Whatever your choice may be, make sure to backup all important data before formatting your SSD as formatting will erase everything on the drive.

    Transferring files

    If you’ve recently purchased a new Samsung SSD T7, transferring your files can seem like a daunting task, but don’t worry, it’s easier than you might think. First things first, you’ll need to connect your Samsung SSD T7 to your computer either via USB-C or USB-A. Once connected, you can then transfer your files by either copying and pasting them from your computer onto the SSD, or by using specialized software such as Samsung’s Portable SSD Software.

    This software allows you to easily transfer files, back up your data, and even secure your SSD with password protection. With the help of these simple steps, you can transfer all your important documents, photos, and videos effortlessly onto your new Samsung SSD T7, giving you peace of mind knowing that your files are safely stored and readily accessible whenever you need them.

    Drag and drop files onto the SSD or use a file transfer software like Samsung Portable SSD Software

    When it comes to transferring files onto your Samsung Portable SSD, there are a couple of options to choose from. If you prefer a traditional method, then you can simply drag and drop your files directly onto the SSD. This method is easy and straightforward, and it doesn’t require you to install any extra software.

    However, if you want to take your file transfer process to the next level, then the Samsung Portable SSD Software is the way to go. This software provides a user-friendly interface that allows you to transfer files quickly and efficiently. It also has additional features like data backup and restoration, so you can rest assured that your important files are always safe and secure.

    Whether you prefer the traditional drag-and-drop method or the advanced software solution, transferring files onto your Samsung Portable SSD has never been easier.

    Safely eject the SSD

    If you want to learn how to transfer files to Samsung SSD T7, it’s actually a pretty simple process. First, connect your Samsung SSD T7 to your computer using the USB-C cable that came with it. Then, open the SamsungPortableSSD.

    exe file that should have automatically downloaded onto your computer. Using the application, drag and drop any files you want to transfer onto your Samsung SSD T Once the transfer is complete, make sure to safely eject the SSD by clicking on the eject button in the SamsungPortableSSD application or by using the eject option on your computer.

    This ensures that the transfer has been completed successfully and that no data has been lost. With this guide, you can easily transfer your files to your Samsung SSD T7 for secure and speedy storage.

    Ensure all files are transferred before ejecting the SSD from your computer

    If you have been using an external SSD to transfer files between devices, it is crucial to ensure that all files are safely transferred before ejecting the device from your computer. This step is often overlooked but can lead to data loss and corruption of files. Always check that all transfer processes have been completed before safely ejecting the SSD from your computer.

    This can be done by checking the progress bar or closing all active data transfer applications. Ejecting the SSD before all files are transferred may result in incomplete files that could cause issues in the future. Remember to always safely eject your external SSD from your computer to prevent data loss and damage to files.

    Additionally, it is important to avoid sudden removal of the SSD during transfer to avoid file corruption. Follow these simple steps to ensure that your data is kept safe and secure.

    Conclusion

    Congratulations! You are now capable of transferring your files to a Samsung SSD T7 like a pro. The process is quick, easy, and reliable, providing you with a lightning-fast storage solution. No more waiting for hours for your data to transfer.

    No more frustrating crashes. With Samsung SSD T7, you can say goodbye to these problems and hello to a world of seamless, uninterrupted storage. So, go ahead, transfer your files, and enjoy the speed and efficiency of the Samsung SSD T

    Your digital life will thank you for it!”

    FAQs

    1. How do I transfer files to Samsung SSD T7 from my Mac? A: To transfer files from your Mac to Samsung SSD T7, connect the SSD to your Mac using the provided USB-C cable. Once it is connected, drag and drop the files that you want to transfer to the SSD. 2. Can I transfer large files to Samsung SSD T7? A: Yes, you can transfer large files to Samsung SSD T7 without any issue. It has a transfer speed of up to 1050MB/s, which allows you to transfer large files quickly and easily. 3. Can I use Samsung SSD T7 with Windows and Mac both? A: Yes, you can use Samsung SSD T7 with both Windows and Mac machines. You just need to reformat the drive according to the file system supported by the operating system you are using. 4. How do I secure my files on Samsung SSD T7? A: Samsung SSD T7 comes with built-in password protection and AES 256-bit encryption, which allows you to secure your files from unauthorized access. To set up a password, install the Samsung Portable SSD software and follow the on-screen instructions.

  • Unleash the Power of Samsung Portable SSD T7: Your Ultimate Guide to Effortless Data Management

    Hey tech enthusiasts! If you are someone who is always on the go and values portable and efficient storage solutions, then you are probably familiar with Samsung Portable SSD T This powerhouse device offers lightning-fast data transfer speeds and is compact enough to fit in the palm of your hand. However, it may be a little overwhelming to get started with, and that’s where this user guide comes in handy.

    In this blog post, we’ll walk you through everything you need to know to get the most out of your Samsung Portable SSD T From setting it up to optimizing performance, we’ve got you covered. So, sit back, grab your device, and let’s dive in!

    System Requirements

    If you want to know how to use the Samsung Portable SSD T7, it’s essential to understand the system requirements beforehand. To make sure that your device is compatible with the T7, you’ll need a computer or laptop with a USB port that meets at least USB 2 Gen 2 standard.

    It’s also necessary to have an operating system that supports the T7 software, such as Windows 7 or higher or Mac OS 10 or higher. Moreover, the T7 software is available on the Samsung website to be downloaded and installed.

    Once you have checked that your computer meets these system requirements, you can easily connect your T7 to your computer, and it should be ready to use. The Samsung Portable SSD T7 is fast, reliable, and offers a lot of storage for those who want to save their files, data, and memories conveniently, and with the right setup, it could be a game-changer for your productivity and storage needs.

    Check if your device has a USB-C port

    In this day and age, technology is constantly evolving, and USB-C is the latest and fastest connector that comes with a lot of advantages. But, before you jump on board and start making the switch, you need to check if your device has a USB-C port. It’s important to note that not all devices have USB-C ports, so you need to check the manual or do some research online to find out.

    This is especially important if you plan on using USB-C connectors for charging your devices or transferring files at high speeds. Without a USB-C port, you won’t be able to take advantage of its latest features. So, make sure to check your device’s system requirements before making any purchases.

    how to use samsung portable ssd t7

    Ensure your operating system is compatible

    An essential step before installing any software or program on your computer is to check the system requirements and ensure that your operating system is compatible with the software. This crucial step can save you a headache later on and even prevent damage to your computer. Before downloading or installing any software, you need to check the minimum requirements for your operating system, such as the CPU speed, RAM, and free disk space.

    Moreover, some software may only be compatible with specific versions of the operating system, so make sure you check that as well. Incompatibility issues may cause the software to malfunction, or worse, cause your computer to crash. Therefore, it’s always better to be safe than sorry, and checking the system requirements before installing any software is a must to guarantee a smooth and hassle-free experience.

    Connecting the SSD T7 to Your Device

    If you’ve recently purchased the Samsung Portable SSD T7, you may be wondering how to connect it to your device. Thankfully, it’s a simple process that requires just a few steps. First, plug one end of the USB-C cable into the SSD and the other end into your device’s USB-C or Thunderbolt 3 port.

    Next, power on your SSD by pressing the button on the top of the device. You should see a blue LED light up, indicating that it’s connected and ready to use. You can then transfer files to and from the SSD using your device’s file explorer or Samsung’s provided software.

    The Samsung Portable SSD T7 offers lightning-fast transfer speeds and is a great option for anyone looking for portable and reliable storage. So if you’re in need of a high-performance storage solution for your device, be sure to give the Samsung Portable SSD T7 a try!

    Plug in the device to your computer

    When it comes to using the SSD T7, the first thing you need to do is connect it to your computer. This can be done easily by using the USB cable that comes with the device. Simply plug one end of the cable into the SSD T7 and the other end into the USB port on your computer.

    Once you’ve done this, your computer should recognize the device and install any necessary drivers automatically. If you’re using a Mac, you may need to download the Samsung Portable SSD Software to get the most out of your SSD T With your device connected to your computer, you’ll be able to transfer files quickly and easily, making it an excellent choice for those who need a reliable and portable storage solution.

    So, whether you’re working on a big project or just need to transfer some important files, connecting the SSD T7 to your computer is the first step.

    Install Samsung Portable SSD software (optional)

    Connecting the Samsung Portable SSD T7 to your device is easy and straightforward. All you need to do is plug in the USB-C cable that comes with the SSD into your computer’s USB-C or Thunderbolt 3 port. Once it’s connected, your computer should automatically detect the SSD and it will show up as a new drive in your file explorer.

    If you want to get the most out of your SSD, you can also install Samsung’s Portable SSD software (optional). This software lets you configure security settings, manage your data, and even update the firmware of the SSD to ensure that it’s running optimally. The software is available for Windows and Mac computers and can be downloaded from Samsung’s website.

    Whether you’re using the Samsung Portable SSD T7 for work or play, it’s important to connect it properly to your device to ensure that you can access your files quickly and easily. And if you want to take advantage of all the features that the SSD has to offer, consider installing the Samsung Portable SSD software as well. With these simple steps, you’ll be up and running in no time!

    Use the included USB-C to USB-C cable

    When it comes to connecting your Samsung SSD T7 to your device, it’s essential to use the included USB-C to USB-C cable. This cable ensures a quick and stable transfer of your data, allowing you to enjoy the lightning-fast speeds that the T7 is capable of. The USB-C to USB-C cable is designed especially for this device and is the most dependable way to connect it to your computer.

    Simply plug one end of the cable into the T7 SSD and the other end into your device, and you’re ready to go. With this cable, you can transfer large files in seconds, making it an essential accessory for anyone who does a lot of data work on the go. So be sure to use the included cable for the best possible performance and reliable connection for your Samsung SSD T

    Transferring Files

    If you’re wondering how to use Samsung Portable SSD T7 to transfer files, I’ve got you covered. This external solid-state drive is an efficient and reliable tool for moving large amounts of data between devices. To start, connect the T7 to your computer or mobile device using the included USB Type-C cable.

    Then, use Samsung’s Portable SSD software to transfer your files. This software can be downloaded from the Samsung website and allows for easy management of your T Alternatively, you can simply drag and drop files directly onto the T7 icon on your desktop.

    With read speeds of up to 1,050 MB/s and write speeds of up to 1,000 MB/s, the Samsung Portable SSD T7 is one of the fastest external drives on the market, making file transfer a breeze. So, whether you’re backing up important documents or transferring large video files, the Samsung Portable SSD T7 is an excellent choice.

    Drag and drop files to/from the SSD T7

    The new Samsung T7 SSD is an excellent way to transfer files quickly and efficiently. One of the easiest ways to do this is by using the drag and drop feature. Drag and drop lets you move files from your computer to the SSD and back again in a matter of seconds.

    All you need to do is place the file you want to transfer in the SSD folder or vice versa and let go of the mouse button. The file will start copying immediately, and you can go ahead and continue with your work without any interruptions. This feature is handy, especially when you have to transfer large files such as videos or photos.

    With the T7’s high-speed transfer rates, those large files will transfer even faster than ever before. So, whether you’re a content creator, a gamer, or someone who needs to move files around frequently, the T7’s drag and drop feature is your saving grace.

    Use the Samsung Portable SSD software for transfers

    One of the best tools you can use with your Samsung Portable SSD is the Samsung Portable SSD software. This software is designed to help you transfer files quickly and easily, making it a must-have for anyone who works with large amounts of data. With this software, you can transfer files of all sizes in just a few clicks, without worrying about slow transfer speeds or dropped connections.

    The software also provides you with tools to manage your files, including the ability to search for specific files and folders. Overall, using the Samsung Portable SSD software makes transferring your files a breeze, ensuring that your data is safe and secure at all times. So whether you’re working on a big project or just need to transfer some files to a colleague, this software is a great solution for your data transfer needs.

    Securing Your Data

    If you’re looking for a secure way to store and transfer your data, the Samsung Portable SSD T7 is a great option to consider. With its lightning-fast read and write speeds, you can quickly move large files between devices without the hassle of slow transfer times. But what about security? The T7 has you covered there too.

    It features AES 256-bit hardware encryption, making sure that your sensitive data is safe from prying eyes. And if you need an extra layer of protection, you can set a password for added security. Plus, the T7’s sleek and compact design means that you can take it with you wherever you go, ensuring that your data is always within reach.

    So if you want to keep your data secure and easily accessible, the Samsung Portable SSD T7 is definitely worth considering.

    Set a password for your SSD T7

    When it comes to securing your data, one important thing you can do is to set a password for your SSD T This will add an additional layer of protection to your files, making it more difficult for anyone without the password to access them. Additionally, setting a password can help prevent data theft in case your SSD T7 is lost or stolen.

    It’s a simple step, but it can make a big difference in protecting your sensitive information. Make sure to choose a strong password that is difficult to guess, and consider changing it regularly for added security. By taking this proactive step to secure your SSD T7, you can enjoy greater peace of mind knowing that your data is safe and protected.

    Use fingerprint recognition for secure access

    In today’s world, data security is more important than ever. While traditional passwords and PINs may seem secure, they can easily be hacked or stolen by malicious individuals. This is where fingerprint recognition comes in – it offers an extra layer of security to protect your data.

    By using your unique fingerprint as your personal access key, you can be sure only you can access your sensitive information. Plus, it’s incredibly fast and easy to use – no more remembering complex passwords or worrying about forgetting your PIN. It’s like having your own personal security guard who knows exactly who you are and only lets you in.

    So if you want to keep your data safe and secure, consider adding fingerprint recognition to your access systems. Not only is it secure, but it’s also convenient and user-friendly. Make the switch today and enjoy the peace of mind that comes with knowing your data is protected.

    Additional Tips and Troubleshooting

    When using your Samsung Portable SSD T7, there are a few additional tips and troubleshooting methods that may come in handy. First, make sure to always safely eject the drive before unplugging it. This will prevent any possible data loss or corruption.

    Also, if you are experiencing slow transfer speeds, try connecting the drive to a different USB port or using a different USB cable. Additionally, ensure that your computer’s software and firmware are up to date to ensure optimal performance. Lastly, if you encounter any issues with your drive, Samsung offers a comprehensive support website and customer service team to assist with any troubleshooting needs.

    By following these tips and utilizing Samsung’s resources, you can ensure a smooth and efficient experience with your Samsung Portable SSD T

    Maximizing the performance of your device

    When it comes to maximizing the performance of your device, there are a few additional tips and troubleshooting steps you can take. First off, make sure you regularly update your device’s software. These updates often come with bug fixes and performance improvements that can greatly improve your device’s functionality.

    Additionally, be aware of any background apps or processes that may be slowing your device down. Closing unnecessary apps or performing a restart can often help to improve performance. If you’re experiencing more serious issues, such as constant freezing or crashing, it may be worth seeking out professional help or contacting the manufacturer for further assistance.

    By staying on top of software updates and staying proactive in troubleshooting, you can help to ensure that your device is always performing at its best. The main keyword in this paragraph is “performance.”

    Troubleshooting common problems

    When it comes to troubleshooting common problems, there are a few additional tips to keep in mind. Firstly, it’s always a good idea to check for any software updates or patches that may have been released. These can often fix bugs or glitches that could be causing issues.

    Additionally, it’s important to make sure that all cables and connections are properly secured and functioning as they should be. Sometimes, a loose cable can easily cause a problem that appears to be much more complex. Finally, if you’re still having trouble after trying these fixes, don’t hesitate to reach out for help.

    Whether it’s contacting customer support for your device or seeking assistance from a professional, there are plenty of resources available to help you get to the root of the problem and find a solution. Overall, by staying vigilant and taking a methodical approach to troubleshooting, you can often resolve common issues in a timely and effective manner.

    Backing up your data on the SSD T7

    When backing up your data on the SSD T7, it’s important to have a few additional tips and troubleshooting strategies in mind. To ensure a smooth and error-free transfer of your files, consider using the latest version of the Samsung Portable SSD software. This software offers a range of extra features, including password protection and firmware updates, which can help to keep your data secure and up-to-date.

    It’s also worth keeping in mind that some file types may not be compatible with your SSD, so be sure to double-check before attempting to transfer large or important files. If you do encounter any issues with your backup, try updating your firmware or checking for driver updates. In most cases, a quick restart of your devices and software can help to resolve any minor issues that may be preventing a successful backup.

    By taking these extra precautions, you can ensure that your data is safe and secure, even in the event of unexpected errors or hardware malfunctions.

    Conclusion

    In conclusion, using the Samsung Portable SSD T7 is as easy as pie. Simply plug it in, drag and drop your files, and you’re good to go! With lightning-fast transfer speeds and a compact design, this portable SSD is the perfect storage solution for anyone on-the-go. So why settle for slow and clunky external hard drives when you can have the sleek and savvy Samsung T7? Get yours today and experience the power of portable storage at your fingertips!”

    FAQs

    What is the maximum transfer speed of Samsung Portable SSD T7?
    The maximum transfer speed of Samsung Portable SSD T7 is up to 1,050MB/s.

    Is Samsung Portable SSD T7 compatible with Mac OS?
    Yes, Samsung Portable SSD T7 is compatible with Mac OS X 10.10 or higher, in addition to Windows 7 or higher, and Android 5.0 or higher.

    How do I set up fingerprint recognition on my Samsung Portable SSD T7?
    To set up fingerprint recognition on your Samsung Portable SSD T7, download and install the Samsung Portable SSD software on your device. Then, connect your SSD to your device using the USB cable provided and follow the on-screen instructions to set up the fingerprint recognition.

    Can Samsung Portable SSD T7 be used as a bootable drive?
    Yes, Samsung Portable SSD T7 can be used as a bootable drive for Windows, Mac, and Linux operating systems. However, you need to ensure that your device supports booting from an external drive and configure your device accordingly.

  • Upgrade Your PC with Ease: A Step-by-Step Guide on How to Remove an SSD Safely

    SSDs have become popular among computer users due to their quick read/write speeds and overall performance. However, when it comes to upgrading or replacing SSDs, users may have to remove the old units first. This task may require some technical skills, but with the right guidance, it is not as complicated as it may seem.

    In this step-by-step guide, we will show you how to remove an SSD from your computer without damaging the system. So, let’s roll up our sleeves and get started!

    Preparation

    Removing an SSD from a PC requires some preparation to avoid damaging the component or the computer. Firstly, shut down the PC completely and unplug it from the power source to prevent any electrical shock. Then, find the location of the SSD in your computer.

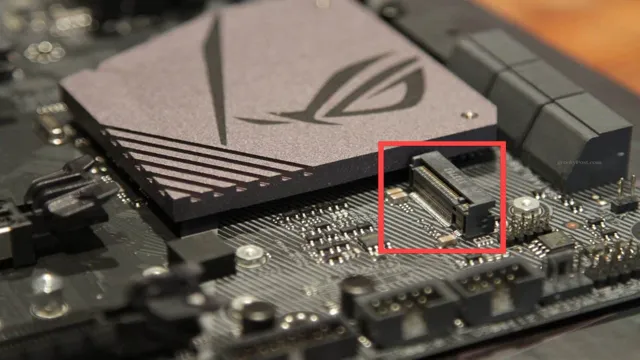
    In most cases, it is installed on a PCIe slot or directly attached to the motherboard. If the SSD is in a PCIe slot, remove any screws or locking mechanism that holds it in place. However, if it is attached to the motherboard, disconnect the cable that leads to the drive.

    Before removing the SSD, ensure that you have a compatible SSD replacement at hand to avoid any inconvenience. Finally, after removing the SSD, dispose of it safely or keep it away in case you may need it in the future. By following these simple steps, you will have removed your SSD without causing any damage to your computer, and you can replace it with a new one or upgrade your storage.

    Turn off PC and unplug from power source

    When it comes to computer maintenance, preparation is key. Before attempting to clean or repair your PC, one of the first things you should do is turn off the power and unplug it from its power source. This may seem like a no-brainer, but many people forget this crucial step and end up risking damage to their computer or even harm to themselves.

    By shutting off the power and disconnecting it from the outlet, you can ensure that there is no electricity running through the device, making it safer to work with. Whether you’re cleaning the inside of your computer or simply moving it to a new location, taking this small step can make a big difference in the safety and longevity of your device. Keyword: Turn off PC

    how to remove ssd from pc

    Ground yourself to prevent static discharge

    Grounding yourself before handling sensitive electronic components is crucial in preventing damage caused by static discharge. Static electricity can build up in our bodies when we move around and accumulate on our fingertips, which can easily transfer to any electronic device that we touch. To ground yourself, all you need to do is touch an unpainted metal surface, such as a doorknob or a metal table leg, before handling electronic components.

    This will allow any built-up static electricity in your body to discharge safely, preventing any damage to your electronics. While it may seem like a small step, it can make all the difference in preventing costly damage to your electronics. So, the next time you’re handling electronic components, take a moment to ground yourself first.

    Removing the SSD

    If you’re thinking of upgrading your SSD or replacing it altogether, it’s important to know how to remove it from your PC. First, ensure your computer is turned off and disconnected from any power source. Next, locate the SSD, which is usually found near the hard drive and looks like a rectangular chip attached to a circuit board.

    Using a screwdriver, locate and remove the screw(s) securing the SSD in place. Gently pull the SSD out of its slot, being mindful of any connections it may have with other components in the PC. If there are any cables attached, make sure to disconnect them carefully.

    Once you’ve removed the SSD, you can either replace it with a new one or simply upgrade it. Keep in mind that some PCs might have different steps for removing an SSD, so it’s always best to consult your computer’s user manual or online resources for specific guidance. With a little bit of caution, you can easily remove an SSD from your PC to upgrade or replace it.

    Locate the SSD in your PC

    If you’re looking to upgrade or replace your SSD, one of the first steps is to locate it within your PC. Depending on your computer model, the location of your SSD might differ. In general, most SSDs are found towards the bottom of your PC and installed onto the motherboard.

    To remove the SSD, first, make sure to power off your computer and disconnect all cables. Then, locate the SSD and remove any screws or brackets that may be holding it in place. Carefully remove the SSD from its slot, avoiding any contact with other components, and ensure that you have all the necessary tools before proceeding.

    Remember to handle all parts with care, as they are delicate. Once you have successfully removed the SSD, you can replace it with a new one or upgrade its capacity to improve your computer’s performance. By taking these steps, you can confidently upgrade or replace your SSD while keeping your PC safe and secure.

    Remove any cables or components obstructing the SSD

    When it comes to removing an SSD, it’s important to first remove any cables or components that might be obstructing it. This could include things like power cables, SATA cables, or even other components like RAM modules or graphics cards. These things can often get in the way and make it difficult to access the SSD, so it’s important to take the time to remove them before attempting to remove the SSD itself.

    Once you’ve done that, removing the SSD is usually a fairly straightforward process. Depending on the type of computer or device you’re working with, you may need to unscrew the SSD from its mounting bracket or remove any fasteners holding it in place. Just be sure to handle the SSD with care to avoid any damage, and keep in mind that different SSDs may require different methods for removal.

    With a bit of patience and some careful maneuvering, however, you should be able to remove your SSD without issue.

    Loosen the screws holding the SSD in place

    Removing the SSD from your computer can be a daunting task, especially if you are not familiar with computer hardware. To begin the process, you will need to loosen the screws holding the SSD in place. The screws are usually located on the sides of the SSD, and you can use a screwdriver to loosen them.

    Once the screws are loose, you should be able to lift the SSD out of its slot. Be careful not to pull too hard or twist the SSD, as this can damage the connections. It is also important to remember to ground yourself before handling the SSD, as a static charge can cause damage as well.

    With these things in mind, removing the SSD should be a relatively easy process. By following these simple steps, you can safely remove your SSD and replace it with a newer or larger one, giving your computer a boost in performance.

    Carefully remove the SSD

    Removing the SSD from a laptop or PC is a delicate process that requires some level of expertise. First, you need to ensure that the device is turned off, and then find where the SSD is located. Usually, it is located at the bottom of the laptop or on the side of a desktop PC.

    Once you locate it, you’ll need to unscrew the bracket or cover that holds it in place. Then, gently disconnect the cable connector that connects the SSD to the motherboard. It’s essential to avoid excessive force to prevent damaging the connections or components.

    Finally, carefully remove the SSD from the slot and place it aside. This process shouldn’t take more than a few minutes, but it requires caution to prevent accidents or damage to the device. Removing the SSD is a critical step when replacing or upgrading it, and it’s essential to do it right to prolong your device’s lifespan.

    Post-removal

    If you’re looking to upgrade or replace your computer’s SSD, the first step is to remove the old one. Removing an SSD from a PC is a straightforward process but requires some care and attention to detail. Before you start, make sure your computer is turned off and unplugged.

    Locate the SSD, which is typically located near the CPU and is a small rectangular board. To remove it, you will need to unscrew any screws holding it in place and gently lift it out of the socket. Be gentle but firm, as you don’t want to damage any connectors or pins.

    Once removed, be sure to store the old SSD safely and securely, as it may contain sensitive data that you don’t want falling into the wrong hands. With your old SSD removed, you can now install your new one and get back to using your computer with faster and more reliable storage.

    Check SSD for any physical damage

    Now that you’ve removed your SSD, it’s important to check for any physical damage before reinstalling it or disposing of it. A damaged SSD can result in lost data, system crashes, and other serious issues. To check for physical damage, first look for any cracks or dents on the exterior of the drive.

    If the drive is bent or warped, it may have suffered damage from impact. Next, examine the connector pins for any signs of bending or misalignment. These pins are delicate and can easily be damaged if the drive is mishandled.

    Lastly, give the drive a sniff test. If you detect any burning or electrical smells, the drive may have suffered internal damage and should be replaced. Taking these steps can help protect your data and ensure that your system runs smoothly.

    Remember, prevention is always better than cure!

    Replace any components and cables previously removed

    After removing any components and cables during maintenance or repair, it is important to replace them carefully and securely. Reinstalling them using the correct techniques and tools is crucial to avoid malfunctions or safety hazards. Double-checking that you have replaced all the necessary parts before starting up your device is also important, and make sure the connections are tight and aligned properly.

    It’s recommended to refer to the device’s manual or manufacturer’s instructions when replacing the components and cables. Remember, taking extra care when putting things back together can save time and money in the long run, and give you peace of mind knowing that your device is functioning smoothly and safely.

    Store SSD in anti-static packaging

    Once you’ve removed your SSD from your computer, it’s important to store it in anti-static packaging. This packaging will protect your SSD from electrostatic discharge, which can damage your device. Anti-static packaging is designed to prevent the buildup of static electricity while also providing a protective barrier from physical damage.

    You can find anti-static bags or foam inserts to place your SSD in, which will keep it safe and secure until you need to use it again. Remember, even if you’re not planning on using your SSD for a while, it’s always better to be safe than sorry and store it properly. By taking care of your SSD, you can ensure that it lasts for years to come and continues to perform at its best.

    Conclusion

    Removing an SSD from a PC is as simple as saying goodbye to a bad ex. Just open up your PC, find the SSD, unplug it, and voila! You’ve gotten rid of any pesky issues and can move on to better things. Just remember to dispose of the SSD responsibly and don’t let it come back to haunt you.

    FAQs

    What are the steps to remove an SSD from a PC?
    First, shut down the PC and unplug it from the electrical outlet. Open the case by removing any screws or clips and locate the SSD. Unplug the cables connected to it and gently remove it from its slot.

    Can I remove an SSD while the PC is running?
    No, it is not recommended to remove any hardware while the PC is running. Always shut down the PC and unplug it from the electrical outlet before removing any hardware.

    Is it necessary to remove the power supply before removing the SSD?
    It depends on the location of the SSD in your PC. If it is situated in a location near the power supply, then it is recommended to remove the power supply before removing the SSD.

    Can I reuse the SSD after removing it from my PC?
    Yes, you can reuse the SSD in another PC or external enclosure as long as it is still in good condition and compatible with the new device. Make sure to properly format the SSD before reuse.

    Do I need any special tools to remove an SSD from my PC?
    No, you do not need any special tools to remove an SSD from your PC. A screwdriver might be needed to open the case of your PC, but aside from that, the process of removing an SSD is straightforward.

  • Unlock the Secret: Your Ultimate Guide on How to Determine if Your SSD is Compatible with Your Motherboard

    Upgrading your computer’s storage system is a great way to breathe new life into an aging machine. But before you go out and buy that shiny new SSD, you need to make sure it’s compatible with your motherboard. After all, there’s nothing worse than shelling out your hard-earned cash only to find out that your new drive won’t work with your system.

    But don’t worry, determining SSD-motherboard compatibility isn’t as daunting as you might think. In this article, we’ll cover everything you need to know to make sure your new hardware upgrade goes smoothly. So sit back, relax, and let’s dive into the world of SSD and motherboard compatibility.

    Check your motherboard’s specifications

    If you’re planning on upgrading your computer with an SSD, it’s important to check your motherboard’s specifications to ensure compatibility. One of the easiest ways to find out is to check the motherboard manual that came with your computer or visit the manufacturer’s website to locate the specifications page. Look for the type of connection interface your motherboard uses, whether it’s SATA or NVMe, and the size of the SSD that it supports.

    Another factor to consider is the generation of your motherboard’s PCIe slot. If your motherboard doesn’t support NVMe, then it’s best to choose a SATA SSD. On the other hand, if your motherboard does support NVMe, then you can go for faster and more expensive NVMe SSDs that provide better performance.

    In summary, checking your motherboard’s specifications before purchasing an SSD will save you from the hassle of buying an incompatible one.

    Find the manufacturer and model number

    When it comes to finding the manufacturer and model number of your motherboard, one of the easiest ways to do so is to check the motherboard’s specifications. This information can typically be found in the motherboard manual or on the manufacturer’s website. To access this information, you’ll need to find the model number of your motherboard, which can usually be found on the motherboard itself.

    Once you have the model number, you can then search for the motherboard’s specifications online, which should provide you with all of the information you need, including the manufacturer’s name, model number, and any other relevant details. By taking the time to do this research, you can ensure that you have the correct information about your motherboard, which can be helpful when it comes to troubleshooting problems or upgrading your system. So why not take a few minutes to check your motherboard’s specifications today?

    how to know if ssd is compatible with motherboard

    Check the documentation or website for compatibility information

    When building your own PC, it’s important to make sure that all the components you choose are compatible with each other. Checking your motherboard’s specifications is a great place to start. Your motherboard is essentially the backbone of your system, and it’s important to make sure that your other components are compatible with it.

    Make sure to check the documentation or the website for compatibility information before purchasing anything. You don’t want to spend your hard-earned money on something that ultimately won’t work with your system. It’s better to do your research ahead of time and ensure that everything will work together smoothly.

    So, take the time to do your research and make sure that your motherboard is compatible with all the other components you plan on using in your build.

    Consider the SSD’s interface

    If you’re wondering how to know if an SSD is compatible with your motherboard, the first thing to consider is the interface. There are several types of SSD interfaces, including Serial ATA (SATA), PCI Express (PCIe), and NVMe (Non-Volatile Memory Express). If your motherboard supports the same interface as the SSD, they should be compatible.

    SATA is the most common interface and is supported by most motherboards, while PCIe and NVMe are faster but require more recent motherboards. It’s also important to check the physical size of your SSD if you have a small form factor (SFF) PC, as some SSDs may not fit properly. Overall, it’s essential to do your research before purchasing an SSD to ensure compatibility with your motherboard.

    Determine if your motherboard supports the selected interface (SATA vs NVMe)

    If you’re looking to upgrade your storage with an SSD, one crucial factor to consider is the interface. SATA and NVMe are the two primary interfaces for SSDs, and knowing which one your motherboard supports can save you a lot of time and hassle. SATA is the older of the two interfaces, and most motherboards support it.

    It’s a reliable and affordable option for those on a budget. NVMe, on the other hand, is a newer and more advanced interface. It’s faster than SATA and can significantly improve your computer’s performance.

    However, not all motherboards support NVMe, so it’s essential to check beforehand to avoid disappointment. Upgrading your motherboard to support NVMe can be expensive, so it’s worth considering whether it’s worth the investment for the added speed. Overall, when choosing an SSD, make sure to check if your motherboard supports the interface you want to use for optimal performance and compatibility.

    Check the form factor

    When it comes to installing an SSD, one of the most important considerations is whether or not it is compatible with your motherboard. There are several factors to consider in this regard, but one of the most crucial is the form factor. SSDs come in a variety of sizes, and it’s important to ensure that the one you choose matches the space available on your motherboard.

    Common form factors include 5-inch, M.2, and NVMe, so make sure to check which type your motherboard supports before purchasing an SSD.

    Some motherboards may also have multiple form factor slots, so you can choose the one that works best for your setup. By keeping the form factor in mind, you can ensure that your SSD will be compatible with your motherboard and function properly, so you can enjoy faster boot times and improved system performance.

    Ensure your motherboard and case can accommodate the SSD’s physical size

    If you’re considering upgrading your storage to a solid-state drive (SSD), it’s important to ensure that your motherboard and case can accommodate its physical size. The first thing to check is the form factor of the SSD. Most modern SSDs are designed using the

    5-inch form factor, which is the same as a standard laptop hard drive. However, some SSDs may have different form factors such as M.2, U.

    2, or PCIe, which can vary in size and shape. This means that you need to check the specifications of both your motherboard and your case to make sure that they can house the SSD. It’s also worth noting that some SSDs may require additional mounting hardware or adapter cards to fit properly.

    Ultimately, it’s important to do your research and ensure that the SSD you plan to buy is compatible with your system before making a purchase.

    Confirm the power source

    When it comes to upgrading your computer’s storage with an SSD, compatibility with your motherboard is crucial. The first step in checking if your SSD is compatible is to confirm the power source. The majority of SSDs require a 5V DC power connection, so you need to ensure that your motherboard has the necessary power supply connectors.

    One way to do this is to check the manual of your motherboard or consult online specifications. Some motherboards have different slot types for SSDs, such as M.2 or SATA, so make sure to check which type your SSD utilizes to ensure compatibility.

    It’s also essential to know the capacity your motherboard can handle, which can affect the size and speed of the SSD. Finding out if your SSD is compatible with your motherboard may take some research, but it’s worth investing time rather than potentially damaging your system.

    Check if your motherboard has the necessary power connectors for the SSD

    When upgrading or installing an SSD in your computer, it’s important to consider the power source and connectors on your motherboard. Before purchasing an SSD, it’s crucial to check if your motherboard has the necessary power connectors for the storage drive. Most modern motherboards have SATA power connectors, which are compatible with most SSDs.

    However, some newer SSDs, such as NVMe drives, require specific power connectors. If your motherboard doesn’t have the necessary connectors, you may need to purchase an adapter or upgrade your motherboard. It’s vital to confirm the power source to ensure that your SSD is receiving enough power to operate at its optimal performance.

    Adequate power supply is essential for preventing corruption and failure of your SSD. Therefore, before installing your SSD, make sure you check your computer’s power supply and motherboard power connectors to ensure that your SSD is getting the power it needs to function correctly.

    Test the compatibility

    If you want to upgrade your PC’s storage for better performance and faster speed, the first thing you need to do is to check if your motherboard is compatible with the SSD you want to install. To do this, you need to consider the interface and form factor of both the motherboard and the SSD. The most common interfaces for SSDs are SATA, PCIe, and NVMe, while form factors can range from

    5-inch to M. If your motherboard supports the same interface and form factor as your SSD, then you’re good to go.

    However, not all motherboard models support all types of SSDs, so it’s crucial to check the manufacturer’s specifications before buying an SSD. It’s essential to test the compatibility before making any purchase to avoid incompatibility issues in the future. A motherboard-SSD mismatch can result in poor performance, booting issues and, in some cases, even complete system failure.

    So don’t skip this crucial step and ensure that your SSD and motherboard are compatible before making any decisions.

    Install the SSD and boot the system to verify functionality

    Installing an SSD is an excellent way to upgrade your computer’s performance and speed. However, before you start reaping the benefits of your new component, it’s essential to test the compatibility of your system. Ensure that the motherboard and BIOS firmware supports the new drive, and the system recognizes it during boot-up.

    You can verify compatibility by starting the system and accessing the BIOS setup page to check if the SSD is detected and listed. If your system fails to recognize the drive, double-check the connections and ensure that you’ve installed the latest firmware and drivers. Once verified and functional, you can install the operating system and necessary software into the SSD.

    With a powerful and reliable SSD, your system will operate at impressive speeds and offer improved storage capacities. Take note that checking for compatibility is crucial to avoid any unwarranted software or mechanical issues, ensuring long-term, reliable usage.

    Conclusion and further recommendations

    To determine if your SSD is compatible with your motherboard, there are a few things you can look for. Firstly, check the connector type – if your motherboard has an M.2 slot, you’ll need an M.

    2 SSD. Secondly, check the interface – if your motherboard supports SATA III, you can use any SATA III SSD. And lastly, do some research to ensure that the specific SSD model you’re considering is compatible with your particular motherboard.

    With these tips in mind, you’ll be able to confidently choose an SSD that matches perfectly with your motherboard, resulting in a lightning-fast and smooth computing experience. As they say, compatibility is key – and with the right SSD and motherboard combo, the sky’s the limit!”

    FAQs

    What is the difference between SATA and NVMe SSDs?
    SATA SSDs use a SATA interface and are slower than NVMe SSDs, which use the PCIe interface. Check if your motherboard has an M.2 slot that supports NVMe before buying an NVMe SSD.

    How do I check if my motherboard has an M.2 slot?
    Check your motherboard’s specifications online or in the manual. If it has an M.2 slot, it should specify whether it supports SATA or NVMe SSDs.

    Can I install an SSD on a motherboard that only has HDD slots?
    Yes, you can install an SSD on a motherboard that only has HDD slots, but you’ll need an adapter to fit the SSD in the 3.5-inch or 5.25-inch drive bay. Make sure the adapter is compatible with your SSD’s form factor.

    Can an SSD be installed on any motherboard?
    No, not all motherboards support SSDs. You need to make sure your motherboard has a compatible interface for the SSD you want to install, either SATA or NVMe. Check your motherboard’s specifications before buying an SSD.

  • Effortlessly Transfer Data: A Step-by-Step Guide on How to Move Files from SSD to HDD

    If you’re running out of space on your SSD and want to free up some storage, moving files from SSD to HDD is a great solution. Not only will it give your SSD some breathing room, but it’ll also help you organize your files better. However, many people find the process of moving files from SSD to HDD confusing, especially if they’re not tech-savvy.

    But fear not, we’re here to help! In this step-by-step guide, we’ll walk you through the entire process, so you can extract the maximum potential from both your SSD and HDD. So whether you’re a gamer, photographer, or simply someone with a cluttered hard drive, read on to learn how to streamlining the process with ease.

    Check Available Storage Space on Your HDD

    When it comes to storage space, it’s always important to keep an eye on how much you have left. If you’re running low on space, moving files from your SSD to your HDD can be a great way to free up some room. To start, you’ll want to check how much space you have available on both drives.

    On a Windows computer, you can do this by opening File Explorer and right-clicking on the drive you want to check. Select “Properties” and you’ll see how much free space you have left. Once you know how much space you have, you’ll be able to decide which files to move over to the HDD.

    It’s important to note that while SSDs are generally faster than HDDs, they’re also more expensive. You might want to consider moving files that you don’t use as often or that don’t require fast access times, like old photos or documents. By doing this, you can free up valuable space on your SSD for more important files and applications.

    Open File Explorer and Navigate to Your HDD

    When it comes to managing your computer’s data storage, one crucial step is to keep an eye on the available space on your hard drive or HDD. To do this, you can simply open File Explorer on your PC and navigate to your HDD. Once you’ve located your HDD, right-click and select “Properties” to view essential information, including the amount of used and available space.

    Keeping track of this information will help you avoid running out of space, which can cause sluggishness and other issues on your computer. It’s an easy task that can go a long way in keeping your computer running smoothly and efficiently. So, next time you’re wondering how much space is available on your HDD, remember to check File Explorer, and you’ll be good to go!

    how to move files from ssd to hdd

    Check Available Storage Space on Your SSD

    Checking the available storage space on your HDD is critical to ensure that you don’t run out of room, causing your system to slow down or crash. There are a few ways to check your available space, but the most straightforward is through your file explorer program. Simply open your file explorer and look under “This PC” or “My Computer” to find your HDD.

    Right-click on the drive and select “Properties.” A new window will open and show you how much space is being used, how much space is free, and the total size of the drive. You should always aim to have at least 10% of your HDD space free, as this ensures your system can function smoothly.

    If you find yourself running low on space, consider deleting unnecessary files, uninstalling programs you no longer use, or move some of your larger files to an external storage device. By regularly checking your HDD space and taking action to free up space, you can ensure your system runs smoothly and avoid any frustrating crashes or slowdowns.

    Select Files to Move

    Moving files from your SSD to your HDD can be a daunting task, especially if you have a lot of files that need to be moved. However, with the right approach, it can be a straightforward process. The first step is to select the files that you want to move.

    You can do this by opening up the File Explorer and navigating to the folders containing your files. Once you have found the files you want to move, right-click on them and select “Copy” or “Cut”. Next, navigate to your HDD and create a new folder to store your files.

    Then, right-click inside the new folder and select “Paste”. This will copy or move the files to your HDD. You can also use software like EaseUS ToDo PCTrans to make the process even easier.

    With a few clicks, you can transfer all your important files and programs from your SSD to your HDD. Overall, moving files from your SSD to your HDD is a simple process that can save you a lot of space on your SSD.

    Select the Files or Folders You Want to Move

    When it comes to moving files or folders, the first step is to select the ones you want to move. This might seem like a straightforward task, but it can become overwhelming if you have a lot of files to sift through. Start by determining which files or folders are most important to you and need to be moved first.

    You can use filters or sorting options to help make the process easier. For example, you could sort files by date modified to determine which ones you’ve worked on most recently. Another way to select files to move is by using the CTRL or Command key on your keyboard and clicking on the individual files or folders.

    This lets you choose several items at once instead of moving them one by one. By putting some thought into your selections, you’ll make the process of moving your files much smoother and less stressful.

    Copy the Selected Files or Folders

    When it comes to selecting files or folders to move, there are a few different methods you can use. One of the simplest is to click and drag your mouse to highlight the files you want to select. Alternatively, you can hold down the “Ctrl” key and click on each file individually.

    Once you’ve selected the files or folders you want to move, the next step is to copy them. To do this, right-click on any of the selected files and choose “Copy” from the drop-down menu. Alternatively, you can use the “Ctrl+C” keyboard shortcut.

    From there, navigate to the location where you want to copy the files and either right-click and choose “Paste” or use the “Ctrl+V” keyboard shortcut. Keep in mind that these same steps can be used to move files instead of copying them. Simply choose “Cut” instead of “Copy” and then paste the files in their new location.

    With just a few clicks or keystrokes, you can quickly and easily move or copy your selected files or folders wherever you need them.

    Move Files to HDD

    If you’re running low on space on your SSD and need to move files to your HDD, don’t worry – it’s a lot simpler than you might think. First, you’ll need to connect your HDD to your computer and make sure it’s recognized. You can do this by opening File Explorer and checking if your HDD is listed under “This PC.

    ” Next, you’ll want to identify which files you’d like to move. You can do this by opening File Explorer and navigating to the folder where your files are stored. Once you’ve found the files you want to move, simply click and drag them into your HDD folder.

    Alternatively, you can right-click on the file and select “Cut,” then navigate to your HDD folder and right-click and select “Paste.” It’s important to note that moving files from your SSD to your HDD won’t delete them from your SSD, so you’ll need to delete them manually if you want to clear up space. By following these simple steps, you can easily move files from your SSD to your HDD and free up valuable space on your computer.

    Navigate to Your HDD in File Explorer

    If you have recently installed a new hard disk drive (HDD) on your computer and want to move files from your computer’s internal storage to the new HDD, the process is straightforward. All you have to do is navigate to your HDD in File Explorer and drag and drop the files to the new location. To do this, open File Explorer, and under “This PC”, you should see your new HDD listed.

    Click on it to open the drive, and then navigate to the location where you want to move your files. Once you have found the right folder, simply drag and drop the files from your internal storage to your HDD. It’s important to note that moving large files can take a while, so be patient and let the transfer process complete.

    This way, you can free up space on your computer’s internal storage and ensure that important files are safely backed up on your new HDD.

    Create a New Folder on Your HDD for the Files

    Creating a new folder on your hard disk drive (HDD) is an essential step when moving files from one location to another. While copying and pasting files is a common practice, it’s crucial to keep your files organized to avoid confusion and misplacing them. To create a new folder, right-click on the location where you want to create the folder and select “New Folder.

    ” Give the folder a name that is related to the contents of the files you’re moving. Once the folder is created, select all the files you want to move, right-click, and select “Cut.” Paste the files into the new folder you just created, and you’re done! This step guarantees that you won’t lose your files and will have them easily accessible whenever you need them.

    So, take some time to create a new folder before moving files, and it will save you time in the long run.

    Paste the Selected Files or Folders into the New Folder

    Moving files to an external HDD can be a smart move to free up space on your computer’s hard drive or to keep important files backed up. Once you have your folder or file(s) selected, you need to create a new folder in the external HDD where you want to move them. This can be done either by right-clicking anywhere in the empty space in the device’s folder, then choosing “New Folder,” or by using the “Ctrl+Shift+N” keyboard shortcut.

    Once you have your new folder in place, select it either by double-clicking or single-clicking and then right-clicking. From there, choose the “Paste” option, or use the keyboard shortcut “Ctrl+V,” to move your selected file(s) or folder(s) into the new folder. It’s as simple as that! By following these simple steps, you can move your files quickly and keep them organized on your external HDD.

    Verify Files Were Moved Correctly

    Moving files from an SSD to an HDD can be a daunting task, especially when you want to ensure that all files have been moved correctly. The first step to verify that files have been moved correctly is to check the file size. If the file size is the same as the original file, then it has been moved successfully.

    The second step is to check the directory path of the file. If the file is now in the correct directory on the HDD, then it has been moved successfully. Another way to verify that files have been moved correctly is to open a few files and ensure that they are working correctly.

    This step is important because sometimes files can become corrupt during the moving process. By following these steps, you can ensure that all files have been moved correctly from the SSD to the HDD. So, if you are wondering how to move files from an SSD to an HDD, just follow these simple steps to ensure that everything is working correctly.

    Conclusion

    So there you have it, folks! Moving files from your SSD to your HDD is as easy as pie. Just remember to prioritize the files you want to keep on your SSD for faster access and the ones you can afford to move to your HDD. With a little know-how and some organization, you’ll be able to optimize your computer’s storage capacity in no time.

    So go ahead, take charge of your files, and happy computing!”

    FAQs

    What is the advantage of moving files from SSD to HDD?
    The advantage of moving files from SSD to HDD is that it frees up space on the faster SSD, allowing it to run more efficiently. Additionally, it helps to keep frequently used files on the SSD for faster access, while less frequently used files can be stored on the HDD.

    How do I determine which files to move from SSD to HDD?
    You can determine which files to move from the SSD to the HDD by looking at the size and frequency of use for each file. Larger files that are accessed less frequently, such as documents, pictures, and videos, can be moved to the HDD. Smaller files that are accessed frequently, such as applications and system files, should be kept on the SSD.

    Can I move files from SSD to HDD without losing data?
    Yes, you can move files from SSD to HDD without losing any data. Simply copy and paste the files you want to move from the SSD to the HDD. It’s important to note that you should not delete the original files from the SSD until you’ve confirmed that they’ve successfully been moved to the HDD.

    What is the best way to transfer files from SSD to HDD?
    The best way to transfer files from SSD to HDD is to use a file transfer program such as TeraCopy or FastCopy. These programs are designed to optimize the copying process, resulting in faster transfer speeds and greater reliability. Alternatively, you can use Windows Explorer to copy and paste the files, but this may take longer and be less efficient.

  • Step-by-Step Guide: The Ultimate Way to Format Your M.2 SSD Like a Pro!

    If you’re looking to upgrade your storage drive on your computer or perhaps build a new one from scratch, you may have come across the term M.2 SSD. M.

    2 SSDs are becoming more popular as they’re faster, more compact, and offer a high performance and storage solution. But one thing that is often overlooked is the formatting process of these drives. How do you format an M.

    2 SSD? In this article, we’ll guide you through the steps to format your M.2 SSD, so you can use it efficiently with your computer. So, let’s get started!

    Understanding M.2 SSDs

    If you’re looking to format a M.2 SSD drive, you’re in luck! It’s actually a pretty straightforward process. The first step is to make sure your computer recognizes the drive.

    You can check this by going into your BIOS settings and looking for the drive in the listed options. Once you’ve confirmed that the drive is recognized, you can move onto formatting it. There are a few different ways to do this, but one of the most common is through the Windows Disk Management tool.

    Simply right-click on the M.2 SSD drive and select “Format.” From there, you can choose your desired file system and allocation unit size.

    Just keep in mind that formatting will erase all data on the drive, so make sure you have a backup if necessary. And with that, you should be all set with a newly formatted M.2 SSD drive ready for use!

    Difference between M.2 and other SSDs

    M.2 SSDs M.2 SSDs have gained popularity among tech enthusiasts due to their compact size and high-speed performance.

    M.2 SSDs are different from other SSDs in their form factor. They are smaller in size than traditional SSDs and connect directly to the motherboard through an M.

    2 slot, eliminating the need for cables. M.2 SSDs come in different lengths and widths, catering to the needs of different motherboards.

    Apart from the size, M.2 SSDs also offer faster read and write speeds. They use a different interface than other SSDs, such as SATA or PCIe, enabling them to transfer data at lightning-fast speeds.

    M.2 SSDs are ideal for gaming setups or computers that require high-speed data transfer. However, they can be a bit more expensive than traditional SSDs.

    In conclusion, M.2 SSDs are a great choice for anyone who wants a high-speed, compact storage option and has the budget to splurge on it.

    how to format a m.2 ssd

    Benefits and drawbacks of M.2 SSDs

    M.2 SSDs Understanding M.2 SSDs can greatly benefit those looking for faster storage solutions, but it also comes with some drawbacks.

    M.2 SSDs are a type of solid-state drive that uses the M.2 interface and can be installed directly onto the motherboard, allowing for faster data transfer rates and more efficient use of space.

    One of the main benefits of M.2 SSDs is the speed at which they can read and write data, which can greatly improve system performance and reduce load times. Additionally, M.

    2 SSDs are much smaller than traditional 5-inch SSDs, taking up less space in the computer. However, M.

    2 SSDs also have some drawbacks, such as the potential for overheating due to the lack of airflow in the slot they are installed in. They also tend to have a higher cost per GB compared to traditional SSDs. Overall, understanding the pros and cons of M.

    2 SSDs can help individuals make an informed decision when looking for a storage solution that meets their needs.

    Backup Your Data

    If you’re looking to format your M.2 SSD, it’s important to back up your data beforehand. When you format a drive, all of the data on it will be erased, so you want to make sure you have it all backed up in case you need it again later.

    One way to do this is to create a copy of your data on an external hard drive or online cloud storage service. Once you’ve backed up your data, you can proceed with formatting the M.2 SSD.

    The first step is to open Disk Management, which you can do by typing “diskmgmt.msc” into the Windows search bar. From there, find your M.

    2 SSD and right-click it, then select “Format.” Choose the file system you want to use, such as NTFS or FAT32, and decide whether you want to perform a quick format or not. Once you’ve made your selections, click “OK” to begin the formatting process.

    With a bit of patience, your M.2 SSD will be formatted and ready for use.

    Why it’s important

    Losing precious data can be a nightmare for any individual or business. That’s why it’s crucial to back up your data regularly. Data loss can happen due to various reasons, such as hardware failure, malware attacks, human error, or natural disasters.

    Without a backup, all your important files and documents could be gone forever. However, by creating and maintaining a backup, you can ensure that your data is safe and secure. You can either use physical backups like external hard drives or opt for cloud-based solutions.

    Whatever your choice may be, it’s always better to be prepared for any contingencies rather than regretting it later. So, take action now, back up your data, and never worry about losing your precious files again.

    Ways to back up your data

    Backing up your data is an essential task that you should make a priority, especially if you store important files on your computer or other devices. Losing your valuable data due to a device crash or cyber attack could lead to a nightmare situation. However, there are several easy ways to back up your data and protect yourself from any unforeseen disaster.

    One of the most commonly used methods is Cloud Backup, which allows you to store your data in a remote location via the internet. Cloud services like Google Drive, Dropbox and OneDrive are some of the popular options you can use. You can also choose to back up your data on an external hard drive or USB drive, which you can store in a safe place to avoid theft or damage.

    Another option is to opt for a hybrid system, which involves using both cloud and local backups for your files. Remember that backing up your data is a simple and effective way to protect yourself from potential data loss.

    Format the M.2 SSD

    If you’re looking to format a M.2 SSD, you’ll need to follow a few simple steps to get the job done. First, you’ll want to make sure that your M.

    2 SSD is connected to your computer. Once you’re certain that it’s properly connected, you can begin the formatting process. It’s best to use a software program that’s designed specifically for formatting SSDs, as this will help ensure that you don’t accidentally delete any important files.

    Some popular software options include EaseUS Partition Master and AOMEI Partition Assistant. Once you’ve chosen your software, you can begin formatting your M.2 SSD by selecting the drive and choosing the format option.

    You’ll want to select the NTFS file system, as this is the most commonly used file system for Windows-based computers. After a few minutes, the formatting process should be complete, and you’ll be left with a freshly-formatted M.2 SSD that’s ready to store your data.

    It’s important to note that formatting will erase all data on the drive, so be sure to back up any important files before starting the process. With these simple steps, you can format your M.2 SSD and get it ready for all your storage needs!

    Step-by-step guide

    If you’ve recently purchased an M.2 SSD, the first thing you’ll need to do is format it to make it compatible with your system. Here’s a step-by-step guide to format your M.

    2 SSD. First, make sure your SSD is connected to your computer. You can do this by accessing your computer’s BIOS and verifying that it is recognized under the “Storage” or “Hard Drive” menu.

    Once you’ve confirmed its presence, you can move forward with the formatting process. Open “Disk Management” by typing “diskmgmt.msc” into the Windows search bar.

    Once you’ve located your SSD, right-click on it and select “Format”. From there, you can choose your file system format and assign a drive letter. Finally, click “OK” to initiate the formatting process.

    That’s it! Your M.2 SSD is now formatted and ready to use.

    Choosing the right format type

    When it comes to installing an M.2 SSD, it’s important to choose the right format type. The most common formats are SATA and PCIe, each with its own advantages and disadvantages.

    SATA is the slower of the two but is still faster than a traditional hard drive. It is also more widely available and tends to be less expensive. PCIe, on the other hand, is much faster and is the preferred format for high-performance systems and applications.

    However, it can be more expensive and may not be compatible with all systems. Once you have chosen the format type, it’s crucial to properly format the SSD before use. This ensures that the SSD will operate efficiently and reliably.

    Most commonly, you’ll want to format the SSD to the NTFS file system for use with Windows. It’s always a good idea to consult the manufacturer’s guidelines to ensure that you’re formatting your SSD correctly.

    Things to keep in mind while formatting

    Formatting your M.2 SSD is an important step if you want to make the most of its speed and performance. When formatting an M.

    2 SSD, there are a few things to keep in mind. Firstly, you should make sure that the drive is compatible with your system. Most modern computers support M.

    2 SSDs, but it’s always best to check to avoid any compatibility issues. Another thing to consider is the file system you want to use. Generally, it’s best to use the NTFS file system for your M.

    2 SSD, as it offers better performance and is more stable than other file systems. However, if you’re using your SSD on a Mac computer, you may want to consider using the HFS+ file system instead. Once you’ve determined the compatibility and file system, the next step is to format the drive itself.

    This can usually be done through the Disk Management utility on Windows or the Disk Utility app on a Mac. When formatting the drive, make sure to choose the right options, such as the partition style and allocation unit size. It’s also important to note that formatting your M.

    2 SSD will erase all data on it. So, make sure to back up any important files before proceeding with the formatting process. In conclusion, formatting your M.

    Conclusion

    In conclusion, formatting an M.2 SSD is a bit like giving your car a tune-up – it may seem daunting at first, but ultimately it will improve your device’s performance and prolong its lifespan. So, whether you’re a tech-savvy enthusiast or a casual user, taking the time to properly format your M.

    2 SSD is a smart way to keep your system running smoothly. Just remember to follow the manufacturer’s instructions and use a reliable formatting tool – after all, a little maintenance can go a long way!”

    FAQs

    What is the difference between SATA and NVMe M.2 SSDs?
    SATA and NVMe M.2 SSDs differ in terms of their interface and speed. SATA has a maximum speed of 600MB/s, while NVMe can reach up to 32GB/s. NVMe also uses the PCIe interface, whereas SATA uses the AHCI interface.

    Can a laptop use M.2 SSD?
    Yes, many modern laptops come equipped with M.2 SSD slots. However, it’s important to check your laptop’s specifications before purchasing an M.2 SSD to ensure compatibility.

    How do I install an M.2 SSD in my desktop computer?
    First, ensure that your motherboard has an M.2 slot. Then, insert the M.2 SSD into the slot and secure it with the screw provided. Finally, connect the M.2 SSD to the motherboard using the provided M.2 screw.

    Do I need to format my M.2 SSD before using it?
    If your M.2 SSD is new, you will need to format it before using it. Go to “Disk Management” in Windows, locate the M.2 SSD, right-click it, and select “Format”. Make sure to choose the correct file system and allocation unit size for your needs.

  • Effortlessly Clone Your M.2 SSD with Only One Slot: A Guide for Tech Enthusiasts

    Are you feeling frustrated with slow load times and lagging system performance? It could be time to upgrade your computer’s storage. One popular option is a solid state drive (SSD), particularly the M.2 form factor.

    These small but speedy drives offer a significant improvement over traditional hard drives, but what if you want to transfer your data from an old SSD to a new one? Cloning your M.2 SSD might be the solution you’re looking for. Keep reading to learn more about the hows and whys of cloning your M.

    2 SSD.

    Assess your system requirements

    If you want to know how to clone M.2 SSD with only one slot, the first step is to assess your system requirements. You need to check if your computer or laptop has compatible hardware and software to facilitate the cloning process.

    Secondly, you need to ensure that your computer has enough free disk space to store the clone. It’s also vital to have a reliable cloning software that can get the job done. Before cloning, you need to back up critical data, so you don’t lose it in the cloning process.

    Finally, you must have patience as the cloning process may take some time, depending on the size of the M.2 SSD being cloned. Overall, cloning an M.

    2 SSD with only one slot may seem like a daunting task, but with the appropriate preparation, it’s a seamless process that can save you time and money.

    Check if you have a cloning cable

    If you’re considering cloning your hard drive, one of the first things you should do is assess your system requirements. This means checking if you have a cloning cable and making sure your computer and destination drive meet the necessary hardware specifications. A cloning cable is a necessity for transferring data from one drive to another, but not all systems come with one.

    You may need to purchase one separately based on the specific models you have. In terms of hardware specifications, you’ll want to ensure that the destination drive has enough storage space to accommodate all the data from your original drive. Additionally, you’ll want to ensure that both drives are compatible with your computer to avoid potential complications.

    Taking the time to assess your system requirements beforehand will save you time and headache down the line.

    how to clone m 2 ssd with only one slot

    Determine your type of M 2 SSD

    When considering purchasing an M 2 SSD for your system, the first step is to assess your system requirements. This involves looking into the specific type of M 2 SSD that would be best suited for your needs. There are different types of M 2 SSDs available, such as SATA-based and NVMe-based, and each one has its own advantages and limitations.

    To determine the type of M 2 SSD that’s appropriate for your system, you should consider factors like speed, storage capacity, and budget. If you’re a gamer or a content creator who regularly works with large files, you may want to opt for an NVMe-based M 2 SSD that can provide faster read and write speeds. On the other hand, if you’re simply looking to upgrade your system’s storage capacity without breaking the bank, a SATA-based M 2 SSD may be more practical.

    It’s also important to check your system’s compatibility with the M 2 SSD you’re considering. You can do this by referring to your motherboard’s manual or contacting the manufacturer’s customer support team. By determining your specific needs and system requirements, you can select the right type of M 2 SSD that will provide optimal performance and reliability for your system.

    Create windows bootable USB drive

    If you have an M.2 SSD with only one slot and you need to clone it, don’t worry! There are still ways to get the job done. One option is to use software like Macrium Reflect or Acronis True Image to create a disk image of your current drive and then restore it onto the new drive.

    Another option is to create a bootable USB drive with Windows on it and use that to clone your drive. To do this, you’ll need a blank USB drive and a Windows installation ISO. Use a tool like Rufus to create the bootable USB drive, then boot from it and use a disk cloning software like Clonezilla to copy your current drive onto the new one.

    It may take some time, but in the end, you’ll have an exact replica of your old drive on your new one. Just remember to back up your data first and be sure to double-check all your settings and options before proceeding. With a little patience and some know-how, you’ll be able to clone your M.

    2 SSD with ease.

    Download the Media Creation Tool

    Creating a bootable USB drive for Windows is necessary when you want to install a fresh copy of the operating system on your computer. One of the easiest ways to create a Windows bootable USB drive is to use the Media Creation Tool, which is available for free on the Microsoft website. This tool allows you to download the latest version of Windows and create an installation media, such as a USB drive or DVD, that can be used to install Windows on any computer.

    To use the Media Creation Tool, simply download it from the Microsoft website and run it on your computer. Then follow the prompts to select the language, edition, and architecture of the Windows installation. Finally, choose the USB drive as the installation media and let the tool create the bootable drive for you.

    Once the process is complete, you can use the USB drive to install Windows on any computer. With this tool, creating a bootable USB drive for Windows has never been simpler.

    Create the bootable USB drive

    To create a bootable USB drive for Windows, the first step is to download the Windows ISO file from the Microsoft website. Once the file is downloaded, insert the USB drive into your computer. In order to make the USB bootable, you’ll need to use a software tool like UNetbootin or Rufus, which are available for free download.

    These tools will guide you through the process of creating a bootable USB drive by formatting the USB drive and copying the Windows ISO file onto it. After this process is complete, you will have a fully functional bootable USB drive that can be used to install Windows on any compatible computer or device. Whether you’re setting up a new system or trying to troubleshoot an existing one, creating a bootable USB drive is a quick and easy way to get up and running with Windows in no time.

    Change the boot order in the BIOS

    Changing the boot order in the BIOS may sound complicated, but it’s actually a straightforward process. All you need is a Windows bootable USB drive, and you can easily change the boot order to prioritize your USB drive and boot from it. Creating a bootable USB drive is also a simple process, requiring just a few steps.

    Firstly, you need to insert a USB flash drive into your computer and download the Windows ISO file. Next, download the Windows USB/DVD download tool and launch it. Choose the ISO file you downloaded earlier and select the USB drive you want to use.

    Finally, click ‘Begin copying’ to create the bootable USB drive. Once you have your bootable USB drive, you can change the boot order in the BIOS by restarting your computer and entering the BIOS settings. From there, go to the Boot tab and use the arrow keys to move your USB drive to the top of the list.

    Save the changes and exit the BIOS, and your computer should boot from the USB drive. By following these straightforward steps, you can easily create a bootable USB drive and change the boot order in the BIOS.

    Cloning the M 2 SSD

    If you have an M 2 SSD and only one slot, there may come a time when you need to clone it. Cloning the drive means making an exact copy of everything on it, including the operating system and all data. This is useful if you are upgrading to a larger capacity drive or if you want to create a backup.

    To clone an M 2 SSD with only one slot, you will need to use specialized software. One such program is Clonezilla, a free and open-source tool that allows you to clone a drive from a live bootable disk. You’ll need to create a bootable USB drive or CD containing Clonezilla, then boot from that device and follow the on-screen instructions to clone your M 2 SSD.

    Make sure you have enough space on the target drive for the clone, and be careful to clone the correct source drive to the correct target drive. With Clonezilla, cloning your M 2 SSD with only one slot is a straightforward process.

    Clone the M 2 SSD using a cloning software

    Cloning an M 2 SSD is a very straightforward process and requires minimal technical skills. With the help of a good cloning software, you can easily copy all the data from your existing M 2 drive to a new one. Cloning software allows you to create an exact copy of your old SSD, including the operating system, applications, files, and personal preferences.

    This means that you don’t have to waste time reinstalling all your programs and transferring your files manually. With just a few clicks, you can have your new M 2 SSD up and running exactly like the old one. One of the best cloning software options is EaseUS Todo Backup, which is free and easy to use.

    It provides a step-by-step guide that takes you through the whole process of cloning your M 2 SSD. Keep in mind that during the cloning process, it’s essential to ensure that the new SSD has enough storage capacity to hold all the data from the old drive. Overall, cloning an M 2 SSD is a quick and simple process that will save you a lot of time and effort.

    Start the cloning process

    If you’re looking to upgrade your computer’s storage capabilities, cloning your M 2 SSD can be a hassle-free option. Before you begin, ensure that you have a backup of all important data on your existing M 2 SSD, as the cloning process will overwrite it. You’ll need a cloning software, such as EaseUS Todo Backup or Samsung Data Migration, along with a new, larger M 2 SSD.

    Once you’ve installed the software and connected the new SSD to your computer, you can begin the cloning process. The software will make an exact copy of your existing M 2 SSD to the new one, allowing you to quickly and easily upgrade your storage without having to reinstall your operating system or transfer files manually. Remember to format the new SSD after the cloning process is complete, and you’ll be all set with a faster, more spacious storage solution!

    Conclusion

    So, there you have it – the secret to cloning an M.2 SSD with only one slot. It may seem like a tricky process, but with the right tools and a bit of patience, you’ll be able to duplicate your precious data in no time.

    And if you’re feeling extra adventurous, why not give it a shot without any instructions? After all, the best way to learn is by doing. Just remember, cloning your SSD is a one-time thing – unlike cloning dinosaurs, which we all know never ends well. Happy cloning!”

    FAQs

    Can I clone a M.2 SSD with only one slot?
    Yes, you can. You will need an external drive or an adapter to connect the new SSD externally to your computer. Use a cloning software to transfer data from the old drive to the new one.

    Do I need a specific adapter to clone a M.2 SSD with only one slot?
    Yes, you will need an M.2 to USB adapter or enclosure to connect the new drive externally. This will enable you to clone the drive using a software like EaseUS ToDo Backup or Clonezilla.

    How do I ensure that my new SSD is bootable after cloning?
    Before cloning, check if your current SSD is booted in UEFI or Legacy mode, and choose the same option for the new SSD. Once the cloning is complete, change the boot order in the BIOS to prioritize the new SSD.

    Can I clone my M.2 SSD without losing any data?
    Yes, cloning your M.2 SSD using a software like Macrium Reflect or Acronis True Image enables you to transfer all data and programs from the old drive to the new one without losing any data.