Category: How to

How to

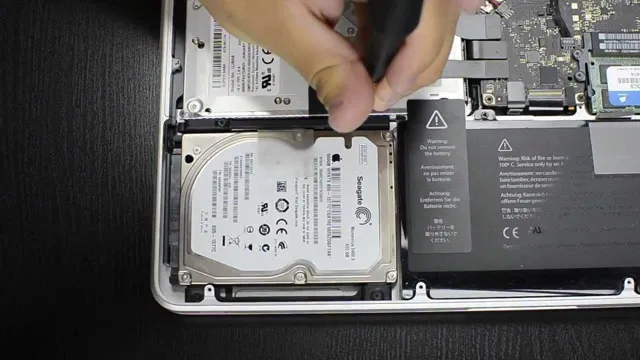
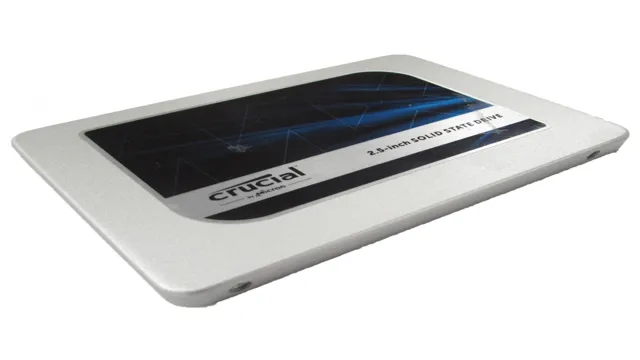
  • Supercharge Your Gaming Experience: Ultimate Guide to Lightning Fast Transfer of Games from HDD to SSD on Steam

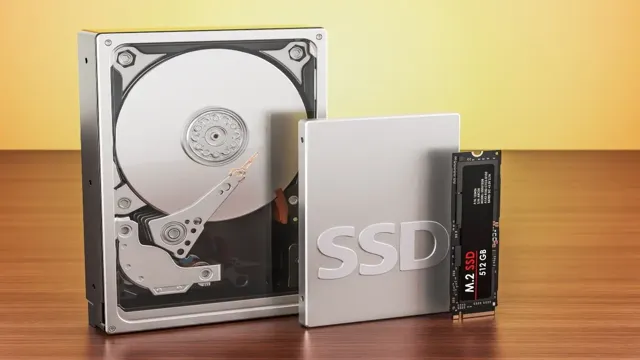
    Do you find that your beloved gaming library is getting too heavy for the old hard disk drive (HDD) that you’ve been using for years? Are you experiencing slow load times or stuttering performance? If so, it might be time to transfer some of your favorite games over to a new solid-state drive (SSD) on Steam. Not only will it free up some space on your HDD, but it can also significantly decrease loading times and improve overall game performance. Think of it like moving from a cramped apartment to a spacious new home – except for your games.

    In this blog, we’ll walk you through the steps to move games from your HDD to an SSD on Steam, so you can get back to playing your favorite games with ease.

    Check the Storage Devices

    If you want to improve your gaming experience, it’s important to check your storage devices. Moving your game from a hard disk drive (HDD) to a solid-state drive (SSD) can significantly increase your loading times and reduce stuttering in-game. But how fast should you move the game from HDD to SSD on Steam? This largely depends on the size of the game and the speed of your SSD.

    For larger games, it may take a bit longer to transfer, but the payoff in smoother gameplay is worth it. When transferring games, it’s also important to make sure that your SSD has enough space to accommodate the game. Steam will automatically detect the new location of the game and update it accordingly, so there’s no need to worry about losing any progress.

    Overall, if you’re looking to take your gaming setup to the next level, transferring your games to an SSD is a simple and effective solution.

    Make sure your HDD and SSD are properly connected and recognized

    When your computer is not functioning properly, it is important to check that your hard disk drive (HDD) and solid-state drive (SSD) are properly connected and recognized. To begin with, you need to physically check if both devices are properly connected to the motherboard. Make sure that the SATA cables and power connectors are properly connected.

    After that, access the BIOS setup utility and check if the drives are detected by the system. If they are not, then you need to troubleshoot the problem. One possible reason is that the drives are not properly formatted.

    In such a case, you need to format the drives using Windows Disk Management tool. Alternatively, your drives might have been damaged. Whatever the reason may be, make sure you take the necessary steps to ensure that your HDD and SSD are properly connected and functioning well.

    This will not only optimize your computer’s performance but also prevent any potential data loss in the future.

    how fast to move game from hdd to ssd steam

    Create a Backup

    If you’re wondering how fast to move a game from your HDD to your SSD on Steam, there are a few things you should consider. First and foremost, you’ll want to be sure that you create a backup of your game before transferring it. This will ensure that you don’t lose any progress or data in the process, should anything go wrong.

    Once you have a backup in place, you can begin the transfer process. The speed at which you can move a game will depend on a variety of factors, including the size of the game, the speed of your internet connection, and the overall speed of your computer. Generally speaking, transferring a game from an HDD to an SSD can take anywhere from a few minutes to an hour or more, depending on these factors.

    However, the improved performance and load times that come with running games from an SSD are well worth the effort. So, if you’re looking to improve your gaming experience, don’t be afraid to make the switch!

    To avoid any data loss, create a backup of your game files on the HDD

    Creating a backup of your game files on the HDD is an essential step to avoid any data loss. Losing your game progress due to system crashes, viruses, or any other unforeseen circumstances can be frustrating and heartbreaking. Therefore, it is crucial to take precautions and create a backup of your game files on an external hard drive or a cloud storage service.

    This way, you can restore your game progress even if your system is entirely wiped out. Creating a backup is not a complicated process; all you need to do is navigate to your game folder, select the files you want to backup, and copy them to the external storage device. Also, remember to update your backup regularly to avoid losing any new progress you make in your game.

    By creating a backup of your game files, you can rest easy knowing that your game progress and achievements are never at risk of loss.

    Open Steam Settings

    If you’re looking to move a game from your HDD to your SSD in Steam, the process is relatively easy. The first step is to open Steam Settings by clicking on the “Steam” button in the top left corner of your screen and selecting “Settings” from the drop-down menu. From there, you’ll want to click on the “Downloads” tab and then select “Steam Library Folders.

    ” This will bring up a list of all the folders where games are stored on your computer. Simply select the game you want to move, click on “Move Folder,” and then choose the location on your SSD where you want to move it. Keep in mind that depending on the size of the game and the speed of your SSD, it may take anywhere from a few minutes to several hours for the move to complete.

    So, how fast can you move a game from your HDD to your SSD in Steam? That depends on a variety of factors, including the size of the game and the speed of your SSD. Generally speaking, however, moving a game from an HDD to an SSD can significantly improve loading times and overall performance, making it well worth the effort.

    Go to the Downloads tab and select ‘Steam Library Folders’

    If you’re a gamer who loves playing games on Steam, chances are you’ve encountered the need to manage your game library at some point. This is where Steam Library Folders come in – they allow you to create and organize your game library on external drives or other storage locations. To access this feature, simply open Steam Settings and go to the Downloads tab, then select “Steam Library Folders.

    ” From there, you can create new folders, move existing ones, or delete folders as needed. This is especially useful if you have a lot of games and limited storage on your PC or want to separate large games from smaller ones for organizational purposes. So if you haven’t explored Steam Library Folders yet, give it a try and take your gaming organization to the next level!

    Click ‘Add Library Folder’ to add your SSD as a new library folder

    If you’re an avid gamer with a growing Steam library, you may find that your computer’s hard drive is running out of space. Fortunately, Steam has an option to add a new library folder to a different drive, such as your SSD. To get started, open Steam and go to the Settings menu.

    From there, click on the “Downloads” tab and then click “Add Library Folder.” Next, select the location on your SSD where you want to create the new library folder and give it a name. Your SSD will now be set up as a new library folder, and any new games you download can be saved there.

    This will free up valuable space on your main hard drive and improve your gaming experience by reducing loading times and increasing your computer’s overall performance. So, go ahead and give it a try – your hard drive (and your games) will thank you!

    Move the Game Files

    If you’re an avid gamer, you probably know the value of moving your game files from a HDD to an SSD. Doing so can drastically increase the speed and performance of your favorite games. But, how fast can you actually move your game files from your HDD to your SSD in Steam? The time it takes will depend on several factors, including the size of the game and the transfer speed of your hardware.

    Generally, it should take anywhere between 10 minutes to an hour or more to move a game from your HDD to an SSD in Steam, but it all depends on the variables involved. If you’re looking for the fastest way to move your game files, consider using a dedicated software tool that can automate the process and ensure that nothing gets lost or corrupted during the transfer. All in all, with the right hardware and tools at your disposal, moving your game files from an HDD to an SSD in Steam can be a quick and easy process that’s well worth the effort.

    Go to your Steam Library and right-click on the game you want to transfer

    If you’re looking to move the game files of a Steam game from one drive to another, it’s actually a pretty easy process. All you have to do is go to your Steam Library and right-click on the game you want to transfer. From there, select “Properties” and then click on the “Local Files” tab.

    Next, click on the “Move Install Folder” button and choose the new location where you want the game files to be moved to. Once you’ve selected the new location, click “Move Folder” and Steam will start the transfer process. This method can save you a lot of time and hassle, especially if you’re trying to free up space on your computer or if you have a faster or larger drive that you want to use for your games.

    So next time you need to move your Steam game files, remember these simple steps and you’ll be up and running in no time!

    Select ‘Properties’ and then click on the ‘Local Files’ tab

    Moving game files may seem like a daunting task at first, but with a few simple steps, you can save yourself a lot of hassle and free up valuable storage space. One way to easily move game files is by accessing the “Properties” menu within your game’s library. To do this, simply right-click on the game in question, select “Properties,” and then click on the “Local Files” tab.

    From there, you can choose to move the game’s files to a new location on your computer’s hard drive or an external storage device. This not only helps with organization but can also speed up loading times and improve overall performance. By taking the time to move your game files, you’ll be able to enjoy your favorite games without any unnecessary lag or disruptions.

    So why not give it a try and see the difference for yourself?

    Click on ‘Move Install Folder’ and select your SSD as the new destination

    Moving game files from your computer’s hard drive to an SSD can be a game-changer in terms of loading speeds and overall performance. Fortunately, the process is straightforward and easy to manage. To begin, you’ll need to navigate to your game’s settings and find the “Move Install Folder” option.

    From there, choose your SSD as the new destination for your game files, and the transfer will commence. The process might take some time, depending on the size of your game and the speed of your SSD, but it’s worth the wait. The benefits of a faster loading time and improved performance are sure to enhance your gaming experience.

    So, don’t hesitate any longer! Click on “Move Install Folder,” choose your SSD, and let the process begin. You’ll be amazed at how much smoother your gameplay will become in no time!

    Wait for the Transfer

    When it comes to transferring games from an HDD to an SSD on Steam, it’s important to exercise patience and wait for the transfer to complete before playing the game. Depending on the size of the game and the speed of your equipment, the transfer can take anywhere from a few minutes to a few hours. It can be tempting to start playing as soon as the transfer begins, but this can lead to errors and interruptions that can slow down or even cancel the transfer altogether.

    Instead, take a break and allow the transfer to complete without any distractions or unnecessary activities. This will ensure that your game is properly installed on the SSD and ready for seamless, speedy gameplay. So, be patient and let your transfer complete efficiently to avoid any problems or delays in your gaming experience.

    Depending on the size of the game and the speed of your SSD, the transfer may take a few minutes to a few hours.

    If you’re transferring a game to an SSD, it’s important to be patient and wait for the transfer to complete. Depending on the size of the game and the speed of your SSD, the transfer may take anywhere from a few minutes to a few hours. It can be tempting to try and speed up the process by interrupting the transfer or attempting to use your computer for other tasks while it’s working, but this can actually slow down the transfer and cause errors.

    Instead, try to find something else to do while you wait, like taking a walk or catching up on some reading. By giving the transfer plenty of time to complete without interruption, you’ll ensure that the game runs smoothly and efficiently on your SSD. So sit back, relax, and let the transfer do its thing.

    Final Thoughts

    If you’re wondering how fast to move a game from HDD to SSD on Steam, the speed will depend on the size of the game and the speed of your SSD and HDD. However, in general, moving a game from an HDD to an SSD on Steam will significantly increase the loading times and performance of the game. This is because SSDs are faster at reading and writing data than HDDs, which means games stored on an SSD will load and respond faster.

    Moving games from an HDD to an SSD is simple, and you can do it through Steam or by manually moving the game files. It’s essential to note that while SSDs are faster, they’re also generally more expensive per gigabyte than traditional HDDs. So if you have limited storage space on your SSD, it’s best to prioritize the games you play frequently and leave the rest on your HDD.

    Moving games from HDD to SSD on Steam is a simple process that can greatly improve your gaming experience.

    Moving games from HDD to SSD on Steam is a simple process that every gamer should know about. If you’re someone who wants to experience gaming at its best, then you must have an SSD. It is faster, more reliable, and makes your games load quicker.

    Moreover, the process of moving games from HDD to SSD is straightforward, as Steam allows you to transfer game files easily. All you need to do is right-click on the game in your Steam library, select Properties, then go to the Local Files tab, and click the “Move Install Folder” button. This will allow you to choose the destination folder, which can be your SSD.

    Once the game has moved, you’ll see a significant impact on your gaming experience. Everything from loading times to in-game performance will see a massive boost. So, if you’re still using an HDD for your games, it’s time to consider moving to an SSD; your gaming experience will thank you for it!

    Conclusion

    In the world of gaming, speed is key. Moving your favorite games from your HDD to an SSD can provide lightning-fast load times and a truly immersive experience. But just how fast should you move your games? The answer, my friend, is faster than Sonic the Hedgehog running towards a chili dog stand.

    So, grab your SSD and get ready to experience gaming at warp speed!”

    FAQs

    What is the difference between installing a game on an HDD and an SSD?
    The main difference is speed. SSDs can load and access data much faster than HDDs, resulting in faster game load times and smoother gameplay.

    How long does it take to transfer a game from an HDD to an SSD on Steam?
    The time it takes to transfer a game from an HDD to an SSD on Steam depends on the size of the game and the speed of your SSD. Generally, it can take anywhere from a few minutes to an hour.

    Can you play a game while it is being transferred from an HDD to an SSD on Steam?
    No, you cannot play a game while it is being transferred from an HDD to an SSD on Steam. You will need to wait until the transfer is complete before launching the game.

    Do all games benefit from being installed on an SSD instead of an HDD on Steam?
    Yes, all games can benefit from being installed on an SSD instead of an HDD on Steam. However, the degree of improvement will vary depending on the game and the speed of your SSD. Games with longer load times and frequent loading screens will see the most significant improvement in performance.

    Do you need to reinstall a game after transferring it from an HDD to an SSD on Steam?
    No, you do not need to reinstall a game after transferring it from an HDD to an SSD on Steam. Simply copy the game files over to the SSD and use the “Verify Integrity of Game Files” option in Steam to ensure that everything is in order.
  • Unlock the Speed: A Comprehensive Guide on How to Format M.2 SSD

    Have you recently purchased an M2 SSD and need to format it? Formatting your M2 SSD may seem daunting, but with the right steps, it’s actually a simple process. Just like with any SSD, formatting wipes all your data and starts anew. But there are additional steps you’ll need to take when formatting an M2 SSD.

    Don’t worry; we’ve got you covered. In this blog post, we’ll explain everything you need to know about how to format your M2 SSD. We’ll cover the necessary prep work, like backing up your data and creating a bootable USB drive.

    We’ll also go over the specific steps you need to take to format your M2 SSD, like initializing it in Disk Management and selecting the right file system. Whether you’re formatting your M2 SSD for the first time or just need a refresher, this guide has everything you need. So let’s get started and make sure your M2 SSD is working at its full potential.

    Understanding M2 SSDs

    If you’re looking to format your M2 SSD, you’re in luck because the process isn’t as complicated as you might think! First, you’ll need to make sure your M2 SSD is properly connected to your computer. Once that’s done, you can format the drive by going to the “Disk Management” section of your computer’s settings. From there, you can find your M2 SSD, right-click on it, and select “Format.

    ” Keep in mind that formatting your M2 SSD will erase all of the data on the drive, so be sure to back up any important files before beginning the process. Additionally, you may need to install drivers or firmware updates for your M2 SSD before it can be properly recognized by your computer. With a little bit of know-how, formatting your M2 SSD can be a breeze!

    What is M2 SSD?

    M2 SSDs are a type of solid-state drive that use the M.2 interface for connectivity, which is a small, rectangular slot found on newer motherboards. They typically offer faster speeds and higher capacities than traditional hard drives, making them ideal for use as a primary storage device in desktops, laptops, and even some high-end smartphones.

    M2 SSDs come in different sizes, including 2242, 2260, and 2280, with the last being the most common. They also come in different forms, including SATA, NVMe, and PCIe, which determine the interface speed, compatibility, and performance. Overall, M2 SSDs offer several significant advantages over traditional hard drives, including faster boot and load times, lower power consumption, and improved durability.

    If you’re looking to upgrade your system’s storage performance, an M2 SSD might be just what you need.

    how to format m2 ssd

    Advantages of M2 SSD

    M2 SSDs are the latest and greatest when it comes to improving the storage capabilities of your computer. They are incredibly fast and efficient, with read and write speeds that blow traditional hard drives out of the water. In fact, M2 SSDs can be up to 5 times faster than regular hard drives! This means that you’ll be able to load programs and files almost instantly, which can save you loads of time in the long run.

    Another advantage of M2 SSDs is that they take up very little space in your computer. They are much smaller than traditional hard drives, which means that you’ll have more room for other components like graphics cards and cooling systems. Plus, because they are so compact, they are also much easier to install and remove from your computer.

    All in all, M2 SSDs are a game-changer for anyone who wants to improve the performance of their computer.

    Types of M2 SSD

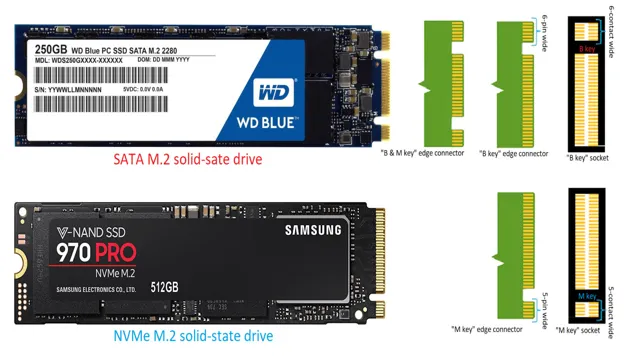
    M2 SSD M2 SSDs come in a variety of types, each with its own advantages and disadvantages. One major difference is between SATA and NVMe M2 SSDs. Like regular SATA SSDs, SATA M2 SSDs work via the SATA interface and provide similar speeds.

    NVMe M2 SSDs, on the other hand, utilize a PCIe interface and are much faster. Another difference between M2 SSDs is their keying. M2 SSDs can have either a B key or an M key, and some can even have both.

    A B key SSD will only fit into a B key slot, while an M key SSD will only fit into an M key slot. If a SSD has both a B and M key, it is known as a B&M key SSD, and can fit into both types of slots. It’s important to make sure that your motherboard has the correct key slot for the M2 SSD you plan to use, as well as the correct type of interface.

    By understanding the different types of M2 SSDs, you can choose the one that’s right for your needs and upgrade to lightning-fast storage.

    Preparing for Formatting

    If you want to format your M.2 SSD drive, it’s worth taking a few steps to prepare beforehand. Start by backing up any data you want to keep, as formatting will erase everything on the drive.

    Next, make sure you have the necessary tools and software. Most operating systems have built-in tools for formatting drives, so check in your system settings to see what’s available. If you need more advanced formatting options, consider downloading third-party software designed specifically for formatting SSDs.

    Once you have everything you need, it’s time to start the formatting process. Follow the instructions carefully, and be patient – formatting can take some time, especially for larger drives. With a little preparation and care, you can easily format your M.

    2 SSD and get it ready for your next project.

    Back-up your important data

    When it’s time to format your computer, it’s crucial to prepare beforehand. One essential step is to back up your important data. Losing files like family photos, important documents, or work projects can be heartbreaking, so it’s best to create a backup before proceeding.

    You can choose to back up your data to an external hard drive, USB drive, or cloud storage service. Each option has its pros and cons, depending on your preferences and the amount of data you need to save. External hard drives offer high storage capacity but can be bulky and vulnerable to physical damage.

    USB drives are portable and convenient but may not have enough storage space. Meanwhile, cloud storage services need an internet connection to access your files, but they offer the flexibility and security of saving your data online. Whatever method you choose, make sure to test your backup and verify that all your important files are securely saved.

    By doing so, you can have peace of mind when formatting your computer and avoid the risk of losing your valuable data.

    Creating a bootable USB drive

    Preparing a bootable USB drive is not as complicated as it may seem, but it requires some preparation to avoid any mishaps during the formatting process. First and foremost, ensure that all important files are backed up before proceeding with the formatting process. This is crucial because the formatting of the USB drive will erase all the data stored on it.

    Next, make sure that the USB drive is plugged into a compatible device and is recognized by the system. In addition, ensure that the USB drive has enough storage capacity to host the operating system or software you plan on using. Once these preparations are complete, you’re ready to move ahead with formatting the USB drive.

    Formatting M2 SSD on Windows

    Formatting an M2 SSD on Windows can be a bit daunting, but don’t worry, it’s not as complicated as you might think. First, determine if your M2 SSD is your primary drive or simply a secondary drive for storage. If it’s your primary drive, you’ll want to start by creating a bootable USB drive with Windows installation media.

    Once you’ve booted from the USB drive, select the M2 SSD drive and proceed with the installation process. If your M2 SSD is just for storage, the formatting process is relatively simple. First, open Disk Management by right-clicking on the Start menu and selecting “Disk Management.

    ” Next, locate the M2 SSD drive and right-click on it, then select “Format.” A window will pop up asking for the formatting options, such as file system and allocation unit size. Select your options, then click “OK.

    ” It’s important to note that formatting your M2 SSD will erase all data on the drive, so be sure to back up any important files beforehand. Additionally, make sure to select the correct drive when formatting to avoid accidentally wiping the wrong one. With these precautions in mind, formatting your M2 SSD should be a breeze.

    Using Disk Management tool

    If you have recently purchased an M2 SSD and need to format it on Windows, the Disk Management tool is an excellent option to use. It’s a built-in tool in Windows that allows you to manage your computer’s disks, including formatting and partitioning them. To format the M2 SSD, first, you need to connect it to your computer and open Disk Management by right-clicking on the Windows button and selecting “Disk Management.

    ” Once you’re in Disk Management, find the M2 SSD in the list of drives, right-click on it, and select “Format.” Follow the prompts to choose the file system, allocation unit size, volume label, and other formatting options. Click “OK” to proceed with the formatting, and wait for it to complete.

    Remember that formatting your M2 SSD will delete all data on it, so be sure to back up any files you need to keep. With the Disk Management tool, formatting an M2 SSD on Windows is quick and straightforward, so you’ll be up and running in no time.

    Using Command Prompt

    Formatting an M2 SSD on Windows can be done using Command Prompt. It’s an incredibly useful tool for those who want to do things faster and more efficiently. However, not everyone is familiar with how to use Command Prompt, and it can be intimidating at first.

    But fear not, because with just a few simple commands, you can format your M2 SSD in no time. First, you need to open Command Prompt as an administrator. Then, type in “diskpart” and press Enter.

    This will bring up the DiskPart command-line utility. Next, you need to type in “list disk” and press Enter. This will show you a list of all the disks connected to your computer.

    Once you have identified your M2 SSD, type in “select disk X” (replace X with the number of your M2 SSD) and press Enter. Finally, type in “clean” and press Enter to wipe all data on the disk, followed by “create partition primary” and press Enter to create a new primary partition. And that’s it! You have successfully formatted your M2 SSD using Command Prompt.

    Formatting M2 SSD on Mac

    If you are wondering how to format M2 SSD on Mac, you have come to the right place. Formatting a drive can be intimidating, especially for those who are not tech-savvy. But don’t worry, it is not as complicated as it may seem.

    The first step is to connect your M2 SSD to your Mac using a compatible adapter. Then, open the Disk Utility application, which can be found in your Mac’s Utilities folder. Select the M2 drive from the list of drives on the left side of the screen and click on the “Erase” button.

    Choose the file system format you prefer, such as macOS Extended (Journaled), and give your drive a name. Finally, click on “Erase” again to begin the formatting process. You may need to wait a few minutes, depending on the size of your drive.

    Once the process is complete, your M2 SSD will be ready to use on your Mac. By following these simple steps, you can format your M2 SSD on Mac without any hassle.

    Using Disk Utility

    If you’re looking to format your M2 SSD on a Mac, Disk Utility is the tool you need. First, connect the M2 SSD to your Mac using a compatible adapter or enclosure. Then, launch Disk Utility from your Applications folder.

    Select the M2 SSD from the list of drives, and click on the Erase button. In the dialog box that appears, choose a name for your drive, select the file system you want to use (e.g.

    APFS or Mac OS Extended), and leave the Scheme as GUID Partition Map. Finally, click on Erase and wait for the process to complete. Once done, your M2 SSD will be formatted and ready to use.

    Just remember that formatting erases all data on the drive, so be sure to back up any important files beforehand. With Disk Utility, formatting an M2 SSD on a Mac is quick and easy.

    Conclusion and Caution

    Formatting an M.2 SSD may seem like a daunting task, but with a little bit of knowledge and the right tools, it’s actually quite simple. By following these steps, you’ll be able to give your M.

    2 SSD the TLC it deserves and get it up and running in no time. So don’t be afraid to roll up your sleeves and dive in – your M.2 SSD will thank you for it in the long run!”

    FAQs

    What is an m2 SSD and how does it differ from a traditional SSD?
    An m2 SSD is a newer form factor that connects directly to the motherboard, whereas traditional SSDs connect using SATA cables. This allows for faster read and write speeds, and the smaller size makes it ideal for compact devices.

    Can any computer use an m2 SSD?
    Not all computers are compatible with m2 SSDs. You’ll need to check that your motherboard has an m2 slot and that it supports the type of m2 SSD you want to use.

    How do I install an m2 SSD?
    Installing an m2 SSD involves opening up your computer and inserting the drive into the appropriate slot on the motherboard. Consult your computer manual or seek assistance from a professional if you’re uncertain.

    What kind of performance boost can I expect from using an m2 SSD?
    You can expect much faster load times and file transfer speeds compared to a traditional hard drive or even a SATA-based SSD.

    Can I use an m2 SSD as a boot drive?
    Yes, an m2 SSD can be used as a boot drive, allowing for faster boot times and overall system performance. Just make sure your motherboard supports booting from an m2 drive.

  • Unleash the Power of ASUS Scar 2: Step-by-Step Guide on How to Upgrade SSD

    If you’re a gaming enthusiast, you know how important it is to have a good laptop that can handle all your favorite games. The ASUS Scar 2 is a laptop that was specifically designed with gamers in mind. It has a powerful processor, good graphics, and ample storage space.

    However, if you want to take your gaming experience to the next level, you might consider upgrading its SSD. An SSD (Solid State Drive) is a type of storage device that can help your laptop run faster and smoother. By upgrading your Scar 2’s SSD, you can significantly reduce the boot-up time and loading time of your favorite games while also increasing its overall performance.

    Whether you’re a casual gamer or a professional one, upgrading your laptop’s SSD is a smart choice to improve your gaming experience. In this blog, we’ll guide you through the process of upgrading your Scar 2’s SSD. We’ll talk about the different types of SSDs, the benefits of upgrading, and the steps you need to follow to upgrade it.

    We’ll also provide some tips and tricks that can help you get the most out of your newly upgraded laptop. So, if you’re ready to make your Scar 2 even better, keep on reading!

    Check Compatible SSDs

    If you’re looking to upgrade the SSD on your ASUS Scar II laptop, one of the first things you need to consider is compatibility. Not all SSDs will work with your laptop, so it’s important to do some research before making a purchase. To make things easier, ASUS provides a list of compatible SSDs on their website.

    You can also check with the SSD manufacturer to ensure compatibility. Additionally, make sure to choose an SSD with the right storage capacity for your needs. A larger SSD will give you more space for files and programs, but it may also be more expensive.

    It’s important to find the right balance between performance and price when upgrading your SSD. With a little bit of planning and research, you can upgrade your ASUS Scar II with an SSD that will improve your laptop’s performance and give you more storage space.

    Asus Scar 2 Compatible SSDs

    If you’re looking to upgrade your Asus Scar 2’s storage with an SSD, then it’s essential to choose a compatible one. By doing so, you can maximize the laptop’s performance and take advantage of its fast read and write speeds. There are several SSDs that work well with the Asus Scar

    One option is the Samsung 970 EVO Plus, known for its high endurance and reliability. Another great choice is the Western Digital WD Black SN750, which boasts impressive sequential read and write speeds. If you’re looking for something more affordable, you can consider the Crucial MX500, which offers excellent value for its price point.

    Whatever your budget may be, make sure to choose an SSD that’s compatible with your Asus Scar 2 to ensure optimal performance.

    asus scar 2 how to upgrade ssd

    Back Up Data and Shut Down

    If you want to upgrade the SSD on your ASUS Scar 2 laptop, it’s important to back up all of your data and properly shut down the computer before getting started. This will help ensure that you don’t lose any important files or damage your system during the upgrade process. Once you’ve backed up your data, you can open up your laptop and locate the existing SSD.

    Remove it carefully, making sure not to damage any other components in the process. Then, install your new SSD and secure it in place before closing up your laptop and restarting it. With your new SSD installed, you’ll likely notice a significant improvement in your computer’s speed and performance.

    If you’re not comfortable performing this upgrade on your own, consider seeking the help of a professional to ensure that your laptop is properly upgraded and functioning at its best.

    Creating a Backup

    Creating a backup of your data is an important step in safeguarding your information. Whether it’s important documents, precious photos, or essential files, backing up your data ensures that you don’t lose them in case of unforeseen events like hardware failure, malware attacks, or accidental deletion. To create a backup, you can use a variety of methods including cloud storage, external hard drives, or specialized backup software.

    Once you have decided on the method, it’s essential to shut down all running applications to make sure that you have a complete backup of all your data. It’s also recommended to carry out backups regularly to ensure that all recent changes are saved. So, taking the time to back up your data today can save you from the loss of important information tomorrow.

    Open Bottom Cover and Locate SSD

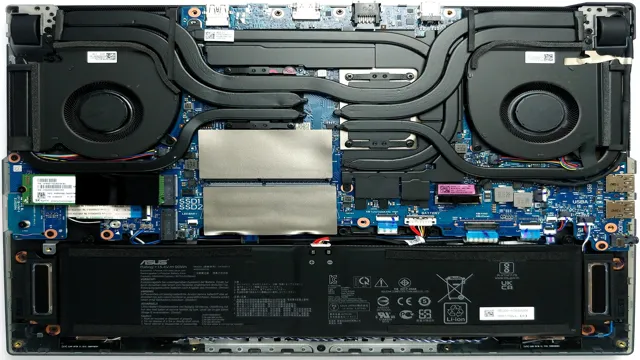
    If you’re looking to upgrade the SSD on your Asus Scar 2, the first step is to open the bottom cover of your laptop. This can be done by loosening the screws on the bottom of the laptop and gently lifting the cover off. Once the cover is removed, you’ll need to locate the SSD, which is typically located near the center of the laptop.

    It is usually a small, rectangular circuit board with a few screws and connectors. Once you have located the SSD, you can carefully remove it by unscrewing the screws and gently pulling it out. Be sure to handle the SSD carefully to avoid damaging it.

    With the SSD removed, you can then replace it with your new, upgraded SSD. Simply connect the new SSD to the connectors and secure it with the screws. Once you’re finished, be sure to replace the bottom cover and tighten the screws back in place.

    With your new SSD installed, you’ll have a faster and more efficient laptop that’s ready to handle your favorite applications and programs!

    Opening the Bottom Cover Safely

    If you’re looking to upgrade your laptop’s storage, the first step is to locate the SSD. To do so, you’ll need to open the bottom cover safely. Before you begin, make sure you have a good understanding of your laptop’s hardware and its components.

    The last thing you want is to accidentally damage your laptop while attempting to open the bottom cover! Be sure to wear an anti-static wrist strap to prevent any static electricity from damaging your hardware. Once you’ve taken the necessary precautions, locate the screws on the bottom cover and gently unscrew them. Then, carefully remove the bottom cover and locate the SSD.

    It should be easy to identify as it’s usually a small rectangular component. If you’re unsure of what the SSD looks like, refer to your laptop’s manual or do some research online. Remember to be gentle when working inside your laptop and take your time to avoid any accidents!

    Replace with New SSD

    Looking to upgrade your Asus Scar 2 SSD? Well, it’s easier than you might think. The first step is to find a new SSD that is compatible with your laptop model. Once you have your new SSD, make sure to save any important data from your old drive onto an external hard drive or cloud storage.

    Next, power down your laptop and remove the bottom cover to access the old drive. Carefully remove the old SSD by unscrewing it and gently pulling it out. Insert your new SSD in the same manner, screw it in place, and replace the bottom cover.

    Finally, power up your laptop and reinstall your operating system. Voila! Your Asus Scar 2 has now been upgraded with a shiny new SSD, providing faster boot and load times for all your programs and files.

    Removing Old SSD and Installing New One

    If you’re looking to upgrade your computer’s performance, replacing your old SSD with a new one might be a great option. Before getting started, make sure to back up all important data and shut down your computer. Once opened, locate the old SSD and carefully remove it from the slot using a screwdriver or any necessary tools.

    Before installing the new SSD, check if it is compatible with your device. If it is, slide it into the slot and screw it into place, making sure it is secure. Finally, close your computer and power it up to start enjoying the benefits of your new SSD.

    By replacing your old SSD with a new one, you can experience improved speed, performance, and storage capacity for your device.

    Reassemble and Power Up

    The final step in upgrading your Asus Scar 2’s SSD is reassembling everything and powering up your laptop. Begin by carefully reattaching the bottom cover and tightening all the screws. Place the battery back into its compartment and reconnect any cables you might have removed during the SSD installation process.

    Once everything is securely in place, plug in the power adapter and press the power button to turn on your laptop. If all goes well, your new SSD should now be detected by your operating system. To ensure that everything is working properly, check the SSD’s status and monitor its performance.

    For best results, run a few benchmark tests to see how much of an improvement you have achieved over your previous setup. Congratulations! You have successfully upgraded your Asus Scar 2’s SSD and should now notice significant speed and performance improvements while using your laptop.

    Replacing Bottom Cover and Turning On PC

    Now that you’ve successfully removed the old cover and replaced it with a new one, it’s time to power up your PC and see if everything is working properly. Before you hit the power button, make sure all the screws are tightly secured and the cover is flush against the case. Once you’re confident everything is snug, plug in all necessary peripherals, such as your monitor, mouse, and keyboard.

    Then, press the power button and listen for any abnormal sounds, such as whirring, buzzing, or clicking. If everything seems normal, wait patiently as your computer boots up. If you notice any issues, such as error messages or an inability to boot properly, don’t panic – it may just be a simple fix like checking the connections or troubleshooting your BIOS settings.

    With a bit of patience and know-how, you’ll have your PC up and running in no time.

    Restore Data Backup and Test

    Upgrading the SSD on your ASUS Scar 2 laptop is a great way to boost its performance and storage capacity. However, it is important to ensure that all your data is backed up before proceeding with the upgrade process. You can use an external hard drive or cloud storage service to create a backup of your files and documents.

    Once the backup is complete, you can proceed with installing the new SSD by opening the laptop casing and removing the old drive and replacing it with the new one. After the new drive is installed, you will need to restore the data backup to the new drive and test its functionality to ensure that everything is working correctly. By following these steps, you can upgrade your ASUS Scar 2 laptop with ease and enjoy faster speeds and increased storage capacity for all your computing needs.

    Restoring Backup and Testing the New SSD

    Now that we’ve cloned our old hard drive onto the new SSD, it’s time to restore our data backup and test if everything is working properly. The first step is to connect our backup external drive to our computer and transfer all the data onto the new SSD. This can take some time depending on the size of your backup, so be patient.

    Once the transfer is complete, we can start testing our new SSD by running various programs and checking the read and write speeds. We can also try booting up our computer to see if everything is working as it should. If any issues arise, it’s important to troubleshoot them immediately to avoid any potential problems.

    Overall, restoring the data backup and testing the new SSD is an important step in ensuring a smooth transition to a faster and more efficient storage solution.

    Conclusion

    And there you have it, folks – upgrading the SSD in your ASUS Scar 2 is no longer a daunting task. With the right tools and a little bit of patience, you can give your gaming laptop the boost it deserves. So, don’t let slow load times hold you back from victory.

    Upgrade that SSD and watch your performance soar.”

    FAQs

    What is the maximum SSD capacity that ASUS Scar 2 supports?
    The ASUS Scar 2 supports up to a 2TB M.2 NVMe SSD.

    Is it possible to upgrade the SSD in ASUS Scar 2 on your own?
    Yes, upgrading the SSD in ASUS Scar 2 is easy and can be done on your own. Just open the back panel and replace the existing SSD with a new one.

    Which type of SSD is compatible with the ASUS Scar 2?
    The ASUS Scar 2 supports PCIe 3.0 x4 NVMe SSDs. Make sure to choose an SSD with the same specification.

    Do I need to reinstall Windows after upgrading the SSD in ASUS Scar 2?
    It is not necessary to reinstall Windows after upgrading the SSD. You can clone the existing drive onto the new one using cloning software.

    Can I use an external SSD with ASUS Scar 2?
    Yes, you can use an external SSD with ASUS Scar 2 via the USB-C port. It can be a great option if you need extra storage capacity without opening up your laptop.

  • Effortlessly Migrate Your Data: A Step-by-Step Guide on How to Transfer Everything from HDD to SSD

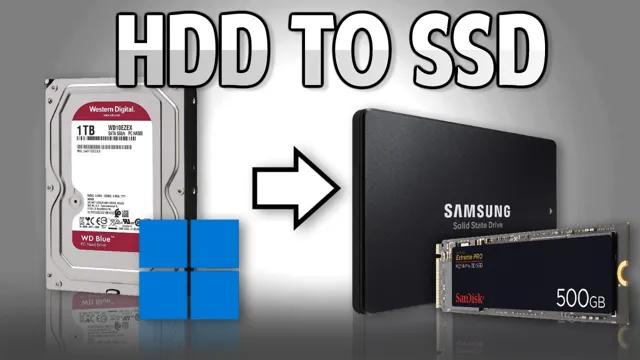
    Are you tired of your computer running slowly? It might be time to consider transferring your files from your old HDD to a faster and more efficient SSD. Many computer users are hesitant to make this switch because they worry about losing important files or damaging their hardware. But fear not, transferring from HDD to SSD is a relatively easy and straightforward process that can greatly improve your computer’s performance.

    Think of it like upgrading from a bicycle to a sports car – you’ll notice the difference immediately. In this blog, we’ll cover everything you need to know about transferring from HDD to SSD, including the benefits of doing so, how to transfer your files, and tips for maintaining your new hardware. So fasten your seatbelt and let’s get started!

    Check Your SSD Capacity and Health

    If you’re planning to transfer everything from your HDD to an SSD, there are a few things you need to keep in mind. First, you need to check the capacity of your SSD to ensure that it can accommodate all your files and programs. If the capacity is not enough, you might need to delete some files or invest in a larger SSD.

    Another thing to consider is the health of your SSD. It’s crucial to monitor the health of your SSD regularly to ensure that it’s functioning properly and has no issues. Various software tools can help you check SSD health, such as CrystalDiskInfo and Samsung Magician.

    These tools can detect errors, bad sectors, and other potential problems that might arise while transferring data. By monitoring your SSD regularly, you can prevent data loss and ensure a smooth transfer from your HDD to an SSD.

    Ensure SSD is compatible with PC/Laptop

    When it comes to getting a new SSD for your PC or laptop, it is important to ensure that it is compatible with your system before making any purchase. One way to do this is to check the capacity and health of the SSD. Capacity refers to the amount of storage space that the SSD has, while health refers to the physical condition and performance of the SSD.

    You can check the capacity of your existing drive and compare it to the capacity of the new SSD you want to purchase. It is essential to ensure that the new SSD has a capacity that is suitable for your needs. Additionally, you can check the health of the SSD by examining its SMART data.

    This data provides information about the overall health of the drive, including read/write errors, temperature, and the number of hours it has been in use. By checking these factors, you can determine if the new SSD is compatible with your PC or laptop and ensure that it can provide the performance you need. Don’t forget, compatibility is key if you want to get the best out of your SSD.

    how do you transfer everything from a hdd to ssd

    Backup Important Data

    When it comes to transferring everything from a HDD to an SSD, one of the most important steps to take is backing up all of your important data. This can include documents, photos, videos, and any other files that you want to keep safe and accessible. There are several ways to back up your data, including using an external hard drive, a cloud-based storage service, or even just copying files to a USB drive.

    Once your data is safely backed up, you can then begin the process of transferring everything from your old HDD to your new SSD. This can be done using software designed specifically for this purpose or by manually copying files over. Whatever method you choose, it’s important to take your time and make sure that everything is transferred correctly and completely.

    With a little patience and attention to detail, you can successfully transfer everything from your old HDD to your new SSD and enjoy all of the benefits that come with a faster and more efficient storage solution.

    Copy Data to External Drive

    Backing up important data is crucial in today’s world where we rely so heavily on technology. One way to ensure that your data is safe is by copying it to an external drive. External drives can provide a secure way to store your important files, photos, and other media.

    They are portable, making it easy to carry important information with you wherever you go and keeping it safe from threats like malware and ransomware attacks. Simply plug the drive into your computer, and you can easily transfer files and create backups of your data. It’s important to note that external drives can fail, just like any other device, so it’s always a good idea to have a backup of your backup.

    When choosing an external drive, be sure to consider factors like storage capacity, speed, and durability. Overall, copying your data to an external drive is a simple, affordable, and effective way to keep your important files safe and secure.

    Install SSD into PC/Laptop

    If you’re upgrading your computer by replacing your hard drive with a new SSD, you’ll need to transfer everything from your old HDD to the new drive. Fortunately, this isn’t as difficult as it may sound. There are a few methods you can use, but the most straightforward is to use an external hard drive enclosure or cloning software.

    To clone your HDD, plug it into the enclosure and connect it to your computer. Then, use cloning software to create an exact copy of your current hard drive on the new SSD. Once cloning is complete, shut your computer down, swap the hard drives, and reboot.

    Your computer will now use the new SSD as its main drive, and everything should work just as it did before. Alternatively, you can also back up your hard drive to an external drive using standard backup software, install the new SSD, and restore your data from the backup. This method may take longer, but it can be more reliable than cloning in some cases.

    Overall, transferring everything from an HDD to an SSD is a simple process that can greatly improve your computer’s performance.

    Use a Cloning Tool

    Installing an SSD in your PC or laptop can significantly improve its performance and speed. However, transferring all your data from your old hard drive to the new SSD can be a daunting task. That’s where a cloning tool comes in to make your life easier.

    A cloning tool is a software that duplicates your old hard drive to the new SSD, creating an exact copy of your entire system, including the operating system, applications, and files. This means you don’t have to worry about manually transferring files or re-installing your OS and applications. The process is straightforward: connect your new SSD to your PC, launch the cloning tool, select your source drive (old hard drive), select your destination drive (new SSD), and hit the “clone” button.

    Many SSD manufacturers offer free cloning tools with their drives, so be sure to check your manufacturer’s website before purchasing a third-party tool. With a cloning tool, upgrading to an SSD can be a hassle-free process, giving your PC or laptop a new lease of life and enhancing its performance.

    Connect Both Drives to PC/Laptop

    install SSD, connect hard drives, PC/laptop Now that you have your SSD in hand, you’re likely eager to install it into your PC or laptop so you can start experiencing the benefits of faster speeds and improved performance. But, before you start tinkering with any hardware, make sure to first connect both hard drives to your PC or laptop. The process may vary depending on your specific setup, but generally, you’ll need an open SATA port in your PC or laptop, as well as a compatible power cable.

    Once you’ve connected both drives, you can begin installing your SSD. Just be sure to follow any specific instructions included with your SSD and familiarize yourself with the installation process before getting started. Once your SSD is securely installed, you can transfer all of your important files and start enjoying the benefits of lightning-fast boot times and improved overall performance.

    Boot from SSD

    If you’re looking to upgrade your computer and switch to a faster and more reliable SSD, one important question you might be asking is, “how do you transfer everything from a HDD to SSD?” Fortunately, the process is not as difficult as it may seem. First, you will need to clone your HDD to your SSD using cloning software, which will copy all of your data and applications from your old drive to your new one. Before you start cloning, make sure you have enough space on your SSD to accommodate all of your data.

    Once you’ve successfully cloned your HDD to your SSD, you can then set your computer to boot from the SSD to take advantage of its increased speed. Overall, transferring everything from a HDD to an SSD can be a straightforward and effective way to upgrade your computer’s performance.

    Change Boot Order in BIOS

    If you recently installed an SSD in your computer and want to boot from it instead of the old HDD, you’ll need to change the boot order in BIOS. This means telling the computer to look for the operating system on the new drive first, rather than the old one. First, you’ll need to enter the BIOS menu by pressing a certain key during startup, usually F2, F10, or Delete.

    Once in the menu, look for the Boot Order section and use the arrow keys to move the SSD to the top of the list. Save and exit the BIOS, and your computer should now boot from the SSD. Keep in mind that different BIOS versions may have slightly different layouts and options, so if you’re unsure, consult your motherboard manual or manufacturer’s website for specific instructions.

    By making this simple change, you can enjoy the faster boot and load times that come with using an SSD as your primary drive.

    Verify Data Transfer and Delete Old Files

    If you’re wondering how to transfer everything from a HDD to SSD, there are a few steps you need to follow. First, you need to verify that the data transfer was successful and that no files were lost or corrupted in the process. You can do this by opening some of your files and checking that they still open and function as they should.

    Next, you should delete any old files from your HDD to free up space and ensure that you’re not duplicating any files on your new SSD. This will also make it easier to keep track of your files and ensure that everything is organized and easy to find. Overall, transferring everything from your HDD to SSD is a straightforward process that can greatly improve your computer’s speed and performance.

    Just be sure to take the necessary steps to verify your data transfer and delete any unnecessary files to ensure a smooth transition.

    Check Capacity and File Integrity

    In order to ensure that your data transfer process runs smoothly, there are a few important steps to take. One of these is to check the capacity of your storage device before initiating the transfer. Running out of space midway through the transfer can lead to errors and incomplete transfers.

    Additionally, it is crucial to verify the integrity of the files that have been transferred to ensure that they have not been corrupted or damaged during the transfer process. A useful technique for ensuring file integrity is to use checksums, which are unique identifiers calculated using algorithms that allow you to compare the transferred file to the original file to ensure that they match. Once you have verified the successful transfer and integrity of your files, remember to delete any old, unnecessary files to free up capacity for future transfers.

    Keeping your storage device clear of old files will not only ensure there is sufficient space for new transfers but also help to prevent any confusion or errors that may arise when working with older files. By taking these simple steps, you can ensure a smooth and successful data transfer process.

    Enjoy the Benefits of SSD

    If you’re considering making the switch from a traditional hard disk drive (HDD) to a solid-state drive (SSD), you may be wondering how to transfer everything from your old hard drive to the new one. Fortunately, the process is fairly straightforward and can be completed in just a few steps. One option is to use a cloning software to copy your entire hard drive onto the SSD.

    This will make an exact copy of the HDD, including all of your files, settings, and programs, onto the new drive. Another option is to manually transfer files from the HDD to the SSD. This method requires you to carefully select which files and programs you want to move over, but it can be more customizable and allow you to only transfer what you really need.

    Either way, once you’ve transferred everything over, you can enjoy the many benefits of SSDs, including faster boot times, quicker application launches, and overall improved performance.

    Conclusion

    Transferring everything from a HDD to SSD may seem daunting at first, but it’s like moving into a new home. You pack up all your belongings, tidy up any loose ends, and move into your new, sleek and speedy abode. With a little bit of effort and the right tools, you can seamlessly transfer all your data and breathe new life into your computer.

    So, don’t let the fear of change hold you back – embrace the SSD revolution and enjoy a faster, smoother computing experience!”

    FAQs

    What is the process for transferring data from an HDD to an SSD?
    The process involves creating a disk image of the HDD, connecting the SSD, and then restoring the image onto the SSD using cloning software.

    Can I transfer my operating system from my HDD to an SSD?
    Yes, it is possible to transfer your operating system from the HDD to the SSD. This can be done using cloning software which will create an exact copy of the operating system and all data on the HDD onto the SSD.

    What type of SSD should I use for transferring data from my HDD?
    It is recommended to use an SSD with the same or higher capacity as the HDD and to choose an SSD with a good read and write speed to ensure optimal performance.

    Is it necessary to format my SSD before transferring data from my HDD?
    No, formatting an SSD before transferring data from an HDD is not necessary. However, it is recommended to clean the SSD before starting the data transfer process to ensure optimal performance.

  • Upgrade Your PC with Ease: A Guide to Moving Windows to SSD on Your New Computer

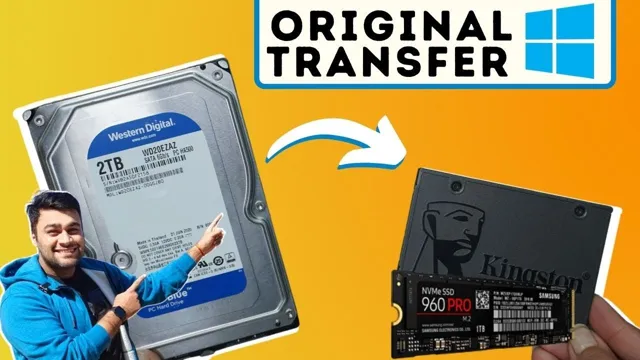
    Are you tired of slow boot-up times and programs taking forever to load? Moving your Windows operating system to an SSD (solid-state drive) can dramatically improve the performance of your computer. But, the process of moving Windows to an SSD can seem daunting for those who are not tech-savvy. Don’t worry, we’ve got you covered.

    In this step-by-step guide, we will walk you through the process of transferring Windows to an SSD, so you can enjoy a faster and more responsive computer. Think of this guide as your GPS, guiding you through the twists and turns of moving your Windows operating system to an SSD. Ready to rev up your computer’s speed? Let’s get started.

    Back Up Your Data

    If you just bought a new computer and want to move your Windows operating system to a new SSD, there are a few steps you need to take. First, it’s important to back up all your data to an external hard drive or cloud storage platform. This ensures that you don’t lose any important files during the migration process.

    Once you’ve backed up your data, you can use a “cloning” software to copy the entire contents of your old hard drive to your new SSD. There are several free and paid options available, but make sure you choose one that is compatible with your specific hardware and operating system. After the cloning process is complete, you’ll need to physically swap out the hard drives and configure your computer to boot from the new SSD.

    With a bit of patience and careful planning, you can easily move your Windows operating system to a new SSD and enjoy faster boot times and improved performance.

    Create a backup of your data and files before proceeding to avoid losing important information.

    Backing up your data is crucial to avoid losing valuable information. No one wants to experience the frustration of losing years’ worth of documents, family photos, or important work files. It’s important to always stay prepared and protect your data from potential harm.

    Backing up your files can be done in different ways, such as using an external hard drive, cloud storage services, or even flash drives. The key is to choose a backup method that is convenient for you and that allows you to access your data easily if needed. One important thing to keep in mind is to always have more than one backup option to ensure that your data is secure and protected.

    Remember, taking preventive measures like backing up your data can save you from the hassle of having to recover lost files or data.

    bought new computer how do i move windows to ssd

    Clone Your Hard Drive

    If you’ve recently bought a new computer and want to move your Windows operating system to an SSD, the easiest option is to clone your hard drive. This process involves copying all the data from your old hard drive to your new SSD, so you don’t have to reinstall Windows or any of your programs. First, you need to connect your SSD to your computer, either directly or using a USB adapter.

    Then, download and install a disk cloning software such as Macrium Reflect or EaseUS Todo Backup. These programs will guide you through the process of cloning your hard drive to your SSD. Make sure to backup all your important data before starting the cloning process, just in case anything goes wrong.

    Once the cloning process is complete, shut down your computer, remove the old hard drive, and install the new SSD in its place. When you boot up your computer, everything should be the same as it was on your old hard drive, except much faster thanks to the SSD.

    Use a cloning software to copy your current Windows installation from the hard drive to the new SSD.

    Cloning your hard drive is a straightforward process that can save you a lot of time and effort. By using a cloning software, you can transfer all your files, settings, and programs from your old hard drive to your new SSD. This means that you can get back to working on your computer exactly where you left off without having to install everything again.

    It’s like creating a mirror image of your old drive on the new one. One of the benefits of cloning software is that it’s easy to use, even for beginners. You’ll need to connect both your old hard drive and your new SSD to your computer, then launch the software and follow the instructions.

    Once the cloning process is complete, you can disconnect your old hard drive and set your new SSD as the primary drive. With this method, you can upgrade to an SSD without having to start from scratch, which can save you a lot of time and make your computer run faster and more efficiently.

    Install Your New SSD

    If you bought a new computer and want to move Windows to your new SSD, the first step is to install your new SSD. Make sure your computer is turned off and disconnected from any power source before opening it up. Once inside, locate the slot where your SSD will fit and securely install it.

    Then, you’ll need to clone your existing hard drive over to your SSD. There are several software programs that can help you do this, such as Macrium Reflect or Clonezilla. Once you’ve cloned your system, you may need to change the boot order in your BIOS so that your computer boots from the new SSD instead of your old hard drive.

    It’s important to note that this process can be tricky, and mistakes can result in data loss. If you’re unsure of how to proceed, it’s always a good idea to seek professional help. With the right support, however, moving Windows to your new SSD can help improve your computer’s performance and speed!

    Physically install the new SSD into the computer and ensure it is properly connected.

    Installing the new SSD into your computer can be an exciting experience, especially when you think about all the speed and storage space it will provide. The first thing you need to do is to turn off your computer and disconnect all cables. Remove the screws that hold the side panel of the computer case in place and then remove the panel.

    The next step is to locate the storage drive bays. If you are not familiar with how to locate them, check the computer manual. Once you have located the bays, remove the screws that hold the bays in place.

    Slide the new SSD into one of the bays and use screws to hold it in place. It is essential to ensure that the SSD is firmly connected to the system. You can do this by using the SATA cable and the power cable.

    Insert one end of the SATA cable into the SSD and the other end into the motherboard’s SATA port. The power cable should be inserted into the power supply unit. When it’s all set, put the side panel back in and screw it in place.

    Finally, plug in all the cables and power on the system. You now have a new SSD installed on your computer, which will improve your computer’s performance and speed significantly. Enjoy the benefits of your new hardware upgrade!

    Change Boot Drive in BIOS

    Congratulations on your new computer! Moving Windows to your SSD can significantly improve your system’s speed and performance. The first step is to enter your computer’s BIOS, usually by pressing F2 or Delete during startup. Once in the BIOS, navigate to the Boot tab and look for an option to change the boot drive order.

    Select your SSD as the primary boot drive, and save and exit the BIOS. You may also need to clone your existing Windows installation to the SSD using software like Macrium Reflect or EaseUS Todo Backup before changing the boot drive. Remember to back up all important files before starting the process to avoid data loss.

    By changing the boot drive to your new SSD, you’ll have a much faster and responsive system to enjoy for years to come.

    Access the BIOS and set the new SSD as the primary boot device.

    Changing the boot drive in BIOS is an essential step in setting up a new SSD as the primary boot device on your computer. The BIOS (Basic Input/Output System) is a crucial component of any computer system that controls the communication between the hardware and software. To access the BIOS, restart your computer and press the appropriate key (F2, F10, Delete, or Esc) as soon as the computer starts.

    Once inside the BIOS, navigate to the “Boot” or “Startup” tab using the arrow keys on your keyboard. From there, you can change the boot sequence and set the new SSD as the primary boot device. Save your changes and exit the BIOS.

    The next time you start your computer, it should boot from the new SSD. Keep in mind that the specific steps may vary depending on your computer’s manufacturer and model. By changing the boot drive in BIOS, you ensure that your computer starts up faster and performs better.

    It’s a simple but crucial step that can make a significant difference in your overall computing experience.

    Boot from SSD and Verify Installation

    So, you’ve just purchased a new computer and are excited about upgrading it to have lightning-fast speeds with an SSD. The good news is, it’s definitely doable! The first step is to clone your current system onto the SSD to ensure that all your files and settings are transferred over correctly. Once that’s done, you’ll need to set the SSD as your boot device in the BIOS settings.

    This is crucial, as it ensures that your computer is loading Windows from the SSD instead of the old hard drive. Once you’ve done that, you can double-check that everything is working by verifying the installation and ensuring that any new applications or files are being saved to the SSD instead of the old drive. Remember, an SSD is a fantastic investment for your computer, and the increased speed and performance it provides will make it worth every penny.

    Restart your computer and verify that Windows is now booting from the new SSD.

    boot from SSD Once you have installed your new SSD, the final step before starting to enjoy its benefits is to ensure that your computer is booting from the SSD. To boot from the SSD, you need to restart your computer and enter the BIOS setup. You can typically access the BIOS setup by pressing a key such as F2 or Del during the boot process.

    Once you’re in the BIOS, navigate to the boot menu, and select the SSD as the primary boot device. Save your changes, exit the BIOS, and let your computer restart. After the restart, your computer should now be booting from the new SSD.

    You can verify this by checking the Windows Boot Manager, which should now list the SSD as the boot option. Once you have confirmed that your computer is booting from your new SSD, you can start using your computer with lightning-fast speeds and improved performance. So, go ahead, give it a try, and enjoy the fast and smooth experience!

    Final Steps

    Congratulations on your new computer! If you’re looking to move your Windows installation to your SSD, there are a few final steps you need to take. First, you’ll need to create a backup of all your essential data, such as photos, documents, and emails. This is important because transferring to a new computer can sometimes result in data loss.

    You should either back up your files to an external hard drive or to a cloud service like Google Drive or Dropbox. Once you’ve backed up your data, you can then install your SSD into your computer’s empty drive bay. Then, you’ll need to boot your computer from your Windows installation disk or USB drive, and follow the instructions to reinstall Windows on the new drive.

    Once you’ve completed the installation process, you can then transfer over your backed-up files and enjoy the benefits of your new, speedy SSD. Good luck!

    Restore your data from the backup and format your old hard drive if desired.

    As the backup process comes to an end, the restoration of data is the next and final step. It’s crucial to review the backup job’s status and ensure that all files have been successfully transferred to the new hard drive before proceeding. Restoring data from a backup is often straightforward and intuitive, and most backup programs have user-friendly interfaces to guide you through the process.

    Once you have restored all essential data, it’s time to consider what to do with the old hard drive. If you plan on selling or donating your computer, formatting the old hard drive is a wise decision. This will erase all your old data and protect your privacy.

    Remember to check if there are any files that you forgot to transfer before formatting the drive. At this point, you can proudly turn off your computer, knowing that your data is secure and well-preserved on your new hard drive.

    Conclusion

    In today’s fast-paced digital world, upgrading to a new computer can be a daunting task, especially when you want to move Windows to your new SSD. But fear not, dear user, for with a little bit of patience and technical know-how, you can easily transfer your operating system and data to your shiny new drive, making your computing experience faster and more seamless than ever before. So go ahead and take the leap – your SSD and your productivity will thank you!”

    FAQs

    What steps are involved in transferring Windows to an SSD?
    The steps involved in transferring Windows to an SSD are: 1. Connect the SSD to your computer 2. Install cloning software and select your old hard drive as the source and the new SSD as the destination 3. Clone your old hard drive to the new SSD using the cloning software 4. Shut down your computer and disconnect the old hard drive 5. Boot your computer from the new SSD

    Can I move Windows to an SSD without losing my data?
    Yes, you can move Windows to an SSD without losing your data using cloning software. The software will clone your old hard drive to the new SSD, including all of your files and programs.

    Will moving Windows to an SSD improve the speed of my computer?
    Yes, moving Windows to an SSD can significantly improve the speed of your computer. SSDs are faster and more reliable than traditional hard drives, so your computer will boot up faster and programs will load more quickly.

    What size SSD do I need to transfer Windows?
    The size of the SSD you need to transfer Windows depends on the size of your current hard drive and how much data you have. You should choose an SSD that is at least as large as your current hard drive, but preferably larger to allow for future growth.

  • Upgrade Your Acer Aspire 5 with Ease: A Step-by-Step Guide on How to Add SSD

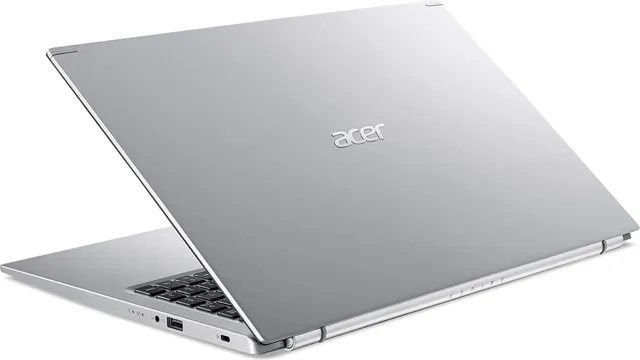
    If you own an Acer Aspire 5 laptop, you might have noticed that its hard drive struggles to keep up with the demands of modern computing. This is where adding an SSD comes in. By replacing the outdated hard drive with a new solid state drive (SSD), you can significantly improve your computer’s performance.

    In this blog post, we will guide you through the process of adding an SSD to Acer Aspire 5 and how it can help you enjoy faster boot times, smoother application launches, and quicker file transfers. So, let’s dive in and learn how to upgrade your laptop’s storage to an SSD.

    What You Need

    If you own an Acer Aspire 5 laptop and want to upgrade it with an SSD, there are a few things you’ll need. First, you’ll need a compatible SSD that is the right size and form factor for your laptop. You should also make sure that the SSD is compatible with your laptop’s connector interface (usually SATA or NVMe).

    Once you have the SSD, you’ll need a screwdriver to open the laptop and install the drive. Be sure to power off the laptop and unplug it before attempting any upgrades. Also, make sure to follow all safety precautions when working with electronics.

    Once you’ve successfully installed the SSD, you’ll need to transfer your data from the old hard drive to the new SSD. You can either clone the entire hard drive or manually transfer your important files and applications. With a new SSD installed, your Acer Aspire 5 will have improved performance and faster boot and load times.

    Tools

    When it comes to working online, having the right tools is essential. Whether you’re a content creator, digital marketer, or remote worker, there are certain tools you’ll need to help you do your job effectively. First and foremost, a reliable computer or laptop is crucial.

    You don’t want to be slowed down by slow load times or outdated technology. It’s also essential to have a stable internet connection, especially if you’re working remotely. Another important tool is a good headset or microphone, especially if you do a lot of video calls or virtual meetings.

    This will ensure clear communication with your team and clients. A comfortable chair and desk setup are also important to prevent posture and back issues. Finally, there are various online tools like project management software, cloud storage, and collaboration tools that are helpful for streamlining your work and staying organized.

    By investing in the right tools, you can be more efficient, productive, and ultimately achieve better results for your business or career.

    acer aspire 5 how to add ssd

    Compatible SSDs

    When looking to upgrade your computer’s storage, it’s important to ensure that you are choosing a compatible SSD. A solid state drive is a great way to improve the speed and performance of your computer, but if it’s not compatible with your system, it won’t work properly. To determine compatibility, you need to consider a few key factors.

    Firstly, the form factor of the SSD needs to match the available space in your computer. Additionally, you need to check that your motherboard supports the interface of the SSD, such as SATA or NVMe. It’s also important to check the capacity and speed of the SSD to ensure that it meets your needs.

    Finally, it’s always best to do your research and check with the manufacturer or a trusted expert to confirm compatibility before making a purchase. By taking these steps, you can ensure that you choose a compatible SSD that optimizes the performance of your computer.

    Preparing Your Laptop

    Are you looking to upgrade your Acer Aspire 5 with an additional SSD? If so, there are a few things you’ll need to do to prepare your laptop before adding the new hardware. First, ensure that you have all the necessary tools and supplies, including a screwdriver, an SSD of your choice, and any mounting brackets or cables required for installation. Once you have everything you need, shut down your laptop and unplug it from the power source to avoid any electrical damage during the installation process.

    Then, remove the back cover of your Acer Aspire 5 using the screwdriver and locate the area where the SSD will be installed. Depending on the specific model, there may be a designated slot or a mounting bracket to attach the new SSD. Carefully insert the new SSD into the appropriate location and secure it in place with any screws or brackets provided.

    After the installation is complete, replace the back cover and plug in your laptop to ensure everything is functioning correctly. With these steps, you can easily upgrade your Acer Aspire 5 with an additional SSD for improved performance and storage capacity.

    Back up Data

    Backing up your important data is crucial to ensure that you don’t lose any important files or documents. When preparing your laptop, it’s essential to create a backup plan. One way to do this is by using an external hard drive to store all your important files and documents.

    You could also consider using cloud storage options such as Google Drive or Dropbox. This way, even if your laptop gets stolen, lost, or damaged, you still have access to all your important data. Additionally, make sure to regularly update your backups to keep your data secure.

    Remember, creating a backup plan might take some time and effort, but it’s worth it in the long run. By having a backup plan in place, you can have peace of mind knowing that your data is secure no matter what happens.

    Power off & unplug

    When it comes to preparing your laptop, one of the most important steps is to power off and unplug it. It may seem like a simple task, but it is crucial to ensuring that your laptop stays safe and secure. Turning off your laptop allows it to rest and cool down, which helps to prevent overheating and potential damage to its internal components.

    Unplugging your laptop also ensures that it doesn’t accidentally turn on while you’re getting it ready for transport or storage. It’s important to note that you should never unplug your laptop while it is still running, as this can corrupt your data and cause permanent damage to your system. By taking the time to properly power off and unplug your laptop, you’ll be able to keep it in good condition and avoid any unnecessary headaches down the line.

    Installing the SSD

    If you’re looking to boost the storage capacity of your Acer Aspire 5 laptop, adding an SSD is a great way to go. To install an SSD, you’ll need to first locate the hard drive bay on your laptop. Typically, the hard drive bay is located on the bottom of the laptop and can be accessed by removing a few screws.

    Once you’ve accessed the hard drive bay, you can remove your current hard drive and replace it with your new SSD. Make sure to secure your new SSD in place with the screws provided, and then reattach any cables or connectors. After everything is securely in place, you can power up your new SSD and enjoy faster boot times and improved overall performance.

    With just a few simple steps, adding an SSD to your Acer Aspire 5 is a simple and effective way to increase your laptop’s storage capacity and performance.

    Open the laptop case

    Once you have decided to upgrade your laptop’s storage by installing an SSD, the first step is to open the laptop case. This can be a bit daunting, but with the right tools and instructions, it shouldn’t be too difficult. First, make sure you have unplugged the laptop and removed the battery.

    Use a screwdriver to loosen the screws that hold the case in place, and carefully lift off the cover. Take care not to damage any of the components inside. Once the case is open, you will be able to locate the hard drive and remove it.

    This will allow you to install the new SSD in its place. Remember, before you start, make sure you have all the necessary tools and research the process thoroughly. With a little patience and know-how, you’ll have your laptop up and running with a new, faster storage solution.

    Mount the SSD

    To install an SSD, you first need to open up your computer’s case and find an available bay where the drive can be mounted. Make sure to wear an anti-static wrist strap to protect yourself and your hardware from static electricity. Once you’ve located the bay, screw the SSD into place.

    Some bays may require you to use brackets or adapters to fit the drive properly. After securing the SSD, connect the necessary cables to both the power supply and the motherboard. Double-check to make sure everything is properly connected before closing the case.

    Congratulations! You’ve successfully installed your SSD, and you’ll now be able to experience faster boot times and improved system performance.

    Connect SSD & secure

    One of the most significant upgrades you can do for your computer is installing a solid-state drive or SSD. Not only does it significantly speed up your machine, but it’s also more robust and less prone to failure, making it a reliable choice for individuals who store a lot of data. Before installing the SSD, you’ll want to make sure that you properly connect it to your computer’s motherboard.

    First, you’ll need to identify the SATA connector on your motherboard and connect it to the corresponding port on your SSD. Once connected, secure the drive in place with screws, so it doesn’t move around or become damaged. Making sure you install the SSD correctly, and it’s well-secured will ensure you get the most out of your new upgrade.

    Configuring the SSD

    If you’re looking to boost the performance of your Acer Aspire 5, adding an SSD is a great way to do it. Not only can an SSD dramatically improve your system’s startup time and load speeds, but it can also give you more storage space for all your files and programs. To add an SSD to your Acer Aspire 5, you’ll need to open up the back panel of your laptop and locate the M.

    2 slot. Once you’ve found the slot, you can insert your SSD and secure it in place with the screw provided. From there, you’ll need to configure your BIOS settings to recognize the new drive.

    This involves going into your BIOS menu and navigating to the Boot section, where you can select your new SSD as your primary boot device. Finally, you can transfer your operating system and files onto your new SSD and enjoy the benefits of faster load times and increased storage space.

    Boot up laptop

    After booting up your laptop, configuring the SSD is the next important step to enhance the performance of your computer. SSDs are undoubtedly faster than the traditional hard drives, but without proper configuration, SSDs cannot work to their full potential. One of the crucial steps for configuring the SSD is to align the drive with the file system.

    Aligning helps the SSD to work specifically with the file system, enabling the computer to read and write data faster. Another way to enhance the performance of your SSD is by enabling TRIM. It is a command that ensures space previously occupied by a deleted file is freed up.

    When these steps are followed, the SSD can work at its peak performance. Make sure to keep these tips in mind as you configure your new SSD for your laptop.

    Initialize the SSD

    Initializing an SSD is an important step when configuring your computer storage. It involves preparing the drive for use by erasing any previous data and setting up a new file system. One effective way to do this is by using a tool called Disk Management if you’re using Windows or Disk Utility for Mac users.

    The software provides an easy-to-use interface that guides you through the initialization process. When initializing the SSD, you’ll need to choose between creating an MBR or GPT partition style, which determines the maximum size of the partition you want to create. Once the initialization is completed, you can then go ahead and start adding files to the drive.

    However, you need to ensure that you have selected the correct settings and partition size to avoid any data loss or formatting issues. Initializing an SSD can significantly improve the speed and performance of your computer, as well as ensure your data is organized efficiently.

    Clone or Install OS

    When configuring your SSD, there are a few steps you can take to optimize its performance and get the most out of its storage capacity. First, you’ll need to decide whether to clone your existing operating system or install a new one from scratch. Cloning your OS can save time and effort, but it also means transferring any existing issues or clutter from your current system onto the SSD.

    Installing a fresh OS, on the other hand, can take longer but allows for a more streamlined and efficient setup. Once your OS is up and running, it’s important to ensure that your SSD is properly configured for optimal performance. This includes adjusting the power settings, enabling TRIM support, and disabling disk defragmentation, among other tips and tricks.

    By taking the time to fine-tune your SSD, you can enjoy faster speeds and more efficient storage for years to come.

    Final Thoughts

    Adding an SSD to your Acer Aspire 5 can greatly improve its performance and allow it to handle more tasks at a faster speed. The process itself can be relatively simple, but it’s important to make sure you have the right tools and equipment before diving in. First, you’ll need to purchase an SSD that’s compatible with your laptop and make sure it has enough storage capacity for your needs.

    Then, you’ll need to open up your laptop’s casing and locate the storage bay where the SSD will be installed. Once you’ve installed the SSD, you’ll need to properly format it and transfer your operating system and other data to the new drive. Overall, the process of adding an SSD to your Acer Aspire 5 can be a great investment in the long-term performance of your laptop.

    Conclusion

    In conclusion, upgrading your Acer Aspire 5 with an SSD is like giving it a turbo boost. It’s the perfect way to improve performance and speed up your daily tasks without breaking the bank. Adding an SSD is a pretty straightforward process, but it requires some patience and attention to detail.

    With the right tools and a little bit of know-how, you can easily breathe new life into your trusty laptop. So go ahead, give your Acer Aspire 5 the upgrade it deserves and feel the difference for yourself!”

    FAQs

    What is the maximum SSD storage capacity that can be added to Acer Aspire 5?
    Acer Aspire 5 can accommodate up to 2TB SSD for storage upgrade.

    Is it possible to add an SSD to Acer Aspire 5 without voiding the warranty?
    Yes, it is possible to add an SSD to Acer Aspire 5 without voiding the warranty. However, it is recommended to seek professional assistance for installation to avoid damaging your device.

    Can Acer Aspire 5 support NVME SSDs?
    Yes, Acer Aspire 5 can support NVME SSDs for faster data transfer rates.

    Can the existing HDD on Acer Aspire 5 be replaced with an SSD?
    Yes, the existing HDD on Acer Aspire 5 can be replaced with an SSD for better performance and faster booting speeds. However, data migration is required to transfer contents from the old drive to the new one.

  • Boost Your Laptop’s Speed: Expert Guide on Transferring OS to Newly Added SSD Drive

    Boost Your Laptop’s Speed: Expert Guide on Transferring OS to Newly Added SSD Drive

    Have you ever found yourself frustrated with how slow your computer is running? Do you spend more time waiting for programs to load than actually using them? If so, you’re not alone! Slow computers can be a major source of stress and lost productivity. The good news is that there’s a simple solution: transferring your operating system (OS) to a solid-state drive (SSD). Why an SSD, you ask? Well, unlike traditional hard drives, SSDs use flash memory to store data.

    This means that they’re faster, quieter, and more dependable. And, best of all, they can dramatically improve your computer’s performance. But, we know what you’re thinking: “Transferring my OS to a new drive sounds complicated and risky.

    ” Fear not, dear reader! This blog post will guide you through the entire process, step-by-step. We’ll cover everything from backing up your data to cloning your drive to troubleshooting common issues. By the end of this post, you’ll be a pro at transferring your OS to an SSD.

    You’ll wonder why you didn’t do it sooner! So, grab a cup of coffee and let’s get started.

    Backing Up Important Data

    If you’ve added an SSD drive to your laptop, you might be wondering how to transfer your operating system. The easiest way to do this is to use cloning software, which duplicates everything from your old drive onto the new one. This means you don’t have to reinstall your OS or any of your programs, and you can get up and running with your new drive quickly and easily.

    However, before you start the cloning process, it’s important to back up all your important data to an external drive, just in case anything goes wrong during the transfer. This way, you can restore your system to its original state if something goes wrong. Once you have a backup, use a reliable cloning software to start the transfer process.

    Follow the instructions carefully, and make sure you select the correct drives. When the process is complete, test your new drive to ensure everything works properly. With a little care and attention, you’ll have a faster, more efficient computer in no time!

    Create a System Image

    Creating a system image is an essential part of backing up your important data. A system image is a complete copy of your computer’s hard drive, including all your installed programs, system files, and settings. It is an exact replica of your system, which can be used to recover your computer in the event of a system crash, virus attack, or other catastrophic event.

    With a system image, you can have peace of mind knowing that all your critical data is backed up safely. You never know when an unexpected event might occur, so it’s important to create a system image regularly. By doing so, you can restore your computer to its previous state quickly and easily, without losing any of your important files or settings.

    So, make sure to set up a reliable backup system, including creating a system image, to avoid losing your valuable data in case of an emergency.

    added ssd drive to laptop how do i transfer os

    Create a Recovery Drive

    Creating a recovery drive is an essential step in backing up important data. Whether it’s your personal photos, important documents, or your favorite movies, it’s crucial to have a backup plan to avoid losing them. By creating a recovery drive, you can quickly restore your system if an unexpected error occurs.

    A recovery drive is a USB or external hard drive that contains an exact copy of your computer’s settings, files, and drivers, so you can easily recover your system to its previous state. It’s effortless to create a recovery drive on Windows All you need is a USB drive with at least 16 GB of free space, and then you can easily create a recovery drive using the operating system’s built-in tools.

    So, if you want to keep your data safe and secure from unexpected errors, creating a recovery drive is the best way to go about it.

    Cloning Your Old Hard Drive

    If you’ve just added an SSD drive to your laptop and want to transfer your OS without losing any important files or settings, you’ll need to clone your old hard drive. This process involves creating an exact copy of your existing hard drive and transferring it to the new SSD drive. There are various software tools available to help you do this, such as Macrium Reflect, Clonezilla, and EaseUS Todo Backup.

    The first step is to connect both your old hard drive and new SSD drive to your laptop. Then, install your chosen cloning software and follow the on-screen instructions to create a clone of your old hard drive. Once the cloning process is complete, you can disconnect your old hard drive and start using your new SSD drive, which will contain all of your old files, programs, and settings.

    Just be sure to backup any important data before starting the cloning process in case anything goes wrong. With a successful clone, you’ll enjoy faster boot-ups and quicker access times on your laptop.

    Choose a Cloning Software

    If you’re upgrading your hard drive or simply moving to a new one, you’ll need to clone your old hard drive to save your files and programs. But how do you do that? Well, the first step is to choose a cloning software. There are several options out there, both free and paid, and it’s important to pick one that suits your needs.

    One popular choice is EaseUS Todo Backup, which is user-friendly, has a fast cloning speed, and offers features like incremental backups. Another great option is Clonezilla, which is free and open-source and can create disk images or clone entire disks. Just be sure to read up on your chosen software’s documentation and follow the instructions carefully to ensure a smooth and successful cloning process.

    With the right software, cloning your old hard drive can be a breeze and you’ll be up and running on your new drive in no time.

    Connect SSD and Install Software

    When it comes to upgrading your computer, connecting a solid-state drive (SSD) and installing the necessary software can make a significant difference in terms of speed and performance. One way to do this is by cloning your old hard drive to the new SSD. This ensures that all the data and settings from your previous hard drive are transferred to the new SSD, saving you the hassle of starting fresh.

    To begin, you’ll need to connect your SSD to your computer through a USB port or internally. Then, you’ll need to install software such as Clonezilla or Macrium Reflect to initiate the cloning process. Once you’ve completed the cloning process, you can disconnect your old hard drive and boot your computer using the new SSD.

    In no time, you’ll experience faster boot-up times, smoother application launches, and better overall performance. So, why wait? Upgrade your computer with an SSD and enjoy a lightning-fast experience!

    Transferring OS to SSD Drive

    So you’ve added an SSD drive to your laptop and now you’re wondering how to transfer the operating system (OS)? Well, fortunately, the process isn’t as difficult as you might think. Firstly, you’ll want to clone your existing hard drive onto the SSD drive. This can be done using software such as Clonezilla or Macrium Reflect.

    Once you’ve done that, you’ll need to change the boot order in your laptop’s BIOS to make sure it boots from the SSD drive rather than the original hard drive. Lastly, you’ll want to format the original hard drive to free up the space and make it available for other uses. Keep in mind that transferring the OS can be a bit tech-heavy, so if you’re not confident doing it yourself, it’s always best to seek the help of a professional.

    But with a few nifty tools and some know-how, you’ll be able to enjoy the speed and performance benefits of your new SSD drive in no time.

    Boot From Recovery Drive

    Transferring OS to SSD Drive If you’ve recently installed an SSD drive on your computer and you want to transfer the operating system to it, you need to create a recovery drive first. This is a USB drive with the capability to boot your computer into a recovery environment and let you troubleshoot issues, repair your system, and even reinstall Windows if necessary. Once you have the recovery drive, plug it into your computer, boot from it and select the custom installation option.

    This will let you choose the new SSD drive as the installation location for Windows. This process may take a while, but once it’s done, you’ll have an operating system that’s optimized for your SSD drive, with faster boot times and snappier performance. Don’t forget to back up all your data before doing this, as the installation will overwrite everything on your current drive.

    Follow On-Screen Instructions

    When transferring your operating system to a new SSD drive, it’s important to carefully follow the on-screen instructions provided by your computer. These instructions will guide you step-by-step through the transfer process, ensuring that the transfer is successful and without any complications. First, make sure that you have all the necessary software and tools on hand before beginning the transfer process.

    This includes a copy of your current operating system, any additional drivers or software that your computer requires, and the new SSD drive that you will be transferring the operating system to. Once you have everything you need, simply follow the on-screen instructions, which will likely involve installing the new SSD drive, running a disk cloning software, and transferring the operating system to the new drive. Throughout the process, be sure to carefully read and follow each instruction to avoid making any mistakes.

    Remember, any errors during the transfer process could result in data loss or other serious issues, so it’s important to take your time and carefully follow each step. With a little patience and attention to detail, transferring your operating system to a new SSD drive can be a simple and straightforward process that can greatly improve your computer’s performance and reliability. So if you’re looking to upgrade your system, be sure to follow the on-screen instructions carefully to ensure a smooth and successful transfer process.

    Final Steps

    After adding an SSD drive to your laptop, you may want to transfer your operating system over to the new and improved hardware. Luckily, this process is not as complicated as it may seem. Before getting started, make sure you have a backup of all of your important files and data.

    There are a few different methods you can use to transfer your OS, including cloning your existing drive or doing a clean installation of your operating system on the new SSD. Cloning your drive is a quicker process and will create an exact replica of your current drive, but a clean installation can be more reliable and ensure that your new SSD is running at its fullest potential. Either way, once your operating system is transferred, you can enjoy faster boot times and improved performance on your laptop.

    Don’t forget to properly dispose of your old drive, either by wiping it clean or physically destroying it to protect your sensitive information. With these final steps, you’ll be able to fully utilize your new SSD and enjoy a better overall experience on your laptop.

    Check SSD Boot Order

    When it comes to setting up a new computer, the final steps can sometimes be the most confusing. One important task you’ll want to complete is checking the SSD boot order. This is the order in which your computer will try to boot from different storage devices, and you want to make sure your SSD is first on the list.

    To check this, you’ll need to enter your computer’s BIOS. The process can vary depending on your computer’s brand and model, but you can usually access the BIOS by pressing a key like F2 or Del as your computer boots up. Once you’re in the BIOS, look for the boot order settings and make sure your SSD is at the top of the list.

    This will ensure that your computer is booting from the fast and reliable SSD instead of a slower HDD or other storage device. By taking the time to check and adjust the SSD boot order, you can optimize your computer’s performance and avoid any potential headaches down the line.

    Erasing Old Hard Drive

    When it comes to getting rid of an old hard drive, it’s important to remember that simply deleting files is not enough. To truly erase the hard drive, you need to take a few final steps. One of the best ways to ensure your data is permanently erased is to use a disk-wiping tool.

    This type of software overwrite your hard drive with junk data, making it nearly impossible to recover anything that was previously on the disk. Some people also choose to physically destroy their old hard drives, but this isn’t always necessary unless you’re dealing with highly sensitive information. In either case, it’s important to take the time to securely erase your old hard drive to protect your privacy and ensure that your data doesn’t fall into the wrong hands.

    Conclusion

    In summary, adding an SSD drive to your laptop can greatly improve your device’s performance and speed. However, transferring your operating system to the new drive can be a bit tricky. It’s important to back up your data beforehand and seek guidance from online tutorials or a tech-savvy friend.

    Think of it as giving your laptop a heart transplant – a delicate procedure, but ultimately worth it in the end. Happy computing!”

    FAQs

    Can I transfer my operating system from an HDD to an SSD?
    Yes, you can transfer your operating system from an HDD to an SSD using software like Clonezilla or Macrium Reflect.

    How do I check if my SSD has enough space for the OS transfer?
    You can check the size of your current OS installation via the properties window of your disk. Make sure the size of the OS is smaller than the capacity of the SSD.

    Should I reinstall the OS on the new SSD drive or clone it?
    It depends on your personal preference. Cloning the OS allows you to preserve your current settings and files, whereas a fresh install will give you a new start and ensure optimal performance.

    Can I clone my OS to an external hard drive before transferring it to the SSD?
    Yes, you can clone your OS to an external hard drive and then transfer it over to the SSD. Just make sure the external drive has enough storage to hold the cloned OS.

  • Boost Your PC’s Performance: A Step-by-Step Guide to Moving Windows 10 to an SSD

    Are you tired of sluggish performance and slow boot times on your Windows 10 PC? Then it’s time to consider upgrading to a solid-state drive (SSD). Moving Windows 10 to an SSD can dramatically improve your computer’s speed and overall performance, making it a worthwhile investment for anyone who relies on their computer for work or play. Think of it like upgrading from a bicycle to a sports car.

    Sure, you can still get from point A to point B on a bicycle, but it’s slow and requires more effort. With a sports car, you’ll get there faster, with less effort and with added benefits like a smoother ride and more responsive handling. That’s exactly what you can expect when you move to an SSD.

    In this guide, we’ll walk you through the steps to move Windows 10 to an SSD, including how to clone your existing hard drive, transfer your data, and configure your new SSD for maximum performance. We’ll also cover some of the drawbacks and potential pitfalls of using an SSD, as well as some tips for optimizing your system to take full advantage of its new hardware. So buckle up and get ready for a faster, more responsive computing experience.

    With just a few simple steps, you can move Windows 10 to an SSD and enjoy the benefits of modern storage technology.

    Preparing to Migrate

    Moving your Windows 10 operating system to a solid-state drive (SSD) can be a great way to boost the performance of your computer. Before you start the migration process, back up all your important files and data to ensure that you do not lose anything in case the migration goes wrong. You also need to make sure that your SSD has enough space to accommodate all the data on your current hard drive.

    Once you have verified that your SSD can accommodate your files, you can use third-party software like EaseUS ToDo Backup, Clonezilla, or Macrium Reflect to clone your current hard drive to your SSD. After the cloning process is complete, you need to change your boot order in the BIOS to direct your computer to boot from the SSD. Finally, ensure that all the hardware drivers are up-to-date and optimize your SSD settings to ensure optimal performance.

    Overall, moving your Windows 10 operating system to an SSD can be a relatively straightforward process, as long as you take the necessary precautions and follow the steps carefully.

    Check Your SSD Compatibility

    Before starting the migration process, it’s crucial to check your SSD’s compatibility with your computer. Not all SSDs work well with all systems, and it’s essential to ensure that your SSD and computer are a match made in heaven. Before investing in an SSD, make sure to check your computer’s specifications and ensure that the SSD is compatible with it.

    Many SSDs come with manufacturer specifications regarding compatibility, and it’s essential to verify them before making a purchase. Installing an incompatible SSD can lead to issues such as data loss or system crashes. So it’s better to be safe than sorry and ensure that everything is compatible before starting the migration process.

    how do i move windows 10 to an ssd

    Backup Important Data

    When getting ready for a data migration, it is crucial to make sure that all important data is backed up. This not only protects your data but also gives you peace of mind knowing that if something goes wrong during the migration process, you won’t lose any vital information. There are several ways to back up your data, including cloud storage solutions, external hard drives, or even just copying files to a USB drive.

    It’s best to use multiple backup methods, especially if the data you are backing up is critical to your business or personal life. Don’t take shortcuts when it comes to data backup, and make sure that every important file is backed up properly. After all, it’s better to be safe than sorry and lose valuable data that you can’t get back.

    Gather Materials

    When preparing to migrate, gathering materials is an essential step to ensure a smooth and successful transition. This includes identifying and backing up all important data, such as files, databases, and applications. It’s critical to assess the amount of data to be migrated and determine if any upgrades or changes will need to be made to accommodate the new environment.

    Additionally, it’s important to determine the hardware and software requirements for the new environment and ensure they meet the necessary specifications. Planning ahead and gathering all necessary materials will save time and reduce stress during the migration process. With proper preparation, migrating to a new environment can be a seamless and stress-free experience.

    Migrate Windows 10 to SSD

    So, you’re looking to move your Windows 10 operating system to an SSD – congrats! This is a great way to boost your computer’s speed and overall performance. The process may seem daunting, but it’s actually fairly straightforward. First, you’ll need to download cloning software like EaseUS Todo Backup or Macrium Reflect.

    Then, you’ll need to connect your SSD to your computer and initialize it through the Disk Management tool. Once your SSD is ready to go, you can use the cloning software to transfer your Windows 10 operating system, along with any files and programs you want to keep. This process can take some time, so be patient! Once the cloning process is complete, you’ll need to change your boot settings in the BIOS to ensure your computer boots from the new SSD.

    And voila – you’ve successfully migrated your Windows 10 to an SSD! Keep in mind, though, that this process does require some technical know-how. If you’re not confident in your abilities, it may be worth seeking the help of a professional.

    Use Built-in Windows Tools

    When it comes to migrating your operating system to a new solid-state drive (SSD), you might feel overwhelmed with the process. However, did you know that Windows 10 comes with built-in tools that allow you to easily migrate your system to a new drive? One of the most helpful tools is the “Clone” feature found in the Windows System Image Backup tool. This tool allows you to create a complete copy of your Windows 10 system, including all files, settings, and applications, onto your new SSD.

    Another built-in tool that can aid in the migration process is the Disk Cleanup tool. This tool helps you to free up space on your system drive, which can make the migration process smoother and less time-consuming. Overall, with the help of these built-in tools, migrating your Windows 10 system to an SSD can be a simple and stress-free process.

    Clone Your Hard Drive

    If you want to speed up your computer’s performance, you may want to migrate Windows 10 to an SSD. The process can seem daunting, but it’s actually quite simple if you clone your hard drive. Cloning your hard drive involves copying all of its contents onto a new drive, including the operating system.

    By doing this, you’ll have an exact replica of your old hard drive, but with the added benefit of the increased speed of an SSD. To get started, you’ll need to purchase an SSD that’s large enough to hold all of your data. Then, you’ll need to use cloning software to copy your hard drive.

    There are many great options available, such as EaseUS Todo Backup, Macrium Reflect, and Clonezilla. These programs make the process easy and straightforward, and they’ll guide you through each step. Once you’ve cloned your hard drive, you’ll need to physically install the SSD.

    This involves opening up your computer’s case, which can be intimidating for some people. It’s important to follow instructions carefully and make sure you ground yourself to avoid damaging your components. Overall, migrating Windows 10 to an SSD can greatly improve your computer’s performance, and cloning your hard drive is an easy way to do it.

    With the right software and a bit of know-how, you can have a faster and more efficient computer in no time.

    Booting From Your SSD

    If you’re looking to speed up your computer or upgrade to a newer and faster solid-state drive, you may be wondering, “how do I move Windows 10 to an SSD?” Thankfully, making the switch is easier than you might think. There are a few different ways to move Windows to your new SSD, but one of the most effective methods is to clone your existing hard drive onto the SSD. This ensures that all your files, settings, and programs are transferred over seamlessly.

    To do this, you’ll first need to connect your SSD to your computer, and then use a cloning software such as EaseUS Todo Backup, Macrium Reflect, or Samsung’s Data Migration tool. Then, simply follow the on-screen instructions to clone your drive and reboot your computer, making sure to select the SSD as your primary boot device in BIOS settings. With your new SSD up and running, you should notice a considerable improvement in your computer’s speed and performance.

    Change Your Boot Order in BIOS

    Booting from your SSD can significantly boost your computer’s performance, and changing the boot order in your BIOS is a crucial step. The process may seem intimidating, but it’s not as complicated as it sounds. Start by entering your BIOS by pressing the corresponding key during startup, usually F2 or Delete.

    Once you’re in the BIOS, navigate to the Boot menu, and find the option that allows you to change the boot order. Move your SSD to the top of the list, ensuring it’s the first device the system tries to boot from. Save your changes and exit the BIOS.

    Your computer can now access your operating system and other essential files from the faster SSD, leading to a faster and smoother computing experience. Make sure to follow the manufacturer’s instructions and consult resources online if you encounter any issues during the process. With a few simple steps, you can significantly improve your computer’s performance with a faster boot time and enhanced overall functioning.

    Remove Old Hard Drive

    If you’ve successfully installed your new solid-state drive (SSD) into your computer, the next step is to remove your old hard drive to free up space and prevent any conflicts between the two. Once your old hard drive is out, it’s time to boot up your computer and make sure it’s now running from your new SSD. To do this, you need to access your computer’s BIOS (Basic Input/Output System) and ensure that the SSD is set as the primary boot drive.

    You can do this by restarting your computer and pressing the appropriate key (usually Del or F2) to enter the BIOS settings. From there, navigate to the “Boot” tab and select your SSD from the list of available boot drives. Hit “Save and Exit,” and your computer should now be running from your new SSD, providing faster speeds and improved performance.

    Enjoy the Benefits of SSD

    If you’re looking to upgrade your computer’s performance, one of the best things you can do is install an SSD. With an SSD, you’ll enjoy faster boot times, faster data access, and better overall responsiveness. But if you’re wondering how to move Windows 10 to an SSD, don’t worry—it’s not as difficult as you might think.

    There are several ways to clone your existing Windows installation to your new SSD, including using built-in Windows tools or third-party software. One popular option is to use a tool like EaseUS Todo Backup, which allows you to create a bootable USB drive, clone your existing drive to your new SSD, and then boot from the USB drive to complete the installation. Once you’ve completed the process, you’ll be able to enjoy all of the benefits of your new SSD.

    So don’t wait—make the upgrade and start experiencing the faster, smoother performance that comes with an SSD.

    Conclusion

    In short, moving Windows 10 to an SSD is like giving your computer a Ferrari engine. It’s faster, smoother, and can handle more tasks seamlessly. Just make sure to follow the instructions carefully and backup your important files before making the switch.

    And voila, you’ll have a computer that’s ready to zoom through any task you throw its way!”

    FAQs

    What are the benefits of moving Windows 10 to an SSD?
    The benefits include faster boot times, faster application load times, and overall improved system performance.

    Can I move Windows 10 to an SSD without losing my files?
    Yes, you can clone your current Windows 10 installation to the SSD using migration software like EaseUS Todo Backup or Macrium Reflect.

    What is the recommended size for an SSD to move Windows 10?
    The recommended size is at least 240GB to ensure enough space for the operating system and essential applications.

    Will moving Windows 10 to an SSD cause any issues with my programs or settings?
    In most cases, moving Windows 10 to an SSD should not cause any issues with your programs or settings. However, it’s always recommended to backup important data before making any changes.

    Can I move Windows 10 to an external SSD?
    Yes, you can move Windows 10 to an external SSD, but it may not perform as fast as an internal SSD due to limitations in data transfer speed.

  • Upgrading to an SSD on your 2012 MacBook Pro: A Comprehensive Guide

    Upgrading to an SSD on your 2012 MacBook Pro: A Comprehensive Guide

    If you’ve been using your 2012 MacBook Pro for a while, it’s no surprise if you’re experiencing slower speeds and performance issues. However, there’s a quick and simple solution to give your Mac the boost it needs: upgrading to an SSD. In this step-by-step guide, we’ll show you how to upgrade to an SSD and give your MacBook Pro a new life! First, let’s explain what an SSD is: it stands for Solid State Drive, a storage device that is faster, more reliable, and durable than the traditional hard drive.

    Instead of using spinning disks to store data, SSDs use flash memory chips, which results in faster read and write speeds. The benefits of SSD can make a noticeable difference in your MacBook Pro’s speed and performance. However, the process of upgrading your MacBook Pro’s hard drive to an SSD may seem daunting, but fear not! We’ve broken it down into simple steps that anyone can follow.

    In this guide, we’ll cover the tools and materials you need, how to backup your data, how to clone your existing hard drive onto the new SSD, and how to install the new SSD into your MacBook Pro. By the end of this guide, you’ll have a faster MacBook Pro that can handle your day-to-day tasks without any hassle. So, let’s get started on upgrading your MacBook Pro with an SSD!

    What You Need

    If you’re an owner of a 2012 MacBook Pro, upgrading the solid-state drive (SSD) might be a beneficial way to breathe new life into your device. To start with, you should check what type of SSD your MacBook Pro is compatible with, as there are various sizes and models in the market. Common drives that support this MacBook model are the Samsung 860 EVO and the Crucial MX500.

    Make sure to connect your MacBook Pro to a stable power source during the upgrade process. Then, make a backup of all important files and settings since the process will require erasing the existing drive. You can then remove the bottom cover and the current drive, insert the new SSD into the drive slot, and reinstall the operating system (OS).

    Follow these steps accurately to avoid any damage or errors. A new SSD can improve your MacBook’s performance in ways such as faster boot times and better multitasking abilities, giving it a new lease of life.

    Compatible SSDs and Tools

    When upgrading your computer’s storage with an SSD, it’s important to make sure that the SSD is compatible with your system. Not all SSDs will work with all computers, so it’s crucial to do your research. Some factors to consider when choosing a compatible SSD include the type of interface your computer uses (such as SATA or PCIe), the form factor (

    5-inch or M.2), and the storage capacity you need. Additionally, you’ll need some tools to install the SSD, such as a screwdriver, and you may need software to clone your existing hard drive onto the new SSD.

    Before making any purchases, make sure to double check that your computer supports the SSD you’re considering. By taking the time to ensure compatibility and having the necessary tools and software, you can upgrade your computer’s storage with ease and enjoy faster speeds and improved performance.

    2012 macbook pro ssd upgrade how to

    Preparing Your MacBook Pro

    If you’re looking to upgrade your 2012 MacBook Pro with an SSD, there are a few things you’ll need to do to prepare. First, you’ll want to make sure you have a backup of all your important files and data. This can be done using Time Machine or any other backup software of your choice.

    Once you’ve backed up your data, you’ll need to gather the necessary tools – a screwdriver set, an anti-static mat or wristband, and of course, your new SSD. Next, you’ll need to open up your MacBook Pro and remove the old hard drive. This can be a bit challenging, but with the right tools and some patience, you should be able to get it done.

    Once you’ve removed the old hard drive, you’ll need to install the new SSD in its place and secure it with the screws. Finally, you’ll need to reinstall macOS on your new SSD and restore your backed-up data. With a bit of effort and some know-how, upgrading your MacBook Pro with an SSD can be a worthwhile investment that can significantly improve your computer’s speed and functionality.

    Backup Important Data

    Backing up important data is a fundamental step in preparing your MacBook Pro for any unforeseen circumstance. Losing data due to a system failure, malware, or accidental deletion can be a frustrating and costly experience. Therefore, before anything else, it’s crucial to ensure that all of your valuable data is safe and secure.

    Backing up data can be done in many ways, including using cloud-based services or external hard drives. These options provide you with reliable ways to keep your files safe and readily available even when your MacBook Pro encounters technical problems. Always remember to make a habit of backing up your data regularly to avoid the risk of losing valuable information.

    Ultimately, taking the time and effort to prepare your MacBook Pro and safeguarding your data can save you time, money, and stress in the long run.

    Create Bootable USB Drive

    Creating a bootable USB drive is essential when preparing your MacBook Pro. It allows you to install or upgrade the macOS operating system, repair damaged disks, or run diagnostic tools. To create a bootable USB drive on your MacBook Pro, you will need a USB drive with a minimum capacity of 8GB, the macOS installation package from the App Store, and a third-party tool like Disk Maker X or Terminal.

    Disk Maker X is a user-friendly application that automates the process of creating a bootable USB drive, while Terminal requires some basic computer skills to execute the commands. Once you have the necessary tools, simply follow the instructions provided by the tool of your choice. Remember to back up your data before proceeding, as creating a bootable USB drive involves erasing the entire disk.

    Don’t forget to eject the USB drive safely before removing it from your MacBook Pro. By creating a bootable USB drive, you can avoid costly repairs or time-consuming trips to the Genius Bar, ensuring your MacBook Pro is up and running in no time.

    Replacing the Hard Drive with SSD

    Upgrading your 2012 MacBook Pro’s hard drive with an SSD is a great way to improve its performance and extend its lifespan. The process involves a few simple steps, but it’s important to have the right tools and know-how before you begin. First, you’ll need to back up all your data to an external hard drive or cloud storage.

    Then, you’ll need to remove the bottom cover of your MacBook Pro and locate the hard drive. Once you’ve found it, carefully remove it and replace it with your new SSD. You’ll then need to reinstall macOS on your new drive and transfer your data back to your computer.

    With an SSD installed, your MacBook Pro will boot up faster, launch applications more quickly, and have a better overall performance. So if you’re looking to give your old MacBook Pro a new lease on life, upgrading to an SSD is definitely worth considering.

    Removing the Old Hard Drive and Installing the SSD

    If you’re planning on replacing your computer’s hard drive with an SSD, the first step is to remove the old hard drive. This process can vary depending on your computer’s make and model, but generally involves opening up the case and locating the hard drive. Once you’ve found it, you’ll need to unscrew any mounting brackets and carefully disconnect the cables.

    Take note of how the old hard drive was configured so you can replicate it with the SSD. Installing the SSD is a similar process – attach it to the mounting brackets and connect the cables. Keep in mind that it’s important to handle the SSD with care, as it’s a delicate piece of equipment.

    Once everything is in place, you’ll need to reinstall the operating system and any important programs or files. With the SSD in place, your computer should boot up faster and perform better overall. You’ll also need to make sure you dispose of the old hard drive properly – either wipe it completely or physically destroy it to ensure your data is secure.

    Formatting the SSD and Installing macOS

    If you’re looking for a significant boost in your Mac’s speed, replacing the hard drive with an SSD might be the way to go. SSDs are faster and more reliable than traditional hard drives, and the process of replacing the drive is relatively straightforward. Once you have the SSD, you’ll need to format it and install macOS.

    To do this, you’ll need to create a bootable USB drive with the macOS installer on it. After that, you’ll need to install the SSD in your Mac, boot from the USB drive, and follow the on-screen instructions to install macOS onto the new drive. The process may seem a little intimidating, but with a little patience and some basic technical knowledge, you can have a lightning-fast Mac in no time.

    So, don’t wait any longer and take the leap to upgrade your Mac with an SSD today!

    Post-upgrade Optimization

    If you’re looking to upgrade your 2012 MacBook Pro with an SSD, you’ll notice a significant improvement in speed and performance. However, it’s important to optimize your new SSD to get the most out of it. One of the first things you’ll want to do is enable TRIM support, which helps to maintain the performance of your SSD over time.

    You can do this by using a utility like Trim Enabler or by using the command line to enable TRIM manually. It’s also a good idea to disable any unnecessary startup items and applications, as these can slow down your system and use up valuable resources. Additionally, you can set your SSD as the default startup disk in System Preferences to reduce boot times.

    It’s important to note that if you’re replacing your old hard drive with an SSD, you’ll want to consider backing up your data and cloning your old drive before installing the new one. With a little bit of post-upgrade optimization, your 2012 MacBook Pro will be running faster and smoother than ever before.

    Enabling TRIM and other Settings

    Post-upgrade optimization is crucial for ensuring that your computer operates at its best capacity. Enabling TRIM is one of the key steps in this process. TRIM aids in maintaining the efficiency of solid-state drives (SSDs) by preventing the drive from slowing down if it becomes full.

    A full drive makes it harder for an SSD to find open cells to write new data, causing it to slow down. Enabling TRIM ensures that the data is wiped out from cells that are no longer in use, allowing the SSD to perform more efficiently. It’s also important to optimize other settings such as updating drivers, clearing cache and cookies, and removing unnecessary software.

    By doing so, your computer will operate faster, more efficiently, and with fewer errors.

    Tips to Maximize SSD Performance

    Congratulations on upgrading your PC or laptop with an SSD! Now it’s time to optimize your new drive to get the most out of it. One key factor to maximize SSD performance is to make sure that the operating system’s partition is aligned properly. You can use a third-party tool like EaseUS Partition Master to ensure that the SSD’s partition is correctly aligned.

    Additionally, disabling features like defragmentation and indexing can help prevent unnecessary wear and tear on your SSD, improving its longevity. Another crucial step to enhancing SSD performance is to avoid filling the drive to capacity, as this can cause the drive to slow down. By keeping at least 20% of free space on the drive, you can ensure that it continues to operate at optimal speeds.

    These post-upgrade optimizations can help your SSD operate at peak performance and ensure that your computer runs smoothly.

    Enjoy Your Upgraded MacBook Pro

    If you’re still using a 2012 MacBook Pro, it’s time for an upgrade. One of the best ways to breathe new life into your old machine is by installing an SSD (solid-state drive). Not only will it make your computer faster, but it will also extend its lifespan and improve its performance.

    The process of upgrading is easier than you might think, and you’ll only need a few tools and some basic know-how. First, you’ll need to purchase an SSD that’s compatible with your MacBook Pro. Next, back up all your data onto an external hard drive, since you’ll need to erase everything from your current hard drive during the installation process.

    You’ll also need a screwdriver and some patience to open up the bottom of your MacBook Pro and replace the old drive with your new SSD. Once you’ve installed the new SSD, you can then install macOS and transfer your files back onto your computer. With your upgraded MacBook Pro, you’ll notice a significant boost in speed and performance, making it feel like a brand new machine.

    So, don’t hesitate any longer and get started on your 2012 MacBook Pro SSD upgrade today!

    Conclusion

    In conclusion, upgrading your 2012 MacBook Pro with an SSD is like giving your trusty old steed a new lease on life. With faster boot times, smoother performance, and increased storage capacity, you’ll wonder how you ever got by without it. It’s like upgrading from a flip phone to a smartphone – once you make the switch, you’ll never look back.

    So don’t be afraid to take the plunge and give your computer the upgrade it deserves. Your future self will thank you!”

    FAQs

    What size SSD can I upgrade to in my 2012 MacBook Pro?
    The maximum supported SSD size for a 2012 MacBook Pro varies depending on the model. The 13-inch MacBook Pro supports up to a 2TB SSD, while the 15-inch MacBook Pro supports up to a 4TB SSD.

    Can I upgrade the RAM in my 2012 MacBook Pro along with the SSD?
    Yes, you can upgrade both the SSD and RAM in your 2012 MacBook Pro. However, the process for each upgrade is different and may require professional assistance.

    What tools do I need to upgrade the SSD in my 2012 MacBook Pro?
    You will need a Pentalobe screwdriver, a Torx screwdriver, an external hard drive, and an SSD with the appropriate connector type (either SATA or PCIe).

    Is it possible to transfer my data from the old SSD to the new one during the upgrade process?
    Yes, you can transfer your data from the old SSD to the new one either by using an external hard drive or by using cloning software. Cloning software like Carbon Copy Cloner or SuperDuper can make the process easier and faster.

  • Unlock the Power of Your Computer: A Guide to Fitting Your SSD Drive with Bay Kit

    Ready to upgrade to an SSD but don’t know where to start? Installing an SSD into a bay kit is a great way to enhance your computer’s speed and performance. And the best part is, it’s easier than you think. With just a few simple steps, you can have your SSD installed and ready to go in no time.

    In this blog, we’ll guide you through the process of installing an SSD into a bay kit, providing you with everything you need to get started. We’ll cover the tools and equipment required, explain the steps involved, and offer useful tips to ensure a smooth and successful installation. So, put on your tech hat and let’s get started!

    Prepare Your Work Area

    When it comes to installing an SSD drive, the first step is to prepare your work area to ensure that you have everything you need. This is crucial to ensure that your installation process goes smoothly. First, make sure that you have all the necessary tools, including a screwdriver, grounding strap, and anti-static mat.

    This will help to protect your drive from electrostatic discharge which can damage the components. Next, clear a work area on a flat surface to ensure that you have enough space to work with. It’s important to also have enough light to see what you’re doing.

    Remember to turn off your computer, unplug all cables, and remove the battery if you’re working on a laptop. By following these steps, you’ll be ready to install your new SSD drive with ease and without any issues. Remember, taking the time to prepare your work area is a small but crucial step in the process of fitting an SSD drive into a bay kit.

    Clear a space on a flat surface

    When preparing to work on a project, it’s essential to clear a space on a flat surface. Having a designated work area that is free from clutter, distractions, and obstacles can help you stay focused and increase productivity. Whether you’re working on a school project, crafting project, or home renovation, make sure to select a workspace that’s spacious enough to hold all of your materials and tools.

    Once you’ve found the perfect spot, clear off the surface and make sure it’s clean and dry. If you’re working on a delicate project or handling hazardous materials, consider covering your workspace with a protective layer such as a mat or tarp. Remember, by clearing a space on a flat surface, you’ll make it easier to work efficiently and keep your work organized.

    crucial how to fit ssd drive into bay kit

    Assemble your tools

    When assembling your tools for a project, it’s important to prepare your work area first. This means ensuring that you have enough space to spread out your materials and that the area is clean and free of clutter. You’ll also want to make sure you have all the necessary tools on hand before beginning.

    Depending on the project, this may include things like a hammer, screwdriver, drill, tape measure, and level. By having everything you need nearby and organized, you’ll be able to work more efficiently and avoid unnecessary interruptions. So take a few minutes before starting your project to assess your work area and gather all the tools you’ll need.

    With a little bit of preparation, you’ll be ready to tackle any DIY project that comes your way!

    Prepare Bay Kit and SSD

    If you’re looking to upgrade your computer’s speed and performance, one of the easiest and most effective ways to do so is by fitting an SSD drive into a bay kit. The process is straightforward and doesn’t require much technical knowledge. Firstly, you need to ensure that the bay kit is compatible with your computer.

    Once you’ve got the right kit, remove the screws from the existing hard drive and slide it out. Then, prepare the bay kit by attaching the brackets and screws that come with it. Finally, attach the SSD drive to the bay kit and slide it back into place.

    Make sure to securely fasten the screws and turn on your computer to ensure that your new drive is recognized. With the right tools and a little bit of patience, you can drastically improve your computer’s performance with a new SSD drive fitted into a bay kit.

    Open SSD drive bay kit

    If you’re looking to upgrade your computer by adding a new solid-state drive (SSD), you might want to consider getting an open SSD drive bay kit. This kit is designed to make installing an SSD into your computer as easy and straightforward as possible. Before you start, make sure you have the necessary tools and materials – you’ll need the SSD, the drive bay kit, a screwdriver, and possibly some screws.

    The first step is to remove the cover of your computer’s drive bay and slide the SSD into the open bay. Make sure the SSD is securely in place, and then use the screws provided with the kit to secure it. Once you’ve done that, you can replace the cover of the drive bay and start using your new, faster SSD! With an open SSD drive bay kit, you can rest assured that your SSD will be installed securely and correctly, giving you the confidence you need to enjoy better performance from your computer.

    Place your SSD in the tray

    If you’re looking to add a solid state drive (SSD) to your computer, the first step is to prepare the bay kit and the SSD itself. Most SSDs come with a mounting kit that includes a tray to fit your drive into. You’ll want to carefully remove the tray from the kit and locate the screws that came with it.

    Make sure to line up the mounting holes on the SSD with those on the tray, and use the screws to secure the drive in place. It’s important to make sure the SSD is snugly fitted into the tray to prevent any movement or vibrations while in use. Once the SSD is securely fastened in its tray, you’re ready to move on to the next step of installing it in your computer.

    By following these simple steps, you can easily prepare your bay kit and SSD for installation and get the best performance possible from your new solid state drive.

    Secure the SSD in place

    When installing an SSD, it’s crucial to secure it in place to prevent any damage or shifting within the device. Firstly, ensure you have all the necessary tools and hardware to prepare the bay kit and SSD for installation. Check the manual of your computer or motherboard to determine the required screws and mounting hardware for your specific device.

    Next, attach the mounting hardware to the SSD, making sure it’s firmly in place. Then, place the SSD in the bay kit and attach the screws tightly to secure it. Be sure not to over-tighten the screws as this can damage the device.

    Finally, double-check that the SSD is securely mounted before proceeding with any further installations. With these steps, you can rest assured that your SSD is firmly in place and ready to provide lightning-fast performance for years to come.

    Install the Bay Kit and SSD

    If you’re looking for a way to increase your computer’s storage capacity, fitting an SSD drive into a bay kit is a great option. The process is relatively straightforward and requires just a few tools. To begin, you’ll want to gather what you need, including a bay kit suitable for your computer and an SSD drive in the appropriate size.

    Next, you’ll want to find the bay in your computer where you want to install the SSD. Typically, this bay will be located near the hard drive bays, and may require removing a cover or bracket to access. Once you’ve identified the bay, carefully install the bay kit by screwing it in firmly.

    Finally, connect the SSD to your computer using the included cables, taking care to ensure everything is securely in place. With the installation complete, you’ll enjoy faster boot times and improved storage capacity that will make your computer run better than ever before. So, don’t be intimidated by this process, with a little time and effort, you’ll be able to install an SSD drive in a bay kit in no time!

    Fit the bay kit into your PC

    If you’re looking to upgrade your PC’s storage, installing an SSD is the perfect solution. One of the best ways to do this is by using a bay kit, which provides a simple and efficient way to install your new drive. Begin by opening your computer case and locating an available drive bay that aligns with your Bay Kit’s dimensions.

    Then, carefully insert the bay kit into the drive bay and secure it with screws or other hardware provided with the kit. Next, remove your new SSD from its packaging and slide it into the bay kit until it clicks into place. Make sure to connect the SATA data and power cables securely to both the SSD and your motherboard.

    Finally, close your computer case, power it on, and confirm that your system is recognizing the SSD. With this straightforward method, you can quickly and easily transform your computer’s storage capabilities.

    Connect the cables

    Now that you’ve got your hands on an SSD, it’s time to install it into your PC using a Bay Kit. Before anything else, make sure your system is shut down, and you’ve unplugged all cables. Next, locate the Bay Kit and carefully open it up.

    You’ll see a bracket inside that can be used to secure the SSD in place once you’ve installed it. You’ll also find some cables that you’ll need to connect to your motherboard. These cables should be labeled, so make sure you read them carefully and connect them to the correct ports.

    Remember, taking your time and being careful is essential at this stage. Rushing can lead to damage to your new hardware or even worse your motherboard. Once you’ve connected the cables, you’ll need to plug them into the power supply.

    After this, attach the bracket to your SSD, then slide it into the Bay Kit and secure it in place. Lastly, you’ll need to reattach any cables you may have disconnected earlier. Once everything is plugged in and secured, you can turn your system on and double-check that everything is functioning correctly.

    Congratulations, you’ve successfully installed your new SSD, and it’s now ready to use!

    Test the SSD and Celebrate

    So, you’ve got your Crucial SSD and the how-to-fit-SSD-drive-into-bay-kit. Now it’s time to put them to the test and celebrate! First, make sure you have the right tools before removing the hard drive from your laptop or desktop. Then, secure the mounting bracket to your SSD and slide it into the drive bay, using screws to fix it in place.

    Next, connect the SATA and power cables to the SSD and secure the drive bay. Congratulations! You’ve successfully installed your SSD. Now it’s time to run some tests and see just how much faster your computer can be.

    Utilize free benchmark programs like CrystalDiskMark, AS SSD Benchmark or Anvil’s Storage Utilities to compare your read and write speeds before and after the installation. You’ll be amazed at the difference a high-quality SSD can make. Best of all, you’ll be able to celebrate with lightning fast boot times, increased overall system performance and faster application launches.

    The Crucial How to Fit SSD Drive into Bay Kit ensures you get the most out of your investment.

    Conclusion

    In conclusion, fitting an SSD drive into a bay kit may seem like a daunting task, but it’s not rocket science. With the right preparation, tools, and a little bit of patience, you’ll be able to slide that drive into its new home with ease. Just remember, an SSD drive can give your computer a significant speed boost, so investing the time and effort into fitting it properly is crucial.

    Plus, if all else fails, you can always consult the instruction manual or call in a tech-savvy friend for assistance. Happy fitting!”

    FAQs

    What is SSD Drive Bay Kit?
    SSD Drive Bay Kit is a device that helps in connecting SSD hard drives to your computer’s motherboard. It also provides support to mount SSD drives inside the computer case.

    How do I know which SSD Drive Bay Kit is compatible with my computer?
    Check your computer motherboard’s specifications to ensure compatibility with the SSD drive and SSD Drive Bay Kit dimensions. You can then buy the SSD Drive Bay Kit with the right dimensions, mounting options (2.5 inches or 3.5 inches), and compatible connection interfaces (USB, SATA, or NVMe).

    Is it necessary to use a SSD Drive Bay Kit to mount an SSD hard drive?
    It is not necessary to use an SSD Drive Bay Kit, but it makes the installation process easier and more secure. If you want to install your SSD without a kit, you will need to use screws or other mounting hardware to connect it to the computer case.

    How do I install an SSD Drive Bay Kit?
    First, you need to open your computer case and locate the drive bay where you want to install the SSD drive. You can then mount the SSD Drive Bay Kit, connect the power and data cables, and secure the SSD drive into the drive bay kit. Finally, power on your computer and check if the SSD drive is recognized.