Category: How to

How to

  • RAM vs SSD Speed Test: Which Offers Lightning-Fast Performance?

    When it comes to choosing computer components, the two most important factors are memory and storage. RAM and SSD are two key elements that play a major role in a computer’s overall performance. But which one is faster, RAM or SSD, and how do they affect your computer’s speed? The answer to this question can be a bit complicated, but it’s important to understand the difference between RAM and SSD and how they work together to speed up your computer.

    In this blog post, we will explore the differences between these two important computer components and how they work together to enhance your computer’s overall speed and performance. So, let’s dive in and find out more about RAM vs SSD speed.

    What is RAM?

    RAM and SSD are both important components of a computer, but they serve different functions. RAM, or Random Access Memory, is the temporary storage space where data is stored while the computer is in use. It is much faster than an SSD because it is directly connected to the CPU and has extremely fast read and write speeds.

    On the other hand, an SSD, or Solid State Drive, is a permanent storage device that retains data even when the power is turned off. While it is slower than RAM, it still has faster read/write speeds than a traditional hard drive, making it a popular choice for storing frequently used files and programs. Depending on your needs, you may want to prioritize one over the other.

    For tasks that require quick data access, such as gaming or video editing, more RAM is typically better. However, for general use and storage, an SSD is a great option for faster boot times and quicker file transfers.

    Explanation of RAM and its speed

    RAM, speed Have you ever wondered what RAM is and why it matters so much? RAM, or Random-Access Memory, is a type of computer memory that stores data and programs that your computer is currently using. Think of it like a workspace – the more RAM your computer has, the bigger the workspace, allowing more programs and data to be kept open and active at the same time. The speed of RAM is measured in megahertz (MHz) or gigahertz (GHz) and determines how quickly it can access and process data.

    Essentially, the faster the RAM, the faster your computer can run programs and complete tasks. So, if you’re a gamer or frequently use resource-intensive programs, investing in faster RAM can make a noticeable difference in overall performance. It’s important to note that the amount of RAM and the type of RAM your computer can handle will vary depending on your system’s specifications, so be sure to check before upgrading.
    how fast is ram compared to ssd

    What is SSD?

    When it comes to comparing RAM to SSD, it’s important to note that they serve different functions and cannot be directly compared in terms of speed. RAM, or Random Access Memory, serves as a type of temporary storage that is used by the computer to access data quickly while it is in use. SSD, or Solid State Drive, is a type of permanent storage that houses all of the computer’s data, including the operating system, software programs, and files.

    While both RAM and SSD are important components in a computer’s overall speed and performance, they cannot be directly compared as they serve different functions. However, it’s worth noting that SSDs are generally faster than traditional hard drives due to their lack of moving parts, which allows for significantly faster data access times. So if you’re looking to improve your computer’s performance, investing in a solid state drive could be a wise choice.

    Explanation of SSD and its speed

    SSD stands for solid-state drive, and it is a type of storage device that uses NAND-based flash memory to store data. Unlike traditional hard disk drives (HDDs), SSDs have no moving parts, making them faster, more reliable, and less susceptible to physical damage. The lack of moving parts also means that SSDs are much quieter than HDDs.

    SSDs can read and write data much faster than HDDs, resulting in significantly faster overall system performance. This speed is due to the fact that data is stored on microchips using electrical charges rather than being written and read from spinning platters. This makes SSDs ideal for use in applications where speed is critical, such as gaming, video editing, and other graphics-intensive tasks.

    With the increasing demand for faster and more efficient computing, SSD technology has become increasingly popular, and they are now widely used in both consumer and enterprise environments.

    RAM vs SSD Speed Comparison

    When it comes to computer performance, both RAM and SSD play important roles, but they work very differently. RAM (Random Access Memory) is designed for temporary storage of data that your computer needs in order to run programs. In other words, it stores the data that your computer is actively using at any given moment.

    On the other hand, SSD (Solid State Drive) is designed for permanent storage of data, like photos, documents, and application files. So when it comes to the speed comparison between RAM and SSD, it really depends on what you’re doing. In general, RAM is much faster than SSD because it can quickly access data that the computer needs immediately, whereas SSDs are slower because they need to locate the data on the drive before accessing it.

    However, SSDs are faster than traditional hard disk drives (HDDs) because they don’t have any moving parts. So if you need to multitask or run resource-intensive applications, you’ll definitely notice a difference between having more RAM and having a faster SSD.

    Benchmark tests and results

    RAM vs SSD Speed Comparison When it comes to performance, RAM and SSD are among the most critical components of a computer. RAM or Random Access Memory is responsible for storing temporary data that the processor needs to access quickly, whereas SSD or Solid State Drive is responsible for storing all the data on the computer, including the operating system and applications. In terms of speed, both RAM and SSD have different performance characteristics.

    RAM is faster than SSD as it has a higher transfer rate, and it allows the processor to access data more quickly. On the other hand, SSD is slower than the RAM because it has limited bandwidth, and it takes longer to access data. When we compare the benchmark test results, we can see that RAM outperforms SSD in terms of speed, but SSD provides better storage capacity and is more reliable in the long run.

    If you’re a graphic designer, video editor, or gamer, you need more RAM as it can handle more data-intensive tasks. However, SSDs are still an excellent investment as they provide faster boot times, faster app launch times, and overall better performance than traditional hard drives. So, it’s essential to choose the right combination of RAM and SSD for your computer to get the best possible performance.

    Real-world performance comparison

    When it comes to your computer’s performance, two components that play a significant role are RAM and SSD. RAM, or Random Access Memory, is responsible for temporarily storing and accessing data while your computer is running. SSD, or Solid State Drive, on the other hand, is responsible for permanently storing your data.

    So, which one is faster? Well, it really depends on what you’re doing. If you’re opening multiple applications at once or running memory-intensive programs, more RAM is going to significantly improve your computer’s performance. However, if you’re looking for faster boot times and file access, an SSD is the way to go.

    In fact, with an SSD, you can expect your computer to start up in mere seconds! Overall, both RAM and SSD play crucial roles in your computer’s speed and performance, and it’s important to have the right balance of both. So, if you’re looking to upgrade your computer’s speed, do your research and determine which component will best fit your needs.

    Which is faster for what tasks?

    When it comes to speed, RAM and SSD are two very different components with different strengths and weaknesses. RAM is much faster than SSD in terms of accessing and transferring data. In fact, RAM can read and write data at speeds that are several times faster than SSD.

    This is why having more RAM can significantly speed up your computer’s performance and make it more responsive. On the other hand, SSDs have faster read and write speeds compared to traditional hard drives, which makes them ideal for storing and accessing large files or running programs that perform many read/write operations. So, to sum it up, SSDs are better for storage and accessing large files, while RAM is better for running programs and applications that require fast access to data.

    Gaming, editing, browsing, etc.

    When it comes to choosing between a laptop and a desktop for gaming, editing, browsing, and other tasks, the answer depends on your specific needs. Desktops generally have higher processing power and better cooling systems, making them ideal for resource-intensive tasks like gaming and video editing. On the other hand, laptops are more portable, making them a better choice for browsing and mobile tasks.

    That being said, there are some laptops specifically designed for gaming and other demanding tasks, so it ultimately comes down to your personal preference and budget. Remember to consider factors such as screen size, weight, battery life, and graphics card when making your decision. Overall, both laptops and desktops have their pros and cons, so it’s important to weigh them carefully to find the best fit for your needs.

    Conclusion: RAM or SSD for speed?

    In the race between RAM and SSD, it’s like comparing a cheetah to a Ferrari – both are incredibly fast, but with different areas of expertise. RAM, with its lightning-fast access times, excels at quick data access, while SSDs, with their impressive read and write speeds, are designed for high-capacity storage and speedy overall performance. So, while they may be different beasts, they both play a vital role in keeping our systems running at maximum capacity.

    Ultimately, the winner of this speed contest depends on the task at hand and the specific needs of the user. So, grab a bucket of popcorn and enjoy the showdown, folks – it’s going to be a thrilling race to watch!”

    FAQs

    What is the difference between RAM and SSD?
    RAM (Random Access Memory) and SSD (Solid State Drive) are two types of computer storage. RAM is a volatile memory that is used to store data temporarily for quick access, while SSD is a non-volatile memory that is used to store data permanently. The speed of RAM is much faster than SSD.

    Can I replace my RAM with an SSD?
    No, you cannot replace RAM with an SSD. They serve different purposes and are not interchangeable. RAM is used for storing and accessing temporary data, while an SSD is used for permanent storage of data.

    Which is better for gaming, RAM or SSD?
    Both RAM and SSD are important for gaming performance. RAM helps in running multiple applications and programs simultaneously, while an SSD helps in reducing game load times. For optimal gaming performance, it is recommended to have a good amount of both RAM and SSD.

    What is RAM cache in SSD?
    RAM cache is a portion of the computer’s RAM that is used to store frequently accessed data for quicker access. In SSDs, RAM cache is used to speed up the process of reading and writing data to the drive. This helps in improving the overall performance of the SSD.
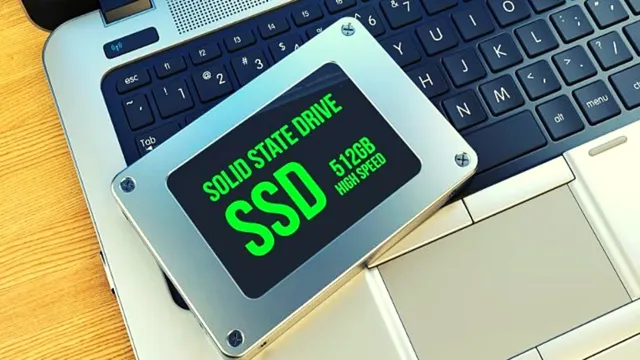
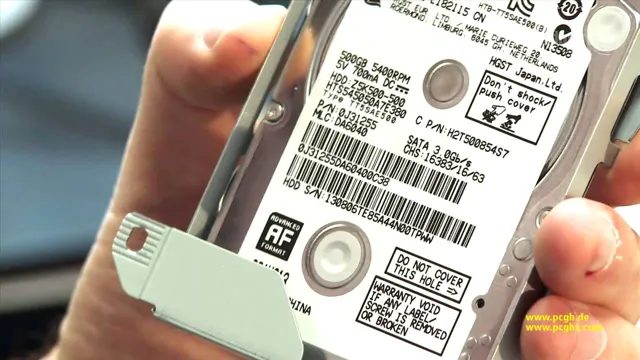
  • Maximizing Windows 10 Performance: The Ultimate Guide to Installing an SSD in No Time

    Are you ready to take your computer’s performance to the next level? Installing Windows 10 on an SSD is an excellent way to achieve lightning-fast speeds and elevate your everyday computing experience. However, many users may question the timeframe and complexity of such a task. Fear not! In this blog post, we will guide you through the process of installing Windows 10 on an SSD and give you an estimated timeframe to set your expectations realistically.

    Think of your computer as a car. You can opt to take the scenic route at a comfortable pace, or you can choose to race down the highway at breakneck speeds. In this analogy, your HDD represents the scenic route, while the SSD is the highway.

    While both will get you to your destination, an SSD can provide a faster, smoother ride. But just like you wouldn’t change your car’s tires without the right tools and preparation, you shouldn’t attempt to install an SSD without some background knowledge. With our step-by-step guide, you’ll be able to install Windows 10 on an SSD with ease.

    The process typically takes a few hours, depending on your computer’s speed, the size of your SSD, and the amount of data you need to transfer. However, with patience and focus, you’ll be enjoying your computer’s newfound speed in no time. So buckle up and get ready to take your computing experience to new heights!

    What is an SSD?

    Installing Windows 10 on an SSD can significantly improve the performance of your computer. An SSD, or solid-state drive, is a type of storage device that uses flash memory to store data. Unlike traditional hard disk drives, SSDs have no moving parts, which means they are faster, more durable, and generate less heat.

    When it comes to installing Windows 10 on an SSD, the process is relatively simple and straightforward. Depending on the hardware and software specifications of your computer, it can take anywhere from 20 minutes to an hour to install Windows 10 on an SSD. The speed of the installation process largely depends on the performance of your computer’s processor, the amount of RAM your computer has, and the speed of the SSD itself.

    Nevertheless, the benefits of installing Windows 10 on an SSD far outweigh the time it takes to install it. Your computer will be faster, more reliable, and capable of handling more demanding applications and tasks.

    Definition and Benefits of SSD

    SSD An SSD or Solid State Drive is a type of storage device that uses NAND flash memory to store data. Unlike traditional hard disk drives (HDDs), SSDs have no moving parts, making them faster, more reliable, and less likely to fail. They are becoming increasingly popular in the tech world due to their numerous benefits.

    One significant advantage of an SSD is its speed. They are known for their fast read and write speeds, enabling programs to open and load quickly. This speed boost can make a significant difference in the user’s productivity, especially when working with large files.

    Additionally, SSDs consume less power than HDDs, which can save energy and prolong battery life in devices like laptops. Overall, SSDs are a great investment for anyone looking to improve their computer’s performance, speed, and reliability.

    how long to install windows 10 ssd

    Factors Affecting Installation Time

    When it comes to installing Windows 10 on an SSD, there are a few factors that can affect the installation time. Some of the main factors include the speed of your SSD, the amount of data that needs to be transferred, and the performance of your computer’s processor. If you have a faster SSD, the installation process will be faster, and if you have a lot of data that needs to be transferred, it will take longer.

    Additionally, if your computer’s processor is older or slower, it may take longer to complete the installation process. However, there are also steps you can take to optimize your computer’s performance during the installation process, such as disabling unnecessary programs and closing any open windows or applications. Overall, the installation time of Windows 10 on an SSD can vary depending on various factors, but with optimized performance and a high-quality SSD, it can be completed quickly and efficiently.

    Type of SSD and Laptop Model

    When it comes to the installation time of an SSD in your laptop, there are a few factors that can affect it. One of the main factors is the type of SSD you have. A SATA SSD typically takes longer to install than an NVMe SSD due to the different installation methods required.

    Additionally, the laptop model can also impact the installation time. Some laptops may have easier access to the SSD slot, while others may require more disassembly of internal components, leading to a longer installation time. It’s essential to research your laptop’s specific model and the SSD you plan to install beforehand to get a better idea of how long the installation process will take.

    Taking these factors into consideration can help ensure a smoother and quicker SSD installation process.

    Amount of Data to Transfer

    When it comes to installing software or updating systems, one factor that plays a major role in determining the amount of time it will take is the amount of data that needs to be transferred. This can vary depending on the specific situation, but there are several key factors that can affect the installation time. One of the biggest factors is the size of the files being transferred.

    Larger files can take longer to transfer, especially if the internet connection or network is slower. Another factor is the complexity of the data being transferred. Files that are highly compressed or encrypted may take longer to transfer due to the need to process the data before it can be installed.

    Additionally, the number of files being transferred can also impact the installation time, particularly if there are many small files to transfer. Ultimately, the amount of data to transfer is an important consideration when determining installation time, and it’s important to take into account all of the factors that can impact this process for a smooth and efficient installation.

    Estimated Time Frame for Installation

    If you’re thinking about upgrading your computer’s storage to an SSD and wondering about the installation time, it’s likely to take around 30-45 minutes to install Windows 10 on your new SSD. However, it might take longer depending on your computer’s speed and additional factors such as the amount of data being transferred, the type of SSD being used, and the available resources on your computer. Before starting the installation process, ensure that your computer meets the necessary system requirements and that you have the necessary hardware and software.

    You may also consider backing up your data before installing Windows to avoid any potential data loss. Overall, the process of upgrading to Windows 10 and installing an SSD might take a bit of time, but the improved performance and storage capacity that you’ll get in return will be well worth the effort.

    Average Time for a Standard SSD Install

    When it comes to installing a standard SSD (solid-state drive), the estimated time frame can vary depending on a few factors. In general, the average time for a standard SSD install is around 30 minutes to an hour or so. However, this can depend on things like the size of the drive, the speed of your system, and how experienced you are with installing computer hardware.

    If you have experience with hardware installation and have all the necessary tools on hand, the process may only take you around 30 minutes. On the other hand, if you’re not as experienced and don’t have the tools required, it may take you closer to an hour or more. Overall, it’s important to take your time with the installation process and ensure that everything is done correctly to avoid any issues with your system down the line.

    So, whether you’re upgrading to an SSD or installing a new one for the first time, be sure to set aside enough time to complete the task.

    Fastest Possible Installation Time

    The estimated time frame for installation is a common concern for many people looking to install a new product or system in their home or business. When it comes to the fastest possible installation time, there are a few factors that can play a role in determining how quickly the installation can be completed. For starters, the complexity of the product or system and the size of the location where it is being installed will have an impact on the installation process.

    Additionally, the experience and skill level of the installer can also play a role in how quickly the installation can be completed. In general, it is best to work with a professional installer who has experience in the specific product or system you are installing and who can provide an estimated time frame for installation based on these factors. Ultimately, the goal is to ensure a quality installation that is completed quickly and efficiently, without sacrificing safety or performance.

    So, whether you are installing a new HVAC system, a security system, or any other type of product or system, be sure to work with an experienced and qualified installer who can provide an estimated time frame for installation that meets your needs.

    Longest Possible Installation Time

    If you’re planning on having a new installation for your home or business, one of the things you’ll want to know is how long it will take to complete. Theoretically, the length of time it takes to install something will depend on the size and complexity of the project. And depending on the job, some installations can take just a few hours, while others can take several days or even weeks.

    Some projects might require multiple stages involving skilled laborers, specialized equipment, and the careful coordination of different teams. For example, a complex HVAC system might require electricians, plumbers, and sheet metal workers, all working together to ensure the system is installed. That being said, always ask your contractor what the estimated time frame for installation is, as it can vary widely depending on the scope of the project.

    Expert Advice For a Quick and Efficient Install

    People often wonder how long it takes to install Windows 10 on an SSD. Well, the answer is that it varies depending on your system’s hardware and software specifications. However, there are certain tips that you can follow to ensure a quick and efficient installation process.

    Firstly, check if your system is compatible with Windows Secondly, ensure that your SSD is properly connected to your system and configured to boot from it. Thirdly, create a bootable USB or DVD with the Windows 10 installation files.

    Lastly, backup all important files and data before beginning the installation process. In terms of time, a typical Windows 10 installation on an SSD can take anywhere from 20 to 30 minutes, depending on the speed of your SSD and the configuration of your system. However, this is only an estimate and it can sometimes take longer if there are any errors or issues during the installation process.

    Therefore, it is important to be patient and follow all the necessary steps carefully to ensure a successful installation. Overall, installing Windows 10 on an SSD can greatly improve the performance of your system and make it run much faster. By following these expert tips, you can easily install Windows 10 on your SSD without any hassle and enjoy all the benefits that come with it.

    Preparing for Install

    If you’re getting ready to install new equipment or technology, taking some time to prepare beforehand can make a big difference in the efficiency of the process. Before you even start, take a moment to ensure that you have all the necessary parts and tools, and that everything is in good working order. It’s also important to carefully read any instructions or guidelines that come with your equipment, and to familiarize yourself with any potential challenges you may face during installation.

    A little bit of planning can go a long way in making your install go smoothly! Remember, it’s always better to take things slow and methodical, rather than rush through the process and potentially cause more problems. With careful preparation and attention to detail, you’ll be up and running in no time – without any headaches!

    Avoiding Common Mistakes

    Installing any new system or appliance in your home can be a daunting task, but with a few expert tips, you can make the process quick and efficient. One common mistake that people make when installing new equipment is not reading the instructions thoroughly, which can lead to costly mistakes and delays. It’s also important to ensure that you have all the necessary tools and equipment before beginning the installation.

    Another common mistake is not properly preparing the installation location and surfaces. Make sure the area is clean, dry, and level to avoid any issues down the line. Finally, be sure to test the system before declaring it complete.

    This can help identify any issues before they become bigger problems. By taking a little extra time to avoid these common mistakes, you can quickly and efficiently install your new equipment, saving you time and money in the long run.

    Additional Resources for Windows 10 SSD Installation

    When it comes to installing Windows 10 on an SSD, the process can be relatively quick and painless. In fact, it can take as little as 20 minutes to complete, assuming that you have all of the necessary hardware and software on hand. Of course, the time it takes to complete this process can vary depending on a variety of factors, such as the speed of your computer and the size of the SSD.

    If you’re new to SSD installation or simply want to ensure that you’re doing everything correctly, there are plenty of resources available online to help guide you through the process. From step-by-step tutorials to detailed videos, you should have no trouble finding the information you need to get the job done right. With a little patience and a bit of know-how, you’ll be up and running on your new SSD in no time at all.

    Conclusion

    Installing Windows 10 on an SSD is like getting a full panel of judges to critique a dance performance – it’s all about timing. With the right tools and a bit of patience, the installation process itself can take as little as 30 minutes, but don’t forget about the time it takes to backup your data and decide on the best SSD for your needs. So, if you want to upgrade to an SSD and enjoy a smooth and speedy performance, carving out enough time to make the process seamless and stress-free will be your key to success!”

    FAQs

    What is the average time it takes to install Windows 10 on an SSD?
    The installation process usually takes around 30 minutes to 1 hour, depending on the specifications of your computer.

    Do I need to prepare anything before installing Windows 10 on an SSD?
    Yes, before installing, you will need to create a bootable USB drive with the Windows 10 installation files and backup all important data on your old hard drive.

    Can I install Windows 10 on an SSD without losing any data?
    Unfortunately, you cannot directly install Windows 10 on an SSD without losing data. You will need to backup your data on an external drive before installing the new operating system.

    Will installing Windows 10 on an SSD improve my computer’s performance?
    Yes, installing Windows 10 on an SSD can significantly improve your computer’s performance as it has faster read and write speeds compared to traditional hard drives.

  • Boost Your PS4 Performance: A Step-by-Step Guide on How to Flash an SSD

    Boost Your PS4 Performance: A Step-by-Step Guide on How to Flash an SSD

    If you’re an avid PS4 gamer looking for a way to boost your system’s loading speed and overall performance, flashing your SSD may be just what you need. Flashing SSDs is a technical process that can appear daunting at first, but with the right tools and guidance, it can be done easily, quickly, and without any major complications. But why flash your SSD in the first place? The benefits of an upgraded SSD include faster loading times, reduced lag, and smoother overall gameplay.

    Additionally, SSDs have no moving parts, so they are less prone to damage and failure than traditional hard drives that have spinning disks. Flashing an SSD is essentially the process of updating its firmware to improve its performance. In order to do so, you will need a computer, a compatible SSD, and a USB drive.

    You will also need to format the USB drive to the correct file system, download the necessary firmware update, and follow a simple set of instructions. Overall, flashing your SSD can be a relatively straightforward procedure that can significantly enhance your PS4 gaming experience. So why not give it a try and see for yourself how much of a difference it can make?

    Preparation

    If you’re considering upgrading your PlayStation 4’s storage capacity, flashing an SSD is a great option that will have your system running much faster and smoother. The first step is to make sure you have a compatible SSD. Check your PlayStation’s user manual or consult with the manufacturer to ensure you choose the right SSD that will work with your console.

    Next, back up all of your important data and files. It’s crucial that you do this to ensure that you don’t lose any important information during the installation process. You can back up your data using an external hard drive or to the cloud.

    Once you’ve backed up your data, you’ll need to obtain the necessary tools, which typically includes a USB drive with the system software, a Phillips head screwdriver, and a SATA to USB adapter. It’s essential that you follow the instructions provided in your SSD’s user manual carefully. Once the SSD is installed, restore your saved data and files and enjoy the speedy upgrade to your system’s performance.

    With a properly flashed SSD, your PlayStation 4 will be able to load games faster, and you’ll have more space to download and save games and media.

    Check PS4 compatibility with SSD

    If you’re considering upgrading your PS4 with a solid-state drive (SSD), it’s important to make sure that the SSD you choose is compatible with your console. Before making any purchases, there are a few preparatory steps you will need to take in order to ensure a seamless installation process. Firstly, it’s vital to do your research and make sure the SSD you’re interested in is compatible with the PS

    Compatibility issues can cause performance problems or even damage your hardware. Secondly, you will need to back up all your data, as installing a new hard drive will erase all current data on your PS Ensure that you have adequate storage space available on your backup device.

    Finally, make sure you have all the necessary tools, including a screwdriver, to safely remove the old hard drive and install the new SSD. Taking the time to prepare and research before upgrading your PS4 with an SSD will save you time, money, and frustration in the long run.

    how do i flash a ssd to use in ps4

    Backup game data and saves

    Are you tired of losing your game progress and saves? Don’t despair, it’s easy to back up your game data and keep it safe. Before you start, make sure you have a reliable storage device, such as an external hard drive or a cloud storage service. Once you have your storage solution, navigate to the game’s save location folder and copy it to your backup device.

    Some games automatically save to a cloud or server, which makes the process a lot easier. However, for those that don’t, it’s essential to remember to regularly back up your game data to avoid losing hours of progress. By doing this simple task, you’ll have peace of mind knowing that your game progress and saves are safe, and you can pick up from where you left off anytime.

    Gather necessary tools

    When it comes to completing any task, preparation is key. Gathering all the necessary tools beforehand can save you a lot of time and hassle. This is especially important when beginning a new project.

    Before starting, take the time to research what tools you’ll need and make sure you have everything readily available. It can be frustrating to start working only to realize you’re missing a tool you need. By having everything on hand, you’ll be able to work uninterrupted and efficiently.

    The keyword “preparation” is crucial to this process. By being prepared, you’re setting yourself up for success and ensuring that you’re able to complete the task at hand without any major disruptions. Don’t underestimate the importance of preparation – it can make a world of difference in the outcome of your project.

    Formatting and Partitioning

    If you’re looking to upgrade your PS4’s storage by swapping out the old hard drive for a solid-state drive (SSD), you’ll need to format and partition the new drive before it can be used. First, you’ll want to back up any important data from the old hard drive before removing it from the PS Then, insert the new SSD into the PS4 and start the console in Safe Mode by holding down the power button for seven seconds.

    From there, you can select the “Initialize PS4” option and follow the prompts to format and partition the SSD. Once the process is complete, you can reinstall games and apps onto the new drive. It’s important to note that not all SSDs are compatible with the PS4, so be sure to do your research before purchasing one.

    Additionally, while an SSD can improve loading times and overall performance, it won’t improve the graphics or frame rate of your games.

    Format SSD to exFAT

    If you’re looking to format your SSD to exFAT, there are a few things you should consider first. Firstly, formatting your SSD will erase all data on the drive, so it’s important to back up any important files before proceeding. Once you’ve backed up your files, you can begin the process of formatting and partitioning your SSD.

    To format your SSD to exFAT, you’ll need to use a formatting tool that supports exFAT. This can typically be found in your operating system’s disk utility tool. Once you’ve opened the tool, locate your SSD and select the option to format it.

    From here, you can select exFAT as the file system format and customize the partitioning settings to suit your needs. It’s important to note that exFAT is an ideal file system format for SSDs due to its ability to handle large file sizes and be read and written on both Windows and Mac operating systems. However, if you plan on using your SSD primarily on a Windows system, it may be more beneficial to format it to NTFS instead.

    In summary, formatting your SSD to exFAT requires careful consideration and backup of important files before proceeding. However, once the process is complete, you can enjoy the benefits of a file system format that is suitable for both Windows and Mac operating systems.

    Partition SSD into two drives

    When you purchase a new SSD, it often comes unpartitioned and unformatted. You will need to partition and format it to start using it. Before doing so, make sure you have backed up any important files on your computer as the process will erase all data on the SSD.

    When partitioning your SSD, you’ll need to decide on the number of partitions to create. We recommend partitioning the SSD into two drives; one partition for your operating system and applications and the other partition for your personal files. By partitioning the SSD, you’ll have better control over your data, as well as improved performance.

    Additionally, separate partitions can help reduce data fragmentation and increase the speed of file transfers. Overall, partitioning your SSD is a crucial step in setting up your computer for optimal use.

    Installation

    If you are wondering how to flash an SSD to use in PS4, it is a fairly simple process. First, make sure you have backed up your important data, as the process will erase everything on the SSD. Then, obtain a USB flash drive with at least 1GB of free space.

    Download the latest PS4 system software from the official PlayStation website and save it onto the flash drive in a folder labeled “PS4”. Turn off your PS4 and unplug all cables. Remove the hard drive cover and pull out the hard drive.

    Replace it with the SSD, screwing it into place. Plug in the USB flash drive and boot up the PS4 in safe mode by holding down the power button for seven seconds. Choose “Initialize PS4 (Reinstall System Software)” and follow the on-screen instructions, selecting the option to install the system software from the USB drive.

    When the installation is complete, your PS4 should be running on the newly installed SSD.

    Remove old PS4 hard drive

    If you’re looking to upgrade your PS4’s hard drive, you’ll first need to remove the old one. This process can seem intimidating, but it’s actually quite straightforward. To start, power down your PS4 and unplug all cables.

    On the back of the console, you’ll find a small plastic panel covering the hard drive. Using a screwdriver, gently pry off this panel and set it aside. Next, locate the screw that’s holding the hard drive in place.

    This screw is typically located towards the center of the console, near the back. Remove this screw, and then slide the hard drive out of its compartment. Be careful not to yank it out or handle it too roughly, as delicate components and cables may be attached.

    With the old hard drive removed, you’re ready to install your new one and experience improved performance and storage capacity.

    Insert SSD into PS4

    Installing an SSD into your PS4 can greatly improve your gaming experience. However, it is essential to follow the proper steps to ensure a successful installation. First, make sure that the new SSD is compatible with your PS

    Once you have confirmed compatibility, turn off your PS4 and unplug all cables from the console. Next, locate the hard drive bay cover on the left side of your PS Use a Phillips-head screwdriver to remove the screw that secures the hard drive bay cover.

    Slide the cover off to reveal the hard drive assembly. Use your fingers or a flathead screwdriver to slide the hard drive caddy out of the assembly. Remove the four screws securing the hard drive to the caddy and remove the hard drive from the caddy.

    Insert the new SSD into the caddy and replace the four screws. Slide the caddy back into the hard drive assembly and replace the hard drive bay cover. Plug all cables back into your PS4 and turn it on to ensure the new SSD is running correctly.

    Overall, installing an SSD into your PS4 is a relatively straightforward process, and with a bit of care, you can accomplish it with ease.

    Initialize PS4 with new SSD

    If you’re looking to upgrade your PS4’s storage capacity, installing a new SSD is a great option. The process can seem intimidating, but it’s actually quite simple. First, backup all your important data, as the installation process will wipe your existing hard drive clean.

    Next, gather all the necessary tools, including a Phillips-head screwdriver and an external hard drive enclosure. Once you’ve removed the console’s outer shell, carefully remove the old hard drive and install the new SSD in its place. Finally, reassemble the console, initialize the new SSD, and restore your saved data from your external hard drive.

    With a new, faster SSD, you’ll experience improved load times and smoother gameplay. So why wait? Upgrade your PS4’s storage capacity today.

    Conclusion

    In conclusion, flashing an SSD to use in your PS4 is like giving your gaming performance an adrenaline shot. It’s a shortcut to faster loading times, smoother gameplay and an overall more enjoyable experience. So if you’re ready to take your gaming to the next level, saddle up and prepare for an electrifying ride.

    Just don’t forget to back up your data beforehand, because once you’re on this SSD train, there’s no going back!”

    FAQs

    What is SSD?
    SSD stands for solid-state drive that is a type of data storage device that uses NAND-based flash memory to store data on an integrated circuit board.

    How does an SSD differ from an HDD?
    HDD stands for hard disk drive and it has mechanical moving parts such as spinning disks to read and write data whereas SSD has no moving parts and uses NAND-based flash memory to store data. SSDs are faster, quieter, and more durable as compared to HDDs.

    Can I use any SSD in PS4?
    No, you cannot use any SSD in PS4. You must use a SATA III (6gb/s) SSD for PS4 with a capacity of at least 250 GB and not more than 8TB.

    How do I flash my SSD for PS4?
    To flash your SSD, you need to download the latest PS4 system software from the official PlayStation website and install it on a USB flash drive. Then, remove the old hard drive from your PS4 and install the new SSD. Finally, connect the USB flash drive to your PS4 and follow the on-screen instructions to install the system software on your new SSD.

  • Effortlessly Upgrade to Lightning-Fast SSD: Move Your Boot Partition in a Few Simple Steps

    Are you struggling with slow boot-up times on your computer, or are you running out of space on your boot drive? One solution to both of these common problems is to move your boot partition to an SSD. By doing so, you can speed up your system’s boot time and free up space on your primary drive. But how do you do it? In this blog post, we’ll cover the steps you need to take to move your boot partition to an SSD, as well as the benefits and drawbacks of doing so.

    So, grab a cup of coffee, sit back, and let’s dive in!

    Backup and Preparation

    Moving your boot partition to an SSD can give your computer a significant speed boost. However, before you start the transfer, you should make sure you have a backup of all your important files and data. This ensures that if anything goes wrong during the transfer, you won’t lose any essential information.

    It’s also essential to prepare your SSD by formatting it and checking for any bad sectors. After preparing your SSD and backing up your data, you can use software like Clonezilla to clone your boot partition to the SSD. Once the cloning process is complete, you’ll need to set the SSD as the primary boot drive in your BIOS and then restart your computer.

    Your computer should now start up from the SSD, and you’ll notice a significant improvement in boot up times and overall performance. By following these steps and taking the necessary precautions, you can easily move your boot partition to an SSD and give your computer a much-needed speed boost.

    Create System Image Backup

    Creating a system image backup is an essential step in ensuring the safety and security of your computer. By backing up all your system files, settings, and software programs, you can easily restore your computer to its previous state in case of a hardware failure, system crash, or malware attack. To create a system image backup, you can use built-in Windows Backup and Restore feature, third-party backup software, or cloud-based backup services.

    Before creating a system image backup, make sure you have enough storage space to store the backup files and disconnect all external devices from your computer. Once you have created a system image backup, it is crucial to regularly update and test the backups to ensure they are free from errors and can be easily restored in case of an emergency. Remember, creating a system image backup is a prudent step that can save you time, money, and headaches if something goes wrong with your computer.

    how do i move my boot partition to ssd

    Make Sure SSD is Compatible and Has Enough Space

    When upgrading to an SSD, it’s essential to make sure that it’s compatible with your computer and has enough space to store all of your important files. Before getting started, it’s a good idea to backup all of your data to an external hard drive or cloud storage service. This way, you can avoid losing any important files during the installation process.

    Next, you should check the compatibility of your computer’s motherboard to ensure that it’s able to support an SSD. You can do this by looking up the specifications of your computer online or consulting with a professional. Finally, make sure that the SSD you choose has enough space to accommodate all of your files and programs.

    SSDs come in different sizes, so it’s important to choose one that meets your needs. Taking these steps will help you ensure a successful and stress-free upgrade to an SSD that will significantly improve the overall performance of your computer.

    Creating Bootable USB

    If you’re looking to move your boot partition to an SSD, creating a bootable USB is essential. First, you’ll need to connect your SSD to your computer and ensure it’s recognized by your system. Then, you’ll want to download a free cloning software, like Clonezilla or EaseUS Todo Backup.

    Once you have this software, you can use it to clone your boot partition to the SSD. However, you’ll need to create a bootable USB to ensure that your computer can start up from the SSD. To do this, you’ll need to download a free tool called Rufus.

    Rufus will take an ISO file and create a bootable USB drive that you can use to start up your system. Once you’ve successfully created your bootable USB, you’ll need to change your boot order in your computer’s BIOS to ensure that your system boots from the SSD. Now you’re all set to move your boot partition to the SSD and enjoy faster boot times and overall system performance.

    Download and Install Windows Installation Media Creation Tool

    If you’re thinking about creating a bootable USB for your Windows operating system, you’ll need the Windows Installation Media Creation Tool. This tool is easy to download and install, and it’s the first step in creating your bootable USB. Once you have the tool downloaded and installed on your computer, you’ll need to select the language, edition, and architecture that you want to use.

    After that, you’ll be able to choose the USB drive you want to use and start the installation process. Creating a bootable USB can be a valuable tool if you ever need to reinstall your operating system. It’s always better to take these steps beforehand to ensure your system is up and running in case of emergency.

    With the Windows Installation Media Creation Tool, you’ll be able to create a bootable USB in no time.

    Create USB Drive with Installation Media using the Tool

    Creating a bootable USB drive with installation media is essential if you want to install a new operating system or reinstall an existing one on your computer. Thankfully, it is very easy to create a bootable USB drive using a dedicated tool. All you need is a blank USB flash drive and the installation media downloaded on your computer.

    The process is straightforward and involves launching the tool, selecting the appropriate options, selecting the USB drive, and initiating the creation process. Once completed, you can use the bootable USB drive to start the installation process on your computer. Whether you’re a beginner or an experienced user, creating a bootable USB drive using a tool is a quick and convenient way to ensure that you can install your desired operating system whenever you need to.

    With this method, you can enjoy a hassle-free installation process and get your computer up and running in no time. So, get started with your USB drive creation process today and enjoy a smooth computing experience.

    Migrating Boot Partition to SSD

    If you’re looking to get the most out of your SSD by moving your boot partition, there are a few steps you need to take. Firstly, you’ll need to clone your current boot partition using a cloning software like EaseUS Todo Backup or Macrium Reflect. Once you’ve got a copy of your boot partition, you’ll need to copy it over to your SSD.

    This can be done using the same cloning software. Next, you’ll need to configure your BIOS to boot from the SSD instead of your old boot partition. This can usually be done by accessing your BIOS settings during startup and changing the boot order.

    Then, once you’ve successfully booted into your new SSD boot partition, you can delete the old boot partition from your old hard drive. This will free up some space and prevent any confusion in the future. By following these steps, you should be able to migrate your boot partition to your SSD and enjoy faster boot times and overall system performance.

    Connect SSD to Computer

    Connecting an SSD to your computer can be an excellent way to increase its speed and performance. One of the key benefits of an SSD is that it can significantly reduce boot times. However, once you’ve connected your SSD to your computer, you’ll need to transfer your boot partition to the new drive.

    This can be done using a disk cloning tool such as Clonezilla. Before you start, make sure that you have enough space on the SSD to accommodate the boot partition. Once the cloning process is complete, you can then set the SSD as the primary boot device in your BIOS settings.

    Overall, by migrating your boot partition to an SSD, you can significantly improve your computer’s performance, making it feel like a brand new machine.

    Boot from USB Drive and Install Windows on SSD

    If you’ve decided to upgrade your computer’s hard drive to a solid-state drive (SSD), it’s important to migrate your boot partition to ensure you can boot from the new drive. The easiest way to do this is by creating a bootable USB drive with the Windows installation files, which will allow you to install Windows on the SSD and migrate your boot partition at the same time. Before beginning the process, make sure to back up any important files and create a recovery drive in case anything goes wrong.

    Once you’ve created the bootable USB drive, insert it into your computer and follow the prompts to install Windows on the SSD. During the installation process, you’ll have the option to migrate your existing boot partition to the new drive. This may take some time, but once it’s done, you can remove the USB drive and set the SSD as the primary boot device in your BIOS.

    With your boot partition successfully migrated to the SSD, you can enjoy faster startup times and improved overall performance.

    Copy Boot Partition from Old Drive to SSD

    If you’re upgrading to an SSD from an older hard drive, you’ll need to migrate your boot partition to ensure your system boots properly. To do this, you can use a free Windows tool called Disk Management. Simply select your old hard drive and shrink the volume of the partition containing your operating system to fit onto your new SSD.

    You can then copy and paste the partition onto the SSD using the “copy” option in Disk Management. Once the process is complete, you can set your new SSD as your boot drive in the system BIOS. This will ensure that your system boots from the new drive, and you’ll enjoy faster boot times and overall system performance.

    With this process, you won’t lose any of your files or programs, so it’s a simple and effective way to upgrade your system.

    Set SSD as the Primary Boot Device

    Migrating your boot partition to an SSD can be a game-changer in terms of your computer’s speed and performance. To set SSD as the primary boot device, you’ll first need to make sure it’s properly installed and recognized by your computer. Once that’s done, you’ll need to access your computer’s BIOS settings and change the boot order to prioritize the SSD.

    This means that when you turn on your computer, it will look to the SSD first for the operating system and other essential files. This can significantly reduce boot times and make your computer run more smoothly overall. Don’t underestimate the difference it can make – switching from a traditional hard drive to an SSD can be like upgrading from a bike to a sports car.

    Whether you’re a gamer, content creator, or just someone who wants their computer to run faster, switching to an SSD is definitely worth considering.

    Testing and Verifying

    If you’re looking to move your boot partition to an SSD, there are a few steps you’ll need to take to ensure everything goes smoothly. First, you’ll want to make sure you have a backup of all your important files, just in case something goes wrong. Next, you’ll need to clone your existing boot partition onto the SSD using software like EaseUS Todo Backup or Clonezilla.

    Once your boot partition is cloned onto the SSD, you’ll then need to make sure your BIOS is set to prioritize booting from the SSD. Finally, you’ll want to test and verify that everything is working properly by booting up your system and making sure all your files and applications are accessible on the new SSD. It’s always a good idea to thoroughly test and verify your system after making any major changes to ensure you don’t run into any unexpected issues.

    With these steps in mind, you should be able to successfully move your boot partition to an SSD and enjoy faster boot times and improved system performance.

    Restart Computer and Confirm Boot from SSD

    Once you’ve installed your SSD and cloned your operating system onto it, it’s time to restart your computer and make sure everything is running smoothly. During the restart process, make sure to enter your computer’s BIOS settings to confirm that it’s booting from the SSD instead of the old hard drive. This is an important step because if your computer still boots from the old hard drive, you won’t experience the improved performance that comes with using an SSD.

    Double-checking your boot order can be a bit confusing at first, but it’s usually done by pressing a key (such as F2 or Delete) during startup to enter the BIOS menu. From there, you’ll need to navigate to the “Boot” tab and look for an option that says “Boot Order,” “Boot Options,” or something similar. Once you find it, select your SSD as the primary boot device and move it to the top of the list.

    Restart your computer again and wait for it to boot up from the SSD. If everything went smoothly, you should notice a significant improvement in startup times, application load times, and overall system performance. Congratulations, you’ve successfully installed and confirmed the use of your new SSD!

    Run Disk Management to Verify Boot Partition on SSD

    If you recently installed a new SSD for your computer, it’s important to verify that the boot partition is properly set up and ready to go. One way to do this is to use the Disk Management tool on a Windows computer – simply search for “Disk Management” in the Start menu. Once you’re in the tool, look for the drive that corresponds to your SSD and make sure the partition is marked as “System” and “Active.

    ” This indicates that it’s ready to boot and should be the primary drive for your operating system. If you don’t see these markers, you may need to adjust your partition settings or reinstall your OS. Double-checking your boot partition is an important step in ensuring that your new SSD is operating at its full potential and providing you with the fast, reliable performance you need.

    Conclusion

    Moving your boot partition to an SSD is like giving your computer a turbo boost. With faster read and write speeds, your computer will be running at lightning-fast speeds, making your computing experience smoother and more efficient. So why stick with sluggish boot times when you can switch to an SSD and make your computer run like a well-oiled machine?”

    FAQs

    What is a boot partition?
    A boot partition is a section of a hard drive that contains the operating system files necessary for a computer to start up.

    Why would I want to move my boot partition to an SSD?
    Moving your boot partition to an SSD can significantly improve your computer’s startup time and overall performance.

    How do I know if my computer already has an SSD installed?
    You can check if your computer has an SSD by going into the system information or device manager and looking for the SSD under the storage devices list.

    Can I move my boot partition to an external SSD?
    Yes, you can move your boot partition to an external SSD. However, it would require you to modify your computer’s boot sequence to boot from the external SSD first.

  • Unlock the Power of Your Computer: The Ultimate Guide to Using HDD and SSD Efficiently

    If you’re looking to upgrade your computer’s storage capabilities, you may have heard the terms “HDD” and “SSD” being thrown around. But what do they mean, and which one is best for your needs? In this blog post, we’ll break down the differences between HDD and SSD storage, and help you decide which one is right for your unique situation. At their core, HDD and SSD are both types of data storage devices for computers.

    However, they differ in their underlying technology and the way they store and access data. HDD, or hard disk drive, uses spinning disks and read/write heads to store and retrieve data. SSD, or solid state drive, uses flash memory to do the same.

    While HDDs are generally cheaper and offer larger storage capacity, SSDs tend to be faster and more durable. That being said, the best choice for you will ultimately depend on your specific needs and budget. Are you a gamer looking for lightning-fast load times? An SSD might be the way to go.

    Do you need to store large amounts of documents or media files? An HDD could be the more cost-effective choice. By weighing the pros and cons of each option, you can make an informed decision and enjoy optimal performance from your computer storage.

    Understanding the Basics

    If you’re new to computers, you might be confused about the difference between HDD and SSD and how to use them. Let’s start with the basics. HDD stands for “hard disk drive,” which is a traditional storage system that has been around for years.

    It works by using a spinning disk to read and write data. SSD, on the other hand, stands for “solid-state drive” and is a newer type of storage system that uses flash memory to store data. SSDs are faster than HDDs, which means that they can access and save data much more quickly.

    In terms of how to use them, it’s important to understand that the operating system and frequently-used programs should be installed on the SSD for faster performance, while less frequently-used files and data can be stored on the HDD for cost-effective storage. By making these decisions, you can ensure that your computer runs as efficiently as possible.

    What is HDD and SSD?

    HDD and SSD are types of storage devices commonly found in computers and other electronic devices. HDD stands for hard disk drive, whereas SSD stands for solid-state drive. Both of these devices perform the same function, which is to store data, but they do so in different ways.

    HDDs are made up of a mechanical arm with a read/write head that moves around a spinning disk coated with a magnetic material to write data. In comparison, SSDs use flash memory chips that retain data even when power is off. The main difference between the two is speed.

    SSDs are much faster than HDDs due to their lack of moving components. This means that tasks such as booting up your computer or opening multiple programs can be completed much quicker with an SSD than an HDD. Another distinction between the two is durability.

    Since HDDs have moving parts, they are more susceptible to damage from drops, bumps, and other physical impacts. SSDs, on the other hand, have no moving parts, making them more resistant to physical damage. In conclusion, while HDDs and SSDs serve the same purpose, there are significant differences when it comes to their performance and durability.

    If you prioritize speed and reliability, an SSD may be the better option for you, but if you require a larger storage capacity, an HDD may be the way to go.

    amd how to use hdd and ssd

    Physical Differences

    Physical differences are natural variations that exist between individuals, and they can manifest in different ways, including height, weight, skin color, eye color, hair texture, and various other biological characteristics. Understanding these differences is crucial not only for personal growth but also for eliminating discrimination and promoting inclusivity. It’s important to acknowledge that these physical differences are not indicators of one’s intelligence, behavior, or abilities.

    For instance, just because someone is tall doesn’t mean that he’s strong, or that someone of a particular skin color is inferior to another. In fact, embracing these differences helps in appreciating the unique qualities of each individual and valuing diversity in our communities. When individuals learn to celebrate each other’s differences, it can lead to a stronger and more unified society where everyone feels valued and accepted.

    Choosing the Right Drive

    When it comes to choosing the right drive for your computer, there are two options to consider: HDD and SSD. AMD processors work well with both types of drives, but each has its own advantages and disadvantages. HDDs are the more traditional option and typically offer more storage space at a lower cost per gigabyte.

    They’re ideal for storing large files that don’t need to be accessed quickly, like movies or photos. SSDs are a newer technology and offer faster read and write speeds, making them ideal for running applications and operating systems. However, they tend to be more expensive and offer less storage space than HDDs.

    Ultimately, your choice will depend on your needs and budget. If you’re working with large files and need ample storage space, an HDD may be the better choice. On the other hand, if speed is a priority, an SSD may be worth the investment.

    Factors to Consider

    When it comes to choosing the right drive, there are a few factors to consider. First and foremost, consider the type of drive that is appropriate for your needs. If you need a drive for personal use, a solid-state drive (SSD) may be a good option, whereas if you need a drive for work or data center use, a hard disk drive (HDD) may be more appropriate.

    Another factor to consider is the storage capacity you need. If you have a lot of files to store, a larger capacity drive may be necessary. Additionally, think about the speed and performance you require.

    If you need fast read and write speeds, an SSD or a hybrid drive may be a good fit. Whatever your needs, be sure to do your research and choose the drive that best meets your requirements.

    HDD vs SSD: Pros and Cons

    When it comes to choosing between HDD and SSD drives for your computer, it can be a tough decision. HDD drives are known for their large storage capacity and affordability, while SSD drives are faster and more durable. However, the decision ultimately comes down to what you need the drive for.

    If you’re looking to store large amounts of data and don’t need it to load quickly, then an HDD drive may be the better option for you. On the other hand, if speed and durability are important to you, then an SSD is the way to go. Keep in mind that SSDs are more expensive and offer less storage capacity, but their performance is worth the investment if you need it.

    Ultimately, it’s important to weigh the pros and cons of each type of drive and choose the one that best suits your needs.

    Installing HDD and SSD

    If you’re an AMD user looking to install both an HDD and SSD, you’re in luck because the process is relatively simple. First, you’ll need to determine installation placement. Typically, the HDD is installed in the

    5-inch drive bay, while the SSD can be installed in the 5-inch drive bay or mounted directly to your case’s interior using screws. Once you’ve found the appropriate placement, you’ll need to connect the SATA and power cables to each drive.

    It’s important to keep in mind that the SATA cable should be connected to the motherboard’s SATA port, and the power cable should be connected to the power supply unit. Lastly, once your HDD and SSD have been physically installed, you’ll need to configure their settings in your computer’s BIOS. This is done by navigating to the boot menu and selecting the boot drive.

    By following these steps, you’ll be able to use both an HDD and SSD simultaneously, allowing for optimal storage and performance capabilities.

    Checking Compatibility

    When installing a new HDD or SSD, it’s essential to check compatibility before making a purchase. You don’t want to buy a drive that won’t work with your system, so take the time to research and confirm that the drive you want to install is compatible with your computer. Firstly, identify the type of drive that your system can support.

    Most computers can either support 5-inch or 5-inch hard drives, and SSDs usually come in a

    5-inch form factor. It’s also crucial to check the interface that your computer supports, which can be either SATA or NVMe. Once you’ve confirmed compatibility, it’s time to take into consideration other factors like the storage capacity you need and the speed you require.

    Investing in a drive that is compatible with your system will not only save you money but ensure you get the best performance out of your computer.

    Backup Your Data

    If you want to make sure that your data is secure, it’s important to backup your data regularly. One way to backup your data is to install an HDD or SSD into your computer. An HDD, or hard disk drive, has been the traditional storage device for computers for many years.

    It uses magnetic disks to store and retrieve data. However, solid-state drives or SSDs have become increasingly popular due to their faster read and write speeds, as well as their improved reliability. SSDs do not have moving parts, making them more durable than HDDs.

    When it comes to installing an HDD or SSD, the process may differ slightly depending on your computer’s hardware. In general, it involves opening up your computer case, locating the drive bays, and securing the drive with screws and cables. If you’re not comfortable doing this yourself, you may want to consider having a professional do it for you.

    Once you have installed your HDD or SSD, you can use backup software to automatically backup your data to the drive. Windows and macOS both offer their own backup software, but there are also third-party options available as well. You can choose to backup your data on a schedule or manually.

    It’s also a good idea to keep multiple copies of your backup in case one of them becomes corrupted or damaged. Remember that backup your data regularly is important to avoid data loss. Installing an HDD or SSD can help you easily back up your data and secure it.

    By taking the time to backup your data, you can rest assured that your files, photos, and important documents are safe and secure.

    Maximizing Performance

    If you’re looking to maximize the performance of your AMD system, it’s important to know how to properly use your HDD and SSD. Hard disk drives (HDDs) are great for storing large files, such as media, games, and documents, while solid-state drives (SSDs) are perfect for storing your operating system and frequently used programs. By utilizing both types of drives, you can optimize your system’s performance by reducing the amount of time it takes to access files.

    To maximize this effect, you can install your operating system and frequently used programs on the SSD, and store large files on the HDD. This will ensure that your system boots quickly and programs load fast, while still having plenty of storage space for large files. With these simple optimizations, you can maximize the performance of your AMD system and enjoy a smoother and more efficient computing experience.

    Best Practices for HDD and SSD

    One key aspect to maximizing the performance of your HDD or SSD is to minimize the amount of unnecessary data that is stored on it. This means regularly deleting old files, uninstalling unused programs, and freeing up space whenever possible. Additionally, it’s important to keep your HDD or SSD clean and free of dust, as this can impact its ability to run efficiently.

    Another best practice is to avoid defragmenting your SSD, as this can actually cause damage over time. Instead, focus on optimizing your storage by utilizing a solid-state drive for your operating system and frequently used programs, while using a traditional hard drive for long-term storage. By following these tips and staying on top of regular maintenance, you can keep your storage running smoothly and efficiently for years to come.

    Tips for Storage Management

    When it comes to storage management, maximizing performance should be a top priority. One important tip is to prioritize frequently accessed data and store it on faster storage media, such as solid-state drives (SSDs) or high-performance hard drives. This can significantly speed up data access times and improve overall system performance.

    Additionally, utilizing storage tiering can also improve performance by automatically moving hot data to faster storage and less frequently accessed data to slower, less expensive storage. It’s also important to regularly monitor and manage storage capacity to prevent performance degradation from storage becoming full. By implementing these tips and best practices for storage management, you can ensure maximum performance and optimize your system’s efficiency.

    Conclusion

    In conclusion, the difference between HDD and SSD is like the tortoise and the hare. HDD might have more storage capacity like the slow and steady tortoise, but SSD is lightning fast like the quick and nimble hare. When it comes to using these forms of storage, it’s all about finding the right balance between speed and capacity.

    So, go ahead and store those precious photos and documents on your trusty HDD, but for tasks that require speedy performance, opt for the agility of an SSD. Happy computing!”

    FAQs

    What is the difference between using an HDD and an SSD in a computer?
    The main difference is that an HDD uses spinning disks to access and store data, while an SSD uses flash memory. This results in faster read and write speeds for an SSD, but typically at a higher cost per GB.

    Can I use both an HDD and an SSD in the same computer?
    Yes, many computers are designed to allow for both types of storage. You can use the SSD as your primary drive for faster boot times and program launches, and use the HDD for larger files such as movies, music, and photos.

    How do I transfer data from my old HDD to a new SSD?
    You can use software such as Macrium Reflect or Acronis True Image to clone your old HDD onto your new SSD. The software will copy your entire hard drive, including the operating system and all files and programs, to the new SSD.

    Are there any special considerations for installing an SSD in a laptop?
    It is important to check that your laptop has a compatible interface for the SSD, such as SATA or NVMe. You may also need to update your BIOS to ensure your laptop can recognize the new drive. Additionally, some laptops may require special tools to access the storage compartment.

  • Clone Your 1TB SSD in No Time: Discover How Long It Really Takes!

    Have you ever run out of space on your computer and had to delete precious files just to make room for new ones? We’ve all been there. But what if we told you that there’s a simple solution to this problem? Cloning a 1TB SSD might just be the answer you’ve been looking for. If you’re not familiar with the term SSD, it stands for Solid State Drive, which is a type of storage device that uses flash memory to store data, rather than spinning disks like traditional hard drives.

    This means SSDs are much faster and more durable than traditional hard drives. Now, back to cloning a 1TB SSD. Essentially, this means copying all of the data from one SSD to another so that you have an exact replica of the original drive.

    This can be incredibly useful if you want to upgrade your computer’s storage without losing any of your existing data. Think of it like transferring your entire house from one location to another. You carefully pack up all of your belongings, load them onto a truck, and transport them to your new home.

    When you arrive, everything is exactly where it should be, ready to be unpacked and placed in its new location. Cloning a 1TB SSD is a similar process, but instead of moving physical objects, you’re moving digital files. So, why might you want to clone a 1TB SSD? Well, maybe you’ve outgrown your current SSD and need more storage space.

    Or, perhaps you’re afraid of losing important files and want to create a backup. Whatever your reason may be, cloning a 1TB SSD can save you time, money, and headaches in the long run. In the next few paragraphs, we’ll walk you through the steps of cloning a 1TB SSD, so you can feel confident in your ability to upgrade your computer’s storage.

    So, grab a cup of coffee, sit back, and get ready to learn something new.

    Introduction

    If you’re looking to clone a 1TB SSD, the time it takes depends on a few factors. First, the speed of both the source and destination drives can impact the time it takes. If you have a fast SSD for both, the process will likely be quicker.

    However, if you’re using a slower hard drive for one, it will take longer. Another thing to consider is the software you’re using to clone the drive. Some are faster and more efficient than others.

    Generally speaking, you can expect it to take anywhere from 30 minutes to several hours to clone a 1TB SSD. It’s always a good idea to back up important data before attempting any data transfer or cloning process.

    Importance of Cloning a SSD

    Cloning a SSD is becoming increasingly important as technology keeps advancing. Not only does cloning allow you to transfer data from one drive to another easily, but it also helps to prevent data loss in case the original drive fails. SSD drives have become a popular choice due to their speedy performance and long lifespan, and cloning them ensures you never lose your important files or programs.

    Using cloning software, you can quickly and easily copy all the data from your old drive onto the new one, making the entire process simple and seamless. Overall, cloning a SSD is an essential step in ensuring your data is protected and safe from the consequences of drive failure.

    how long to clone a 1tb ssd

    Factors Affecting Cloning Time

    Cloning time can vary greatly depending on a multitude of factors, including the type of cells being cloned, the method of cloning being used, and the quality of the starting material. In general, the more complex the cells being cloned, the longer it will take to create viable clones. Additionally, if the cloning method chosen requires a lot of preparation or specialized equipment, this can add to the overall time it takes to complete the cloning process.

    On the other hand, if the starting material is of high quality and has been well-preserved, it may be possible to shorten the cloning time. Ultimately, the most important factor in determining how long cloning will take is the expertise of the person carrying out the procedure. With experience and skill, it is possible to streamline the cloning process and achieve optimal results in less time.

    Cloning Time Estimation

    If you’re wondering how long it takes to clone a 1TB SSD, the answer isn’t straightforward. The process could take anywhere from a few hours to a whole day or more depending on various factors. For starters, the speed of your computer plays a significant role.

    If you’re using an older model, the process will take longer than if you were using a modern, high-speed system. The software you use to clone the drive also makes a difference. Some utilities are faster than others, and some offer features that could slow the process down.

    Data transfer speed is another critical factor. If you’re cloning between two external drives connected using USB 0, for example, it’ll take much longer than using USB

    0 or a Thunderbolt connection. However, it’s safe to say that on average, cloning a 1TB SSD takes around 2-4 hours, but it could be shorter or longer depending on the factors mentioned above.

    Calculation of Cloning Time

    Cloning Time Estimation Calculating cloning time can be a challenging aspect of genetic engineering. However, it is a crucial step towards ensuring that the cloning process is successful. The time it takes to complete cloning depends on various factors, including the type of cells being cloned, the method used, and the growth conditions.

    For instance, cloning using embryonic stem cells often takes longer than cloning using adult stem cells. Additionally, the method used, such as somatic nuclear transfer or cell fusion, can influence the time it takes for cloning to be completed. Growth conditions such as temperature, pH, and nutrient availability can also affect the cloning process.

    By considering these factors, researchers can estimate the time it takes for cloning to be completed and develop a workable timeline for their projects. Overall, cloning time estimation is an essential aspect of genetic engineering that requires meticulous planning and execution. With proper planning and consideration of the factors mentioned above, researchers can accurately estimate the time it takes to complete cloning, and avoid potential delays or obstacles along the way.

    Moreover, understanding cloning time can help in the development of new techniques and methods aimed at improving the efficiency and effectiveness of the cloning process. Ultimately, the successful completion of cloning projects relies on the precise estimation of cloning times, and this should be taken seriously by researchers in the field.

    Time Frame for Cloning a 1TB SSD

    When it comes to cloning a 1TB SSD, the time frame can vary depending on a few factors. Firstly, the speed of the SSD and the cloning software being used will play a role in the estimation. On average, it can take anywhere from 30 minutes to a few hours to clone a 1TB SSD.

    It is important to note that the process of cloning involves copying all the data from one SSD to another, including the operating system and any installed programs. So, if there is a large amount of data on the SSD, it may take longer to complete the cloning process. If you are in a rush and need the cloned SSD as quickly as possible, you can opt for a cloning software that supports disk-to-disk cloning rather than file-by-file cloning.

    This method can significantly reduce the time it takes to clone the SSD. Overall, the time frame for cloning a 1TB SSD can vary, but it is important to be patient and allow enough time for the process to complete to ensure a successful cloning operation.

    Tips for Faster Cloning

    When it comes to cloning a 1TB SSD, the time it takes can seem daunting. However, there are a few tips that can help speed up the process. Firstly, make sure to use software designed for SSD cloning, as this will potentially save hours of time.

    Additionally, disconnect any unnecessary peripherals and close any other programs on your computer to ensure the cloning process is given full priority. Another key tip is to use a high-speed docking station or enclosure that supports the SSD’s transfer speeds, as this can significantly cut down on cloning time. Finally, consider using an SSD with a built-in hardware cloning feature, as this can make the process even faster and more seamless.

    With these tips in mind, cloning a 1TB SSD doesn’t have to take forever, and you can enjoy the benefits of a cloned drive in no time.

    Choosing the Right Cloning Software

    When it comes to cloning software, choosing the right one can make all the difference in terms of speed and efficiency. It’s essential to take the time to research and compare different options before making a decision. One important factor to consider is the software’s ability to handle larger quantities of data.

    A more powerful program with better compression capabilities will be able to transfer data faster and with less strain on your system. Another key feature to look for is automation, which can save time and eliminate potential human errors during the cloning process. Don’t forget to read reviews and get recommendations from others in your field to ensure you’re selecting the best option for your specific needs.

    With the right cloning software in place, you can quickly and easily create clones of your system or data for backup and recovery purposes to protect against data loss or damage.

    Boosting Cloning Speed with Hardware

    Cloning is an essential process for computer users and administrators. As time-consuming as it may be, it’s crucial to ensure data is preserved during migration or upgrade processes correctly. One significant way to boost cloning speed is through hardware.

    Using an SSD (solid-state drive) to store the data during the cloning process is highly recommended. Not only is an SSD faster than an HDD (hard disk drive), but it also has no moving components, which makes it more durable and less prone to data loss or damage. Another helpful tip is to use a USB

    0 or Thunderbolt connection for the cloning process. These connections offer faster transfer speeds than USB 0, which can save hours during a cloning process.

    With the right hardware in place, it’s easier to achieve faster cloning speeds.

    Conclusion

    In conclusion, although the idea of cloning a 1TB SSD may seem daunting, the process is actually quite simple and can be completed relatively quickly depending on your equipment and software. However, like any good heist, success requires careful planning and execution. So, if you’re up for the challenge, grab your digital tools and get cloning – just remember, time is of the essence!”

    FAQs

    Can a 1TB SSD be cloned?
    Yes, a 1TB SSD can be cloned.

    How long does it take to clone a 1TB SSD?
    The time it takes to clone a 1TB SSD varies depending on the cloning software and the speed of the hard drive. It can take anywhere from a few hours to a full day.

    What is the best software for cloning a 1TB SSD?
    There are many software options for cloning a 1TB SSD, including Clonezilla, EaseUS Todo Backup, and Acronis True Image.

    Can a 1TB HDD be cloned to a 1TB SSD?
    Yes, a 1TB HDD can be cloned to a 1TB SSD using cloning software. The process is similar to cloning an SSD to SSD.

  • Upgrade Your PC with Ease: A Step-by-Step Guide on Moving Windows 7 to SSD Without Reinstalling

    Upgrading to an SSD can dramatically improve computer performance, but the prospect of moving all your data and reinstalling your operating system can be daunting. Fortunately, if you’re using Windows 7, there’s a relatively simple way to transfer your system to a new SSD without starting from scratch. In this blog post, we’ll walk you through the steps to move Windows 7 to an SSD without reinstalling, so you can enjoy the faster load times and improved performance of your new drive without the headache of a complete reinstall.

    Whether you’re a novice user or a seasoned tech expert, we’ve got you covered with easy-to-follow instructions and tips for optimizing your system after the transfer. So, let’s dive in!

    Check SSD Compatibility

    If you’re planning to upgrade your computer’s storage system, moving Windows 7 to SSD can be a significant improvement in terms of performance. However, before you proceed with the migration, it’s essential to check the SSD compatibility with your system. Some older computers might not support the latest SSDs, and you need to ensure that the device you choose is compatible with your computer’s motherboard, ports, and other hardware components.

    In addition, you should consider the available capacity and the type of SSD you need, whether it is a SATA or NVMe SSD. Once you’ve confirmed the compatibility, you can proceed with transferring Windows 7 to SSD. There are several methods you can use, but one of the easiest ways is to clone your existing hard drive to SSD using cloning software.

    This process helps to transfer all your data, files, programs, and operating system to the new SSD without having to reinstall Windows 7 and other applications manually.

    Make sure your SSD is compatible with your computer.

    When it comes to upgrading your computer’s storage with an SSD, compatibility is key. Not all SSDs are created equal, and it’s important to make sure that the one you choose is compatible with your computer. This means checking factors such as the interface, form factor, and capacity of the SSD and comparing them to your computer’s specifications.

    You don’t want to end up with an SSD that won’t fit in your computer’s drive bay or isn’t supported by your motherboard. Additionally, some SSDs may require specific drivers or firmware updates, so it’s important to research and confirm compatibility before making a purchase. By doing your due diligence and checking SSD compatibility, you’ll ensure a smooth and successful upgrade process without any unexpected hiccups.

    how do i move windows 7 to ssd without reinstalling

    Create a System Image

    If you’re looking to move your Windows 7 system to an SSD without having to reinstall everything, one option is to create a system image. This involves creating a backup of your entire system, including all installed software, files, and settings, and then restoring that backup onto your new SSD. To do this, you’ll need a large external hard drive or another location to store the backup.

    You can use the built-in Backup and Restore feature in Windows 7 to create the system image. Once you have the backup, you’ll need to install your new SSD and then restore the image onto it. This will transfer everything over to your new drive and allow you to boot up and use Windows 7 on your new SSD, without having to reinstall any software or drivers.

    Remember, it’s important to ensure your SSD has enough capacity to store everything from your original hard drive before attempting this method. By following these steps and creating a system image, you can easily move your Windows 7 system to an SSD without going through a time-consuming and complex reinstall process.

    Use built-in Windows utility to create a system image of your current installation.

    Creating a system image of your current Windows installation can save you a lot of headache in case of any system failures or unexpected crashes. Luckily, Windows has a built-in utility that allows you to easily create a system image. To start, go to the Control Panel and select “Backup and Restore (Windows 7)”.

    From there, click on “Create a system image” and choose where you want to save the backup. You can save it on an external hard drive, USB drive, or a network location. It’s important to note that the system image will include all of your operating system files, programs, and personal data, so it may take some time to create.

    Once the system image is created, you can use it to restore your computer to the exact state it was in when you created the backup. In case of any system failures, you can rest easy knowing that you have a way to recover your system and get it back up and running.

    Create a System Repair Disc

    Are you looking to move Windows 7 to an SSD without the hassle of reinstalling the operating system from scratch? One method you can try is creating a system repair disc. This disc allows you to access the recovery options for your Windows 7 installation and perform a system image restore to the new SSD drive. To create a system repair disc, insert a blank DVD or CD into your disc drive, then go to the Start menu and search for “system repair disc.

    ” Follow the prompts to create the disc and ensure it’s properly labeled and stored in a safe place. With the system repair disc, you can easily transfer your Windows 7 installation to an SSD drive without any data loss or major disruptions. Give it a try and see how easy it can be to upgrade to a faster, more reliable system.

    Create a repair disc in case anything goes wrong during the transfer process.

    If you’re planning to transfer important data from one device to another, it’s always a good idea to create a system repair disc in case anything goes awry during the transfer process. A system repair disc is essentially a bootable disc or USB drive that can help you troubleshoot system and hardware problems on your computer. Creating a repair disc is an easy, straightforward process that can save you a lot of time and frustration down the line.

    Simply navigate to the Control Panel on your device, select “Backup and Restore,” and then click on “Create a System Repair Disc.” Follow the prompts to burn the disc or save it to a USB drive, and you’ll be all set in case something goes wrong during your data transfer. This quick and easy step can provide peace of mind and ensure that you’re able to quickly fix any issues that may arise.

    Don’t forget to keep your repair disc in a safe place where you can easily access it if needed!

    Restore Image to SSD

    If you’re wondering how to move Windows 7 to an SSD without reinstalling, you’ll be relieved to know that it’s entirely doable. Essentially, you’ll need to create a disk image of your current Windows installation, then use that image to restore the operating system to your new SSD drive. The first step is to prepare your SSD by connecting it to your computer and formatting it.

    Then, use a disk cloning software such as Macrium Reflect or Clonezilla to create an image of your Windows installation. Next, use the same software to restore the image to your new SSD. This process is typically straightforward, but be sure to follow the software’s instructions carefully to avoid any mishaps or data loss.

    Once the process is complete, you can disconnect your old hard drive and boot your computer from the new SSD. With the right tools and a bit of patience, moving your Windows 7 installation to an SSD can be a breeze.

    Connect SSD to PC and use the system image to transfer the operating system.

    If you’ve recently upgraded to a solid-state drive (SSD) for your PC, you may want to transfer your operating system to the new drive. One way to do this is by restoring an image of your system to your SSD. To begin, connect your SSD to your PC and ensure it is recognized by the system.

    Next, locate the saved system image on your computer and follow the instructions to restore it to the SSD. This process may take some time, depending on the size of the image and the speed of your computer and SSD. However, once the transfer is complete, you can set the SSD as the primary boot drive in your BIOS settings, and your operating system should load from the new drive.

    By restoring an image to your SSD, you can ensure a seamless transition to your new drive and enjoy faster performance and improved reliability. Give it a try, and experience the benefits of an SSD for yourself!

    Set SSD as Boot Drive

    If you want to move Windows 7 to an SSD without reinstalling it, there are a few steps you can take to make the transfer as seamless as possible. First, you’ll need to clone your current drive to the SSD. This can be done with free software such as EaseUS Todo Backup or Macrium Reflect.

    Once you’ve cloned the drive, you’ll need to set the SSD as the boot drive. This can be done by accessing the BIOS settings and changing the boot order to give the SSD priority. Finally, you’ll want to make sure that your computer is optimizing the SSD for best performance.

    This can be achieved by enabling TRIM in Windows By following these steps, you can successfully move your Windows 7 operating system to an SSD without having to reinstall everything from scratch.

    Go to BIOS and set the SSD as the boot drive to load Windows from it.

    When setting up a new SSD in your computer to upgrade or improve system performance, it’s important to ensure the SSD is set as the boot drive. This means that your computer will load Windows from the SSD, resulting in faster boot times and overall system responsiveness. To do this, you’ll need to access your computer’s BIOS settings.

    Upon starting up your computer, you’ll need to access the BIOS by pressing a key such as F2 or Del, depending on your computer’s manufacturer. Once in the BIOS, navigate to the Boot menu and select the SSD as the first boot device. Save the changes and exit the BIOS.

    Your computer will now boot up from the SSD, allowing you to take full advantage of its improved performance and speed. Don’t forget to check your computer’s motherboard manual for specific instructions on accessing the BIOS, as the process may differ depending on the manufacturer. With this simple process, you can set your SSD as the boot drive and enjoy faster system performance.

    Optimize SSD Settings

    If you want to move Windows 7 to an SSD without reinstalling, there are a few things you can do to optimize your settings. First, you can enable TRIM, which helps the SSD perform more efficiently by freeing up space that is no longer in use. Additionally, you can disable Superfetch, which is a feature that preloads frequently used programs into memory.

    While this can improve performance on a traditional hard drive, it can actually cause performance issues on an SSD. You can also disable indexing, which speeds up file searches, but can also cause unnecessary wear and tear on an SSD. Finally, you should make sure that your SSD is properly aligned, which can improve performance and prevent issues with data corruption.

    By taking these steps, you can optimize your SSD settings and enjoy faster, more efficient performance without having to reinstall Windows 7 from scratch.

    Use Windows built-in utilities to optimize the SSD for best performance.

    Optimizing your SSD settings can help improve the overall performance and lifespan of your solid-state drive. Luckily, Windows has built-in utilities that can help with this. Firstly, make sure that your SSD is properly formatted with the correct file system.

    The optimal file system for SSDs is NTFS, which can be set during the formatting process. Next, enable TRIM, which allows your SSD to clear unused data blocks, improving write speeds and reducing wear on the drive. You can also disable defragmentation, as SSDs do not benefit from this like traditional hard drives.

    Another helpful setting to adjust is the power plan; using the high performance option can ensure that your SSD is running at maximum capacity. By optimizing these settings, you can get the most out of your SSD and extend its lifespan.

    Conclusion

    Moving Windows 7 to an SSD without reinstalling is like a game of Tetris: you need to carefully plan your moves and make sure everything fits into place, without losing any pieces along the way. But with a little patience and the right tools, you can slide your operating system onto a faster and more efficient drive, and enjoy the benefits of SSD speed without starting from scratch. So, get your blocks in order and start the relocation adventure!”

    FAQs

    Can I move Windows 7 to SSD without reinstalling?
    Yes, you can move Windows 7 to SSD without reinstalling using software like EaseUS Todo Backup, Clonezilla, or Macrium Reflect.

    Is it necessary to clone all the partitions to move Windows 7 to SSD?
    Yes, it is necessary to clone all the partitions to move Windows 7 to SSD. Cloning just the system partition may result in booting issues.

    Can I use a USB-to-SATA cable to clone Windows 7 to SSD?
    No, USB-to-SATA cable is not suitable for cloning Windows 7 to SSD as it may result in data corruption or clone failures. It is recommended to use a SATA-to-USB adapter or an external hard drive enclosure.

    What should I do if the cloned Windows 7 does not boot from the SSD?
    If the cloned Windows 7 does not boot from the SSD, try changing the boot order in the BIOS, disconnecting the old hard drive, or repairing the boot sector using the Windows 7 installation disc.

  • Unleashing the Power of Samsung T7 SSD on Windows 10: A Complete Guide

    If you’re in desperate need of a reliable external storage device that’s portable enough to carry around wherever you go, look no further than the Samsung T7 SSD. This sleek and compact solid-state drive boasts impressive performance and storage capacities up to 2TB, making it an ideal choice for handling large files, such as high-res photos, 4K videos, and even games. Plus, with its shock-resistant and durable design, you can be sure your data is safely stored even if you’re on the move.

    But once you have the Samsung T7 SSD, you might be left wondering how to make the most of it, especially if you’re using it with a Windows 10 PC. With that being said, in this blog post, we’ll guide you through the steps for using a Samsung T7 SSD on Windows 10, including how to set it up, format it, and optimize it for better performance. So, let’s dive in and make sure you’re getting the most out of your SSD.

    Connecting the SSD to Your Device

    If you’re wondering how to use Samsung T7 SSD on Windows 10, the good news is that it’s a straightforward process. First, connect the SSD to your device using the USB-C to USB-C or USB-C to USB-A cable provided. Next, wait for your computer to recognize the device.

    You should receive a notification that a new drive has been connected. If this doesn’t happen, try plugging the cable into a different USB port. Once your computer has recognized the SSD, you can begin using it as you would any other external drive.

    You can copy and paste files onto the device or use it as a backup for important data. With its fast read and write speeds, the Samsung T7 SSD is an excellent option for anyone looking to expand their storage options.

    Step-by-Step Guide

    Connecting an SSD to your device can seem daunting at first, but it is actually a straightforward process. First, you need to identify the location of the SSD on your device. This can vary depending on the device, so consult the owner’s manual or online resources if you’re unsure.

    Once you’ve located the SSD, you’ll need to connect it to your device using a data cable. Make sure the cable is firmly attached and secured into place. You will also need to connect a power cable to the SSD, which provides it with the necessary electricity to function properly.

    Once everything is connected, you can power on your device and make sure the SSD is recognized by your system. With that, you’ve successfully connected your SSD and are ready to start enjoying its benefits!

    how to use samsung t7 ssd on windows 10

    Connecting via USB-C or USB-A

    When it comes to connecting your SSD to your device, it’s important to know whether you’re using a USB-C or USB-A port. USB-C is the newer, more versatile and faster option, while USB-A is the traditional port found on older devices. To connect your SSD to a USB-C port, you’ll need a USB-C to USB-C cable, which should be included with your SSD.

    If your device only has a USB-A port, you’ll need a USB-A to USB-C adapter or cable. A good adapter is a small investment that will allow you to connect your SSD to older devices. Regardless of the connection type, always make sure to plug the cable in appropriately and securely.

    With a reliable connection, you can easily transfer files back and forth between your device and your SSD.

    Setting Up the SSD on Windows 10

    Setting up the Samsung T7 SSD on Windows 10 is a straightforward process that can significantly boost your computer’s performance. To begin, connect the SSD to your computer using the USB Type-C cable provided in the box. Once connected, Windows 10 should detect the SSD and automatically install the necessary drivers.

    If the drivers are not installed automatically, you can download them from Samsung’s website. Next, you’ll need to format the SSD using Disk Management. Open Run by pressing the Windows key + R, type “diskmgmt.

    msc” and press OK. Locate the new disk (should be labeled as “unallocated”) and right-click on it, then select “New Simple Volume” and follow the prompts to format and assign a drive letter to the SSD. Congratulations, you’ve successfully set up your Samsung T7 SSD on Windows 10 and can start enjoying the benefits of lightning-fast file transfers and improved system performance!

    Formatting the SSD

    Setting up an SSD on Windows 10 involves formatting the SSD before it can be used. This is a crucial step that ensures the SSD operates at optimum performance levels. The first step is to connect the SSD to your computer, either using a SATA cable or an external enclosure.

    Once connected, open up the Disk Management tool and locate the SSD. Right-click on the SSD and select the “New Simple Volume” option. Follow the prompts to format the SSD, choosing the file system and allocation unit size.

    The default settings are fine for most users, but you can adjust them to suit your needs. When formatting is complete, the SSD will be ready to use. With its fast read and write speeds, the SSD will significantly improve your computer’s performance.

    Plus, by setting up the SSD, you can move your operating system and programs to it, freeing up space on your primary hard drive. In summary, formatting the SSD is a quick and easy process that is essential for making the most of this storage device.

    Using the Samsung Portable SSD Software

    One of the first things you need to do when you get your Samsung Portable SSD is to set it up on Windows Luckily, doing so is a straightforward process when using the Samsung Portable SSD software. To begin the setup, make sure your SSD is properly connected to your computer’s USB port.

    Open the Samsung Portable SSD software, and you’ll see a dashboard with all the features and settings you can access. Click on the “Setup” tab, and then the “Software Update” button, which will check for any updates available for your SSD’s firmware and software. Once updated, you can use the software to customize your SSD’s settings, including the drive name, security settings, and automatic backup settings.

    The software also offers features such as password protection and automatic SSD locking, giving you peace of mind knowing your data is safe and secure. With the Samsung Portable SSD software set up, you are ready to make the most of your SSD’s features and enjoy its lightning-fast speeds to transfer and store your important files and data.

    Tips and Tricks for Optimal Performance

    Setting up the SSD on Windows 10 can be a game-changer for your computer’s performance. To start, make sure you have the latest version of Windows 10 installed. Then, connect your SSD to the computer and open the Disk Management utility.

    From there, you can assign a drive letter, create a new partition, and format the drive properly. To ensure your SSD is running at optimal speeds, you’ll also want to make sure you have the latest firmware updates installed for the drive. Keep in mind, you may need to adjust some settings in your computer’s BIOS to get the best performance out of your SSD.

    It may seem like a lot of work, but setting up your SSD correctly can make a significant difference in your computer’s speed and overall performance. So, take the time to do it right and enjoy a faster, more efficient computer experience!

    Using the Samsung T7 SSD on Windows 10

    If you’re a Windows 10 user, you may be wondering how to use the Samsung T7 SSD. It’s actually quite simple! First, plug the USB-C cable into your computer’s USB-C port. Then, connect the other end into the T7 SSD.

    Your computer should recognize the drive automatically, but if it doesn’t, you may need to update your drivers. Once the drive is recognized, you can transfer files to and from it just like any other storage device. The T7 offers lightning-fast transfer speeds, so you’ll be able to move even large files quickly and easily.

    Plus, its compact size makes it perfect for use on the go. Overall, the Samsung T7 SSD is a great choice for anyone looking to add some extra storage to their Windows 10 computer.

    Transferring and Managing Files

    If you’re looking for a fast and reliable way to transfer and manage files on your Windows 10 computer, the Samsung T7 SSD might just be the solution you’re looking for. This portable drive offers lightning-fast transfer speeds of up to 1050 MB/s, making it ideal for large file transfers and backups. Plus, with its compact and durable design, you can take it with you wherever you go without worrying about damage or data loss.

    Managing your files is also a breeze, thanks to the included Samsung Software that lets you password protect your data and keep it safe from prying eyes. Whether you’re a casual user or a professional, the Samsung T7 SSD is a great option for anyone looking to streamline their file management and storage needs. Give it a try and see for yourself how much easier it can make your digital life!

    Encrypting Your Data

    If you’re looking for a reliable and secure way to store your important data, consider using the Samsung T7 SSD on Windows This impressive device offers lightning-fast transfer speeds and comes with built-in security features that ensure your data remains safe from prying eyes. With 256-bit AES encryption, your files are protected by a password that only you know.

    Plus, you can choose to use a fingerprint or the included security software to further enhance the security of your data. Whether you’re a business professional or just looking for a way to keep your personal files safe, the Samsung T7 SSD is a great choice. So why not take the first step towards securing your data today?

    Conclusion

    In conclusion, using the Samsung T7 SSD on Windows 10 is a breeze. It’s as easy as plugging in the device, clicking on the drive letter, and watching your files transfer at lightning-fast speeds. With its durable design and impressive storage capacity, the Samsung T7 is the perfect solution for anyone looking to enhance their computer’s performance and increase their storage capabilities.

    So don’t be left in the digital Stone Age – upgrade to the Samsung T7 SSD today and experience the future of storage technology!”

    FAQs

    Can I use Samsung T7 SSD on Windows 10 without any additional software?
    Yes, you can use the Samsung T7 SSD on Windows 10 without any additional software. Your computer should automatically recognize the drive and its contents.

    How do I connect Samsung T7 SSD to my Windows 10 computer?
    You can connect Samsung T7 SSD to your Windows 10 computer using a USB 3.2 Gen 2 Type-C cable that comes with the drive. Plug one end of the cable into the drive and the other end into the USB-C port on your computer.

    How do I transfer files to and from Samsung T7 SSD on Windows 10?
    To transfer files to and from Samsung T7 SSD on Windows 10, simply drag and drop the files from the source location on your computer to the drive. You can also use a file transfer software like TeraCopy to speed up the process.

    Can I partition Samsung T7 SSD on Windows 10?
    Yes, you can partition Samsung T7 SSD on Windows 10 using the built-in Disk Management tool. Right-click on “This PC” on your desktop, select “Manage”, then go to “Disk Management”. Right-click on the Samsung T7 SSD, select “New Simple Volume”, and follow the wizard to partition the drive.

  • Step-by-Step Guide to Install Windows 11 on an External SSD Drive – Boost Your PC’s Speed and Storage

    Ready to upgrade to the latest version of Windows? With its sleek design and new features, Windows 11 has been eagerly awaited by many users. However, if you’re wondering how to install it on your device, don’t worry – we’ve got you covered. In this blog post, we will guide you through the process of installing Windows 11 step-by-step, so you can get up and running in no time.

    Whether you’re a seasoned pro or a complete novice, our simple instructions will make the installation process a breeze. From checking system requirements to downloading and installing Windows 11, we’ve got all the information you need right here. So, are you ready to take the plunge and upgrade to Windows 11? Let’s get started!

    Requirements

    Installing Windows 11 on an external SSD drive can be a great way to keep your system light and speedy. There are just a few requirements to make this happen. First, you’ll need an external SSD drive with enough storage space to hold Windows 1

    You’ll also need a computer that meets the minimum system requirements for running Windows 1 This includes a processor with at least 1 GHz clock speed and support for SSE2, 2 GB of RAM for the 64-bit version or 1 GB for the 32-bit version, and at least 64 GB of storage space. You’ll also need a Windows 11 installation file, which you can download from the Microsoft website.

    Once you have all this, it’s a matter of connecting your external SSD to your computer, booting from the installation media, and following the prompts to install Windows 11 on your external drive. It’s a relatively easy process, but be sure to follow the instructions carefully to avoid any issues. With Windows 11 installed on your external drive, you’ll be able to take your system with you wherever you go, without sacrificing performance or storage space.

    Check your PC’s compatibility with Windows 11

    If you’re planning to upgrade to Windows 11, the first thing you need to check is whether your PC meets the requirements. Microsoft has raised the bar with Windows 11, and not all computers will be compatible. So what are the minimum requirements? Your computer must have a 64-bit processor with at least two cores, 4GB of RAM, and 64GB of storage.

    Additionally, your PC must support DirectX 12 or later, have a display with HD resolution (720p), and a UEFI firmware with Secure Boot capability. If your computer is relatively new, there is a high chance that it will meet these requirements. However, older PCs may struggle to run Windows 11 smoothly.

    It’s also important to note that Windows 11 will come with stricter hardware restrictions for devices that want to utilize its advanced features. If your PC doesn’t meet the minimum requirements, it’s time to start shopping for a new one. Overall, checking your PC’s compatibility with Windows 11 now will save you from frustration down the road.

    how to install windows 11 on external ssd drive

    External drive with at least 16GB free space

    One of the essential requirements for numerous computer tasks, such as creating a backup or transferring files, is an external drive. A reliable and compatible external drive with at least 16GB free space is one of the most important things that you should consider. Whether you need it for personal or professional use, having an external drive that can handle large amounts of data is crucial.

    It may be tempting to choose a cheaper option with less space, but it’s important to keep in mind that it may not be sufficient for your needs. Investing in a high-quality external drive with a large storage capacity will not only ensure that you have enough space to store your files but also help you avoid headaches caused by insufficient storage space. So, if you’re in the market for an external drive, be sure to check the storage capacity to make sure it’s suitable for your needs.

    Creating a Windows Installation Media

    If you want to install Windows 11 on an external SSD drive, the first thing you need to do is create a Windows installation media. To do this, you’ll need a USB flash drive with a minimum of 8GB of storage and a Windows 11 ISO file. Once you have those, you can use the Windows USB/DVD Download Tool to create a bootable USB flash drive.

    Simply select the ISO file and the USB drive you want to use, and let the tool do the rest. Once your USB drive is ready, you can connect it to your computer and boot from it to begin the Windows 11 installation process on your external SSD drive. Don’t forget to adjust your BIOS settings to boot from the USB drive before the internal hard drive.

    With a little patience and a bit of know-how, you’ll have Windows 11 up and running on your external SSD drive in no time.

    Download the Windows 11 Installation Tool

    Windows 11 installation tool If you’re planning on upgrading to Windows 11, you’ll need to create a Windows installation media to do it. The creation of a Windows installation media is essential because you might need to reinstall Windows, install it on multiple devices, or perform a “clean” installation to rid your system of bloatware and optimize its performance. Thankfully, Microsoft has made it easy.

    You can download the Windows 11 installation tool directly from their website. Once downloaded, launch the tool and select the “Create installation media (USB flash drive, DVD, or ISO file) for another PC” option, then follow the prompts. In no time at all, you’ll have a fully functioning Windows 11 installation media at your disposal.

    It’s that simple! The Windows 11 installation tool is an essential tool for upgrading or reinstalling Windows 11 from scratch. So, if you want to make sure you’re ready for the next-generation operating system, download it today!

    Connect your External SSD to your PC

    To start building a Windows installation media, you’ll need to connect your external SSD to your PC. This step might sound obvious, but it is crucial to ensure that your files transfer correctly. First, locate the USB port on your computer.

    Most modern PCs have multiple USB ports, so select the one that’s most convenient for you. Next, take your external SSD and find its USB port, which should be on the side or back of the device. Plug the SSD into the USB port on your computer, and you should feel a satisfying click when it connects.

    Once the SSD is connected, open File Explorer to confirm that your PC has recognized the device. If your PC successfully detects the SSD, you can proceed to the next step of building a Windows installation media.

    Create a bootable USB drive with Windows 11 Installation Tool

    If you’re planning on installing Windows 11 on your computer, one essential tool you need to have is a bootable USB drive. Luckily, creating one is a straightforward process, and all you need is the Windows 11 Installation Tool. To get started, you first need to download the Windows 11 Installation Tool from the Microsoft website and save the file to your computer.

    Once the download is complete, open the tool and select the language and edition of Windows 11 you want to install. Next, select the USB flash drive you want to use as the installation media. Remember that all data on the USB drive will be erased during this process, so make sure you backup any important files.

    The tool will then prepare your USB drive and download all the necessary files to create the installation media. This process may take some time, depending on your internet connection speed. Once everything is downloaded, the tool will create the bootable USB drive for you automatically.

    You can now use this USB drive to install Windows 11 on your computer. Overall, creating a bootable USB drive with the Windows 11 Installation tool is a simple process that ensures you have a reliable way of installing the operating system on your computer. Just remember to backup any important files on your USB drive beforehand and ensure that your computer is set up to boot from a USB drive.

    Installing Windows 11 on External SSD

    If you’re looking to install Windows 11 on an external SSD drive, you’re in luck. It’s definitely possible, and it’s not as difficult as you might think. By following a few simple steps, you’ll be up and running with Windows 11 on your external drive in no time.

    First, you’ll need to make sure your external drive is formatted correctly and has enough storage space for the operating system. Then, you’ll need to create a bootable USB drive, which you’ll use to install Windows 11 on the external SSD. Once you’ve done that, you’ll need to boot your computer from the USB drive and follow the on-screen instructions to install Windows 11 on your external SSD drive.

    Don’t worry, it’s not as complicated as it sounds, and with a little patience, you’ll be enjoying the benefits of a fast, portable Windows 11 setup in no time!

    Restart your PC and Boot from the USB drive

    To install Windows 11 on an external SSD, the first step is to restart your PC and boot from the USB drive. This process is quite simple. Once you have connected the external SSD to your PC, ensure that it is recognized by your system.

    Then, you would need to restart your PC and enter the boot settings by pressing F2 or F12, depending on your computer manufacturer. From there, select the USB drive as the primary boot device and press enter to save the settings. After restarting your PC, the setup process for Windows 11 will begin.

    You would need to follow the prompts on the screen, select your language preferences, and agree to the terms and conditions. Before proceeding with the installation, ensure that you select the external SSD as the destination drive. Using an external SSD to install Windows 11 can be highly beneficial and improve system performance, especially if your PC has limited storage space or an older hard drive.

    With the external SSD, you can easily carry your data and work with you anywhere, making it an excellent option for those who work remotely or travel frequently. Overall, installing Windows 11 on an external SSD is a straightforward process that can be completed quickly and efficiently.

    Choose the language, time, and keyboard preferences and click ‘Next’

    If you’re planning to install Windows 11 on an external SSD, the process is pretty straightforward. Once you have your external drive set up and ready to go, you’ll need to insert your Windows 11 installation media and point the installer towards your external drive. Once you’ve done that, you should see the typical Windows 11 installation wizard pop up.

    The first step is to choose your language, time, and keyboard preferences from the dropdown menus and click “Next.” This is a quick and easy step, but it’s important to make sure you’re selecting the correct options for your location and needs. Keep in mind that this step will affect how Windows 11 interacts with your computer.

    For example, if you’re in a different time zone than your computer’s default setting, you’ll want to ensure you select the right one to avoid any confusion. By taking a minute to double-check these settings, you’ll set yourself up for a smooth and seamless installation of Windows 11 on your external SSD.

    Click ‘Install Now’ and accept the license terms

    Installing Windows 11 on an external SSD has become a popular choice for computer users who want to have a portable and efficient operating system. The process of installing Windows 11 on an external SSD is not complicated, but there are some important factors to consider. First, you need to ensure that your external SSD has enough space to accommodate Windows 1

    Additionally, you will need to download the Windows 11 ISO file from the Microsoft website and create a bootable USB drive. Once you have done this, you can start the installation process by plugging in the USB drive and restarting your computer. When prompted, select the external SSD as the destination for the installation and click “Install Now.

    ” Be sure to read and accept the license terms before proceeding with the installation. With a few simple steps, you can have Windows 11 up and running on your external SSD in no time. So, why not give it a try and enjoy the flexibility of a portable operating system?

    Choose ‘Custom: Install Windows only (Advanced)’ option

    If you are ready to install Windows 11 on your external SSD, you’ll want to choose the ‘Custom: Install Windows only (Advanced)’ option during the installation process. This option allows you to select the specific drive and partition you want to install Windows 11 on. It’s important to note that installing Windows on an external drive might affect the performance compared to internal drives and it’s recommended to use SSDs for better speed.

    Once you select the appropriate drive and partition, the installation process will proceed as usual. This option gives you more control over the installation process and allows you to ensure that Windows 11 operates smoothly on your external SSD.

    Select the external SSD as the destination and click ‘Next’

    When installing Windows 11 on an external SSD, selecting it as the destination is crucial. This process is not as complicated as it sounds. Once you have your external SSD connected to your computer, go to the installation tool and select ‘custom installation.

    ’ Then, select the external SSD as the destination drive and click ‘Next.’ Windows 11 will begin its installation process onto your external SSD. It’s a great option if you’re low on internal storage or want to install Windows 11 on multiple devices without having to go through the setup process every time.

    It also benefits from faster read and write speeds, as compared to a traditional HDD, making it faster and more efficient. When the installation process is complete, you can boot up Windows 11 from your external SSD, and voila, you’re running your OS on a lightning-fast and portable device. So, if you’re considering installing Windows 11 on an external SSD, it’s a smart choice.

    Follow the installation process and enter your product key, if prompted

    If you’re looking to install Windows 11 on an external SSD, you’re in luck because the process is fairly straightforward. First, make sure your device meets the system requirements for Windows 1 Next, download the Windows 11 installation files and create a bootable USB drive using a tool like Rufus.

    Once you have the bootable USB ready, connect your external SSD to your computer and boot from the USB drive. From here, simply follow the installation process and enter your product key if prompted. It’s important to note that installing Windows 11 on an external SSD can improve the overall performance of your computer, especially if your built-in storage is running out of space.

    Additionally, you can easily remove the external SSD and take it with you on the go, allowing you to access your files and applications from any device. So don’t be afraid to give it a try, and enjoy the benefits of a faster and more accessible operating system.

    Boot from the External SSD and Enjoy Windows 11

    Are you tired of limited storage space on your laptop or computer? With the release of Windows 11, you can now install it on your external SSD drive, giving you the freedom to take your operating system with you wherever you go. So, how to install Windows 11 on external SSD drive? It’s easy! All you need to do is create a bootable media drive, connect your external SSD drive to your computer, and follow the prompts to install Windows 1 Once you’ve installed Windows 11 on your external SSD drive, you can boot from it and enjoy a fast and reliable operating system with ample storage capacity.

    With this simple solution, you can say goodbye to the low storage space warning and hello to portable efficiency. So, what are you waiting for? Get started with your external SSD drive and enjoy the power of Windows 11 on the go!

    Conclusion

    Congratulations! You’ve successfully learned how to install Windows 11 on an external SSD drive. Now you can take your operating system with you wherever life takes you, whether it’s for work or play. Who needs a fixed address when your operating system can be as mobile as you are? So go forth, adventurer, and embrace the freedom and flexibility that an external SSD drive can bring to your computing experience!”

    FAQs

    What are the minimum system requirements for installing Windows 11 on an external SSD drive?
    The minimum system requirements for installing Windows 11 on an external SSD drive are a USB 3.0 port, a PC with a 64-bit processor, 4 GB of RAM, and a minimum 64 GB of storage.

    Can I install Windows 11 on any external SSD drive?
    Not all external SSD drives are compatible with installing Windows 11. Make sure that your external SSD drive has a USB 3.0 port and a minimum read/write speed of 100 MB/s.

    How do I create a bootable external SSD drive for Windows 11 installation?
    You need to download the Windows 11 ISO file and a free tool called Rufus. Open Rufus and select your external SSD drive, choose the Windows 11 ISO file, and click on “Start”. This will create a bootable external SSD drive.

    Can I use the external SSD drive for other purposes, after installing Windows 11 on it?
    Yes, you can use the external SSD drive for other purposes, like storing your personal files and data. However, make sure that you do not delete or modify any of the Windows 11 system files on the external SSD drive to prevent any system errors.

  • Step-by-Step Guide: Formatting Your M.2 SSD for Windows 10 in Top-Notch Fashion!

    If you’ve recently purchased an M.2 SSD for your Windows 10 PC, congratulations! You’ve made an excellent investment that will undoubtedly improve your computer’s performance. However, before you can start using your new storage device, you’ll need to format it.

    While the process may seem daunting, it’s relatively simple to do, and we’re here to walk you through it. In this blog, we’ll cover everything you need to know about formatting M.2 SSDs in Windows 10, from what tools you’ll need to the step-by-step process.

    So, grab your M.2 SSD and let’s get started!

    Understanding M.2 SSD

    If you’re looking to format your M.2 SSD on Windows 10, there are a few steps you’ll need to follow. First, you’ll want to make sure you have all the necessary drivers and software for your specific SSD model.

    Then, you’ll need to access the Disk Management tool by right-clicking the Start menu and selecting “Disk Management.” Once there, you should see your M.2 SSD listed as a disk.

    Right-click on the disk and select “Format.” From there, you can choose your formatting options and confirm the process. It’s important to note that formatting your M.

    2 SSD will erase all data, so be sure to back up any important files before proceeding. With a bit of patience and attention to detail, you’ll have your M.2 SSD formatted and ready to go in no time.

    What is M.2 SSD?

    M.2 SSD is a compact and efficient storage solution for modern computer systems. It is a small, slim, and easy to install SSD that uses the M.

    2 slot on the motherboard. M.2 SSDs can provide faster boot times and improved overall performance compared to traditional hard drives.

    This type of storage uses the latest NVMe interface technology that delivers lightning-fast speed and reliable data transfer. M.2 SSDs come in a variety of capacities and can be up to four times faster than SATA III SSDs.

    They are ideal for users who require high-speed data transfer for gaming, video editing, and other processor-intensive applications. With M.2 SSDs, users can enjoy faster processing times, reduced loading times, and smoother multitasking experiences.

    So if you’re planning to upgrade your computer system, an M.2 SSD is a smart choice to consider.

    how to format m.2 ssd windows 10

    Advantages of M.2 SSD

    M.2 SSD, advantages of M.2 SSD.

    M.2 SSDs are a newer type of solid-state drive that are becoming increasingly popular for their advantages over traditional SATA drives. One of the biggest benefits of M.

    2 SSDs is their small form factor, which allows them to be used in a wide range of devices, from laptops to desktops and even small form factor PCs. This is due to their design which eliminates the need for any cables, resulting in a much smaller footprint. Additionally, M.

    2 SSDs are typically faster than their SATA counterparts, due to the use of the NVMe protocol which allows for faster data transfer speeds. This makes them ideal for use in demanding applications such as gaming or video editing, where speed is crucial. Another advantage of M.

    2 SSDs is their increased reliability, as they have no moving parts that can fail over time. This means they are less likely to suffer from mechanical failure or damage due to shock or vibration. Overall, M.

    2 SSDs offer a range of benefits over traditional SATA drives, making them an excellent choice for anyone looking for high-speed, reliable storage that takes up minimal space in their build.

    Backup Important Data

    If you’re wondering how to format M.2 SSD Windows 10, it’s not as difficult as it sounds. However, before you start the process, it’s important to back up important data to avoid losing any important files or documents.

    One way to do this is by transferring your files to an external hard drive, cloud storage, or another computer. Once you’ve backed up your data, you can proceed with the formatting process. First, locate the M.

    2 SSD on your computer and make sure it’s properly connected. Next, go to the Windows search bar and type “disk management”. From there, you can right-click on the M.

    2 SSD and choose the option to format it. It’s important to note that formatting your SSD will erase all data on the drive, so make sure you have everything backed up before proceeding. Once the formatting process is complete, you can then reinstall Windows 10 or transfer your backed up data back onto the newly formatted SSD.

    Why backup is necessary?

    Backup is essential for protecting critical data from loss or damage. Every day, businesses and individuals generate volumes of important information that hold great value. This data can include everything from financial records and customer data to personal documents and cherished memories.

    Without proper backup measures in place, all of this data is at risk. Whether it’s due to hardware failure, cyber attacks, natural disasters, or human error, losing important data can have disastrous consequences. Backing up data ensures that, even if the worst happens, you can still recover your valuable information and minimize the impact of any loss.

    Make sure to back up your important data regularly and keep multiple copies in different locations, either offsite or in the cloud. By doing so, you can ensure that your data is always safe and secure from any unforeseen events.

    Methods to backup data

    Backup important data is a crucial task that every individual and organization should perform regularly. There are various methods to backup data, and choosing the right method can save you from losing important files and documents. One of the most common methods to backup data is by using an external hard drive.

    External hard drives can be connected to your device and used to backup and store data. Another method is cloud storage, which allows you to store your data remotely on a server. This is an excellent option for people who require constant access to their data from anywhere in the world.

    Additionally, there is also tape backup, which uses tape cartridges to store data. This method is typically used for large amounts of data and can be a cost-effective solution. Regardless of the method chosen, it’s essential to regularly backup data to ensure the safety and security of your important files and documents.

    Creating a Bootable USB Drive

    If you are having trouble formatting your M.2 SSD on Windows 10, the best way to go about it would be by creating a bootable USB drive. This will allow you to quickly and easily install a fresh copy of Windows, complete with all the necessary drivers and software.

    To begin, you will first need to download the Windows 10 ISO file from the official Microsoft website. Next, you will need to use a tool such as Rufus to create a bootable USB drive. Once you have your bootable USB drive ready, simply plug it into your computer and boot from the USB drive.

    From there, you can follow the on-screen instructions to install a fresh copy of Windows 10 and format your M.2 SSD in the process. Remember to back up all of your important files before formatting your drive, as this process will delete all data on the drive.

    By following these simple steps, you can easily format your M.2 SSD on Windows 10 and start fresh with a clean installation of the operating system.

    Purpose of Bootable USB

    The purpose of a bootable USB is to allow you to install or run an operating system on a computer that doesn’t have a CD/DVD drive, or one with a broken drive. A bootable USB is created by copying the operating system files onto the USB drive and making it bootable. This process is straightforward and can be done using free software available online.

    Creating a bootable USB drive is useful if you need to install or run an operating system quickly and easily, without the need for an external drive or Internet connection. Overall, a bootable USB drive is a convenient tool to have in your IT arsenal, whether you use it for troubleshooting, installing Windows, or running Linux on a computer.

    How to create Bootable USB?

    If you want to install an operating system on your computer or laptop, then creating a bootable USB drive is necessary. It’s a straightforward process that you can complete within a few minutes. First, ensure that you have a USB drive with enough space, typically 8 GB or more.

    Then, download the ISO file of the operating system you want to install. Once you have the ISO file, you can use software like Rufus to create a bootable USB drive. Rufus is a free and easy-to-use tool that can create a bootable USB drive in just a few clicks.

    After opening Rufus, select the USB drive you want to use and the ISO file of the operating system. Customize the other settings as per your needs, such as the partition scheme and file system. Once you’re finished, click on the “Start” button and wait for the process to complete.

    However, before using the bootable USB drive, ensure that you have changed the boot order in your BIOS. To do this, restart your computer and press the key that takes you to the BIOS settings page, usually F2 or Del. Once in the settings, navigate to the boot order or boot sequence option and change it to USB as the first priority.

    Save the changes and exit the BIOS. Now you’re ready to boot your computer with the USB drive and install the operating system. In conclusion, creating a bootable USB drive is an easy and necessary process if you want to install a new operating system.

    It’s essential to follow the steps carefully and change the boot order in your BIOS to boot from the USB drive. Remember to keep your USB drive safe so that you can use it again in the future.

    Formatting M.2 SSD

    If you’re looking to format an M.2 SSD on your Windows 10 computer, you’ll be pleased to know that the process is actually quite simple. First, you’ll need to open up the Disk Management tool.

    To do this, simply right-click on your Start button and select “Disk Management” from the menu. Once the tool is open, you should be able to see your M.2 SSD listed.

    Simply right-click on the SSD and select “Format”. From here, you’ll need to choose the file system that you’d like to use for the drive (NTFS is a good option for most users). You’ll also need to choose a volume label for the drive.

    Once you’ve made your selections, click “OK” and the formatting process will begin. Depending on the size of your drive, this process may take some time. However, once it’s complete, you’ll have a freshly formatted M.

    2 SSD ready to use for all your storage needs. So if you’re ready to get started, fire up Disk Management and get to formatting!

    Step-by-step guide for formatting M.2 SSD in Windows 10

    If you have just acquired an M.2 SSD and need to format it, then Windows 10 has got you covered. Formatting an M.

    2 SSD is easy and can be done within a few clicks. However, before you begin, make sure that the M.2 SSD is installed correctly.

    Once that is checked, you can proceed with the formatting process. To begin with, right-click on the Start menu and click on ‘Disk Management’. Here, you will find the list of all the installed drives.

    Locate the M.2 SSD and right-click on it. Select the ‘Format…’ option and follow the on-screen prompts.

    You can choose the file system, allocation unit size, and volume label as per your preference. Once you’re done, click on ‘OK’ and wait for the formatting process to complete. And that’s it! Your M.

    2 SSD is now formatted and ready to use. So, don’t worry, the process is simple and doesn’t take much time.

    Common errors and how to solve them

    Formatting an M.2 SSD can sometimes be tricky, and errors can occur if not done correctly. One common issue is formatting the SSD in the wrong file format.

    Many people make the mistake of formatting their M.2 SSD in NTFS, which is the default file format for Windows. However, this can cause problems if you plan on using the SSD in a different operating system, such as macOS or Linux.

    Instead, it is recommended to format the drive in exFAT, which is compatible with all operating systems. Another common mistake is not initializing the SSD before formatting it. This step is essential as it tells the computer that there is a new storage device connected.

    To initialize the SSD, you can go to Disk Management on Windows and select the SSD, then choose the option to initialize it. By following these simple steps, you can avoid common formatting errors and ensure your M.2 SSD is fully functional and compatible with all operating systems.

    Conclusion

    In conclusion, formatting an M.2 SSD for Windows 10 is a simple process that can be achieved with just a few clicks. It’s like giving your trusty steed a fresh coat of polish – it may not be glamorous, but it will ensure that it’s running smoothly and ready for whatever challenges lie ahead.

    So take the time to properly format your M.2 SSD and enjoy the lightning-fast speeds that await you!”

    FAQs

    What is an M.2 SSD and how does it differ from other types of SSDs?
    An M.2 SSD is a solid-state drive that uses an M.2 form factor to connect to a computer’s motherboard. It differs from other types of SSDs in terms of its physical size and interface.

    Is it possible to install an M.2 SSD on a Windows 10 computer?
    Yes, it is possible to install an M.2 SSD on a Windows 10 computer, but you need to make sure that your motherboard supports the M.2 interface and that your computer’s BIOS is configured to recognize the M.2 SSD.

    How do I format an M.2 SSD in Windows 10?
    You can format an M.2 SSD in Windows 10 by following these steps: (1) Open Disk Management by pressing Windows key + X and selecting Disk Management; (2) Locate the M.2 SSD, right-click on it, and select Format; (3) Choose the file system and allocation unit size, then click OK to confirm the format.

    What are the benefits of using an M.2 SSD in Windows 10?
    The benefits of using an M.2 SSD in Windows 10 include faster boot and load times, improved system responsiveness, and less noise and heat generation compared to traditional hard drives.

    Can I clone my existing hard drive to an M.2 SSD in Windows 10?
    Yes, you can use a disk cloning software like EaseUS Todo Backup or Acronis True Image to clone your existing hard drive to an M.2 SSD in Windows 10. This can be a quick and easy way to upgrade your system without having to reinstall everything from scratch.