Category: How to

How to

  • Boost Your PC’s Performance: A Step-by-Step Guide on How to Install a Secondary SSD

    Boost Your PC’s Performance: A Step-by-Step Guide on How to Install a Secondary SSD

    Ready to upgrade your computer’s storage capacity? Installing a secondary SSD might just be the solution you’ve been looking for! As we all know, solid-state drives (SSDs) are a game-changer in terms of data access and transfer speeds. Unlike traditional hard disk drives (HDDs), SSDs don’t have any moving parts, which means they’re faster, quieter, and less prone to damage. By adding a secondary SSD to your computer, you’ll not only increase your storage space but also boost your system’s performance.

    So, let’s dive into the world of SSDs and learn how to install a secondary one in your machine!

    Preparation

    If you’re looking to increase the storage capacity of your computer, installing a secondary SSD is a great option. Before you begin, it’s important to ensure that your computer has the necessary connectors and power supply to support an additional drive. You may also need to purchase a mounting bracket or adapter to properly secure the drive in your computer’s case.

    Once you have everything you need, you’ll want to power off your computer and unplug all cables before opening up the case. Take care not to touch any components with your bare hands, as static electricity can damage sensitive electronics. You’ll need to locate an available SATA data and power connector on your motherboard to connect the SSD, and then secure the drive in place with screws or brackets.

    Once you’ve completed the physical installation, you’ll need to initialize and format the drive in your operating system before you can start using it. With a little bit of preparation and care, installing a secondary SSD can be a relatively simple and straightforward process that can greatly enhance your computer’s overall performance.

    Check Compatibility

    When it comes to checking compatibility, a little preparation can go a long way. The first step is to identify what it is you’re trying to check compatibility for. Is it software, hardware, or something else entirely? Once you know what you’re looking for, you can start to do some research.

    Check the manufacturer’s website for compatibility information, and look for user forums or communities where people with similar setups may have asked similar questions. It’s also a good idea to gather information about your own setup, including your operating system, processor, and any other relevant details. By doing some preliminary work, you can increase your chances of finding accurate and useful compatibility information when you need it.
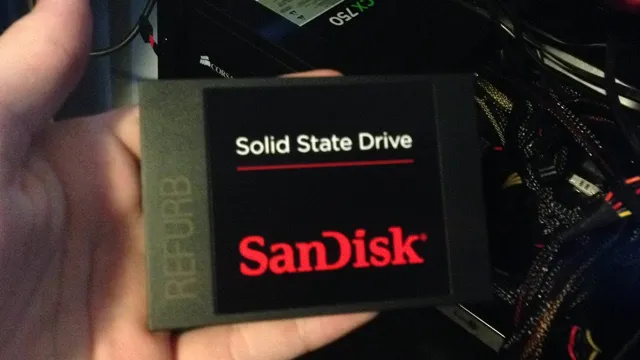
    how to install secondary ssd

    Gather Tools

    Preparation is key when undertaking any task, and gathering tools is a crucial step in the process. When considering the tools needed, think not only about the equipment required but also the resources. For example, if you’re planning on doing some DIY, you’ll need not only a hammer and nails but also screws and other hardware.

    Make a list of all the tools you need and prioritize them by importance. If your budget doesn’t allow for everything, focus on the essentials first. Don’t forget you can also take advantage of borrowing tools from friends or renting them from a hardware store.

    By gathering all the necessary tools in advance, you’ll be able to begin your project smoothly and efficiently, avoiding unnecessary delays. Remember that preparation is the key to success in any endeavor, so take the time to gather all the tools you need before you start.

    Hardware Installation

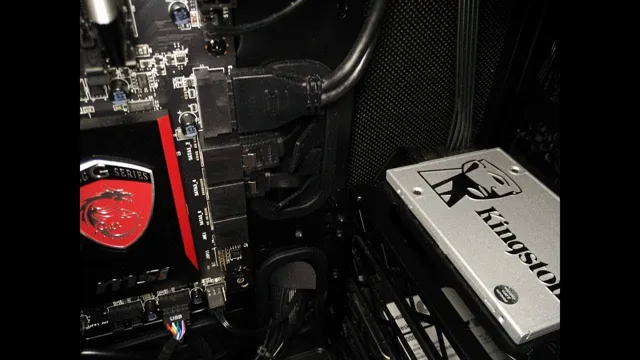
    Are you planning to upgrade your computer’s storage capacity by adding a secondary SSD? Installing a secondary SSD is a relatively straightforward process that even beginners can handle. Before you proceed, make sure to shut down your computer and unplug all cables. Open the case to access the motherboard and locate the available SATA connectors.

    Check your motherboard manual to identify the correct placement of the secondary SSD. Slide the SSD into the designated slot and screw it into place. Connect a SATA cable from the motherboard’s available SATA connector to the SSD.

    Make sure to attach the power cable to the SSD as well. Reattach the case and all cables. Power on your computer and check if it detects the new secondary SSD.

    You can then format the SSD to use it either for additional storage or as your new boot drive. Overall, adding a secondary SSD to your computer is an easy and effective way to improve its performance and storage capacity.

    Open Computer Case

    When it comes to hardware installation, one important step to consider is opening up the computer case. This can be a bit intimidating for those new to DIY computer building, but it’s actually a simple process that allows you to access the internal components of your computer. To start, make sure your computer is turned off and unplugged.

    Then, locate the screws or clips holding the case in place and remove them. Once the case is open, you can easily add or replace components like RAM, hard drives, and graphics cards. Keep in mind that opening your computer case can potentially void any warranties, so proceed with caution and make sure you know what you’re doing.

    With a little bit of research and practice, opening and working inside your computer case can be a great way to upgrade and customize your PC.

    Mount SSD

    Mounting an SSD is an easy way to upgrade your computer’s hardware and improve its performance. First, you need to shut down your computer and unplug all cables from it. Next, locate the hard drive bay in your computer case and remove the screws that hold it in place.

    Then, gently slide the SSD into the bay and screw it back in. Be sure to connect the power and data cables to the SSD and motherboard. Finally, close up your computer case and power it on to make sure the installation was successful.

    With an SSD, your computer will boot up faster, load applications quicker, and have more overall speed and responsiveness. So if you want to give your computer a boost, consider mounting an SSD today.

    Software Configuration

    Installing a secondary SSD on your computer can be a great way to expand your storage capacity and boost your system’s performance. But how do you go about doing it? To start, you’ll need to purchase the SSD and an adapter if necessary. Once you have those, shut down your computer and unplug it from all power sources.

    Open up your computer case and locate the spot where you want to install the SSD. Then, carefully attach the adapter if needed and insert the SSD into the appropriate slot. Fasten it in place with screws if necessary and close up your computer case.

    When you turn it on, your computer should recognize the new drive. From there, you can format and partition it as needed. With a little bit of know-how, installing a secondary SSD can be a great way to improve your computer’s performance and storage capacity.

    Initialize SSD

    SSD initialization is a crucial step that needs to be done before using a new SSD. It’s a process of configuring the SSD to work with the operating system. There are different ways to initialize an SSD, but the most common one is through the Disk Management utility in Windows OS.

    To do this, you need to right-click on the Windows Start button and choose Disk Management from the menu. A window will appear showing all the connected drives, including the uninitialized SSD. Right-click on the uninitialized SSD and choose Initialize Disk.

    You will be asked to choose between MBR and GPT partition styles. Choose the appropriate one for your system and click OK. The initialization process may take a few minutes, depending on the size of the SSD.

    Once it’s done, you need to create a partition on the SSD and format it before you can start using it. Overall, SSD initialization is a simple process that ensures proper usage of your new SSD.

    Format SSD

    If you want to optimize the performance of your computer, one of the most effective measures you can take is to format your SSD. This process essentially erases all the data on the drive, reconfigures it to be more efficient, and installs the operating system from scratch. There are a variety of software tools available to help you format an SSD, from built-in functions in Windows to third-party applications like EaseUS Partition Master and MiniTool Partition Wizard.

    However, before you get started, it’s important to back up any critical files on the drive and ensure that you have a recovery USB or CD in case something goes wrong. Once you’re ready to proceed, the process typically involves opening the disk management utility, selecting your SSD, deleting all the existing partitions, and creating a new one. While it may take a bit of time and effort, formatting your SSD can significantly boost your computer’s speed and responsiveness, making it well worth the investment.

    Assign Drive Letter

    When setting up your computer system, it is essential to assign drive letters to your storage devices and partitions. The drive letter allows you to easily identify and access the specific partition or storage device. Fortunately, configuring this is relatively straightforward on most operating systems.

    On Windows, you can open the Disk Management tool and right-click the partition or storage device you want to assign a drive letter to, then select “Change Drive Letter and Paths.” From here, click “Change” and select a letter from the drop-down list. Similarly, on macOS, you can open the Disk Utility tool and select the partition or storage device.

    Then choose “File” > “Get Info” from the menu, and you can assign a letter under the “Volume Information” section. This process can help you keep your files organized and easier to access, making it a worthwhile step in your system setup.

    Conclusion

    Congratulations! You’ve made it to the end of the journey of installing a secondary SSD. You’ve learned that it takes a bit of research, patience and a steady hand. But don’t forget, installing a secondary SSD is like adding an extra spice to your computer.

    It’s a little extra flavor that will make your PC faster and more powerful than ever before. So go ahead, add that extra SSD, and take your computer to the next level. Your future-self will thank you!”

    FAQs

    What is a secondary SSD?
    A secondary SSD is an additional solid-state drive that can be installed in a computer to increase storage capacity and improve performance.

    How do I know if my computer supports a second SSD?
    You can check the specifications of your computer or motherboard to see if it has an available slot for a secondary SSD. Additionally, you can consult with a computer technician or manufacturer for more information.

    How do I physically install a secondary SSD?
    First, turn off your computer and unplug it from any power source. Open the computer case and locate an available slot for the SSD. Mount the SSD onto the slot and secure it using screws or clips. Connect the necessary cables, close the case, and turn on the computer.

    How do I format and configure the secondary SSD?
    Once the SSD is physically installed, you will need to format it and configure it in your operating system. This may involve going into the computer’s BIOS or using disk management tools. You can also consult online guides or seek assistance from a professional.
  • Step-by-Step Guide: Setting Up Your New SSD for Booting Like a Pro

    Are you tired of waiting for your computer to start up every time you turn it on? Do you find yourself twiddling your thumbs while your computer takes ages to load? It sounds like you might be in need of a solid-state drive (SSD) upgrade! SSDs offer a faster and more efficient way of booting up your computer, allowing you to get started on your work or play in no time. In this blog, we’ll walk you through the process of setting up an SSD boot drive, giving you the speed and performance boost you’re looking for. So sit back, relax, and get ready to level up your computer game!

    Check BIOS Settings

    If you’ve installed a new SSD, but your computer isn’t booting from it, then the first thing you need to check is your BIOS settings. That’s because your system will likely be set to boot from your old hard drive by default, so you’ll need to tell it to boot from your new SSD instead. To do this, restart your computer and press the appropriate key to enter your BIOS setup.

    This key is usually displayed on your screen during startup and varies depending on your computer manufacturer, but it’s typically F2, Delete, or F Once you’re in your BIOS, look for the “Boot” tab and select your new SSD as the primary boot device. Save your changes and exit the BIOS.

    Your computer should now boot from your new SSD. With this simple fix, you can start enjoying the added speed and performance that your new SSD brings.

    Enter BIOS on Startup

    Entering the BIOS on startup is an essential task when you need to check your system’s settings. This process can seem daunting at first, but it’s actually quite simple. All you need to do is press a specific key on your keyboard as the computer starts up.

    This key can vary depending on your device’s manufacturer, but it is typically F2, F10, or Del. Once you enter the BIOS, you will have access to a range of settings that you can adjust to optimize your system’s performance. You can modify the boot order, overclock your CPU, and a host of other settings that can make a significant impact on your computer’s operation.

    So, if you’re experiencing issues with your computer, it’s a good idea to enter the BIOS and check your settings. It could be the key to unlocking your system’s full potential.

    how do i set my new ssd to boot

    Locate Boot Options

    If you’re having trouble booting up your computer, one thing you can do is check the BIOS settings to ensure that your boot options are properly configured. To do this, restart your computer and press the key indicated on the screen (usually F2, F10, or Delete) to enter the BIOS setup. Once you’re in, navigate to the Boot Options section and make sure that your primary boot device is set to your computer’s hard drive or SSD.

    You can also check the boot order to make sure that any other bootable devices, such as USB drives or optical discs, are not interfering with the boot process. By taking the time to locate and adjust your boot options in the BIOS, you can often resolve boot issues and get your computer up and running again in no time.

    Set SSD as First Boot Drive

    When upgrading your computer’s storage by adding an SSD, it’s essential to set it as the first boot drive. This will ensure that your operating system and programs load faster. To make this change, you need to access your computer’s BIOS settings.

    BIOS or Basic Input/Output System is where you can configure hardware settings for your computer. To check your BIOS settings, restart your computer and press the key that appears on your screen to enter BIOS mode, usually F2, F10, or Delete. Once you’re in BIOS, navigate to the boot tab and change the boot order to prioritize your SSD.

    You can also disable other boot options to avoid booting from the wrong drive accidentally. Setting your SSD as the first boot drive will significantly improve your computer’s performance and speed.

    Clone Your Operating System

    If you want to set your new SSD to boot, it’s important to clone your operating system from your old hard drive. This means copying everything on your existing system to the new drive so that you can maintain all your files, programs, and settings. There are a few different methods to clone your hard drive, but the easiest is to use a tool like Macrium Reflect, which offers step-by-step instructions to guide you through the process.

    Once you’ve completed the clone, you can set your new SSD as the boot drive in your computer’s BIOS settings. This will ensure that your system starts up quickly and efficiently from the new drive every time. Remember, cloning your hard drive is an important process, so be sure to backup all your important files and take any necessary precautions before you begin.

    With a little bit of time and effort, you can easily set your new SSD to boot and enjoy all the benefits of a faster, more reliable storage solution.

    Download Cloning Software

    Cloning software is essential for anyone who wants to clone their operating system, whether it’s for backup purposes or for transferring to a new computer. There are many different cloning software options available, each with its own benefits and drawbacks. Some popular choices include Macrium Reflect, Acronis True Image, and EaseUS Todo Backup.

    These programs allow you to create an exact copy of your operating system, including all your files, settings, and even your installed programs. This way, if your system ever crashes or becomes infected with malware, you can quickly and easily restore your computer to its previous state without losing any of your data. Cloning software is also useful for businesses that need to clone multiple computers or for IT professionals who want to create pre-configured system images to deploy across an organization.

    Whatever your needs, there is a cloning software out there that is right for you.

    Follow Cloning Instructions

    If you want to clone your operating system, it’s crucial to follow the instructions carefully. Cloning is an excellent way to create an exact replica of an operating system, which can be useful for backup purposes or transferring data onto another device. Before you start the cloning process, make sure you have a reliable cloning software.

    Some popular options include Clonezilla, Macrium Reflect, and Acronis True Image. Then, follow the step-by-step instructions provided by the software and make sure you have enough storage space on the destination device. Keep in mind that the process may take some time, so be patient and avoid interrupting it.

    Once the cloning is complete, you should have an exact replica of your operating system that you can use seamlessly on another device. In summary, cloning your operating system is a handy technique that can save you time and effort when setting up a new device or backing up important data. Make sure to choose a reliable cloning software, follow the instructions carefully, and have enough storage space before starting the process.

    With a successful cloning, you can have a replica of your operating system that will work seamlessly with another device without losing any data or personal settings. So why not give it a try and experience the convenience of cloning your operating system?

    Remove Old Hard Drive

    If you’re upgrading to a new hard drive but don’t want to lose your data, cloning your operating system is a great option. This process makes an exact copy of your old drive, including your operating system, installed software, and personal files, and transfers it to the new drive. First, you’ll need to remove your old hard drive and connect your new one.

    Then, you can use software like Clonezilla or Macrium Reflect to create a disk image of your old drive and transfer it to the new one. This way, when you boot up your computer, everything will look and feel exactly the same as before, just with more storage space. It’s important to note that this process may take several hours depending on the size of your old drive and the speed of your computer, but the end result is well worth it.

    By cloning your operating system, you can save yourself the time and hassle of reinstalling all of your software and setting up your preferences from scratch.

    Reboot and Test

    If you’ve just installed a new SSD and need to set it as your boot drive, don’t worry – it’s a pretty easy process. First, turn off your computer, unplug any external devices, and open up your computer case. Locate the old hard drive, unplug it, and replace it with the new SSD in the same location.

    Make sure it’s securely connected and then close the case and plug everything back in. Now, turn on your computer and enter the BIOS settings by pressing the appropriate key (usually F2 or Delete) during startup. Once in the BIOS, navigate to the Boot menu and select the new SSD as your primary boot device.

    Save your changes and exit the BIOS. Your computer will now boot from the SSD. To check that everything is working properly, you can test your computer’s speed and performance.

    Congrats – you have successfully set your new SSD as your boot drive!

    Restart Computer

    Restarting your computer can fix a variety of issues and is an important step in troubleshooting problems. When your computer is acting up or running slowly, a simple reboot can often do the trick. It’s like giving your computer a chance to start fresh and clear out any glitches or errors that may be causing issues.

    Before you restart, make sure all your important documents and files are saved and closed to avoid any data loss. Then, click on the “Restart” button or choose “Restart” from the Shut Down menu. After your computer has rebooted, take some time to test it out and see if the original problem has been resolved.

    This simple step can often save you time and frustration compared to more complex troubleshooting methods. So, the next time your computer is giving you trouble, try the age-old solution of restarting to see if it does the trick.

    Confirm SSD Boots Up

    To ensure that your newly installed SSD is working correctly, it’s crucial to test it by rebooting your system. This will give you a clear indication of whether your SSD is booting up correctly or not. If everything goes well, your operating system will load up quickly, and you should be able to navigate through your desktop without any lag or delay.

    However, if there is an issue with the installation or configuration of your SSD, you may encounter startup problems or boot errors. In such cases, you may need to consult the manufacturer’s instructions to troubleshoot the problem. In general, though, the process of rebooting and testing your SSD is straightforward and should only take a few minutes.

    Once you’ve confirmed that your SSD boots up correctly, you’ll be able to enjoy improved performance, faster read and write speeds, and an overall smoother computing experience.

    Troubleshooting Tips

    If you have recently installed a new SSD in your computer, the next step is to set it as your boot drive. This can be easily done through your computer’s BIOS settings. Before changing the boot drive, you will need to make sure that the SSD is properly connected to your computer.

    Once that is done, restart your computer and enter the BIOS settings by pressing the appropriate key (usually F2 or Delete) during startup. In the BIOS settings, look for the Boot section and select the SSD as the primary boot device. Save your changes and exit the BIOS settings.

    Your computer should now boot up from the SSD. If you encounter any issues during the process, double-check the connection and try again. Remember to back up important files before making any changes to your computer’s settings.

    With these troubleshooting tips, setting your new SSD as the boot drive should be a breeze!

    Conclusion

    Congratulations on your new SSD! Now that you’re ready to set it up as your boot drive, it’s important to remember that just like a sleek sports car needs a good driver to perform at its best, your SSD needs the right settings to achieve maximum speed and efficiency. So buckle up, take the wheel, and follow these easy steps to get your new SSD humming along like a well-oiled machine.”

    FAQs

    What is an SSD?
    An SSD (Solid State Drive) is a storage device that uses NAND-based flash memory to store data.

    How do I install my new SSD?
    To install your new SSD, you need to first shut down your computer, open the case, and connect the SSD to a free SATA port on your motherboard. Then, you will need to format the drive and clone your operating system if you want to transfer your data from your old hard drive.

    How do I set my new SSD as the boot drive?
    To set your new SSD as the boot drive, you need to access your BIOS settings and change the boot order. You can do this by pressing the appropriate key during startup (usually Del or F2), navigating to the boot menu, and selecting the new SSD as the primary boot device.

    Can I clone my existing operating system to my new SSD?
    Yes, you can clone your existing operating system to your new SSD using a cloning software such as EaseUS Todo Backup or Clonezilla. This will allow you to transfer your files, applications, and settings to the new SSD without having to reinstall everything from scratch.

    How do I ensure that my new SSD is running optimally?
    To ensure that your new SSD is running optimally, you should enable TRIM (a command that helps the operating system optimize the performance of the SSD), update the SSD firmware, and avoid writing large files or frequently deleting and rewriting files on the SSD. Additionally, you may want to disable hibernation and reduce the size of your pagefile, as these can cause excessive wear and tear on the SSD.

  • Step-by-Step Guide: Connecting SSD to Motherboard like a Pro

    Are you looking to ramp up the speed of your computer’s storage system? Perhaps you’re tired of slow boot times or sluggish program loading speeds. Whatever the case may be, one solution is to upgrade to an SSD (Solid State Drive) from your traditional hard drive. But how do you go about connecting an SSD to your motherboard? Don’t fret! We’ve got you covered.

    In this blog, we’ll discuss the steps you need to take to connect your SSD to your motherboard and get the most out of your new storage upgrade. So grab a cup of coffee and let’s get started!

    Check Motherboard Compatibility

    If you want to connect an SSD to your motherboard, you need to ensure compatibility between the two first. You should first determine the type of SSD you have and match it with the appropriate SATA connector on your motherboard. Additionally, you need to check whether your motherboard supports the type of interface that your SSD uses.

    A popular SSD interface is the NVMe, which is faster than a regular SATA interface. So, you need to ensure that your motherboard supports NVMe if you have an NVMe SSD. One key thing to remember during installation is to double-check that all connectors are fully plugged-in.

    Sometimes, an incomplete connector can lead to data corruption or weakening performance. Overall, it’s essential to do your research regarding the compatibility of your SSD and motherboard before installation to ensure optimal functionality.

    Check if Motherboard has SATA or NVMe support

    If you’re looking to add a new storage device to your PC or upgrade your existing one, it’s important to know whether your motherboard is compatible with SATA or NVMe drives. SATA (Serial Advanced Technology Attachment) is an older standard, whereas NVMe (Non-Volatile Memory Express) is a newer and faster one. To check whether your motherboard supports these standards, you can look up its specifications online or consult its manual.

    Generally, newer motherboards are more likely to support NVMe, while older ones may only support SATA. It’s important to note that even if your motherboard supports both of these connections, you may need to adjust some settings in your BIOS to ensure your drive is properly recognized. By doing a bit of research before purchasing a new storage device, you can save yourself the headache of compatibility issues down the line.

    how do you connect an ssd to a mother board

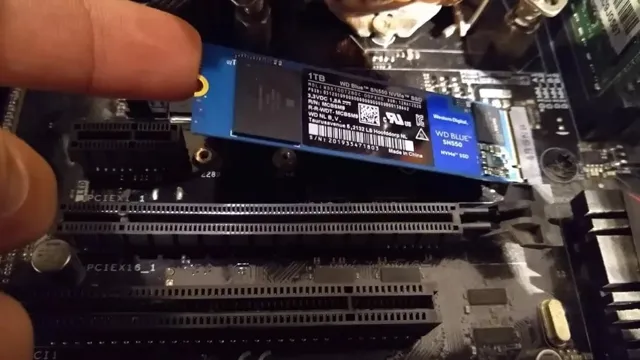
    Check if motherboard has M.2 SSD slot

    If you’re building or upgrading a computer, one of the most important things to consider is whether your motherboard has an M.2 SSD slot. M.

    2 is a small form factor SSD that can greatly improve your PC’s performance. However, not all motherboards have an M.2 slot, so it’s important to check whether yours is compatible.

    The easiest way to do this is by looking at your motherboard’s manual or specifications online. There, you should be able to find information on whether or not your motherboard supports M.2 SSDs, as well as what types of M.

    2 SSDs it supports. It’s also worth noting that some motherboards only have one M.2 slot, while others have multiple, so make sure to check how many you have available.

    If your motherboard doesn’t have an M.2 slot, you can still use an M.2 SSD with an adapter or by using a PCIe slot, although this may not be as fast as using a dedicated M.

    2 slot. Overall, it’s essential to check your motherboard’s compatibility before buying an M.2 SSD to avoid any compatibility issues.

    Gather Necessary Hardware

    When it comes to connecting an SSD to your motherboard, there are a few hardware pieces that you need to gather beforehand. Firstly, you will need your motherboard manual to ensure that you locate the correct SATA port. Usually, if you are using an SSD, you would go for a SATA III slot.

    You will also need a SATA cable that is long enough to connect your SSD to the motherboard. Secondly, you need screws to attach your SSD onto your computer case. These screws usually come included with your SSD, but if not, you can usually find them at most hardware stores.

    Lastly, you will need a computer case that supports an SSD and a power supply unit (PSU) that can provide power to your SSD and other components. Once you have gathered all these pieces of hardware, you can then proceed to connect your SSD to your motherboard.

    Get the right SSD

    When it comes to upgrading your computer’s storage, getting the right SSD is crucial for ensuring efficient and fast performance. But before you start shopping for an SSD, you need to gather some necessary hardware. Firstly, you need to check if your computer has an available slot for an SSD.

    Most modern desktops and laptops have at least one M.2 or SATA slot. You also need to ensure that your computer supports the interface of the SSD you are planning to buy, whether it is SATA, NVMe, or PCIe.

    Additionally, since SSDs generate heat, make sure that your computer has adequate cooling and ventilation to avoid overheating. Lastly, if you plan to transfer data between your old and new drives, you will need a SATA-to-USB adapter or an external SSD enclosure. By taking these hardware requirements into consideration, you will be well on your way to choosing the right SSD for your computer and upgrading your storage game.

    Get the right cables

    When it comes to setting up your computer, gathering the necessary hardware is essential. One crucial piece of hardware is the cables. Choosing the right cables can make a big difference in the functionality and efficiency of your computer.

    The first step is to identify what cables you will need for your particular setup. Make sure to get high-quality cables that are compatible with your devices to avoid any connectivity issues. Whether you need HDMI, USB, Ethernet, or power cables, it’s important to invest in cables that are durable and long-lasting.

    Don’t settle for cheap cables that can damage your devices or cause connectivity issues. Remember, getting the right cables is crucial for ensuring optimal performance and avoiding technical headaches in the future.

    Prepare Your Workstation

    If you’re looking to upgrade your computer’s storage capabilities, adding an SSD (solid-state drive) can significantly improve your computer’s overall performance. But how do you connect an SSD to a motherboard? The first step is to prepare your workstation. Make sure it’s turned off and unplugged.

    Before opening your computer tower, ground yourself by touching a metal surface to discharge any static electricity. Once you’ve opened the tower, find an empty SATA (Serial Advanced Technology Attachment) port on the motherboard. This is where you’ll plug in the SATA cable that comes with your SSD.

    Next, attach the SSD to a drive bay inside the tower using screws. Finally, connect the other end of the SATA cable to the SSD and the power cable to the power supply. That’s it! Your SSD is now connected and ready to use.

    Turn off your PC and unplug it

    When it comes to working on your PC, it’s essential to ensure that you have a well-prepared workstation. One of the most critical steps in preparing your workstation is turning off your PC and unplugging it. Why is this important, you may ask? Well, it’s quite simple – it helps prevent electrical damage to your PC.

    When you shut down your PC and unplug it, you give it a chance to cool down and avoid any power surges that could result in hardware damage. This step also ensures that you have a fresh start the next day and avoid any potential problems when you start working on your PC. So, the next time you finish your work, don’t forget to turn off your PC and unplug it to prepare your workstation for the next day.

    Ground Yourself

    When it comes to setting up your workstation, one important step in ensuring safety and stability is grounding yourself. This means creating an electrical connection between your body and the ground, which can help eliminate the risk of electric shock and static discharge while you work. To ground yourself, start by wearing ESD (electrostatic discharge) wrist straps that connect to your work surface and keep you in contact with a ground point.

    Additionally, make sure your workstation is properly equipped with grounding elements like anti-static mats and ESD-safe tools. By taking these steps, you can create a safe and secure environment for your work, protecting both yourself and your equipment. Remember, always prioritize safety when preparing your workstation and take the necessary steps to ground yourself properly, avoiding unnecessary risk and ensuring optimal performance.

    Installation Process

    Connecting an SSD to a motherboard can seem intimidating at first glance, but it’s actually a straightforward process. First, locate the SATA port on your motherboard and plug in the power and data cables from the SSD. Make sure to align the notches on the cables and the port correctly to avoid any damage.

    Next, screw the SSD onto the designated mounting bracket inside your computer case to secure it in place. Once everything is plugged in and secured, you’ll need to enter your motherboard’s BIOS and change the boot settings to prioritize the SSD as the primary boot device. From there, you can install your operating system and enjoy the improved speed and performance that comes with having an SSD in your setup.

    With these steps, connecting an SSD to a motherboard is a quick and easy way to upgrade your computer’s capabilities.

    Open your PC case and locate the M.2 SSD slot

    One of the first steps in installing an M.2 SSD in your PC is to locate the M.2 SSD slot.

    If you’re unsure of where the slot is located, don’t worry, it’s not that difficult to find. You’ll need to open up your PC case and take a look at the motherboard. The M.

    2 SSD slot is typically located near the center of the motherboard, and it’s usually labeled as such. It’s important to note that not all motherboards have an M.2 SSD slot, so make sure to check your motherboard’s specifications to see if it’s compatible.

    Once you’ve located the slot, the next step is to insert the M.2 SSD into the slot. Make sure to align the notches on the SSD with the keys on the slot, and then gently push it down until it clicks into place.

    Congratulations, you’ve successfully installed an M.2 SSD in your PC!

    Insert the SSD into the slot

    When it comes to installing an SSD into your computer, it’s important that you take the necessary precautions to prevent any damage to your device. To begin the installation process, locate the SSD slot on your computer. It is typically located near the hard drive bay on laptops and on the motherboard on desktops.

    Once you have located the slot, ensure that the computer is turned off and unplugged from any power source. Carefully insert the SSD into the slot, making sure that it is properly aligned and securely fastened. It’s crucial that you handle the SSD with care, making sure not to touch the connectors or PCB.

    After inserting the SSD, reassemble your computer and power it back on. Congratulations, you have successfully installed your SSD! By following these steps, you can ensure that your device is functioning optimally and that you won’t encounter any issues with your new SSD.

    Secure the SSD with a screw

    When installing a solid-state drive (SSD), securing it in place is essential, and this can be achieved by using a screw. The process of installing an SSD involves opening your computer case, locating the slot or bay for the SSD, and then screwing it into place using the compatible screw holes. Ensure that the SSD is accurately aligned with the screw holes before tightening the screw to prevent any misalignments or damage to the drive.

    By securing the SSD with a screw, you’ll be protecting it from vibration that could cause data loss and physical damage. A loose SSD can also create noise, which could be another reason to ensure that it’s firmly screwed in place. Remember to avoid overtightening the screws since this could damage the drive or strip the screw holes, making subsequent drives difficult to install.

    Connect data cable from SSD to motherboard

    If you’re new to building computers, connecting a data cable from an SSD to the motherboard might seem intimidating. However, it’s a fairly simple process once you know what you’re doing. First, locate the SATA connector on your motherboard and connect one end of the data cable to it.

    Then, locate the SATA connector on your SSD and connect the other end of the cable to it. Make sure the cable is securely connected on both ends. Some motherboards also require you to connect a power cable to the SSD, so be sure to check your motherboard manual for any additional instructions.

    With the data cable securely connected, you’re one step closer to completing your build and enjoying faster load times on your SSD.

    Final Checks

    So, you’ve got yourself a shiny new SSD and you want to connect it to your motherboard. First things first, you need to identify where your SSD is going to fit in on your board. Most motherboards have a slot specifically designed for an additional SSD.

    Once you’ve located this, you can then proceed to attach the SSD. There are different ways to connect an SSD, but the easiest and most common method is to use a SATA cable. SATA cables come in different shapes and sizes, so make sure to select the right one for your SSD and motherboard.

    Once you’ve secured the SSD using screws, you can then connect the SATA cable to the motherboard. Finally, connect the power cable to the SSD and make sure everything is secured in place. Now you’re ready to go! Your new SSD should be detected by your motherboard and ready to use.

    Connecting an SSD to a motherboard is a relatively painless process, just make sure to follow these steps carefully, and you’ll be up and running in no time!

    Close PC case and plug it back in

    Now that you’ve installed all the components, it’s time to give the PC its final checks. The first thing to do is to close the PC case properly, ensuring that all the screws are tightened and secured in place. This ensures that the internal components are safe and protected from dust and accidental damage.

    Once the casing is secured, plug the power cord back in and turn the PC on. Check to see if the fans are spinning, the GPU is detected, and the HDD is recognized. Also, check if the PC is booting up correctly, and the monitor displays the correct output.

    If everything is functioning correctly, then congratulations! You have successfully assembled your own PC. Now it’s time to install the operating system, drivers, and software you need and start using your new machine. Remember to keep your PC updated, maintain it regularly, and enjoy your new powerful system!

    Check BIOS detects your new SSD

    Now that you’ve installed your new SSD into your computer, it’s time to make sure your BIOS can detect it. This is an essential final step to ensure that your system recognizes the new hardware and that it’s running correctly. To check your BIOS, restart your computer and access the BIOS menu by pressing a specific key, which is usually displayed during the startup process.

    Once you’re in the menu, navigate to the SATA or Storage options and check if your new SSD is listed. If it is, then congratulations, you’ve successfully installed your new SSD, and it’s ready to use. However, if it’s not listed, then check your cables or consult with your motherboard manual to troubleshoot why it’s not being detected.

    It’s crucial to make sure you’ve done this final check to avoid issues like data loss, system crashes, or the inability to boot your computer. So, take the time to make sure that your new SSD is detected by your BIOS, and enjoy the improved performance and storage capacity.

    Initialize and format the SSD in Disk Management

    After initializing and formatting the SSD in Disk Management, it’s time to do some final checks to ensure everything is running smoothly. First off, make sure that the SSD has been assigned a drive letter by checking in Disk Management. If it hasn’t, simply right-click on it, select “Change Drive Letter and Paths”, and assign one.

    Next, check that the volume label is correct and matches what you want to call your SSD. You can do this by right-clicking on the drive letter and selecting “Properties”. Finally, it’s always a good idea to do a quick performance test to make sure your SSD is performing as it should be.

    You can easily do this by using a program like CrystalDiskMark or AS SSD Benchmarks. With these final checks, you can rest assured knowing that your SSD is properly set up and ready to use.

    Conclusion

    Connecting an SSD to a motherboard is like a match made in tech heaven – it’s a simple and efficient process that can massively boost your computer’s performance. With just a few clicks and cables, you can enjoy faster boot times, quicker file transfers, and a seamless computing experience. It’s like upgrading from an ordinary bike to a fancy sports car.

    So, if you’re still stuck with a sluggish hard drive, it’s time to make the switch and inject some lightning-fast SSD power into your motherboard!”

    FAQs

    What type of cable do I need to connect an SSD to a motherboard?
    You will need a SATA cable to connect the SSD to the motherboard.

    Where do I connect the SSD on the motherboard?
    You can connect the SSD to the SATA port on the motherboard. Consult your motherboard manual to find the exact location of the port.

    Can I use an M.2 SSD with any motherboard?
    No, not all motherboards have an M.2 SSD slot. You will need to check your motherboard specifications to see if it supports M.2 SSDs.

    Do I need to install any special drivers for my SSD to work on the motherboard?
    No, usually the motherboard will automatically detect the SSD and install the necessary drivers. However, it is always a good idea to check for any updates on the manufacturer’s website.

  • Boot Up in Seconds: Finding the Perfect Size SSD for Your Needs

    Boot Up in Seconds: Finding the Perfect Size SSD for Your Needs

    Have you ever wondered what size SSD is necessary for a smooth and fast booting experience? Solid-state drives, or SSDs, have replaced the traditional hard drives due to their exceptional speed, durability, and efficiency. However, choosing the right size can be overwhelming, with numerous options available in the market, ranging from 128GB to 4TB. In this blog, we will guide you through the process of selecting the right size SSD to make your booting experience stress-free and enjoyable.

    Whether you are a gamer, a programmer, or a regular computer user, stick around to discover crucial factors that will inform your decision-making about the size of your boot SSD. Let’s dive in!

    Understanding SSD Basics

    When it comes to figuring out how big an SSD needs to be for boot, the answer lies in several factors. Firstly, one needs to determine the type of operating system they are running. For instance, Windows 10 requires a minimum of 16 GB of storage space for a 32-bit installation and 32 GB of storage space for a 64-bit installation.

    On the other hand, popular Linux distributions, such as Ubuntu and CentOS, require a minimum of 25 GB of storage space. It’s also vital to consider the software and application needs as well, which can significantly impact the amount of storage space required. Ultimately, utilizing cloud storage options can drastically decrease the amount of storage required in the SSD for boot, which can save costs and improve system performance.

    Therefore, the size of an SSD for boot primarily depends on one’s individual needs and preferences.

    What is an SSD?

    An SSD (Solid State Drive) is a type of data storage device that uses NAND-based flash memory to store data. Unlike traditional hard disk drives (HDDs), an SSD has no moving parts, which means it’s faster, more reliable, and less prone to data loss. An SSD works by storing data on interconnected flash memory chips which can be accessed quickly and efficiently.

    This allows for faster boot times, faster application loading, and faster data transfer rates. SSDs also use less power than traditional HDDs and generate less heat, making them more energy-efficient and ideal for use in laptops and other portable devices. Overall, an SSD can provide a significant improvement in performance and productivity compared to traditional hard drives.

    how big does an ssd need to be for boot

    How does an SSD differ from an HDD?

    If you’re looking to upgrade your computer’s storage system, you’re probably considering the differences between a solid-state drive (SSD) and a hard disk drive (HDD). To understand the basics of an SSD, it’s important to know that it uses flash memory to store data, whereas an HDD relies on spinning platters and a mechanical arm to read/write data. What this means is that an SSD has no moving parts, which in turn makes it faster, more reliable, and more energy-efficient than an HDD.

    In fact, an SSD can boot up your computer, launch apps, and transfer files in a matter of seconds. Furthermore, because SSDs have no moving parts, they are less vulnerable to physical shock, which makes them perfect for laptops and other portable devices. Overall, if you’re looking for increased speed and durability in your storage system, an SSD is definitely the way to go.

    Size Matters: How Much Space Do You Need?

    When it comes to the size of an SSD for boot, the answer can vary depending on individual needs and preferences. Generally speaking, a minimum of 120GB is recommended for the operating system and essential applications, although some may opt for larger storage capacities for additional files and programs. It’s important to consider not only the initial space needed, but also potential future growth and expansion.

    Additionally, factors such as drive speed and technology should also be taken into account. While having a larger SSD can certainly provide more flexibility and storage, it’s ultimately up to each user to determine the right balance between space and cost. With that in mind, it’s always a good idea to do some research and consult with technology experts before making a final decision on the size of your SSD for boot.

    Factors to Consider

    When it comes to finding the perfect office space, size matters. You don’t want to shell out for more real estate than you actually need, but at the same time, you don’t want to find yourself crammed into a tiny space. So, how much space do you need? Start by assessing your business needs.

    Will your team be working primarily at their desks, or will you need room for meetings and collaboration? Do you need to accommodate equipment, such as printers or servers? Will you be using the space for storage? Once you have an idea of your requirements, consider potential growth. If your team is poised for expansion in the near future, you may want to rent more space than you actually need right now to avoid the hassle of moving again soon. Overall, find the sweet spot that meets your current needs and can accommodate growth, without breaking the bank.

    How much storage do you need?

    When it comes to storage, size matters. Determining how much space you need can be a tricky task, but it’s essential to ensure you have enough room to store all your files and data. Your storage needs will depend on several factors, such as the type of files you need to store, the frequency with which you use them, and the number of users who will be accessing them.

    For instance, if you work with large files like videos or design files, you’ll need much more storage than someone who mainly works with text documents. Similarly, if you have multiple users accessing the same files simultaneously, you’ll require more storage space to accommodate them all. In general, it’s better to err on the side of caution and choose a high-capacity storage solution, so you don’t run out of space unexpectedly.

    Overall, taking the time to assess your storage needs carefully will pay dividends in the long run, ensuring you have enough space to handle all your files and data, no matter what you throw at it.

    What else will you be using the SSD for?

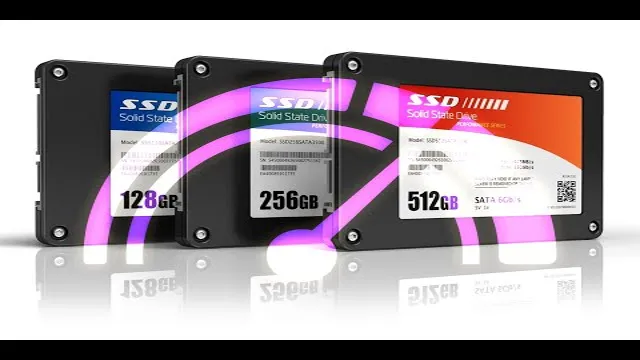
    When it comes to choosing the size of your SSD, it’s crucial to consider what else you’ll be using it for. Will it primarily store your operating system and applications, or will you also be using it to store large amounts of multimedia files such as photos, videos, and music? It’s important to note that SSDs can be pricey, so it’s essential to ensure you’re purchasing one that will accommodate your needs without overspending. A good rule of thumb is to aim for at least a 256GB SSD if you plan on storing your OS and a few applications.

    However, if you’re working with larger files such as high-resolution videos, you may want to consider a larger size such as 512GB or even 1TB. It all comes down to your specific needs and budget. Remember, an SSD with more space than you need is better than one with less space, as you don’t want to run out of room and have to go through the hassle of upgrading.

    Conclusion: Finding the Right Size SSD for Booting

    In the world of SSDs, size does matter – but bigger isn’t always better. When it comes to booting, you need enough space to store your operating system and essential files, without going overboard and wasting precious storage. So, how big does an SSD need to be for boot? It depends on your needs.

    If you’re a minimalist who only uses your computer for basic tasks, a smaller SSD will do just fine. However, if you’re a power user who needs to store multiple operating systems, programs, and files, a larger SSD may be necessary. The bottom line? It’s up to you to decide what size SSD best fits your individual needs.

    Just remember to strike the perfect balance between functionality and efficiency!”

    FAQs

    What is the minimum recommended SSD size for a boot drive?
    The minimum recommended SSD size for a boot drive is 128GB. However, if you plan to install additional applications and store data on the same drive, you may want to consider getting a larger SSD.

    Can I use a hard drive instead of an SSD for my boot drive?
    Yes, you can use a hard drive instead of an SSD for your boot drive. However, using an SSD will significantly improve your system’s boot and load times.

    Do I need to allocate all the space on my SSD for my boot drive?
    No, you do not need to allocate all the space on your SSD for your boot drive. It’s recommended to leave some free space for temporary files and future updates.

    Can I install multiple operating systems on the same SSD boot drive?
    Yes, you can install multiple operating systems on the same SSD boot drive, but you will need to partition the drive accordingly. Keep in mind that each operating system will require its own space, so make sure to allocate enough storage for each one.

  • Unlocking Your SSD’s Potential: Tips and Tricks To Ensure Your Files Are Read with Ease

    If you’ve recently purchased a new Solid State Drive (SSD) for your computer or laptop, you may run into the issue of it not reading your files. While frustrating, don’t panic just yet – there are ways to solve this problem and get your SSD up and running smoothly. A solid-state drive is a data storage device that uses NAND-based flash memory to store files.

    Unlike a mechanical hard drive, an SSD has no moving parts, which makes it faster and more reliable. However, this also means that it requires a specific set up to be recognized by your computer. To get your SSD to read your files, the first step is to check that your computer’s BIOS is correctly configured to recognize the drive.

    You can do this by entering the BIOS during startup and ensuring that the SATA or AHCI mode is enabled. Another solution is to use a disk partitioning tool to format and repartition the SSD. This will ensure that it is set up correctly and will be recognized by your computer’s operating system.

    In some cases, the issue may be caused by outdated or missing drivers. You can fix this by updating your computer’s chipset or storage drivers, which will enable it to properly recognize your SSD. Overall, while it may seem daunting to troubleshoot and fix issues with your SSD, there are numerous solutions out there to get it to read your files.

    By taking the time to properly configure, format, and update your system, you can ensure that your SSD performs optimally and efficiently.

    Check the Compatibility of Your SSD and Computer

    If you’re having trouble getting your SSD to read your files, the first thing you should do is check the compatibility of your SSD and computer. Sometimes, the problem may simply be that your computer is not capable of supporting your SSD. This could be due to an outdated operating system or incompatible hardware.

    Before you go out and purchase a new SSD or computer, however, there are a few things you can do to troubleshoot the issue. First, try updating your computer’s drivers and firmware. You can do this by visiting the manufacturer’s website and following their instructions for updating your system.

    Additionally, it’s important to ensure that your SSD is properly connected to your computer and that it’s being recognized by your system. If you’ve tried everything and you’re still having trouble, it may be time to consult with a professional. Regardless of the issue, it’s important to ensure that your SSD and computer are compatible in order to avoid any future issues with reading files or data loss.

    Good luck!

    Ensure Your SSD is Installed Correctly

    When upgrading your computer with a new SSD, ensuring compatibility is crucial. Not all computers are compatible with all SSDs, so it’s essential to do your research beforehand. Check your computer’s documentation or manufacturer’s website for a list of compatible SSDs.

    Additionally, make sure you have the correct interface type, such as SATA or PCIe, and that you have an available slot on your motherboard for the SSD. Installing an incompatible SSD can cause problems with booting your system or even damage your hardware. By taking the time to ensure compatibility, you can ensure your SSD is installed correctly and avoid any unnecessary headache.

    So, before you purchase an SSD, check compatibility to make sure it’s a smooth upgrade experience.

    how do i get my ssd to read my files

    Verify that Your Computer is Recognizing the SSD

    To ensure that your computer is recognizing your SSD, it’s essential to check the compatibility of your SSD and computer. Different computers may require varying types of SSDs, and it’s crucial to ensure that your SSD will work with your computer before you start using it. So, if you’re replacing the hard drive of your computer with an SSD, it’s important to see if your computer can support SSDs.

    You can check your computer’s specification, and if it’s compatible, you can go ahead and install the SSD. However, if your computer does not support SSDs, you may have to find an alternate solution or upgrade your computer entirely. Therefore, it’s crucial to check the compatibility of your SSD and computer before you install it to ensure that your computer recognizes it.

    Configure the SSD in Your Computer’s BIOS Settings

    If you’ve recently installed an SSD on your computer but are having trouble getting it to read your files, you may need to configure it in your computer’s BIOS settings. The BIOS (Basic Input/Output System) is a firmware that runs when you turn on your computer and controls how it interacts with hardware components such as the SSD. To access the BIOS settings, you need to restart your computer and press the key that appears on your screen to enter setup mode (usually F2, F10 or DEL).

    Once you’re in the BIOS settings, navigate to the boot menu and select the SSD as the primary boot device. You may also need to enable the AHCI (Advanced Host Controller Interface) mode, which will allow the SSD to communicate with your computer more efficiently. By configuring the BIOS settings correctly, you’ll be able to get your SSD up and running so you can start accessing your files quickly and easily.

    Access Your Computer’s BIOS Settings

    Configuring an SSD in the BIOS settings of your computer is an essential step for optimal performance. To access the BIOS settings, you must restart your computer and press the designated key as the system boots up. The key varies by computer brand, so it’s best to check the manufacturer’s website or manual for instructions.

    Once you’re in the BIOS settings, navigate to the storage configuration section. There, you’ll see a list of connected drives, including your SSD. Select the SSD and ensure that it’s set as the primary boot drive.

    You may also want to enable AHCI mode or disable legacy SATA mode for optimal SSD performance. With your SSD properly configured in the BIOS settings, you’ll be able to take full advantage of its capabilities and experience faster boot times and application load times.

    Find and Select Your SSD in the BIOS Settings

    When installing an SSD in your computer, you will need to configure it in the BIOS settings. First, make sure the SSD is properly connected to the motherboard. Once that is done, restart your computer and enter the BIOS settings by pressing the indicated key on your screen.

    The location of the SSD settings will vary depending on your motherboard, but it can usually be found in the “Storage” section of the BIOS menu. Look for a list of connected drives and select the SSD you installed. From there, you can configure the boot priority so that your computer boots from the SSD rather than the previous boot drive.

    This will ensure that your computer is utilizing the faster speeds of the SSD. Pro tip: In some BIOS settings, your SSD may be labeled as a “solid-state drive” instead.

    Adjust Your Boot Sequence to Include the SSD

    When you add a new SSD to your computer, you’ll need to adjust the boot sequence in BIOS settings to ensure that your computer boots from the SSD correctly. To do this, first enter the BIOS settings by restarting your computer and pressing the key indicated on the screen (often F2, Delete, or ESC). Once inside the BIOS, locate the Boot Order or Boot Sequence settings.

    Here, you can select the SSD as the primary boot device, ensuring that the computer looks to the SSD first for the operating system. This will speed up your computer’s boot time significantly, and also provide faster access to your files saved on the SSD. Be sure to save any changes made in the BIOS before exiting to ensure that the new boot sequence takes effect.

    Use a Data Recovery Tool to Access Lost Files

    If you’re struggling to access files on your SSD, a data recovery tool may be just what you need to get things back on track. These tools are specifically designed to help you retrieve files that have been lost or corrupted, and they can be a lifesaver in situations where you need to access crucial data quickly. One of the best things about these tools is that they’re easy to use – even if you’re not tech-savvy, you should be able to get the hang of them relatively quickly.

    When it comes to finding the right data recovery tool for your needs, there are a few things you’ll want to keep in mind. Look for a tool that’s compatible with your specific operating system, and make sure it offers the features you need to recover your files effectively. With the right tool at your disposal, you’ll be able to get your SSD reading your files like it’s supposed to in no time.

    Select a Data Recovery Tool

    When you accidentally delete a file or lose access to it, the first thing you should do is to stop saving any new data to the affected drive immediately. This prevents overwriting the lost file by new files. The next crucial step is to select a data recovery tool to retrieve your lost files.

    These tools can scan your hard drive, find the lost files, and restore them for you. There are numerous data recovery tools available online, and it can be tough to choose the right one. Look for a tool that supports the file type you’re trying to recover, offers a user-friendly interface, and provides a preview feature to ensure that you’re retrieving the right file.

    EaseUS Data Recovery Wizard, Recuva, and Disk Drill are some popular data recovery tools you can try out. Remember, using a data recovery tool is not always guaranteed to work, and the sooner you attempt using it, the higher the success rate of your data recovery.

    Connect Your SSD to Your Computer Using an Enclosure

    If you’ve ever experienced the frustration of losing important files on your SSD, you’re not alone. Thankfully, there’s a simple solution to accessing those lost files through the use of a data recovery tool. First, connect your SSD to your computer using an enclosure.

    This will allow you to access the drive and scan for any lost data. Once connected, run a data recovery tool such as EaseUS Data Recovery Wizard or Stellar Data Recovery to look for any lost files. These tools use advanced algorithms to search for deleted files and recover them.

    The process may take some time depending on the size of your SSD and the amount of data you’re trying to recover. However, it’s worth the wait to recover those important files. By using these tools, you’ll be able to retrieve lost files and avoid the frustration of having them permanently deleted.

    Run the Data Recovery Tool to Scan for Files

    “Data Recovery Tool” Losing important files can be incredibly frustrating and stressful. Fortunately, a data recovery tool can help you retrieve lost files. This software scans your computer’s hard drive for remnants of deleted files and offers the possibility of restoring them.

    It’s essential to act fast, as continued use of your device could risk overwriting the lost data. Once you’ve installed the data recovery tool, select the disk or drive where the files were last seen and begin the scan. The scanning process could take some time, depending on the size of your hard drive and the amount of data on it.

    Once the scan is complete, you can preview the recovered files and select the ones you want to restore. Remember, always keep a backup of your important files to avoid data loss in the future. Don’t let data loss get you down; use a data recovery tool to access your lost files quickly and efficiently.

    Conclusion

    In the eternal quest for technological harmony, one may find themselves asking “how do I get my SSD to read my files?” The answer lies in a deep understanding of the inner workings of this powerful data storage device. With a keen eye and a steady hand, one must navigate the complex web of drivers, settings, and permissions to unlock the full potential of their SSD. But fear not, for with patience and diligence, success is within reach.

    So go forth, intrepid reader, and conquer the elusive SSD-File connection with all the wit and cleverness you can muster. Happy computing!”

    FAQs

    Why isn’t my SSD reading my files?
    There could be several reasons for this issue. Firstly, ensure that your SSD is properly connected and recognized by your computer. You can check this by going into your computer’s device manager. Additionally, try updating your SSD drivers and firmware. If the issue persists, it may be due to file system errors on your SSD that can be resolved by using a disk checking tool such as CHKDSK or Disk Utility.

    How can I troubleshoot my SSD if it’s not reading my files?
    Firstly, check to make sure that your SSD is properly connected to your computer. If the drive is recognized by your computer, try scanning your SSD for potential issues using a disk checking tool such as CHKDSK or Disk Utility. Additionally, try updating your SSD firmware and drivers. If none of these solutions work, consider contacting the manufacturer for further assistance.

    How can I recover my SSD files if it’s not reading them?
    If your SSD is not reading your files, there may be a possibility of data loss. In this scenario, it’s recommended to stop using the SSD immediately and use a data recovery tool to restore your lost files. Some popular data recovery tools include Recuva, EaseUS Data Recovery, and Stellar Data Recovery.

    What can I do if my SSD is not detecting any files?
    If your SSD is not detecting any files, check to see if the drive is properly connected and recognized by your computer. Ensure that your SSD is part of the boot order in your computer’s BIOS. If the issue persists, it could be due to a corrupted file system or partition table on your SSD. In this scenario, consider using a disk checking tool such as CHKDSK or Disk Utility to check for errors and repair your SSD.

  • Upgrade Your PC Performance: A Step-by-Step Guide on How to Transfer Windows 10 to an SSD

    Thinking about it, transferring Windows 10 to an SSD can seem like a daunting task, but believe me, it is easier than you think. You may have gotten a new SSD, and you are wondering how to move Windows to it, or maybe your computer is running slow, and you need an upgrade. Whichever the case, this blog post is for you.

    Upgrading your HDD to an SSD is a great way to boost your PC’s performance and overall speed. Anyways, we’ll walk you through the process and all necessary steps to ensure you can transfer your Windows 10 to your SSD without any hassle. So, let’s dive right in!

    Backup Your Data

    If you’re looking to transfer Windows 10 to an SSD, it’s important to backup your data first. This ensures you won’t lose any important files during the process. To do this, you can use Windows built-in backup tool or a third-party backup software.

    Once your data is safely backed up, you’ll need to create a bootable USB with Windows 10 using the Media Creation Tool. From there, you can replace your old hard drive with the new SSD, boot from the USB, and select the SSD as the installation destination. The process is relatively straightforward, but it’s crucial to be careful and double-check your steps along the way.

    With a bit of patience and attention to detail, you can successfully transfer Windows 10 to an SSD and enjoy faster boot times and improved performance.

    Use Windows Backup Feature

    Backing up your data is an important step in ensuring that you never lose any important files or documents. Windows 10 comes with its own built-in backup feature that allows you to automatically backup your documents and files to an external hard drive or a network location. It’s important to remember that relying on a single copy of your data can be risky, and backing up your data with Windows Backup feature ensures that you have a copy of your data in case something goes wrong.

    The process of setting up a backup with Windows Backup feature is really simple and can be done in just a few easy steps. Simply choose where you want your backup to be stored, select the files and folders you want to include and set a schedule for the backup to run. By utilizing the Windows Backup feature, you can ensure that your data is safe and secure, no matter what happens.

    how can i transfer windows 10 to an ssd

    Use Third-Party Backup Tool

    Backing up your data is crucial, and one way to do this is by using a third-party backup tool. These tools automate the process, making backup a breeze. They work by storing your data on external servers or hard drives, providing a reliable solution in case of data loss.

    Plus, they come with advanced features such as automatic scheduling and versioning. This means that you can set it up once and let it do its work giving you peace of mind. Remember, data loss can occur due to a multitude of reasons, such as accidental deletion, system failure, hardware damage, and malware attacks.

    Thus, regularly backing up your data ensures that you can easily restore it when things go wrong. So, don’t wait until it’s too late, get yourself a reliable third-party backup tool today.

    Create Windows 10 USB Installation Media

    If you want to transfer Windows 10 to an SSD, one way to do that is by creating a Windows 10 USB installation media. This method is efficient and straightforward, and it will help you to install Windows 10 on your new SSD without much hassle. To get started, you will need a USB flash drive with at least 8 GB of storage space.

    Then head over to Microsoft’s official website and download the Windows 10 Media Creation tool. Once downloaded, run the tool, select “Create installation media for another PC,” choose your preferred language, edition, and architecture, and select your USB drive as the destination. The tool will then format the USB drive, copy the necessary files, and create a bootable USB drive that you can use to install Windows 10 on your new SSD.

    After that, you need to boot your computer from the USB drive, follow the installation wizard, and select the new SSD as the installation destination. Overall, creating a Windows 10 USB installation media is the most efficient way to transfer Windows 10 to an SSD and it should take less than an hour to complete the entire process.

    Download and Install Media Creation Tool

    Creating a Windows 10 USB installation media is crucial when you want to install the operating system on multiple computers. The first step is to download and install the Media Creation Tool – a free utility provided by Microsoft. You can use this tool to create USB bootable media or an ISO file that you can burn to a DVD.

    Once you have the Media Creation Tool downloaded and installed, open it, and select “Create installation media.” Next, select your preferred language, edition, and architecture. You can then choose to create a USB flash drive, a DVD, or an ISO file.

    Follow the prompts and wait for the tool to prepare the USB drive or ISO file. Once done, you can use the USB drive to install Windows 10 on the computer of your choice. With this tool, you have an easy and straightforward way of creating Windows 10 USB installation media.

    Create Windows Installation Media

    If you’re planning on installing Windows 10 on your computer, the first step is to create installation media. One of the easiest ways to do this is by using a USB drive. To get started, you’ll need a blank USB drive with at least 8 GB of storage and a Windows 10 ISO file.

    Once you have these, connect your USB drive to your computer and open the Media Creation Tool. From there, you can select the option to create installation media and choose your USB drive as the destination. The tool will then download the necessary files and create the installation media on your USB drive.

    This process may take some time, but once it’s complete, you’ll be ready to install Windows 10 on your computer. By creating installation media on a USB drive, you’ll have a portable and convenient way to install Windows on any computer that meets the system requirements.

    Install SSD and Boot from USB Installation Media

    If you’re looking to transfer Windows 10 to an SSD for faster boot-up times and better performance, there are a few steps you can follow. Firstly, make sure your computer has a working USB port and that you have a USB installation media with Windows 10 on it. You can create a bootable USB by downloading the Windows 10 Media Creation Tool from Microsoft’s website and following the instructions.

    Once you have your USB ready, shut down your computer and insert the SSD into an available slot. Then, connect the USB to your computer and boot from it. You may need to enter the BIOS and change the boot order to prioritize the USB device.

    Once you’ve booted from the USB, follow the on-screen prompts to install Windows 10 onto the SSD. After the installation is complete, your computer will automatically boot from the SSD and you can start using your new, faster storage device. With these simple steps, you can easily transfer Windows 10 to an SSD and enjoy the benefits of improved performance.

    Shut down your computer and unplug it

    Are you tired of waiting forever for your computer to boot up? Installing an SSD can significantly boost the speed of your computer. But before you start, make sure to shut down your computer and unplug it to avoid any accidents. Once you’ve ensured your safety, it’s time to get started.

    First, you need to determine where your SSD will go. Most computers have a designated slot for it, so make sure to check your motherboard’s manual for the exact location. Once you’ve located the slot, gently insert the SSD and secure it with screws.

    Next, you need to create a USB installation media and set it up to boot from it. This involves downloading the installation files and creating a bootable USB drive, which can be done using various software tools. When the USB media is ready, reboot your computer and enter the BIOS settings.

    From there, select the USB drive as the primary boot device and save the settings. Once you’ve done that, your computer should now recognize the USB drive as the boot device, and you can proceed with installing the operating system. With an SSD and a USB installation media, your computer will be up and running in no time!

    Install SSD and connect cables

    Installing an SSD can be a great way to speed up your computer’s performance and ensure faster boot times. To do this, first, ensure that the SSD you purchase is compatible with your computer’s motherboard. Once you have the SSD, open up your computer case and locate the hard drive bays.

    Slide the SSD into an available bay and screw it in place. Next, connect the SATA data cable from the SSD to the motherboard and connect a SATA power cable from the power supply to the SSD. Once you have connected the cables, you are ready to install a fresh copy of your operating system on the SSD.

    Boot from a USB installation media and follow the prompts to complete the installation process. Once you have completed the installation, your computer will now be running from the faster, more reliable SSD drive. Say goodbye to sluggish performance and hello to faster boot times and improved overall responsiveness.

    Boot from USB Installation Media

    Installing an SSD and booting from USB installation media can be a great way to speed up your computer and improve its overall performance. First, you’ll need to physically install the SSD into your computer. This involves opening up your computer case, locating the existing hard drive, removing it, and replacing it with the SSD.

    Once the physical installation is complete, you’ll need to boot from the USB installation media. This can typically be done by pressing a key during startup to access the boot menu, selecting the USB drive as the primary boot device, and following the prompts to install the operating system onto the new SSD. It’s important to note that this process will erase any files and data on the previous hard drive, so be sure to back up any important information beforehand.

    By upgrading your computer with an SSD and booting from USB installation media, you can give your system a significant performance boost and get more done faster. So, if your computer is running sluggishly or you’re looking for a performance upgrade, this could be the solution you’ve been searching for.

    Transfer Windows 10 to SSD

    Are you looking to transfer Windows 10 to an SSD for faster performance? It’s a great move and can make your system run like a dream. The first step is to use a cloning tool, such as EaseUS Todo Backup, to copy the entire hard drive to the new SSD. After cloning, you need to access the BIOS or UEFI firmware to change the boot order and make the SSD the primary boot drive.

    Once your system boots up using the SSD, you can then delete the operating system from your old hard drive, along with other unwanted files, to free up space. Voila! You’ve successfully transferred your Windows 10 to an SSD, and now your system is running at lightning-fast speeds!

    Select Language and Keyboard Settings

    When transferring Windows 10 to an SSD, one of the first things you’ll need to do is select your language and keyboard settings. While this may seem like a simple task, it’s important to take your time and ensure you make the right choices. Choosing the wrong language or keyboard layout can lead to frustration and mistakes down the line.

    Fortunately, Microsoft makes it easy to customize these settings during the installation process. Simply choose your preferred language and keyboard layout from the drop-down menus provided. After making your selections, you can continue with the installation process.

    By taking a few extra minutes to choose the right language and keyboard settings, you’ll ensure a smoother and more enjoyable experience using your Windows 10 SSD.

    Enter Windows Product Key

    If you’ve just purchased a new SSD and want to transfer your Windows 10 to it, the first step you’ll need to take is to enter your product key. It’s important to have your product key handy as you’ll need it to activate your Windows once it’s been transferred over to the new drive. Don’t worry if you don’t have your product key, you can typically find it in your original packaging or on a sticker on your computer or laptop.

    Once you have your product key, you can begin the transfer process. Remember to back up your important files and data before starting the transfer to ensure you don’t lose anything important. With a bit of patience and careful attention to detail, you can easily transfer your Windows 10 to your new SSD and enjoy faster, more efficient performance.

    Choose Custom Installation Option

    When transferring Windows 10 to an SSD, it is important to choose the custom installation option. This can be a bit confusing, but it is the best way to ensure that you don’t accidentally erase any important files. The custom installation option allows you to select the specific partition that you want to install Windows 10 on.

    It also allows you to choose which additional features, such as language packs and drivers, you want to install. By selecting only what you need, you can optimize your system’s performance and save space on your SSD. It is important to note that the custom installation option may not be available if you are upgrading from an older version of Windows, so it’s always a good idea to check beforehand.

    By choosing the custom installation option when transferring Windows 10 to your SSD, you can ensure that everything is set up just the way you want it, with no unnecessary clutter or bloatware.

    Select SSD as the Installation Destination

    If you’re looking to upgrade your storage space, transferring Windows 10 to an SSD is a great option. Not only will it speed up your system, but it’s also straightforward to do. Start by selecting your SSD as the installation destination, and then follow the prompts to migrate your operating system.

    This process will ensure that all your files, settings, and programs are transferred over to the new drive. The best part is that SSDs are much faster than traditional hard drives, resulting in faster boot times and reduced load times for your applications. So, if you’re tired of waiting for your system to catch up with you, upgrading to an SSD is the way to go.

    It’s a simple and effective solution to breathing new life into your computer and keeping up with the fast-paced digital world.

    Follow On-Screen Instructions to Finish Installation

    If you’re planning to upgrade your desktop or laptop’s hard drive, transferring your operating system, windows 10, to the new SSD (solid-state drive) is a crucial step. Doing this will maximize your computer’s potential in terms of speed and performance. Fortunately, the process is not as complicated as you might think.

    First, you need to identify what type of SSD your computer supports and purchase one with enough capacity to accommodate all your files. After that, it’s time to install the SSD and windows You can use various tools available online, such as EaseUS Todo Backup, to clone your OS onto the SSD.

    Once done, follow the on-screen instructions to complete the installation. Don’t forget to update your drivers, check for system updates, and optimize your settings to ensure your computer runs smoothly on your new SSD. By following these steps, you can experience a faster and more efficient computer without the expense of buying a new one.

    Restore Your Data

    If you are looking to transfer your Windows 10 operating system to an SSD, there are a few steps you can take to make the process smoother. First, you will need to back up your data to an external hard drive or cloud storage service. Next, you should install your new SSD into your computer and ensure it is recognized by your system.

    Then, you can use a disk cloning software to copy your existing hard drive to your new SSD. Once the cloning process is complete, you can remove your old hard drive and configure your system to boot from the new SSD. Finally, you should verify that all of your data is intact and that your system is running smoothly.

    By following these steps, you can ensure a successful transfer to your new SSD while avoiding data loss or other issues.

    Use Windows Backup Feature

    If you’re someone who frequently saves important files and documents on your Windows computer, then it’s important to have a backup plan in place in case anything unexpected happens. One of the easiest ways to create a backup is by using the Windows Backup feature. This helpful tool allows you to create a system image or backup of all your files and settings, which you can then restore if necessary.

    To restore your data, you can simply go to the Backup and Restore center, select “Restore my files” or “Restore all users’ files”, and then choose the files or folders you want to restore. Using the Windows Backup feature ensures that your important information is protected and easily recovered in case of a computer malfunction or data loss.

    Use Third-Party Backup Tool

    Once you’ve backed up your important files using a third-party backup tool, you’ll want to know how to restore them safely and efficiently. The process for restoring your data will vary depending on the backup tool you’re using, but generally, you’ll need to connect the storage device or cloud storage account where your backup is stored, and then navigate to the specific files or folders you want to restore. Some backup tools may even allow you to restore your entire system to a previous state.

    Make sure to follow the instructions carefully to avoid accidentally deleting or overwriting any of your existing files. With the right backup tool and a bit of know-how, restoring your data can be a simple and stress-free process. So, don’t wait until it’s too late – start backing up your files regularly today!

    Conclusion

    In essence, transferring Windows 10 to an SSD is like giving your computer a turbo boost. It’s a simple process that can greatly enhance your machine’s performance and extend its lifespan. So, don’t let your computer drag its feet any longer – take the plunge and transfer Windows 10 to an SSD today!”

    FAQs

    What are the benefits of transferring Windows 10 to an SSD?
    Transferring Windows 10 to an SSD can provide faster boot and load times, improved system responsiveness, and better overall performance.

    Can I transfer my Windows 10 operating system to an SSD without losing my files and settings?
    Yes, there are methods to transfer your entire operating system to an SSD without losing any files or settings. The most popular method is to use cloning software.

    Do I need to reinstall Windows 10 after transferring to an SSD?
    No, there is no need to reinstall Windows 10 after transferring to an SSD. You can simply clone your existing operating system and all of your files and settings will be preserved.

    How much space do I need on my SSD to transfer Windows 10?
    The amount of space required will depend on the size of your current operating system and the amount of data stored on your computer. A good rule of thumb is to have an SSD that is at least 20% larger than the current amount of data on your hard drive.

    What is the easiest way to transfer Windows 10 to an SSD?
    The easiest way to transfer Windows 10 to an SSD is to use a cloning software such as Clonezilla or EaseUS Todo Backup. These programs provide step-by-step instructions and can quickly transfer your entire operating system to a new SSD.

  • Unlock the Mystery: Understanding How SSDs Connect to Your Motherboard

    If you want to upgrade the performance of your computer, adding an SSD to your motherboard can do the trick. Solid-state drives (SSDs) are faster and more reliable than traditional hard disk drives (HDDs) because they use flash memory instead of spinning disks. Installing an SSD to your motherboard may seem daunting, especially if you’re unfamiliar with the process.

    But fear not, because we’ve got you covered. In this article, we’ll guide you through the process of connecting an SSD to your motherboard step-by-step, so you can upgrade your computer with confidence. So, whether you’re a seasoned tech enthusiast or a beginner, keep reading to learn everything you need to know about connecting an SSD to your motherboard.

    Understanding SSD Connections

    When it comes to understanding how a SSD connects to a motherboard, it’s all about the interface. SSDs use a variety of interfaces to connect including, SATA, NVMe, and PCIe. SATA is the easiest and most common connection type, using a simple cable that connects to the motherboard.

    NVMe and PCIe connections, on the other hand, use a more complex interface that can provide higher speeds. NVMe is designed specifically for SSDs and is capable of speeds up to six times faster than SATA. PCIe connections use a dedicated lane for data transfer, making them the fastest option with speeds up to three times faster than NVMe.

    When selecting an SSD, it’s important to consider not only the speed but also the type of interface that will best suit your needs.

    SATA Connection

    SATA Connection When it comes to SSD connections, one of the most common options is SATA or Serial ATA. This connection type is widely used in computers and laptops, making it a popular choice for many users. SATA connections provide fast and reliable data transfer speeds, which is essential for SSDs to perform at their best.

    Plus, they are easy to install, with most motherboards and computers featuring multiple SATA interfaces. It’s essential to remember that SATA connections come in a variety of speeds, ranging from SATA I at 5 Gbps to SATA III at 6 Gbps.

    Thus, users must consider their system’s compatibility with their chosen SSD and ensure that they are utilizing the right SATA interface to achieve optimal performance. However, overall, SATA connections offer a reliable, accessible, and efficient means of connecting SSDs to a computer system.

    how does a ssd connect to motherboard

    M.2 Connection

    One of the most popular connection types for solid-state Drives (SSDs) is the M.2 connection. This type of connection provides a high-speed data transfer rate and a compact form factor.

    M.2 SSDs connect directly to the motherboard of the computer, eliminating the need for cables and providing a secure connection. The M.

    2 connection is also known for its high performance, making it a popular choice for gamers and enthusiasts who want fast and reliable storage. However, it’s important to note that not all motherboards support M.2 SSDs, so it’s essential to check compatibility before making a purchase.

    Additionally, M.2 SSDs come in different sizes, so it’s crucial to double-check the physical dimensions before buying one. Overall, the M.

    2 connection offers an excellent way to upgrade your computer’s storage and performance.

    Step-by-Step Guide

    If you’re planning to upgrade to a solid-state drive (SSD) from your old hard disk drive (HDD), one of the essential things to consider is how to connect it to your motherboard. Unlike the older HDDs, SSDs use a different type of connector called a SATA connector. On your motherboard, you’ll find several SATA ports located near the chipset.

    To connect your new SSD, locate an unused SATA port and align the connector to the port. You’ll then need to take the SATA data cable that comes with your SSD and connect one end to the SSD and the other to the SATA port on your motherboard. Make sure that both are firmly attached to avoid any connection issues, and you’re all set! Your computer should now recognize your new SSD as a storage device, and you can start using it in your system to achieve faster boot times and improved performance.

    It’s that simple – just a few easy steps to get your SSD connected to your motherboard.

    Step 1: Identify the SSD Connection

    When upgrading or installing an SSD, the first step is to identify the SSD connection. There are two primary types of SSD connections: SATA and NVMe. To make sure you get the right SSD for your computer, you need to know which connection your motherboard supports.

    SATA is the most common type of connection, and you can easily identify it by looking for the SATA connector on your motherboard. NVMe, on the other hand, is a newer and faster option that requires an M.2 slot.

    Some motherboards support both SATA and NVMe connections, while others only support one or the other. By knowing which type of connection your motherboard supports, you’ll be able to choose the right SSD for your computer.

    Step 2: Prepare the SSD

    Now that you’ve ensured your computer has the necessary hardware compatibility, it’s time to get your SSD ready for installation. First things first, you’ll want to back up all of your data from your current hard drive. This is to ensure that you don’t lose any of your essential files during the migration process.

    Once that’s done, you’ll need to physically install the SSD into your computer. Depending on your setup, you may need to swap out the existing drive bay with the one designed for the SSD. You’ll then need to connect the power and data cables to the drive.

    Before you can start using your new SSD, you’ll need to initialize and format it. You can do this by going to the “Disk Management” utility in Windows and following the prompts to format the drive. Congratulations! You’re now ready to start enjoying the speed and performance benefits of your new SSD.

    Step 3: Connect the SSD to the Motherboard

    Once you have the SSD ready, it’s time to connect it to the motherboard. This can be done easily with a few simple steps. First, locate the PCIe M.

    2 slot on your motherboard. Then, gently insert the SSD into the slot, making sure it aligns with the socket. Secure it in place by screwing it down.

    If you’re using a 5-inch SSD, you will need to connect it to a SATA port on your motherboard. Simply locate an available SATA port, connect one end of the SATA cable to the drive, and the other end to the motherboard.

    Once you’ve made the connection, turn your PC on. The BIOS should detect the new drive automatically. If it doesn’t, you may need to enter the BIOS and manually enable the port.

    With the SSD connected, you can enjoy faster boot times, improved application loading, and quicker file transfers. It’s a simple upgrade that can make a big difference to your computer’s performance.

    Conclusion

    In conclusion, it’s as simple as this – SSDs and motherboards have a special kind of love story. They connect with each other through a unique interface that involves no cables, no screws, and no hard work. Instead, they use a sleek and simple connector called the SATA connector, which is the core of their eternal bond.

    With SATA, SSDs can slide into the motherboard’s slot, ready to share their lightning-fast speeds, their remarkable durability, and their amazing storage capacities. And with that, the two become one, a perfect match made in high-tech heaven. Together, they bring life to your computer, enrich it with power, and elevate your gaming, editing, and browsing experience to the next level.

    All thanks to the magic of the SSD and the brilliance of the motherboard that embraces it.”

    FAQs

    What type of connector does a SSD use to connect to a motherboard?
    Most SSDs use a SATA connector to connect to a motherboard, while some newer models use an M.2 connector.

    Can an SSD be connected to any motherboard?
    If the motherboard has a compatible connector (SATA or M.2), then an SSD can be connected to it.

    Do all motherboards support SSDs?
    Most modern motherboards support SSDs, but older or budget motherboards may not have a compatible connector.

    Can I connect multiple SSDs to one motherboard?
    Yes, most motherboards have multiple SATA or M.2 connectors, allowing for multiple SSDs to be connected. Some motherboards also have specialized RAID configurations for multiple SSDs.

  • Clone Your Hard Drive to SSD in a Flash: The Ultimate Time-Saving Guide

    Upgrading to a solid-state drive (SSD) is perhaps the easiest and most cost-effective way to give an old computer new life. However, many computer users are often confused about the process of transferring their operating system and data from their old hard drive to their new SSD. One of the most common questions people ask when upgrading to an SSD is how long it will take to clone their hard drive? The answer is not as straightforward as you may think, as it depends on various factors such as the amount of data on your hard drive, the speed of your computer, and how you clone your hard drive.

    In this blog, we’ll explore different methods of cloning a hard drive to an SSD and how long each method typically takes. By the end of this article, you’ll have a better understanding of the timeframe to expect when you clone your hard drive to an SSD.

    Factors Affecting Transfer Time

    If you’re wondering how long it takes to clone your hard drive to a new SSD, it actually depends on several factors. One of the most significant factors that affect transfer time is the size of your hard drive. If you have a lot of data, expect the cloning process to take longer.

    The speed of your computer is also important – if your computer is older or slower, then the transfer will be slower as well. Another factor affecting transfer time is the type of connection you’re using – USB 0 is much faster than USB

    0, for example. Lastly, the software used also plays a role. Some cloning software provides more efficient processes that can speed up the transfer.

    Overall, it’s hard to provide an exact time, but it could range from several minutes to several hours. It’s recommended to keep your computer plugged in while cloning and to avoid running any other programs or actions that may slow down the process. By understanding these factors, you can better prepare and estimate how long it will take to transfer your data to your new SSD.

    Data Transfer Rate

    Data Transfer Rate When it comes to data transfer rate, there are several factors that can affect transfer time. One of the most significant factors is the distance between the two devices involved in the transfer. The farther apart they are, the longer it will take for data to travel between them.

    Another important factor is the type of data being transferred. If it’s a large file, like a high-resolution video or a program installation file, it will take longer to transfer than a smaller file, like a simple text document. Bandwidth can also play a role in transfer time.

    If many people are using the same network or internet connection at the same time, the transfer rate for each individual device may be slowed down. Finally, the quality of the equipment being used can affect transfer time. Older or slower devices may take longer to complete data transfers than newer, faster ones.

    Overall, there are many variables that can impact data transfer rate and therefore transfer time. By understanding these factors, individuals can take steps to optimize their data transfer processes for faster and more efficient transfers. Whether it’s upgrading devices or choosing the right time of day to perform transfers, there are many ways to improve data transfer rates and make data transfer a smoother and faster process.

    how long to clone harddrive to new ssd

    Size of the Hard Drive

    When it comes to transferring files, the size of your hard drive can play a significant role in how long it takes. As a general rule, larger files will take longer to transfer than smaller ones, and the capacity of your hard drive can also impact transfer times. This is because the bigger the file, the more data that needs to be moved, and the longer it will take to complete the transfer.

    Additionally, if your hard drive is running low on free space, it can impact transfer speeds as well. This is because your computer will have to work harder to find open areas to store the transferred data. In some cases, it may even need to move existing files around to make room, which can slow things down even further.

    So, if you’re planning to transfer a lot of data, make sure you have plenty of free space on your hard drive to help speed up the process.

    Type of Interface

    When it comes to transferring data, the type of interface used plays a significant role in determining the transfer time. The two types of interfaces commonly used are USB and Thunderbolt. USB is the most popular interface and is used in almost all devices.

    However, it is considerably slower than Thunderbolt, which is why Thunderbolt is preferred in devices that require faster transfer rates. The performance of the interface also depends on the version being used. For example, the latest USB

    1 Gen 2 interface is ten times faster than the original USB 1 interface. Another factor to consider is the number of devices connected to the interface.

    The more devices connected, the slower the transfer rate. Therefore, to ensure faster transfer rates, it is best to connect one device at a time. Overall, it is essential to research the type of interface required for the device and the required transfer rate as this will significantly affect the transfer time.

    Software and Tools for Clone Process

    If you’re looking to upgrade your computer’s hard drive to a new SSD, a common question you might have is how long it takes to clone the drive. The answer depends on a few factors, such as the size of the drive, the speed of your computer, and the method you use to clone the drive. Generally, a standard hard drive with 500GB of data can take anywhere from 1-2 hours to clone to a new SSD using software like EaseUS Todo Backup or Acronis True Image.

    However, if you have a larger hard drive or a slower computer, it may take longer. It’s important to note that certain software and tools may offer faster cloning speeds or additional features that can help streamline the process. Additionally, it’s always a good idea to back up your data before starting the cloning process to ensure that nothing is lost in the event of an error or user error.

    With the right software and tools, cloning your hard drive to a new SSD can be a straightforward and relatively quick process, ultimately giving your computer a much-needed boost in performance.

    Using Windows Backup and Restore

    When it comes to cloning your system or backing up important files, it’s important to have the right tools. Windows Backup and Restore is a great option for creating a system image or backing up files and folders. This built-in tool allows you to schedule backups, create a recovery drive, and restore files in case of a system failure.

    However, for more advanced cloning needs, there are other software options available such as Macrium Reflect or Clonezilla. These programs allow for more customization and flexibility when it comes to creating disk images or cloning entire drives. Regardless of the tool you choose, it’s important to regularly backup your data to protect against potential data loss or system failure.

    Using Macrium Reflect

    If you’re in need of a reliable software to clone your hard drive, Macrium Reflect is an excellent choice. This software offers a range of tools and features that make the cloning process straightforward and user-friendly. One of the standout features of Macrium Reflect is the ability to schedule automatic backups, meaning you don’t have to worry about manually cloning your hard drive on a regular basis.

    Additionally, the software offers support for both Windows and Linux operating systems, making it a versatile option for a wide range of users. Overall, if you’re looking for a reliable and robust tool to clone your hard drive, Macrium Reflect is definitely worth considering.

    Using EaseUS Todo Backup

    If you’re looking for an easy and reliable way to clone your hard drive, EaseUS Todo Backup is the software to use. It offers a user-friendly interface and a wide range of features to help you create an exact copy of your current drive. One of the key benefits of using this software is that it allows you to clone your hard drive without losing any data.

    This means that you can transfer all your files, applications, and settings to your new drive seamlessly. EaseUS Todo Backup also allows you to schedule automatic backups, which means you can set it and forget it. Another great feature is the ability to create a bootable USB drive, which ensures that you can still clone your drive even if your computer won’t boot.

    Overall, if you’re looking for a reliable and easy-to-use cloning solution, EaseUS Todo Backup is definitely worth considering.

    Estimated Time for Cloning

    If you’re upgrading to a new SSD, you may be wondering how long it will take to clone your old hard drive. The actual time it takes can vary based on a few different factors. First, the size of your hard drive and the amount of data on it will play a role in how long the cloning process takes.

    Generally, the more data you have, the longer it will take. Additionally, the speed of your computer and the type of cloning software you use can also impact the duration of the process. However, on average, cloning a hard drive to a new SSD can take anywhere from 30 minutes to a few hours.

    It’s important to note that while the process may take some time, it’s worth it in the long run to have a faster, more efficient computer that runs on an SSD. And once the cloning process is complete, you can start enjoying the benefits of your new SSD right away!

    Example Calculation for 500 GB HD

    If you need to clone a 500 GB hard drive, you’re probably wondering how long it will take. The answer depends on a few factors, such as the speed of your computer and the software you’re using for the cloning process, but we can give you a rough estimate. Assuming you have a mid-range computer with decent specs, and you’re using a standard cloning tool, it will likely take anywhere from 2-4 hours to clone a 500 GB hard drive.

    This time frame can vary depending on the speed of your computer, the speed of the hard drive being cloned and the type of cloning software that you are using. It’s important to note that this estimate only includes the time it takes to perform the actual clone, and doesn’t take into account any time needed for prepping the hard drives, organizing files, or any issues that may arise during the process. It’s also important to have enough space on the destination hard drive to store everything from the source drive.

    In conclusion, cloning a 500GB hard drive will take a few hours, but the exact time will depend on several factors. However, the end result will be an exact copy of your source drive that you can use as a backup or replace a damaged hard drive. Always ensure that your data is backed up on at least two different locations to ensure that it is safe and secure for the future.

    Example Calculation for 1 TB HD

    If you’re looking to clone a 1 TB hard drive, you’re probably wondering how long it will take. Well, the answer depends on a few factors. First, the speed of your computer and the hard drive being used for cloning will impact the time it takes.

    As a rule of thumb, using a solid-state drive (SSD) for cloning can speed up the process. On average, it takes about 5-7 hours to clone a 1 TB hard drive using an SSD and a USB 0 interface.

    However, if you’re using a traditional hard disk drive, it can take up to 12 hours or more. Additionally, the type of data being cloned can also impact the time it takes. Large video files, for example, will take longer to clone than smaller text files.

    Overall, if you’re unsure about the estimated time it will take to clone your 1 TB hard drive, it’s always a good idea to give yourself a buffer and start the process the night before you need it. That way, you won’t have to worry about waiting around for it to finish.

    Conclusion and Final Thoughts

    In the race to clone a hard drive to a new SSD, it all depends on the horse power of your computer. With a speedy processor and plenty of RAM, you could be up and running in no time. However, if you’re rocking an old, tired machine, the cloning process may feel like watching paint dry.

    Either way, sit back, relax, and let your computer do the heavy lifting. In the end, the result will be a shiny, new SSD that’ll make your old hard drive feel like a floppy disk. “

    FAQs

    What is the process of cloning a hard drive to a new SSD?
    The process of cloning a hard drive to a new SSD involves creating an exact copy of all data on the existing hard drive and transferring it to the new SSD.

    Can you clone a hard drive to a smaller-sized SSD?
    Yes, it is possible to clone a hard drive to a smaller-sized SSD as long as the data on the hard drive can fit within the available storage space on the new SSD.

    How long does it take to clone a hard drive to a new SSD?
    The time it takes to clone a hard drive to a new SSD depends on various factors such as the size of the hard drive being cloned, the speed of the computer, and the type of cloning software being used. On average, it can take anywhere from 30 minutes to several hours.

    Can you continue to use your computer while the hard drive is being cloned to a new SSD?
    It is not recommended to use your computer while the hard drive is being cloned to a new SSD as it can interfere with the copying process and may result in errors or incomplete data transfer. It is best to let the cloning process run uninterrupted.

  • Seamlessly Transfer Storage from One SSD to Another: The Complete Guide

    Are you running out of storage space on your solid-state drive (SSD)? Or maybe you just upgraded to a larger SSD and want to transfer all your files and data to the new one? No worries, transferring SSD storage is a relatively simple process that can be done with just a few steps. Whether you’re a tech-savvy person or a beginner, our comprehensive guide will help you transfer SSD storage without any hassle. Think of it as moving all your belongings from your old house to your new one, except this time it’s all virtual! So, buckle up and get ready to learn how to transfer SSD storage like a pro!

    Choosing the Right SSD

    If you’re considering upgrading or replacing your SSD, you’ll want to make sure you properly transfer your data to the new device. One way to do this is to simply copy and paste your old files onto your new drive, but this may not be the most efficient way, especially if you have a lot of large files. Instead, you can use cloning software to make a full copy of your old drive onto your new one.

    This ensures that all your files, programs, and settings are transferred over seamlessly. There are many different cloning software options available, such as Clonezilla, EaseUS Todo Backup, and Acronis True Image. Be sure to choose one that’s compatible with your specific SSD and computer, and follow the instructions carefully to avoid any data loss or system errors.

    With the right tools and approach, transferring your storage from one SSD to another can be a simple and stress-free process.

    Consider the Capacity and Form Factor

    When looking for the best SSD for your device, it’s important to consider both the capacity and form factor. Capacity refers to the amount of data that can be stored on the SSD, so it’s crucial to choose an SSD that has enough space for your needs. On the other hand, form factor refers to the physical size and shape of the SSD, which can impact compatibility with your device.

    For example, if you have a smaller device, you may require a smaller form factor, such as an M.2 or mini PCIe SSD. Conversely, if you need a high-capacity SSD, you may need to opt for a larger form factor, such as a

    5-inch or 5-inch SSD. It’s important to consider both factors together to ensure that you choose an SSD that meets your storage needs and is compatible with your device.

    By finding the right combination of capacity and form factor, you can ensure that your device runs efficiently and that you have enough space to store all of your important files and data securely.

    how to transfer storage from one ssd to another

    Ensure Transfer Compatibility

    When it comes to choosing the right SSD for your computer, one of the most important things to consider is transfer compatibility. This refers to whether the SSD is compatible with the transfer interface on your computer’s motherboard. The most commonly used transfer interface today is SATA, which has been around for more than a decade.

    However, newer SSDs may use faster interfaces, such as PCIe, which can provide much faster transfer speeds. So, it’s essential to ensure that your computer’s motherboard has the right interface for the SSD you’re considering. You don’t want to spend money on a fast SSD only to find out that it’s not compatible with your computer’s transfer interface.

    Always check your computer’s specs before purchasing an SSD to avoid compatibility issues. This way, you can ensure that your new SSD will work seamlessly with your computer and provide the speed and performance you need. So, choose wisely and enjoy faster storage on your computer!

    Preparing for the Transfer

    So, you’ve recently upgraded your PC and now you want to transfer all your important data from one SSD to another? No problem! You can easily transfer storage from one SSD to another in just a few simple steps. First, you’ll need to clone your current drive using a cloning software like Acronis True Image. This software will create a complete copy of your existing drive, including your operating system, files, and settings.

    Once the clone is complete, install your new SSD into your computer and boot it up. Next, use the cloning software to transfer the cloned data onto your new SSD. Once the transfer is complete, you can now use your new SSD as your primary storage.

    Remember to verify that all your files and data are accessible on your new SSD before completely wiping your old drive. With these steps, you can easily transfer storage from one SSD to another without any data loss.

    Backup Important Data

    When it comes to transferring your important data from one device to another, it’s essential to prepare beforehand by backing up all of your critical files and documents. After all, there’s nothing worse than losing valuable data during a transfer, potentially leaving you with irretrievable information. So, take the time to transfer important files to an external hard drive, use a cloud-based storage system, or utilize a specialized backup software to ensure your essential data remains safe and easily accessible during the transfer process.

    Once you have your backup ready to go, you can rest easy knowing your sensitive files and documents are protected and secure, ready to be moved to your new device quickly and efficiently. Remember, it’s better to be safe than sorry when it comes to transferring your important information, so take the necessary steps beforehand to ensure a smooth and seamless transition.

    Create a Bootable Cloning Tool

    When it comes to cloning your hard drive, it’s important to have a reliable and effective bootable cloning tool. Before you begin the transfer process, there are a few things you need to prepare for. First, make sure you have enough space on your target drive for all the files and data you want to transfer.

    Second, ensure that you have the appropriate software installed on your computer to complete the process. It’s also a good idea to close any unnecessary programs or apps and disconnect any external devices to prevent any interruptions during the transfer. Lastly, set aside some time for the process as it can take a while depending on the amount of data being transferred.

    With these things in mind, you can confidently begin the transfer with your bootable cloning tool and have complete peace of mind knowing that all your data is safely duplicated.

    Transferring Storage

    Are you thinking of upgrading your SSD but worried about transferring your data? It’s actually easier than you think! First, make sure you have a backup of important data just in case. Then, use cloning software like Clonezilla or EaseUS to transfer all contents from your old SSD to the new one. It’s important to note that the new SSD should have equal or more storage capacity than the old one.

    Once the transfer is complete, shut down your computer and replace the old SSD with the new one. Boot up your system and voila! You should have all your files and data as if nothing was ever changed. Remember, transferring storage from one SSD to another isn’t a daunting task and can lead to a significant improvement in your computer’s performance.

    Connect the SSDs

    Connecting SSDs can be a daunting task, especially for those who are new to building computers. However, transferring storage from one device to another is an important step in upgrading or reconfiguring a computer system. The first step is to ensure that the SSDs are compatible with the computer’s motherboard.

    Once confirmed, the next step is to physically connect the SSDs to the motherboard using the appropriate SATA cables. After connecting the SSDs, power on the computer and enter the BIOS to ensure that the new drives are recognized by the system. If the SSDs are not recognized, double-check the connections and make sure they are secure.

    After confirming that the SSDs are recognized, transfer the data from the old storage devices to the new ones using a storage cloning software. This process enables the transfer of all the data, including the operating system, from the old hard drive to the new SSDs, ensuring a seamless transition. Ensuring that the SSDs are correctly connected and transferring data reliably will ensure an efficient, high-performing computer system.

    Launch Cloning Tool

    If you’re upgrading to a new device, one of the biggest headaches can be transferring all your data from your old device to the new one. That’s where cloning tools come in. Launching a cloning tool can make the process quick and easy.

    These tools work by essentially copying all the files and data from your old device and transferring them to your new one. One of the biggest benefits of using a cloning tool is that it reduces the risk of losing any important data during the transfer. Additionally, it saves time and effort, allowing you to get up and running on your new device without spending hours manually transferring data.

    Overall, a cloning tool is an essential tool for anyone who wants to make the switch to a new device without all the headaches that come with transferring data manually.

    Initiate Transfer

    Transferring storage can be an intimidating process. However, with the right precautions and planning, it doesn’t have to be stressful. The first step is to initiate the transfer by contacting your preferred storage provider.

    They will guide you through the rest of the process, including packing and transporting your items to their facility. It’s essential to prioritize safety when moving your items. This means using proper packing materials, labeling boxes, and making sure anything fragile is secured.

    When choosing a storage facility, consider factors such as location, accessibility, and security. Using a reputable provider will give you peace of mind that your belongings are in good hands and easily accessible when you need them. So take the leap and start transferring your storage today, knowing that with proper planning and precautions, the process can be straightforward and stress-free.

    Testing the New SSD

    If you’re looking to upgrade your computer’s storage by transferring data from one SSD to another, there are a few things you need to keep in mind. Firstly, make sure you have enough space on the destination drive to accommodate all the data you want to transfer. You’ll also need to decide whether you want to clone the original drive or copy the files over manually.

    Cloning is a quicker option, but it requires a software tool and some technical know-how. Alternatively, manually copying the files may take longer, but it’s a simpler process that doesn’t require any specialist tools. Whichever option you choose, be sure to back up your data beforehand to avoid any accidental loss.

    With the right planning and preparation, upgrading your SSD can be a quick and hassle-free process that improves your computer’s performance and storage capacity.

    Conclusion

    In conclusion, transferring storage from one SSD to another does not have to be a daunting task. With the proper tools and techniques, it can be as smooth as sliding a puck on an ice rink. Just remember to backup your data, clone your drive, and don’t forget to update your boot loader.

    Whether you’re a tech-savvy individual or a beginner in the world of storage migration, with these steps, you too can confidently upgrade your storage and make your computer run lightning fast!”

    FAQs

    How to transfer files from one SSD to another?
    You can transfer files from one SSD to another by using a file transfer program like EaseUS Todo PCTrans or by manually copying and pasting the files.

    Is it possible to clone one SSD to another?
    Yes, it is possible to clone one SSD to another by using cloning software such as Acronis True Image or Macrium Reflect.

    Can I transfer my operating system to a new SSD?
    Yes, you can transfer your operating system to a new SSD by cloning your current SSD or by doing a fresh installation of the OS.

    How long does it take to transfer storage from one SSD to another?
    The time it takes to transfer storage from one SSD to another depends on the amount of data being transferred and the method being used. On average, it can take anywhere from a few minutes to several hours.

  • Step-by-Step Guide: Formatting Your SSD to FAT32 Like a Pro!

    Looking to format your SSD to FAT32? Maybe you purchased a new SSD and want to make it compatible with your Mac or Windows computer. Or perhaps you want to use your SSD on other devices that only support the FAT32 file system. Whatever the reason, formatting an SSD to the FAT32 file system is a simple process that can be done in just a few steps.

    In this blog post, we’ll guide you through the process and provide you with tips to ensure a successful format. Get ready to make your SSD compatible with all your favorite devices!

    Preparing Your SSD

    Formatting a SSD to FAT32 can be a straightforward process. However, it’s worth noting that this file system has its limitations. For example, the maximum size of a file saved in a FAT32 partition can only be up to 4 GB.

    So, if you’re preparing your SSD for use with a device that has sizeable files, consider using NTFS or exFAT instead. That said, if you prefer using FAT32, here are the steps you should follow: First, plug in your SSD and back up any data you don’t want to lose. Next, open Disk Management in Windows and find the SSD in question.

    Right-click on it and choose “Format…

    “. In the Format dialog box, choose “FAT32” as the file system. You can also rename the volume, set the allocation unit size, or enable compression (though this may slow down the drive’s performance).

    After you double-check your settings, click the “Start” button to initiate the format. It may take a few minutes to complete. Once done, you should have a formatted SSD that you can use to store your files.

    Backing up Data

    Backing up your data is a crucial step in ensuring that your important files and documents are safe, secure, and easily retrievable. When it comes to preparing your SSD for data backup, there are a few important things to keep in mind. Firstly, it’s important to choose a reliable backup tool or software that fits your needs and preferences.

    This can be anything from cloud-based services to local backup solutions. Once you’ve chosen the backup tool that you want to use, it’s important to properly format your SSD to ensure that it is compatible. This involves selecting the appropriate file format, partitioning your drive, and setting the appropriate encryption and file system settings.

    Taking these steps can help you prepare your SSD for data backup and ensure that your important files are safe and secure. Remember, backing up your data is not only important for protecting your data from loss or damage, but it also keeps your files accessible and organized for when you need them the most.

    how do you format a ssd to fat32

    Checking for Errors

    When it comes to preparing your SSD, it’s important to check for errors beforehand to ensure that it’s functioning properly. One way to do this is by using built-in software like Windows Error Checking or macOS Disk Utility. These tools scan your SSD for any bad sectors or data errors that may be present.

    If any issues are found, it’s important to address them before using the SSD for storage. Another important step in preparing your SSD is to format it properly. This involves selecting the appropriate file system and partition scheme based on your intended use.

    For example, if you plan on using the SSD for a Windows operating system, you’ll want to format it with the NTFS file system and set up a primary partition. Overall, taking the time to prepare your SSD properly can help prevent data loss and ensure that your device runs smoothly for years to come. So, before you start using your new SSD for storage, be sure to check for errors, format it correctly, and optimize its settings for your specific needs.

    Formatting to FAT32

    If you’re wondering how to format your SSD to FAT32, there are a few steps you can take. Firstly, it’s important to note that using the Windows built-in formatting tool will only allow you to format to FAT32 if the drive is 32GB or less. If your drive is larger than that, you’ll need to use a third-party formatting tool.

    One such tool is called EaseUS Partition Master, which is free to download and use. Once you have the tool installed, you can select your SSD and choose to format it to FAT3 It’s important to note that formatting will erase all data on the drive, so make sure to back up any important files before proceeding.

    Overall, formatting your SSD to FAT32 can be done relatively easily with the right tools, and can be useful if you need to use the drive with devices that only support that file system.

    Using Windows Disk Management Tool

    Formatting a hard drive to the FAT32 file system is an important process for those who want to use their external drives on multiple platforms, especially on devices such as gaming consoles, televisions, and media players. Windows Disk Management Tool can be used to format your drive to FAT32 without the need for third-party software. To begin, plug the external drive into your computer and open the Disk Management Tool by pressing the Windows key + X and selecting Disk Management.

    Once there, right-click on the drive you want to format and select Format. A new window will pop up, allowing you to choose the file system. Select FAT32, set the allocation unit size to default, and click OK.

    Keep in mind that formatting your drive will erase all data on it, so make sure to backup essential files before proceeding. The process may take some time depending on the size of your drive, but once complete, your external drive will be ready to use on any device that supports FAT32 file format.

    Using Third-Party Software

    Using third-party software to format a USB drive is a common practice, especially when the operating system fails to recognize the file system. One of the most popular options for formatting is the FAT32 format, which is compatible with a wide range of devices. Third-party software such as EaseUS Partition Master or MiniTool Partition Wizard can help you quickly format your USB drive to FAT32, even if your operating system is unable to do so.

    However, it is important to remember that formatting a drive will erase all data, so make sure to backup any important files before proceeding. Additionally, be cautious when downloading and installing third-party software, as some programs may contain malware or damage your system. Overall, using third-party software for formatting can be a helpful solution, but it is important to be informed and cautious throughout the process.

    Command Prompt Method

    If you’re looking to format your drive or USB to FAT32, you can use the Command Prompt method. This method is relatively straightforward and easy to follow. First, you’ll need to open the Command Prompt window by pressing the Windows key + R and typing in CMD.

    Then, type in “diskpart” and press Enter. After that, type in “list disk” to display all the disks attached to your computer. Locate the disk you want to format and type in “select disk x” (replace x with the number of the disk you want to format).

    Finally, type in “format fs=fat32 quick” and press Enter. This will start the formatting process, which may take some time depending on the size of your drive. Once done, your drive will be formatted to FAT32, making it compatible with most devices.

    Conclusion

    Formatting an SSD to FAT32 is like giving a sleek sports car a flamboyant paint job – it may not alter the core performance, but it adds a fun touch of personality. With the right tools and steps, anyone can easily format their SSD to FAT32 and enjoy increased compatibility with various devices. Who said formatting had to be a boring chore?”

    FAQs

    What is the significance of formatting an SSD to FAT32?
    Formatting an SSD to FAT32 is important for compatibility with various operating systems such as Windows, Mac, and Linux.

    Can I format my SSD to FAT32 without losing data?
    No, formatting an SSD erases all data on the drive. Therefore, it is recommended to back up the data before formatting the drive.

    How do I format my SSD to FAT32 on a Windows computer?
    You can format your SSD to FAT32 by opening the Disk Management tool in Windows, right-clicking on the SSD, selecting “Format,” choosing “FAT32” as the file system, and clicking “OK.”

    What are the limitations of FAT32 on an SSD?
    FAT32 has a file size limitation of 4GB and a partition size limitation of 8TB. This may not be suitable for storing large files or partitions.

    Can I convert my SSD’s file system from NTFS to FAT32?
    Yes, you can convert your SSD’s file system from NTFS to FAT32 by reformatting the drive. However, this process will erase all data on the drive, so it’s important to back up any important files before proceeding.