Category: How to

How to

  • Effortless OS Migration: A Comprehensive Guide to Migrating to New Samsung SSD

    Are you planning to upgrade your computer’s storage system? If so, then congratulations, you’re taking a step towards better performance and faster speeds. However, with a new hard drive comes the challenge of transferring your old operating system and data to the new drive. This can be a daunting task, especially if you’re not tech-savvy or don’t have any prior experience in computer maintenance.

    Rest assured, though, as we’ve got you covered with our step-by-step guide to migrating your OS to a new Samsung SSD. Samsung is a well-known brand in the computer industry, and their SSDs are popular among users for their reliability and speed. Before we dive into the actual process of transferring your OS, it’s important to note that proper preparation is key to ensure the migration goes smoothly.

    This includes backing up your important data and creating a bootable USB drive. Once you’ve got these tasks out of the way, you’re ready to start the migration process. In this guide, we’ll take you through each step of the migration process, from installing the new Samsung SSD to cloning your existing OS onto the drive.

    We’ll also address any common issues that may arise during the migration process and provide solutions to these problems. By the end of this guide, you’ll have successfully transferred your operating system to your new Samsung SSD, and your computer will be running as good as new! So, if you’re ready to take your computer’s performance to the next level, follow along with our step-by-step guide and make the migration process a breeze.

    Check Compatibility and Capacity of SSD

    Congratulations on your new Samsung SSD! Now that you have it, the next thing you need to consider is how to migrate your OS to the new drive. Before you begin the migration process, you need to make sure that your SSD is compatible with your computer and has enough capacity to store all your files and programs. You should also check if your operating system supports SSDs and if you need to update your BIOS or drivers to ensure a smooth migration.

    To check compatibility, you can visit the manufacturer’s website and look for the specifications of your computer and the SSD. You should also check the storage capacity of your current hard drive and make sure that your new SSD has enough space to accommodate all your files and programs. Once you have confirmed compatibility and storage capacity, you can begin the migration process.

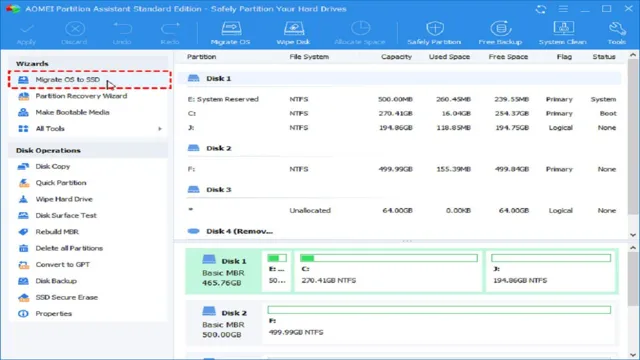
    You can use cloning software such as EaseUS Todo Backup or Macrium Reflect to copy your current OS and files to the new SSD. The software will guide you through the process and ensure that everything is copied correctly. In summary, migrating your OS to a new Samsung SSD requires you to check compatibility and storage capacity, update your BIOS and drivers if necessary, and use cloning software to copy your files and programs.

    With these steps, you can enjoy faster speeds and improved performance on your computer. So go ahead and migrate your OS to your new SSD today!

    Ensure New SSD is Compatible with Computer and Has Sufficient Capacity

    When upgrading to an SSD, it’s crucial to ensure that the new SSD is compatible with your computer and has enough capacity to suit your needs. Compatibility is essential, and you should check that your computer’s motherboard supports the connection type of the SSD, whether it be SATA or PCIe. Additionally, ensure that the computer’s BIOS is up to date to guarantee seamless compatibility between the new SSD and your system.

    As for capacity, it’s crucial to consider your current storage requirements and look for an SSD with enough space that provides ample room for future needs. You don’t want to upgrade to an SSD only to find yourself facing a lack of space shortly after. A good rule of thumb is to get an SSD with double the capacity of your current hard drive.

    So, before you invest in an SSD, make sure it matches your computer’s requirements and has sufficient storage capacity to fulfill your current and future needs.
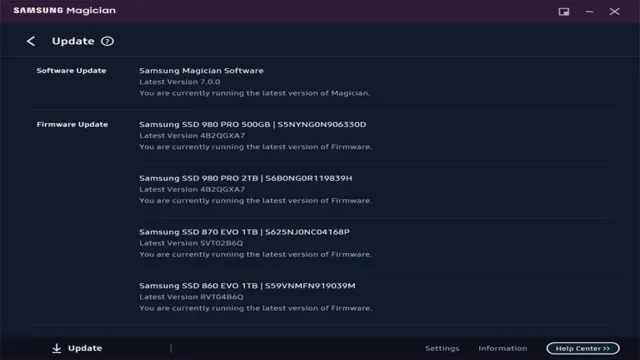
    bought samsung ssd how to migrate os to new

    Create Backup of Important Data

    If you have recently bought a Samsung SSD and want to migrate your OS to the new drive, backing up your important data should be your first step. This is because the migration process requires extensive manipulation of your operating system, which can result in data loss or corruption. To start the backup process, you can use an external hard drive or cloud backup services.

    Once you have created a backup of your important data, you can use Samsung’s Data Migration software or other third-party tools to migrate your OS to the new SSD. However, keep in mind that this process can take several hours and may require some technical knowledge. In addition, you should update any relevant drivers and ensure that your BIOS is set up to boot from the new drive.

    By taking the time to create a backup of your important data and following these steps carefully, you can ensure a smooth and stress-free migration to your new Samsung SSD.

    Use External Hard Drive or Cloud Storage to Backup Important Files

    Backing up your important files is crucial to protect them from potential loss due to various reasons such as hardware failure, virus attacks, or accidental deletion. To create a backup of your files, you can use an external hard drive or cloud storage. External hard drives are a great option for those who want to keep their data close at hand and easily accessible.

    You can simply connect the drive to your computer, transfer the files you want to backup, and then disconnect the drive. This way, you can keep your important data safe from any physical damage to your computer. On the other hand, cloud storage services like Google Drive, Dropbox, and Microsoft OneDrive offer a more convenient and automatic way to backup your files.

    You can simply upload your files to the cloud and access them from anywhere using an internet-connected device. Moreover, most cloud storage services offer synchronization across multiple devices, so your files are always up-to-date. However, it’s important to keep in mind that you need a reliable internet connection to access your files from the cloud.

    Whichever option you choose, make sure you create a backup of your important data regularly to avoid any unexpected loss.

    Download and Install Data Migration Software from Samsung

    So, you’ve finally bought a Samsung SSD and you’re eager to migrate your OS to the new device. Well, the good news is that Samsung provides its own data migration software to make this process seamless and straightforward. All you need to do is download and install the software from their official website onto your computer.

    Once you’ve installed it, connect your Samsung SSD to your computer and follow the instructions on the screen to migrate your OS and data to your new device. The Samsung data migration software is specifically designed for this purpose and is incredibly user-friendly, so you don’t need to be a tech expert to get the job done. In no time at all, you’ll be up and running on your new SSD with all your data safely, securely, and efficiently migrated over.

    So why wait? Download and install the Samsung data migration software today and take the first step towards a faster and more reliable computing experience!

    Samsung Data Migration Software is Specifically Designed for Samsung SSDs

    As Samsung SSDs gain greater popularity, it’s essential to have a reliable data migration tool to make the transition smooth. Samsung Data Migration Software is a specifically developed and dedicated software that provides a simple and easy way to transfer data from your old storage device to your Samsung SSD. This software is specifically designed to be used with Samsung SSDs and is not compatible with other brands.

    The migration process is seamless and faster than other data transfer methods, as the process is accelerated with Samsung’s Rapid Mode. With the Data Migration software, you can quickly move your files, photos, videos and operating system settings all in one process. The software is very user-friendly and easy to navigate, so even those without much technical experience can use it.

    You can download and install Samsung Data Migration software from the Samsung website at no cost. Upgrading to a new SSD is now efficient and effortless with the Samsung Data Migration software in your arsenal.

    Open Data Migration Software and Select Source and Destination Disk

    So you’ve just bought a Samsung SSD and you’re super excited to migrate your OS to the new drive? Great news! There are plenty of open data migration software options out there to help you accomplish this task. Your first step is to select both your source and destination disks. Make sure you double-check which disk is which before proceeding! Once you have confirmed which disk is the source and which is the destination, you can start the migration process.

    This may take a while, depending on the size of your operating system and the speed of your drives. But sit back, relax, and let the software do its thing. Once the transfer is complete, you can reboot your computer and you should be up and running on your new Samsung SSD in no time! Don’t forget to erase your old disk and securely dispose of it if you won’t be using it anymore.

    And that’s pretty much all there is to it! With a bit of patience and the right software, you can easily migrate your OS to a new drive and enjoy faster boot times and improved performance.

    Select Old Hard Drive as Source and New SSD as Destination

    When you’ve decided to upgrade your computer’s hard drive by switching to a new SSD, it may seem like a daunting process at first. However, the good news is that with the right data migration software, this can be a relatively straightforward process. First, you’ll need to connect both the old hard drive and the new SSD to your computer.

    Then, open up your data migration software and select the source and destination disks. In this case, you’ll want to choose your old hard drive as the source and your new SSD as the destination. This tells the software where to copy all your data from and where to put it.

    Once you’ve made these selections, you can sit back and let the software do the rest of the work. The program will transfer all your files, settings, programs, and operating system to the new SSD with minimal intervention from you. Before you know it, you’ll be up and running on your new SSD, enjoying faster speeds and better performance.

    So don’t be intimidated by the upgrade process; with the right tools, it can be a breeze.

    Begin Migration Process

    If you’ve recently purchased a Samsung SSD and are looking to migrate your OS to the new drive, don’t panic! The process can be straightforward with a bit of preparation. Before you begin, ensure that you have a backup of all your files and programs. You’ll also need to download and install a disk cloning tool such as Samsung’s Data Migration software.

    Once installed, connect your new SSD via USB or SATA and launch the cloning tool. Follow the prompts to select your source drive (the one with your OS) and the destination drive (your new SSD). The tool will clone the contents of your old drive to the new one, including your operating system, programs, and files.

    Once the process is complete, disconnect the old drive and set the new SSD as your boot drive in your computer’s BIOS. You’re now ready to enjoy the benefits of a lightning-fast Samsung SSD!

    Wait for Software to Copy Operating System and Data to New SSD

    Now that you’ve finished preparing your new SSD and have installed the migration software, it’s time to begin the migration process. This is the part where you sit back and wait as the software copies your operating system and data to the new SSD. Depending on the size of your files and the speed of your computer, this could take a while.

    It’s important not to interrupt the process or turn off the computer during this time, as it could cause data loss or corruption. Imagine this like moving into a new house – you’ve packed up all your belongings, hired the movers, and now it’s time to watch as they transfer everything to your new home. The process may be slow and tedious, but the end result is worth it.

    Just sit back, relax, and let the software do its job.

    Swap Old Hard Drive with New SSD

    If you’ve recently purchased a Samsung SSD and want to swap out your old hard drive for it, migrating your operating system can feel like a daunting task. However, it’s easier than you might think. The first step is to clone your old hard drive onto the new SSD.

    You can use software like Samsung Data Migration or Macrium Reflect to complete the transfer. Once you’ve completed the cloning process, you’ll need to physically install the new SSD into your computer and set it as the primary boot device in your BIOS settings. This ensures that your computer will boot from the new drive instead of the old one.

    If you run into any issues during the cloning or installation process, Samsung provides support to help you troubleshoot and resolve any problems. In no time at all, you’ll be enjoying the benefits of faster boot times and improved system performance thanks to your new SSD.

    Physically Install New SSD in Place of Old Hard Drive

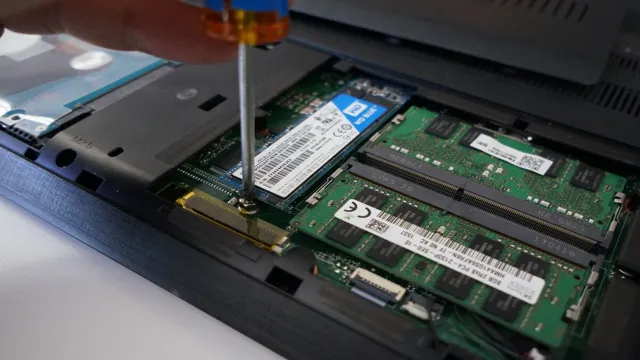
    Swapping a traditional hard drive with a solid-state drive (SSD) is an excellent way to boost your computer’s performance. But before you begin, make sure to back up all important data and shut down your computer. Once your computer is off, locate your old hard drive and unscrew it from the mounting brackets.

    Carefully disconnect the cables from the hard drive and remove it from your system. Then, remove your new SSD from its packaging and screw it into the same bracket. Reconnect the cables in the same position as they were in with the hard drive, and make sure they are secure.

    Once everything is connected, start your computer and check the BIOS to ensure that your computer recognizes the new SSD. From there, you can start transferring data, installing software and apps, and enjoy the improved speed and performance of your computer with your new SSD in place. It’s that easy!

    Boot Computer from New SSD and Verify OS Migration

    So, you’ve just bought a new Samsung SSD and you’re ready to migrate your operating system from the old hard drive to the new one. The first step is to physically install the new SSD, which requires opening up your computer and connecting it to your motherboard with a SATA cable. Then, you’ll need to clone your old hard drive using software like Samsung’s Data Migration tool or third-party options like Clonezilla.

    Once the cloning process is complete, you can set the cloned SSD as the primary boot device in your computer’s BIOS settings and start up your computer from the new drive. This will allow you to verify that the OS migration was successful and that all your files and settings have been transferred over to the new SSD. With your new SSD up and running, you should notice a significant boost in speed and overall performance, making it all worth it in the end.

    Check that Operating System and Data are Functioning Properly on New Samsung SSD

    boot computer, Samsung SSD, OS migration If you’ve recently installed a new Samsung SSD in your computer and transferred the operating system and data over, there are a few crucial steps you should take to ensure everything is functioning correctly. The first thing you’ll want to do is boot your computer from the new SSD. Once you’re up and running, verify that your operating system migration was successful by checking that your computer’s settings and applications are all present and working correctly.

    Take some time to test out various functions and features to make sure nothing was lost or broken during the transfer. With everything running smoothly, you can now enjoy the increased performance and storage capacity that your new Samsung SSD offers. Congratulations on a successful upgrade!

    Conclusion

    In conclusion, migrating your operating system to a new Samsung SSD is a bit like giving your computer a new pair of sneakers. It’ll run smoother, faster, and feel like a whole new machine! With a little bit of know-how and the right tools, it’s a simple process that can save you a lot of time and frustration in the long run. So why not treat your computer to a Samsung SSD migration, and let it step into the future with a brand new set of kicks!”

    FAQs

    What are the benefits of migrating OS to a new SSD?
    Migrating OS to a new SSD can significantly speed up your system’s performance, reduce boot times, and increase overall responsiveness.

    Is it possible to migrate my existing OS to a new Samsung SSD without losing any data?
    Yes, it is possible to migrate your existing OS to a new Samsung SSD without losing any data. You can use Samsung’s Data Migration software to migrate your data to the new SSD.

    Can I migrate my OS from a hard drive to a Samsung SSD?
    Yes, you can migrate your OS from a hard drive to a Samsung SSD. You will need to use Samsung’s Data Migration software to clone your existing drive onto the new SSD.

    Will migrating my OS to a new Samsung SSD delete my existing files?
    No, migrating your OS to a new Samsung SSD will not delete your existing files. However, it is always recommended to back up your data before any major system changes just to be safe.
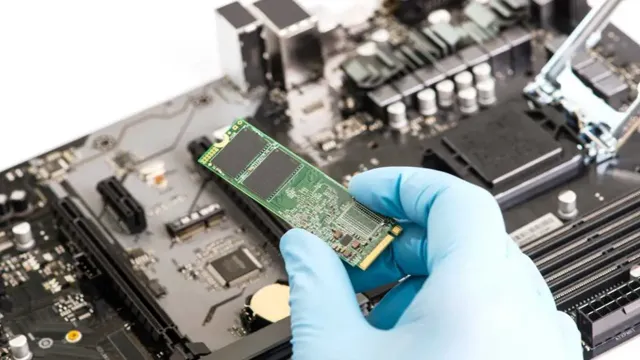
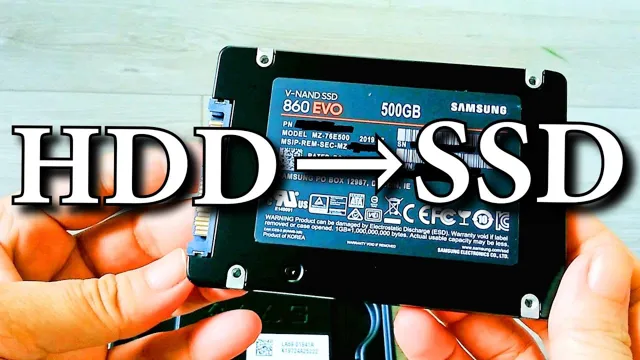
  • Boost Your PC Performance: A Step-by-Step Guide to Making an SSD Your Main Drive

    When it comes to upgrading your computer’s performance, one of the easiest and most effective ways is by making your SSD the main drive. SSDs or Solid-State Drives are faster and more reliable than traditional hard drives and can significantly improve your computer’s overall speed and efficiency. But how do you make SSD your main drive, and what are the benefits of doing so? In this blog, we will answer these questions and guide you through the process of making SSD your main drive.

    So, grab a cup of coffee, sit back, and let’s dive in!

    Choose and Purchase an SSD

    If you’re looking to boost your computer’s performance, upgrading your hard drive to an SSD is a great place to start. Making an SSD your main drive can significantly increase your system’s boot and application load times, and overall responsiveness. First, you’ll need to choose the right SSD for your needs, whether it’s a SATA or NVMe drive.

    Once you’ve selected your SSD, you’ll need to install it inside your computer, making sure the drive is properly connected to the motherboard. Next, you can transfer your operating system and files from your old hard drive onto your new SSD. This can be achieved through a cloning process, where you’ll need to use a software tool to transfer the data over to the new drive.

    After the cloning process is complete, you can set your new SSD as the primary drive in your computer’s BIOS settings. With these steps, you’ll have successfully made your SSD the main drive in your computer, resulting in faster performance and quicker load times.

    Consider capacity and compatibility

    When choosing and purchasing an SSD, there are two important factors to consider: capacity and compatibility. Capacity refers to how much data the SSD can hold. It’s important to choose an SSD with enough capacity to suit your needs, but not so much that you’re paying for more storage than you’ll actually use.

    As for compatibility, it’s crucial to check the specifications for your device to ensure that the SSD you choose is compatible. Generally, most modern devices are compatible with most SSDs, but it’s always best to double-check before making a purchase. It’s also worth noting that there are different types of SSDs, such as SATA, PCIe, and NVMe, each with its own compatibility specifications.

    By taking the time to consider both capacity and compatibility, you can choose an SSD that meets your specific needs and provides the best performance possible for your device. So next time you’re in the market for an SSD, keep these factors in mind to make the best purchase decision.

    how to make ssd main drive

    Choose a reputable brand and model

    When it comes to purchasing an SSD, it’s important to choose a reputable brand and model. SSDs are becoming increasingly popular due to their fast speeds and reliability, so there are many options out there. However, not all brands and models are created equal.

    It’s important to do your research and choose a brand that has a proven track record of performance and durability. Some of the top brands in the market include Samsung, Crucial, and Kingston. Additionally, you’ll want to consider the specific model you’re interested in and read reviews from other users to ensure it meets your needs.

    Don’t be swayed by the cheapest option – investing in a high-quality SSD will pay off in the long run with faster load times and greater reliability. So, take your time and choose wisely.

    Backup and Migration

    If you’re looking to make your SSD the main drive of your computer, there are a few steps you’ll need to take. First and foremost, you’ll want to back up all of your important files and data before making any changes to your system. This can be done using a variety of methods, such as storing your files on an external hard drive or using a cloud-based storage service.

    Once you’ve backed up your data, you can begin the process of migrating your operating system and programs to your SSD. This can involve cloning your existing hard drive onto the SSD, or doing a clean install of your operating system and reinstalling your programs on the SSD. Regardless of which method you choose, it’s important to make sure that your SSD is properly connected and recognized by your system before you start moving files and programs onto it.

    With a little bit of patience and preparation, you can easily make your SSD the primary drive of your computer and enjoy faster boot times and improved performance.

    Backup important data and files

    There’s nothing more frustrating than losing important data and files due to a computer crash or other type of mishap. That’s why it’s essential to regularly backup your data and files to avoid such scenarios. Backing up your data provides an additional copy of your important documents, photos, music, and movies in case the original files become lost or damaged.

    It’s critical to remember that if you don’t have a backup of your data, you may never get it back. There are various ways to backup your data, such as using external hard drives or cloud storage solutions like Google Drive or Dropbox. You should also consider migrating your files and data to a new computer.

    This process can be time-consuming, but it’s essential if you want to keep your data and files organized and secure. In conclusion, backing up important data and files is crucial, whether you’re using your computer for work or personal use. Don’t wait until it’s too late – make it a regular habit to backup your data and files frequently!

    Use migration software to clone existing drive to SSD

    If you want to upgrade your hard drive to an SSD, migrating all your data and applications can seem like a daunting task. But don’t worry, you can use migration software to clone your existing drive and transfer it to your new SSD easily. With the help of this software, you can effortlessly transfer your operating system, personal files, and installed applications to your new drive without losing any data.

    This way, you can enjoy the benefits of faster boot times, improved performance, and increased storage space without starting from scratch. When choosing a migration software, look for one that is user-friendly, reliable, and has good customer support. Some popular options include Clonezilla, Acronis True Image, and EaseUS ToDo Backup.

    So, make the most of your upgrade and use migration software to clone your existing drive to an SSD!

    Install and Set Up SSD

    If you’re looking to speed up your computer’s performance, one of the best ways to do so is by installing and setting up an SSD as your main drive. Not only will this make your operating system and applications run faster, but it will also reduce load times and improve overall system responsiveness. To make the switch, you’ll need to first make sure your computer is compatible with SSDs and then purchase the SSD itself.

    Once you have the SSD, you’ll need to install and set it up as your main drive, which involves transferring files and reinstalling your operating system. While the process may seem daunting, there are many resources available online that can guide you through the process step-by-step. With a little patience and effort, you can make your computer feel like new again with an SSD as your main drive.

    Install SSD physically

    If you’re looking to breathe new life into your computer system, installing a solid-state drive (SSD) is a great place to start. The first step is to physically install the SSD into your computer. Depending on your device, this can be a straightforward process or may require a bit more effort.

    First, locate the old hard drive or other storage device that you’re replacing and unscrew it from the computer case. Next, insert the SSD into the empty slot and secure it with screws. If you don’t have an empty slot available, you may need to remove the optical drive or another component to make room.

    Once the SSD is securely in place, you can take the next steps to set it up properly. Overall, installing an SSD can be a quick and easy process that will greatly improve your computer’s performance and speed. So, why not give it a try and upgrade your system today?

    Adjust boot order in BIOS settings

    One important step in installing and setting up an SSD is adjusting the boot order in your computer’s BIOS settings. The BIOS, or Basic Input/Output System, is responsible for handling the initial startup process of your computer. By default, your computer may prioritize booting from your old hard drive instead of the new SSD.

    To change this, you’ll need to access the BIOS settings and change the boot order to prioritize the SSD. The process varies by computer, but you can usually find the necessary key to enter the BIOS by checking your computer’s manual or doing a quick online search. Once you’re in the BIOS, navigate to the boot settings and move the SSD to the top of the list.

    This ensures that your computer will boot from the SSD instead of the old hard drive, resulting in a faster and smoother overall performance.

    Configure Settings and Optimize Performance

    Making an SSD (Solid State Drive) as your main drive is an excellent way to boost your computer’s performance. To configure your settings, you can start by transferring your operating system (OS) to the SSD. Doing this would make your computer boot-up faster, and programs would open and run more quickly.

    You can also change the default location of your files to the SSD, allowing them to load almost instantly. Another way to optimize your SSD’s performance is by disabling certain features such as System Restore, SuperFetch, and indexing. These features can put a strain on your drive’s capacity and slow down its performance.

    Additionally, updating your drivers and firmware regularly can help improve your SSD’s performance. Remember, when installing new software or updates, confirm that you are installing them on your SSD and not any other drive. Overall, making your SSD the main drive entails a few steps, and once you finish, your computer’s speed and performance would be noticeably faster and smoother.

    Enable TRIM and AHCI

    If you want to optimize your computer’s performance, there are a few settings you can configure to make things run more smoothly. One of those settings is TRIM, which stands for “Trimming of Solid State Drives”. TRIM helps increase the efficiency of your SSD by reducing the amount of time it takes for the drive to write new data to memory.

    By enabling TRIM, your computer can write new data to your SSD more quickly, leading to faster startup times and generally better system performance. Another setting to pay attention to is AHCI, which is short for “Advanced Host Controller Interface”. Enabling AHCI allows your computer’s operating system to communicate more efficiently with your SSD.

    This can result in faster data transfer rates, quicker application launch times, and fewer instances of data loss or corruption. Overall, making sure that TRIM and AHCI are enabled on your computer is a quick and effective way to improve system performance.

    Adjust power settings and optimize SSD usage

    When it comes to optimizing your computer’s performance, adjusting power settings and optimizing SSD usage can have a significant impact. By tweaking power settings, you can choose when and how your computer uses battery power, which can help extend its lifespan. On the other hand, optimizing SSD usage involves eliminating unnecessary files, defragmenting the drive, and enabling TRIM to keep it functioning at its best.

    Taking the time to configure these settings can mean the difference between a sluggish machine and one that runs smoothly and efficiently. So why not take a few moments to make the necessary adjustments and get the most out of your computer?

    Monitor and Maintain SSD

    If you want to make your SSD your main drive, there are a few things to consider. First, you’ll need to clone your hard drive onto the SSD to transfer all of your information. This can be done using software such as Clonezilla or Macrium Reflect.

    Once you have everything transferred over, you’ll want to make sure your SSD is properly maintained. One way to do this is to constantly monitor its health using software such as CrystalDiskInfo. This will allow you to keep an eye on its temperature, error rates, and overall health.

    It’s also important to keep your SSD clean of any unnecessary files or applications that could bog down its performance. Finally, make sure to keep your firmware up to date to ensure optimal performance and compatibility with your system. By following these steps, you can make your SSD your main drive and ensure it operates at its best for years to come.

    Regularly check for firmware updates

    If you want your SSD to work efficiently and last for a long time, you’ll need to take care of it properly. One crucial aspect of that is regularly checking for firmware updates. Firmware is the software that controls how your SSD hardware functions and communicates with other components in your system.

    These updates can improve performance, fix bugs or security issues, and add new features to your SSD. It’s important to keep your firmware up to date so that your drive can work optimally. Check the manufacturer’s website for firmware updates for your SSD model, and follow the instructions carefully to avoid any data loss or complications.

    Updating the firmware can also help your SSD avoid issues like data corruption and slow write speeds that can occur over time. By monitoring and maintaining your SSD through regular firmware updates, you’ll be ensuring smooth and optimal performance for years to come.

    Monitor drive health and performance

    When it comes to maintaining the health and performance of your SSD, monitoring it regularly is key. Thankfully, there are plenty of tools available to help make this process easy and efficient. One of the most useful tools for SSD health monitoring is CrystalDiskInfo, which provides detailed information about the health of your drive, including a SMART analysis that can detect any potential issues before they become major problems.

    It’s also important to keep your SSD firmware updated, as this helps to ensure that the drive is operating at peak performance levels. In addition, you can use benchmarking tools like CrystalDiskMark to measure the actual read and write speeds of your SSD, which can help you identify any performance issues or bottlenecks. Overall, by diligently monitoring and maintaining your SSD, you can help extend its lifespan and ensure that it continues to perform at its best for years to come.

    Take steps to prevent data loss

    Monitoring and maintaining your SSD is a crucial step in preventing data loss. Solid-state drives are built to last, but they are not invincible. They can still fail due to a variety of reasons, such as overheating, physical damage, or wear and tear.

    Regularly monitoring your SSD’s health can help you identify potential issues before they turn into irreversible problems. You can check your SSD’s health status using specialized software designed for this purpose. It can tell you how much usable life your SSD has left, how many read and write cycles it has gone through, and whether there are any sectors that have become unstable.

    You can also take steps to maintain the health of your SSD, such as avoiding overuse, keeping it clean and cool, and backing up your data regularly. By monitoring and maintaining your SSD regularly, you can prevent data loss and ensure that your system runs smoothly for years to come.

    Conclusion

    So there you have it, folks. Making your SSD the main drive may seem like a daunting task, but with a bit of tech savvy and some elbow grease, you too can experience lightning-fast boot times and ultra-fast file access. Just remember to back up your data, take your time, and maybe even treat yourself to a celebratory cookie once you’re done.

    Because with an SSD as your main drive, the sky’s the limit! Happy computing.”

    FAQs

    Can I use my SSD as my main drive?
    Yes, you can use your SSD as your main drive by installing your operating system and other important software on it.

    How do I make my SSD my main drive?
    To make your SSD your main drive, you will need to install your operating system and all other important software on it. You may also need to change your boot order in your computer’s BIOS settings.

    What are the benefits of using my SSD as my main drive?
    Using your SSD as your main drive can significantly increase the speed and performance of your computer, as SSDs have faster read and write speeds than traditional hard drives.

    Can I use my SSD as a secondary drive instead of my main drive?
    Yes, you can use your SSD as a secondary drive to store files and other data, while still using a traditional hard drive as your main drive for your operating system and important software. This can be a good option if you don’t need the speed and performance benefits of an SSD for all of your files and programs.

  • Boosting Your System’s Performance: A Closer Look at Cloning to Samsung SSD and How Long it Takes

    If you’ve ever upgraded to an SSD or Solid-State Drive, you know the benefits of faster read and write speeds. But what about when it comes to cloning your old drive to your new Samsung SSD? How long does it take, and is it worth the effort? We’ve got you covered. In this blog post, we’ll explore the topic of Samsung SSD cloning time and how long you can expect the process to take.

    Whether you’re a tech pro or a novice, this guide will help you better understand the time and effort involved in switching to a new drive. So, let’s dive in and find out everything you need to know about Samsung SSD cloning time.

    Introduction

    Cloning your computer’s hard drive to a Samsung SSD is a great way to improve your system’s speed and performance. But the burning question on everyone’s mind is, how long does this process take? Well, the answer is it depends on your computer’s specifications and the amount of data you’re transferring. On average, though, cloning your hard drive to a Samsung SSD can take anywhere from 30 minutes to a couple of hours.

    If you’re only transferring basic data, it should take less time. However, if you have a large number of files, programs, and applications, then the transfer process could take longer. But don’t worry, once the cloning process is complete, you’ll be able to enjoy the lightning-fast performance of your new Samsung SSD.

    So sit back, relax, and let your computer do its thing.

    Explanation of cloning

    Cloning is the process of creating a genetic copy of an organism. While the term might bring to mind the image of a lab-grown human being, cloning is actually more commonly used in agriculture and medicine. In agriculture, cloning is used to produce plants with desirable traits, such as better yield or disease resistance.

    In medicine, cloning is used to create genetically identical animals for research purposes. The most famous example of cloning is Dolly the sheep, who was the first mammal to be successfully cloned in 199 This breakthrough sparked both excitement and controversy, as cloning has the potential to revolutionize many fields – but also raises tricky ethical questions.

    Despite the challenges, cloning remains an area of active research and exploration, with new breakthroughs being made all the time.

    cloning to samsung ssd how long does it take

    Benefits of cloning to Samsung SSD

    Samsung SSD cloning is a process that copies the entire hard drive contents and moves it to a new solid-state drive (SSD). This process comes with several benefits, including increasing the speed and performance of your computer, improving its lifespan, and providing more storage space for new files. By cloning your hard drive to a Samsung SSD, you can expect faster boot times, quicker application launches, and improved file transfer rates.

    Additionally, cloning to an SSD can also enhance your computer’s battery life, making it last longer before needing a recharge. With all these advantages, it’s no surprise why more and more people are turning to Samsung SSD cloning for their computing needs.

    Factors Affecting Cloning Time

    If you’re considering cloning your data onto a Samsung SSD, the time it takes to complete the process can vary depending on a number of factors. Firstly, the size of the data being transferred is a major factor in determining the cloning time. The more data there is, the longer it will take to transfer.

    Secondly, the speed of your source and destination drives also plays a role in cloning time. Faster drives will decrease the time taken to clone data. Additionally, the CPU and RAM of your computer will affect the speed at which data is transferred.

    The more powerful your computer, the quicker the cloning process will be. Lastly, if you’re using software to transfer your data, the efficiency of the program will dictate transfer time. In conclusion, the duration it takes to clone data to a Samsung SSD is dependent on various factors, with the amount of data being transferred and the speed of the drives being the most significant.

    Size of data being cloned

    Cloning large data sets can be a daunting task, especially when it comes to dealing with bulky files. The size of data being cloned is one of the primary factors that can affect the cloning time. Larger the size of the data, the more time it takes to clone.

    It is important to understand that the time needed to clone large data sets can vary depending on multiple factors, including the type of storage device, the speed of the connection, and the computing power of the system. The size of the data also plays a vital role in determining the storage capacity that is required. It is crucial to ensure that the destination drive has adequate space to accommodate the cloned data.

    In summary, the size of data being cloned is an essential factor that cannot be overlooked while cloning, and it is essential to have the right infrastructure to avoid any hiccups during the process.

    Type of data being cloned

    When it comes to cloning data, the type of data being cloned is a major factor that affects the overall time that the process takes. For instance, cloning simple data such as text files or word documents can be done relatively quickly, while cloning larger and more complex data sets like multimedia files or databases can take significantly longer. This is because of the sheer amount of information that needs to be copied and transferred during the cloning process.

    Additionally, the size and complexity of the data can also impact the amount of resources that are required to complete the cloning process, such as the amount of available memory or processing power. By understanding these factors and considering the type of data being cloned beforehand, users can optimize their cloning settings to ensure that the process is as efficient as possible, regardless of the size or complexity of the data that they are working with.

    Computer specifications

    When it comes to cloning a computer, factors such as computer specifications play a significant role in determining the overall time it takes to complete the process. For example, the processing power and memory capacity of a computer can significantly affect cloning time. A computer with higher processing power and more memory can typically clone data faster than a computer with lower specifications.

    Additionally, the age of a computer and the type of hardware it uses can also impact cloning time. An older computer with outdated hardware may take longer to clone a hard drive compared to a newer model with updated hardware. In other words, the overall time it takes to clone a computer can vary depending on the specifications of the computer being used.

    So, if you’re looking to clone a computer, it’s essential to consider the specifications of the computer you’re using to ensure a faster, more efficient cloning process.

    Estimated Cloning Time

    Cloning your hard drive to a Samsung SSD can take anywhere from 20 minutes to a few hours, depending on the capacity and speed of both your original hard drive and the new SSD. A faster computer system and a larger SSD may result in quicker cloning times, while slower devices or smaller storage capacities could lead to longer wait times. It’s important to note that cloning your hard drive can also depend on the software you choose to use for the process.

    Some software may be more efficient and faster than others, so it’s essential to choose the right tool to avoid long waiting times. In summary, cloning to a Samsung SSD can take varying amounts of time, but in general, it’s a straightforward process that can be completed with just a few clicks. Overall, having a faster operating system with an SSD can significantly improve your computer’s performance, making it worth the time and effort spent in the cloning process.

    Average cloning time for various data sizes

    Cloning a large amount of data can take a considerable amount of time, and the estimated time required to complete the process is dependent on the size of the data. Generally, the bigger the size of the data, the more time it will take to clone it. For example, cloning a small-sized data like a file of 1 GB (gigabyte) will take much less time compared to a file of 10 GB or 100 GB.

    While the time required to clone data varies with factors such as network speed and the hardware of the system, it is essential to note the significance of the amount of data being cloned. When cloning data, rush may arise to determine the estimated time needed to complete the process. This time frame can be calculated by referring to the cloning process’ average time based on the data size.

    For instance, to clone data of 2 GB, the average cloning duration is typically around five minutes. Cloning data of 50 GB can take about 2 hours or more, depending on the factors discussed earlier. The massive amount of data implies that the computer has to keep up with reading and writing data, leading to more time consumption.

    In conclusion, cloning time mostly depends on the data size, hardware and network speed, and how intense the process is. While multiple factors impact the time required to clone data, it is essential to make sure that the process doesn’t hinder other operations, and to be aware of the time frame in which the cloning task will be completed.

    Case studies and user experiences

    If you’re interested in cloning, you might be wondering how long it takes to generate a replica. The answer is that it depends on what type of organism you’re cloning, as well as the technique that’s being used. For example, cloning a plant can take anywhere from a few weeks to a few years, depending on the species and the complexity of the cloning process.

    On the other hand, cloning mammals typically takes much longer. In the case of Dolly the sheep, the first animal to be cloned from an adult cell, it took 277 attempts over 7 months before a successful clone was created. While modern cloning techniques have become more efficient and accurate, cloning still requires patience and persistence, with the timeline varying depending on the specific circumstances.

    Conclusion

    In conclusion, the cloning process from your old hard drive to a Samsung SSD is like playing a game of Jenga – you carefully remove all the blocks from the tower and transfer them piece by piece to the new structure. The only difference is, with cloning, you don’t have to worry about the tower collapsing and ruining your game night. As for how long it takes, well, that depends on the size of your hard drive and the speed of your computer.

    But one thing’s for sure, with a Samsung SSD, you’ll be up and running faster than you can say “double bacon cheeseburger”.

    FAQs

    What factors can affect the time it takes to clone to a Samsung SSD?
    The size of the data being cloned, the speed of the computer’s processor and hard drive, and the type of cloning software being used can all affect the time it takes to clone to a Samsung SSD.

    How long should it take to clone to a Samsung SSD?
    The time it takes to clone to a Samsung SSD can vary depending on the factors mentioned in the previous question. However, it generally takes anywhere from 30 minutes to a few hours.

    Can you use a Samsung SSD for cloning?
    Yes, Samsung SSDs are well-suited for cloning because of their high read and write speeds.

    Do you need any special software to clone to a Samsung SSD?
    No, there are several free and paid software options available for cloning to a Samsung SSD, such as the Samsung Data Migration software that is provided with the SSD.

  • Replacing Laptop Hard Drive with SSD: A Comprehensive Guide to Make Your Upgrade Easy

    Have you ever been frustrated by your sluggish laptop? Does it take forever to open a program or boot up? It might be time to consider upgrading your hard drive to a solid-state drive (SSD). Replacing a laptop hard disk drive (HDD) with an SSD is a cost-effective way to breathe new life into an old machine. In this blog post, we will explain the benefits of swapping your HDD for an SSD, the step-by-step process to do so, and some best practices to keep in mind.

    Whether you’re looking to boost your laptop’s performance or prolong its lifespan, this post has got you covered. So, let’s dive into the world of SSDs!

    Benefits of Upgrading to SSD

    If you’re wondering how hard it is to upgrade your laptop’s hard drive to an SSD, the answer is – it’s not that hard! In fact, it’s a relatively simple process that can greatly enhance your laptop’s performance. The benefits of upgrading to an SSD are numerous, including faster boot-up times, quicker program launches and shutdowns, and improved overall system responsiveness. Plus, SSDs are more reliable than traditional hard drives, making them a smart choice for anyone looking to protect their important data.

    You’ll need to do a bit of research to ensure that the SSD you choose is compatible with your laptop and that you have the necessary installation tools, but overall, it’s a fairly straightforward process. So why not upgrade your laptop’s hard drive to an SSD and start enjoying all the benefits today?

    Improved Performance

    Upgrading to an SSD can greatly improve the performance of your computer or laptop, delivering a much faster and smoother user experience. With an SSD, you can boot up your system in seconds instead of minutes, launch programs and applications almost instantly, and transfer large files or data in a matter of seconds. This is because SSDs use flash memory to store and retrieve data, which is much faster than traditional mechanical hard drives that use spinning disks.

    The improved performance of an SSD can be especially beneficial for gamers, content creators, and anyone who uses resource-intensive software. So if you’re tired of waiting for your computer to catch up to your demands, upgrading to an SSD is a smart investment that will save you time and frustration in the long run.

    how hard is it to replace laptop hard with ssd

    Faster Boot Times

    Upgrading to a solid-state drive (SSD) is one of the most efficient ways to improve your computer’s speed and performance, and one of the most significant benefits of upgrading to an SSD is faster boot times. Unlike traditional hard disk drives (HDDs), which use spinning disks to store data and read/write information, SSDs use flash memory, allowing them to access and load files much faster. With an SSD, you’ll notice a significant decrease in boot time, meaning your computer will start up faster, and you can get to work or play sooner.

    Plus, you won’t have to wait as long for your applications and files to load, making your overall user experience much smoother. In short, upgrading to an SSD will provide you with an instant performance boost that’s well worth investing in.

    Increased Durability

    One of the top benefits of upgrading to an SSD is the increased durability that it provides. Unlike traditional hard drives that have spinning disks, an SSD has no moving parts which means it is less prone to physical damage due to mishandling or accidental drops. This makes it ideal for laptops, which are more likely to get dropped or bumped.

    An SSD is also less likely to fail due to wear and tear since it doesn’t have any mechanical parts that can break down over time. Additionally, since an SSD uses flash memory, it is much faster and more efficient than a traditional hard drive, which means it can handle more read and write requests without slowing down. So, if you want to upgrade your device’s durability, switching to an SSD is a great option.

    Process for Replacing HDD with SSD

    Are you worried about how hard it is to replace a laptop hard drive with an SSD? Don’t be! Replacing your hard drive with an SSD is a lot easier than you may think. It’s actually a straightforward process that can be done with just a few basic tools and a little bit of know-how. Firstly, you’ll need to gather the necessary tools such as a screwdriver and an external drive enclosure.

    Then, you need to back up your data and create a bootable USB drive. Once you’ve swapped out the drives, you simply need to reinstall your operating system and restore your backup. With the use of online tutorials and guides, this process can be completed in as little as 30 minutes.

    By making the switch to an SSD, you’ll be amazed at how much faster and smoother your laptop will run, and you’ll be grateful you went through with the upgrade. Overall, don’t let the fear of the unknown stop you from upgrading your hard drive to an SSD. It’s easier than you think and the rewards are well worth it!

    Check for Compatibility

    When replacing your HDD with an SSD, it’s crucial to check for compatibility first. Not all laptops or desktops are made equal, and different models may have unique specifications that need to be taken into account. Before you start the replacement process, ensure that your system can support an SSD.

    You can do this by checking your manual or consulting with the manufacturer’s website for compatibility details. Additionally, you’ll need to consider whether your system has the necessary connectors for an SSD. Most modern systems have SATA connections, but some older models may need an adapter.

    By taking the time to check for compatibility, you’ll avoid any issues and ensure a smooth replacement process.

    Gather Necessary Tools

    Replacing HDD with SSD Before starting the process for replacing your traditional hard disk drive (HDD) with a solid-state drive (SSD), it’s important to gather all the necessary tools. You’ll need a screwdriver set, an external hard drive or USB drive to backup your data, an SSD, and a SATA-to-USB enclosure for easy installation. Make sure the screwdriver set fits the screws in your computer, as some may require a Phillips head while others may require a Torx or Allen wrench.

    The SATA-to-USB enclosure will allow you to clone your HDD data onto the new SSD before installing it, preserving all your files and settings. Once you have all the tools needed, the process of replacing your HDD with an SSD will be much smoother. Don’t forget to properly ground yourself before handling any computer components to prevent electrical static discharge which could damage the internal parts.

    Overall, with the right tools and a little patience, the process of replacing your HDD with an SSD will be a simple and worthwhile upgrade for your computer.

    Backup Important Data

    Replacing your HDD with SSD is a great way to boost your computer’s performance and speed up the boot-up process. However, before you start with the replacement process, it is important to backup all your important data to avoid loss or corruption. There are several ways to backup data such as using an external hard drive, cloud storage, or even manually transferring the files to a different location.

    Once you have backed up all your data, you can then proceed with the replacement process. This involves opening your computer’s casing, removing the old HDD, and installing the new SSD in its place. It is important to follow the manufacturer’s instructions and use the appropriate tools throughout the replacement process.

    Once you have installed the new SSD, you will need to reinstall your operating system and your programs. This can be done using a bootable USB drive or DVD that contains the necessary software. In conclusion, replacing your HDD with an SSD can significantly improve your computer’s performance.

    However, it is important to backup your data and follow the manufacturer’s instructions throughout the replacement process to avoid any mishaps.

    Physical Installation

    If you’re looking to replace your old HDD with a new SSD for better performance, there are some important steps you need to follow. The first step is to back up all your data and ensure that you have a copy of all the important files on your computer. Once you’ve done that, open up your computer and locate the HDD.

    You need to carefully remove the HDD by unplugging it from the motherboard and unscrewing it from the housing. Be sure to remember the positions of the screws, as you’ll need to use them to attach the SSD. Next, insert the new SSD in the same position as the old HDD and secure it with the screws.

    You’ll then need to reconnect the cables, ensuring that they are inserted properly. Once you’ve done that, turn on your computer and go into the BIOS to make sure that the new SSD is recognized as the primary disk. Lastly, you can transfer all your backed-up data from the external media to the new SSD.

    Replacing an HDD with an SSD can be a great way to improve the performance of your computer, as SSDs are faster and more reliable than traditional HDDs. By following these simple steps, you can easily install a new SSD and enjoy faster boot times, faster app load times, and an overall smoother computing experience. Remember to always take care when handling computer components and to consult the manufacturer’s instructions if you’re unsure about any step of the process.

    Software Configuration

    Replacing HDD with SSD If you’re looking to replace your old and slow HDD with a much faster SSD, you might be surprised to know that the process is actually quite straightforward. However, before you start, make sure to back up all your data and turn off your computer. Once you’ve done that, it’s a matter of opening up your PC or laptop, locating the HDD, and swapping it out for your new SSD.

    After installing the SSD, you will need to reinstall your operating system and all your applications. This can be done via a USB or CD installation media. Once everything is up and running, you’ll notice a considerable increase in speed and performance.

    SSDs are much faster than HDDs and have no moving parts, making them more durable and reliable. So if you’re tired of waiting for your computer to load up, it might be time to upgrade to an SSD.

    Conclusion

    Swapping out your laptop hard drive for an SSD might seem like a daunting task, but fear not! With a little bit of research and the right tools, you can easily give your computer a boost in speed and performance. Don’t let fear hold you back from upgrading your laptop — embrace the challenge and enjoy the benefits of a lightning-fast computer.”

    FAQs

    What are the benefits of replacing a laptop hard drive with an SSD?
    Replacing a laptop hard drive with an SSD can improve the overall performance and speed of the laptop. It can also reduce the boot-up time and application loading time.

    Is it difficult to replace a laptop hard drive with an SSD?
    The difficulty level of replacing a laptop hard drive with an SSD depends on the type of laptop and its internal design. However, with the right tools and some technical knowledge, it can be done easily.

    Can I replace any laptop hard drive with an SSD?
    It is important to check the compatibility of the SSD with the laptop before replacing the hard drive. Some laptops may require specific types of SSDs or may not be compatible with an SSD at all.

    What is the cost of replacing a laptop hard drive with an SSD?
    The cost of replacing a laptop hard drive with an SSD may vary depending on the brand and capacity of the SSD. Additionally, the cost may also include any additional tools or services required for the replacement process.

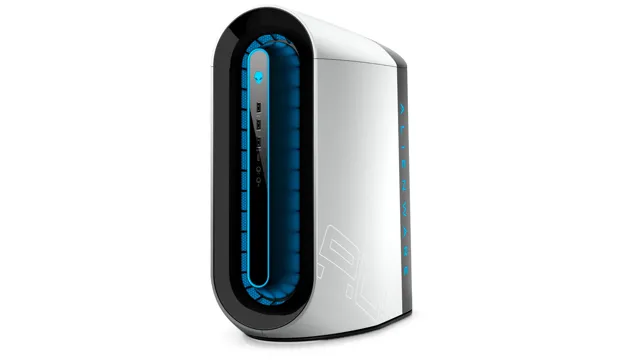
  • Boost Your Gaming Performance: A Step-by-Step Guide on How to Install SSD in Alienware Aurora R12

    Looking to upgrade your Alienware Aurora R12 by installing an SSD? If you want a faster and more efficient computer, then adding a solid-state drive (SSD) can help. Installing an SSD in your Alienware Aurora R12 can give you a significant performance boost, reduce boot times, and accelerate application launch times. But before you start, there are a few things you need to know.

    In this blog post, we’ll guide you through everything you need to know about installing an SSD in your Alienware Aurora R12, including how to choose the right SSD, how to install it properly, and tips for optimizing performance. So, let’s get started!

    Step 1: Gather Necessary Tools

    Installing an SSD in an Alienware Aurora R12 can be a great way to boost your computer’s speed and performance. Before you start, however, make sure you have all the necessary tools. You’ll need a Phillips-head screwdriver, a non-magnetic flat-head screwdriver, an anti-static wrist strap, and a soft cloth or anti-static mat to protect your components from static electricity.

    It’s also a good idea to have a backup of your important data before you start working with your hardware. With these tools on hand, you’ll be ready to tackle the next steps of the installation process. Remember, taking the time to gather the right tools now will save you time and prevent frustration later on!

    Required hardware and software

    To get started with building your own PC, it’s important to gather all the necessary tools and components beforehand. This includes hardware such as a screwdriver set, zip ties, thermal paste, and an anti-static wrist strap. You’ll also need software like BIOS and drivers for your specific components.

    Before purchasing components, make sure they are compatible with each other and the operating system. It’s essential to consult the documentation that comes with each component to ensure proper installation. Be sure to have a well-lit workspace with ample room for all your tools and parts.

    Gathering all the necessary tools and software will make the assembly process smoother and less frustrating. By having everything at your disposal, you’ll be well on your way to building your dream PC.

    how to install ssd in alienware aurora r12

    Recommended tool kits

    When it comes to fixing or repairing any project, a good toolkit is essential. Assembling the necessary tools can be overwhelming for beginners, but don’t despair. To start gathering your toolkit, you’ll need a hammer, a set of pliers, a utility knife, a set of screwdrivers (both flat and phillips head), an adjustable wrench, and a measuring tape.

    Additionally, a stud finder, a level, and a power drill may come in handy depending on the project. Having these tools ready to go will make any home improvement or DIY project more manageable and efficient. Don’t compromise on the quality of your tools; investing in durable and reliable equipment can significantly improve the quality of your work.

    Remember, a good toolkit is an investment that pays off in the long run.

    Step 2: Prepare the System

    Now that you’ve obtained your SSD and made sure it’s compatible with your Alienware Aurora R12, it’s time to prepare the system! The first thing you’ll want to do is shut down your computer and unplug it from any power sources. Once that’s done, remove the side panel of your case and locate the hard drive bays. In most cases, these bays are located towards the front of the case, but the specific location can vary depending on the model of your Alienware Aurora R1

    Before you remove your current hard drive, make sure to back up any important data you have stored on it. Once that’s done, carefully unscrew and unplug your current hard drive from the motherboard, then remove it from the bay. Now it’s time to install your SSD! Make sure that the SATA connectors on your SSD line up with the connectors on the motherboard, then slide it into the free bay.

    Once it’s in place, carefully screw it in, making sure not to overtighten anything. With the SSD securely in place, it’s time to reconnect everything. Carefully plug in the data and power cables to your SSD, making sure that everything is properly aligned.

    Finally, replace the side panel of your case and plug your computer back in. Once you power your computer on, it should recognize your new SSD and be ready to use! With this simple process, you can upgrade your Alienware Aurora R12 and enjoy all the benefits of faster load times and improved performance.

    Shut down the Alienware Aurora R12

    Preparing your Alienware Aurora R12 for shutdown is crucial to prevent any damage or loss of important data. Before shutting down the system, make sure that you have saved all the work and closed all the applications that are running. It is also advisable to unplug all the external devices from the system, such as USB drives, headphones, and external hard drives, to avoid any malfunction or loss of data due to sudden power outages.

    Once you have ensured that everything is saved and unplugged, you can proceed to the next step of shutting down the system safely. By properly preparing your Alienware Aurora R12 for shutdown, you can extend its life and keep it functioning optimally.

    Unplug the computer

    The second step in preparing your system for maintenance is to unplug the computer. This may seem like a no-brainer, but it’s a crucial step that should not be overlooked. By unplugging your computer, you’re protecting it from any potential electrical surges that could damage the internal components.

    Additionally, this step ensures your safety while working on the system. Imagine accidentally spilling water on an exposed circuit board while the computer is still plugged in – yikes! It’s always better to be safe than sorry, especially when it comes to expensive electronics. So, take the extra minute or two to unplug your computer before proceeding with any maintenance tasks.

    Your computer (and potentially your wallet) will thank you.

    Step 3: Access the Interior of the System

    After preparing the tools and the components, the next step in installing an SSD to your Alienware Aurora R12 is accessing the interior of the system. Before starting, ensure that the power cord is unplugged, and that the system is turned completely off. The Aurora R12’s chassis is designed to be opened easily.

    Start by removing the screws found at the back of the unit and sliding off the panel’s side. After this, locate the drive bays, which are situated at the front of the system, with a set of hard drive trays that are designated with a green tab. Simply pull the tab down to open the tray and carefully slide the SSD in place.

    Push the tray back into the drive bay firmly, making sure that the connectors on the computer’s side are secure, ensuring that you won’t run into any issues in the future. Once everything is connected, the final step is to return the side panel, that you removed previously, and replace the screws to secure it back in place.

    Remove the left side panel

    To continue accessing the interior of your system and making any needed adjustments or upgrades, the next step is to remove the left side panel. This may seem daunting, but with the right tools and a bit of patience, it can be a straightforward process. First, make sure your system is powered down and unplugged from any electrical source to ensure safety.

    Next, locate the screws or clips that secure the left panel in place. Depending on your system, these may be on the back or side of the unit. If using screws, use a screwdriver to carefully remove them.

    If using clips, gently press down on them while pulling the panel away from the system. Once the panel is removed, you’ll have easy access to the inner components of your system. With this step complete, you can now move forward with any necessary upgrades or repairs.

    Locate the existing storage drive

    Once you’ve located the desktop computer’s access panel, it’s time to take a look inside to find the existing storage drive. Carefully remove the screws or clips holding the panel in place and gently slide it off. Before you start disconnecting any wires or components, make sure to ground yourself to avoid damaging any sensitive parts.

    From here, you should be able to identify the existing storage drive, which may be a hard disk drive (HDD) or a solid-state drive (SSD). Take note of the type of drive and its size, as this will be important when choosing a replacement or additional drive to install. If you’re unsure about which drive is which, consult the computer’s user manual or do a quick online search using your model number.

    With the existing storage drive properly identified, you’re one step closer to upgrading your desktop computer’s storage capacity and enhancing its overall performance.

    Step 4: Install the SSD

    Now that you’ve prepared your Alienware Aurora R12, it’s time to install the SSD. First, locate the SSD slot on your motherboard. It’s typically a small rectangular port with a latch on one side.

    Slip the SSD into the slot, using gentle pressure until it clicks into place. Make sure to align the pins correctly and not force the SSD. Next, connect the power and data cables to the SSD and motherboard, respectively.

    Check your motherboard manual if you’re not sure which ports to use. Once everything is connected, close your computer case and power on your Aurora R1 Your computer should now recognize the new SSD! Don’t forget to format the drive before using it.

    Congratulations, you’ve successfully installed an SSD in your Alienware Aurora R12!

    Insert the SSD into the available slot

    If you’re upgrading your computer or building a new one from scratch, installing an SSD is a great way to boost its performance. Here’s how you can install an SSD into an available slot in your computer. Firstly, you need to locate the slot where you can install your SSD.

    You might find it on the motherboard layout in the user manual that comes with your computer. Once you’ve identified the correct slot, you can insert the SSD carefully into it. Make sure you’re grounded and don’t touch the electronic components on the SSD or the motherboard.

    When you are inserting the SSD into the slot, be sure to do it slowly and carefully. If there are any locking mechanisms or screws, make sure you secure them in place properly. When you’ve fully inserted the SSD and it’s securely in place, you can close the computer casing and connect all the cables.

    Once your computer is reassembled, you can turn it on and check if it detects the new SSD. If all is well, you can now start using your computer with the new SSD. It’s important to note that you should use the SSD for your operating system and frequently used applications to see the maximum benefit in terms of performance.

    So, that’s how you can install an SSD into an available slot on your computer. It’s a relatively simple process that will give your computer a big performance boost. Happy upgrading!

    Secure the SSD with screws

    Step 4 in securing your SSD in your computer is to install it properly. Before anything else, make sure that you have the right tools to do the job, specifically screws that fit your SSD. Once you have the right screws, it’s time to attach your SSD.

    Carefully slide it into its assigned slot until it clicks into place. Double-check its alignment and make sure that it’s snug and seated firmly. After installation, secure the SSD with screws to keep it from moving around.

    This step is crucial since SSDs are sensitive and can be damaged easily if not properly installed. With your screwdriver, tighten the screws just enough to keep the SSD in place. Do not over-tighten, as you might damage the SSD circuit board.

    Once done, make sure that the other components such as the RAM and cables are correctly installed. You don’t want your newly installed SSD to be damaged due to other components’ malfunctions.

    Step 5: Connect the SSD

    Now that you’ve prepared your Alienware Aurora R12 for an SSD, it’s time to connect it. First, locate the M.2 slot on your motherboard.

    Then, carefully insert the SSD into the slot, making sure it’s properly aligned. Secure the SSD in place by fastening the screw at the end of the slot. Once fastened, you can create a bootable USB drive with your operating system and enter the BIOS menu to set the SSD as the primary boot device.

    Congratulations, you’ve successfully installed an SSD into your Alienware Aurora R12! With improved speed and storage space, your computer will be running like a dream.

    Connect power and data cables to the SSD

    Connecting power and data cables to the SSD is a critical step in the installation process. It is essential to ensure these cables are firmly connected to avoid any potential issues later on. You can connect the power cable for the SSD by using a SATA power connector from the power supply unit (PSU).

    Depending on the type of SSD, you may need an Molex or SATA power connector. Once you have connected the power cable, you will need to connect a SATA data cable. Most modern motherboards feature SATA connectors, so you can connect the data cable directly to the motherboard.

    Make sure to connect the data cable to the corresponding port on the motherboard, and then connect the other end to the SSD’s respective port. Once both cables are connected, you are ready to move on to the next step in the installation process.

    Step 6: Reassemble the System

    Now that you have successfully installed your SSD in your Alienware Aurora R12, it’s time to put everything back together again. Start by placing the side panel back onto the case, making sure all screws are tight. Reconnect the power and data cables to your SSD, as well as any other components you may have removed during the installation process.

    Once everything is connected, turn on your PC and check if the system recognises the new drive. If everything is working correctly, you’re all set! Your Alienware Aurora R12 should now be running faster and smoother than ever before thanks to the added SSD. Congratulations on completing the installation process.

    Reattach the left side panel

    It’s time to reassemble your system! The next step in the process is to reattach the left side panel. This panel is crucial for ensuring that your components stay in place and are protected from external factors such as dust or accidental knocks. Before you start, make sure that the panel is clean and free of any debris.

    Take the panel and line it up with the slots on the case. Once you have aligned it correctly, push the panel inwards until you hear a click. This confirms that the panel is secure and in place.

    If you encounter any resistance, double-check that the panel is aligned correctly and try again. With the panel securely in place, your system is one step closer to being fully reassembled and ready to use!

    Plug the computer back in

    After completing all the necessary steps to clean and replace any necessary components in your computer, it’s time to reassemble the system. The final step is to plug the computer back in. Ensure that all parts are properly connected and securely attached before plugging the computer back into the power source and turning it on.

    Once you’ve reassembled everything, take a few moments to ensure that everything is working correctly. The computer should boot up without issue, and all components should be functioning correctly. If you encounter any issues, go back through the steps to ensure that every step was completed correctly.

    With everything back together, you can finally enjoy your clean and functioning computer. Congratulations on successfully cleaning and reassembling your computer system!

    Step 7: Verify the Setup

    Now that you’ve installed the SSD in your Alienware Aurora R12, it’s time to verify that everything is set up correctly. The first step is to make sure that the SSD is being detected by your system. Go to your computer’s BIOS and check the storage settings to see if the SSD is being identified.

    If it’s not showing up, you may need to check the connections or make sure the drive is properly seated in the slot. Next, you’ll want to check that your system is booting from the SSD instead of the old hard drive. Restart your computer and go into the BIOS again.

    Look for the boot order settings and make sure that the SSD is listed as the first boot device. Finally, test the SSD’s performance by opening up some programs and files to see if they are loading faster than before. You should notice a significant improvement in speed and overall performance.

    If everything looks good, congratulations! You have successfully installed an SSD in your Alienware Aurora R12 and can enjoy faster load times and improved performance.

    Boot up the system and verify the SSD installation

    Once you have installed your SSD and connected the power and data cables, it’s time to boot up your system and verify that the installation was successful. When you turn on your computer, make sure that the SSD is recognized in the BIOS and that it is set as the primary boot device. You can also check the device manager in your operating system to confirm that the SSD is listed.

    Additionally, you can run a benchmark test to see the speed and performance improvements that the SSD provides. This test will help you determine if you have fully optimized your system with the new SSD. If you encounter any issues during this verification process, double-check the installation steps and consult the SSD manufacturer’s website or technical support team for further assistance.

    Overall, checking the setup of your new SSD is an essential final step that can help you ensure that your computer is running at its best performance possible.

    Conclusion: Enjoy your upgraded Alienware Aurora R12

    Now that you know how to install an SSD in your Alienware Aurora R12, you’ll be able to speed up your computer faster than the speed of light. Don’t let the fear of tech jargon hold you back – with this guide, even a novice can become an expert in upgrading their system. So go ahead and show off your newfound skills, and enjoy the blazingly fast speeds of your newly installed SSD.

    May your gaming, content creation, and everyday computing experience be smoother than silk from now on.let’s get started!”

    FAQs

    What tools are needed to install an SSD in Alienware Aurora R12?
    You will need a screwdriver, an anti-static wrist strap, and the SSD you want to install.

    Can I install an SSD in addition to the existing hard drive in Alienware Aurora R12?
    Yes, you can install an SSD alongside the existing hard drive in Alienware Aurora R12. You can even use the SSD to install the operating system for faster boot times.

    What is the process for cloning the existing hard drive onto the new SSD?
    You can use any reliable cloning software such as Acronis True Image, Macrium Reflect, or EaseUS to clone the existing hard drive onto the new SSD. Connect the new SSD to the system, launch the cloning software, select the source and destination drives, and follow the on-screen instructions to clone the drive.

    How do I physically install the SSD in Alienware Aurora R12?
    To install the SSD, first, make sure the system is unplugged from the power source. Open the case, locate the empty 2.5-inch drive bay, insert the SSD in the available slot, and secure it with screws. Reassemble the case and connect the necessary cables to power up the system.

  • Quick Guide: How Long Does It Really Take to Migrate OS to SSD?

    Upgrading your computer with an SSD is a smart decision that can boost the speed, performance, and efficiency of your system. But before you can enjoy the benefits of blazing-fast bootup times and application loading speeds, you’ll need to migrate your operating system to the new drive. Many people wonder how long this process will take and what factors can affect the time frame.

    In this blog, we’ll take a closer look at the process of migrating your OS to an SSD and provide some insights into what you can expect in terms of timing. Whether you’re a tech enthusiast trying to optimize your system or a novice looking for some guidance, this article will help demystify this essential process. So, let’s dive in and explore how long it takes to migrate an OS to an SSD!

    Factors Affecting Migration Time

    When it comes to migrating your OS from an HDD to an SSD, the time it takes can vary depending on a few factors. Firstly, the size of your existing OS and the amount of data you have stored on your HDD can impact the migration time. If you have a large amount of data, it may take longer to transfer to the new SSD.

    The overall speed of your computer and the age of your HDD can also play a role. If your computer is older and the HDD is slow, the migration time may be slower than expected. Another factor to consider is the software used for the migration.

    Some programs may be faster and more efficient than others. However, it’s important to remember that the time it takes to migrate your OS to an SSD is worth it in the end. The improved speed and performance of your computer will make the process well worth it.

    Size of the OS and SSD

    When it comes to migrating your operating system (OS) to a solid-state drive (SSD), several factors can affect the time it takes to complete the process. One of the most crucial factors is the size of your OS and SSD. Generally, the larger your operating system files, the longer it will take for the migration process to finish.

    Additionally, if your SSD has a smaller storage capacity than your original hard drive, you may need to remove some files or programs to make the migration possible. However, keep in mind that just because your OS and SSD sizes aren’t a perfect match, it doesn’t mean that migration is impossible. Several tools can help you reduce the size of your operating system or make more space on your SSD.

    Ultimately, the time it takes to migrate depends on your unique situation, and it may take longer than expected. But with patience and planning, you can have your new SSD up and running smoothly in no time.

    how long does it take to migrate os to ssd

    Transfer Speed of the Data

    When it comes to data migration, transfer speed is a crucial factor that needs to be considered. A higher transfer speed means that data can be migrated faster, reducing the time and effort required for the entire process. However, several factors can impact the migration time, including the type of data being migrated, the network bandwidth, the distance between the source and destination, and the complexity of the migration process.

    For instance, large files such as high-resolution images or videos take longer to transfer than smaller files like documents or spreadsheets. Similarly, a limited network bandwidth can cause slow transfer speeds, leading to longer migration times. Moreover, a longer distance between the source and destination can cause significant delays in the migration process.

    Therefore, it is essential to choose the right migration approach that takes into account all these factors and ensures the fastest possible transfer speed. Overall, a well-planned and executed data migration strategy can significantly reduce migration time, and thus, maximize the benefits of the process.

    Type of Connection Used

    When it comes to data migration, one of the factors that affects the time it takes to complete the process is the type of connection used. The speed and reliability of the connection greatly impact the overall migration time. For example, if you’re using a slow internet connection, it could significantly increase the time required to transfer all the data.

    On the other hand, a fast and stable connection would enable quicker data transfer, ultimately cutting down on the migration time. When migrating data, it’s essential to choose the right type of connection to suit your needs. If you’re transferring large amounts of data, a fibre optic connection may be your best bet due to its high-speed.

    However, if you’re transferring smaller quantities, a Wi-Fi connection may suffice. Therefore, it’s crucial to assess your needs and requirements before choosing a connection type for data migration.

    The Actual Migration Process

    When it comes to migrating your operating system (OS) to a solid-state drive (SSD), the time it takes can vary depending on a few factors. Typically, the migration process can take anywhere from 30 minutes to a few hours. The length of time can depend on the amount of data you have on your current hard drive, the speed of your computer, and the type of software you use to transfer your OS to the SSD.

    Additionally, if you opt to fresh install the operating system rather than cloning it, the process will take much longer due to the need to reinstall all your applications and programs. Overall, the time it takes to migrate your OS to an SSD is a small price to pay for the significant performance boost you’ll experience once the switch is complete.

    Preparation Steps

    Now that you’ve completed all the necessary preparation steps for your migration process, it’s time to tackle the actual migration. It can be a daunting task, but with careful planning and execution, it can be done efficiently and effectively. The first step is to make sure you have a backup of your existing website or application before making any changes.

    This will ensure that if any issues arise during the migration process, you can easily revert back to your previous version. Next, it’s essential to test your new environment thoroughly before attempting any live migration. This includes testing all functionalities, plugins, and themes that will be used on your new site.

    It’s crucial to make sure everything works as expected and that there are no unexpected issues or bugs. Once you’ve completed all the necessary testing and are confident that everything is working correctly, it’s time to make your live migration. This involves transferring all your website or application files, databases, and other relevant data to your new hosting environment.

    Once the migration is complete, thoroughly test the website or application to ensure that everything is working as expected. Finally, don’t forget to update your DNS settings to point to your new hosting environment. This may take some time to propagate globally, so it’s essential to keep an eye on your website or application’s accessibility during this timeframe.

    In summary, the actual migration process can be overwhelming, but by taking careful steps to prepare and execute, it can be done smoothly. Remember to test thoroughly before the live migration, and don’t forget to back up your existing website or application beforehand. With some patience and attention to detail, you can successfully migrate to your new hosting environment and enjoy the benefits it brings.

    Migration Strategies

    When it comes to the actual migration process, there are various strategies to consider. One approach is the “big bang” method, where all data and systems are migrated at once. This can be efficient but also risky, as any issues or errors can impact the entire system.

    Alternatively, the “phased” approach involves migrating different parts of the system gradually. This can be less risky but may take longer to complete. Whichever approach is chosen, it is important to thoroughly test the system before and after migration to ensure everything is functioning properly.

    In addition, having a backup plan in case of any unexpected issues can help minimize downtime and potential consequences. With careful planning and execution, the migration process can go smoothly and lead to improved efficiency and functionality.

    Actual Time for Migration Process

    When it comes to migrating to a new system or platform, the actual process can take anywhere from a few days to several months. The exact timeframe depends on multiple variables such as the size and complexity of the existing system, the amount of data that needs to be transferred, and the level of customization required. It’s important to keep in mind that a rushed migration can result in data loss, security breaches, and other complications that can negatively impact your business operations.

    That’s why it’s crucial to have a well-planned and executed migration process that prioritizes the safety and accuracy of your data. Whether you’re migrating to a new e-commerce platform, enterprise software, or cloud-based solution, be sure to work with experienced professionals who can guide you through each step of the migration journey. With their help, you can minimize downtime and maximize the potential for long-term success in your new system.

    Post-Migration Steps and Tips

    If you’re planning to migrate your OS to an SSD, it’s essential to know how long the process typically takes to plan accordingly. On average, the entire migration process can take around 1-2 hours, but the actual time can vary depending on several factors, such as the amount of data you’re transferring, the speed of your computer, and the method you’re using. If you’re using a tool like Macrium Reflect, the process can be relatively quick, around 15-30 minutes, and the software will automatically partition the SSD and transfer all data.

    However, suppose you’re manually transferring data, like copying files and folders manually. In that case, it can take longer and may require specific technical knowledge to ensure that all critical files are transferred correctly. Remember that after the migration, it’s crucial to check that everything works correctly and to optimize your new SSD, such as checking for firmware updates, enabling TRIM, and configuring your BIOS settings.

    Optimizing Performance

    When it comes to optimizing performance after a migration, there are several steps and tips that can help ensure a smooth transition. One important aspect is to conduct thorough testing before and after the migration to identify any potential issues and address them accordingly. It’s also essential to monitor the system regularly for any performance dips or anomalies and make necessary adjustments.

    Another tip to consider is optimizing your website’s caching and compression settings, as this can significantly improve load times and reduce server load. Additionally, minimizing CSS and JavaScript files, optimizing images, and compressing files can further improve performance. By keeping these post-migration steps and tips in mind, you can ensure optimal performance and user experience for your website.

    Backing up Previous Data

    Backing up Previous Data One of the most crucial steps after migrating data is to backup your previous information. Although it may seem like an unnecessary step, backing up data ensures that if there are any mishaps or errors in the migration process, you still have a copy of your previous data. Losing precious information can lead to significant consequences, especially for businesses or individuals who depend on that data.

    By taking a few moments to back up your data, you can prevent a disaster and save yourself a lot of time and headaches. There are several ways you can back up your data. One option is to use an external hard drive or server to store copies of your files.

    Alternatively, you could use cloud storage services like Dropbox or Google Drive, which have automatic backups and updates, reducing the risk of losing data. Whatever method you choose, it’s essential to ensure that your backup is secure and up-to-date. Remember to create a backup before starting any migration project, as this ensures that if anything goes wrong, you don’t lose anything important.

    To wrap things up, backing up previous data is critical when it comes to data migration. It’s a simple task that could save you from agony in case of any errors. By taking the precautionary measure of backing up your previous data, you can guarantee that your information is safe and secure.

    It’s always better to be safe than sorry, so make sure to back up your data before undergoing any migration procedures.

    Conclusion

    In the time it takes to finish a cup of coffee, you can migrate your OS to an SSD and experience lightning-fast speeds and improved performance. So sip your drink, sit back, and watch as your computer transforms from a sluggish tortoise to a speedy hare.”

    FAQs

    What are the benefits of migrating OS to SSD?
    Migrating OS to SSD offers faster booting time and application load times, improved overall system performance, and increased durability and reliability of data.

    Is it possible to migrate the OS from an HDD to SSD without reinstalling the operating system?
    Yes, it is possible to migrate the OS using specialized software such as Acronis True Image, EaseUS Todo Backup, or Macrium Reflect.

    Can I migrate the OS from a larger HDD to a smaller SSD?
    Yes, but the HDD must not use more space than the SSD’s capacity. The OS should be resized first to fit the SSD.

    How long does it take to migrate OS to an SSD?
    The process of migrating OS to SSD usually takes between 30 minutes to a few hours, depending on the size of the data to be transferred and the speed of the drives, the software used, and the computer’s configuration.

  • Effortless Guide for Downloading Windows 10 from HD to SSD

    If you’ve recently purchased a solid-state drive (SSD) and you’re wondering how to download Windows 10 onto it, look no further! With the growing popularity of SSDs, it’s important to know how to transfer your operating system to your new drive for faster boot times and improved performance. Switching to an SSD requires a bit of technical know-how, but fear not! With the right steps and guidance, it’s relatively easy to download Windows 10 to your SSD. In this blog, we’ll guide you through the process of transferring your operating system from your current hard drive to your new SSD, step-by-step.

    We’ll also discuss some of the benefits of using an SSD, including faster read/write speeds, quicker startup times, and better reliability. By the end of this blog, you’ll be able to enjoy the lightning-fast speeds of your new SSD, and your computer will be running like a well-oiled machine! So, let’s get started and learn how to download Windows 10 to your new SSD.

    Check SSD Space and Compatibility

    If you’re wondering how to download Windows 10 from HD to SSD, the first thing you need to do is check for SSD space and compatibility. SSDs come in different sizes, so you need to make sure you have enough space for Windows 10 and other applications you plan on installing on your computer. Additionally, you need to ensure that your SSD is compatible with your system.

    You should check the specifications of your computer’s motherboard and CPU to make sure your SSD is compatible with your system. Once these factors are confirmed, you can transfer your Windows 10 OS from your old HD to your new SSD. However, keep in mind that the process of transferring your OS can be complicated and is best left to professionals to avoid data loss or any other related complications.

    Ensure SSD has Enough Space

    When upgrading your computer’s storage system to an SSD, it’s crucial to ensure that you have enough space for your files and programs. A general rule of thumb is to leave at least 20% of the SSD’s capacity free to ensure optimal performance and longevity. Before making the switch, check the size of the files and programs on your current hard drive and compare them to the capacity of the new SSD you’re considering, making sure you have enough space for everything.

    Also, make sure that the SSD you choose is compatible with your computer’s hardware and operating system. Taking these steps will ensure a smooth transition and better performance for your system. By having enough space available, you’ll be able to avoid the risk of slow performance or even a system crash due to insufficient storage.

    Remember, an SSD with enough space can make a noticeable difference in your computer’s speed and overall performance, keeping you happy and productive for years to come.

    how do i download windows 10 from hd to ssd

    Verify SSD is Compatible with Windows 10

    SSD, Windows 10, compatibility, space Upgrading to a solid-state drive (SSD) is one of the most effective ways to speed up your computer and improve its overall performance. Before purchasing an SSD, however, it’s essential to ensure that it’s compatible with your Windows 10 operating system. One of the first things you should check is the available storage space on your current hard drive.

    You’ll need to transfer all of your files and system software to the new drive, so make sure there’s enough space to accommodate everything. Additionally, ensure that your computer’s BIOS is set to support booting from an SSD. Lastly, check the manufacturer’s website or consult an IT professional to confirm that the SSD you’re considering is compatible with Windows

    By taking these steps, you can ensure that your SSD upgrade will be smooth and successful, giving you improved performance and speed for years to come.

    Create Bootable Windows 10 USB Drive

    Looking to switch from an HDD to an SSD and wondering how to download Windows 10? The best way is to create a bootable USB drive with the Windows 10 installation file. First, ensure that you have a valid Windows 10 license key, then head to the Microsoft website and download the Media Creation Tool. Run the tool and select the option to create installation media for another PC.

    Follow the prompts to select your desired language and edition of Windows 10 and choose the USB drive as your installation media. The tool will then download and transfer the required files to your USB drive. Once complete, plug your USB drive into your new PC with the SSD installed and boot from the USB drive to begin the installation process.

    By following these steps, you can easily download and install Windows 10 on your new SSD.

    Download Windows 10 Media Creation Tool

    If you’re looking to install Windows 10 on your computer but don’t have a DVD drive, you can create a bootable USB drive using the Windows 10 Media Creation Tool. This tool can be downloaded directly from the Microsoft website and provides a simple way to create a Windows 10 ISO image file that you can use to install the operating system on your computer. To get started, you’ll need a USB flash drive with at least 8GB of storage space and a Windows 10 product key.

    Once you have the Windows 10 Media Creation Tool downloaded and installed, simply follow the on-screen instructions to create your bootable USB drive. This is a quick and easy way to get Windows 10 up and running on your computer without having to mess around with DVDs or physical media. Plus, with a bootable USB drive, you can install Windows 10 on multiple computers, making it a great option for IT professionals and technicians.

    Select USB Drive as Installation Media

    Creating a bootable Windows 10 USB drive is a quick and easy solution for installing the operating system on a new computer or upgrading an existing one. To get started, you will need a USB drive with at least 8GB of storage space and a computer with an internet connection. Begin by downloading the Windows 10 Media Creation Tool from the official Microsoft website.

    Once the tool is downloaded, insert your USB drive into your computer and select it as the installation media. Follow the prompts to create the bootable USB drive, and you’re ready to install or upgrade Windows 10 on your computer. With this straightforward process, you’ll have your computer up and running with the latest version of Windows in no time.

    Choose Language and Edition of Windows 10

    Creating a bootable USB drive for Windows 10 is a convenient way to install the operating system on your computer. To begin, you should choose the language and edition of Windows 10 that you require. Selecting the correct version is crucial to ensure that it is compatible with your system and meets your needs.

    Once you have made your choice, the next step is to create a bootable USB drive. This process involves downloading the Windows 10 media creation tool, which will guide you through the process step-by-step. Simply follow the prompts and select the USB drive that you want to use as the installation media.

    It is essential to ensure that your USB drive has enough space to accommodate the Windows 10 files. Creating a bootable USB drive for Windows 10 is a straightforward process that can be completed by anyone with a basic knowledge of computers. By following these steps, you can easily and quickly install Windows 10 on your PC and enjoy its many features and benefits.

    Install Windows 10 on SSD

    If you’re looking to download Windows 10 from your hard drive to an SSD, there are a few steps you need to follow. First off, you’ll need to make sure your SSD is properly installed and recognized by your computer. Then, you’ll need to create a bootable USB drive with the Windows 10 installation files.

    Once you’ve done that, you can plug in the USB drive and boot from it. From there, you’ll need to follow the prompts to install Windows 10 onto your SSD. It’s important to note that this process will erase all data on your SSD, so make sure you back up any important files before proceeding.

    Additionally, you’ll need to make sure you have a valid Windows 10 license key to activate your new installation. Overall, the process of installing Windows 10 onto an SSD can be a bit daunting, but with some patience and attention to detail, you can have your new system up and running in no time.

    Insert USB Drive into PC with HD and SSD

    If you’re looking to upgrade your PC’s performance by installing Windows 10 on an SSD, you’ll need to start by inserting a USB drive with the Windows 10 installation files into your computer. Once you’ve done that, you’ll need to ensure that your PC recognizes your SSD as the primary drive. To do so, you’ll need to enter the BIOS and change the boot order to prioritize the SSD.

    From there, you should be able to follow the prompts on the Windows 10 installer to install the operating system on your SSD. The benefits of installing Windows 10 on an SSD include faster boot times, faster app launches, and faster file transfers. Plus, since SSDs don’t have any moving mechanical parts, they’re less likely to break down or fail than traditional hard drives.

    Upgrading to an SSD is a great way to give your PC a new lease on life and keep it running smoothly for years to come!

    Boot from USB Drive on PC

    If you’re looking to upgrade your PC’s hard drive, installing Windows 10 on an SSD can improve the performance of your computer. To do so, you’ll need to boot from a USB drive and install the operating system onto the SSD. The first step is to create a bootable USB drive with the Windows 10 install files.

    Once you have the USB drive ready, you’ll need to change the boot order in your BIOS settings to make the USB drive the primary boot device. Then, simply follow the prompts to install Windows 10 onto the SSD. It’s important to note that during the installation process, you’ll need to format the SSD to prepare it for the operating system.

    Overall, installing Windows 10 on an SSD can greatly improve your computer’s speed and overall performance, making it a worthwhile investment.

    Follow On-Screen Instructions to Install Windows 10 on SSD

    If you’re looking to speed up your computer’s performance, installing Windows 10 on an SSD is a great place to start. The first step in the process is to make sure you have a Windows 10 installation disc or USB drive on hand. You’ll also want to ensure that your computer is capable of booting from the USB drive or DVD.

    Once you’re ready to start the installation process, simply follow the on-screen instructions. You’ll be prompted to select your language, time zone, and keyboard layout, and then you’ll be asked to enter your product key. From there, you’ll select the installation location, which should be your SSD, and then you’ll just need to sit back and let the installation process run its course.

    It’s important to note that the installation process can take anywhere from 30 minutes to an hour, depending on your computer’s speed and the size of your SSD. After the installation is complete, you can begin using your newly installed Windows 10 operating system to its fullest potential. So if you’re ready to upgrade your computer’s performance, try installing Windows 10 on your SSD and see the difference for yourself.

    Conclusion

    In conclusion, downloading Windows 10 from HD to SSD is like transplanting your computer’s brain to a faster and more efficient body. It’s like trading in your old Volkswagen for a Lamborghini. And the best part? Unlike a surgical transplant, this upgrade won’t break the bank.

    So, get ready to experience lightning-fast boot-up times and seamless multitasking with your newly installed SSD. Buckle up, because your computer is about to take you on a wild ride!”

    FAQs

    What are the benefits of transferring Windows 10 from an HDD to an SSD?
    Transferring Windows 10 from an HDD to an SSD can significantly improve the overall system performance by reducing the boot time, program loading time, and file transfer time. It also increases the system’s durability and reliability as SSDs have no moving parts, thus making them less prone to mechanical failure.

    What are the steps to transfer Windows 10 from an HDD to an SSD?
    The steps to transfer Windows 10 from an HDD to an SSD include cloning the HDD using a cloning software, creating a bootable USB drive, installing the SSD, booting the system from the USB drive, and transferring the cloned data from the HDD to the SSD.

    What type of SSD is compatible with Windows 10?
    Windows 10 is compatible with all types of SSDs, including SATA, M.2, and PCIe NVMe. However, the type of SSD that is compatible with your system depends on your motherboard and system specifications.

    Can I transfer only the Windows 10 operating system to an SSD without losing other data?
    Yes, it is possible to transfer only the Windows 10 operating system to an SSD without losing other data by using a cloning software that allows you to select specific data to clone. However, it is recommended to backup all important data before transferring to avoid any data loss.

  • Moving Windows from HDD to SSD: A Beginner’s Guide to Lightning-Fast Booting

    Are you tired of waiting for your computer to boot up? Is your system running slower than usual? It’s time to consider transferring your operating system from your HDD to an SSD. Not only will this significantly improve your computer’s performance, but it will also increase its reliability. The process of moving your Windows operating system from one drive to another may sound intimidating at first, but it’s actually a fairly straightforward process.

    With the right tools and a little bit of know-how, you can do it yourself and save yourself some money in the process. In this step-by-step guide, we’ll show you exactly how to transfer your Windows operating system from an HDD to an SSD. We’ll cover everything from backing up your data to cloning your hard drive and updating your drivers.

    With this guide in hand, you’ll be able to upgrade your system and enjoy faster boot times and better performance in no time. So grab your screwdriver and let’s get started!

    Backup Your Data and Create a Windows Installation Media

    Moving Windows from an HDD to an SSD can be a daunting task, but with the right tools, it can be done efficiently and effectively. The first step to make this transition is to backup all your data. It’s important to keep in mind that when you reinstall Windows, all your files and programs will be erased, so creating a backup is crucial.

    Once you’ve backed up all your important data, the next step is to create a Windows installation media. This can be done by downloading a Windows ISO file and using a tool like Rufus to create a bootable USB drive. The process of moving Windows from an HDD to an SSD involves reinstalling it in the SSD, so having a bootable installation media will make this process much smoother.

    By following these steps, you can easily move Windows from an HDD to an SSD, and enjoy the benefits of faster boot times and improved overall system performance.

    Use a Backup Tool to Save Your Important Files

    Backing up your important files is crucial to ensure that you don’t lose your data in case of any unexpected event. One essential tool you should consider using is a backup tool. It helps to create a copy of your important files and store them in a different location, be it external hard drives or cloud storage.

    This way, if your computer crashes, gets stolen, or damaged, you’ll have a backup of your data, and you won’t have to worry about losing anything important. It’s also important to create a Windows installation media to ensure that you can quickly restore your computer to its previous state if it becomes irreparable. Taking these simple steps can save you from stress, time, and money.

    So, don’t wait until you lose your data. Start backing up your important files today and keep your data safe and secure.

    how do i move windows from hdd to ssd

    Download a Windows 10 ISO File and Create a Bootable USB Drive

    Creating a backup and preparing a Windows installation media is essential if you’re planning on upgrading your PC. Microsoft offers a free tool to create a bootable USB drive with a Windows 10 ISO file that allows you to install Windows on a PC without an existing operating system. The first step is to backup all your important data as installing a fresh copy of Windows will erase everything on your hard drive.

    Once you’ve backed up your data, head over to the Microsoft website and download the Windows 10 ISO file. Next, insert a blank USB drive with at least 8GB of storage space and run the Microsoft tool. It will guide you through the process of creating a bootable USB drive with the Windows 10 ISO file.

    You can then use this USB drive to install Windows on your PC or boot your existing system from it for troubleshooting purposes. Creating a backup and preparing a Windows installation media might seem like a lot of work, but it’s a crucial step towards ensuring smooth and hassle-free upgrades or troubleshooting.

    Physically Install the SSD and Clone the HDD

    If you’re looking to speed up your computer, upgrading to an SSD is a popular option. One of the challenges you may face when making this upgrade is moving your operating system from your HDD to your new SSD. Thankfully, this process is straightforward and can be achieved using cloning software.

    Before you begin the cloning process, you must physically install the new SSD into your computer. You can do this by opening your computer case and locating an empty drive bay. Once installed, you’ll need cloning software to transfer the contents of your HDD onto your new SSD.

    The software will guide you through the process and make an exact copy of your system, including the operating system, programs, and files. Don’t forget to change the boot order in the BIOS to ensure your computer boots from the new SSD. With these steps, you can easily move your Windows operating system from your HDD to your new SSD and take advantage of the performance boost that SSDs offer.

    Shut Down Your Desktop or Laptop and Disconnect any External Devices

    One of the first things you need to do when installing an SSD is to shut down your desktop or laptop and disconnect any external devices to prevent any electrical shock and protect your data. Once you’ve done that, you should physically install the SSD into your computer and clone the HDD to transfer all your files and settings to the new drive. This process is relatively simple, but it can take some time depending on the size of your HDD and how much data you have.

    However, it’s a worthwhile investment that will significantly speed up your computer’s performance and give you more storage space. In addition, make sure you have all the necessary tools and cables to connect the SSD and clone the HDD. Overall, just take your time and be patient, and soon you’ll be upgrading your computer’s performance in no time.

    Remove the HDD and Install the SSD in its Place

    If you’re looking to upgrade your computer’s storage capabilities, replacing your old and slow HDD with a brand-new SSD is a great place to start. In order to do this, you’ll need to physically remove the HDD from its place and install the SSD in its place. Once the hardware is in place, it’s time to clone your HDD’s data and transfer it to the new SSD.

    This process essentially creates an exact copy of your HDD’s data on your new SSD, which allows you to seamlessly transition to your new storage device without losing any of your files or data. With the new SSD in place and your data fully transitioned, you’ll experience faster boot times, quicker file transfers, and an overall smoother performance on your computer. So, if you’re ready to take your computer’s storage capabilities to the next level, it’s time to remove that old HDD and install a lightning-fast SSD in its place.

    Clone Your HDD to the SSD Using a Cloning Software

    Cloning software, SSD, HDD, Install, Physically, Clone If you’re planning to upgrade your computer’s hard drive, switching to SSD (Solid State Drive) is an excellent option. SSDs deliver higher speeds and increased reliability, but the old HDD (Hard Disk Drive) still holds plenty of data you probably don’t want to lose. In such a scenario, the best way to move your data from HDD to the new SSD is by using cloning software.

    Before doing that, you need to physically install the SSD to your computer, which is relatively easy. Once installed, it’s time to make a copy of your operating system, files, documents, and other data. Cloning software will copy your current hard drive’s contents to the new SSD.

    A great benefit of cloning is that you don’t need to re-install software and applications you already have on the old drive – everything will be there in your new drive as it was before. Cloning can take some time, depending on the amount of data being transferred, but it’s a relatively easy and straightforward process to move your operating system and data to a new SSD drive.

    Set Your BIOS to Boot from the SSD and Test Your System

    If you’re looking to move Windows from HDD to SSD, the first step is to set your BIOS to boot from the SSD. This can usually be done by pressing a key, such as F2 or Delete, during startup to access the BIOS menu. Once there, navigate to the boot options and select the SSD as the primary boot device.

    Save and exit the BIOS, and your computer should now boot from the SSD. Next, it’s important to test your system to ensure everything is running smoothly. Check that Windows boots up properly and that your software and drivers are all up to date.

    You may also want to run a few benchmarks to measure the speed and performance of your new SSD. With these steps completed, you should be good to go and enjoy the benefits of faster boot times and improved overall performance.

    Access Your Computer’s BIOS Settings and Change the Boot Order

    If you’ve just installed a new SSD, you’ll want to change your computer’s BIOS boot settings to ensure it boots from the new drive. To access your BIOS, reboot your computer and press the key or key combination indicated on your screen during startup. Once you’re in the BIOS settings, navigate to the boot menu and change the boot order so that your SSD is the first boot device.

    This will ensure that your system boots from the SSD instead of your old hard drive. Don’t forget to save your settings and exit the BIOS. Now that you’ve set your BIOS to boot from the SSD, test your system to make sure it’s working properly.

    You should notice a significant improvement in your computer’s speed and performance after installing an SSD. Enjoy the benefits of faster boot times and quicker access to your programs and files!

    Check That Your System is Booting from the SSD Instead of the HDD

    When you upgrade your computer with a new SSD, there’s one important step you need to take to ensure you’re booting from the faster drive instead of the old HDD. You’ll need to set your computer’s BIOS to boot from the SSD instead. The BIOS is a program stored on a chip on your computer’s motherboard that controls basic hardware operations, including the boot process.

    To access the BIOS, you’ll need to restart your computer and press the key indicated on the screen to enter setup. This is usually F2, F10, or Delete. Once you’re in the BIOS, look for the Boot menu and then navigate to the Boot Order or Boot Priority section.

    You should then see a list of devices, with the SSD and HDD among them. Use the arrow keys to move the SSD to the top of the list, so it’s the first device checked during the boot process. Save the changes, exit the BIOS, and restart your computer.

    If everything is working properly, your computer should boot from the SSD instead of the HDD. To verify this, you can go into your computer’s file explorer or use a disk management tool to see which drive is listed as the boot device. By setting your BIOS to boot from the SSD, you’ll ensure you’re getting the full benefits of the faster drive, including faster boot times, improved performance, and more reliable storage.

    It’s a simple step that can make a big difference in your computer’s overall performance.

    Optimize Your SSD and Enjoy Your Improved System Performance

    Moving your Windows operating system from HDD to SSD can significantly boost your computer’s overall performance. One way to move your Windows is to clone the HDD to the SSD using specialized software. However, before cloning, it’s essential to optimize your SSD to ensure maximum performance.

    Optimal SSD performance can be achieved by enabling the AHCI mode in BIOS, aligning SSD partitions, disabling defragmentation and indexing, and updating SSD firmware. Once the SSD is optimized, use cloning software, such as EaseUS or MiniTool Partition Wizard, to migrate your Windows operating system. Finally, after successful migration, you may have to change your boot device order to prioritize the SSD as your main boot device.

    With these steps, you can enjoy faster bootup and application launch times, reduced system slowdowns, and improved general system performance.

    Run a Disk Cleanup and Disable Unnecessary Services and Programs

    If you want to improve your system performance and optimize your SSD, there are a few things you can do. One of the first steps is to run a disk cleanup, which will remove unnecessary files and free up space on your drive. This can help your system run more smoothly and reduce the strain on your SSD.

    Additionally, you can disable unnecessary services and programs that may be running in the background, using up valuable resources. This can help to speed up your system and reduce any lag or slow-down. By taking these steps to optimize your SSD, you can enjoy a faster, more efficient system that runs smoothly and reliably.

    So if you’re looking to improve your computing experience, consider giving your SSD a little TLC today.

    Test Your System’s Speed and Enjoy Faster Boot and Load Times

    SSD optimization Are you tired of slow boot and load times on your computer? It might be time to optimize your SSD. SSD optimization can improve your system performance and make your computer run faster. One way to optimize your SSD is to disable unnecessary startup programs.

    These programs can slow down your boot time and take up valuable resources. You can also disable any unnecessary services in your system configuration. Another way to optimize your SSD is to defragment your hard drive.

    Defragmenting your hard drive will help to organize your files and improve your load times. Finally, make sure to keep your drivers up-to-date. Outdated drivers can cause slow performance or even crashes.

    By optimizing your SSD, you can enjoy faster boot and load times, allowing you to work more efficiently and enjoy your computer experience to the fullest.

    Conclusion

    Moving Windows from an HDD to an SSD is like upgrading from a tricycle to a Ferrari – the performance boost is undeniable. With just a little bit of tech-savviness, transferring your operating system to an SSD can be a breeze. And once you’ve experienced the lightning-fast boot-up times and seamless application launches, you’ll wonder how you ever managed without it.

    So go ahead, make the upgrade – your computer (and your sanity) will thank you.”

    FAQs

    Can I transfer Windows from HDD to SSD without reinstallation?
    Yes, you can use disk cloning software like EaseUS Todo Backup, Clonezilla or Acronis True Image to transfer Windows from HDD to SSD without reinstalling it.

    How much space do I need on my SSD to move Windows from HDD?
    You need at least as much space on your SSD as the used space on your HDD where Windows is installed.

    Do I need to format my SSD before transferring Windows from HDD?
    Yes, you need to format your SSD before transferring Windows from HDD. You can do this using Windows Disk Management or third-party disk formatting software.

    Can I transfer Windows from HDD to SSD on a laptop?
    Yes, you can transfer Windows from HDD to SSD on a laptop. You need to connect your SSD to your laptop via a USB-to-SATA adapter or an external drive enclosure and then use disk cloning software to transfer Windows.

    What are the benefits of moving Windows from HDD to SSD?
    Moving Windows from HDD to SSD can significantly improve the speed and performance of your computer, reduce boot and loading times, and increase the lifespan of your battery (in case of a laptop).

  • Upgrade Your Boot Time: A Step-by-Step Guide on Switching from Mechanical to SSD

    If you’re looking to improve your PC’s boot and overall performance, swapping out your mechanical hard drive for a solid-state drive (SSD) may be just what you need. An SSD is faster, more durable, and quieter than a traditional hard drive. However, before you can start taking advantage of its benefits, you’ll need to make the switch.

    Fortunately, we’re here to guide you through the process! In this step-by-step guide, we’ll take you through everything you need to know about switching from mechanical to SSD boot. From selecting the right SSD to migrating your data and setting up your new drive, we’ve got you covered. Whether you’re a tech-savvy pro or a newbie, you’ll find valuable information in this guide.

    So, are you ready to take the leap and upgrade your PC to an SSD boot drive? Let’s dive in and get started!

    Backup Your Data

    If you’re planning on upgrading from a mechanical hard drive to a solid-state drive (SSD), it’s important to backup your data before making the switch. This ensures that you don’t lose any important files during the transition. There are a few different ways to backup your data, but one of the easiest and most convenient methods is to use a cloud-based backup service, such as Google Drive or Dropbox.

    These services allow you to store your files securely in the cloud, so you can access them from any device with an internet connection. Alternatively, you can use an external hard drive or USB drive to backup your data. Simply copy all of your important files onto the external drive and then transfer them back to your computer after the upgrade is complete.

    Once your data is safely backed up, you can proceed with switching your boot drive from the mechanical hard drive to the new SSD. This process can vary depending on the specific computer and operating system you’re using, but there are plenty of tutorials and guides available online to walk you through the steps. With a little preparation and the right tools, upgrading to an SSD can be a simple and rewarding process.

    Use an External Drive or Cloud Storage

    Backing up your data is one of the most important things you can do to protect your personal and professional information. One effective way to do this is by using an external drive or cloud storage. External drives are portable and can be plugged into any computer, allowing you to easily transfer and backup your data.

    They are also affordable and can hold large amounts of data. Cloud storage, on the other hand, offers the convenience of accessing your data from anywhere with an internet connection. You can upload files and access them from multiple devices, and the cloud storage provider will handle the backup and maintenance of your data.

    Both external drives and cloud storage have their own advantages and disadvantages, so it’s important to consider your needs and budget when choosing which method to use. Whether you choose an external drive or cloud storage, the key is to consistently backup your data to protect it from unexpected data loss.

    how do i switch my boot from mechanical to ssd

    Ensure All Files are Backed Up

    Backing up your data is an essential step in protecting your digital information from unexpected events. Many people realize the importance of backing up their files only when it’s too late. A simple power outage or a hard drive failure can lead to losing all your data, including important documents, precious photos, and videos you’ve accumulated over time.

    Losing such data can be devastating, especially if they are irreplaceable. Therefore, ensuring all files are backed up is a crucial aspect of safeguarding your data. By doing so, you can easily recover any files lost due to hardware failure, accidental deletion, or any other unforeseen issues.

    The best way to backup important files is to keep them in multiple locations, such as an external hard drive, cloud storage, or a combination of both. With multiple backups, you can rest assured that even if you lose one copy, you’ll have another one to fall back on. Ultimately, backing up your data can give you peace of mind, knowing that your information is safe and protected.

    Select Your SSD

    If you’re looking to switch your boot from a mechanical hard drive to a solid-state drive (SSD), there are a few steps you need to follow. First, you’ll need to purchase an SSD that’s compatible with your computer’s hardware, and then clone your current hard drive’s operating system and data onto the new SSD. Once that’s done, you’ll need to replace the mechanical hard drive with the new SSD in your computer and set it as the primary boot drive in your computer’s BIOS.

    This will ensure that your computer boots up from the new SSD instead of the old hard drive. It’s important to note that the process may vary slightly depending on the type of computer you have, so be sure to consult your computer’s manual or seek professional help if you’re unsure about any steps in the process. With a bit of patience and some careful steps, switching to an SSD as your primary boot drive can greatly improve your computer’s performance and speed.

    Choose an SSD that Fits your Needs and Budget

    When it comes to choosing an SSD that fits your needs and budget, there are a few factors to consider. First and foremost, you need to determine what your intended usage is for the SSD. Are you a gamer, content creator, or just looking for faster boot-up speeds? Once you have a clear understanding of your needs, you can start looking at the different types of SSDs available and their respective price points.

    For those on a tight budget, a SATA-based SSD may be the way to go, offering decent speeds at an affordable price. However, if you require faster read and write speeds, you may want to consider a PCIe-based SSD. It’s important to keep in mind that while PCIe-based SSDs can offer faster speeds, they come at a higher price point.

    Ultimately, it’s all about finding the SSD that meets your specific needs and fits within your budget.

    Ensure Compatibility with your System

    When it comes to upgrading your system’s storage with an SSD, compatibility is key. Before selecting your SSD, ensure that it is compatible with your system’s motherboard and interface (SATA, PCIe, etc.).

    You can do this by checking your system’s manual or manufacturer specifications. Additionally, consider the form factor of the SSD as it needs to physically fit into your system’s SSD mounting points. Choosing an SSD with the right compatibility will ensure that it runs at its highest potential and will prevent any issues or inconsistencies.

    Don’t forget to also check for any firmware updates or compatibility issues with your operating system before making your final decision. By taking these steps, you will ensure a smooth and successful upgrade for your system.

    Transfer your Operating System to the SSD

    If you’re looking to speed up your computer’s performance, transferring your operating system from a mechanical hard drive to a solid-state drive (SSD) is a great solution. Not only will it drastically decrease your boot time, but it will also improve your system’s overall responsiveness and load times for programs. The process of switching your boot from mechanical to SSD can seem daunting, but it’s actually quite simple.

    Start by backing up your files and creating a clone of your current operating system on your new SSD. Next, change your computer’s boot order in the BIOS to prioritize your new SSD. Then, restart your computer and check that it’s now booting from the SSD.

    Finally, format your old mechanical hard drive to remove the old operating system, and you’re done! With a little bit of patience, you can easily switch your boot from mechanical to SSD and enjoy faster computer speeds.

    Use a Cloning Software

    If you’re looking to speed up your computer’s performance, adding an SSD is an excellent option. However, transferring your operating system to the SSD can seem like a daunting task. Fortunately, you can use a cloning software to make the process easier.

    With this software, you can create an exact copy of your current operating system and move it over to the new SSD. This way, you won’t have to go through the hassle of reinstalling everything from scratch. Just make sure you choose a reliable cloning software that works with your particular computer and SSD model.

    In no time, you’ll be enjoying the faster boot times and improved performance of your newly-upgraded computer.

    Follow the Instructions Provided by the Software Carefully

    If you’re planning to transfer your operating system to the SSD, then you need to follow the instructions provided by the software carefully. First and foremost, make sure that the SSD you will be using is compatible with your system. The process of transferring the operating system to the SSD is generally straightforward, but not all software is the same, and care should be taken to avoid any mistakes that could affect your system.

    Before you make any changes, back up all your important files to an external drive or cloud storage platform. Then, you can start the process of transferring your operating system. Follow the steps given by your software and allow it to complete the transfer process.

    Once it’s done, restart your system and check if everything is working correctly. If there are any issues, check the troubleshooting guide provided by the software. By following the instructions carefully, you can transfer your operating system to the SSD without facing any problems.

    Replace your Mechanical Drive with the SSD

    If you’re looking to upgrade your computer’s storage speed, switching from a mechanical drive to a solid-state drive (SSD) is the way to go. Not only do SSDs provide faster boot times and application load times, but they also have lower power consumption and are less prone to damage from drops or shocks. So how do you switch your boot from mechanical to SSD? First, you’ll need to clone your existing hard drive onto the new SSD using software such as Acronis or Macrium Reflect.

    Once the cloning process is complete, open your computer and replace the mechanical drive with the new SSD. Reboot your computer and enter the BIOS settings, where you can choose the new SSD as your primary boot device. Finally, save your changes and exit the BIOS, and your computer should now boot from the SSD.

    With a few simple steps, you can upgrade your computer’s performance and enjoy the benefits of faster storage speeds.

    Shut Down Your Computer and Unplug It

    If you’re looking to boost the speed and performance of your computer, then replacing your mechanical hard drive with a solid-state drive (SSD) is a great place to start. Not only will it significantly improve your computer’s startup time, but it will also reduce the load times of your favorite programs and games. But before you start the process, make sure to shut down your computer and unplug it from the wall to ensure your safety.

    Once you’ve done that, it’s time to get started. Simply remove your old hard drive from its slot and replace it with the SSD. Then, install your operating system and your favorite programs, and you’ll be up and running in no time.

    The benefits of an SSD over a mechanical hard drive are well-documented. SSDs have no moving parts, which means they can access data much faster than a mechanical hard drive can. They’re also more reliable, consume less power, and generate less heat.

    So if you’re looking to upgrade your computer’s performance, there’s no better place to start than replacing your old mechanical hard drive with an SSD. With just a few simple steps, you can breathe new life into your computer and enjoy faster load times, smoother performance, and a more enjoyable computing experience overall. So why not give it a try? You won’t be disappointed!

    Remove the Mechanical Drive

    If you’re tired of slow boot times and sluggish computer performance, it might be time to replace your mechanical hard drive with an SSD. Solid-state drives are capable of storing and accessing data much more quickly than traditional hard drives, which use spinning disks to read and write data. Upgrading your computer with an SSD is a simple process, but you’ll first need to remove your existing mechanical drive.

    Start by powering down your computer and unplugging all cables. Then, locate your hard drive and remove it from its mounting bracket. You’ll want to be careful when handling the drive, as it is likely to be hot and fragile.

    Once you’ve removed the drive, install your new SSD in its place and connect all necessary cables. Boot up your computer and you should notice a significant improvement in boot times and overall performance. Upgrade to an SSD today and experience the speed and responsiveness your computer has been missing.

    Insert the SSD and Securely Mount It

    If you’re tired of the slow performance of your mechanical drive, it’s time to replace it with an SSD. Once you’ve acquired an appropriate SSD, you’ll need to insert it into your computer and securely mount it. Keep in mind that your computer likely needs to be opened up and the drive bay exposed, so if you’re not comfortable doing this yourself, it may be best to seek assistance.

    Once you’re ready to begin, simply slide the SSD into the drive bay and screw it in. Ensure that it’s secure and won’t shake loose during use. After this, simply connect the necessary cables and boot up your computer.

    Your SSD should now be recognized and ready to use. Enjoy the considerable boost in performance that SSDs offer, and take comfort in knowing that your data is now stored on a much more reliable medium.

    Reboot Your Computer and Enjoy Your New SSD Boot Drive

    If you’ve recently made the switch from a mechanical hard drive to an SSD, you’re probably wondering how to switch your boot drive. Don’t worry, it’s a fairly simple process that can be done in just a few steps. First, make sure your new SSD is properly connected to your computer.

    Next, you’ll need to enter your computer’s BIOS settings. This can usually be done by pressing a key during startup, such as F2 or Del. Once you’re in the BIOS settings, navigate to the boot section and select your new SSD as the primary boot drive.

    Save your changes and exit the BIOS settings. Finally, reboot your computer and enjoy the lightning-fast speed of your new SSD boot drive. With just a few simple steps, you can enjoy a faster and more efficient computing experience.

    Conclusion

    In conclusion, switching your boot from mechanical to SSD is kind of like upgrading from a horse-drawn carriage to a Ferrari. Sure, the horse can get you from point A to point B, but the Ferrari gets you there faster, smoother, and with more style. So if you want to step up your computer game and enhance your overall experience, make the switch to SSD.

    Your computer (and your patience) will thank you.”

    FAQs

    What is the benefits of switching boot from mechanical to SSD?
    SSDs have faster read and write speeds than mechanical hard drives, which means that your computer will have faster boot times and program launches. SSDs are also less prone to failures than mechanical hard drives.

    What is the process of switching boot from mechanical to SSD?
    You will need to clone the contents of your mechanical hard drive onto the new SSD using cloning software. Once the cloning is complete, swap out the mechanical hard drive for the SSD in your computer’s drive bay and change the boot order in your BIOS to make the SSD the primary boot device.

    Can I switch boot from mechanical to SSD myself?
    Yes, you can switch boot from mechanical to SSD yourself as long as you have the necessary tools and knowledge. However, if you are not comfortable with technical tasks, it is recommended that you seek assistance from a professional.

    Is it worth switching boot from mechanical to SSD?
    Yes, it is definitely worth switching boot from mechanical to SSD. You will notice a significant improvement in your computer’s overall performance, including faster boot times, faster program launches, and improved system responsiveness. Additionally, SSDs are more reliable and have a longer life span than mechanical hard drives.

  • Ultimate Guide on How to Partition Your 2TB SSD Internal Drive for Improved Performance

    Partitioning a 2TB SSD Internal Drive can feel like a daunting task, but it’s essential for getting the most out of your device. Imagine your computer as a house with multiple rooms, and partitioning is like dividing your house into separate areas for different purposes. By doing so, you can create separate spaces for storing photos, videos, documents, games, and apps, which can make it easier to find and access specific files.

    With a 2TB SSD internal drive, you have ample space to partition it in different configurations. The partitioning process involves dividing the drive into separate sections, each with its unique letter and name, like C, D, E, etc. These sections can be customized to suit your needs, such as allocating more space to frequently used files or creating a separate backup section in case of system failure or data loss.

    But why partition a 2TB SSD internal drive in the first place? Partitioning can improve your computer’s performance, reduce its vulnerability to malware attacks, and help you organize your files more efficiently. For example, if you install your operating system and apps on one section and store your data on another, your computer can access and run them more quickly. In conclusion, Partitioning a 2TB SSD Internal Drive is a crucial step to optimize your computer’s storage space and performance.

    With proper partitioning, you can organize your files in a more efficient manner, protect your data from system crashes or failures, and boost your computer’s speed. Whether you’re a professional video editor, graphic designer, or a casual user, partitioning can help you get the most out of your device.

    Understanding Hard Drive Partitioning

    If you have recently purchased a 2TB SSD internal drive, you may be wondering how to partition it. Partitioning a hard drive essentially means dividing it into multiple sections or partitions. This can be helpful for organizing your files and separating your operating system from your personal data.

    To partition a 2TB SSD internal drive, you can use the built-in disk management tool on your computer’s operating system. This tool will allow you to create and format new partitions to suit your needs. It’s important to note that partitioning does not affect your drive’s storage capacity or performance, so feel free to experiment with different partition sizes and configurations until you find what works best for you.

    Overall, partitioning your hard drive is a simple and effective way to improve your data storage and organization.

    What is partitioning?

    Partitioning refers to the act of dividing a hard drive into multiple sections or partitions. Each partition is treated as a separate storage space, with its own letter assigned to it. This process is beneficial because it allows you to organize your data more efficiently and safely.

    For instance, you can place your operating system on one partition and your personal files on another one. That way, if something happens to your operating system, your personal files will remain unaffected. Additionally, partitioning can help improve system performance by reducing file fragmentation and providing more space for temporary files.

    Overall, partitioning is an excellent way to manage your data, stay organized, and ensure the safety of your files.

    2tb ssd internal drive how to partition

    Why partition your hard drive?

    Hard Drive Partitioning Hard drive partitioning is the process of dividing a computer’s hard drive into multiple segments, each of which functions as a separate hard drive. There are several reasons why you may want to partition your hard drive. Firstly, partitioning can help you better organize your files and make them easier to access.

    For example, you could create a separate partition for your operating system, another for your programs, and another for your personal files. Secondly, partitioning can also be useful if you want to run multiple operating systems on your computer. By creating separate partitions for each operating system, you can avoid potential conflicts and ensure that your files remain isolated from one another.

    Finally, partitioning can help you optimize your computer’s performance by allowing you to store frequently accessed files on separate partitions. Overall, hard drive partitioning can be a useful tool for streamlining your computer’s storage and improving its performance.

    How does partitioning work?

    Hard Drive Partitioning When it comes to hard drives, partitioning is the process of dividing the available storage space into multiple logical sections, each of which can be formatted and used as a separate drive. This can be incredibly useful in terms of organizing data and maximizing available space, as it allows you to separate different kinds of files and programs onto different partitions. For example, you might use one partition for your operating system and essential programs, another for games, and a third for documents and personal files.

    There are a few different ways to partition a hard drive, but the most common method involves using software built into your operating system. This software will typically allow you to create, delete, and resize partitions as needed, and you can usually choose to format them using pretty much any file system you like, from Windows’ NTFS to Linux’s EXT It’s important to keep in mind, however, that partitioning a hard drive can result in data loss, so it’s always a good idea to back up your data before making any major changes.

    One analogy that can help to illustrate the concept of partitioning is to think of your hard drive as if it were a bookshelf. Without partitioning, you might just pile all your books onto the shelf in a random order, making it difficult to find what you need. But by dividing the shelf into sections—say, one for fiction, one for non-fiction, and one for reference books—you can keep everything neatly organized and make it easier to access what you need.

    And if you ever need more space for one category of books or another, you can simply adjust the partitions accordingly.

    Preparing for Partitioning

    If you’ve just purchased a 2TB SSD internal drive and are wondering how to partition it, don’t worry – it’s not as complicated as it sounds! Partitioning your drive can be a useful way to separate your data from your operating system, allowing for easier organization and better system performance. One simple way to partition your drive is to use the Disk Management tool in Windows. Simply right-click on the drive in your file explorer, select “Shrink Volume”, and follow the prompts.

    You can then create a new partition to your desired size. It’s important to note that partitioning will erase all data on the drive, so make sure to back up any important files before proceeding. With your 2TB SSD internal drive properly partitioned, you’ll be able to utilize its full potential and keep your system running smoothly.

    Backing up your data

    Preparing for Partitioning may seem like a daunting task, but it doesn’t have to be. One of the most important things you can do before partitioning your hard drive is to back up your data. This is because partitioning involves dividing your hard drive into different sections, which could potentially lead to the loss of important files and documents.

    By backing up your data beforehand, you can ensure that everything important is safely stored away. There are many ways to back up your data, including using an external hard drive, cloud storage, or even a simple USB drive. Whatever method you choose, make sure to keep your backups up to date as you work through the partitioning process.

    Remember, a little preparation goes a long way when it comes to partitioning your hard drive, so take the time to backup your data and ensure a smooth transition.

    Choosing a partitioning tool

    When preparing for partitioning, it’s important to choose a reliable tool that will make the process seamless and efficient. One option is to use the built-in partitioning tool in your operating system, but it may not have all the features you need. Alternatively, there are third-party tools available that offer more advanced options and customization.

    When selecting a tool, consider factors such as ease of use, compatibility with your system, and any additional features that may be beneficial to your specific needs. It’s also important to ensure that you back up all important data before partitioning to avoid any potential data loss. By taking the time to carefully choose and prepare for the partitioning process, you can confidently create the necessary partitions without any major hiccups.

    Partitioning the 2TB SSD Drive

    Partitioning a 2TB SSD internal drive can seem like a daunting task, but it’s actually quite simple. First, you need to decide how many partitions you want. For example, you may want to split the drive into two partitions of equal size, or you may want one large partition for your operating system and programs, and another smaller partition for storing important documents and files.

    Once you have a plan in place, you can use a partitioning tool such as Disk Utility on a Mac or Disk Management on a Windows PC to create the partitions. Be sure to allocate enough space for each partition, and label them appropriately so you don’t get confused later on. With a little bit of time and effort, partitioning your 2TB SSD drive can help you stay organized and make the most of your valuable storage space.

    Creating partitions

    Partitioning a 2TB SSD drive can be intimidating, but with the right tools and knowledge, it can be a straightforward process. First, it’s essential to decide how many partitions you want and the size of each partition. There are advantages to having multiple partitions, such as keeping your operating system files and personal files separate.

    After deciding on the partition sizes, you can use Disk Management on Windows or Disk Utility on Mac to create the partitions. One thing to keep in mind is that the partition for the operating system should be large enough to accommodate future updates and installations. It’s also important to note that once you create partitions, they are difficult to change, so plan ahead.

    However, having multiple partitions can increase the efficiency of your computer by allowing it to access specific files faster. Partitioning a 2TB SSD drive requires careful planning, but with the right approach, it can be a beneficial investment in your computer’s performance.

    Assigning drive letters

    Assigning drive letters is an essential process when partitioning a 2TB SSD drive. This process involves assigning a unique letter to each partition, which makes it easier to access and recognize each partition. When partitioning the drive, you can create multiple partitions that can be used for different purposes.

    This is especially useful if you want to install multiple operating systems on your computer or store different types of data. Once you have partitioned the drive, you can assign a drive letter to each partition. This will enable you to easily access each partition from your computer’s file explorer.

    You can also customize the drive letter names to make it easier for you to remember which partition is for what purpose. Overall, assigning drive letters is a simple and effective way to organize your 2TB SSD drive and make it easier to use.

    Formatting partitions

    Partitioning a large hard drive like our 2TB SSD drive can seem intimidating, but with the right tools and knowledge, it is a breeze. The first step is to open the Disk Management tool, which can be done by right-clicking on the Windows Start menu. From there, you can see all the drives connected to your computer, including the new 2TB SSD drive, which should show up as unallocated space.

    Right-click on this space and select “New Simple Volume.” This will bring up a wizard that will guide you through the partitioning process, where you can choose the size of the partition, assign a drive letter, and choose the file system format. We recommend using NTFS as it is the most compatible with Windows systems.

    Once the formatting is complete, the new partition will show up in the Disk Management tool, and you can start transferring data to it. With just a few clicks, you can easily partition a 2TB SSD drive and take full advantage of the immense storage capacity it offers.

    Managing and Changing Partitions

    If you’ve recently purchased a 2TB SSD internal drive, you may be wondering how to partition it. Partitioning your drive can help you manage your data better by separating it into different sections. One way to partition your drive is to use the built-in Disk Management tool in Windows.

    To do this, right-click on the Windows Start button and select Disk Management. From there, you can select your 2TB SSD internal drive and choose the option to shrink it. This will create unallocated space that you can then use to create partitions.

    You can also use third-party partitioning software to manage and change your drive’s partitions. When deciding how to partition your drive, consider your specific storage needs and the optimal size for each partition. With a little planning and some simple tools, you can easily manage and change your partitions on your 2TB SSD internal drive.

    Resizing partitions

    Resizing partitions can be a useful tool to manage and change the storage allocation on your computer. A partition is a section of your hard drive that is dedicated to storing specific information, such as your operating system, applications, or data files. Over time, you may find that one partition is getting too full while another partition has plenty of space.

    By resizing partitions, you can adjust the amount of space allocated to each partition without having to delete or move any files. This can be particularly useful if you’re trying to install a new application or save a large file that won’t fit in your current partition. With the right tools and knowledge, resizing partitions can be done quickly and easily, without the need for complex software or assistance from a technician.

    So if you’re struggling with storage space on your computer, consider resizing your partitions to better manage your data.

    Merging partitions

    If you’re running out of space on your hard drive or SSD, merging partitions can be a helpful solution to consider. This process allows you to combine two or more partitions into one, creating additional storage space and making it easier to manage your files. However, merging partitions can be a bit tricky if you’re not familiar with disk management tools.

    The first step is to back up any important data on the partitions you plan to merge, just in case something goes wrong during the process. Next, you’ll need to use a partition manager program to merge the partitions, making sure you select the correct partitions and follow the program’s prompts carefully. Once the merge is complete, you should have a larger partition with all of the previously separate files now in one place.

    However, keep in mind that merging partitions can also result in data loss if not done correctly, so it’s always a good idea to proceed with caution and perhaps seek the help of a professional if you’re not sure what you’re doing.

    Deleting partitions

    When it comes to managing and changing partitions on your computer, deleting a partition can be a necessary step. Deleting a partition involves removing a section of your hard drive and essentially freeing up space for other uses. You might consider deleting a partition if you no longer need the data it contains or if you want to reallocate that space for other purposes.

    However, it’s important to note that deleting a partition can also result in data loss, so it’s crucial to back up any important data before beginning the deletion process. To delete a partition, you can use the Disk Management tool on Windows or the Disk Utility on Mac. From there, you can select the partition you wish to delete and follow the prompts to complete the process.

    Just remember to proceed with caution and always back up your important files first.

    Conclusion and Considerations

    In conclusion, partitioning a 2TB SSD internal drive is like giving your car a tune-up – it’s necessary for optimal performance. But unlike a car, partitioning requires a bit more finesse and attention to detail. By taking the time to properly organize and allocate space on your drive, you’ll ensure that your data is easily accessible, speeding up your workflow and potentially preventing headaches down the road.

    So don’t let that 2TB drive turn into a digital dumping ground – partition it like a pro and see the difference for yourself!”

    Partitioning for specific purposes

    Partitioning Managing and changing partitions can be useful for various purposes, including creating separate spaces for data organization, running multiple operating systems, or allocating storage to specific applications. However, it is essential to take caution when changing partitions, as it can result in data loss or system instability. Before making any changes, it’s critical to have a reliable backup and know the partition’s current status by checking disk usage and allocation.

    There are several tools available for managing and modifying partitions, including the built-in Disk Management utility in Windows, third-party software like EaseUS Partition Master or GParted for Linux. You can also perform basic operations like creating, deleting, resizing, or merging partitions. However, some tasks, like moving partitions or changing their file system, can be more complex and may require advanced knowledge.

    Therefore, it’s crucial to follow instructions carefully and seek assistance from experts if necessary. By properly managing and changing partitions, you can optimize your device’s storage usage and enhance its performance.

    Potential risks and drawbacks

    When managing or changing partitions on your computer, there are some potential risks and drawbacks to be aware of. One major risk is data loss if the process is not done correctly or if there are any technical issues. It’s important to back up any important files before making partition changes to avoid any potential loss.

    Another issue is the potential for reduced performance if partitions are not created or managed efficiently. This may result in slower loading times or issues with running multiple programs at once. To minimize these risks, it’s important to carefully research and understand how to properly manage and change partitions or consider getting assistance from a professional.

    Overall, while partition management can be a useful tool, it’s important to proceed with caution to avoid any unwanted consequences.

    Maintaining and updating partitions

    Managing and changing partitions is an important aspect of maintaining and organizing your computer’s storage. Partitions are essentially sections of your hard drive that have been designated for specific purposes or operating systems. It’s important to keep your partitions organized and updated to ensure that your computer runs smoothly and efficiently.

    This means regularly checking the size and usage of each partition, and making changes as necessary. For example, if you find that one partition is taking up too much space and causing your computer to run slowly, you may need to delete some files or resize the partition. On the other hand, if you need to install a new operating system or software, you may need to create a new partition to accommodate it.

    By properly managing and changing your partitions, you can ensure that your computer runs smoothly, and you have plenty of space available for all your important files and documents.

    FAQs

    What is a 2TB SSD internal drive?
    A 2TB SSD internal drive is a solid-state drive for a computer that has a storage capacity of 2 terabytes and is installed inside the computer.

    What is partitioning a hard drive?
    Partitioning a hard drive is the process of dividing the storage space of a hard drive into multiple sections, called partitions, so that the computer can treat each partition as a separate drive.

    How do I partition a 2TB SSD internal drive?
    To partition a 2TB SSD internal drive, you can use the built-in Disk Management tool on Windows or third-party software like EaseUS Partition Master. First, you would need to shrink the existing partition to create unallocated space, then create a new partition on the unallocated space.

    What are the advantages of partitioning a 2TB SSD internal drive?
    Partitioning a 2TB SSD internal drive provides several advantages, including organizing data more efficiently, separating data and programs for better performance, creating a backup partition, and enabling dual-boot configurations.