Author: David L. Lynn

  • Effortlessly Transfer Storage from One SSD to Another: A Step-by-Step Guide for Hassle-free Migration

    If you happen to be a tech-savvy person, there’s a good chance that you have more than one SSD in your collection. It can be difficult to manage multiple storage drives, but the good news is that it’s possible to transfer storage from one SSD to another without losing any data. However, it’s not as simple as just dragging and dropping files between drives.

    In this blog post, we’ll explore the ins and outs of transferring storage from one SSD to another, giving you all the information you need to make the process as smooth and stress-free as possible. Whether you’re upgrading to a larger SSD or simply consolidating your existing drives, read on to learn the best practices for transferring storage between SSDs.

    Materials Required

    If you’re looking to transfer storage from one SSD to another, there are a few materials you’ll need to get started. First and foremost, you’ll need both SSDs, of course. You’ll also need a computer with a working operating system, and ideally at least one spare SATA port.

    Depending on the specifics of your setup, you may also need a SATA cable to connect the new SSD to your motherboard. In terms of tools, you’ll likely want a screwdriver to remove any panels or brackets that are holding the old SSD in place, and potentially a data transfer cable or software program to facilitate the actual transfer of files. Once you have all of these materials gathered, you’ll be ready to start the transfer process and get your new SSD up and running with all of your important data safely stored.

    SSD cable and cloning software

    If you’re looking to upgrade to an SSD, then you’re going to need a few things to make the process go smoothly. First and foremost, you’ll need an SSD cable that is compatible with your computer. This will usually involve determining the type of connection that your old hard drive used and then finding a cable that works with that particular type of connection.

    Additionally, you’ll need cloning software that allows you to copy all of your data from your old hard drive to your new SSD. There are many different software options available, but it’s important to choose one that is both user-friendly and reliable. With these two key materials in hand, you’ll be well on your way to upgrading to an SSD and enjoying faster data transfer speeds and improved overall performance.
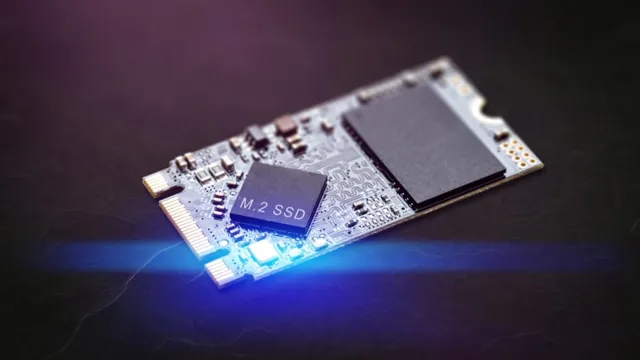
    how to transfer storage from one ssd to another

    Step-by-Step Guide

    If you’re planning to move your data from an SSD to another, there are a few steps you’ll need to keep in mind. Firstly, ensure that the new SSD that you are planning to move the data to is compatible with your computer system. Once confirmed, you can start by backing up your data to an external hard drive or cloud storage so that in the event of any issues, your data remains safe.

    Next, use cloning software to copy your entire operating system and files to the new SSD. After the successful transfer of data, access the BIOS and change the boot order to start up from the new SSD. Finally, double-check that everything looks good and that all of the files have transferred successfully.

    By following this step-by-step process, you can easily and securely transfer all of your data from one SSD to another, ensuring a hassle-free experience.

    Connect the old and new SSDs to the computer

    One of the essential steps to upgrading your computer’s storage with a new SSD is to connect both the old and new drives to the computer. This process is relatively simple and requires just a few tools. Firstly, you’ll need to locate the SATA ports on your motherboard and plug in the SATA cables that come with both the old and new SSDs.

    It’s vital to remember that the cable connecting the old SSD and the motherboard should be unplugged from the motherboard and connected to the new one. Once connected, you can switch on your computer and head to the BIOS settings to ensure that both drives are recognized. Depending on your computer, you may need to enable the new SSD as the primary disk to get it running.

    Remember, this process may vary slightly depending on your computer’s configuration, but it’s vital to ensure that both drives are appropriately connected before proceeding with data transfers. With these simple steps, you can seamlessly upgrade your computer’s storage and unlock its full potential.

    Install and open the cloning software

    When it comes to cloning a hard drive, the first step is to install and open the cloning software. This may seem daunting for those who are not tech-savvy, but rest assured that the process is easy and can be done in just a few clicks. You can start by downloading the cloning software of your choice from a trusted source online.

    Once you have downloaded the software, make sure to read the installation instructions carefully. Most software comes with a simple installation wizard that guides you through the process. Once the software is installed, open it to begin the cloning process.

    The interface may vary depending on the software you choose, but most of them offer step-by-step instructions to ensure that you don’t miss anything important. By following these simple steps, you can get your hard drive cloned in no time.

    Select the source and destination disk

    When it comes to cloning a disk, one of the essential steps is to select the source and destination disks. The source disk is the one you want to clone, while the destination disk is where you want to copy the data. Both disks must be connected to your computer and recognized by the cloning software.

    Selecting the wrong disks may result in data loss or even irreversible damage to your system. Therefore, it’s crucial to double-check and verify which disks you’re selecting. Before you start the cloning process, ensure that your destination disk has enough capacity to store all the data from the source disk.

    If not, you may have to upgrade to a larger disk. Also, ensure that you have a backup of your data and important files in case something goes wrong during the cloning process. Remember to choose the correct disks and double-check before proceeding with the disk cloning process.

    Start the cloning process

    Starting the cloning process can seem daunting, but with a step-by-step guide, it can be a manageable task. The first step is to choose the source material that will be cloned. This could be a plant, animal, or even a human cell.

    Once the source material has been identified, the next step is to find a suitable host organism. This host will contain the genetic material of the original organism, allowing it to develop and grow. The process of transferring genetic material between the source and host organisms is known as nuclear transfer.

    This involves removing the nucleus from the host cell and replacing it with the nucleus from the source cell. The next step is to stimulate the new cell to divide and grow, resulting in the formation of a cloned embryo. With careful handling, the embryo can be implanted into a surrogate mother to develop and grow into a genetically identical copy of the original organism.

    Overall, the cloning process is a complex yet fascinating journey that requires careful consideration and attention to detail. But with the right approach, it can open up new possibilities in medicine, biotechnology, and agriculture.

    Verify the cloned data

    After successfully cloning your data, the next step is to verify if the cloned data matches the original data. It is essential to verify the cloned data to ensure that all information has been copied without any inconsistencies or errors. The first step is to compare the original and cloned data and check if all the files and folders are present in the cloned data.

    Then, you need to ensure that the data is accessible and can be opened and edited without any issues. Additionally, it is crucial to verify the file size and integrity of the data. You can use specialized software to verify the cloned data’s checksum and compare it to the original file to see if they match.

    Once you have verified the cloned data’s accuracy and integrity, you can be confident that your data has been successfully cloned. It is always better to verify your cloned data to avoid any loss of critical information or data.

    Common Errors and Solutions

    If you’re looking to transfer storage from one SSD to another, there are a few common errors that you might encounter along the way. One mistake that people often make is attempting to simply copy and paste files between drives. While this might work for some files, it can often result in incomplete transfers and lost data.

    Instead, it’s best to use a specialized software program designed specifically for transferring data between drives. Another potential error is not properly formatting the new SSD before transferring data to it. This can lead to compatibility issues and decreased performance.

    To avoid this, be sure to format the drive using the appropriate file system before beginning the transfer process. Lastly, make sure that you have enough space on the new SSD to accommodate all of the data you plan to transfer. If not, you may need to prioritize certain files or consider purchasing a larger drive.

    By being aware of these common errors and taking the necessary steps to avoid them, you can ensure a smooth and successful transfer process.

    Failed to boot from the new SSD

    If you’ve recently installed a new SSD and your computer is failing to boot from it, don’t worry – you’re not alone. This is actually quite a common error that many users encounter. One of the main reasons for this error is that your BIOS may not be configured to boot from the new SSD.

    This can be easily fixed by going into your BIOS settings and changing the boot priority to the SSD. Another possible reason could be that there was an issue with the installation process, which could mean that the SSD wasn’t correctly connected or that the operating system wasn’t properly installed. In this case, you may need to reinstall the operating system or seek the help of a professional.

    Remember to always back up your data before making any changes to your computer’s hardware or settings. With a little troubleshooting, you’ll be able to get your computer up and running from your new SSD in no time.

    Incomplete transfer of data

    If you’ve ever transferred data from one device to another, you’ve probably experienced an incomplete transfer at some point. It can be frustrating to think you’ve moved all your important files, only to discover something is missing. Fortunately, there are a few common errors that can cause incomplete transfers and simple solutions to avoid them.

    One of the most common errors is simply not selecting all the files you want to transfer. Make sure you’re selecting everything you need before starting the transfer. Another issue can be running out of storage space on the receiving device.

    Before transferring large amounts of data, make sure there’s enough space to accommodate it all. And lastly, a poor or unstable WiFi connection can also cause incomplete transfers. To avoid this, ensure you have a strong and stable connection before starting any transfers.

    By being proactive and avoiding these common errors, you can ensure your data is fully transferred without any missing pieces.

    Conclusion and Final Tips

    In sum, transferring storage from one SSD to another may seem daunting, but it’s not rocket science. It takes a few simple steps, the right tools, and a little bit of patience. Think of it as packing up your digital life and moving it into a new, better home.

    So, go ahead, upgrade your SSD, and enjoy the speedy performance and ample storage that comes with it. Your files will thank you!”

    FAQs

    What are the steps to transfer storage from one SSD to another?
    The basic steps involve connecting both SSDs to your computer, cloning the original SSD to the new one using specialized software, swapping the SSDs and restarting the computer.

    Can I transfer my operating system along with files and programs to a new SSD?
    Yes, most cloning software can copy all data including the OS, files, and applications to the new SSD so that you can seamlessly start working on it.

    Do I need to format the new SSD before transferring data to it?
    No, you don’t need to format the new SSD before the transfer. The cloning software will ensure that all data on the new SSD is deleted and replaced with the data from the original SSD.

    What are the precautions I need to take before transferring data to a new SSD?
    You need to ensure that the new SSD has enough space to store all data from the original SSD. Also, ensure that the new SSD is of the same or higher capacity, the cloning software is compatible with your system, and you have created a backup of your data before starting the transfer process.
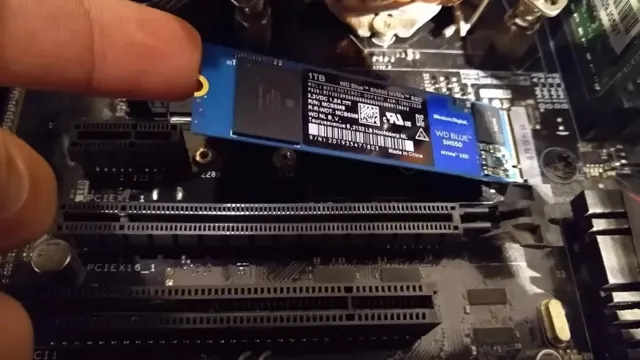
  • Maximize the Performance of Your PC: 10 Essential Things to Do After Installing an SSD

    Congratulations! You’ve just installed an SSD in your computer and are ready to start experiencing lightning-fast boot times and blazing-fast performance. But what’s next? Don’t just sit back and enjoy the speed, there are a few things you should do after installing your new SSD to make the most of it. In this blog post, we’ll cover some essential steps to take to ensure your SSD is running smoothly and you’re getting the most out of it.

    So, grab a coffee and let’s dive in!

    Check SSD Performance

    After installing an SSD, you may be eager to see just how much faster your computer is running. One way to check your SSD’s performance is by using a benchmarking tool. These tools run a series of tests that measure read and write speeds, among other things, and generate a score that you can use to compare your SSD’s performance to other similar products.

    Some popular benchmarking tools include CrystalDiskMark and AS SSD Benchmark. Running these benchmarks can provide insight into whether your SSD is performing as expected and can help identify any issues that may need to be addressed. Additionally, it can be useful to monitor the health of your SSD over time to ensure it remains in good condition.

    Many SSDs come with software that allows you to check the drive’s health, or you can use a third-party tool like SMARTmontools. Regularly checking your SSD’s performance and health can help ensure that you get the most out of your investment.

    Run Benchmark Tests

    When it comes to checking the performance of your solid-state drive (SSD), running benchmark tests is crucial. Benchmark tests can help you identify any issues with your SSD’s performance and determine whether it’s operating at its maximum potential. Whether you’re a gamer, an IT professional, or just someone who wants their computer to run smoothly, checking your SSD’s performance is a must.

    There are several free benchmark testing tools available online that can help you measure your drive’s read and write speeds, access times, and other important metrics. By using these tools, you can gain valuable insights into your SSD’s performance, identify any bottlenecks or issues, and take steps to optimize your system for peak efficiency. So, if you want to ensure that your computer is running at its best, be sure to check your SSD’s performance with benchmark tests!

    what to do after installing ssd

    Enable TRIM Command

    SSD Performance If you’re using a solid-state drive (SSD) as your primary storage device, you want to ensure that it’s operating at its full potential. One way to do this is by enabling the TRIM command. TRIM is a built-in feature on most modern SSDs that helps to optimize performance by allowing the operating system to tell the SSD which blocks of data are no longer in use and can be wiped clean.

    Without TRIM, the SSD’s performance can degrade over time, leading to slower boot times and longer application load times. Enabling TRIM is a straightforward process that varies depending on your operating system, but it’s definitely worth doing if you want to get the most out of your SSD. So, if you’re noticing your SSD’s performance starting to suffer, try enabling TRIM and see if it helps.

    Transfer Operating System and Files

    So you’ve installed your new SSD, congrats! But what do you do now? One important step is to transfer your operating system and files from your old hard drive to your new SSD. This can be done in a few different ways, depending on your preferences and technical expertise. One option is to use a disk cloning software, which essentially creates an exact copy of your old hard drive and transfers it to your new SSD.

    Another option is to manually install your operating system onto your new SSD and then transfer your files over using an external hard drive or cloud storage service. Whichever method you choose, make sure to backup your important files beforehand and thoroughly research the process to prevent any data loss or unexpected issues. By transferring your operating system and files to your new SSD, you’ll be able to enjoy faster speeds and improved performance.

    Clone System Drive

    Cloning your system drive is a great way to transfer your operating system and files to a new computer or hard drive. Essentially, it creates an exact copy of your entire system, including the OS, programs, settings, and files. This can be incredibly helpful if you want to upgrade your computer or if you need to replace a failing hard drive.

    To clone your system drive, you’ll need to use cloning software that can copy the contents of your current drive to a new one. There are many different options available, but some of the most popular include EaseUS Todo Backup, Acronis True Image, and Macrium Reflect. Once you’ve chosen your software, you’ll need to follow the instructions to clone your system drive.

    This can take some time depending on the size of your drive, but once it’s finished, you’ll have a perfect copy of your system ready to use on your new computer or hard drive. So why wait? If you want to transfer your operating system and files quickly and easily, cloning your system drive might be the perfect solution!

    Reinstall Operating System

    If you’re looking to transfer your operating system and files, you may be wondering what the best method is. Reinstalling your operating system can seem daunting, but there are simple ways to ensure your files transfer over smoothly. Some people prefer to use an external hard drive, while others choose to use cloud storage services like Google Drive or Dropbox.

    Another option is to use a migration tool that will transfer your files and settings from your old operating system to your new one seamlessly. Ultimately, the method you choose may depend on your preferences and the amount of data you need to transfer. With the right tools and a bit of patience, you can transfer your operating system and files without much hassle.

    Configure SSD for Optimal Performance

    Congratulations on installing your new SSD! But wait, there’s more to do to ensure you’re getting the most out of it. To achieve optimal performance, configuring your SSD is essential. You can start by ensuring that your SSD is properly aligned.

    This can be achieved by checking if your partitions begin on a sector that is divisible by 4,096 without incurring any offset. It’s also important to disable any defragmentation or Superfetch caching. Instead, enable TRIM command support to facilitate data management and deletion.

    Further configurations to consider include disabling unnecessary startup programs and optimizing power settings for maximum performance. Don’t forget to update your drivers as well to optimize communication between the hardware and operating system. These tips should get you on your way to enjoying the full benefits of your new SSD!

    Disable Unnecessary Services

    When you have a solid-state drive (SSD) in your computer, you want it to perform at its best. One way to do so is to configure it for optimal performance. One thing you can do is to disable unnecessary services that may be running in the background.

    These can drain your resources and slow down your overall system performance. Examples of such services are automatic updates, unnecessary software that runs at startup, and unessential network services, just to name a few. By disabling these services, you ensure that more resources are free for your system to use, resulting in better performance overall.

    So, take a few minutes to investigate which services are running on your computer and disable those that you don’t need. Your SSD will thank you for it!

    Adjust Power Settings

    When it comes to optimizing the performance of your SSD, adjusting your power settings is an important step to consider. By default, Windows might not be configured to work best with SSDs, and it’s up to you to fine-tune it. One way to do this is by configuring your power settings to favor performance over energy efficiency.

    This change can be made by going to the Power Options settings in Control Panel and selecting the High Performance power plan. This ensures that your SSD is operating at maximum performance levels at all times. Without this change, your SSD may not be performing as efficiently as it should, leading to slower overall speeds and longer loading times.

    Another setting that you can adjust is the “Turn off hard disk after” option. SSDs don’t require any time to “spin up” like traditional hard drives, so leaving this option on can actually hinder the performance of your SSD. Instead, it’s recommended to set the value to “never” to ensure that your SSD is always ready to go and operating at the maximum possible speeds.

    By making these simple changes to your power settings, you can help ensure that your SSD is performing at its best. This can have a noticeable impact on your overall system speed and save you time waiting for your computer to load files or applications. So why wait? Give it a try and see the difference for yourself!

    Update SSD Firmware

    If you’re looking to get the most out of your Solid State Drive (SSD), it’s essential to update its firmware regularly. The firmware is the software that controls the SSD and can significantly impact its performance. Updating the firmware can fix bugs and improve overall stability, security, and speed.

    It is recommended to check your SSD manufacturer’s website regularly and keep your firmware up to date. Failing to update your firmware can lead to degraded performance or even data loss. So, don’t take any chances and make sure your SSD is always optimized for optimal performance by updating the firmware regularly.

    Backup Data Regularly

    After installing an SSD, it’s important to backup your data regularly to ensure all your valuable information is safe in case of unexpected issues. An SSD is reliable and fast, but like any electronic device, it’s not indestructible and may fail at any point. Therefore, it’s essential to implement a backup system and create copies of your files and folders regularly.

    You can back up your data either on an external hard drive or cloud-based services like Dropbox and Google Drive. The choice of software and service you use primarily depends on your preference, but whichever option you choose, make sure you create a reliable backup strategy to avoid losing vital information. In summary, to get the most out of your SSD, backup data regularly for your peace of mind and as an insurance policy against data loss.

    Conclusion

    Congratulations, you’ve installed an SSD and now your computer is running faster than a cheetah wearing a jetpack. But don’t stop there! Take full advantage of your SSD’s capabilities by optimizing your settings and keeping your system clean. Just like a finely tuned sports car, your newly souped-up computer deserves proper maintenance and TLC.

    Give it some regular love, and it’ll zip along smoothly for years to come. Happy computing!”

    FAQs

    What are the benefits of installing an SSD?
    Installing an SSD can greatly improve your computer’s speed and performance, as it allows for faster boot-up times and quicker access to files.

    Do I need to replace my hard drive with an SSD?
    While it is not necessary to replace your existing hard drive with an SSD, it is highly recommended in order to fully experience the benefits of faster speeds and improved performance.

    How do I transfer my data from my old hard drive to my new SSD?
    You can transfer your data using cloning software, which will duplicate your entire hard drive onto the new SSD.

    What precautions should I take when installing an SSD?
    It is important to ground yourself before handling any computer components, and to ensure that your computer is turned off and unplugged before installing the SSD. Additionally, make sure you have the proper tools, such as a screwdriver, for the installation process.

  • 5 Simple Steps to Transfer Windows 10 to Your SSD Hassle-Free: A Comprehensive Guide

    Ready to turbo-charge your computer’s performance? Upgrading to a solid-state drive (SSD) can take your PC from sluggish to lightning-fast speeds. Not only will your Windows 10 boot time be reduced drastically, but your applications and files will also load in a snap. While purchasing an SSD may seem daunting at first, the real challenge lies in transferring your Windows operating system from your existing hard drive to the SSD.

    In this guide, we’ll provide you with the step-by-step instructions to seamlessly transfer Windows 10 to an SSD without losing any data or settings. Whether you’re a beginner or an advanced user, we’ve got you covered. Let’s dive in and make the switch to an SSD!

    Check SSD Compatibility

    If you’re looking to upgrade your computer’s storage and wondering how do I transfer windows 10 to my SSD, the first step is to check SSD compatibility. Not all SSDs are compatible with all computers, so it’s important to research which types of SSDs will work with your specific system. One way to do this is to look up your computer’s specifications, which should include information on the type of storage it supports.

    You can also consult with the manufacturer of your computer or the SSD you want to use to ensure compatibility. Once you’ve confirmed compatibility, you can then follow the steps to transfer your Windows 10 operating system to your new SSD. This can typically be done using software such as Clonezilla or Acronis True Image, or through built-in tools in Windows 10 like the Create a Recovery Drive feature.

    By taking the time to check SSD compatibility before upgrading, you can ensure a smooth transition and avoid any potential issues down the road.

    Confirm SSD is supported by your current system

    If you are considering upgrading to an SSD, the first thing you should confirm is whether your current system is compatible with it. Some older computers might not support SSD technology, so it’s worth verifying before you invest in one. Check your computer’s documentation or manufacturer’s website to see if it supports SATA III or NVMe interfaces, which are required for most modern SSDs.

    If your computer has an older interface like SATA II, you might still be able to use an SSD, but it will not perform as optimally. Checking SSD compatibility upfront can save you a lot of frustration down the road, so take the time to research your system’s capabilities before making a purchase.

    how do i transfer windows 10 to my ssd

    Create Windows 10 Installation Media

    If you’re looking to transfer Windows 10 to your SSD, one of the first steps you’ll need to take is creating installation media. This is essentially a bootable USB or DVD that you can use to install the operating system on your new drive. The good news is that Microsoft makes it easy to create installation media through their website.

    All you need is a USB flash drive with at least 8GB of storage space, and a reliable internet connection. From there, it’s just a matter of following the prompts on the website and downloading the necessary files to your USB drive. Once you have the installation media, you can use it to transfer Windows 10 to your SSD and enjoy faster speeds and improved performance.

    It’s worth noting that you may need to adjust your BIOS settings to ensure that your computer boots from the USB drive instead of your old hard drive, but this is a relatively simple process that can be done through your computer’s startup settings. Overall, with a little bit of time and patience, transferring Windows 10 to your SSD is a task that’s well within reach for most users.

    Download Windows 10 ISO and create a bootable USB drive

    Creating a bootable USB drive is a convenient way to install Windows 10, especially if you are working on a device that does not have an optical drive. To do this, you will need to download the Windows 10 ISO file and create a bootable USB drive. Firstly, visit the official Microsoft website and click on the ‘Download tool now’ button.

    Once the tool has downloaded, open it and select the option to create installation media for another PC. Then, choose your language, edition, and architecture, and click next. After selecting the USB drive you want to use, click on ‘Next’ and wait for the files to download.

    Once the process is complete, you will have a bootable USB drive that you can use to install Windows 10 on your device. It is important to note that this process will erase all the data on your USB drive, so be sure to back it up before starting. With this method, you are able to create your own installation media, ensuring you have the latest version of Windows 10 and can customize it to your liking.

    Insert the bootable USB into the target computer

    Now that you have created your Windows 10 installation media on a bootable USB drive, it’s time to start the installation process on your target computer. The first step is to insert the USB drive into the computer’s USB port. Be sure to choose the correct port, as there may be multiple options.

    Once inserted, power on your computer and enter the BIOS settings. This is typically done by pressing a specific key during the boot-up process. The exact key varies depending on the computer manufacturer, so be sure to check the documentation or search the web for instructions.

    Once in the BIOS settings, change the boot order so that the USB drive is the first option. This will ensure that the installation process starts from the USB drive rather than the computer’s hard drive. Once the changes are saved, exit the BIOS settings and restart the computer.

    The installation process should now begin automatically, and you’ll be on your way to enjoying all the new features and improvements of Windows

    Clone Windows 10 to SSD

    Are you wondering how to transfer Windows 10 to your newly purchased SSD? Well, you’re in luck! As replacing your hard drive with an SSD is one of the most effective ways to speed up your computer, it’s essential to have your operating system installed on the faster drive for optimal performance. Thankfully, there are several methods to clone Windows 10 to an SSD. One practical approach is to use the built-in utility called Windows System Image Backup.

    This tool enables you to create a copy of your entire system on an external drive and then restore it on your SSD. Alternatively, you can use third-party software like Macrium Reflect or EaseUS Todo Backup to clone your system effortlessly. The process involves creating a disk image of your operating system, which you can then transfer to your SSD.

    Whichever method you choose, be sure to back up your critical files before starting the process. That way, you won’t lose any data during the transfer. With these simple steps, you’ll have a faster and more efficient computer in no time!

    Use a cloning software like EaseUS Todo Backup to clone your Windows 10 to SSD

    EaseUS Todo Backup, clone Windows 10 to SSD If you’re looking for a way to speed up your computer’s performance, cloning your Windows 10 to an SSD may be a great solution. By transferring your operating system from a hard drive to a solid-state drive, you can significantly reduce boot times and improve your computer’s overall speed. Luckily, with a cloning software like EaseUS Todo Backup, the process is relatively straightforward.

    First, you’ll need to install the software and connect your SSD to your computer. Next, launch the software and select the option to clone your disk. From there, select your hard drive as the source disk and your SSD as the destination disk.

    Finally, review your settings and click “Proceed” to start the cloning process. The software will take care of the rest, and you’ll be up and running on your new SSD in no time. The best part is that you won’t lose any of your important files or applications in the process.

    So give it a try and see how much faster your computer can be with a cloned Windows 10 on an SSD!

    Choose the old system disk as the source and the SSD as the Destination

    If you’re looking to upgrade your computer’s storage system, one of the best choices you can make is to clone your Windows 10 operating system to an SSD. Doing this will give you faster boot times and overall better performance with your system. To start, you’ll need to choose the old system disk as the source and the SSD as the destination.

    This means that you’ll be copying your current operating system over to the new SSD drive. This can be done with various software programs, some of which are free and others that require purchase. Once you have your software set up, you can begin the cloning process.

    The software will guide you through the steps needed to successfully clone your Windows 10 operating system to your new SSD drive. Overall, cloning your system is a great way to upgrade your computer’s performance without having to completely reinstall everything from scratch. So, if you’re looking to speed things up, cloning your Windows 10 operating system to an SSD is the way to go.

    Set SSD as the Boot Drive

    If you’re wondering how to transfer Windows 10 to your SSD, the process is relatively straightforward. Your first step will be to clone your current Windows 10 installation to your SSD. There are several cloning software options available that can help you do this, such as EaseUS Todo Backup, Acronis True Image, or Macrium Reflect.

    Once you’ve cloned your Windows installation, you’ll need to set your SSD as the boot drive in your BIOS settings. This will ensure that your computer boots from the SSD instead of the old hard drive. It’s important to note that before you begin this process, you should back up any important files and ensure that your SSD has enough storage space to accommodate your operating system, applications, and files.

    With the right tools and a bit of patience, you’ll soon be able to enjoy the benefits of a faster, more efficient system with your new SSD as the boot drive.

    Power off the PC and remove the old system disk

    After shutting down your computer, the first step in setting your SSD as the boot drive is to remove the old system disk. This is crucial because you don’t want your computer to try to boot from the wrong drive, which could cause errors and slow performance. Once you’ve located the old system disk, carefully remove it from its slot.

    Depending on the type of computer you have, you may need a screwdriver or other tools to complete this step. Be sure to handle the old system disk carefully, as it may contain important files or data you need to save or transfer. With the old system disk removed, it’s time to install the new SSD.

    Carefully slide the SSD into the slot where the old system disk was located, making sure it fits snugly. Then, double-check all connections to ensure everything is secure before powering up your computer. With the SSD properly installed, you’re now ready to proceed to the next steps in the process of setting it up as your boot drive.

    By following these steps, you can improve your computer’s performance and enjoy faster boot times and overall responsiveness.

    Install the SSD into your computer

    Now that you have installed your SSD into your computer, it’s time to set it as the boot drive. Setting your SSD as the boot drive will ensure that your computer will boot up quickly and operate at faster speeds. The first step in setting your SSD as the boot drive is to enter the BIOS settings on your computer.

    To do this, restart your computer and press the appropriate key (usually F2, F10, or DEL) to enter the BIOS. Once you are in the BIOS, navigate to the Boot tab and select your SSD as the primary boot drive. Save your changes and exit the BIOS.

    Your computer should now automatically boot from your SSD. One thing to keep in mind is that if you had an operating system installed on your old hard drive, you will need to transfer it over to your SSD or install a fresh copy of the operating system onto your SSD. This will ensure that your computer runs smoothly and takes full advantage of the increased speeds and performance offered by your new SSD.

    So, go ahead and make the most of your new SSD by setting it as the boot drive and enjoy smoother and faster computer performance!

    Power on the PC, go to BIOS and set SSD as the primary boot drive

    When you install a new SSD in your PC, it’s important to set it as the primary boot drive so that your system can start up quickly. To do this, you’ll need to enter your PC’s BIOS setup. The BIOS (Basic Input/Output System) is a program that’s stored on a chip on your motherboard, and it contains the instructions your computer needs to boot up.

    Usually, you can access the BIOS by pressing a specific key (such as F2 or Delete) when your computer starts up. Once you’re in the BIOS, you can navigate to the boot options and select your SSD as the primary boot drive. This means that the BIOS will look for an operating system on the SSD first, before checking any other drives.

    Setting your SSD as the primary boot drive will ensure that your PC boots up quickly and efficiently. So, power on your PC and head to the BIOS to set your newly installed SSD as the primary boot drive.

    Conclusion

    In conclusion, transferring Windows 10 to your SSD is like giving your computer a luxurious upgrade. It’s like moving into a penthouse suite with only the best amenities. Your computer will boot faster, load programs quicker, and have an overall smoother performance.

    So don’t let your old hard drive hold you back – make the switch to an SSD and experience the ultimate computing experience!”

    FAQs

    What is the benefit of transferring Windows 10 to an SSD?
    The benefit of transferring Windows 10 to an SSD is that it can significantly improve your computer’s performance and boot-up time.

    Can I transfer Windows 10 to an SSD without reinstalling all of my programs?
    Yes, you can use migration software such as EaseUS Todo Backup or Macrium Reflect to transfer Windows 10 to an SSD without reinstalling all of your programs.

    How much space do I need on my SSD to transfer Windows 10?
    You will need a minimum of 16 GB of free space on your SSD to transfer Windows 10.

    How long does it take to transfer Windows 10 to an SSD?
    The transfer time depends on the size of your data and the speed of your SSD. It can take anywhere from 30 minutes to a few hours.

  • Unlocking the Power of Windows 10: Choosing the Perfect SSD Size for Your PC

    If you’re planning on upgrading your PC or building a new one, one of the most important components to consider is the SSD. A solid-state drive (SSD) can have a huge impact on the performance of your system, but with so many size options available, it can be difficult to know how big an SSD you need for Windows Well, the answer to that question is not exactly straightforward as it depends on your usage and storage requirements.

    If you only plan on installing Windows 10 and a handful of programs, then a 128GB SSD would suffice. However, if you’re a power user who will be running multiple applications, storing large files and gaming, then you might want to consider a larger SSD. The good news is that SSD prices have dropped significantly over the years, allowing you to get more storage for your money.

    Whether you’re a light or heavy user, investing in an SSD is definitely worth considering as it can greatly improve your system’s performance.

    Understanding SSD Storage

    If you’re wondering how big of an SSD you need to run Windows 10, it ultimately depends on your usage. However, a 250GB SSD would be a great place to start. This should be able to accommodate Windows 10 with room for some essential applications and files.

    Still, if you’re a heavy user or tend to store a lot of multimedia files, you might want to consider upgrading to a larger SSD. A 500GB or even 1TB SSD would provide ample storage for all your needs. SSDs are faster and more reliable than traditional hard drives and can significantly enhance the performance of your computer.

    So, if you’re looking for a speedy and efficient system, upgrading to an SSD could be just what you need.

    What is an SSD?

    If you’re familiar with the concept of computer storage, you’ve likely heard the term SSD thrown around at some point. But what exactly is an SSD? Well, simply put, it stands for Solid State Drive. Instead of using traditional spinning disks to store data, SSDs rely on flash memory to operate.

    This means they have no moving parts, which results in faster transfer speeds, more reliable storage, and lower power consumption. In the grand scheme of things, upgrading to an SSD can make a huge difference in the performance of your computer. Think of it like upgrading from a bicycle to a motorcycle – you’ll still get to your destination, but with much greater speed and efficiency.

    So, if you’re in need of a storage upgrade, consider investing in an SSD to take your computing experience to the next level.

    how big an ssd to run windows 10

    Benefits of using SSDs

    SSDs, Storage SSDs, or Solid State Drives, are increasingly becoming the preferred storage choice for those who want fast and reliable storage. SSDs are designed with no moving parts and use flash memory to store data, which makes them more reliable and less prone to failure. Compared to traditional hard drives, SSDs offer much faster read and write speeds, making them ideal for demanding applications like video editing and gaming.

    Moreover, SSDs consume less power and generate less heat, which makes them perfect for use in laptops, tablets and other mobile devices. Overall, the benefits of using SSD storage are numerous, and it’s no wonder why they are gaining so much popularity. So, if you want high performance and reliability, consider upgrading to an SSD storage solution today.

    Different types of SSDs

    If you’re in the market for a new SSD, you might be wondering what the different types are. There are several types of SSDs available on the market, each with its own set of advantages and disadvantages. The most common type is the SATA SSD, which uses the same interface as traditional hard drives and is the easiest to install.

    PCIe SSDs, on the other hand, are faster than SATA SSDs, but are more expensive and require a compatible motherboard. NVMe SSDs are the fastest option, but also the most expensive and require a compatible motherboard with NVMe support. It’s important to assess your storage needs and budget before choosing the type of SSD that’s right for you.

    It’s also worth noting that SSDs come in different sizes, so make sure you choose one that fits your system.

    Minimum SSD size for Windows 10

    Are you wondering how big an SSD you need to run Windows 10? Well, it depends on your intended use of the operating system. If you’re a casual user who only needs to check emails and surf the web, a 120GB SSD could suffice. However, if you plan on installing multiple applications or games, a 240GB SSD or bigger is recommended.

    This will give you enough space to store your operating system, programs, and files. Plus, a larger SSD generally means faster performance. If you’re a power user, you may even want to consider a 1TB SSD.

    This will provide plenty of space for all your files, applications, and games. Remember, having a larger SSD also means less reliance on external storage options such as USB drives or cloud storage. So, invest in a quality SSD that fits your needs, and enjoy a smoother Windows 10 experience.

    Factors to consider

    When determining the minimum SSD size for Windows 10, there are a few factors to consider. The operating system itself requires at least 20GB of space, but additional space is needed for updates, applications, and personal files. The recommended minimum SSD size for Windows 10 is 128GB, which allows for plenty of storage space and ensures smooth system performance.

    However, if you plan on using your computer for more demanding tasks such as gaming or video editing, you may want to consider a larger SSD size. A larger SSD not only allows for more storage space but also can improve overall system performance and speed. So, depending on your usage needs, consider upgrading to a larger SSD for the best experience.

    Windows 10 storage requirements

    When it comes to storage requirements for Windows 10, the minimum SSD size required can vary depending on your usage. For instance, if you’re simply using your computer for browsing the web and basic office tasks like word processing, then a 64GB SSD should suffice. However, if you’re a gamer or you use software that requires a lot of storage space, such as video editing software or graphic design programs, then you may need a larger SSD size, such as 256GB or 512GB.

    It’s important to note that Windows 10 requires at least 20GB of storage space, so keep that in mind when choosing an SSD size. Additionally, it’s always a good idea to leave some extra space for future updates and new software installations. So, whether it’s a 64GB SSD or a larger one, make sure to choose the one that best suits your needs and budget.

    Recommended SSD size for Windows 10

    When it comes to choosing the perfect SSD size for running Windows 10, there are a few factors to consider. Generally, the minimum recommended size for a Windows 10 installation is at least 20GB, but this doesn’t account for any additional software or programs you may want to install. For a more comfortable experience, most users prefer an SSD with at least 128GB of storage.

    This should give you enough room for the operating system, commonly used applications, and some extra files without worrying about running out of space. If you’re a power user or gamer, then you might want to go for a larger SSD to store more games and applications. In summary, if you want to enjoy the fast boot time and speedy application loading that SSDs offer, then we recommend going for a 128GB or larger SSD for your Windows 10 installation.

    Factors to consider

    When considering the right SSD size for Windows 10, there are a few factors to take into account. Firstly, the amount of storage you require will depend on how you plan to use your computer. If you’re a gamer or a content creator, you may need a larger SSD for storing large files and applications.

    On the other hand, if you only use your computer for basic tasks like browsing the internet and checking emails, a smaller SSD may suffice. Another factor to consider is your budget. Larger SSDs can be significantly more expensive, so it’s important to think about how much you’re willing to spend.

    Ultimately, it’s recommended to opt for an SSD with a minimum of 256GB for Windows This will provide enough space for the operating system, important files, and some applications. However, if you plan on using your computer for more demanding tasks, a larger SSD may be necessary to ensure optimal performance.

    Additional storage needs

    When it comes to additional storage needs for your Windows 10 system, an SSD is a great choice for boosting your computer’s performance. But what size should you choose? The recommended SSD size for Windows 10 depends on your specific needs and usage habits. For basic users, a 128GB SSD may suffice, allowing for the operating system and a few applications to be installed.

    However, if you’re a heavy user or need to store large files, a 256GB or even a 500GB SSD may be a better choice. It’s important to consider not only the current storage needs but also potential future storage needs. So, take some time to assess how you intend to use your computer, and choose an SSD size that will meet your needs both now and in the future.

    Conclusion

    When it comes to the question of how big of an SSD you need to run Windows 10, there is no one-size-fits-all answer. It really depends on your personal usage and needs. However, if you’re looking for a witty and clever conclusion, we say go big or go home! Because as technology advances and new updates are released, you’ll never regret having more storage space and faster performance.

    So let’s raise a toast to the big SSDs, because as they say, size does matter!”

    FAQs

    What is the minimum SSD size required to run Windows 10?
    The minimum SSD size required to run Windows 10 is 16GB for the 32-bit version and 20GB for the 64-bit version.

    Can I run Windows 10 on a 128GB SSD?
    Yes, you can easily run Windows 10 on a 128GB SSD. However, it is recommended to have at least 256GB of storage for better performance.

    What factors should I consider when selecting an SSD for Windows 10?
    When selecting an SSD for Windows 10, you should consider factors such as the storage capacity, read/write speeds, durability, and price.

    Is it worth upgrading to an SSD for Windows 10?
    Yes, upgrading to an SSD for Windows 10 can significantly improve the overall performance of your system. It will help in faster boot times, quicker application launches, and smoother workflow.

  • Unleashing the Full Potential of Your Raspberry Pi with Geekworm X825-C8: A Comprehensive Review

    Unleashing the Full Potential of Your Raspberry Pi with Geekworm X825-C8: A Comprehensive Review

    If you’re an avid Raspberry Pi user, you may be wondering how to take your projects to the next level. That’s where the Geekworm X825-C8 comes in. This powerful expansion board allows for seamless integration with your Pi, providing ample storage and cool power management features.

    But what exactly does it do? In short, the X825-C8 allows you to connect up to eight 5-inch hard drives to your Raspberry Pi, enabling you to store large amounts of data and access it with lightning-fast speeds. Plus, with its built-in power switch, you can easily turn your system on and off without having to unplug anything.

    But that’s just scratching the surface. The X825-C8 also features a cooling fan and a voltage display, ensuring that your Pi stays at the optimal temperature and voltage levels. And with its sleek design and easy installation process, it’s the perfect addition to any Pi enthusiast’s toolkit.

    So, if you’re ready to take your Raspberry Pi projects to the next level, the Geekworm X825-C8 is the perfect way to do it. With its powerful storage capabilities, efficient power management, and convenient design, this expansion board is the ultimate tool for maximizing your Pi’s potential.

    Introduction

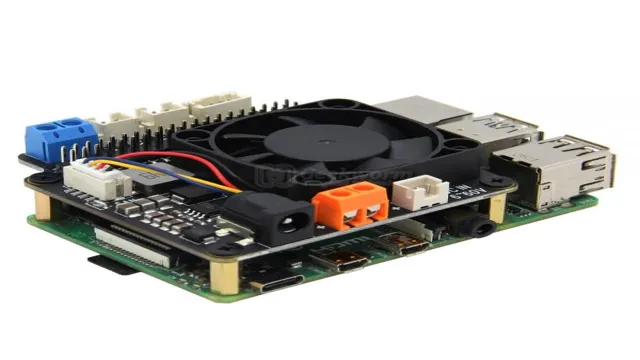
    The Geekworm X825-C8 is a powerful storage expansion board for the Raspberry Pi that offers high-speed data transfer and excellent storage performance. With SATA3 6Gbps connectivity and support for up to 8TB of storage, this board is perfect for users looking to expand their Raspberry Pi’s storage capacity and enable faster data transfer. The X825-C8 is easy to install and comes with a user-friendly design that makes it easy to set up and use right out of the box.

    Whether you are a hobbyist, a professional developer or someone in between, the X825-C8 is an excellent choice for getting the most out of your Raspberry Pi’s storage capabilities. So if you’re looking to expand your storage and increase your Raspberry Pi’s capabilities, then the Geekworm X825-C8 is definitely worth considering.

    What is Geekworm X825-C8?

    Geekworm X825-C8 is an expansion board that can be used in conjunction with a Raspberry Pi to provide additional functionality and storage. With the X825-C8, you can connect multiple hard drives to your Raspberry Pi, which makes it ideal for use as a media center or file server. The board also includes an RTC (real-time clock) module, which ensures that your Raspberry Pi always maintains accurate time.

    This feature is especially useful if you plan on using your Raspberry Pi for time-sensitive applications. Additionally, the X825-C8 board includes a fan that helps keep your Raspberry Pi cool, which is essential if you plan on running it for extended periods. With its multiple features and capabilities, the Geekworm X825-C8 is an excellent addition to any Raspberry Pi setup.

    geekworm x825-c8

    What are its Features?

    When it comes to features, there’s a lot to love about the Blog section. In essence, it’s a platform for writers to share their thoughts and ideas on a wide variety of topics – whether it’s personal experiences, industry news, or just something that’s been on their mind. One of the key features of the Blog section is the ability to comment and engage with other readers and writers.

    This creates a sense of community and can lead to interesting discussions and debates. Additionally, Blog posts can be shared on social media platforms, making it easy to reach a larger audience. Another feature of the Blog section is its flexibility – there are no strict guidelines on what can be posted and writers are free to express themselves in their own unique way.

    So whether you’re looking to read about a particular topic or share your own thoughts with others, the Blog section is the perfect place to do it.

    Installation

    If you’re looking to upgrade your Raspberry Pi storage and improve its performance, the Geekworm X825-C8 is a great option. The installation process is straightforward and doesn’t require any special skills or tools. First, you need to make sure that your Raspberry Pi is powered off and unplugged.

    Then, connect the X825-C8 board to the GPIO pins on the Raspberry Pi, making sure that the pins are aligned correctly. Next, attach the casing to the board using the screws provided. Finally, insert your SATA drive into the X825-C8’s connector and close the lid.

    Once you power up your Raspberry Pi, it should automatically recognize the attached storage device. You can then proceed to format the drive and start using it as your primary storage. With the Geekworm X825-C8 installed, you’ll enjoy faster transfer speeds and more reliable storage for your Raspberry Pi projects.

    Step-by-Step Guide on How to Install Geekworm X825-C8

    Installing Geekworm X825-C8 can seem daunting at first, but it’s actually a straightforward process. Here’s a step-by-step guide on how to install Geekworm X825-C8 on your Raspberry Pi: Step 1: Gather your materials. You’ll need a Raspberry Pi, a case for your Pi, a power supply for your Pi, an SD card with Raspbian software, and of course, the Geekworm X825-C8 expansion board.

    Step 2: Connect the expansion board. The Geekworm X825-C8 expansion board comes with all the necessary hardware, including jumper wires and screws. Attach the board to your Raspberry Pi using the included screws and cables.

    Step 3: Insert the SD card. Make sure to insert the SD card into your Raspberry Pi before connecting the power supply or turning on the device. Step 4: Connect the power supply.

    Once everything is connected, plug in the power supply and turn on your Raspberry Pi. You should now see the Raspberry Pi booting up. Step 5: Configure your settings.

    The Geekworm X825-C8 is designed to work with Raspbian software, so you may need to configure your settings to match the software. Follow the instructions for setting up the software. That’s it! With these simple steps, you can install your new Geekworm X825-C8 expansion board and get it up and running in no time.

    So go ahead and give it a try – you’ll be amazed at what you can do with your Raspberry Pi and the Geekworm X825-C

    How to Safely Connect Your Raspberry Pi to the X825-C8 Board

    Connecting your Raspberry Pi to the X825-C8 board can be tricky, but with the right steps, you can do it safely and securely. First, ensure that both the X825-C8 board and the Raspberry Pi are powered off before connecting them. Then, slide the Raspberry Pi into the X825-C8 board and use the screws provided to secure it in place.

    Next, connect the power supply to the X825-C8 board and plug it in. Finally, connect any additional peripherals, such as a USB drive or camera, to the Raspberry Pi. With these steps, you can safely and easily connect your Raspberry Pi to the X825-C8 board and enjoy all of its features and benefits.

    Performance

    When it comes to Raspberry Pi storage options, the Geekworm X825-C8 enclosure stands out for its impressive performance. The X825-C8 utilizes the JMicron JMS561 chipset, which supports SATA III speeds, ensuring optimal data transfer rates. This enclosure also features an active cooling system, with a fan that helps keep the drive running at a reasonable temperature, preventing overheating and ensuring consistent performance.

    Thanks to its robust design, the X825-C8 is perfect for those who require a faster, more reliable storage solution for projects that demand high-speed access to data. Overall, if you’re looking for an enclosure that can provide fast and reliable performance for your Raspberry Pi, the X825-C8 is an excellent choice.

    Speed and Efficiency Improvements with X825-C8

    Looking for ways to enhance the performance of your Raspberry Pi? Look no further than the X825-C8 expansion board. This powerful add-on delivers significant speed and efficiency improvements by providing up to 8 high-speed SATA interfaces with support for RAID 0/1/5/6/ That means faster data transfers, improved access times, and better overall system performance.

    With its compact design and easy installation, the X825-C8 is the perfect solution for anyone seeking to take their Raspberry Pi to the next level. So why wait? Upgrade your system today and experience the full power of the X825-C8 expansion board.

    Real-Life Applications and Use Cases with X825-C8

    As an advanced power management and storage solution for the Raspberry Pi, the X825-C8 offers exceptional performance and versatility. Its advanced power management features allow it to operate with minimal power consumption, while its support for multiple storage devices makes it ideal for various real-life applications and use cases. For instance, the X825-C8 can be used as a backup power supply for the Raspberry Pi and other embedded systems.

    Its USB 0 ports also make it easy to connect and transfer data to and from multiple external storage devices. Moreover, the X825-C8 can be used for smart home automation systems, robotics projects, and industrial automation applications.

    With its high-performance features and compatibility with various operating systems, the X825-C8 is the perfect solution for businesses and individuals looking for reliable, efficient, and cost-effective power management and storage solutions for their Raspberry Pi projects.

    Conclusion

    In conclusion, the Geekworm X825-C8 is the ultimate weapon in the battle against storage limitations. It’s like having a quiver of arrows for your data, ready to shoot them onto your Raspberry Pi with blazing speed. With its clever design and unmatched performance, the X825-C8 will have you saying goodbye to slow load times and hello to a world of lightning-fast data transfers.

    So if you want to level up your Pi game, get yourself a Geekworm X825-C8 and join the elite ranks of data warriors. After all, who needs a sword when you’ve got a geekworm on your side?

    Final Thoughts on Geekworm X825-C8

    When it comes to performance, the Geekworm X825-C8 does not disappoint. It offers fast data transfer rates and excellent reliability, making it a great option for anyone in need of dependable and efficient storage solutions. Additionally, its compatibility with various operating systems and the ability to work with multiple hard drives means users can customize their setup to their specific needs.

    Whether you’re a professional who requires large amounts of storage for work-related files or a DIY enthusiast who needs a versatile and reliable storage solution, the Geekworm X825-C8 is definitely a solid choice. Overall, the performance of the X825-C8 is outstanding and will undoubtedly exceed the expectations of even the most demanding users.

    FAQs

    What is the function of the Geekworm X825-C8?
    The Geekworm X825-C8 is a SATA expansion board designed for Raspberry Pi, providing up to 8 hard drives connection. It expands the storage capacity of your Pi and allows for easy access to multiple drives at the same time.

    Is the Geekworm X825-C8 compatible with Raspberry Pi 4?
    Yes, the Geekworm X825-C8 is compatible with Raspberry Pi 4, as well as with previous versions of Raspberry Pi.

    How do I install the Geekworm X825-C8 on my Raspberry Pi?
    The installation of the Geekworm X825-C8 is quite simple. You need to stack it on top of your Raspberry Pi’s GPIO pins, connect the power cable and data cables from the hard drives to the board, and you are good to go.

    Can I use the Geekworm X825-C8 without connecting all 8 hard drives?
    Yes, you can use the Geekworm X825-C8 with fewer hard drives by just connecting the ones that you need. The board is designed to provide flexibility in terms of the number of drives you can connect.

  • Maximizing Your NVMe SSD Performance: Do You Need a Heatsink?

    Maximizing Your NVMe SSD Performance: Do You Need a Heatsink?

    Are you someone who is unfamiliar with the concept of heat sinks and wondering whether you need one for your device? Or maybe you’ve heard conflicting advice on whether heat sinks are necessary and are unsure of what to believe. In today’s world, electronics have become an essential part of our lives, and with it, the potential for overheating and damage. The use of heat sinks is a common solution to this problem, but whether or not you need one depends on various factors.

    In this article, we’ll explore the basics of heat sinks, the science behind them, and the circumstances under which you’d need one. So, let’s dive in and find out whether to heat sink or not!

    What is an NVMe SSD heatsink?

    Are you wondering whether you need an NVMe SSD heatsink or not? Well, the answer depends on how you plan to use your NVMe SSD and what kind of workload you’ll be putting on it. In general, if you’re using your NVMe SSD for basic tasks such as browsing the web, streaming media, or running light software, you probably won’t need a heatsink. However, if you plan on using your NVMe SSD for heavy workloads such as gaming, video editing, or complex software, a heatsink can make a big difference in keeping your drive cool and avoiding throttling.

    A heatsink can help dissipate heat more efficiently, preventing performance degradation or even data loss. So, if you’re planning on using your NVMe SSD for intensive tasks, it’s worth considering an NVMe SSD heatsink to improve its longevity and performance.

    Description of an NVMe SSD heatsink

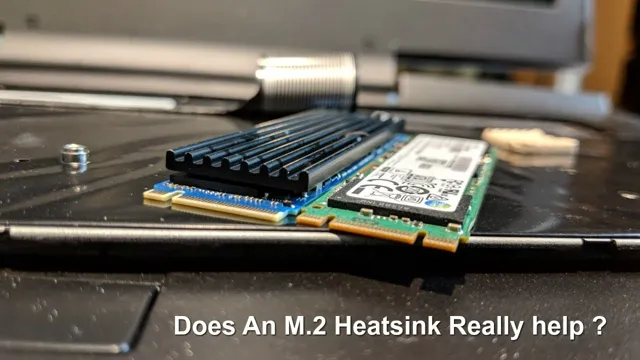
    An NVMe SSD heatsink is an essential component that helps dissipate heat from the solid-state drive, ensuring optimal performance and longevity. It is a small metallic block that attaches to the NVMe SSD through a thermal pad or adhesive tape. This heatsink provides an extra layer of cooling that supplements the natural airflow generated within the computer’s case.

    With an NVMe SSD heatsink, the temperature of the drive can be significantly reduced, preventing thermal throttling and potential data loss. The heatsinks are specifically designed for NVMe SSDs and can be easily installed by anyone. If you are using an NVMe SSD for gaming or other heavy-duty tasks, a heatsink is highly recommended to maintain peak performance.

    nvme ssd heatsink or not

    Benefits of using an NVMe SSD heatsink

    An NVMe SSD heatsink is a cooling mechanism designed to help dissipate the excess heat produced by NVMe solid-state drives. This type of heatsink attaches to your motherboard and sits on top of your NVMe SSD, keeping it cool during heavy use. The benefits of using an NVMe SSD heatsink are numerous.

    First and foremost, using a heatsink can help increase the lifespan of your solid-state drive by preventing overheating. It can also improve overall system performance by maintaining the optimum temperature while reducing the risk of thermal throttling. Additionally, an NVMe SSD heatsink can help improve system stability, prevent data loss, and ensure smoother operation by eliminating the risks associated with overheating.

    In conclusion, an NVMe SSD heatsink is an essential accessory for any computer user who wants to maintain the health and longevity of their solid-state drive.

    Do you need an NVMe SSD heatsink?

    When it comes to the topic of NVMe SSD heatsinks, the question is whether or not you really need one for your system. The answer to this question depends on the use case of your NVMe SSD and how much heat it generates during operation. If you are using your SSD for moderate daily use, such as general web browsing or office work, then adding a heatsink may not be necessary.

    However, if you are using your NVMe SSD for intensive tasks such as gaming, video editing, or large file transfers, then a heatsink can help dissipate heat and prevent thermal throttling. Additionally, if you have a compact system with limited airflow, a heatsink can provide an extra layer of cooling to help keep your SSD operating at optimal temperatures. Ultimately, the decision on whether or not to use an NVMe SSD heatsink will depend on your specific use case and system setup.

    Factors to consider before buying an NVMe SSD heatsink

    If you’re into intense gaming or other system-intensive activities that rely heavily on your computer’s storage system, chances are you’ve heard of NVMe SSD heatsinks. But, before you run off purchasing one, there are a few factors to consider. Firstly, consider your existing cooling system.

    Does your computer already have enough cooling, or do you need an additional heatsink? Secondly, think about the size and compatibility of the heatsink with your NVMe SSD. The heatsink must fit accurately and work well with your SSD in terms of performance and heat dispersion. Finally, take into account the aesthetics of the heatsink and your computer’s overall look.

    Aesthetics can be a significant factor, especially if you like to optimize the look of your gaming rig. Ultimately, weighing all these factors will help you decide whether you indeed need an NVMe SSD heatsink or not.

    When an NVMe SSD heatsink is necessary

    NVMe SSD heatsink If you’re someone who likes playing games or editing videos for long hours, then you might wonder if you need an NVMe SSD heatsink. The answer is “Yes.” An NVMe SSD heatsink is necessary for people who push their systems to the limit by putting heavy processing loads on their computer.

    As NVMe SSDs generate heat while in use, they can reach peak temperatures that can lower their performance or, worse, damage your system or data. This is where an NVMe SSD heatsink can help. It keeps your NVMe SSD from overheating, which ensures that it will perform at its best for an extended period.

    Moreover, a heatsink acts as a barrier to prevent harmful effects on other components of your computer. By installing an NVMe SSD heatsink, you can rest assured that your computer’s performance will remain at an optimal level, whether you’re gaming, rendering a high-quality video, or running complex tasks.

    When an NVMe SSD heatsink is unnecessary

    When it comes to NVMe SSDs, many people wonder whether or not they need a heatsink. The answer to this question really depends on the use case for your SSD. If you’re using your NVMe SSD for basic tasks like web browsing, gaming, or general office work, you probably won’t need a heatsink.

    These types of tasks don’t typically require sustained high performance, so the temperature of your SSD won’t get high enough to cause any issues. However, if you’re using your NVMe SSD for more demanding tasks like content creation, video editing, or heavy file transfers, then a heatsink might be a wise investment. These types of tasks can cause your SSD to generate a lot of heat, which can lead to thermal throttling and reduced performance.

    A heatsink can help dissipate that heat and keep your SSD running smoothly. Ultimately, the decision to use a heatsink for your NVMe SSD comes down to your use case and personal preference. If you’re using your SSD for basic tasks, you probably won’t need one.

    But, if you want to ensure optimal performance and longevity for your SSD, investing in a heatsink might be a smart move.

    Alternatives to an NVMe SSD heatsink

    If you’re not interested in installing an NVMe SSD heatsink, there are still some alternatives that can help keep your drive running at a cooler temperature. One option is to make sure that your case has good airflow. By having fans installed and ensuring that they are free from dust and debris, you’ll be able to reduce the amount of heat that is generated inside your system.

    Another alternative is to use a thermal pad. These are designed to sit between your SSD and your motherboard, and they can help transfer heat away from your drive. While they may not be as effective as a dedicated heatsink, they can still offer some extra protection against overheating.

    Lastly, you can simply choose a cooler-running NVMe SSD. Some models are designed with efficiency in mind, which means they generate less heat than others. By doing your research and selecting a drive that has a good balance of speed and temperature management, you can avoid the need for a heatsink altogether.

    Other methods for cooling an NVMe SSD

    While adding a heatsink to an NVMe SSD is one effective way to keep it cool, there are other alternatives that you can use. One of these is using a thermal pad, which can help transfer heat away from the SSD’s controller, thereby reducing its temperature. Another option is to install your NVMe SSD in a slot with good ventilation or in a well-ventilated room.

    You can also use a dedicated cooling fan or an aftermarket M.2 heatsink enclosure to help maintain the ideal temperature of your NVMe SSD. However, remember that having too much cooling can also be detrimental to your SSD’s lifespan, so it’s important to find the right balance between cooling and performance.

    Try these other methods and see which one works best for you and your NVMe SSD.

    When to explore alternative cooling options

    Alternative Cooling Options NVMe SSDs are designed to work under high load conditions, which can cause them to overheat. To prevent this, heatsinks are often used to dissipate heat. However, there may be situations where an alternative cooling option is necessary.

    For example, if you are building a small form factor PC, space may not allow for a large heatsink. In this case, alternative options such as heat pipes or liquid cooling may be more appropriate. Additionally, if you are working in a high-temperature environment or using your NVMe SSD for sustained periods of time, even with a heatsink, it may be necessary to explore alternative cooling options.

    It’s important to remember that proper cooling is vital for the longevity and performance of your NVMe SSD, so it’s always better to err on the side of caution.

    Final Verdict

    When it comes to whether or not to use an NVMe SSD heatsink, the answer really depends on your specific usage scenario. If you’re using your NVMe SSD for intense workloads or gaming, you may want to consider adding a heatsink to help dissipate heat and prevent thermal throttling. However, if you’re just using your SSD for everyday tasks and not experiencing any issues with overheating, a heatsink may not be necessary.

    Ultimately, it’s important to monitor your SSD’s temperatures and make an informed decision based on your usage needs. Don’t just add a heatsink because it’s trendy – consider the intended purpose and overall impact it may have on your system’s performance.

    Conclusion

    In the end, whether or not to use a heatsink for your NVMe SSD boils down to personal preference and use case scenario. Sure, it may provide some extra cooling power, but if your SSD is not experiencing any significant rise in temperature, then it might just be an unnecessary addition to your build. On the other hand, if you’re running high-performance tasks that consistently push your drive to the limit, a heatsink could potentially give you that extra edge.

    So, it’s up to you to decide whether you want to play it safe or take the heat! Either way, it’s all about finding that perfect balance between performance and peace of mind.”

    FAQs

    What is a heatsink in an NVMe SSD?
    A heatsink is a device that is used to dissipate or transfer heat from a component to the surrounding environment. In the case of an NVMe SSD, a heatsink is used to keep the device cool and prevent overheating during intensive workloads.

    Do all NVMe SSDs come with a heatsink?
    No, not all NVMe SSDs come with a heatsink. Some SSDs are designed to be used in laptops or notebooks, where space is limited and a heatsink may not be feasible. However, many high-performance NVMe SSDs do come with a built-in heatsink, or have the option to purchase a compatible one separately.

    Is a heatsink necessary for an NVMe SSD?
    It depends on how you plan to use your NVMe SSD. If you are using it for general computing tasks, such as browsing the internet or word processing, a heatsink may not be necessary. However, if you plan to use your SSD for intensive workloads, such as video editing or gaming, a heatsink can help to prevent throttling and maintain optimal performance.

    Can I add a heatsink to my existing NVMe SSD?
    In many cases, yes. If your SSD has a compatible heatsink available, you can purchase it separately and install it yourself. However, it is important to ensure that the heatsink is properly installed and does not impede airflow or cause damage to the SSD.

  • Effortlessly Upgrade to SSD: A Step-by-Step Guide on How to Clone HDD to SSD on Windows 10

    If you’re thinking of upgrading your computer’s storage with an SSD, the thought of moving all your data over can seem quite daunting. However, the process of cloning your HDD to an SSD on Windows 10 is actually quite simple. In fact, if done correctly, it can even save you time in the long run.

    When you first buy a computer or laptop, it usually comes with a hard disk drive (HDD) pre-installed. While HDDs are reliable and affordable, they can be slower and have less capacity than the newer solid-state drives (SSDs). Upgrading to an SSD can make a huge difference in terms of speed and performance.

    Cloning your HDD to your new SSD can be a great way to make the transition to the new drive while keeping all your data, settings, and programs intact. Your computer will run faster, be more responsive, and have more space for files, applications, and games. In this blog post, we’ll walk you through the steps to clone your HDD to your new SSD on Windows

    We’ll cover the tools you’ll need, the preparation needed before cloning, and the actual cloning process step-by-step. So sit back, relax, and get ready to upgrade your computer’s storage like a pro!

    Create a Backup

    If you’re looking to upgrade your computer’s hard drive, it’s essential to create a backup before beginning the process of cloning your HDD to an SSD. There are several methods to backup your data, including using an external hard drive, cloud-based storage, or a data backup software. It’s crucial to ensure your backup is complete before proceeding with the cloning process.

    Once your backup is complete, you can start the cloning process by using software designed for HDD to SSD cloning. A popular choice is the EaseUS Todo Backup software, which is user-friendly and efficient. Follow the instructions carefully, and you’ll successfully clone your HDD to an SSD without losing any data.

    Overall, creating and ensuring your backup is complete is the key to a smooth transition to a faster SSD.

    Back Up Important Data to External Drive

    Backing up important data is crucial, and one of the best ways to do this is by creating a backup on an external drive. Whether you have important documents, cherished photos, or a vast music library, storing them on just one device puts them at risk of loss or damage. That’s where backups come in handy.

    By having the data saved on multiple devices, you reduce the risk significantly. Creating a backup on an external drive is effortless and doesn’t require technical expertise. Just connect the drive to your device, select the data you’d like to backup, and drag and drop the files into the external drive.

    You can also use cloud-based backup services, but it is essential to note that cloud-based backups require an internet connection, which may not be available all the time. By creating a backup on an external drive, you have offline access to your data at all times and can be assured that your important files are secure.

    how do i clone a hdd to ssd wondows 10

    Create a System Image Using Built-in Tool

    If you want to ensure that your important files and data are always safe in case of a disaster or system failure, creating a system image backup is an essential step. Luckily, Windows provides a built-in tool that allows you to create a backup of your entire system, including your installed programs, settings, and personal files. To create a system image backup, all you have to do is open the Control Panel, go to the Backup and Restore option, and select “Create a system image.

    ” Windows will prompt you to choose a location to save the backup, such as an external hard drive or network location. Once you’ve chosen your backup location, Windows will start creating the backup. This process may take some time, depending on the size of your system and the speed of your computer.

    But in the end, you’ll have peace of mind knowing that you can easily restore your system to its previous state in case of an unexpected event. So, don’t delay creating a system image backup today and keep your important files and data safe and secure.

    Prepare the SSD

    If you’re wondering how to clone a HDD to SSD in Windows 10, one important step is to prepare the SSD properly. First, make sure your SSD is properly installed and recognized by your computer. You can do this by opening the Disk Management tool and checking if your SSD is listed.

    If not, you may need to update your drivers or check your BIOS settings. Next, you should format the SSD to remove any existing data and prepare it for cloning. This can also be done through the Disk Management tool.

    Finally, you may want to adjust your computer’s settings to optimize your SSD’s performance. Some recommended adjustments include disabling disk defragmentation and enabling TRIM. By properly preparing your SSD, you can ensure a smooth and successful cloning process.

    Connect the SSD to Your Computer

    Before you can connect your new SSD to your computer, you’ll need to make sure it’s properly prepared. Start by shutting down your computer and disconnecting all cables. Open up your computer case and locate an empty drive bay where the SSD can be mounted.

    Some cases may require additional mounting brackets which can generally be purchased separately. Attach the bracket to the SSD before mounting it in the drive bay. Once the SSD is securely in place, reconnect any necessary cables such as power and data cables.

    Now you’re ready to move on to the next step in the process of connecting your SSD to your computer and getting it set up for use. Don’t forget to keep your anti-static wrist strap on to prevent any damage during the installation process. By following these steps, you can ensure that your new SSD is properly prepared and ready to go.

    Initialize the SSD

    Initializing an SSD is an important step to ensure proper functioning of your solid state drive. Before initializing the SSD, make sure it is connected to your system. Next, access the Disk Management tool in Windows by right clicking the Windows key and selecting Disk Management.

    Once there, you should see your SSD listed as unallocated space. Right click on the unallocated space and select New Simple Volume. Follow the prompts on the screen to create a partition and format the drive to your desired file system, such as NTFS or exFAT.

    Keep in mind that the initialization process will erase all data on the SSD, so be sure to back up any important files beforehand. After the initialization is complete, your SSD is ready to be used for storing and accessing data quickly and efficiently.

    Partition and Format the SSD

    When you get a new SSD, it is important to prepare it for use by partitioning and formatting it. Partitioning means dividing the SSD into separate sections that can be used for different purposes. Formatting, on the other hand, involves setting up the file system that will be used to organize and store data on the drive.

    Both of these steps are necessary to ensure that your SSD is ready to use and will function properly. One of the main benefits of using an SSD is its superior speed and performance, but this can only be realized if the drive is properly prepared. To partition and format the SSD, you can use built-in tools in your operating system or third-party software.

    This process should be done before installing any operating system or data on the drive to avoid data loss or corruption. By taking the time to prepare your new SSD, you can ensure that it will function optimally and provide reliable performance for years to come.

    Clone the HDD to SSD

    If you’re looking to upgrade your computer’s storage, there’s no better option than cloning your hard disk drive (HDD) to a solid state drive (SSD) in Windows Cloning is essentially transferring all the contents from one drive to another, making an exact copy of your data and settings. First, you’ll need to purchase an SSD that has enough space to hold all your data.

    After that, download a cloning software like Macrium Reflect to start the process. Once the software is installed, connect your new SSD to your computer using a USB adapter, and run the cloning software. Select your HDD as the source drive and your SSD as the destination drive, and let the software do its job.

    Once the cloning is complete, shut down your computer and replace the HDD with the SSD, and you’re good to go. Enjoy your faster system and improved storage capacity with ease!

    Download and Install Disk Cloning Software

    Cloning your HDD to an SSD is a smart move that can significantly improve your computer’s performance. To get started, you’ll need to download and install disk cloning software. There are several great options available, including Clonezilla, Acronis True Image, and Macrium Reflect.

    Once you’ve chosen your preferred software, follow the instructions to install it on your computer. With your software installed and ready to go, you can start the cloning process. This involves copying all the data from your HDD over to your SSD, so be prepared to wait a little while as the process can take some time.

    When the cloning is complete, you’ll have a perfect replica of your old HDD on your new SSD, and your computer will be faster and more responsive than ever before. So, why wait? Get started today and give your computer the boost it deserves!

    Select Source Disk

    When it comes to upgrading your computer, cloning your old HDD onto a new SSD can make a world of difference in terms of speed and performance. However, before you can begin the cloning process, you’ll need to select your source disk. This is essentially the hard drive that you’ll be transferring all of your data from.

    When choosing a source disk, it’s important to take a few factors into consideration. First and foremost, you’ll want to ensure that the drive has enough space to accommodate all of your data. You’ll also want to make sure that the drive is in good working condition, as any errors or issues on the source disk can result in issues during the cloning process.

    Additionally, it’s a good idea to consider the speed of your source disk, as this can impact the overall speed of the cloning process. By taking these factors into account, you can ensure that you select the right source disk for your SSD cloning needs.

    Select Destination Disk

    When cloning your HDD to SSD, the first step is to select your destination disk. This disk will receive a copy of all the data on your original HDD, so it’s important to make the right choice. Generally speaking, you’ll want to choose an SSD with enough storage space to accommodate all your data and applications.

    You should also ensure that the SSD is compatible with your computer’s hardware and operating system. When making your selection, keep in mind that not all SSDs are created equal – some offer faster read and write speeds, while others have better durability or a longer warranty. Make sure to do your research and choose a reputable brand that suits your specific needs.

    With the right destination disk, cloning your HDD to SSD can be a quick and seamless process. So, take your time to select the best option for you, and enjoy the speed and efficiency of your new SSD.

    Start Cloning Process

    If you’re looking to transfer your files from your old HDD to a new SSD, cloning is a great option. Cloning is an exact copy of your old drive, meaning you won’t have to reinstall your operating system or transfer files manually. To begin the cloning process, you’ll need a cloning software program.

    There are plenty of free and paid options available online. Once you have your software downloaded and installed, connect your SSD to your computer. Then, use the cloning software to copy the contents of your old drive to your new SSD.

    The process may take a few hours, depending on the size of your old drive, so be patient. Once the cloning process is complete, you’ll have a fully functioning copy of your old drive on your new SSD. Just make sure to remove your old HDD and set your new SSD as your primary drive in your BIOS settings.

    This will ensure that your computer boots up from the new drive and you can begin using it immediately. Cloning your HDD to an SSD is a simple process that can improve the performance of your computer and make transferring files a breeze.

    Verify and Boot from SSD

    If you’re looking to upgrade from a traditional hard drive to a faster solid state drive (SSD), cloning your HDD to your new SSD can be a great option. Not only can you keep all of your files and settings intact, but your computer will boot up and run programs much faster. Fortunately, Windows 10 has built-in tools to make this process easy.

    First, you’ll need to verify that your SSD is properly connected and recognized by your computer. Once that’s done, you can use the built-in Disk Management tool to clone your HDD to your SSD. After that, you’ll want to double-check that your computer is set to boot from the SSD so you can fully take advantage of the increased speed.

    With a bit of patience and attention to detail, you’ll be up and running with your new SSD in no time.

    Perform a Verification Check

    It is important to perform a verification check when installing or upgrading an SSD in your computer. One crucial step is verifying and booting your system from the SSD. To do this, you must first enter the BIOS setup utility by pressing the correct key during startup (usually F2, F10, or Delete).

    Navigate to the boot order settings and ensure that the SSD appears as the first boot device. Once verified, save and exit the BIOS settings and wait for your system to boot up. If successful, your computer will now run faster and more efficiently with the new SSD as its primary storage device.

    Remember to always back up your data before making any changes to avoid losing important files. By verifying and booting from your SSD correctly, you will be able to fully benefit from its improved speed and performance.

    Switch to Boot from the SSD Drive

    After successfully cloning your old hard drive to the new SSD drive, the next important step is to verify if your computer has booted from the correct drive. Before changing the boot drive order in the BIOS settings, make sure that your computer recognizes the new SSD drive in the system. To verify this, restart your computer, and enter the BIOS settings by pressing the designated key (usually F2, F10, or Del) during the boot process.

    Once you’re in the BIOS settings, locate the boot options, and check if the SSD is listed as the primary boot device. If not, change the boot order by moving the SSD drive to the top of the list. Save the changes, and exit the BIOS settings.

    Your computer will restart automatically, and this time it should boot from the SSD drive. After successfully booting from the SSD, you’ll notice a significant improvement in the overall performance and speed of your computer. The read and write speeds of the SSD are much faster than the conventional hard drives, which means that your computer will now be able to open programs and files faster than before.

    Congratulations, you have successfully switched to boot from the SSD drive, and now you can enjoy the benefits of increased speed and performance on your computer.

    Conclusion

    Congratulations, you have now learned how to give your old HDD a facelift with a new and improved SSD! Cloning your HDD to SSD in Windows 10 may sound like a daunting task, but with the right tools and a little bit of know-how, it’s actually quite simple. Just remember to back up your data, choose the right software, and follow the steps carefully. And just like that, your computer will have a spring in its step and you’ll be whizzing through tasks like never before.

    It’s like your computer went to the gym and just did a serious workout!”

    FAQs

    What is the difference between cloning and copying a hard drive?
    Cloning creates an exact copy of the entire hard drive, including the operating system and all the installed programs and files. Copying only copies the data files, but not the operating system or programs.

    Can I clone a larger HDD to a smaller SSD?
    Yes, but only if the data on the HDD will fit onto the smaller SSD. You can use software that automatically adjusts the partition sizes during the cloning process.

    How long does it take to clone a hard drive to an SSD?
    The time it takes depends on the size of the hard drive, the amount of data being cloned, and the transfer speed of the drive connections. On average, it can take anywhere from 30 minutes to a few hours.

    Do I need any additional software to clone a hard drive to an SSD on Windows 10?
    Windows 10 comes with its own built-in cloning software called “System Image Backup” that you can use to clone a hard drive. However, many people prefer to use third-party software like Macrium Reflect or Acronis True Image for more advanced options.

    Do I need to format the SSD before cloning a hard drive to it?
    No, formatting the SSD is not necessary before cloning. The cloning process will erase any existing data on the SSD and replace it with a copy of the hard drive.

  • PS5 SSD Heatsink: To Use or Not to Use? Unveiling the Truth!

    Are you ready to take your PS5 gaming experience to the next level with a lightning-fast SSD? Then you might be wondering whether or not you need a heatsink for your new drive. SSDs generate heat while they work, and without proper cooling, they can damage your computer’s components or slow down your system’s performance. So, do you need a heatsink for your PS5 SSD to keep it cool? The answer is not a simple yes or no.

    It depends on several factors, such as your SSD’s design, your gaming habits, and the amount of airflow in your PS5’s case. In this article, we’ll dive deeper into the question of whether you need a heatsink for your PS5 SSD, what types of heatsinks are available, and how to install them. Grab a drink, sit back, and let’s explore this topic together!

    What is a Heatsink?

    Whether you need a heatsink for your PS5 SSD largely depends on the kind of usage you expect from your console. A heatsink is a device that helps to dissipate any excess heat generated by your console’s operating systems. It is recommended for people who plan on using their PS5 for intense gaming or streaming, as these activities can cause the console to overheat.

    Heat can potentially damage the internal components of your PS5, leading to reduced performance, shorter lifespan, and potentially, costly repairs. Using a heatsink, however, can go a long way in ensuring that your PS5 remains cool and efficient, regardless of how much you use it. It’s important to remember that not all heatsinks are created equal, and you should invest in a high-quality one if you plan on using your console for extended periods of time.

    Ultimately, whether or not you need a heatsink for your PS5 depends on your usage habits and how much you value the longevity and performance of your console.

    Explanation of how heatsinks work to cool high-powered components.

    A heatsink is a passive cooling device that is used to dissipate the heat generated by high-powered components such as computer processors. The purpose of a heatsink is to take the heat generated by a component and transfer it to the surrounding environment, thereby preventing the component from overheating and potentially being damaged. A heatsink works by increasing the surface area of the component, allowing more heat to be dissipated into the air.

    This is achieved by using a material with high thermal conductivity, such as copper or aluminum. The heatsink is designed with fins or ridges that increase the surface area available for heat transfer. As air flows over the heatsink, the heat is transferred from the component to the heatsink and then into the surrounding environment.

    Heatsinks come in a variety of shapes and sizes, and can be either passive or active. Passive heatsinks rely solely on natural convection to dissipate the heat, while active heatsinks use a fan to move air over the fins and increase heat dissipation. Overall, heatsinks play a crucial role in ensuring the reliable operation of high-powered components in a variety of applications.

    do i need a heatsink for ps5 ssd

    Inside the PS5

    One of the most discussed aspects of the PS5 is its SSD upgradeability. While it is possible to replace the system’s standard solid-state drive with a larger one, many gamers have been wondering if they need to add a heatsink for the new storage. The answer is yes, you will need a heatsink.

    The PS5’s SSD utilizes PCIe 0 technology, which generates a significant amount of heat. Without a heatsink, the drive may get too hot during extended play sessions, which could cause performance issues or even damage the hardware.

    It’s essential to select an appropriate heatsink that fits the SSD’s size and heat dissipation requirements. Luckily, there are several options available, and some even come with pre-applied thermal paste for easy installation. In short, a heatsink is not optional for upgrading your PS5’s SSD, but it is a necessary step for ensuring optimal performance and longevity.

    Explanation of PS5’s internal components and how they generate heat

    The PS5 is a powerful piece of technology that comes equipped with a host of advanced components that generate heat while in use. One of the most significant components of the PS5 is its AMD Zen 2 processor, which has an eight-core CPU that runs at up to 5GHz.

    This processor generates a considerable amount of heat as it operates, which is why the PS5 comes with a sophisticated cooling system that uses a combination of a liquid metal thermal interface, a huge 120mm diameter axial fan, and a heat sink to keep temperatures low. Additionally, the PS5 also features a custom-designed SSD that is capable of outputting data at an astonishing rate, which generates even more heat. To counteract this, the PS5 comes with a built-in heat sink that is perfectly positioned to dissipate excess heat generated by the SSD.

    All of these components work together to power the PS5 and generate heat, but the cutting-edge cooling system ensures that the console stays cool and performs at its best, even during intense gaming sessions.

    PS5 SSD Heat Dissipation

    If you’re planning on upgrading the storage on your PS5, you may be wondering if you need a heatsink for the SSD to prevent overheating. The answer is: it depends. The PS5 SSD uses a custom-designed heatsink to dissipate heat away from the drive, which means that for most users, additional cooling isn’t necessary.

    However, if you plan on installing a third-party SSD that doesn’t come with its own cooling solution, you may want to consider purchasing a separate heatsink to ensure optimal performance and prevent potential heat-related issues. Ultimately, it’s always better to err on the side of caution when it comes to hardware upgrades, so if you’re unsure whether a heatsink is necessary, it’s worth doing some research and consulting with a professional.

    Explanation of how PS5 SSD generates heat and how it is dissipated

    PS5 SSD heat dissipation The PS5 SSD is not only a game changer for storage speed and game loading times, but it also generates heat. As with any electronic device, the more it is used, the more heat it generates. The PS5 SSD uses the latest technology in solid-state drive storage, and as a result, it does create a fair amount of heat.

    The heat generated by the PS5 SSD is dissipated through a heat sink system that is integrated within the console. The heat generated by the SSD is drawn away from the components that generate it and is then dissipated through the heat sink. The heat sink is a passive cooling solution that works by using a series of fins to dissipate heat.

    This is an effective way of keeping the PS5 SSD cool, ensuring that it can continue to function optimally and prolong its lifespan. Overall, the PS5 SSD heat dissipation solution is well-engineered, and gamers can enjoy the latest in SSD technology without having to worry about overheating.

    What Experts Say

    If you’re wondering whether you need a heatsink for your PS5 SSD, the answer is not completely straightforward. Some experts recommend getting a heatsink to help dissipate heat buildup in the SSD, which can affect its performance and longevity. Heat can also potentially damage other components in your PS

    However, others argue that the SSD already has built-in thermal management systems and that adding a heatsink may not make a significant difference. It ultimately depends on your usage habits and preferences. If you regularly push your PS5 to its limits and run high-end games for extended periods, a heatsink may provide added peace of mind.

    On the other hand, if you’re a casual gamer who doesn’t put too much strain on your PS5, you may be fine without one. It’s important to do your research and consider your specific needs before making a decision.

    Citing expert opinions and reviews on the topic

    When it comes to seeking expert opinions and reviews on a particular topic, it’s always important to do your research and ensure that you’re getting insights from trusted sources. For instance, if you’re curious about the best smart home gadgets on the market, you might turn to tech experts like CNET or Wired to get their take. These publications have a team of knowledgeable writers who have tested and reviewed a wide range of gadgets, making them a great starting point for anyone interested in the topic.

    However, it’s important to keep in mind that opinions can vary among experts – what one person loves, another might dislike. That’s why it’s useful to read multiple reviews and compare different viewpoints before making any purchasing decisions. Ultimately, the best expert opinion is one that aligns with your own needs and preferences – so be sure to take the time to find the right fit for you.

    Benefits of Adding a Heatsink

    Do you need a heatsink for your PS5 SSD? The answer is yes! Adding a heatsink to your PS5 SSD comes with numerous benefits. Firstly, it prevents overheating and prolongs the lifespan of your device. The SSD generates heat while in operation, and if it’s not dissipated correctly, it can cause damage to the device’s circuitry.

    Secondly, a heatsink improves performance by reducing thermal throttling. Thermal throttling happens when the device reduces its performance to keep the temperature low, and adding a heatsink helps maintain the optimum temperature and allows the SSD to operate at its full potential. The third benefit of adding a heatsink is that it reduces noise.

    The fan works less hard when there is a heatsink, leading to less noise. Lastly, a heatsink adds to the device’s aesthetics, as it comes in different designs, shapes, and colors. In conclusion, adding a heatsink to your PS5 SSD is a worthwhile investment that improves the device’s performance, prolongs its lifespan, reduces noise, and enhances its appearance.

    Explanation of potential benefits of using a heatsink with your PS5 SSD

    If you’re planning to upgrade your PS5 with an SSD, adding a heatsink to your setup can have a multitude of benefits. A heatsink helps dissipate the heat generated by your SSD, reducing the likelihood of overheating and system instability. It can also prolong the lifespan of your SSD by preventing excessive heat from damaging the internal components.

    Not only that, but a heatsink can potentially improve the overall performance of your PS5 by allowing the SSD to operate at optimal temperatures, resulting in faster data transfer speeds. Think of it like a car’s engine – if the engine overheats, it won’t perform as well as it could, and may even break down. Adding a heatsink to your PS5’s SSD is a practical and affordable solution that can improve your gaming experience and extend the life of your system’s components.

    Do You Really Need a Heatsink?

    If you’re planning on upgrading your PS5’s SSD, you might be wondering if you need a heatsink to go with it. The short answer is that it’s not necessary, but it’s definitely a good idea. A heatsink is essentially a piece of metal that helps dissipate heat away from your components.

    When your SSD is under heavy use, it can generate a lot of heat, which can cause performance issues or even damage your hardware over time. While your PS5 already has a built-in heatsink, adding an aftermarket one can help keep things even cooler. This is especially important if you plan on gaming for long periods or running demanding applications.

    So while you can technically upgrade your SSD without a heatsink, it’s certainly worth considering if you want to ensure the longevity and optimal performance of your PS

    Final thoughts on whether or not you need a heatsink for your PS5 SSD.

    After considering all options, it ultimately comes down to personal preference whether or not you need a heatsink for your PS5 SSD. While it is true that a heatsink can help dissipate heat and potentially improve the longevity of your SSD, it may not be necessary for everyone. If you plan on using your PS5 heavily or for extended periods of time, a heatsink might be a worthwhile investment.

    However, if you primarily use your console for short gaming sessions, a heatsink may not make much of a difference. Ultimately, the decision is up to you and your specific usage habits. So, evaluate your needs and preferences before making a decision on whether or not to invest in a heatsink for your PS5 SSD.

    Conclusion

    In the grand scheme of things, it’s true that you don’t necessarily need a heatsink for your PS5 SSD. However, if you’re someone who always strives for the best performance and wants to ensure that your system runs at optimal conditions, it certainly wouldn’t hurt to invest in one. Plus, who doesn’t love the feeling of being able to brag about their top-of-the-line cooling system to their friends? So, to answer the question – no, you don’t need a heatsink, but it definitely wouldn’t hurt to have one if you want to keep your PS5 running like a well-oiled machine.

    FAQs

    What is a heatsink?
    A heatsink is a device that is used to dissipate heat away from a high temperature object, such as a computer component.

    Why do I need a heatsink for my PS5 SSD?
    A heatsink is necessary for a PS5 SSD because the SSD generates heat, which can degrade its performance over time and cause system instability.

    Can I use a third-party heatsink for my PS5 SSD?
    While it is technically possible to use a third-party heatsink for your PS5 SSD, it is important to note that doing so may void your warranty and may not provide optimal cooling performance.

    How do I install a heatsink on my PS5 SSD?
    The process for installing a heatsink on your PS5 SSD will vary depending on the specific heatsink design and the type of SSD you are using. Generally, you will need to remove the existing heatsink or cover from your SSD, apply thermal paste to the chip, and then attach the new heatsink to the chip. It is recommended that you follow the manufacturer’s instructions or seek professional assistance when installing a heatsink on your PS5 SSD.

  • Step-by-Step Guide: Installing PNY SSD on your Mac like a Pro!

    If you’re looking to breathe new life into your Mac, upgrading to an SSD is a fantastic way to do it. An SSD can make even an older Mac feel brand new again, increasing its speed and performance. However, to enjoy these benefits, you need to install the SSD correctly.

    If you’re new to the process, don’t worry, we’ve got you covered. In this article, we’ll take you through the straightforward process of installing a PNY SSD on your Mac. By the end, you’ll be able to enjoy the speed and performance boost of your new SSD.

    So, let’s dive in!

    Check Mac Compatibility

    If you’re looking to upgrade your Mac with a PNY SSD, the first step is to ensure compatibility. Not all PNY SSDs are compatible with all Mac models, so it’s crucial to check before making a purchase. You’ll need to consider factors such as the interface, capacity, and form factor of the SSD, as well as the specific model of your Mac.

    Once you’ve determined compatibility, the actual installation process is fairly straightforward. You’ll need to remove the back panel of your Mac, locate the existing hard drive, and replace it with the PNY SSD. Make sure to securely fasten the SSD and reattach the back panel before powering on your Mac.

    Once your Mac is up and running, you’ll need to format the PNY SSD and transfer over your files and data. With a compatible PNY SSD properly installed, you’ll enjoy faster boot and application load times and improved overall performance.

    Verify your Mac’s Compatibility with PNY SSD

    If you’re planning to swap your old hard disk drive (HDD) for a new PNY solid state drive (SSD) on your Mac, it is crucial to verify your Mac’s compatibility with the chosen SSD model. Upgrading your Mac is a smart move, and SSDs offer faster data access times and improved performance. However, you must ensure compatibility before making the purchase.

    Various factors like form factor and interface can affect compatibility. For instance, only Macs launched from 2013 are equipped with PCIe SSDs, but those before 2013 have SATA-based SSDs. Therefore, it’s essential to check your Mac’s model and determine which SSD would work best with it.

    Failing to verify compatibility can result in data corruption, hardware malfunction, and worsened system performance. The good news is that most PNY SSD models are Mac compatible, and researching beforehand ensures that your upgrade process is seamless.

    how do you install a pny ssd to a mac

    Prepare your Mac for Installation

    Are you wondering how to install a PNY SSD to your Mac? Don’t worry, the process is simple and can significantly increase the speed and performance of your device. Before you begin, make sure to prepare your Mac by creating a backup of all your important files and data. This can be done through Time Machine or any other backup software of your choice.

    Next, ensure that your Mac is turned off and unplugged from any power source. Open up your Mac and locate the hard drive bay. Remove the old hard drive and replace it with the new PNY SSD.

    Secure it in place with the screws provided. Finally, turn on your Mac and follow the instructions for installing the operating system onto your new SSD. With your new PNY SSD, you’ll notice faster speeds and improved performance on your Mac.

    Back up your Mac Data

    Backing up your Mac data is extremely important before preparing for installation. You don’t want to lose any important files or programs in the process. To begin, make sure you have an external hard drive that can support all of your data.

    Next, use Time Machine to create a full backup of your Mac onto the external hard drive. This will include all of your files, applications, settings, and preferences. Once the backup is complete, you can then proceed with the installation process without fear of losing any important data.

    Using Time Machine is an easy and effective way to backup your data and ensure that your Mac is properly prepared for installation. With this simple step, you can have peace of mind knowing that your important information is safe and secure.

    Shutdown your Mac

    When it’s time to upgrade your Mac operating system, it’s important to prepare your computer for a smooth installation. One key step is to shut down your Mac properly before beginning the installation process. Make sure all apps are closed and any important files are saved before proceeding.

    This will help ensure that your Mac’s memory is clear and ready to receive the new operating system. Additionally, be sure to have a solid internet connection and enough power to sustain the installation process. By taking these preparatory steps, you can help ensure that your Mac is ready for a successful upgrade.

    Physical Installation of PNY SSD

    If you’re looking to increase the speed and performance of your Mac, installing a PNY SSD is a great option. The physical installation process is fairly simple and can be done with just a few tools. First, shut down your Mac and disconnect all cables.

    Next, open up the case using a screwdriver and locate the SSD bay. Carefully install the PNY SSD into the bay and secure it with screws. Connect the cables to the SSD and reassemble the case.

    Once everything is in place, turn on your Mac and follow the prompts to initialize the SSD. Now you’re ready to enjoy the benefits of faster data transfer speeds and improved overall performance. With this easy process, it’s no wonder more and more people are choosing to upgrade their Mac with a PNY SSD.

    Remove Mac’s Back Cover

    If you’re looking to upgrade your Mac’s internal storage capacity with a new PNY SSD, the first step is to remove the back cover of your computer. This process may vary slightly depending on the model and year of your Mac, but generally involves unscrewing the screws on the bottom panel and gently prying it off with a tool or your hands. It’s important to be cautious and gentle during this step, as you don’t want to damage any internal components or cables.

    Once the back cover is removed, you’ll have access to the internal components of your Mac and can begin the process of installing your new PNY SSD. Remember to consult your Mac’s user manual or online resources for specific instructions on how to remove the back cover and install your new SSD safely and effectively. Overall, upgrading your Mac’s internal storage capacity with a PNY SSD can greatly improve its performance and storage capabilities, making it a worthwhile investment for any Mac user.

    Attach PNY SSD to the Connector

    To physically install your PNY SSD, the first step is to attach it to the connector on your motherboard. Make sure to locate the appropriate SATA or M.2 connector that is available on your motherboard and connect the SSD to it.

    You can use the screws that come with your SSD to firmly attach it to the motherboard. Once you have connected your PNY SSD, it is recommended that you check the BIOS settings to ensure your computer recognizes the new drive. You may need to enable SATA or M.

    2 devices in your BIOS settings to guarantee your system identifies the new drive. Overall, connecting your PNY SSD to the connector on your motherboard is a simple and straightforward process that you can easily complete in a matter of minutes. Remember to take your time and follow the manufacturer’s instructions so that you don’t damage either the SSD or your motherboard.

    With a successfully installed PNY SSD, your computer’s performance will significantly improve, with faster boot time and quicker access to your apps and files.

    Secure SSD with Screws

    When it comes to securing an SSD, screws may seem like a simple solution, but they can provide a reliable and practical method of physical installation for your PNY SSD. Not only do they prevent the SSD from accidentally disconnecting, but they also add an extra layer of protection against unauthorized tampering. The screws are easy to install and remove, providing the flexibility to switch or replace the SSD if needed.

    Additionally, the added benefit of using screws is that it eliminates the need for adhesives or tape, which can damage the SSD or leave a sticky residue behind. Therefore, when considering security measures for your PNY SSD, using screws is an effective and practical way to ensure that your data stays safe and secure.

    Booting and Configuration

    Installing a PNY SSD to a Mac is a pretty straightforward process. First, you’ll need to turn off your Mac and unplug it. Then, locate the drive bay and unscrew it.

    Carefully remove the old drive and insert the PNY SSD into the empty slot. Once the SSD is securely in place, screw the drive bay back in and reattach any cables. Boot up your Mac and navigate to the Disk Utility app to format the SSD.

    After that, you’re ready to configure your new drive and start using it. Overall, installing a PNY SSD is a quick and easy way to improve your Mac’s performance, so don’t hesitate to give it a try.

    Boot into Recovery Mode

    Booting into recovery mode is an essential troubleshooting step when your computer encounters any issues. Whether it’s a virus, a software glitch, or a hardware problem, recovery mode can help you diagnose and fix the problem. To boot into recovery mode, you first need to shut down your computer.

    Then, press the power button to turn it back on, and as soon as you see the manufacturer’s logo appear, press the designated key to enter the boot menu. From there, select the recovery mode option and follow the prompts to troubleshoot and repair your system. Keep in mind that the key to access boot menu may vary depending on your computer’s manufacturer, so it’s best to refer to the documentation or search online to find the correct key.

    By using recovery mode, you can avoid costly repairs and get your computer back to working order in no time.

    Initialize and Format New PNY SSD

    So, you’ve just gotten your hands on a brand new PNY SSD. Congrats! Now, it’s time to get it up and running. First things first, you’ll need to connect it to your computer.

    Once that’s done, go ahead and power on your machine. Your computer should recognize the new SSD, but you’ll need to head into the BIOS to ensure it’s properly formatted and ready for use. The process for doing this will vary based on your specific computer and BIOS setup, so it’s important to refer to your computer’s manual or online resources for instructions.

    Once you’re in the BIOS, locate the section for storage settings. From here, you should see the new SSD listed alongside any other storage devices connected to your computer. Make sure the SSD is set to be the boot drive and then format it with your preferred file system.

    Congratulations, you’re now all set to start using your new PNY SSD!

    Restore Backup Data

    Booting and Configuration Once you have successfully restored your backup data, the next step is to configure your system. This involves booting up your device and adjusting the settings to your desired preferences. The booting process may vary depending on the device you are using, but it generally involves pressing a specific key or combination of keys to access the boot menu.

    From there, you can choose the device you want to boot from, such as your hard drive or USB drive. Once your device has booted up, you can begin configuring your settings. This may include adjusting your display resolution, setting up your network connection, and installing any necessary drivers.

    It’s important to take the time to ensure everything is set up correctly so that your system runs smoothly. With proper booting and configuration, you’ll be back up and running in no time!

    Conclusion

    In conclusion, installing a PNY SSD to a Mac is as easy as sliding a piece of butter on a hot toast! With a few simple steps, you can transform your snail-paced Mac into a lightning-fast machine. So, what are you waiting for? Grab your PNY SSD and upgrade your Mac like a pro!”

    FAQs

    Is a PNY SSD compatible with a Mac?
    Yes, PNY SSDs are compatible with Macs.

    What tools do I need to install a PNY SSD on a Mac?
    You will need a screwdriver and a SATA-to-USB cable to clone your existing drive.

    Can I install a PNY SSD into a MacBook Air?
    It depends on your specific model of MacBook Air, but most can have their SSDs upgraded.

    What software do I need to clone my existing drive to a PNY SSD?
    You can use software like Carbon Copy Cloner or SuperDuper! to clone your existing drive onto the PNY SSD.

  • Boost Your System Speed: Step-by-Step Guide on How to Install 980 Pro SSD

    Are you tired of slow boot times, sluggish program launches, and endless file transfers? If so, it may be time to upgrade your computer’s storage to an SSD drive. And not just any SSD, but rather the cutting-edge 980 Pro SSD from Samsung. This high-performance drive boasts lightning-fast read and write speeds of up to 7,000 and 5,000 MB/s, respectively, making it ideal for power users and gamers.

    But how do you install it? Don’t worry, we’ve got you covered with this step-by-step guide on how to install the 980 Pro SSD in your computer. So grab a cup of coffee and let’s get started!

    Preparation

    So you just received your Samsung 980 Pro SSD and you’re excited to install it, but before you start, there are a few things you need to prepare. First and foremost, make sure your computer is turned off and unplugged. If you’re replacing your current SSD or hard drive, be sure to back up all your important files to an external drive or cloud storage before proceeding.

    You’ll also need a screwdriver to open up your computer and secure the new SSD in place. Take note of the type of connection your computer uses for storage – SATA or PCIe – as that will determine how you’ll install the 980 Pro SSD. Lastly, ensure that you have all of the necessary drivers and software downloaded onto your computer before turning it back on.

    With these preparations done, you’re ready to begin the installation process and start enjoying the lightning-fast speeds of your new Samsung SSD.

    Check Compatibility with Your System

    When it comes to checking compatibility with your system, there are a few key steps you can take to ensure a smooth installation experience. Firstly, make sure you have all the necessary system requirements listed by the developer or manufacturer of the software you want to install. This typically includes details like the operating system version, processor type and speed, RAM, and storage space.

    Next, it’s important to perform any necessary system updates or upgrades to ensure your computer is running the most recent software versions. This will not only help with overall system stability, but may also include new drivers or other components that are required for your software. By being prepared beforehand, you can save yourself a lot of frustration and potential errors during the installation process.

    Remember, it’s always better to double check compatibility before investing your time and money in a software program that may not work on your computer.

    how to install 980 pro ssd

    Gather Necessary Tools

    When it comes to starting a new project, gathering the necessary tools should be the first step. Preparation is key to achieving success, and having the right equipment can save you time and frustration. Depending on the project, different tools may be required.

    For example, if you’re planning on doing some woodworking, you’ll need saws, chisels, and sandpaper. On the other hand, if you want to start a vegetable garden, you’ll need shovels, rakes, and hoes. It’s essential to evaluate the scope of your project and gather all the tools you’ll need beforehand.

    This way, you’ll be ready to start working when inspiration strikes. Don’t forget to consider the quality of your tools. Investing in high-quality equipment may seem expensive at first, but it can save you money in the long run by reducing the risk of accidents and allowing you to complete tasks efficiently.

    By taking the time to gather the necessary tools, you’ll ensure that you’re well-prepared for any project that comes your way.

    Installation

    For those looking to upgrade their computer’s storage with the blazing speed of the Samsung 980 Pro SSD, installation is a breeze. Firstly, ensure that your motherboard supports either PCIe 0 or at the very least PCIe

    0 to fully take advantage of the drive’s speed. If so, simply locate the M.2 slot on your motherboard, gently insert the drive and screw it into place.

    If your computer does not support PCIe 0, head into your BIOS settings and ensure that your boot mode is set to UEFI rather than legacy. From there, your computer should recognize the drive and allow you to format and partition it.

    With the 980 Pro’s read and write speeds going up to 7,000MB/s and 5,000MB/s respectively, you’ll instantly notice a difference in your computer’s performance. So don’t be intimidated – upgrading your computer’s storage has never been easier with the Samsung 980 Pro SSD.

    Shut Down and Unplug Your Computer

    When it comes to installing new hardware or software on your computer, it’s important to shut down and unplug your computer before beginning the installation process. This might seem like an obvious step, but it’s one that many people overlook in their eagerness to get started. Shutting down your computer ensures that no programs or processes are running that could interfere with the installation process, while unplugging it helps to prevent any potential power surges or other electrical issues that could cause damage to your hardware.

    Think of it like performing surgery on your computer. Just like a surgeon prepares the patient by putting them under anesthesia and making sure they’re stable, you need to prepare your computer by shutting it down and unplugging it before you begin any installation. This step takes just a few seconds but can save you a lot of headaches down the road.

    And, of course, don’t forget to plug your computer back in and turn it on once the installation is complete! By taking these simple precautions, you can ensure a smooth and successful installation process, without any unexpected interruptions or technical difficulties.

    Open Up Your Computer Case

    When installing new hardware to your desktop computer, the most crucial step is opening up your computer case. This can seem intimidating at first, but it’s a simple process that only requires a few tools and careful attention. First, locate the screws that secure the case in place and use a screwdriver to remove them.

    Once the case is open, carefully lay it down and assess the internal components to determine where you’ll need to make your hardware installation. Remember to handle all parts with care, as they are delicate and can be easily damaged. By opening up your computer case and properly installing new hardware, you can improve the performance of your computer and enhance your overall computing experience.

    Install the 980 Pro SSD

    If you’re looking for a faster and more efficient storage solution, you might want to consider installing the 980 Pro SSD from Samsung. This solid-state drive boasts read and write speeds of up to 7,000 and 5,000 MB/s, respectively, making it one of the fastest SSDs available in the market. However, before you can start enjoying its blazing-fast performance, you’ll need to install it properly on your computer or laptop.

    The installation process may vary depending on your device, so it’s essential to consult the manual or look for online resources that can guide you through the process. Generally, though, you’ll need to open up your computer, locate the PCIe NVMe slot, and firmly insert the SSD into it until it clicks into place. After that, you’ll need to secure the SSD using the screws provided and reconnect any cables that you’ve detached.

    Once you’ve successfully installed the 980 Pro SSD, you’ll want to initialize it and transfer your data to it. With its outstanding speed and reliability, you can expect a significant improvement in your computer’s overall performance, whether you’re gaming, editing, or just browsing the web. So, go ahead and give it a try!

    Close Up Your Computer Case

    When it comes to building your own computer, closing up the computer case is an important step in the installation process. Before sealing the case, it’s important to ensure that all components are properly installed, including the motherboard, power supply, and any additional components such as a graphics card or storage devices. Taking the time to double-check connections and make any necessary adjustments will prevent any potential issues down the line.

    Once you’re satisfied that everything is in place, it’s time to close up the case. This will help protect your components from dust and other potential hazards, as well as give your computer a clean and polished appearance. So, while it may seem like a small step, closing up your computer case is actually a crucial part of the installation process that shouldn’t be overlooked.

    Configuration

    Installing a 980 Pro SSD is a great way to boost the performance of your computer. To get started, first you need to ensure that your motherboard is compatible with PCIe 0.

    If it’s not, unfortunately this SSD won’t work with your system. Once you’ve confirmed compatibility, you can begin installation. First, locate the M.

    2 slot on your motherboard, then insert the SSD at an angle, gently pushing it down until it clicks into place. Next, use the provided screw to secure the SSD in place. After installation, you’ll need to configure the SSD in your computer’s BIOS settings.

    Make sure that the SSD is recognized and set as your boot drive. This will ensure that your computer boots up quickly and your software runs smoothly. With these steps, you’ll have your 980 Pro SSD up and running in no time, delivering faster load times and better overall performance for your machine.

    Check BIOS/UEFI Settings

    When it comes to your computer’s BIOS/UEFI settings, it’s important to check that everything is configured correctly. This is because any wrong settings can lead to system instability, slow performance, and even boot failures. One of the first things you should do is check the boot order to make sure the correct boot device is selected.

    If you have multiple hard drives or SSDs, make sure the one with your operating system is set as the boot device. You should also check the RAM settings to ensure they are set to their recommended speed and timings. If the RAM settings are too high or too low, this can cause crashes or other issues.

    Additionally, it’s important to check the CPU settings and make sure they are set to the correct values for your processor. By taking the time to check your BIOS/UEFI settings, you can ensure your computer is running at its best and avoid any potential problems.

    Initialize Your 980 Pro SSD

    Initializing your 980 Pro SSD is an important part of maximizing its performance. The first step is to configure it properly. To do this, you will need to access your computer’s BIOS settings.

    Once you are in the BIOS, navigate to the storage configuration section. Here, you can set the 980 Pro SSD as the primary boot drive and configure it to run at full speed. You can also tweak additional settings, such as enabling AHCI mode for faster data transfer rates.

    It is important to note that improper configuration can lead to slower speeds and even data corruption. So, it is important to follow the manufacturer’s instructions carefully and make sure you understand what each setting does before changing it. With proper configuration, your 980 Pro SSD can provide lightning-fast speeds and reliable performance for years to come.

    Conclusion

    Congratulations! You’ve successfully navigated the SSD-installation maze and emerged victorious. By following these simple steps, you’ve managed to upgrade your rig with Samsung’s lightning-fast 980 Pro SSD, making it faster and more efficient than ever before. Now sit back, relax, and soak up all that blazing speed and top-of-the-line performance.

    With your new SSD installed, there’s no limit to how much you can achieve. Just remember, patience and care are key to a successful installation. Whether you’re a seasoned pro or a tech newbie, know that with the right tools and information, you can accomplish anything.

    So go forth, and let your Samsung 980 Pro SSD take you on a wild ride of ultra-fast storage performance!”

    FAQs

    What kind of PCIe slot do I need to install the 980 Pro SSD?
    You will need a PCIe 4.0-compatible slot for optimal performance. However, the 980 Pro is backward compatible with PCIe 3.0 slots.

    Do I need to install any drivers for the 980 Pro SSD?
    No, the 980 Pro SSD uses standard NVMe drivers that are included in most modern operating systems.

    Can I use the 980 Pro SSD as a boot drive?
    Yes, you can install your operating system on the 980 Pro SSD and use it as your primary boot drive.

    Is it difficult to install the 980 Pro SSD?
    Installing the 980 Pro SSD is relatively easy if you have some experience with computer hardware. However, if you are not comfortable with opening up your computer and installing hardware components, it may be best to seek professional assistance.