Author: David L. Lynn

  • Step-by-Step Guide: Setting Up Your New SSD on Windows 11

    Have you recently purchased a new SSD and are excited to reap all the benefits of faster boot times and increased storage space? Setting up a new SSD may seem a daunting task, but fear not! With a few simple steps, you can have your new SSD up and running in no time. In this blog post, we’ll walk you through the process of setting up a new SSD, starting from preparing your computer to cloning your existing hard drive. We’ll cover all the nitty-gritty details so that you can confidently upgrade your computer’s storage and enhance its performance.

    So buckle up and let’s dive into the world of SSDs!

    Check Compatibility

    If you’re setting up a new SSD on your Windows 11 computer, the first thing you should do is check compatibility. Make sure that the SSD you’ve purchased is compatible with your computer’s motherboard. You can do this by checking the specs of both the SSD and your computer or by reaching out to the manufacturer.

    Once you’ve confirmed that the SSD is compatible, the next step is to physically install it into your computer. Make sure to follow the manufacturer’s instructions carefully and use proper tools to avoid damaging your hardware. After installing the SSD, you’ll need to transfer your operating system and files onto it.

    This can be done using migration software or by doing a clean install of Windows 1 Finally, don’t forget to update all your drivers and run a diagnostic test to ensure that everything is functioning properly. By following these steps, you can set up your new SSD and enjoy faster speeds and better performance on your computer.

    Ensure Motherboard and SSD are Compatible

    When building a PC, it’s essential to ensure that your motherboard and SSD are compatible with each other. You don’t want to end up with a high-speed SSD and a motherboard that can’t take advantage of its top-notch performance. Compatibility issues can cause problems like slower data transfer rates and even damage your hardware.

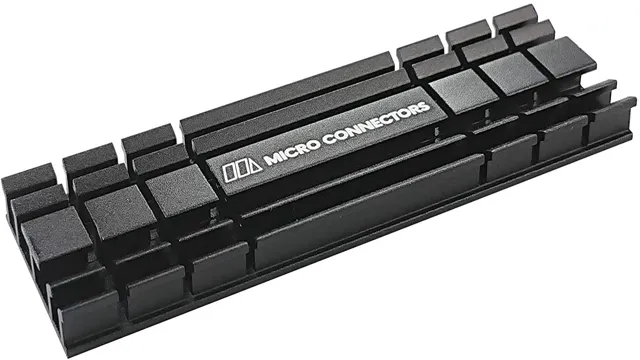
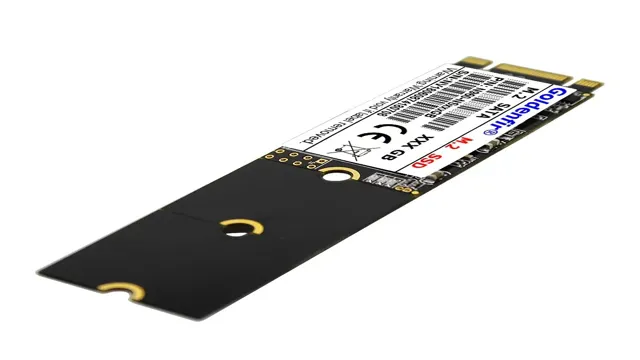
    So, it’s best to research your motherboard’s compatibility with the SSD you want to choose before making a purchase. The right SSD can boost your computer’s speed, productivity, and efficiency, but choosing the right one requires some technical knowledge. Some SSDs use SATA connections, and others require an M.

    2 slot, so it’s essential to ensure that the motherboard you choose supports your SSD’s connection type. Additionally, SSDs have varying performance levels, so it’s crucial to consider the maximum read and write speeds of an SSD. Ultimately, the key is to find an SSD that is compatible with your existing build or chosen motherboard and provides all the performance benefits you need.

    In conclusion, ensuring motherboard and SSD compatibility is critical to the success of your PC’s build. You need to be confident that the two pieces of hardware will work together effectively and provide the necessary performance benefits. Thorough research and technical knowledge are essential to finding the right SSD for your particular motherboard.

    So, take the time to choose wisely, and you’ll enjoy a fast and reliable computer that meets your needs.
    how to setup new ssd windows 11

    Back Up Data

    When backing up data, it’s important to ensure compatibility between your backup and restore processes. This means taking the time to check that the backup software you’re using is compatible with the operating system and file types you’re working with. Otherwise, you risk losing important data or experiencing difficulties when trying to recover it.

    Compatibility checks may require some research, but it’s worth the effort in the long run to ensure that your backup and restore processes are seamless and effective. Additionally, testing your backups on a regular basis is crucial to ensuring that your data is truly recoverable in the event of a disaster or system failure. By taking a few extra steps to ensure compatibility and testing your backups regularly, you can have peace of mind knowing that your data is protected.

    Install SSD

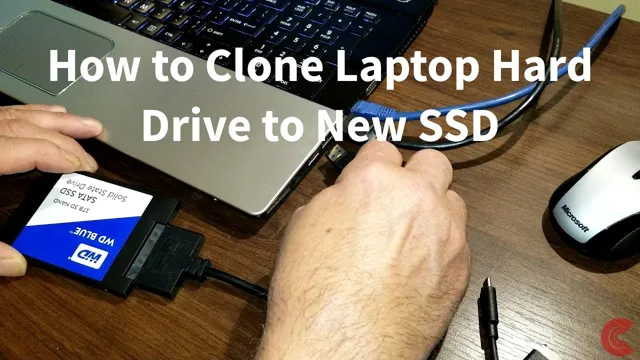
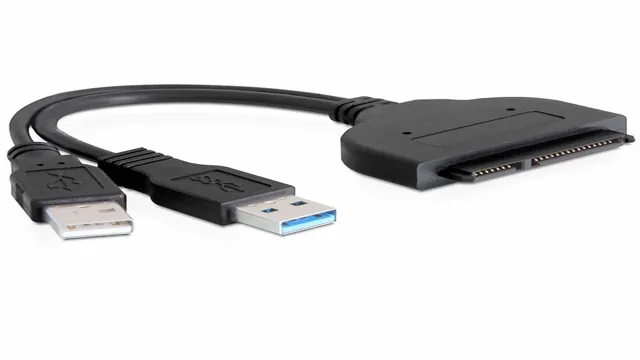
    If you’re looking to boost the performance of your computer or laptop, installing an SSD (Solid State Drive) is a great way to do it. The process to set up a new SSD on Windows 11 is rather simple. First, you need to connect the SSD to your computer using a SATA or USB cable.

    Then, you will need to format the drive and create a partition on it. After that, you can transfer your operating system and other programs from your existing hard drive onto the SSD. This will make your computer or laptop much faster and more responsive.

    Essentially, an SSD is like a sports car compared to a regular hard drive which is like a family sedan. So, if you want to give your computer or laptop an upgrade, installing an SSD is a great way to do it.

    Open Computer Case and Locate SATA cable

    To install an SSD, the first step is to open the computer case and locate the SATA cable. This cable is responsible for connecting the hard drive and the motherboard, and it’s usually easy to spot due to its distinctive shape and connection point. Once you’ve located the SATA cable, the next step is to unplug it from the existing hard drive.

    Be sure to handle it with care and be gentle when pulling it out to avoid any damage. With the cable removed, you’ll need to unscrew the existing hard drive and remove it from the case. Finally, it’s time to install the SSD by screwing it into place and plugging the SATA cable into the appropriate slot.

    With these steps complete, you’re ready to boot up your computer and start reaping the benefits of a faster, more reliable storage solution. By installing an SSD, you can significantly improve your computer’s performance and make your day-to-day computing experience much smoother.

    Connect SSD using SATA cable

    Connecting an SSD to your computer can significantly speed up your operations. The first thing you’ll need is a SATA cable, which will connect your SSD to the motherboard. Before connecting the SSD, make sure your computer is turned off.

    Next, open your computer case and locate your hard drive bays. These are usually found near the front of the case and will be either 5 inches or

    5 inches wide. If your SSD is 5 inches, you might need to use an adapter to fit it in the bay correctly.

    Once your SSD is in place, connect the SATA cable to the motherboard, and connect the other end of the cable to your SSD. Most motherboards have multiple SATA ports, so make sure you’re using the one labeled for your SSD. Finally, close your computer case, and boot up your computer to ensure the SSD is working correctly.

    With this simple installation, you’ll have a faster and more efficient computer experience.

    Mount SSD in Place

    When it comes to upgrading your computer’s storage, installing an SSD is an excellent option. But it’s not enough to just buy an SSD and plug it in; you need to mount it properly to ensure it stays secure and functions correctly. To install your SSD, you should start by identifying an appropriate location for it in your computer case.

    Then, you’ll need to remove any existing mounting hardware and screws from that area and attach the SSD’s brackets to the case. Once your SSD’s brackets are in place, you can slide in your SSD and attach it to the brackets using screws. It’s essential to make sure your SSD is mounted firmly, so it doesn’t move or vibrate excessively while in use.

    Moreover, a correctly mounted SSD can help prevent data loss or other issues that could arise from a loose or unsecured hard drive. With proper mounting, your new SSD will fit seamlessly into your computer, providing faster speeds and smoother performance.

    Install Windows 11

    If you’re looking to setup a new SSD with Windows 11, then you’ve come to the right place! First things first, you’ll need to make sure your computer meets the minimum requirements for Windows 1 Once you’ve done that, it’s time to gather your installation files. You can either create a bootable USB drive or use a DVD.

    Insert the installation media and restart your computer. During the boot process, hit the key that allows you to access the boot menu. Select your installation media and hit enter.

    Now the installation process begins! Follow the prompts and input your preferences for language, time zone, and keyboard. The installer may ask you to enter your product key, so make sure you have that handy. You’ll also need to choose your installation type – make sure you select Custom if you want to install Windows 11 on your new SSD.

    Select the new SSD as the installation destination and let the installer do its thing. Once the installation is complete, you’ll need to set up your new Windows 11 installation with your preferences and applications. Congratulations, you’ve successfully installed Windows 11 on your new SSD!

    Insert Windows 11 Installation Disc or USB

    If you’re ready to install Windows 11, the first thing you’ll need to do is insert the installation disc or USB. This will allow your computer to boot from the installation media and begin the setup process. Make sure that you’ve saved any important files and that your computer meets the minimum system requirements before proceeding.

    Once you’ve inserted the installation media, you may need to change your boot order to prioritize it over your existing operating system. This process will vary depending on your computer, but you can usually access your boot menu by pressing a key (such as F11 or F12) during startup. If you’re having trouble getting your computer to boot from the installation media, you may need to change your BIOS settings or consult your computer’s documentation for more information.

    Once you’ve successfully booted from the installation media, follow the on-screen prompts to install Windows 1 During the install process, you may be prompted to enter your product key, so make sure you have this handy. Overall, installing Windows 11 is a straightforward process that can be completed in a matter of hours.

    Boot from Disc or USB

    Installing Windows 11 can be a daunting task, but it’s not as complicated as you might think. One of the first steps is to boot your computer from a disc or USB drive. This is necessary because you will need to access the Windows 11 installation files, which are located on the drive.

    Booting from a disc or USB drive can vary depending on the manufacturer and model of your computer, but generally, you can access your computer’s BIOS settings by pressing a specific key during startup. Once you’re in the BIOS, you can change the boot order, so your computer looks for the Windows 11 installation files on the disc or USB drive first. It’s important to follow the installation instructions carefully to ensure that Windows 11 installs correctly, and you don’t lose any important data or settings.

    Overall, booting from a disc or USB drive is a critical step in installing Windows 11, but with a little patience and attention to detail, you’ll be up and running in no time.

    Format and Initialize SSD

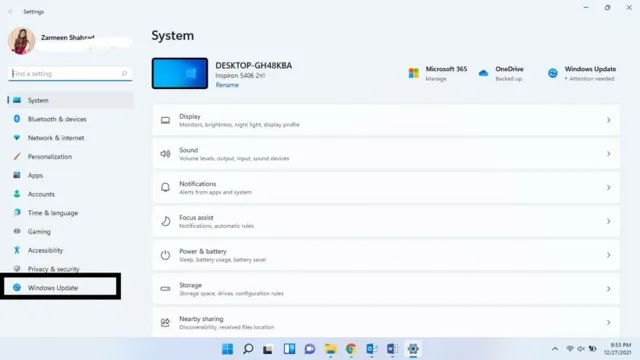
    If you want to setup a new SSD on your Windows 11 computer, there are a few steps you need to follow to properly initialize it. Firstly, you need to format the SSD to ensure that it is wiped clean and ready for use. To do this, simply open the Disk Management tool by right-clicking on the Start menu and selecting it from the options.

    Once there, locate your SSD and right-click on it to select the “Format” option. This will erase all the data on the SSD. After formatting, you need to initialize the SSD by right-clicking on it again and selecting the “New Simple Volume” option.

    Follow the steps on the wizard to set up a new partition on your SSD. Remember to assign a drive letter to the new partition before completing the wizard. Once done, your new SSD will be ready for use, and you can start transferring your important files and data to it.

    By following these easy steps, you can easily set up your new SSD on Windows 11 and enjoy faster performance and improved storage space.

    Access Disk Management in Windows 11

    If you’ve just acquired a new SSD or simply want to start using an existing one, you’ll need to format and initialize the drive before you can use it. Thankfully, Windows 11 has made it easy to access Disk Management through the Settings app. To access Disk Management, simply search for “disk management” in the Windows search bar and click on the “Create and format hard disk partitions” option.

    Once in Disk Management, right-click on the SSD you want to format and select “New Simple Volume”. From there, you can choose the file system you want to use (usually NTFS), assign a drive letter, and format the drive. Keep in mind that formatting an SSD will erase all existing data, so make sure to backup any important files before proceeding.

    With these simple steps, you can easily format and initialize your SSD in Windows 11 and start taking advantage of its speedy performance.

    Format and Initialize SSD

    If you’ve recently purchased a new SSD or want to reuse an old one, it’s important to properly format and initialize it before use. Formatting and initializing an SSD involves erasing any existing data and setting it up for use with your operating system. The process may vary slightly depending on your specific operating system, but generally involves accessing your computer’s disk management tool.

    In Windows, this can be done by searching for “disk management” in the Start menu. From there, you’ll see a list of available disks, including your SSD. Right-click on the SSD and select “Format” to erase any existing data and create a new file system.

    Then, right-click again and select “Initialize disk” to prepare it for use with your computer. By properly formatting and initializing your SSD, you’ll ensure that it’s reliable and ready to use for all your data storage needs.

    Finalize Setup

    So, you’ve successfully installed the new SSD in your device! Now it’s time to set up your Windows 11 on the fresh drive to ensure you can start using it right away. The first step is to ensure that your BIOS is set to boot from the new SSD. Then, insert the Windows 11 installation media and follow the on-screen instructions to install the operating system on your new SSD.

    After that, you’ll want to install specific drivers for your device to make full use of its capabilities. You can do this by visiting the manufacturer’s website and downloading the latest drivers for your device. Once that’s all done, you’re ready to start using your new SSD for all of your storage needs! Overall, completing the final setup process for your new SSD and operating system can be a bit of work, but the payoff is worth it.

    By following these steps, you can ensure that your device is running at optimal performance and takes full advantage of your new SSD. So, don’t hesitate to finalize the setup and start enjoying a faster and more efficient device today!

    Install necessary drivers and software

    After setting up your new device, the next step is to install the necessary drivers and software. This will ensure that your device performs optimally and avoids any compatibility issues. You can start by checking the manufacturer’s website for the latest drivers and software updates.

    It is essential to download and install all the necessary drivers, including the graphics card, sound card, Ethernet, and chipset drivers. Additionally, consider downloading any essential software, such as antivirus and productivity tools. Keep in mind that some devices will require a reboot after installing new drivers.

    Therefore, be sure to save all your work before beginning the installation process. By finalizing your setup, you can take full advantage of your device’s features, and it will be ready to use for all your everyday needs. So, make sure to complete this critical step to avoid any unnecessary issues down the line.

    Transfer backed up data to new SSD

    Now that you have backed up all your data, it’s time to transfer it to your brand new SSD. The process can be simple and straightforward, but it requires careful attention to avoid losing any of your valuable information. First, ensure that the new SSD is properly installed and connected to your computer.

    Once your computer recognizes the SSD, you can begin transferring your data. You can do this by using specialized software or manually copying and pasting the files from your backup. It’s important to carefully review your data and ensure that everything has been transferred successfully.

    Remember to take your time, and don’t rush the process. Double-check everything, and be sure to test that the data is accessible and working correctly on your new SSD. By following these steps, you can finalize your setup and have the peace of mind that your data is safely and securely backed up on a brand new SSD.

    Conclusion

    Well, there you have it! Setting up a new SSD on Windows 11 is a breeze and will give your computer the boost it needs to perform at its best. Just remember to follow these easy steps: clone your existing drive, install the new SSD, boot from it, and enjoy the lightning-fast speed and improved performance. It’s like adding a turbocharger to your car – you won’t know how you lived without it! So, go ahead and upgrade your computer’s drive, and let the good times roll!”

    FAQs

    What are the requirements for setting up a new SSD in Windows 11?
    To setup a new SSD in Windows 11, you will need a SATA or NVMe SSD, a Windows 11 installation USB drive, and a working computer with a USB port.

    How do you physically install the new SSD in your computer?
    You need to open your computer, locate the SSD slot on the motherboard, carefully insert the SSD into it, and screw it in place if necessary.

    How do you install Windows 11 on the new SSD?
    To install Windows 11 on the new SSD, you need to plug in the Windows 11 installation USB drive, boot from it, select the new SSD as the installation location, and follow the on-screen prompts to complete the installation.

    What should you do after installing Windows 11 on the new SSD?
    After installing Windows 11 on the new SSD, you should activate Windows 11, install necessary drivers, update the operating system, and transfer your files from the old hard drive to the new SSD.
  • 256GB SSD vs 1TB HDD: The Ultimate Showdown of Speed and Storage

    When shopping for a new laptop or desktop computer, one of the most important decisions you’ll need to make is how much storage space you need. Two popular options are 256GB and 1TB, but which one is better for you? At first glance, it may seem like bigger is always better, but that’s not necessarily true when it comes to storage space. A 1TB drive may be a great choice if you plan on storing a lot of large files, such as videos or music libraries, but it’s unlikely that you’ll need that much space if you mainly use your computer for browsing the web and creating documents.

    On the other hand, a 256GB drive can quickly fill up if you frequently download large files or install large programs. If you’re worried about running out of space, you may need to regularly delete files or invest in an external hard drive. Ultimately, the decision between 256GB and 1TB comes down to how you plan on using your computer.

    Are you a content creator who needs ample space to store large projects? Or are you a casual user who primarily browses the web and creates documents? By considering your needs and usage habits, you can make an informed decision about which storage option is best for you.

    Introduction

    Are you wondering how a 256GB SSD drive compares to a 1TB hard drive? Well, the answer lies in storage space and speed. SSDs (solid-state drives) provide faster boot and load times due to their lack of moving parts and flash-based memory, while hard drives offer larger storage capacity. A 256GB SSD is ideal for those who prioritize speed and efficiency, as it can hold an ample amount of files, such as documents or photos.

    On the other hand, a 1TB hard drive is better suited for those who deal with larger file sizes, such as video editing or gaming. It ultimately comes down to personal preference and what you intend to use your drive for. So, whether you choose an SSD or hard drive, make sure to do your research and choose the one that best suits your needs.

    Defining SSD and HDD

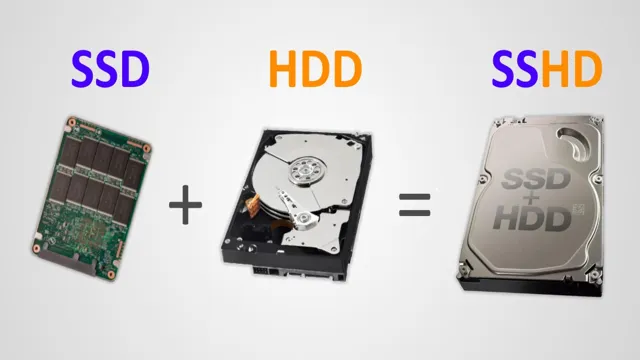
    When it comes to data storage, two terms that are often used are Solid State Drive (SSD) and Hard Disk Drive (HDD). In simple terms, they both do the same job, but they differ in how they store and retrieve data. HDDs have been the dominant type of storage for decades, and they rely on spinning platters to read and write data.

    On the other hand, SSDs use NAND-based flash memory to store and retrieve data much faster than an HDD. The speed, capacity, and cost of SSDs have improved over the years, making them a popular choice for both personal and professional use. While an HDD may be more affordable and offer higher storage capacity than an SSD, the latter is much faster, more reliable, consumes less power, and produces less heat.

    In this blog, we will delve deeper to understand the differences between these two types of data storage and the benefits and drawbacks of each one.

    how does 256gb ssd drive compare to 1tb hard drive

    Storage Capacity

    When comparing the storage capacity of a 256GB SSD drive to a 1TB hard drive, there are a few things to consider. While the SSD drive has less storage capacity, it also offers faster read and write speeds, making it ideal for tasks that require a lot of data access. On the other hand, the hard drive offers a much larger storage capacity, making it a great choice for storing large files such as videos and photos.

    However, hard drives are generally slower in terms of read and write speeds, so they may not be as ideal for tasks that require quick data access. Ultimately, the choice between a 256GB SSD drive and 1TB hard drive depends on your specific needs and the types of tasks you will be performing. If speed is a priority, you might consider the SSD drive, while if storage capacity is your main concern, a hard drive may be the better option.

    256GB SSD vs 1TB HDD

    When it comes to storage capacity, there is a major difference between 256GB SSD and 1TB HDD. While the solid-state drive (SSD) has a storage capacity of 256GB, the hard disk drive (HDD) has a massive 1TB storage capacity. If you’re someone who requires a lot of storage for files, documents, photos, videos, and games, then the HDD is what you should opt for.

    The 1TB HDD provides ample space for storing all types of files without you having to worry about running out of space, while 256GB SSD will quickly fill up. However, SSDs are a better choice for those who want faster storage and quick booting and loading times. If you’re someone who prioritizes speed over storage capacity, then 256GB SSD is a great choice.

    It is also more durable, compact, and consumes less power than an HDD. Ultimately, the choice between the two comes down to your personal preferences and usage.

    When to Choose 256GB SSD

    If you’re in the market for a new laptop or desktop computer, you might be wondering how much storage space you need. 256GB SSD (Solid State Drive) is a popular option for those who need a balance between speed and storage capacity. This amount of storage can typically hold around 50,000 photos, 20 hours of high-resolution video, and a few dozen applications and games.

    However, if you’re planning on storing large amounts of files, such as music or video projects, you may want to consider a larger SSD or an external hard drive. It’s important to keep in mind that the more storage space your SSD has, the more expensive it will typically be. Ultimately, the decision of how much storage space you need will depend on your specific needs and budget.

    When to Choose 1TB HDD

    Choosing the right storage capacity for your needs can be a tricky business, especially with so many options available on the market. However, when it comes to choosing a 1TB HDD, there are certain factors to consider. First and foremost, you should think about what you will be storing on your hard drive.

    If you’re planning on storing a lot of photos, videos, music, or games, then a 1TB HDD would be a great option. This capacity is also ideal for those who need to store large files for work or school projects. Additionally, if you’re on a tight budget but still need a sizable storage capacity, then a 1TB HDD is a cost-effective choice.

    With this option, you can store a significant amount of data without breaking the bank. Overall, a 1TB HDD is a great choice for those who need a lot of storage space and don’t want to spend a lot of money.

    Speed and Performance

    When it comes to speed and performance, a 256GB SSD drive blows a 1TB hard drive out of the water. SSD stands for Solid State Drive, which means it has no moving parts like a traditional hard drive. This lack of movement leads to lightning-fast read and write speeds that are only possible with an SSD.

    On the other hand, a 1TB hard drive can hold more data, but it is significantly slower in terms of data transfer. It’s important to consider your specific needs before choosing between an SSD and a hard drive. If speed and performance are high on your priority list, then an SSD drive is the way to go, even if you sacrifice some storage capacity.

    However, if you need to store a lot of data and don’t mind a slower load time, then a hard drive may suit your needs better. Ultimately, the decision between an SSD drive and a hard drive comes down to what you prioritize and value most in a computer’s performance.

    Read and Write Speeds

    When it comes to digital storage devices like hard drives, solid-state drives, and memory cards, speed and performance play a critical role. One of the key factors that determine how fast these devices can transfer data is their read and write speeds. The read speed refers to how quickly the device can retrieve data from its memory, while the write speed refers to how fast it can store data on its memory.

    The faster the read and write speeds, the quicker these devices can perform tasks such as transferring files, loading apps, and booting up the operating system. Modern solid-state drives and memory cards are known for offering exceptionally fast read and write speeds, which is why they have become increasingly popular among professionals who need to work with large files quickly. However, it’s worth noting that not all devices are created equal, and some may have faster read speeds than write speeds, or vice versa.

    It’s crucial to look at both of these factors when choosing a storage device that matches your needs.

    Boot and Load Times

    When it comes to computing, speed and performance are two of the most important factors to consider, and boot and load times play a big role in both. Boot time refers to the time it takes for your computer to start up when you turn it on, while load time refers to the time it takes for applications and files to open. Both are crucial for a seamless and efficient user experience, and there are several ways to optimize both boot and load times.

    One effective approach is to upgrade your hardware, such as getting a faster SSD or more RAM, which can significantly improve boot and load times. Another option is to disable unnecessary programs from starting up automatically, as these can slow down your system and increase boot and load times. By taking steps to optimize boot and load times, you can enjoy a faster, smoother, and more productive computing experience.

    Durability and Reliability

    When it comes to durability and reliability, one might assume that a 1TB hard drive would be the clear winner over a 256GB SSD drive. However, this may not necessarily be the case. While hard drives use magnetic disks to store data, which are more prone to failure and can be affected by shock or movement, solid-state drives (SSDs) use flash memory technology, making them more resistant to physical damage.

    Additionally, SSDs have no moving parts, which means they are less likely to overheat or wear out over time. Although hard drives may have a longer lifespan due to their storage capacity, it’s important to consider the risk of losing all that data in case of failure. So, in terms of durability and reliability, a 256GB SSD drive may actually be a more sensible and secure choice.

    Shock Resistance and Physical Damage

    When it comes to electronic devices, durability and reliability are key factors to consider. Shock resistance and physical damage are among the top concerns for consumers who want their devices to last. Manufacturers know this and have taken steps to make their products more durable and reliable.

    Some devices are designed to withstand drops and shocks, while others have protective covers that can be added for extra protection. Choosing a device that is built to last can save you money in the long run and prevent the frustration of having to replace it frequently. Don’t settle for a device that is likely to break with the smallest bump or fall; look for one that can handle a bit of wear and tear and still function properly.

    After all, no one wants to deal with a cracked screen or malfunctioning device.

    Lifespan and Failure Rates

    Durability and reliability are essential factors to consider when evaluating lifespan and failure rates of product. A product with high durability is expected to be less prone to wear and tear, while a reliable product is one that performs consistently and without fail. Ideally, products should maintain high levels of both to ensure maximum value and customer satisfaction.

    Unfortunately, not all products are built to last, and some can fail unexpectedly. For this reason, it is crucial to invest in products that are manufactured with high-quality materials and are well-designed. When evaluating the lifespan of a product, it is important to keep in mind factors such as intended use, environmental conditions, and maintenance requirements.

    Understanding these factors can help determine if a product is likely to perform as expected throughout its expected lifespan, or if it is more likely to fail prematurely. In the end, investing in durable and reliable products can save you time, money, and frustration in the long run.

    Final Verdict

    In conclusion, comparing a 256GB SSD drive to a 1TB hard drive is a matter of trade-off between speed and storage space. While a 1TB hard drive offers significantly more storage capacity, a 256GB SSD drive is significantly faster and has better performance. It’s true that SSD drives are currently more expensive than hard drives on a price per GB basis, but the speed and efficiency benefits they provide make them worth the investment, especially for users who demand high-performance computing or gaming.

    However, for users who don’t need the speed, the 1TB hard drive may be a more cost-effective option. Ultimately, the choice between the two depends on personal needs and budget. Overall, if you are looking for faster performance and don’t need a massive amount of storage, a 256GB SSD drive will be a better choice, but if you prioritize space over speed, a 1TB hard drive will be the way to go.

    Conclusion

    In the battle between the 256GB SSD drive and the 1TB hard drive, it’s not just about capacity, it’s about speed. While the hard drive may be able to store more data, the SSD drive is lightning fast, allowing for quick access and retrieval of files. So, if you value speed and performance over sheer capacity, the 256GB SSD is the way to go.

    It’s like having a sports car versus a big old SUV – sure the SUV can carry more, but the sports car will always come out on top in terms of speed and agility.”

    FAQs

    What are the differences between a 256GB SSD drive and a 1TB hard drive?
    One major difference is the storage capacity, with the SSD having less storage space than the hard drive. Another difference lies in the speed, with the SSD being faster and providing quicker access to files.

    Is a 256GB SSD drive enough for daily use?
    It depends on the user’s needs. For basic daily use such as browsing the internet, streaming media, and working on documents, a 256GB SSD drive is sufficient. However, if a user plans on storing large amounts of media files and programs, a larger storage option may be necessary.

    What are the benefits of using a 1TB hard drive over a 256GB SSD drive?
    The main benefit of using a 1TB hard drive is the larger storage capacity. This makes it ideal for users who need to store large amounts of media files, such as photos, videos, and music. Additionally, hard drives are typically cheaper than SSDs, making them a budget-friendly option.

    Can a 256GB SSD drive be upgraded to a larger storage option?
    It depends on the device being used. Some laptops and desktops allow for storage upgrades, while others may not. It’s important to check the device’s specifications before attempting to upgrade the storage.

  • Revolutionizing Speed: The Fastest SSD in the World Set to Launch in 2023

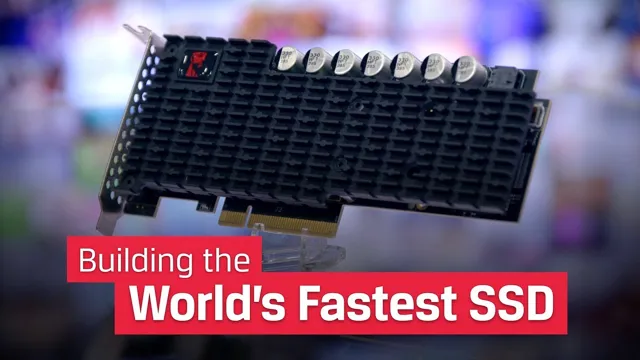
    Are you ready for lightning-fast computer speeds? Look no further than the latest technology in solid-state drives (SSDs). As technology advances, so do the capabilities of data storage options. In 2023, the fastest SSDs will take computing to new heights, and we’re here to give you all the details.

    Gone are the days of sluggish processing times and limited storage options. The SSD market is constantly evolving, with new products emerging all the time. In just a few years, experts predict that we’ll see the dawn of a new era: the era of the fastest SSDs yet.

    With their high read and write speeds, SSDs already boast impressive daily performance on both personal and professional computing devices. By 2023, we can expect massive advancements in SSD technology, with impressive new products that outperform traditional hard drives in every category. Imagine opening programs and files instantly, rendering graphics seamlessly, and downloading files in the blink of an eye.

    These are just a few of the benefits of the fastest SSD yet to come. If you’re looking to take your computing to the next level, stay tuned for the newest SSD technology in 202

    Current Fastest SSDs

    Looking for the fastest SSDs in the world in 2023? Well, you’re in luck because the race for the speediest solid-state drives is still ongoing. As of now, the current fastest SSDs are hitting extraordinary speeds, boasting write speeds of up to 7GB/s and read speeds of up to 15GB/s. One such SSD is the PCIe

    0-based Samsung 980 PRO, which can deliver breathtaking performance levels with its sequential read and write speeds. However, as we approach 2023, we can expect even faster options to emerge surpassing existing models. Although the competition is getting tougher, manufacturers worldwide are still vigorously working on creating the next generation of high-performance SSDs to fulfill the ever-increasing demands of modern computing.

    So keep an eye on the latest releases to see what the future holds and which one will take the spot of the fastest SSD in the world in 202

    Samsung 980 Pro

    If you’re a gamer or a content creator, you’re probably on the lookout for the fastest SSDs on the market. One of the best options out there is the Samsung 980 Pro, which is currently considered the fastest consumer-grade NVMe SSD available. With read speeds of up to 7,000 MB/s and write speeds of up to 5,000 MB/s, it’s perfect for those who need blazing fast speed for demanding tasks like gaming, 3D modeling, and video editing.

    Plus, its PCIe 0 support means it’s future-proofed for the coming years. While it may be a little pricier than some other options, the Samsung 980 Pro is definitely worth the investment if you want the best of the best in SSDs.

    fastest ssd in the world 2023

    Seagate Firecuda 530

    The Seagate Firecuda 530 is currently one of the fastest SSDs on the market. Boasting impressive read and write speeds of up to 7,300 MB/s and 6,900 MB/s, respectively, this NVMe SSD is perfect for gamers, content creators, and professionals who demand lightning-fast performance. The Firecuda 530 also features a high endurance rating, meaning it can withstand heavy usage without losing performance or integrity.

    Its sleek and compact design makes it easy to install in desktops or laptops, making it a versatile option for anyone in need of a speedy storage solution. With the Firecuda 530, you can enjoy faster boot times, quicker file transfers, and seamless multitasking. If you’re in the market for a high-performing SSD, the Seagate Firecuda 530 is definitely worth considering.

    WD Black SN850

    The WD Black SN850 is regarded as one of the fastest SSDs on the market today. This lightning-fast drive boasts an impressive sequential read speed of up to 7,000 MB/s and a write speed of up to 5,300 MB/s, making it perfect for demanding workloads that require speedy data transfer rates. Its impressive hardware also includes a PCIe Gen4 interface that provides increased bandwidth, lower latency, and faster speeds compared to traditional PCIe Gen3 interfaces.

    Additionally, the drive comes equipped with a custom heatsink that helps maintain optimal temperatures even during heavy usage. If you’re in the market for a blazing-fast SSD, the WD Black SN850 is definitely worth checking out.

    SSD Trends to Watch

    The solid-state drive (SSD) market is rapidly evolving, and with technological advancements, the third generation (3D NAND) is currently the fastest SSD today. However, with new innovations, it is expected that the fastest SSD in the world in 2023 will feature non-volatile memory express (NVMe) interfaces with PCIe Gen 4 technology, providing lightning-fast speeds of over 7 GB/s. Revolutionary designs like stacked and quad-level cell technologies are predicted to offer higher densities and lower power consumption, fulfilling the increasing need for storage solutions in data-intensive environments.

    With the advent of artificial intelligence and machine learning, there will be an exponential increase in the amount of data generated, making faster and more reliable SSDs an integral part of the tech industry. Exciting times are ahead, and we look forward to the arrival of the fastest SSD in the world in 202

    PCIe Gen 5 Interface

    One of the most exciting developments in the world of solid-state drives (SSDs) is the introduction of the PCIe Gen 5 interface. This next-generation interface is capable of delivering incredible speeds of up to 64GB/s, which is more than twice the speed of the previous PCIe Gen 4 interface. The PCIe Gen 5 interface is the latest development in SSDs that promises to take performance to the next level.

    With this technology comes the capability of accessing more data much faster than ever before, making it ideal for power users, gamers, and enterprises. As more and more devices incorporate this technology, we can expect to see significant improvements in storage performance and capacity. If you’re in the market for a new SSD, it’s important to keep an eye on the PCIe Gen 5 interface and take advantage of what it has to offer.

    QLC and PLC Technologies

    As the storage industry continues to evolve, two technologies that are making significant strides are QLC and PLC. QLC, or quad-level cell, is a flash memory technology that offers higher storage capacities with lower costs. It achieves this by storing 4 bits of data per memory cell, compared to the traditional 2 bits per cell in TLC or 3 bits per cell in MLC.

    PLC, or penta-level cell, takes this a step further by storing 5 bits of data per cell. While these technologies offer impressive storage capabilities, they do come with some trade-offs. QLC and PLC flash memory have lower endurance than traditional flash memory, meaning they may wear out faster and be less reliable over time.

    However, as advancements continue to be made in these technologies, they are becoming increasingly viable options for a variety of use cases, particularly where cost-effective, high-capacity storage is a priority. It will be interesting to see how these trends continue to develop and how QLC and PLC technologies will shape the future of storage.

    AI-Assisted Storage Management

    As we move forward into the age of increased reliance on AI, we are observing new trends in the field of SSD storage systems. One of the most significant trends involves AI-assisted storage management. This approach involves the use of machine learning algorithms to automate the optimization of disk usage.

    It works by analyzing data patterns and identifying usage trends, which are then used to optimize the location of data on the disk. Additionally, as the demand for high-capacity storage systems increases, we are also witnessing a shift towards the development of larger capacity SSDs. These drives are being designed to meet growing data center demands and provide faster and more reliable data access.

    As a result, this trend has led to an increase in the use of solid-state drives in enterprise environments, as well as in consumer products such as laptops and game consoles. Overall, the SSD market is evolving rapidly, and with the integration of AI-assisted storage management and larger drives, it is set to revolutionize the industry over the coming decade.

    Future of SSD Speed

    If you’re excited about the future of technology, you’re going to love the possibilities for the fastest SSD in the world in 202 As technology advances, we can expect SSDs to continue to get faster and more efficient than ever before. By using advanced techniques like NVMe and PCIe

    0, SSD manufacturers will be able to create drives that are capable of reaching incredible speeds. This means that in just a few years, we may see SSDs that are capable of reading and writing data at rates that were once thought impossible. The future is looking bright for SSDs, and it’s only a matter of time before we see the fastest and most efficient SSDs in the world.

    Predicted Breakthroughs in SSD Technology

    The future of SSD speed is looking promising with some predicted breakthroughs in technology. One of the most exciting developments is the use of non-volatile memory express (NVMe) technology. This technology allows SSDs to communicate with a computer’s processor more efficiently, resulting in faster transfer speeds.

    Another breakthrough is the use of more efficient controllers, which will allow for faster read and write speeds. Additionally, the use of 3D NAND flash memory allows for greater storage capacity and faster speeds. The combination of these technologies will result in SSDs that are much faster than what we currently have on the market.

    We can look forward to SSDs that can transfer large files in mere seconds, making them essential for professionals who need to work quickly and efficiently. Overall, the future of SSD speed looks bright, and we can expect to see some exciting new products in the coming years.

    Potential Impact on Computing Performance

    The future of SSD speed looks extremely promising. With new advancements in technology, data transfer speeds are expected to increase significantly. This will have a major impact on computing performance, especially for those who rely heavily on large files and fast data transfer.

    The use of NVMe technology has already shown improvements in speed and efficiency, and it’s only going to get better from here. This means that performing tasks such as booting up, loading applications, and transferring large files will become much faster and smoother. With faster SSD speeds, our computers will be able to keep up with our demands, providing us with a more seamless experience.

    It’s like driving on a freshly paved road versus a bumpy gravel road. The future of SSD speed is going to pave the way for exciting new possibilities in computing performance.

    Conclusion

    As we charge into the future, the demand for speed and efficiency has never been greater. In 2023, the race for the fastest SSD in the world will come to an epic conclusion. Tech wizards will unite to create a technological masterpiece, a miracle of modern engineering that will shatter all previous speed records.

    With lightning-fast data transfer rates, blazing read and write speeds, and the capability to handle the most complex operations with ease, this SSD will be the almighty champion of the storage world. So if you’re looking to upgrade your system, don’t settle for second place – go for the gold standard, the creme de la creme, the reigning champion of the fastest SSD in the world!”

    FAQs

    What is the significance of having the fastest SSD in the world in 2023?
    Having the fastest SSD in the world in 2023 means faster data transfer rates, improved system performance, and quicker load times for software applications and games.

    What are the factors that contribute to the speed of an SSD?
    The speed of an SSD is affected by various factors such as the interface used, the type of NAND flash memory, the controller, and the firmware.

    Will the fastest SSD in the world in 2023 be compatible with existing computers?
    Yes, as long as the computer has a compatible interface (such as NVMe) and the necessary drivers, the fastest SSD in the world in 2023 should be compatible with existing computers.

    What kind of performance benefits can we expect from the fastest SSD in the world in 2023?
    The fastest SSD in the world in 2023 will offer significant performance benefits such as faster boot times, improved system responsiveness, and quicker load times for large files and software applications.

  • Smooth Sailing: Your Guide to Cloning SSD to New SSD on Your Dell Computer

    Smooth Sailing: Your Guide to Cloning SSD to New SSD on Your Dell Computer

    If you’re looking to upgrade your Dell computer’s storage, then you might be wondering how to clone SSD to new SSD. This process can be a bit intimidating, but it doesn’t have to be. Cloning your SSD allows you to transfer all your files, folders, and settings to the new SSD without any data loss.

    It also saves time and eliminates the need to reinstall the operating system and applications. In this blog post, we’ll guide you through the process of cloning your SSD to a new SSD on your Dell computer. We’ll cover all the necessary steps and tools you need to complete the process successfully.

    So, grab a cup of coffee, sit tight, and let’s get started.

    Step 1: Prepare the new SSD

    If you’re wondering “how do I clone SSD to new SSD Dell?”, the first step is to prepare the new SSD for the cloning process. The most important thing to remember is to make sure that the new SSD have sufficient storage to accommodate all the data from the original SSD. You also need to format the new SSD to ensure its compatibility with your Dell computer.

    You can use a third-party software like EaseUS Backup for this task or the built-in Windows Disk Management utility. Once the new SSD is ready, you can now move on to the next step, which is to clone the original SSD to the new one.

    Check compatibility and capacity

    Before installing your new SSD, it is crucial to ensure its compatibility and capacity with your system. In order to do this, you need to prepare the new SSD before installation. The first step is to check the compatibility of your system with the new SSD.

    Make sure to check the type of SSD your computer supports, whether it is SATA, PCIe, or NVMe, for instance. This will help you avoid any incompatibilities and save time and money. Another thing to consider is the capacity of the new SSD.

    You need to decide on the exact amount of storage you need for your system and buy an SSD that can provide it. Keep in mind that you should have enough capacity to install the operating system, applications, and other files that you need. Once you determine these two factors, you can move on to the next step of preparing the new SSD for installation.

    how do i clone ssd to new ssd dell

    Connect the new SSD to your computer

    To connect your new SSD to your computer, you first need to prepare the new SSD. Begin by removing it from its packaging and ensuring that it is free from damage. Make sure to read the manufacturer’s instructions carefully before proceeding to the installation process.

    You might also need to purchase an adapter to ensure that the SSD fits properly in your computer. Once you have everything you need, turn off your computer and unplug it from the power source. Open up your computer case and identify an available SATA port on your motherboard.

    Connect the SSD to the port using a SATA cable and then secure it in place using screws or other mounting hardware. Close the case, plug your computer back in, and turn it on. Your computer should automatically detect the new SSD, but you may need to manually configure it through your computer’s BIOS settings.

    With these simple steps, you can connect your new SSD to your computer and enjoy faster transfer speeds and improved performance.

    Step 2: Backup your current SSD

    To clone your SSD to a new SSD on your Dell laptop, the second step is to back up your current SSD. This step is important because it ensures that you have a copy of all your important data in case anything goes wrong during the cloning process. There are various backup software tools available that you can use to backup your current SSD, including Dell Backup and Recovery, Acronis True Image, and EaseUS Todo Backup.

    Simply choose the software tool that works best for you and follow the instructions to create a full backup of your current SSD. Ensure that you have enough space on your backup media to accommodate the backup size of your current SSD. Once you have a secure backup, you are ready to move on to the next step of cloning your SSD to a new SSD.

    Choose the right backup method for your data

    Now that you have chosen the right backup method for your data, it’s time to actually back up your current SSD. This step is crucial in ensuring that your important files are safe and secure in case of any hardware failure, theft, or accidental deletion. There are several methods you can use to backup your SSD, including cloud storage, external hard drives, and even backing up to another computer on your network.

    Whatever method you choose, make sure to do it regularly and have multiple backups in case one fails. Don’t wait until it’s too late to start backing up your data – start today and have peace of mind knowing that your important files are safe and sound.

    Transfer files to a backup drive

    Now that you have created a system image of your current SSD, it’s time to back up all your important files and data. One way to do this is by transferring them to an external backup drive. This is an essential step because it ensures that your sensitive and valuable information will not be lost in case of a system failure or any other unforeseen event.

    There are various backup options available, such as using cloud-based storage services, but using an external drive is the most reliable and secure option. This way, you have full control over your data, and you can easily access it whenever you need it. To transfer your files to the backup drive, simply connect it to your computer, locate the files you want to back up, and drag and drop them onto the backup drive.

    Make sure to organize your files in a way that makes it easy to find them later on. With this step completed, you can rest assured that all your essential files are safe and secure.

    Step 3: Clone your SSD

    If you’re wondering how to clone your SSD to a new SSD on your Dell computer, the process is actually quite simple. The first step is to make sure you have the necessary cables and software to perform the clone. Then, you need to connect your new SSD to your computer and make sure it is recognized by your operating system.

    Once that’s done, you can use cloning software, such as Clonezilla or Acronis True Image, to copy everything from your old SSD to your new one. This process ensures that all of your files and settings are transferred over to the new drive seamlessly, without any loss of data. By cloning your SSD, you can upgrade to a larger, faster drive without having to reinstall all of your programs or transfer files manually.

    It’s a great way to save time and avoid any potential issues that can arise from a fresh install of your operating system. So if you’re looking to upgrade your Dell computer’s storage, cloning your SSD is definitely the way to go!

    Use Dell’s built-in cloning software

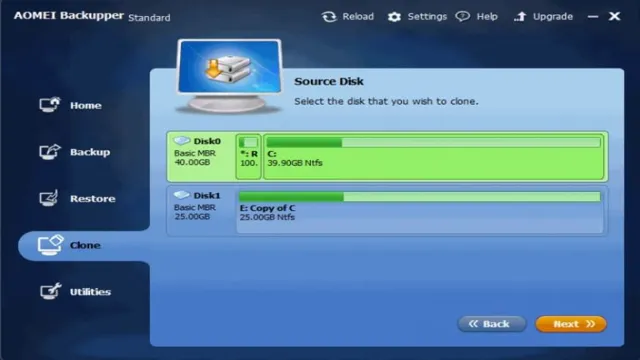
    Now that you’ve backed up your data and replaced your hard drive with an SSD, it’s time to clone your system using Dell’s built-in cloning software. This process eliminates the need to reinstall your operating system and applications. Start by connecting your new SSD to your laptop and opening the cloning software.

    Follow the on-screen instructions to select your source drive (original hard drive) and target drive (new SSD). The software will then copy all of your files, settings, and operating system to the new drive. Keep in mind that this process may take a few hours depending on the size of your hard drive and the speed of your laptop.

    Once the cloning process is complete, shut down your laptop, remove the original hard drive, and replace it with the new SSD. Boot up your laptop and enjoy the improved speed and performance of your new SSD. With Dell’s easy-to-use cloning software, upgrading to an SSD has never been simpler.

    Use third-party cloning software tool

    Now that you have backed up your data, you can move on to cloning your SSD. One way to do this is by using a third-party cloning software tool. There are many options available, but be sure to choose a reputable and trustworthy one.

    The process can vary depending on the software you use, but generally, you will need to select the source and destination drives and then begin the cloning process. Some software may also offer options for adjusting partition sizes and optimizing performance. It’s important to note that cloning can take some time, so be patient and avoid interrupting the process.

    With the right software and a bit of patience, you can quickly and easily clone your SSD and enjoy the benefits of improved performance and storage capacity.

    Step 4: Confirm Cloning Results

    After completing the cloning process, it is important to confirm that the cloning was successful. It is crucial to check and verify that all the data from the source SSD has been properly copied onto the new Dell SSD. To confirm this, you can check the storage space on both the source and the target SSD.

    If the space taken up by files, folders and applications on the new Dell SSD matches that of the source SSD, then the cloning process was successful. Additionally, you should run a few applications to ensure that everything is working smoothly. It is also important to update device drivers, firmware, and software to ensure optimal performance of the new cloned SSD.

    In conclusion, before disposing of the old SSD, ensure that the new Dell SSD is working correctly, all data has been copied, and all drivers, firmware and software have been updated. Following these steps will ensure a seamless and successful cloning process.

    Check your new SSD for all copied files and data

    Now that you’ve successfully cloned your old hard drive to your new SSD, it’s essential to confirm that all data and files have been successfully transferred. Double-checking your new drive will give you peace of mind, knowing that everything you need is there. First, navigate to your folders and files, and see if they’re the same as they previously were on your old hard drive.

    You can also run some quick tests to ensure that everything runs smoothly, such as opening a few applications or playing a video game. It’s also essential to check the system image, and make sure that everything is working correctly. By taking the time to confirm cloning results, you’ll avoid the risk of losing any valuable data or files that didn’t transfer correctly.

    So, take your time, check your new SSD thoroughly, and enjoy your new, faster, and efficient operating system!

    Boot your computer from the new SSD

    Congratulations! You have successfully cloned your existing hard drive into a new SSD. Now, it’s time to make sure that everything went smoothly before you boot your computer from the new SSD. The first step is to check the space on the new SSD.

    You can right-click on the SSD icon to view its properties. The used space on the new SSD should match the used space on the old hard drive. Additionally, you should check that all your files, programs, and settings are present and accounted for.

    Don’t forget to check the boot speed, as the primary goal of upgrading to an SSD is to have a faster system. Once you’ve confirmed everything is in order, it’s time to change the boot order in your computer’s BIOS. You should set the new SSD as the first boot device, so your computer will boot from it automatically when you restart your system.

    After changing the boot order, restart your computer, and if everything went as planned, your computer should boot from the new SSD with all your files and settings intact!

    Conclusion: Enjoy Your New Fast Dell SSD

    Cloning your SSD to a new one is like creating a carbon copy of yourself. It may seem like a daunting task, but with the right tools and knowledge, it can be done easily. Just remember, you can’t make an omelette without breaking a few eggs, and you can’t clone your SSD without taking a few steps.

    So grab your cloning software, your new SSD, and let the cloning begin! Soon enough, you’ll have a brand new, faster and more efficient SSD ready to go, just like the original. Happy cloning!”

    FAQs

    What tools do I need to clone my SSD to a new SSD on my Dell laptop?
    You will need a cloning software, a USB to SATA adapter, and a screwdriver to open the laptop.

    Can I clone my Dell laptop SSD to a larger SSD?
    Yes, as long as the new SSD has enough capacity to accommodate all the data on the old SSD.

    Is it possible to clone only the operating system to a new SSD on my Dell laptop?
    Yes, you can use cloning software that allows you to select only the operating system to clone to the new SSD.

    How long does it take to clone an SSD on my Dell laptop to a new SSD?
    The time it takes to clone an SSD depends on the size of the SSD and the speed of your USB to SATA adapter. It can take anywhere from 30 minutes to a few hours.

  • Seamless Guide: Clone Your SSD to Another in No Time

    So, you’re in need of upgrading your SSD? That’s great! Solid State Drives (SSDs) are becoming more and more popular with their lightning-fast speeds and high reliability. However, the process of cloning one SSD to another does not come without its complications. Cloning an SSD refers to copying all data from one drive to another, essentially creating an exact replica of the original drive.

    The significant advantage of SSD cloning is that you can put all your files, operating system, and applications in a new drive without any reinstallation required. It’s like moving into a new house without having to pack your belongings. But, before you start cloning, you must ensure that the source and target drives are compatible and have enough space available.

    You also need to take the necessary precautions to make sure that your data is safe during the cloning process. We understand that the whole process can seem daunting and confusing. It requires technical knowledge and careful attention to detail.

    That’s why we’re here to help you. In this article, we’ll guide you step-by-step through how to clone one SSD to another while keeping your precious data safe. So, sit back, relax, and let’s get started!

    Preparing the destination SSD

    If you’re looking to upgrade your SSD and want to transfer all your data from one SSD to another, then cloning is a great option. To begin, you need to prepare the destination SSD. This involves formatting it and laying out the partitions.

    Formatting is the process of organizing the structure of the storage device by deleting its contents, setting up a file system, and creating partitions. It ensures that the new SSD is clean and ready to accept data. Next, you need to set up the partitions, which means dividing the SSD into sections where the data will be stored.

    You can choose to have one partition or several, depending on your needs. Be sure to allocate enough space for the operating system and any programs you plan to install. Once you’ve formatted and partitioned the SSD, you’re ready to start the cloning process.

    This involves making an exact copy of your current SSD and transferring it to the new one. With some cloning software, this can be done with just a few clicks.

    Backup important data

    When preparing your destination SSD, it is vital to ensure that it is ready to receive your important data. First things first, you should backup your essential files before transferring them. This will give you peace of mind and guarantee that your information is safe in case of any mishaps that may occur during the transfer process.

    Next, you need to ensure that the destination SSD is formatted correctly and has enough space to store your data. You can do this by using the built-in disk utility on your computer. Once you have formatted the SSD, you can then copy and paste your data or use a cloning software to transfer everything over quickly.

    It’s essential to remember that the SSD speeds up your computer’s performance and improves the overall functionality. Therefore, you should take into consideration the quality of your new SSD when purchasing it. Opt for a high-quality SSD with enough storage capacity that will meet your needs in the long run.

    By doing this, your system will run faster and provide you with more storage space for your essential files.

    how to clone one ssd to another

    Connect the destination SSD to your system

    When you are preparing to transfer data to a new SSD, the first step is to connect the destination SSD to your system. This can be done easily with a SATA cable or M.2 slot, depending on the type of SSD you have.

    Before doing so, it’s important to make sure the destination SSD is properly prepared. This includes formatting the drive and creating a partition, which will ensure your data is organized and easily accessible. You may also want to update the firmware on your SSD, which can improve its performance and reliability.

    Once you have completed these steps, you can safely connect your destination SSD to your system and begin transferring your data. By following these simple steps, you can ensure a smooth and hassle-free data transfer process.

    Selecting a cloning software

    If you are looking to clone one SSD to another, selecting the right cloning software is crucial to ensure the process is done efficiently and effectively. There are many different cloning software options available, but it is important to choose one that is reliable and user-friendly. Some popular options include Macrium Reflect, Acronis True Image, and Clonezilla.

    Macrium Reflect and Acronis True Image both offer a user-friendly interface and support for both Windows and Mac operating systems. Clonezilla is a free and open-source option, but it has a steeper learning curve compared to the other options. No matter which cloning software you choose, it is important to follow the instructions carefully and ensure that both SSDs are compatible with the software.

    By choosing the right software and following the proper steps, you can clone your SSD without any issues and enjoy a smooth transition to your new device.

    Using a built-in Windows tool

    When it comes to selecting a cloning software, there’s no shortage of options available on the market. However, if you’re a Windows user, you may not even need to download any external software. That’s because Windows comes equipped with its own built-in cloning tool.

    Known as “System Image Backup,” this tool allows you to create a complete backup of your system and restore it in case of a crash or other failure. The process involves making an exact replica of your entire hard drive, including all files, settings, and applications. The best part? It’s completely free and already included in your operating system.

    To access the tool, simply search for “System Image Backup” in the Control Panel or simply type “backup” in the search bar. Keep in mind, however, that this method does have its limitations. It’s only recommended for users with a basic understanding of system backup and restore.

    For more advanced cloning needs, you may want to consider using specific cloning software.

    Using third-party software

    When it comes to selecting a cloning software, there are a variety of options available for both personal and professional use. One popular choice is EaseUS Todo Backup, which offers a simple interface and a range of features such as disk cloning, system backups, and file backups. Another reliable option is Acronis True Image, which includes cloud backup capabilities and allows for full disk image backups.

    Additionally, Clonezilla is a free, open-source option that can be used for system imaging and cloning, albeit with a steeper learning curve. Ultimately, the choice of software will depend on individual needs and preferences, including budget, level of technical expertise, and desired features. But regardless of the selection, choosing a cloning software can simplify the process of backing up important information and provide peace of mind for any potential data loss scenarios.

    Cloning the SSD

    Are you upgrading your computer’s SSD and wondering how to clone one SSD to another? Well, the good news is that it’s a straightforward process. First, ensure that the new SSD has the same or larger storage capacity as the source SSD. Then, download and install a reliable disk cloning software, such as Clonezilla or EaseUS Todo, to your computer.

    Connect both SSDs to your computer, making sure they are recognized by the software. Follow the prompts on the software to clone the source drive to the destination drive. Once the cloning process is complete, you will need to physically swap the drives in your computer.

    Now, power up the computer, and it should boot from the new SSD with all your data and settings intact. With this simple process, you can upgrade your computer’s SSD without losing any data. So, why not give it a try and enjoy faster and better performance?

    Using built-in Windows tool to clone

    If you need to upgrade your SSD or move it to a new computer, cloning can save you the hassle of reinstalling everything from scratch. Luckily, Windows has a built-in tool that allows you to do this easily. The process involves creating a backup of your current SSD, then restoring it onto the new one.

    This ensures that all your settings, files, and programs are preserved. To begin, connect the new SSD to your computer and make sure it is recognized. Then, open the Windows Backup and Restore tool and select “Create a System Image”.

    Choose the SSD as the backup location and wait for the process to complete. Once done, shut down your computer, swap out the old SSD for the new one, and boot it up again. This time, select “System Image Recovery” in the Backup and Restore tool, choose the SSD as the restore location, and let the process run its course.

    Overall, using Windows’ built-in tool to clone your SSD is a straightforward and convenient method for upgrading or migrating your storage.

    Using third-party software to clone

    If you want to clone your SSD, using third-party software can be a great option. These programs make it easy to copy all your data from one drive to another without having to manually transfer everything. One popular cloning software is EaseUS Todo Backup, which can create a bootable USB drive to clone your SSD.

    Simply plug in the USB drive, boot your computer from it, and follow the on-screen instructions. Another option is Acronis True Image, which can clone your SSD while your computer is still running. Both options offer a straightforward approach to cloning, making it easy to upgrade or replace your SSD without losing any of your data.

    Whether you choose EaseUS Todo Backup or Acronis True Image, make sure to back up your data beforehand just in case anything goes wrong. With the right software and preparation, cloning your SSD can be a breeze.

    Finishing up

    Now that you have successfully cloned one SSD to another, it’s time to finish up the process. The first step is to shut down your computer and remove the old SSD. Once you do that, insert the new SSD and turn your computer back on.

    Make sure to enter the BIOS settings and verify that the new SSD is being recognized. If it’s not, you might need to adjust the boot order. Once you have confirmed that everything is working properly, you can go ahead and format the old SSD.

    This will wipe all the data from it, so make sure to back up any important files before proceeding. After formatting, you can either reuse the old SSD for another purpose or dispose of it properly. Congratulations, you have successfully cloned your SSD and upgraded your computer’s storage capacity!

    Disconnecting the SSD

    As you finish up your work with the SSD, it is important to disconnect it properly to avoid any damage. To do this, you must first ensure that your computer is turned off completely. Once your system has shut down completely, unplug the power cable and remove the back cover.

    You will find the SSD located in the slot of your computer. Proceed to remove it gently by pulling it out of the slot. Ensure that you do this with utmost care to avoid any damage to the components.

    Finally, it is important to properly store the SSD by placing it in an anti-static bag to protect it from electrostatic discharge. By following these simple steps, you will safely disconnect the SSD, making it easier to install it back in the future.

    Testing the cloned SSD

    We’re almost done with the process of cloning the SSD, but before we can wrap things up, we need to make sure that the cloned SSD is working as it should. Testing the SSD is a critical step, as it ensures that all the data has been copied over successfully and that there are no errors or corruption in the files. To do this, we need to boot up the computer using the cloned SSD and run some diagnostics and check for errors.

    We can also browse through our files and folders to make sure everything is there, and everything is working as it should. By testing the cloned SSD, we can feel confident that we have a reliable backup of our data, and we won’t have to worry about losing any important files if something goes wrong with our original drive. So, now that we’ve finished testing the cloned SSD, we can safely say that our data is secure, and we’re ready to use it for whatever we need.

    Conclusion

    Cloning one SSD to another is like giving birth to identical twins, minus the nine months of waiting and physical labor. With a few simple clicks, you can replicate your data and operating system onto a new, shiny and identical SSD. Think of it as an electronic form of reproduction – no need for fertilization, just a bit of technological know-how.

    So go forth and clone, my tech-savvy friends, and marvel at the beauty of technological reproduction!”

    FAQs

    What is SSD cloning?
    SSD cloning is the process of making an exact copy of one SSD to another. This means that all the contents of the original SSD, including the operating system, applications, and data, will be replicated onto the new SSD.

    Why would I want to clone my SSD?
    There are several reasons why you might want to clone your SSD. For example, you might be upgrading to a larger and faster SSD and want to transfer all your data to the new drive. Alternatively, you might want to create a backup of your existing drive in case of hardware failure.

    Is it difficult to clone an SSD?
    Cloning an SSD can be a complex process, especially if you have little experience with computer hardware and software. However, there are several tools available that can simplify the process and guide you through each step.

    What tools do I need to clone my SSD?
    To clone your SSD, you will need a cloning tool, such as Acronis True Image, EaseUS Todo Backup, or Macrium Reflect. You will also need a destination drive to copy the data to, such as an external hard drive or another SSD. Finally, you will need a computer with the necessary hardware and software to run the cloning tool.

  • HDD vs. SSD: Exploring the Differences in Data Storage Techniques

    Have you ever wondered what the best way to store your data is? With the rise of technology, we now have several options to choose from, including the traditional hard disk drive (HDD) and the newer solid-state drive (SSD). Both of them have their pros and cons, making it difficult to decide which one to use. So let’s dive in and explore the world of HDD vs SSD storing data.

    First, let’s start with the basics. HDDs have been around since the 1950s and are mechanical devices that store data on spinning disks. They have been the primary storage solution for decades because of their reliability and affordability.

    On the other hand, SSDs are a newer technology that uses flash memory to store data. They have no moving parts, making them faster and more durable than HDDs. While both storage devices can store your data, they have significant differences that make one better than the other, depending on your needs.

    For example, if you need a lot of storage space at an affordable cost, an HDD might be the better choice for you. But if you need speed, durability, and energy efficiency, an SSD might be the way to go. In this blog, we’ll take a closer look at the differences between HDDs and SSDs in terms of speed, durability, cost, and other factors.

    We’ll also explore when it’s best to use one over the other and the future of data storage. By the end of this read, you’ll have a better understanding of HDD vs SSD storing data and make an informed decision on which one is right for you. So grab a coffee, sit back, and let’s dive into the world of data storage.

    How Data is Stored in HDDs

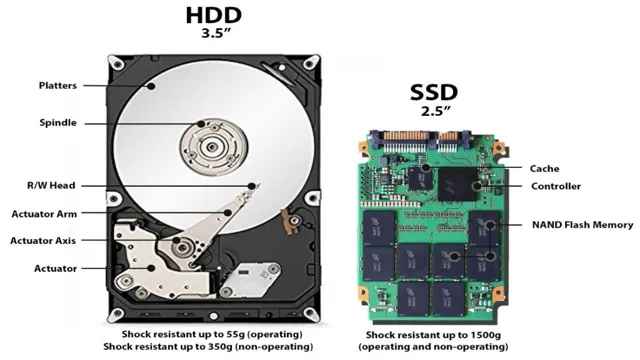
    If you are wondering how an HDD stores data in comparison to an SSD, the answer lies in their basic components. Hard Disk Drives (HDDs) use spinning disks or platters coated with magnetic material to read and write data onto a moving head. These platters spin at high speeds while the head reads and writes data, creating a magnetic field that stores data in billions of tiny sectors.

    The more platters an HDD has, the more data it can store. In contrast, Solid State Drives (SSDs) use a different technology to store data. They use NAND-based flash memory that stores data in cells, which are organized in pages, blocks, and planes.

    SSDs are faster than HDDs because they don’t have to read or write data from moving parts. That’s why an SSD is a good choice for those who prioritize speed, while an HDD is a good choice for those who need more storage space. The decision largely depends on the intended use and needs of the users.

    Magnetic Storage Platters

    Magnetic Storage Platters and How Data is Stored in HDDs Do you ever wonder how your computer stores all your information? Well, the answer lies in hard disk drives (HDDs) and their magnetic storage platters. These platters are made of a magnetic material and use tiny magnetic fields to store and retrieve data. The platters spin inside the HDD at high speeds and a tiny magnetic head reads and writes data onto the surface of the platters.

    These magnetic platters are typically made of aluminum or glass and have a special coating that allows data to be written repeatedly without degrading the platter’s surface. And the more platters inside the HDD, the more data it can store! With several layers of platters stacked on top of each other, the modern HDD can store terabytes of data. While solid-state drives are now gaining popularity, it’s important to recognize the importance of magnetic storage platters and how they revolutionized the way we store data on our computers.

    how does an hdd store date compared to a ssd

    Read/Write Arm and Head

    One of the most fascinating aspects of hard disk drives (HDDs) is the read/write arm and head, which stores data on the disk’s magnetic surface. The hard disk drive’s platters are covered with a magnetic layer, with tiny magnetic regions that store binary data. The actuator arm is a component that moves throughout the disk, positioning the read/write head at the right location to access data, and to store new data on the rotating disk as it spins.

    The head floats over the surface on a thin layer of air only a few atoms thick, transferring bits of data to and from the rapidly spinning platter in a matter of nanoseconds. In other words, the read/write arm and head work together to accurately store and retrieve data from the disk, making the HDD an essential component of most computing devices.

    How Data is Stored in SSDs

    When it comes to storing data, there are two main options: HDDs and SSDs. While an HDD relies on spinning platters to read and write information, an SSD uses flash memory. So how does this affect the way data is stored? Well, in an HDD, data is stored on one or more metal platters coated in a magnetic material.

    These platters spin around, and data is read and written using a magnetic read/write head. In contrast, an SSD stores data on interconnected memory chips. These chips contain no moving parts and are instead made up of non-volatile NAND-based flash memory.

    When data is written, it is stored in blocks of memory cells. These blocks can then be erased and rewritten as needed. Overall, the main difference between the two is that an HDD relies on physical movement to store and retrieve data, while an SSD uses solid-state storage, making it faster and more reliable.

    So if you’re looking for speed and durability, an SSD is the way to go.

    NAND Flash Memory Cells

    NAND Flash Memory Cells If you’ve ever wondered how all your photos, music, and data are stored in an SSD, it all comes down to NAND flash memory cells. These cells are the building blocks of SSDs and represent the bits of data that are stored. NAND flash memory cells are organized in a grid, with each cell holding either a 1 or a 0 depending on whether there’s electricity flowing through it or not.

    When you save a file, the SSD stores the data by changing the voltage of the cells to represent a series of 1s and 0s. When you access the file, the controller reads the voltages of the cells to retrieve the data. The more cells an SSD has, the more data it can store.

    Hence, SSDs with a higher capacity have more NAND flash memory cells. Exciting, isn’t it? Just imagine all the possibilities of storing data on tiny little cells in a grid!

    Electrical Charges and Transistors

    SSDs rely on electrical charges to store and retrieve data quickly and efficiently. These small semiconductor-based devices contain many transistors, which act as tiny switches that can either allow or block the flow of electrons. Each transistor has a gate, a source, and a drain, with the gate controlling the flow of electrons between the source and the drain.

    When a voltage is applied to the gate, it creates an electrical field that can either attract or repel electrons, effectively turning the transistor on or off. SSDs use these tiny electrical charges to store data in binary code, with each charge representing a 0 or a By manipulating the charges at a micro-scale level, SSDs can quickly read, write, and erase data, making them a popular choice for high-speed storage in laptops, desktops, and servers.

    Controller to Manage Data Access

    When it comes to storing data in SSDs, the role of the controller is essential. The controller is responsible for managing data access and ensuring that data is stored in the most efficient and reliable way possible. SSDs are made up of multiple NAND flash memory chips, which are organized into pages and blocks.

    The controller manages these pages and blocks and decides how data is stored. One way that data is stored in SSDs is using a process called wear-leveling. This process distributes data evenly across the NAND flash memory chips, which helps prevent any individual chip from wearing out faster than the others.

    The controller also uses error-correction algorithms to ensure that data is stored accurately and retrieved without any errors. Another way that data is stored in SSDs is using a process called TRIM. When a file is deleted, the SSD doesn’t immediately erase it from the NAND flash memory chips.

    Instead, it marks the blocks containing the data as available for future use. This can lead to reduced performance over time, as the SSD has to search for the available blocks. TRIM helps to prevent this by immediately erasing the blocks containing the deleted data.

    Overall, the controller plays a critical role in how data is stored in SSDs. By managing data access, distributing data evenly, using error-correction algorithms, and utilizing TRIM, the controller ensures that data is stored reliably and efficiently.

    Comparing Performance and Reliability

    When it comes to storing data, there are two primary types of hard drives: traditional hard disk drives (HDDs) and solid-state drives (SSDs). An HDD uses spinning disks with magnetic coatings to store data, while an SSD has no moving parts and instead uses flash memory chips. This fundamental difference impacts not only how the drives store data, but also their performance and reliability.

    HDDs are generally slower and less reliable than SSDs, as moving parts are more prone to wear and tear and failure. However, they are also less expensive and can store more data. SSDs, on the other hand, are faster and more reliable, but also more expensive per gigabyte of storage.

    When deciding between an HDD and SSD, it’s important to consider your priorities and budget. If you need a lot of storage and don’t need the fastest possible performance, an HDD may be the best choice. But if speed and reliability are your top priorities, an SSD is likely the way to go.

    Speed of Data Access and Transfer

    When it comes to data access and transfer, speed is always a top priority. Businesses and organizations rely heavily on the speed of their data transfer for mission-critical operations. To compare the performance and reliability of different options, several factors must be considered.

    One of the most important is the quality of the connection. High-speed internet connections are essential for fast data transfer and access. Another factor is the type of data being transferred.

    Large files may take longer to transfer than smaller ones, so the speed needs to be adjusted based on file size and type. Companies can also choose between wired and wireless connections, each with their own unique benefits and drawbacks. Overall, the speed and reliability of data transfer can make or break a business and its bottom line.

    Durability and Lifespan

    When it comes to the durability and lifespan of products, it’s important to compare their performance and reliability. For example, you might be looking for a new laptop that can withstand frequent travel and daily use. In this case, you would want to look for a model that has a reputation for reliability, such as a brand that is known for durability.

    You might also want to consider the materials used to make the laptop, as well as any features that are designed to enhance its lifespan. For example, some laptops have reinforced hinges or special coatings that help to protect against wear and tear. By comparing different models based on their performance and reliability, you can choose a product that will stand the test of time and give you the best value for your money.

    Making the Right Choice for Your Needs

    When it comes to data storage, there are two main options: HDDs and SSDs. HDDs work by storing data on spinning disks, which are accessed by read and write heads. In contrast, SSDs store data on flash chips, which can be accessed much faster than spinning disks.

    This means that SSDs can access data much faster than HDDs, making them ideal for applications that require fast read and write speeds. However, SSDs can be more expensive than HDDs, and they may not be suitable for applications that require large amounts of storage space. Ultimately, the choice between an HDD and an SSD depends on your specific needs, and you will need to consider factors such as performance, cost, and storage capacity when making your decision.

    Conclusion

    In summary, while both HDDs and SSDs are capable of storing data, the mechanisms behind their data storage are quite different. HDDs use spinning disks and moving parts to read and write data, while SSDs rely on high-speed flash memory to transmit information. The result? While HDDs may provide greater storage capacity and physical durability, SSDs offer faster read and write speeds and can withstand more extreme temperatures and vibrations.

    It’s ultimately up to the individual user to determine which technology best suits their needs – but one thing’s for sure: when it comes to data storage, both HDDs and SSDs have their own unique strengths and weaknesses.”

    FAQs

    What is an HDD and how does it store data?
    HDD (Hard Disk Drive) is a data storage device that uses magnetic storage to store and retrieve digital information. It works by spinning disks called platters that are coated with magnetic material and read/write heads that move back and forth over the spinning disks. As the platters spin, the read/write heads magnetically read and write data to the disks.

    How does an SSD store data compared to an HDD?
    Unlike HDDs, SSDs (Solid State Drives) have no moving parts and rely on flash memory to store data. Data is stored in microchips that retain information even without power. When the SSD receives a request to access data, it reads the information from the chips and sends it to the computer’s processor.

    What are the advantages of using an SSD over an HDD?
    SSDs have faster read and write times compared to HDDs, which means faster load times and faster data transfers. They are also less prone to mechanical failure since they have no moving parts, making them more durable and reliable. Additionally, SSDs are usually smaller and lighter than HDDs.

    Why do some people still prefer HDDs over SSDs?
    HDDs are typically cheaper per gigabyte of storage compared to SSDs, making them a more cost-effective option for storing large amounts of data. Additionally, HDDs can have higher storage capacities than SSDs, which makes them a better option for storing large files such as videos and photos. Lastly, individuals with security concerns may prefer HDDs as they can be more easily wiped clean of data.

  • Effortlessly Format C Drive after Cloning to SSD: The Ultimate Guide

    So you’ve finally decided to upgrade your computer by cloning your C drive to an SSD. Congratulations on taking this step towards better performance and faster load times! However, there’s still one crucial step left to take before you can enjoy your new setup – formatting your C drive. By formatting your old hard drive, you’ll free up space and prevent any potential conflicts between your old and new drives.

    It’s like decluttering your room before moving to a new one – you don’t want to bring unnecessary junk with you. But how do you go about formatting your C drive, and what should you be aware of before starting the process? In this blog post, we’ll guide you through the steps of formatting your C drive after cloning to your new SSD. We’ll also share some tips and tricks to make the process as smooth and hassle-free as possible.

    So grab a cup of coffee, take a deep breath, and let’s dive into the world of formatting drives!

    Check SSD Compatibility

    If you’ve successfully cloned your operating system onto a new SSD but are having troubles formatting the C drive, worry not. There’s a simple solution to this problem! Firstly, ensure that your new SSD is compatible with your system. Check that it has enough storage capacity, matches your existing drive’s speed, and uses the same interface, be it SATA or NVMe.

    Once confirmed, you can format the C drive by following a few steps. First, open the start menu and search for “disk management.” Next, right-click on your C drive and select “Format.

    ” Be sure to double-check that you’ve chosen the correct drive since this action will erase all the data on that partition. Lastly, you can choose your preferred file system, like NTFS, depending on your requirements. Congratulations, you’ve now formatted your C drive!

    Verify SSD is same system architecture and firmware as previous HDD.

    When upgrading from an HDD to an SSD, it’s crucial to ensure that the new SSD is compatible with the system architecture and firmware of the previous HDD. This is because different systems require different types of SSDs, and using an incompatible SSD can result in issues with performance, reliability, and even system crashes. Before purchasing an SSD, it’s essential to research the specifications and requirements of your system, as well as the different types of SSDs available.

    Additionally, it’s a good idea to check with the manufacturer or a trusted professional to ensure that the SSD you choose is compatible and will work seamlessly with your system. By taking the time to verify compatibility, you can ensure a smooth and successful upgrade to faster and more reliable storage.

    how do i format c after clone to ssd

    Backup C Drive and Data

    Formatting your C drive after cloning to an SSD can be a daunting process, but it’s an important step in optimizing your computer’s performance. However, before formatting, it’s crucial to backup your C drive and important data to ensure that nothing is lost in the process. There are various backup options available, including cloud storage, external hard drives, and USB drives.

    Once you have backed up your data, you can then proceed with the formatting process. To do this, you can utilize the Disk Management tool on your Windows computer. Simply right-click on the C drive and select “Format” to initiate the process.

    Alternatively, you can use a third-party tool for formatting, such as EaseUS Partition Master. Remember to be patient during the process, as it may take some time to complete. By backing up your data and formatting your C drive, you can expect a faster and more efficient computer performance.

    Create a backup of your C drive on an external hard drive to prevent data loss.

    Creating a backup of your C drive on an external hard drive is a crucial step to prevent data loss. A C drive is where your operating system and essential programs are stored, and it’s vulnerable to crashes, viruses, and other issues that can compromise your data. By backing up your C drive, you ensure that you have a reliable copy of all your critical files and programs that can be quickly and easily restored if anything goes wrong.

    A backup also protects you in case of hardware failure, theft, or natural disaster. It’s best to set up an automated backup system and keep your external drive in a safe place to avoid losing it. Don’t wait until it’s too late – backup your C drive today and enjoy peace of mind knowing your data is secure.

    Create a Bootable USB Drive

    If you’ve cloned your hard drive to an SSD and want to format the old drive, you’ll need to create a bootable USB drive first. This is because formatting C without a bootable drive can lead to system failure and data loss. To create a bootable USB drive, you’ll need a USB drive with at least 8GB of storage space and a Windows installation ISO file.

    Once you have the file and the USB drive, you can use a tool like Rufus to create the bootable USB drive. Simply select the ISO file and the USB drive, and Rufus will create the bootable drive for you in just a few minutes. Once you have the bootable drive, you can use it to boot your computer and proceed with formatting C.

    Remember to back up any important data on the drive before formatting, as the process will erase all data on the drive. Overall, creating a bootable USB drive is an essential step when formatting C after cloning to an SSD, so be sure to do it properly to avoid any problems.

    Download and create a bootable USB drive with Windows 10 installation media.

    Are you looking to create a bootable USB drive for your Windows 10 installation media? It’s easy to do, and I’m here to guide you through the process. First, you’ll need to download the Windows 10 ISO file from Microsoft’s official website. Once you have the file, you’ll need to plug in a USB drive with at least 8GB of storage space.

    Then, you’ll need to use a tool like Rufus, which can create a bootable USB drive with the Windows 10 ISO. When you open Rufus, select your USB drive and then select the Windows 10 ISO file. Make sure to choose the option to create a bootable disk using ISO image.

    Once you’ve selected the ISO file and the appropriate settings, Rufus will begin creating your bootable USB drive. This process may take a bit of time, depending on the speed of your computer and the size of the ISO file. But once it’s done, you’ll have a portable Windows 10 installation media that you can use on any computer.

    Creating a bootable USB drive is a great way to have a backup Windows 10 installation media in case your computer crashes or you need to install Windows on a different computer. With just a few simple steps, you’ll be on your way to having a reliable and portable solution for any Windows 10 installation needs.

    Boot from USB Drive

    If you have cloned your hard drive to an SSD, you may want to format the old hard drive to free up space and avoid confusion. Before doing so, ensure that you have backed up all important files from the old drive. One way to format the old drive is to boot the computer from a USB drive with a Windows installation media.

    Insert the USB drive and restart the computer, then press the key that allows you to access the boot options menu (usually F2, F8 or F12). Select the USB drive from the list of boot options and press enter. Follow the prompts to install Windows on the new SSD, then use the Disk Management tool to format the old drive.

    Alternatively, you can use third-party software such as EaseUS Partition Master to format the old drive. Either way, be cautious not to format any drives that contain important data. With these steps, you can easily format the old hard drive after cloning to an SSD while preserving your data and optimizing your computer’s performance.

    Insert USB drive into your computer and boot from it.

    When it comes to troubleshooting issues or upgrading the operating system of your computer, booting from a USB drive is an essential skill to have. The process of booting your device from a USB drive is simple and straightforward, and it all begins with inserting the USB drive into your computer. Once you have the USB drive, you need to ensure that your computer is powered down completely.

    Then, you should insert the USB drive into one of your computer’s USB ports. Once the USB drive is in place, you can turn on your computer and quickly press the appropriate button to enter the boot menu. Typically, the button to access the boot menu is F8, F10, or F1

    From the boot menu, select the option to boot from the USB drive, and your device will load the operating system or software that is on the USB drive. By following these simple steps, you can easily boot your computer from a USB drive and solve any software-related issues or upgrade your system.

    Format C Drive

    If you’ve recently cloned your computer’s hard drive onto a new SSD, chances are you’ll want to format the old C drive to free up some space and prevent any potential compatibility issues. But how exactly do you format the C drive after a clone to an SSD? It’s a relatively simple process, but it’s important to proceed with caution to avoid losing any important data. First, make sure all your personal files and programs have been transferred to the new SSD and that you have a backup of anything you want to keep.

    Next, click on the Start menu and search for “Disk Management.” Once open, right-click on the C drive and select “Format.” Follow the on-screen prompts, making sure to select the “NTFS” file system and the “Quick Format” option.

    Once the formatting is complete, you can safely delete any leftover files or partitions on the old C drive. Just remember to double-check that everything you want to keep has been transferred beforehand.

    Select the C drive and format it as NTFS file system during Windows 10 installation.

    When installing Windows 10, one crucial step is formatting the C drive. This is important because it erases all the data on the drive and prepares it for the new operating system. It’s important to select the C drive carefully and avoid accidentally formatting the wrong drive.

    During installation, Windows 10 gives the option to select the drive to install the operating system. At that point, users should select the C drive and choose the NTFS file system for formatting. The NTFS file system provides better performance and reliability than other file systems.

    It’s essential to note that formatting the drive erases all data, and it’s recommended to make a backup of important files, folders, and documents before proceeding with the process. Once formatted, the C drive is ready for installing Windows Remember to double-check the drive selection and file system before proceeding with installation.

    By following these steps, users can ensure a successful Windows 10 installation and enjoy the benefits of a fresh and updated operating system.

    Install Windows 10 on SSD

    If you’ve recently cloned your Windows 10 operating system to an SSD, you may be wondering how to properly format the old C drive without causing any issues. The process is actually simpler than you might think. First, ensure that all of your personal data and important files have been properly transferred to the new SSD.

    Next, open the Disk Management tool in Windows, right-click on the old C drive, and select “Format.” Choose the “NTFS” file system and a quick format, then click “OK” to begin the process. Once the drive has been formatted, you can remove it from your system or use it for additional storage.

    It’s important to note that formatting the old C drive will permanently delete all data and files stored on it, so make sure you have everything you need backed up beforehand. By following these simple steps, you can safely and easily format your old C drive after cloning to an SSD.

    Complete the installation process and activate Windows 10 on your new SSD.

    If you’ve recently upgraded to an SSD and want to install Windows 10 on it, follow these steps to complete the process. Firstly, create a Windows 10 installation media using a USB drive or DVD and insert it into your computer. Next, restart your computer and press the relevant key (usually F2, F12, or Del) to enter the BIOS settings.

    Change the boot priority to the USB or DVD drive, save changes, and exit the BIOS. Now, the Windows 10 installation screen will appear, and you can select your preferred language, time, and other settings. When prompted to select a partition, choose the SSD and click “Next” to begin the installation.

    Once the installation is complete, you’ll need to activate Windows 10 using a valid activation key. If you already had an activated copy of Windows 10 on your previous hard drive, you can use the same key again. If not, you can purchase a new key from the Microsoft Store, or you can use a free product key if you’re a student or have a valid license from participating universities.

    With these steps, you can easily install and activate Windows 10 on your new SSD and enjoy faster speeds and improved performance!

    Restore C Drive Backup and Data

    If you have recently cloned your C Drive to an SSD, you may be wondering how to format C to free up some space and get rid of any leftover data. Before you do so, it’s important to make sure you have a backup of your C Drive data in case anything goes wrong during the formatting process. One way to do this is by using a trusted backup software to create an image or a copy of your C Drive.

    Once you have a backup of your data, it’s time to format C. To do this, you can use the Windows Disk Management tool or a third-party partition manager. After formatting C, you can restore your data from the backup you created.

    This will ensure that you don’t lose any important files or settings, and that your C Drive is clean and free of clutter. Remember, it’s always a good idea to create regular backups of your data, especially before making any major changes to your system. By doing so, you can avoid potential data loss and protect yourself from unexpected issues.

    Restore your C drive backup to the new SSD and transfer any additional data from the external hard drive.

    Restoring your C drive backup is integral to transferring data to your new SSD. Once you’ve successfully cloned your current drive to an external hard drive, you can begin the process of restoring it to your new solid-state drive. This process involves accessing the backup file and running the restore program.

    It is important to note that once the restore process begins, any data currently on the SSD will be overwritten, so it’s best to transfer any additional data from the external hard drive after the restore is complete. During the process, it’s important to ensure that the backup file is error-free and contains all necessary files. Once everything is restored, you’ll be able to enjoy a seamless transition to your new SSD, with all your files and programs exactly as they were on your old drive.

    With this straightforward process, upgrading to an SSD has never been easier.

    Conclusion

    In conclusion, formatting C after a clone to an SSD is like giving your computer a fresh start in life, wiping away all its past mistakes and giving it a chance to shine anew. It’s a simple process that requires a bit of technical know-how, but with a little patience and the right tools, you can get the job done in no time. So don’t be afraid to take the plunge and give your PC a new lease on life by formatting C after a clone to SSD – your machine will thank you for it!”

    FAQs

    What is the purpose of formatting a C drive after cloning to SSD?
    Formatting the C drive after cloning to SSD ensures that all the previous data and settings are erased, and the SSD is set up for optimal performance.

    How do I format my C drive after cloning to SSD?
    You can format your C drive by following these steps: 1) Open File Explorer, 2) Right-click on your C drive, 3) Click on Format, 4) Select the File System, 5) Click on Start, and 6) Click on OK to confirm.

    Is it necessary to format my C drive after cloning to SSD?
    While it is not necessary to format your C drive after cloning to SSD, it is recommended as it helps optimize your SSD’s performance by removing all the previously installed programs and settings.

    Can I format my C drive directly from BIOS after cloning to SSD?
    No, you cannot format your C drive directly from BIOS after cloning to SSD. You need to boot into your Windows environment to format your C drive using File Explorer or any other third-party disk formatting tool.

  • SATA to USB: How to Transfer Your Data like a Pro!

    Have you ever found yourself in a situation where you needed to retrieve data from an old hard drive, but your computer no longer has a SATA port? Fear not, because a SATA to USB adapter can come to the rescue! In this complete guide, we will cover everything you need to know about SATA to USB adapters, including how to use them, what to look for when buying one, and some troubleshooting tips. But first, let’s start with the basics. What is a SATA to USB adapter? Simply put, it is a device that allows you to connect a hard drive or solid-state drive (SSD) with a SATA interface to your computer via USB.

    This is incredibly useful for anyone who wants to recover data from an old computer or upgrade their current one with a new SSD, without having to buy a new motherboard or computer altogether. One of the main benefits of using a SATA to USB adapter is that it provides a simple, plug-and-play solution for accessing files stored on an older hard drive. It can also be a fantastic tool for transferring large files quickly and easily, as USB

    0 supports data transfer speeds of up to 5 Gbps. While SATA to USB adapters are generally easy to use, it’s important to know what to look for when buying one. Some key factors to consider include compatibility with your hard drive, transfer speed, and portability.

    We’ll delve into these in more detail later in the guide, along with some important considerations when troubleshooting problems with your adapter. Overall, if you need a quick and easy way to access data stored on an old hard drive or upgrade your computer with a new SSD, a SATA to USB adapter could be just what you need. So, let’s dive in and discover how to use one!

    What is SATA?

    SATA, or Serial Advanced Technology Attachment, is a type of connector used to transfer data between hard drives and other storage devices. One common use for SATA is to connect a hard drive to a computer’s motherboard, allowing the computer to access data stored on the drive. However, sometimes you may need to transfer data from a SATA drive to another device, such as a laptop or tablet, that doesn’t have a SATA connector.

    That’s where a SATA to USB adapter comes in handy. This small device allows you to connect a SATA drive to a USB port, making it easy to transfer files between devices. So if you need to access data stored on a SATA hard drive, but don’t have a computer with a SATA connector, a SATA to USB adapter is a simple and affordable solution.

    Understanding the Basics of SATA Technology

    SATA, or Serial ATA, stands for Serial Advanced Technology Attachment. It is a type of storage interface that enables communication between a computer’s motherboard and internal hard drives or solid-state drives. Unlike its predecessor, IDE, SATA has a faster data transfer rate and supports larger storage capacities.

    SATA technology is widely used in modern desktops, laptops, gaming consoles, and other electronic devices that require reliable, high-speed data storage. SATA cables have a thin, flat design that makes them easy to route and manage within a computer case. Whether you’re building a new PC or upgrading an old one, understanding the basics of SATA technology is essential for choosing the right storage devices and optimizing your system’s performance.

    sata to usb

    SATA Compatibility and Versions

    SATA SATA stands for Serial Advanced Technology Attachment and is a type of interface used to connect storage devices such as hard drives and solid-state drives to a computer’s motherboard. It has become the standard interface for most modern storage devices and replaced the older IDE (Integrated Drive Electronics) interface. SATA has undergone several versions over the years, including SATA I, SATA II, and SATA III.

    Each new version has increased data transfer speeds, with SATA III being the current standard and capable of speeds up to 6 Gbps. SATA is an essential component of modern computing systems, enabling the fast and reliable transfer of data between storage devices and the computer’s processor. If you’re building or upgrading a computer, it’s essential to ensure that your storage devices and motherboard are compatible with the same version of SATA.

    Why You Need a SATA to USB Converter

    If you have ever needed to transfer data from an old hard drive to a new one without using a desktop computer, then you would appreciate the importance of owning a SATA to USB converter. A SATA to USB converter is a versatile tool that enables you to connect SATA hard drives to a USB port on your laptop or PC, allowing you to transfer files, images, or videos from the hard drive to your system. This tool comes in handy, especially when you have an old computer system, or you need to retrieve data from a damaged hard drive.

    With a SATA to USB converter, you can quickly and conveniently access the files on your hard drive without having to take your computer apart. They are easy to use, lightweight, and affordable, making them a must-have tool for anyone who works with computers. In summary, the SATA to USB converter is an essential tool that will save you time, energy, and money during data transfer operations.

    Benefits of Using a SATA to USB Converter

    A SATA to USB converter can be a game-changer for anyone who regularly works with external hard drives or wants to upgrade their computer’s storage capabilities. With this device, you can easily connect any SATA drive to your computer via USB, allowing for quick and efficient data transfer. The benefits of using a SATA to USB converter go beyond just convenience, however.

    For one, it saves you the cost of having to invest in an external hard drive, which can be expensive. It’s also much faster than other methods of data transfer, such as WiFi or Bluetooth. Plus, you can easily swap out different SATA drives without having to take apart your computer, making upgrades a breeze.

    In short, if you’re looking for an affordable, efficient way to manage your data, a SATA to USB converter is definitely the way to go.

    How to Choose the Best SATA to USB Converter for Your Needs

    If you’re dealing with old hard drives, SSDs, or need a way to connect your internal drives to your laptop or computer, you’ll need a SATA to USB converter. It’s necessary because SATA connections are internal interfaces, and therefore, you’ll need to convert them to USB to access them externally. But how do you choose the best SATA to USB converter for your needs? Firstly, make sure you know the type of drive you’ll be connecting.

    You have to ensure that the converter is compatible with the interface of your device and the type of drive you’ll be using. For example, if you need to connect a 5-inch SSD, you’ll need a converter with a SATA III interface.

    Secondly, consider the data transfer speed you’ll be working with. SATA III conversions offer the fastest speeds, while SATA II or I converters will allow slower transfer speeds. Lastly, consider the power needs of your drive.

    Some drives will require external power sources, while others will work with just the power from your USB connection. Overall, consider these factors and read reviews before you purchase to ensure you’re provided with the best converter for your data transfer needs.

    Popular Brands of SATA to USB Converters

    If you’re someone who frequently works with hard drives, then you must have heard of SATA to USB converters. These devices are incredibly useful when it comes to transferring data from a computer to an external hard drive. SATA to USB converters help in bridging the gap between the two devices, allowing you to access the contents of the hard drive on any other computer.

    Moreover, they also come in handy when salvaging data from an old or damaged hard drive. The process of salvaging data requires connecting the hard drive to a computer, and that’s where a SATA to USB converter comes in. Some popular brands of SATA to USB converters include Cable Matters, Sabrent, and StarTech.

    com. These brands are known for their reliability and ability to transfer data at high speeds.

    How to Use a SATA to USB Converter

    Connecting a hard drive to a computer can sometimes be a hassle, especially if you don’t have the right cable or interface. Fortunately, a SATA to USB converter makes it easy to hook up a hard disk drive or solid-state drive to your computer through a USB port. All you need to do is plug one end of the SATA cable into the hard drive and the other end into the converter, then connect the converter to your computer via USB.

    Once connected, you can use the converter to transfer data, retrieve important files, or even clone your hard drive. Just be sure to choose a high-quality SATA to USB converter that meets the requirements of your hard drive and provides reliable connectivity. With the right converter, you can effectively upgrade your computer’s storage capacity and your productivity.

    So, give it a try and enjoy the benefits of a faster and more spacious storage solution with the convenience of USB connectivity.

    Step-by-Step Guide for Connecting Your SATA Drive to USB

    If you’re looking to access files on an old SATA hard drive, or simply trying to transfer data to or from your computer, using a SATA to USB converter is an easy and convenient solution. To get started, you’ll need to connect the SATA drive to the converter with a SATA cable. Then, connect the converter to your computer using a USB cable.

    Once everything is connected, your computer should recognize the drive automatically, allowing you to transfer files or access data just like any other external storage device. Make sure to keep the SATA drive correctly formatted, and always practice safe removal before disconnecting it from your computer. With a SATA to USB converter, accessing old files or transferring data has never been easier!

    Troubleshooting Common Issues with SATA to USB Conversion

    Using a SATA to USB converter can be a great way to transfer data from an old hard drive to a new computer or to back up important files. However, like with any technology, there can be some common issues that arise. One of the most frustrating issues is when the converter doesn’t seem to be recognized by the computer.

    This could be due to a faulty cable or a problem with the converter itself. It’s important to check that the cable is securely connected and that the converter is properly inserted into the USB port. Another issue that can occur is when the speed of the transfer is slower than expected.

    This could be due to a number of reasons, including the age and condition of the hard drive, the speed of the USB port, or even the quality of the converter. To improve the transfer speed, it’s important to use a USB 0 port and to make sure the converter is of high quality.

    With these tips, troubleshooting common issues with SATA to USB conversion should be a breeze.

    Final Thoughts and Recommendations on SATA to USB

    In conclusion, utilizing a SATA to USB adapter can be an excellent way to access and transfer data from your hard drive to your computer or vice versa. These adapters often come in handy when upgrading or replacing hard drives, as you can easily transfer your data without having to start from scratch. When choosing an adapter, it’s essential to ensure it is compatible with your hard drive and computer.

    Also, purchasing an adapter that supports USB 0 will enhance the transfer speed and performance of your device significantly. Overall, SATA to USB adapters are a useful and efficient tool for any computer enthusiast or professional seeking to streamline their data management process.

    Conclusion

    So there you have it, the Sata to USB adapter – bridging the gap between two worlds and making data transfer a breeze. It’s like a marriage counselor for your hard drive and computer, keeping their connection strong and steady. With this handy little gadget, you can say goodbye to outdated technology and hello to seamless file sharing.

    The Sata to USB adapter: the hero we never knew we needed, but can’t imagine living without.”

    FAQs

    What is a SATA to USB adapter?
    A SATA to USB adapter is a device that allows you to connect a hard drive with a SATA interface to a computer or laptop through a USB port.

    Can I use a SATA to USB adapter to clone my hard drive?
    Yes, you can use a SATA to USB adapter to clone your hard drive. Simply connect the old drive to the adapter, connect the adapter to the new drive, and use cloning software to transfer the data.

    What is the maximum transfer speed for a SATA to USB adapter?
    The maximum transfer speed for a SATA to USB adapter depends on the version of USB and the speed of the hard drive. USB 2.0 has a maximum transfer speed of 480 Mbps, while USB 3.0 has a maximum transfer speed of 5 Gbps. SATA III hard drives can transfer data at up to 6 Gbps.

    Can I use a SATA to USB adapter to connect an SSD to my computer?
    Yes, you can use a SATA to USB adapter to connect an SSD (solid-state drive) to your computer. SATA is the interface used by most SSDs, so it should be compatible with the adapter. This is a great way to transfer data or use an SSD as an external drive.

  • Unveiling the truth: Do NVMe heatsinks really make a difference?

    When building a computer or upgrading its parts, it is easy to overlook the importance of proper cooling. One component that often goes without any additional cooling is the NVMe drive. However, with the increasing need for faster storage solutions, NVMe heatsinks are becoming a more common sight.

    But the question remains: are they necessary? Considering the fact that NVMe drives operate at much higher temperatures than their traditional SSD counterparts, the answer might seem obvious. The faster read and write speeds come at a cost of generating more heat, which can lead to thermal throttling and even drive failure. In addition, NVMe heatsinks can help dissipate the heat generated by the drive, leading to a longer lifespan and improved performance.

    But not all NVMe drives require heatsinks – some come with built-in cooling solutions that are sufficient for their needs. It is important to check the manufacturer’s specifications before investing in an additional heatsink. Furthermore, the placement and orientation of the NVMe slot on the motherboard can affect the effectiveness of the heatsink, and not all NVMe heatsinks are compatible with every motherboard.

    In conclusion, while NVMe heatsinks are not always necessary, they can provide a significant benefit to the performance and longevity of the drive. It is important to do research and consult the manufacturer’s specifications and compatibility before investing in one, but for high-performance systems, they are often a worthwhile addition.

    What are NVMe Heatsinks?

    Are NVMe heatsinks necessary? The answer is, it depends. If you are using your NVMe SSD for heavy workloads and prolonged operations, then a heatsink may help to dissipate the heat generated by your drive. However, for everyday use and casual gaming, a heatsink is not entirely necessary.

    NVMe heatsinks are designed to maintain optimal temperatures for the solid-state drive by increasing the surface area for heat to escape. They are especially helpful in computers with poor airflow that could cause your drive to overheat and throttle. Ultimately, the decision to install an NVMe heatsink should be based on your system’s needs and usage.

    If you do decide to install one, make sure that it fits your drive and doesn’t interfere with other components in your system.

    Description of NVMe Heatsinks

    NVMe heatsinks are specialized parts that help dissipate the heat generated by NVMe SSDs. They are designed to work with M.2 NVMe SSDs, which are commonly used in modern computers and gaming systems.

    These heatsinks are made from high-quality materials such as aluminum and copper, which have excellent thermal conductivity. They are also designed with fins or ridges that allow for maximum airflow and heat dissipation. By installing an NVMe heatsink, you can prolong the life of your NVMe SSD by ensuring it operates at optimal temperature levels.

    Plus, it can help avoid performance issues that might arise from overheating, data loss, and system crashes. NVMe heatsinks are easy to install and come in various shapes and sizes to fit different computer builds. Whether you are a gamer or a professional, adding an NVMe heatsink to your computer can be a great investment in better performance and reliability.

    are nvme heatsinks necessary

    Benefits of NVMe Heatsinks

    Are NVMe heatsinks necessary? The answer is yes, and it is mainly because of the benefits they offer. NVMe heatsinks help regulate the temperature of your NVMe drives and prevent overheating, which can lead to slower performance and decreased lifespan of the drive. A hot NVMe drive can cause read and write errors, potentially losing important data.

    With a heatsink installed, heat dissipation is improved, allowing the drive to maintain its highest performance level without throttling. Additionally, NVMe heatsinks can improve the aesthetics of your build. They come in various designs and colors, so you can choose one that matches the style of your build.

    Installing an NVMe heatsink is a simple and effective way to protect your NVMe drive and enhance your computer’s performance. So, if you want to ensure that your NVMe drive works optimally and lasts for years, investing in a heatsink is definitely worth considering.

    Better Performance

    NVMe heatsinks are becoming increasingly popular due to the fact that they offer a multitude of benefits, one of which is improved performance. By dissipating heat effectively, NVMe heatsinks can prevent thermal throttling, which can occur when a drive becomes too hot and thus slows down to prevent overheating. This means that with an NVMe heatsink, users can expect their drive to maintain high speeds consistently, improving overall system performance.

    In addition, an NVMe heatsink can also increase the lifespan of a drive by reducing the wear and tear caused by excess heat. With these benefits in mind, it’s no wonder that more and more users are opting for NVMe heatsinks to improve the performance and longevity of their storage drives.

    Longer Lifespan of SSD

    NVMe heatsinks can be an excellent investment for those looking to extend the lifespan of their SSDs. Standard M.2 SSDs used to heat up quickly due to their high-speed data transfer, leading to a shorter lifespan.

    However, with the implementation of NVMe heatsinks, the lifespan of these drives can increase by reducing their operating temperatures. The heatsinks work by absorbing the excess heat generated during the data transfer process, preventing the SSDs from getting heated up and extending their life. This not only ensures better performance but also saves money in the long run, as you won’t have to replace your SSD frequently.

    So, if you’re looking to invest in your SSD’s health, consider getting an NVMe heatsink!

    Prevent Throttling

    NVMe Heatsinks Throttling is a common issue that affects the performance and lifespan of NVMe SSDs due to their high-speed, low-latency capabilities. This may result in lower performance levels and increased wear and tear due to excessive heat. NVMe heatsinks are an effective solution for preventing throttling by dissipating heat away from your SSD, promoting better thermals and increasing overall durability.

    These little devices fit over your SSD and help prevent heat buildup which is crucial in maintaining optimal performance. By adding an NVMe heatsink to your SSD, you can minimize thermal throttling and ensure that your NVMe SSD is running at its highest possible performance levels by keeping everything cool, calm, and collected. Overall, adding an NVMe heatsink is a low-cost solution that can provide significant benefits for users looking to get the most out of their NVMe SSDs.

    When Are NVMe Heatsinks Necessary?

    Are NVMe heatsinks necessary? Well, it depends on a few factors. NVMe SSDs are capable of generating a substantial amount of heat during operation, and if the drive gets too hot, it can lead to performance throttling, error correction, and even data loss. So, if you are doing heavy and consistent tasks like gaming or video editing, it is recommended to have a heatsink installed to keep your NVMe SSD running at optimal performance and prolong its lifespan.

    Moreover, if your NVMe SSD comes without a factory-installed heatsink, it would be wise to consider purchasing one separately. However, if you use your computer for light tasks or browsing, and your NVMe SSD doesn’t struggle with overheating, then a heatsink may not be necessary. Overall, investing in a heatsink can offer additional protection for your NVMe SSD and improve your computer’s performance.

    High-Performance Tasks

    NVMe heatsinks When it comes to high-performance tasks, NVMe heatsinks can be necessary in certain situations. NVMe solid-state drives (SSDs) are becoming increasingly popular due to their lightning-fast speeds. However, with high speed comes high temperatures, which can lead to thermal throttling.

    This means that the SSD has to slow down to prevent overheating, resulting in lower performance. To prevent this, an NVMe heatsink can be applied to dissipate the heat and keep the SSD running at full speed. Generally, NVMe heatsinks are most useful for those using their SSD for intensive tasks like video editing or gaming.

    For the average user, it may not be necessary unless you are pushing your SSD to its limits. So, when deciding whether or not to install an NVMe heatsink, consider your usage and the tasks you will be performing on your SSD.

    Overclocking

    Overclocking, NVMe heatsinks Overclocking enthusiasts push their hardware to the limit, maximizing performance and speed. But when it comes to using NVMe storage devices, when are heatsinks necessary for optimal performance? The answer is, it depends on the hardware and use case. If you’re running intense workloads or frequently accessing large files, heatsinks can help dissipate heat and prevent throttling.

    Additionally, if your NVMe drive is installed in a cramped case with limited airflow, a heatsink can be beneficial. However, if you’re using your NVMe drive for everyday tasks like web browsing and emailing, a heatsink may not be necessary. Ultimately, it’s best to check your specific hardware specifications and usage scenarios to determine if a heatsink would be beneficial for overclocking your NVMe drive.

    Conclusion: Are NVMe Heatsinks Necessary?

    In conclusion, whether or not NVMe heatsinks are necessary depends on a few factors. If you’re running intensive workloads that involve sustained data transfers, then a heatsink can definitely help keep your SSD cool and prevent overheating. On the other hand, if you’re just using your SSD for everyday tasks like browsing the web, checking email, and streaming videos, chances are you won’t really need one.

    Ultimately, the decision to add a heatsink or not comes down to personal preference and the specific needs of your system. But if you really want to play it safe and ensure maximum performance and reliability from your NVMe SSD, a good heatsink is always a smart investment.”

    FAQs

    What is an NVMe heatsink?
    An NVMe heatsink is a piece of hardware that is designed to help improve the cooling of an NVMe SSD.

    Why might I need an NVMe heatsink?
    NVMe SSDs can run quite hot, particularly during heavy use, and an NVMe heatsink can help to dissipate that heat.

    Do I need to buy a specific NVMe heatsink for my SSD?
    It’s best to check with the manufacturer of your SSD to find out if they recommend a specific type of NVMe heatsink.

    How do I install an NVMe heatsink?
    Installing an NVMe heatsink is typically a straightforward process that involves attaching it to the top of your SSD using the adhesive pads that come with the heatsink.

    Will using an NVMe heatsink affect the performance of my SSD?
    In most cases, using an NVMe heatsink should not have a negative impact on the performance of your SSD. In fact, it may help to improve performance by allowing the SSD to operate at cooler temperatures.

  • Unleashing Lightning-Fast Speeds with M2 SATA: Your Ultimate Guide!

    Unleashing Lightning-Fast Speeds with M2 SATA: Your Ultimate Guide!

    If you’re building a new computer or upgrading an old one, you might come across the acronym M2 SATA. What is it, and what benefits does it offer compared to other storage solutions? M2 SATA is a type of solid-state drive (SSD) that connects directly to your motherboard. Unlike traditional hard drives, which use spinning disks to store data, SSDs use flash memory.

    This makes them faster, quieter, and more reliable. There are two common types of SSDs: SATA and NVMe. SATA SSDs use the same interface as traditional hard drives, while NVMe SSDs use a faster, more modern interface.

    M2 SATA is an M.2 form factor SSD that uses the SATA interface. So why choose M2 SATA over other SSD options? First and foremost, it’s often cheaper than NVMe SSDs, while still offering fast read and write speeds.

    It’s also a more compact solution, taking up less space inside your computer case. M2 SATA is a great choice for anyone who wants a fast, affordable SSD that doesn’t take up much space. Whether you’re building a gaming PC or just looking to upgrade your existing system, M2 SATA is definitely worth considering.

    What is M2 SATA?

    M2 SATA is a form factor for SSDs, which provides a smaller and more compact design than traditional 5-inch drives. M2 SATA drives use the SATA interface and provide fast read and write speeds, making them ideal for use in laptops, desktops, and other applications where space is limited.

    With their small size and high performance, M2 SATA drives are becoming increasingly popular in gaming rigs and other high-performance computing applications. If you’re looking for a fast, reliable, and compact storage solution for your computer or other device, an M2 SATA drive may be the right choice for you. So, the next time you upgrade your computer, consider switching to an M2 SATA drive and experience the benefits of this innovative form factor.

    M2 SATA: The Smaller and Faster Storage Option

    M2 SATA is a type of storage option that is smaller and faster than traditional SATA drives. It is a form of Solid State Drive (SSD) that connects directly to the motherboard of a computer, eliminating the need for cables. M2 SATA drives can offer speeds of up to 4 times faster than traditional hard drives, making them ideal for high-performance applications such as gaming, video editing, and data-intensive tasks.

    Unlike traditional hard drives, which use spinning disks to store data, M2 SATA drives use flash memory, which has no moving parts and is less prone to failure. This makes them more reliable, durable, and efficient than traditional hard drives. With their small form factor and high speeds, M2 SATA drives are becoming increasingly popular among computer enthusiasts and professionals who require fast and efficient storage solutions.

    So if you want to upgrade your computer’s storage, consider M2 SATA as a great option to consider.

    m2 sata

    Key Features of M2 SATA

    M2 SATA is a newer, faster interface for solid-state drives (SSDs) that uses the M.2 form factor. It uses the SATA III protocol to communicate with the computer’s motherboard, allowing for faster data transfer rates than traditional hard drives.

    One key feature of M2 SATA is its small size, which allows for it to be installed in tight spaces or laptops with limited space for storage. Another advantage is its faster transfer speeds, which can greatly improve overall system performance. M2 SATA SSDs can also be easily upgraded or replaced, allowing for future hardware upgrades.

    Overall, the M2 SATA interface is a great choice for those looking to upgrade their storage system with a faster, more efficient option.

    Benefits of M2 SATA

    M2 SATA is a revolutionary technology that can offer various benefits to its users. One of the most significant advantages is its incredibly fast read and write speeds, making it ideal for high-performance applications that require quick data processing. Its compact size also saves valuable space, making it perfect for laptops and other small form factor devices.

    Additionally, M2 SATA’s energy efficiency ensures longer battery life and reduced power consumption. It is also easy to install and maintain, making it an excellent option for both beginners and professionals. With its superior speed, size, and energy-efficiency, M2 SATA is undoubtedly an outstanding choice for anyone looking to upgrade their storage capabilities and optimize their system’s performance.

    Unmatched Speed and Performance

    If you’re looking for unmatched speed and performance from your SSD, then M2 SATA is the perfect choice for you. The benefits of M2 SATA are numerous and impressive, including lightning-fast data transfer speeds that can reach up to 6Gbps. This technology not only cuts down on load times but also offers a seamless experience for gaming and other high-performance tasks.

    With M2 SATA, you can be sure that you are getting the most out of your drive, making it an excellent choice for power users and enthusiasts alike. Additionally, M2 SATA drives don’t require any power or data cables, making them easy to install and manage. So, whether you’re looking to upgrade your gaming system or simply want to take advantage of faster load times, M2 SATA is the way to go.

    Compact and Space-Saving Design

    When searching for the perfect storage solution for your device, one of the benefits of M2 SATA is its compact and space-saving design. M2 SATA is designed to be small, lightweight, and portable, making it an ideal solution for slim laptops or devices with limited internal space. Its slim profile means you can save on space without sacrificing storage capacity, allowing you to store your essential files and media without any hassle.

    M2 SATA is also fast and reliable, allowing you to transfer data quickly and efficiently. Whether you are a student, professional, or content creator, M2 SATA is an excellent investment that will help you streamline your workflow and boost productivity. So, if you’re looking for an affordable, compact, and high-performance storage solution, M2 SATA is definitely worth considering.

    Advanced Technology and Durability

    When it comes to advanced technology and durability, M2 SATA is a game-changer. One of the most significant benefits of M2 SATA is speed. With faster read and write speeds, M2 SATA drives can handle more intensive data usage, making them perfect for gaming or graphic design.

    M2 SATA also has a longer lifespan than traditional hard drives, which means less chance of failure and more reliable performance over time. Additionally, M2 SATA SSDs are more power-efficient, which means less energy is needed to operate them. This translates to a more significant battery life for laptops and reduced energy consumption overall.

    Overall, the advanced technology and durability of M2 SATA offer numerous benefits that make it a superior choice for those in need of high performance and reliability.

    How to Install M2 SATA

    If you’re looking to upgrade your computer’s storage capacity, then installing an M2 SATA drive might be the perfect solution for you. The installation process is relatively straightforward, and can be done in a few simple steps. Firstly, you need to locate the M2 slot on your computer’s motherboard, which will usually be located near the PCIe slots.

    Once you’ve found the slot, you can insert your M2 SATA drive by carefully aligning it with the socket and gently pressing down until it clicks into place. Afterward, you should secure the M2 SATA drive in place with a screw or retainer clip provided with your storage device. Be sure to check your computer’s BIOS settings to ensure that your M2 SATA drive is recognized, and you’re all set! The beauty of using an M2 SATA drive is that it offers faster read and write speeds than standard mechanical hard drives, making it an excellent choice for gamers, content creators, and other professionals who require speedy access to their data.

    Step-by-Step Guide to Installing M2 SATA

    Installing M2 SATA If you’re looking to upgrade your computer, one of the easiest and most effective ways to do so is by installing a M2 SATA drive. This type of drive is incredibly fast and offers excellent storage performance over traditional hard disk drives (HDD). To install an M2 SATA drive, you need to first identify the M2 slot on your motherboard.

    Once you have located it, insert the M2 SATA drive into the slot at a 30-degree angle, ensuring that the notched side is aligned. Next, tighten the screw that holds the M2 SATA in place. After securing it, you will need to open the BIOS settings and set the M2 SATA as the primary boot device.

    Once completed, you can install your operating system on the new drive and enjoy its faster performance. Overall, installing an M2 SATA drive is a simple and effective way to upgrade your computer’s storage and speed up its performance.

    Compatibility and Requirements

    If you’re looking to install an M2 SATA, it’s important to check for compatibility and requirements beforehand. Firstly, ensure that your motherboard is equipped with an M2 slot. Most modern motherboards nowadays come with an M2 slot, but some older models might not have it.

    Additionally, check if your operating system supports M2 SSDs. Windows 10 and most Linux distributions natively support M2 SATA drives without additional drivers. Finally, make sure to choose the right type of M2 SATA drive based on your requirements.

    Consider factors such as storage capacity, read/write speeds, and endurance before making a purchase. By being mindful of these compatibility and requirement factors, you can ensure a smooth and hassle-free M2 SATA installation process.

    Conclusion: Why M2 SATA is the Future of Storage

    In conclusion, when it comes to storage solutions, the m2 SATA is a slick and speedy all-star player in the game. With its compact size and lightning-fast transfer rates, loading up your files and applications has never been smoother. It’s like having a Ferrari for your data.

    So, if you’re looking for a storage solution that’s both efficient and stylish, look no further than the m2 SATA. It’s the ultimate MVP for your digital storage needs!”

    FAQs

    What is an m2 SATA SSD?
    An m2 SATA SSD is a type of solid-state drive that utilizes the m2 form factor and the SATA interface for data transfer.

    What is the difference between m2 SATA and m2 NVMe?
    m2 SATA and m2 NVMe are both types of m2 SSDs, but they differ in terms of interface and performance. m2 SATA uses the SATA interface and is slower, while m2 NVMe uses the PCIe interface and is faster.

    Can I use an m2 SATA SSD with a motherboard that only supports m2 NVMe?
    Yes, as long as the motherboard has an m2 slot that supports both m2 SATA and m2 NVMe SSDs.

    What are the advantages of using an m2 SATA SSD?
    The advantages of using an m2 SATA SSD include faster boot and load times, lower power consumption, and a smaller form factor that allows for more efficient use of space in a computer case.