Author: David L. Lynn

  • Say Goodbye to Slow Loading Times: A Step-by-Step Guide on Switching from HDD to SSD

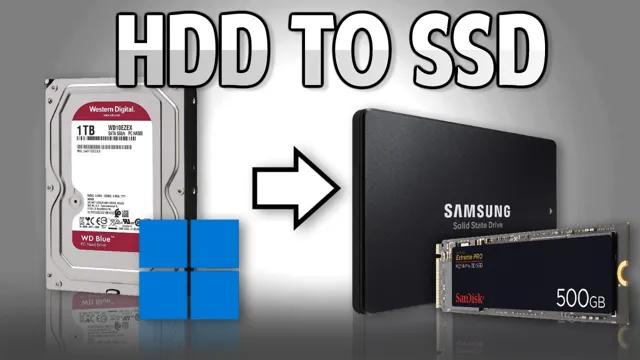
    Are you tired of your slow, outdated computer? Are you ready for a major upgrade that will drastically improve your device’s performance? Look no further than upgrading to an SSD. An SSD, or solid-state drive, is a storage device that uses flash memory to store data and has no moving parts. Unlike traditional hard disk drives, SSDs are faster, more reliable, and less likely to fail.

    Upgrading to an SSD may sound intimidating, but it’s actually a relatively simple process that can be done in just a few steps. In this step-by-step guide, we’ll break down the process and show you how to upgrade to an SSD yourself. From choosing the right SSD for your needs, to backing up your data and transferring it to your new drive, we’ll cover everything you need to know.

    So whether you’re a tech novice or a seasoned pro, follow our guide and you’ll be up and running on your new SSD in no time.

    Why upgrade to an SSD?

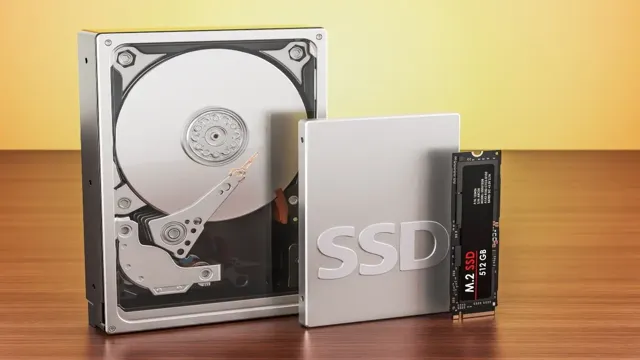
    Switching from an HDD to an SSD may seem daunting, but the benefits of upgrading make it worth the effort. An SSD, or solid-state drive, is faster and more durable than a traditional hard disk drive (HDD). Making the switch can lead to faster boot times, quicker application launch speeds and file transfers, and longer lifespan for your storage device.

    How do you switch from an HDD to an SSD? Firstly, you’ll need to choose an SSD that meets your needs in terms of size, speed, and capacity. Next, you’ll need to clone your existing HDD to the new SSD. To do this, you can use specialized software or take your computer to a professional.

    Once the cloning process is complete, you can swap out the HDD for the new SSD. If you’re not confident with opening up your computer, it’s best to consult a professional. Upgrading to an SSD can significantly improve your computer’s performance and extend the lifespan of your storage device, making it a smart investment for both personal and business use.

    The benefits of an SSD over an HDD

    Upgrading from a traditional HDD to an SSD can significantly improve the performance of your computer. The SSD, or solid-state drive, has no moving parts, meaning it can access and transfer data at much faster speeds than an HDD. This results in lightning-fast boot times and faster software launches, making your computing experience much more efficient.

    Not only that, but an SSD is also much more reliable, as there are no moving parts that can fail, so you don’t have to worry about losing your data. Additionally, SSDs consume less power than HDDs, which means your laptop’s battery life will be extended. In summary, upgrading to an SSD can provide faster load times, increased productivity, improved reliability, and longer battery life.

    So, if you’re looking to boost your computer’s performance, an SSD upgrade is definitely worth considering.
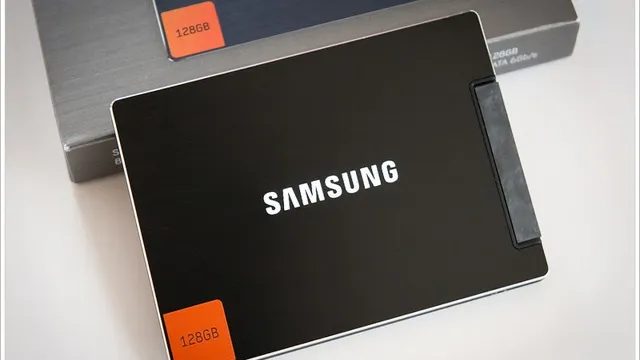
    how do i switch from an hdd to an ssd

    Prepare for the switch

    Switching from an HDD to an SSD can be a significant upgrade for your computer’s overall performance. But how do I switch from an HDD to an SSD? First, you need to back up all your important files and data to an external hard drive or cloud storage. Then, you’ll need to purchase a compatible SSD with the same form factor as your current HDD.

    You will also need a screwdriver to open up your computer and replace the hard drive. Once you’ve installed the new SSD, you can install your operating system and all your programs. If you’re not familiar with how to install an operating system, you can find step-by-step instructions online or have a professional do it for you.

    Keep in mind that the process may vary depending on your computer model, so it’s always a good idea to research specific instructions beforehand. Upgrading to an SSD can provide faster boot times, faster load times, and improved overall system performance, making it well worth the investment.

    Back up your data

    If you’re planning on switching devices or upgrading your computer, it’s important to prepare beforehand by backing up all your data. You wouldn’t want to lose all your important photos, documents, and files due to technical difficulties or errors during the switch. Backing up your data ensures that all your information is safe and easily accessible after the transition.

    You can choose to back up your data using an external hard drive, cloud storage, or even a USB drive. It’s important to take the time to carefully transfer your data to ensure a smooth and secure transition. Don’t let the fear of losing everything hold you back from upgrading your technology – just remember to back it up first!

    Create a bootable USB drive

    If you’re considering switching to a different operating system, you’ll need to create a bootable USB drive. This is a crucial step in preparing for the switch. Creating a bootable USB drive allows you to install the new operating system onto your computer easily.

    Plus, it gives you the flexibility to install the new OS on any computer you choose. To get started, you’ll need a USB drive that’s at least 8 GB in size and a reliable software program that can create a bootable drive. One popular option is Rufus, which is free to download and easy to use.

    Simply download and install the program, insert your USB drive, and follow the step-by-step instructions. Once you’ve created your bootable USB drive, you’re one step closer to making the switch to a new operating system. So, don’t hesitate–prepare for the switch today and create a bootable USB drive with ease!

    Install the SSD

    If you’re looking to upgrade your computer’s storage capacity or improve its performance, switching from an HDD to an SSD can be a great idea. Before starting, you’ll need to gather some tools like a screwdriver and a migration kit (if your SSD didn’t come with one). After power off your computer, you’ll need to open your computer case and locate the hard drive mounting bay.

    Unscrew the screws holding the HDD in place and remove it. Now, depending on your computer, you can insert the SSD into a separate bay or replace the HDD slot with the SSD. After placing the SSD, secure it with screws and then connect the SATA and power cables.

    Finally, power on your computer and go to the BIOS settings to make sure the new drive is detected. Once detected, you can boot your operating system, and if everything is working correctly, you should notice a significant improvement in speed and performance. Hence, by following the above process, you can easily switch from your old HDD to a new SSD, giving your computer a much-needed boost!

    Open your laptop or desktop

    So, you’ve decided to upgrade your laptop or desktop’s performance by installing an SSD. Great choice! The first step in this process is to open up your computer. Depending on the device, this could be a simple task or require a bit of finesse.

    It’s important to follow the manufacturer’s instructions carefully when doing so. Once your computer is open, locate the hard drive and remove it from the bay. Next, insert your new SSD into the same slot and secure it in place.

    Double-check that it’s secure before closing up your computer and powering it on. Congratulations, you’ve successfully installed your SSD! Watch as your computer boots up faster and runs applications more smoothly than ever before. Remember, before starting the installation process, make sure to back up any important data and research compatibility requirements for your specific device and SSD.

    By following these steps, you can have a faster, more efficient computer in no time. Happy upgrading!

    Remove the old HDD

    When upgrading your computer’s hard drive, the first step is to remove the old HDD. This can be a daunting task for some, but it’s actually quite simple. First, make sure to shut down your computer and unplug it from any power source.

    Next, open up your computer case and locate the old hard drive. You’ll need to carefully disconnect its cables and remove any screws or brackets holding it in place. Once you’ve done that, you can set it aside and begin the process of installing the new SSD.

    Remember to handle your old hard drive with care, as it may still contain important data or personal information that you need to preserve. With a little bit of patience and attention to detail, you’ll be able to remove the old HDD quickly and easily, and get started on your new and improved computer setup.

    Install the new SSD

    To install the SSD (solid-state drive), first, you need to turn off your computer and unplug it from the electrical outlet. Next, locate the hard drive bay inside your computer’s case. It’s usually on the side or bottom of the case and secured by screws.

    Remove the screws and slide out the old hard drive carefully, being mindful of any cables that may be connected to it. Then, insert the new SSD in the same position where the old hard drive was. Make sure it’s securely in place before screwing it back in.

    You’ll need to reconnect any cables that are attached to your old hard drive to your new SSD. Finally, turn on your computer and make sure it detects the new SSD. With the new SSD installed, your computer should boot up faster, and applications should open quicker.

    Congratulations, you’ve successfully installed a new SSD!

    Migrate your data

    If you’re looking to upgrade from a traditional HDD to an SSD, you’ll need to migrate your data from the old drive to the new one. There are several methods to do this, but the easiest way is to clone your current drive to the SSD using specialized software. This will create an exact copy of your current drive, including the operating system, applications, and data.

    You will need to connect both drives to your computer and ensure that there is enough space on the SSD to accommodate all your files. Once you’ve completed the cloning process, you can disconnect the old HDD and set the SSD as your primary drive. You’ll be amazed by the speed and performance boost you get from switching to an SSD.

    So, don’t be intimidated by the process, just follow the steps carefully, and you’ll be enjoying all the benefits of an SSD in no time.

    Clone your old drive

    If you’re upgrading to a new hard drive or SSD, you may be wondering how to move all your files and data over to the new drive. One option is to clone your old drive to your new one. This involves copying the entire contents of your old drive to the new one, so you won’t lose any files or data.

    However, it can be a bit complicated, so it’s important to do your research first. You’ll need to have a software program that can clone a hard drive, and you may need to purchase a new cable or adapter to connect the two drives. It’s also important to note that cloning a drive will overwrite the existing data on your new drive, so make sure you don’t have anything important on there that you haven’t backed up elsewhere.

    Overall, cloning your old drive can be a good option if you want to keep everything exactly as it was before on your new drive, but make sure you do it correctly with the right tools and precautions to avoid any data loss.

    Restore your data

    Are you worried about losing your important data when migrating to a new device or system? Fear not, as there are various methods to help you restore your data. One effective way is to transfer your data to an external storage device, like a USB flash drive or an external hard drive. This ensures that your data is safe and can be restored to your new device easily.

    Another option is to use cloud storage services like Google Drive or Dropbox. These services allow you to backup your data to the cloud, and you can access your files from anywhere, anytime. They also offer automatic syncing, so your files are always up to date.

    Additionally, consider using data migration software to transfer your data seamlessly from your old device to the new one. This software can move your files, folders, and settings in just a few clicks, making the migration process stress-free. With these options, you can confidently migrate your data without any worries of losing valuable information.

    Enjoy your new SSD!

    Switching from a traditional hard drive to a speedy solid-state drive (SSD) is an excellent way to breathe new life into your computer. The process may seem daunting, but it’s relatively straightforward. Start by backing up all of your important data to an external drive or cloud storage service to avoid losing any files during the transfer.

    Then, shut down your computer, unplug it, and remove the old hard drive. Replace it with the new SSD, secure it with screws, and reconnect all cables and power cords. Remember to install the operating system and necessary drivers on the new SSD.

    Once you’ve completed this step, you’ll notice a significant improvement in your computer’s overall speed and performance. Enjoy your new SSD!

    Conclusion

    In conclusion, the transition from an HDD to an SSD may seem daunting, but with a little patience and know-how, you can make the switch and never look back. Think of it like upgrading from a clunky station wagon to a sleek sports car – your computer will run faster, smoother, and with less noise. So say goodbye to those loading screens and hello to a fresh new start on your computer journey.

    It’s time to rev up those engines and switch to an SSD!”

    FAQs

    What are the benefits of switching from an HDD to an SSD?
    Switching from an HDD to an SSD can significantly improve the speed and performance of your computer. SSDs have no moving parts and can read and write data much faster than HDDs, leading to faster boot times, faster application launches, and quicker file transfers.

    What do I need to do to switch from an HDD to an SSD?
    To switch from an HDD to an SSD, you will need to clone your HDD onto the new SSD. You can do this using built-in software on your computer or using a third-party cloning tool. You will also need to physically replace the HDD with the new SSD in your computer.

    Can I switch from an HDD to an SSD on my laptop?
    Yes, you can switch from an HDD to an SSD on your laptop. In fact, upgrading to an SSD is one of the most effective ways to improve the performance and speed of your laptop. The process of switching from an HDD to an SSD on a laptop is similar to the process on a desktop computer.

    How much storage do I need on my SSD?
    The amount of storage you need on your SSD depends on your usage and needs. If you mainly use your computer for basic tasks like browsing the web, checking email, and working on documents, a smaller SSD (around 120GB) may suffice. However, if you have a lot of files, photos, or videos, or if you use your computer for gaming or video editing, a larger SSD (around 1TB or more) may be necessary.
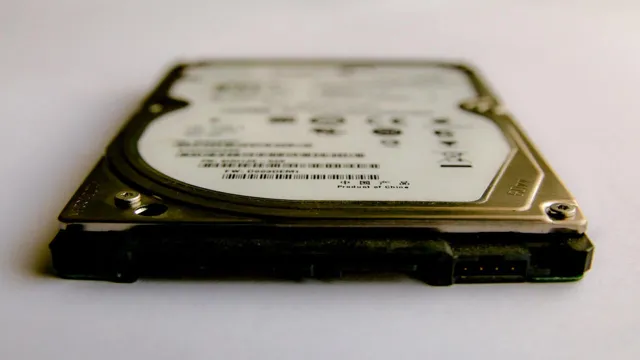
  • Recover Your Data with Ease: A Comprehensive Guide on How to Fix Corrupted SSD Drive

    Are you facing issues with your SSD drive and suspect that it may be corrupted? Well, don’t panic just yet. While it can be disheartening to experience data loss or difficulty accessing important files, there are ways to fix a corrupted SSD drive. Solid State Drives or SSDs are known for their speed and reliability.

    But just like any other type of storage device, SSDs can also suffer from data corruption due to various reasons such as power surges, system crashes, bad sectors, software or hardware failures, and more. When an SSD drive gets corrupted, you may experience errors, slower performance, or complete data loss. But the good news is that there are ways to fix a corrupted SSD drive without losing your data.

    Depending on the extent of corruption, you can try various methods ranging from simple checks to more advanced techniques like data recovery software or professional data recovery services. In this blog, we will guide you through the process of fixing a corrupted SSD drive, step-by-step. We will cover the common signs of a corrupted SSD drive, causes of corruption, and possible solutions to get your drive back to functioning normally.

    So, if you’re ready to learn how to fix a corrupted SSD drive and recover your valuable data, keep reading!

    Identifying the Problem

    Are you experiencing problems with your SSD drive? If your computer is behaving sluggishly or some of your data is inaccessible, it could be caused by a corrupted SSD drive. Fortunately, this is a fixable issue, and there are some things you can try to fix the problem before taking your SSD to a professional. One of the first things you should do is to diagnose the issue by running a diagnostic scan.

    This can help you identify the root cause of the corruption and give you an idea of what steps you need to take to repair it. Some SSD manufacturers provide diagnostic tools that you can download and use to test the drive’s health. Another potential solution is to perform a clean install of the operating system.

    This can help you eliminate software conflicts and other issues that may be contributing to the SSD’s corruption. Ultimately, if the drive is severely damaged, you may need to replace it, but these initial steps can help you get started with fixing your corrupted SSD drive.

    Symptoms of Corrupted SSD Drive

    When it comes to assessing the health of your computer’s SSD drive, there are several telltale signs that may indicate it’s time for a replacement. One of the most common symptoms of a corrupted SSD drive is slow performance, including sluggish boot times and lagging program launches. You may also notice that your computer crashes more frequently or freezes during operation.

    Additionally, files may start to become corrupted or disappear altogether, and you may experience difficulty accessing or saving data. If you suspect that your SSD drive is corrupted, it’s important to seek professional assistance to prevent any further damage or data loss. By pinpointing the problem early on, you can avoid costly repairs or even a complete system failure.

    So, if you’re noticing any of these warning signs, don’t hesitate to take action and get your SSD drive checked out.

    how to fix corrupted ssd drive

    Causes of SSD Corruption

    Identifying the Problem: Causes of SSD Corruption We’ve all experienced the frustration of losing important data due to storage device corruption. When it comes to SSDs, there are a myriad of potential causes for such corruption. The most common reason, though, is simply wear and tear.

    Over time, the cells that store data in an SSD can become more difficult to write to and read from, causing errors and eventual corruption. Another common cause is power surges or outages, which can disrupt the writing or reading of data and cause file system damage. Similarly, physical damage to the SSD, such as drops or impact, can also cause corruption.

    It’s important to identify the root cause of the corruption in order to prevent future data loss.

    Recovering Data from Corrupted SSD Drive

    If you’re experiencing issues with a corrupted SSD drive, don’t panic – there are ways to recover your data. First, try using repair tools provided by the manufacturer. These can usually be found on their website or in the software that came with the drive.

    If that doesn’t work, you can try connecting the SSD to another computer as a secondary drive and running data recovery software. Be sure to make a backup of any recovered files immediately, as the data may still be at risk. It’s important to note that some types of SSD corruption may be irreversible, so be sure to regularly backup your important data to avoid any potential loss.

    With some persistence and the right tools, you can usually recover data from a corrupted SSD drive.

    Backup Your Data

    Backing up your data is crucial to prevent data loss due to unforeseen circumstances such as a corrupted SSD drive. Recovering data from a failing or corrupt SSD drive can be a challenging task, and it is not always possible to recover all of your data. It is always best to have a backup in place to avoid data loss altogether.

    An SSD drive can become corrupted due to various reasons such as physical damage, power surges, sudden shutdowns, or software issues. When an SSD drive fails or becomes corrupt, it can become difficult to access or retrieve your data. However, several data recovery tools are available that can help you recover some or all of your data from the affected drive.

    It’s important to note that not all data on the drive may be recoverable, and the process can be time-consuming and expensive. To avoid data loss, you should backup your data regularly to an external hard drive or cloud storage. This way, even if your SSD drive becomes corrupt, you still have access to your data from the backup.

    It’s always best to have multiple backup copies in different locations to ensure maximum protection. Additionally, keep an eye out for signs of an SSD drive failure such as frequent crashes, slow performance or loud clicking sounds. If you do suspect a problem with your SSD drive, it’s best to seek professional help to diagnose and fix the issue before it’s too late.

    In summary, backing up your data is the best way to avoid data loss from a corrupt SSD drive. Invest in an external hard drive or cloud storage to create regular backups and keep an eye out for signs of failure. Don’t wait until it’s too late, protect your precious data today!

    Use a Data Recovery Tool

    If you have a corrupted SSD drive, using a data recovery tool may be your best bet to retrieve your lost data. These tools are designed to work with specific file systems and can scan your drive thoroughly to locate and recover data that is still intact. While there are many data recovery tools available online, it’s important to choose one that’s reputable and has good customer reviews.

    Some of the best data recovery tools include EaseUS Data Recovery, Recuva, and Stellar Data Recovery. Once you’ve downloaded and installed the software, follow the instructions provided to scan your drive and recover any lost data. Remember to save any recovered files to a different drive to avoid overwriting any other lost data.

    With a reliable data recovery tool and some patience, you can recover data from your corrupted SSD drive and get back to using it as normal.

    Fixing Corrupted SSD Drive

    If you’re dealing with a corrupted SSD drive, don’t worry. You can fix it yourself without much hassle! First, try running the Error Checking tool that comes with Windows. This tool will scan the drive for errors and fix any it finds.

    If that doesn’t work, try using a program like CrystalDiskInfo to identify any problems with the drive. If you’re still having trouble, you may need to update the firmware for your drive. Check the manufacturer’s website for instructions on how to do this.

    In extreme cases, you may need to format the drive and reinstall your operating system. Remember to back up any important data before doing this! By following these steps, you can easily fix a corrupted SSD drive and get back to using your computer.

    Check for Errors in Windows

    SSD Drive A corrupted SSD drive can cause a lot of problems and headaches for computer users. Thankfully, there are ways to fix it. One method is to check the drive for errors in Windows.

    To do this, open File Explorer and right-click on the SSD drive. Select “Properties” from the drop-down menu, then click on the “Tools” tab. From there, click on “Check” under the “Error checking” section.

    Windows will then scan the drive for errors and fix them if any are found. It’s important to note that this process may take some time, depending on the size of the drive and how many errors need to be fixed. But once it’s done, the SSD drive should work properly again.

    Update SSD Firmware

    If your SSD drive suddenly stops working or begins to have issues, it may be due to corrupted firmware. Firmware plays a crucial role in the functioning of the drive, and over time, it may become outdated or unstable. In such cases, updating your SSD firmware can often solve the problem.

    Updating the firmware can help fix bugs, improve performance, add new features, and increase the lifespan of the drive. However, it is important to be careful when updating the firmware, as a mistake can cause irreversible damage to the drive. As such, it is recommended to follow the manufacturer’s instructions or seek assistance from a professional.

    Keeping your SSD firmware up to date can ensure that your drive functions smoothly and efficiently for years to come.

    Run CHKDSK Command

    If your SSD drive is acting up and you suspect data corruption, running a CHKDSK command may fix the issue. CHKDSK, short for “check disk,” is a built-in Windows tool that scans your drive for any bad sectors and attempts to recover any readable information. To run CHKDSK, right-click on your SSD drive in File Explorer, then go to Properties > Tools > Check.

    Select “Scan and repair drive” and let the tool do its work. Be patient, as this process can take some time depending on the size of your drive and the state of its health. CHKDSK may not always solve your issue, and in severe cases, you may need to back up your data and replace your SSD drive.

    However, it’s worth a try before taking more drastic measures.

    Preventing Future SSD Corruption

    If you’ve ever experienced a corrupted SSD drive, you know how frustrating and worrisome it can be. Not only can you potentially lose important data, but the cost of replacing an SSD drive can be quite expensive. Luckily, there are steps you can take to prevent future SSD corruption.

    First and foremost, it’s important to regularly backup your important files. This way, even if your SSD drive does become corrupted, you won’t lose everything. Additionally, you can try updating your SSD’s firmware or using disk repair software to fix any potential issues before they cause problems.

    Just as importantly, you should always properly shut down your computer or device rather than simply powering it off – this can help prevent corruption from occurring in the first place. With these steps in mind, you can help ensure that your SSD drive stays in top shape for as long as possible.

    Conclusion

    If all else fails in trying to revive your corrupted SSD drive, fear not my friend! Take a deep breath, grab a hammer, and proceed to smash the device into a million tiny pieces. Not only will you feel an extreme sense of satisfaction, but you’ll also have effectively fixed the problem by destroying it completely. Sometimes, the most clever solution is the simplest one.

    FAQs

    What are the common signs of a corrupted SSD drive?
    Common signs of a corrupted SSD drive include slower performance, random errors, system crashes, and data loss.

    How can I fix my corrupted SSD drive?
    You can try using disk repair tools, such as CHKDSK, SFC, and DISM, to fix your corrupted SSD drive. Alternatively, you can try formatting the drive, reinstalling the operating system, or consulting a professional data recovery service.

    What causes SSD drives to become corrupted?
    SSD drives can become corrupted due to physical damage, manufacturing defects, outdated firmware, power surges, malware infections, or file system errors.

    Can I prevent my SSD drive from becoming corrupted?
    Yes, you can prevent your SSD drive from becoming corrupted by updating its firmware regularly, using surge protectors, avoiding sudden power outages, and backing up your data regularly. Additionally, you can avoid exposing your SSD drive to extreme temperatures and physical shocks.

  • Supercharge Your Gaming Experience: Ultimate Guide to Lightning Fast Transfer of Games from HDD to SSD on Steam

    Do you find that your beloved gaming library is getting too heavy for the old hard disk drive (HDD) that you’ve been using for years? Are you experiencing slow load times or stuttering performance? If so, it might be time to transfer some of your favorite games over to a new solid-state drive (SSD) on Steam. Not only will it free up some space on your HDD, but it can also significantly decrease loading times and improve overall game performance. Think of it like moving from a cramped apartment to a spacious new home – except for your games.

    In this blog, we’ll walk you through the steps to move games from your HDD to an SSD on Steam, so you can get back to playing your favorite games with ease.

    Check the Storage Devices

    If you want to improve your gaming experience, it’s important to check your storage devices. Moving your game from a hard disk drive (HDD) to a solid-state drive (SSD) can significantly increase your loading times and reduce stuttering in-game. But how fast should you move the game from HDD to SSD on Steam? This largely depends on the size of the game and the speed of your SSD.

    For larger games, it may take a bit longer to transfer, but the payoff in smoother gameplay is worth it. When transferring games, it’s also important to make sure that your SSD has enough space to accommodate the game. Steam will automatically detect the new location of the game and update it accordingly, so there’s no need to worry about losing any progress.

    Overall, if you’re looking to take your gaming setup to the next level, transferring your games to an SSD is a simple and effective solution.

    Make sure your HDD and SSD are properly connected and recognized

    When your computer is not functioning properly, it is important to check that your hard disk drive (HDD) and solid-state drive (SSD) are properly connected and recognized. To begin with, you need to physically check if both devices are properly connected to the motherboard. Make sure that the SATA cables and power connectors are properly connected.

    After that, access the BIOS setup utility and check if the drives are detected by the system. If they are not, then you need to troubleshoot the problem. One possible reason is that the drives are not properly formatted.

    In such a case, you need to format the drives using Windows Disk Management tool. Alternatively, your drives might have been damaged. Whatever the reason may be, make sure you take the necessary steps to ensure that your HDD and SSD are properly connected and functioning well.

    This will not only optimize your computer’s performance but also prevent any potential data loss in the future.

    how fast to move game from hdd to ssd steam

    Create a Backup

    If you’re wondering how fast to move a game from your HDD to your SSD on Steam, there are a few things you should consider. First and foremost, you’ll want to be sure that you create a backup of your game before transferring it. This will ensure that you don’t lose any progress or data in the process, should anything go wrong.

    Once you have a backup in place, you can begin the transfer process. The speed at which you can move a game will depend on a variety of factors, including the size of the game, the speed of your internet connection, and the overall speed of your computer. Generally speaking, transferring a game from an HDD to an SSD can take anywhere from a few minutes to an hour or more, depending on these factors.

    However, the improved performance and load times that come with running games from an SSD are well worth the effort. So, if you’re looking to improve your gaming experience, don’t be afraid to make the switch!

    To avoid any data loss, create a backup of your game files on the HDD

    Creating a backup of your game files on the HDD is an essential step to avoid any data loss. Losing your game progress due to system crashes, viruses, or any other unforeseen circumstances can be frustrating and heartbreaking. Therefore, it is crucial to take precautions and create a backup of your game files on an external hard drive or a cloud storage service.

    This way, you can restore your game progress even if your system is entirely wiped out. Creating a backup is not a complicated process; all you need to do is navigate to your game folder, select the files you want to backup, and copy them to the external storage device. Also, remember to update your backup regularly to avoid losing any new progress you make in your game.

    By creating a backup of your game files, you can rest easy knowing that your game progress and achievements are never at risk of loss.

    Open Steam Settings

    If you’re looking to move a game from your HDD to your SSD in Steam, the process is relatively easy. The first step is to open Steam Settings by clicking on the “Steam” button in the top left corner of your screen and selecting “Settings” from the drop-down menu. From there, you’ll want to click on the “Downloads” tab and then select “Steam Library Folders.

    ” This will bring up a list of all the folders where games are stored on your computer. Simply select the game you want to move, click on “Move Folder,” and then choose the location on your SSD where you want to move it. Keep in mind that depending on the size of the game and the speed of your SSD, it may take anywhere from a few minutes to several hours for the move to complete.

    So, how fast can you move a game from your HDD to your SSD in Steam? That depends on a variety of factors, including the size of the game and the speed of your SSD. Generally speaking, however, moving a game from an HDD to an SSD can significantly improve loading times and overall performance, making it well worth the effort.

    Go to the Downloads tab and select ‘Steam Library Folders’

    If you’re a gamer who loves playing games on Steam, chances are you’ve encountered the need to manage your game library at some point. This is where Steam Library Folders come in – they allow you to create and organize your game library on external drives or other storage locations. To access this feature, simply open Steam Settings and go to the Downloads tab, then select “Steam Library Folders.

    ” From there, you can create new folders, move existing ones, or delete folders as needed. This is especially useful if you have a lot of games and limited storage on your PC or want to separate large games from smaller ones for organizational purposes. So if you haven’t explored Steam Library Folders yet, give it a try and take your gaming organization to the next level!

    Click ‘Add Library Folder’ to add your SSD as a new library folder

    If you’re an avid gamer with a growing Steam library, you may find that your computer’s hard drive is running out of space. Fortunately, Steam has an option to add a new library folder to a different drive, such as your SSD. To get started, open Steam and go to the Settings menu.

    From there, click on the “Downloads” tab and then click “Add Library Folder.” Next, select the location on your SSD where you want to create the new library folder and give it a name. Your SSD will now be set up as a new library folder, and any new games you download can be saved there.

    This will free up valuable space on your main hard drive and improve your gaming experience by reducing loading times and increasing your computer’s overall performance. So, go ahead and give it a try – your hard drive (and your games) will thank you!

    Move the Game Files

    If you’re an avid gamer, you probably know the value of moving your game files from a HDD to an SSD. Doing so can drastically increase the speed and performance of your favorite games. But, how fast can you actually move your game files from your HDD to your SSD in Steam? The time it takes will depend on several factors, including the size of the game and the transfer speed of your hardware.

    Generally, it should take anywhere between 10 minutes to an hour or more to move a game from your HDD to an SSD in Steam, but it all depends on the variables involved. If you’re looking for the fastest way to move your game files, consider using a dedicated software tool that can automate the process and ensure that nothing gets lost or corrupted during the transfer. All in all, with the right hardware and tools at your disposal, moving your game files from an HDD to an SSD in Steam can be a quick and easy process that’s well worth the effort.

    Go to your Steam Library and right-click on the game you want to transfer

    If you’re looking to move the game files of a Steam game from one drive to another, it’s actually a pretty easy process. All you have to do is go to your Steam Library and right-click on the game you want to transfer. From there, select “Properties” and then click on the “Local Files” tab.

    Next, click on the “Move Install Folder” button and choose the new location where you want the game files to be moved to. Once you’ve selected the new location, click “Move Folder” and Steam will start the transfer process. This method can save you a lot of time and hassle, especially if you’re trying to free up space on your computer or if you have a faster or larger drive that you want to use for your games.

    So next time you need to move your Steam game files, remember these simple steps and you’ll be up and running in no time!

    Select ‘Properties’ and then click on the ‘Local Files’ tab

    Moving game files may seem like a daunting task at first, but with a few simple steps, you can save yourself a lot of hassle and free up valuable storage space. One way to easily move game files is by accessing the “Properties” menu within your game’s library. To do this, simply right-click on the game in question, select “Properties,” and then click on the “Local Files” tab.

    From there, you can choose to move the game’s files to a new location on your computer’s hard drive or an external storage device. This not only helps with organization but can also speed up loading times and improve overall performance. By taking the time to move your game files, you’ll be able to enjoy your favorite games without any unnecessary lag or disruptions.

    So why not give it a try and see the difference for yourself?

    Click on ‘Move Install Folder’ and select your SSD as the new destination

    Moving game files from your computer’s hard drive to an SSD can be a game-changer in terms of loading speeds and overall performance. Fortunately, the process is straightforward and easy to manage. To begin, you’ll need to navigate to your game’s settings and find the “Move Install Folder” option.

    From there, choose your SSD as the new destination for your game files, and the transfer will commence. The process might take some time, depending on the size of your game and the speed of your SSD, but it’s worth the wait. The benefits of a faster loading time and improved performance are sure to enhance your gaming experience.

    So, don’t hesitate any longer! Click on “Move Install Folder,” choose your SSD, and let the process begin. You’ll be amazed at how much smoother your gameplay will become in no time!

    Wait for the Transfer

    When it comes to transferring games from an HDD to an SSD on Steam, it’s important to exercise patience and wait for the transfer to complete before playing the game. Depending on the size of the game and the speed of your equipment, the transfer can take anywhere from a few minutes to a few hours. It can be tempting to start playing as soon as the transfer begins, but this can lead to errors and interruptions that can slow down or even cancel the transfer altogether.

    Instead, take a break and allow the transfer to complete without any distractions or unnecessary activities. This will ensure that your game is properly installed on the SSD and ready for seamless, speedy gameplay. So, be patient and let your transfer complete efficiently to avoid any problems or delays in your gaming experience.

    Depending on the size of the game and the speed of your SSD, the transfer may take a few minutes to a few hours.

    If you’re transferring a game to an SSD, it’s important to be patient and wait for the transfer to complete. Depending on the size of the game and the speed of your SSD, the transfer may take anywhere from a few minutes to a few hours. It can be tempting to try and speed up the process by interrupting the transfer or attempting to use your computer for other tasks while it’s working, but this can actually slow down the transfer and cause errors.

    Instead, try to find something else to do while you wait, like taking a walk or catching up on some reading. By giving the transfer plenty of time to complete without interruption, you’ll ensure that the game runs smoothly and efficiently on your SSD. So sit back, relax, and let the transfer do its thing.

    Final Thoughts

    If you’re wondering how fast to move a game from HDD to SSD on Steam, the speed will depend on the size of the game and the speed of your SSD and HDD. However, in general, moving a game from an HDD to an SSD on Steam will significantly increase the loading times and performance of the game. This is because SSDs are faster at reading and writing data than HDDs, which means games stored on an SSD will load and respond faster.

    Moving games from an HDD to an SSD is simple, and you can do it through Steam or by manually moving the game files. It’s essential to note that while SSDs are faster, they’re also generally more expensive per gigabyte than traditional HDDs. So if you have limited storage space on your SSD, it’s best to prioritize the games you play frequently and leave the rest on your HDD.

    Moving games from HDD to SSD on Steam is a simple process that can greatly improve your gaming experience.

    Moving games from HDD to SSD on Steam is a simple process that every gamer should know about. If you’re someone who wants to experience gaming at its best, then you must have an SSD. It is faster, more reliable, and makes your games load quicker.

    Moreover, the process of moving games from HDD to SSD is straightforward, as Steam allows you to transfer game files easily. All you need to do is right-click on the game in your Steam library, select Properties, then go to the Local Files tab, and click the “Move Install Folder” button. This will allow you to choose the destination folder, which can be your SSD.

    Once the game has moved, you’ll see a significant impact on your gaming experience. Everything from loading times to in-game performance will see a massive boost. So, if you’re still using an HDD for your games, it’s time to consider moving to an SSD; your gaming experience will thank you for it!

    Conclusion

    In the world of gaming, speed is key. Moving your favorite games from your HDD to an SSD can provide lightning-fast load times and a truly immersive experience. But just how fast should you move your games? The answer, my friend, is faster than Sonic the Hedgehog running towards a chili dog stand.

    So, grab your SSD and get ready to experience gaming at warp speed!”

    FAQs

    What is the difference between installing a game on an HDD and an SSD?
    The main difference is speed. SSDs can load and access data much faster than HDDs, resulting in faster game load times and smoother gameplay.

    How long does it take to transfer a game from an HDD to an SSD on Steam?
    The time it takes to transfer a game from an HDD to an SSD on Steam depends on the size of the game and the speed of your SSD. Generally, it can take anywhere from a few minutes to an hour.

    Can you play a game while it is being transferred from an HDD to an SSD on Steam?
    No, you cannot play a game while it is being transferred from an HDD to an SSD on Steam. You will need to wait until the transfer is complete before launching the game.

    Do all games benefit from being installed on an SSD instead of an HDD on Steam?
    Yes, all games can benefit from being installed on an SSD instead of an HDD on Steam. However, the degree of improvement will vary depending on the game and the speed of your SSD. Games with longer load times and frequent loading screens will see the most significant improvement in performance.

    Do you need to reinstall a game after transferring it from an HDD to an SSD on Steam?
    No, you do not need to reinstall a game after transferring it from an HDD to an SSD on Steam. Simply copy the game files over to the SSD and use the “Verify Integrity of Game Files” option in Steam to ensure that everything is in order.

  • Unlock the Speed: A Comprehensive Guide on How to Format M.2 SSD

    Have you recently purchased an M2 SSD and need to format it? Formatting your M2 SSD may seem daunting, but with the right steps, it’s actually a simple process. Just like with any SSD, formatting wipes all your data and starts anew. But there are additional steps you’ll need to take when formatting an M2 SSD.

    Don’t worry; we’ve got you covered. In this blog post, we’ll explain everything you need to know about how to format your M2 SSD. We’ll cover the necessary prep work, like backing up your data and creating a bootable USB drive.

    We’ll also go over the specific steps you need to take to format your M2 SSD, like initializing it in Disk Management and selecting the right file system. Whether you’re formatting your M2 SSD for the first time or just need a refresher, this guide has everything you need. So let’s get started and make sure your M2 SSD is working at its full potential.

    Understanding M2 SSDs

    If you’re looking to format your M2 SSD, you’re in luck because the process isn’t as complicated as you might think! First, you’ll need to make sure your M2 SSD is properly connected to your computer. Once that’s done, you can format the drive by going to the “Disk Management” section of your computer’s settings. From there, you can find your M2 SSD, right-click on it, and select “Format.

    ” Keep in mind that formatting your M2 SSD will erase all of the data on the drive, so be sure to back up any important files before beginning the process. Additionally, you may need to install drivers or firmware updates for your M2 SSD before it can be properly recognized by your computer. With a little bit of know-how, formatting your M2 SSD can be a breeze!

    What is M2 SSD?

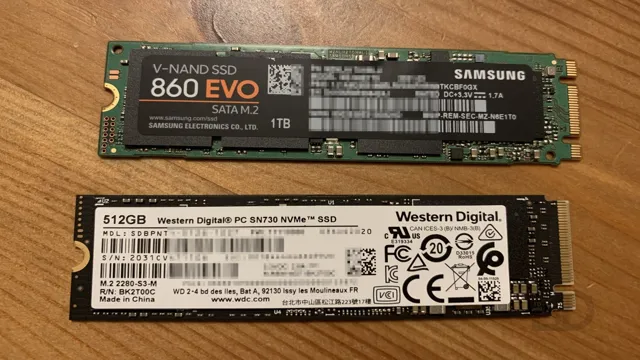
    M2 SSDs are a type of solid-state drive that use the M.2 interface for connectivity, which is a small, rectangular slot found on newer motherboards. They typically offer faster speeds and higher capacities than traditional hard drives, making them ideal for use as a primary storage device in desktops, laptops, and even some high-end smartphones.

    M2 SSDs come in different sizes, including 2242, 2260, and 2280, with the last being the most common. They also come in different forms, including SATA, NVMe, and PCIe, which determine the interface speed, compatibility, and performance. Overall, M2 SSDs offer several significant advantages over traditional hard drives, including faster boot and load times, lower power consumption, and improved durability.

    If you’re looking to upgrade your system’s storage performance, an M2 SSD might be just what you need.

    how to format m2 ssd

    Advantages of M2 SSD

    M2 SSDs are the latest and greatest when it comes to improving the storage capabilities of your computer. They are incredibly fast and efficient, with read and write speeds that blow traditional hard drives out of the water. In fact, M2 SSDs can be up to 5 times faster than regular hard drives! This means that you’ll be able to load programs and files almost instantly, which can save you loads of time in the long run.

    Another advantage of M2 SSDs is that they take up very little space in your computer. They are much smaller than traditional hard drives, which means that you’ll have more room for other components like graphics cards and cooling systems. Plus, because they are so compact, they are also much easier to install and remove from your computer.

    All in all, M2 SSDs are a game-changer for anyone who wants to improve the performance of their computer.

    Types of M2 SSD

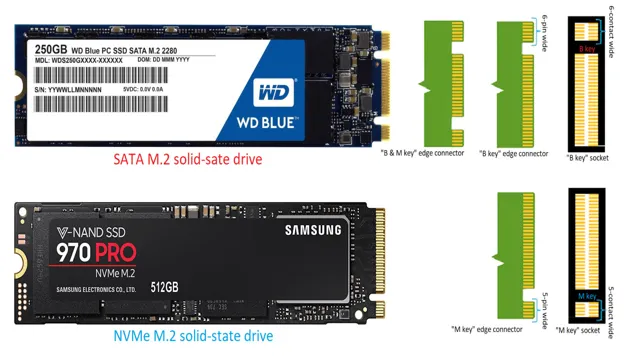
    M2 SSD M2 SSDs come in a variety of types, each with its own advantages and disadvantages. One major difference is between SATA and NVMe M2 SSDs. Like regular SATA SSDs, SATA M2 SSDs work via the SATA interface and provide similar speeds.

    NVMe M2 SSDs, on the other hand, utilize a PCIe interface and are much faster. Another difference between M2 SSDs is their keying. M2 SSDs can have either a B key or an M key, and some can even have both.

    A B key SSD will only fit into a B key slot, while an M key SSD will only fit into an M key slot. If a SSD has both a B and M key, it is known as a B&M key SSD, and can fit into both types of slots. It’s important to make sure that your motherboard has the correct key slot for the M2 SSD you plan to use, as well as the correct type of interface.

    By understanding the different types of M2 SSDs, you can choose the one that’s right for your needs and upgrade to lightning-fast storage.

    Preparing for Formatting

    If you want to format your M.2 SSD drive, it’s worth taking a few steps to prepare beforehand. Start by backing up any data you want to keep, as formatting will erase everything on the drive.

    Next, make sure you have the necessary tools and software. Most operating systems have built-in tools for formatting drives, so check in your system settings to see what’s available. If you need more advanced formatting options, consider downloading third-party software designed specifically for formatting SSDs.

    Once you have everything you need, it’s time to start the formatting process. Follow the instructions carefully, and be patient – formatting can take some time, especially for larger drives. With a little preparation and care, you can easily format your M.

    2 SSD and get it ready for your next project.

    Back-up your important data

    When it’s time to format your computer, it’s crucial to prepare beforehand. One essential step is to back up your important data. Losing files like family photos, important documents, or work projects can be heartbreaking, so it’s best to create a backup before proceeding.

    You can choose to back up your data to an external hard drive, USB drive, or cloud storage service. Each option has its pros and cons, depending on your preferences and the amount of data you need to save. External hard drives offer high storage capacity but can be bulky and vulnerable to physical damage.

    USB drives are portable and convenient but may not have enough storage space. Meanwhile, cloud storage services need an internet connection to access your files, but they offer the flexibility and security of saving your data online. Whatever method you choose, make sure to test your backup and verify that all your important files are securely saved.

    By doing so, you can have peace of mind when formatting your computer and avoid the risk of losing your valuable data.

    Creating a bootable USB drive

    Preparing a bootable USB drive is not as complicated as it may seem, but it requires some preparation to avoid any mishaps during the formatting process. First and foremost, ensure that all important files are backed up before proceeding with the formatting process. This is crucial because the formatting of the USB drive will erase all the data stored on it.

    Next, make sure that the USB drive is plugged into a compatible device and is recognized by the system. In addition, ensure that the USB drive has enough storage capacity to host the operating system or software you plan on using. Once these preparations are complete, you’re ready to move ahead with formatting the USB drive.

    Formatting M2 SSD on Windows

    Formatting an M2 SSD on Windows can be a bit daunting, but don’t worry, it’s not as complicated as you might think. First, determine if your M2 SSD is your primary drive or simply a secondary drive for storage. If it’s your primary drive, you’ll want to start by creating a bootable USB drive with Windows installation media.

    Once you’ve booted from the USB drive, select the M2 SSD drive and proceed with the installation process. If your M2 SSD is just for storage, the formatting process is relatively simple. First, open Disk Management by right-clicking on the Start menu and selecting “Disk Management.

    ” Next, locate the M2 SSD drive and right-click on it, then select “Format.” A window will pop up asking for the formatting options, such as file system and allocation unit size. Select your options, then click “OK.

    ” It’s important to note that formatting your M2 SSD will erase all data on the drive, so be sure to back up any important files beforehand. Additionally, make sure to select the correct drive when formatting to avoid accidentally wiping the wrong one. With these precautions in mind, formatting your M2 SSD should be a breeze.

    Using Disk Management tool

    If you have recently purchased an M2 SSD and need to format it on Windows, the Disk Management tool is an excellent option to use. It’s a built-in tool in Windows that allows you to manage your computer’s disks, including formatting and partitioning them. To format the M2 SSD, first, you need to connect it to your computer and open Disk Management by right-clicking on the Windows button and selecting “Disk Management.

    ” Once you’re in Disk Management, find the M2 SSD in the list of drives, right-click on it, and select “Format.” Follow the prompts to choose the file system, allocation unit size, volume label, and other formatting options. Click “OK” to proceed with the formatting, and wait for it to complete.

    Remember that formatting your M2 SSD will delete all data on it, so be sure to back up any files you need to keep. With the Disk Management tool, formatting an M2 SSD on Windows is quick and straightforward, so you’ll be up and running in no time.

    Using Command Prompt

    Formatting an M2 SSD on Windows can be done using Command Prompt. It’s an incredibly useful tool for those who want to do things faster and more efficiently. However, not everyone is familiar with how to use Command Prompt, and it can be intimidating at first.

    But fear not, because with just a few simple commands, you can format your M2 SSD in no time. First, you need to open Command Prompt as an administrator. Then, type in “diskpart” and press Enter.

    This will bring up the DiskPart command-line utility. Next, you need to type in “list disk” and press Enter. This will show you a list of all the disks connected to your computer.

    Once you have identified your M2 SSD, type in “select disk X” (replace X with the number of your M2 SSD) and press Enter. Finally, type in “clean” and press Enter to wipe all data on the disk, followed by “create partition primary” and press Enter to create a new primary partition. And that’s it! You have successfully formatted your M2 SSD using Command Prompt.

    Formatting M2 SSD on Mac

    If you are wondering how to format M2 SSD on Mac, you have come to the right place. Formatting a drive can be intimidating, especially for those who are not tech-savvy. But don’t worry, it is not as complicated as it may seem.

    The first step is to connect your M2 SSD to your Mac using a compatible adapter. Then, open the Disk Utility application, which can be found in your Mac’s Utilities folder. Select the M2 drive from the list of drives on the left side of the screen and click on the “Erase” button.

    Choose the file system format you prefer, such as macOS Extended (Journaled), and give your drive a name. Finally, click on “Erase” again to begin the formatting process. You may need to wait a few minutes, depending on the size of your drive.

    Once the process is complete, your M2 SSD will be ready to use on your Mac. By following these simple steps, you can format your M2 SSD on Mac without any hassle.

    Using Disk Utility

    If you’re looking to format your M2 SSD on a Mac, Disk Utility is the tool you need. First, connect the M2 SSD to your Mac using a compatible adapter or enclosure. Then, launch Disk Utility from your Applications folder.

    Select the M2 SSD from the list of drives, and click on the Erase button. In the dialog box that appears, choose a name for your drive, select the file system you want to use (e.g.

    APFS or Mac OS Extended), and leave the Scheme as GUID Partition Map. Finally, click on Erase and wait for the process to complete. Once done, your M2 SSD will be formatted and ready to use.

    Just remember that formatting erases all data on the drive, so be sure to back up any important files beforehand. With Disk Utility, formatting an M2 SSD on a Mac is quick and easy.

    Conclusion and Caution

    Formatting an M.2 SSD may seem like a daunting task, but with a little bit of knowledge and the right tools, it’s actually quite simple. By following these steps, you’ll be able to give your M.

    2 SSD the TLC it deserves and get it up and running in no time. So don’t be afraid to roll up your sleeves and dive in – your M.2 SSD will thank you for it in the long run!”

    FAQs

    What is an m2 SSD and how does it differ from a traditional SSD?
    An m2 SSD is a newer form factor that connects directly to the motherboard, whereas traditional SSDs connect using SATA cables. This allows for faster read and write speeds, and the smaller size makes it ideal for compact devices.

    Can any computer use an m2 SSD?
    Not all computers are compatible with m2 SSDs. You’ll need to check that your motherboard has an m2 slot and that it supports the type of m2 SSD you want to use.

    How do I install an m2 SSD?
    Installing an m2 SSD involves opening up your computer and inserting the drive into the appropriate slot on the motherboard. Consult your computer manual or seek assistance from a professional if you’re uncertain.

    What kind of performance boost can I expect from using an m2 SSD?
    You can expect much faster load times and file transfer speeds compared to a traditional hard drive or even a SATA-based SSD.

    Can I use an m2 SSD as a boot drive?
    Yes, an m2 SSD can be used as a boot drive, allowing for faster boot times and overall system performance. Just make sure your motherboard supports booting from an m2 drive.

  • Unleash the Power of ASUS Scar 2: Step-by-Step Guide on How to Upgrade SSD

    If you’re a gaming enthusiast, you know how important it is to have a good laptop that can handle all your favorite games. The ASUS Scar 2 is a laptop that was specifically designed with gamers in mind. It has a powerful processor, good graphics, and ample storage space.

    However, if you want to take your gaming experience to the next level, you might consider upgrading its SSD. An SSD (Solid State Drive) is a type of storage device that can help your laptop run faster and smoother. By upgrading your Scar 2’s SSD, you can significantly reduce the boot-up time and loading time of your favorite games while also increasing its overall performance.

    Whether you’re a casual gamer or a professional one, upgrading your laptop’s SSD is a smart choice to improve your gaming experience. In this blog, we’ll guide you through the process of upgrading your Scar 2’s SSD. We’ll talk about the different types of SSDs, the benefits of upgrading, and the steps you need to follow to upgrade it.

    We’ll also provide some tips and tricks that can help you get the most out of your newly upgraded laptop. So, if you’re ready to make your Scar 2 even better, keep on reading!

    Check Compatible SSDs

    If you’re looking to upgrade the SSD on your ASUS Scar II laptop, one of the first things you need to consider is compatibility. Not all SSDs will work with your laptop, so it’s important to do some research before making a purchase. To make things easier, ASUS provides a list of compatible SSDs on their website.

    You can also check with the SSD manufacturer to ensure compatibility. Additionally, make sure to choose an SSD with the right storage capacity for your needs. A larger SSD will give you more space for files and programs, but it may also be more expensive.

    It’s important to find the right balance between performance and price when upgrading your SSD. With a little bit of planning and research, you can upgrade your ASUS Scar II with an SSD that will improve your laptop’s performance and give you more storage space.

    Asus Scar 2 Compatible SSDs

    If you’re looking to upgrade your Asus Scar 2’s storage with an SSD, then it’s essential to choose a compatible one. By doing so, you can maximize the laptop’s performance and take advantage of its fast read and write speeds. There are several SSDs that work well with the Asus Scar

    One option is the Samsung 970 EVO Plus, known for its high endurance and reliability. Another great choice is the Western Digital WD Black SN750, which boasts impressive sequential read and write speeds. If you’re looking for something more affordable, you can consider the Crucial MX500, which offers excellent value for its price point.

    Whatever your budget may be, make sure to choose an SSD that’s compatible with your Asus Scar 2 to ensure optimal performance.

    asus scar 2 how to upgrade ssd

    Back Up Data and Shut Down

    If you want to upgrade the SSD on your ASUS Scar 2 laptop, it’s important to back up all of your data and properly shut down the computer before getting started. This will help ensure that you don’t lose any important files or damage your system during the upgrade process. Once you’ve backed up your data, you can open up your laptop and locate the existing SSD.

    Remove it carefully, making sure not to damage any other components in the process. Then, install your new SSD and secure it in place before closing up your laptop and restarting it. With your new SSD installed, you’ll likely notice a significant improvement in your computer’s speed and performance.

    If you’re not comfortable performing this upgrade on your own, consider seeking the help of a professional to ensure that your laptop is properly upgraded and functioning at its best.

    Creating a Backup

    Creating a backup of your data is an important step in safeguarding your information. Whether it’s important documents, precious photos, or essential files, backing up your data ensures that you don’t lose them in case of unforeseen events like hardware failure, malware attacks, or accidental deletion. To create a backup, you can use a variety of methods including cloud storage, external hard drives, or specialized backup software.

    Once you have decided on the method, it’s essential to shut down all running applications to make sure that you have a complete backup of all your data. It’s also recommended to carry out backups regularly to ensure that all recent changes are saved. So, taking the time to back up your data today can save you from the loss of important information tomorrow.

    Open Bottom Cover and Locate SSD

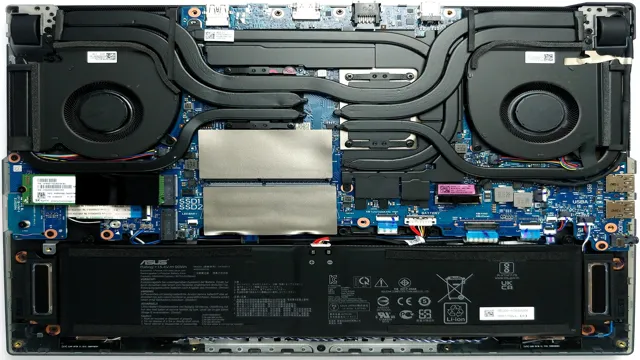
    If you’re looking to upgrade the SSD on your Asus Scar 2, the first step is to open the bottom cover of your laptop. This can be done by loosening the screws on the bottom of the laptop and gently lifting the cover off. Once the cover is removed, you’ll need to locate the SSD, which is typically located near the center of the laptop.

    It is usually a small, rectangular circuit board with a few screws and connectors. Once you have located the SSD, you can carefully remove it by unscrewing the screws and gently pulling it out. Be sure to handle the SSD carefully to avoid damaging it.

    With the SSD removed, you can then replace it with your new, upgraded SSD. Simply connect the new SSD to the connectors and secure it with the screws. Once you’re finished, be sure to replace the bottom cover and tighten the screws back in place.

    With your new SSD installed, you’ll have a faster and more efficient laptop that’s ready to handle your favorite applications and programs!

    Opening the Bottom Cover Safely

    If you’re looking to upgrade your laptop’s storage, the first step is to locate the SSD. To do so, you’ll need to open the bottom cover safely. Before you begin, make sure you have a good understanding of your laptop’s hardware and its components.

    The last thing you want is to accidentally damage your laptop while attempting to open the bottom cover! Be sure to wear an anti-static wrist strap to prevent any static electricity from damaging your hardware. Once you’ve taken the necessary precautions, locate the screws on the bottom cover and gently unscrew them. Then, carefully remove the bottom cover and locate the SSD.

    It should be easy to identify as it’s usually a small rectangular component. If you’re unsure of what the SSD looks like, refer to your laptop’s manual or do some research online. Remember to be gentle when working inside your laptop and take your time to avoid any accidents!

    Replace with New SSD

    Looking to upgrade your Asus Scar 2 SSD? Well, it’s easier than you might think. The first step is to find a new SSD that is compatible with your laptop model. Once you have your new SSD, make sure to save any important data from your old drive onto an external hard drive or cloud storage.

    Next, power down your laptop and remove the bottom cover to access the old drive. Carefully remove the old SSD by unscrewing it and gently pulling it out. Insert your new SSD in the same manner, screw it in place, and replace the bottom cover.

    Finally, power up your laptop and reinstall your operating system. Voila! Your Asus Scar 2 has now been upgraded with a shiny new SSD, providing faster boot and load times for all your programs and files.

    Removing Old SSD and Installing New One

    If you’re looking to upgrade your computer’s performance, replacing your old SSD with a new one might be a great option. Before getting started, make sure to back up all important data and shut down your computer. Once opened, locate the old SSD and carefully remove it from the slot using a screwdriver or any necessary tools.

    Before installing the new SSD, check if it is compatible with your device. If it is, slide it into the slot and screw it into place, making sure it is secure. Finally, close your computer and power it up to start enjoying the benefits of your new SSD.

    By replacing your old SSD with a new one, you can experience improved speed, performance, and storage capacity for your device.

    Reassemble and Power Up

    The final step in upgrading your Asus Scar 2’s SSD is reassembling everything and powering up your laptop. Begin by carefully reattaching the bottom cover and tightening all the screws. Place the battery back into its compartment and reconnect any cables you might have removed during the SSD installation process.

    Once everything is securely in place, plug in the power adapter and press the power button to turn on your laptop. If all goes well, your new SSD should now be detected by your operating system. To ensure that everything is working properly, check the SSD’s status and monitor its performance.

    For best results, run a few benchmark tests to see how much of an improvement you have achieved over your previous setup. Congratulations! You have successfully upgraded your Asus Scar 2’s SSD and should now notice significant speed and performance improvements while using your laptop.

    Replacing Bottom Cover and Turning On PC

    Now that you’ve successfully removed the old cover and replaced it with a new one, it’s time to power up your PC and see if everything is working properly. Before you hit the power button, make sure all the screws are tightly secured and the cover is flush against the case. Once you’re confident everything is snug, plug in all necessary peripherals, such as your monitor, mouse, and keyboard.

    Then, press the power button and listen for any abnormal sounds, such as whirring, buzzing, or clicking. If everything seems normal, wait patiently as your computer boots up. If you notice any issues, such as error messages or an inability to boot properly, don’t panic – it may just be a simple fix like checking the connections or troubleshooting your BIOS settings.

    With a bit of patience and know-how, you’ll have your PC up and running in no time.

    Restore Data Backup and Test

    Upgrading the SSD on your ASUS Scar 2 laptop is a great way to boost its performance and storage capacity. However, it is important to ensure that all your data is backed up before proceeding with the upgrade process. You can use an external hard drive or cloud storage service to create a backup of your files and documents.

    Once the backup is complete, you can proceed with installing the new SSD by opening the laptop casing and removing the old drive and replacing it with the new one. After the new drive is installed, you will need to restore the data backup to the new drive and test its functionality to ensure that everything is working correctly. By following these steps, you can upgrade your ASUS Scar 2 laptop with ease and enjoy faster speeds and increased storage capacity for all your computing needs.

    Restoring Backup and Testing the New SSD

    Now that we’ve cloned our old hard drive onto the new SSD, it’s time to restore our data backup and test if everything is working properly. The first step is to connect our backup external drive to our computer and transfer all the data onto the new SSD. This can take some time depending on the size of your backup, so be patient.

    Once the transfer is complete, we can start testing our new SSD by running various programs and checking the read and write speeds. We can also try booting up our computer to see if everything is working as it should. If any issues arise, it’s important to troubleshoot them immediately to avoid any potential problems.

    Overall, restoring the data backup and testing the new SSD is an important step in ensuring a smooth transition to a faster and more efficient storage solution.

    Conclusion

    And there you have it, folks – upgrading the SSD in your ASUS Scar 2 is no longer a daunting task. With the right tools and a little bit of patience, you can give your gaming laptop the boost it deserves. So, don’t let slow load times hold you back from victory.

    Upgrade that SSD and watch your performance soar.”

    FAQs

    What is the maximum SSD capacity that ASUS Scar 2 supports?
    The ASUS Scar 2 supports up to a 2TB M.2 NVMe SSD.

    Is it possible to upgrade the SSD in ASUS Scar 2 on your own?
    Yes, upgrading the SSD in ASUS Scar 2 is easy and can be done on your own. Just open the back panel and replace the existing SSD with a new one.

    Which type of SSD is compatible with the ASUS Scar 2?
    The ASUS Scar 2 supports PCIe 3.0 x4 NVMe SSDs. Make sure to choose an SSD with the same specification.

    Do I need to reinstall Windows after upgrading the SSD in ASUS Scar 2?
    It is not necessary to reinstall Windows after upgrading the SSD. You can clone the existing drive onto the new one using cloning software.

    Can I use an external SSD with ASUS Scar 2?
    Yes, you can use an external SSD with ASUS Scar 2 via the USB-C port. It can be a great option if you need extra storage capacity without opening up your laptop.

  • Unlocking the Speed Power of ADATA Legend 750: A Comprehensive Review

    ADATA is known for its innovative and advanced storage solutions, and the ADATA Legend 750 SSD is no exception. This powerful solid-state drive offers impressive performance improvements over traditional hard drives, with lightning-fast read and write speeds, reduced power consumption, and improved durability. But what sets the Legend 750 apart from other SSDs on the market? In this review, we’ll take a closer look at the features and benefits of the ADATA Legend 750, and see how it stacks up against the competition.

    Whether you’re a gaming enthusiast, professional content creator, or just looking to upgrade your computer’s storage, the ADATA Legend 750 offers a compelling choice for high-speed, reliable storage solutions. So let’s dive in and see what makes this SSD a legend in its own right!

    Design and Build

    Let’s talk about the ADATA Legend 750 review. If you’re looking for a high-performance SSD that won’t break the bank, the ADATA Legend 750 is definitely worth considering. With read speeds of up to 1,800 MB/s and write speeds of up to 1,200 MB/s, this drive can handle even the most demanding tasks with ease.

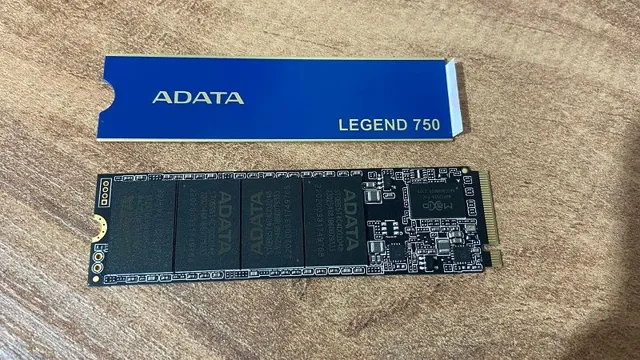
    And with a capacity of up to 2TB, you’ll have plenty of space for all your important files. The Legend 750 is also built to last, with a durable aluminum heatsink that helps dissipate heat and keep your drive cool under heavy loads. Plus, with support for NVMe

    4 and AES 256-bit encryption, you can rest assured that your data is safe and secure. Overall, the ADATA Legend 750 is a great choice for anyone looking for a reliable and high-performance SSD at an affordable price.

    Premium feel with sleek design

    When it comes to design and build quality of a device, it’s not just about functionality but also about aesthetics. And that’s where the premium feel with sleek design of a device comes into play. The combination of high-quality materials and sleek lines give devices that premium look and feel that we all crave for.

    The look and feel of a device are usually the first things that catch our attention, and as humans, we are inspired by aesthetically pleasing objects. From the smartphone that we carry around in our pocket to the laptop that we use every day, design and build quality matter. So, if you want a device that not only functions well but also looks and feels premium, you should look for one with a sleek and modern design.

    In conclusion, having a device that boasts a design that is not only functional but also visually appealing can enhance the user’s overall experience and elevate the device’s status from just another gadget to a coveted accessory.

    adata legend 750 review

    High-quality materials and sturdy construction

    When it comes to choosing furniture, one of the most important considerations is the design and construction. It doesn’t matter how good something looks; if it’s not built to last, it will quickly become a source of frustration and disappointment. That’s why high-quality materials and sturdy construction are key.

    Look for pieces made from solid wood, metal, or other durable materials that can withstand daily wear and tear. In addition, pay attention to the joints and seams. Well-made furniture will have tight joints, smooth seams, and no gaps or wobbling.

    This ensures that the piece will remain stable and won’t fall apart over time. Whether you’re investing in a new sofa, dining table or bedframe, always check the materials and construction to ensure you’re getting something that will last for years to come. Remember, well-crafted furniture doesn’t just look good – it also performs well and adds value to your home.

    Performance

    If you’re in the market for a reliable and fast SSD, then the ADATA Legend 750 is worth checking out. With read speeds of up to 6600MB/s, this drive delivers lightning-fast performance that’s perfect for gamers, content creators, and power users alike. The Legend 750 uses the latest PCIe Gen 4 interface and NVMe

    4 protocol, which ensures that it can handle even the most demanding applications with ease. It’s also equipped with SLC caching and DRAM cache buffer technology, which optimizes its read and write speeds for consistent and reliable performance. Additionally, the drive features a sturdy aluminum heatsink that helps dissipate heat and keeps the drive cool under heavy loads.

    Overall, the ADATA Legend 750 is an excellent SSD that combines speed, reliability, and durability in a sleek and stylish package, making it a solid choice for anyone in need of high-performance storage.

    Lightning-fast read and write speeds

    Looking to upgrade your computer’s storage performance? Consider lightning-fast read and write speeds for a significant boost in performance. With lightning-fast speeds, you’ll be able to access and save data significantly faster, making regular computer tasks and even high-performance tasks such as gaming or video editing smoother and faster. Say goodbye to waiting for files to load or saving to finish and say hello to a more efficient workflow and computing experience.

    So, how can you achieve such speeds? Consider upgrading your computer’s storage to a solid-state drive (SSD), which offers significant improvements in read and write speeds compared to traditional hard drives. The result? A faster, more responsive computer that can keep up with your demands. Don’t settle for slow storage speeds when you can upgrade to lightning-fast ones with ease.

    Efficient power consumption and heat management

    When it comes to ensuring high performance in computing devices, one of the most important factors to consider is efficient power consumption and heat management. Efficient power consumption means that the device is able to use energy responsibly, which not only reduces its impact on the environment but also allows it to last longer on a single charge. Heat management is equally important as devices that generate excessive amounts of heat will not only consume more power, but also fail to perform optimally.

    One way of achieving efficient power consumption is through the use of low-powered processors that are specifically designed for use in mobile devices. These processors offer the right balance between performance and energy consumption, helping to extend the battery life of the device. To manage heat, manufacturers use advanced cooling solutions such as heat pipes and liquid cooling, which help to dissipate heat quickly and efficiently.

    Efficient power consumption and heat management are crucial for the overall performance and longevity of computing devices, enabling them to operate optimally for extended periods.

    Features

    The Adata Legend 750 is a reliable and high-performance Solid State Drive (SSD) with a maximum storage capacity of up to 2TB. It comes with an exceptional feat of being able to deliver a read speed of up to 3,500 MB/s and a write speed of up to 3,000 MB/s, making it an outstanding performer in the SSD market. The Adata SSD also comes with advanced technologies such as the AES 256-bit encryption, which ensures the safety and protection of your data.

    With its Power Loss Immunity feature, you don’t have to worry about data corruption or loss during power outages. The Adata Legend 750 is also designed for durability, with the ability to withstand extreme temperatures, shock, and vibrations, making it an ideal option for gamers, video editors, and other professionals who require high-speed data transfer with utmost reliability. Overall, the Adata Legend 750 is a great investment for those seeking reliable and high-quality storage solutions for their data needs.

    Advanced encryption and security options

    One of the key elements of any secure online communication is the use of strong encryption. That’s why advanced encryption and security options should be a top priority when choosing a service or platform for your sensitive data. In today’s digital age, cyber threats are rampant, and data breaches are all too common.

    That’s why it’s important to choose a platform that uses strong encryption algorithms that can protect your data from unauthorized access. The best platforms use end-to-end encryption, which means that your data is encrypted before it leaves your device and remains encrypted until it reaches its intended recipient. This ensures that even if the data is intercepted, it cannot be read by anyone who doesn’t have the appropriate decryption key.

    With advanced encryption, your confidential information stays safe and secure.

    Compatibility with various devices and operating systems

    When it comes to choosing a new software, compatibility with devices and operating systems is an essential consideration. Opting for software that cannot work with your devices or operating systems can be quite frustrating and a total waste of money and time. Thankfully, there are software programs available that are compatible with almost all devices and operating systems, including mobile phones, tablets, and desktops.

    These software solutions typically come with customizable features that help users tweak them to meet their specific needs, ensuring that they can work on any device or platform effectively. Additionally, with the rise of cloud-based software solutions, accessing your software applications from any device or platform is much more accessible than ever before. So, whether you are using an Android phone, an iOS device, a Windows machine or a macOS device, finding software that is compatible should not be an issue.

    Ultimately, when it comes to choosing an application, always prioritize compatibility to ensure efficient and seamless operations on all your devices.

    Conclusion

    The ADATA Legend 750 is a true gaming beast that’s been designed with performance in mind. It’s packed with features that will make any gamer’s heart skip a beat, such as RGB lighting, customizable macros, and 1 surround sound.

    But what really sets the Legend 750 apart is its durable construction, which uses top-tier materials to ensure that it can withstand even the wildest gaming marathons. All in all, the ADATA Legend 750 is an excellent choice for any serious gamer who’s looking to dominate the competition in style. So if you’re ready to take your gaming to the next level, look no further than the ADATA Legend 750 – your competitors won’t know what hit them!”

    Pros and Cons of the ADATA Legend 750

    The ADATA Legend 750 is a versatile and powerful external SSD that boasts impressive features. For starters, this SSD has a high-speed USB 2 Gen 2 interface that allows for lightning-fast data transfer rates of up to 10Gbps.

    That means you can transfer large files in no time at all. Another unique feature is the sturdy yet sleek aluminum body that not only protects the drive from external damage but also dissipates heat efficiently. This helps to enhance the longevity of the SSD and ensures that it performs optimally.

    It’s also worth noting that the ADATA Legend 750 comes with AES 256-bit encryption enabling maximum security for your data. However, as one of the cons of the ADATA Legend 750, its price might be a bit steep for some individuals with a limited budget. Nonetheless, if you’re looking for a reliable and dependable external SSD with admirable features, the ADATA Legend 750 is worth considering.

    FAQs

    What are the key features of the ADATA Legend 750?
    The ADATA Legend 750 boasts a 750W power supply, 80+ Gold efficiency rating, fully modular design, and a 120mm fluid dynamic bearing fan for quiet operation.

    Can the ADATA Legend 750 handle high-end gaming rigs?
    Yes, the ADATA Legend 750 can handle high-end gaming rigs with ease due to its 750W power supply and efficient power delivery.

    Is the ADATA Legend 750 compatible with all computer cases?
    Yes, the ADATA Legend 750 is compatible with most computer cases due to its standard ATX form factor.

    Does the ADATA Legend 750 come with a warranty?
    Yes, the ADATA Legend 750 comes with a 10-year warranty, providing peace of mind for the long term.

  • Effortlessly Migrate Your Data: A Step-by-Step Guide on How to Transfer Everything from HDD to SSD

    Are you tired of your computer running slowly? It might be time to consider transferring your files from your old HDD to a faster and more efficient SSD. Many computer users are hesitant to make this switch because they worry about losing important files or damaging their hardware. But fear not, transferring from HDD to SSD is a relatively easy and straightforward process that can greatly improve your computer’s performance.

    Think of it like upgrading from a bicycle to a sports car – you’ll notice the difference immediately. In this blog, we’ll cover everything you need to know about transferring from HDD to SSD, including the benefits of doing so, how to transfer your files, and tips for maintaining your new hardware. So fasten your seatbelt and let’s get started!

    Check Your SSD Capacity and Health

    If you’re planning to transfer everything from your HDD to an SSD, there are a few things you need to keep in mind. First, you need to check the capacity of your SSD to ensure that it can accommodate all your files and programs. If the capacity is not enough, you might need to delete some files or invest in a larger SSD.

    Another thing to consider is the health of your SSD. It’s crucial to monitor the health of your SSD regularly to ensure that it’s functioning properly and has no issues. Various software tools can help you check SSD health, such as CrystalDiskInfo and Samsung Magician.

    These tools can detect errors, bad sectors, and other potential problems that might arise while transferring data. By monitoring your SSD regularly, you can prevent data loss and ensure a smooth transfer from your HDD to an SSD.

    Ensure SSD is compatible with PC/Laptop

    When it comes to getting a new SSD for your PC or laptop, it is important to ensure that it is compatible with your system before making any purchase. One way to do this is to check the capacity and health of the SSD. Capacity refers to the amount of storage space that the SSD has, while health refers to the physical condition and performance of the SSD.

    You can check the capacity of your existing drive and compare it to the capacity of the new SSD you want to purchase. It is essential to ensure that the new SSD has a capacity that is suitable for your needs. Additionally, you can check the health of the SSD by examining its SMART data.

    This data provides information about the overall health of the drive, including read/write errors, temperature, and the number of hours it has been in use. By checking these factors, you can determine if the new SSD is compatible with your PC or laptop and ensure that it can provide the performance you need. Don’t forget, compatibility is key if you want to get the best out of your SSD.

    how do you transfer everything from a hdd to ssd

    Backup Important Data

    When it comes to transferring everything from a HDD to an SSD, one of the most important steps to take is backing up all of your important data. This can include documents, photos, videos, and any other files that you want to keep safe and accessible. There are several ways to back up your data, including using an external hard drive, a cloud-based storage service, or even just copying files to a USB drive.

    Once your data is safely backed up, you can then begin the process of transferring everything from your old HDD to your new SSD. This can be done using software designed specifically for this purpose or by manually copying files over. Whatever method you choose, it’s important to take your time and make sure that everything is transferred correctly and completely.

    With a little patience and attention to detail, you can successfully transfer everything from your old HDD to your new SSD and enjoy all of the benefits that come with a faster and more efficient storage solution.

    Copy Data to External Drive

    Backing up important data is crucial in today’s world where we rely so heavily on technology. One way to ensure that your data is safe is by copying it to an external drive. External drives can provide a secure way to store your important files, photos, and other media.

    They are portable, making it easy to carry important information with you wherever you go and keeping it safe from threats like malware and ransomware attacks. Simply plug the drive into your computer, and you can easily transfer files and create backups of your data. It’s important to note that external drives can fail, just like any other device, so it’s always a good idea to have a backup of your backup.

    When choosing an external drive, be sure to consider factors like storage capacity, speed, and durability. Overall, copying your data to an external drive is a simple, affordable, and effective way to keep your important files safe and secure.

    Install SSD into PC/Laptop

    If you’re upgrading your computer by replacing your hard drive with a new SSD, you’ll need to transfer everything from your old HDD to the new drive. Fortunately, this isn’t as difficult as it may sound. There are a few methods you can use, but the most straightforward is to use an external hard drive enclosure or cloning software.

    To clone your HDD, plug it into the enclosure and connect it to your computer. Then, use cloning software to create an exact copy of your current hard drive on the new SSD. Once cloning is complete, shut your computer down, swap the hard drives, and reboot.

    Your computer will now use the new SSD as its main drive, and everything should work just as it did before. Alternatively, you can also back up your hard drive to an external drive using standard backup software, install the new SSD, and restore your data from the backup. This method may take longer, but it can be more reliable than cloning in some cases.

    Overall, transferring everything from an HDD to an SSD is a simple process that can greatly improve your computer’s performance.

    Use a Cloning Tool

    Installing an SSD in your PC or laptop can significantly improve its performance and speed. However, transferring all your data from your old hard drive to the new SSD can be a daunting task. That’s where a cloning tool comes in to make your life easier.

    A cloning tool is a software that duplicates your old hard drive to the new SSD, creating an exact copy of your entire system, including the operating system, applications, and files. This means you don’t have to worry about manually transferring files or re-installing your OS and applications. The process is straightforward: connect your new SSD to your PC, launch the cloning tool, select your source drive (old hard drive), select your destination drive (new SSD), and hit the “clone” button.

    Many SSD manufacturers offer free cloning tools with their drives, so be sure to check your manufacturer’s website before purchasing a third-party tool. With a cloning tool, upgrading to an SSD can be a hassle-free process, giving your PC or laptop a new lease of life and enhancing its performance.

    Connect Both Drives to PC/Laptop

    install SSD, connect hard drives, PC/laptop Now that you have your SSD in hand, you’re likely eager to install it into your PC or laptop so you can start experiencing the benefits of faster speeds and improved performance. But, before you start tinkering with any hardware, make sure to first connect both hard drives to your PC or laptop. The process may vary depending on your specific setup, but generally, you’ll need an open SATA port in your PC or laptop, as well as a compatible power cable.

    Once you’ve connected both drives, you can begin installing your SSD. Just be sure to follow any specific instructions included with your SSD and familiarize yourself with the installation process before getting started. Once your SSD is securely installed, you can transfer all of your important files and start enjoying the benefits of lightning-fast boot times and improved overall performance.

    Boot from SSD

    If you’re looking to upgrade your computer and switch to a faster and more reliable SSD, one important question you might be asking is, “how do you transfer everything from a HDD to SSD?” Fortunately, the process is not as difficult as it may seem. First, you will need to clone your HDD to your SSD using cloning software, which will copy all of your data and applications from your old drive to your new one. Before you start cloning, make sure you have enough space on your SSD to accommodate all of your data.

    Once you’ve successfully cloned your HDD to your SSD, you can then set your computer to boot from the SSD to take advantage of its increased speed. Overall, transferring everything from a HDD to an SSD can be a straightforward and effective way to upgrade your computer’s performance.

    Change Boot Order in BIOS

    If you recently installed an SSD in your computer and want to boot from it instead of the old HDD, you’ll need to change the boot order in BIOS. This means telling the computer to look for the operating system on the new drive first, rather than the old one. First, you’ll need to enter the BIOS menu by pressing a certain key during startup, usually F2, F10, or Delete.

    Once in the menu, look for the Boot Order section and use the arrow keys to move the SSD to the top of the list. Save and exit the BIOS, and your computer should now boot from the SSD. Keep in mind that different BIOS versions may have slightly different layouts and options, so if you’re unsure, consult your motherboard manual or manufacturer’s website for specific instructions.

    By making this simple change, you can enjoy the faster boot and load times that come with using an SSD as your primary drive.

    Verify Data Transfer and Delete Old Files

    If you’re wondering how to transfer everything from a HDD to SSD, there are a few steps you need to follow. First, you need to verify that the data transfer was successful and that no files were lost or corrupted in the process. You can do this by opening some of your files and checking that they still open and function as they should.

    Next, you should delete any old files from your HDD to free up space and ensure that you’re not duplicating any files on your new SSD. This will also make it easier to keep track of your files and ensure that everything is organized and easy to find. Overall, transferring everything from your HDD to SSD is a straightforward process that can greatly improve your computer’s speed and performance.

    Just be sure to take the necessary steps to verify your data transfer and delete any unnecessary files to ensure a smooth transition.

    Check Capacity and File Integrity

    In order to ensure that your data transfer process runs smoothly, there are a few important steps to take. One of these is to check the capacity of your storage device before initiating the transfer. Running out of space midway through the transfer can lead to errors and incomplete transfers.

    Additionally, it is crucial to verify the integrity of the files that have been transferred to ensure that they have not been corrupted or damaged during the transfer process. A useful technique for ensuring file integrity is to use checksums, which are unique identifiers calculated using algorithms that allow you to compare the transferred file to the original file to ensure that they match. Once you have verified the successful transfer and integrity of your files, remember to delete any old, unnecessary files to free up capacity for future transfers.

    Keeping your storage device clear of old files will not only ensure there is sufficient space for new transfers but also help to prevent any confusion or errors that may arise when working with older files. By taking these simple steps, you can ensure a smooth and successful data transfer process.

    Enjoy the Benefits of SSD

    If you’re considering making the switch from a traditional hard disk drive (HDD) to a solid-state drive (SSD), you may be wondering how to transfer everything from your old hard drive to the new one. Fortunately, the process is fairly straightforward and can be completed in just a few steps. One option is to use a cloning software to copy your entire hard drive onto the SSD.

    This will make an exact copy of the HDD, including all of your files, settings, and programs, onto the new drive. Another option is to manually transfer files from the HDD to the SSD. This method requires you to carefully select which files and programs you want to move over, but it can be more customizable and allow you to only transfer what you really need.

    Either way, once you’ve transferred everything over, you can enjoy the many benefits of SSDs, including faster boot times, quicker application launches, and overall improved performance.

    Conclusion

    Transferring everything from a HDD to SSD may seem daunting at first, but it’s like moving into a new home. You pack up all your belongings, tidy up any loose ends, and move into your new, sleek and speedy abode. With a little bit of effort and the right tools, you can seamlessly transfer all your data and breathe new life into your computer.

    So, don’t let the fear of change hold you back – embrace the SSD revolution and enjoy a faster, smoother computing experience!”

    FAQs

    What is the process for transferring data from an HDD to an SSD?
    The process involves creating a disk image of the HDD, connecting the SSD, and then restoring the image onto the SSD using cloning software.

    Can I transfer my operating system from my HDD to an SSD?
    Yes, it is possible to transfer your operating system from the HDD to the SSD. This can be done using cloning software which will create an exact copy of the operating system and all data on the HDD onto the SSD.

    What type of SSD should I use for transferring data from my HDD?
    It is recommended to use an SSD with the same or higher capacity as the HDD and to choose an SSD with a good read and write speed to ensure optimal performance.

    Is it necessary to format my SSD before transferring data from my HDD?
    No, formatting an SSD before transferring data from an HDD is not necessary. However, it is recommended to clean the SSD before starting the data transfer process to ensure optimal performance.

  • Upgrade Your PC with Ease: A Guide to Moving Windows to SSD on Your New Computer

    Are you tired of slow boot-up times and programs taking forever to load? Moving your Windows operating system to an SSD (solid-state drive) can dramatically improve the performance of your computer. But, the process of moving Windows to an SSD can seem daunting for those who are not tech-savvy. Don’t worry, we’ve got you covered.

    In this step-by-step guide, we will walk you through the process of transferring Windows to an SSD, so you can enjoy a faster and more responsive computer. Think of this guide as your GPS, guiding you through the twists and turns of moving your Windows operating system to an SSD. Ready to rev up your computer’s speed? Let’s get started.

    Back Up Your Data

    If you just bought a new computer and want to move your Windows operating system to a new SSD, there are a few steps you need to take. First, it’s important to back up all your data to an external hard drive or cloud storage platform. This ensures that you don’t lose any important files during the migration process.

    Once you’ve backed up your data, you can use a “cloning” software to copy the entire contents of your old hard drive to your new SSD. There are several free and paid options available, but make sure you choose one that is compatible with your specific hardware and operating system. After the cloning process is complete, you’ll need to physically swap out the hard drives and configure your computer to boot from the new SSD.

    With a bit of patience and careful planning, you can easily move your Windows operating system to a new SSD and enjoy faster boot times and improved performance.

    Create a backup of your data and files before proceeding to avoid losing important information.

    Backing up your data is crucial to avoid losing valuable information. No one wants to experience the frustration of losing years’ worth of documents, family photos, or important work files. It’s important to always stay prepared and protect your data from potential harm.

    Backing up your files can be done in different ways, such as using an external hard drive, cloud storage services, or even flash drives. The key is to choose a backup method that is convenient for you and that allows you to access your data easily if needed. One important thing to keep in mind is to always have more than one backup option to ensure that your data is secure and protected.

    Remember, taking preventive measures like backing up your data can save you from the hassle of having to recover lost files or data.

    bought new computer how do i move windows to ssd

    Clone Your Hard Drive

    If you’ve recently bought a new computer and want to move your Windows operating system to an SSD, the easiest option is to clone your hard drive. This process involves copying all the data from your old hard drive to your new SSD, so you don’t have to reinstall Windows or any of your programs. First, you need to connect your SSD to your computer, either directly or using a USB adapter.

    Then, download and install a disk cloning software such as Macrium Reflect or EaseUS Todo Backup. These programs will guide you through the process of cloning your hard drive to your SSD. Make sure to backup all your important data before starting the cloning process, just in case anything goes wrong.

    Once the cloning process is complete, shut down your computer, remove the old hard drive, and install the new SSD in its place. When you boot up your computer, everything should be the same as it was on your old hard drive, except much faster thanks to the SSD.

    Use a cloning software to copy your current Windows installation from the hard drive to the new SSD.

    Cloning your hard drive is a straightforward process that can save you a lot of time and effort. By using a cloning software, you can transfer all your files, settings, and programs from your old hard drive to your new SSD. This means that you can get back to working on your computer exactly where you left off without having to install everything again.

    It’s like creating a mirror image of your old drive on the new one. One of the benefits of cloning software is that it’s easy to use, even for beginners. You’ll need to connect both your old hard drive and your new SSD to your computer, then launch the software and follow the instructions.

    Once the cloning process is complete, you can disconnect your old hard drive and set your new SSD as the primary drive. With this method, you can upgrade to an SSD without having to start from scratch, which can save you a lot of time and make your computer run faster and more efficiently.

    Install Your New SSD

    If you bought a new computer and want to move Windows to your new SSD, the first step is to install your new SSD. Make sure your computer is turned off and disconnected from any power source before opening it up. Once inside, locate the slot where your SSD will fit and securely install it.

    Then, you’ll need to clone your existing hard drive over to your SSD. There are several software programs that can help you do this, such as Macrium Reflect or Clonezilla. Once you’ve cloned your system, you may need to change the boot order in your BIOS so that your computer boots from the new SSD instead of your old hard drive.

    It’s important to note that this process can be tricky, and mistakes can result in data loss. If you’re unsure of how to proceed, it’s always a good idea to seek professional help. With the right support, however, moving Windows to your new SSD can help improve your computer’s performance and speed!

    Physically install the new SSD into the computer and ensure it is properly connected.

    Installing the new SSD into your computer can be an exciting experience, especially when you think about all the speed and storage space it will provide. The first thing you need to do is to turn off your computer and disconnect all cables. Remove the screws that hold the side panel of the computer case in place and then remove the panel.

    The next step is to locate the storage drive bays. If you are not familiar with how to locate them, check the computer manual. Once you have located the bays, remove the screws that hold the bays in place.

    Slide the new SSD into one of the bays and use screws to hold it in place. It is essential to ensure that the SSD is firmly connected to the system. You can do this by using the SATA cable and the power cable.

    Insert one end of the SATA cable into the SSD and the other end into the motherboard’s SATA port. The power cable should be inserted into the power supply unit. When it’s all set, put the side panel back in and screw it in place.

    Finally, plug in all the cables and power on the system. You now have a new SSD installed on your computer, which will improve your computer’s performance and speed significantly. Enjoy the benefits of your new hardware upgrade!

    Change Boot Drive in BIOS

    Congratulations on your new computer! Moving Windows to your SSD can significantly improve your system’s speed and performance. The first step is to enter your computer’s BIOS, usually by pressing F2 or Delete during startup. Once in the BIOS, navigate to the Boot tab and look for an option to change the boot drive order.

    Select your SSD as the primary boot drive, and save and exit the BIOS. You may also need to clone your existing Windows installation to the SSD using software like Macrium Reflect or EaseUS Todo Backup before changing the boot drive. Remember to back up all important files before starting the process to avoid data loss.

    By changing the boot drive to your new SSD, you’ll have a much faster and responsive system to enjoy for years to come.

    Access the BIOS and set the new SSD as the primary boot device.

    Changing the boot drive in BIOS is an essential step in setting up a new SSD as the primary boot device on your computer. The BIOS (Basic Input/Output System) is a crucial component of any computer system that controls the communication between the hardware and software. To access the BIOS, restart your computer and press the appropriate key (F2, F10, Delete, or Esc) as soon as the computer starts.

    Once inside the BIOS, navigate to the “Boot” or “Startup” tab using the arrow keys on your keyboard. From there, you can change the boot sequence and set the new SSD as the primary boot device. Save your changes and exit the BIOS.

    The next time you start your computer, it should boot from the new SSD. Keep in mind that the specific steps may vary depending on your computer’s manufacturer and model. By changing the boot drive in BIOS, you ensure that your computer starts up faster and performs better.

    It’s a simple but crucial step that can make a significant difference in your overall computing experience.

    Boot from SSD and Verify Installation

    So, you’ve just purchased a new computer and are excited about upgrading it to have lightning-fast speeds with an SSD. The good news is, it’s definitely doable! The first step is to clone your current system onto the SSD to ensure that all your files and settings are transferred over correctly. Once that’s done, you’ll need to set the SSD as your boot device in the BIOS settings.

    This is crucial, as it ensures that your computer is loading Windows from the SSD instead of the old hard drive. Once you’ve done that, you can double-check that everything is working by verifying the installation and ensuring that any new applications or files are being saved to the SSD instead of the old drive. Remember, an SSD is a fantastic investment for your computer, and the increased speed and performance it provides will make it worth every penny.

    Restart your computer and verify that Windows is now booting from the new SSD.

    boot from SSD Once you have installed your new SSD, the final step before starting to enjoy its benefits is to ensure that your computer is booting from the SSD. To boot from the SSD, you need to restart your computer and enter the BIOS setup. You can typically access the BIOS setup by pressing a key such as F2 or Del during the boot process.

    Once you’re in the BIOS, navigate to the boot menu, and select the SSD as the primary boot device. Save your changes, exit the BIOS, and let your computer restart. After the restart, your computer should now be booting from the new SSD.

    You can verify this by checking the Windows Boot Manager, which should now list the SSD as the boot option. Once you have confirmed that your computer is booting from your new SSD, you can start using your computer with lightning-fast speeds and improved performance. So, go ahead, give it a try, and enjoy the fast and smooth experience!

    Final Steps

    Congratulations on your new computer! If you’re looking to move your Windows installation to your SSD, there are a few final steps you need to take. First, you’ll need to create a backup of all your essential data, such as photos, documents, and emails. This is important because transferring to a new computer can sometimes result in data loss.

    You should either back up your files to an external hard drive or to a cloud service like Google Drive or Dropbox. Once you’ve backed up your data, you can then install your SSD into your computer’s empty drive bay. Then, you’ll need to boot your computer from your Windows installation disk or USB drive, and follow the instructions to reinstall Windows on the new drive.

    Once you’ve completed the installation process, you can then transfer over your backed-up files and enjoy the benefits of your new, speedy SSD. Good luck!

    Restore your data from the backup and format your old hard drive if desired.

    As the backup process comes to an end, the restoration of data is the next and final step. It’s crucial to review the backup job’s status and ensure that all files have been successfully transferred to the new hard drive before proceeding. Restoring data from a backup is often straightforward and intuitive, and most backup programs have user-friendly interfaces to guide you through the process.

    Once you have restored all essential data, it’s time to consider what to do with the old hard drive. If you plan on selling or donating your computer, formatting the old hard drive is a wise decision. This will erase all your old data and protect your privacy.

    Remember to check if there are any files that you forgot to transfer before formatting the drive. At this point, you can proudly turn off your computer, knowing that your data is secure and well-preserved on your new hard drive.

    Conclusion

    In today’s fast-paced digital world, upgrading to a new computer can be a daunting task, especially when you want to move Windows to your new SSD. But fear not, dear user, for with a little bit of patience and technical know-how, you can easily transfer your operating system and data to your shiny new drive, making your computing experience faster and more seamless than ever before. So go ahead and take the leap – your SSD and your productivity will thank you!”

    FAQs

    What steps are involved in transferring Windows to an SSD?
    The steps involved in transferring Windows to an SSD are: 1. Connect the SSD to your computer 2. Install cloning software and select your old hard drive as the source and the new SSD as the destination 3. Clone your old hard drive to the new SSD using the cloning software 4. Shut down your computer and disconnect the old hard drive 5. Boot your computer from the new SSD

    Can I move Windows to an SSD without losing my data?
    Yes, you can move Windows to an SSD without losing your data using cloning software. The software will clone your old hard drive to the new SSD, including all of your files and programs.

    Will moving Windows to an SSD improve the speed of my computer?
    Yes, moving Windows to an SSD can significantly improve the speed of your computer. SSDs are faster and more reliable than traditional hard drives, so your computer will boot up faster and programs will load more quickly.

    What size SSD do I need to transfer Windows?
    The size of the SSD you need to transfer Windows depends on the size of your current hard drive and how much data you have. You should choose an SSD that is at least as large as your current hard drive, but preferably larger to allow for future growth.

  • Unleash Lightning-Fast Speeds with M.2 SSD: Everything You Need to Know

    Unleash Lightning-Fast Speeds with M.2 SSD: Everything You Need to Know

    Looking for a way to boost your PC’s performance? You might want to consider upgrading to an M.2 SSD. These tiny devices pack a big punch when it comes to speed and storage, making them a popular choice among tech enthusiasts and gamers alike.

    With an M.2 SSD, you’ll be able to load applications and files faster than ever before, making multitasking a breeze. You’ll also have more space to store your favorite games, movies, and music without worrying about running out of room.

    So what exactly is an M.2 SSD, and how does it work? Essentially, it’s a type of solid-state drive that connects directly to your computer’s motherboard. This allows for faster data transfer speeds and improved overall performance.

    But don’t take our word for it – try it out for yourself! Upgrading to an M.2 SSD is a relatively simple process, and the benefits are well worth it. So why not give your PC the boost it deserves and maximize your speed and storage with an M.

    2 SSD today?

    What is an M.2 SSD?

    An M.2 SSD is a solid-state storage device that has grown in popularity over recent years due to its lightning-fast speeds and compact design. Unlike the traditional

    5-inch SSDs, M.2 SSDs are much smaller in size, making them perfect for use in slim and ultrabook laptops. These SSDs come in different sizes and shapes but their small form factor makes them a perfect choice for a space-constrained PC build.

    Moreover, they use the PCI Express bus interface, which means they can deliver speeds of up to 4GB/s making them capable of providing faster file transfer and boot times. If you’re looking for an upgrade on your storage device, you should definitely consider an M.2 SSD.

    Not only does it offer excellent performance, but its small form factor makes it a perfect storage solution for smaller PC builds, providing a high performance to space ratio.

    Get Faster Load Times and Increased Storage Capacity

    An M.2 SSD is a solid-state drive that offers faster load times and increased storage capacity than traditional hard drives. SSDs use flash memory technology to store data, which allows them to read and write data much faster than a traditional hard drive.

    M.2 SSDs also offer a smaller form factor, which makes them ideal for use in small form factor devices such as laptops and ultrabooks. The key advantage of an M.

    2 SSD over other types of SSDs is its ability to utilize the PCIe interface, which allows for faster data transfer speeds. This is because the PCIe interface is designed to handle high-speed data transfer and is much faster than the traditional SATA interface used by most SSDs. With an M.

    2 SSD, you can enjoy faster boot times, shorter load times, and increased storage capacity, making it a great choice for gamers, professionals, and anyone looking to speed up their computer’s performance. So, if you’re looking to improve your computer’s performance, an M.2 SSD is definitely worth considering.

    m 2 ssd

    Why Choose an M.2 SSD Over Other Storage Options

    If you’re looking for a faster and more efficient way to store and access your data on your computer, an M.2 SSD is definitely worth considering. An M.

    2 SSD is a small and compact storage device that fits directly onto your computer’s motherboard, providing high-speed data transfer rates, lower latency, and faster load times compared to traditional hard disk drives or even SATA SSDs. The keyword “M.2 SSD” refers to the form factor and the interface that this type of SSD uses, which is why it’s important to check your motherboard’s compatibility before purchasing one.

    Its slim profile and multi-functional capabilities make the M.2 SSD the perfect storage solution for both laptops and desktops. As technology continues to advance, the need for faster and more reliable storage solutions will only increase, and investing in an M.

    2 SSD is a great way to future-proof your computer and enhance its overall performance.

    Installation and Compatibility

    One of the best ways to upgrade your computer’s performance is by installing an M 2 SSD. Not only does it offer faster boot times and file transfer speeds, but it also takes up less space than traditional hard drives. However, before purchasing an M 2 SSD, you need to make sure your computer is compatible with this type of storage.

    Firstly, you have to check if your motherboard’s M 2 slot supports the NVMe protocol, which allows for faster data transfer speeds. Additionally, you need to ensure that your computer’s BIOS is up to date. Some motherboards may also require specific drivers to be installed for the M 2 SSD to function correctly.

    It’s also essential to ensure that your computer supports PCIe M 2 SSDs, which offer faster speeds than SATA-based M 2 SSDs. By verifying your computer’s compatibility, you can guarantee that the installation process of your M 2 SSD goes smoothly, and you can take full advantage of its benefits.

    Check if Your Motherboard Supports M.2 SSDs

    M.2 SSDs Have you been considering upgrading to an M.2 SSD but unsure if your motherboard is compatible? The first step is to check your motherboard’s specification to see if it has an M.

    2 slot. M.2 SSDs are incredibly fast and much smaller than traditional SATA-based SSDs.

    They come in different sizes and use different keys to ensure proper installation. Before purchasing an M.2 SSD, ensure that your motherboard supports the same key as the SSD.

    Most modern motherboards have multiple M.2 slots that support NVMe, PCIe, or SATA protocols. However, some older motherboards may not support M.

    2 SSDs at all. Upgrading to an M.2 SSD is a smart move, but first, make sure your motherboard is compatible to avoid any issues during installation.

    Easy Step-by-Step Guide to Install an M.2 SSD on Your PC

    Installing an M.2 SSD on your PC can significantly boost its performance, but you need to ensure its compatibility first. Not all motherboards support M.

    2 SSDs, so it’s crucial to check your motherboard’s manual before buying one. Additionally, not all M.2 SSDs are the same, so you should match the type and interface of the SSD with your motherboard’s M.

    2 slot. Once you’ve confirmed compatibility, installing the M.2 SSD is a straightforward process.

    First, remove the screw from the M.2 socket on your motherboard and insert the SSD into the socket. Secure it with the screw you removed earlier, and connect the SSD to the socket with the screw.

    Finally, close your PC case and turn on your computer to enjoy the benefits of a faster storage drive. By following these easy steps, you can install an M.2 drive on your PC and take full advantage of its speed and performance.

    Tips for Maintaining the Health of Your M.2 SSD

    Installing an M.2 SSD can be a bit overwhelming, but it’s crucial to ensure compatibility with your system to maintain the health of your drive. First things first, check your motherboard’s manual to see if it supports M.

    2 PCIe/NVMe or SATA. Typically, newer motherboards will support both, but it’s always good to double-check. Additionally, make sure you have the proper screw to secure the drive in place, as a loose connection can cause data corruption or physical damage.

    When installing the M.2 SSD, handle it carefully to avoid any static electricity buildup, and make sure to insert the drive into the socket at an angle before securing it in place. Double-check your BIOS settings to ensure the drive is recognized and configure it as your system’s primary boot drive.

    Following these simple installation and compatibility tips will help ensure the longevity and health of your M.2 SSD.

    Top M.2 SSD Brands and Models

    Looking for a speedy and reliable storage solution for your PC or laptop? Look no further than M.2 SSDs! These small, high-performance drives are a popular choice among gamers and professionals alike. If you’re in the market for an M.

    2 SSD, there are several brands and models worth considering. Samsung’s 970 EVO Plus is a favorite among enthusiasts, offering lightning-fast speeds and a sleek design. The Western Digital WD Blue SN550 is a great budget option that still delivers impressive performance.

    For those who need even more speed, the AORUS NVMe Gen4 SSD from Gigabyte is a top-of-the-line choice, boasting read and write speeds that are several times faster than traditional SSDs. Other notable options include the Crucial P5 and the Intel 665p. Regardless of your needs and budget, there’s an M.

    2 SSD out there that’s right for you!

    Compare the Best M.2 SSDs on the Market

    Looking for the best M.2 SSDs on the market? Look no further than some of the top brands and models in the industry. One of the most popular brands is Samsung, with their 970 EVO Plus and 970 PRO offerings leading the pack.

    The 970 EVO Plus boasts fast read and write speeds, making it a great choice for gamers and content creators alike. Another top brand is Western Digital, with their WD Black SN750 offering excellent performance with a unique heatsink design to prevent overheating. For budget-friendly options, the Crucial MX500 and Intel 660p are reliable choices that won’t break the bank.

    When it comes to choosing the best M.2 SSD for your needs, these brands and models are a great place to start your search.

    Choose the Perfect M.2 SSD for Your Budget and Needs

    As the demand for faster and more efficient storage solutions increases, M.2 SSDs have become an increasingly popular option for many consumers. With their compact design and lightning-fast read and write speeds, M.

    2 SSDs provide an ideal solution for those who are looking for faster boot and game load times. Some top brands that offer M.2 SSDs include Samsung, Western Digital, Kingston, and Seagate.

    Samsung’s 970 EVO Plus SSD is a favorite among many users, thanks to its exceptional performance and high endurance. Western Digital’s Black SN750 SSD and Kingston’s A2000 are also popular choices, providing excellent read and write speeds at an affordable price point. Seagate’s FireCuda 520 SSD boasts remarkable speed and capacity, making it an excellent option for power users.

    When choosing the perfect M.2 SSD for your budget and needs, it’s essential to consider the read and write speeds, capacity, endurance, and price. Whether you’re a gamer, a creative professional, or someone who needs a faster and more efficient storage solution, there’s an M.

    2 SSD out there that’s perfect for your needs.

    Upgrade Your PC with an M.2 SSD Today!

    If you’re looking to upgrade the performance of your PC, consider investing in an M.2 SSD. This small but mighty component can significantly boost your computer’s speed and overall efficiency.

    Unlike traditional hard drives, which use spinning disks to store data, M.2 SSDs use flash memory for lightning-fast read and write speeds. They’re also smaller and more energy-efficient than standard SSDs, making them a popular choice for gamers, content creators, and other power users.

    Installing an M.2 SSD is relatively easy, but be sure to check your motherboard’s compatibility and storage capacity before making a purchase. With an M.

    2 SSD, you can enjoy faster load times, smoother multitasking, and an overall snappier computing experience. So why not upgrade your PC with an M.2 SSD today?

    Conclusion

    In conclusion, an M.2 SSD is not just a fancy acronym. It’s a technological marvel that can make your computer lightning-fast and super-efficient.

    Think of it as a tiny, yet mighty, turbocharger that boosts your system’s speed and performance. So, if you want to take your computing experience to the next level, go ahead and invest in an M.2 SSD – it’s a wise choice that will surely pay dividends in the long run!”

    FAQs

    What is an M.2 SSD?
    An M.2 SSD (solid-state drive) is a storage device that uses the M.2 form factor and operates on the NVMe or SATA interface. It is usually faster and more compact than traditional 2.5-inch SSDs.

    How do I install an M.2 SSD?
    To install an M.2 SSD, first locate the M.2 slot on your motherboard. Insert the M.2 SSD into the slot at an angle and secure it with a screw. Then, boot up your system and initialize the drive in Disk Management.

    Can I use an M.2 SSD as my primary boot drive?
    Yes, you can use an M.2 SSD as your primary boot drive. In fact, many users prefer to use an M.2 SSD as the boot drive due to its fast read and write speeds.

    What are the advantages of using an M.2 SSD?
    Some advantages of using an M.2 SSD include faster boot and load times, reduced noise and heat, and improved durability and reliability compared to traditional hard drives. Additionally, M.2 SSDs are more compact, making them a good choice for laptops and other portable devices.

  • Upgrade Your Acer Aspire 5 with Ease: A Step-by-Step Guide on How to Add SSD

    If you own an Acer Aspire 5 laptop, you might have noticed that its hard drive struggles to keep up with the demands of modern computing. This is where adding an SSD comes in. By replacing the outdated hard drive with a new solid state drive (SSD), you can significantly improve your computer’s performance.

    In this blog post, we will guide you through the process of adding an SSD to Acer Aspire 5 and how it can help you enjoy faster boot times, smoother application launches, and quicker file transfers. So, let’s dive in and learn how to upgrade your laptop’s storage to an SSD.

    What You Need

    If you own an Acer Aspire 5 laptop and want to upgrade it with an SSD, there are a few things you’ll need. First, you’ll need a compatible SSD that is the right size and form factor for your laptop. You should also make sure that the SSD is compatible with your laptop’s connector interface (usually SATA or NVMe).

    Once you have the SSD, you’ll need a screwdriver to open the laptop and install the drive. Be sure to power off the laptop and unplug it before attempting any upgrades. Also, make sure to follow all safety precautions when working with electronics.

    Once you’ve successfully installed the SSD, you’ll need to transfer your data from the old hard drive to the new SSD. You can either clone the entire hard drive or manually transfer your important files and applications. With a new SSD installed, your Acer Aspire 5 will have improved performance and faster boot and load times.

    Tools

    When it comes to working online, having the right tools is essential. Whether you’re a content creator, digital marketer, or remote worker, there are certain tools you’ll need to help you do your job effectively. First and foremost, a reliable computer or laptop is crucial.

    You don’t want to be slowed down by slow load times or outdated technology. It’s also essential to have a stable internet connection, especially if you’re working remotely. Another important tool is a good headset or microphone, especially if you do a lot of video calls or virtual meetings.

    This will ensure clear communication with your team and clients. A comfortable chair and desk setup are also important to prevent posture and back issues. Finally, there are various online tools like project management software, cloud storage, and collaboration tools that are helpful for streamlining your work and staying organized.

    By investing in the right tools, you can be more efficient, productive, and ultimately achieve better results for your business or career.

    acer aspire 5 how to add ssd

    Compatible SSDs

    When looking to upgrade your computer’s storage, it’s important to ensure that you are choosing a compatible SSD. A solid state drive is a great way to improve the speed and performance of your computer, but if it’s not compatible with your system, it won’t work properly. To determine compatibility, you need to consider a few key factors.

    Firstly, the form factor of the SSD needs to match the available space in your computer. Additionally, you need to check that your motherboard supports the interface of the SSD, such as SATA or NVMe. It’s also important to check the capacity and speed of the SSD to ensure that it meets your needs.

    Finally, it’s always best to do your research and check with the manufacturer or a trusted expert to confirm compatibility before making a purchase. By taking these steps, you can ensure that you choose a compatible SSD that optimizes the performance of your computer.

    Preparing Your Laptop

    Are you looking to upgrade your Acer Aspire 5 with an additional SSD? If so, there are a few things you’ll need to do to prepare your laptop before adding the new hardware. First, ensure that you have all the necessary tools and supplies, including a screwdriver, an SSD of your choice, and any mounting brackets or cables required for installation. Once you have everything you need, shut down your laptop and unplug it from the power source to avoid any electrical damage during the installation process.

    Then, remove the back cover of your Acer Aspire 5 using the screwdriver and locate the area where the SSD will be installed. Depending on the specific model, there may be a designated slot or a mounting bracket to attach the new SSD. Carefully insert the new SSD into the appropriate location and secure it in place with any screws or brackets provided.

    After the installation is complete, replace the back cover and plug in your laptop to ensure everything is functioning correctly. With these steps, you can easily upgrade your Acer Aspire 5 with an additional SSD for improved performance and storage capacity.

    Back up Data

    Backing up your important data is crucial to ensure that you don’t lose any important files or documents. When preparing your laptop, it’s essential to create a backup plan. One way to do this is by using an external hard drive to store all your important files and documents.

    You could also consider using cloud storage options such as Google Drive or Dropbox. This way, even if your laptop gets stolen, lost, or damaged, you still have access to all your important data. Additionally, make sure to regularly update your backups to keep your data secure.

    Remember, creating a backup plan might take some time and effort, but it’s worth it in the long run. By having a backup plan in place, you can have peace of mind knowing that your data is secure no matter what happens.

    Power off & unplug

    When it comes to preparing your laptop, one of the most important steps is to power off and unplug it. It may seem like a simple task, but it is crucial to ensuring that your laptop stays safe and secure. Turning off your laptop allows it to rest and cool down, which helps to prevent overheating and potential damage to its internal components.

    Unplugging your laptop also ensures that it doesn’t accidentally turn on while you’re getting it ready for transport or storage. It’s important to note that you should never unplug your laptop while it is still running, as this can corrupt your data and cause permanent damage to your system. By taking the time to properly power off and unplug your laptop, you’ll be able to keep it in good condition and avoid any unnecessary headaches down the line.

    Installing the SSD

    If you’re looking to boost the storage capacity of your Acer Aspire 5 laptop, adding an SSD is a great way to go. To install an SSD, you’ll need to first locate the hard drive bay on your laptop. Typically, the hard drive bay is located on the bottom of the laptop and can be accessed by removing a few screws.

    Once you’ve accessed the hard drive bay, you can remove your current hard drive and replace it with your new SSD. Make sure to secure your new SSD in place with the screws provided, and then reattach any cables or connectors. After everything is securely in place, you can power up your new SSD and enjoy faster boot times and improved overall performance.

    With just a few simple steps, adding an SSD to your Acer Aspire 5 is a simple and effective way to increase your laptop’s storage capacity and performance.

    Open the laptop case

    Once you have decided to upgrade your laptop’s storage by installing an SSD, the first step is to open the laptop case. This can be a bit daunting, but with the right tools and instructions, it shouldn’t be too difficult. First, make sure you have unplugged the laptop and removed the battery.

    Use a screwdriver to loosen the screws that hold the case in place, and carefully lift off the cover. Take care not to damage any of the components inside. Once the case is open, you will be able to locate the hard drive and remove it.

    This will allow you to install the new SSD in its place. Remember, before you start, make sure you have all the necessary tools and research the process thoroughly. With a little patience and know-how, you’ll have your laptop up and running with a new, faster storage solution.

    Mount the SSD

    To install an SSD, you first need to open up your computer’s case and find an available bay where the drive can be mounted. Make sure to wear an anti-static wrist strap to protect yourself and your hardware from static electricity. Once you’ve located the bay, screw the SSD into place.

    Some bays may require you to use brackets or adapters to fit the drive properly. After securing the SSD, connect the necessary cables to both the power supply and the motherboard. Double-check to make sure everything is properly connected before closing the case.

    Congratulations! You’ve successfully installed your SSD, and you’ll now be able to experience faster boot times and improved system performance.

    Connect SSD & secure

    One of the most significant upgrades you can do for your computer is installing a solid-state drive or SSD. Not only does it significantly speed up your machine, but it’s also more robust and less prone to failure, making it a reliable choice for individuals who store a lot of data. Before installing the SSD, you’ll want to make sure that you properly connect it to your computer’s motherboard.

    First, you’ll need to identify the SATA connector on your motherboard and connect it to the corresponding port on your SSD. Once connected, secure the drive in place with screws, so it doesn’t move around or become damaged. Making sure you install the SSD correctly, and it’s well-secured will ensure you get the most out of your new upgrade.

    Configuring the SSD

    If you’re looking to boost the performance of your Acer Aspire 5, adding an SSD is a great way to do it. Not only can an SSD dramatically improve your system’s startup time and load speeds, but it can also give you more storage space for all your files and programs. To add an SSD to your Acer Aspire 5, you’ll need to open up the back panel of your laptop and locate the M.

    2 slot. Once you’ve found the slot, you can insert your SSD and secure it in place with the screw provided. From there, you’ll need to configure your BIOS settings to recognize the new drive.

    This involves going into your BIOS menu and navigating to the Boot section, where you can select your new SSD as your primary boot device. Finally, you can transfer your operating system and files onto your new SSD and enjoy the benefits of faster load times and increased storage space.

    Boot up laptop

    After booting up your laptop, configuring the SSD is the next important step to enhance the performance of your computer. SSDs are undoubtedly faster than the traditional hard drives, but without proper configuration, SSDs cannot work to their full potential. One of the crucial steps for configuring the SSD is to align the drive with the file system.

    Aligning helps the SSD to work specifically with the file system, enabling the computer to read and write data faster. Another way to enhance the performance of your SSD is by enabling TRIM. It is a command that ensures space previously occupied by a deleted file is freed up.

    When these steps are followed, the SSD can work at its peak performance. Make sure to keep these tips in mind as you configure your new SSD for your laptop.

    Initialize the SSD

    Initializing an SSD is an important step when configuring your computer storage. It involves preparing the drive for use by erasing any previous data and setting up a new file system. One effective way to do this is by using a tool called Disk Management if you’re using Windows or Disk Utility for Mac users.

    The software provides an easy-to-use interface that guides you through the initialization process. When initializing the SSD, you’ll need to choose between creating an MBR or GPT partition style, which determines the maximum size of the partition you want to create. Once the initialization is completed, you can then go ahead and start adding files to the drive.

    However, you need to ensure that you have selected the correct settings and partition size to avoid any data loss or formatting issues. Initializing an SSD can significantly improve the speed and performance of your computer, as well as ensure your data is organized efficiently.

    Clone or Install OS

    When configuring your SSD, there are a few steps you can take to optimize its performance and get the most out of its storage capacity. First, you’ll need to decide whether to clone your existing operating system or install a new one from scratch. Cloning your OS can save time and effort, but it also means transferring any existing issues or clutter from your current system onto the SSD.

    Installing a fresh OS, on the other hand, can take longer but allows for a more streamlined and efficient setup. Once your OS is up and running, it’s important to ensure that your SSD is properly configured for optimal performance. This includes adjusting the power settings, enabling TRIM support, and disabling disk defragmentation, among other tips and tricks.

    By taking the time to fine-tune your SSD, you can enjoy faster speeds and more efficient storage for years to come.

    Final Thoughts

    Adding an SSD to your Acer Aspire 5 can greatly improve its performance and allow it to handle more tasks at a faster speed. The process itself can be relatively simple, but it’s important to make sure you have the right tools and equipment before diving in. First, you’ll need to purchase an SSD that’s compatible with your laptop and make sure it has enough storage capacity for your needs.

    Then, you’ll need to open up your laptop’s casing and locate the storage bay where the SSD will be installed. Once you’ve installed the SSD, you’ll need to properly format it and transfer your operating system and other data to the new drive. Overall, the process of adding an SSD to your Acer Aspire 5 can be a great investment in the long-term performance of your laptop.

    Conclusion

    In conclusion, upgrading your Acer Aspire 5 with an SSD is like giving it a turbo boost. It’s the perfect way to improve performance and speed up your daily tasks without breaking the bank. Adding an SSD is a pretty straightforward process, but it requires some patience and attention to detail.

    With the right tools and a little bit of know-how, you can easily breathe new life into your trusty laptop. So go ahead, give your Acer Aspire 5 the upgrade it deserves and feel the difference for yourself!”

    FAQs

    What is the maximum SSD storage capacity that can be added to Acer Aspire 5?
    Acer Aspire 5 can accommodate up to 2TB SSD for storage upgrade.

    Is it possible to add an SSD to Acer Aspire 5 without voiding the warranty?
    Yes, it is possible to add an SSD to Acer Aspire 5 without voiding the warranty. However, it is recommended to seek professional assistance for installation to avoid damaging your device.

    Can Acer Aspire 5 support NVME SSDs?
    Yes, Acer Aspire 5 can support NVME SSDs for faster data transfer rates.

    Can the existing HDD on Acer Aspire 5 be replaced with an SSD?
    Yes, the existing HDD on Acer Aspire 5 can be replaced with an SSD for better performance and faster booting speeds. However, data migration is required to transfer contents from the old drive to the new one.