Author: David L. Lynn

  • Boost Your PC’s Performance: Step-by-Step Guide on How to Add an SSD

    Are you tired of slow boot and load times on your PC? Upgrading to a solid-state drive (SSD) is a simple and effective solution. An SSD can provide faster read and write speeds, improving your PC’s overall performance. Think of it as upgrading from a horse-drawn carriage to a sports car – it’s a game-changer.

    But how do you go about adding an SSD to your PC? Don’t worry, it’s not as complicated as it may seem. In this guide, we’ll walk you through the steps of adding an SSD to your PC and getting it up and running smoothly. So, let’s get started!

    Preparation

    If you’re looking to add an SSD to your PC, the first step is to make sure your PC is compatible with one. Check your motherboard and ensure it has an available SATA port for the SSD. You will also need to consider the size of the SSD you need, and whether you want it to be your primary or secondary storage drive.

    Next, you will need to physically install the SSD into your PC. Make sure your PC is turned off, then open the case and locate an available drive bay. Slide the SSD into the bay and secure it with screws.

    Once installed, you will need to format the SSD and transfer your files to it. This can be done through disk management in Windows or a third-party partition tool. Finally, you can set your SSD as the primary boot drive in your BIOS to increase the speed and performance of your system.

    With a little preparation and some basic knowledge, adding an SSD to your PC can be a fairly simple and straightforward process.

    Check Compatibility and Capacity

    Before you start any new project, it’s essential to ensure that all your equipment is compatible and has enough capacity to handle the job. This preparation step is vital when it comes to technology, especially in relation to computer peripherals and hardware. Before you invest in a new piece of equipment, check that it will work with your existing tech setup.

    Check the compatibility of both your computer system and the new hardware you are considering purchasing. Additionally, you should check that your computer will have the capacity to run the hardware and software that you are planning to use simultaneously. Having proper equipment and compatibility will improve your system’s overall performance, speed, and stability.

    Don’t skimp on this step as it can save you from unwanted headaches and frustration in the long run. So, make sure to invest in the right equipment, check the compatibility, and make sure your system can handle it.
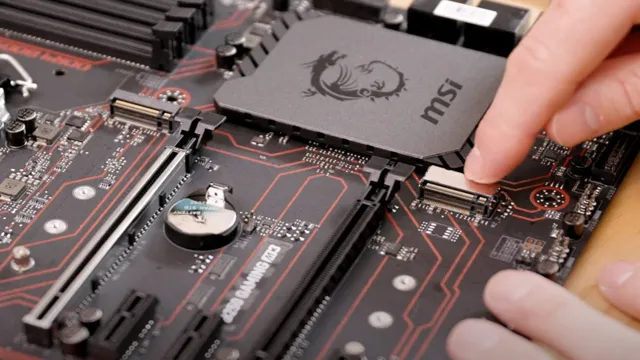
    how do you add ssd to a pc

    Gather Tools and Materials

    When it comes to any project, preparation is key. Gathering the necessary tools and materials is the first step in ensuring a successful outcome. Before starting any project, take the time to make a list of all necessary items.

    This could include anything from measuring tapes, screwdrivers, and hammers to paints, brushes, and sandpaper. The key here is to be organized and to have everything ready before starting. This will prevent any unnecessary trips to the store or delays in the project’s completion.

    One analogy would be to think of gathering tools and materials like packing for a trip. You don’t want to find yourself in a foreign country without the necessary essentials, just as you don’t want to start a project without the proper tools. So take the time to prepare and gather everything you need beforehand to ensure a smooth and successful project.

    Installation

    Adding an SSD to your PC is a great way to improve its performance. Installing an SSD is a fairly simple process, but it requires a bit of technical knowledge. First, you’ll need to open up your PC and locate the hard drive bay.

    If you already have a HDD installed, you’ll need to remove it before installing the SSD. Once you’ve done that, you’ll need to connect the SSD to the motherboard using a SATA cable and power cable. Make sure that you secure the SSD in the bay with screws.

    Next, you’ll need to clone your operating system from your HDD to your new SSD. You can use software like Acronis True Image or EaseUS Todo Backup to do this. Finally, you’ll need to change your boot order in the BIOS to make sure that your PC boots from the SSD.

    Overall, adding an SSD to your PC is a great way to speed up your system and improve your overall computing experience.

    Open the PC Case

    To begin the installation of a new component, the first step is to open the PC case. This can seem daunting, but with the right tools and knowledge, it’s a straightforward process. First, ensure the PC is turned off and unplugged from the wall.

    Locate the screws or latches on the side panel of the case and remove them. In some cases, the panel may slide off or require additional force to release. Once you have access to the inside of the case, take note of all the components and their placement.

    This will help you avoid accidentally disconnecting anything important. Ensure you discharge any static electricity before handling any components. Installing new hardware can be a great way to upgrade your PC’s performance, but always take care to avoid damaging any existing components.

    By following these steps and using caution, opening the PC case should be a breeze.

    Locate the SATA Ports

    When it comes to installing a SATA hard drive into your computer, one of the first things you’ll need to do is locate the SATA ports. These are small connectors on your motherboard that allow you to connect your hard drive directly to the computer. Depending on your motherboard, these ports may be labeled or color-coded for easy identification.

    Typically, SATA ports are located near the bottom of the motherboard, near the edge, and are easily accessible. Once you’ve identified where the SATA ports are located, you can begin to connect your hard drive and other necessary components. It’s important to take your time here and make sure that everything is connected securely and in the correct order.

    With a little bit of patience and attention to detail, you’ll be up and running in no time.

    Mount the SSD

    To install an SSD in your computer, you must first mount it securely. This process is relatively easy, but it’s important to be careful and take your time to avoid any damage or mistakes. First, make sure your computer is turned off and unplugged.

    Then, locate the SSD mounting area in your computer’s chassis. It’s usually located near the hard drive bays. If you can’t find it, consult your computer’s manual or manufacturer’s website.

    Once you’ve located it, attach the mounting bracket to the SSD using screws provided with your SSD. Then, slide the SSD into the mounting area and secure it in place using additional screws if necessary. Be sure the SSD is snug and secure before you turn your computer back on.

    Once you’ve mounted the SSD, you can move on to the next step of installing and configuring it for use. Following these steps will ensure a successful and seamless installation for your new SSD.

    Configuration and Optimization

    Adding an SSD to your PC is a great way to optimize its performance. SSDs, or solid state drives, are a type of data storage that is faster and more durable than traditional hard drives. To add an SSD to your PC, you will first need to choose the right SSD for your needs.

    You will also need to make sure that your PC has an available slot for the SSD. Once you have your SSD, you can install it by opening up your PC and connecting the SSD to the motherboard using a SATA cable. After you have installed the SSD, you will need to configure your PC to use it as the boot drive.

    This will ensure that your PC starts up faster and runs more smoothly. With an SSD, you can enjoy faster load times, quicker data transfer speeds, and an overall smoother computing experience.

    Update BIOS and Drivers

    If you want to get the most out of your computer, then you need to update your BIOS and drivers. BIOS stands for Basic Input/Output System, which is responsible for booting up your computer and initializing hardware components such as the CPU, memory, and hard drive. Meanwhile, drivers are software programs that allow your computer to communicate with peripherals such as printers, scanners, and cameras.

    Updating your BIOS and drivers can improve system stability, fix bugs, add new features, and enhance performance. By doing so, you can make sure that your computer is running smoothly and efficiently, and that you are getting the most out of your hardware. So, if you haven’t done so already, take some time to check for updates and install them.

    You’ll be glad you did!

    Clone or Install OS on SSD

    One of the most effective ways to improve the speed and performance of your computer is to clone or install your operating system (OS) onto your SSD. By doing this, you can drastically reduce the boot-up time and improve the overall responsiveness of your machine. There are two ways to go about doing this: cloning your existing OS or doing a fresh install.

    Cloning allows you to transfer all your existing files and settings onto the new SSD, while a fresh install will give you a clean slate to work with. The key thing to keep in mind is to ensure that your SSD has enough space to accommodate your existing data if you choose to clone it. Additionally, configuring and optimizing your SSD after the installation is crucial to ensure maximum performance benefits.

    This includes changes to your BIOS settings, disabling unnecessary features, and ensuring that your drivers and software are up to date. With these steps, you can give your computer a much-needed speed boost and optimize it for better performance.

    Conclusion

    Adding an SSD to your PC can be a game changer in terms of overall performance and speed. It’s like giving your computer a cup of espresso in the morning – it wakes it up and gets it ready to tackle any task. Whether you’re a gamer, a professional videographer, or just a casual user, adding an SSD can improve your computing experience in ways you never thought possible.

    So, go ahead and give your PC the upgrade it deserves, and watch as it transforms from a slowpoke to a speedy beast in no time!”

    FAQs

    What is an SSD and how does it differ from a HDD?
    An SSD is a solid-state drive that uses flash memory to store data, while a HDD is a hard disk drive that uses spinning disks with magnetic coating. SSDs offer faster read and write speeds, greater durability, and lower power consumption than HDDs.

    Can any PC be upgraded with an SSD?
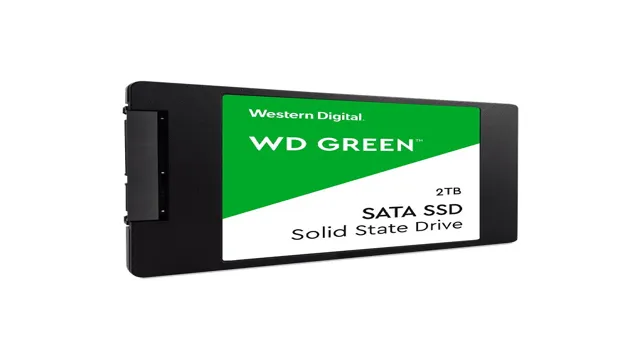
    Most desktop and laptop computers can be upgraded with an SSD as long as they have a compatible interface (SATA or NVMe) and an available drive bay. Some ultra-thin laptops and small form factor PCs may not have room for a standard 2.5-inch SSD.

    What tools do I need to install an SSD in my PC?
    You will need a screwdriver, an anti-static wristband or mat, and possibly a SATA or NVMe cable depending on your SSD and motherboard. It’s also a good idea to have a backup of your important data before installing the new drive.

    How do I transfer my operating system and files to the new SSD?
    You can use cloning software such as Clonezilla or Macrium Reflect to make an exact copy of your existing drive onto the new SSD. Alternatively, you can do a fresh install of the operating system and manually transfer your files and programs. Be sure to update your BIOS and drivers after installing the new SSD.
  • Upgrade Your PC’s Speed and Performance with M.2 SSD 500GB: Your Ultimate Guide

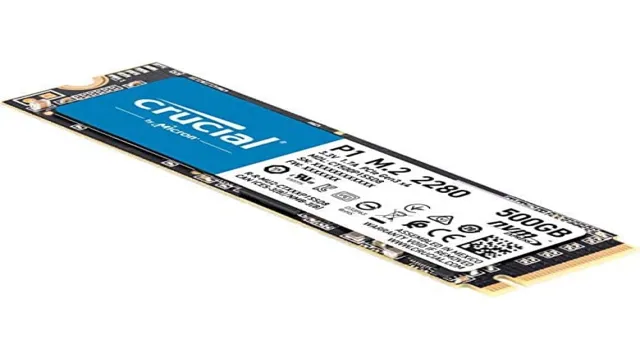
    Is your PC struggling to keep up with your daily workload? Perhaps it’s time for an upgrade! One of the most significant improvements you can make is swapping out your old hard drive for a shiny new SSD. And when it comes to SSDs, nothing beats the speed and capacity of the 500GB M.2 SSD.

    Think of it as giving your PC a shot of adrenaline. With read and write speeds up to 3,500 MB/s and 2,900 MB/s, respectively, all your apps, games, and files will load lightning-fast. No more waiting for sluggish boot-ups or application launches! The 500GB M.

    2 SSD is also a great choice for anyone who needs ample storage space. Its compact design makes it easy to install in any compatible system, without taking up extra space. Plus, its high durability ensures that your data is safe and secure, even during drops or impacts.

    So, what are you waiting for? Upgrade to the 500GB M.2 SSD today and give your PC the boost it needs to keep up with your busy lifestyle!

    Boost Your Performance with Lightning Fast Speed

    If you’re looking to boost your PC’s performance to lightning-fast speed, consider upgrading to an M.2 SSD 500GB. This type of solid-state drive is smaller and faster than traditional HDDs, giving you faster boot times, quicker data access, and smoother multitasking capabilities.

    With an M.2 SSD 500GB, you can load games and programs in seconds, stream high-quality media with ease, and run multiple apps at once without any lag or stutters. Plus, since it’s a solid-state drive, you won’t have to worry about mechanical failures or data loss due to physical damage.

    So if you’re tired of slow load times and sluggish performance, an M.2 SSD 500GB could be just what you need to take your PC to the next level.

    Experience faster boot and load times

    Looking to upgrade your computer’s performance? One of the best ways to make a noticeable difference is by improving your boot and load times. With faster boot times, you’ll be able to start up your computer quickly and jump right into your work or play. And when it comes to load times, you won’t have to wait around for programs or files to open up, enabling you to work faster and more efficiently.

    The true key to unlocking lightning-fast speeds lies in optimizing your computer’s hardware and software. By upgrading your hard drive to a solid-state drive or installing more RAM, you’ll see significant improvements in boot and load times. Additionally, regularly flushing out unnecessary programs and files and adjusting your power settings can help streamline your system for optimal performance.

    Remember, investing in faster speeds can save you time, increase productivity, and improve your overall computing experience.

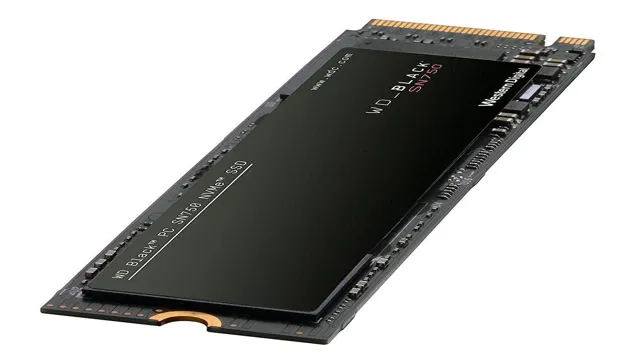
    m 2 ssd 500gb

    Enjoy seamless multitasking and gaming

    Are you tired of your computer slowing down when you’re trying to get things done? Do you find yourself getting frustrated when playing your favorite games because of lag? Well, it’s time to boost your performance with lightning fast speed. With the right technology, you can enjoy seamless multitasking and gaming without any hiccups. The key is finding a computer with a powerful processor and plenty of RAM.

    These components work together to ensure that your computer can handle multiple tasks without slowing down. So, the next time you’re picking out a new computer, make sure it has the speed you need to keep up with your busy life. Trust us, you won’t regret it.

    Reliable Storage for Your Data

    Looking for a reliable storage solution? Look no further than the M 2 SSd 500GB. This powerful storage option offers lightning-fast speeds and unparalleled reliability, making it the perfect choice for anyone who needs to store and access important data quickly and easily. Whether you’re a gamer, a professional photographer, or simply need a secure place to store your documents and files, the M 2 SSD 500GB is the perfect choice.

    With its high-speed read and write speeds, this compact storage solution is ideal for anyone who needs to access and retrieve data quickly and efficiently. So what are you waiting for? Invest in the M 2 SSD 500GB today and experience the power and performance of one of the most reliable storage solutions on the market!

    Protect your files with advanced security features

    Protecting your data is crucial these days with increasing cyber threats and data breaches. Reliable storage for your data can give you peace of mind knowing that your important files are safe and secure. Many storage options offer advanced security features, such as encryption, access controls, and redundancy, which can prevent unauthorized access and data loss.

    With encryption, your files are scrambled and can only be accessed with a password or encryption key, making it difficult for anyone to hack into your files. With access controls, you can limit who can access certain files, ensuring that your sensitive information is only seen by those with permission. Redundancy means that your data is stored in multiple locations, providing backups in case of unexpected system failure or data loss.

    By utilizing these advanced security features, you can protect your files and maintain confidence in your data storage solution.

    Get peace of mind with long endurance and reliability

    When it comes to storing your important data, you want peace of mind knowing that it’s safe and secure. That’s why choosing reliable storage is essential. Long endurance and reliability are crucial factors to consider when selecting a storage solution.

    A dependable storage device offers you durability and longevity, ensuring your data stays safe and accessible for an extended period. With reliable storage, you won’t have to worry about sudden breakdowns, and you can trust that your data will always be accessible when you need it. Choosing reliable storage is like choosing a trustworthy friend who’s always there for you.

    Just like how a dependable friend can provide you with comfort and peace of mind, choosing reliable storage can provide you with the same level of ease and confidence in knowing that your data is safe and secure. So, opt for a storage device that’s durable, efficient, and trustworthy, and enjoy the peace of mind that comes with knowing your data is in good hands.

    Save space with a compact form factor

    When it comes to storing your important data, reliability is key. That’s why a compact form factor for your storage solution can be a lifesaver. Not only does it allow you to save precious desk space, but it can also be a more reliable option than larger, more cumbersome storage options.

    With a smaller size comes a smaller chance of mechanical failure and fewer potential points of failure overall. Plus, a compact form factor can make your data more portable and easier to access on-the-go. So, the next time you’re considering a new storage solution for your data, don’t overlook the benefits of a compact form factor.

    Your data (and your desk) will thank you.

    Easy Installation and Compatibility

    If you’re looking for a fast and efficient way to upgrade your computer’s storage, an M.2 SSD 500GB might just be what you need. Not only does it offer blazing-fast read and write speeds, but it’s also incredibly easy to install, even for those who are not technically savvy.

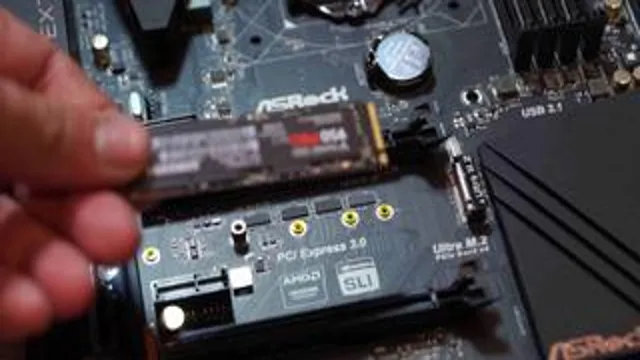
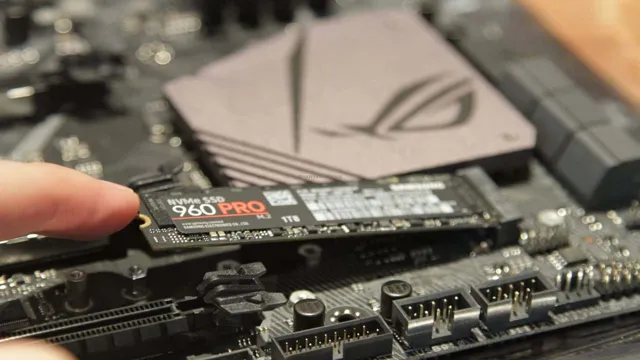
    All you need to do is open up your computer’s case and slot the M.2 SSD into the appropriate slot on the motherboard. Plus, M.

    2 SSDs are compatible with a wide range of devices, including laptops and desktops. This means you can enjoy faster boot times, smoother app launches, and seamless performance across multiple devices. So if you want to take your computing experience to the next level, consider upgrading to an M.

    2 SSD 500GB.

    Choose from a variety of brands and prices

    When it comes to choosing the right brand and price for your next home project, it can be overwhelming. That’s where we come in, offering a wide array of options to fit your budget and needs. Our products are known for their easy installation and compatibility, making the DIY process a breeze.

    Whether you’re a seasoned handyman or a novice DIY enthusiast, we have something for everyone. Our selection ranges from trusted and reliable brands to more affordable options, allowing you to choose what’s best for you. What sets us apart is our commitment to quality.

    We only offer products that we believe in, ensuring that they meet our high standards for durability and performance. You can trust that when choosing a product from us, you’re getting top-notch quality. Our products are also designed with ease of use in mind.

    They’re simple to install and don’t require any special tools or expertise. This means you can get your project done quickly and efficiently, without the hassle of complicated installations. Compatibility is also a top priority for us.

    We understand how frustrating it can be to purchase something only to find out it doesn’t work with your existing setup. That’s why we make sure our products are compatible with a wide range of systems and devices, so you can be confident in your purchase. In summary, when it comes to choosing the right product for your home project, we offer a wide range of options to fit your needs and budget.

    Our products are known for their easy installation and compatibility, making the DIY process stress-free. Trust us to provide quality products that will get the job done right.

    Easily install the drive with simple instructions

    When it comes to installing a drive, it can seem daunting at first, but with simple instructions, it can be a breeze. The installation process is made easy with compatibility in mind. The instructions are clear and straightforward, allowing anyone to carry out the process with little to no difficulty.

    Not only are the instructions easy to understand, but the installation process is also relatively quick. There is no need to be an expert in installations or technology; anyone can do it. The drive’s compatibility also ensures that it can be quickly installed into your computer without any issues.

    In short, the installation process for any drive is easy and straightforward, and it can be done by anyone with the right tools in no time.

    Upgrade Your PC Today for Better Performance

    Are you tired of slow loading times and sluggish performance from your computer? An easy solution to upgrade your PC’s performance is by installing an M.2 SSD 500GB. This small but mighty device can significantly improve your boot-up times, file transfer speeds, and overall system responsiveness.

    The M.2 SSD’s compact size and lack of moving parts make it more durable and reliable than traditional hard drives. Plus, with its high-speed read and write capabilities, you won’t have to endure frustrating lag times when opening large files or programs.

    So if you want to take your computing experience to the next level, consider upgrading to an M.2 SSD 500GB. Your computer (and your sanity) will thank you!

    Conclusion

    In conclusion, an M.2 SSD 500GB is like having a high-end sports car for your computer. It’s fast, reliable, and gets you where you need to go in record time.

    With lightning-fast read and write speeds, you’ll be able to open your favorite programs and files in the blink of an eye. And, just like a sports car, it’s compact and sleek, making it easy to fit into any system. So if you want to take your computer to the next level, get yourself an M.

    2 SSD 500GB and feel the speed!”

    FAQs

    What is an m.2 SSD and how is it different from a traditional hard drive?
    A m.2 SSD is a solid-state drive that connects directly to the motherboard, unlike a traditional hard drive that connects via a cable. This makes m.2 SSDs more compact and faster, as there is no latency caused by data transfer through cables.

    Can I use an m.2 SSD with any computer or motherboard?
    No, not all computers or motherboards support m.2 SSDs. You should check the specifications of your computer or motherboard to determine if they have an m.2 slot.

    How much data can a 500GB m.2 SSD hold?
    A 500GB m.2 SSD can hold approximately 100,000 photos, 80 hours of high-definition video, or 250,000 songs, depending on the file size.

    Is it worth upgrading to a m.2 SSD from a traditional hard drive?
    Yes, upgrading to an m.2 SSD can significantly improve your computer’s speed and performance, as the read and write speeds are much faster than traditional hard drives. However, it may not be necessary if you don’t frequently use resource-intensive applications or large files.

  • Experience Lightning-Fast Speed with ZTC SSD: The Ultimate Solution for Data Storage

    Do you ever feel like your device is slowing down over time? It’s frustrating when your applications take ages to load, and your device’s performance is sluggish at best. Luckily, you don’t have to put up with it anymore. A ZTC SSD could be the perfect solution to boost your device’s performance.

    A blade SSD is a newer, innovative alternative to traditional hard drives, using flash memory to store data. Installing a ZTC SSD in your device can increase its performance by several factors, drastically reducing the time taken to boot up and load applications. With faster load times and more space for storage, a ZTC SSD is a cost-effective solution for anyone who wants their device to perform better.

    In this blog, we’ll look at how a ZTC SSD could benefit your device and the different options available.

    What is a ZTC SSD?

    A ZTC SSD is a solid-state drive that is specially designed to function as a replacement for the traditional spinning hard disk drives found in most desktop and laptop computers. ZTC SSDs are known for their high speed and reliability, which makes them an ideal choice for users who demand more from their storage devices. Unlike traditional hard drives, which use spinning disks to store data, SSDs use flash memory to store and retrieve data quickly and effectively.

    This makes them much faster than traditional hard drives, which can often be a bottleneck in the performance of a computer system. ZTC SSDs come in a range of capacities and form factors, making it easy to find the right one for your specific needs.

    Introduction to Blade and ZIF Drives

    Blade and ZIF drives are compact storage devices that have gained much popularity in recent years. However, you may also come across the term ZTC SSD, which stands for Zero Transmission Count SSD. What is it, you ask? Essentially, it is a type of SSD that eliminates the use of the standard transmission channels commonly found in other SSDs.

    This allows the ZTC SSD to achieve a higher level of performance and reduce lag during data transmission. In simpler terms, a ZTC SSD gets the job done faster and more efficiently, making it ideal for those who demand speed and efficiency in their storage devices. So, whether you are a gamer, a content creator, or a professional in the healthcare industry, a ZTC SSD can help you complete your tasks in record time.

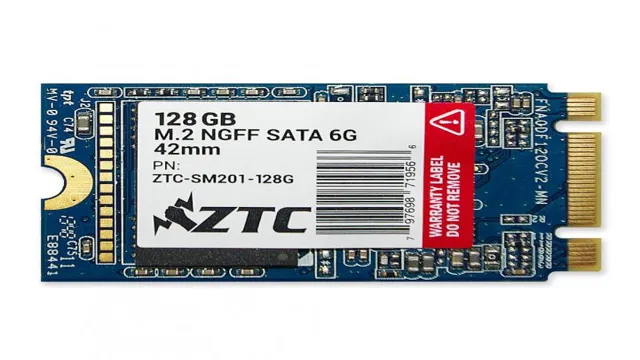
    ztc ssd

    The Benefits of Upgrading to a ZTC SSD

    If you’re looking to upgrade your computer’s speed and performance, you might want to consider getting a ZTC SSD. But what exactly is a ZTC SSD? Essentially, it’s a type of solid-state drive that uses a more advanced controller chip than traditional SSDs, which allows for faster read and write speeds. This means that your computer can boot up faster, load programs quicker, and transfer files more efficiently.

    In addition to speed, ZTC SSDs also offer a longer lifespan and improved durability compared to other types of SSDs. Overall, upgrading to a ZTC SSD can provide a significant boost to your computer’s performance and make your daily tasks much smoother and faster. So if you’re ready to take your computing experience to the next level, consider investing in a ZTC SSD for your system.

    Compatibility and Installation

    If you’re planning on upgrading your PC or laptop with a new ZTC SSD, it’s important to ensure that it’s compatible with your system. Fortunately, ZTC SSDs are generally compatible with most motherboard and operating systems, but it’s always best to double-check the specifications of your system and the SSD before making a purchase. Additionally, installing the ZTC SSD is a relatively simple process.

    If you’re replacing an old hard drive, all you need to do is remove the old drive and install the new SSD in its place. However, if you’re installing the SSD as an additional drive, make sure to plug it into an available SATA port on your motherboard and configure it as a new drive in your operating system. Overall, ZTC SSDs offer a reliable and high-speed storage solution that can greatly improve the performance of your system.

    Choosing the Right ZTC SSD for Your Device

    When it comes to choosing the right ZTC SSD for your device, compatibility and installation are two key factors to consider. Not all SSDs are compatible with every device, so it’s important to check the specifications of both your device and the SSD you’re considering before making a purchase. You’ll want to make sure the SSD is the correct size and form factor for your device, and that it’s compatible with the interface (such as SATA or PCIe) your device uses.

    Additionally, installation can vary depending on the device and SSD, so it’s important to follow the manufacturer’s instructions carefully to avoid any problems. By taking these factors into consideration, you can ensure that your ZTC SSD will work seamlessly with your device and provide the performance boost you’re looking for.

    Installation Process and Tips for Optimal Performance

    When it comes to installing software, there are a few key things to keep in mind to ensure optimal performance. Firstly, it’s important to ensure that you have the correct version of the software for your operating system. Before you begin the installation process, make sure to check for any compatibility issues.

    Additionally, be sure to follow the instructions provided carefully and complete all necessary steps. In some cases, you may need to configure certain settings to ensure that the software runs smoothly. If you’re having trouble, don’t hesitate to reach out to customer support for assistance.

    By taking these steps, you can ensure a smooth installation process and get the most out of your software. And remember, always keep your software updated for the best possible performance!

    Troubleshooting Common Installation Issues

    When it comes to installation and compatibility issues, there are several factors that come into play. One common problem people face is trying to install software on incompatible operating systems. For example, if you’re trying to install software designed for Windows on a Mac computer, it’s bound to cause some problems.

    Another issue could be outdated hardware or insufficient system requirements. This can cause the installation to fail or the software to run improperly. It’s important to make sure your computer meets the requirements before attempting to install any new software.

    Another solution could be to update your system and hardware if needed. Overall, ensuring compatibility and system requirements is key to avoiding common installation issues.

    Comparing ZTC SSDs to Other Solid State Drives

    When it comes to solid state drives, there are many options on the market. One such option is the ZTC SSD, which is a high-performance drive that offers fast read and write speeds. When comparing the ZTC SSD to other SSDs, there are a few key factors to consider.

    One important factor is the type of NAND flash used in the drive. The ZTC SSD uses SLC NAND flash, which is known for its durability and reliability. Another factor to consider is the speed of the drive.

    The ZTC SSD offers fast read and write speeds, which can be important for users who need to transfer large amounts of data quickly. Ultimately, when choosing a solid state drive, it is important to consider your specific needs and requirements to determine which drive is the best fit for you. If you need a high-performance drive that offers fast read and write speeds and reliable performance, the ZTC SSD may be a good option to consider.

    Performance and Reliability Compared to Other Brands

    When it comes to performance and reliability, ZTC SSDs stand out in comparison to other brands of solid state drives. ZTC has earned its reputation as a top-notch manufacturer of high-quality SSDs, which consistently outperform and outlast many of their competitors. One of the biggest factors in ZTC’s success is the company’s focus on using only the best components in their drives.

    This attention to detail allows ZTC to produce SSDs that are both fast and reliable, providing users with the best possible experience. When compared to other brands, ZTC SSDs consistently rank higher in terms of read and write speeds, endurance, and overall reliability. Additionally, ZTC SSDs are known for their exceptional customer support, which sets them apart from many of their competitors.

    Whether you are in need of a new SSD for your personal computer or for a business application, ZTC is a brand you can trust to deliver top-notch performance and reliability.

    Cost Comparison and Value for Money

    When it comes to solid state drives, getting the best value for your money is important. While ZTC SSDs may not be as well-known as other brands, they definitely hold their own when it comes to performance and cost. Comparing ZTC SSDs to other solid state drives on the market, you’ll find that ZTC offers similar storage capacities and read/write speeds at a more affordable price point.

    In fact, many reviewers have found that ZTC SSDs provide some of the best cost-per-gigabyte ratios available. So, if you’re looking for a high-quality SSD that won’t break the bank, ZTC is definitely worth considering.

    Final Thoughts and Recommendations

    Overall, if you’re looking for a reliable and cost-effective SSD option, the ZTC SSD is definitely worth considering. With its fast read and write speeds, as well as its durability and reliability, this SSD is a great choice for those who want to upgrade their computer’s performance without breaking the bank. Additionally, with its easy installation process and user-friendly interface, even technology novices will be able to get up and running with minimal hassle.

    Overall, if you’re in the market for an SSD and want a reliable and high-performing option, the ZTC SSD is definitely worth checking out.

    Conclusion

    In the world of storage devices, the ZTC SSD stands out as a ray of light in a sea of mediocrity. It’s a clever and innovative solution that showcases the power and speed that cutting-edge technology can offer. Its ability to transfer data quickly and efficiently makes it a reliable and valuable asset for any user.

    So if you’re looking for a storage device that’s fast, dependable, and all-around awesome, look no further than the ZTC SSD – because it’s the real deal.”

    FAQs

    What are the benefits of using a ZTC SSD?
    ZTC SSDs offer faster data transfer rates, improved system responsiveness, and reduced boot times compared to traditional hard drives. They are also more reliable and durable due to their lack of moving parts and have lower power consumption.

    How do I install a ZTC SSD in my computer?
    To install a ZTC SSD in your computer, first, make sure you have the appropriate connections and space available on your motherboard. Then, open up your computer case, locate the hard drive bay, and carefully connect the ZTC SSD. Finally, secure the SSD in place with screws or clips.

    Can I upgrade my old laptop with a ZTC SSD?
    Yes, you can upgrade your old laptop with a ZTC SSD as long as it has a compatible connection interface. Check the user manual or online specifications to ensure compatibility.

    How do I know what size ZTC SSD to purchase?
    The size of the ZTC SSD you should purchase depends on your storage needs. Consider how much data you currently have and estimate how much you might need in the future. Aim to purchase an SSD with at least enough storage capacity to hold your operating system and frequently used applications.

  • Unlock the Potential of Your SSD: Step-by-Step Guide on How to Fix Unallocated SSD

    Dealing with an unallocated SSD can be a frustrating and confusing experience. Suddenly you’re unable to access your data, and you’re left wondering what went wrong. Fortunately, there are several ways to fix an unallocated SSD and recover your lost data.

    In this article, we will explore the causes of SSD allocation issues and provide you with some useful tips and tricks to get your drive up and running again. So, if you’re looking for a quick and hassle-free solution to recover your lost data from an unallocated SSD, then keep reading!

    Understanding unallocated SSDs

    If you’re facing an unallocated SSD issue, you’re not alone. Unallocated SSDs usually occur due to hard disk failures or incorrect disk partitioning. The good news is, you can repair it without much hassle.

    The first step is to ensure that the unallocated space is visible. Once you’ve done that, you can create a new volume, which will automatically format the lost space. You can also use a data recovery software to restore your data if necessary.

    Remember to back up your data regularly to protect against unforeseen data loss. In summary, fixing an unallocated SSD is a straightforward process as long as you follow the correct steps, and it’s crucial to take preventative measures to avoid future issues.

    What is an unallocated SSD?

    An unallocated SSD is a solid-state drive that hasn’t been partitioned or formatted yet. It’s essentially a blank slate that requires initialization before it can be used. Unallocated SSDs are common in new computers as well as when upgrading or replacing an old hard drive.

    Failing to set up an unallocated SSD properly can lead to poor performance or even data loss. Think of it as a blank canvas waiting to be painted. You need to partition it to create separate sections where you can store data and install an operating system.

    Formatting is the process of preparing the drive for use with a specific file system. Once you’ve completed these crucial steps, you’ll have a fully functional SSD ready to store your files and enhance your computer’s overall performance.

    how to fix unallocated ssd

    What causes an SSD to become unallocated?

    SSD unallocated An SSD becomes unallocated when the drive loses its partition. In simple terms, the SSD’s storage space is not assigned to a specific partition, which means your files become inaccessible. This can occur due to several reasons, including malware infections, operating system crashes, and accidental deletion or formatting of the partition.

    When an SSD becomes unallocated, Windows Disk Management tool may show the drive as RAW, unformatted, or unallocated. However, this doesn’t mean your data is lost forever. You can still recover data from an unallocated drive using specialized data recovery software like EaseUS Data Recovery Wizard.

    But it’s important to avoid using the defective drive to prevent further data corruption and overwrite chances. Keeping regular backups and maintaining the drive’s health is imperative in preventing SSD unallocation.

    Diagnosing the issue

    If you’re experiencing an issue with an unallocated SSD, there are a few things you can do to diagnose the issue. First, you’ll need to check if the SSD shows up in Disk Management. If it doesn’t appear, try checking the connection in your PC or laptop.

    Ensure that the SATA and power cables are properly attached. If the SSD does show up in Disk Management but appears as unallocated space, you can try using a partition recovery tool to recover any lost partitions. There are numerous free partition recovery tools available online that can help you do this.

    Alternatively, you can try initializing the SSD to create a new partition, but this will cause any data on the SSD to be lost. Once you’ve identified the problem, you can take appropriate steps to fix your unallocated SSD and get back to using your device as normal.

    Checking disk management

    When you are faced with disk-related issues, one of the first things you should do is check your disk management utility. Disk management is a crucial function of your computer that allows you to manage your drives and partitions. It is also the first place you should look if you are experiencing problems with your disk, such as missing drives, volumes, or partitions.

    To diagnose the issue, you can open the disk management tool and look for the status of your drives and partitions. If you see any errors or warnings, you can investigate them further to determine the cause of the issue. Additionally, you can use the disk management tool to format or resize your disks, which can help resolve some problems related to disk space or file system errors.

    By regularly checking your disk management, you can stay on top of any issues and ensure that your computer is running efficiently.

    Running built-in SSD diagnostic tools

    Running built-in SSD diagnostic tools can be a useful way to diagnose and troubleshoot any issues with your SSD. Nowadays, most SSDs come equipped with their own built-in diagnostic tools, which can help detect and identify any underlying issues. These tools allow you to run a number of diagnostic tests, including SMART tests, multi-point temperature checks, and block-level testing.

    By running these diagnostic tests, you can easily identify any potential problems with your SSD, such as bad blocks, read/write errors, and overheating issues. This not only helps to ensure that your SSD is functioning optimally, but can also help to prevent data loss and other issues down the line. Overall, if you’re experiencing any issues with your SSD, running built-in diagnostic tools is a great place to start.

    Recovering data from an unallocated SSD

    If you find yourself dealing with an unallocated SSD, don’t panic as it’s not the end of the world. An SSD may become unallocated due to several reasons, such as power surges, accidental formatting, malware, and many more. The good news is that it’s possible to recover all the data stored in the drive.

    However, you’ll need to use a high-quality data recovery software tool to do so. Many data recovery tools are available, but not all of them are created equal. When looking for one, ensure that it’s capable of recovering data from unallocated SSDs.

    Once you’ve selected a suitable data recovery tool, install it and follow the instructions provided. The tool will scan the unallocated SSD to identify and recover any lost data. While some data may still be lost forever, it’s worth a try to restore it.

    In summary, when dealing with an unallocated SSD, keep calm and use a data recovery tool to recover any lost data.

    Using data recovery software

    Data recovery software is a powerful tool that can help you recover lost, deleted, or corrupted files from a variety of storage devices, including solid-state drives (SSDs). If you have an unallocated SSD, it means that the partition table or file system has been damaged, and the drive is no longer recognized by your computer. However, with the help of data recovery software, you may still be able to recover your data.

    This software works by scanning the unallocated space on your drive for any recoverable data and then reconstructing it into usable files. It’s important to note that the success rate of data recovery from an unallocated SSD can vary depending on the extent of the damage and the quality of the software you choose. To increase your chances of recovering your data, it’s best to use a reputable data recovery software program that specializes in SSD recovery and follow the instructions carefully.

    Working with a professional data recovery service

    When it comes to data recovery, working with a professional service is key to retrieving your lost files. If you’re dealing with an unallocated SSD, it’s even more important to seek out a professional who has experience with this type of issue. An unallocated SSD means that the data partition on your drive has been completely erased or deleted, making it difficult to recover any lost data.

    However, a professional data recovery service can use specialized tools and techniques to analyze the drive and attempt to retrieve any remaining files. It’s important to note, though, that not all data may be recoverable in these cases. So, if you find yourself faced with an unallocated SSD, don’t panic – instead, contact a trusted data recovery professional who can guide you through the process and help you retrieve any crucial data you may have lost.

    Fixing the unallocated SSD

    If you have encountered the frustrating issue of an unallocated SSD, don’t worry, it is a common occurrence, and there are ways to fix it. Firstly, you need to ensure that your SSD is properly connected to your system. If it is not, your computer may not recognize it, and this could cause the unallocated status.

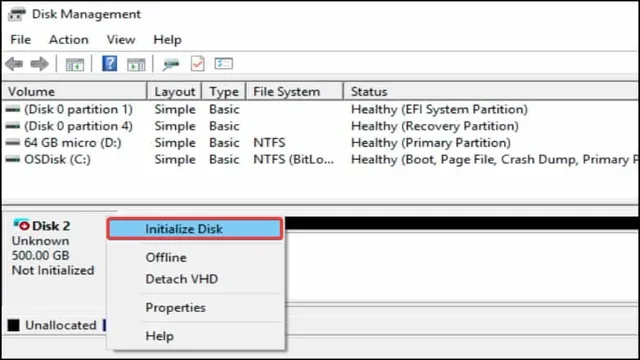
    Once you have confirmed that the SSD is properly connected, you need to assign a new volume to it. You can do this by going to Disk Management and selecting the unallocated SSD. Right-click on it, and then click on “New Simple Volume.

    ” Follow the prompts to allocate the volume, assign a drive letter, and format the SSD. This should resolve the issue of your unallocated SSD, and you can now use it as normal. Remember to keep your SSD updated with the latest firmware and software updates to prevent future issues.

    By following these simple steps, you can easily fix an unallocated SSD.

    Assigning a new drive letter

    When your SSD is showing as unallocated, assigning a new drive letter can be a solution to fix the problem. To do this, you need to access Disk Management by right-clicking on the Windows start menu and selecting it from the list. In Disk Management, you should see your SSD listed with unallocated space.

    Right-click on it and select “New Simple Volume,” then follow the prompts to assign a new drive letter. This process will initialize and format the SSD, allowing it to be recognized by the system and assigned a letter for easy access. By assigning a new drive letter, you’ll be able to utilize your SSD and enjoy faster loading times for your applications and files.

    Creating a new partition

    Creating a new partition is an easy solution for fixing an unallocated SSD. To start, open the Disk Management tool by right-clicking on the Windows button and selecting Disk Management. Once there, locate the unallocated SSD and right-click on it.

    Select New Simple Volume, and follow the prompts. You’ll have the option to set the size of the partition and assign it a letter. This process will format the unallocated space and create a new partition on your SSD.

    Remember to create a backup of your data before making any changes to your storage devices. By creating a new partition, you’ll effectively fix the unallocated space on your SSD, making the remaining space easy to manage. With a little bit of know-how, you can fix technical issues yourself and save yourself the hassle of having to take your computer to a technician.

    Formatting the drive

    If you’re facing issues with your unallocated SSD, formatting the drive might just be the solution you need. However, it’s important to note that formatting will wipe all the data on the drive, so be sure to back up important files first. To format the drive, you can use the built-in Windows Disk Management tool.

    Simply right-click on the unallocated SSD, select “New Simple Volume,” and follow the on-screen prompts. This will guide you through the process of creating a new partition and formatting the drive. Once the process is complete, your unallocated SSD should be fully functional again.

    Remember to always back up your data before making any changes to your drive to avoid accidental data loss.

    Preventing future unallocated SSD issues

    If you’ve ever experienced an unallocated SSD issue, you know how frustrating it can be. But the good news is that you can take steps to prevent it from happening in the future. First and foremost, regularly backing up your data to an external hard drive or cloud-based storage is crucial.

    This way, if your SSD does become unallocated, you won’t lose all your important files. Another way to prevent unallocated SSD issues is to keep your system and software up to date. This helps ensure compatibility and stability, which can prevent sudden crashes and data loss.

    Finally, it’s a good idea to run regular disk checks and scans. This can identify any potential problems early on and let you fix them before they become more serious. By following these simple steps, you can help prevent future unallocated SSD issues and ensure the safety of your valuable data.

    Conclusion

    In the world of technology, few things can be more frustrating than seeing your SSD suddenly become unallocated. But fear not! With a little bit of know-how and some clever tricks up your sleeve, you can fix this issue in no time. Whether it’s through using specialized software, tweaking your computer’s settings, or even just performing a fresh installation of your OS, it’s all about being smart, methodical, and never giving up.

    So roll up your sleeves, put on some good music, and get ready to bring that unallocated SSD back to life!”

    FAQs

    What is an unallocated SSD?
    An unallocated SSD is a storage device that has not been properly partitioned or formatted, and therefore cannot be used for data storage.

    What causes an SSD to become unallocated?
    An SSD can become unallocated due to a variety of reasons, including virus attacks, improper disk management, or hardware failure.

    How can I fix an unallocated SSD?
    To fix an unallocated SSD, you can use disk management tools built into your operating system or third-party software to create a new partition and format the drive. You can also check for any physical damage to the drive and replace it if necessary.

    Can I recover data from an unallocated SSD?
    Yes, it is possible to recover data from an unallocated SSD using data recovery software. However, it is important to note that the chances of successful data recovery decrease the longer you wait to attempt recovery.

    How can I prevent my SSD from becoming unallocated in the future?
    To prevent your SSD from becoming unallocated, it is important to regularly check and maintain your storage devices. This includes keeping your operating system and antivirus software up-to-date, properly partitioning and formatting storage devices, and ensuring that all physical components are functioning properly.

  • Effortless HDD to SSD Cloning: A Simple Guide to Connecting the Two

    So you want to clone your hard drive to your shiny new SSD, but you’re not quite sure how to connect them. Don’t worry, we’ve got you covered. Connecting your HDD to your SSD for cloning is a relatively simple process, but it can be confusing if you’re not familiar with the steps involved.

    First, you’ll need to make sure you have the necessary cables. Depending on your specific drives, you may need a SATA cable or a USB adapter. Once you have the proper cables, connect your HDD and SSD to your computer.

    Next, you’ll need to download cloning software such as Clonezilla or Macrium Reflect. Once you’ve installed the software, follow the instructions to select your source drive (the HDD) and your target drive (the SSD). Now, it’s time to start the cloning process.

    This can take anywhere from a few minutes to a few hours depending on the size of your drives and the speed of your computer, so be patient. Once the cloning is complete, you can disconnect your HDD and boot up your computer using your new, faster SSD. In the end, connecting your HDD to your SSD for cloning is a relatively simple process that anyone can do with a bit of patience and the right tools.

    So why wait? Upgrade your computer today and experience lightning-fast boot times and improved performance with a cloned SSD.

    Check SSD Compatibility

    If you’re wondering how to connect your HDD to SSD for cloning, one of the first things to consider is compatibility. While most SSDs are compatible with standard SATA connections, you’ll want to double-check the specific model of your existing HDD and the new SSD to make sure they are compatible with each other. This includes checking the size and form factor of your drives, as well as any interface requirements.

    Additionally, you’ll want to make sure you have the right tools and cables for connecting your drives, such as SATA cables and a power source. It may also be helpful to consult the user manuals or online resources for your specific drives to ensure you have all the necessary steps and precautions for successful cloning. With a little preparation and attention to compatibility, you should be able to connect your HDD to SSD for cloning with confidence and ease.

    Ensure SSD has enough storage space

    When it comes to upgrading or replacing the storage in your computer, it’s essential to ensure compatibility with your existing hardware. If you’re considering swapping out your traditional hard drive with a solid-state drive (SSD), one critical factor you should keep in mind is whether the SSD has enough storage space available. The amount of storage you need will depend on your usage requirements and the types of files you typically work with.

    If you frequently work with large files such as videos or high-resolution images, you may need a larger SSD to accommodate these files. In contrast, if you mainly use your computer for everyday tasks such as browsing the internet and using productivity software, a smaller SSD may be sufficient for your needs. Ultimately, it’s crucial to research and check the compatibility of your system and the SSD to make sure you get the storage capacity you need.

    how do you connect hdd to ssd for cloning

    Check SATA connector types

    When it comes to upgrading your computer’s hardware, one important aspect to consider is the compatibility of your storage devices. If you’re looking to upgrade to a solid-state drive (SSD), it’s crucial to check if your motherboard’s SATA connectors are compatible with the SSD’s connector type. There are three main types of SATA connectors: SATA 1, SATA 2, and SATA

    The latest version, SATA 3, offers the fastest transfer speeds, but it may not be supported by older motherboards. Therefore, it’s essential to check the specifications of your motherboard to ensure that it is compatible with the SSD’s SATA connector type before making a purchase. Upgrading to an SSD can significantly improve your computer’s overall performance, but it’s important to do your research and ensure compatibility to avoid any potential issues.

    Prepare for Cloning

    Cloning your hard drive to an SSD can boost performance and give your computer a speed upgrade. But before you dive right into the cloning process, you need to connect your HDD to your SSD. There are a few different ways to do this, but the most common method is to use a SATA to USB adapter cable.

    These cables allow you to connect your old hard drive to your new SSD via USB, making it easy to transfer your files and settings. Once you have your cables sorted, it’s important to ensure that your SSD is formatted correctly and has enough space to accommodate all of your files. You can use a program like Clonezilla to make a complete copy of your HDD and transfer it to your new SSD.

    Just remember to back up your files first to avoid any data loss during the cloning process. With a little bit of preparation, connecting your HDD to your SSD for cloning can be a straightforward and hassle-free process.

    Back up data on HDD

    If you want to upgrade your computer’s storage or clone your hard drive to keep your data safe, you need to prepare before jumping into the process. It’s essential to back up your data on your HDD before you begin cloning. That way, if something goes wrong, you won’t lose all your files.

    There are different ways to back up your data, but one easy way is to use an external hard drive. Just plug it into your computer’s USB port, and it’s ready to use. Alternatively, you can use cloud storage services like Google Drive or Dropbox to store your files offsite, reducing the risk of data loss in case of theft, fire, or other unforeseen events.

    Whatever option you choose, ensure that it’s secure, reliable, and offers adequate storage space for your needs. By preparing adequately, you can avoid data loss and ensure that your hard drive cloning process goes smoothly.

    Download cloning software

    If you’re thinking about cloning your hard drive, the first step is to find and download a reliable cloning software. You should look for a program that is easy to use and has good reviews from other users. Two popular options are Clonezilla and EaseUS Todo Backup – both of which are free to download and provide step-by-step instructions to guide you through the cloning process.

    After downloading the software, it’s important to ensure that your computer meets the system requirements and that you have enough space on your destination drive to store the cloned data. It’s also a good idea to backup any important files in case something goes wrong during the cloning process. Once you have everything in order, you’re ready to start the cloning process and create a copy of your hard drive.

    Remember to handle with care and always keep backups just in case!

    Connect HDD and SSD to PC

    If you’re looking to upgrade your PC, adding a new SSD and cloning your old hard drive onto it is an excellent way to boost performance. But before you jump into the cloning process, there are a few things you need to do to prepare. First and foremost, you’ll need to physically connect both the HDD and the SSD to your PC, either by installing them directly into your computer or using external enclosures.

    Once you’ve connected them, you will need to ensure the drives are properly recognized by your operating system. This can be done by checking Disk Management in Windows or Disk Utility on a Mac. Next, you should make sure that your PC is properly configured to boot from the SSD, which will be your new system drive.

    This may involve adjusting the boot order in your BIOS settings or disabling secure boot, depending on your specific setup. You’ll also need to make sure you have enough space on your SSD to accommodate all of your data and applications from your old hard drive. Finally, it’s always a good idea to back up any important data before you begin the cloning process.

    While cloning is generally a safe and reliable method for transferring data, there’s always a chance that something could go wrong. By backing up your data, you can ensure that you don’t lose any important files in the event of an unexpected error. So, in summary, connecting your HDD and SSD to your PC is the first step in preparing for a successful clone.

    Make sure your system recognizes both drives, configure your PC to boot from the SSD, ensure adequate space, and don’t forget to back up your data. Once you’ve completed these steps, you’re ready to proceed with the cloning process and enjoy the improved performance of your upgraded PC.

    Cloning Process

    If you’re looking to upgrade your computer’s hard drive, cloning the contents of your old HDD onto a new SSD can save you time and hassle in the long run. But how do you connect the two drives for cloning? The process depends on your computer and the types of ports available, but generally, you’ll need a SATA cable and a cloning software program. First, power down your computer and disconnect all cables.

    Open the computer case and locate the old HDD. Connect one end of the SATA cable to the HDD and the other end to the SSD. Use the cloning software to select the HDD as your source and the SSD as your destination.

    You may need to change some settings in your computer’s BIOS or UEFI to ensure the cloned drive is bootable. Once you’ve verified all the settings, start the cloning process and wait for it to complete. When finished, shut down your computer, disconnect the HDD and SATA cable, and restart your computer with the SSD as your primary drive.

    Congratulations, you’ve successfully connected and cloned your HDD onto an SSD!

    Open cloning software

    Open cloning software is a process that allows you to make exact copies of your hard drive or other storage devices. It’s a handy tool for those who want to migrate to a new system, back up important data, or restore their computer to a previous state. The process involves creating a “clone” of your storage device and transferring it to a new one.

    With open cloning software, you can see the entire process from start to finish, and customize it to suit your needs. This type of software is typically free and open source, meaning anyone can use it and make modifications to the code. Overall, cloning your storage device is an excellent way to ensure your data is safe and secure, and open cloning software makes it even easier to do so.

    Select source (HDD) and target (SSD)

    When it comes to cloning your existing HDD to a new SSD, the first step is to select the appropriate source and target drives. You want to ensure that you are cloning from the correct drive and that the target drive has enough space to hold all your data. Usually, the target SSD will have more storage capacity than the source HDD, but you should still double-check before starting the cloning process.

    It’s also worth noting that some cloning software may require you to create a bootable USB drive, which will allow you to clone the drive even if the operating system is not running. Once you have selected your source and target drives and ensured that you have enough space, you can begin the cloning process. Cloning is essentially making a duplicate copy of your hard drive, making the transition to a new SSD much quicker and easier.

    With the right tools and a bit of patience, you can complete this process without losing any of your data or having to reinstall your operating system.

    Start cloning process

    Cloning Process Let’s start talking about the cloning process! Cloning is the process of creating genetically identical copies of an organism. This process has been a subject of fascination for scientists for decades. One of the most famous examples of cloning is Dolly the sheep, who was the world’s first cloned mammal.

    Cloning can be achieved through various methods, but the most common type of cloning is referred to as somatic cell nuclear transfer (SCNT). This method involves taking an egg cell and removing its nucleus, which contains the genetic material. The nucleus of a somatic cell (cells that are not sperm or egg cells) is then transferred into the empty egg cell.

    Once the nucleus is transferred, it can be stimulated to divide and develop into an embryo. This embryo can then be implanted into a surrogate mother and carried to term. The result of this process is an organism that is genetically identical to the donor organism.

    Cloning has numerous applications in various fields such as agriculture, medicine, and conservation. However, it also poses ethical concerns and debates. Overall, the cloning process is a fascinating field that continues to expand our understanding of genetics and biology.

    Final Steps

    Connecting your HDD to SSD for cloning isn’t as daunting as it sounds. All you need is a computer, a cloning software and the old hard drive and new SSD. Once you have everything set up, the first step is to connect both your old hard drive and new SSD to your computer.

    You can do this by using either a USB to SATA adapter or a docking station. Once the drives are connected, you can launch the cloning software and select the option to clone your old hard drive to the new SSD. This process may take some time depending on the size of your hard drive, so be patient.

    After the cloning process is complete, you can swap out the old hard drive and the new SSD and start using your new and improved system. In essence, connecting your HDD to SSD for cloning is a straightforward process that anyone can accomplish with the right tools and a little patience.

    Swap out old HDD for new SSD

    If you’re thinking of swapping out your old HDD for a new SSD, congratulations, that’s a great decision! Now that you’ve got your SSD mounted and your data transferred, there are just a few final steps to take before you’re good to go. First, make sure to securely fasten your SSD using the requisite screws and connectors. Next, ensure that the device is properly recognized by the BIOS upon boot-up.

    Finally, double-check that your operating system recognizes the new drive and that it’s available for use. With these crucial precautions taken care of, you’re free to enjoy the lightning-fast speeds and enhanced performance that comes with using an SSD. Congratulations on completing a truly worthwhile upgrade that will improve your computer’s performance for years to come!

    Verify cloned data on new SSD

    Once the cloning process is done, it’s essential to verify the cloned data on your new SSD. Checking the data ensures that everything has been transferred correctly and that there are no missing files or corrupted data. To do this, you can use a disk cloning software or run a check on your new SSD’s properties.

    Make sure to check the data’s size and the number of files present in the SSD to ensure that everything has transferred correctly. Double-checking these details gives you peace of mind and ensures that your new SSD is performing correctly. In conclusion, verifying the cloned data on your new SSD is crucial to ensure smooth and seamless data transfer.

    Wipe and dispose of old HDD properly

    When it comes to disposing of an old hard disk drive (HDD), merely throwing it in the trash or recycling bin isn’t the safest option. You don’t want to risk exposing your personal data to others who could use it maliciously. To wipe your old HDD correctly, you can use a software tool designed specifically for erasing hard drives, which will overwrite the data stored on it multiple times to make it unrecoverable.

    Alternatively, you can physically destroy the hard drive to remove all data. However, remember to dispose of it properly to avoid harming the environment. Donating it to a local computer repair shop, a data destruction company, or a charity that could use it could be your best bet to wipe off your old HDD’s data and dispose of it correctly.

    By taking these necessary steps, you can ensure that your personal data remains secure and out of the wrong hands.

    Conclusion

    In conclusion, connecting your HDD to your SSD for cloning is all about getting the right adapter or enclosure, having a steady hand and a bit of technical know-how. It’s like solving a puzzle – you need to find the right pieces, put them together in the correct order, and voila! You’ve got yourself a better, faster and more efficient storage device. So, if you’re feeling up for a challenge and want to upgrade your computer’s performance, give cloning a try – you may just surprise yourself with how easy it can be!”

    FAQs

    What are the prerequisites for connecting an HDD to an SSD for cloning?
    Before connecting an HDD to an SSD for cloning, make sure that you have a suitable cloning software, a USB to SATA/IDE adapter, and enough power supply.

    Can I clone an entire HDD to an SSD without losing data?
    Yes, you can clone an entire HDD to an SSD without any data loss. However, you need to make sure that the SSD has enough capacity to accommodate the data.

    How do I physically connect the HDD to the SSD for cloning?
    To connect the HDD to the SSD for cloning, you need to use a USB to SATA/IDE adapter. Connect one end of the adapter to the HDD, and the other end to the SSD. Make sure both are properly connected.

    Do I need to format the SSD before cloning the data from the HDD?
    No, you don’t need to format the SSD before cloning the data from the HDD. Formatting the SSD will erase all the data, so make sure you don’t format it if you want to retain the data stored in it.

    How long does it take to clone an HDD to an SSD?
    The time required to clone an HDD to an SSD depends on the size of the data. It may take anywhere from a few minutes to a few hours. Make sure your computer doesn’t go into sleep mode during the process.

  • Effortlessly Transfer Your Data to SSD with These Easy Tips and Tricks

    If you’re looking to boost your computer’s performance, upgrading to an SSD drive is one of the easiest and most effective ways to do it. SSDs (solid-state drives) are faster and more reliable than conventional hard drives, which makes them ideal for storing large amounts of data, including operating systems, applications, and documents. However, with all that data and information on your hard drive, transferring it to your new SSD can be a daunting task.

    But don’t worry, we’ve got you covered. In this blog post, we’ll show you everything you need to know about transferring data to your SSD drive, from backing up your files to cloning your hard drive. So, grab a cup of coffee and let’s get started!

    Check Compatibility

    So, you’ve made the decision to upgrade your computer’s storage by transferring your files to a shiny new SSD drive. Congratulations! But, before you start moving everything over, it’s important to check for compatibility. First, make sure that your computer’s motherboard or laptop’s system supports the type of SSD you’ve purchased.

    Next, consider if your operating system supports the size of your new SSD. Finally, check if your current drive has any special interfaces or connection types that may not be compatible with your new SSD. If you find any issues during your compatibility check, it may be necessary to purchase additional hardware or seek professional technical assistance.

    By taking these steps, you can ensure a smooth and successful transfer of your files to your new SSD drive. So, go ahead and make the upgrade – your computer (and your files) will thank you!

    Ensure that your computer or laptop is compatible with an SSD drive

    Before purchasing an SSD drive for your computer or laptop, it is essential to ensure that it is compatible with your device. SSDs can offer faster performance and increased storage capacity, but not all computers or laptops can support them. The first thing you should do is check the specifications of your device, such as the motherboard and the interface connections.

    The most common interface for SSDs is SATA, but there are also newer interfaces like NVMe. If your device only supports SATA, you may not be able to use an NVMe SSD. Additionally, some older devices may have limitations on the amount of storage they can handle.

    Checking your device’s specifications will help you determine if an SSD is compatible and which type you should purchase. It’s important to note that upgrading your device with an SSD may also require additional hardware or software changes, so you should consult with a professional or do your research before making the upgrade. By checking compatibility, you can ensure that your investment in an SSD will provide the desired benefits and improve your device’s performance.

    how do i transfer my stuff to my ssd drive

    Backup Important Data

    If you’re looking to transfer your stuff to an SSD drive, the first thing you should do is backup your important data. This is an essential step to ensure that none of your important files or documents get lost during the transfer process. One of the best ways to back up your data is to create a copy of it on an external hard drive or cloud storage.

    You can also use built-in backup tools in your operating system to create a backup of your important files. Once you have backed up your data, you can transfer it to your SSD drive. Simply connect your SSD drive to your computer, and copy the files over.

    It’s important to note that when transferring files to an SSD, it’s best to avoid using drag and drop methods. Instead, use file transfer software that is specifically designed to handle SSDs. This will ensure a smooth and error-free transfer process.

    By following these simple steps, you can easily transfer your stuff to an SSD drive and enjoy faster and more reliable performance.

    Save important files and documents to an external hard drive or cloud storage

    Backing up important data is crucial to prevent disasters such as accidental deletion, hardware failures, and cyber attacks. Saving essential files and documents to an external hard drive or cloud storage is an excellent way to ensure that you don’t lose your valuable information. External hard drives are portable and can be easily carried around, and they offer a great way to back up your data and keep it safe.

    Cloud storage, on the other hand, ensures that your data is accessible from any device with internet access. With cloud storage, you don’t have to worry about carrying an external hard drive or losing it. It provides greater convenience and flexibility for users, making it a popular choice for backing up important data.

    Taking the time to backup your important data can save you from a lot of stress and frustration in case of an unexpected data loss. So, whether you choose an external hard drive or cloud storage, make sure you backup your data regularly to avoid any data loss mishaps.

    Clone Hard Drive

    If you have recently upgraded to a solid-state drive (SSD) and are wondering how to transfer your data from your old hard drive, the easiest way to accomplish this is by using a cloning tool. By cloning your old drive, you create a perfect copy of the data onto your new SSD so that everything remains intact, including your operating system, files, and programs. There are many cloning tools available online, some of which are free, so do your research and choose the one that works best for you.

    Once you have your tool of choice, connect both your old hard drive and new SSD and run the cloning software. The tool will guide you through the process, which typically takes a few hours, depending on the amount of data you are transferring. The end result is a fully functioning SSD with all your original data.

    Don’t forget to wipe your old hard drive once you’re done to ensure that none of your personal information remains on it. With these steps, you can easily transfer all your data to your new SSD and enjoy all the benefits of faster load times and improved system performance.

    Use cloning software to transfer data to SSD drive

    For those looking to upgrade to an SSD drive, cloning software can make the process much smoother. By cloning your hard drive, you can transfer all of your data and settings to your new SSD drive without having to manually reinstall everything. This can save you a lot of time and effort, especially if you have a lot of programs and files on your computer.

    Cloning software is easy to use and typically comes with step-by-step instructions to guide you through the process. It’s important to note that not all cloning software is created equal, so it’s important to do some research and find a reliable program that will ensure a successful transfer. Some popular options include Acronis True Image, EaseUS Todo Backup, and Clonezilla.

    With the help of cloning software, upgrading to an SSD drive can be a breeze and can significantly improve your computer’s performance.

    Ensure that SSD drive is the same size or larger than the hard drive being cloned

    When it comes to cloning your hard drive, it’s important to ensure that your new SSD drive is the same size or larger than the hard drive you’ll be cloning. This ensures that all of your data can be transferred over without any issues, and that you won’t run out of space on your new drive. If your new SSD drive is smaller than the hard drive you’re cloning, you might have to delete some of your data or programs to make everything fit.

    On the other hand, if your new SSD drive is larger, you’ll have plenty of room to add even more files and programs in the future! So be sure to check the size of your new drive before you start cloning your old hard drive, and make sure it’s big enough to hold everything you need. By doing this, you’ll be able to have a seamless transition to a faster and more reliable SSD drive.

    Install Operating System

    If you’ve recently purchased an SSD drive and want to transfer your files, programs, and operating system to it, there are a few steps you’ll need to take. First, you’ll need to install your operating system onto the SSD drive. To do this, you can either clone your existing hard drive or do a fresh install of your operating system onto the SSD drive.

    If you choose to clone your existing hard drive, there are many free tools available to help make this process easier. Just make sure to back up your data ahead of time to avoid losing anything important. Once your operating system is installed on the SSD drive, you can transfer your files and programs over to it.

    This can either be done manually or through migration software. Just keep in mind that you’ll need to reinstall any programs that use registry entries, as these won’t typically transfer over during the migration process. With a little bit of time and effort, you’ll be able to enjoy the benefits of faster boot times and improved overall performance with your new SSD drive.

    Install operating system on the SSD drive for faster boot-up times and overall performance

    Installing your operating system on an SSD drive can greatly improve your computer’s performance. SSD drives are more efficient than traditional hard drives because they have no moving parts and can access data much faster. By installing your operating system on an SSD drive, you can cut down your start-up time to mere seconds.

    Additionally, programs and files will load faster, allowing you to work more efficiently. Installing an operating system on an SSD is relatively easy. First, you need to purchase an SSD drive and connect it to your computer.

    Then, you can use an installation disc or USB drive to install your operating system onto the SSD. Finally, set the SSD as the primary boot device in your computer’s BIOS, and you’re done! While there are a few more steps involved, installing an operating system on an SSD can be a game-changer for those looking to improve their computer’s performance.

    Test and Verify

    So, you’ve upgraded your computer by purchasing an SSD drive. Congratulations! But now you may be wondering, “How do I transfer my stuff to my SSD drive?” Well, the first step is to make sure you have everything backed up. You don’t want to lose any important files during the transfer process.

    Next, you’ll need to install your SSD drive into your computer. Once it’s installed, you can use cloning software to transfer everything from your old drive to your new one. This will ensure that all your files, programs, and settings are transferred over seamlessly.

    It’s important to test and verify everything once the transfer is complete to make sure everything is working properly. And voila! All your files are now stored on your speedy new SSD drive.

    Double-check that all data has been successfully transferred to the SSD drive

    When transferring data to a new SSD drive, it’s important to take the time to test and verify that everything has been successfully transferred. The last thing you want is to realize you’re missing important files or documents after the fact. One way to make sure everything is there is to compare the data from your original hard drive to the new SSD.

    This can be easily done using a file comparison tool, which will show you any differences or missing files. Another way to test your data is to open different files and folders to ensure they are functioning correctly. It’s also a good idea to keep your original hard drive as a backup until you’re confident all the data has been successfully transferred.

    By taking these extra steps, you can rest easy knowing that your important files are safe and secure on your new SSD drive. Double-checking that everything has been successfully transferred will give you peace of mind and ensure that you don’t lose any important data.

    Run tests and benchmarks to ensure SSD drive is running optimally.

    Performing regular tests and benchmarks on your SSD drive is crucial to ensuring that it’s running optimally. These tests and benchmarks help to identify any potential issues with the drive’s performance, allowing you to take the necessary steps to rectify them before they worsen. One important benchmark to consider is the sequential read and write speeds, which measure how quickly data can be read from and written to the drive.

    This is particularly important for tasks that involve a lot of data transfer, such as video editing or gaming. Additionally, it’s important to perform regular health checks on the drive, which can detect any signs of wear and tear that may be affecting its performance. By following these steps and making sure your SSD is running at optimal performance, you can enjoy faster and more reliable computing for years to come.

    Conclusion

    Congratulations on making the wise decision to transfer your precious data to a speedy SSD drive! It’s like upgrading from a bicycle to a Ferrari in terms of storage performance. Now, all you need to do is follow the simple steps of cloning or moving your data to your SSD drive, and you’ll be experiencing lightning-fast load times and seamless multitasking. So wave goodbye to sluggish storage and say hello to the future of fast-paced computing!”

    FAQs

    What steps do I need to follow to transfer my files to an SSD drive?
    First, connect your SSD drive to your computer and make sure it is recognized. Then, you can either clone your entire hard drive to the SSD or manually transfer selected files. For cloning, you will need cloning software such as EaseUS Todo Backup. If you choose to transfer files manually, simply drag-and-drop the files from your hard drive to the SSD.

    Can I transfer my operating system to an SSD drive?
    Yes, it is possible to transfer your operating system to an SSD drive. To do this, you can either clone your entire hard drive to the SSD or reinstall your operating system onto the SSD. Cloning is the quicker option, but reinstalling ensures a fresh start on the new drive.

    Is it better to clone or manually transfer my files to an SSD drive?
    Cloning your hard drive to an SSD is generally the quickest and easiest option. However, manually transferring files allows you to be more selective about which files you want to keep and which to delete. It ultimately depends on your preferences and how much time you have to spare.

    Do I need to format my SSD drive before transferring files?
    No, you do not need to format your SSD drive before transferring files. If the drive is new, it may already be formatted. If it is not, your computer will prompt you to format it before use.

  • Unlock the Power of M.2 SSD: A Step-by-Step Guide to Help Your Motherboard Recognize It

    Have you recently purchased an M.2 SSD but aren’t sure how to integrate it into your motherboard? Fear not, as this guide will provide you with all the information you need to recognize an M.2 SSD on your motherboard.

    Firstly, it’s essential to check if your motherboard supports M.2 SSDs. This can typically be found in the motherboard manual or specifications online.

    If your motherboard has an M.2 slot, then you’re one step closer to getting your SSD up and running. Once you’ve confirmed that your motherboard supports M.

    2, the next step is to locate the M.2 slot. This can vary depending on the motherboard’s design, but it’s usually found near the PCIe slots or the chipset.

    Look for a small, rectangular slot on the motherboard that resembles a RAM slot. Next, it’s time to insert your M.2 SSD into the slot.

    Make sure to line up the notches on the SSD with those on the slot and gently push it in until it clicks into place. Remember to secure the SSD with a screw, usually provided with your motherboard or in the SSD packaging. Finally, enter the BIOS settings by hitting the Del or F2 key during boot-up and navigate to the storage options.

    Check Your Motherboard Manual

    If you’re wondering how to get your motherboard to recognize an M.2 SSD, the first thing you should do is check the manual that came with your motherboard. This document contains all the information you need to ensure that your M.

    2 SSD is properly installed and configured. You’ll need to make sure that your motherboard supports M.2 SSDs and that you’ve installed the SSD in the correct slot.

    The manual will also tell you how to access the BIOS settings to activate the M.2 SSD and ensure that it’s being recognized by your system. If you’re having trouble finding the appropriate information in the manual, you can always visit the website of your motherboard manufacturer for further assistance.

    By following the steps provided in your motherboard manual, you’ll be able to successfully install and use your M.2 SSD.

    Locate the M.2 Slot

    When it comes to locating the M.2 slot on your motherboard, the first step is to check your motherboard manual. Different motherboards come with different layouts and features, so it’s always a good idea to consult the manual first before proceeding with any hardware installation.

    Once you have the manual handy, look for the section that covers the motherboard layout and component locations. The M.2 slot is usually labeled as such and can be found near the storage and expansion slots.

    Depending on the motherboard model, it may be placed in a different location, so pay close attention to the illustrations and diagrams in the manual. Remember to also check the size and length of the M.2 slot, as not all motherboard models support all sizes.

    Overall, taking the time to locate the M.2 slot properly can save you a lot of hassle and ensure a successful hardware installation.

    how do you get your motherboard to recognize m.2 ssd

    Check Compatibility

    When building or upgrading your computer, it is essential to ensure that all components are compatible with each other. One crucial component to consider is the motherboard. To avoid any potential issues, it is recommended that you check your motherboard manual before purchasing or installing any new hardware.

    The motherboard manual provides vital information about the type of components that can be installed, such as the processor, RAM, and graphics card, as well as the recommended specifications and compatibility. Checking your motherboard manual can save you from buying incompatible components that may not work correctly or even damage your system. So, before you begin your computer build, make sure to take a few minutes to review your motherboard manual and ensure that everything you plan to install is compatible with your motherboard.

    Configure BIOS Settings

    If you’re having trouble getting your motherboard to recognize your M.2 SSD, you may need to configure your BIOS settings. First, make sure your motherboard supports M.

    2 SSDs by checking your manual or manufacturer’s website. Then, access your BIOS by pressing the assigned key during startup (usually F2 or Delete). Look for the SATA Settings or Storage Configuration section and make sure M.

    2 is enabled. You may also need to switch from Legacy to UEFI mode. Save your changes and exit the BIOS.

    Your M.2 SSD should now be recognized by your motherboard. Remember to always back up your data before making any BIOS changes.

    With these steps, you should have your M.2 SSD recognized by your motherboard and ready to go!

    Enter BIOS

    “Enter BIOS” To configure BIOS settings on your computer, you first need to enter the BIOS (Basic Input/Output System). The BIOS is software that’s built into your computer’s motherboard and is responsible for controlling hardware initialization, such as your CPU, memory modules, and input devices. To enter the BIOS, you must press a specific key during startup.

    The key differs depending on the manufacturer, but it is usually displayed on the initial startup screen. Some of the most common keys to access BIOS include F2, F10, and Delete. Once you press the designated key to enter the BIOS, you’ll be taken to a blue screen with white text that displays all the configuration settings.

    Here, you can configure various system settings, such as hard drive options, password protection, and boot order. Configuring the BIOS correctly is important to optimize system performance. Incorrect configuration can lead to instability and errors, so it’s essential to ensure that you know what you’re doing before making any changes.

    In summary, the BIOS is a crucial software program installed on your computer’s motherboard that controls hardware initialization at startup. Configuring the BIOS correctly is critical to ensure your system runs smoothly and to optimize system performance. Always be careful when making changes to any setting and be sure to save any changes before exiting the BIOS.

    Enable M.2 Support

    Enabling M.2 support on your computer can be a game-changer when it comes to speeding up data transfer and boosting overall performance. However, before you can take advantage of this technology, you need to configure the BIOS settings properly.

    To do this, you’ll need to access the BIOS menu when you first power on your computer by pressing a specific key (usually DEL, F2, or F12, depending on your computer’s make and model). Once you’re in the BIOS, you’ll need to locate the “SATA” or “NVMe” settings and make sure they’re configured correctly for M.2 support.

    This might involve changing the mode from “IDE” to “AHCI” or enabling RAID support if you have multiple M.2 drives. You should also make sure that the boot order is set correctly, so your computer can boot from the M.

    2 drive instead of the traditional hard drive. By taking the time to properly configure your BIOS settings, you can ensure that your computer is optimized for M.2 support and get the most out of this valuable technology.

    Adjust Boot Order

    Adjust Boot Order When it comes to computer troubleshooting, one of the most important steps is configuring BIOS settings. This is especially true if you are having issues with your computer’s boot order. BIOS stands for Basic Input/Output System and is the software that your computer’s motherboard uses to communicate with its hardware components.

    Within the BIOS settings, you can adjust the boot order, which determines the order in which your computer looks for an operating system to load. By default, the boot order is set to look for the Operating System on the hard drive, but with the right adjustments, you can change it to boot from external devices like a USB flash drive or a CD. To adjust the boot order, you need to boot into BIOS by tapping the necessary keys during startup.

    Once there, you can navigate to the boot order settings to make changes. Changing the boot order can help you troubleshoot various issues and get your computer back up and running in no time.

    Install the M.2 SSD

    If you’re looking to take advantage of the lightning-fast speeds an M.2 SSD can provide, you’ll need to install it properly to ensure your motherboard can recognize it. The first step is to locate the M.

    2 slot on your motherboard, which will typically be labeled on the board itself. Once you’ve found it, gently insert the M.2 SSD into the slot and secure it with the screw provided.

    Note that there are different types of M.2 slots, so be sure to check your motherboard to ensure compatibility with your chosen SSD. Once your M.

    2 SSD is installed, you’ll need to ensure your motherboard BIOS is set up to recognize it. This involves entering the BIOS on startup and navigating to the storage settings, where you should be able to locate and enable the M.2 SSD.

    With your M.2 SSD properly installed and recognized by your motherboard, you’ll be able to enjoy lightning fast boot times and speedy data transfers.

    Insert the SSD

    To install the M.2 SSD, you must first locate the appropriate slot on your motherboard. Most modern motherboards have at least one M.

    2 slot, which is typically located near the PCIe slots or near the rear I/O panel. Once you’ve found the slot, carefully insert the SSD into the slot at a 30-degree angle before using gentle pressure to push it in. Don’t worry if the SSD doesn’t slide in easily; it may require a bit of force to snap into place.

    Keep in mind that some M.2 slots may have locks or retention clips, so make sure you secure the SSD in place according to the manufacturer’s instructions. After installation, your motherboard should recognize the SSD, and you’ll be able to use it as a primary or secondary drive, depending on your system configuration.

    With this simple process, you can significantly improve your system’s performance and increase your storage capacity.

    Secure with Screw

    The M.2 SSD is one of the most popular storage options for modern computers, enabling faster data transfer rates and better performance. To install an M.

    2 SSD, you need to first ensure that your motherboard supports it. Once you have confirmed this, open your computer case and locate the M.2 slot on your motherboard.

    Place the M.2 SSD in the slot, making sure it is seated properly. Then, secure it with a screw to prevent it from moving.

    It’s important to note that different motherboards may have slightly different setup processes, so refer to your motherboard’s manual for specific instructions. Overall, installing an M.2 SSD is a relatively simple process that can improve your computer’s performance significantly.

    So what are you waiting for? Give it a try and enjoy faster speeds and reliable storage!

    Test and Verify M.2 SSD Recognition

    If you’re struggling to get your motherboard to recognize your M.2 SSD, don’t worry, you’re not alone. Here are some steps you can take to troubleshoot and verify that your SSD is correctly recognized on your motherboard.

    First, ensure that your SSD is securely connected to your motherboard’s M.2 slot. If it’s still not recognized, check that your BIOS settings are properly configured to support M.

    2 SSDs. Sometimes, M.2 slots can be disabled in the BIOS menu or may require enabling the NVMe protocol for optimal performance.

    You can also try updating your motherboard’s BIOS firmware to ensure compatibility with your SSD. Finally, use a software tool like CrystalDiskInfo to verify that your M.2 SSD is correctly recognized and functioning correctly.

    By following these steps, you can ensure that your M.2 SSD is properly recognized by your motherboard for optimal performance and storage capacity.

    Conclusion

    In the quest to get your motherboard to recognize your M.2 SSD, there are a few key steps to follow. First, ensure that your motherboard and SSD are compatible.

    Next, make sure your BIOS settings are configured correctly, including activating the M.2 slot and selecting the appropriate boot drive. Finally, double-check your physical connections to ensure that everything is securely plugged in.

    With a little bit of patience and perseverance, you’ll be up and running with lightning-fast M.2 storage in no time. And just like that, you can rest easy knowing that your motherboard and M.

    2 SSD are on speaking terms, thanks to your tech-savvy skills.”

    FAQs

    What is an M.2 SSD?
    M.2 SSD is a type of storage device that uses the M.2 interface to connect to the motherboard.

    How do I check if my motherboard supports M.2 SSD?
    You can check your motherboard’s specifications either from the manual or the manufacturer’s website to see if it has an M.2 slot.

    What do I need to do to install an M.2 SSD?
    First, make sure your motherboard supports M.2 SSD and has an available M.2 slot. Then, insert the M.2 SSD into the slot and secure it with a screw. Finally, boot up your system and initialize the drive.

    Why isn’t my M.2 SSD recognized by my motherboard?
    There are several reasons why this could happen, such as a faulty SSD, outdated motherboard BIOS, or incorrect installation. Try checking these factors and updating your BIOS if necessary.

  • Revolutionize Your Storage Game with a Lightning-Fast 2TB SATA SSD!

    Revolutionize Your Storage Game with a Lightning-Fast 2TB SATA SSD!

    Are you tired of slow computer speeds and long loading times? Upgrading to a 2TB SATA SSD may be just what you need to boost your computer’s performance. SSDs, or solid-state drives, have become increasingly popular in recent years due to their faster read and write speeds compared to traditional hard drives. And with a larger capacity of 2TB, you’ll have plenty of space for all your personal and professional files without the worry of running out of storage.

    Plus, the benefits of a 2TB SATA SSD go beyond just faster speeds and more space. Keep reading to find out how upgrading can transform your computer experience.

    What is a 2TB SATA SSD?

    A 2TB SATA SSD is a type of solid-state drive that has a storage capacity of 2 terabytes and uses a SATA interface to connect to the computer’s motherboard. It provides faster read and write speeds than traditional hard drives, making it an ideal choice for high-performance computing needs such as gaming or content creation. The SATA interface is a widely used standard and is supported by most modern motherboards, which makes it easy to install and set up.

    With a 2TB SATA SSD, you can store a vast amount of data, including photos, videos, and files, all in one place. This makes it a convenient and reliable option for individuals or businesses that require large storage capacity and fast performance. So, if you’re looking for a high-capacity storage solution, a 2TB SATA SSD is definitely worth considering.

    Solid State Drives vs. Hard Disk Drives

    Solid State Drives vs. Hard Disk Drives When it comes to choosing the right storage option for your computer, the main choice you’ll face is between Solid State Drives (SSDs) and Hard Disk Drives (HDDs). SSDs are a newer technology that is slowly replacing HDDs.

    The reason for this is that SSDs have no mechanical parts, which means they are more durable and more reliable than HDDs. Now, what is a 2TB SATA SSD? A SATA SSD, or Serial Advanced Technology Attachment SSD, is an SSD that uses the SATA interface to connect to a computer’s motherboard. It has a storage capacity of 2TB, which means it can store a lot of data.

    This type of SSD is perfect for those who need a lot of storage space, such as content creators and gamers. The main benefit of a 2TB SATA SSD is its speed. It is much faster than a traditional HDD because it uses flash memory to store data.

    This means that it can read and write data much faster, resulting in faster boot times and faster application load times. Additionally, the lack of moving parts means that it is quieter and generates less heat than an HDD. In conclusion, if you’re in need of a lot of storage space and want a fast, reliable option, a 2TB SATA SSD is an excellent choice.

    While it may be more expensive than an HDD, its durability and speed are worth the investment. So, if you want to improve your computer’s performance and storage capacity, consider upgrading to a SATA SSD.

    2tb sata ssd

    Benefits of 2TB SATA SSDs

    A 2TB SATA SSD is a type of solid-state drive that offers a massive amount of storage for your data. SATA stands for Serial Advanced Technology Attachment, which is the interface used for communicating between the drive and the motherboard of your computer. The benefit of having a 2TB SATA SSD is that you’ll have plenty of space to store all your files, photos, videos, and programs without having to worry about running out of room.

    Plus, since it’s an SSD, it offers faster read and write speeds than a traditional hard drive. This means your computer will boot up and launch programs much more quickly, and you’ll be able to access your files in a flash. Whether you’re a gamer, a content creator, or just someone who needs a lot of storage space, a 2TB SATA SSD is an excellent choice that will provide you with both speed and ample storage capacity.

    How to Choose the Right 2TB SATA SSD for Your Computer

    When it comes to upgrading your computer’s storage, a 2TB SATA SSD can provide a significant boost in speed and performance. However, choosing the right one can be overwhelming with so many options available. To make the decision process easier, consider factors such as the read and write speeds, the durability of the drive, and any additional features such as encryption.

    Samsung, Crucial, and Western Digital are all reputable brands that offer high-quality options in the 2TB SATA SSD category. Additionally, make sure to check your computer’s compatibility and ensure that it supports the SATA interface. By taking the time to research and choose the right 2TB SATA SSD for your computer, you can enjoy faster boot and load times and a more responsive system overall.

    Considerations When Choosing a 2TB SATA SSD

    When it comes to choosing a 2TB SATA SSD for your computer, there are several things you need to consider. The first thing you should pay attention to is the read and write speeds of the SSD. A higher read and write speed will result in faster data transfer and faster boot times.

    Another thing to consider is the endurance rating of the SSD. The endurance rating refers to the amount of data that can be written to the drive over its lifetime. A higher endurance rating means the drive will last longer.

    You should also look into the warranty offered by the manufacturer, which can give you peace of mind in case of any issues. Finally, consider the price and your budget. While higher-end SSDs may offer better performance, they may also be more expensive than lower-end models.

    Overall, it’s important to choose an SSD that will meet your needs and fit within your budget.

    Top 2TB SATA SSDs on the Market

    Apple MacBook Choosing the right 2TB SATA SSD for your computer can be a daunting task, especially with so many options on the market. However, if you’re in need of a speedy and reliable storage upgrade for your Apple MacBook, there are two top contenders that stand out from the rest. The Samsung 870 QVO and the Crucial MX500 are both exceptional choices that offer high-capacity storage and fast read/write speeds.

    The Samsung 870 QVO is known for its impressive endurance and affordable price, while the Crucial MX500 offers superior performance and better power efficiency. Ultimately, the choice depends on your specific needs and budget. If you’re looking for a wallet-friendly upgrade, the Samsung is a great option, while the Crucial excels in performance and energy efficiency.

    No matter which one you choose, both are excellent choices that won’t disappoint.

    Installation and Maintenance Tips

    When it comes to choosing the right SATA SSD for your computer, there are a few things you need to consider. First, you should determine your storage needs and budget. A 2TB SATA SSD is a great choice if you tend to store a lot of media files, large games, or other large files.

    Next, you should choose a reputable brand with good reviews and ratings. Checking for a warranty and the lifespan of the SSD is also important. As for maintenance, you should regularly update the firmware and run disk checks to optimize the performance and prevent any potential issues.

    Lastly, proper installation is crucial for the longevity of your SSD. Make sure to handle it with care and securely connect it to your motherboard. With the right choice and maintenance, a 2TB SATA SSD can greatly boost your computer’s performance and storage capacity.

    Improving Computer Performance with a 2TB SATA SSD

    If you are looking to upgrade your computer’s performance, then a 2TB SATA SSD is an excellent option to consider. By replacing your old hard drive with a solid-state drive, you can see a significant improvement in the speed and responsiveness of your system. Not only does a 2TB SATA SSD provide ample storage space, but it also delivers lightning-fast read and write speeds, making it perfect for demanding applications such as gaming, video editing, and 3D modeling.

    Plus, with no moving parts, SSDs are more durable and reliable than traditional hard drives, ensuring that your computer stays fast and responsive for years to come. So, if you’re ready to take your computer’s performance to the next level, consider upgrading to a 2TB SATA SSD today.

    Faster Boot Times and Application Loading

    Upgrading your computer with a 2TB SATA SSD can drastically improve its performance, specifically when it comes to boot times and application loading. Compared to traditional hard drives, SSDs have no moving parts and can access data much faster, resulting in faster boot times and quicker application loading. With a higher capacity SSD, you can store more files and programs without sacrificing speed.

    Plus, with the added bonus of lower power consumption and less noise, upgrading to a 2TB SATA SSD is a smart investment for anyone looking to improve their computer’s overall performance. So, if you’re tired of waiting for your computer to load and want a faster and more efficient experience, consider upgrading to a 2TB SATA SSD.

    Increased Storage Capacity and Efficiency

    Upgrading your computer’s storage capacity and efficiency can significantly enhance its overall performance. By replacing your traditional hard drive with a 2TB SATA SSD, you can improve your system’s read and write speed, minimize load times, and reduce boot-up time. This is because an SSD uses flash memory to store data, which provides faster access to information than an HDD’s mechanical spinning disk.

    Therefore, your computer can transfer large files and run multiple programs simultaneously without experiencing lag or slowdown. Additionally, an SSD consumes less power and generates less heat, thus reducing strain on your computer’s components. In summary, upgrading to a 2TB SATA SSD can significantly boost your computer’s performance, making it easier and faster to use.

    So, why not consider investing in one and getting the performance you deserve?

    Final Thoughts on 2TB SATA SSDs

    2TB SATA SSDs provide ample storage space for individuals and businesses alike. With the ability to store large amounts of data, these SSDs are ideal for content creators, gamers, and anyone else who requires extensive storage capabilities. Compared to traditional hard drives, 2TB SATA SSDs offer faster read and write speeds, helping to improve overall system performance.

    Additionally, they are more durable and have a longer lifespan, making them a great investment in the long run. As technology continues to advance, the need for more storage space is only going to increase. Therefore, investing in a 2TB SATA SSD is a smart decision that will keep you ahead of the curve.

    Whether you’re looking to upgrade your personal computer or outfitting an entire business network, a 2TB SATA SSD is an excellent option that offers both reliability and efficiency. So, if you’re in need of some serious storage space, be sure to consider a 2TB SATA SSD for your next upgrade.

    Conclusion

    In conclusion, a 2TB SATA SSD is like having your cake and eating it too – you can have the massive storage capacity of a traditional hard drive, combined with the lightning-fast speeds of a solid-state drive. It’s the perfect marriage of old-school storage and modern technology, giving you the best of both worlds. So if you want your computer to be lightning-fast and have plenty of room for all your files, a 2TB SATA SSD is the way to go!”

    FAQs

    What is the storage capacity of a 2TB SATA SSD?
    The storage capacity of a 2TB SATA SSD is 2 terabytes of data.

    What is the difference between a SATA SSD and a traditional HDD?
    SATA SSDs are faster and more reliable than traditional HDDs because they have no moving parts and use flash memory to store data.

    Can a 2TB SATA SSD be used as an external drive?
    Yes, a 2TB SATA SSD can be used as an external drive as long as it is placed in an external enclosure that supports SATA connections.

    What is the read and write speed of a 2TB SATA SSD?
    The read and write speed of a 2TB SATA SSD varies depending on the brand and model, but it is generally faster than a traditional HDD and can reach up to 500 MB/s read and 470 MB/s write speeds.

  • Boost Your PC Speed: The Ultimate Guide on How to Convert to m2 SSD

    Are you tired of your computer’s sluggish performance? Converting to an M2 SSD could be the answer to your problems. This small but mighty storage device is quickly becoming the go-to for those seeking lightning-fast transfer speeds and improved system responsiveness. Comparable in size to a stick of gum, the M2 SSD offers users higher read and write speeds, faster boot and load times, and lower power consumption than traditional hard drives.

    It’s like upgrading from a standard bicycle to a sleek, high-performance racing bike. So, if you’re looking to give your computer a powerful boost and join the ranks of the lightning-fast, read on to learn more about converting to an M2 SSD.

    Introduction

    If you’re looking to boost your computer’s speed and performance, upgrading to an M.2 SSD drive is a great option. Many people are intimidated by the process of converting to an M.

    2 SSD, but it’s actually a fairly straightforward process. First, you’ll need to ensure that your motherboard is compatible with M.2 SSDs.

    If it is, you can simply purchase an M.2 SSD and install it into your computer’s M.2 slot.

    Once the drive is installed, you’ll need to migrate your operating system and other important files over to the new drive. There are a number of tools available to help you do this, such as Macrium Reflect or Clonezilla. By following these steps, you’ll be able to enjoy faster load times, quicker boot-ups, and improved overall performance on your computer.

    So if you’re wondering how to convert to an M.2 SSD, don’t hesitate to give it a try!

    Understanding M2 SSDs

    M2 SSDs Introduction: M2 SSDs are one of the most advanced types of solid-state drives available on the market today. They are known for their blazing-fast data transfer speeds, compact size, and low power consumption. M2 SSDs are particularly popular in the gaming and high-performance computing communities, as they allow for lightning-fast boot and load times and quicker access to large files.

    But what exactly are M2 SSDs, and how do they work? In this blog post, we’ll take a closer look at M2 SSDs and what makes them different from other types of SSDs.

    how do i convert to m2 ssd

    Benefits of Upgrading to M2 SSD

    If you’re looking to boost the performance of your computer or laptop, upgrading to an M2 SSD is definitely worth considering. Modern M2 SSDs can deliver high-speed data transfer rates, fast boot times, and improved performance compared to traditional hard drives or even older SSDs. With an M2 SSD, you can expect faster file transfers, faster program loading times, and a more responsive computing experience.

    Not to mention, M2 SSDs use less power and generate less heat, which can lead to improved battery life and reduced system noise. By making the switch to an M2 SSD, you can enjoy all these benefits and more, making it an excellent investment for anyone looking to optimize their computer’s performance.

    Checking Compatibility

    If you’re looking to upgrade your storage options and move to a faster M.2 SSD, one of the first things you’ll need to do is check the compatibility of your system. Before making any purchases, it’s important to make sure that your motherboard supports M.

    2 drives and has an available slot for one to be installed. You’ll also want to consider the size of the drive you’re interested in and whether it will fit in your case. Additionally, if you plan to use the drive as your primary boot drive, you’ll need to make sure that your motherboard supports booting from an M.

    2 drive. Overall, taking the time to confirm the compatibility of your system can save you a lot of frustration and hassle down the line when trying to install your new drive.

    M2 SSD Slot Types

    When it comes to adding an M2 SSD to your computer, it’s important to check compatibility before making a purchase. There are different types of M2 SSD slot types, including B key, M key, and B+M key. B key slots only support SATA-based SSDs, while M key slots support both SATA and NVMe-based SSDs.

    B+M key slots can accommodate both SATA and NVMe-based SSDs as well, but it’s essential to check the exact specifications of the slot before buying an M2 SSD. Using the wrong type of M2 SSD can lead to compatibility issues and may cause damage to your computer. Therefore, prior research is crucial to ensuring you buy an M2 SSD that is compatible with your computer’s M2 slot.

    Checking Motherboard Compatibility

    Checking motherboard compatibility is an essential step when building a PC or upgrading an old one. You need to ensure that your motherboard is compatible with all the components you are planning to use, including the processor, RAM, and graphics card. To do this, it’s vital to check the motherboard’s specifications and compare them with those of your other components.

    The easiest way to determine motherboard compatibility is to visit the manufacturer’s website and check the specifications listed for your motherboard model. Once you determine which components you’ll be using, ensure they are compatible with your motherboard before purchasing them. It’s better to invest time in checking compatibility beforehand than to end up with a non-working PC due to incompatible components.

    Always keep in mind that a PC is like a jigsaw puzzle, and each component must fit together perfectly to create a functional computer.

    Installation

    If you’re looking to upgrade your computer’s storage by switching to an M.2 SSD, the installation process isn’t as daunting as it may seem. First, you’ll want to ensure your computer’s motherboard supports M.

    2 SSDs. Once confirmed, shut down your computer and unplug all cables. Open up the case and locate the M.

    2 slot on your motherboard. Carefully insert the M.2 SSD into the slot at a slight angle, ensuring the pins align properly.

    Use a retaining screw or clip to secure the M.2 SSD in place. Before closing up the case and reconnecting cables, make sure the M.

    2 SSD is recognized in your computer’s BIOS settings. Once confirmed, it’s time to enjoy the faster read and write speeds of your new M.2 SSD.

    With the right tools and a little bit of patience, converting to an M.2 SSD should be a breeze.

    Step-by-Step Guide to Installation

    Installing new components or software on your computer can often feel like a daunting task, especially if you haven’t done it before. However, with just a little bit of guidance and some basic knowledge, it can be a straightforward and painless process. Whether you’re installing a new program or upgrading your hardware, the first step is to ensure that you have all the necessary tools and equipment.

    It’s crucial to read the instructions carefully and prepare yourself before starting. For example, if you’re upgrading your CPU, make sure you have a compatible motherboard and enough thermal paste. Similarly, if you’re installing a new program, check the system requirements and make sure that your computer meets them.

    Following a step-by-step guide can ensure that you don’t miss any important steps and provide you with the confidence to tackle any installation process on your own.

    Cloning Data to M2 SSD

    If you’re looking to boost the performance of your computer, one upgrade you can make is replacing your old hard drive with an M2 SSD. Not only do SSDs offer faster read and write speeds, but they also run cooler and are more durable. But what happens to all the data on your old hard drive? That’s where cloning comes in.

    Cloning your data means making an exact copy of your current drive and transferring it to the new one. To do this, you’ll need a cloning software and a USB to M2 adapter. Once you have everything you need, simply connect both drives and begin the cloning process.

    It’s important to note that the new drive must have sufficient space to accommodate all the data on the original drive. So if you have a 1TB hard drive, you’ll need a 1TB M2 SSD or larger. Once the cloning process is complete, you’ll be able to enjoy faster boot times and improved overall performance without losing any of your precious data.

    So what are you waiting for? Upgrade to an M2 SSD today and experience the benefits for yourself!

    Conclusion

    In conclusion, converting to an M.2 SSD is like upgrading your car’s engine – it’s all about maximizing speed and performance. By following a few simple steps, you can swap out your old hard drive for a sleek and speedy M.

    2 SSD that will take your computer to the next level. So if you’re ready to rev up your computer’s performance, it’s time to grab a screwdriver and make the switch to an M.2 SSD.

    FAQs

    What is an m2 SSD?
    An m2 SSD is a type of solid state drive that connects directly to the motherboard of a computer via a small form factor M.2 slot.

    How can I tell if my computer supports m2 SSDs?
    You can usually check your computer’s documentation or specifications to see if it has an available M.2 slot. Alternatively, you can visually inspect the motherboard to see if it has an M.2 slot.

    Can I replace my current hard drive with an m2 SSD?
    Yes, you can usually replace your traditional hard drive with an m2 SSD, but be sure to check compatibility with your computer’s specifications and ensure that you have the necessary equipment and knowledge for installation.

    What are the benefits of using an m2 SSD?
    Using an m2 SSD can provide faster performance, improved boot times, and increased storage capacity, all in a smaller and more compact form factor compared to traditional hard drives.

  • Unleashing the Speed of M.2: How It Outperforms SSDs

    If you’re looking to upgrade your computer’s storage, you might have stumbled upon two popular options: M.2 and SSD. Both M.

    2 and SSD offer impressive speed and performance compared to traditional HDDs, but which one is faster? In this blog post, we’re going to compare M.2 vs SSD and help you figure out which one is the best option for your needs. Whether you’re a gamer, a graphic designer, or simply looking to speed up your computer, read on to learn more about the different features and benefits of these two options.

    Introducing M.2 and SSD

    If you’re looking for a faster storage solution for your computer, you might be considering either an M.2 or SSD drive. While both types of storage offer significant improvements over traditional hard drives, M.

    2 drives are generally faster than SSDs. This is because M.2 drives connect directly to your computer’s motherboard via an M.

    2 slot, which allows for faster data transfer speeds than the SATA interface used by most SSDs. In fact, M.2 drives can offer read and write speeds of up to 4GB/s, compared to the 550MB/s read and write speeds of most SATA SSDs.

    Of course, the speed of your M.2 drive will depend on a number of factors, including the read and write speeds of the NAND flash memory it uses. However, in general, an M.

    2 drive will offer faster performance than an SSD drive. So, if you’re looking for the fastest storage option available, an M.2 drive is the way to go.

    M.2: faster and smaller form factor

    M.2 and SSD are two terms that have become synonymous with speed and efficiency when it comes to data storage and transfer. M.

    2 is a small form factor that has replaced the bulky and outdated SATA interface for solid-state drives (SSDs). The M.2 interface is up to six times faster than the SATA interface, thanks to its use of the PCIe Gen3 x4 interface.

    This blazing-fast interface allows M.2 SSDs to transfer data at speeds of up to 5GB/s.

    Besides being faster than the SATA interface, M.2 SSDs are also smaller, making them ideal for slim and compact devices like ultrabooks, tablets, and even smartphones. They also consume less power, which is a crucial aspect of the ever-increasing battery-powered devices.

    In summary, M.2 SSDs are smaller, faster, and more energy-efficient than their SATA counterparts, making them the go-to solution for modern computing devices.

    how fast is m.2 compared to ssd

    SSD: solid-state drive technology

    The world of storage technology has seen a significant shift from traditional hard disk drives to solid-state drives (SSD) in the past decade. One of the latest advancements in this field is the M.2 SSD, which offers higher speeds and better performance compared to the SATA III SSD.

    These small and compact devices are designed to fit directly onto the motherboard of a computer, eliminating the need for power and data cables. M.2 SSDs are available in different sizes and can store larger amounts of data, making them perfect for high-speed computing and gaming.

    With no moving parts, SSDs are less prone to failure, making them more reliable than traditional hard drives. This means faster data access and boot-up times, as well as better overall system performance. So, whether you’re a gamer, a professional, or a casual user, the M.

    2 SSD is a worthy investment for those looking to improve their computer’s performance.

    Benchmark Tests

    If you’re wondering how fast an M.2 drive is compared to an SSD, the answer is significantly faster. While traditional SSDs have been the go-to for high-speed storage for a few years now, M.

    2 drives are on another level. M.2 drives use the NVMe interface, which offers much faster read and write speeds than their SATA-based SSD counterparts.

    To put it into perspective, an SSD can achieve read/write speeds of up to 550 MB/s, while an M.2 can go up to 3500 MB/s for reads and 2000 MB/s for writes. These figures translate to faster boot times, quicker application launches, and faster file transfers.

    When it comes down to benchmark testing, M.2 drives often outperform SSDs by a sizeable margin. So, if you’re looking for a significant upgrade in speed, an M.

    2 drive is the way to go.

    Sequential Read Performance

    When it comes to measuring the speed of a storage device, sequential read performance is a crucial metric. This particular benchmark test determines the speed at which data can be read from a drive in a sequential manner, meaning reading data in order, from the beginning to the end of a file. The higher the sequential read speed, the faster data can be accessed and transferred between the storage device and the computer.

    A storage device with fast sequential read performance is especially useful for tasks such as loading large files and booting up the operating system. When looking for a high-performance storage device, it’s important to consider not only the advertised maximum speed but also the real-world performance under different workload conditions. Ultimately, selecting the right storage device with fast sequential read performance will lead to faster and more efficient computing.

    Sequential Write Performance

    When it comes to measuring the performance of storage devices, one key factor is sequential write speed. This refers to how quickly data can be written to the device in a continuous stream. Benchmark tests are often used to determine a device’s sequential write performance.

    These tests involve writing a large amount of data to the device and measuring the time it takes to complete the task. Different benchmarking tools may generate slightly different results, but they can still provide a helpful comparison between devices. When it comes to choosing a storage device for a particular use case, sequential write speed is just one factor to consider, but it’s an important one for tasks like video editing or large file transfers.

    Random Read Performance

    When it comes to measuring the performance of hard drives and SSDs, one of the most important metrics is random read performance. This refers to how quickly the drive can access data that is stored in a non-sequential or fragmented way. In other words, how fast can it find and retrieve a specific piece of data without having to read through everything that came before it? This is essential for tasks like running applications or loading large files.

    Benchmark tests can provide valuable insights into a drive’s random read performance, allowing users to make informed decisions about which drives are best suited for their needs. By analyzing metrics such as IOPS (input/output operations per second) and latency, these tests can help identify which drives are capable of delivering the speed and responsiveness required for high-performance computing.

    Random Write Performance

    Random write performance is a critical aspect to consider when benchmarking storage devices. It refers to the speed at which data can be written to random locations on a drive. This is crucial for tasks like gaming, database management, and video editing – anything that requires frequent and rapid data read and write capabilities.

    A storage device with good random write performance will be able to handle these tasks with ease, allowing for seamless operation even with heavy data workloads. On the other hand, a device with poor random write performance will struggle, leading to latency issues, longer load times, and reduced performance overall. When it comes to selecting a storage device, it is important to consider its random write performance along with other factors like capacity and cost.

    Real-Life Performance Differences

    M.2 and SSD are two of the most popular storage options in the market today. When it comes to speed, M.

    2 takes the lead and leaves SSD in the dust. M.2 solid-state drives use the NVMe (non-volatile memory express) interface, which is a lot faster than the SATA interface used by SSD.

    How much faster, you ask? Well, an M.2 SSD can read and write data at blazing-fast speeds of up to 3,500MB/s and 3,300MB/s, respectively. In comparison, a traditional SSD can only achieve speeds of up to 550MB/s and 520MB/s for reading and writing, respectively.

    That’s a huge performance boost that you’ll definitely notice in your day-to-day computing activities. Imagine starting up your computer in seconds or being able to transfer large files in the blink of an eye – that’s the kind of performance boost you can expect from M.

    So if you’re looking for the fastest and most efficient storage option, M.2 is the way to go.

    Boot and Load Times

    Boot and Load Times: Real-Life Performance Differences The boot and load times of a device can greatly impact its overall performance. The faster the boot time, the quicker the device can be ready for use. Likewise, fast load times make it possible to open applications or load web pages in a matter of seconds, enhancing the overall user experience.

    In fact, slow boot and load times can be a source of frustration for users, as they may have to wait for long periods before they can start working on their device. Fortunately, modern devices have significantly decreased the time it takes to boot up and load applications, with some computers and smartphones now taking just a few seconds to start up. This means that users can get to work or leisure activities much more quickly, improving their productivity and satisfaction.

    So, if you’re looking for a new device, make sure to check the boot and load times, as they can make a real difference in your day-to-day life.

    Application and Game Launch Speeds

    When it comes to application and game launch speeds, performance differences can vary greatly in real-life scenarios. It’s not just about how fast your hardware is, but also about the optimization of the software and how it’s coded to run on your device. Some apps and games may take longer to load initially, but then run smoothly without any hiccups.

    Others may load quickly but have frequent crashes or lag. It’s important to consider your specific needs and uses for your device when evaluating launch speeds. Are you using it for professional work or for casual gaming? The demands placed on your device can greatly impact the launch speed of apps and games.

    It’s like comparing a sports car to a family sedan – both can get you from point A to point B, but the sports car may be faster and more thrilling to drive. Similarly, some apps may prioritize speed and sacrifice other factors like graphics or functionality. It’s all about finding the right balance for your specific device and purposes.

    Conclusion and Verdict

    In conclusion, M.2 drives are like the Usain Bolt of storage devices, blazing past traditional SSDs with lightning-fast speed. With their compact form factor and direct connection to the motherboard, they leave the sluggishness of SATA-based SSDs in the dust.

    So if you’re looking for a storage solution that can keep up with even the most demanding tasks, M.2 is the clear winner. Trust us, your computer will thank you for the upgrade.

    FAQs

    1. What is M.2 and how does it differ from a traditional SSD?
    M.2 is a form factor for solid state drives that connects directly to the motherboard, while traditional SSDs connect via a cable. M.2 SSDs are also typically faster than traditional SSDs. 2. How fast can M.2 SSDs get compared to traditional SSDs?
    M.2 SSDs can offer significantly faster speeds than traditional SSDs, with typical read and write speeds reaching 3,500 MB/s and 2,700 MB/s, respectively. Traditional SSDs typically only reach speeds of around 500-600 MB/s. 3. Are there any downsides to using an M.2 SSD instead of a traditional SSD?
    One potential downside is the cost, as M.2 SSDs can be more expensive than traditional SSDs. Additionally, some older motherboards may not have an M.2 slot, which would require the purchase of a separate adapter. 4. How does M.2 compare to other types of SSDs, such as NVMe SSDs?
    M.2 is a form factor for SSDs, while NVMe is a type of protocol that allows for faster communication between the SSD and the rest of the system. M.2 drives can use NVMe, but not all M.2 drives do. NVMe SSDs can offer even faster speeds than M.2 SSDs, with read and write speeds reaching 7,000 MB/s and 5,000 MB/s, respectively.