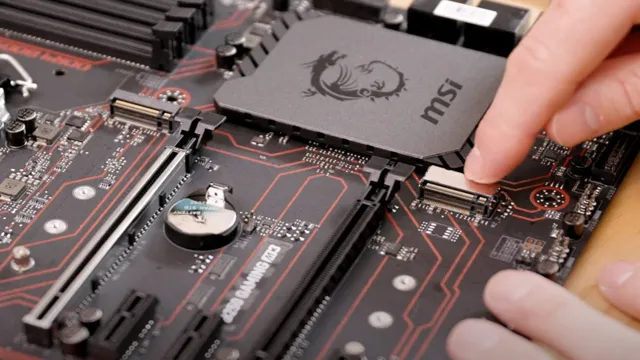
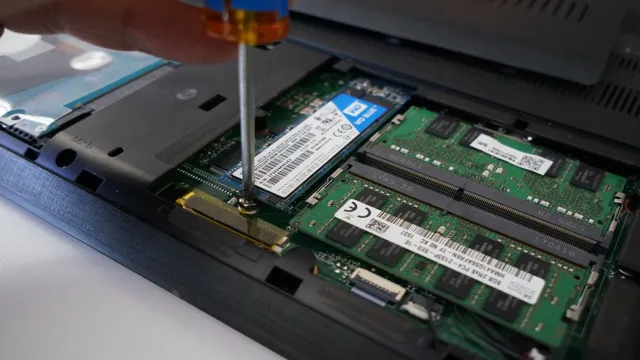
Are you tired of slow boot and load times on your PC? Upgrading to a solid-state drive (SSD) is a simple and effective solution. An SSD can provide faster read and write speeds, improving your PC’s overall performance. Think of it as upgrading from a horse-drawn carriage to a sports car – it’s a game-changer.
But how do you go about adding an SSD to your PC? Don’t worry, it’s not as complicated as it may seem. In this guide, we’ll walk you through the steps of adding an SSD to your PC and getting it up and running smoothly. So, let’s get started!
Preparation
If you’re looking to add an SSD to your PC, the first step is to make sure your PC is compatible with one. Check your motherboard and ensure it has an available SATA port for the SSD. You will also need to consider the size of the SSD you need, and whether you want it to be your primary or secondary storage drive.
Next, you will need to physically install the SSD into your PC. Make sure your PC is turned off, then open the case and locate an available drive bay. Slide the SSD into the bay and secure it with screws.
Once installed, you will need to format the SSD and transfer your files to it. This can be done through disk management in Windows or a third-party partition tool. Finally, you can set your SSD as the primary boot drive in your BIOS to increase the speed and performance of your system.
With a little preparation and some basic knowledge, adding an SSD to your PC can be a fairly simple and straightforward process.
Check Compatibility and Capacity
Before you start any new project, it’s essential to ensure that all your equipment is compatible and has enough capacity to handle the job. This preparation step is vital when it comes to technology, especially in relation to computer peripherals and hardware. Before you invest in a new piece of equipment, check that it will work with your existing tech setup.
Check the compatibility of both your computer system and the new hardware you are considering purchasing. Additionally, you should check that your computer will have the capacity to run the hardware and software that you are planning to use simultaneously. Having proper equipment and compatibility will improve your system’s overall performance, speed, and stability.
Don’t skimp on this step as it can save you from unwanted headaches and frustration in the long run. So, make sure to invest in the right equipment, check the compatibility, and make sure your system can handle it.

Gather Tools and Materials
When it comes to any project, preparation is key. Gathering the necessary tools and materials is the first step in ensuring a successful outcome. Before starting any project, take the time to make a list of all necessary items.
This could include anything from measuring tapes, screwdrivers, and hammers to paints, brushes, and sandpaper. The key here is to be organized and to have everything ready before starting. This will prevent any unnecessary trips to the store or delays in the project’s completion.
One analogy would be to think of gathering tools and materials like packing for a trip. You don’t want to find yourself in a foreign country without the necessary essentials, just as you don’t want to start a project without the proper tools. So take the time to prepare and gather everything you need beforehand to ensure a smooth and successful project.
Installation
Adding an SSD to your PC is a great way to improve its performance. Installing an SSD is a fairly simple process, but it requires a bit of technical knowledge. First, you’ll need to open up your PC and locate the hard drive bay.
If you already have a HDD installed, you’ll need to remove it before installing the SSD. Once you’ve done that, you’ll need to connect the SSD to the motherboard using a SATA cable and power cable. Make sure that you secure the SSD in the bay with screws.
Next, you’ll need to clone your operating system from your HDD to your new SSD. You can use software like Acronis True Image or EaseUS Todo Backup to do this. Finally, you’ll need to change your boot order in the BIOS to make sure that your PC boots from the SSD.
Overall, adding an SSD to your PC is a great way to speed up your system and improve your overall computing experience.
Open the PC Case
To begin the installation of a new component, the first step is to open the PC case. This can seem daunting, but with the right tools and knowledge, it’s a straightforward process. First, ensure the PC is turned off and unplugged from the wall.
Locate the screws or latches on the side panel of the case and remove them. In some cases, the panel may slide off or require additional force to release. Once you have access to the inside of the case, take note of all the components and their placement.
This will help you avoid accidentally disconnecting anything important. Ensure you discharge any static electricity before handling any components. Installing new hardware can be a great way to upgrade your PC’s performance, but always take care to avoid damaging any existing components.
By following these steps and using caution, opening the PC case should be a breeze.
Locate the SATA Ports
When it comes to installing a SATA hard drive into your computer, one of the first things you’ll need to do is locate the SATA ports. These are small connectors on your motherboard that allow you to connect your hard drive directly to the computer. Depending on your motherboard, these ports may be labeled or color-coded for easy identification.
Typically, SATA ports are located near the bottom of the motherboard, near the edge, and are easily accessible. Once you’ve identified where the SATA ports are located, you can begin to connect your hard drive and other necessary components. It’s important to take your time here and make sure that everything is connected securely and in the correct order.
With a little bit of patience and attention to detail, you’ll be up and running in no time.
Mount the SSD
To install an SSD in your computer, you must first mount it securely. This process is relatively easy, but it’s important to be careful and take your time to avoid any damage or mistakes. First, make sure your computer is turned off and unplugged.
Then, locate the SSD mounting area in your computer’s chassis. It’s usually located near the hard drive bays. If you can’t find it, consult your computer’s manual or manufacturer’s website.
Once you’ve located it, attach the mounting bracket to the SSD using screws provided with your SSD. Then, slide the SSD into the mounting area and secure it in place using additional screws if necessary. Be sure the SSD is snug and secure before you turn your computer back on.
Once you’ve mounted the SSD, you can move on to the next step of installing and configuring it for use. Following these steps will ensure a successful and seamless installation for your new SSD.
Configuration and Optimization
Adding an SSD to your PC is a great way to optimize its performance. SSDs, or solid state drives, are a type of data storage that is faster and more durable than traditional hard drives. To add an SSD to your PC, you will first need to choose the right SSD for your needs.
You will also need to make sure that your PC has an available slot for the SSD. Once you have your SSD, you can install it by opening up your PC and connecting the SSD to the motherboard using a SATA cable. After you have installed the SSD, you will need to configure your PC to use it as the boot drive.
This will ensure that your PC starts up faster and runs more smoothly. With an SSD, you can enjoy faster load times, quicker data transfer speeds, and an overall smoother computing experience.
Update BIOS and Drivers
If you want to get the most out of your computer, then you need to update your BIOS and drivers. BIOS stands for Basic Input/Output System, which is responsible for booting up your computer and initializing hardware components such as the CPU, memory, and hard drive. Meanwhile, drivers are software programs that allow your computer to communicate with peripherals such as printers, scanners, and cameras.
Updating your BIOS and drivers can improve system stability, fix bugs, add new features, and enhance performance. By doing so, you can make sure that your computer is running smoothly and efficiently, and that you are getting the most out of your hardware. So, if you haven’t done so already, take some time to check for updates and install them.
You’ll be glad you did!
Clone or Install OS on SSD
One of the most effective ways to improve the speed and performance of your computer is to clone or install your operating system (OS) onto your SSD. By doing this, you can drastically reduce the boot-up time and improve the overall responsiveness of your machine. There are two ways to go about doing this: cloning your existing OS or doing a fresh install.
Cloning allows you to transfer all your existing files and settings onto the new SSD, while a fresh install will give you a clean slate to work with. The key thing to keep in mind is to ensure that your SSD has enough space to accommodate your existing data if you choose to clone it. Additionally, configuring and optimizing your SSD after the installation is crucial to ensure maximum performance benefits.
This includes changes to your BIOS settings, disabling unnecessary features, and ensuring that your drivers and software are up to date. With these steps, you can give your computer a much-needed speed boost and optimize it for better performance.
Conclusion
Adding an SSD to your PC can be a game changer in terms of overall performance and speed. It’s like giving your computer a cup of espresso in the morning – it wakes it up and gets it ready to tackle any task. Whether you’re a gamer, a professional videographer, or just a casual user, adding an SSD can improve your computing experience in ways you never thought possible.
So, go ahead and give your PC the upgrade it deserves, and watch as it transforms from a slowpoke to a speedy beast in no time!”
FAQs
What is an SSD and how does it differ from a HDD?
An SSD is a solid-state drive that uses flash memory to store data, while a HDD is a hard disk drive that uses spinning disks with magnetic coating. SSDs offer faster read and write speeds, greater durability, and lower power consumption than HDDs.
Can any PC be upgraded with an SSD?
Most desktop and laptop computers can be upgraded with an SSD as long as they have a compatible interface (SATA or NVMe) and an available drive bay. Some ultra-thin laptops and small form factor PCs may not have room for a standard 2.5-inch SSD.
What tools do I need to install an SSD in my PC?
You will need a screwdriver, an anti-static wristband or mat, and possibly a SATA or NVMe cable depending on your SSD and motherboard. It’s also a good idea to have a backup of your important data before installing the new drive.
How do I transfer my operating system and files to the new SSD?
You can use cloning software such as Clonezilla or Macrium Reflect to make an exact copy of your existing drive onto the new SSD. Alternatively, you can do a fresh install of the operating system and manually transfer your files and programs. Be sure to update your BIOS and drivers after installing the new SSD.
