Author: David L. Lynn

  • Boost Your PC’s Speed: A Step-By-Step Guide to Cloning Your HDD to SSD

    Are you thinking of upgrading your computer’s storage system from an HDD to an SSD? Cloning your HDD to an SSD makes the process a lot easier and faster, without having to spend the time and effort to reinstall all your programs and system settings. But the thought of cloning your entire drive might seem intimidating, and you may not know where to start. Fear not, because we’ve got you covered with a step-by-step guide to make cloning your HDD to an SSD a breeze! In this blog post, we’ll walk you through the process, starting from backing up your files to transferring them over to the new drive.

    With an SSD, you’ll notice a significant boost in your computer’s performance, with faster boot-up times, quicker program load times, and snappier overall responsiveness. So, let’s dive in and get your computer q uick and responsive!

    Check SSD Compatibility

    If you’re looking to upgrade your computer’s storage by cloning your HDD to an SSD, it’s important to check for compatibility between the two storage devices first. Not all SSDs are created equal, so it’s important to make sure that the SSD you plan on using is compatible with your system’s motherboard and BIOS. You can find this information by checking your system’s documentation or by contacting the manufacturer.

    Additionally, it’s important to check the physical dimensions of your existing HDD and make sure that the SSD you choose will fit in your computer’s hard drive bay. Once you’ve confirmed compatibility, you can proceed with cloning your HDD to the SSD using software like Clonezilla or Macrium Reflect. Don’t forget to backup your important data before starting the cloning process, just in case something goes wrong.

    With a bit of preparation and attention to detail, you can upgrade to an SSD and enjoy faster boot times and improved performance.

    Ensure SSD is compatible with your computer

    When upgrading your computer to an SSD, it’s essential to ensure that the SSD you choose is compatible with your computer. SSDs use different connectors and interfaces compared to traditional hard drives, so it’s crucial to verify compatibility to avoid any headaches. Begin by checking your computer’s specifications and identifying the type of connector and interface your computer uses for storage.

    The most commonly used interfaces for SSDs are SATA and NVMe, so your SSD should match the interface your computer uses. Choosing an SSD that’s incompatible or choosing an SSD with the wrong connector will result in either slow performance or the SSD not working at all. You don’t want to waste your time and money on an SSD that’s not compatible with your computer.

    Therefore it’s crucial to do your research before buying an SSD.
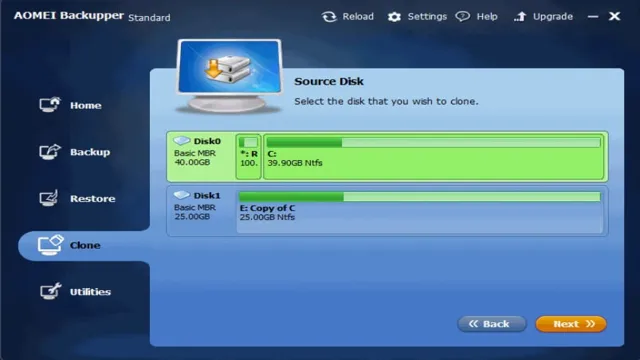
    how do i clone my hdd to ssd

    Select Cloning Software

    If you’re looking to transfer all your files from your old hard drive to a new solid-state drive, the easiest way to do so is by cloning the drive. But, how do you clone your HDD to SSD? Well, the simple answer is by using cloning software. There are various cloning tools available in the market, including free and paid options.

    Some of the popular ones include EaseUS Todo Backup, Clonezilla, Acronis True Image, Macrium Reflect Free, and more. It’s essential to research and find the best software that suits your needs and preferences. Once you’ve decided on the software, you can follow the instructions to create a clone of the old drive to the new one.

    Cloning helps transfer everything from your old drive to the new SSD without reinstalling the operating system and software which saves you a lot of time and effort. So, use cloning software and enjoy a faster and more efficient solid-state drive experience!

    Choose cloning software that suits your needs

    When it comes to choosing cloning software, you need to consider your specific needs and requirements. Different software options offer unique features and capabilities that may better suit your situation. For instance, some cloning software is geared towards personal use, while others are designed for enterprise-level applications.

    Additionally, some programs offer more automation capabilities, while others provide more customization options. Therefore, it’s important to research and compare different cloning software options to determine which one is best for you. By selecting the right cloning software, you can simplify the process of copying and transferring data, system settings, and even entire operating systems.

    This can save you time and effort, no matter what your cloning needs may be.

    Prepare Your SSD and HDD

    If you’re looking to upgrade your computer’s storage from an HDD to an SSD, cloning your data is the way to go. But before you start the cloning process, you need to prepare your SSD and HDD. First, make sure your SSD is properly formatted and ready for use.

    If it came with software, install it and follow the instructions to format the drive. If it didn’t come with software, you can use a program like Windows Disk Management to format the drive. Once your SSD is ready, connect it to your computer alongside your HDD.

    Next, backup any important data from your HDD to a separate external drive or cloud storage. This is important in case anything goes wrong during the cloning process. Finally, make sure your computer is turned off, and open it up to physically install the SSD in an empty drive bay if necessary.

    Once you’ve completed these steps, you’re ready to start cloning your HDD to your SSD. With the right software and some patience, you’ll be enjoying faster boot times and improved performance in no time.

    Format and partition SSD and HDD

    Before you can start using your new SSD and HDD, it’s important to prepare them by formatting and partitioning them appropriately. This will ensure that they work efficiently and effectively with your operating system, programs, and files. Formatting involves setting the file system and structure for the drive.

    With an SSD, it’s best to use the NTFS file system, while with an HDD, you can choose between NTFS, exFAT, and FAT32 depending on your needs. Partitioning is the process of dividing the drive into separate logical sections, each with its own file system and designated purpose. For example, you might create one partition for your operating system, another for programs, and a third for personal files.

    It’s important to plan your partitioning strategy carefully to ensure optimal performance and organization. By taking the time to properly prepare your SSD and HDD, you can avoid potential issues and enjoy fast, reliable storage for years to come.

    Connect SSD to Your Computer

    If you’re looking for a faster and more efficient way to store and access your files, you might want to consider upgrading to an SSD (solid state drive). But before you can start enjoying the benefits of an SSD, you’ll need to know how to connect it to your computer and transfer your files. One of the easiest ways to do this is by cloning your HDD (hard disk drive) to your SSD.

    This process creates an exact copy of your entire hard drive, including your operating system, files, and settings. Not only does this save you the hassle of manually reinstalling everything, but it ensures that all your programs and settings will be transferred seamlessly to your new drive. To clone your HDD to SSD, you’ll need cloning software and a SATA-to-USB adapter cable.

    Once you have these tools, you can connect your SSD to your computer, initialize it, and then begin the cloning process. After the cloning is complete, you can set your SSD as the primary boot drive in your BIOS, and then enjoy the increased speed and responsiveness of your new solid state drive!

    Attach SSD to your computer using an adapter or enclosure

    If you want to speed up your computer’s performance, attaching an SSD (Solid State Drive) is a great way to do it. The first thing you need to do is to choose an adapter or enclosure that’s compatible with your SSD. Once you have the right equipment, connecting it to your computer is easy.

    Start by turning off your computer and disconnecting all cables. Next, remove the side panel from the computer case and locate an available drive bay. Carefully line up the adapter with the bay and screw it into place.

    Then, connect the data and power cables to the adapter and the SSD. Finally, connect the power and data cables to the motherboard and turn on your computer. Your system should automatically detect the new SSD and prompt you to initialize it.

    With your new SSD attached, you’ll notice faster boot times and improved performance across the board.

    Open Cloning Software

    If you’re wondering “how do I clone my HDD to SSD”, the answer is easy – use open cloning software! Cloning your HDD to an SSD can be a great way to speed up your computer, improve boot times, and even extend the life of your old HDD. Open cloning software like Clonezilla or Macrium Reflect can make the process easy and stress-free. These software options are user-friendly and offer step-by-step instructions to help ensure your data is successfully transferred to the new drive.

    Plus, open cloning software is often free to use, so you won’t need to pay for expensive software to get the job done. So if you’re ready to upgrade to an SSD but don’t want to lose your important data, consider using open cloning software to help make the transition smooth and simple.

    Start the cloning process in the software

    To begin cloning your hard drive, the first step is to open the cloning software. Connect the new hard drive or SSD to your computer and ensure it is recognized by your system. Run the cloning software and select the source and target drives.

    The source drive is your original hard drive, and the target drive is the new one or the SSD you want to clone it to. Once you have selected the drives, the software will show you any partitions on the source drive. Select the partitions you want and specify how much space you want to allocate on the target drive for the new clone.

    Once you have selected all the options, hit the start button, and the cloning process will begin. Depending on the amount of data being cloned, this process can take a few minutes to several hours. The cloning software is essential when creating a copy of your hard drive.

    It saves time and effort that would have been used when installing the operating system and other programs from scratch. Additionally, the cloning process preserves all files and data, including the partitioning layout and file structure. As a result, you can boot the cloned hard drive or SSD and work as if you were using your original hard drive.

    Remember to keep your original hard drive safe, as mistakes in the cloning process can cause data loss. With that said, the cloning process is simple, and anyone can do it in a few easy steps as long as they have the right software and hardware.

    Monitor Cloning Process

    If you’re wondering how to clone your HDD to SSD, it’s actually a relatively simple process. But it’s important to monitor the cloning process to ensure everything is going smoothly. This can be done by using a software program that will show you the progress of the cloning process.

    These programs will also let you know if there are any errors or issues that need to be addressed. It’s important to monitor the process so you can catch any potential problems early on and fix them before they become bigger issues that can cause data loss. By keeping an eye on the cloning process, you can ensure that your data is securely and accurately transferred from your HDD to your new SSD, and you can enjoy the benefits of improved performance and faster load times.

    So, take the time to monitor your cloning process and enjoy your new and improved SSD.

    Keep an eye on the progress of cloning

    Cloning has been a topic of discussion in the scientific community for years now, and as technology continues to advance, there is more work being done in this field than ever before. If you are interested in keeping up with the progress of cloning, there are a few things you can do to stay informed. Firstly, you can keep an eye on the latest research papers being published by scientists all over the world.

    By understanding the latest breakthroughs in cloning technology, you can gain insight into where the field is headed and what new developments might be on the horizon. Secondly, you can follow news outlets that cover scientific advancements, as there is often coverage of cloning and genetic research in these publications. Lastly, connecting with experts in the field on social media or forums can be a great way to stay up to date on the latest developments and breakthroughs in cloning technology.

    By staying informed, you can gain a better understanding of the potential benefits and risks of cloning, and contribute to the ongoing conversation surrounding this controversial topic.

    Finalize Cloning and Install SSD

    If you’re wondering how to clone your HDD to SSD, the process may seem intimidating at first, but it’s actually quite simple. Before you begin, make sure you have a cloning software and your SSD ready for installation. Start by connecting your SSD to your computer and selecting it as the destination drive for your cloning software.

    Then, initiate the cloning process, which may take some time depending on the size of your HDD and the speed of your computer. Once the cloning is complete, you’ll need to physically install the SSD into your computer, which can vary depending on your hardware setup. Finally, make sure you configure your bios settings to recognize the new SSD as the boot drive.

    With these steps completed, you can enjoy the increased speed and improved performance of your new SSD. Overall, the process of cloning your HDD to SSD can be a great way to breathe new life into an older computer and enhance its capabilities with minimal effort.

    Finish cloning and install SSD into your computer

    Now that you’ve finished cloning all your files onto your new SSD, it’s time to install it into your computer. First, shut off your computer and unplug all cables. Locate your old hard drive and remove it from your computer, taking care not to damage any other components.

    Insert your new SSD into the same location and secure it in place. Then, reattach all cables and turn on your computer. If everything went smoothly during the cloning process, your computer should now boot up from the SSD instead of your old hard drive.

    Congratulations, you’ve successfully upgraded your computer’s storage to an SSD – enjoy faster performance and quicker load times!

    Verify Cloning Success

    If you’ve recently cloned your hard drive to an SSD, then you’ll want to make sure the cloning process was successful before making any changes or deleting any files from your HDD. You can verify your cloning success by checking if the newly cloned SSD is bootable. First, restart your computer and press the key that takes you to your BIOS settings.

    From there, set your newly cloned SSD as the primary boot device and save changes. Next, restart your computer again and check if it boots from the SSD instead of the HDD. If it does, then your cloning process was successful.

    Additionally, you can check the capacity and available storage of your cloned SSD to ensure that all the files and data were successfully cloned. By following these simple steps, you can ensure that you have successfully cloned your HDD to an SSD, and you can now enjoy the speed and performance boost that comes with using an SSD.

    Check to see if the cloning was successful

    Once you’ve completed the cloning process, it’s important to verify if it was successful. One of the simplest ways to do this is by conducting a DNA analysis to confirm if the genetic makeup of the clone matches that of the original organism. This will help to identify any possible genetic alterations that may have occurred during the cloning process.

    Another method is to observe physical characteristics such as size, eye color, and behavior, to see if they are consistent with those of the original organism. Additionally, conducting tests to confirm that the cloned organism is capable of the same functions as the original will also be useful. It’s essential to ensure the success of the cloning process to prevent any potential issues such as genetic defects or abnormalities that could arise.

    By conducting these tests and verifying the success of cloning, you can ensure that the cloned organism can function as intended.

    Conclusion

    In conclusion, cloning your HDD to an SSD is like giving your old car a new engine. It’s a simple and efficient way to upgrade and boost your system’s speed and performance without having to start from scratch. So, gear up and channel your inner mechanic, and get ready to enjoy a smooth and turbocharged ride with your newly cloned SSD!”

    FAQs

    What is HDD cloning and why is it necessary to clone my HDD to SSD?
    HDD cloning is the process of copying all the data from an existing hard drive to a new one. It is necessary to clone your HDD to SSD in order to transfer all your data, including the operating system, to a faster and more efficient SSD.

    Can I clone my HDD to SSD without any special software?
    No, you need special software to clone your HDD to SSD. There are various paid and free software options available online, including Macrium Reflect, EaseUS Todo Backup, and Clonezilla.

    How long does it take to clone my HDD to SSD?
    The time it takes to clone your HDD to SSD depends on the amount of data you have. It usually takes anywhere from 1-4 hours, but it might take longer depending on the speed of your computer and the transfer speed of your hard drives.

    Do I need to prepare my SSD before cloning my HDD to SSD?
    Yes, you need to prepare your SSD before cloning. You need to make sure your SSD has enough space to hold all your data and create a bootable USB drive with cloning software. Additionally, you need to configure your BIOS to boot from the USB drive.

    Is it safe to clone my HDD to SSD?
    Yes, it is safe to clone your HDD to SSD as long as you use reliable cloning software and follow the instructions carefully. However, it’s always a good idea to create a backup of your important files in case of any unforeseen problems during the cloning process.
  • Thunder into the Future with Thunderbolt 3: The Ultimate Guide

    Imagine transferring large files in just a matter of seconds. Sounds exciting, right? Well, Thunderbolt 3 is here to make that a reality. Thunderbolt 3 is the latest and fastest data transfer technology.

    It’s a game-changer that’s taking the world by storm, providing remarkable speed and versatility. It’s the answer to all those frustrations caused by slow data transfer, which can be so time-consuming and tiring. Thunderbolt 3 provides exceptional speed, supports dual 4K displays, has a versatile USB-C port, and is ideal for gamers, content creators, and business professionals alike.

    What is Thunderbolt 3?

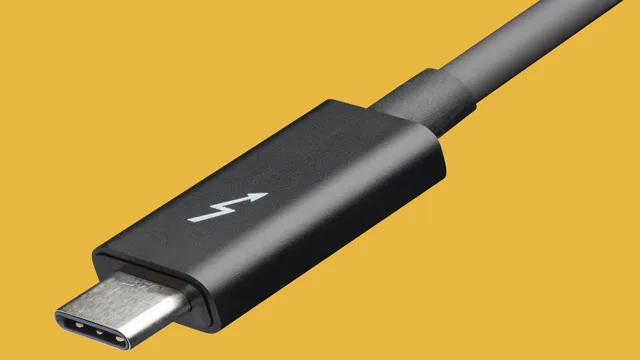
    Thunderbolt 3 is a high-speed data transfer technology that has revolutionized the way we connect devices and peripherals to our computers. It has a blazing-fast data transfer rate of up to 40Gbps, which means it can transfer large files in a matter of seconds. Thunderbolt 3 is also capable of delivering up to 100W of power to charge your devices and can support one 5K display or two 4K displays.

    Thunderbolt 3 uses a USB-C connector, which has become increasingly popular in recent years. With Thunderbolt 3, you can connect multiple devices to your computer and transfer data between them without losing any speed or quality. In summary, Thunderbolt 3 is an amazing technology that has truly transformed the way we connect and transfer data, and it’s worth considering when looking for high-performance computer accessories.

    Definition and Features

    Thunderbolt 3 is a high-speed technology that allows lightning-fast data transfer between computers and other devices. It was developed by Intel and combines data transfer speeds of up to 40 Gbps with display connectivity, power delivery and daisy-chaining capabilities. Thunderbolt 3 ports can be found in a variety of devices, ranging from laptops, tablets and desktop computers to external hard drives, monitors and docking stations.

    One of the most significant features of Thunderbolt 3 is its ability to support two 4K displays or one 5K display, making it an ideal solution for video editors, gamers and other professionals who need to multitask on multiple screens. Thunderbolt 3 cables are also reversible, meaning that they can be plugged in with either side facing up, making them more convenient to use than traditional USB cables. Another key feature of Thunderbolt 3 is its ability to provide up to 100 watts of power to connected devices, making it possible to charge laptops and other power-hungry devices quickly.

    Thunderbolt 3 also supports the latest USB-C standards, which means that it’s compatible with a wide range of devices. Overall, Thunderbolt 3 is a powerful and versatile technology that offers a range of features and benefits for users. It’s fast, powerful and flexible, making it an ideal solution for anyone who needs to transfer large amounts of data quickly and easily.

    Whether you’re a professional editor, gamer, or simply a power user, Thunderbolt 3 is a technology worth considering for your next device or peripheral purchase.

    thunderbolt 3

    Speed and Bandwidth

    Thunderbolt 3 is the latest and greatest in data transfer technology, offering unprecedented speed and bandwidth to users. It is a high-speed data transfer port that offers a maximum transfer rate of up to 40Gbps, which is four times faster than USB 1 Gen

    Thunderbolt 3 uses the USB Type-C connector, enabling it to be compatible with a wide range of devices, from laptops to desktops. The real magic of Thunderbolt 3 is its ability to transform a single USB-C port into a multi-purpose powerhouse, allowing you to connect to external displays, charge devices, and transfer data all at the same time. Thunderbolt 3 is perfect for anyone who needs to move large amounts of data quickly, such as video editors, photographers, and gamers.

    So, if you’re looking for lightning-fast transfer speeds and unparalleled bandwidth, Thunderbolt 3 is the way to go!

    Benefits of Thunderbolt 3

    Thunderbolt 3 is a versatile interface that provides a wide range of benefits for those who use it. One of the biggest advantages of Thunderbolt 3 is its incredible speed and power. With lightning-fast data transfer rates of up to 40 Gbps, Thunderbolt 3 allows for quick and easy file transfers between devices, making it an excellent choice for creative professionals who need to move large amounts of data.

    Another advantage of Thunderbolt 3 is its ability to support multiple displays. This means that you can connect up to two 4K displays, or one 5K display, making it an ideal choice for graphic designers, video editors, and other professionals who need to work with large amounts of visual data. Overall, Thunderbolt 3 offers a wide range of benefits for those who need fast, reliable connectivity and powerful performance, making it a top choice for anyone who demands the best from their devices.

    Fast File Transfers and Backup

    Thunderbolt 3 is a game-changer when it comes to fast file transfers and backup. With its lightning-fast speed of up to 40 Gbps, it can transfer large files in mere seconds. This means less waiting time and more productivity for users who need to transfer large files regularly.

    Thunderbolt 3 also offers a dual 4K display support, making it perfect for creative professionals who require a high-quality visual experience. Another benefit of Thunderbolt 3 is its ability to charge devices faster. This is extremely useful for people who are always on the go and need to charge their devices quickly.

    Overall, Thunderbolt 3 is a convenient and essential tool for anyone who needs fast file transfers and backup.

    Connect Multiple Devices

    Thunderbolt 3 is an excellent technology that allows you to connect multiple devices to your computer. There are many benefits to using Thunderbolt 3, such as fast data transfer speeds and the ability to charge devices. With Thunderbolt 3, you can connect up to six devices at once, making it easy to use your computer for work or play.

    One of the best things about Thunderbolt 3 is that it supports 4K displays, which means you can have a stunning visual experience when watching movies or working on graphics-intensive tasks. In addition to its connectivity features, Thunderbolt 3 also offers a range of other benefits. For example, it supports the use of external graphics cards, which can be a game-changer for gamers and videographers.

    With an external graphics card, you can improve your computer’s graphics performance without having to upgrade your main components. Thunderbolt 3 also supports daisy-chaining, which means you can connect devices in a series, making it easier to manage your cables and keep your desk tidy. Overall, Thunderbolt 3 is an excellent technology that offers many benefits for anyone who needs to connect multiple devices.

    Whether you’re a professional who needs to connect multiple displays or a casual user who wants to charge their devices, Thunderbolt 3 has you covered. So, if you’re in the market for a new computer or looking to upgrade your existing one, be sure to consider the benefits of Thunderbolt

    Improve Workflow and Productivity

    Thunderbolt 3 is a technology that can greatly improve workflow and productivity. One of the biggest benefits of Thunderbolt 3 is its speed. With a bandwidth of up to 40 Gbps, Thunderbolt 3 allows for lightning-fast data transfers and significantly reduces wait times.

    This means that tasks that used to take hours can now be completed in just a few minutes. In addition, Thunderbolt 3 can support up to two 4K displays, which can enhance multitasking capabilities and allow for a more streamlined workflow. Furthermore, Thunderbolt 3 devices are versatile and can be used with a wide range of peripherals, from external hard drives to docking stations.

    All in all, Thunderbolt 3 can revolutionize the way work is done, making it faster, more efficient, and more enjoyable.

    Thunderbolt 3 Compatible Devices

    Thunderbolt 3 is definitely a technology to watch out for, as it offers faster speeds and improved connectivity over its predecessors. If you’re looking for Thunderbolt 3 compatible devices, you won’t have to look too hard. There are a plethora of laptops, desktops, and peripheral devices that are already equipped with Thunderbolt 3 ports.

    Some of the most popular laptops that come with a Thunderbolt 3 port include the MacBook Pro, Dell XPS 13, Razer Blade Stealth, and the HP Spectre x360. On the desktop side, the iMac Pro, Mac Pro, and Dell Precision 7730 all come with Thunderbolt 3 ports. And if you’re looking for external SSDs, docks, or displays, there are plenty of options to choose from as well.

    With a Thunderbolt 3 connection, you can expect faster data transfer speeds, improved charging capabilities, and higher video resolutions. So if you haven’t already, consider upgrading to Thunderbolt 3 compatible devices to experience the benefits it has to offer.

    Laptops and Desktops

    If you’re in the market for a new laptop or desktop, it’s essential to consider Thunderbolt 3 compatible devices. Thunderbolt 3 is a type of connection that allows high-speed data transfer. This connection enables you to connect your computer to peripherals, such as external hard drives or monitors, with lightning-fast speeds.

    Thunderbolt 3 is also compatible with USB-C, allowing you to use a single port for multiple devices. So, when you’re shopping for a new computer, check to see if it has Thunderbolt 3 compatibility. It will enhance your overall experience by allowing for quick and effortless data transfer.

    Plus, it will make your life easier by reducing the need for multiple cables and adapters. Make sure to keep Thunderbolt 3 compatibility in mind when shopping so you won’t miss out on the benefits it offers.

    External Storage Devices

    If you’re in the market for an external storage device that is both blazing fast and highly efficient, you should look no further than Thunderbolt 3 compatible devices. These powerful peripherals have the ability to transfer data at speeds that are simply staggering, with transfer rates of up to 40 Gbps. Whether you’re backing up your most important files, editing your latest 4K video project, or just need a reliable and high-performing storage device for all your needs, Thunderbolt 3 compatible devices are perfect for you.

    So, if you want unmatched speed, power, and versatility in your external storage solutions, be sure to check out the range of Thunderbolt 3 compatible devices available on the market today!

    Future of Thunderbolt 3 Technology

    As technology continues to evolve, Thunderbolt 3 is proving to be a game-changer. With its lightning-fast data transfer speeds, it’s not hard to see why. Thunderbolt 3 boasts up to 40Gbps and allows for multiple displays, providing seamless productivity with a single cable.

    But what’s next for Thunderbolt 3? With the increasing demand for faster and more efficient technology, Thunderbolt 4 is on the horizon. Thunderbolt 4 is expected to further increase data transfer speeds and potentially even provide improved charging capabilities. Additionally, Thunderbolt 4 is expected to be more widely available, as Intel has announced plans to open up the certification process to third-party manufacturers.

    This means more devices will be able to incorporate Thunderbolt 4, providing users with even more seamless and efficient data transfer options. Overall, Thunderbolt 3 has already had a massive impact on technology, and with Thunderbolt 4 on the horizon, the future only looks brighter.

    Conclusion

    Thunderbolt 3 is like a superhero that can do it all. It’s faster than a speeding bullet, more powerful than a locomotive, and can connect to up to six devices at once. With Thunderbolt 3, you don’t need a utility belt full of adapters and cords.

    It’s the all-in-one solution that saves the day when you need to transfer large amounts of data or connect to multiple displays. So, if you want the ultimate superpower for your tech world, Thunderbolt 3 is the way to go.”

    FAQs

    What is Thunderbolt 3?
    Thunderbolt 3 is a hardware interface that enables fast transfer of data, video, and power between devices and computers using a single connector.

    What are the advantages of Thunderbolt 3 over Thunderbolt 2?
    Thunderbolt 3 provides twice the bandwidth and supports 4K displays, USB-C, and power delivery up to 100W, unlike Thunderbolt 2, which only supports a maximum bandwidth of 20Gbps and does not support USB-C or power delivery.

    Can Thunderbolt 3 be used with older Thunderbolt devices?
    Yes, Thunderbolt 3 has backward compatibility, which means that Thunderbolt 3 devices can connect to older Thunderbolt 2 or Thunderbolt devices using an adapter.

    What types of devices can use Thunderbolt 3?
    Thunderbolt 3 is used in a variety of devices like high-speed storage devices, external GPUs, docking stations, displays, and even smartphones and tablets that support Thunderbolt 3 connectivity.

  • Unveiling the Secrets: 5 Ways to Store Data on an SSD Drive Safely & Securely

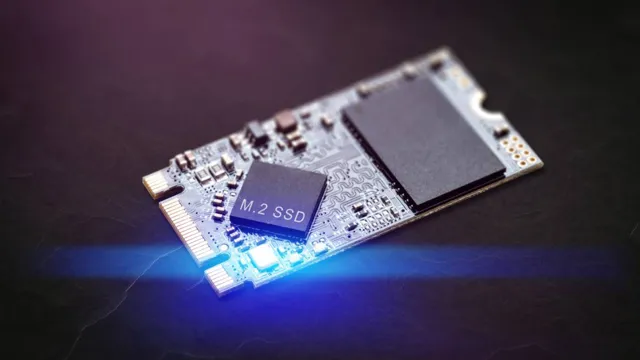
    Have you ever wondered how your computer’s SSD (Solid State Drive) stores and accesses all your data so quickly? Unlike traditional hard drives, SSDs use a completely different approach to store data. Rather than utilizing magnetic discs to read and write data, SSDs rely on NAND-based flash memory chips. But how exactly does this process work? In this blog, we’re going to delve into the mechanics of how data is stored on SSDs and explore the technology that has revolutionized the way we store and access our digital content.

    So fasten your seatbelt and let’s dive in!

    Introduction

    When it comes to storing data on an SSD, there are a few key differences compared to traditional hard drives. Rather than using spinning disks to read and write data, SSDs use something called NAND flash memory. This type of memory works by storing data in cells that are arranged in a grid-like pattern.

    Each cell can be charged with an electric current to hold a 1 or discharged to hold a 0, which represents binary data. The cells are grouped together in pages, which can then be combined into blocks for more efficient storage. Because SSDs don’t have any moving parts, they can access data much faster than traditional hard drives, making them a popular choice for performance-focused applications.

    Additionally, SSDs are more durable and can withstand shocks and vibration better than traditional hard drives, making them ideal for use in laptops and other mobile devices. Overall, understanding how data is stored on an SSD is key to getting the most out of this powerful storage technology.

    What is an SSD?

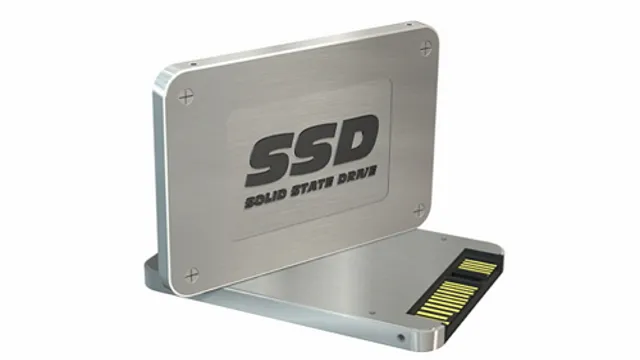
    An SSD, or Solid State Drive, is a type of storage device that utilizes flash memory to store data. Unlike traditional hard disk drives, SSDs have no moving parts, allowing for faster access times and improved reliability. These drives are becoming increasingly popular due to their ability to significantly improve computer performance and speed up the loading time.

    An SSD can be considered as a highly efficient and fast storage medium, akin to how a sports car can beat a sedan in a race. With no mechanical components to slow down processes, SSDs can access and transfer data much faster than hard disk drives, making them a highly sought-after component for gamers, video editors, and professionals working with large datasets. In summary, an SSD is a storage device that can revolutionize a computer’s performance by providing faster loading times and improved data transfer speed.

    5 how is data stored to an ssd

    Why use an SSD for data storage?

    If you’re in the market for a new storage solution, you may have heard about the benefits of using an SSD. SSD, which stands for solid-state drive, is a type of storage device that is becoming increasingly popular due to its many advantages over traditional hard disk drives. One of the main reasons to consider using an SSD for data storage is its speed.

    An SSD can read and write data much faster than an HDD, which means that your programs and files will load more quickly. This can make a huge difference in terms of overall performance and productivity. Additionally, SSDs are more durable and less prone to damage from shock or other forms of physical impact, which makes them a better choice for portable devices.

    Overall, if you want a storage solution that is fast, reliable, and built to last, an SSD is definitely worth considering.

    SSD Architecture

    If you’re curious about how data is stored on an SSD, it helps to understand the architecture of the device. SSDs use flash memory to store data, which consists of a grid of cells that can either be charged or discharged. Each cell represents a single bit of data, and groups of cells are organized into pages.

    These pages, in turn, are grouped together into blocks. When you save data to an SSD, the controller sends the data to a free page within a block, and the page is programmed with the new information. When you delete data, the controller flags the pages containing the data as “invalid.

    ” Over time, as more data is written and deleted, the controller will look for blocks with a high number of invalid pages and move the valid pages to a new block. This process, called garbage collection, is important for keeping the SSD running smoothly and avoiding data fragmentation. By understanding the basic architecture of SSDs, you can better appreciate why they’re so fast and reliable compared to traditional hard drives.

    NAND Flash Memory

    NAND Flash Memory When it comes to SSD architecture, NAND flash memory plays a crucial role. It’s a type of non-volatile storage that allows data to be stored even when the power is turned off. Where NAND differs from traditional storage like hard drives is that it can perform access times with latency in the microsecond range and has excellent read/write speeds.

    Moreover, it has a lower power consumption, which makes it ideal for laptops, mobile devices, and other portable devices that require energy-efficient drives. Furthermore, there are various types of NAND, such as SLC, MLC, and TLC, that have different levels of performance, durability, and cost. SLC is the fastest and most durable, whereas TLC is slower but cost-effective.

    Understanding the different types of NAND flash memory and how they impact SSD architecture can help users pick the right storage device for their specific needs.

    Controller Unit

    SSD architecture The controller unit is a key element of SSD architecture. It acts as the brain of the solid-state drive and manages all of its functions. When you perform any operation on your SSD, such as reading or writing data, it is the controller unit that processes and manages it.

    It coordinates communication between the host computer and the NAND flash memory chips, ensuring that data is stored and retrieved accurately and efficiently. The controller unit also performs important functions such as error correction and wear-leveling, which help to prolong the lifespan of the SSD. Without the controller unit, an SSD would not be capable of functioning at all.

    The design of the controller unit is a critical factor in SSD performance, and different manufacturers may use different approaches to optimize its performance. Overall, the controller unit is a crucial component of the SSD architecture that plays a critical role in its overall performance and reliability.

    Data Writing Process

    When it comes to storing data on an SSD, it goes through a complex process that involves several steps. The data writing process begins with the computer processing unit (CPU) sending signals to the controller of the peripheral component interconnect express (PCIe) drive. The controller then converts the signals into instructions that the NAND flash memory can understand, and the data is written to the memory chips.

    SSDs use a wear-leveling algorithm that distributes data evenly across the memory cells, ensuring that the cells wear out evenly. Every writing process needs to erase the previously stored data before adding new data. The SSD performs this function using a process called garbage collection.

    The process maximizes the usable space by removing data that is no longer needed, marking the space as free, and waiting for new data to occupy the space. Following these steps ensures that the data stored on the SSD is secure, efficient, and long-lasting.

    Page Programming

    When it comes to data writing, there are a few important processes that must be understood in order to ensure accuracy and consistency. One key aspect of data writing is determining what data to collect and how to store it. This involves identifying the relevant data points for a given project or task, as well as determining the format and structure for organizing that data.

    It also involves determining any necessary data validation rules to ensure that the data is entered correctly and is consistent across all relevant systems. Once this process has been completed, the data can be written into a database or file for later use. It’s important to note the importance of attention to detail in this process in order to avoid data errors or inconsistencies down the line.

    Block Erasure

    When it comes to storing data on solid-state drives (SSD), block erasure is an essential process. This process involves deleting entire blocks of data at a time, which is necessary because SSDs can only write new data to previously empty blocks. The block erasure process ensures that there is enough space for new data to be written, but it also has implications for the overall lifespan of the SSD.

    Each block can only be erased a certain number of times, and when that limit is reached, the block becomes unusable. This is why it’s important to have a solid wear-leveling algorithm in place that distributes the data evenly across the SSD. By doing so, the same blocks won’t be constantly overwritten, ensuring a longer lifespan for the drive.

    Overall, the block erasure process is a critical part of the data writing process for SSDs, and it’s important to understand how it works to get the most out of your storage device.

    Conclusion

    In conclusion, data is stored to an SSD in five fascinating ways. It’s like a symphony that creates beautiful notes by utilizing the latest technology. Each note has its own distinct sound, and each method of storing data has its own unique advantages.

    Together they make for a perfect harmony that ensures fast and reliable performance. So, the next time you’re transferring files to an SSD, remember that you’re building a beautiful sonic masterpiece!”

    FAQs

    What is an SSD?
    An SSD, or solid-state drive, is a type of storage device that uses flash memory to store data and has no moving parts.

    How does data get stored on an SSD?
    Data is stored on SSDs using NAND-based flash memory cells, which are organized into pages and blocks.

    What is the difference between an SSD and a traditional hard disk drive (HDD)?
    SSDs have no moving parts, while HDDs operate using spinning disks and read/write heads. SSDs are faster, more reliable, and typically more expensive than HDDs.

    How long do SSDs last?
    While SSD lifespan varies based on usage, most modern SSDs have a lifespan measured in years and can withstand hundreds of terabytes of data writes before reaching their limit.

    How can I optimize my SSD’s performance?
    To optimize your SSD’s performance, make sure you enable AHCI mode in your computer’s BIOS, update your firmware, and regularly perform TRIM operations to maintain the SSD’s performance over time.

  • Maximize Heat Dissipation with the Ultimate 2.5 mm Thermal Pad: A Comprehensive Guide

    Maximize Heat Dissipation with the Ultimate 2.5 mm Thermal Pad: A Comprehensive Guide

    Thermal pads are a crucial element in the cooling system of electronic devices. Despite their petite size, they can make a notable difference in the performance and lifespan of your laptop or PC. But, have you ever heard about

    5mm thermal pads? These minuscule components are often overlooked, possibly because they are not commonly needed in every device. However, they can be a game-changer in some circumstances. In this blog post, I’m going to explain why

    5mm thermal pads are important and when you should consider using them. So get ready to geek out on some tech talk with me.

    Heat Management

    Heat management is an essential element in any computing setup, particularly those which generate a great deal of heat. One solution that is commonly used for heat management is the 5 mm thermal pad.

    A thermal pad is designed to improve the heat transfer between two surfaces by filling any gaps and creating full contact between them. The 5 mm thickness is ideal for many applications due to its ability to effectively manage heat even in high-performance computing situations.

    Thermal pads are easy to install, making them a convenient option for those in need of efficient and effective heat management in their computing setup. Overall, incorporating a 5 mm thermal pad into a computing setup can dramatically improve its heat management capabilities and ensure that the device continues to function optimally without any interruption.

    Explaining Thermal Pads

    Heat management is crucial to maintain the performance and longevity of electronic components. One crucial aspect of heat management is the use of thermal pads. Thermal pads serve as a bridge between the heat source and the heat sink, efficiently transferring heat away from the source and dissipating it into the atmosphere.

    These pads are made of thermally conductive materials such as silicone, ceramic, or graphite, providing excellent thermal conductivity to efficiently transfer heat. The thickness and surface area of the thermal pads also play a significant role in improving heat transfer. It is important to choose the right size and type of thermal pad for your electronic component to ensure optimal heat management.

    With the right thermal pad, you can prevent overheating, reduce the risk of damage to the components, and improve the overall performance of your electronic device.

    2.5 mm thermal pad

    Why Size Matters

    When it comes to electronic devices, one of the key factors that affects their performance is heat management. And the size of a device plays a crucial role in that. Smaller devices generally have less space for effective cooling mechanisms, making them more prone to overheating and subsequent performance issues.

    This is particularly true for devices like smartphones and laptops, which often require powerful processors and can generate a lot of heat. This is why you may notice that laptops designed for heavy-duty tasks have larger bodies and more robust cooling systems. So, when you’re choosing a device, it’s important to consider the size and how it may affect the heat management and, in turn, the performance of the device.

    Ensuring that a device has adequate cooling mechanisms and is well-designed for its size can significantly improve its performance and lifespan.

    Quality and Durability

    If you’re looking for a thermal pad to ensure quality and durability in your electronic devices, a 5 mm thermal pad may be just what you need. These thermal pads are specifically designed to provide excellent thermal conductivity while also being strong enough to withstand the rigors of daily use.

    Whether you’re building a new computer or upgrading an existing one, a high-quality 5 mm thermal pad can help ensure that your device stays cool and runs smoothly over a long period of time. Plus, with their ease of installation and compatibility with a wide range of devices, you can breathe easy knowing that your investment is protected for the long haul.

    So why settle for mediocre thermal performance when you can have the best of both worlds with a 5 mm thermal pad?

    Materials Used for Thermal Pads

    Thermal pads are essential components used in electronic devices to ensure efficient heat transfer. Different materials can be used to make thermal pads, each with unique properties that affect quality and durability. Higher quality thermal pads are often made from ceramic or silicone-based materials, which offer superior thermal conductivity and extended lifespan.

    Ceramic-based thermal pads are particularly durable and can withstand high temperatures, making them ideal for use in industrial applications. On the other hand, silicone-based thermal pads are more affordable, but their thermal conductivity is lower compared to ceramic-based pads. Ultimately, the choice of materials used in thermal pads depends on the specific application and the desired level of quality and durability.

    By choosing the right materials, you ensure that your electronic devices function optimally and enjoy extended lifespans.

    Longevity of 2.5mm Pads

    When it comes to the longevity of 5mm pads, quality and durability are key factors. These pads are essential in providing cushioning and support to various products such as footwear, electronics, and even furniture.

    High-quality materials and careful manufacturing processes ensure that these pads can withstand daily wear and tear, as well as impact and weight distribution. Additionally, specialized coatings can be applied to further increase durability and prevent deterioration over time. While the exact lifespan of

    5mm pads varies depending on usage and other factors, it is safe to say that investing in a high-quality product can extend its usefulness for a significant amount of time. So whether it’s for personal or industrial use, it’s important to prioritize the quality and durability of 5mm pads for optimal performance.

    Resistance to Compression

    When it comes to building materials, quality and durability are essential factors to consider. One key aspect of this is resistance to compression. Essentially, this refers to a material’s ability to withstand the weight or pressure placed on it without being crushed or deformed.

    Without proper compression resistance, a building’s structure may weaken over time and even collapse. That’s why it’s so important to choose materials that can withstand compression, such as high-quality concrete or steel. By selecting materials with excellent compression resistance, you can ensure that your building will remain standing strong for years to come.

    So, the next time you’re working on a construction project, be sure to prioritize compression resistance to ensure the utmost in quality and durability.

    Installation and Maintenance

    When it comes to installing and maintaining electronics, a 5 mm thermal pad is a must-have tool to ensure optimal performance. This small, but essential, component sits between the CPU and heatsink, preventing overheating and thermal damage.

    Installation is simple, with the pad simply being placed on top of the CPU before attaching the heatsink. Maintenance is also important, with the pad needing to be replaced every time the heatsink is removed. Additionally, it’s important to ensure that the size of the thermal pad matches the size of your CPU and heatsink to prevent any complications.

    By using a 5 mm thermal pad during installation and maintenance, you can enjoy high-performance computing without any fear of overheating or thermal damage.

    Proper Installation Steps

    Installing and maintaining your appliances properly is crucial for their longevity and efficient operation, and can save you a lot of money and hassle in the long run. When it comes to installation, it’s important to follow the proper steps to ensure everything is installed safely and correctly. This includes reading the manufacturer’s instructions carefully, ensuring proper ventilation and electrical connections, and checking for leaks and other potential hazards.

    It’s also important to use the right tools and equipment for the job, and if you’re not comfortable or experienced with the installation process, it’s best to hire a professional to do it for you. Maintaining your appliances also requires regular cleaning and upkeep, such as removing lint from your dryer and changing your air filter on a regular basis. By taking proper care of your appliances, you can prolong their lifespan, save energy and money, and reduce your risk of accidents and other hazards.

    Maintenance Tips for Maximum Efficiency

    Installing and maintaining your equipment is crucial to ensuring maximum efficiency in your home or business. When it comes to HVAC systems and other appliances, having a professional installation can prevent future issues and ensure top performance. Additionally, regular maintenance includes cleaning or replacing filters, inspecting and repairing any worn or broken parts, and scheduling annual tune-ups.

    Neglecting these tasks can lead to decreased efficiency, higher energy bills, and potential safety risks. Think of it as taking care of your car – it needs regular oil changes and tire rotations to keep it running smoothly. By properly installing and maintaining your equipment, you can ensure it runs efficiently for years to come.

    Conclusion

    In conclusion, the 5 mm thermal pad may not be the most glamorous component in your electronic devices, but it plays a crucial role in keeping them cool. This slim yet mighty pad acts as a conduit, transferring heat away from sensitive components and toward the device’s heat sink.

    So, even though it may not be the center of attention, the 5 mm thermal pad is a silent hero that keeps our devices running efficiently. Don’t underestimate the power of thinness!”

    FAQs

    What material is the 2.5 mm thermal pad made of?
    The 2.5 mm thermal pad is typically made of silicone material that can withstand high temperatures.

    Can the 2.5 mm thermal pad be cut to a custom size?
    Yes, the 2.5 mm thermal pad can be easily cut to a custom size using scissors or a utility knife.

    Can the 2.5 mm thermal pad be reused after installation?
    It is not recommended to reuse the 2.5 mm thermal pad once it has been installed as it may no longer provide optimal thermal conductivity.

    What is the maximum operating temperature for the 2.5 mm thermal pad?
    The maximum operating temperature for the 2.5 mm thermal pad typically varies between 150°C to 200°C, depending on the manufacturer’s specifications.

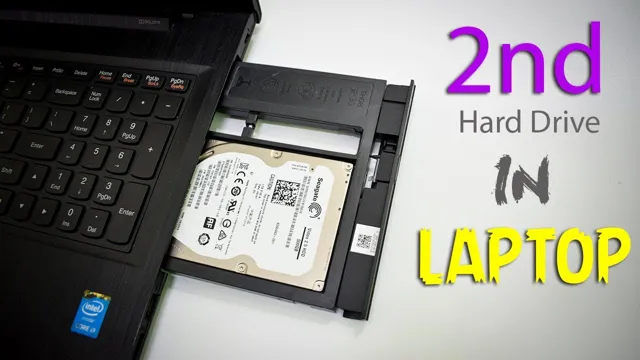
  • Boost Your PC’s Performance: A Step-by-Step Guide on How to Install a Secondary SSD

    Boost Your PC’s Performance: A Step-by-Step Guide on How to Install a Secondary SSD

    Ready to upgrade your computer’s storage capacity? Installing a secondary SSD might just be the solution you’ve been looking for! As we all know, solid-state drives (SSDs) are a game-changer in terms of data access and transfer speeds. Unlike traditional hard disk drives (HDDs), SSDs don’t have any moving parts, which means they’re faster, quieter, and less prone to damage. By adding a secondary SSD to your computer, you’ll not only increase your storage space but also boost your system’s performance.

    So, let’s dive into the world of SSDs and learn how to install a secondary one in your machine!

    Preparation

    If you’re looking to increase the storage capacity of your computer, installing a secondary SSD is a great option. Before you begin, it’s important to ensure that your computer has the necessary connectors and power supply to support an additional drive. You may also need to purchase a mounting bracket or adapter to properly secure the drive in your computer’s case.

    Once you have everything you need, you’ll want to power off your computer and unplug all cables before opening up the case. Take care not to touch any components with your bare hands, as static electricity can damage sensitive electronics. You’ll need to locate an available SATA data and power connector on your motherboard to connect the SSD, and then secure the drive in place with screws or brackets.

    Once you’ve completed the physical installation, you’ll need to initialize and format the drive in your operating system before you can start using it. With a little bit of preparation and care, installing a secondary SSD can be a relatively simple and straightforward process that can greatly enhance your computer’s overall performance.

    Check Compatibility

    When it comes to checking compatibility, a little preparation can go a long way. The first step is to identify what it is you’re trying to check compatibility for. Is it software, hardware, or something else entirely? Once you know what you’re looking for, you can start to do some research.

    Check the manufacturer’s website for compatibility information, and look for user forums or communities where people with similar setups may have asked similar questions. It’s also a good idea to gather information about your own setup, including your operating system, processor, and any other relevant details. By doing some preliminary work, you can increase your chances of finding accurate and useful compatibility information when you need it.

    how to install secondary ssd

    Gather Tools

    Preparation is key when undertaking any task, and gathering tools is a crucial step in the process. When considering the tools needed, think not only about the equipment required but also the resources. For example, if you’re planning on doing some DIY, you’ll need not only a hammer and nails but also screws and other hardware.

    Make a list of all the tools you need and prioritize them by importance. If your budget doesn’t allow for everything, focus on the essentials first. Don’t forget you can also take advantage of borrowing tools from friends or renting them from a hardware store.

    By gathering all the necessary tools in advance, you’ll be able to begin your project smoothly and efficiently, avoiding unnecessary delays. Remember that preparation is the key to success in any endeavor, so take the time to gather all the tools you need before you start.

    Hardware Installation

    Are you planning to upgrade your computer’s storage capacity by adding a secondary SSD? Installing a secondary SSD is a relatively straightforward process that even beginners can handle. Before you proceed, make sure to shut down your computer and unplug all cables. Open the case to access the motherboard and locate the available SATA connectors.

    Check your motherboard manual to identify the correct placement of the secondary SSD. Slide the SSD into the designated slot and screw it into place. Connect a SATA cable from the motherboard’s available SATA connector to the SSD.

    Make sure to attach the power cable to the SSD as well. Reattach the case and all cables. Power on your computer and check if it detects the new secondary SSD.

    You can then format the SSD to use it either for additional storage or as your new boot drive. Overall, adding a secondary SSD to your computer is an easy and effective way to improve its performance and storage capacity.

    Open Computer Case

    When it comes to hardware installation, one important step to consider is opening up the computer case. This can be a bit intimidating for those new to DIY computer building, but it’s actually a simple process that allows you to access the internal components of your computer. To start, make sure your computer is turned off and unplugged.

    Then, locate the screws or clips holding the case in place and remove them. Once the case is open, you can easily add or replace components like RAM, hard drives, and graphics cards. Keep in mind that opening your computer case can potentially void any warranties, so proceed with caution and make sure you know what you’re doing.

    With a little bit of research and practice, opening and working inside your computer case can be a great way to upgrade and customize your PC.

    Mount SSD

    Mounting an SSD is an easy way to upgrade your computer’s hardware and improve its performance. First, you need to shut down your computer and unplug all cables from it. Next, locate the hard drive bay in your computer case and remove the screws that hold it in place.

    Then, gently slide the SSD into the bay and screw it back in. Be sure to connect the power and data cables to the SSD and motherboard. Finally, close up your computer case and power it on to make sure the installation was successful.

    With an SSD, your computer will boot up faster, load applications quicker, and have more overall speed and responsiveness. So if you want to give your computer a boost, consider mounting an SSD today.

    Software Configuration

    Installing a secondary SSD on your computer can be a great way to expand your storage capacity and boost your system’s performance. But how do you go about doing it? To start, you’ll need to purchase the SSD and an adapter if necessary. Once you have those, shut down your computer and unplug it from all power sources.

    Open up your computer case and locate the spot where you want to install the SSD. Then, carefully attach the adapter if needed and insert the SSD into the appropriate slot. Fasten it in place with screws if necessary and close up your computer case.

    When you turn it on, your computer should recognize the new drive. From there, you can format and partition it as needed. With a little bit of know-how, installing a secondary SSD can be a great way to improve your computer’s performance and storage capacity.

    Initialize SSD

    SSD initialization is a crucial step that needs to be done before using a new SSD. It’s a process of configuring the SSD to work with the operating system. There are different ways to initialize an SSD, but the most common one is through the Disk Management utility in Windows OS.

    To do this, you need to right-click on the Windows Start button and choose Disk Management from the menu. A window will appear showing all the connected drives, including the uninitialized SSD. Right-click on the uninitialized SSD and choose Initialize Disk.

    You will be asked to choose between MBR and GPT partition styles. Choose the appropriate one for your system and click OK. The initialization process may take a few minutes, depending on the size of the SSD.

    Once it’s done, you need to create a partition on the SSD and format it before you can start using it. Overall, SSD initialization is a simple process that ensures proper usage of your new SSD.

    Format SSD

    If you want to optimize the performance of your computer, one of the most effective measures you can take is to format your SSD. This process essentially erases all the data on the drive, reconfigures it to be more efficient, and installs the operating system from scratch. There are a variety of software tools available to help you format an SSD, from built-in functions in Windows to third-party applications like EaseUS Partition Master and MiniTool Partition Wizard.

    However, before you get started, it’s important to back up any critical files on the drive and ensure that you have a recovery USB or CD in case something goes wrong. Once you’re ready to proceed, the process typically involves opening the disk management utility, selecting your SSD, deleting all the existing partitions, and creating a new one. While it may take a bit of time and effort, formatting your SSD can significantly boost your computer’s speed and responsiveness, making it well worth the investment.

    Assign Drive Letter

    When setting up your computer system, it is essential to assign drive letters to your storage devices and partitions. The drive letter allows you to easily identify and access the specific partition or storage device. Fortunately, configuring this is relatively straightforward on most operating systems.

    On Windows, you can open the Disk Management tool and right-click the partition or storage device you want to assign a drive letter to, then select “Change Drive Letter and Paths.” From here, click “Change” and select a letter from the drop-down list. Similarly, on macOS, you can open the Disk Utility tool and select the partition or storage device.

    Then choose “File” > “Get Info” from the menu, and you can assign a letter under the “Volume Information” section. This process can help you keep your files organized and easier to access, making it a worthwhile step in your system setup.

    Conclusion

    Congratulations! You’ve made it to the end of the journey of installing a secondary SSD. You’ve learned that it takes a bit of research, patience and a steady hand. But don’t forget, installing a secondary SSD is like adding an extra spice to your computer.

    It’s a little extra flavor that will make your PC faster and more powerful than ever before. So go ahead, add that extra SSD, and take your computer to the next level. Your future-self will thank you!”

    FAQs

    What is a secondary SSD?
    A secondary SSD is an additional solid-state drive that can be installed in a computer to increase storage capacity and improve performance.

    How do I know if my computer supports a second SSD?
    You can check the specifications of your computer or motherboard to see if it has an available slot for a secondary SSD. Additionally, you can consult with a computer technician or manufacturer for more information.

    How do I physically install a secondary SSD?
    First, turn off your computer and unplug it from any power source. Open the computer case and locate an available slot for the SSD. Mount the SSD onto the slot and secure it using screws or clips. Connect the necessary cables, close the case, and turn on the computer.

    How do I format and configure the secondary SSD?
    Once the SSD is physically installed, you will need to format it and configure it in your operating system. This may involve going into the computer’s BIOS or using disk management tools. You can also consult online guides or seek assistance from a professional.

  • Step-by-Step Guide: Setting Up Your New SSD for Booting Like a Pro

    Are you tired of waiting for your computer to start up every time you turn it on? Do you find yourself twiddling your thumbs while your computer takes ages to load? It sounds like you might be in need of a solid-state drive (SSD) upgrade! SSDs offer a faster and more efficient way of booting up your computer, allowing you to get started on your work or play in no time. In this blog, we’ll walk you through the process of setting up an SSD boot drive, giving you the speed and performance boost you’re looking for. So sit back, relax, and get ready to level up your computer game!

    Check BIOS Settings

    If you’ve installed a new SSD, but your computer isn’t booting from it, then the first thing you need to check is your BIOS settings. That’s because your system will likely be set to boot from your old hard drive by default, so you’ll need to tell it to boot from your new SSD instead. To do this, restart your computer and press the appropriate key to enter your BIOS setup.

    This key is usually displayed on your screen during startup and varies depending on your computer manufacturer, but it’s typically F2, Delete, or F Once you’re in your BIOS, look for the “Boot” tab and select your new SSD as the primary boot device. Save your changes and exit the BIOS.

    Your computer should now boot from your new SSD. With this simple fix, you can start enjoying the added speed and performance that your new SSD brings.

    Enter BIOS on Startup

    Entering the BIOS on startup is an essential task when you need to check your system’s settings. This process can seem daunting at first, but it’s actually quite simple. All you need to do is press a specific key on your keyboard as the computer starts up.

    This key can vary depending on your device’s manufacturer, but it is typically F2, F10, or Del. Once you enter the BIOS, you will have access to a range of settings that you can adjust to optimize your system’s performance. You can modify the boot order, overclock your CPU, and a host of other settings that can make a significant impact on your computer’s operation.

    So, if you’re experiencing issues with your computer, it’s a good idea to enter the BIOS and check your settings. It could be the key to unlocking your system’s full potential.

    how do i set my new ssd to boot

    Locate Boot Options

    If you’re having trouble booting up your computer, one thing you can do is check the BIOS settings to ensure that your boot options are properly configured. To do this, restart your computer and press the key indicated on the screen (usually F2, F10, or Delete) to enter the BIOS setup. Once you’re in, navigate to the Boot Options section and make sure that your primary boot device is set to your computer’s hard drive or SSD.

    You can also check the boot order to make sure that any other bootable devices, such as USB drives or optical discs, are not interfering with the boot process. By taking the time to locate and adjust your boot options in the BIOS, you can often resolve boot issues and get your computer up and running again in no time.

    Set SSD as First Boot Drive

    When upgrading your computer’s storage by adding an SSD, it’s essential to set it as the first boot drive. This will ensure that your operating system and programs load faster. To make this change, you need to access your computer’s BIOS settings.

    BIOS or Basic Input/Output System is where you can configure hardware settings for your computer. To check your BIOS settings, restart your computer and press the key that appears on your screen to enter BIOS mode, usually F2, F10, or Delete. Once you’re in BIOS, navigate to the boot tab and change the boot order to prioritize your SSD.

    You can also disable other boot options to avoid booting from the wrong drive accidentally. Setting your SSD as the first boot drive will significantly improve your computer’s performance and speed.

    Clone Your Operating System

    If you want to set your new SSD to boot, it’s important to clone your operating system from your old hard drive. This means copying everything on your existing system to the new drive so that you can maintain all your files, programs, and settings. There are a few different methods to clone your hard drive, but the easiest is to use a tool like Macrium Reflect, which offers step-by-step instructions to guide you through the process.

    Once you’ve completed the clone, you can set your new SSD as the boot drive in your computer’s BIOS settings. This will ensure that your system starts up quickly and efficiently from the new drive every time. Remember, cloning your hard drive is an important process, so be sure to backup all your important files and take any necessary precautions before you begin.

    With a little bit of time and effort, you can easily set your new SSD to boot and enjoy all the benefits of a faster, more reliable storage solution.

    Download Cloning Software

    Cloning software is essential for anyone who wants to clone their operating system, whether it’s for backup purposes or for transferring to a new computer. There are many different cloning software options available, each with its own benefits and drawbacks. Some popular choices include Macrium Reflect, Acronis True Image, and EaseUS Todo Backup.

    These programs allow you to create an exact copy of your operating system, including all your files, settings, and even your installed programs. This way, if your system ever crashes or becomes infected with malware, you can quickly and easily restore your computer to its previous state without losing any of your data. Cloning software is also useful for businesses that need to clone multiple computers or for IT professionals who want to create pre-configured system images to deploy across an organization.

    Whatever your needs, there is a cloning software out there that is right for you.

    Follow Cloning Instructions

    If you want to clone your operating system, it’s crucial to follow the instructions carefully. Cloning is an excellent way to create an exact replica of an operating system, which can be useful for backup purposes or transferring data onto another device. Before you start the cloning process, make sure you have a reliable cloning software.

    Some popular options include Clonezilla, Macrium Reflect, and Acronis True Image. Then, follow the step-by-step instructions provided by the software and make sure you have enough storage space on the destination device. Keep in mind that the process may take some time, so be patient and avoid interrupting it.

    Once the cloning is complete, you should have an exact replica of your operating system that you can use seamlessly on another device. In summary, cloning your operating system is a handy technique that can save you time and effort when setting up a new device or backing up important data. Make sure to choose a reliable cloning software, follow the instructions carefully, and have enough storage space before starting the process.

    With a successful cloning, you can have a replica of your operating system that will work seamlessly with another device without losing any data or personal settings. So why not give it a try and experience the convenience of cloning your operating system?

    Remove Old Hard Drive

    If you’re upgrading to a new hard drive but don’t want to lose your data, cloning your operating system is a great option. This process makes an exact copy of your old drive, including your operating system, installed software, and personal files, and transfers it to the new drive. First, you’ll need to remove your old hard drive and connect your new one.

    Then, you can use software like Clonezilla or Macrium Reflect to create a disk image of your old drive and transfer it to the new one. This way, when you boot up your computer, everything will look and feel exactly the same as before, just with more storage space. It’s important to note that this process may take several hours depending on the size of your old drive and the speed of your computer, but the end result is well worth it.

    By cloning your operating system, you can save yourself the time and hassle of reinstalling all of your software and setting up your preferences from scratch.

    Reboot and Test

    If you’ve just installed a new SSD and need to set it as your boot drive, don’t worry – it’s a pretty easy process. First, turn off your computer, unplug any external devices, and open up your computer case. Locate the old hard drive, unplug it, and replace it with the new SSD in the same location.

    Make sure it’s securely connected and then close the case and plug everything back in. Now, turn on your computer and enter the BIOS settings by pressing the appropriate key (usually F2 or Delete) during startup. Once in the BIOS, navigate to the Boot menu and select the new SSD as your primary boot device.

    Save your changes and exit the BIOS. Your computer will now boot from the SSD. To check that everything is working properly, you can test your computer’s speed and performance.

    Congrats – you have successfully set your new SSD as your boot drive!

    Restart Computer

    Restarting your computer can fix a variety of issues and is an important step in troubleshooting problems. When your computer is acting up or running slowly, a simple reboot can often do the trick. It’s like giving your computer a chance to start fresh and clear out any glitches or errors that may be causing issues.

    Before you restart, make sure all your important documents and files are saved and closed to avoid any data loss. Then, click on the “Restart” button or choose “Restart” from the Shut Down menu. After your computer has rebooted, take some time to test it out and see if the original problem has been resolved.

    This simple step can often save you time and frustration compared to more complex troubleshooting methods. So, the next time your computer is giving you trouble, try the age-old solution of restarting to see if it does the trick.

    Confirm SSD Boots Up

    To ensure that your newly installed SSD is working correctly, it’s crucial to test it by rebooting your system. This will give you a clear indication of whether your SSD is booting up correctly or not. If everything goes well, your operating system will load up quickly, and you should be able to navigate through your desktop without any lag or delay.

    However, if there is an issue with the installation or configuration of your SSD, you may encounter startup problems or boot errors. In such cases, you may need to consult the manufacturer’s instructions to troubleshoot the problem. In general, though, the process of rebooting and testing your SSD is straightforward and should only take a few minutes.

    Once you’ve confirmed that your SSD boots up correctly, you’ll be able to enjoy improved performance, faster read and write speeds, and an overall smoother computing experience.

    Troubleshooting Tips

    If you have recently installed a new SSD in your computer, the next step is to set it as your boot drive. This can be easily done through your computer’s BIOS settings. Before changing the boot drive, you will need to make sure that the SSD is properly connected to your computer.

    Once that is done, restart your computer and enter the BIOS settings by pressing the appropriate key (usually F2 or Delete) during startup. In the BIOS settings, look for the Boot section and select the SSD as the primary boot device. Save your changes and exit the BIOS settings.

    Your computer should now boot up from the SSD. If you encounter any issues during the process, double-check the connection and try again. Remember to back up important files before making any changes to your computer’s settings.

    With these troubleshooting tips, setting your new SSD as the boot drive should be a breeze!

    Conclusion

    Congratulations on your new SSD! Now that you’re ready to set it up as your boot drive, it’s important to remember that just like a sleek sports car needs a good driver to perform at its best, your SSD needs the right settings to achieve maximum speed and efficiency. So buckle up, take the wheel, and follow these easy steps to get your new SSD humming along like a well-oiled machine.”

    FAQs

    What is an SSD?
    An SSD (Solid State Drive) is a storage device that uses NAND-based flash memory to store data.

    How do I install my new SSD?
    To install your new SSD, you need to first shut down your computer, open the case, and connect the SSD to a free SATA port on your motherboard. Then, you will need to format the drive and clone your operating system if you want to transfer your data from your old hard drive.

    How do I set my new SSD as the boot drive?
    To set your new SSD as the boot drive, you need to access your BIOS settings and change the boot order. You can do this by pressing the appropriate key during startup (usually Del or F2), navigating to the boot menu, and selecting the new SSD as the primary boot device.

    Can I clone my existing operating system to my new SSD?
    Yes, you can clone your existing operating system to your new SSD using a cloning software such as EaseUS Todo Backup or Clonezilla. This will allow you to transfer your files, applications, and settings to the new SSD without having to reinstall everything from scratch.

    How do I ensure that my new SSD is running optimally?
    To ensure that your new SSD is running optimally, you should enable TRIM (a command that helps the operating system optimize the performance of the SSD), update the SSD firmware, and avoid writing large files or frequently deleting and rewriting files on the SSD. Additionally, you may want to disable hibernation and reduce the size of your pagefile, as these can cause excessive wear and tear on the SSD.

  • Step-by-Step Guide: Connecting SSD to Motherboard like a Pro

    Are you looking to ramp up the speed of your computer’s storage system? Perhaps you’re tired of slow boot times or sluggish program loading speeds. Whatever the case may be, one solution is to upgrade to an SSD (Solid State Drive) from your traditional hard drive. But how do you go about connecting an SSD to your motherboard? Don’t fret! We’ve got you covered.

    In this blog, we’ll discuss the steps you need to take to connect your SSD to your motherboard and get the most out of your new storage upgrade. So grab a cup of coffee and let’s get started!

    Check Motherboard Compatibility

    If you want to connect an SSD to your motherboard, you need to ensure compatibility between the two first. You should first determine the type of SSD you have and match it with the appropriate SATA connector on your motherboard. Additionally, you need to check whether your motherboard supports the type of interface that your SSD uses.

    A popular SSD interface is the NVMe, which is faster than a regular SATA interface. So, you need to ensure that your motherboard supports NVMe if you have an NVMe SSD. One key thing to remember during installation is to double-check that all connectors are fully plugged-in.

    Sometimes, an incomplete connector can lead to data corruption or weakening performance. Overall, it’s essential to do your research regarding the compatibility of your SSD and motherboard before installation to ensure optimal functionality.

    Check if Motherboard has SATA or NVMe support

    If you’re looking to add a new storage device to your PC or upgrade your existing one, it’s important to know whether your motherboard is compatible with SATA or NVMe drives. SATA (Serial Advanced Technology Attachment) is an older standard, whereas NVMe (Non-Volatile Memory Express) is a newer and faster one. To check whether your motherboard supports these standards, you can look up its specifications online or consult its manual.

    Generally, newer motherboards are more likely to support NVMe, while older ones may only support SATA. It’s important to note that even if your motherboard supports both of these connections, you may need to adjust some settings in your BIOS to ensure your drive is properly recognized. By doing a bit of research before purchasing a new storage device, you can save yourself the headache of compatibility issues down the line.

    how do you connect an ssd to a mother board

    Check if motherboard has M.2 SSD slot

    If you’re building or upgrading a computer, one of the most important things to consider is whether your motherboard has an M.2 SSD slot. M.

    2 is a small form factor SSD that can greatly improve your PC’s performance. However, not all motherboards have an M.2 slot, so it’s important to check whether yours is compatible.

    The easiest way to do this is by looking at your motherboard’s manual or specifications online. There, you should be able to find information on whether or not your motherboard supports M.2 SSDs, as well as what types of M.

    2 SSDs it supports. It’s also worth noting that some motherboards only have one M.2 slot, while others have multiple, so make sure to check how many you have available.

    If your motherboard doesn’t have an M.2 slot, you can still use an M.2 SSD with an adapter or by using a PCIe slot, although this may not be as fast as using a dedicated M.

    2 slot. Overall, it’s essential to check your motherboard’s compatibility before buying an M.2 SSD to avoid any compatibility issues.

    Gather Necessary Hardware

    When it comes to connecting an SSD to your motherboard, there are a few hardware pieces that you need to gather beforehand. Firstly, you will need your motherboard manual to ensure that you locate the correct SATA port. Usually, if you are using an SSD, you would go for a SATA III slot.

    You will also need a SATA cable that is long enough to connect your SSD to the motherboard. Secondly, you need screws to attach your SSD onto your computer case. These screws usually come included with your SSD, but if not, you can usually find them at most hardware stores.

    Lastly, you will need a computer case that supports an SSD and a power supply unit (PSU) that can provide power to your SSD and other components. Once you have gathered all these pieces of hardware, you can then proceed to connect your SSD to your motherboard.

    Get the right SSD

    When it comes to upgrading your computer’s storage, getting the right SSD is crucial for ensuring efficient and fast performance. But before you start shopping for an SSD, you need to gather some necessary hardware. Firstly, you need to check if your computer has an available slot for an SSD.

    Most modern desktops and laptops have at least one M.2 or SATA slot. You also need to ensure that your computer supports the interface of the SSD you are planning to buy, whether it is SATA, NVMe, or PCIe.

    Additionally, since SSDs generate heat, make sure that your computer has adequate cooling and ventilation to avoid overheating. Lastly, if you plan to transfer data between your old and new drives, you will need a SATA-to-USB adapter or an external SSD enclosure. By taking these hardware requirements into consideration, you will be well on your way to choosing the right SSD for your computer and upgrading your storage game.

    Get the right cables

    When it comes to setting up your computer, gathering the necessary hardware is essential. One crucial piece of hardware is the cables. Choosing the right cables can make a big difference in the functionality and efficiency of your computer.

    The first step is to identify what cables you will need for your particular setup. Make sure to get high-quality cables that are compatible with your devices to avoid any connectivity issues. Whether you need HDMI, USB, Ethernet, or power cables, it’s important to invest in cables that are durable and long-lasting.

    Don’t settle for cheap cables that can damage your devices or cause connectivity issues. Remember, getting the right cables is crucial for ensuring optimal performance and avoiding technical headaches in the future.

    Prepare Your Workstation

    If you’re looking to upgrade your computer’s storage capabilities, adding an SSD (solid-state drive) can significantly improve your computer’s overall performance. But how do you connect an SSD to a motherboard? The first step is to prepare your workstation. Make sure it’s turned off and unplugged.

    Before opening your computer tower, ground yourself by touching a metal surface to discharge any static electricity. Once you’ve opened the tower, find an empty SATA (Serial Advanced Technology Attachment) port on the motherboard. This is where you’ll plug in the SATA cable that comes with your SSD.

    Next, attach the SSD to a drive bay inside the tower using screws. Finally, connect the other end of the SATA cable to the SSD and the power cable to the power supply. That’s it! Your SSD is now connected and ready to use.

    Turn off your PC and unplug it

    When it comes to working on your PC, it’s essential to ensure that you have a well-prepared workstation. One of the most critical steps in preparing your workstation is turning off your PC and unplugging it. Why is this important, you may ask? Well, it’s quite simple – it helps prevent electrical damage to your PC.

    When you shut down your PC and unplug it, you give it a chance to cool down and avoid any power surges that could result in hardware damage. This step also ensures that you have a fresh start the next day and avoid any potential problems when you start working on your PC. So, the next time you finish your work, don’t forget to turn off your PC and unplug it to prepare your workstation for the next day.

    Ground Yourself

    When it comes to setting up your workstation, one important step in ensuring safety and stability is grounding yourself. This means creating an electrical connection between your body and the ground, which can help eliminate the risk of electric shock and static discharge while you work. To ground yourself, start by wearing ESD (electrostatic discharge) wrist straps that connect to your work surface and keep you in contact with a ground point.

    Additionally, make sure your workstation is properly equipped with grounding elements like anti-static mats and ESD-safe tools. By taking these steps, you can create a safe and secure environment for your work, protecting both yourself and your equipment. Remember, always prioritize safety when preparing your workstation and take the necessary steps to ground yourself properly, avoiding unnecessary risk and ensuring optimal performance.

    Installation Process

    Connecting an SSD to a motherboard can seem intimidating at first glance, but it’s actually a straightforward process. First, locate the SATA port on your motherboard and plug in the power and data cables from the SSD. Make sure to align the notches on the cables and the port correctly to avoid any damage.

    Next, screw the SSD onto the designated mounting bracket inside your computer case to secure it in place. Once everything is plugged in and secured, you’ll need to enter your motherboard’s BIOS and change the boot settings to prioritize the SSD as the primary boot device. From there, you can install your operating system and enjoy the improved speed and performance that comes with having an SSD in your setup.

    With these steps, connecting an SSD to a motherboard is a quick and easy way to upgrade your computer’s capabilities.

    Open your PC case and locate the M.2 SSD slot

    One of the first steps in installing an M.2 SSD in your PC is to locate the M.2 SSD slot.

    If you’re unsure of where the slot is located, don’t worry, it’s not that difficult to find. You’ll need to open up your PC case and take a look at the motherboard. The M.

    2 SSD slot is typically located near the center of the motherboard, and it’s usually labeled as such. It’s important to note that not all motherboards have an M.2 SSD slot, so make sure to check your motherboard’s specifications to see if it’s compatible.

    Once you’ve located the slot, the next step is to insert the M.2 SSD into the slot. Make sure to align the notches on the SSD with the keys on the slot, and then gently push it down until it clicks into place.

    Congratulations, you’ve successfully installed an M.2 SSD in your PC!

    Insert the SSD into the slot

    When it comes to installing an SSD into your computer, it’s important that you take the necessary precautions to prevent any damage to your device. To begin the installation process, locate the SSD slot on your computer. It is typically located near the hard drive bay on laptops and on the motherboard on desktops.

    Once you have located the slot, ensure that the computer is turned off and unplugged from any power source. Carefully insert the SSD into the slot, making sure that it is properly aligned and securely fastened. It’s crucial that you handle the SSD with care, making sure not to touch the connectors or PCB.

    After inserting the SSD, reassemble your computer and power it back on. Congratulations, you have successfully installed your SSD! By following these steps, you can ensure that your device is functioning optimally and that you won’t encounter any issues with your new SSD.

    Secure the SSD with a screw

    When installing a solid-state drive (SSD), securing it in place is essential, and this can be achieved by using a screw. The process of installing an SSD involves opening your computer case, locating the slot or bay for the SSD, and then screwing it into place using the compatible screw holes. Ensure that the SSD is accurately aligned with the screw holes before tightening the screw to prevent any misalignments or damage to the drive.

    By securing the SSD with a screw, you’ll be protecting it from vibration that could cause data loss and physical damage. A loose SSD can also create noise, which could be another reason to ensure that it’s firmly screwed in place. Remember to avoid overtightening the screws since this could damage the drive or strip the screw holes, making subsequent drives difficult to install.

    Connect data cable from SSD to motherboard

    If you’re new to building computers, connecting a data cable from an SSD to the motherboard might seem intimidating. However, it’s a fairly simple process once you know what you’re doing. First, locate the SATA connector on your motherboard and connect one end of the data cable to it.

    Then, locate the SATA connector on your SSD and connect the other end of the cable to it. Make sure the cable is securely connected on both ends. Some motherboards also require you to connect a power cable to the SSD, so be sure to check your motherboard manual for any additional instructions.

    With the data cable securely connected, you’re one step closer to completing your build and enjoying faster load times on your SSD.

    Final Checks

    So, you’ve got yourself a shiny new SSD and you want to connect it to your motherboard. First things first, you need to identify where your SSD is going to fit in on your board. Most motherboards have a slot specifically designed for an additional SSD.

    Once you’ve located this, you can then proceed to attach the SSD. There are different ways to connect an SSD, but the easiest and most common method is to use a SATA cable. SATA cables come in different shapes and sizes, so make sure to select the right one for your SSD and motherboard.

    Once you’ve secured the SSD using screws, you can then connect the SATA cable to the motherboard. Finally, connect the power cable to the SSD and make sure everything is secured in place. Now you’re ready to go! Your new SSD should be detected by your motherboard and ready to use.

    Connecting an SSD to a motherboard is a relatively painless process, just make sure to follow these steps carefully, and you’ll be up and running in no time!

    Close PC case and plug it back in

    Now that you’ve installed all the components, it’s time to give the PC its final checks. The first thing to do is to close the PC case properly, ensuring that all the screws are tightened and secured in place. This ensures that the internal components are safe and protected from dust and accidental damage.

    Once the casing is secured, plug the power cord back in and turn the PC on. Check to see if the fans are spinning, the GPU is detected, and the HDD is recognized. Also, check if the PC is booting up correctly, and the monitor displays the correct output.

    If everything is functioning correctly, then congratulations! You have successfully assembled your own PC. Now it’s time to install the operating system, drivers, and software you need and start using your new machine. Remember to keep your PC updated, maintain it regularly, and enjoy your new powerful system!

    Check BIOS detects your new SSD

    Now that you’ve installed your new SSD into your computer, it’s time to make sure your BIOS can detect it. This is an essential final step to ensure that your system recognizes the new hardware and that it’s running correctly. To check your BIOS, restart your computer and access the BIOS menu by pressing a specific key, which is usually displayed during the startup process.

    Once you’re in the menu, navigate to the SATA or Storage options and check if your new SSD is listed. If it is, then congratulations, you’ve successfully installed your new SSD, and it’s ready to use. However, if it’s not listed, then check your cables or consult with your motherboard manual to troubleshoot why it’s not being detected.

    It’s crucial to make sure you’ve done this final check to avoid issues like data loss, system crashes, or the inability to boot your computer. So, take the time to make sure that your new SSD is detected by your BIOS, and enjoy the improved performance and storage capacity.

    Initialize and format the SSD in Disk Management

    After initializing and formatting the SSD in Disk Management, it’s time to do some final checks to ensure everything is running smoothly. First off, make sure that the SSD has been assigned a drive letter by checking in Disk Management. If it hasn’t, simply right-click on it, select “Change Drive Letter and Paths”, and assign one.

    Next, check that the volume label is correct and matches what you want to call your SSD. You can do this by right-clicking on the drive letter and selecting “Properties”. Finally, it’s always a good idea to do a quick performance test to make sure your SSD is performing as it should be.

    You can easily do this by using a program like CrystalDiskMark or AS SSD Benchmarks. With these final checks, you can rest assured knowing that your SSD is properly set up and ready to use.

    Conclusion

    Connecting an SSD to a motherboard is like a match made in tech heaven – it’s a simple and efficient process that can massively boost your computer’s performance. With just a few clicks and cables, you can enjoy faster boot times, quicker file transfers, and a seamless computing experience. It’s like upgrading from an ordinary bike to a fancy sports car.

    So, if you’re still stuck with a sluggish hard drive, it’s time to make the switch and inject some lightning-fast SSD power into your motherboard!”

    FAQs

    What type of cable do I need to connect an SSD to a motherboard?
    You will need a SATA cable to connect the SSD to the motherboard.

    Where do I connect the SSD on the motherboard?
    You can connect the SSD to the SATA port on the motherboard. Consult your motherboard manual to find the exact location of the port.

    Can I use an M.2 SSD with any motherboard?
    No, not all motherboards have an M.2 SSD slot. You will need to check your motherboard specifications to see if it supports M.2 SSDs.

    Do I need to install any special drivers for my SSD to work on the motherboard?
    No, usually the motherboard will automatically detect the SSD and install the necessary drivers. However, it is always a good idea to check for any updates on the manufacturer’s website.

  • Revolutionary Move by Sony: Unveiling the Next-Gen PS5 SSD without Heatsink – A Gamers’ Dream Come True!

    Gamers are eagerly anticipating the arrival of Sony’s next-generation gaming console, the PS Its lightning-fast SSD (solid-state drive) promises to deliver lightning-fast load times and open-world gameplay like never before. However, some gamers are concerned about the lack of a heatsink on the PS5’s SSD.

    Without proper cooling, high temperatures could affect the performance and lifespan of the drive. In this comprehensive guide, we’ll explore the importance of heatsinks, how they work, and what gamers can do to ensure their PS5’s SSD stays cool. So, let’s buckle up and dive into the exciting world of SSD heatsinks!

    What is a Heatsink and Why is it Important?

    A heatsink is a device that helps to regulate the temperature of electronic components. It’s essentially a passive device that works to transfer heat away from the component that generates it and dissipates it into the air. Heatsinks are particularly vital in electronic devices such as computers and gaming consoles because the components can quickly overheat without them.

    That’s why the upcoming PS5 SSD without a heatsink has been a hot topic recently. Due to the SSD being the main source of storage and speed for the PS5, without a heatsink, it can easily overheat and crash the console. This sparks concerns with gamers regarding the longevity of the PS5 and its performance.

    Heatsinks may be small, but they play a significant role in keeping our devices cool and functioning optimally.

    Explaining the Role of Heatsinks in Gaming Consoles

    Heatsink If you’re an avid gamer, you’ve probably heard of heatsinks. But what exactly are they and why are they important? A heatsink is a component in gaming consoles (and other electronic devices) that helps dissipate heat generated by the system. As gaming consoles become more powerful and compact, they generate a lot of heat, which can negatively impact their performance and lifespan.

    That’s where heatsinks come in – they absorb heat from the console’s components and transfer it to a larger surface area where it can be dispersed. This prevents the console from overheating and potentially causing damage. Heatsinks come in many shapes and sizes, but their function remains the same.

    Just like how a person sweats to regulate their body temperature, heatsinks help keep gaming consoles cool and operating smoothly. So, the next time you’re enjoying your favorite game, remember to thank the humble heatsink for keeping your console from overheating.

    ps5 ssd without heatsink

    PS5 SSDs without Heatsinks: What to Expect

    If you’re considering upgrading your PS5’s SSD, you may be wondering what to expect from an SSD without a heatsink. First and foremost, it’s important to note that adding a heatsink can help dissipate heat and prevent thermal throttling, which can occur when the SSD gets too hot. Without a heatsink, the SSD may experience more fluctuations in performance due to heat buildup, and it may not be able to sustain the same level of performance over long periods of intensive use.

    That being said, some SSDs without heatsinks may still perform quite well, especially if you’re not pushing the limits of your PS5’s capabilities. Ultimately, it will depend on the specific SSD you choose and how well it’s able to handle heat. As always, it’s a good idea to do your research before making any upgrades to your console.

    Performance Comparison: With and Without Heatsinks

    The PS5 is known for its ultra-fast SSDs, but what happens when you remove the heatsinks? Well, the performance drops significantly. The heatsinks are crucial for keeping the SSDs cool, which in turn, ensures they function optimally. Without heatsinks, the SSDs can quickly overheat and throttle, causing stutters, lag, and even crashes.

    Thus, it’s crucial to keep the heatsinks intact if you want to enjoy the best performance out of your PS It’s like having a car engine with no cooling system – it won’t take long before it breaks down due to overheating. So, don’t try to remove the heatsinks on your PS5 SSDs to save some space or make modifications; it’s not worth sacrificing performance for aesthetics or some tinkering.

    Potential Risks and Precautions to Consider

    The PS5 has been a game changer in the world of gaming, especially with the introduction of SSDs. However, some gamers may be concerned with the potential risks and precautions to consider when using SSDs without heatsinks on their PS Firstly, it’s important to understand that using SSDs without heatsinks may cause overheating and damage to other components.

    This can ultimately result in system failure and cause you to lose your valuable game data. It’s crucial to place proper ventilation systems in your gaming setup. Secondly, investing in an aftermarket heatsink to install with your SSD can prevent overheating issues.

    This additional investment is worth it in the long run to protect your PS5 and game data. Remember, investing in proper cooling measures is better than paying for expensive repairs down the road. Always put precautionary measures in place to ensure your gaming experience remains seamless.

    Options for Installing Heatsinks on PS5 SSDs

    If you’re considering installing a new SSD into your PS5, you may be wondering if you need a heatsink. While a heatsink can help dissipate heat and keep your SSD cool, not all SSDs come with one. Luckily, there are several options available if you want to install a heatsink on your PS5 SSD.

    You can purchase aftermarket heatsinks that are specifically designed to fit onto the SSD slot in your PS5, ensuring a proper fit and maximum cooling. Another option is to use thermal pads, which are adhesive pads that can be placed between the SSD and a custom heatsink. This can be a more cost-effective option, as thermal pads are often less expensive than dedicated heatsinks.

    Ultimately, the choice to install a heatsink on your PS5 SSD is up to you, but it’s important to consider the potential benefits in preventing heat damage and prolonging the life of your SSD. And if you do decide to install one, be sure to research your options and choose a heatsink or thermal pad that is compatible with your specific SSD model.

    Recommended Heatsinks for PS5 SSD Upgrades

    If you’re planning to upgrade your PS5’s storage with an SSD, it’s highly recommended to install heatsinks as well. Not only will they help dissipate the heat generated by the new SSD, but they can also prevent thermal throttling and other performance issues. There are several options for installing heatsinks on PS5 SSDs, including aftermarket ones designed specifically for this purpose and DIY solutions using thermal pads or even pieces of aluminum foil.

    Some popular heatsink options include the Sabrent Rocket heatsink, the EKWB M.2 heatsink, and the IC Graphite Thermal Pad. Ultimately, the best heatsink for your PS5 SSD upgrade will depend on the specific model of SSD you’re using and your personal preferences.

    Regardless of which option you choose, be sure to follow the manufacturer’s instructions carefully to ensure proper installation and optimal performance.

    DIY Heatsink Installation Guide

    PS5 SSD heatsink installation If you’re looking to improve the performance of your PS5, installing a heatsink on the SSD may be a smart move. While the PS5 already comes with a heatsink, it may not be enough to handle demanding games. There are several options for installing heatsinks on PS5 SSDs, including purchasing an aftermarket heatsink or DIY installation.

    If you choose to take the DIY route, make sure you have the necessary tools and are comfortable opening up your console. Once you have the heatsink, it’s a matter of attaching it to the SSD and ensuring proper thermal paste application. A well-installed heatsink can help dissipate heat more effectively, leading to better performance and potentially longer lifespan for your SSD.

    So if you’re seeking better performance on your PS5, consider installing a heatsink on your SSD to help keep things cool.

    Final Thoughts and Recommendations

    If you’re considering upgrading the SSD on your PS5 without a heatsink, there are a few things to keep in mind. First, it’s important to note that the PS5’s internal cooling system was designed to work with the original SSD that comes with the console, which has a heatsink attached to it. Without a heatsink, your new SSD may not be properly cooled, leading to overheating and potential damage to your console over time.

    Additionally, some aftermarket SSDs may require a specific amount of power or may not be compatible with the PS5’s hardware, so it’s important to do your research and choose a reliable and compatible option. Ultimately, if you’re dead set on upgrading your SSD without a heatsink, proceed with caution and keep an eye on your console’s temperatures to ensure it’s not overheating.

    Conclusion

    In the world of gaming technology, the PS5 SSD is a high-performance powerhouse. It delivers lightning-fast load times and a seamless gaming experience. But what happens when you take away its heatsink? Well, it’s like asking a Ferrari to go from 0 to 60mph without an engine.

    Sure, it may start, but it won’t get very far. Without the proper cooling mechanism, the PS5 SSD would quickly overheat and fail to function effectively. So, let’s make sure to give our gaming machines the love and care they deserve, including the all-important heatsink.

    FAQs

    What happens if I use PS5 SSD without a heatsink?
    Using PS5 SSD without a heatsink can cause overheating, which might damage your SSD. It’s crucial to install a proper heatsink to control the temperature and ensure long-term durability.

    How do I install a heatsink on my PS5 SSD?
    You can install a heatsink on your PS5 SSD by following the instructions provided by the manufacturer. Usually, you need to remove the SSD cover, clean the surface, apply thermal paste, and attach the heatsink carefully.

    Can I use any heatsink for my PS5 SSD, or does it need to be a specific one?
    You need to choose a compatible heatsink that fits your PS5 SSD. There are many brands and models available in the market, and you can check the specifications to find the compatible one.

    Does installing a heatsink on my PS5 SSD improve its performance?
    The primary purpose of installing a heatsink is to prevent overheating and increase durability. However, it can indirectly improve the performance of your PS5 SSD by ensuring consistent speed and reducing the risk of data loss.

  • Boot Up in Seconds: Finding the Perfect Size SSD for Your Needs

    Boot Up in Seconds: Finding the Perfect Size SSD for Your Needs

    Have you ever wondered what size SSD is necessary for a smooth and fast booting experience? Solid-state drives, or SSDs, have replaced the traditional hard drives due to their exceptional speed, durability, and efficiency. However, choosing the right size can be overwhelming, with numerous options available in the market, ranging from 128GB to 4TB. In this blog, we will guide you through the process of selecting the right size SSD to make your booting experience stress-free and enjoyable.

    Whether you are a gamer, a programmer, or a regular computer user, stick around to discover crucial factors that will inform your decision-making about the size of your boot SSD. Let’s dive in!

    Understanding SSD Basics

    When it comes to figuring out how big an SSD needs to be for boot, the answer lies in several factors. Firstly, one needs to determine the type of operating system they are running. For instance, Windows 10 requires a minimum of 16 GB of storage space for a 32-bit installation and 32 GB of storage space for a 64-bit installation.

    On the other hand, popular Linux distributions, such as Ubuntu and CentOS, require a minimum of 25 GB of storage space. It’s also vital to consider the software and application needs as well, which can significantly impact the amount of storage space required. Ultimately, utilizing cloud storage options can drastically decrease the amount of storage required in the SSD for boot, which can save costs and improve system performance.

    Therefore, the size of an SSD for boot primarily depends on one’s individual needs and preferences.

    What is an SSD?

    An SSD (Solid State Drive) is a type of data storage device that uses NAND-based flash memory to store data. Unlike traditional hard disk drives (HDDs), an SSD has no moving parts, which means it’s faster, more reliable, and less prone to data loss. An SSD works by storing data on interconnected flash memory chips which can be accessed quickly and efficiently.

    This allows for faster boot times, faster application loading, and faster data transfer rates. SSDs also use less power than traditional HDDs and generate less heat, making them more energy-efficient and ideal for use in laptops and other portable devices. Overall, an SSD can provide a significant improvement in performance and productivity compared to traditional hard drives.

    how big does an ssd need to be for boot

    How does an SSD differ from an HDD?

    If you’re looking to upgrade your computer’s storage system, you’re probably considering the differences between a solid-state drive (SSD) and a hard disk drive (HDD). To understand the basics of an SSD, it’s important to know that it uses flash memory to store data, whereas an HDD relies on spinning platters and a mechanical arm to read/write data. What this means is that an SSD has no moving parts, which in turn makes it faster, more reliable, and more energy-efficient than an HDD.

    In fact, an SSD can boot up your computer, launch apps, and transfer files in a matter of seconds. Furthermore, because SSDs have no moving parts, they are less vulnerable to physical shock, which makes them perfect for laptops and other portable devices. Overall, if you’re looking for increased speed and durability in your storage system, an SSD is definitely the way to go.

    Size Matters: How Much Space Do You Need?

    When it comes to the size of an SSD for boot, the answer can vary depending on individual needs and preferences. Generally speaking, a minimum of 120GB is recommended for the operating system and essential applications, although some may opt for larger storage capacities for additional files and programs. It’s important to consider not only the initial space needed, but also potential future growth and expansion.

    Additionally, factors such as drive speed and technology should also be taken into account. While having a larger SSD can certainly provide more flexibility and storage, it’s ultimately up to each user to determine the right balance between space and cost. With that in mind, it’s always a good idea to do some research and consult with technology experts before making a final decision on the size of your SSD for boot.

    Factors to Consider

    When it comes to finding the perfect office space, size matters. You don’t want to shell out for more real estate than you actually need, but at the same time, you don’t want to find yourself crammed into a tiny space. So, how much space do you need? Start by assessing your business needs.

    Will your team be working primarily at their desks, or will you need room for meetings and collaboration? Do you need to accommodate equipment, such as printers or servers? Will you be using the space for storage? Once you have an idea of your requirements, consider potential growth. If your team is poised for expansion in the near future, you may want to rent more space than you actually need right now to avoid the hassle of moving again soon. Overall, find the sweet spot that meets your current needs and can accommodate growth, without breaking the bank.

    How much storage do you need?

    When it comes to storage, size matters. Determining how much space you need can be a tricky task, but it’s essential to ensure you have enough room to store all your files and data. Your storage needs will depend on several factors, such as the type of files you need to store, the frequency with which you use them, and the number of users who will be accessing them.

    For instance, if you work with large files like videos or design files, you’ll need much more storage than someone who mainly works with text documents. Similarly, if you have multiple users accessing the same files simultaneously, you’ll require more storage space to accommodate them all. In general, it’s better to err on the side of caution and choose a high-capacity storage solution, so you don’t run out of space unexpectedly.

    Overall, taking the time to assess your storage needs carefully will pay dividends in the long run, ensuring you have enough space to handle all your files and data, no matter what you throw at it.

    What else will you be using the SSD for?

    When it comes to choosing the size of your SSD, it’s crucial to consider what else you’ll be using it for. Will it primarily store your operating system and applications, or will you also be using it to store large amounts of multimedia files such as photos, videos, and music? It’s important to note that SSDs can be pricey, so it’s essential to ensure you’re purchasing one that will accommodate your needs without overspending. A good rule of thumb is to aim for at least a 256GB SSD if you plan on storing your OS and a few applications.

    However, if you’re working with larger files such as high-resolution videos, you may want to consider a larger size such as 512GB or even 1TB. It all comes down to your specific needs and budget. Remember, an SSD with more space than you need is better than one with less space, as you don’t want to run out of room and have to go through the hassle of upgrading.

    Conclusion: Finding the Right Size SSD for Booting

    In the world of SSDs, size does matter – but bigger isn’t always better. When it comes to booting, you need enough space to store your operating system and essential files, without going overboard and wasting precious storage. So, how big does an SSD need to be for boot? It depends on your needs.

    If you’re a minimalist who only uses your computer for basic tasks, a smaller SSD will do just fine. However, if you’re a power user who needs to store multiple operating systems, programs, and files, a larger SSD may be necessary. The bottom line? It’s up to you to decide what size SSD best fits your individual needs.

    Just remember to strike the perfect balance between functionality and efficiency!”

    FAQs

    What is the minimum recommended SSD size for a boot drive?
    The minimum recommended SSD size for a boot drive is 128GB. However, if you plan to install additional applications and store data on the same drive, you may want to consider getting a larger SSD.

    Can I use a hard drive instead of an SSD for my boot drive?
    Yes, you can use a hard drive instead of an SSD for your boot drive. However, using an SSD will significantly improve your system’s boot and load times.

    Do I need to allocate all the space on my SSD for my boot drive?
    No, you do not need to allocate all the space on your SSD for your boot drive. It’s recommended to leave some free space for temporary files and future updates.

    Can I install multiple operating systems on the same SSD boot drive?
    Yes, you can install multiple operating systems on the same SSD boot drive, but you will need to partition the drive accordingly. Keep in mind that each operating system will require its own space, so make sure to allocate enough storage for each one.

  • Unlocking Your SSD’s Potential: Tips and Tricks To Ensure Your Files Are Read with Ease

    If you’ve recently purchased a new Solid State Drive (SSD) for your computer or laptop, you may run into the issue of it not reading your files. While frustrating, don’t panic just yet – there are ways to solve this problem and get your SSD up and running smoothly. A solid-state drive is a data storage device that uses NAND-based flash memory to store files.

    Unlike a mechanical hard drive, an SSD has no moving parts, which makes it faster and more reliable. However, this also means that it requires a specific set up to be recognized by your computer. To get your SSD to read your files, the first step is to check that your computer’s BIOS is correctly configured to recognize the drive.

    You can do this by entering the BIOS during startup and ensuring that the SATA or AHCI mode is enabled. Another solution is to use a disk partitioning tool to format and repartition the SSD. This will ensure that it is set up correctly and will be recognized by your computer’s operating system.

    In some cases, the issue may be caused by outdated or missing drivers. You can fix this by updating your computer’s chipset or storage drivers, which will enable it to properly recognize your SSD. Overall, while it may seem daunting to troubleshoot and fix issues with your SSD, there are numerous solutions out there to get it to read your files.

    By taking the time to properly configure, format, and update your system, you can ensure that your SSD performs optimally and efficiently.

    Check the Compatibility of Your SSD and Computer

    If you’re having trouble getting your SSD to read your files, the first thing you should do is check the compatibility of your SSD and computer. Sometimes, the problem may simply be that your computer is not capable of supporting your SSD. This could be due to an outdated operating system or incompatible hardware.

    Before you go out and purchase a new SSD or computer, however, there are a few things you can do to troubleshoot the issue. First, try updating your computer’s drivers and firmware. You can do this by visiting the manufacturer’s website and following their instructions for updating your system.

    Additionally, it’s important to ensure that your SSD is properly connected to your computer and that it’s being recognized by your system. If you’ve tried everything and you’re still having trouble, it may be time to consult with a professional. Regardless of the issue, it’s important to ensure that your SSD and computer are compatible in order to avoid any future issues with reading files or data loss.

    Good luck!

    Ensure Your SSD is Installed Correctly

    When upgrading your computer with a new SSD, ensuring compatibility is crucial. Not all computers are compatible with all SSDs, so it’s essential to do your research beforehand. Check your computer’s documentation or manufacturer’s website for a list of compatible SSDs.

    Additionally, make sure you have the correct interface type, such as SATA or PCIe, and that you have an available slot on your motherboard for the SSD. Installing an incompatible SSD can cause problems with booting your system or even damage your hardware. By taking the time to ensure compatibility, you can ensure your SSD is installed correctly and avoid any unnecessary headache.

    So, before you purchase an SSD, check compatibility to make sure it’s a smooth upgrade experience.

    how do i get my ssd to read my files

    Verify that Your Computer is Recognizing the SSD

    To ensure that your computer is recognizing your SSD, it’s essential to check the compatibility of your SSD and computer. Different computers may require varying types of SSDs, and it’s crucial to ensure that your SSD will work with your computer before you start using it. So, if you’re replacing the hard drive of your computer with an SSD, it’s important to see if your computer can support SSDs.

    You can check your computer’s specification, and if it’s compatible, you can go ahead and install the SSD. However, if your computer does not support SSDs, you may have to find an alternate solution or upgrade your computer entirely. Therefore, it’s crucial to check the compatibility of your SSD and computer before you install it to ensure that your computer recognizes it.

    Configure the SSD in Your Computer’s BIOS Settings

    If you’ve recently installed an SSD on your computer but are having trouble getting it to read your files, you may need to configure it in your computer’s BIOS settings. The BIOS (Basic Input/Output System) is a firmware that runs when you turn on your computer and controls how it interacts with hardware components such as the SSD. To access the BIOS settings, you need to restart your computer and press the key that appears on your screen to enter setup mode (usually F2, F10 or DEL).

    Once you’re in the BIOS settings, navigate to the boot menu and select the SSD as the primary boot device. You may also need to enable the AHCI (Advanced Host Controller Interface) mode, which will allow the SSD to communicate with your computer more efficiently. By configuring the BIOS settings correctly, you’ll be able to get your SSD up and running so you can start accessing your files quickly and easily.

    Access Your Computer’s BIOS Settings

    Configuring an SSD in the BIOS settings of your computer is an essential step for optimal performance. To access the BIOS settings, you must restart your computer and press the designated key as the system boots up. The key varies by computer brand, so it’s best to check the manufacturer’s website or manual for instructions.

    Once you’re in the BIOS settings, navigate to the storage configuration section. There, you’ll see a list of connected drives, including your SSD. Select the SSD and ensure that it’s set as the primary boot drive.

    You may also want to enable AHCI mode or disable legacy SATA mode for optimal SSD performance. With your SSD properly configured in the BIOS settings, you’ll be able to take full advantage of its capabilities and experience faster boot times and application load times.

    Find and Select Your SSD in the BIOS Settings

    When installing an SSD in your computer, you will need to configure it in the BIOS settings. First, make sure the SSD is properly connected to the motherboard. Once that is done, restart your computer and enter the BIOS settings by pressing the indicated key on your screen.

    The location of the SSD settings will vary depending on your motherboard, but it can usually be found in the “Storage” section of the BIOS menu. Look for a list of connected drives and select the SSD you installed. From there, you can configure the boot priority so that your computer boots from the SSD rather than the previous boot drive.

    This will ensure that your computer is utilizing the faster speeds of the SSD. Pro tip: In some BIOS settings, your SSD may be labeled as a “solid-state drive” instead.

    Adjust Your Boot Sequence to Include the SSD

    When you add a new SSD to your computer, you’ll need to adjust the boot sequence in BIOS settings to ensure that your computer boots from the SSD correctly. To do this, first enter the BIOS settings by restarting your computer and pressing the key indicated on the screen (often F2, Delete, or ESC). Once inside the BIOS, locate the Boot Order or Boot Sequence settings.

    Here, you can select the SSD as the primary boot device, ensuring that the computer looks to the SSD first for the operating system. This will speed up your computer’s boot time significantly, and also provide faster access to your files saved on the SSD. Be sure to save any changes made in the BIOS before exiting to ensure that the new boot sequence takes effect.

    Use a Data Recovery Tool to Access Lost Files

    If you’re struggling to access files on your SSD, a data recovery tool may be just what you need to get things back on track. These tools are specifically designed to help you retrieve files that have been lost or corrupted, and they can be a lifesaver in situations where you need to access crucial data quickly. One of the best things about these tools is that they’re easy to use – even if you’re not tech-savvy, you should be able to get the hang of them relatively quickly.

    When it comes to finding the right data recovery tool for your needs, there are a few things you’ll want to keep in mind. Look for a tool that’s compatible with your specific operating system, and make sure it offers the features you need to recover your files effectively. With the right tool at your disposal, you’ll be able to get your SSD reading your files like it’s supposed to in no time.

    Select a Data Recovery Tool

    When you accidentally delete a file or lose access to it, the first thing you should do is to stop saving any new data to the affected drive immediately. This prevents overwriting the lost file by new files. The next crucial step is to select a data recovery tool to retrieve your lost files.

    These tools can scan your hard drive, find the lost files, and restore them for you. There are numerous data recovery tools available online, and it can be tough to choose the right one. Look for a tool that supports the file type you’re trying to recover, offers a user-friendly interface, and provides a preview feature to ensure that you’re retrieving the right file.

    EaseUS Data Recovery Wizard, Recuva, and Disk Drill are some popular data recovery tools you can try out. Remember, using a data recovery tool is not always guaranteed to work, and the sooner you attempt using it, the higher the success rate of your data recovery.

    Connect Your SSD to Your Computer Using an Enclosure

    If you’ve ever experienced the frustration of losing important files on your SSD, you’re not alone. Thankfully, there’s a simple solution to accessing those lost files through the use of a data recovery tool. First, connect your SSD to your computer using an enclosure.

    This will allow you to access the drive and scan for any lost data. Once connected, run a data recovery tool such as EaseUS Data Recovery Wizard or Stellar Data Recovery to look for any lost files. These tools use advanced algorithms to search for deleted files and recover them.

    The process may take some time depending on the size of your SSD and the amount of data you’re trying to recover. However, it’s worth the wait to recover those important files. By using these tools, you’ll be able to retrieve lost files and avoid the frustration of having them permanently deleted.

    Run the Data Recovery Tool to Scan for Files

    “Data Recovery Tool” Losing important files can be incredibly frustrating and stressful. Fortunately, a data recovery tool can help you retrieve lost files. This software scans your computer’s hard drive for remnants of deleted files and offers the possibility of restoring them.

    It’s essential to act fast, as continued use of your device could risk overwriting the lost data. Once you’ve installed the data recovery tool, select the disk or drive where the files were last seen and begin the scan. The scanning process could take some time, depending on the size of your hard drive and the amount of data on it.

    Once the scan is complete, you can preview the recovered files and select the ones you want to restore. Remember, always keep a backup of your important files to avoid data loss in the future. Don’t let data loss get you down; use a data recovery tool to access your lost files quickly and efficiently.

    Conclusion

    In the eternal quest for technological harmony, one may find themselves asking “how do I get my SSD to read my files?” The answer lies in a deep understanding of the inner workings of this powerful data storage device. With a keen eye and a steady hand, one must navigate the complex web of drivers, settings, and permissions to unlock the full potential of their SSD. But fear not, for with patience and diligence, success is within reach.

    So go forth, intrepid reader, and conquer the elusive SSD-File connection with all the wit and cleverness you can muster. Happy computing!”

    FAQs

    Why isn’t my SSD reading my files?
    There could be several reasons for this issue. Firstly, ensure that your SSD is properly connected and recognized by your computer. You can check this by going into your computer’s device manager. Additionally, try updating your SSD drivers and firmware. If the issue persists, it may be due to file system errors on your SSD that can be resolved by using a disk checking tool such as CHKDSK or Disk Utility.

    How can I troubleshoot my SSD if it’s not reading my files?
    Firstly, check to make sure that your SSD is properly connected to your computer. If the drive is recognized by your computer, try scanning your SSD for potential issues using a disk checking tool such as CHKDSK or Disk Utility. Additionally, try updating your SSD firmware and drivers. If none of these solutions work, consider contacting the manufacturer for further assistance.

    How can I recover my SSD files if it’s not reading them?
    If your SSD is not reading your files, there may be a possibility of data loss. In this scenario, it’s recommended to stop using the SSD immediately and use a data recovery tool to restore your lost files. Some popular data recovery tools include Recuva, EaseUS Data Recovery, and Stellar Data Recovery.

    What can I do if my SSD is not detecting any files?
    If your SSD is not detecting any files, check to see if the drive is properly connected and recognized by your computer. Ensure that your SSD is part of the boot order in your computer’s BIOS. If the issue persists, it could be due to a corrupted file system or partition table on your SSD. In this scenario, consider using a disk checking tool such as CHKDSK or Disk Utility to check for errors and repair your SSD.