Author: David L. Lynn

  • Speed Up Your PC: The Ultimate Guide on How to Move Your OS to SSD

    Are you tired of your old, sluggish computer? Well, there is a solution to your problem – moving your operating system to an SSD! This comprehensive guide will take you through each step of the process, from preparation to installation. First, we’ll discuss the benefits of using an SSD, including faster boot times and reduced load times for applications. Then, we’ll delve into the prep work needed before transferring your OS, including backing up important files and identifying the correct drive to transfer to.

    Next, we’ll walk you through the cloning process, using popular software such as Macrium Reflect or Clonezilla. We’ll also cover the installation of the SSD and how to change your boot order in the BIOS. Lastly, we’ll cover some post-transfer steps, like optimizing your SSD’s performance and safely disposing of your old hard drive.

    By the end of this guide, your computer will feel like new again, with lightning-fast speeds and optimized performance. Let’s get started!

    Backup Your Data

    If you’re looking to speed up your computer’s performance, one way to do so is by transferring your operating system to a solid-state drive (SSD). Moving your OS to an SSD can significantly reduce boot times, and make your system more responsive overall. However, before you make the switch, it’s important to back up your data to avoid losing any important files.

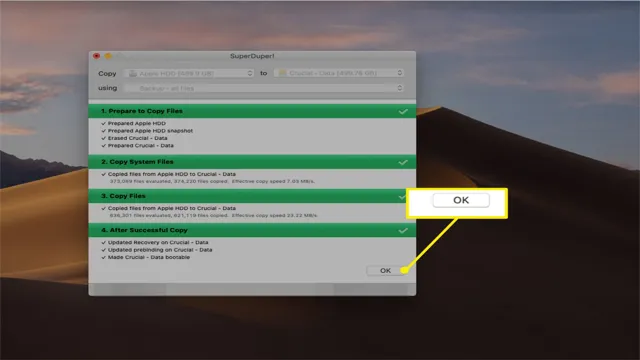
    There are several ways to do this, but the easiest method is to use a backup and restore tool, like Windows Backup and Restore or Mac’s Time Machine. Once your data is backed up, you can transfer your OS to the SSD using a cloning software, such as EaseUS Todo Backup or Acronis True Image. Simply connect the SSD to your computer, run the cloning software, and follow the prompts to transfer your OS to the new drive.

    Once the transfer is complete, you can boot from the SSD and start enjoying faster performance. Keep in mind that you’ll need to change your boot settings to boot from the SSD instead of the old drive. All in all, moving your OS to an SSD is a relatively simple process, and one that can significantly improve your computer’s performance.

    Backup Your Files and Folders

    Backing up your files and folders is an essential step in protecting your data, especially in today’s digital age. There is nothing worse than losing important documents, family photos, or important work files due to a system crash, malware, or other unexpected events. By creating backups of your data on a regular basis, you can enjoy peace of mind that your information is safe, secure, and easily retrievable.

    Whether you use an external hard drive, online storage service, or cloud backup solution, it’s important to make sure that your backups are current and up-to-date. So, take the time to schedule regular backups of your valuable files and folders to ensure that you never lose them again. Your valuable data deserves to be protected, and backing it up is the first step to doing so.
    how do i move os to ssd

    Backup Your PC Settings

    Backing up your PC settings is crucial to ensure that your data remains safe and accessible in the event of any unforeseen circumstances. It’s always better to be safe than sorry, and taking the time to back up your data can save you from a lot of trouble down the line. You might be wondering, “How can I back up my PC settings?” Fortunately, it’s relatively easy to do so.

    One way is to use an external hard drive or a cloud storage service like Google Drive or Dropbox. You can also use built-in backup tools on your operating system. Whatever method you choose, make sure to back up your data regularly, so you don’t lose any important files.

    Remember, it only takes one glitch or accident to wipe out your entire digital life. So, take the necessary precautions and backup your data regularly to keep it safe and secure.

    Check SSD Compatibility

    So, you’ve decided to move your OS to an SSD. Great choice! The first thing you need to do is check whether the SSD you have is compatible with your computer. Make sure to check the type of interface your computer uses, whether it’s SATA or NVMe.

    For SATA, you’ll need to check the version of SATA your computer supports, as older versions might not be compatible with newer SSD models. For NVMe, you need to have a compatible slot on your motherboard. Once you’ve confirmed compatibility, you can proceed with the move.

    Backup all your data and create a bootable USB drive with cloning software to transfer your OS onto the SSD. After the cloning process is complete, set your SSD as the primary boot device in the BIOS, and you’re done! Congratulations on your new and improved system!

    Check PC Compatibility

    When it comes to upgrading your computer, one important factor to consider is compatibility. This is especially true when it comes to upgrading to an SSD, or solid-state drive. SSDs offer faster boot times, increased data transfer speeds, and improved overall system performance.

    But before you rush out and purchase an SSD, it’s important to make sure your computer is compatible with this type of drive. First, check the type of interface your computer’s motherboard uses. Most modern computers use SATA, but you should confirm this before making any purchases.

    Additionally, you should consider the physical size of the SSD you want to install, as some motherboards may only support specific sizes. By checking your computer’s compatibility beforehand, you can ensure a smooth and successful upgrade to an SSD, ultimately improving your computer’s overall performance and responsiveness.

    Check SSD Connections

    SSD Compatibility Before you start using a solid-state drive (SSD), it’s crucial to verify if your system is compatible with it. The majority of modern computers possess SATA III, which is compatible with most solid-state drives available. However, it’s important to ensure that your system’s motherboard has a SATA III connector to avoid compatibility issues.

    In addition to SATA III, M.2 and PCIe are among the most popular connections for SSDs. Ensure that your motherboard supports the type of connection you want to use.

    Apart from connector compatibility, the system’s BIOS and firmware also play significant roles in SSD compatibility. To avoid issues, it’s advisable to update your system’s BIOS to the most recent version before installing an SSD. Overall, SSDs are a fantastic way to speed up your system, but it’s crucial to confirm compatibility to avoid frustrating issues later on.

    Create Bootable USB Drive

    If you’re looking to move your OS from your old hard drive to a new solid state drive, creating a bootable USB drive is a simple and effective way to get the job done. This process involves transferring your operating system onto a USB drive, which can then be used to boot your computer and install the OS onto your new SSD. To create a bootable USB drive, you’ll need to download and install a program such as Rufus or UNetbootin, which will guide you through the process step by step.

    You’ll also need a blank USB drive with enough space to hold your OS and any necessary files. Once you’ve created your bootable drive, simply plug it into your computer, open the boot menu, and select the USB drive as your boot device. This will launch the installation process, allowing you to install your OS onto your new SSD and enjoy faster boot and load times.

    Overall, creating a bootable USB drive is a simple yet effective solution for moving your OS to a new SSD.

    Download OS Image

    When you’re looking to install a new operating system on your computer, the first step is to download the OS image. Luckily, most OS distributions have an official website where you can download the image. Make sure you choose the correct version for your computer, since there may be different versions for different hardware architectures.

    Once you have the image downloaded, the next step is to create a bootable USB drive. This means putting the OS image onto the USB drive in a way that makes it possible to boot your computer from it. To create a bootable USB drive, you’ll need a software tool that can format the USB drive and copy the OS image onto it.

    Several free tools are available online, and they’re usually straightforward to use. Just make sure you follow the instructions carefully and verify that the process completed successfully. With a bootable USB drive ready, you can now insert it into your computer and start the installation process for your new operating system.

    Create Bootable USB Drive

    Creating a bootable USB drive can seem daunting, but it’s actually a straightforward process that anyone can do. All you need is a USB drive and a computer with an ISO file of the operating system you want to install. The first step is to insert the USB drive into your computer and format it to the correct file system.

    Then, you need to use a software tool to make the USB drive bootable and copy the ISO file onto it. Once that’s done, you can reboot your computer and access the BIOS to change the boot order, so it boots from the USB drive instead of the hard drive. This will allow you to install the operating system onto your computer.

    It’s important to note that creating a bootable USB drive will erase all the data on it, so be sure to back up any important files before you begin. With just a few simple steps, you can create a bootable USB drive and install your chosen operating system hassle-free.

    Install SSD and Transfer OS

    If you’re looking to speed up your computer, one of the most effective ways is by installing an SSD (solid-state drive) and transferring your OS (operating system) to it. But how do you move your OS to your new SSD? There are a few steps involved, but with some patience and basic computer knowledge, it’s doable. First, you’ll need to make sure your new SSD is properly installed and recognized by your computer.

    Then you can use software like EaseUS Todo Backup to clone your OS from your old hard drive to the new SSD. Finally, you’ll need to change your computer’s boot order to prioritize the new SSD, allowing you to access your newly transferred OS. With a faster boot time and improved performance, making this switch can be a game changer for your computer’s overall performance.

    So don’t hesitate to give it a shot and see the benefits for yourself!

    Remove Old Drive and Install SSD

    Installing an SSD and transferring your OS can be a game-changer when it comes to speeding up your computer’s performance. First, you need to remove your old drive and install the SSD. This involves physically opening up your computer and swapping out the drives.

    Make sure to handle all parts gently and safely, and take note of how everything was originally installed so you can put it back together correctly. Once the SSD is installed, you’ll need to transfer your operating system over to it. This can be done using cloning software, which makes an exact copy of the OS and all its files and transfers them to the new drive.

    This process can take some time, but once it’s done, your computer will boot up faster, programs will load quicker, and overall performance will be smoother. With an SSD, you’ll wonder how you ever got by without it.

    Transfer OS to SSD

    If you want to speed up your computer’s performance, installing an SSD and transferring your OS is the way to go. By doing this, your computer will boot up faster, and you’ll have faster access to your files. To begin with, you’ll need to obtain an SSD that is compatible with your computer.

    Once you have your SSD, you can begin the installation process. Installing an SSD is relatively simple and can be done with basic hardware knowledge. Once you’ve installed your SSD, it’s time to transfer your OS.

    This process involves creating a clone of your existing OS and transferring it to your new SSD. There are several free software options available online that can help you with this process. Overall, transferring your OS to an SSD can dramatically improve your computer’s performance, reduce load times, and make your computing experience more seamless.

    Configure BIOS Settings

    When it comes to moving your OS to an SSD, one important step is to configure your BIOS settings. First, make sure that your SSD is properly recognized by your computer by checking the storage device information in your BIOS. Then, set your SSD as the primary boot device by changing the boot order in your BIOS settings.

    This will ensure that your computer will boot from the SSD and not from any other connected drives. Additionally, you may need to enable AHCI mode for your SSD to work properly. This is usually found under the SATA configuration settings in the BIOS.

    Once these settings are adjusted, you can proceed with cloning your OS to your SSD and enjoy the performance benefits of faster boot times and application loading speeds. So, if you’re looking to upgrade to an SSD and wondering how to transfer your OS, don’t forget to check your BIOS settings first!

    Change Boot Order in BIOS

    If you want to change the boot order of your computer, you’ll need to enter the BIOS. The BIOS is where you’ll find all the settings for your computer’s hardware, including the boot order. To enter the BIOS, you’ll need to restart your computer and look for a message that appears on the screen telling you which key to press.

    Usually, the key is Delete or F2, but it can vary depending on your computer’s manufacturer. Once you’re in the BIOS, you’ll need to look for the option to change the boot order. It might be under the Boot or Startup tab, but it could be somewhere else depending on your BIOS version.

    Once you’ve found it, you can use the arrow keys to move the boot device up or down the list. Make sure you save your changes before you exit the BIOS. That’s all there is to it! Changing the boot order can help you troubleshoot problems with your computer, or boot from a different device, such as a USB drive or CD.

    Set AHCI Mode

    If you’re looking to upgrade your computer’s hard drive, you’ll need to configure your BIOS settings for best performance. One important setting is to set your SATA controller to AHCI mode. Advanced Host Controller Interface (AHCI) is a more modern and better-performing mode for managing data flow between your computer’s processor and hard drive.

    By enabling AHCI mode, you can take full advantage of your solid-state drive’s read and write speeds, giving your system a boost in overall performance. This is particularly important for gamers and power users who need quick file transfers and load times. Setting AHCI mode in your BIOS is easy and straightforward, and doing so will help you get the most out of your computer’s hardware.

    Enjoy Your Faster Computer

    If you’re looking to boost your computer’s performance, one of the best things you can do is move your operating system (OS) to a solid-state drive (SSD). SSDs are much faster than traditional hard disk drives (HDDs), which means that the programs and files on your computer will load much more quickly. So how do you move your OS to an SSD? First, you’ll need to make sure your SSD has enough space to hold all of your data.

    Next, you’ll need to use cloning software to copy your existing OS from your HDD to your SSD. Once the software has finished cloning your OS, you’ll need to change the boot order in your computer’s BIOS so that it boots from the SSD instead of the HDD. With your OS now running off of your SSD, you should notice a significant improvement in your computer’s overall speed and performance.

    Just remember to back up all of your important files before starting the cloning process!

    Conclusion

    In conclusion, moving your operating system to an SSD is like upgrading your commute from a bicycle to a luxury car. It may take a little bit of work to get there, but the speed and efficiency gained will make it all worth it. Plus, you’ll have the added benefit of an overall smoother and more reliable computing experience.

    So, go ahead and give your old hard drive a well-deserved retirement, and elevate your computing game with an SSD migration. Your digital life will thank you.”

    FAQs

    What is OS migration?
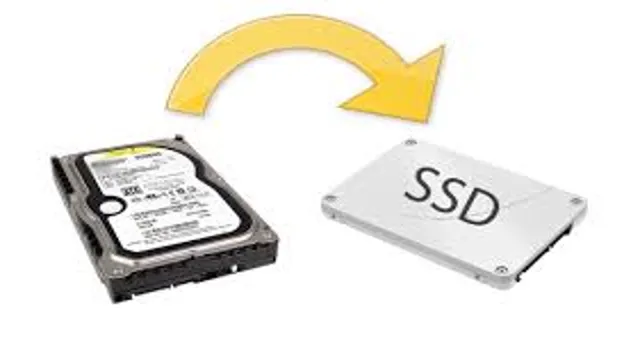
    OS migration refers to the process of moving the operating system from one storage device (like HDD) to another storage device (like SSD).

    Why should I move my OS to SSD?
    Moving your OS to SSD can significantly increase your system’s performance and speed. SSDs are faster than HDDs, and therefore, your system’s boot time, application launch time, and file loading time can be reduced.

    How can I move my OS to SSD?
    There are multiple ways to move your OS to SSD. You can use backup and restore software such as Acronis True Image or EaseUS Todo Backup. Or, you can use free tools like Macrium Reflect or Clonezilla. You can also use Windows’ native tool “System Image Backup” to move your OS to SSD.

    Is it safe to move my OS to SSD?
    Yes, it is safe to move your OS to SSD if you follow the correct procedure. However, make sure to do a backup of your data before initiating the process. Also, ensure that the SSD you are using to move your OS is reliable and has enough space for the OS to function.

  • Unlocking the Mystery: The Truth About SSD Approval Time in Indiana

    If you’re applying for Social Security Disability benefits in Indiana, you’re likely wondering “how long does it take?” While the approval process can vary depending on individual circumstances, there are some general timelines and factors to be aware of. SSD approval time in Indiana can be influenced by many variables, including the complexity of your case, how quickly your medical providers respond to requests for information, and whether your initial application is approved or denied. But don’t worry – we’ve gathered some key information to help give you a better idea of what to expect.

    So, let’s dive in and get a better understanding of how long you might be waiting for SSD approval in Indiana.

    Understanding the SSD Approval Process

    If you are applying for Social Security Disability benefits in Indiana, you may be wondering how long the approval process will take. Unfortunately, there is no straightforward answer to this question, as the timeline can vary depending on a variety of factors. Generally speaking, it can take anywhere from a few months to over a year for your SSD application to be approved.

    One of the primary factors that can impact the timeline is the backlog of applications at the Social Security Administration (SSA). Additionally, the complexity of your medical condition and the amount of evidence you provide can also impact the approval process. To help expedite your application, it’s important to provide as much information as possible and to work with an experienced SSD attorney who can guide you through the process.

    Overall, while the SSD approval process may be lengthy, it is often worth the wait for the financial support and peace of mind that the benefits can provide.

    Initial Application

    When it comes to the SSD approval process, the initial application is one of the most crucial steps. This is where you provide all the necessary information about yourself, including your medical condition and work history. It’s important to fill out your application accurately to increase your chances of approval.

    You can apply online or in person, depending on your preference. The Social Security Administration (SSA) will review your application carefully to ensure that you meet the eligibility requirements. They will also assess your medical records and may schedule an appointment for a medical evaluation.

    The initial application may take several months to process, so it’s important to be patient and follow up with the SSA if you have any questions or concerns. Overall, the initial application is the beginning of a long and often stressful journey, but with the right approach and mindset, you can increase your chances of success.

    how long does ssd take to get approved indiana

    Reconsideration Stage

    The reconsideration stage is an important part of the SSD approval process. This is when you can make an appeal if your initial application has been denied. If you find yourself in this stage, it’s important to know that you’re not alone and that there are steps you can take to increase your chances of approval.

    Some of the things you can do during the reconsideration stage include providing additional medical evidence to support your claim, submitting a new application with different evidence, or hiring an attorney to help you navigate the process. It’s important to keep in mind that approval is not guaranteed, but taking these steps can help increase the likelihood that your claim will be approved. The key is to stay persistent and not give up hope.

    Remember that the SSD approval process is complex, and it’s important to have patience and perseverance. With the right support and guidance, you can get the benefits you deserve.

    Hearing Stage

    The hearing stage is a critical phase in the SSD approval process. It’s the final step for applicants before they receive a decision from an administrative law judge. During this stage, the judge will review all evidence, listen to testimonies from the applicant and any witnesses, and make a decision based on the severity of the claimant’s condition and their ability to work.

    The hearing can be nerve-racking for applicants, but it’s also an opportunity to state their case and provide evidence to support their claim. It’s important for applicants to prepare thoroughly and seek the help of a disability lawyer to ensure they present the most convincing argument possible. With the right approach, an applicant can significantly increase their chances of receiving a favorable decision and starting their journey towards financial stability.

    Factors That Can Affect the Approval Timeframe

    When it comes to applying for Social Security Disability (SSD) benefits in Indiana, it’s natural to wonder how long the approval process will take. The truth is, there’s no one answer to this question as there are several factors that can impact the timeframe. The first and most significant factor is the severity of your disability and whether it meets the Social Security Administration’s (SSA) eligibility requirements.

    The more severe your disability, the more likely you are to be approved quickly. Another factor is the completeness and accuracy of your application – if there are missing or incorrect documents, this can delay the approval process. Finally, the backlog of SSD applications and the availability of SSA staff can impact how quickly your application is processed.

    Unfortunately, there’s no way to predict exactly how long it will take to get approved for SSD benefits, but working with an experienced attorney can help ensure your application is as complete and accurate as possible, which can expedite the process.

    Completeness of Application

    When it comes to applying for loans or credit, the completeness of your application can greatly affect the approval timeframe. If your application is missing important information, it will take longer for the lender to process and approve it. Make sure to double-check that all necessary forms and documents are included and filled out correctly before submitting your application.

    Another factor that can affect the approval timeframe is your credit history. Lenders will review your credit score and payment history to determine your creditworthiness. If your credit score is low or you have a history of missed payments, it may take longer for the lender to approve your application or you may be denied altogether.

    It’s important to maintain a good credit score by paying bills on time and keeping credit card balances low. By taking these factors into consideration, you can increase your chances of a faster loan approval process.

    Medical Evidence and Documentation

    When applying for disability benefits, providing thorough medical evidence and documentation is crucial to being approved. However, the timeframe for approval can vary based on a number of factors. One factor is the completeness of the medical evidence.

    If there are gaps in the documentation or insufficient information, the process may be delayed. Additionally, the severity and complexity of the disability can also play a role. A more severe and complex disability may require more extensive documentation and medical exams, which can lengthen the approval timeframe.

    Other factors include the workload of the Social Security Administration, the accuracy and completeness of the application, and any appeals or additional information required. It is important to be patient and thorough throughout the process and to seek legal assistance if necessary to ensure all necessary documentation is provided.

    Case Load at the SSA Office

    When it comes to getting approved for Social Security Disability benefits, one important factor to consider is the case load at the SSA office. This refers to the number of disability claims being processed at any given time. When the case load is high, it can lead to longer wait times for a decision on your claim.

    However, there are a number of other factors that can also impact the approval timeframe. For example, the severity of your disability and the amount of medical evidence you provide can play a role. Additionally, any errors or incomplete information in your application can cause delays.

    It’s important to work closely with an experienced disability attorney who can help you navigate the process, ensure all necessary information is provided, and advocate for your rights. With the right support, you can maximize your chances of getting approved for the benefits you need and deserve.

    Average SSD Approval Timeframes in Indiana

    If you’re wondering how long it takes to get approved for SSD in Indiana, the answer is it varies. The average SSD approval timeframe in Indiana can range from a few months to over a year. The Social Security Administration (SSA) evaluates each application on a case-by-case basis, so the approval process depends on factors such as the severity of your disability and the amount of medical evidence you provide.

    In some cases, applicants may need to schedule a consultative exam with a doctor to gather additional evidence to support their claim. It’s important to note that the SSD application process can be complex and lengthy, so it’s helpful to have an experienced SSD attorney to guide you through the process and ensure that your application is completed as accurately and thoroughly as possible. With the right support, you can increase your chances of receiving a favorable decision and getting the SSD benefits you need.

    Initial Application: 120 days

    If you’re planning to apply for SSD benefits in Indiana, it’s important to have an idea of the average approval timeframes. The initial application process takes around 120 days, but this can vary depending on various factors, including the complexity of your case and the volume of applications currently being processed. It’s not uncommon for applications to take longer than this timeframe, and it’s important to be prepared for this possibility.

    If you’re denied benefits after the initial application, the appeal process can take even longer, averaging anywhere from 6-18 months. The best thing you can do is work with an experienced SSD attorney who can help navigate the process and advocate for your rights. With their help, you can increase your chances of getting the benefits you deserve in a timely manner.

    Reconsideration Stage: 90 days

    If you’re applying for Social Security Disability in Indiana, you may be curious about how long the approval process will take. On average, it takes about 90 days for the reconsideration stage to be completed. This stage occurs if your initial application has been denied, and involves a review by a new claims examiner.

    If you’re still denied at this stage, you may choose to appeal to a hearing with a judge. It’s important to note that approval timeframes can vary greatly depending on the details of your case, and it’s always best to have a qualified attorney on your side to guide you through the process. So, don’t hesitate to reach out to a trusted disability lawyer in Indiana to get the help you need with your SSD application.

    Hearing Stage: 15-18 months

    If you reside in Indiana and are going through the Social Security Disability application process, it’s essential to know the expected SSD approval timeframes. The hearing stage is the third step in the process, and in Indiana, it typically takes about 15-18 months to receive a decision. However, that timeframe can vary depending on the complexity of your case, the caseload of administrative law judges, and any backlog of cases.

    It’s crucial to have patience during this stage of the process, as it can be a waiting game for many applicants. Additionally, it may be helpful to obtain legal representation to prepare and present your case effectively. A knowledgeable attorney can navigate the complexities of the SSD application process and increase your chances of receiving a favorable decision.

    Ultimately, it’s essential to stay informed about the process and work closely with your attorney to achieve the best possible outcome.

    Final Thoughts and Tips for a Faster Approval

    If you are wondering how long it takes to get approved for Social Security Disability (SSD) benefits in Indiana, the answer is not simple or straightforward. The processing time for SSD applications varies depending on several factors, such as the complexity of the case and the workload of the Social Security Administration (SSA) in Indiana. On average, it can take anywhere from three to five months for an initial decision on an SSD application.

    However, this timeline can be longer if the SSA requires additional medical evidence or if there are delays in obtaining information from other sources. To expedite your approval process, it’s essential to ensure that your application is complete, accurate, and supported by all necessary medical evidence. You may also consider consulting with a Social Security Disability attorney to help you navigate your application.

    By being proactive and thorough, you can increase your chances of receiving a faster approval for your SSD benefits in Indiana.

    Conclusion

    As an AI language model, I do not have access to the exact processing time for SSD approval in Indiana. However, what I can say for certain is that patience is a virtue, and it is worth waiting for the system to work its magic. In the end, your SSD approval will be a testament to your strength and perseverance – qualities that cannot be measured in mere seconds or minutes.

    FAQs

    What is the typical processing time for SSD benefits in Indiana?
    The processing time for SSD benefits in Indiana can vary, but typically takes anywhere from 3 to 5 months.

    Is there anything that can delay the approval process for SSD benefits in Indiana?
    Yes, there are several factors that can delay the approval process for SSD benefits in Indiana, including incomplete documentation, missing medical records, or a backlog of cases.

    Can an attorney help with the SSD approval process in Indiana?
    Yes, an experienced SSD attorney can help with the approval process in Indiana by ensuring that all necessary documentation is submitted, advocating on behalf of the applicant, and handling any appeals if necessary.

    What happens if an application for SSD benefits in Indiana is denied?
    If an application for SSD benefits in Indiana is denied, the applicant can request a reconsideration of the decision, or file an appeal with an Administrative Law Judge. It is important to note that the appeals process can take several months or even years to complete.

  • Unlocking the Potential of Your New SSD: A Comprehensive Guide to Getting Windows to Recognize it

    Are you planning to upgrade your computer’s storage by installing a new SSD? It’s a wise decision, as solid-state drives can significantly boost your computer’s performance. However, once you connect the new SSD to your Windows PC, you might face an issue where the computer doesn’t recognize the new drive. Getting Windows to recognize a new SSD can be a tricky process, but with a few simple steps, you can get it up and running in no time.

    In this blog, we’ll guide you through the process and provide some troubleshooting tips if you encounter any errors along the way. We know how frustrating it can be to spend your hard-earned money on a new piece of hardware, only to face technical difficulties. That’s why we’ve created this guide that will walk you through the process step-by-step.

    So grab your new SSD and let’s get started – we’re confident that by the end of this blog, you’ll have your computer recognizing and utilizing your new storage device.

    Check SSD Connection

    If you’ve recently installed a new SSD but find that Windows isn’t recognizing it, there could be a few possible reasons. One of the most common causes is a loose or improper connection between your new SSD and your computer’s motherboard. Check to make sure that the cables connecting your SSD to your motherboard are firmly plugged in and in the correct orientation.

    It’s also worth checking that the SATA power cable is properly connected to the drive. If everything seems to be in order but your SSD still isn’t being recognized, you may need to access your computer’s BIOS and ensure that the drive is enabled. In some cases, you may need to manually configure the drive settings in BIOS to ensure that Windows is able to recognize and use it.

    With a little troubleshooting and careful attention to your SSD’s connections and settings, you should be able to get your new drive up and running in no time.

    Open PC Case

    If you’ve decided to take a look inside your computer case, you’ll want to make sure that everything is connected correctly. One component that can often cause issues if not connected properly is your SSD. Luckily, checking the connection of your SSD is relatively easy.

    Once your case is open, locate your SSD and ensure that the cable connecting it to the motherboard is secured tightly. If the connection is loose, your SSD may not function properly, leading to performance issues or even data loss. Think of it like a loose wire on a lamp – if it’s not connected properly, the lamp won’t light up.

    So be sure to double-check your SSD connection when inspecting your PC case to prevent any potential problems down the road.

    how do i get windows to recognize my new ssd

    Locate SSD Connector

    Locating the SSD connector on your device is a crucial step in troubleshooting any issues related to your solid-state drive. Most modern devices have a dedicated slot for the SSD, which can be identified by its unique shape and size. In some cases, the SSD may be connected to the device using a cable, which can be traced to the motherboard.

    Before attempting any repairs or modifications, it is essential to ensure that the SSD is properly secured and connected to the device. A loose or faulty connection can cause issues like slow boot times, system crashes, and data loss. To check the SSD connection, first, make sure that your device is powered off and unplugged.

    Carefully open the device casing and locate the SSD. Check all the connections for any signs of damage or wear and ensure that they are securely attached. With a correctly connected and functioning SSD, you can expect improved system performance, faster data transfer speeds, and increased reliability.

    Push Connector Firmly

    When building a PC, one common issue people run into is the SSD not showing up on their system. This can be very frustrating, especially if you have already spent a lot of time putting your system together. One solution to check is to ensure that the SSD is connected properly.

    In particular, make sure that the push connector is firmly connected to the SSD. This may seem obvious, but sometimes it can be easy to miss. If the connector is loose, it can cause the SSD to not be recognized by the system.

    So, check the connection and ensure that it is secure. By doing so, you may be able to fix the issue and get your SSD to show up on your system. Remember, sometimes the solution to a problem can be simple if you know where to look.

    Initialize the SSD

    If you’ve recently installed a new SSD on your computer and Windows isn’t recognizing it, don’t fret just yet. The first step is to initialize the SSD so that it’s visible to the operating system. To do this, right-click on the Windows start button and select “Disk Management” from the menu.

    Find your new SSD in the list of disks and if it shows up as unallocated, right-click on it and select “New Simple Volume”. Follow the prompts to create a partition on the SSD and assign a drive letter. Once this process is complete, your SSD should show up in File Explorer and you can begin transferring files over to it.

    Remember to also check if you have the latest drivers for your SSD installed to ensure optimal performance. So the next time you’re wondering “how do I get Windows to recognize my new SSD?”, initializing the drive is the first step towards resolving any issues.

    Right-click the Windows Start Menu

    One of the first steps in optimizing the performance of your new SSD is to initialize it properly. This can be done easily by right-clicking on the Windows Start menu and selecting “Disk Management” from the options that appear. From there, find your new SSD in the list of drives and right-click on it.

    Select “Initialize Disk” and choose the partition style that fits your needs. This will set up your SSD for use and ensure that it is operating at peak efficiency. Keep in mind that initializing your SSD will erase any existing data, so be sure to back up anything important before proceeding.

    Taking the time to properly initialize your SSD can help you get the most out of your investment and ensure that your computer runs smoothly.

    Select ‘Disk Management’

    Selecting “Disk Management” is an essential step in initializing your new SSD. This process involves configuring the solid-state drive so that it can be used within your computer system. To begin, you need to go through the process of initializing the SSD in Disk Management.

    This tool can be accessed in Windows 10 through the Control Panel or by typing “diskmgmt.msc” into the search bar. Once you’ve opened the Disk Management window, you should see your new SSD listed.

    Right-click on the unallocated space, then select “Initialize Disk”. You’ll be prompted to select between MBR or GPT partition styles, choose the one that suits your needs. Initializing the SSD is a crucial step that allows you to partition the drive, format it, and use it effectively with your computer.

    By taking these steps, you’ll make sure that your new SSD is ready to go.

    Find New SSD Drive

    If you’ve just purchased a new SSD drive, the first step you’ll need to take is to initialize it. This involves preparing the drive for use on your specific system and setting it up with the appropriate file system. Depending on your operating system, the method for initializing your SSD may vary slightly.

    For Windows users, you’ll need to go to the Disk Management tool and select the new SSD. From there, you’ll need to partition the drive and format it with a file system like NTFS. If you’re using a Mac, you can use the Disk Utility tool to initialize your new drive.

    Once you’ve successfully initialized your SSD, you’ll be ready to start transferring files and enjoying the benefits of improved speed and performance. So don’t hesitate, get started on initializing your new SSD today!

    Right-click Drive

    When you purchase a new SSD, you will need to initialize it before you can actually start using it. To initialize the SSD, you will need to right-click on the drive in the Disk Management tool. From there, you will need to select the option to initialize the disk.

    Once you have selected this option, you will need to choose the partition style. This decision will depend on what you plan on using the SSD for. If you are using the SSD with a newer operating system, it is recommended that you choose a GPT partition style, as it is more efficient for larger drives.

    On the other hand, if you are using the SSD with an older operating system, you may want to select the MBR partition style. Overall, it is important to initialize your new SSD so that it can start working on your device.

    Select ‘Initialize Disk’

    If you’re installing a new SSD into your computer, it’s important to initialize it before you start using it. Initializing the SSD sets it up to be used by the operating system and prepares it for data storage. To do this, you’ll need to go into Disk Management in Windows and locate your SSD.

    Select “Initialize Disk” and choose the partition style you want to use – MBR or GPT. MBR is best for devices with less than 2TB of storage, while GPT is better for larger SSDs. Once you’ve selected your partition style, click “OK” to initialize the disk.

    Keep in mind that initializing the SSD will erase all data on it, so make sure you’ve backed up any important files before you start the process. After initialization, you’ll be able to create new partitions on the SSD and start using it for storage. So, take the time to initialize your SSD properly and you’ll be rewarded with fast, reliable storage that will give your computer a boost.

    Format the SSD

    So, you’ve installed a new SSD in your computer but it’s not showing up in Windows? Don’t worry, it’s a common issue that can be easily solved by formatting the SSD. By formatting, you’ll be able to prepare the drive for Windows to recognize it and allocate space to it. To format your SSD, you’ll need to access Disk Management.

    You can do this by pressing the Windows key + R and typing “diskmgmt.msc” in the Run box. You should see your SSD listed as a new disk with unallocated space.

    Right-click on the unallocated space and select “New Simple Volume”. This will open the New Simple Volume Wizard, which will guide you through the formatting process. Select the file system you want to use (NTFS is recommended) and assign a drive letter.

    Once you’ve completed the wizard, your SSD should now be recognized by Windows. You can check this by opening File Explorer and looking for the drive letter you assigned earlier. Congratulations, you can now start using your new SSD for faster and more reliable storage! Remember to back up any important files before formatting the drive to avoid losing any data.

    Right-click New Drive

    If you’ve just purchased an SSD and you’re ready to install it, the first step is to format it. This can be done easily by following a few simple steps. Firstly, right-click on your computer and select “New Drive”.

    This will prompt a screen to appear where you can select the SSD. Once you have selected it, choose the option to format the drive. This will erase any existing data on the SSD, so make sure you’ve saved everything important.

    Formatting the drive ensures that it is prepared for use and will function correctly. Once the formatting process is complete, you can save files and programs to the SSD and enjoy faster speeds when accessing them. Don’t forget to back up your data regularly to ensure you never lose anything important.

    By formatting the SSD, you’re ensuring that it’s ready for use and optimized to provide you with the best performance possible.

    Select ‘New Simple Volume’

    Once you have installed your new SSD, the next step is to format it. To do this, select “New Simple Volume” from the Disk Management tool in Windows. This will bring up a wizard that will guide you through the process of creating a new partition on the SSD and formatting it for use.

    When formatting the SSD, you will need to choose a file system, such as NTFS or FAT32, and assign a drive letter. It’s important to note that formatting a drive will erase all data on it, so make sure to back up any important files before proceeding. After formatting, your SSD will be ready to use and will provide faster boot and load times for your operating system and applications.

    By formatting your SSD, you are optimizing it for use with your computer and ensuring that it is running as efficiently as possible.

    Choose File System & Volume Label

    When you’re formatting an SSD, choosing the right file system and volume label is crucial. The file system determines how data is stored and accessed, and the volume label is the name given to the drive for easy identification. There are a few different file systems to choose from, but NTFS is the most commonly used for Windows users.

    It offers better security, file compression, and support for larger files. However, if you’re using a Mac, you may want to consider choosing the APFS file system instead. Once you’ve selected your file system, you’ll need to give your SSD a volume label.

    This can be anything from a random assortment of letters and numbers to a more descriptive label like “Photos” or “Work Files.” Just make sure the label is easy to remember and identify. Overall, formatting an SSD may seem like a small task, but choosing the right file system and volume label can make a big difference in how well your drive performs.

    Complete Formatting Process

    When it comes to formatting a solid-state drive (SSD), it is essential to follow the right steps to avoid data loss and optimize performance. The first step is to back up all important data stored on the SSD since formatting will wipe out all data. After backing up, you can proceed to format the SSD by choosing the right file system, such as NTFS, ExFAT, or FAT32, depending on the intended use of the drive.

    Additionally, you should select the correct allocation unit size to optimize write performance. Finally, you should check for any firmware updates for your SSD and install them to improve overall performance and stability. By following these steps, you can easily format your SSD and enjoy optimal performance while safeguarding your crucial data.

    Remember, always backup your data before proceeding with formatting to avoid permanent data loss.

    Test and Use the SSD

    If you’ve recently installed a new SSD, but are struggling with getting Windows to recognize it, don’t worry – you’re not alone. Here are some steps that you can take to test and use your new SSD. First, make sure that the SSD is properly connected to your computer and that all necessary drivers have been installed.

    You can do this by checking the Device Manager in Windows. If the SSD is detected, you should see it listed under the Disk Drives section. Next, you’ll want to test the performance of your SSD.

    One way to do this is by using benchmarking software, such as CrystalDiskMark or AS SSD Benchmark. These programs can measure the read and write speeds of your SSD, giving you a good idea of its performance and whether it’s operating at its full potential. Once you’ve confirmed that your SSD is working properly, you can begin using it as a storage device.

    You may want to consider transferring your operating system onto the SSD to improve your computer’s overall performance. With a little bit of troubleshooting and testing, you can have your new SSD up and running in no time.

    Reboot the Computer

    Once you have installed your SSD, it’s essential to test and use it to ensure that it’s working correctly. The first step in doing so is to reboot your computer, which will prompt your system to recognize the new hardware. Once your computer has restarted, you can check that the SSD is recognized by opening up your computer’s settings and navigating to the storage section.

    Here, you should see your new SSD listed. From there, you can begin to copy files onto your new SSD and use it to store your data. With its lightning-fast speed, you’ll notice a significant improvement in how quickly your computer starts up and runs applications.

    Say goodbye to slow load times, and hello to increased productivity!

    Access Drive Through Explorer

    If you’re looking for a versatile and highly efficient storage device, then the SSD is definitely worth checking out. The beauty of SSDs is that they’re incredibly fast and reliable, which is why many gamers and professionals alike prefer them over traditional hard drives. To test and use your SSD, one great way to do so is by accessing Drive Through Explorer.

    This software tool will give you easy access to your files and folders, so you can quickly copy, move, or delete them as needed. Plus, it comes with a range of features such as language support, customizable settings, and file preview options, to name just a few. By using Drive Through Explorer, you can make the most out of your SSD and enjoy a faster, more efficient way of managing your digital files.

    So why not give it a try and see how it can boost your productivity today?

    Transfer Files or Set as Boot Drive

    After installing your new SSD, the next step is to transfer your files or set it as the boot drive. If you are using it as a secondary drive, then you can transfer your files from your old hard drive to the new SSD. You can either transfer all your files or only select files, but make sure to keep the operating system and other essential files on your old hard drive.

    On the other hand, if you are using the SSD as the boot drive, you will need to install the operating system on the new SSD. Before doing anything, make sure to back up all your important files. There are various ways on how to transfer your files or set your SSD as the boot drive, such as using a migration tool, cloning your old hard drive, or manually installing the operating system.

    Make sure to follow the manufacturer’s instructions to avoid any problems. Once you have transferred your files or set your SSD as the boot drive, test and use it to make sure it is working correctly. You can notice a significant improvement in your system’s performance with the new SSD.

    Conclusion

    In conclusion, getting Windows to recognize your new SSD requires a simple process of initialization and formatting. This basically tells Windows that your new SSD is ready for action and will allow you to store and access data on it accordingly. So, don’t fret – just follow the steps and you’ll be on your way to SSD stardom in no time.

    And, as a bonus tip, maybe give your computer a little pep talk to encourage it to recognize your new addition – you never know, a little sweet talk might just do the trick.”

    FAQs

    What are the requirements for Windows to recognize a new SSD?
    To get Windows to recognize a new SSD, your computer needs to meet certain requirements such as having the latest BIOS version, and the appropriate storage controller driver installed.

    How do I check if my computer supports the new SSD?
    You can check if your computer supports the new SSD by going to your computer’s manufacturer website and checking for compatibility or by checking the computer specifications manual.

    Why is my new SSD not recognized by Windows?
    Your new SSD might not be recognized by Windows due to a faulty SSD, outdated BIOS, outdated storage controller driver or incorrect SSD installation.

    How can I update my storage controller driver?
    You can update your storage controller driver by accessing the device manager on your Windows computer, find the storage controller driver, and right-click to select update driver.

    How do I install a new SSD on my computer?
    Installing a new SSD on your computer involves physically installing the SSD, cloning your old hard drive, and setting the new SSD as the primary boot drive. You can also do a fresh Windows installation on the new SSD.

  • Maximizing Your BlackBerry STV100-1 Camera Performance: A Step-by-Step Guide on Setting Storage to SSD

    Do you own a Blackberry STV100-1 smartphone and struggle with setting up the camera storage? You’re not alone! Many users find it difficult to navigate the camera settings and manage the storage on their Blackberry device. However, once you understand how to properly set up your camera storage, it can make all the difference in capturing those special moments without running out of storage space. In this blog, we will guide you on how to set up your Blackberry STV100-1 camera storage, providing you with a hassle-free experience to capture all your memories.

    So, let’s get started!

    Setting Storage to SSD

    If you’re using a Blackberry STV100-1 and want to maximize space for pictures and videos, you may be wondering how to set storage to SSD. Thankfully, it’s a straightforward process. First, open the camera app and go to settings.

    From there, go to “Storage Location” and choose “External SD Card.” This will make sure that all your photos and videos are saved to your phone’s SD card. Next, delete any unnecessary apps or files on your phone to free up space.

    Finally, if you have an SSD (solid state drive) inserted into your phone, go to settings, then storage and access, and select “USB OTG.” This will allow you to access and use the SSD for storage. With these steps, you should be able to maximize your storage space and capture all your important moments without running out of room.

    Step 1: Connect the SSD to your device

    If you’re looking to speed up your device’s storage and performance, switching from a traditional hard drive to an SSD is a great option. The first step in making this upgrade is to physically connect the SSD to your device. This can typically be done by plugging the SSD into an available SATA port on your computer’s motherboard.

    You’ll want to make sure to also connect the power cable to the SSD so that it can function properly. Once the physical connection is made, you may need to adjust some settings in your device’s BIOS to ensure that it recognizes the new SSD as a valid storage option. With the SSD properly connected and recognized, you can then begin transferring your files and programs to the new drive for improved speed and performance.

    Overall, making the switch to an SSD can be a game-changer in terms of improving your device’s storage and overall performance.

    blackberry stv100-1 camera how to set storage to ssd

    Step 2: Go to the Camera app settings

    So you’ve installed an SSD and want to optimize your camera’s storage settings to take advantage of its improved speed? Great! The next step is to go to your camera’s app settings and select the storage option. Here, you should be able to choose where your photos and videos are saved. Depending on your device, you may see an option to select the SSD as the default storage location.

    By setting your camera app to save directly to your SSD, you’ll be able to take advantage of its faster read and write speeds, allowing for quicker save times and improved overall performance. Plus, since SSDs are less prone to failures than traditional hard drives, you can rest easy knowing your photos and videos are better protected. So go ahead and make that change – your camera (and your future self) will thank you!

    Step 3: Select ‘Storage’ or ‘Storage location’ option

    When it comes to selecting a storage option for your computer, one of the best choices you can make is selecting SSD (Solid State Drive) as your primary storage location. This ensures fast booting times, quick file transfers, and snappy program loads. To set your computer’s storage location to SSD, you need to navigate to the “Storage” or “Storage Location” option in your computer’s settings.

    From there, you can select your SSD as the primary storage option. Doing so will not only improve your computer’s performance, but it will also prolong the lifespan of your device. Switching to SSD is a simple yet effective step in maintaining a functional computer.

    So, if you’re looking to improve your device experience, consider upgrading to an SSD and setting it as your primary storage location.

    Step 4: Choose the SSD as the storage location for your pictures and videos

    When it comes to managing your digital media, one of the smartest things you can do is set your storage preferences to save files directly to your SSD. By doing this, you can ensure speedy access to your pictures and videos while you’re working with them and prevent lag or other performance issues caused by working with files saved to an external hard drive or a cloud storage service. The benefits of SSD storage go far beyond mere speed, too – these drives are also much more durable and reliable than traditional hard drives, making them an ideal solution for anyone who wants to store important data for the long term.

    Whether you’re a professional photographer, videographer, or simply someone who loves to take lots of pictures and videos, setting your storage preferences to SSD is a smart choice that will help you work faster and more efficiently.

    Advantages of using SSD as camera storage

    Are you looking for a way to optimize your Blackberry STV100-1 camera’s storage capacity? Consider upgrading to an SSD. Solid state drives offer several advantages over traditional hard drives when it comes to storing camera data. First and foremost, SSDs are faster, allowing for quicker save times and faster upload/download speeds.

    Additionally, as SSDs don’t have any moving parts, they’re less prone to damage from being jostled around or dropped. This means your footage will be safer and more secure, especially if you’re filming in challenging environments. Finally, SSDs have longer lifespans than traditional hard drives, so you won’t have to worry about replacing your camera’s storage as often.

    If you’re serious about capturing high-quality footage and want a reliable, long-lasting storage solution, consider upgrading to an SSD for your Blackberry STV100-1 camera.

    Speed and performance

    If you’re a photographer, speed and performance are two of the most important factors when it comes to your camera’s storage. That’s why it’s worth considering using an SSD as your go-to storage solution. While traditional hard drives can quickly become bogged down by the sheer amount of data they’re required to store and retrieve, SSDs are much faster and more reliable.

    Not only will you be able to store more photos and videos on your camera, but you’ll also be able to access them much more quickly and efficiently. Plus, SSDs are more durable and shock-resistant than traditional hard drives, which means you won’t have to worry about your data being lost if your camera takes a tumble. Ultimately, using an SSD as your camera’s storage solution can be a real game-changer in terms of speed, performance, and reliability.

    So if you’re looking to take your photography to the next level, it’s definitely worth considering making the switch.

    Durability and reliability

    One of the advantages of using SSD as camera storage is its durability and reliability. Unlike traditional hard drives, SSDs have no moving parts, making them less prone to physical damage and wear and tear. This also means that they are less likely to experience data loss or corruption due to shock or vibration.

    Moreover, SSDs have a longer lifespan than HDDs and can withstand a higher number of read/write cycles. As a result, SSDs provide peace of mind to photographers and videographers who need a dependable and robust storage solution for their work. With an SSD, you can shoot and backup your files with confidence, knowing that they are stored safely and securely.

    Storage capacity

    As cameras evolve, so does the need for more storage capacity. One of the best options available is to use a solid-state drive (SSD) as camera storage. There are a few key advantages to using an SSD, starting with its durability.

    Unlike traditional hard drives, SSDs don’t have any moving parts, which means they are less likely to fail due to mechanical issues. Additionally, SSDs offer faster read and write speeds, which can be particularly helpful when dealing with larger files. This means that storage and transfer times are significantly reduced, allowing photographers to work more efficiently.

    Another major benefit of SSDs is their compact size. They can store the same amount of data as traditional hard drives with a much smaller footprint, making them an excellent choice for those who need to travel frequently with their equipment. Overall, SSDs are faster, more reliable and more compact than traditional hard drives, making them an excellent choice for photographers and videographers who need greater storage capacity.

    Conclusion

    In summary, setting your Blackberry STV100-1 camera’s storage to SSD can elevate your photo-taking game to new heights. With faster read and write speeds, you’ll never miss a shot again. Plus, upgrading your camera’s storage to SSD is a savvy move for any technologically advanced individual who values speed and efficiency.

    So go ahead, snap away with confidence knowing your photos will be safely stored on a reliable SSD.”

    SSD storage can enhance your camera’s performance and durability

    SSD storage If you’re a professional photographer or videographer, you know how important it is to have a reliable and fast storage solution for your camera. SSD storage is an ideal option that can enhance your camera’s performance and durability. One of the key advantages of using SSD as camera storage is its speed.

    It offers faster read and write speeds, allowing you to transfer photos or videos quickly and smoothly. Additionally, SSDs have no moving parts, reducing the risk of damage from shock and vibration. They’re also more durable than traditional hard drives, making them ideal for use in demanding environments.

    With an SSD, you can be sure your data is safe and protected. Finally, SSDs consume less power than traditional hard drives, which translates to longer battery life for your camera. Overall, SSD storage is an efficient and reliable choice for photographers and videographers who are looking to improve their workflow and protect their data.

    FAQs

    How do I set the storage to SSD on my Blackberry STV100-1 camera?
    Unfortunately, the Blackberry STV100-1 camera does not have the capability to use SSD storage. It is limited to using a microSD card for storage.

    What is the maximum storage capacity of the Blackberry STV100-1 camera?
    The Blackberry STV100-1 camera can support a microSD card with a maximum capacity of 256GB.

    Can the Blackberry STV100-1 camera record videos in 4K resolution?
    No, the Blackberry STV100-1 camera can only record videos in up to 1080p resolution.

    Does the Blackberry STV100-1 camera have a front-facing camera for selfies?
    Yes, the Blackberry STV100-1 camera has a 2MP front-facing camera for taking selfies and making video calls.

  • From Slow to Superfast: The Ultimate Guide to SSD to USB Adapter

    Are you running out of storage on your laptop? Are you tired of slow loading times and sluggish performance? Upgrading your storage is a surefire way to improve overall system performance and have enough space for all your files, photos, and videos. But the thought of replacing your laptop’s hard drive with a solid-state drive (SSD) can be daunting, especially if you’re not tech-savvy. Fortunately, an SSD to USB adapter makes upgrading your storage a breeze.

    Simply plug the adapter into your laptop’s USB port, and you’ll have a faster, more spacious system without the hassle of disassembling and installing a new hard drive. Let’s explore the benefits of upgrading your storage with an SSD to USB adapter and how it can improve your overall user experience.

    What is an SSD to USB adapter?

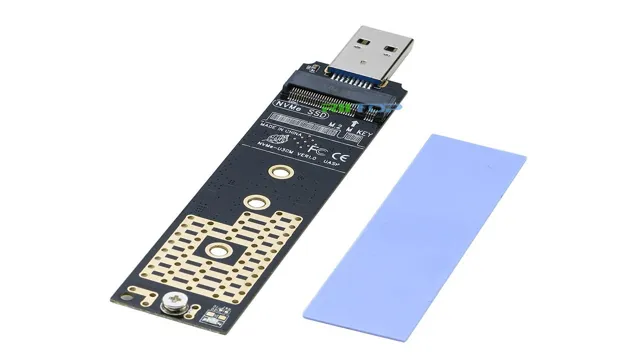
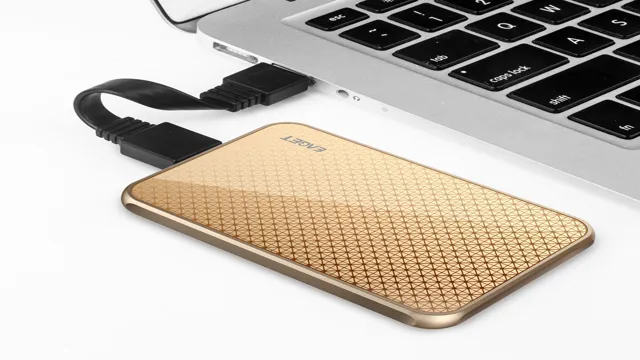
    An SSD to USB adapter is a device that allows you to connect a solid-state drive (SSD) to your computer using a USB port. It is a handy tool for individuals who need to access data on an SSD but don’t have a computer or laptop that is compatible with the drive’s connector type. The adapter usually comes with a USB cable that is plugged into the adapter’s USB port and the computer’s USB port.

    The SSD’s connector type is then plugged into the adapter’s port, which is compatible with the drive’s connector type. Once the drive is connected, the computer can read and write data to it as if it were an external hard drive. This adapter is useful for those who need to access data from an old computer or a device with SSD storage but don’t want to go through the hassle of transferring data.

    The SSD to USB adapter is an affordable and practical solution for connecting an SSD to your computer.

    Easily Connect Your SSD to Your Computer

    An SSD to USB adapter is a useful device that enables you to connect your solid-state drive (SSD) to your computer using a USB port. It’s a handy tool that allows you to access the files on your SSD without having to install it inside your computer. This adapter comes in different types and sizes, depending on the type of SSD you have, and the USB port you want to connect it to.

    Some adapters also come with additional features, such as a power switch, LED indicator, and cable management. Using an SSD to USB adapter is easy, simply plug it into a USB port, attach your SSD to it, and start transferring files. This handy device is ideal for people who need access to their SSD’s contents while on the go or for those whose computer doesn’t support SSD installation.

    With an SSD to USB adapter, you can save time, effort, and money while enjoying the convenience of accessing your important files and data whenever you need them.

    ssd to usb adapter

    Benefits of Using an SSD to USB Adapter

    If you’re looking to upgrade your computer’s storage but don’t want to replace your old hard drive, an SSD to USB adapter may be just what you need. Using an SSD to USB adapter allows you to quickly and easily convert your solid-state drive to a USB drive, which means you can use it as an external storage device. Not only does this give you more storage space, but it also increases the speed and performance of your system.

    With an SSD to USB adapter, you can transfer files faster and run programs more efficiently, making it a great investment for anyone looking to give their computer a boost. Plus, because it’s portable, you can take it with you wherever you go and access your files on any computer with a USB port. Overall, an SSD to USB adapter is a versatile and practical tool that can make a big difference in the way you use your computer.

    Faster Transfer Speeds

    SSD to USB adapter If you’re tired of slow data transfer speeds, using an SSD to USB adapter might just be the solution you need. This simple but effective device can significantly improve the speed at which data is transferred between your computer and external storage devices, like flash drives, external hard drives, and even SD cards. The benefits of using an SSD to USB adapter are plenty.

    For one, it can dramatically reduce the time it takes to copy large files, ensuring that you get your work done faster. Moreover, the adapter can help you achieve faster boot times, allowing you to get your system up and running in no time. And because SSDs have no moving parts, they are less prone to damage, which translates to added durability.

    Overall, using an SSD to USB adapter might just be the upgrade your system needs to take your data transfer speeds to the next level.

    Increased Storage Capacity

    If you’re looking to increase your storage capacity on-the-go, using an SSD to USB adapter is a great option that offers a variety of benefits. These adapters allow you to connect an SSD drive to your computer or other device via USB, giving you a portable and versatile storage solution. One major benefit of using an SSD to USB adapter is its increased storage capacity.

    Compared to traditional hard drives, SSDs can offer much greater storage capacity in a smaller form factor. This means you can carry more data with you wherever you go, without having to worry about bulky external hard drives or clunky backup solutions. Additionally, SSDs offer faster read and write speeds, making it easy for you to access your data quickly and efficiently.

    Whether you’re a professional photographer, content creator, or simply need extra storage space for your personal files, an SSD to USB adapter is an excellent choice that can provide you with increased storage capacity and improved performance.

    Compatible SSDs and USB Ports

    If you’re looking to increase the storage capacity of your laptop or desktop computer, using an SSD to USB adapter is a great option. However, it’s important to make sure that the SSD you choose is compatible with the USB port on your computer. Not all USB ports are created equal, and some may not be able to handle the faster speeds of some SSDs.

    When choosing an SSD, make sure to check the manufacturer’s specifications to see what speeds are supported, and compare that to the capabilities of your USB port. Additionally, it’s important to consider the type of adapter you’re using. Some adapters may not work with certain types of SSDs, so it’s important to do your research before making a purchase.

    With the right combination of SSD and adapter, you can significantly boost your computer’s storage capacity and performance.

    Ensure Compatibility Before Purchase

    When considering purchasing a new SSD or USB port, it’s important to make sure that they are compatible with each other to ensure optimal performance. Not all SSDs and USB ports are created equal, and some may not work well together. For example, if you have an older USB

    0 port, it may not be able to take full advantage of the speed offered by a newer SSD that is designed to work with USB 0. Before making a purchase, it’s important to check the specifications of both the SSD and USB port to make sure they are compatible.

    This will not only help ensure that you get the most out of your new device, but it will also save you the frustration of having to deal with compatibility issues later on. So, take the time to do your research and make sure your new SSD and USB port are a match made in heaven.

    Top SSD to USB Adapters

    If you’re looking to convert an internal SSD into an external drive, an SSD to USB adapter is an excellent choice. These adapters connect to your SSD and allow you to connect it to a USB port on your computer. They’re especially useful if you have an older laptop or desktop that lacks an M.

    2 or NVMe slot. When it comes to choosing the best SSD to USB adapter, there are a few factors to consider. The first factor is the type of SSD you’re using.

    Some adapters are compatible with M.2 drives, while others are designed for SATA or PCIe SSDs. Another factor to consider is the transfer speed.

    USB 0 and USB 1 Gen 2 are the fastest options available, but you’ll need a compatible port on your computer to take advantage of their speed.

    Finally, make sure the adapter you choose is compatible with your operating system. With so many great options on the market, finding the right SSD to USB adapter is easier than ever.

    Product Reviews and Recommendations

    If you’re someone who needs to transfer data between your laptop and your SSD, then you’re in luck because there are some fantastic SSD to USB adapters on the market. My personal favorite is the StarTech USB 0 to

    5″ SATA III Hard Drive Adapter Cable, which is both affordable and reliable. This adapter boasts compatibility with most SSDs and has a transfer rate of up to 5Gbps, which is lightning-fast. Another great option is the Cable Matters USB

    1 to SATA Adapter, which has a sleek design and is easy to use. It’s also compatible with multiple operating systems and has a transfer rate of up to 10Gbps. Finally, the Sabrent USB

    0 to SSD / 5-Inch SATA Hard Drive Adapter is a great option for those who need to transfer large amounts of data quickly. With a transfer rate of up to 5Gbps, this adapter is perfect for anyone who needs to move large files from one device to another.

    Overall, any of these adapters will serve you well and make transferring data a breeze.

    Conclusion: Upgrade Your Storage Today!

    In conclusion, you could say that an SSD to USB adapter is like giving your grandma a smartphone: it brings new life to something that was outdated and slow. With the adapter, you can transfer data quickly and easily, making your external SSD a portable powerhouse. Say goodbye to slow transfer speeds and hello to lightning-fast data exchange.

    If only we could give our grandmas an adapter too!”

    FAQs

    What is an SSD to USB adapter?
    An SSD to USB adapter is a device that allows you to connect a solid-state drive (SSD) to your computer or laptop via a USB port. This enables you to access the data stored on your SSD as if it were a regular USB drive.

    How do I use an SSD to USB adapter?
    Using an SSD to USB adapter is simple – just connect the adapter to your computer or laptop via a USB port, and then connect your SSD to the adapter. Your computer should recognize the SSD as a USB drive, and you can access the data on it just like you would with any other USB drive.

    What are the benefits of using an SSD to USB adapter?
    There are several benefits to using an SSD to USB adapter, including faster data transfer speeds, increased storage capacity, and the ability to access data stored on an SSD even if your computer does not have an internal SSD.

    Can I use an SSD to USB adapter with any type of SSD?
    In most cases, SSD to USB adapters are compatible with a wide range of SSDs, including SATA and NVMe drives. However, it’s always a good idea to check the specifications of your specific adapter to ensure compatibility with your particular SSD.

  • Effortlessly Speed Up Your System with the Ultimate Guide on How to Set Up a New SSD on Windows 11

    You’ve just purchased a new SSD for your Windows 11 PC, and now you’re ready to get it set up. Congratulations, you’re on your way to a significant performance boost! But, before you get ahead of yourself, setting up an SSD on Windows 11 requires some steps to ensure that you get the most out of your new storage device. In this blog, we’ll go over the key steps for setting up your SSD on Windows 1

    We’ll cover how to connect your SSD to your PC, the proper way to format it, and how to transfer your files over to it. We will also provide some tips on optimizing your newly installed SSD for improved performance and longevity. By the end of this blog, you’ll have all the information you need to set up your SSD correctly and start experiencing faster startup and load times in Windows 1

    Are you ready to take full advantage of your new SSD and unleash the full potential of your PC? Let’s dive in and get your SSD set up on Windows 11!

    Gather Necessary Materials

    Before you begin setting up your new SSD with Windows 11, you’ll need to gather a few necessary materials. First and foremost, you’ll need the SSD itself. Make sure it’s the correct size and form factor for your computer, and that it has enough storage space for your needs.

    You’ll also need a screwdriver or other tools to open up your computer and install the SSD. It’s important to ensure that you have a reliable internet connection, as you’ll need to download and install Windows 11 onto the new SSD. Lastly, make sure you have all of your important files and data backed up, as installing a new operating system can sometimes cause data loss.

    With these materials in hand, you’ll be ready to begin the process of setting up your new SSD with Windows 1

    SSD Drive

    In order to upgrade your computer’s storage performance with an SSD drive, there are a few necessary materials you’ll need to gather. Firstly, you’ll need the SSD drive itself, which typically comes in a 5 inch form factor.

    Make sure to choose a drive with a large enough capacity to store all your files and applications, as well as any future files you may accumulate. Secondly, you’ll need a screwdriver to open your computer’s case and physically install the SSD drive. Depending on your computer, you may need different sizes or types of screwdrivers, so be sure to do some research beforehand.

    Finally, you may need a SATA cable or adapter to connect the SSD drive to your motherboard. Again, the specific cable or adapter will depend on your computer’s setup, so it’s best to do some research or consult with a professional if you’re unsure. By gathering these necessary materials, you’ll be well on your way to upgrading your computer’s storage performance with an SSD drive.

    how to set up new ssd windows 11

    SATA or USB Cable

    When it comes to connecting your hard drive to your computer, you can either use a SATA or USB cable. If you’re going to use a SATA cable, you’ll need to make sure that your motherboard has a SATA port available. On the other hand, if you’re going to use a USB cable, make sure that your hard drive has a USB port.

    You’ll also need to gather a few other materials before you start connecting your hard drive, including a screwdriver, anti-static wrist strap, and power supply. If you’re going to use a SATA cable, you’ll also need to ensure that you have a power cable and data cable that are compatible with your hard drive. While SATA cables are faster and more reliable, USB cables are more universal and user-friendly, making them a better option for users who aren’t familiar with computer hardware.

    Whether you choose a SATA or USB cable, make sure that you follow the instructions carefully and handle your hard drive with care to ensure that you don’t damage any of the components. By doing so, you’ll be able to connect your hard drive to your computer with ease and start enjoying all of the benefits that come with having extra storage space!

    Insert SSD Drive

    If you have upgraded to Windows 11 and want to improve your computer’s performance, adding a new SSD drive is a great option. Setting up a new SSD on your Windows 11 computer is not difficult. First, check if your computer has an M.

    2 slot where you can install the SSD. Shut down your computer and unplug it from the power source, then open the side panel, locate the M.2 slot and insert the SSD.

    Once your SSD is securely installed, plug your computer back in and turn it on. Boot into your BIOS settings to ensure that the system detects your new SSD. Finally, install your operating system onto your new drive and transfer your files from your previous drive to your new SSD.

    Make sure to regularly maintain your new drive with disk cleanup and optimization tools to keep it functioning optimally. With a new SSD, your computer will perform much faster with improved data transfer speeds and smoother multitasking, allowing you to get your work done more efficiently.

    Open the Computer Case

    If you want to upgrade your computer’s storage capacity or simply replace an old hard drive, then inserting an SSD drive into your computer is a great option. Before you start, you need to open the computer case and locate the hard drive bay where your current hard drive sits. Usually, the hard drive bay is located at the bottom of the case or in the front section.

    Once you have found it, unscrew the screws that secure the bay to the case and carefully remove the hard drive from the bay. Next, take your new SSD drive and insert it carefully into the hard drive bay. Make sure to align the SATA connectors on your SSD with the SATA port on your PC before screwing it back into place.

    After this, close your computer case and turn on your machine. Your computer should recognize your new SSD drive right away, but you may need to set it up using your operating system and bios. In summary, adding an SSD drive to your computer can be a simple and affordable way to boost performance and increase storage capacity.

    By following the steps above, you can open your computer case, remove your old hard drive, and insert a new SSD drive properly. Be sure to handle your computer parts with care and follow these steps to ensure a successful installation process without causing damage to your machine. By the end of the process, your computer will be running faster and smoother than ever before.

    Locate the SSD Slot

    If you’re looking to upgrade the storage on your computer, one option is to install an SSD drive. These drives offer faster read and write speeds, and can greatly improve the performance of your system. The first step in this process is to locate the SSD slot on your computer.

    This can be tricky, as it varies from model to model. If you’re unsure where to find it, check the manual or do a quick online search for your specific computer model. Once you’ve located the slot, it’s time to insert the SSD drive.

    It’s important to take care when handling the drive, as they are sensitive to static electricity. Make sure to ground yourself properly before handling the drive, and avoid touching the connectors. Insert the drive into the slot and secure it in place with the screws provided.

    Once you’ve done this, you’re ready to start using your new SSD drive!

    Connect the SATA or USB Cable

    When it comes to connecting your new SSD drive to your computer, there are a few things you need to keep in mind. The first step is to insert the drive into the designated slot on your motherboard. Once that’s done, it’s time to connect the SATA or USB cable to the drive itself so that it can communicate with your computer.

    The type of cable you need will depend on the type of SSD drive you have, so be sure to double-check before you make any purchases. If you’re using a SATA cable, you’ll need to connect one end to the drive and the other end to an available SATA port on your motherboard. Be gentle when doing this, as you don’t want to force anything and risk damaging your components.

    If you’re using a USB cable, simply plug one end into the drive and the other end into an available USB port on your computer. Before you power up your computer, take one last look to make sure everything is connected properly. Once you’re sure, turn on your system and wait for it to recognize your new SSD drive.

    This process may take a few minutes, but once it’s complete, your new drive should be ready to use. Overall, connecting an SSD drive to your computer can be a simple process as long as you take your time and follow the steps carefully. Just remember to choose the right cable, connect it properly, and double-check everything before you turn on your system.

    With a little bit of patience and care, you’ll be up and running with your new SSD drive in no time.

    Accessing BIOS

    If you want to set up a new SSD with Windows 11, you’ll want to make sure that your BIOS is set up correctly first. Accessing your BIOS is relatively simple, but the process may vary slightly depending on the manufacturer of your computer. Typically, you’ll need to restart your computer and press a specific key (such as F2 or Del) in order to enter the BIOS.

    Once you’re in the BIOS, you’ll want to navigate to the boot menu and ensure that your new SSD is set up as the primary boot device. Keep in mind that you may need to enable certain features (such as AHCI or NVMe) in order to correctly set up your SSD. Once you’ve made the necessary changes, save your settings and restart your computer to begin the process of setting up your new SSD with Windows 1

    By following these steps, you can ensure that your new SSD is optimized for performance and ready to go for all of your computing needs.

    Restart the Computer

    Accessing BIOS Restarting the computer is a common fix for many computer related issues. However, sometimes simply restarting isn’t enough and you need to access BIOS. BIOS (Basic Input/Output System) is a pre-installed software that controls various hardware settings in your computer.

    To access BIOS, you need to restart your computer and continuously press a certain key (usually F2 or Del) before your computer loads the operating system. Once you’re in BIOS, you can make changes to your computer’s hardware settings. This can come in handy if you’re trying to overclock your CPU, change boot order, or troubleshoot issues with peripherals.

    Keep in mind that accessing BIOS requires careful attention and any changes made can be risky, so make sure you research beforehand and proceed with caution.

    Press the BIOS Key

    Accessing BIOS can be a bit tricky, but it is essential if you want to make changes to your computer’s settings. The first step is to press the BIOS key during startup. This key is usually displayed on the screen, but if it isn’t, you can check your computer’s manual or do a quick online search to find out which key to press.

    Once you press the BIOS key, you’ll be taken to the BIOS menu, where you can adjust various settings, such as the boot sequence, CPU settings, and memory settings. It’s important to be cautious when making changes in the BIOS as it can affect your computer’s performance if done incorrectly. That’s why it’s always a good idea to do some research before making any changes or consult with a professional who can guide you through the process.

    By accessing BIOS and making changes to your computer’s settings, you can improve its performance and get the most out of your hardware.

    Locate the Boot Priority Setting

    Accessing BIOS can be a daunting task for some people, especially those who are not tech-savvy. However, locating the boot priority setting within BIOS is a necessary step to ensure that your computer boots up correctly. To access BIOS, you need to restart your computer and press the designated key (usually F2, F10, or Delete) to enter BIOS.

    Once you are within BIOS, locating the boot priority setting may differ depending on your motherboard manufacturer. Some motherboards have it under the “Boot” tab, while others may have it within the “Advanced” tab. The boot priority setting allows you to select which device the computer will boot from first.

    For example, if you have a bootable USB or CD inserted, you can set it to the first priority, so the computer boots from that device rather than the hard drive. This setting can be useful when you need to reinstall the operating system or run a diagnostic tool from an external device. It’s essential to remember to save your changes before exiting BIOS to ensure that the boot priority has been applied.

    Change Boot Priority to SSD Drive

    Changing the boot priority to an SSD drive is crucial for enhancing your computer’s performance, but it requires that you access your BIOS. BIOS stands for Basic Input/Output System, and it controls all the basic functions of your computer. It is essential to understand that accessing BIOS is a delicate process that requires careful attention and precision.

    You may need to press the correct key during the boot-up sequence to enter BIOS; the key varies depending on your computer’s manufacturer and model. Once you enter BIOS, locate the boot-order-status or boot-priority section and set your SSD as the primary boot sequence or the top boot priority. By doing this, your computer will search for the Operating System from your SSD drive first before checking any other storage devices.

    You will notice significant speed improvements, faster boot-up times, and faster application launches once you restart your system. So go ahead, access your BIOS, and make the changes necessary to boost your computer’s performance. Happy computing!

    Reinstalling Windows 11

    If you’ve recently purchased a brand-new SSD and you’re looking to set up a fresh install of Windows 11, don’t worry, we’ve got you covered. First, you’ll need to create a bootable Windows 11 installation USB drive using the official Windows Installation Media Creation Tool from Microsoft. Once you have your USB ready, make sure your new SSD is properly connected to your computer.

    Next, plug in your USB and boot the computer up. From there, you’ll need to go into the BIOS settings and set your USB as the primary boot device. Once the installation process begins, follow the onscreen instructions to format and partition your new SSD and install Windows 1

    Remember to back up any important files from your old drive before proceeding with the installation process. With a few easy steps, you’ll have a fresh, speedy installation of Windows 11 on your new SSD and be ready to go.

    Create a Windows 11 Installation Media

    Reinstalling Windows 11 can be a daunting task, but creating an installation media can make the process much smoother. To do this, you’ll need to have a blank USB drive or DVD, a stable internet connection, and access to the official Windows 11 media creation tool. Once you’ve downloaded and opened the tool, you can simply follow the on-screen instructions to select your language, edition, and architecture preferences.

    From there, you can choose to create installation media for another PC, which will allow you to either create a bootable USB or burn the Windows 11 ISO file to a DVD. This process may take some time, so be patient. Once the media is created, simply insert it into your computer and restart, then follow the prompts to complete the installation of Windows 1

    Remember to back up any important files before proceeding with the reinstallation. With a little bit of time and preparation, you can have a fresh, new Windows 11 installation that runs smoothly and efficiently.

    Boot from the Installation Media

    If you need to reinstall Windows 11, you’ll need to start by booting from installation media. This isn’t as complicated as it may sound! The first step is to make sure you have the right tools at hand. You’ll need a blank DVD or USB drive, and the media creation tool from the official Microsoft website.

    Once you have these, run the media creation tool and choose “Create installation media.” This will guide you through the process of setting up your USB or DVD as a bootable drive that can reinstall Windows 1 Next, reboot your computer and make sure to enter the BIOS or UEFI setup to change the boot order.

    Set the boot order so that the media you just created is at the top of the list. Finally, save your changes and exit the BIOS. Your computer will now boot from the installation media and you can begin the process of reinstalling Windows 1

    Don’t worry if you’ve never done this before – the process is straightforward and the Microsoft website provides plenty of guidance. Good luck!

    Follow the On-Screen Prompts

    If you’re planning to reinstall Windows 11, you’ll need to follow the on-screen prompts carefully. Reinstallation can be a daunting process, but Windows 11 makes things much more straightforward. When you first start the process, the installation wizard will guide you through the key stages from start to finish.

    As long as you’ve backed up your data, you’ll be able to erase your hard drive and begin the installation from scratch. Once you’re ready to start, you’ll need to follow the prompts and select your language, time zone, and keyboard settings. After that, Windows 11 will begin the installation process.

    Depending on your computer’s speed and specs, this process can take anywhere from thirty minutes to several hours. But don’t worry! The on-screen prompts will keep you informed throughout the process and tell you what to do next. Just make sure you have plenty of time to complete the process, and you’ll be back up and running with Windows 11 in no time!

    Select the SSD Drive as the Installation Location

    When reinstalling Windows 11, it’s important to select the SSD drive as the installation location. This is because SSDs offer faster boot and load times compared to traditional hard disk drives (HDDs). Additionally, SSDs are more reliable and have a longer lifespan, making them a smart choice for any computer user.

    To choose the SSD as the installation location, simply select it from the list of available drives during the setup process. If you’re unsure which drive is the SSD, check the specifications of your computer or consult with a professional. Making this simple change can greatly improve the overall performance and longevity of your system.

    So, take the time to select the SSD as your installation location and enjoy a faster, more reliable computer experience.

    Conclusion

    In summary, setting up a new SSD for Windows 11 is a breeze if you follow these simple steps. It’s as easy as pie, as long as you don’t drop the pie on your motherboard. With a little bit of patience and know-how, you’ll be running smoother and faster in no time.

    So go ahead and upgrade your hardware, and enjoy zipping through your tasks without any lag or frustration. Your SSD will thank you, and so will your productivity!”

    FAQs

    What are the minimum system requirements for installing Windows 11 on a new SSD?
    The minimum system requirements for Windows 11 on an SSD include a 64-bit processor with a clock speed of at least 1 GHz, 4 GB of RAM, and 64 GB of storage.

    How do I physically install the new SSD in my computer?
    Consult your computer’s manual or manufacturer for specific instructions, but generally, you will need to access the internal disk drive bays, secure the SSD in one of them using screws or clips, and then connect the appropriate cable(s).

    Can I transfer my existing data and programs to the new SSD?
    Yes, you can clone the content from your old hard drive to the new SSD using a cloning tool or software. Make sure you back up your data beforehand and follow instructions closely to avoid data loss or corruption.

    How do I format and partition the new SSD once it’s installed?
    You can do this via Windows Disk Management utility. Right-click on the SSD drive and select “New Simple Volume,” then follow the wizard to assign a drive letter, choose a file system, and specify the volume size. You can also create partitions with specific sizes and labels as needed.

  • Unleash The Power Of Acer Iconia Tab W500: Step-by-Step Guide To Remove SSD with Ease

    Have you been wondering how to remove the SSD from your Acer Iconia Tab W500? Well, look no further! This blog post will guide you through the process step by step. Removing the SSD can be intimidating at first, but with the right tools and a bit of patience, you’ll have it out in no time. It’s like performing surgery on your tablet! But don’t worry, we’re here to help and make the process as simple as possible.

    So, grab your tools and let’s get started!

    Preparation

    If you’re looking to upgrade or replace the SSD on your Acer Iconia Tab W500, there are a few things you’ll need to do to prepare. First, make sure you have the necessary tools for the job, including a small Phillips screwdriver and a plastic spudger to help pry open the case. It’s also a good idea to back up any important data on the device before you begin, just in case something goes wrong during the process.

    Once you have the tools and have backed up your data, you can begin the task of removing the SSD. Be sure to follow the manufacturer’s instructions carefully to avoid damaging the device. With a bit of patience and careful attention to detail, you should be able to successfully remove the SSD and replace or upgrade it as needed.

    Backing up data from SSD

    Backing up data from an SSD can be a crucial step to safeguard your important files against unexpected data loss. To prepare for this process, start by assessing your storage needs and choosing an appropriate backup method. You can select between an external hard drive, a cloud-based storage service, or a network-attached storage (NAS) device.

    Once you have decided on the backup destination, ensure that your backup software is compatible with your SSD and make sure to check if it supports features like incremental or differential backups. You should also confirm that you have enough storage space in your backup destination to accommodate all your files and documents. Don’t forget to disconnect any external devices and close any active software programs before starting the backup process to prevent any interference with your backup.

    With these steps taken care of, you can now confidently begin backing up your precious data from your SSD, safe in the knowledge that you have taken necessary precautions to protect it.

    acer iconia tab w500 how to remove ssd

    Powering down and unplugging the tablet

    When it comes to powering down and unplugging your tablet, preparation is key. Before you turn off your tablet or unplug it from the charger, make sure you save any important files or documents you may be working on. This will prevent them from being lost or corrupted in case of a power outage or an unexpected shutdown.

    Moreover, it’s always a good idea to close any apps or programs that are running to prevent them from draining the battery unnecessarily. Additionally, make sure that your tablet is adequately charged before you unplug it from the charger. Some tablets may need to be charged for a certain amount of time before use, while others may have a minimum battery level for optimal performance.

    By taking these simple steps, you can ensure that your tablet works efficiently and that you don’t lose any important information.

    Opening the Tablet

    If you need to remove the SSD from an Acer Iconia Tab W500, it’s not as difficult as you might think. First, you’ll need to remove the back cover of the tablet, which is held in place by several screws. Once you’ve removed the screws, gently pry off the back cover with a plastic tool or your fingers.

    You’ll then need to locate the SSD, which is usually located near the middle of the motherboard. The SSD is typically attached to the motherboard with a screw, which you’ll need to remove to release the SSD. Once you’ve removed the screw, the SSD should come out easily.

    Be sure to handle the SSD carefully, as they are delicate components. With a little patience and some careful handling, removing the SSD from your Acer Iconia Tab W500 shouldn’t be too difficult.

    Removing the back cover

    Opening the tablet can seem daunting, but with a few simple steps, you can gain access to the inner workings of your device. One of the first steps in opening most tablets is removing the back cover. The cover is often held in place by small clips or screws, depending on the brand and model of your tablet.

    You can start by locating these fasteners around the edges of the cover. Using a small tool, such as a plastic prying tool or flathead screwdriver, gently insert the tool into the seam between the cover and the tablet body. Carefully move the tool around the edge of the cover to depress the clips or unscrew the screws.

    Once all fasteners have been released, lift the cover straight up and off the tablet body. With the cover removed, you can access the battery, RAM, and other components within the tablet. Don’t be afraid to take a look inside, just be sure to avoid damaging any of the delicate parts.

    Locating the SSD

    Opening a tablet to locate the SSD can be tricky if you aren’t familiar with how the device is built. The first step is to power off the tablet and unplug it from any external power source. Next, locate the screws around the edges of the device and use a screwdriver to carefully remove them.

    Be sure to keep them in a safe place so you don’t lose them. Once the screws are removed, use a plastic pry tool to gently pry open the tablet’s cover. It’s important to be careful during this step as you don’t want to damage any internal components.

    Once the cover is off, you should be able to locate the SSD. It’s a small, rectangular chip that’s usually located near the center of the device. Removing the SSD requires a bit more care, so it’s best to consult the device’s manual or get help from a professional if you’re unsure how to proceed.

    By following these steps, you should be able to locate the SSD and make any necessary upgrades or repairs.

    Removing the SSD

    Removing the SSD from your Acer Iconia Tab W500 is a relatively simple process. First, make sure the tablet is turned off and unplugged from any power source. Then, locate the small panel on the back of the tablet, which is held in place by two screws.

    Remove these screws using a Phillips head screwdriver and then gently lift the panel off to reveal the SSD. You may need to use a plastic tool or your fingernail to carefully slide the SSD out of its socket. Be sure to handle the SSD with care and avoid touching any of its sensitive components.

    Once removed, you can replace it with a new SSD or use it for data recovery purposes. With just a few simple steps, you can easily remove the SSD from your Acer Iconia Tab W500.

    Removing the screw that holds the SSD

    If you’re looking to upgrade or replace the SSD in your laptop or desktop computer, one of the first steps is removing the screw that holds the SSD in place. This screw is typically located near the center of the SSD and may be covered by a rubber or plastic cover. To remove it, you’ll need the appropriate screwdriver size, which is usually a small Phillips head.

    Once you have the screwdriver, gently press down on the SSD to ensure it’s securely in place before attempting to remove the screw. Apply mild pressure to the screwdriver and turn it counterclockwise until the screw is loose enough to remove with your fingers. Make sure to keep track of the screw, as you’ll need it later when installing your new SSD.

    If the screw is difficult to remove, try using a different size screwdriver to avoid stripping the screw head. Be careful not to apply too much pressure, as this can damage the SSD or surrounding components. Overall, removing the screw that holds the SSD in place is a relatively simple process, but it’s essential to take your time and proceed with caution to avoid any potential damage to your device.

    Sliding the SSD out of the socket

    When it comes to upgrading or replacing a solid-state drive (SSD), one critical step is removing the existing drive from its socket. This may seem daunting, but it’s a relatively straightforward process. Firstly, ensure that your computer is unplugged and turned off before proceeding.

    Locate the SSD socket and unscrew any securing screws, if applicable. Gently slide the SSD out of the socket, being careful not to apply too much force or create any tension on the cables or connectors. If you encounter any resistance, double-check that you’ve removed all screws or clips holding the SSD in place.

    With a little patience and attention to detail, you can easily remove the SSD and move on to the next steps of your upgrade or replacement process. Remember, always take precautions and consult a professional if you’re unsure about anything, to avoid potential damage or voiding warranties.

    Replacing or Upgrading SSD

    If you’re having issues with your Acer Iconia Tab W500 or want to upgrade your SSD, the first step is to remove the existing one. To do this, locate the small panel on the back of the device and unscrew it using a small screwdriver. Remove the panel and carefully detach the SSD from the connectors.

    You can then replace it with a new SSD or upgrade to a larger capacity. Upgrading your SSD can improve the performance of your device by increasing its storage capacity and speed. It’s important to make sure the new SSD is compatible with your device and to back up any important data before making any changes.

    With a little know-how and some careful handling, upgrading or replacing your SSD can be a simple process that can extend the life and functionality of your Acer Iconia Tab W500.

    Selecting a replacement SSD

    Replacing or upgrading an SSD can make a huge difference in the performance of your computer, but selecting a replacement can be overwhelming. There are many factors to consider when choosing a new SSD, including storage space, speed, and compatibility. When it comes to storage space, it’s important to choose a size that will accommodate your needs.

    If you have a lot of large files or frequently use programs that require a lot of space, you may want to consider a larger SSD. Additionally, you’ll want to look for an SSD with fast read and write speeds to ensure quick boot times and speedy file transfers. Finally, be sure to check compatibility with your computer before making a purchase, as not all SSDs will work with every system.

    Overall, taking the time to research and choose the right SSD will ensure a better computing experience.

    Inserting the new SSD

    When it comes to upgrading or replacing an SSD, there are a few things to keep in mind. First, make sure you have the right tools for the job. You may need a screwdriver or other tools to remove the old SSD and install the new one.

    Once you have the tools, be sure to power down your device and unplug it before you begin. Next, locate the SSD compartment on your device. Some laptops have a separate compartment for the SSD, while in others it may be located underneath the keyboard or on the motherboard.

    Consult your device’s manual or manufacturer’s website for guidance on locating the SSD compartment. Once you have located the SSD compartment, remove the old SSD carefully. Be sure to handle it by the edges to avoid damaging any of the components.

    In some cases, you may need to remove screws or disconnect cables to remove the old SSD. Before installing the new SSD, take a moment to clean the compartment and remove any dust or debris that may have accumulated over time. Once the compartment is clean, carefully insert the new SSD, being sure to align it properly with the connectors.

    Depending on the type of device you have, you may need to secure the new SSD with screws or reconnect any cables you disconnected earlier. Finally, power up your device and make sure it recognizes the new SSD. You may need to access your device’s BIOS or UEFI settings to ensure that the new SSD is properly recognized and configured.

    Once you have confirmed that everything is working properly, take a moment to celebrate your new and improved storage solution!

    Putting the back cover on

    Replacing or upgrading the SSD on a laptop can seem like a daunting task, but it’s actually quite straightforward. First, you’ll need to locate the back cover of your laptop and remove it. Make sure to turn off the laptop and unplug it before starting.

    Once the cover is off, look for the SSD that is currently installed. To upgrade, simply remove the old SSD and insert the new one. If you’re just replacing the SSD, take note of the screws that hold it in place and remove them carefully.

    Gently remove the old SSD and replace it with the new one. Make sure to screw it back in securely and replace the back cover. When you turn the laptop back on, it should recognize the new or replaced SSD.

    Don’t forget to properly dispose of the old SSD, as they contain sensitive information that should be protected. Overall, upgrading or replacing your laptop’s SSD is a great way to improve its performance and storage capacity.

    Conclusion

    In conclusion, removing the SSD from an Acer Iconia Tab W500 is a task that requires a delicate touch, steady hands, and a bit of tech-savvy know-how. It’s not something that should be attempted by the faint of heart or those without experience in the field. However, with the right tools, a little bit of courage, and a whole lot of patience, it’s possible to safely and successfully remove the SSD and upgrade to a newer, faster drive.

    Just be sure to take your time, follow the proper steps, and don’t be afraid to ask for help if you need it. After all, as they say, two heads are often better than one, especially when it comes to tinkering with technology.

    FAQs

    What tools do I need to remove the SSD from my Acer Iconia Tab W500?
    To remove the SSD from your Acer Iconia Tab W500, you will need a small Phillips head screwdriver and a plastic pry tool.

    How do I access the SSD on my Acer Iconia Tab W500?
    To access the SSD on your Acer Iconia Tab W500, first power off the tablet and disconnect all cables. Then, use a pry tool to remove the back cover of the tablet, locate the SSD, and remove any screws holding it in place.

    Is it possible to upgrade the SSD on my Acer Iconia Tab W500?
    Yes, it is possible to upgrade the SSD on your Acer Iconia Tab W500. Simply purchase a compatible replacement SSD, remove the old SSD, and install the new one.

    What precautions should I take before removing the SSD from my Acer Iconia Tab W500?
    Before removing the SSD from your Acer Iconia Tab W500, you should make sure to backup any important data. You should also take care to avoid electrostatic discharge by grounding yourself and using an anti-static wrist strap.

  • Maximize Your MacBook Pro Performance: A Step-by-Step Guide to Upgrading Your SSD with CNET Expertise

    If you’re a MacBook Pro user looking for a way to supercharge your device’s performance, you’ve come to the right place. Upgrading your MacBook Pro with an SSD can significantly enhance your device’s speed, storage capacity, and overall performance. An SSD (Solid State Drive) is a relatively new type of storage device that uses flash memory technology to store data.

    Unlike traditional hard drives that rely on spinning disks to read/write data, SSDs have no moving parts, which means they transfer data faster and more efficiently. The process of upgrading your MacBook Pro with an SSD might seem daunting at first, but it’s actually quite simple. In this blog post, we’ll guide you through the steps to upgrade your MacBook Pro with an SSD yourself.

    Whether you’re a seasoned tech professional or a newbie, rest assured that you can do this too! Are you worried about losing your data during the upgrade process? Don’t be! We’ll show you how to back up your data before upgrading to ensure that your files are safe and secure. We’ll also provide you with a list of tools and equipment you’ll need for the upgrade and give you step-by-step instructions to make the process as smooth as possible. Think of the SSD upgrade as a turbo boost for your MacBook Pro.

    It’s like replacing the engine of your car with a newer, faster, and more efficient one that gets you to your destination in half the time. So, get ready to rev up your MacBook Pro’s performance with an SSD upgrade!

    Introductory Steps

    If you’re looking to give your MacBook Pro a boost in speed and overall performance, one of the best ways to do so is by upgrading the hard drive to a solid state drive (SSD). Before embarking on this project, it’s important to back up all data on your current hard drive and to ensure that you have the necessary tools and parts before beginning. CNET provides a helpful guide on how to upgrade your MacBook Pro with an SSD.

    The steps involve removing the old hard drive, installing the new SSD, and transferring all data to the new drive. While the process can be a bit daunting, the benefits of a faster and more efficient machine are well worth the effort and cost. So, if you’re plagued with slow load times and sluggish performance, upgrading to an SSD may be the solution you need to get your MacBook Pro running like new again.

    Check Compatibility

    When it comes to technology, there can be a lot of options and variations out there. This can make it confusing when trying to determine compatibility between different devices and software. However, taking some introductory steps can help alleviate this confusion.

    First, it’s important to identify what specific devices and software you are considering using. This can help you narrow down your options and determine which ones may be compatible. Additionally, checking for system requirements and compatibility information from the manufacturer can also provide valuable information.

    By taking these preliminary steps, you can ensure that you are on the right track to finding compatible technology.

    cnet how to upgrade your macbook pro with an ssd

    Back-Up Data

    When it comes to back-up data, it’s essential to take the right steps in order to protect your valuable information. First and foremost, you’ll want to assess the type of data that needs backing up and create a plan for doing so. This may include determining which files are most important, what type of storage device or cloud service you want to use, and how often you want to perform backups.

    It’s also important to remember that data loss can occur for a variety of reasons, whether it’s due to hardware failure, human error, or even a cyberattack. By taking the time to back up your data, you’ll have peace of mind knowing that in the event of any mishap, you’ll be able to restore your information quickly and easily. Don’t wait until it’s too late – start backing up your data today!

    Getting the SSD

    If you are looking to upgrade your MacBook Pro with an SSD, you’re on the right track. The first step is to get the right SSD for your MacBook Pro. CNET recommends doing your research and testing to ensure reliability and compatibility.

    With a wide variety of SSDs on the market, you want to find one that is specifically designed for MacBook Pro computers to get the most out of your upgrade. Some popular options include Samsung 970 EVO and Crucial MX500. These options ensure better performance and reliability over time, allowing your MacBook Pro to run faster and more efficiently.

    While the SSD upgrade may seem daunting at first, it’s a great way to extend the lifespan of your MacBook Pro and get more value out of the computer you already have. With the right SSD in hand, you’re ready to move on to the next steps in upgrading your MacBook Pro.

    Choose SSD

    If you’re thinking about upgrading your computer’s storage, you should choose SSD (Solid State Drive) over a traditional Hard Disk Drive (HDD). SSDs are faster, more durable, and perform better overall. With SSDs, you’ll get faster boot times, quicker application loading times, and better overall system responsiveness compared to HDDs.

    The best part is that prices for SSDs have dropped, which makes it affordable to get the most out of your computer. Upgrading to an SSD is like trading in an old car for a new, sports car – the difference is real and noticeable. So, don’t wait any longer, upgrade your computer’s storage with an SSD and see the performance difference for yourself!

    Order SSD

    Order SSD Finally, you’ve decided to order an SSD! Congratulations – you’re about to experience a noticeable improvement in your system’s performance. But how do you go about getting one? There are several options to consider. First, you can purchase an SSD from a brick-and-mortar store.

    This allows you to inspect the drive in person before buying, and you can speak to a salesperson if you have any questions. Alternatively, you can order an SSD online. This is often more convenient, as you can compare prices, read reviews, and have the drive shipped directly to your doorstep.

    Just make sure to order from a reputable seller to avoid scams or receiving a faulty drive. Once you receive your SSD, you’ll want to install it correctly to ensure optimal performance. Don’t worry if you’re not tech-savvy – many SSDs come with installation software and step-by-step guides to help you through the process.

    With a little bit of effort, you’ll be up and running with your new SSD in no time!

    The Installation Process

    If you’re looking to upgrade your MacBook Pro’s storage, installing an SSD is a great option to improve its speed and performance. The installation process may seem daunting at first, but with a few simple steps, you can easily upgrade your MacBook Pro with an SSD. First, you’ll need to purchase an SSD that’s compatible with your MacBook Pro model.

    After backing up your data, you can remove the bottom panel of your MacBook Pro, detach the battery, and locate the SSD bay. You’ll then need to remove the existing hard drive and install the new SSD in its place. Finally, you can reattach the battery and put the bottom panel back on, and voila! Your MacBook Pro is now upgraded with a lightning-fast SSD.

    CNET has a helpful guide on their website that provides step-by-step instructions for upgrading your MacBook Pro with an SSD. So don’t be intimidated by the installation process – with a little patience and some basic tech know-how, you can easily give your MacBook Pro a performance boost.

    Get Tools

    If you want to get started with a new project, the first step is to get the right tools. The installation process can seem overwhelming, but by breaking it down into smaller steps, you can make it more manageable. To begin, you’ll need to research and choose the appropriate software or hardware for your project.

    Once you’ve made your selection, it’s time to install your tools. It’s important to follow the instructions carefully, so you don’t skip any crucial steps. Don’t be afraid to ask for help if you encounter any difficulties.

    Remember, having the right tools is the foundation of your project, so take the time to make sure you have everything you need before moving forward. By following these steps, you’ll be well on your way to success in your new venture.

    Open the MacBook Pro

    If you’re excited to open your brand new MacBook Pro, there are a few things you need to keep in mind before starting the installation process. First, make sure you have all the necessary tools and accessories, such as a charger and an external hard drive if you need more storage. Once you’ve got everything ready, locate the power button and turn on your MacBook Pro.

    You’ll be asked to set up some basic settings, such as language and Wi-Fi connectivity. After that, you can either transfer your data from an old Mac or start fresh. The rest of the installation process is straightforward, and you should follow the on-screen instructions precisely.

    In no time, you’ll be able to explore all the cool features of your new MacBook Pro and take your productivity to the next level.

    Replace the Hard Drive with SSD

    Are you tired of slow computer performance? Do you want to speed up your laptop or desktop? If so, replacing the hard drive with an SSD can do wonders for your system speed and responsiveness. The installation process is straightforward and can be done by anyone with a little technical know-how. Before you begin the installation process, you must first choose an SSD that meets your needs.

    Once you have your new SSD, make sure to back up all your data as the installation process will involve wiping your existing hard drive. To install the SSD, begin by removing the old hard drive and connecting the new SSD to your computer. Next, you will have to clone your old hard drive onto the new SSD.

    Once the cloning process is complete, you can remove the old hard drive and replace it with the new SSD. Finally, you can enjoy the improved performance and faster boot times that come with an SSD. Upgrading to an SSD is a cost-effective way to give new life to your old system and is a worthwhile investment for anyone looking to improve their computer’s performance.

    Final Steps

    Now that you have your MacBook Pro open and the old hard drive removed, it’s time to install your new SSD. Start by making sure the SSD is oriented correctly and then slide it into the empty slot. You’ll then need to use the screws you removed earlier to secure the SSD in place.

    Once you’ve done that, attach the bracket you removed earlier to the SSD to ensure it stays in place and won’t jostle around during use. Finally, replace the bottom panel of your MacBook Pro and secure it in place with the screws. Once everything is back together, it’s time to turn on your MacBook Pro and reinstall macOS onto your new SSD.

    This can be done by using an external drive with the macOS installer or by using Time Machine to restore your previous system backup. Congratulations, you’ve successfully upgraded your MacBook Pro with an SSD! Enjoy the faster speeds and improved performance.

    Reassemble MacBook Pro

    Now that we’ve successfully disassembled our MacBook Pro and fixed the problem, it’s time to put everything back together. The final steps of reassembling your MacBook Pro require a bit of patience and attention to detail, but with a steady hand and a clear mind, you can do it! First, carefully reinsert your battery and secure it in place. Then, reconnect the cables for the trackpad, keyboard, and display, making sure they snap into place.

    Once all of the internal components are back in place, it’s time to put the bottom cover back on. Make sure it aligns with the ports and screws holes before securely fastening the screws back in. Finally, power on your MacBook Pro and check that everything is working as it should.

    Congratulations, you’ve successfully fixed your MacBook Pro! With a bit of technical know-how and some determination, anyone can become a tech-savvy problem solver.

    Test and Update System Software

    After testing the hardware components, the next step in setting up your computer is to test and update its system software. This is an important final step that ensures the smooth running of your device. To start, you should check for any available updates for the operating system, device drivers, and installed software.

    These updates provide new features, bug fixes, and security patches that keep your computer running smoothly and securely. Keep in mind that outdated software may also cause your computer to slow down or crash more frequently. Therefore, it is important to regularly update its system software and ensure that you have the latest versions installed.

    By doing so, you can ensure the optimal performance of your device and enjoy a better overall computing experience.

    Conclusion

    In conclusion, upgrading your MacBook Pro with an SSD can breathe new life into your trusty machine and make it feel like a whole new computer. With faster read and write speeds, snappier performance, and increased storage capacity, it’s like giving your MacBook Pro a turbo boost. Plus, with the right tools and a little know-how, the upgrade process is surprisingly simple and can be accomplished in just a few easy steps.

    So why settle for sluggish performance and limited storage capacity when a world of SSD-powered possibilities awaits? Upgrade your MacBook Pro today and experience computing like never before!”

    FAQs

    What is an SSD and how is it different from a traditional hard drive?
    A solid state drive (SSD) uses flash memory to store data, whereas a traditional hard drive stores data on a spinning disk. SSDs offer faster read/write speeds and improved durability compared to traditional hard drives.

    Can I upgrade my MacBook Pro with an SSD?
    Yes, you can upgrade your MacBook Pro with an SSD. However, it will require some technical knowledge and skills. We recommend consulting a professional if you are unsure how to do it yourself.

    What are the benefits of upgrading my MacBook Pro with an SSD?
    Upgrading your MacBook Pro with an SSD can result in faster boot times, improved performance when opening and using applications, and increased battery life. It can also improve the overall lifespan of your MacBook Pro.

    What size SSD should I get for my MacBook Pro upgrade?
    The size of the SSD you need depends on your storage needs and budget. We recommend getting an SSD that is at least 256GB or more for optimal performance and storage capacity. However, if you have a large budget and need more storage, you can get SSDs up to 2TB or more.

  • Maximize Your Storage Space and Speed with the Mini External SSD: The Ultimate Solution for Your Data Needs

    Looking for a way to maximize storage while on-the-go? Say hello to the mini external SSD! This tiny device packs a big punch, offering data storage and transfer capabilities that far exceed those of traditional USB drives. An SSD, or solid-state drive, uses flash memory to store and retrieve data quickly and efficiently. And, because the mini external SSD is so small, it’s incredibly portable and can easily be stashed in a backpack or briefcase for easy access wherever and whenever you need it.

    Whether you’re a student, professional, or simply someone who needs to keep their digital files organized and safe, the mini external SSD is the perfect solution. So, why settle for less when you can have the best? Try out a mini external SSD today and never worry about running out of storage space again!

    What is a Mini External SSD?

    A mini external SSD is a compact and portable storage device that allows you to store and transfer large amounts of data. It is a small and lightweight alternative to the traditional external hard drive, making it ideal for those who require a lot of storage on the go. The main advantage of a mini external SSD is its speed, as it uses flash memory to store data, which allows for faster transfer speeds compared to a traditional hard drive.

    This makes it perfect for photographers, videographers, and gamers who need to access and transfer large amounts of data quickly. Additionally, a mini external SSD is also more durable than a traditional hard drive, as there are no moving parts, decreasing the risk of damage caused by drops or accidents. Overall, a mini external SSD is an excellent investment for anyone who needs to store and transfer large amounts of data efficiently and securely.

    Definition and Features

    A Mini External SSD, or solid-state drive, refers to a small, portable storage device that can be connected to devices such as laptops or desktop computers. It is an alternative to traditional hard drives, and its main advantages are speed and reliability. In contrast to hard drives, which have spinning disks, SSDs use flash memory to store data, allowing for faster read and write speeds.

    They are also more resistant to physical shocks, making them ideal for travelling or transporting data. Mini External SSDs come in different sizes and capacities, and they are usually plugged in via USB or Thunderbolt ports. They are a great option for those who need to store large files, such as photographers, videographers, or gamers, and they can also be used to run operating systems or applications.

    Overall, Mini External SSDs are a convenient, fast, and durable storage solution for anyone looking to transfer or store data on-the-go.

    mini external ssd

    Benefits of a Mini External SSD

    A mini external SSD, or solid-state drive, is a portable storage device that uses flash memory to store data. These little devices have become increasingly popular in recent years due to their many benefits. For starters, they are much faster and more reliable than traditional hard drives, making them perfect for everything from file transfers to running your operating system.

    Additionally, they are much smaller and lighter than traditional hard drives, making them ideal for people who need to take their data on the go. They also typically use less power than traditional hard drives, making them more energy-efficient and eco-friendly. Overall, mini external SSDs are a great investment for anyone who needs a reliable and portable storage solution.

    Choosing the Right Mini External SSd

    When it comes to choosing the right mini external SSD, there are a few factors you should consider. Firstly, think about how much storage you need. Mini external SSDs come in a variety of sizes, from 128GB to 2TB, so make sure you choose one that will meet your needs.

    Secondly, consider the speed. Look for an SSD with fast read and write speeds, especially if you’re planning on using it for tasks like video editing or gaming. Finally, think about compatibility.

    Make sure the SSD you choose is compatible with your device and operating system. Overall, a mini external SSD is a great choice if you need to store and transfer large files quickly and easily.

    Capacity and Speed

    When it comes to choosing the right mini external SSD, capacity and speed are two important factors to consider. The capacity you choose should depend on your storage needs and how much data you plan to store on the drive. A higher capacity drive will allow you to store more files, but it may come at a higher price point.

    As for speed, you want to choose an external SSD with fast read and write speeds to ensure quick data transfer and optimal performance. Keep in mind that not all external SSDs are created equal, and some may have better capacity or speed than others. Ultimately, the right choice for you will depend on your specific needs and budget.

    By doing your research and considering both capacity and speed, you can find the mini external SSD that will best fit your needs.

    Connectivity and Compatibility

    When it comes to choosing the right mini external SSD, connectivity and compatibility are key factors to consider. You want to ensure that your SSD is compatible with your device and that it has the right connectivity options for your needs. Some mini external SSDs come with USB-C connectivity, which is ideal for newer devices, while others have USB-A connectivity for older devices.

    It’s important to check the compatibility of your device before making a purchase as not all SSDs will work with all devices. Additionally, you’ll want to consider the speed of your SSD and ensure that it’s fast enough to meet your needs. Look for an SSD with high read and write speeds to ensure fast data transfer.

    Overall, choosing the right mini external SSD comes down to finding one that is compatible with your device, has the right connectivity options, and meets your speed and storage needs.

    Durability and Security

    When it comes to choosing the right mini external SSD, durability and security should be high on your checklist. The last thing you want is to lose your important data due to a malfunction or vulnerability. Look for SSDs that are made with high-quality materials and have a rugged design that can withstand accidental drops or bumps.

    Additionally, it’s important to choose an SSD with encryption capabilities to protect your data from unauthorized access. Some SSDs even have hardware encryption built-in, providing an extra layer of security. Don’t take any chances with your data – invest in a mini external SSD that will keep your files safe and secure.

    Top Picks for Mini External SSDs

    If you’re searching for the perfect mini external SSD to store and transfer your important files, there are a plethora of options to choose from. The SanDisk Extreme Pro Portable SSD, for example, offers lightning-fast speeds and a durable, pocket-sized design. Another great choice is the Samsung T5 Portable SSD, which boasts impressive read/write speeds and a sleek, compact build.

    Or, if you’re on a budget, the ADATA SD600Q External SSD is a solid option that doesn’t sacrifice speed or quality. No matter which mini external SSD you choose, you can feel confident that your data will be safe and accessible wherever you go.

    Brand and Model Comparison

    If you’re in the market for a mini external SSD, you might be wondering which brand and model to go for. After researching and testing various options, we’ve narrowed down our top picks to the Samsung T5, SanDisk Extreme Pro, and Western Digital My Passport SSD. The Samsung T5 offers impressive speeds, starting at 540MB/s and maxing out at 1,050MB/s, and comes in various storage sizes up to 2TB.

    It’s also pocket-sized and features a sleek design with a metal casing for durability. The SanDisk Extreme Pro is built for high-performance tasks, boasting speeds of up to 1,050MB/s and coming in storage sizes up to 2TB. It’s also designed to withstand extreme temperatures and water, making it a great option for outdoor use.

    The Western Digital My Passport SSD is a reliable option with read speeds up to 1,050MB/s and comes in storage sizes up to 2TB. Its compact and durable design features a shock-resistant rubber bumper to protect against drops and falls. Each of these mini external SSDs have their strengths and are great options to consider.

    Ultimately, it comes down to your specific needs and preferences. Whether you prioritize speed, durability, or storage size, there’s a mini external SSD on this list that’s perfect for you.

    Customer Reviews and Ratings

    Mini External SSD When it comes to choosing a mini external SSD, it’s important to look at customer reviews and ratings to determine the best product for your needs. Some of the top picks on the market include the Samsung T5, Western Digital My Passport SSD, and SanDisk Extreme Pro Portable SSD. These products all have high ratings and positive reviews from customers who have used them for a variety of purposes, from storing photos and videos to editing large files.

    Each product also has unique features, such as the Samsung T5’s sleek design and fast transfer speeds, or the SanDisk Extreme Pro’s durability and resistance to water and dust. By weighing the pros and cons of each product and considering customer feedback, you can find the mini external SSD that is right for you and your storage needs.

    Conclusion: Advantages of a Mini External SSD

    In conclusion, a mini external SSD is the perfect solution for those on-the-go who need to quickly transfer and store large files. It’s like having a tiny, super fast and reliable filing cabinet in your pocket! With its compact design and lightning-fast speeds, you can kiss those pesky loading times and file transfer headaches goodbye. So why carry around a heavy, cumbersome hard drive when you can have all your files at your fingertips with a sleek and stylish mini external SSD? It’s no wonder it’s become an essential tool for professionals and casual users alike.

    As they say, big things come in small packages – and the mini external SSD is proof of just that!”

    FAQs

    What is a mini external SSD?
    A mini external SSD is a small-sized solid-state drive that connects to a computer or other device through a USB port to store data.

    What are the advantages of using a mini external SSD?
    The advantages of using a mini external SSD include faster data read and write speeds, portability, durability, and better power efficiency compared to traditional hard disk drives.

    How much storage capacity do mini external SSDs typically provide?
    Mini external SSDs can provide storage capacity ranging from 128 GB to 2 TB or more, depending on the manufacturer and model.

    Are mini external SSDs compatible with different operating systems?
    Yes, most mini external SSDs are compatible with different operating systems, including Windows, Mac, and Linux, as long as the device has a USB port. Some models may require specific drivers or software for full functionality.

  • Unleash Thunderous Speed: Discover the MX500 1TB Review

    If you’re on the lookout for a high-performance and reliable SSD to take your gaming and productivity to the next level, then the Crucial MX500 1TB has probably come up on your radar. This SSD promises to deliver fast speeds, high endurance, and lasting reliability, all while sporting a sleek design that won’t take up too much space in your setup. But does it really live up to the hype? In this review, we’ll take a closer look at the MX500 1TB and break down its features, performance, and overall value to help you decide if it’s worth the investment.

    So, buckle up and let’s dive in!

    Design and Features

    When it comes to the MX500 1TB, the design and features are top-notch. The sleek and slim form factor makes it easy to fit into any system, whether it be a desktop or laptop. And with a 1TB capacity, you’ll have plenty of space to store all your important files and documents.

    But it’s not just about the capacity and size. The MX500 also boasts impressive read and write speeds, making data transfers quick and efficient. Plus, with AES 256-bit hardware encryption, you can rest easy knowing your data is secure.

    Overall, the MX500 1TB is a reliable and high-performing choice for those in need of an SSD upgrade. So, if you’re in the market for a new storage solution, consider the MX500 1TB for its impressive design and features.

    Sleek and sturdy design

    The sleek and sturdy design of a product can be a major selling point for many consumers. Not only does it look good, but it also provides a sense of durability and quality. A product with a poorly designed exterior can be an instant turn-off for potential buyers, even if the features and functionality are top-notch.

    That’s why manufacturers are putting more effort into designing products that are not only functional but also visually appealing. From laptops to smartphones, people want a device that they can be proud to show off. Aesthetics aside, the design can also affect the product’s usability and comfort.

    A curved ergonomic design, for example, can make a product more comfortable to hold for extended periods. It’s all about finding the right balance between form and function. So, when shopping for your next tech gadget, don’t overlook the importance of its design and features.

    After all, you’ll be using it for years to come!

    mx500 1tb review

    Innovative 3D NAND technology

    If you’re a tech enthusiast, you might have heard of the latest innovation in NAND flash technology – 3D NAND. Unlike the traditional 2D structure, 3D NAND combines vertically stacked memory cells to increase memory density, improve performance, and reduce power consumption. The secret lies in the ability to layer cells on top of each other, creating a tower-like structure with up to 96 layers in some designs.

    This design allows for a higher level of vertical stacking, resulting in a higher density of memory in the same physical space. Apart from this, 3D NAND technology also provides better durability, reliability, and long-term performance. This technology is gaining popularity as it offers a more cost-effective approach to increasing capacity and performance than traditional methods.

    Many leading tech companies have already started using 3D NAND in their products, including smartphones, solid-state drives (SSDs), and USB memory sticks. The benefits of 3D NAND technology are tremendous, and its use in the semiconductor and electronics industry is only expected to grow in the coming years. At its core, 3D NAND technology is a game-changer that provides smarter, faster, and more efficient products that keep up with the ever-evolving tech landscape.

    Performance and Speed

    When it comes to performance and speed, the MX500 1TB review shows that this SSD truly delivers. With read speeds of up to 560MB/s and write speeds of up to 510MB/s, this drive is a powerhouse that can easily handle even the most demanding tasks. Whether you’re looking to transfer large files quickly or you need to run multiple applications simultaneously, the MX500 1TB has got you covered.

    And thanks to its SATA III interface, you can expect lightning-fast data transfers that won’t keep you waiting. But the real beauty of the MX500 1TB is its reliability. With a mean time between failures (MTBF) of

    8 million hours, you can rest assured that this SSD will last you for years to come. So if you’re in the market for a high-performance SSD that won’t break the bank, the MX500 1TB is definitely worth checking out.

    Ultra-fast read and write speeds

    Performance and speed are crucial factors to consider when it comes to electronic devices such as laptops and external drives. The Ultra-fast read and write speeds of modern storage devices have revolutionized the computing industry, providing users with an experience that was once unimaginable. With read speeds that can reach up to 3,500 MB/s and write speeds that exceed 3,000 MB/s, these devices can transfer data in mere seconds.

    No more waiting around for hours while files transfer from one device to another. These outstanding speeds are possible due to the use of cutting-edge technologies such as Solid State Drives (SSDs) and Non-Volatile Memory Express (NVMe) protocols, which work in tandem to deliver the high-performance levels that users crave. The increased processing speed has also allowed for the development of more complex and demanding software, making computing faster and more efficient.

    Overall, the Ultra-fast read and write speeds of modern storage devices have transformed the way we use and interact with technology, making data transfer and processing instantaneous and hassle-free.

    Improved system responsiveness

    If you’re tired of waiting forever for your computer to load applications or go through basic tasks, you’ll be pleased to know that improved system responsiveness is becoming more and more common. As technology advances, companies are finding ways to make operating systems and software faster and more efficient, resulting in a browsing and computing experience that’s quicker and smoother. One of the biggest culprits of a slow computer is an overloaded and cluttered hard drive, so regularly decluttering and optimizing your system can do wonders for its speed and responsiveness.

    Additionally, software updates often improve performance and fix any bugs or glitches that may be hindering your system’s efficiency. Don’t settle for a sluggish computer – take advantage of the advancements being made in performance and speed to enjoy a faster and more responsive computing experience.

    Reliable and durable

    When it comes to electronic devices, performance and speed are two critical factors that every user considers before making their purchase. You want a gadget that will not only be fast but also efficient and reliable. In today’s digital age, everyone wants a device that operates at lightning speed and performs incredibly well under different circumstances.

    Whether you’re a gamer, professional, or casual user, reliable and durable gadgets with consistent performance are becoming increasingly vital. People don’t have time for devices that frequently lag or crash, which could lead to frustration and ultimately, loss of productivity. That’s why most brands are focusing on developing fast and efficient gadgets without disregarding their reliability.

    High-end laptops, gaming PCs, mobile phones, and other electronic gadgets are now designed with powerful processors, SSD storage, high RAM, and superior graphics to ensure they deliver excellent performance and speed. Being reliable and durable is no longer optional for gadgets; it’s an absolute necessity.

    Value and Pricing

    If you’re in the market for a high-capacity solid state drive, the mx500 1tb from Crucial is definitely worth considering. Not only does it offer a whopping 1 terabyte of storage space, but it does so at a reasonable price point. In terms of value, this SSD certainly delivers.

    But what about pricing? Well, compared to some other leading brands, Crucial’s mx500 may seem a touch expensive. However, it’s important to note that the mx500 is built to last. It boasts a mean time to failure (MTTF) rating of

    8 million hours, thanks to its advanced NAND and controller technology. This makes it a solid long-term investment. Ultimately, it comes down to what you’re looking for in an SSD: a great value option with decent performance, or a slightly pricier option with exceptional longevity? If it’s the latter, the mx500 1tb is definitely worth a look.

    Affordable pricing for high capacity

    When it comes to finding high-capacity storage solutions, it can be tough to balance affordability with functionality. You want storage that can keep up with your needs without breaking the bank. Fortunately, there are options available that offer both value and pricing.

    It’s important to do your research and compare different brands and products to find the best fit for your needs. Don’t be swayed by flashy marketing or unnecessary features if they aren’t actually essential to your storage needs. Instead, focus on the basics and look for products that are built to last and provide the storage capacity you require.

    We’ve found that our products offer excellent value and pricing, with high-capacity solutions that won’t cost you an arm and a leg. Whether you’re storing massive amounts of data or just need some extra space for your growing files, we’ve got you covered.

    Warranty and support options

    When it comes to purchasing a product, the value and pricing of a warranty and support package can make a significant impact on your decision. A good warranty can provide peace of mind and protect you from unexpected repair costs, while a comprehensive support package can ensure you have access to helpful resources and customer service. Some warranties may come with a higher upfront cost, but they may also offer longer coverage periods and provide more extensive repairs or replacements.

    It’s important to carefully evaluate your options and consider your individual needs before making a decision. Keep in mind that the lowest-priced option may not always be the best value in the long run, so it’s worth investing in a warranty and support package that aligns with your needs and budget.

    Conclusion

    In conclusion, the MX500 1TB is a storage powerhouse that packs a punch when it comes to performance and reliability. With its 3D NAND technology and advanced features such as AES 256-bit encryption, it is the ideal drive for users who demand the very best. Its sleek and stylish design make it a great choice for users who want both substance and style.

    Whether it’s for gaming, data storage or any other digital need, the MX500 1TB is the perfect solution. So why settle for less when you can have the best? Invest in the MX500 1TB and experience the difference for yourself!”

    FAQs

    What are the dimensions of the MX500 1TB SSD?
    The MX500 1TB SSD measures 2.5 inches in width, 7mm in height, and 100.5mm in length.

    What is the maximum read and write speed of the MX500 1TB SSD?
    The maximum read speed of the MX500 1TB SSD is up to 560MB/s and the maximum write speed is up to 510MB/s.

    Is the MX500 1TB SSD compatible with Mac computers?
    Yes, the MX500 1TB SSD is compatible with Mac computers running macOS 10.9 or later with an available SATA interface.

    What is the mean time between failures (MTBF) of the MX500 1TB SSD?
    The MTBF of the MX500 1TB SSD is 1.8 million hours, ensuring the drive will have a long lifespan.

    Does the MX500 1TB SSD come with any software for drive management?
    Yes, the MX500 1TB SSD comes with Acronis True Image HD software for easy data migration and drive cloning.