If you’re a frequent Mac user, then you understand the importance of fast data transfer and reliable storage. And what better way to achieve both than by using a Sandisk SSD? Sandisk has proven to be a popular choice among Mac enthusiasts, thanks to its high-quality build and incredible performance. In this blog post, we’ll explore the benefits of using Sandisk SSDs on your Mac, and how you can get the best out of this powerful storage device.
Whether you’re a professional photographer, videographer, or gamer, this post is for you. So, let’s dive in!
Check Compatibility
If you are planning to use a SanDisk SSD on your Mac, it is essential to check its compatibility beforehand. Luckily, SanDisk provides detailed information on their website about the supported operating systems, including macOS versions that the SSD can be used on. To ensure compatibility, you can also check the system requirements of your Mac by navigating to the Apple menu > About This Mac.
Once you have confirmed that the SSD is compatible with your Mac, you can install the drive using the provided instructions. SanDisk SSDs are a great choice for Mac users as they offer fast read and write speeds, which can significantly improve the overall performance of your device. Just make sure to check compatibility before making a purchase to avoid any issues down the line.
Verify macOS Version
If you’re planning to update your macOS, it’s essential to ensure that your Mac supports the latest version. Checking your Mac’s compatibility is crucial because newer versions may not be supported by older models. To verify your macOS version, click on the Apple logo in the top-left corner of your screen, and select About This Mac.
You’ll see the version of macOS you’re currently running, along with your Mac’s model name and other specifications like processor, memory, and graphics. If you’re planning to upgrade, ensure that your Mac supports the latest version of the operating system. Otherwise, you may experience performance issues or compatibility problems.
Checking your macOS version is easy, and it ensures that you’re running the latest software that your Mac can handle.
Check if Sandisk SSD is Compatible with macOS
If you’re a Mac user looking to upgrade your storage options with a Sandisk SSD, it’s important to check compatibility before purchasing. While many of Sandisk’s SSDs are compatible with macOS, some may require firmware updates or may not work at all with certain models. To ensure your Sandisk SSD will work seamlessly with your Mac, check for compatibility with your specific model and OS version.
You can also check for any necessary firmware updates on Sandisk’s website and download them before installing the SSD. It’s always better to be safe than sorry, as a non-compatible or improperly installed SSD can cause data loss and potentially damage your computer. So take the extra step to check compatibility and firmware updates before upgrading to a Sandisk SSD on your macOS device.
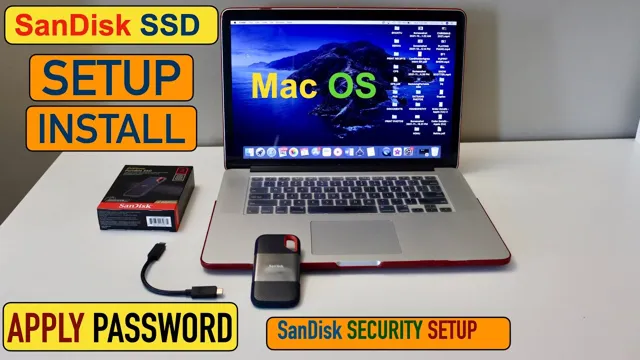
Connecting Sandisk SSD to Mac
Using a Sandisk SSD on a Mac is a straight-forward process that can give your device a significant upgrade in storage and performance. To connect your Sandisk SSD to your Mac, you simply need to insert the SSD into a USB port and wait for your Mac to detect it. Once detected, you can go ahead and start using your new drive.
However, if your Mac doesn’t detect the Sandisk SSD, you might need to format it using the Disk Utility app. Just select the Sandisk SSD from the list of drives in the Disk Utility window, click on “Erase,” and choose the appropriate file system format. With the Sandisk SSD connected and formatted, you can now move, copy, or delete files from the drive just as you would with any other drive on your Mac.
So, if you’re looking for a simple and effective way to add more storage and boost your Mac’s speed, using a Sandisk SSD is a fantastic option.
Connect Sandisk SSD using USB Cable
Connecting a Sandisk SSD to a Mac is a straightforward process and can be accomplished using a USB cable. First, make sure that your Sandisk SSD is powered off and then connect one end of the USB cable to the SSD and the other end to the Mac’s USB port. Turn on the Sandisk SSD and wait for it to be recognized by the Mac.
Once it’s recognized, the SSD can be accessed just like any other external drive by opening Finder and locating the Sandisk SSD under the “Devices” section. Keep in mind that it’s essential to handle your Sandisk SSD with care and avoid any impacts or falls that could cause damage to the drive’s internal components. By following these simple steps, you can connect your Sandisk SSD to your Mac and start taking advantage of its high-speed performance capabilities.
Format Sandisk SSD for Mac
Connecting your Sandisk SSD to your Mac is an important first step in formatting the drive for use on your computer. Luckily, this process is relatively easy and straightforward. Start by connecting the SSD to your computer using a USB-C or Thunderbolt cable.
Once the SSD is connected, you should see it appear on your Mac as an external drive. If you have trouble locating the SSD, try opening the Finder window and looking under the “Devices” section. From here, you can right-click on the SSD and select “Erase” to begin formatting the drive.
Make sure to choose the correct format for your needs, such as APFS or Mac OS Extended. After selecting your desired format and clicking “Erase,” the formatting process will begin, and your Sandisk SSD will be ready to use on your Mac.
Transferring Data to Sandisk SSD
If you’ve just bought a Sandisk SSD and want to transfer your data from your old hard drive to it using a Mac, don’t worry. The process is pretty straightforward. First, connect your Sandisk SSD to your Mac via a USB cable and launch the Disk Utility application.
Once there, select your old hard drive, click on the “Restore” tab, and drag and drop its icon into the “Source” field. Then, click and drag the icon of your Sandisk SSD into the “Destination” field. Finally, click “Restore” and wait for the process to complete.
It may take a while, depending on the size of your data, but you can monitor the progress in the Disk Utility window. Once the transfer is complete, you can eject both drives and start using your Sandisk SSD like a pro. See, that wasn’t so hard, was it?
Drag and Drop Files to Sandisk SSD
When it comes to transferring your data to a Sandisk SSD, there are several methods available, but drag and drop is one of the easiest and most convenient ways. This method involves selecting the files or folders you want to transfer and dragging them to the Sandisk SSD drive icon in your file explorer window. Once you drop these files into the drive, the transfer process begins immediately, and you can monitor the progress of the transfer by checking the bar at the bottom of your screen.
It’s important to note that this method is only suitable for transferring small quantities of data, as transferring large files or folders may take longer and even crash your system. However, if used correctly, drag and drop can ensure a swift and efficient transfer of your important files and data to your Sandisk SSD.
Using Time Machine for Backups
If you’re looking for a reliable and secure way to back up your Mac, Time Machine is a great option. But transferring your Time Machine backups to a Sandisk SSD can be a bit confusing. Don’t worry, though – it’s not as difficult as it might seem! The first step is to connect your Sandisk SSD to your Mac and make sure it’s properly formatted.
Then, open Time Machine and click on the “Select Backup Disk” option. Choose your Sandisk SSD as the backup disk and wait for the backup process to complete. Once it’s finished, you’ll have a copy of all your important data securely stored on your Sandisk SSD.
With this method, you can rest easy knowing that your important files and documents are always safe and accessible when you need them.
Ejecting Sandisk SSD from Mac
If you own a Sandisk SSD and want to use it on your Mac, you might be wondering how to eject it properly. Ejecting your Sandisk SSD is an important step to ensure that your data is saved and your device is not damaged. To eject your Sandisk SSD from your Mac, simply drag the icon of the SSD from your desktop to the Trash.
Once you do this, the SSD will disappear from your desktop, and it will be safe to unplug it from your Mac. It’s important to wait until the icon disappears before unplugging your SSD to avoid any potential data loss or damage. Using your Sandisk SSD on your Mac is a convenient way to store and transfer files between devices, just remember to eject it properly to maintain its longevity.
Properly Eject Sandisk SSD from Finder
If you’re looking for the best way to safely eject your Sandisk SSD from Finder on your Mac computer, then you’ve come to the right place. Ejecting your solid-state drive improperly can lead to data loss, corrupted files, and other issues. To properly eject your Sandisk SSD from Finder, simply find the drive in the Finder window, then click and hold on the icon.
From the drop-down menu, select “Eject” and wait for the icon to disappear. Once it disappears, you can safely disconnect the drive from your Mac. It’s important to always eject your Sandisk SSD before unplugging it from your computer, as this will prevent any data loss or file corruption.
By following these simple steps, you can ensure that your Sandisk SSD remains safe and secure.
Conclusion
And voila! With these simple steps, you can unleash the full potential of your Sandisk SSD on your Mac. Your files will load faster, your data will be safer, and your computer will thank you for it. So stop twiddling your thumbs waiting for slow loading times and join the SSD revolution! Trust us, you’ll never go back to an ordinary hard drive after experiencing the lightning-fast performance of a Sandisk SSD on your Mac.
“
FAQs
What is required to use Sandisk SSD on Mac?
You will need a compatible interface cable and an available port on your Mac to use Sandisk SSD.
Can I use Sandisk SSD as an external drive on Mac?
Yes, Sandisk SSD can be used as an external drive on Mac as long as you have a compatible interface cable.
How do I format Sandisk SSD for use on Mac?
You can format Sandisk SSD using the Disk Utility application on Mac. Select the Sandisk SSD and choose the format option as “Mac OS Extended (Journaled)” for the file system.
Is it possible to use Sandisk SSD for Time Machine backups on Mac?
Yes, Sandisk SSD can be used for Time Machine backups on Mac by formatting it to “Mac OS Extended (Journaled)” and selecting it as the backup disk in Time Machine preferences.