Welcome to the world of computer hardware! Sometimes, you may encounter a situation where you need to replace or upgrade certain components on your computer. One of the most common components that are often upgraded is the SSD (Solid State Drive). However, removing the SSD screw can be a daunting task, especially if you’re not familiar with the process.
Unscrewing an SSD screw requires a delicate touch and some basic tools. It’s not rocket science but can be tricky if you’re not careful. Luckily, we’ve got you covered with some simple steps on how to unscrew an SSD screw without damaging your computer hardware.
In this blog post, we’ll give you a step-by-step guide on how to unscrew an SSD screw quickly and efficiently. We’ll show you all the necessary tools you’ll need, as well as useful tips and tricks to make the process as easy as possible. Trust us; you’ll be able to unscrew an SSD screw like a pro in no time! So, if you’re ready to upgrade your SSD or just need to remove it from your computer for whatever reason, read on to learn how to unscrew an SSD screw like a pro!
Gather the necessary tools
When removing an SSD from your computer, it’s crucial to have the right tools for the job, including a screwdriver. However, unscrewing an SSD screw can be quite tricky, as they are often smaller in size and can be challenging to grab onto. To tackle this, you will need a precision screwdriver set that includes a small Phillips head screwdriver.
This tool is essential for unscrewing the small screws that secure the SSD. It’s also crucial to have a clean workspace where you can spread out your materials. You may also want to invest in an anti-static mat to prevent any damage to your components.
By gathering all of the necessary tools beforehand, you can avoid frustration and potentially causing damage to your computer’s internal components. So, take your time, and make sure you have everything you need to successfully complete the task at hand.
Tools required to unscrew an SSD screw
If you need to remove an SSD from your computer, it’s important to have the right tools on hand. The most important tool you’ll need is a screwdriver. Specifically, you’ll need a small screwdriver with a flat head.
This will allow you to unscrew the tiny screws that hold the SSD in place. It’s also a good idea to have a magnetized screwdriver, as this can help you avoid losing any screws while you’re working. Another useful tool is a pair of anti-static gloves.
These gloves will help protect your computer from any static electricity that may be generated as you work. In addition to these tools, you may also want to have a small flashlight on hand. This can help you see the screws and other small parts more clearly, especially if you’re working in a dimly lit area.
With these tools in hand, you’ll be well-equipped to safely remove your SSD and make any necessary upgrades or repairs.
Identify the size and type of screw
If you’re trying to unscrew an SSD screw, the first thing to know is the size and type of screw you’re dealing with. These screws are usually very small and require a precision screwdriver to remove them without stripping the head. Most commonly, they are either Phillips head or Torx head screws, but it’s important to check the manual or online specifications for your particular SSD to confirm.
Once you have the correct type of screwdriver, take your time and apply gentle pressure to turn the screw counterclockwise. If it’s stuck, applying a tiny drop of lubricant may help loosen it. Remember to be patient and gentle, as SSDs are delicate and can be easily damaged if mishandled.
And if you’re still having trouble, consider seeking the help of a professional technician.
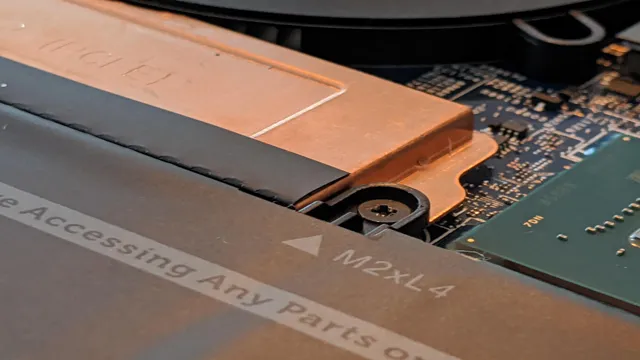
Different types of SSD screws and their sizes
When building or upgrading a computer, it’s important to know what type and size of screws are needed for your solid-state drive (SSD). The most common types of screws for SSDs are M2, M3, and 6-3 M2 screws are smaller and thinner than M3 screws, usually found in laptops or smaller form factor computers.
M3 screws are a bit larger and more common, with a diameter of 3mm. 6-32 screws are also commonly used and have a thread gauge of 6 and a length of 32mm. It’s important to identify the size and type of screw needed for your SSD before purchasing or installing.
Using the wrong screw can damage your SSD or cause it not to be secured properly, leading to potential performance issues. Taking the time to ensure the correct screw is used will not only prevent damage but also ensure a proper fit and longevity of your SSD.
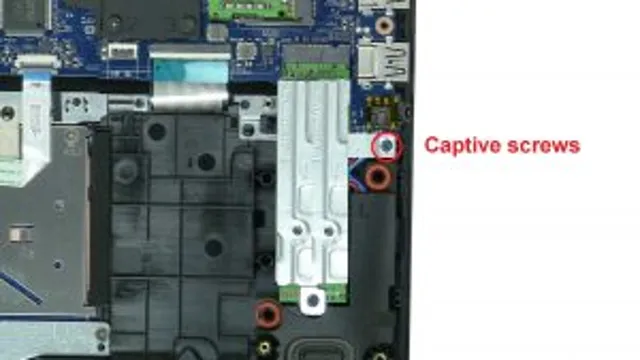
Remove the SSD screw
If you’re looking to upgrade or replace the SSD in your computer or laptop, the first step is to remove the SSD screw. This can be a tricky task, but with a bit of patience and the right tools, it can be done easily. First, make sure to power off the device and unplug it from any power sources.
Then, locate the SSD screw on the bottom of your device. It’s usually positioned near the corner of the laptop or desktop. You can use a Phillips head screwdriver to carefully unscrew the SSD screw.
Be sure to apply firm but gentle pressure, and take care not to strip the screw or damage the device’s casing. Once the screw is fully loosened, you can remove it and set it aside. With the screw removed, you can now access and replace the SSD as needed.
Step-by-step guide for removing SSD screws
Removing the SSD screw can be a bit tricky, but with the right steps, it can be done with ease. First, make sure you have the right screwdriver that fits the size of the screw. Once you have the right tool, flip over your computer or laptop and locate the SSD compartment.
It’s usually located near the battery or at the bottom of the device. You’ll notice that the SSD is secured by a tiny screw, which needs to be removed to access the drive. Before proceeding, make sure you’re working in a well-lit and clear workspace.
Use a magnetized screwdriver to avoid losing the screw during the removal process. Begin by gently unscrewing the SSD screw in a counterclockwise motion. It’s important not to apply too much pressure or torque to the screw, as it may damage the SSD or the screwdriver.
If the screw is difficult to remove, try applying a bit of pressure while twisting the screwdriver. You can also use a rubber band on the tip of your screwdriver to provide extra grip and torque. Once the screw is loose, lift it with the screwdriver and place it aside.
Congratulations, you have successfully removed the SSD screw! You can now proceed to remove the SSD drive and upgrade or replace it with a new one. Always remember to handle the SSD with care to avoid damage, and keep your workspace clean to prevent any debris from getting into the device. With this simple step-by-step guide, you can now confidently remove the SSD screw and upgrade your laptop or computer’s storage.
Troubleshooting tips if the screw won’t budge
If you’re having trouble unscrewing your SSD screw, don’t worry – it’s a common issue that can be frustrating, but there are a few troubleshooting tips you can try. First, make sure you’re using the right size screwdriver and that it’s in good condition. Try applying downward pressure while turning the screwdriver, as this can help with stubborn screws.
If that doesn’t work, you can try using a heat gun or hair dryer to warm up the area around the screw, as this can help loosen any adhesive holding it in place. Finally, if all else fails, you can use pliers to grip the screw and carefully turn it counterclockwise. Remember, it’s important to be patient and avoid using excessive force, as this can damage the screw and make the problem even worse.
By following these troubleshooting tips, you should be able to successfully unscrew your SSD screw and complete your repairs or upgrades.
Possible reasons why the SSD screw won’t unscrew
If you are having trouble unscrewing the SSD screw, there may be some possible reasons why. First, make sure that you have the right screwdriver for the job. The size and type of the screwdriver matter since using the wrong one can damage the screw or make it impossible to remove.
Another reason could be the screw itself is jammed or stripped. In this case, try applying some pressure or using some pliers to help turn the screw. In extreme cases, you may need to use a drill or a screw extractor tool.
However, be very careful not to damage the surrounding hardware in the process. Trying to force the screw to turn can lead to snapping it or damaging other components of the SSD. Frustrating as it may be, be sure to stay patient, take your time, and try some of these troubleshooting tips.
Remember, it’s always better to take extra precautions than to end up causing more damage. With the right approach and tools, you’ll eventually be able to remove the stubborn screw and access your SSD.
Prevent damage while unscrewing SSD screws
If you’ve ever tried to upgrade your computer’s SSD, you know how difficult it can be to unscrew the tiny screws that hold it in place. But did you know that you could potentially damage the SSD if you’re not careful? Fortunately, there are a few simple steps you can take to prevent this from happening. First, make sure you have the correct sized screwdriver for the screws.
Using one that’s too big or small can cause damage to the screw head and make it difficult to unscrew. Next, apply gentle pressure while turning the screwdriver to avoid stripping the screw or causing it to become stuck. It’s also a good idea to use a magnetic screwdriver, which can help keep the screw from falling out and getting lost.
By taking these precautions, you can safely upgrade your computer’s SSD without damaging any of the components.
How to prevent damage to the SSD screw or the device
When it comes to unscrewing the SSD screws, it is important to take a few precautions to prevent damage to either the screws or the device. One of the first steps to take is to make sure you have the right sized screwdriver for the job. Using a screwdriver that is too small may cause the screw to strip, while using one that is too large could result in damage to the screw or the surrounding area.
Another important factor is to make sure that you loosen the screw carefully, avoiding any unnecessary force or pressure. If the screw is not coming out easily, stop and reassess the situation. Spraying a small amount of liquid lubricant onto the screw can make it easier to loosen, but be careful not to use too much and risk damaging the components.
When tightening the screw back in, make sure not to overtighten it, as this can also cause damage. By taking these simple precautions, you can safely and effectively remove and install SSD screws without causing any damage to your device.
Conclusion
In conclusion, unscrewing an SSD screw may seem like a daunting task, but fear not! With the right tools, a steady hand, and a can-do attitude, anyone can tackle this challenge. And remember, when all else fails, don’t hesitate to call in a tech-savvy friend or professional for assistance. Just like trying to unscrew a stubborn jar of pickles, sometimes it takes a little bit of extra effort to get the job done.
“
FAQs
What tool do I need to unscrew an SSD screw?
Typically, you can use a small Phillips head screwdriver to unscrew SSD screws. However, it’s important to make sure you’re using the correct size to avoid stripping the screw or causing damage.
How can I tell if the SSD screw is stripped?
If you’re having difficulty turning the screw or if the screwdriver keeps slipping or “jumping” out of the screw, it may be stripped. Another sign is if the screw appears worn or has a rounded-out shape.
What can I do if the SSD screw is stuck?
In some cases, the SSD screw may be stuck due to corrosion or rust. You can try applying penetrating oil, such as WD-40, and letting it sit for a few minutes before attempting to unscrew it again. If that doesn’t work, you may need to use a screw extractor tool.
Is it safe to use an electric drill to unscrew SSD screws?
It’s generally not recommended to use an electric drill or power tools to unscrew SSD screws, as it increases the risk of stripping the screw or damaging the drive. It’s best to stick with a manual screwdriver and ensure you’re using the correct size for the screw.