If you’re someone who wants to increase their computer’s storage or upgrade to a faster storage device, chances are you’ve come across SSDs and NVMe drives. These storage devices are both reliable and efficient, but the dilemma arises when one has to transfer their data from an existing SSD to an NVMe drive. The process might seem daunting at first, but it’s actually quite simple.
In this blog post, we’ll delve into the procedure of transferring data from SSD to NVMe so that you can upgrade your system without losing any important data.
Check Compatibility
When transferring data from an SSD to an NVMe, the first step is to check compatibility. Ensure that the NVMe slot on your motherboard is compatible with the NVMe drive you want to use. Some older motherboards may not support NVMe, so it’s always important to check the motherboard specifications.
Additionally, it’s crucial to ensure that the SSD and NVMe use the same partition scheme. If they use different partition schemes, the data transfer may not work correctly, and you may lose data. Finally, before transferring data, ensure that you have a backup of all important files stored on the SSD.
It’s better to be safe than sorry, and having a backup can help prevent data loss if something goes wrong during the transfer process. By checking compatibility and taking necessary precautions, you can safely transfer important data from an SSD to an NVMe without troubles.
Ensure Both Drives are Compatible with Each Other
When looking to use two hard drives together, it’s important to make sure that both drives are compatible with each other. This involves checking the interface type, storage capacity, and speed of both drives. Different interfaces include SATA, IDE, and SCSI, with SATA being the most common for modern hard drives.
Storage capacity should match or exceed the size of the drive you are adding it to, and speed should be matched as well for optimal performance. It’s important to do your research and ensure that both drives will work well together before starting the installation process. Just like how you wouldn’t use a VHS tape in a DVD player, you wouldn’t want to use incompatible hard drives in your computer.
Compatibility is key for a successful installation and optimal performance.
Check if Your Motherboard has NVMe slots
If you’re looking to upgrade your system’s storage capabilities, it’s important to first check if your motherboard has NVMe slots. NVMe, or Non-Volatile Memory Express, is a new standard for storage that offers faster speeds and lower latency than traditional SATA drives. However, not all motherboards are compatible with NVMe drives, so it’s crucial to check before making a purchase.
The easiest way to check compatibility is to look at your motherboard’s manual or specifications online. Look for information on the number of M.2 slots and their compatibility with NVMe.
If your motherboard doesn’t have compatible slots, you may need to consider upgrading your motherboard as well. Upgrading your storage can greatly improve your system’s performance, but always make sure to do your research and check compatibility before making any purchases.
Cloning your SSD
Are you planning to upgrade your system’s storage by moving your data from your SSD to an NVMe drive? Doing so can provide a significant boost in performance, but the process can be quite tricky if you’re not familiar with it. The best way to do this is by cloning your SSD to an NVMe drive. Cloning allows for an exact copy of your current drive, including the operating system and all files and applications, to be transferred to the new drive.
To begin, you’ll need cloning software, which can be downloaded for free online. Once you have the software installed, attach your new NVMe drive to your computer and launch the software. From there, select the option to clone your SSD to the NVMe drive, choose the source and target drives, and let the software do the rest.
Once complete, your new NVMe drive should be a duplicate of your old drive, and you can remove your old drive and start using your new and faster storage solution. With this simple process, you can transfer your data from your SSD to NVMe without losing any of your files or applications.
Create a Backup
Cloning your SSD can be a great way to create a backup of your important data. SSDs have become increasingly popular due to their speed and reliability, but no storage medium is completely invulnerable to failure. Cloning your SSD means creating an exact copy of everything on it, including all your files, applications, and operating system.
This way, if your original drive fails, you can simply swap in the cloned drive and be back up and running in no time. It’s also a good idea to regularly create new clones as you add new data to your drive or make significant changes to your system. This ensures that you always have a current backup on hand should anything go wrong.
With the right software, cloning your SSD is a fairly straightforward process that can give you peace of mind and keep your data safe. So, if you haven’t already, consider cloning your SSD today.
Purchase a Cloning Software like EaseUS ToDo Backup
If you’re looking to upgrade your computer’s hard drive to a faster SSD, you may want to consider cloning your existing drive using a software like EaseUS ToDo Backup. Cloning your SSD ensures that all your data and settings remain intact while making the switch. The process of cloning involves creating an exact copy of your current drive onto the new SSD.
This means you won’t have to reinstall all your programs, transfer files, or reconfigure your settings, saving you time and hassle. EaseUS ToDo Backup is a reliable and user-friendly cloning software that can help you make the switch smoothly. With just a few clicks, you can clone your drive and enjoy the increased speed and performance of your new SSD.
So, if you’re ready to take the leap, consider investing in a cloning software and cloning your SSD today!
Connect Your NVMe Drive
If you’re thinking of upgrading your PC’s storage storage, using a NVMe drive is a great option. Before you can start using it, though, you’ll need to make sure all the data on your current drive is transferred over first. That’s where cloning comes in.
Cloning your SSD is the process of copying all the data and files on it to a new drive, essentially making a perfect duplicate. This ensures that you don’t miss anything important, and also saves you the trouble of having to manually copy everything over. Once you’ve cloned your SSD, you can then connect your NVMe drive and start enjoying its faster speeds and increased storage capacity.
It’s a simple process, and definitely worth considering if you’re running out of space on your current drive or just want to boost your PC’s performance.
Begin Data Transfer Process
So you’ve decided to upgrade your laptop or desktop computer with a new SSD, but you’re not sure what to do next. The next step is to clone your existing hard drive onto the new SSD. This process transfers all your data, settings, and operating system onto the new drive, so you don’t have to reinstall everything from scratch.
Cloning is also a good way to backup your system and safeguard your data against hardware failure or other mishaps. To begin the data transfer process, you’ll need a cloning software program and an external hard drive or USB flash drive to store the clone. There are many free and paid cloning software options available, such as Clonezilla, EaseUS Todo Backup, and Acronis True Image.
Just make sure to choose a reputable software with good reviews and customer support. Cloning your SSD isn’t difficult, but it does take some time, so sit back, relax, and let the software do its thing. Once the clone is complete, insert the new SSD into your computer and enjoy the benefits of faster boot-up times and improved performance!
Manually Transferring Data
If you’ve recently upgraded to a newer, faster NVMe drive, you may be wondering how to transfer your data from your old SSD. Fortunately, the process is straightforward and can be accomplished with a few manual steps. The first step is to ensure that your NVMe drive is properly installed and recognized by your system.
Once that’s done, you’ll need to create a backup of your data from your old SSD to an external drive or cloud storage. Then, you can copy or drag and drop your backed-up files onto your new NVMe drive. It’s worth noting that you may need to reinstall any programs or applications you had installed on your old SSD, as they typically won’t transfer over in this process.
But overall, transferring data from an SSD to an NVMe drive is a relatively simple process that should only take a few minutes. With the improved performance and speeds of your new NVMe drive, you’ll quickly see the benefits of upgrading.
Move Important Files to External Storage
If you’re running out of space on your device, moving important files to an external storage device can help free up some precious space. This process can be done manually, and it’s a great way to ensure that your important files are safe and secure. Before you begin the transfer process, make sure you have an external storage device that is large enough to accommodate all of your files.
Once you have your external storage device, you can begin transferring your files by connecting it to your device and selecting the files you wish to transfer. This process can take some time depending on the size of the files, but once the transfer is complete, you can rest assured that your important files are safely stored on an external device. By doing so, you can also keep a backup of your important data in case of any unexpected system failures, ensuring your data is never lost.
Download and Install the NVMe Driver
If you’re looking to boost your computer’s performance speed, downloading and installing the NVMe driver could be the solution you need. However, this process can be difficult for those without technical experience. Manually transferring data is a complicated task that requires precision and technical know-how.
But don’t worry, there are resources available to help with this process. By following step-by-step instructions or seeking professional assistance, you can ensure a successful installation of the NVMe driver. Once installed, be prepared for a significant improvement in your computer’s speed and overall functionality.
Don’t let the complex process of manual data transfer keep you from optimizing your computer’s performance. Take advantage of the NVMe driver and experience the benefits it offers.
Copy and Paste Data from SSD to NVMe
If you’re upgrading your storage system from an SSD to an NVMe drive, you may need to transfer your data manually. While this may seem like a daunting task, it’s actually quite straightforward. The first step is to connect both drives to your computer and make sure they’re both recognized by the system.
Then, you’ll need to copy and paste the data from your SSD to your NVMe. This can be done using your computer’s file explorer. Simply select the files or folders you want to transfer, right-click, and select “Copy.
” Then, navigate to the location where you want to transfer the data to and right-click again, this time selecting “Paste.” Depending on the amount of data you’re transferring, this process may take some time, but it’s a simple and effective way to get your data from your old drive to your new one. Just remember to triple-check that you’ve transferred everything you need before wiping your old drive and retiring it.
Final Checks
Before completing the transfer of data from SSD to NVMe, it is important to perform several final checks to ensure that everything has been transferred correctly. First, make sure that you have backed up all of your important data in case anything goes wrong during the transfer process. Then, check that the software you used for the transfer has successfully transferred all of your data.
Double-check that the NVMe drive has enough capacity to hold all the data that you transferred from your SSD. Finally, run a test to confirm that the NVMe drive is working correctly and that you can access your data without any issues. Once you have confirmed that everything has been transferred correctly and the NVMe drive is fully operational, you can start using it to boost the performance of your PC, making it run faster and smoother.
Ensure All Data Has Been Transferred
When it comes to transferring data from one device to another, it’s important to make sure that all the data has been transferred successfully. It’s easy to assume that everything has been transferred when you see some files on the new device, but there can also be files that have been left behind or missed out completely. This can be a frustrating experience, especially if you realize that the missing data was important.
To avoid this situation, make sure that you do a final check before you finish the transfer process. This involves going through all the folders and files on the old device, making sure that everything has been copied over to the new device. You should also check that the files are accessible and can be opened without any errors.
It’s also a good idea to create a backup of the transferred files as soon as possible, just in case anything goes wrong with the new device or if you accidentally delete some files. This ensures that you have a copy of all the files that you transferred, which can give you peace of mind and prevent you from losing any important data. In summary, make sure that you do a final check of all the files and folders before you finish the transfer process.
It’s better to be safe than sorry, and taking a few extra minutes to double-check can save you a lot of trouble in the long run. Remember to always create a backup of your files to avoid any mishaps or accidental loss of data.
Disconnect SSD
When it’s time for your computer’s SSD to be disconnected, it’s important to make sure that all other components are safe from harm. Before doing anything else, you should shut down your computer and unplug it from the power source. It’s also a good idea to ground yourself by touching a metal object, such as the frame of your computer case.
The next step is to locate the SSD and remove any screws or mounting brackets that are holding it in place. Once it’s free, gently disconnect the power and data cables from the SSD, making sure not to tug or twist them. You can then safely remove the SSD from your computer.
Remember to take care when handling electronic components and always follow proper safety procedures to avoid damage or injury.
Boot Up and Enjoy Your NVMe Drive
Now that you’ve successfully installed your new NVMe drive, it’s essential to perform some final checks to ensure everything is working correctly. First, check your BIOS settings to make sure your computer recognizes the new drive. You may need to enable NVMe support in your BIOS settings if it’s not already enabled.
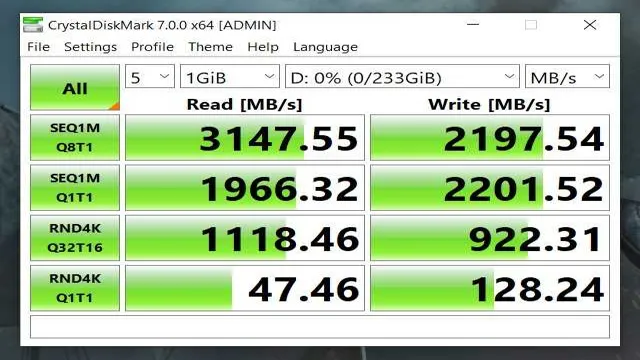
Next, confirm that your operating system detects your NVMe drive and that it appears as a new hard drive in your file explorer. Finally, run some benchmark tests to see if your new NVMe drive is performing as expected. You might be surprised by how much faster your computer is booting up and loading applications with the new drive.
Overall, by following these simple steps, you can ensure that your NVMe drive is working correctly and that you’ll enjoy faster application load times and speedy boot-up times. So sit back, relax, and let your computer do the heavy lifting!
Conclusion
In conclusion, transferring data from an SSD to NVMe may seem daunting at first, but with the right tools and mindset, it can be an easy and seamless process. Think of it like upgrading from a bicycle to a sports car – faster and more efficient, with the ability to handle heavier workloads. So, gear up and get ready to shift your data into high gear with the power and speed of NVMe technology!”
FAQs
What is the difference between SSD and NVMe?
SSD or solid-state drive is a type of storage device that uses NAND flash memory to store data, whereas NVMe or Non-Volatile Memory Express is a protocol designed for efficient communication between the storage device and the computer’s central processor. The main difference between these two is that NVMe is faster than SSD because it communicates directly with the CPU, whereas SSD has to go through the I/O controller.
Why would I want to transfer data from SSD to NVMe?
You would want to transfer data from SSD to NVMe because NVMe is faster than SSD. If you have large files or applications that require high-speed data transfer, then transferring data from SSD to NVMe can help to improve the speed of your computer.
How do I check if my computer supports NVMe?
To check if your computer supports NVMe, you can check the specifications of your motherboard or contact the manufacturer. Another way is to check if your computer has an M.2 connector, which is a small slot on the motherboard designed for NVMe storage devices.
How do I transfer data from SSD to NVMe?
To transfer data from SSD to NVMe, you can do it in several ways. One way is to use a data migration tool that can clone the data from your SSD to the NVMe. Another way is to copy and paste the data manually, but this can be time-consuming and error-prone. You can also reinstall the operating system onto the NVMe and then move the data over. It is recommended to backup your data before transferring to avoid data loss.