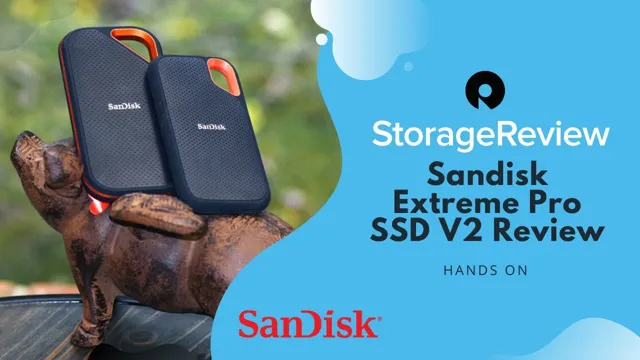
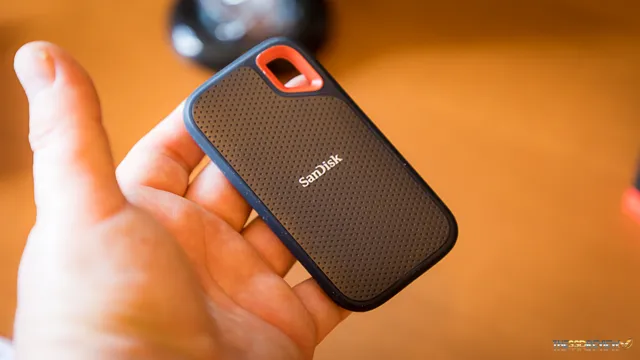
Portable storage is a necessity in today’s technological era. With the increase in file sizes and the need for secure backups, having a reliable and efficient portable SSD is a must. The Sandisk Extreme Portable SSD is a popular product that promises to offer both quality and performance.
However, setting up the device can be a daunting task, especially for those who are not tech-savvy. Are you one of those who recently purchased a Sandisk Extreme Portable SSD and are not sure where to begin? Do not worry! In this blog post, we will guide you through the process of setting up your new device step-by-step. Whether you intend to use it for backups, transferring files, or storing media, you will be up and running in no time.
We will explain the technical terms and functions involved in the setup process in simple language so that you can understand them even if you are not tech-savvy. We will cover everything from formatting the drive to choosing the right connection type. So, make yourself comfortable and get ready to set up your Sandisk Extreme Portable SSD like a pro.
What You Need
Setting up a SanDisk Extreme Portable SSD can seem like a daunting task, but it doesn’t have to be. First and foremost, make sure you have all the necessary components. These include the SSD drive itself, a USB-C cable, and a computer with a USB-C port or adapter.
Once you have everything, connect the USB-C cable to both the SSD and your computer. If your computer does not recognize the device, you may need to install drivers or update your operating system. Once your computer recognizes the SSD, you can begin transferring files and using it as additional storage.
Remember to always safely eject the drive before disconnecting it to avoid corrupting any files. With these steps, setting up your SanDisk Extreme Portable SSD should be a breeze.
Sandisk Extreme Portable SSD
If you’re someone who travels frequently or needs fast, reliable external storage for creative projects, the Sandisk Extreme Portable SSD is a great option that gives you what you need. This powerful, speedy device can hold up to 2TB of data and can transfer files at a lightning-fast pace. No more waiting around for files to transfer or worrying about the safety of your data while you’re out and about.
With its durable design and advanced security features, you can trust the Sandisk Extreme Portable SSD to keep your files safe and secure wherever you go. Plus, with its compact design and low weight, it’s easy to carry with you wherever you go. Whether you’re a photographer, videographer, or just someone who needs reliable external storage, the Sandisk Extreme Portable SSD is a great investment that won’t disappoint.

USB Type-C Cable
If you’re someone who frequently transfers data, charges devices, or connects peripherals, then having a USB Type-C cable is a must. This new and improved cable has quickly become the go-to choice for many tech-savvy individuals due to its convenience and versatility. Not only is it reversible, meaning you can insert it into a port without having to worry about orientation, but it also delivers speedy charging and fast data transfer rates.
What’s more, with its ability to handle up to 100 watts of power, it’s capable of charging larger devices like laptops. However, it’s worth mentioning that not all USB Type-C cables are created equal, and it’s essential to choose one that’s designed for your specific device. This will ensure that you get the optimal performance and safety from your cable.
So, before you rush out and purchase one, take some time to research and read reviews to find the perfect USB Type-C cable that meets your needs.
Computer or Laptop
When it comes to choosing between a computer or a laptop, there are a few things to consider. It all comes down to what you need. If you’re someone who needs to work on-the-go or needs to work in different locations, a laptop might be the best option.
Laptops are portable, lightweight, and have built-in batteries that allow you to work for hours without needing a power outlet. On the other hand, if you need a powerful workstation for intensive tasks like video editing, graphic designing, or gaming, a computer might be the better option. Computers are more powerful than laptops and are designed to handle more demanding workloads.
Additionally, they have more space for additional components, like graphics cards or larger storage drives, which can enhance performance. Ultimately, the decision between a computer or laptop comes down to your specific needs. If you need portability, go for a laptop.
If you need power, go for a computer.
Step-by-Step Guide
If you’re looking for a reliable and speedy external storage solution, the SanDisk Extreme Portable SSD is an excellent choice. Here’s a step-by-step guide on how to set it up quickly and easily. First, unbox the SSD and connect it to your computer using the included USB cable.
In most cases, your computer will recognize the drive automatically. However, if your computer is older or has unusual settings, you might need to install the SanDisk driver first. Once your computer recognizes the drive, you can start transferring files and storing your data on the SSD.
The SanDisk Extreme Portable SSD comes with handy software preloaded, which you can use to manage your files, password protect your data, and even back up your computer automatically. Overall, setting up and using the SanDisk Extreme Portable SSD is a breeze, and it will save you time and hassle in the long run.
Connect SSD to Computer/Laptop
If you’re looking to connect an SSD to your computer or laptop, there are a few easy steps to follow. First, make sure your computer has an available SATA port, which is the slot where the SSD will be connected. Then, open up your computer case and locate the SATA cable that runs from your motherboard to your hard drive.
Unplug the cable from your hard drive and plug it into your SSD instead. Next, find a power cable from your power supply and connect it to your SSD. Make sure everything is securely plugged in and you’re ready to go! If you’re unsure about anything, consult the manual for your computer or SSD for more detailed instructions.
Connecting an SSD can greatly improve the performance and speed of your computer, so it’s definitely worth the effort.
Format the SSD
SSD Formatting an SSD may seem like a daunting task, but with the right guidance, it can be a simple process. Before you begin, it’s important to back up any important data on the SSD as formatting will erase everything on it. Once you’ve done that, follow these steps:
Connect the SSD to your computer. Open Disk Management by searching for it in the Start Menu.
Locate the SSD in the list of disks and right-click on it.
Select “Format” and choose the file system you want to use (NTFS is recommended for Windows). Name the volume and assign a letter to the SSD.
Check the box for “Perform a quick format” to speed up the process.
Click “OK” to start formatting the SSD. Formatting an SSD can help improve its performance and efficiency. With this step-by-step guide, you can confidently format your SSD and optimize its performance for all your storage needs.
Install Sandisk Software
If you’ve recently purchased a Sandisk product and need to install the required software, don’t worry – it’s a relatively easy process. In this step-by-step guide, we’ll walk you through the installation process to ensure that you can start using your Sandisk product in no time. First, insert the Sandisk product into your computer’s USB port.
Next, visit the Sandisk website and click on the “Downloads” page. Here, you’ll be able to select the specific software that you need to download based on your product and system requirements. Once the download has finished, open the installer and follow the on-screen instructions to complete the installation.
It’s important to note that if you encounter any issues during the installation, you should consult Sandisk’s support resources or seek assistance from their customer service team. By following these simple steps, you’ll be able to install your Sandisk software quickly and efficiently, allowing you to start using your product right away.
Final Thoughts
In conclusion, setting up a Sandisk Extreme Portable SSD is a quick and easy process that can improve your storage capabilities and speed up your workflow. By following the simple steps outlined in the user manual or watching online tutorials, you can format the drive, transfer your files, and start working on the go. It’s important to remember to regularly back up your data and protect your drive from physical damage, such as drops or exposure to extreme temperatures.
With its compact size, durability, and high performance, the Sandisk Extreme Portable SSD is a great investment for anyone who needs to store, access, and share large files without compromising speed or security.
Conclusion
In conclusion, setting up the Sandisk Extreme Portable SSD is easier than building a sandcastle. All you need is a USB-C cable, a computer, and a few clicks of the mouse. And just like a well-designed sandcastle, this SSD is built to withstand the toughest conditions with its rugged shock-resistant design.
It’s time to stop playing in the sandbox and start storing your data with confidence. So go ahead, make your beach day complete with the Sandisk Extreme Portable SSD.”
FAQs
What are the system requirements for using the SanDisk Extreme Portable SSD?
The SanDisk Extreme Portable SSD requires a USB Type-C or Type-A port interface, and the system must be running Microsoft Windows 10, 8.1, or 7, or macOS High Sierra or newer.
Does the SanDisk Extreme Portable SSD come with software for data backup?
Yes, the SanDisk Extreme Portable SSD comes with SanDisk SecureAccess software for encrypted data backup.
Can the SanDisk Extreme Portable SSD withstand extreme temperature and shock?
Yes, the SanDisk Extreme Portable SSD is designed to be resistant to water, dust, extreme temperatures, and shock.
How do I transfer data to and from the SanDisk Extreme Portable SSD?
You can transfer data using the USB Type-C or Type-A cable that comes with the SSD, or you can use a compatible adapter or cable. Drag and drop files or use data backup software to transfer files.
