
If you’re looking to install Windows 11 on an external SSD drive, you’ve come to the right place. Whether your laptop or PC doesn’t meet the minimum system requirements for Windows 11, or you simply want to run the operating system on an external drive for convenience, this guide will walk you through the process. But why would you want to run Windows 11 on an external SSD drive, you may ask? Well, there are a few advantages to doing so.
For one, it allows you to keep your main computer free of clutter and potential software conflicts. Additionally, an external drive can be easily transported between devices, so you can take your Windows 11 setup with you wherever you go. Before we get started, it’s worth noting that installing Windows 11 on an external SSD drive is not the simplest process.
It requires a bit of technical know-how and patience, but the results are worth it. In this guide, we’ll be covering everything from creating a bootable USB drive to configuring your BIOS settings. So, grab your external SSD drive and let’s get started!
Check if Your PC Supports Windows 11 and External Booting
If you are thinking of trying out Windows 11 but don’t want to install it on your main drive, you may be wondering if it’s possible to install it on an external SSD drive. The good news is that you can, but there are a few things you need to consider first. Firstly, you need to ensure that your PC supports Windows 1
Microsoft has released a PC Health Check app that can quickly determine if your system meets the minimum requirements for Windows 1 Secondly, you need to check if your PC supports external booting. Not all systems can boot from an external drive, so it’s important to confirm this before proceeding.
Once you have confirmed that your PC meets these requirements, you can proceed with installing Windows 11 on your external SSD drive. This can give you the flexibility to use Windows 11 on any system you choose, without having to worry about modifying your primary system. By following the installation instructions carefully, you can enjoy the benefits of Windows 11 without any risk to your main system.
System Requirements and BIOS Settings
Before upgrading or installing Windows 11, it is crucial to ensure that your PC meets the necessary system requirements. This includes having a compatible processor, a minimum of 4GB of RAM, and at least 64GB of internal storage. Additionally, your PC must support TPM version
0 and have Secure Boot enabled in the BIOS settings. To avoid any installation issues, it is also important to check if your PC supports external booting. If it doesn’t, you may need to update your BIOS settings or consider purchasing a new system that meets the Windows 11 requirements.
Remember, without meeting the required specifications, your device may not function properly or experience stability issues.
Create Windows 11 Bootable USB Drive
Are you ready to get your hands on Windows 11 but don’t want to give up valuable storage space on your computer? Luckily, you can install Windows 11 on an external SSD drive! The first step is to create a bootable USB drive with the Windows 11 ISO file. You can use the built-in Windows 10 Media Creation Tool to create the bootable USB drive. Once you have the bootable USB drive, connect your external SSD drive to your computer.
Then, restart your computer and enter the BIOS settings to change the boot order. Make sure to set the external SSD drive as the primary boot device. Now, simply follow the installation process to install Windows 11 on your external SSD drive.
With this easy process, you can experience the excitement of Windows 11 without sacrificing your precious storage space.
Download Windows 11 ISO and Rufus USB Tool
Are you excited to get your hands on Windows 11? Well, the first thing you need to do is create a bootable USB drive for your installation. To do that, you’ll need two things: the Windows 11 ISO file and Rufus USB tool. Firstly, you need to download the Windows 11 ISO file from the official Microsoft website.
You’ll need a valid Windows licence key to activate it, so make sure you have that ready too. The ISO file size is around 5GB, so make sure you have enough free space on your computer to download it. Next, you’ll need to download Rufus USB tool.
This is a free and easy-to-use tool that will help you create your bootable USB drive. Make sure to download the latest version from their official website. Once both downloads are complete, open Rufus and select your USB drive.
Choose the Windows 11 ISO file you just downloaded as the source. Then, hit the “start” button and let Rufus work its magic. The process usually takes around 15-20 minutes, depending on the speed of your computer and USB drive.
Once Rufus has finished, you’ll have a bootable USB drive ready to go. Plug it into your computer and reboot. This will bring up the Windows 11 installation process, so just follow the prompts to get started.
Creating a bootable USB drive can seem daunting, but with the Windows 11 ISO file and Rufus USB tool, the process is simpler than you think. So get downloading and enjoy all the new features that Windows 11 has to offer!
Create Bootable USB Drive Using Rufus
If you’re looking to install Windows 11 on a new computer or upgrade your existing one, creating a bootable USB drive is essential. Fortunately, Rufus makes the process easier than ever before. With Rufus, you can create a bootable USB drive for Windows 11 in just a few simple steps.
First, download and install Rufus on your computer. Next, plug in your USB drive and select it as the target device in Rufus. Choose the Windows 11 ISO file and select “Start” to begin creating your bootable USB drive.
Rufus will format your USB drive and copy the necessary Windows 11 files to the drive, which may take some time depending on the speed of your computer and USB drive. Once the process is complete, you’ll have a bootable USB drive ready to use for installing Windows 11 on your computer. So what are you waiting for? Give Rufus a try and get started with Windows 11 today!
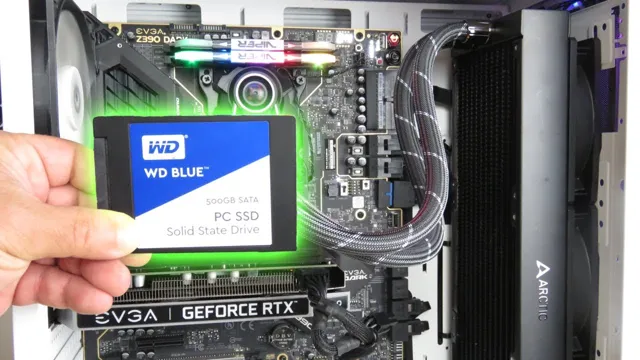
Connect External SSD Drive
If you’re looking to install Windows 11 on an external SSD drive, you’re in luck because it can be done quite easily. First, make sure your external SSD has enough space for the operating system file, which is at least 64 GB. Then, connect your external SSD drive directly to your computer’s USB port.
Make sure your computer is set to boot from external drives. Go into the BIOS settings and select the external SSD drive as the primary boot device. Also, make sure your external SSD drive is formatted as NTFS.
You can now proceed to install Windows 11 on your external SSD drive just like you would on your internal hard drive. Once the installation is complete, you can boot up your computer from the external SSD drive and enjoy all the benefits of Windows 11 on the go. It’s that simple!
Format External SSD Drive
If you just got a new external SSD drive and you’re not sure how to format it, don’t worry, it’s an easy process. First, connect your SSD drive to your computer using a USB cable. Your computer should automatically detect the new drive and show a pop-up message.
If it doesn’t, go to “This PC” or “My Computer” and look for the new drive. Once you’ve located it, right-click on the drive and select “Format.” Depending on your preferences, you can choose the file system you want, such as FAT32 or NTFS, and select a label for the drive.
It’s important to note that formatting will erase all data on the drive, so make sure you back up any important files before proceeding. With just a few clicks, you can have your new external SSD drive ready for use.
Insert and Connect External SSD Drive
Connecting an external SSD drive to your computer can provide additional storage space and faster data transfer speeds compared to traditional hard drives. To get started, you’ll need to find an available USB port on your computer. Then, connect the external SSD drive to the USB port using the cable provided.
Once connected, your computer should recognize the external drive and prompt you to install any necessary drivers or software. After installation, you can begin using the drive and transfer files to and from it just like you would with your internal hard drive. Whether you’re looking to store large files or improve your computer’s performance, an external SSD drive can be a valuable addition to your setup.
So go ahead and insert that SSD drive, and get ready to experience the benefits of faster and more efficient storage.
Boot PC with Bootable USB Drive
Are you looking for a way to install Windows 11 on an external SSD drive? Well, the good news is that it’s absolutely possible. All you need is a bootable USB drive and a few simple steps to make it happen. Firstly, make sure your external SSD is connected to your computer and then insert your bootable USB drive into a USB port.
Next, you’ll need to enter your computer’s BIOS menu and set the boot priority to boot from your USB drive. Once you’ve done that, save your changes, restart your computer, and voila! You can now install Windows 11 on your external SSD drive. Just make sure that you select your external SSD as the installation destination during the installation process, and you’re good to go.
With this method, you can easily keep your Windows 11 installation separate from your computer’s internal drive, giving you the freedom to take your operating system with you wherever you go. So why not give it a try and see how it works for you?
Reboot Your PC and Enter Boot Menu
To boot your PC with a bootable USB drive, you first need to restart your computer and access the boot menu. The boot menu contains a list of devices where you can select to boot from, such as your hard drive or a USB drive. To access the boot menu, press the appropriate key (usually F12 or Esc) during the boot-up process.
Keep in mind that the key to access the boot menu can vary depending on your computer’s manufacturer. Once you’re in the boot menu, select the USB drive that contains the bootable software you want to use and press Enter. Your PC will now boot from the USB drive, allowing you to install a new operating system or repair your existing one.
By following these steps, you can easily boot your PC with a bootable USB drive and take full advantage of its capabilities.
Select Bootable USB Drive to Boot from
When you need to boot your PC from a bootable USB drive, it’s important to know how to select the drive as the boot device. First, insert the USB drive into your computer’s USB port. Next, restart the PC and enter the BIOS or UEFI settings.
This may require pressing a specific key during startup, such as F2 or Delete. Once in the settings, look for the boot section and select the option to change the boot order. From there, select the USB drive as the first boot device, save the changes, and exit the settings.
Your PC will now boot from the bootable USB drive instead of the internal hard drive. It’s important to note that not all computers or devices have the same BIOS or UEFI settings, so the exact process may vary. But with a little bit of research or help from a professional, you should be able to easily select the bootable USB drive and get your PC up and running.
Install Windows 11 on External SSD Drive
If you’re looking to install Windows 11 on an external SSD drive, you’re in luck! It’s totally possible to do so, and it can be a great way to have your operating system available on the go. First, you’ll need to make sure your external SSD drive is connected to your computer. Next, download the Windows 11 installation media from the official Microsoft website and create a bootable USB drive.
Once you’ve done this, restart your computer and boot it from the USB drive. From here, follow the prompts to install Windows 11 as you normally would – just make sure to select your external SSD drive as the installation destination. It’s important to note that while installing the operating system on an external drive can be useful, it may not run as smoothly as it would on an internal drive.
However, with the right equipment and a bit of patience, you can have a portable Windows 11 solution in no time!
Follow the Installation Wizard and Choose External SSD Drive
Installing Windows 11 on an external SSD drive can be a great option for those who want to keep their system running smoothly without having to upgrade their internal storage. To get started, simply follow the installation wizard and choose your external SSD drive as the location for the operating system. This process is straightforward and can be done in just a few easy steps.
Once your external SSD drive is selected, the installation wizard will begin installing Windows 11 onto the drive. It’s important to note that you’ll need to have a good amount of space available on your external SSD drive in order to complete the installation process. With the installation complete, you’ll be able to boot your system directly from the external SSD drive and experience the performance benefits of running Windows 11 on an external drive.
So if you’re looking for an easy and effective way to upgrade your system, consider installing Windows 11 on an external SSD drive!
Complete the Installation Process and Boot into Windows 11
If you’re looking to install Windows 11 on an external SSD drive, you’ve come to the right place! Once you’ve got the ISO file downloaded and the bootable USB created, it’s time to complete the installation process and boot into Windows 1 First, plug in your external SSD drive and select it as the destination for the Windows 11 installation. Make sure to erase any existing data on the drive before proceeding.
Next, follow the on-screen prompts to install Windows 11 as you would on any other device. Once the installation is complete, eject the USB and restart your computer. You may need to adjust your BIOS settings to boot from the external SSD drive.
From there, you should be able to enjoy all of the features and benefits of Windows 11 on your portable SSD. Keep in mind that some older computers may not be compatible with Windows 11, so check your system requirements before attempting the installation. Happy computing!
Conclusion
Congratulations! You have successfully learned how to take your love for Windows 11 to the next level by installing it on an external SSD drive. With this new setup, you’ll have the flexibility to take your personalized desktop environment with you on-the-go, bringing a bit of home with you wherever you go. Say goodbye to stationary computing and hello to equipping yourself with the tools to conquer all your technology goals, one portable SSD at a time!”
FAQs
Can Windows 11 be installed on an external SSD drive?
Yes, Windows 11 can be installed on an external SSD drive, as long as the drive is compatible with the system requirements and has enough space for the installation.
What are the system requirements for installing Windows 11 on an external SSD drive?
The system requirements for installing Windows 11 on an external SSD drive are the same as those for installing it on an internal drive, which include a compatible processor, RAM, and graphics card. Additionally, the SSD must have at least 64 GB of storage space.
How do I install Windows 11 on an external SSD drive?
To install Windows 11 on an external SSD drive, you will need to create a bootable USB drive with the Windows 11 installation files, connect the SSD drive to your computer, and then boot from the USB drive to begin the installation process. You will then be prompted to select the external SSD drive as the destination for the installation.
Can I use a portable SSD drive to install Windows 11?
Yes, you can use a portable SSD drive to install Windows 11, as long as it meets the system requirements and has enough space for the installation. Portable SSD drives are convenient for use with laptops and other mobile devices, as they do not require an external power source.