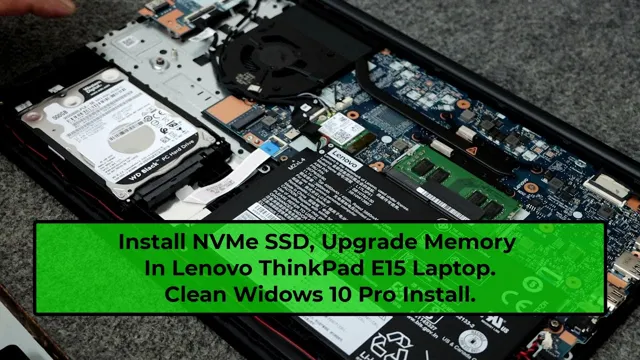
Adding a secondary SSD to your computer can provide a significant boost in performance and storage space. Whether you are looking to store large files or want to speed up your system’s boot and application load times, installing a secondary SSD is a straightforward process that anyone can do. But how do you go about it? In this guide, we will walk you through the steps required to install a secondary SSD in your computer, including what tools you will need, how to physically install the drive, and how to format and partition it once you have it up and running.
So, buckle up and get ready to boost your computer’s performance with a secondary SSD!
Check Compatibility and Needed Materials
Before installing a secondary SSD, it is important to ensure that your computer is compatible with it. Check the specifications of your motherboard to confirm if it accepts the type of SSD you plan to install. Additionally, you will need the necessary tools and materials.
It is recommended to have a screwdriver set, an anti-static wrist strap, and thermal paste on hand. Before beginning the installation process, it is also important to back up any important data from your primary drive to avoid any loss of data. Finally, ensure that your computer is shut down and unplugged before starting the installation process.
By following these steps, you can successfully install a secondary SSD to enhance your computer’s performance.
Check Motherboard Compatibility
Now that you’ve decided to build a PC, it’s essential to check the compatibility of the motherboard. The motherboard is the most critical component of the computer, so it’s crucial to ensure that it’s compatible with other parts you plan to use. Checking compatibility helps to avoid any potential problems down the line, and it can save you a lot of time and money.
One way to check compatibility is to look at the motherboard’s specifications and compare them to the parts you plan to use. Another option is to use online compatibility tools that match up the motherboard with other components, saving you time and energy. Checking compatibility isn’t the only thing you need to do when building a PC, though.
You’ll also need to gather the necessary materials. Depending on the build, this can include a case, power supply, processor, RAM, storage, and graphics card. Make sure you have all the materials you need before you start building, so you don’t run into any problems halfway through.
With a little bit of preparation, you’ll be able to build a PC that meets your needs and is compatible with all of its components.
Buy Required SATA Cables if Needed
When you’re building or upgrading a computer, it’s essential to check compatibility and ensure you have all the necessary materials. One crucial aspect to consider is the SATA cables. If your new components require SATA cables and you don’t already have them, be sure to buy them before starting your build.
You don’t want to get halfway through the process and have to run out to the store. SATA cables connect your hard drives and solid-state drives to your motherboard, and without them, your computer won’t be able to read or write data to those drives. It’s important to note that there are different types of SATA cables, so make sure you’re getting the right kind for your specific motherboard and drives.
Double-check compatibility before making any purchases to avoid any issues down the line. Remember, investing in required SATA cables can save you time and frustration during the build process, so don’t skimp on this essential component.
Prepare the Computer for Installation
Installing a secondary SSD can be a straightforward process once you have prepared your computer. First, make sure to shut down your computer and unplug it from any power source. Next, ground yourself by touching a metal surface to release any static electricity that may damage the internal components of your computer.
Then, locate the appropriate slot for your new SSD and ensure it is compatible with the computer. If needed, remove any cables or brackets that may be in the way. Once installed, connect any necessary cables and ensure the drive is secured in place.
Finally, turn on your computer and ensure the new SSD is recognized by the system. With these steps completed, your computer is ready to take full advantage of the benefits of a secondary SSD, such as faster boot times and improved overall performance.
Shut Down and Unplug Your Computer
Before installing your new computer, it’s crucial to prepare the computer properly to ensure that it functions optimally. The first step in the preparation process is to shut down and unplug your computer. It may seem like a no-brainer, but it’s essential to make sure that your computer is turned off completely, with no power supply connected to it, before you start disassembling anything.
Not doing so could lead to electrical damage or even personal injury, so it should never be skipped. Once you’re guaranteed to have safe access, it’s time to start the installation process. Taking the time to prepare your computer properly means that you’ll have a smoother, more seamless experience throughout the entire installation process.
Remove the Computer Case
When building a computer, one of the crucial steps is to remove the computer case. To do this, you need to start by giving yourself enough space to work. Ensure that you have a clean and flat area to work on where you can lay out all the parts and tools needed.
Then, unplug all the cords and cables from the computer, including the power cable. Next, locate the screws or clips holding the case in place. If your computer case has screws, use a screwdriver to remove them.
If it has clips, press them to release the case from the frame. Once the case is loose, gently lift it away from the frame to avoid damaging any internal components. By removing the computer case, you will have easy access to replace or add any necessary parts to your computer.
Ground Yourself
“Ground Yourself” Before installing any new computer hardware, it is always best to ground yourself to prevent any static electricity build-up that could potentially damage your components. One way to do this is by using an anti-static wrist strap, which can be easily attached to your wrist and grounded to a metal surface such as your computer case. Alternatively, you can also touch a grounded metal object before handling any hardware to discharge any static electricity in your body.
It may seem like a small thing, but grounding yourself can help protect your investment and ensure a successful installation. So, take a moment to ground yourself before diving into your computer’s internals.
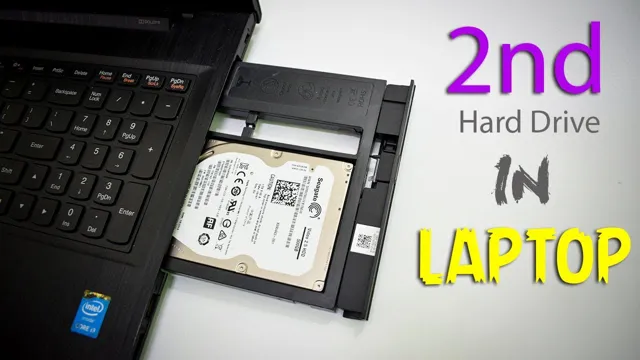
Install the Secondary SSD
If you’re running out of storage space on your computer, it might be time to install a secondary SSD. Fortunately, doing so can be relatively straightforward, even for those with limited technical expertise. First, you’ll want to gather your tools, including the SSD, screwdrivers, and an anti-static bracelet.
Once you’ve done so, turn off your computer and unplug it from the outlet. Open up the computer case and locate an available drive bay. Check the size of your SSD to make sure it fits the bay, and then remove the mounting bracket screws if necessary.
Attach the SSD to the bracket, being careful to line everything up correctly. Finally, secure the bracket to the drive bay using screws. Once everything is in place, you can close up the case, plug in your computer, and turn it back on.
With your secondary SSD installed, you’ll have plenty of extra storage space to work with.
Locate a Free Bay or Slot on the Motherboard
When it comes to installing an additional SSD in your computer, the first step is to locate a free bay or slot on the motherboard. This can be a bit confusing for beginners, but don’t worry, it’s not as complicated as it may seem. Before opening up your computer, make sure to turn it off and unplug it from any power sources.
Once you’ve opened up your computer case, you’ll need to locate the SATA ports on your motherboard. These are typically located near the bottom of the board and will be labeled. Simply plug in the data and power cables from your SSD into an available slot and you’re good to go! Just make sure to secure the SSD in place with the screws provided and close up your computer case.
Congratulations, you’ve successfully installed your secondary SSD! With this additional storage, you’ll be able to store more files and applications without sacrificing the performance of your computer.
Mount the SSD in the Bay or Slot
If you’re looking to install a secondary SSD in your computer, the first step is to mount it in a bay or slot. This involves physically installing the SSD into the computer’s case so that it can be connected to power and data cables. To do this, start by locating an open bay or slot in your computer’s case.
Depending on the type of case you have, this could be a dedicated SSD bay or a spare hard drive bay. Once you’ve found a suitable location, you can screw the SSD into place using the provided mounting screws. Be sure to connect both the power and data cables to the SSD, making sure they’re securely seated.
Once the SSD is installed and connected, you can power on your computer and start using it right away. With your new secondary SSD in place, you’ll enjoy faster read and write speeds, allowing you to access your files more quickly than ever before.
Connect the SSD to the Power Supply Unit
If you’re looking to install a secondary SSD in your computer, the first step is to connect it to the power supply unit. It’s a simple process that can be accomplished by following a few basic steps. The first thing you’ll need to do is locate the SATA power connector on your power supply unit.
This connector is typically a small, rectangular plug that’s labeled as SATA. Once you’ve located it, simply connect the SATA power cable from your secondary SSD to the power supply’s SATA connector. This will give your SSD the power it needs to operate and function properly.
It’s important to ensure that the connections are secure and tight to avoid any problems down the line. Once connected, you can move on to installing the SSD in your computer and beginning the setup process. With just a few simple steps, you can easily install your secondary SSD and start reaping the benefits of faster speeds and improved performance.
Connect the SSD to the Motherboard via SATA Cable
To install a secondary SSD, you first need to connect it to the motherboard via a SATA cable. This is a relatively simple process that requires just a few steps. Start by locating the SATA ports on your motherboard.
These are usually positioned near the edge of the board and are labeled with numbers or letters. Once you have located the SATA port, plug one end of the SATA cable into the port on the motherboard and the other end into the SSD. Make sure that the cable is securely connected on both ends.
Once the cable is in place, power on your computer and wait for it to detect the new SSD. You may need to navigate to the BIOS to ensure that the SSD is recognized. With the SSD connected to the motherboard, you can now install your operating system or use it to store data.
Overall, connecting your secondary SSD via SATA cable is a straightforward process that can greatly enhance the performance of your computer.
Put the Computer Case Back On
Now that you have the computer case off, it’s time to install the secondary SSD. Before you do so, make sure to locate the corresponding slot on your motherboard. Once you find it, gently insert the SSD into the slot and secure it in place by tightening the screws.
Don’t forget to connect the SATA data cable and power cable to the SSD. Now that your secondary SSD is installed and secure, it’s time to put the computer case back on. Carefully line up the screw holes on the case with those on the motherboard and screw everything back into place.
Remember, it’s important to handle your components with care when building or upgrading your PC to avoid any unnecessary damage. With your secondary SSD installed, you’ll have more storage space for all your files, programs, and games. Happy computing!
Configure and Initialize the Secondary SSD
So, you’ve decided to upgrade your computer’s storage capacity by installing a secondary SSD? Great decision! To get started, you’ll need to configure and initialize the new drive. First, open your computer’s case and locate the SATA ports on the motherboard. Connect the SATA cables from the new SSD to an available port, making sure to secure the connections.
Power up your computer, and head to the Disk Management tool in the Control Panel. Here, you’ll see your new SSD listed as unallocated space. Right-click on it and select “Initialize Disk.
” Choose either MBR or GPT partition tables, and follow the prompts to create a new partition and format the drive. Voila! Your new SSD is now ready to use. Don’t forget to transfer over your files and programs from your old drive, or you can simply use your new SSD as additional storage space, depending on your needs.
Congrats on successfully installing your secondary SSD – enjoy the increased speed and storage capacity it provides!
Turn on the Computer
When it comes to setting up a secondary SSD, the first step is to turn on the computer. Once it’s up and running, it’s time to configure and initialize the SSD. This process involves preparing the SSD for use by formatting it and assigning it a drive letter.
The first thing to do is connect the SSD to the computer using a SATA cable and power cable. You can then go into the BIOS settings to make sure the computer recognizes the new SSD. Next, you’ll need to open Disk Management in Windows and initialize the SSD.
This involves selecting the disk and choosing the partition style (either MBR or GPT). Finally, you’ll need to format the SSD and assign it a drive letter. This will make it accessible from Windows Explorer.
By following these steps, you’ll be able to set up a secondary SSD that’s ready to use. Overall, setting up a secondary SSD may seem daunting at first, but it’s a relatively straightforward process that can greatly benefit your computer’s storage and performance.
Enter the BIOS Setup Menu to Check for SSD Detection
SSD detection, BIOS setup menu, secondary SSD, configure, initialize If you have installed a secondary SSD into your computer and it isn’t being detected, you may need to enter the BIOS setup menu to check for SSD detection. The BIOS, or Basic Input/Output System, is the firmware that initializes the hardware and software of a computer. Once you access the BIOS setup menu, look for the section labeled “Storage” or “Drives” and check if the secondary SSD is listed.
If it isn’t, you may need to enable the SATA port that it’s connected to. Once the secondary SSD is detected, you can configure and initialize it. This means setting it up to store data and making sure it’s functioning properly.
To do this, you’ll need to format the drive and assign a drive letter to it. This process can be done through the Disk Management tool on Windows. Properly configuring and initializing your secondary SSD will allow it to function as intended and provide you with more storage space for your files and programs.
Initialize and Format the Drive in the Operating System
To configure and initialize the secondary SSD, you will first need to connect it to your computer, and then initialize and format it in your operating system. This process involves allocating space on the drive for storing data and setting it up to be used by your computer. To initialize the SSD, open the Disk Management utility in Windows, select the drive, and choose the option to initialize it with the MBR or GPT partition table.
Once the drive is initialized, you can format it with a file system such as NTFS or exFAT. Formatting the drive will erase any existing data, so be sure to back up any important files before proceeding. After formatting, you can assign a drive letter to the SSD, so that it can be easily recognized by your operating system.
Remember to periodically check the health of your SSD, as constant usage can cause wear and tear on the drive. By initializing and formatting the drive, you can ensure that it functions smoothly and efficiently, providing you with reliable storage for your important files, videos, music, and more. So go ahead, configure and initialize your secondary SSD, and enjoy the added speed and storage capacity it brings to your computer!
Conclusion
And there you have it, folks! Installing a secondary SSD is a piece of cake. With a little bit of patience, a screwdriver, and some know-how, you’ll be up and running in no time. So go forth and double your storage capacity, because in today’s age of endless media and data, you can never have too much space.
Happy installing!”
FAQs
What are the requirements for installing a secondary SSD?
To install a secondary SSD, you need to make sure that your system has an available SATA port, a power connector, and enough physical space to accommodate the new drive. You also need to ensure that the new drive is compatible with your motherboard.
How do I physically install a secondary SSD?
Firstly, turn off your computer and unplug all cables. Open your computer case, locate an empty drive bay, and attach the SSD to the bay using screws. Connect the SATA data cable to the SSD and the motherboard, and connect the power cable to the power supply.
How do I format a secondary SSD?
Once the physical installation is complete, you need to format the drive. Go to Disk Management, locate your new SSD, right-click on it and select “New Simple Volume.” Follow the wizard to allocate a drive letter and set up the file system.
How do I transfer data to my secondary SSD?
You have two options for transferring data to your secondary SSD. You can transfer data manually by copying and pasting files to the new drive, or you can use backup software to clone your existing drive to the new SSD. Cloning your drive is generally faster and more efficient.