If you’re someone who enjoys working with technology, then installing a second SSD on your computer might be right up your alley! However, if you’re not sure where to start or how to go about it, then you’re in the right place. In this blog, we’ll talk about how to install a second SSD on Windows 11 and why it could be beneficial for you. You might be wondering, “why bother installing a second SSD if I already have one?” Well, just like how adding a new storage cabinet to your kitchen can make your life easier, having a second SSD can enhance your computer’s performance and make it run faster.
We’ll cover everything from purchasing your second SSD to physically installing it in your computer and setting it up properly. It might sound daunting at first, but with a little bit of patience and the right tools, you can do it! Plus, there’s nothing quite like the satisfaction of completing a DIY project, especially when it comes to technology. So, whether you’re a seasoned computer whiz or just starting to delve into the world of tech, get ready to take your computer’s performance to the next level with a second SSD.
Check Compatibility
If you’re looking to add a second SSD to your Windows 11 system, the first step is to check compatibility. Make sure your motherboard has an available SATA or NVMe slot, and that your power supply has enough wattage to support the additional drive. Once you’ve confirmed compatibility, physically install the SSD into the available slot and secure it in place.
Next, boot your computer and navigate to the Disk Management tool in Windows 1 From there, you can initialize and format the new drive. Once it’s formatted, you can begin using it to store files or install programs.
Remember to always handle sensitive computer components with care and to ground yourself to avoid damaging your hardware. Overall, installing a second SSD can greatly improve your system’s performance and storage capacity.
Ensure compatible SATA interface and available power connectors
When you are shopping for a new SATA hard drive or solid-state drive, compatibility is key. You need to make sure that the drive you are purchasing has a compatible SATA interface and the necessary power connectors to work with your computer. SATA interfaces come in different speeds, so make sure that the speed of the new drive matches that of your system.
Additionally, check whether your computer has enough power output to support the new drive, as some of the latest solid-state drives require a lot of power. Finding a compatible drive requires some research, but it’s essential to ensure a seamless installation process and avoid problems in the long run. So, take the time to do your homework, and you’ll be sure to find an excellent SATA drive that meets all your needs.
Shut Down and Open Computer Case
Installing a second SSD on a Windows 11 computer can significantly boost storage and speed capabilities. To begin the process, you will need to shut down your computer and open the computer case. Once you have done this, locate an available slot for the new SSD and connect it to the power supply and data cables.
Make sure to use proper precautions to avoid damaging any components or static electricity. Once the SSD is securely in place, power up the computer and go into the BIOS settings to ensure that the new drive is recognized. From there, you will need to format and partition the drive, and then set it up for use in Windows 1
Overall, adding a second SSD is a straightforward process that can greatly enhance your computing experience.
Turn off PC, unplug power, open side panel of case
When it comes to opening up your computer case, there are some important steps that you need to take. First, turn off your PC completely. This means shutting down any programs or applications and then selecting the “shut down” option.
Once your computer is completely powered off, you should unplug the power cord to avoid any potential electric shock. Next, locate the side panel of the computer case and remove any screws or clasps that are holding it in place. Carefully slide the panel off to reveal the inner workings of your computer.
It’s important to be gentle and avoid touching any delicate components, especially if you’re not familiar with them. Overall, taking the time to safely shut down and open up your computer case can be a great way to troubleshoot and upgrade your system. So go ahead and give it a try, just make sure to follow these simple steps!
Mount SSD in Available Bay
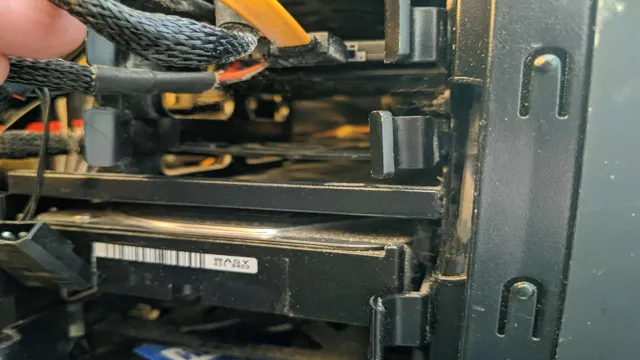
If you’re looking to increase your storage capacity, installing a second SSD in your Windows 11 system is a great option. The first step to installing a second SSD is to identify an available bay. Most desktop towers come with extra bays to add additional hard drives or SSDs.
Once you find an available bay, carefully remove the cover to the bay and lay it aside. Then, slide the SSD into the bay and ensure that it is secured with the screws that come with your system. Finally, connect the power cable and data cable to the SSD and connect them to the appropriate ports on the motherboard.
Make sure to properly ground yourself before working on any internal components to avoid damage from electrostatic discharge. By following these steps, you’ll be able to easily install a second SSD and enjoy all the benefits of expanded storage on your Windows 11 system.
Screw or slide in SSD in compatible bay
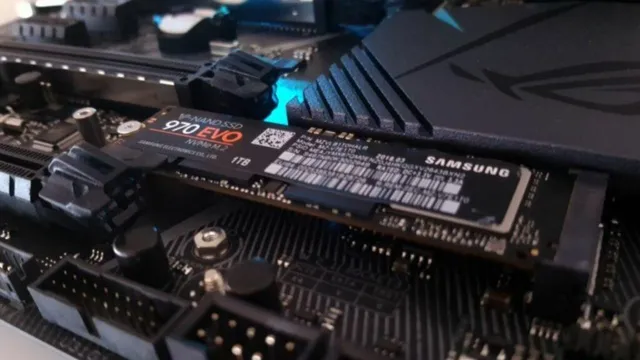
If you’re looking to upgrade your computer’s storage space, one of the easiest ways to do so is by installing an SSD. Once you have a compatible bay available, the first step is to decide whether you want to screw or slide in the SSD. If you choose to screw it in, make sure to align it properly and use the correct screws provided with the SSD.
If you opt for sliding it in, make sure to push it gently until it clicks into place. Once the SSD is securely mounted, you can connect the necessary cables and start transferring your data. It’s important to note that some bays may require additional hardware or adapters, so double check compatibility before purchasing an SSD.
With the right installation process, you can enhance your computer’s performance and increase storage capacity in no time.
Connect Data and Power Cables
If you want to install a second SSD in your Windows 11 system, then you need to know how to connect data and power cables properly. First, make sure you have the appropriate cables and a screwdriver. Locate an available SATA port on your motherboard and connect one end of the data cable to it.
The other end of the data cable should be connected to your second SSD. Be sure to firmly attach the data cable connectors to prevent any potential data transfer issues. Then, connect the power cable to the power supply and attach the other end of the cable to your second SSD.
Once everything is properly connected, you can turn on your computer and make driver installations and formatting adjustments, as necessary. However, don’t forget to make sure your system is compatible with the new SSD and to backup all important data prior to installation. By following these steps, you will successfully install a second SSD into your Windows 11 system and improve your overall storage capacity.
Attach SATA data cable to SSD and motherboard, then power cable to PSU
Connecting your SSD to your computer is an important step in getting your system up and running. To do this, you’ll need to attach the SATA data cable to both your SSD and your motherboard. This will allow the two components to communicate and work together seamlessly.
You’ll also need to attach a power cable to your SSD and your power supply unit (PSU). This will provide the necessary power to your SSD and allow it to function properly. When connecting the data cable, be sure to line up the connectors correctly to avoid damaging either component.
As for the power cable, it’s important to make sure it’s securely connected to both the SSD and the PSU to avoid any loose connections or potential malfunctions. Once this step is complete, you’re one step closer to getting your computer up and running smoothly.
Boot Up and Format SSD
If you’re wondering how to install a second SSD in Windows 11, don’t worry – it’s a relatively straightforward process. The first step is to ensure that your computer is turned off and unplugged from the power source. Once you’ve opened up the case, you’ll need to locate an empty drive bay where you can install the new SSD.
Next, insert the SSD into the bay and secure it in place with screws or other hardware as necessary. Then, connect the appropriate cables to the SSD and ensure that it’s properly seated. Once you’ve finished physically installing the new SSD, it’s time to boot up your computer and format the SSD so that it’s ready to use.
Go to your computer’s BIOS settings and ensure that the new SSD is detected. Then, boot into Windows and use your system’s disk management tools to format the new drive. With these steps completed, you should now have a functional second SSD ready to use alongside your existing storage devices.
Access Disk Management and format SSD as NTFS file system
To format your SSD as NTFS file system, you’ll first need to access Disk Management. After connecting your SSD to your PC and booting it up, right-click on the Windows Start button and select “Disk Management” from the dropdown menu. This will open a window displaying all connected drives, including your newly installed SSD.
Locate your SSD and ensure that it is recognized by the system. If it isn’t, make sure all connections are secure and power is being supplied correctly. Once you confirm that your SSD is visible, right-click on it and select “Format”.
This will bring up the “Format” menu where you can select the file system type you want to use – in this case, NTFS. After selecting NTFS, you can choose a volume label and enable file compression if desired. You can also adjust the allocation unit size, but leaving it at the default setting is generally recommended.
Click “OK” to begin the formatting process. It’s important to note that formatting your SSD will erase all existing data, so make sure to back up any important files before proceeding. Once the formatting is complete, your SSD will be ready for use as an NTFS file system drive.
Congratulations, you’ve successfully formatted your new SSD!
Transfer Data to SSD
If you want to install a second SSD on your Windows 11 computer, transferring data from your current drive to the new one isn’t as complicated as it may seem. First, make sure to shut down your computer and disconnect any cables. Next, locate an open drive bay and install your SSD.
Once installed, connect the SATA power and data cables to your new drive. After completing the physical installation, you can transfer data using a cloning software. There are a number of free software options available that will help you transfer data from your current drive to the new SSD.
Simply select the software you prefer, connect your new SSD to your computer, and follow the step-by-step instructions provided by the software. Once the transfer is complete, your data will be safely transferred to your new drive. And with your new SSD in place, you’ll enjoy faster performance and a smoother computing experience.
So go ahead and take the plunge – you’ll be glad you did!
Copy or migrate data from old drive to new SSD
If you’re looking to upgrade your old computer to a new SSD, transferring your data to the new drive is a crucial step. The good news is that it doesn’t have to be a daunting task. There are several easy ways to copy or migrate your data from your old drive to the new SSD.
You can use a cloning software that makes an exact copy of your current drive and transfers it to the new SSD, or you can manually transfer your data by copying and pasting your files and folders to the new drive. There are also specialized migration tools that come with your new SSD, which are designed to make the transfer process as easy as possible. The most important thing to remember is to back up your data before attempting any transfer, as it’s always better to be safe than sorry.
With a bit of planning, transferring your data to your new SSD can be a simple and stress-free process that ensures your data is safe and secure.
Conclusion
Congratulations! With the above steps, you are now a seasoned pro at installing a second SSD on Windows 1 No need to be baffled by the idea of upgrading your computer’s storage – the process is straightforward and easy to execute. Remember to follow the precautions, pay attention to the details, and take breaks as needed.
With your newfound knowledge, you’re on your way to having a computer that’s both faster and more capable than ever before. Happy computing!”
FAQs
Can I install a second SSD in my Windows 11 system?
Yes, you can add a second SSD to your Windows 11 system for extra storage space.
Do I need to format the second SSD before installing it in my system?
Yes, you will need to format the second SSD before you can use it on your Windows 11 system.
What steps do I need to follow to install a second SSD in my Windows 11 system?
The steps to install a second SSD on your Windows 11 system include shutting down the PC, opening the case, connecting the SSD to the motherboard, initializing it in Disk Management, and finally formatting it.
Is it possible to use the second SSD to run Windows 11?
Yes, you can use the second SSD as your primary storage device to run Windows 11. However, you will need to reinstall the operating system on the new drive and ensure it is set as the boot device in your BIOS settings.