Are you tired of struggling to format your Sandisk Extreme Portable SSD? Perhaps it’s giving you headaches with constant errors popping up whenever you try to access your files. Don’t worry, you’re not alone. Many people find formatting their portable SSD a daunting task, but fear not, we’re here to help.
In this blog post, we’ll guide you through the process of formatting your Sandisk Extreme Portable SSD step-by-step. You’ll learn about the different file systems you can use, how to choose the best one for your needs, and how to format your drive to ensure it is optimized for faster read and write speeds. We’ll also cover some common issues that people face while formatting their SSDs, including what to do if your drive is not recognized by your computer or if you encounter any other errors.
Plus, we’ll give you tips on how to properly maintain your Sandisk Extreme Portable SSD to ensure longevity and optimal performance. So, let’s dive in and get your SSD formatted in no time!
Connect SSD to Computer
If you’re wondering how to format Sandisk Extreme portable SSD, don’t worry, it’s quite simple. The first step is to connect the SSD to your computer. This can be done using the USB
0 cable that comes with the device. Once connected, your computer should recognize the drive and prompt you to format it. If it doesn’t, you can manually access the drive through your computer’s file explorer, right-click on it, and select the option to format.
It’s important to note that formatting will erase all data on the drive, so make sure to back up any important files before proceeding. When formatting, you’ll be prompted to choose the file system and allocation unit size. For most users, the default settings will be sufficient.
And that’s it! With these simple steps, you’ll have a freshly formatted Sandisk Extreme portable SSD ready for all your storage needs.
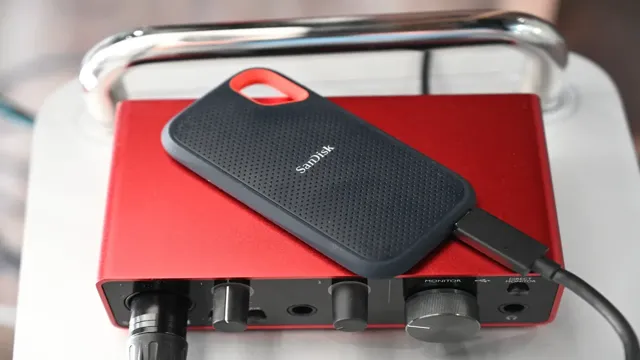
USB Type-C Cable Required
If you want to connect your SSD to your computer, then you’re going to need a USB Type-C cable. This new type of cable is becoming increasingly popular due to its high speed and durability. It’s also reversible, which means you don’t have to worry about plugging it in the wrong way round.
Just make sure that your computer has a USB Type-C port, or at least an adapter that can convert it from USB Type-C to another port. Once you’ve got your cable sorted, connecting your SSD is simple. Just plug one end of the cable into your SSD’s USB Type-C port and the other end into your computer’s USB Type-C port.
Then, you’re good to go!
Open Disk Utility
If you’re looking to format your Sandisk Extreme Portable SSD, the first step is to open Disk Utility on your Mac. This can be done by navigating to your Applications folder, then the Utilities folder, and finally locating Disk Utility. Once you’ve got that open, connect your Sandisk SSD to your Mac and make sure it’s recognized by your computer.
Next, select the Sandisk drive in the list of devices on the left-hand side of Disk Utility, and click on the Erase button. Here you’ll be able to choose a new file format, name your drive, and select a disk partition scheme if you need to. Keep in mind that formatting your drive will erase all data on it, so be sure to save any important files before proceeding.
By following these steps, you’ll be able to quickly and easily format your Sandisk Extreme Portable SSD using Disk Utility on your Mac.
Mac: Go to Applications/Utilities/Disk Utility
If you’re a Mac user and you’re looking to manage your hard drive, Disk Utility is the perfect tool for you. To access Disk Utility, you’ll need to go to your Applications folder first. There, you’ll find Utilities – click on that and you’ll see Disk Utility.
Once you open it, you’ll see a list of all the drives connected to your Mac. This includes your internal hard drive, any external hard drives or flash drives, and CD/DVD drives. Using Disk Utility, you can easily manage your drives, including formatting, partitioning, and repairing any errors.
If you’re experiencing any issues with your Mac’s hard drive, Disk Utility is the go-to tool for troubleshooting and fixing those problems. So next time you need to manage your drives on your Mac, remember to open Disk Utility via the Applications/Utilities folder!
Windows: Search for Disk Management
If you’re running Windows and need to manage your hard disk partitions, the Disk Management tool is an essential feature. To open it, simply search for Disk Management in the Windows search bar. Once you’ve located it, click on the Disk Management icon and the tool will open.
From here, you can create, delete, format, and resize partitions as needed, as well as manage drive letter assignments and other disk-related tasks. It’s a powerful tool that can help you keep your system running smoothly, so make sure you know how to access it when you need it. So, next time you want to manage your hard disk partitions on Windows, just search for Disk Management and you’ll be on your way.
Select SSD from Available Drives List
When formatting your SanDisk Extreme Portable SSD, it is essential to first select the SSD from the available drives list on your device. To begin, connect your SSD to your computer and make sure it is recognized. Next, open a file explorer window and locate the list of available drives on your computer.
Look for your SanDisk Extreme Portable SSD and click on it to select it. Once selected, right-click on the drive and choose the “Format” option from the drop-down menu. You will then be prompted to choose the file system and allocation unit size for the formatting process, so select the options that best suit your needs.
Finally, click on the “Start” button to begin the formatting process. Remember to back up any important data that you want to keep before formatting your SSD to avoid losing any important files. With these simple steps, you can quickly and easily format your SanDisk Extreme Portable SSD.
Click on Erase or Format
If you’re looking to reset your Sandisk Extreme Portable SSD, you may want to consider either formatting or erasing it. Both options will erase all data on the device, so make sure you have a backup before you proceed. To format the SSD, begin by connecting it to your computer using a USB cable.
Then, open the “Disk Utility” tool on your Mac or “Disk Management” tool on your Windows PC. Select the Sandisk SSD from the list of drives and click on “Erase” or “Format”. If you choose to erase, select “Mac OS Extended (Journaled)” or “exFAT” as your file system.
If you choose to format, select “MS-DOS (FAT)” or “exFAT”. Finally, give your device a name and click on “Erase” or “Format” to initiate the process. Once completed, your Sandisk Extreme Portable SSD will be completely reset and ready to use again.
Remember to always safely eject the drive before disconnecting it from your computer to avoid data loss. And that’s how you can format Sandisk Extreme Portable SSD!
Choose Formatting Option (ex. exFAT)
When it comes to formatting our storage devices, we often have to choose the formatting option as per our requirements. One popular formatting option is exFAT, which is ideal for devices that need to work with both Windows and Mac. However, before you format your device to exFAT, it’s essential to back up all your data as The formatting process will erase everything in your device.
Once your data is backed up, navigate to the Disk Utility on Mac or the File Explorer on Windows. Select the device you wish to format, and choose the exFAT formatting option. Once you’ve chosen your desired formatting option, click the erase or format button, and the process will begin.
It’s important to note that formatting a device can take a few minutes, depending on the storage size. So, it’s best to stay patient and not interrupt the formatting process. After the process is complete, your device will be ready to use with your chosen format.
Remember, formatting is irreversible, so make sure you choose the option you need before clicking erase or format.
Confirm Formatting of SSD
If you’re looking to format your SanDisk Extreme Portable SSD, you’ve come to the right place. Formatting an SSD is important to ensure that it’s functioning at its best and that any pre-existing data is wiped. Here’s how you can format your SanDisk Extreme Portable SSD: Step
Connect your SSD to your computer using the USB-C cable that came with your device. Step Open the Disk Utility application on your Mac computer.
If you’re a Windows user, you can access the Disk Management Tool by pressing the Windows Key + X and selecting Disk Management. Step Select the SanDisk Extreme Portable SSD from the list of disks.
Step Click on “Erase” or “Format.” Step
Choose a name for your device and select the file system you want to use. We recommend using the exFAT file system if you plan on using the SSD with both Mac and Windows computers. Step
Click “Erase” or “Format” to complete the process. And that’s it! You’ve successfully formatted your SanDisk Extreme Portable SSD. Remember, formatting your SSD is an essential step in maintaining its health, so be sure to do this regularly.
Complete Process by Clicking Erase/Format Button
If you want to give your SSD a fresh start and delete everything, you can simply click the erase/format button. However, this is not an action to take lightly as this will completely wipe everything clean. Before confirming, make sure that you have saved all important files and that you have made a backup for your OS.
Also, ensure that you know what you’re doing as the process is irreversible and once you click the button, you can’t go back. The erase/format button is located under the disk tools in the device manager, and clicking it will initiate the full SSD cleanup process. You will be asked to confirm, and once you do, the process will start, completely wiping the drive and making it suitable for reuse.
As a precaution, make sure that you double-check everything before proceeding with the erase/format process. Everything will be gone once the process is finished, so be certain that you want to wipe everything clean.
Conclusion
Congratulations on successfully formatting your SanDisk Extreme Portable SSD! You’re now ready to take on the world of fast and reliable storage, without any fear of losing your precious data. Remember, a formatted drive is like a blank canvas, ready to be filled with your digital masterpieces. So, go ahead and create something amazing today! And who knows, one day, you might just become an SSD formatting pro, dazzling all your friends with your witty and clever explanations.
“
FAQs
What is the storage capacity of the Sandisk Extreme portable SSD?
The Sandisk Extreme portable SSD comes in 250GB, 500GB, 1TB, and 2TB storage capacities.
What is the read/write speed of the Sandisk Extreme portable SSD?
The Sandisk Extreme portable SSD has a read speed of up to 550MB/s and a write speed of up to 500MB/s.
Does the Sandisk Extreme portable SSD require a power source?
No, the Sandisk Extreme portable SSD is designed to be powered by your device’s USB port.
Is the Sandisk Extreme portable SSD compatible with all devices?
The Sandisk Extreme portable SSD is compatible with Windows, Mac, and a range of other devices that support USB storage. It is also backwards compatible with USB 2.0 ports.
How can I format my Sandisk Extreme portable SSD?
You can format your Sandisk Extreme portable SSD using your device’s built-in formatting tools. For Windows devices, you can use the Disk Management tool, and for Mac devices, you can use the Disk Utility tool. Alternatively, Sandisk provides a free formatting tool that you can download from their website.