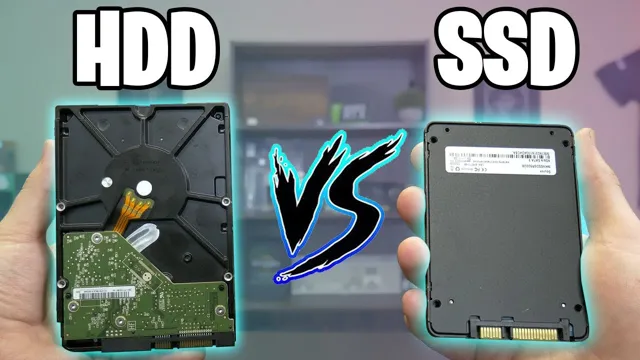
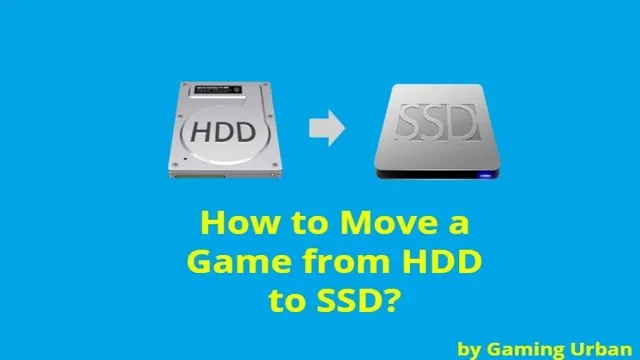
Have you ever wondered why your game’s loading time takes forever, or why your SSD is almost full? Well, the answer might just lie in moving games from SSD to HDD. While SSDs are known for their speed, they can be quite expensive and have lower storage capacity than HDDs. So, it’s quite common for gamers to transfer their less-frequently played games onto the cheaper, but larger HDD, freeing up space on their SSD while still being able to access them when they want to play.
In this blog post, we’ll cover everything you need to know about the pros and cons of moving games from SSD to HDD, and how to do it properly. So, if you’re someone who’s looking to improve their computer’s performance or simply running out of space, keep reading to learn more!
Check Available Space on HDD
If you’re running out of space on your SSD and want to move some games to your HDD, the first step is to check how much available space you have on your HDD. To do this, you can open File Explorer and right-click on your HDD drive, then select Properties. You’ll see a pie chart indicating how much space is being used and how much is still available.
It’s important to make sure you have enough free space on your HDD before moving games over to avoid any performance issues. Once you’ve checked your available space, you can start transferring your games by either manually moving the game files or using a game management software like Steam or Origin to move the game to your HDD. Just keep in mind that moving games may require you to adjust the game settings or file paths within the game launcher, so always make sure to follow any instructions or guidelines provided by the software.
Navigate to HDD in File Explorer
When it comes to managing the storage on your computer, it’s essential to know how much space you have available on the hard disk drive (HDD). Navigating to your HDD in File Explorer is a simple process that can quickly provide you with this information. Once you’ve opened File Explorer, click on “This PC” in the left-hand navigation panel.
You should see your HDD listed here, typically labeled as “Local Disk (C:).” Right-click on the icon and select “Properties,” and you’ll be presented with a window that displays the total capacity of your HDD and how much space is currently available. This information can be invaluable when working with large files or considering installing new software.
By keeping an eye on your available space, you can avoid encountering issues caused by insufficient disk space, such as slow performance or failed updates. So if you’re not sure how much space you have on your HDD, take a moment to navigate to it in File Explorer and check!
Create a New Folder on HDD
When it comes to creating a new folder on your HDD, the first thing you should do is check the available space on your hard drive. It’s important to make sure you have enough space to store all the files you need without running into any issues. One way to check your available space is to right-click on the hard drive and select “Properties.
” From there, you’ll be able to see the available free space and the total size of the drive. Once you know you have enough space, simply right-click anywhere on the blank space in the folder or directory where you want to create the new folder, and select “New Folder.” Name the folder something descriptive, so you can easily find it later.
Having a well-organized hard drive will save you time and energy, so it’s worth taking the extra few seconds to create a new folder and organize your files properly.
Moving Game Files
Are you running out of space on your SSD? It’s time to move some games over to your HDD! The process is relatively straightforward. First, locate the game files on your SSD. You can do this by going to your Steam or Epic Games library and right-clicking on the game you want to move.
Select properties, then go to the local files tab, and click “browse local files.” Next, copy the entire game folder and paste it into a location on your HDD. Make sure you have enough free space on your HDD to accommodate the game files.
Once the files have finished copying, navigate back to the original game files on your SSD and delete them. Don’t worry, deleting the files won’t delete your game progress. When you next launch the game, it may take a little longer to start up as it reconfigures itself on the HDD, but other than that, you should be good to go! No more pesky “low disk space” warnings for you.
Exit the Game Being Moved
If you’re a fan of the popular “Exit” game series by Kosmos, you may have heard that some of the game files are being moved. Fear not, this process will not affect your ability to play the game, but it may make it easier for you to access and enjoy it. The move is part of the company’s efforts to streamline and improve the game’s design and functionality.
Essentially, all the files will be consolidated in one place, making it easier for you to find and use them. This is great news for game enthusiasts who may struggle with finding game components or instructions. So, the next time you play an “Exit” game, take comfort in knowing that the company is working hard to make the experience even better for you.
Copy Game Files from SSD to HDD
Moving Game Files If you’re running out of space on your Solid State Drive (SSD), it’s a good idea to move game files to your Hard Disk Drive (HDD). This can not only free up space on your SSD but can also help you organize your games more effectively. The process to move your game files is straightforward.
First, locate the game files on your SSD. Once you’ve found them, copy the files to your HDD. It’s important to make sure you’re not deleting any important files from your SSD.
After they’ve been copied to the HDD, you’ll need to create a shortcut to the new location on your desktop. This way, you can easily access the game from your HDD without having to navigate through your files. Overall, moving game files from your SSD to your HDD can be an effective way to free up space and organize your files, making your gaming experience smoother and more enjoyable.
Paste Game Files into New Folder on HDD
If you’re looking to transfer game files to a new folder on your HDD, it’s important to follow a few simple steps to ensure a successful move. First, create a new folder on your HDD by right-clicking on the destination drive and selecting “New Folder”. Give your new folder a name that’s easy to remember, like “My Games”.
Next, locate the game files you want to move and right-click on them. Select “Cut” from the drop-down menu. Then, navigate to your new folder on the HDD and right-click on it.
Select “Paste” to move the game files into the new folder. It’s important to note that transferring game files can take a while, depending on the size of the files and the speed of your HDD. So, be patient and allow the transfer to complete before attempting to play your games again.
By following these simple steps, you should be able to easily move your game files to a new folder on your HDD.
Configure Game Installation Settings
If you recently purchased a new SSD and have been using it to store your games, you might be wondering how you can move some of your games to your HDD to free up space on your SSD. Luckily, there are a few ways you can configure your game installation settings to move games from your SSD to your HDD. One option is to simply change the default install directory in your game launcher or downloader to your HDD instead of your SSD.
Another option is to move the game folder from your SSD to your HDD and then create a symbolic link so that the game launcher still recognizes the game as being installed on your SSD. This method can be a bit more complicated, but it saves you from having to redownload the game entirely. Regardless of which method you choose, make sure to back up your game files before making any changes to prevent any data loss.
Open Steam or Game Platform
When it comes to installing games on your computer, you’ll need to open up your preferred game platform, such as Steam. Once you’ve logged in, you can start configuring your game installation settings. These settings include where your game will be installed, which drive to use, and how much space you want to allocate.
You can also make adjustments to the graphics and audio settings before you download the game. It’s important to note that game installation settings can vary from platform to platform, so make sure you read up on the specifics of your preferred platform beforehand. By taking the time to configure your installation settings correctly, you’ll be able to enjoy a smooth gaming experience without any interruptions or technical difficulties.
Select Game in Library
When it comes to configuring your game installation settings, it’s important to start by selecting the game in your library. This process can vary depending on the platform you’re using, but generally involves navigating to your library and finding the game you want to configure. Once you’ve selected the game, there are a variety of settings you can modify to improve your gaming experience.
For example, you might adjust graphics settings to optimize performance on your particular computer, or tweak audio settings to make sure you’re hearing everything the way you want to. Other settings might include things like control options or network settings. Ultimately, the key is to experiment with different configurations until you find the ones that work best for you and your gaming setup.
By taking the time to configure your game installation settings, you can ensure that you’re getting the most out of your gaming experience and enjoying every moment of your gameplay.
Click on Settings or Properties
Configuring the installation settings of a game is an essential aspect of optimizing its performance on your system. To do this, click on Settings or Properties, which are usually found in the launcher of the game. Here, you will be able to customize several settings such as video quality, game resolution, graphics options, and more.
By selecting the right options, you can improve the game’s performance, reduce lags, and decrease its memory usage. From the Settings menu, you can also toggle the audio settings to get the best sound experience while playing. To ensure that the game runs smoothly, it is essential to select the right installation settings and to adjust them from time to time as per your requirements.
So, next time before starting a game, don’t forget to access the Settings or Properties menu and configure the installation settings to optimize your gaming experience.
Set Game Installation Location to HDD
When it comes to downloading games, it can be frustrating when you realize that the game is being installed on your computer’s default drive, which is typically the C: drive. This can cause your computer to slow down, as the C: drive is often used for installing operating systems and programs. To avoid this problem, it’s important to configure your game installation settings to ensure that games are installed on your HDD, or secondary hard drive.
This will not only free up space on your primary drive but also help optimize game performance, especially with more demanding games. So next time you’re downloading a game, take a moment to adjust the installation settings to ensure that it goes to your HDD instead. It’s a small step that can make a big difference in the long run.
Conclusion
In conclusion, moving games from an SSD to an HDD is like cleaning out your closet. You have to decide which items you use frequently and need to keep handy (the games you want to keep on your fast SSD) and which items you can tuck away for safekeeping (the games you can move to your spacious but slower HDD). With a bit of organization and patience, you can optimize your storage and ensure that your gaming experience is speedy and enjoyable.
“
FAQs
Can I move games from my SSD to HDD?
Yes, you can move games from your SSD to HDD by simply copying the game folder from your SSD to your HDD.
Is it safe to move games from SSD to HDD?
Yes, it is safe to move games from SSD to HDD as it does not affect the performance or quality of the game.
Will the game performance be affected after moving it to HDD?
No, the game performance will not be affected after moving it to HDD unless the HDD is faulty or slow.
How do I choose which games to move from SSD to HDD?
You can choose which games to move from SSD to HDD by considering the game size, frequency of use, and need for fast load times.
Can I move games back from HDD to SSD?
Yes, you can move games back from HDD to SSD by simply copying the game folder from your HDD to your SSD.