Upgrading to a solid-state drive (SSD) is one of the most effective ways to boost your computer’s speed and performance. Still, transferring the operating system and all your files from an old hard drive to a new SSD can be a daunting task. That’s where cloning comes in — a highly efficient and straightforward method for copying all your data to a new drive.
In this guide, we’ll show you how to clone Windows 10 to an SSD step-by-step. With this process, you’ll be able to transfer your entire operating system, files, and programs to a new SSD without losing any data. So, buckle up, and let’s get started!
Backup Your Data
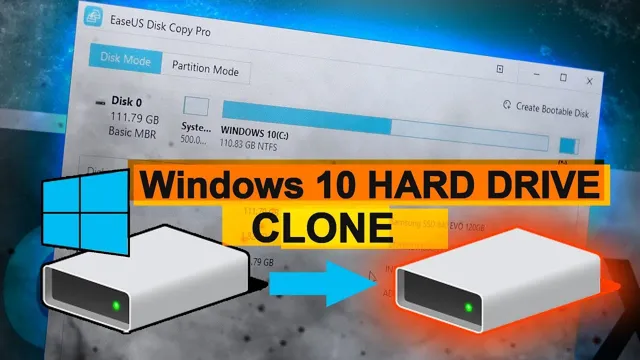
If you’re looking for ways to clone Windows 10 to an SSD drive, there are several options available to you. The easiest and most reliable method is to use specialized cloning software. Programs like Macrium Reflect, EaseUS Todo Backup, and Clonezilla enable you to create an exact copy of your Windows 10 system and transfer it to your SSD drive.
With cloning software, you can clone not only your operating system but also your applications, files, and settings, saving you time and effort in the long run. It’s important to note that when you clone your system, you should also create a backup in case anything goes wrong. Having a backup of your data is essential, as it guarantees you won’t lose any important files in the event of a system failure or hardware issue.
Remember to always back up your data regularly and store it in multiple locations to ensure its safety.
Use a Backup Tool
Backing up your data is critical in this digital age where everything seems to be interconnected. A backup tool can be a lifesaver, ensuring that you’re never caught off guard when your system crashes or you lose your device. By using a backup tool, you can safeguard all your important files, documents, photos, and videos.
You can choose from various types of backup tools, such as cloud-based, offline or physical storage methods. Whether it’s a natural disaster, cyber-attack, or any other unforeseen event, having a backup tool in place will give you peace of mind knowing that your data is safe and sound. Remember, it’s better to be safe than sorry!
Copy Files to External Drive
Backing up your data is always a good idea, especially when using an external hard drive to store your files. One way to do this is by copying your files to the external drive. This process is simple and straightforward, requiring just a few steps.
First, connect your external drive to your computer and wait for it to be recognized. Then, open the file explorer and locate the files you want to backup. Next, select the files you want to copy and drag them to the external drive folder.
Finally, wait for the files to finish copying over, and then safely eject the external drive. By copying your files to an external drive, you can have peace of mind knowing that your data is safe and accessible in case of computer crashes or other data loss incidents. Remember to regularly backup your files to ensure that you always have access to the most recent versions of your important documents and media.
Create a Windows 10 System Image
If you just got yourself a new SSD drive and want to transfer your Windows 10 system to it, creating a system image is your best bet. A system image is like a snapshot of your entire operating system, including Windows, programs, settings, and personal files. So, by creating a system image, you can basically clone your current Windows 10 installation to the SSD drive and quickly restore it whenever necessary.
To create a system image, go to Control Panel > Backup and Restore (Windows 7) > Create a system image. Then, select the drive where you want to save the image and follow the prompts to complete the process. Once the system image is created, you can use it to restore your Windows 10 installation on the new SSD drive, and you’ll have everything just the way it was before.
It’s important to note that creating a system image may take some time and require a large amount of storage space, so make sure that you have enough free space on your drive. With this method, you can clone Windows 10 to an SSD drive with ease and without losing any data or settings.
Search for ‘Create a System Image’
If you’re looking to create a system image in Windows 10, you’ve come to the right place. A system image is basically a copy of your entire operating system, including all your files, applications, and settings. It’s a great way to backup your system and ensure that you can quickly recover from a disaster such as a hard drive failure or malware infection.
To get started, open the Control Panel and search for “Create a System Image” in the search bar. Click on the option in the search results to launch the System Image Backup tool. From there, you can choose where to save the image, whether it be an external hard drive or a network location.
Once you’ve chosen your backup location, click “Start backup” to begin the process. The amount of time it takes will depend on the size of your system, so be patient and let it finish. It’s always better to be safe than sorry, so creating a system image is a great way to ensure you never lose your important files and settings.
Select System Drive and SSD
Creating a Windows 10 system image is an essential part of securing your computer’s data and performance. To do this, you need to select the system drive and SSD. The system drive contains all your customizations, installed programs, and settings.
On the other hand, the SSD is where Windows 10 stores its core files for faster performance. When creating a system image, you’ll need to select these two drives and include all their partitions. This ensures that your data and system settings are captured accurately and can be restored in case of any system failure or data loss.
It’s essential to create regular system images and store them on an external drive, cloud storage, or other secure locations. This way, you can always restore your computer to a previous state without losing any data or important information. With this simple procedure, you can keep your computer secure and ensure it runs smoothly.
Save Image to External Drive or Cloud
Creating a Windows 10 system image is a great way to protect your computer’s files and settings in case of a system crash or failure. One important step in this process is saving the image to an external drive or cloud storage for safekeeping. This ensures that you can access the system image even if your computer is no longer functional.
Saving the image to an external drive is an easy and convenient option since you can simply plug in the drive and copy the image file to it. However, using cloud storage services like Google Drive or Dropbox can also be helpful since it allows you to access the image from anywhere with an internet connection. Remember to choose a secure cloud storage service and ensure that your system image is encrypted for extra protection.
By following these simple steps, you can rest easy knowing that your important files and settings are safe and secure.
Restore System Image to SSD
Are you planning to upgrade to a SSD drive and wondering how to clone Windows 10 to it? Well, the good news is that it is a straightforward process that you can easily do yourself. First, make sure that your SSD drive has enough space to accommodate the data on your current hard drive. Then, create a system image of your current drive using Windows Backup or any reliable third-party software.
Once the image is created, you can then restore it to your SSD drive, which will make an exact copy of your current system, including the operating system, applications, and personal files. This means that you can simply switch to the SSD drive and enjoy faster boot times, improved performance, and more storage space. So if you want to experience the benefits of a SSD drive, don’t hesitate to clone your Windows 10 system today!
Boot from Windows Installation Media
Restoring a system image to an SSD can be a daunting task for some users, but with the right tools and guidance, it can be accomplished seamlessly. One way to do this is by booting from the Windows installation media. First, you’ll need to insert the installation disk or USB drive into your computer and restart it.
When prompted, press the key to enter the boot menu and choose the installation media as the primary boot device. This will initiate the Windows setup process, which will allow you to select the drive where you want to restore the system image. Once you’ve chosen the destination drive, the process of restoring the system image to your SSD will begin automatically.
Just remember to have patience as it may take some time depending on the size of the system image. By following these steps, you can easily restore a system image to an SSD and enjoy faster performance and improved overall system functionality.
Select System Image to Restore
Restoring a system image to an SSD can be a lifesaver for anyone who’s experienced a system failure or other issues causing the loss of important files and data. This process involves selecting the correct system image and restoring it to the SSD. It’s essential to choose the right image, as it contains everything needed for your system to operate correctly.
Once you have chosen the image, the next step is to restore it to the SSD. This process can take some time, depending on the size of the image and your system’s speed. However, it’s crucial to be patient and let the process complete without interruption to ensure the best results.
By following these steps, you’ll be able to restore your system image to your SSD successfully. Keyword: System Image to Restore, Restore System Image to SSD.
Choose SSD as Restore Location
If you’re planning to restore a system image, it’s highly recommended to choose an SSD as the restore location. SSDs offer faster read and write speeds compared to traditional hard drives, resulting in decreased boot times and application load times. Additionally, SSDs have no moving parts, making them less prone to damage from drops or bumps.
When restoring a system image to an SSD, make sure to prepare the drive by formatting it and setting it up as the restore location. Once the process is complete, you’ll enjoy a faster and more reliable system that can handle even the most demanding tasks. So, if you want to take advantage of the benefits of faster storage, consider choosing an SSD as the restore location for your system image.
Finalize Installation
So, you’ve decided to upgrade your computer’s hard drive to a speedy and reliable SSD drive, and you want to know how to clone your current Windows 10 system to the new drive. Well, you’re in luck because it’s an easy process that you can do in just a few steps. Firstly, ensure that the SSD has enough space to hold your data.
Then, download and install a cloning software like EaseUS Todo Backup or Macrium Reflect. Connect the SSD to your computer via a USB cable or SATA cable, and run the cloning software. Follow the prompts and select the source drive (your current hard drive) and the destination drive (the new SSD).
Finally, initiate the cloning process, which may take a few minutes to a few hours depending on the amount of data, and wait for it to complete. Once it’s done, reboot your computer and access the BIOS to set the SSD as the primary boot device. There you have it, your Windows 10 system is now cloned onto your new SSD, and you can enjoy faster boot times and improved system performance.
Remove External Drive
Now that you have successfully installed your new software or application, it’s important to finalize the installation process. This involves removing any external drives you may have used during the installation process. External drives such as USBs or hard drives can cause conflicts with the installed software or application, resulting in errors or glitches.
To avoid this, simply remove any external drives connected to your device before running the newly installed software or application. This small step can save you a lot of frustration and time spent troubleshooting any issues that may arise due to external drive interference. So, before you start using your new software, ensure that all external drives have been safely disconnected.
This way, you can enjoy your new program without any hiccups or complications.
Set SSD as Boot Drive
Congratulations on completing the installation of your brand new SSD! The final and most important step is to set it as your boot drive. Why? Well, your computer needs to know which drive to boot from when it starts up. By setting your SSD as the boot drive, you’ll experience significantly faster boot times compared to a regular HDD.
Here’s how you can set your SSD as the boot drive. First, restart your computer and enter the BIOS by pressing the designated key (usually F2 or Delete) during startup. Then, navigate to the Boot menu and locate your SSD.
Move it to the top of the boot order, and save your changes. Now your computer will boot from your SSD, and you’ll see a significant performance boost. Enjoy the lightning-fast speeds of your new SSD!
Update Drivers and Software
Now that you’ve successfully installed your software or drivers, it’s important to finalize the installation by updating them. This step is crucial to ensure the smooth running of your system and prevent any potential security vulnerabilities. Outdated drivers or software can lead to crashes, bugs, and even security breaches, so staying up-to-date is imperative.
Most software and driver updates are designed to fix known bugs or glitches, improve system performance, and enhance features. Additionally, some updates may provide patches that address newly discovered security flaws. By simply taking the time to periodically check for updates, you can avoid many potential headaches down the road.
Don’t let outdated drivers or software hinder your system’s performance and security – keep them updated!
Conclusion
In conclusion, cloning your Windows 10 operating system to an SSD drive is like giving your computer a facelift – it rejuvenates and revitalizes its performance. With the right tools and a bit of technical know-how, you can seamlessly transfer all your files and program settings to a faster and more efficient storage solution. Don’t let a sluggish hard drive hold you back – give your computer the ultimate makeover with an SSD clone!”
FAQs
What is cloning the Windows 10 operating system to an SSD drive?
Cloning is the process of copying the entire Windows 10 operating system from the original hard drive to a new SSD drive. This way, you can transfer all data from the old drive to the new drive.
What are the benefits of cloning Windows 10 to an SSD drive?
Cloning Windows 10 to an SSD drive can significantly improve the overall performance of the system. SSDs are faster and more reliable than traditional hard drives, which can help decrease boot time, loading times, and overall system responsiveness.
Can I clone Windows 10 to an SSD drive without losing any data?
Yes, you can clone Windows 10 to an SSD drive without losing any data. However, it is important to create a backup of all important files before starting the cloning process, just in case any errors occur.
Can I clone my Windows 10 installation from an HDD to an SSD that is smaller in size?
Yes, it is possible to clone your Windows 10 installation from an HDD to an SSD that is smaller in size. However, you will need to remove any unnecessary files and programs from your system to fit the installation on the smaller drive.