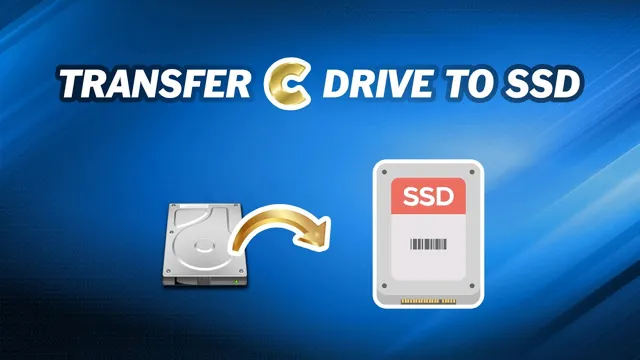
Are you tired of your computer running slow as molasses? It’s time to upgrade your C Drive to an SSD! But what exactly is an SSD, and how do you swap out your old hard drive for this super-efficient powerhouse? In this blog, we’ll break down the steps you need to take to switch from a traditional hard drive to an SSD, including how to clone your operating system, transfer your files, and optimize your new storage device for maximum speed and performance. Don’t let a sluggish computer hold you back – upgrade to an SSD and take your computing to the next level!
Preparation and Backing Up Data
Changing your C drive to a new SSD can be a great way to speed up your computer significantly. However, it is important to take the right preparation steps before making the switch to ensure that you don’t lose any important data in the process. First, you should create a backup of all your important documents, photos, and other files to an external hard drive or cloud storage service.
It’s also a good idea to create a system image backup of your current hard drive, just in case anything goes wrong during the installation process. Once you have your backups in place, you can begin the process of cloning your old hard drive onto your new SSD. There are a number of free software programs that can help you do this, such as Clonezilla or Macrium Reflect.
Make sure to follow the software’s instructions closely to avoid any errors. When the cloning process is complete, you can switch out your old hard drive for your new SSD and enjoy the increased speed and performance!
Check System Requirements and Compatibility
When preparing to install new software or upgrade your existing operating system, it’s important to check the system requirements and compatibility first. This will ensure that your device has the necessary specs and software to run the latest version without any issues. Before you begin the installation process, it’s also crucial to back up all of your important data.
This includes all files, photos, videos, and other documents that you don’t want to lose in the event of an installation mishap. Backing up your data will give you peace of mind that your information is safe and secure, and can be easily restored if needed. By taking these precautions, you can avoid any potential problems and ensure a smooth upgrade process for your device.
Remember, prevention is always better than cure!

Back Up Data on C Drive
Backing up data on your C drive is of utmost importance to ensure that your important files and folders are safe and secure, even in the event of a system crash or failure. Before you begin backing up your data, you need to make sure you are prepared. First, gather all the files and folders you want to save.
This might include documents, photos, videos, music, and more. You should also invest in an external hard drive or cloud storage service to store your backup. Once you have everything you need, it’s time to back up your data.
This can be done using the built-in Windows Backup and Restore tool or a third-party backup software. Set a regular backup schedule to ensure that your data is always up to date. Remember, it’s better to be safe than sorry when it comes to data backup, so don’t put it off any longer.
Installing the New SSD
Upgrading your computer by changing your C drive to a new SSD is a great way to improve its overall performance. However, the installation process can be a bit daunting if you’re not technically savvy. The first step is to physically install the SSD into your computer.
This typically involves opening up your tower or laptop and finding an empty drive bay to install the SSD into. Once installed, you’ll need to connect power and data cables to the drive. After securing the SSD in place, the next step is to migrate your operating system and files over to the new drive.
This can be done using cloning software, which creates an exact copy of your C drive onto the new SSD. Once the cloning process is complete, you’ll need to change your boot sequence to ensure that your computer boots from the new drive. With a bit of patience and technical know-how, anyone can upgrade their computer by changing their C drive to a new SSD.
Create a System Backup Disk
Now that we have created a backup disk of our system files, it’s time to install the new SSD onto our computer. Firstly, you will need to make sure your computer is turned off and unplugged from the power source before you begin the installation process. Then, locate the old SSD and disconnect it from the computer.
Once you have done this, take your new SSD and align it with the slot where the old SSD was located. You may need to gently adjust the new SSD to fit in, so be sure to reference your computer’s manual for specific instructions on how to install the SSD. Then, screw in the new SSD to secure it in place and reconnect any cables that were previously connected to the old SSD onto the new one.
Finally, turn your computer back on and ensure that it recognizes the new SSD as the primary drive. Congratulations, you have successfully installed your new SSD!
Physically Install the SSD in Your System
To physically install the new SSD in your system, you will need to first locate an available slot for it on your motherboard. Most motherboards will have multiple slots, so ensure that you choose one that will accommodate the size of your SSD. Once you’ve selected the slot, screw the SSD into place securely.
You should also connect the necessary power and data cables to ensure that your new SSD is properly powered and able to communicate with your system. This installation process may vary depending on the specific system you have, but the general steps should remain consistent. If you’re unsure about the process or encounter any issues, it’s always best to consult the manufacturer’s instructions or seek the help of a professional.
With your new SSD properly installed and connected, you can begin taking advantage of faster and more reliable storage for all of your important files and applications. So go ahead and make the upgrade, you won’t regret it!
Transferring Data from C Drive to New SSD
If you’re looking to change your C drive to a new SSD, you’ll need to transfer all your data over. The good news is that this process is fairly straightforward. The first step is to make sure you have all the necessary equipment.
You’ll need your new SSD, a SATA-USB cable, and software like Acronis True Image or Macrium Reflect that can clone your C drive to the new SSD. Once you’ve got everything ready, the first thing you’ll need to do is connect the new SSD to your computer using the SATA-USB cable. Next, you’ll need to clone your C drive to the new SSD using your chosen software.
This process will copy all your data, programs, and settings over to the new drive. Once the cloning process is complete, you can then remove your old drive and replace it with the new SSD. With this process, you’ll be able to change your C drive to a new SSD without losing any of your data or programs.
Clone the C Drive onto the New SSD
Transferring data from the C drive to a new SSD can seem like a daunting task, but with the right tools and a bit of patience, it can be done easily. First, you’ll need to clone the C drive onto the new SSD. This involves copying all the data from the old drive to the new one so that you can use it as a boot drive.
You can use free software like Clonezilla or commercial software such as Acronis True Image to do this. Once you have your cloning software ready, connect your new SSD to your computer and launch the cloning software. Follow the step-by-step instructions provided by the software to clone your C drive onto the new SSD.
This may take some time, depending on the size of your C drive and your computer’s processing power. Once the cloning process is complete, shut down your computer and disconnect the old C drive. Your new SSD should now contain everything your old C drive did, and you should be able to use it as a boot drive with all your software and data intact.
Boot from the New SSD
When it comes to upgrading your computer’s hard drive, transferring data from the old drive to a new SSD can be a daunting task. However, with some simple steps, it can be done without any hassle. First, you need to make sure that your new SSD is properly installed and recognized by your computer.
Then, you can use software like EaseUS Todo Backup to clone your C drive to the new SSD. Once the transfer is complete, you need to change the boot order in your computer’s BIOS to prioritize the new SSD. This will allow you to boot into your operating system from the new SSD, giving you faster boot and load times.
With this process, you can smoothly transfer your data and boot from the new SSD without any complications. So, if you’re looking for faster performance and better storage, upgrading to an SSD is definitely worth it.
Finalizing the Process
So you’ve decided to switch out your old hard drive for a shiny new SSD. Congratulations! Now the question is, how do you transfer your C drive over to the new drive? The process can be a bit tricky, but it’s definitely doable with a little patience and know-how. First, you’ll need to clone your C drive onto the new SSD.
There are several software programs that can help with this, such as Norton Ghost or EaseUS Todo Backup. Once the cloning process is complete, you’ll need to disconnect your old hard drive and connect the new SSD using a SATA cable. Then, make sure your BIOS settings are configured to boot from the new SSD.
Finally, go to Disk Management and format the old hard drive so that it’s empty and ready for use. With these steps done, your C drive should now be running on the new SSD. Enjoy your faster, more reliable storage!
Format and Erase the Old C Drive
Now that you’ve backed up your important files and transferred them to a new drive, it’s time to format and erase the old C drive. This process is crucial for ensuring that no traces of personal information or sensitive data are left behind. First, you’ll want to open Disk Management and locate the old C drive.
Right-click on it and select “Format.” This will erase all data on the drive, so be sure to double-check that you’ve transferred everything you need before proceeding. Once the format is complete, you can then right-click on the old C drive again and select “Delete Volume.
” This will remove any remaining partitions and completely erase the drive. It’s important to note that this process may take some time, depending on the size of the drive, so be patient. With this final step completed, you can rest assured that all your personal data has been properly deleted and your old C drive is now ready for disposal without any worries.
Confirm That the System Is Functioning Correctly
Before wrapping up the installation process, it’s crucial to confirm that the system is functioning properly. This step is essential to ensure that the system meets the required standards and specifications. Once all the components have been installed and connected, turn on the system and check that all the devices and functions are operating correctly.
Conduct a test run of the system to verify that each device is receiving power, and all monitoring tools are working correctly. Test the sensors and alarms to confirm that the system will react accordingly in an emergency situation. If everything is working correctly, you can conclude that the installation process was successful, and the system is ready for use.
However, if you encounter any issues or malfunctions, it’s best to troubleshoot the system before calling for help. This precautionary measure can save time and money in the long run by preventing avoidable repairs and damages.
Conclusion
In conclusion, swapping out your old clunky hard drive for a speedy new SSD can make your computer feel like it’s gotten a brand new lease on life. But the process of moving your operating system and files over to the new drive can be a daunting task. Fear not, however, with the right tools and a little bit of technical know-how, the transfer can be done with ease.
So go ahead and make the switch, your computer (and your sanity) will thank you for it!”
FAQs
What things do I need to consider before changing my C drive to a new SSD?
Before changing your C drive to a new SSD, you should consider the storage capacity of the SSD, the speed of the SSD, the size compatibility with your laptop/desktop, and the data transfer process to avoid losing data during the migration.
Can I clone my current C drive to the new SSD without re-installing the operating system?
Yes, you can clone your current C drive to the new SSD without re-installing the operating system with software tools such as Acronis True Image, Macrium Reflect, or EaseUS Todo Backup.
Should I format my new SSD before moving my C drive to it?
No, you don’t need to format your new SSD before moving your C drive to it. You can format it later after the migration process is complete.
How to make my new SSD the default C drive after the migration process?
After the migration process, you need to visit “Disk Management” on your Windows operating system and find your new SSD. Then, you need to right-click on your new SSD and select “Mark partition as active” to make it the default C drive.