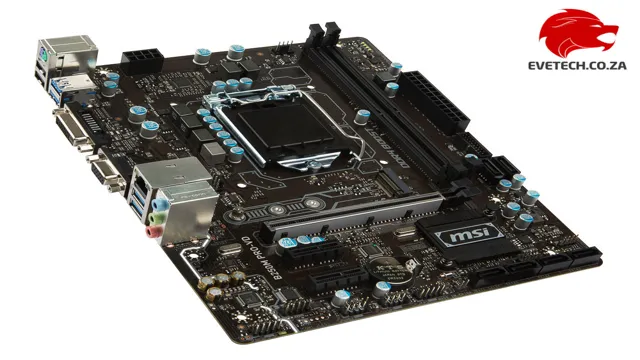
Are you looking to activate your SSD on a B250M motherboard? If so, you’re in the right place. Activating your SSD on a B250M motherboard can provide you with lightning-fast computer performance, allowing you to open and load programs at lightning speeds. However, it can be confusing for beginners to navigate the process of activating an SSD on a B250M motherboard.
But don’t worry, we’ve got you covered. Think of activating your SSD on a B250M motherboard as getting a sports car engine installed in your car. Just like how a sports car engine allows you to zip through the streets, activating your SSD on a B250M motherboard allows your computer to process data and information faster and more efficiently.
With an activated SSD, your computer will be able to boot up in seconds and launch programs without any lag or delay. Now, you may be wondering, “How do I activate my SSD on a B250M motherboard?” Don’t worry, we’ll cover everything you need to know in detail. From checking if your BIOS is up to date to enabling AHCI mode, we’ll guide you through every step of the process.
Check Compatibility
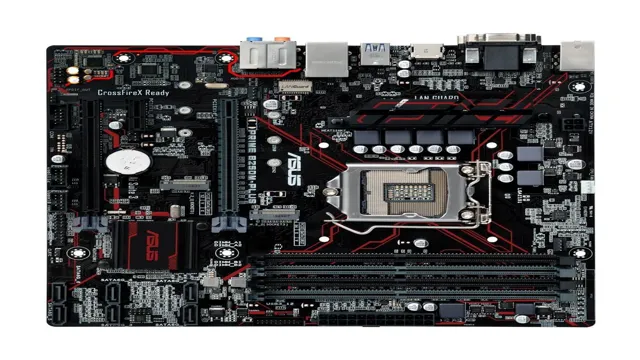
So you’ve got a B250M motherboard and you want to activate your SSD, huh? Well, first things first, it’s important to check the compatibility of your motherboard with your SSD. Make sure that your B250M motherboard has an available M.2 slot for an M.
2 SSD or at least an available SATA port for a SATA SSD. Once you’ve confirmed compatibility, the next step is to activate the SSD in the BIOS settings. This process may vary depending on the motherboard manufacturer, but generally involves enabling the SATA or M.
2 interface and selecting the SSD as the primary boot drive. It’s also a good idea to update your motherboard’s BIOS to the latest version before activating the SSD to ensure the best possible performance and stability. With these steps done, you should be able to enjoy faster boot times and improved overall system performance with your newly activated SSD!
Confirm your motherboard supports SSDs.
When it comes to upgrading your computer, adding an SSD can significantly improve its performance. However, before you rush out to buy one, it’s crucial to confirm that your motherboard supports SSDs. The compatibility between the SSD and your motherboard plays a vital role in achieving optimal performance.
You can check this by consulting your computer’s manual or consulting with a professional. Some older motherboards or budget motherboards may not feature an M.2 slot, which is required for more modern SSD models.
Therefore, it’s essential to ensure that your motherboard is compatible with the SSD you plan to install. By taking the time to check your motherboard compatibility, you can ensure that the SSD you buy is compatible with your system and avoid any issues that could cause delays or operational difficulties. Don’t forget to also check the maximum capacity and data transfer speed to ensure you get the right SSD for your needs.
Upgrade your computer experience by ensuring your motherboard is compatible with an SSD, and experience faster boot times and improved operational efficiency.
Enable RAID Mode
If you own a B250M motherboard and want to activate your SSD, enabling RAID mode can be a great solution. RAID (Redundant Array of Independent Disks) is a storage technology that combines multiple disks into a single unit, which can improve performance, redundancy, and capacity. To enable RAID mode, you’ll need to access the BIOS (Basic Input/Output System) settings, which are usually accessed by pressing the Delete or F2 key during boot-up.
Once you’re in the BIOS settings, navigate to the Storage Configuration or SATA Configuration menu and select RAID as the SATA mode. You’ll also need to configure your RAID arrays, which can be done using the RAID software provided by your motherboard manufacturer. Keep in mind that enabling RAID mode may require you to reinstall your operating system, so it’s important to backup your data before proceeding.
With RAID mode activated, you can enjoy faster read and write speeds from your SSD, as well as increased reliability and data protection.
Access BIOS and enable RAID mode for SATA drives.
If you want to set up a RAID configuration for your SATA hard drives, the first step is to access your computer’s BIOS and enable RAID mode. To access the BIOS, you’ll need to restart your computer and press the key indicated on the screen to enter the setup menu. Once in the BIOS, look for an option to enable RAID mode and select it.
This will allow you to configure your SATA hard drives as a RAID array, which can increase performance, provide redundancy, and allow for faster data recovery in case of a drive failure. It’s important to note that enabling RAID mode will require you to set up your hard drives in a specific way, so be sure to consult your motherboard manual or do some research online before making any changes. With RAID mode enabled, you can take advantage of the benefits of RAID and improve the reliability and performance of your system.
Connect SSD
If you’re looking to activate your SSD on a B250M motherboard, there are a few steps you need to take to connect it properly. The first thing you’ll want to do is locate the SATA ports on the motherboard. There will usually be a few options for where to plug in your SSD, so pay attention to the labels on the ports to make sure you’re connecting in the right spot.
Once you’ve found the right port, it’s time to connect your SSD. Gently slide the connector into the port and ensure that it’s secure. Some motherboards may also require you to enable the SSD in the BIOS settings.
This is an important step, as it allows the system to detect the drive and use it for storage. Once you’ve enabled the SSD, it should be ready to use. Just make sure to format the drive and set it up properly in your operating system before trying to store any data on it.
With these steps complete, you should be able to take advantage of your new SSD’s faster speeds and increased storage capacity.
Attach SSD to motherboard with SATA cable.
When it comes to attaching an SSD (solid-state drive) to a motherboard, it’s a straightforward process that requires a SATA cable. First of all, make sure your motherboard has a compatible SATA port that can support the SSD. Then, plug in the SATA cable from your SSD to the SATA port on your motherboard.
Once you have connected the SSD, you can power up your system and enter the BIOS to make sure your SSD is detected by the motherboard. If your SSD is recognized, you can go ahead and format the drive to ensure it’s ready for use. It’s essential to ensure that your system is properly grounded and shut down before attempting to connect the SSD.
This process can be completed quickly without the need for any specialized tools. When you connect your SSD, you’ll notice how it can significantly improve the performance of your system, especially when it comes to boot-up times and applications’ load times. With an SSD installed and connected to your motherboard, your computer will feel like a brand new machine, fast and efficient.
Format SSD
If you have a B250M motherboard and want to activate an SSD, the first step is to format the drive. To do this, you’ll need to access the BIOS menu by pressing the “Delete” key during startup. Once in the BIOS, navigate to the “Advanced” tab and look for the “Storage Configuration” option.
From there, you can select your SSD and format it to prepare it for use. Remember to save your changes before exiting the BIOS. After formatting, you can install your operating system and other software onto the SSD for faster performance.
By activating your SSD on a B250M motherboard, you’ll benefit from increased speed and responsiveness for your computer tasks, such as booting up and opening applications.
Format SSD using Disk Management or third-party software.
Formatting a solid-state drive or SSD is a simple process that can be done using the Disk Management tool or third-party software. SSDs are becoming increasingly popular as a storage solution because of their speed and durability. When formatting an SSD, it’s important to choose the right file system and allocation unit size that will best suit your needs.
Using the Disk Management tool to format an SSD is straightforward. You first need to open the Disk Management tool by pressing the Windows + X key and selecting “Disk Management.” In the Disk Management window, locate the SSD that you want to format and right-click on it.
From the drop-down menu, select “Format” and choose the appropriate file system, allocation unit size, and volume label. Click “OK” to begin the formatting process. Alternatively, if you prefer to use third-party software, there are many options available online that you can download and install.
These software tools offer more advanced options and features, such as the ability to securely erase data or create multiple partitions. Simply search for “SSD formatting software” and choose the one that suits your needs. In conclusion, whether you choose to use the Disk Management tool or third-party software, formatting an SSD is a necessary step that ensures optimal performance and extends the life of your drive.
Don’t forget to back up any important data before formatting and choose the file system and allocation unit size that will best suit your needs.
Set SSD as Primary Boot Drive
If you have a B250M motherboard and want to activate your SSD as the primary boot drive, there are a few simple steps you can follow. First, you’ll need to enter your computer’s BIOS settings by pressing a specific key during startup (usually Del or F2). Once you’re in the BIOS, navigate to the Boot menu and look for the option to change your primary boot device.
Select your SSD from the list of available devices and move it to the top of the boot order. This ensures that your computer will prioritize booting from the SSD before any other storage devices. Once you’ve made this change, save your settings and exit the BIOS.
Now your computer should boot up quickly and efficiently from the SSD. Remember to keep your BIOS settings updated to get the best performance from your hardware, including your SSD!
Access BIOS and set SSD as primary boot drive.
If you’ve recently installed a new SSD, you’ll want to set it as the primary boot drive to maximize its speed and performance. To do this, you’ll need to access your computer’s BIOS settings. The BIOS is a program that runs before your operating system and manages your computer’s hardware.
To enter the BIOS, you’ll need to press a specific key during startup, usually F2 or Del. Once you’re in the BIOS, navigate to the boot options and set your SSD as the first boot device. This ensures that your computer boots from the SSD instead of the slower hard drive.
Don’t forget to save your settings before exiting the BIOS. Once completed, your computer should boot faster and with improved performance, thanks to the lightning-fast read and write speeds of your SSD. By setting your SSD as the primary boot drive, you’re taking full advantage of its capabilities and giving your computer a significant performance boost.
Enjoy Improved Performance
If you own a B250M motherboard and want to get the most out of your system, then activating your SSD is a must. By enabling your SSD, you can enjoy significantly improved performance compared to using a traditional hard drive alone. Your computer will boot up faster, files will load quicker, and programs will run smoother.
Activating your SSD on a B250M motherboard is easy to do. Simply enter the BIOS settings, select the SATA Mode option, and change the setting from IDE to AHCI. This will ensure that your SSD is working to its full potential and that you are getting the most out of your system.
So what are you waiting for? Follow these steps and enjoy the improved performance that activating your SSD can provide.
Experience faster boot times and improved system performance with your activated SSD.
If you want to enjoy faster boot times and improved system performance, then an activated SSD is the way to go. With its lightning-fast read and write speeds, your computer will be up and running in no time. No more staring at a spinning wheel, waiting for your computer to start – an SSD will get you to the desktop in seconds.
But the benefits don’t stop there. An activated SSD can improve overall system performance, allowing programs to load more quickly and reducing lag in intensive applications. You’ll even notice a difference in everyday tasks like web browsing and file transfers.
So if you’re looking to upgrade your computer, an activated SSD is a great place to start.
Conclusion
To activate your SSD on a B250M motherboard, it’s like giving your computer a turbo boost. The B250M is the engine, the SSD is the nitrous oxide, and when combined, they provide lightning-fast performance that’ll leave your old hard drive in the dust. So buckle up, strap in, and activate that SSD – your computer will thank you for it.
“
FAQs
What is the process to activate an SSD on a B250M motherboard?
To activate an SSD on a B250M motherboard, first, make sure the SSD is properly connected. Then enter the BIOS settings and check if the drive is detected. If it is not detected, change the SATA port or cable to troubleshoot. After detection, go to the boot order settings and change the priority to boot from SSD drive.
Can I install an SSD on a B250M motherboard that already has an existing HDD?
Yes, you can install an SSD on a B250M motherboard that already has an existing HDD. You need to install the SSD and configure it as the boot drive in BIOS settings. You can keep the HDD as a secondary storage drive.
What is the recommended SSD type to use with a B250M motherboard?
A B250M motherboard supports both SATA and NVMe SSD types. NVMe SSD is faster than SATA SSD, but it is also more expensive. If you want to use a budget SSD, then SATA SSD is recommended. If speed is your priority, then NVMe SSD is recommended.
Can I use an M.2 SSD with my B250M motherboard?
Yes, you can use an M.2 SSD with your B250M motherboard. Check the motherboard manual to see if it has an M.2 slot and if it supports NVMe or SATA M.2 SSD. Install the M.2 SSD into the slot and configure it as the boot drive in BIOS settings.