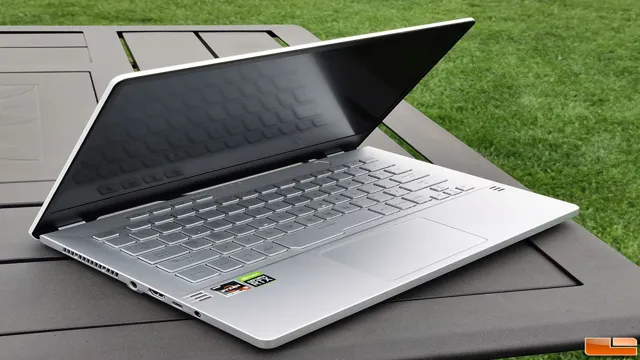
Looking to upgrade the storage space of your Asus Zephyrus M? Well, you’re in luck! Upgrading your laptop’s SSD can significantly improve its overall speed and performance. With the Asus Zephyrus M laptop, upgrading the primary SSD may seem like a daunting task, but it’s a straightforward process that won’t require much technical expertise. Furthermore, with an SSD upgrade, you’ll be able to enjoy faster boot times, quicker application launch, and an overall boost in system performance.
In this article, we’ll guide you through every step of upgrading your SSD storage, making it easier for you to follow along and get started. So, let’s get right into it!
Check the existing SSD capacity
If you’re wondering how to upgrade the SSD capacity on your ASUS Zephyrus M laptop, the first step is to check the existing capacity. This can be done by opening the “System Information” tool on your computer and locating the “Storage” section. Here, you’ll be able to see the total capacity of your SSD and how much of it is currently being used.
This information is crucial because it will help you determine the type and size of SSD to purchase for your upgrade. Generally, it’s recommended to choose an SSD with at least twice the capacity of your current drive to ensure optimal performance and storage space. With this information in hand, you can move forward with purchasing and installing your new SSD with confidence.
Open the task manager and go to the performance tab.
If you want to check your SSD’s existing capacity, the first step is to open your task manager and navigate to the performance tab. From there, you’ll be able to see a breakdown of your system’s resources, including your SSD’s capacity. This information can be crucial if you’re running low on storage and need to free up some space.
Once you’re on the performance tab, look for the “storage” section. Underneath that, you should see a display of your available and total storage capacity. If you’re not sure what your SSD is called on your system, look for a drive with the type “Solid State Drive” or “SSD.
” If you find that your SSD is running out of space, there are a few steps you can take to free up some room. The first thing you can do is delete unnecessary files and programs. You can also clear your browser cache and delete old system files that are no longer needed.
Overall, checking your SSD’s existing capacity is essential for maintaining a healthy system and making sure you have enough space to keep your files and programs running smoothly.

Find the storage option and check the capacity of the existing SSD.
When it comes to checking the capacity of your existing SSD, it’s important to find the storage option first. Once you have located your SSD, you can check its capacity by simply right-clicking on it and selecting “Properties.” In the General tab, you should be able to see the total capacity of your SSD listed.
It’s important to keep in mind that the actual capacity may be slightly lower than the listed capacity due to the formatting and system files taking up space on the drive. Knowing the capacity of your SSD can be helpful in determining whether you need to upgrade to a larger capacity in order to store more files and programs. It’s also important to note that the capacity of your SSD can affect its overall performance, as a drive that is nearly full may run slower than a drive with plenty of free space.
So, if you find that your SSD is nearing its capacity, it may be time to consider upgrading to a larger one in order to ensure optimal performance and storage capabilities.
Choose the right SSD
If you’re looking to upgrade the SSD on your ASUS Zephyrus M, it’s important to choose the right one to ensure optimal performance. First, you’ll want to check the specifications of your laptop to determine compatibility with different SSD types and sizes. Then, consider factors such as read and write speeds, storage capacity, and durability.
For example, a PCIe NVMe SSD will offer faster read and write speeds than a SATA SSD, but may come at a higher price point. Additionally, a larger storage capacity may be necessary for those who work with large files such as video or graphics. Ultimately, the right SSD for your needs will depend on your specific usage and budget.
Research and comparison shopping can help you make an informed decision on the best SSD upgrade for your ASUS Zephyrus M.
Determine the type and size of the SSD needed.
When it comes to choosing an SSD, it’s important to determine the type and size that’s needed for your specific purposes. First, consider the type of SSD you need. There are two main types: SATA and NVMe.
SATA drives are typically less expensive and work well for basic computing tasks. For more demanding tasks such as gaming or video editing, NVMe drives offer faster speeds and better performance. Next, consider the size of the SSD.
It’s important to choose a size that will provide enough storage capacity for your needs. If you only plan on storing basic files and applications, a smaller SSD (such as 256GB) may be sufficient. However, if you plan on storing large files or running multiple applications simultaneously, a larger SSD (like 512GB or even 1TB) may be necessary.
Ultimately, choosing the right SSD depends on your specific needs and budget, but taking the time to consider the type and size can help ensure you get the best performance and value for your investment.
Research and select a compatible SSD with the Zephyrus M.
When it comes to selecting a compatible SSD for your Zephyrus M, it’s important to consider a number of factors to ensure the best performance possible. Firstly, you’ll want to consider the form factor – the Zephyrus M requires an M.2 SSD with a length of 80mm.
Next, you should look at the interface – ideally, you’ll want to choose an SSD with a PCIe interface, which will provide faster speeds compared to SATA. Additionally, the Zephyrus M supports NVMe SSDs, which are even faster than standard PCIe SSDs. Finally, you’ll want to consider the capacity of the SSD – depending on your needs, you may want to go for a smaller, more affordable SSD with a capacity of 256GB or 512GB, or a larger SSD with a capacity of 1TB or more.
Ultimately, the key is to find an SSD that balances your performance needs with your budget.
Prepare the laptop for installation
So you’ve decided to upgrade the SSD on your Asus Zephyrus M. Congratulations! This can greatly enhance your laptop’s performance and speed. First things first, turn off your laptop and unplug it from any power source.
Lay it flat on a clean, static-free surface. Next, gather all the necessary tools: a Phillips-head screwdriver and an anti-static wrist strap. Before opening your laptop, make sure to ground yourself by wearing the anti-static wrist strap or touching a grounded metal object.
Now, flip your laptop over and remove all the screws securing the bottom panel. Be sure to keep track of where each screw goes, as they may vary in size and placement. Once all the screws are removed, gently lift off the bottom panel and set it aside.
Voila! You can now access your SSD. From here, it’s simply a matter of removing and replacing the old SSD with the new one. Remember to reattach the bottom panel and screws securely.
Congrats on successfully preparing your laptop for an SSD upgrade!
Turn off the laptop and unplug it from the power source.
Before you start installing any software or update on your laptop, it’s important to prepare it properly. First, turn off the laptop and unplug it from the power source. This is crucial to ensure that the installation process is smooth and without any interruptions.
Once you’ve done that, check your laptop’s battery level to make sure it’s fully charged or at least has enough power to complete the installation. It’s also a good idea to close any open applications before starting the installation process. This will help prevent any unnecessary crashes or errors during the installation.
By taking the time to properly prepare your laptop, you’ll ensure that the installation process goes smoothly and your device remains in good condition. Remember, always prepare before diving into any installation process, just like how a chef prepares his kitchen before cooking up a delicious feast.
Open the back panel of the laptop to access the SSD slot.
When it comes to upgrading or replacing the SSD in your laptop, accessing the slot can sometimes be a bit confusing. However, most laptops have a removable back panel that provides easy access to the internal components. Before starting the installation process, it’s essential to prepare your laptop properly.
Begin by shutting down the computer and unplugging it from the power source. Then, remove the battery if it’s removable. Next, locate the back panel of your laptop and remove any screws securing it in place.
Use a prying tool or your fingers to gently lift the panel off. Once removed, you should be able to see the internal components, including the SSD slot. Depending on your laptop model, you may need to remove additional screws or connections to access the SSD slot fully.
Take your time, read the user manual if necessary, and be careful not to damage any components during the process. Following proper procedure should make it easy to access the SSD slot and perform the upgrade or replacement you need.
Install the new SSD
If you’re looking to upgrade the SSD on your ASUS Zephyrus M laptop, the process is fairly straightforward. First, you’ll need to turn off your laptop and unplug it from any power sources. Then, locate the existing SSD – it should be located in a slot on the underside of your laptop.
You’ll need to remove the screws that hold the SSD in place, carefully slide it out of the slot, and disconnect any cables that are attached to it. Next, take your new SSD and carefully connect any cables that need to be attached. Then, slide the new SSD into the slot where the old one used to be and secure it with the screws.
Finally, turn your laptop back on and check to make sure that it recognizes the new SSD. With these simple steps, you can seamlessly upgrade your ASUS Zephyrus M’s SSD and enjoy improved performance and storage capabilities.
Remove the existing SSD by unscrewing the brackets on the sides.
Congratulations on making the decision to upgrade your SSD! Before installing your new SSD, you’ll need to remove the existing one first. First, unscrew the brackets on either side of the current SSD. Once those are free, gently slide the old SSD out and set it aside.
Make sure to handle it with care, as static electricity can damage sensitive components. Now that you’ve successfully removed the old SSD, it’s time to install the new one. Before inserting it into the slot, make sure to check the manufacturer’s instructions for any special considerations or precautions.
Once you’ve double-checked everything, slowly slide the new SSD into the slot until it’s flush with the brackets. Then, use the screws you removed from the old SSD to secure the brackets on either side of the new one. And voila! Your new SSD is installed and ready to go.
Happy computing!
Insert the new SSD in its place and holder, and secure it with screws.
Installing the new SSD on your computer can dramatically improve its speed and overall performance. To begin the installation process, turn off your computer and unplug it from the power source. Locate the old hard drive and remove it by unclipping the holder and gently sliding it out.
Now it’s time to insert the new SSD in its place and holder, and secure it with screws. It is important to follow the manufacturer’s directions to ensure the proper alignment of the new SSD in the holder. Once it is securely fastened, gently slide it back into the computer until it clicks into place.
Finally, replace the computer cover and plug in the power source to turn it back on. By installing the new SSD with the proper care, you’ll experience faster boot times and a noticeable improvement in your computer’s performance. With this quick and straightforward process, anyone can upgrade their computer with ease and boost their productivity in no time!
Restore the data and settings
When upgrading the SSD on your Asus Zephyrus M, restoring your data and settings is an essential step. First, make sure to back up any important files to an external hard drive or cloud storage. Then, insert the new SSD and use the Asus Backup and Recovery software to restore your system to its previous state.
This software will guide you through the process of restoring your OS, drivers, and applications. Once the restore is complete, you can transfer your backed-up files back onto your computer. It’s important to note that the restore process may take some time, so be patient and allow the software to do its job.
With this easy process, you can successfully upgrade your Asus Zephyrus M’s SSD without losing any of your valuable data.
Reinstall the operating system on the new SSD.
Once you have reinstalled the operating system on your new SSD, the next step is to restore your data and settings. This is an important step to ensure that your computer is functioning just as it was before the upgrade. The process of restoring your data and settings will differ depending on whether you have a backup of your files or not.
If you have a backup, then all you need to do is restore your files and settings from that backup. If you don’t have a backup, then you’ll need to manually transfer your files and settings over to your new SSD. This can be a time-consuming process, but it’s essential to ensure that all your important files are transferred over to your new drive.
Don’t forget to double-check that all your programs are installed and configured correctly. Once everything is restored, you should be good to go and enjoy the benefits of your new SSD!
Transfer the data and software applications to the new SSD.
When transferring data and software applications to a new SSD, it’s important to restore your data and settings to ensure a seamless transition to your new device. Firstly, you’ll need to create a backup of all your important files and folders. This is to make sure that you don’t lose any of your data during the process.
Once you’ve created a backup, you can transfer your data to the new SSD by using the software tools provided by the manufacturer. Some SSD makers such as Samsung, Crucial, and Kingston provide free software that can help you migrate your data from the old hard drive to new SSD. The process may take some time depending on the amount of data you have.
After the transfer is complete, it’s time to install the software applications you had on your old hard drive. The best way to do this is to reinstall the software from the original installation discs or download them from the official website of the software manufacturer. Once installed, configure the applications to your preferences and settings.
With your data and software applications restored, your new SSD will be up and running in no time.
Conclusion
In conclusion, upgrading the SSD in your ASUS Zephyrus M is as easy as pie! With a few simple steps, you can give your laptop a boost in speed and storage capacity. Whether you’re looking to store more games, run multiple applications at once, or just breathe new life into your trusty machine, swapping out the SSD is a smart move. So, don’t wait any longer, follow the steps, and enjoy the benefits of an upgraded SSD! Your laptop will thank you for it.
“
Upgrading the SSD on the Asus Zephyrus M can be done with a few simple steps, and can significantly boost the laptop’s performance and storage capacity.
Upgrading the SSD on your Asus Zephyrus M laptop is one of the best ways to give it a significant performance boost and more storage capacity. Once you’ve installed the new SSD, the final step is to restore your data and settings. This may sound daunting, but it’s actually a straightforward process that you can easily complete.
First, make sure you have all your important data and files backed up. You can do this by transferring them to an external hard drive or using cloud storage services like Google Drive or Dropbox. Once you have your data backed up, you can proceed with the restoring process.
Your Asus Zephyrus M laptop should come with a built-in recovery tool, which you can use to restore your settings and data. Simply follow the on-screen instructions and select the restore option. This will take a few minutes, depending on how much data you have saved.
After the restore process, you’ll have to install any necessary drivers or software that you need. You can use the driver CD that came with your laptop or download them from the Asus website. Once you’ve completed these steps, your Asus Zephyrus M laptop will be running faster than ever before, with more storage space to store all your files, documents, and games.
In conclusion, upgrading the SSD on your Asus Zephyrus M laptop is an excellent way to boost its speed and storage capacity. The final step of restoring your data and settings may seem overwhelming, but it’s easy to do with the built-in recovery tool. Just make sure you have all your important data backed up and follow the on-screen instructions.
Then, install any necessary drivers or software, and you’ll be good to go!
FAQs
What type of SSD is compatible with the ASUS Zephyrus M?
The ASUS Zephyrus M is compatible with M.2 NVMe SSDs.
What is the maximum SSD capacity that can be installed in the ASUS Zephyrus M?
The ASUS Zephyrus M can support up to a 2TB M.2 NVMe SSD.
Can I upgrade the SSD in the ASUS Zephyrus M myself, or do I need to take it to a professional?
While it is possible to upgrade the SSD yourself, it is highly recommended to seek professional assistance to ensure proper installation and avoid potential damage to the laptop.
Will upgrading the SSD in the ASUS Zephyrus M void the warranty?
Upgrading the SSD on the ASUS Zephyrus M will not void the warranty as long as it is done properly and by a qualified technician.