
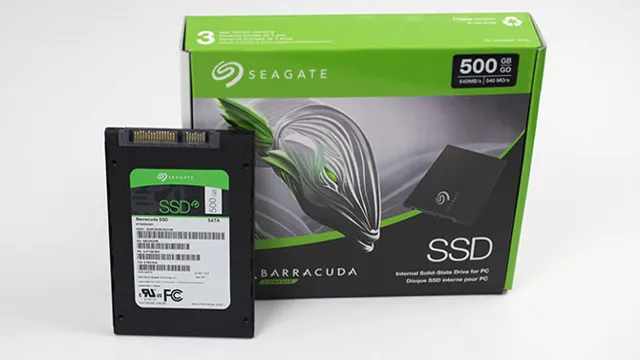
If you’re looking to upgrade the storage capacity of your computer, then you’re probably considering an SSD card. SSD technology is faster and more efficient than traditional hard drives, and installing one can improve your computer’s performance significantly. If you’ve purchased a Barracuda SSD card, you may be wondering how to get started with the installation process.
Fortunately, it’s a straightforward process that you can complete in just a few simple steps. In this blog post, we’ll guide you through the process of plugging in your Barracuda SSD card, so you can get started with enjoying all the benefits of a faster and more efficient computer. So, let’s dive in!
Step 1: Locate the PCle slot on your motherboard
If you’ve recently purchased a Barracuda SSD card and are wondering how to plug it in, your first step is to locate the PCle slot on your motherboard. This can be a bit tricky depending on the layout of your computer, but with a little bit of investigation, you should be able to find it. The PCle slot is typically located towards the bottom of the motherboard and is often marked with the letters “PCle.
” Once you’ve located the PCle slot, you’ll need to carefully line up the Barracuda SSD card and insert it into the slot. It’s important to ensure that the card is properly seated in the slot and securely fastened in place to avoid any issues with data transfer or reliability. With a little bit of patience and attention to detail, you should be able to get your Barracuda SSD card up and running in no time.
Look for a slot with a black tab on one end.
When it comes to installing a new hardware component such as a GPU or a network adapter on your computer, you will need to locate a PCIe slot on your motherboard. These slots are where you can connect expansion cards that can add various functionalities to your computer. To find the PCIe slot, you will need to look for a black tab on one end of it.
This tab is used to secure the expansion card and prevent it from slipping out of place. It is essential to ensure that you are inserting the card in the correct slot to avoid any damage to your hardware or motherboard. Once you have located the PCIe slot with the black tab, you can insert the expansion card by aligning it with the slot and applying gentle pressure until it clicks into place.
Remember always to handle your hardware with care and follow the manufacturer’s instructions to avoid any mishandling. By following this simple step, you can add new functionalities and enhance your computer’s performance effortlessly.
Step 2: Remove the protective cover on the SSD card
Now, let’s move on to the second step of plugging in your Barracuda SSD card. Once you have located the M.2 slot on your computer’s motherboard, it’s time to remove the protective cover on the SSD card.
This cover is meant to shield the sensitive components of the card during transit, but needs to be removed in order for the card to function properly. Before removing the cover, be sure to ground yourself by touching a metal surface to discharge any static electricity that may harm the card. Once grounded, carefully remove the cover and set it aside.
Handle the SSD card by its edges to prevent any damage to the components and place it into the M.2 slot with the notched end aligned with the slot. Gently push the card in until it clicks into place.
That’s it! You have successfully plugged in your Barracuda SSD card.
Find the cover on the bottom of the card and slide it off.
When it comes to upgrading or replacing the SSD card in your device, the first step is to remove the protective cover on the card. The cover is usually located on the bottom of the card and can be easily slid off. It’s important to remove this cover before attempting to handle the card as it helps to prevent any damage to the delicate components inside.
Before you begin, make sure to turn off your device and unplug it from any power sources. Once the cover is removed, you can safely remove the old SSD card and replace it with the new one. It’s important to be gentle and careful when handling the card, as even a small amount of damage can render it unusable.
With a little bit of patience and care, you’ll be able to remove the protective cover and replace your SSD card in no time.
Step 3: Insert the SSD card into the PCle slot
When it comes to installing your new Barracuda SSD card into your PC, the first step was to make sure you had the right tools. Now, the third step is to insert the SSD card into the PCle slot. But first, it’s important to make sure the slot is not obstructed by any cables or components.
If it is, carefully move them out of the way so you have a clear path to insert the SSD card. Once the slot is clear, you can line up the SSD card’s connector pins with the slot and gently press it down until it clicks into place. It’s important to be gentle yet firm during this step, as applying too much force can damage both the SSD card and the slot itself.
Once it’s securely in place, you can replace any components you removed and move on to the next step in setting up your new SSD card for peak performance. With these simple steps, you’ll be able to enjoy blazing-fast storage speeds and improved PC performance in no time.
Align the card with the slot and push down firmly.
SSD card, PCle slot When it comes to installing an SSD card in your PC, the third step is a crucial one. After opening your computer case, you need to locate the PCle slot where the SSD card will be inserted. It’s important to align the card correctly, so it slots in smoothly.
Once you’ve located the slot, gently place the SSD card into the slot, ensuring it’s correctly aligned. It’s crucial to ensure the SSD card is firmly pushed down into the slot, using a little force if necessary. Finally, you’ll need to screw the SSD card into place, securing it firmly in the PCle slot.
This final step will ensure your SSD card is securely installed and ready to go. With these simple instructions, you’ll have your SSD card installed in just a few minutes!
Step 4: Secure the card
To properly use your Barracuda SSD card, you need to make sure it is securely connected to your device. Before plugging it in, ensure that your device is turned off to avoid any potential damage. Then, locate the appropriate port on your device where the card should be inserted.
Carefully align the connectors on the card with those inside the port and gently insert the card until it clicks into place. It’s important to make sure the card is fully inserted to avoid any connectivity issues or accidental disconnection. Once inserted, turn on your device and your Barracuda SSD card should be ready for use.
Remember to handle the card with care when removing it from your device to avoid any physical damage. With these simple steps, you can easily and securely use your Barracuda SSD card.
Use a screw to fasten the card to the motherboard.
Now it’s time to secure the card to the motherboard. Grab a screw and use it to fasten the card to the appropriate slot. It’s important to ensure that the card is aligned properly and doesn’t wiggle or move around too much when you’re screwing it in.
Once it’s secure, check for any loose connections or parts and make sure everything is snug and properly in place. This step might seem small, but it’s crucial for the longevity and stability of your computer – if the card isn’t securely fastened, it could potentially cause damage to other components or even malfunction. So take your time, double-check your work, and enjoy the satisfaction of a job well done!
Step 5: Connect power and data cables
So, you’ve got yourself a shiny new Barracuda SSD card, and you’re ready to install it in your computer. Great! Now it’s time to connect the power and data cables. First things first, you’ll need to locate the PCIe slot on your motherboard where the card will be installed.
Once you’ve found it, carefully insert your SSD card into the slot and secure it in place with the screw. Now you’ll need to connect the power cable and data cable. The power cable will usually be a SATA power cable, which you should plug into a free SATA power connector from your PSU.
The data cable, on the other hand, will be a SATA data cable that should be connected to a free SATA port on your motherboard. It’s important to make sure that these cables are securely connected to avoid any potential data loss or electrical issues. And that’s it! You’ve successfully connected your Barracuda SSD card and are ready to start enjoying lightning-fast storage speeds.
Attach cables to the card and motherboard.
In order to get your graphics card up and running, you’ll need to connect power and data cables to both the card and your motherboard. This step is crucial if you want your card to function properly. When it comes to power cables, most modern GPUs require an 8-pin or 6-pin connector that plugs directly into your power supply.
Be sure to check the requirements of your specific graphics card to avoid any mishaps. As for data cables, you’ll need to attach your HDMI, DisplayPort, or DVI cable to your graphics card and corresponding port on your monitor. Once everything is properly connected, you should be able to power on your computer and enjoy your newly installed graphics card.
With a bit of patience and attention to detail, you can easily connect the necessary cables to bring your graphics card to life!
Step 6: Install drivers and software
When you’ve plugged in your Barracuda SSD card to your computer, you’ll need to install the necessary drivers and software to make it work properly. The type of driver/software needed will vary depending on your operating system and the specific card you’ve purchased. Look for the installation files that came with your card or download the latest versions from the manufacturer’s website.
Once you’ve located the correct files, follow the prompts to install them onto your computer. These drivers and software will allow your computer to recognize and communicate with the SSD card, unlocking its full potential for increased speed and storage. Don’t forget to restart your computer after installation is complete to ensure everything is properly configured.
With the driver and software installation complete, your Barracuda SSD is now ready to use!
Download necessary drivers and software from manufacturer’s website.
After assembling your new hardware, it’s essential to install the necessary drivers and software. These drivers help your computer communicate with your hardware components, ensuring that they function correctly. If you bought a pre-built computer, it may already have the necessary drivers installed, but it’s always best to confirm and update if necessary.
Download the drivers and software from the manufacturer’s website to ensure that you have the latest version and avoid compatibility issues. Look for the specific model number of your hardware to find the right drivers. You may also need additional software depending on your hardware, such as a utility program for customizing settings or a performance monitoring tool.
Installing the drivers and software is straightforward, and the instructions are usually included in the package. After the installation, restart your computer so that the changes take effect. Without proper drivers and software, your hardware may malfunction or not function at all, so make sure you go through this step to get the most out of your hardware.
Conclusion
In the world of technology, plugging in a device can often feel like navigating a maze. However, when it comes to the Barracuda SSD card, fear not! Simply locate the appropriate slot, gently insert the card, and voila! Your device will be running faster and smoother than ever before. It’s like giving your technology a shot of adrenaline, without the needles.
“
FAQs
What is a Barracuda SSD Card?
A Barracuda SSD Card is a solid-state drive (SSD) produced by Seagate that offers high-speed data storage and retrieval in a compact form factor.
How do I plug in a Barracuda SSD card?
To plug in a Barracuda SSD card, locate the M.2 slot on your motherboard and gently insert the card at a 30-degree angle. Press it down until it clicks into place, and then secure it with the screw provided.
What are the benefits of using a Barracuda SSD card?
Using a Barracuda SSD card can significantly improve your computer’s performance by providing faster boot times, application loading times, and data transfer speeds. It can also offer a more reliable form of storage than traditional hard disk drives.
Can I use a Barracuda SSD card as an external drive?
Yes, you can use a Barracuda SSD card as an external drive by purchasing an M.2 enclosure that supports NVMe SSDs. Simply insert the card into the enclosure, plug it into your computer’s USB port, and you’re ready to go.