NVMe SSDs are all the rage these days. Their lightning-fast speeds and unmatched stability make them a favorite among PC enthusiasts and gamers alike. But what if you need to upgrade or clone your NVMe SSD? To do so, you might think you need two slots, but that’s not necessarily the case.
In fact, with the right tools and software, it is possible to clone your NVMe SSD in one slot. Keep reading to find out how.
Overview
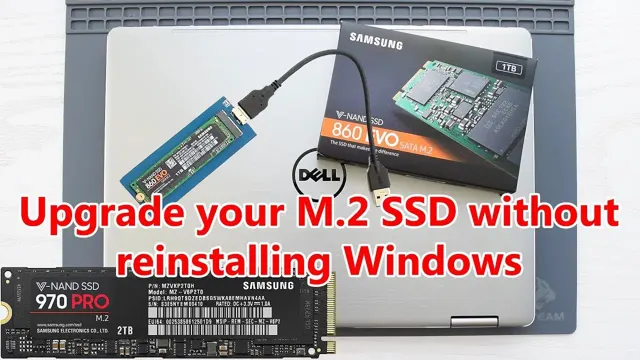
Cloning an NVMe SSD with only one slot can pose a challenge, but with the right tools and steps, it is possible. One way to do this is by using a USB-to-NVMe adapter and cloning software. The adapter can connect the new NVMe SSD to the computer via USB, allowing the cloning software to transfer the data from the old SSD to the new one.
It’s important to ensure that the adapter and cloning software are compatible with NVMe technology, as some may only work with SATA SSDs. It’s also crucial to back up any important data before beginning the cloning process to avoid loss of information. By following these steps, you can easily clone your NVMe SSD with only one slot, and upgrade your computer’s storage capacity.
Understand the NVMe SSD
NVMe SSD Have you ever heard of NVMe SSDs? It stands for Non-Volatile Memory Express Solid-State Drive, and it’s the latest storage technology in the market. NVMe SSDs are faster, more efficient, and more reliable compared to other traditional storage devices like HDDs or SATA SSDs. They have a high-end performance that’s perfect for gaming enthusiasts, content creators, and professionals in various industries.
NVMe SSDs can read and write data at incredible speeds, thanks to their direct PCIe interface, which reduces latency and improves overall system responsiveness. If you’re looking for an upgrade to your storage system, NVMe SSDs might just be the perfect choice for you.

NVMe SSD cloning requirements
Cloning an NVMe SSD can be a daunting task, as it requires certain specifications to ensure compatibility between the source drive and the destination drive. The cloning process involves copying the entire contents of one drive to another, so both drives must have the same power supply and controller interface. This means that the destination drive must also be an NVMe SSD in order to fully utilize the capabilities of the source drive.
Additionally, both drives must have the same storage capacity, or the cloning process may not be successful. It’s important to ensure that both drives are properly formatted and have enough available space to accommodate the cloning process. Overall, the requirements for cloning an NVMe SSD are specific, but with the right tools and attention to detail, the process can be successful.
Creating a Bootable USB Drive
If you need to clone an NVMe SSD with only one slot, you may be wondering how it’s possible. One option is to use a bootable USB drive. First, you need to create a bootable USB drive with cloning software such as Clonezilla or EaseUS.
To do this, download the software and then insert the USB drive into your computer. Next, open the software and select the option to create a bootable USB drive. Follow the prompts and wait for the process to complete.
Once the USB drive is created, restart your computer and boot from the USB drive. From there, you can clone the NVMe SSD by following the instructions in the cloning software. This method allows you to clone an NVMe SSD with only one slot, and it can also be used to back up your data in case of a system failure or other issue.
Just remember to keep the USB drive in a safe place, as it contains your important data.
Download and Install the Cloning Software
To download and install cloning software, the first step is to create a bootable USB drive. This is an essential and straightforward process that enables the installation of the cloning software on your computer. To begin, you will need to insert a USB drive into your computer and download a bootable creation tool.
You can find a variety of tools online, such as Rufus or Universal USB Installer, to name a few. Once you have selected your tool, follow the instructions provided by the software to create your bootable USB drive. It is essential to ensure that your USB drive is formatted correctly, as this will ensure that the cloning process goes smoothly.
This process should take only a few minutes, and once complete, you will be ready to proceed with downloading and installing the cloning software. By creating a bootable USB drive, you are providing your computer with the necessary tools to install software, making the cloning process simpler and more efficient.
Create a Bootable USB Drive
Creating a bootable USB drive is an essential task for those who need to install or upgrade their operating system. It is a quick way of installing software and can come in handy if your computer is not working correctly. All you need is a USB drive and a computer that can boot from USB, and you’re good to go.
The first step in creating a bootable USB drive is to format the USB drive using the NTFS file system. This ensures that the drive is bootable and can be read by your computer. Once the USB drive is formatted, you need to download the ISO file for the operating system that you want to install.
Finally, you can use tools like Rufus or UNetbootin to create a bootable USB drive. It is essential to follow the instructions carefully and make sure that the bootable USB drive is correctly created. This way, you can easily install or upgrade your operating system in no time.
So, the next time you need to install an operating system, remember to create a bootable USB drive, and you’ll be up and running in no time.
Begin the Cloning Process
Are you struggling with how to clone an NVMe SSD with only one slot? Don’t worry, it’s easier than you might think! First, you’ll need to get a cloning kit that comes with a USB to NVMe adapter and cloning software. Make sure the adapter is compatible with your SSD and support USB 0 for faster data transfer.
Once you have the kit, connect the NVMe SSD to the adapter and plug it into a USB port on your computer. Open the cloning software and select your current SSD as the source disk and the NVMe SSD as the destination disk. Follow the on-screen instructions to start the cloning process, which may take some time depending on the size of your drive.
Once the cloning is complete, shut down your computer and swap your old SSD with the newly cloned NVMe SSD. You should be able to boot up your computer as usual, but with faster read/write speeds and more storage space! With these simple steps, you can clone an NVMe SSD with only one slot and enjoy all the benefits of a faster and more efficient storage system.
Installation
To install a cloned repository, the first step is to begin the cloning process. This can be done by opening your terminal and navigating to the local directory where you want to clone the repository. Once you’re in the correct directory, you can use the “git clone” command followed by the URL of the repository.
This will create a copy of the repository on your local machine. It’s important to note that in order to run the “git clone” command, you will need to have Git installed on your machine. If you don’t already have it installed, you can download it for free from the Git website.
Once the cloning process is complete, you can start working with the codebase and making any necessary changes. With this simple initial step, you’re well on your way to successfully installing a cloned repository and embarking on your project with confidence.
NVMe SSD Cloning with a Single Slot
If you’re in the process of upgrading your computer’s storage, you may need to clone your existing NVMe SSD to a new one. But what happens if you only have a single slot available? Fortunately, it’s still possible to complete the cloning process. First, you’ll need to connect your new NVMe SSD to your computer using an external enclosure or M.
2 to USB adapter. Next, download and install cloning software such as Acronis True Image or Clonezilla. Open the software and select the option to clone your existing NVMe SSD to the new one.
Follow the prompts and allow the software to complete the cloning process. Once done, shut down your computer, remove the old NVMe SSD, and replace it with the new one. Power up your computer and confirm that everything is working properly.
And there you have it – a successfully cloned NVMe SSD using just a single slot!
Conclusion
Well, it may seem like an impossible feat to clone an NVMe SSD with only one slot, but fear not! With a little bit of ingenuity and creativity (along with some high-quality cloning software), you too can become a master of the cloning game. So, whether you’re looking to upgrade your system or simply back up your valuable data, don’t let a single slot hold you back. With the right tools and know-how, you can take your computing to the next level and beyond!”
FAQs
Is it possible to clone an NVMe SSD with only one slot?
Yes, it is possible to clone an NVMe SSD with only one slot by using an external NVMe enclosure or an NVMe to USB adapter.
Can the cloning process damage the NVMe SSD?
Cloning an NVMe SSD does not damage it as long as the process is done correctly with a reliable cloning software and hardware.
What is the best cloning software to use for NVMe SSDs?
Some of the best cloning software for NVMe SSDs include Acronis True Image, EaseUS Todo Backup, and Clonezilla.
Do I need to format my new NVMe SSD before cloning my old one?
No, formatting the new NVMe SSD is not necessary before cloning the old one. The cloning software will take care of the formatting process during the cloning process.
