If you’re planning to upgrade your PC’s storage or replace a faulty SSD, you may be wondering how to remove the SSD. Well, you’re in the right place! In this step-by-step guide, we’ll explain how to safely and easily remove an SSD from your PC. Removing an SSD may sound like a tricky task, but it can be done quickly and easily with just a few simple tools.
By the end of this guide, you’ll be able to confidently remove your SSD without any worries. So, grab your tools, and let’s get started!
Preparation
If you’re looking to upgrade or replace your SSD, removing it from your PC can be a daunting task. Before you start, it’s important to gather the necessary tools and materials, such as a small screwdriver and an anti-static wristband. You’ll also want to make sure the computer is turned off and unplugged, and that you have access to the inside of the computer’s case.
From there, locate the SSD and carefully disconnect any cables or connections. Depending on the model of your SSD, it may be secured in place with screws or a locking mechanism – if this is the case, be sure to remove these before attempting to remove the SSD. Gently lift the SSD out of its slot and place it in an anti-static bag for safe keeping.
With a bit of care and attention, removing an SSD from your PC can be done quickly and easily.
Back Up Your Data
Backing up your data is a crucial step towards safeguarding your valuable information from being lost in case of any unfortunate incident such as a laptop crash or a ransomware attack. Before you start backing up your data, make sure you know exactly what you need to back up and where you will be storing it. This will help you prepare a comprehensive backup plan and ensure that no crucial information is left behind.
One option for storing your data is cloud storage, which allows you to access your information from anywhere. Another option is an external hard drive, which gives you physical access to your data and is a good backup solution in case of an internet outage. Whatever option you choose, remember to frequently update your backups and store them in a secure location.
Don’t leave your data’s safety to chance – take proactive steps to protect it by backing it up regularly. Remember, an ounce of prevention is worth a pound of cure.
Turn Off Your PC
Preparation is key when it comes to turning off your PC. Before shutting down your computer, it’s important to close any open programs and save any unsaved work to prevent data loss. Additionally, it’s a good idea to run any necessary updates or virus scans to ensure your computer is running smoothly and protected from potential threats.
Once you’ve completed these steps, you can safely shut down your PC. Turning off your computer correctly not only helps to extend the lifespan of your hardware and preserve your data, but it can also save you money on your energy bill. By taking a few simple precautions and properly shutting down your PC, you can optimize its performance and ensure it’s ready for use the next time you need it.
So, don’t forget to turn off your PC before calling it a day!
Removing the SSD
If you’re looking to upgrade or replace your SSD, you’ll need to know how to remove it from your PC. The process varies slightly depending on your computer and how the SSD is installed, but generally, it involves opening up the case and disconnecting the SSD from its connections. Before you begin, you’ll want to make sure you have all the necessary tools, such as a screwdriver and an anti-static wrist strap to prevent damage to your components.
Once you’ve taken the necessary precautions, you can get started by turning off your computer and unplugging it from the power source. Then, open up your case and locate the SSD. Carefully disconnect any cables or connectors before unscrewing the SSD from its mounting point.
Gently lift the SSD out of the slot and store it in a safe place. With a little patience and attention to detail, removing your SSD can be a quick and painless process that will allow you to upgrade or replace it as needed.
Open the PC Case
To remove the SSD from your PC, you’ll first need to open up the case. This can seem daunting at first, but it’s a relatively straightforward process. You’ll want to start by unplugging all cables and turning off the power supply.
Once that’s done, locate the screws on the back of the case and remove them. You may need to use a screwdriver to do this. Once the screws are removed, gently pull the side panel off to reveal the inside of the case.
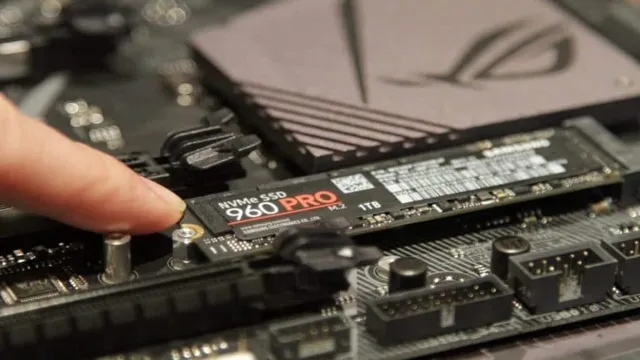
Next, you’ll need to locate the SSD. It will likely be a small rectangular box attached to the motherboard with screws or brackets. Carefully remove any screws or brackets that are holding the SSD in place, using a screwdriver if necessary.
Once the SSD is free, you can gently pull it out of its slot. It’s important to handle the SSD carefully when removing it, as it’s a delicate piece of hardware. Avoid touching the metal parts or any exposed circuitry, as this can cause damage.
Once you have the SSD out of the PC, you can either replace it with a new one or transfer the data to a new machine. With a little bit of care and precision, removing an SSD from your PC is a quick and painless process.
Locate the SSD
SSD If you’re planning to upgrade or replace your computer’s SSD, the first step is to locate it. Depending on your computer’s make and model, the SSD may be located in different spots. For most laptops, the SSD is often located underneath the bottom panel.
The first step is to shut down your computer and remove the battery (if removable). Once you’ve located the panel covering the SSD, use a screwdriver to remove the screws holding it in place. Carefully remove the panel, and you should be able to see the SSD.
To remove it, you’ll need to unscrew the screws holding it in place or slide it out of its connector, depending on how it’s installed. It’s important to be gentle and not rush the process to avoid damage to the SSD or other components. Once the SSD is removed, you can replace it with a new one or upgrade to a larger one.
Just be sure to follow the reverse order of steps when putting your computer back together.
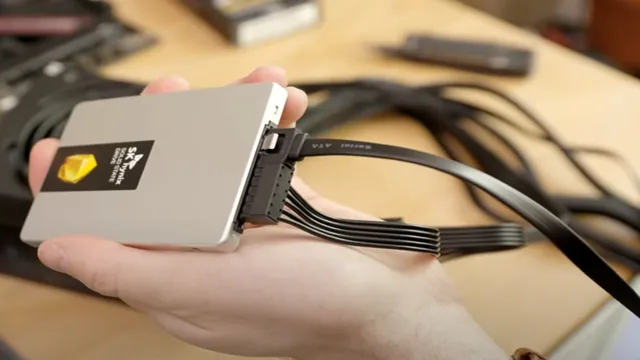
Unplug the SSD
Unplugging an SSD is a crucial component of replacing, upgrading, or repairing an SSD. Before proceeding with this process, it’s crucial to make sure that you’ve shut down the computer completely. Once you’ve done that, you can open up the panel of your computer that contains the hard drives.
Locate the SSD and then gently unscrew the screws that hold it in place. Carefully take the SSD out of its compartment, making sure not to touch any of the other components inside the computer. Once you’ve removed the SSD, it’s essential to store it safely, preferably in an anti-static bag to prevent any electric discharge.
Make sure that you don’t jostle the device while carrying it around, as it may cause data corruption or damage to the device. Removing the SSD is an easy process if taken with care and attention, and you can do it yourself with minimal tools. By unplugging the SSD, you can upgrade it to a new model, swap it out for a faulty one, or access the data inside for backup purposes.
Remove the Screws Holding the SSD in Place
When it comes to upgrading or replacing your SSD, removing it from its location can be a bit daunting. However, with a few simple steps, you’ll be able to remove it with ease. Firstly, you’ll need to locate the screws that are holding the SSD in place.
These screws are usually located on the sides or bottom of the SSD. Once you’ve found them, grab a screwdriver and remove them one by one. Make sure to keep them in a safe place, as you’ll need them to reattach the SSD later on.
Once all the screws are removed, you can gently lift the SSD out of its slot. Be careful not to damage any of the components around it, especially if the SSD is located near other essential hardware. With the SSD successfully removed, you’re free to install a new one or perform any upgrades necessary.
Remember, always handle components with care and attention, to avoid causing any damage or issues down the line.
Next Steps
Removing an SSD from your PC can be a simple process as long as you follow the right steps. First, ensure that your PC is turned off and disconnected from the power source before proceeding. Next, locate the SSD, which is typically located near the motherboard and connected by a cable or screws.
Make sure to remove any screws or cables that are securing the SSD to the PC. Once the SSD is loose, gently lift it out of its compartment. Finally, store the SSD safely in an anti-static bag to prevent any damage that could occur from static electricity.
Overall, removing an SSD from a PC is a straightforward process that should not take more than a few minutes.
Install Replacement Storage
If you’ve decided to replace your current storage device, the next step is to install a replacement storage device. Before you begin, you’ll want to ensure that you have all the necessary tools, data backup, and software required. You’ll also need to identify the type of storage device that you need and whether it is compatible with your system.
Once you have the replacement storage, you’ll want to power down your system and remove the old storage device carefully. Installing the new device will require connecting it to the system and ensuring that it is properly powered and recognized by the operating system. This step may also require reconfiguring and formatting the new storage device to make it ready for use.
Be sure to follow the manufacturer’s instructions carefully, as improper installation can result in data loss or damage to your equipment. Overall, installing a replacement storage device can greatly improve your system’s performance and storage capacity, making it worth the effort and time.
Close the PC Case
Now that all your components are in place, it’s time to close the PC case. Make sure all the cables are neatly arranged and tucked away. It may be helpful to use twist ties or zip ties to keep them organized and out of the way of any fans or components.
Once all the cables are secure, place the side panel back onto the case and screw it into place. It may feel like a small step, but properly closing the PC case ensures that all the components are protected and functioning as they should be. You don’t want any loose cables or debris getting inside and causing potential damage.
So, take the time to properly secure everything and enjoy your newly-built PC!
Conclusion
Removing an SSD from a PC is a lot like ending a toxic relationship – it may be daunting, but it’s ultimately for the better. After all, once you’ve taken the necessary steps to safely disconnect your SSD, you can move on to bigger and better things (like upgrading to a bigger and better SSD, perhaps?). So go ahead, take charge of your PC’s storage and break free from the shackles of that old, worn-out SSD – your future self will thank you.
“
FAQs
What tools do I need to safely remove an SSD from my PC?
To safely remove an SSD from your PC, you’ll need a screwdriver, an antistatic wrist strap, and a clean workspace.
How do I know if it’s safe to remove my SSD from my PC?
Before removing your SSD from your PC, it’s important to make sure that your computer is shut down and unplugged. Also, be sure to wear an antistatic wrist strap to avoid damaging your SSD with static electricity.
Can I remove and install an SSD myself, or should I take it to a professional?
If you have some experience with computer hardware and feel comfortable with the process, you can typically remove and install an SSD yourself. However, if you’re not sure what you’re doing, it’s always best to consult a professional to avoid damaging your SSD or your computer.
How do I physically remove an SSD from my PC?
To remove an SSD from your PC, you’ll need to locate the mounting screws that hold it in place, unscrew them, and gently lift the SSD out of the slot. Be careful not to damage the connectors when disconnecting it from the motherboard and power supply.