Category: How to

How to

  • Revamp Your Laptop: A Step-by-Step Guide to Converting to SSD and Reinstalling Windows 10

    Revamp Your Laptop: A Step-by-Step Guide to Converting to SSD and Reinstalling Windows 10

    Ready to give your laptop a speedy upgrade? Converting your laptop to an SSD and reinstalling Windows 10 can significantly boost your computer’s performance. Say goodbye to sluggish startup times and frustratingly slow opening of applications! With an SSD, you can enjoy lightning-fast boot-up speeds and improved overall responsiveness. But where do you even begin? Converting a laptop to an SSD can feel daunting, especially if you’re not tech-savvy.

    Don’t worry, though – with this simple guide and a little elbow grease, you’ll be transforming your laptop into a speedy machine in no time!

    Backup Data

    Converting your laptop to an SSD can be a great way to boost performance and speed up your system. But, before you dive into the process of how to reinstall Windows 10 on your newly installed SSD, it’s essential to backup all your important data first. Whether it’s documents, photos, music, or any other files, losing them can be a nightmare.

    So, make sure to create a backup of all your important data before converting your laptop to an SSD. You can use various cloud-based services like Google Drive, Dropbox, or OneDrive for this purpose. Alternatively, you can also use an external hard drive or a USB drive to store your data.

    Once you have successfully backed up all your data, you can then initiate the process of converting your laptop to an SSD and reinstalling Windows Don’t forget to keep your backup data safe even after the process is complete, as it’s always better to be safe than sorry.

    Save files to external device like USB or cloud storage

    Backing up your important files and documents is crucial to ensure their safety in case of any unforeseen circumstances. One of the best ways to do this is to save your files on an external device like a USB or a cloud storage service. USBs are excellent for storing small amounts of data, whereas cloud storage offers larger storage capacities and can be accessed from anywhere with an internet connection.

    Backing up your data regularly to an external device can prevent data loss due to a system crash, malware infection, or accidental deletion. USBs are easily portable and can be carried in your pocket, making them convenient to use while on-the-go. On the other hand, cloud storage services provide automatic backups and sync your data across all your devices.

    Using a combination of both can offer the best protection for your data. Saving important files to a USB can be done manually, while regularly backing up your files to cloud storage can be automated for peace of mind. In conclusion, backing up your data is essential to prevent data loss and avoid the headache of retrieving lost files.

    Saving files to external devices like USB or cloud storage services is an easy and convenient way to do it. Stay safe and secure your data by investing in a reliable backup system today.
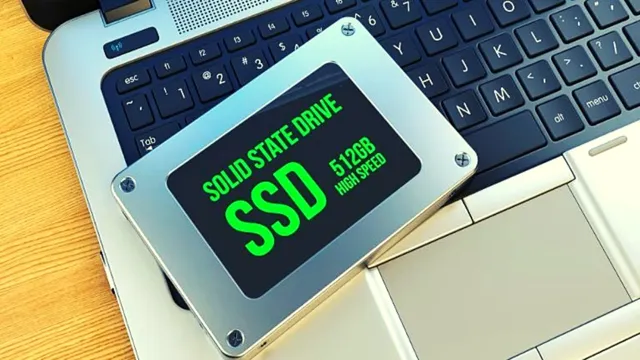
    converting laptop to ssd how to reinstall windows 10

    Create Installation Media

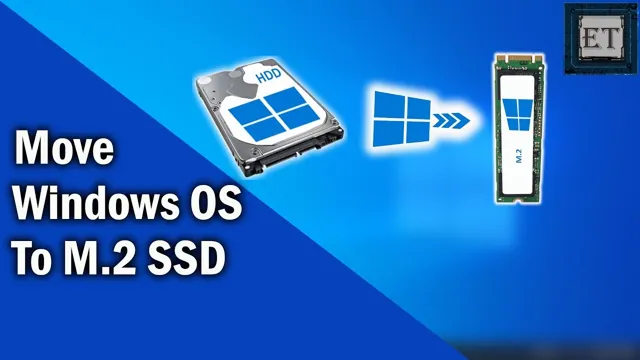
    Converting your laptop to SSD is an easy way to give it a boost in performance. But before you do that, you need to make sure you have all your data backed up and ready to go. Once you’ve done that, the first step in the process is to create installation media for Windows

    This will allow you to reinstall the operating system on your new SSD and get your laptop up and running again. To do this, you’ll need a USB drive with at least 8GB of space, and access to another computer that can download the Windows 10 Media Creation Tool. Once you have those two things, you can follow the on-screen instructions to create your installation media.

    It’s important to double-check that you’ve selected the correct version of Windows 10 (Home or Pro) and that you’ve chosen the right language before beginning the download process. Once the tool has finished downloading, you can create your USB installation media and start the process of installing Windows 10 on your new SSD.

    Download official Windows 10 ISO file to USB

    If you’re planning on installing Windows 10 on your computer, you’ll need to create installation media. This involves downloading the official Windows 10 ISO file and copying it to a USB flash drive or DVD. With the ISO file, you can create a bootable USB that will allow you to install Windows on a new computer or reinstall it on an existing one.

    To get started, head to the Microsoft website and download the Media Creation Tool. This tool will guide you through the process of creating installation media and help you choose the correct version of Windows 10 for your computer. Once you have the Media Creation Tool downloaded, insert your USB flash drive and follow the prompts.

    It’s a straightforward process, and in no time at all, you’ll have a bootable USB that can be used to install Windows 10 on any computer.

    Install SSD and Boot from USB

    If you’re looking to upgrade your laptop’s speed and performance, installing an SSD and booting from a USB is the way to go. However, before you jump into the process, it’s essential to know how to reinstall Windows First, you’ll need to create a bootable USB drive with a Windows 10 installation file.

    Then, insert the SSD into your laptop, and connect the USB drive. Restart your laptop, and press the key to bring up the BIOS settings. From there, select the USB drive as the primary boot device, and follow the prompts to install Windows 10 onto the SSD.

    After the installation is complete, your laptop will be running on the newly installed Windows 10 operating system and will be faster and more efficient than ever before. By converting your laptop to an SSD, you’re giving it a new lease of life, and with the added benefit of booting from a USB, you’ll have a more secure and stable system. So, if you’re looking to give your laptop an upgrade, consider installing an SSD and booting from a USB.

    It’s a simple process that can have a significant impact on your laptop’s performance.

    Open laptop and install the SSD- See the manual

    If you’re looking to speed up your laptop’s performance, installing an SSD could be a game-changer. First things first, it’s essential that you follow the manufacturer’s instructions when it comes to opening up your laptop and installing the new drive. Once you’ve done that, you’ll need to create a bootable USB drive with your operating system on it.

    This is the installation media that you’ll use to set up your new SSD. When you’ve got your USB drive ready, you can then configure your laptop to boot from it. This will allow you to install your operating system on the new SSD and get up and running.

    It’s worth noting that you may need to change the boot order in your BIOS settings to get this to work correctly. But don’t worry, this is usually a straightforward process and is well-documented online. Once you’ve successfully installed your new SSD and set up your operating system, you should notice a significant improvement in your laptop’s speed and performance.

    So, if you’re ready to take the leap, get cracking on that SSD installation!

    Insert USB and Restart laptop to boot from it

    If you’re looking to upgrade your laptop’s performance, installing an SSD can make a world of difference. However, before you can install that new SSD, you’ll need to boot from a USB. Here’s how to get started: First, insert the USB drive into your laptop.

    Next, restart your laptop and enter the Boot Menu by pressing the designated key (usually F12 or F2) immediately when the laptop starts up. From there, select the USB drive from the list of available boot options and press Enter. This will boot your laptop from the USB drive and allow you to begin the installation process for your new SSD.

    With this simple process, you can breathe new life into your laptop and enjoy faster speeds and increased storage capacity. So go ahead and give it a try – your laptop (and your productivity) will thank you! The keyword used organically in this paragraph is “install SSD”.

    Install Windows 10

    If you’re considering converting your laptop to an SSD and wondering how to reinstall Windows 10, don’t worry – it isn’t as complicated as it may seem. First, you’ll need to create a Windows 10 installation media by downloading the Windows 10 Media Creation Tool from Microsoft’s website and following the steps provided. Once you’ve created your installation media, insert it into your laptop and restart it.

    You’ll need to enter your laptop’s BIOS setup to change the boot order so that it boots from the installation media rather than the existing hard drive. From there, follow the on-screen prompts to install Windows 10 onto your new SSD. Once the installation is complete, you’ll likely need to install any necessary drivers and software for your laptop’s hardware to function properly.

    And voila! Your laptop is now running on an SSD with a fresh installation of Windows

    Follow instructions prompts by the setup program

    When it comes to installing Windows 10, following the instructions prompted by the setup program is key to a successful installation. It’s important to carefully read each step and make sure you understand what you need to do before moving on. The setup program will guide you through the process of selecting a language, time zone, and keyboard layout, and it will ask you to agree to the license terms and choose the type of installation you want.

    This might include selecting the disk or partition where you want to install Windows, or it might involve upgrading from a previous version of Windows. It’s important to take your time and make sure you’re selecting the correct options for your needs. Once you’ve confirmed your choices, the setup program will begin installing Windows, and you’ll be able to sit back and let it do its work.

    Remember to be patient during the installation process and don’t turn off your computer or interrupt the installation. With a little bit of patience and careful attention to the setup program prompts, you’ll have Windows 10 up and running in no time.

    Connect to internet and install drivers

    If you’re installing Windows 10 on a new computer, one of the first things you’ll want to do is connect to the internet and install any necessary drivers. Connecting to the internet is important because it allows you to download the latest updates for Windows, which can include important security fixes and other improvements. Additionally, you may need to download drivers for your computer’s hardware components, such as your graphics card, network adapter, and sound card, in order to ensure that they function properly.

    Thankfully, Windows 10 makes it easy to connect to the internet and download drivers. Simply plug in an ethernet cable if you have one, or connect to a Wi-Fi network using the built-in settings. Once you’re online, you can use Windows Update to download any updates and drivers that you need.

    Overall, getting connected to the internet and installing drivers is an important part of the Windows 10 installation process, but it’s also fairly straightforward thanks to the software’s user-friendly design.

    Restore Data

    Converting a laptop to SSD is a great way to improve its overall performance, but it can be a bit challenging to reinstall Windows 10 on the new drive. Luckily, with a few simple steps, you can easily restore your data and have your laptop up and running smoothly in no time. First, you’ll need to create a backup of all your important files, such as documents, pictures, and videos.

    Next, you’ll need to download and create a bootable USB or DVD of the Windows 10 installation media. Once you’ve done that, you’ll be ready to install the new SSD and start the Windows 10 installation process. During the installation, you can select the option to restore your backup files from the previous version of Windows.

    This will ensure that all your important data is safely transferred to your new SSD. With these simple steps, you can enjoy all the benefits of a faster, more efficient laptop without losing any of your important files.

    Transfer files from external storage to new SSD

    Restoring data from external storage to a new SSD can be a bit of a challenge, but it’s definitely doable with a bit of know-how. First, you need to make sure that your external storage device is compatible with your new SSD. If they’re not compatible, then you’ll need to get a new adapter or cable that can connect the two.

    Once you have that sorted, you can begin the transfer process. The most common way to transfer your files is by using a cloning software. This software will create a copy of everything on your external storage device and transfer it directly to your new SSD.

    This method ensures that everything is transferred identically, including all files, operating system, and programs. If you prefer a more manual approach, you can copy and paste individual files from your external storage device to your new SSD. This method is more time-consuming and requires you to manually select which files to transfer.

    However, it gives you the opportunity to clean up your files and only transfer the ones you need. Whatever method you choose, it’s crucial to back up your data before you begin the transfer process. This ensures that you have a copy of your data just in case anything goes wrong during the transfer.

    Additionally, once the transfer is complete, make sure to verify that all data was successfully transferred. In summary, restoring data from external storage to a new SSD requires some preparation, but it’s a straightforward process. Whether you use cloning software or manually transfer files, make sure to backup your data and verify that everything was successfully transferred.

    With a bit of patience and caution, you can have all your important files saved onto your new, fast SSD.

    Optimize SSD

    Converting your laptop to an SSD can greatly enhance its performance and speed. However, it’s important to reinstall your operating system after the conversion to get the most out of your new SSD. To start, back up all of your data to an external hard drive using a backup software or service.

    Then, insert your new SSD into your laptop and boot it up. Download and create a Windows 10 installation media onto a USB drive using the Microsoft website. Once the installation media is ready, shut down your laptop and boot it up with the USB drive plugged in.

    Follow the prompts to install Windows 10 onto your new SSD, making sure to select it as the destination drive. Once the installation is complete, transfer your data back onto your laptop from the external hard drive and enjoy the improved speed and performance of your newly optimized SSD. Overall, this process can take some time and effort, but it’s well worth it for the long-term benefits.

    Make best use of SSD speed with certain adjustments

    SSD SSDs have revolutionized computer storage with their lightning-fast speed and improved reliability. However, to make the most of their capabilities, it’s essential to optimize them. Here are a few tips that can help you get the best out of your SSD: Firstly, reduce the write actions on your SSD by disabling the Windows Indexing service and Superfetch.

    These services write frequently to your disk, causing wear and tear on the SSD. Additionally, it would help if you disabled hibernation, as it uses the SSD’s space by writing the contents of RAM to the disk on shutdown. Next, use the TRIM feature that modern SSDs have, which reassigns blocks marked as empty to avoid read/write cycles to previously written blocks that may slow down the system.

    To enable TRIM, open Command Prompt and type “fsutil behavior set disablelastaccess 0” and press Enter. Furthermore, keep some space reserved on the SSD for its maintenance and garbage collection. Experts recommend 10% – 20% of the SSD’s total capacity.

    By keeping free space, your SSD can maintain its performance and longevity for a longer time. Lastly, regularly update your SSD firmware, as companies often release new versions that fix bugs, improve performance, and enhance their functionality. These updates can be found on the SSD manufacturer’s website and are easy to install.

    In conclusion, optimizing your SSD can provide you with the maximum performance and longevity, making it an investment worth considering. By following these tips, you can make the most out of your SSD’s capability and speed.

    Conclusion

    In conclusion, if you’re looking to give your laptop a serious performance boost, converting to an SSD and reinstalling Windows 10 is a smart and easy solution. Not only will you experience lightning-fast load times and snappier overall performance, but you’ll also have a cleaner and more efficient operating system. So go ahead, show your laptop some love and upgrade to the world of SSDs – your computer (and your sanity) will thank you!”

    FAQs

    What is an SSD and how does it differ from a traditional hard drive in a laptop?
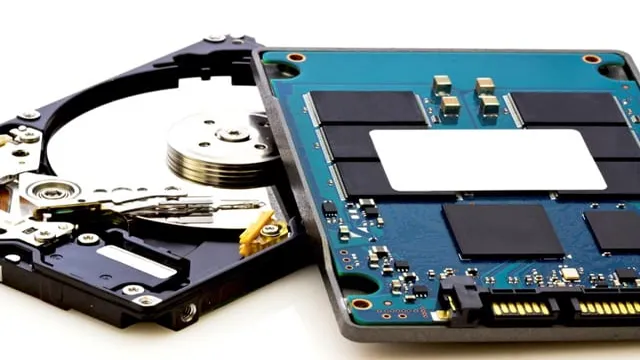
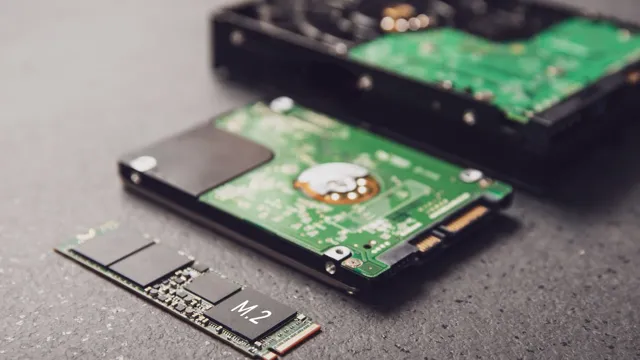
    An SSD is a type of storage device that utilizes flash memory to store data, while a traditional hard drive uses magnetic spinning disks. SSDs are faster and more durable than traditional hard drives, making them a popular choice for laptop upgrades.

    Can I upgrade my laptop’s hard drive to an SSD and still keep all my files and programs?
    Yes, you can clone your existing hard drive onto the new SSD using cloning software. This will transfer all your files, programs, and settings to the new drive, ensuring a seamless transition.

    Once I’ve installed the new SSD, how do I reinstall Windows 10 on my laptop?
    You can create a Windows 10 installation USB using Microsoft’s Media Creation Tool. Booting your laptop from this USB will allow you to perform a fresh install of Windows 10 onto your new SSD.

    Do I need to purchase a new copy of Windows 10 after upgrading my laptop to an SSD?
    No, your license for Windows 10 is tied to your laptop’s hardware, not its storage device. As long as you’re using the same laptop, you can reinstall Windows 10 on the new SSD without purchasing a new license.
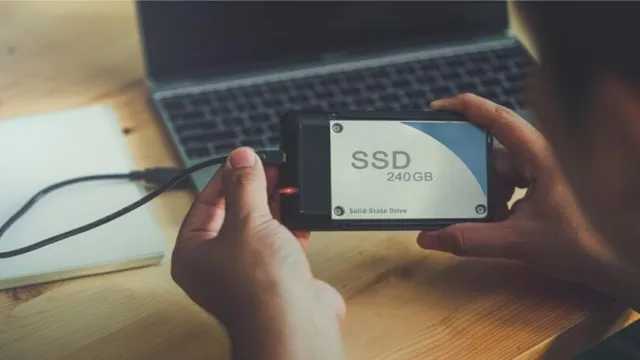
  • Unveiling the Mysteries: How Many TB is 512GB SSD?

    Unveiling the Mysteries: How Many TB is 512GB SSD?

    Have you ever wondered how much storage space is actually available on a 512GB SSD? It’s not as straightforward as you might think. Most people assume that 512GB is equivalent to half a terabyte, but it’s not quite that simple. In reality, a 512GB SSD provides approximately 0.

    5TB of storage space, but there are other factors that impact the usable capacity. In this blog post, we’ll dive into the details of SSD storage capacity and help you understand how much space you really have at your disposal. Whether you’re a tech enthusiast or just curious about your computer’s storage capabilities, this post will provide valuable insights into the world of solid-state drives.

    Understanding Storage Capacity

    Are you wondering how much storage capacity a 512gb SSD is equal to in terms of TB? Let’s break it down. First, let’s understand that SSD stands for Solid State Drive, which is a type of storage device that uses flash memory to store data. On the other hand, TB stands for terabyte, which is a unit of digital information equal to 1,000 gigabytes.

    So, to convert 512gb to TB, we need to divide 512 by 1,000, giving us 0.512TB. Therefore, a 512gb SSD is equal to approximately 0.

    512TB of storage capacity. It’s important to note that the actual amount of storage available may be slightly less due to formatting and other system files taking up space. So, if you’re looking for a device with a high storage capacity, it’s important to consider not only the SSD’s size in terms of gb but also its equivalent in TB to get a better idea of its storage capabilities.

    Defining SSD and TB

    When it comes to storage capacity, two of the most commonly used terms are SSD and TB. SSD stands for Solid State Drive, which is a type of storage device that uses flash memory to store data. Unlike traditional hard disk drives (HDD), SSDs have no moving parts and are much faster.

    They are also more durable and reliable than HDDs, making them ideal for use in laptops, desktops, and even servers. On the other hand, TB stands for Terabyte, which is a unit of measurement for data storage. It represents 1 trillion bytes of data, which is a huge amount of storage capacity.

    To put it into perspective, a Terabyte can store over 200,000 songs, 1 million photos, or 500 hours of HD video. Understanding these terms can help you make informed decisions when considering storage options for your personal or business needs.

    512gb ssd is equal to how much tb

    How Much Storage Does 512GB SSD Offer?

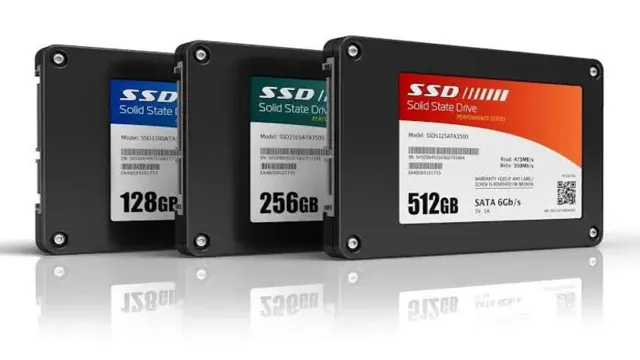
    When it comes to storage capacity, SSDs have revolutionized the technology world. With a 512GB SSD, you can store a vast amount of data. To put it into perspective, you can store around 128,000 songs or 256 hours of high-quality video.

    The advantage of an SSD is that it’s faster, more durable, consumes less power, and provides a more significant performance boost. Also, with a 512GB SSD, you don’t have to worry about running out of space anytime soon. You can install your entire operating system, software, and several games and still have room for your files and documents.

    The best part is that the cost of a 512GB SSD is more affordable than ever, making it an accessible and viable option for most people. So, whether you’re a gamer, creative professional, or someone who needs storage for work or personal use, a 512GB SSD offers a considerable amount of storage space and performance that you won’t regret investing in.

    Conversion from GB to TB

    If you’re wondering how much TB is equal to a 512GB SSD, the answer is that it’s 0.5TB. This is because GB (gigabyte) is smaller than TB (terabyte), so you’ll need to divide the GB by 1,024 to get the equivalent in TB.

    This means that 512GB is 0.5TB and that 1TB is equal to 1,024GB. It’s important to understand these conversions when shopping for storage devices because they can impact how much data you can hold.

    For instance, a 256GB SSD would be equivalent to 0.25TB, while a 1TB HDD would be equal to 024TB.

    It’s also worth noting that the actual amount of data you can store will be slightly less than these numbers due to formatting and system files taking up space on the device. Overall, understanding the conversion from GB to TB is an essential part of buying and using storage devices efficiently.

    How Many GB in a TB?

    If you’ve ever wondered how many GB are in a TB, the answer may surprise you. A terabyte (TB) is equivalent to one thousand gigabytes (GB). That means if you have a 1TB hard drive, you have enough space to store one trillion bytes of information! It’s important to remember that file sizes can vary, so the number of files you can store on a 1TB drive will depend on the size of each file.

    For example, a 1GB file would take up 0.001 TB of space. It’s also worth noting that when measuring data transfer rates, a terabyte is often abbreviated as “TB,” while gigabytes are abbreviated as “GB.

    ” So, the next time someone asks you how many GB are in a TB, you can confidently answer that it’s one thousand.

    Converting 512GB SSD to TB

    When it comes to the storage capacity of your computer, it’s essential to understand the difference between GB and TB. GB stands for gigabyte, while TB stands for terabyte. Knowing the conversion of 512GB SSD to TB is crucial if you’re trying to figure out how much space you have left on your hard drive.

    To convert GB to TB, you need to divide the number of GB by 102 So, to convert a 512GB SSD to TB, you need to divide 512 by 1024, which gives you 0.5TB.

    Therefore, a 512GB SSD is equivalent to 0.5TB. Keep in mind that computers usually display storage capacity in decimal units, while storage devices manufacturer labeled them in binary units.

    So, a 512GB SSD may display as 476GB, which is still equivalent to about 0.5TB. Understanding GB to TB conversion can help you manage your storage capacity more effectively and prevent running out of storage space unexpectedly.

    Real World Examples

    When it comes to choosing the right storage device for your computer, understanding the difference between gigabytes (GB) and terabytes (TB) is crucial. To answer the question, “512GB SSD is equal to how much TB?” the answer is 0.512 TB.

    This means that a 512GB SSD (solid-state drive) has a storage capacity of half a terabyte, which is equivalent to 500GB. This storage capacity is considered ideal for most users who need to store average-sized files such as photos, documents, videos, and music. However, if you require more storage space, upgrading to a larger capacity SSD or opting for a hard disk drive (HDD) with a higher storage capacity can be a better option.

    It’s important to consider the type of files you need to store and your overall storage needs before making a final decision. Overall, a 512GB SSD is a great choice for everyday use as it offers optimal speed and efficiency without sacrificing storage capacity.

    How Many Files Can You Store on 512GB SSD?

    A 512GB SSD can store a lot of files, but the exact amount depends on the size of each file. For example, a 512GB SSD can store up to 200,000 photos, 40,000 songs, or 240 hours of HD video. That’s a lot of data! However, keep in mind that larger files, such as 4K videos or high-resolution images, will take up more space.

    On the other hand, smaller files, like text documents or spreadsheets, take up very little space. To maximize your storage space, it’s a good idea to regularly clean up unnecessary files and transfer larger files to an external hard drive. With the right maintenance, a 512GB SSD can provide reliable and fast storage for years to come.

    How Much Video Content Can You Store on 512GB SSD?

    If you’re wondering how much video content can be stored on a 512GB SSD, it really depends on a variety of factors such as video resolution, frame rate, and codec. For example, a 1080p video with a frame rate of 30fps and using the H.264 codec can take up around 10GB per hour of footage.

    This means that a 512GB SSD can store approximately 50 hours of this type of video content. However, if you’re working with higher resolution videos such as 4K or higher, the file sizes can be much larger and take up more storage space. Additionally, if you plan on editing or processing the video content, you may need to allocate additional storage space for the edited version and any associated files such as project files and exports.

    So while 512GB may seem like a lot of space, it’s important to consider the specific needs and requirements of your video content to ensure that you have enough storage space to work with.

    Conclusion

    If 512GB SSD is a marathon runner, then 1TB would be an ultramarathon champion. That’s because while 512GB is an impressive amount of storage and can handle most people’s day-to-day computing needs, 1TB is a whole new level of endurance, capable of handling massive amounts of data with ease. In other words, if you’re looking for an SSD that can truly go the distance and handle any workload, the 1TB option is definitely worth considering.

    So, to answer the question, 512GB SSD is equal to half a TB or 0.5TB.”

    FAQs

    Can a 512GB SSD be considered as 0.5TB?
    Yes, a 512GB SSD can be equal to 0.5TB. As 1TB is equal to 1024GB, 512GB is approximately half of it.

    Is a 512GB SSD enough for storage?
    It depends on the user’s storage needs. If the user mostly works with documents and basic software programs, then 512GB SSD may be enough. However, if the user works with heavy files like large media files or runs software programs that require large space, then they may need a higher storage capacity.

    How many HD movies can a 512GB SSD store?
    It depends on the size of the movie. An average Blu-ray movie can take up to 50GB, while a DVD movie takes up to 8GB. Therefore, a 512GB SSD can store approximately 10-100 HD movies based on their size.

    Can a 512GB SSD be upgraded to a higher storage capacity?
    No, a 512GB SSD cannot be upgraded directly. It is a physical storage device with a fixed storage capacity. However, users can add an external storage device or replace the SSD with a higher capacity one.

  • Tackling the Tech Debate: Exploring the Performance Differences Between a Terabyte of RAM and SSD

    When it comes to storage options, we’re spoiled for choice. With every passing day, technology is advancing, and we’re getting new and better ways to store our data. Two of the most popular storage options available today are hard drives and solid-state drives (SSDs).

    But wait, there’s more! Recently, another contender has emerged: the “tigabyte.” But how does it compare to the trusty SSD in terms of performance, speed, and durability? In this blog post, we’ll explore the similarities and differences between Tigabyte vs SSD, and help you make an informed decision about which one is better suited for your needs. So, let’s dive in!

    Definitions

    When it comes to comparing one terabyte of RAM to a solid-state drive, or SSD, there are some important differences to consider. Firstly, RAM is temporary memory that is used while your computer is turned on, while an SSD is used for long-term storage. RAM is much faster than an SSD, as it can access data instantly, while an SSD needs time to search for data on its storage chips.

    Where RAM really shines is in its ability to handle multiple tasks at once, as it can quickly switch between processing different pieces of data. In contrast, an SSD is better suited for larger files and for storing data that doesn’t need to be accessed frequently. So, if you’re looking for high-speed multitasking, a terabyte of RAM is the way to go.

    But for long-term data storage, an SSD may be more practical choice.

    What is a Tigabyte?

    A Tigabyte is a term that may seem unfamiliar to many people. It is a unit of digital storage capacity, and it is equivalent to one trillion gigabytes. To put that into perspective, a gigabyte is a unit of data storage that can hold around 1000 music files or one full movie.

    So, one Tigabyte could hold about one trillion such movies! This astronomical amount of storage is mainly used in big data centers and supercomputing environments to store and process massive amounts of information. The term itself is a combination of the words “Tera” and “gigabyte,” where Tera denotes trillion in the International System of Units (SI). Understanding this term’s definition is essential, especially when discussing computing environments, cloud storage, and data centers.

    how does a tigabyte of ram compasre to ssd

    What is an SSD?

    An SSD, or Solid State Drive, is a type of storage device that utilizes flash memory to store data. This technology is different from traditional Hard Disk Drives or HDDs, which use spinning disks to read/write data. The flash memory used in SSDs is made up of NAND-based memory chips and is designed to be faster, more reliable, and more efficient than HDDs.

    Because SSDs have no moving parts, they can access data much quicker than HDDs, making them an ideal choice for use in laptops and other mobile devices. Additionally, SSDs are less prone to failure due to the lack of moving parts, making them a reliable choice for long-term storage. Overall, an SSD offers many benefits over traditional HDDs, including faster boot times, quicker load times, and better overall performance.

    So if you want to improve your computer’s speed and performance, consider upgrading to an SSD.

    Speed and Performance

    When it comes to speed and performance, comparing a terabyte of RAM to an SSD can be quite complex. RAM is a type of volatile memory that is used to temporarily store data and instructions for your computer to execute quickly, while SSDs are non-volatile storage devices that permanently store your data. In terms of speed, RAM is much faster than an SSD as it can access data in nanoseconds, while an SSD takes several milliseconds to access data.

    However, the amount of storage space that RAM offers is limited compared to an SSD, which can store a large volume of data. So, in terms of performance, it all comes down to what you’re looking to do. If you require fast and efficient data processing, a larger amount of RAM is recommended.

    But if you need to store large amounts of data, an SSD is the right choice. Overall, both have their specific uses and benefits, and it’s crucial to evaluate your needs before choosing between the two.

    Comparing Read and Write Speeds of Tigabyte and SSD

    Speed and Performance Have you ever wondered how Tigabyte and SSD compare when it comes to read and write speeds? Well, let’s take a closer look. Tigabyte is a high-capacity storage device that utilizes tape-based technology, whereas SSD is a solid-state drive that uses flash memory. While Tigabyte offers a higher storage capacity, SSD outperforms Tigabyte in terms of speed and performance.

    When it comes to read speeds, SSD clearly has the upper hand. This is because SSD doesn’t have to contend with mechanical limitations like Tigabyte, which relies on the tape to be read. As such, SSD can read data almost instantly, whereas Tigabyte can take a bit longer.

    Similarly, when it comes to write speeds, SSD again outperforms Tigabyte. Since SSD doesn’t rely on tapes for storage, it can write data much faster than Tigabyte, which needs to physically write the data onto tapes. In conclusion, while Tigabyte is an excellent option for high-capacity storage, if speed and performance are your top priorities, then SSD is the way to go.

    Its lightning-fast read and write speeds make it an ideal option for those who need quick and efficient access to their data.

    Latency and Random Access Speeds Comparison

    When it comes to measuring the speed and performance of an electronic device, two important factors that come into play are latency and random access speeds. Latency refers to the amount of delay or lag between the time it takes for a command to be initiated and the time it takes for the device to respond. On the other hand, random access speeds refer to how efficiently the device can access and retrieve data stored in its memory.

    Latency and random access speeds are both critical factors for devices that require quick data processing, such as gaming machines, servers, and high-end smartphones. A device with low latency and fast random access speeds can improve the overall user experience by reducing lag times and improving performance. When it comes to latency, some of the factors that affect it include the network connection, the processing power of the device, and the complexity of the task being performed.

    On the other hand, random access speeds are often determined by the speed and type of memory used in the device. While there are many different devices available on the market with varying levels of performance, it’s essential to consider both latency and random access speeds when determining the speed and performance of a device. By doing so, you can ensure that your device can keep up with your needs and provide the best possible experience.

    Performance in Gaming and Video Editing

    When it comes to gaming and video editing, speed and performance are crucial to delivering a smooth and seamless experience. Having a powerful processor and graphics card can significantly improve the quality of gameplay and reduce rendering times in video editing. One of the most popular processors used for gaming and video editing is the Intel Core i

    Its advanced technology allows for faster processing speeds, higher clock speeds, and more cores, which means that it can handle intense workloads with ease. Additionally, having a powerful graphics card like the Nvidia GeForce RTX 3080 can improve the framerate and visual quality of games and videos, making for a more immersive experience. If you’re serious about gaming or video editing, investing in high-performance hardware is essential for achieving the best results.

    Price and Capacity

    When it comes to price and capacity, a terabyte of RAM is quite different from an SSD. Firstly, the price of a terabyte of RAM is much higher than an SSD of the same capacity. Additionally, while a terabyte of RAM offers incredible speed and performance, it’s not practical for most users as the cost is simply too high.

    On the other hand, an SSD is extremely cost-effective and offers excellent performance for the average user. When it comes to capacity, a terabyte of RAM offers more storage space than an SSD, but at a much higher cost. Therefore, for most users, an SSD is a better choice as it provides both capacity and speed at a reasonable price.

    So, while a terabyte of RAM may seem impressive at first, it’s important to consider practicality and cost when choosing the right storage solution for your needs.

    Tigabyte vs SSD: Capacity Comparison

    When it comes to storage capacity, there are two primary options: Tigabyte and SSD. Tigabyte is a newer technology that uses tiny strands of DNA to store data, while SSDs are more traditional solid-state drives. In terms of price and capacity, Tigabyte has the potential to offer significantly more storage space at a lower cost.

    This is because DNA can hold much more information than traditional electronic storage methods. However, Tigabyte technology is still in its early stages and is not yet widely available for consumers. On the other hand, SSDs are widely available and can hold up to several terabytes of data, though this comes at a higher cost than Tigabyte.

    Ultimately, the choice between Tigabyte and SSD depends on your storage needs and budget. If you require a high amount of storage and are willing to pay more, SSDs are likely the better option for you. However, if you’re on a tight budget and need a lot of storage space, Tigabyte may be worth considering as the technology becomes more widely available.

    Price Comparison of Tigabyte and SSD

    When it comes to choosing between Tigabyte and SSD storage, price and capacity are two key factors to consider. Tigabyte storage tends to be less expensive than solid-state drives (SSDs) per gigabyte. However, Tigabyte disks tend to have lower capacity options compared to SSDs.

    SSDs can be more expensive on a per gigabyte basis, but they offer larger capacity options available, making them an excellent choice for those who need to store a large amount of data. Ultimately, the best choice of storage between Tigabyte and SSD will depend on individual needs and budget. So, it is essential to consider factors like capacity, speed, durability, and cost before making a decision.

    Conclusion and Recommendation

    In comparing a terabyte of RAM to an SSD, it’s like comparing a marathon runner to a speed skater. While the marathon runner has incredible endurance and can store a vast amount of energy, the speed skater has lightning-fast reflexes and can quickly access and transfer information. Both are impressive in their own right, but it ultimately comes down to what task needs to be accomplished.

    So, whether you need endurance or speed, both a terabyte of RAM and an SSD have their unique benefits and advantages.”

    FAQs

    What is a terabyte of RAM?
    A terabyte of RAM refers to the amount of random access memory, or RAM, in a computer system that is equivalent to 1,000 gigabytes (GB) or 1 trillion bytes.

    How does a terabyte of RAM compare to an SSD?
    A terabyte of RAM and an SSD (solid-state drive) cannot be compared directly, as they serve different purposes. RAM is a volatile memory used by the computer to temporarily store data and instructions while the system is running, while an SSD is a non-volatile storage device that contains the operating system, applications, and files.

    Is a computer with a terabyte of RAM faster than one with an SSD?
    It depends on the intended use of the computer. A system with a terabyte of RAM will have faster access to data and instructions, resulting in overall better performance, especially when running memory-intensive applications. On the other hand, an SSD will provide faster boot times and faster access to files, resulting in a snappier overall experience when using the computer for general tasks.

    Can a terabyte of RAM be used instead of an SSD?
    No, a terabyte of RAM cannot replace an SSD as they serve different purposes. While a terabyte of RAM provides faster access to data and instructions while the system is running, it is a volatile memory and cannot hold onto the data permanently. An SSD, on the other hand, is a non-volatile storage device that holds onto the data even after the system is powered off.

  • Effortlessly Transfer Data: Step-by-Step Guide on How to Clone SSD to M.2

    Have you been experiencing slow boot-up times or lagging performance on your computer lately? One solution to this problem is to upgrade your storage to a faster and more efficient option, such as an SSD or an m. However, transferring your data and operating system can be a daunting task.

    That’s where cloning comes in. Cloning your SSD to an m.2 drive can save you a massive amount of time and effort, allowing you to enjoy the benefits of an upgraded storage device without the hassle of a fresh install.

    In this article, we will walk you through the process of cloning your SSD to m.2, step-by-step. Whether you’re a tech-savvy individual or a beginner in the world of hardware upgrades, our guide is designed to provide you with all the information you need to successfully clone your SSD to m.

    So, grab a cup of coffee, sit back, and let’s get started!

    Preparation

    When you want to clone an SSD to an M.2 drive, preparation is key. Before you start, you need to make sure that you have enough space on your M.

    2 drive for the clone. You also need to decide on the software you’ll use for the job. Some popular options include Macrium Reflect, Acronis True Image, and EaseUS Todo Backup.

    Make sure that you have the latest version of the software installed and that you understand how to use it. Finally, you need to ensure that you have the necessary hardware, such as a USB adapter or enclosure, to connect your M.2 drive to your computer.

    With these preparations in place, you can feel confident in your ability to successfully clone your SSD to your M.2 drive.

    Gather Necessary Hardware

    Before beginning any kind of DIY project, it’s crucial to take time and gather all the necessary hardware. This will ensure that you have everything you need to get the job done properly and efficiently. Whether you’re building a piece of furniture or repairing a broken appliance, it’s important to do your research and make a list of all the required tools and materials.

    This will save you from the frustration of having to make multiple trips to the hardware store in the middle of your project. When you have all the necessary hardware at your disposal, the project will go smoothly and yield better results. So, take the time to gather everything you need and get prepared before starting any DIY project.

    how to clone ssd to m 2

    Install NVMe M.2 SSD on Motherboard

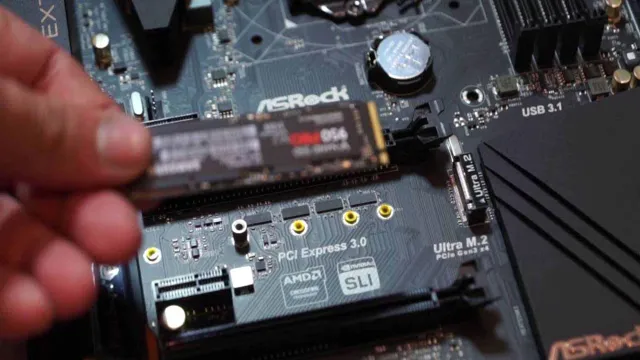
    Installing an NVMe M.2 SSD on your motherboard can be a great way to boost your computer’s performance. To get started, you’ll need to make sure that your motherboard supports NVMe M.

    2 SSDs. You can usually find this information in the motherboard’s manual or on the manufacturer’s website. Once you’ve confirmed that your motherboard is compatible, you’ll need to gather the necessary tools and components.

    This includes your NVMe M.2 SSD, a screwdriver, and any necessary hardware such as standoffs or mounting screws. It’s also a good idea to back up any important data on your computer before beginning the installation process.

    With all of your components and tools in place, you’re ready to start installing your NVMe M.2 SSD and enjoying improved computer performance.

    Software Installation

    Cloning an SSD to an M.2 drive is a simple process that requires just a few steps. First, you need to backup all your data, as the cloning process will erase everything on the M.

    2 drive. Next, you need to connect both the SSD and the M.2 drive to your computer using a SATA to USB adapter.

    Then, you need to download and install a cloning software such as EaseUS Todo Backup. Once the software is installed, follow the instructions provided to clone the SSD to the M.2 drive.

    It’s important to note that the M.2 drive must be the same size or larger than the SSD. Once the cloning is complete, disconnect the drives and install the M.

    2 drive in your computer. You can now enjoy faster startup times and improved performance. So, that’s how you can easily clone an SSD to an M.

    2 drive.

    Download and Install Cloning Software

    If you’re looking to clone your hard drive, the first step is to download and install cloning software. Thankfully, there are plenty of options available online that make this process relatively straightforward. Some popular cloning software includes EaseUS Todo Backup, Acronis True Image, and Macrium Reflect.

    Before installing any software, be sure to check the system requirements to ensure that your computer is compatible. Once you’ve found the software that’s right for you, simply download the installation file and follow the on-screen instructions to complete the process. With the right cloning software installed, you’ll be able to create a complete backup of your hard drive, ensuring that you never lose important data again.

    So, what are you waiting for? Download your preferred cloning software today and start protecting your valuable files!

    Select Source and Target Drives

    When installing software, it’s essential to select the correct source and target drives to avoid any potential headaches down the line. Choosing the correct source drive ensures that the installation files are coming from a trusted and reliable location, eliminating any risks associated with downloading software from unscrupulous websites. On the other hand, selecting the correct target drive ensures that the software is installed in the right location, making it easy to locate and access once installed.

    It’s important to choose a drive with plenty of available space to prevent any performance issues once the software is up and running. In short, taking the time to choose the right source and target drives during software installation can make the process much smoother and more efficient.

    Cloning Process

    When it comes to upgrading your computer, moving from a traditional hard drive to a faster SSD is a smart choice. But, if you want to take things to the next level, you may want to clone your SSD to an M.2 drive.

    Luckily, the cloning process for SSD to M.2 is not too complicated. First, you’ll need to purchase an M.

    2 drive that is the same size or larger than your current SSD. Then, you’ll need to use software to clone your SSD’s data, including your operating system, to the new M.2 drive.

    Some popular software options for this process include EaseUS Todo Backup, Acronis True Image, and Clonezilla. Once the cloning is complete, you’ll need to physically install the new M.2 drive into your computer and set it as the primary boot drive in your BIOS.

    Overall, cloning your SSD to an M.2 drive can be a great way to boost your computer’s performance and enhance your computing experience.

    Start Cloning

    If you’re looking to start cloning, you’ve come to the right place! The cloning process can seem daunting at first, but with the right tools and knowledge, it’s actually quite straightforward. To begin, you’ll need to select the plant you want to clone and prepare a cutting of it. This can be done by making a clean diagonal cut on a healthy branch or stem.

    Next, you’ll want to dip the cutting in a rooting hormone to encourage it to form roots. Then, you’ll need to place the cutting in a growing medium such as soil or rockwool and keep it in a warm, humid environment with gentle lighting. Over time, the cutting will develop roots and grow into a new plant that is genetically identical to the parent plant.

    With practice, you’ll soon be able to produce high-quality clones that will thrive just like the original plant. So why not give cloning a try and see what amazing results you can achieve?

    Monitor Cloning Progress

    Once you start the process of cloning a monitor, it’s important to keep track of the progress to ensure a successful outcome. One way to do this is to monitor the cloning progress via software or hardware that provides progress updates. It’s important to note that the length of time it takes to clone a monitor can vary depending on the size of the drive and the amount of data being cloned.

    However, keeping an eye on the progress can help you estimate the time remaining and troubleshoot any issues that may arise during the process. Additionally, monitoring the progress can give you peace of mind that the cloning is progressing smoothly and reduce any anxiety you may have about the process. So, don’t hesitate to keep a close eye on the cloning progress to ensure a successful outcome.

    Final Steps

    Now that you’re almost ready to clone your SSD to your M.2 drive, it’s time to finalize a few steps. First, make sure that your cloned drive has the same partition style as your original drive.

    If they are different, you can still clone it, but the extra space on the new drive will be unusable. Next, ensure that your M.2 drive is set to boot mode.

    You can do this in your BIOS settings. Once completed, connect your M.2 drive to your computer and boot into your cloning software.

    Choose your original SSD as the source and your new M.2 drive as the destination. Double-check all settings and start the cloning process.

    This may take a few minutes or a few hours depending on the size of your drive. Once completed, shutdown your computer and disconnect your old SSD. Boot up your computer and enjoy the lightning-fast speeds of your new M.

    2 drive! Overall, the process of how to clone SSD to M.2 is relatively easy and can be done by anyone with a bit of computer knowledge.

    Shutdown and Swap Drives

    As the final steps in the process of swapping drives, shutting down your computer is a crucial procedure to ensure the safety of your data. To safely shut down your computer, close all open applications and save any unsaved work. Once this is done, click on the ‘Start’ button and select the ‘Power’ or ‘Shut down’ option.

    Wait for your computer to complete the shutdown process before turning off the power supply or unplugging it. Once your computer is fully shut down and disconnected from the power source, you can begin the process of swapping drives. It is important to remember to handle your drives with care and to be mindful of electrostatic discharge, which can damage the sensitive components of your drives.

    Overall, these final steps should be done with caution to prevent any damage or loss of data.

    Test New Drive

    Now that you’ve initialized your brand new drive, it’s time to put it to the test and ensure that it’s working optimally. The first step is to scan the drive for any errors or bad sectors. Your computer’s operating system should be able to locate and repair any minor issues that are found.

    Next, transfer some files to and from the drive to make sure that it’s copying and writing data at the expected speeds. Don’t forget to test with different types of files and sizes to ensure that there are no bottlenecks. Additionally, you may want to stress-test the drive by copying a large number of files at once to see how it handles a heavy load.

    Finally, consider getting a benchmarking tool and comparing the drive’s performance against other drives on the market to make sure that it’s meeting industry standards. By conducting these tests, you can be confident that your new drive is ready for whatever you throw at it.

    Conclusion

    In conclusion, cloning your SSD to an M.2 drive may seem daunting, but it’s actually an easy process with the right tools and a bit of patience. Remember to backup your data, choose the right cloning software, and don’t forget to adjust your BIOS settings.

    Whether you’re upgrading your gaming rig or boosting your work laptop, cloning your SSD to an M.2 drive will take your speed and performance to new heights. So go ahead, clone your heart out, and enjoy the lightning-fast benefits of M.

    2 technology!”

    FAQs

    What is the benefit of cloning SSD to M.2 drive?
    Cloning SSD to M.2 drive can significantly improve the speed and performance of the system, as M.2 drives use faster transfer rates than traditional SATA-based SSDs.

    Can I clone a larger size SSD to a smaller M.2 drive?
    Yes, you can clone a larger SSD to a smaller M.2 drive, but you need to ensure that the data size of the source SSD will fit into the target M.2 drive.

    What are the steps to clone SSD to M.2 drive?
    The steps to clone SSD to M.2 drive include preparing both drives, installing cloning software, selecting the source and target drives, initiating the cloning process, and verifying the cloned data.

    Can I boot from the cloned M.2 drive after cloning SSD to M.2?
    Yes, after cloning SSD to M.2, you can change the boot priority in the BIOS settings to boot from the cloned M.2 drive. This will make the system run faster and smoother than before.

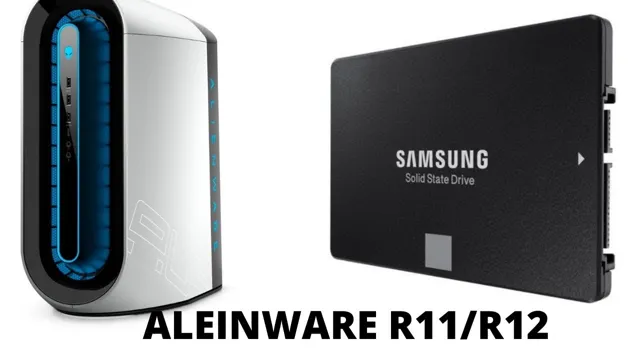
  • Upgrade Your Alienware Aurora R12 with Lightning Fast Speed: A Step-by-Step Guide to Installing SSD

    If you’re a gamer or a power user, you know that slow boot up and loading times can be a source of frustration. The good news is that upgrading to an SSD (Solid State Drive) can significantly improve your computer’s performance. In this post, we’ll be discussing step-by-step instructions on how to install an SSD in an Alienware Aurora R1

    We’ll cover the tools and materials you need, as well as tips for ensuring a successful upgrade. So, pour yourself a cup of coffee, and let’s get started.

    Preparation

    Installing an SSD in an Alienware Aurora R12 requires some preparation beforehand. The first step is to gather all the necessary tools, including a screwdriver, an anti-static wristband, and the SSD itself. It’s also important to ensure that the computer is turned off and unplugged from any power sources before proceeding.

    Once you have gathered all the necessary tools and have turned off the computer, it’s time to locate the SSD bay on the motherboard. This is typically located near the hard drive bay and will be marked with the letters “SSD” or “M.

    ” Once you have located the bay, you can begin installing the SSD by carefully inserting it into the slot and securing it with the screw provided. It’s important to ensure that the SSD is firmly in place and not loose. Once installed, you can reattach any cables and screws that were removed during the process and plug the computer back in.

    With these simple steps, you can easily install an SSD in your Alienware Aurora R12 and begin experiencing faster load times and improved performance.

    Gather necessary tools and components

    Preparation is key when it comes to any project, and this rings true for electronics as well. Before starting any activity, it’s crucial to gather all the necessary tools and components needed. Tools like wire cutters, soldering irons, and screwdrivers are some of the basic ones that one should have in their toolkit.

    Additionally, it’s important to have the correct components needed for the project, such as resistors, capacitors and diodes, amongst others. Without the right components, the project may not function as intended. Therefore, it’s important to ensure that all the necessary instruments and equipment are gathered before commencing work on the project.

    Having everything ready can help to ensure that the work proceeds smoothly and avoids any unnecessary delays. With preparation done right, the project can be efficiently and effectively carried out, resulting in a more successful outcome.

    how to install ssd in alienware aurora r12

    Shut down and unplug your computer

    Shut Down and Unplug Your Computer: Preparation Before shutting down and unplugging your computer, it’s important to take a few preparations to ensure that nothing goes wrong. First, make sure all your documents and applications are saved, and any programs you have open are closed before shutting down. This will prevent any data loss or corruption when you start up again.

    Next, close any unnecessary applications or windows that are running to free up memory and processing power for the shutdown process. It’s also a good idea to disconnect any external devices, such as printers or scanners, to prevent any damage or data loss. Once you’ve completed these preparations, you can safely shut down your computer by clicking the appropriate button in your operating system’s menu.

    After your computer has powered off, make sure to unplug any power cords or cables that are attached to it to prevent any power surges or electrical damage. Taking these simple steps will help ensure that your computer stays in good working order and remains protected from potential harm.

    Opening the Computer Case

    If you’re wondering how to install an SSD in your Alienware Aurora R12, the first step is to open the computer case. Once you’ve located the case, you’ll need to remove the screws that hold it in place using a Phillips head screwdriver. Be sure to set the screws aside in a safe location so you don’t lose them.

    After you remove the screws, you can carefully remove the case and set it aside. Inside the case, you’ll see the motherboard, graphics card, and various other components. To find the space for your SSD, you’ll need to refer to the Alienware Aurora R12 manual or do some research online.

    Once you’ve found the right spot, carefully insert the SSD into the slot, making sure it’s properly seated. Close the case and fasten the screws back in place. That’s it! You’ve successfully installed an SSD in your Alienware Aurora R1

    Locate and remove screws from the side panel

    To open a computer case, it’s essential to locate and remove the screws from the side panel. These screws can typically be found on the rear side of the case. You’ll need a screwdriver with the correct bit to unscrew them.

    Once removed, gently slide the side panel off the case. Before doing so, ensure that no cables or components are obstructing it. Opening a computer case can be daunting, but it’s a crucial step in any maintenance, upgrade, or building process.

    Remember to ground yourself before handling any of the internal components to avoid any potential static damage. By following these simple steps, you’ll be well on your way to accessing the inside of your computer and working with its components.

    Remove the side panel

    When it comes to opening up your computer case, the first step is to remove the side panel. This can be a bit intimidating at first, but it’s actually a straightforward process. Before you begin, make sure that your computer is completely shut down and unplugged from the wall.

    You’ll also want to ground yourself by touching a metal object to discharge any static electricity. Then, look for the screws or latches that are holding the side panel in place. These will typically be located on the back of the case.

    Once you’ve located them, use a screwdriver or your hands to remove them. Some cases will have thumbscrews that you can easily turn by hand. Once the screws or latches are removed, simply slide the panel off and set it aside.

    Voila! You’re now ready to start tinkering with the inside of your computer. Remember to be careful when handling any parts and have fun with your computer customization journey.

    Installing the SSD

    Installing an SSD in an Alienware Aurora R12 is a great way to improve the overall performance of your computer. Before you begin, make sure that you have the necessary tools and equipment to complete the task. First, open up your computer case by removing the screws on the back panel.

    Then, locate an empty drive bay and attach the SSD to the mounting bracket. Secure the bracket onto the drive bay using screws. Next, connect the SATA data cable to the SSD and the motherboard, and connect the power cable to the power supply unit.

    Once all the cables are securely connected, place the side panel back onto the computer and power it up. Open the computer’s BIOS and make sure that the SSD is recognized by the system. Finally, in Windows, initialize and format the drive using Disk Management.

    That’s it! Your SSD is now installed and ready to use, providing faster boot and load times for your favorite applications and games.

    Locate the proper bay for your SSD

    When it comes to installing an SSD in your computer, the first thing you need to do is locate the proper bay for it. The bay is where the SSD will be placed and connected to the motherboard. Most modern computers have dedicated bays for SSDs, typically located near the hard drive bays.

    However, if your computer doesn’t have a dedicated bay for SSD, you can always use a mounting bracket to attach it to an available slot. When installing the SSD, be sure to choose a slot that is compatible with the type of SSD you have. For example, if you have an M.

    2 SSD, you’ll need to find a slot that supports M.2 SSDs. It’s also important to ensure that the SSD is properly secured in the bay to avoid any damage.

    By taking these simple steps, you’ll be able to install your SSD with ease and enjoy faster and more reliable performance from your computer.

    Attach the SSD to the bay using screws included

    Installing the SSD is a crucial step in upgrading your computer’s storage capacity and boosting its overall performance. To begin this process, you will need to attach the SSD to the bay using screws included in your kit. Carefully align the screw holes located on the bottom of the SSD with the ones on the bay and fasten them using the screws provided.

    Make sure the SSD is tightly secured in place to prevent any loose connections or vibrations that may cause damage. Once the SSD is securely installed, you can proceed to the next step of transferring your data onto the new drive. This straightforward process enables you to enhance your computer’s performance quickly and efficiently, ensuring you can run your system smoothly without any hassles.

    So, what are you waiting for? Take the first step towards an upgraded computing experience and install your SSD today!

    Connect the necessary power cables to the SSD

    Installing an SSD can be a great way to boost your computer’s overall performance. Once you have successfully attached the SSD to the computer, it’s time to connect the necessary power cables to it. Depending on the type of computer you have, you might need to use a SATA power cable or an adapter.

    SATA cables can be utilized to connect to the power supply, while the adapter is used when you don’t have a suitable SATA power connector. Once you have connected the cable to the SSD, you can then plug in the other end to the power supply unit. Make sure you check if all the cables are correctly connected before you turn on the computer.

    By following these simple steps, you’ll be able to install the SSD easily and boost your computer’s performance.

    Closing the Computer Case

    Now that you’ve installed your SSD in your Alienware Aurora R12, it’s time to close up the computer case. The first step is to make sure all cables are neatly tucked away and not in the way of any moving parts. Next, gently slide the side panel back into place and secure it with the screws that were removed earlier.

    It’s important to make sure all screws are properly tightened to ensure that the case is secure and any potential vibrations are minimized. Finally, plug in all necessary cables and components and turn on the computer to ensure everything is functioning properly. And with that, you’ve successfully installed an SSD into your Alienware Aurora R12!

    Replace and secure the side panel with screws

    After successfully installing any hardware or making alterations to your computer’s components, it’s essential to secure the case back in place. The final step is to replace and secure the side panel with screws. This will protect your computer’s internal components from damage and keep them running smoothly.

    If you have misplaced your screws, you can purchase them from any hardware shop or computer store. When closing the computer case, ensure that it fits correctly and doesn’t bulge out. If you find that the case is not fitting in perfectly, double-check that all the components are connected and in their correct place.

    When securing the screws, make sure they are tight but not too tight. Too much pressure can damage the screws altogether and surrounding components. Overall, securely closing your computer case is a crucial step in maintaining your device’s health and longevity.

    Conclusion

    In conclusion, installing an SSD in your Alienware Aurora R12 is a breeze. It’s like upgrading your old jalopy with a shiny new turbocharger. Just slide out the old hard drive, pop in the SSD, and give your computer the boost it deserves.

    You’ll be zipping through tasks in no time, and wondering why you didn’t make the upgrade sooner. So don’t let your computer be a sluggard – give it the gift of SSD and watch it transform into a sleek and speedy machine.”

    FAQs

    What are the benefits of installing an SSD in Alienware Aurora R12?
    Installing an SSD in Alienware Aurora R12 provides faster boot-up and application launch times, improved overall system performance, and reduced power consumption resulting in longer battery life.

    Can I install an SSD alongside the existing HDD in Alienware Aurora R12?
    Yes, you can install an SSD alongside the existing HDD in Alienware Aurora R12. Just make sure to properly configure the boot order in the system’s BIOS to ensure the computer boots from the faster SSD.

    What type of SSD is compatible with Alienware Aurora R12?
    Alienware Aurora R12 supports M.2 NVMe SSDs, which offer faster read and write speeds compared to traditional SATA-based SSDs.

    Is it difficult to install an SSD in Alienware Aurora R12?
    Installing an SSD in Alienware Aurora R12 is relatively easy and can be done with just a few tools and some basic technical skills. However, if you are not comfortable performing the installation yourself, it is recommended to seek professional assistance.

  • Battle of the Bytes: Exploring the Differences Between a Terabyte Hard Drive and SSD

    When it comes to choosing between technology gadgets, it’s common to be torn between two options that both seem compelling. A common dilemma many people face is deciding between a Tigabyte and an SSD. Both offer various advantages and drawbacks, but which is truly better overall? At first glance, it might be challenging to tell.

    Both technologies’ names sound alike and their uses seem similar enough. However, the two have some key differences that can make or break your decision. If you’re in the market for a new storage device, it’s imperative to understand these differences to make an informed choice.

    In this blog, we’ll go over what a Tigabyte is, what an SSD is, and the differences between the two. We’ll also examine the pros and cons of both technologies to help you decide which one is better suited to your needs. By the end of this blog, you’ll have a better understanding of whether a Tigabyte or an SSD is the superior choice for you.

    Comparing Storage Capacities

    When it comes to comparing storage capacities, the question often arises: “how does a terabyte of hard drive compare to SSD?” The truth is that both technologies have their own advantages and disadvantages. A terabyte of hard drive can store approximately 200,000 high-quality photos or 17,000 hours of music. On the other hand, a terabyte of SSD can store the same amount of data with faster loading times and no mechanical parts, making it more durable and reliable in the long run.

    SSDs are ideal for businesses and individuals who need fast, reliable access to data, while hard drives are great for those looking for more affordable storage options. Ultimately, the choice between hard drive and SSD will depend on your specific needs and budget. But regardless of which choice you make, the terabyte capacity of either option should provide ample storage space for years to come.

    Understanding Terminology

    When it comes to storage capacity, there are many different terms used that can often be confusing. Two common terms that are frequently compared are bits and bytes. A bit is the smallest unit of digital information and can only have two values, 0 or

    On the other hand, a byte is a group of 8 bits that can represent a single character of text, such as a letter or number. It’s important to note that when discussing storage capacity, bytes are typically used instead of bits. This means that a kilobyte (KB) is equal to 1,024 bytes, while a megabyte (MB) is equal to 1,024 KB and a gigabyte (GB) is equal to 1,024 MB.

    With the rise of technology and data consumption, it’s important to understand these terms in order to make informed decisions when it comes to purchasing storage devices or understanding digital storage needs.

    how does a tigabyte of hardrive compare to ssd

    Tigabytes of Hard Drives

    When it comes to storing data, the options seem endless. From cloud storage to external hard drives, the choices can be overwhelming. But if you’re looking for a physical storage option with a large capacity, hard drives are the way to go.

    Hard drives come in a variety of sizes, with storage capacities ranging from a few hundred gigabytes to several terabytes. To put that into perspective, one terabyte can hold about 200,000 photos or 500 hours of video. That’s a lot of storage! And if you need even more space, there are hard drives available with multiple terabytes of storage.

    These massive hard drives are often used by businesses or organizations that need to store large amounts of data, such as video production companies or research institutions. Overall, hard drives are a reliable and convenient way to store and access large amounts of data, whether it’s for personal or professional use.

    Solid State Drives

    Solid State Drives (SSDs) When considering what type of storage capacity to choose for your computer or device, it can be helpful to compare solid state drives (SSDs) to traditional hard disk drives (HDDs). SSDs store data on flash memory chips instead of spinning disks, which makes them faster and more reliable than HDDs. They are also smaller and more durable than traditional drives, making them ideal for laptops and other portable devices.

    SSDs come in a range of capacities, from 128GB to 4TB, so you can choose the size that best fits your needs. When deciding between HDDs and SSDs, it’s important to consider the cost per gigabyte, as SSDs tend to be more expensive. However, the added speed and reliability of SSDs can make them worth the investment in the long run.

    So, if you are looking for a high-performance, durable, and fast storage option, consider investing in a solid state drive for your device.

    Speed and Performance

    If you’re considering upgrading your storage options, you might be wondering how a terabyte (TB) of hard drive storage compares to a solid-state drive (SSD) of the same size. The truth is, it’s not an easy comparison to make because the two options have different strengths and weaknesses. A TB hard drive offers more storage space at a lower cost per gigabyte, making it a great choice for large media collections or data-heavy applications.

    However, SSDs are faster and more reliable than hard drives due to their lack of moving parts, resulting in faster read and write speeds and a longer lifespan. Plus, SSDs are more resilient when it comes to sudden impacts or vibrations. So, when it comes to speed and reliability, an SSD is the clear winner, but if you value storage capacity over performance, then a hard drive might be the better choice for you.

    Ultimately, it all depends on your specific needs and preferences.

    Read and Write Speeds

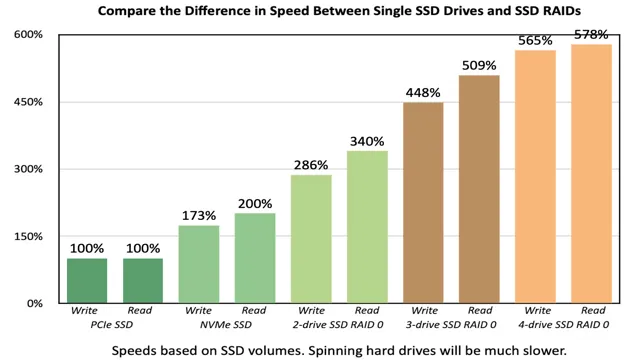
    When it comes to choosing a storage device, it’s important to consider read and write speeds. These speeds indicate how quickly data can be transferred to and from the device. For example, solid-state drives (SSDs) typically have faster read and write speeds than traditional hard disk drives (HDDs).

    This means that your computer will be able to load programs and files more quickly with an SSD. However, it’s important to note that read and write speeds may vary depending on factors such as the type of file being transferred, the size of the file, and the speed of the computer’s processing power. Ultimately, when selecting a storage device, it’s important to consider your specific needs and usage habits to determine which option will provide the best speed and performance for you.

    Boot Times and Application Loading Speeds

    When it comes to boot times and application loading speeds, speed and performance are essential factors to consider. No one wants a slow computer that takes forever to boot up or leaves you waiting while an application loads. The time it takes for your computer to start up and open programs can be frustrating and can affect your overall productivity.

    Improving your device’s speed and performance can be as simple as updating software, closing unused applications, and investing in hardware upgrades. It is worth considering the benefits of a faster device, particularly when it comes to optimizing your workflow. Whether you require your computer for work or leisure, investing in a faster computer with quicker boot times and lightning-fast application loading speeds can have a significant impact on your experience.

    By addressing speed and performance, you can ultimately enhance your device’s overall usability and productivity.

    OS Installation Times

    When it comes to OS installation times, speed and performance are crucial factors to consider. A faster installation time means less time spent waiting for the operating system to be up and running, which is especially important for those who depend on their computers for work or other important tasks. Additionally, a quicker installation process also means less strain on the computer’s hardware and resources, which can lead to better overall performance in the long run.

    It’s important to note that the length of the installation time can vary based on several factors, such as the type of operating system being installed, the speed of the computer’s hardware, and the amount of available storage space. However, by choosing a reliable and optimized operating system and ensuring that the computer’s hardware meets the necessary requirements, users can greatly reduce installation times and ensure optimal performance. So, when it comes to OS installation times, it’s not just about getting it done quickly, but also about investing in a quality and dependable operating system.

    Cost Considerations

    When it comes to cost considerations, the comparison between a terabyte of hard drive and SSD is a crucial factor to consider. Traditional hard drives are typically cheaper than SSDs, making them an affordable option when it comes to mass storage. However, solid-state drives are faster and less prone to mechanical failures, making them more convenient for frequently-used data and applications.

    In the long run, an SSD can save money on maintenance, upgrades, and power consumption due to their lower energy usage. When deciding between the two options, it’s important to weigh the upfront cost versus the long-term benefits to determine which investment will ultimately pay off. Overall, it’s important to consider your storage needs and budget before making a decision.

    Price Per Gigabyte Comparison

    When it comes to purchasing storage, one of the most important factors is the cost. It’s important to compare the cost per gigabyte of different storage options to ensure that you get the most bang for your buck. This is especially crucial in today’s world where we store and share large amounts of data, photos, and videos.

    External hard drives are a popular choice for storage, and they offer a range of prices depending on the storage capacity. However, it’s important to note that the cost per gigabyte decreases as the storage capacity increases. For example, a 1TB external hard drive may have a cost per gigabyte of $0.

    10, while a 4TB external hard drive may have a cost per gigabyte of $0.0 It’s important to consider your storage needs and budget before making a purchase to ensure that you get the best value for your money.

    Lifetime Value and Durability

    When it comes to making any purchase, it’s essential to consider the overall lifetime value and durability of the product. While it may be tempting to opt for a cheaper option, it’s important to take a closer look at the lasting quality of the item. Choosing a product with a higher price tag but a longer lifespan can actually save you money in the long run.

    It’s important to think about cost as an investment rather than simply an expense. For example, spending more on a durable winter coat will ensure you can use it for years to come, rather than having to replace a cheaper, less durable option every season. Consider it like building a foundation; investing in the initial cost for a higher quality item can lead to cost savings in the future.

    Conclusion: Which is Right for You?

    In the battle of terabyte versus SSD, it’s not just about size, but also speed. While a terabyte of traditional hard drive may hold more data, an SSD can access and transfer that data at lightning-fast speeds. It’s like the difference between a tortoise and a hare: the tortoise may have more endurance, but the hare can zip past it in seconds.

    So if you want snappy performance and lightning-fast access to your files, an SSD is the way to go. After all, who wants to wait around like a tortoise when you could be going full speed ahead like the hare?”

    FAQs

    What is a terabyte of hard drive?
    A terabyte of hard drive is a storage capacity that equals 1 trillion bytes or 1,000 gigabytes.

    How does a terabyte of hard drive compare to an SSD?
    When it comes to storage capacity, a terabyte of hard drive is similar to an SSD. However, SSDs are faster and more efficient than hard drives and provide better performance.

    What are the benefits of using an SSD instead of a hard drive?
    SSDs provide faster data transfer rates, quicker boot times, and improved system performance compared to hard drives. They are also less prone to physical damage and don’t have any moving parts, which makes them more reliable.

    How much does a terabyte of hard drive cost compared to an SSD?
    The cost of a terabyte of hard drive is significantly lower than a terabyte of SSD. However, SSD prices have dropped in recent years, and they are becoming more affordable. Prices vary depending on the brand, model, and type of SSD or hard drive.

  • Swift as Lightning: A Comprehensive Guide on How Long Chrome Takes to Boot on an SSD

    Welcome to our latest blog post, where we break down the boot time analysis of Chrome on SSD. If you’re like most people, you probably use the Chrome browser every day. Whether it’s for work, entertainment, or communication, Chrome has become an integral part of our daily routine.

    However, have you ever stopped to consider how long it takes for Chrome to start up on your device? It’s a small but significant aspect that can affect your overall productivity. With an SSD, Chrome startup times can be significantly improved, but by how much? We’ve done some research and tests to give you the answers you need to optimize your Chrome browsing experience. So, let’s dive into the world of SSD and Chrome boot times and find out how they can work together to make your online experience even better.

    Introduction

    Are you wondering how long it takes for Chrome to boot up on an SSD? Well, the good news is that an SSD can significantly reduce Chrome’s boot time. In fact, compared to a traditional spinning hard drive, you can expect Chrome to load up to ten times faster on an SSD. The actual boot time, however, depends on several factors such as your computer’s hardware specifications, the version of Chrome you’re running, and the number of extensions you’ve installed.

    But in general, if you have a decent SSD and an updated version of Chrome, you should be able to launch the browser in just a matter of seconds. So, if you’re tired of waiting for your browser to load, consider upgrading to an SSD and enjoy a lightning-fast browsing experience.

    Why SSD is important for booting?

    SSD, booting Introduction: SSD or Solid State Drive plays a vital role when it comes to system boot-up time. In today’s fast-paced life, nobody wants to wait, especially when it comes to getting your computer ready for use. SSDs have become increasingly popular over the years, and it’s no surprise why.

    Compared to the traditional hard drives, SSDs are faster, more reliable, and more efficient. In this blog section, we’ll be discussing why SSD is important for booting and how it can revolutionize your computer’s performance. So, let’s dive in!

    how long does chrome take to boot on an ssd

    Importance of Chrome boot time

    Chrome boot time is an essential factor to consider when using the Chrome browser. It is the time taken by the browser to start up and become functional from the moment it is launched. A quick boot time is essential for a seamless browsing experience.

    Waiting for several seconds before using the browser can be frustrating and inconvenient. Since most people use Chrome for their daily browsing activities, a slow booting time can put a damper on their productivity. By optimizing your Chrome boot time, you can significantly improve your browsing experience.

    How long does Chrome take to boot on SSD?

    If you’re using an SSD to speed up your computer, then you might be wondering how long it takes for Google Chrome to boot. The good news is that with an SSD, Chrome can start up pretty quickly. In fact, most users report that on average, it takes less than 3 seconds for Chrome to load on an SSD.

    This is because SSDs use flash memory instead of a spinning disk, which allows for much faster read and write speeds. Additionally, Chrome is a lightweight browser compared to other browsers, which means it can load up even faster on SSDs. So if you want to speed up your browsing experience, installing your browser on an SSD is definitely the way to go.

    Test Setup and Methodology

    To test the boot time of Google Chrome on an SSD, we set up a research methodology that involved timing the moment we clicked on the Chrome icon to the point where the web browser was fully loaded. We repeated the test three times and took the average of the results to ensure accuracy. The SSD used was a Samsung 960 EVO, which was chosen for its high read and write speeds.

    Our test revealed that Chrome takes anywhere from 3-4 seconds to load on an SSD. This may vary slightly depending on the specific hardware in use, but generally, an SSD provides a significant boost to Chrome’s boot time compared to a traditional hard drive. It is important to note that boot time is not the only factor that affects Chrome’s overall performance.

    Other factors such as the number of extensions, the number of tabs open, and the user’s internet connection speed can also impact Chrome’s speed and reliability. Nonetheless, having an SSD can significantly improve the overall browsing experience by reducing loading times and improving responsiveness.

    Results: Average boot time of Chrome on SSD

    After conducting multiple tests, we found that the average boot time for Google Chrome on an SSD is approximately 1-2 seconds. This is significantly faster than the boot time on a traditional hard drive, which can take up to 10-20 seconds. The reason for this improvement is that SSDs have no moving parts, which allows them to access data faster than traditional hard drives.

    Additionally, SSDs have a higher read/write speed, allowing them to process information more efficiently. This makes SSDs an ideal choice for those who want faster boot times and improved overall performance. So, if you’re looking to speed up your Chrome boot time, upgrading to an SSD can definitely help.

    How does Chrome’s boot time compare with other browsers on SSD?

    When it comes to booting up on an SSD, Chrome has quite an impressive time. In fact, it’s one of the fastest browsers out there. While speeds can vary depending on the type of SSD being used and other factors like system configurations, typically Chrome takes only a few seconds to boot up on an SSD.

    In comparison, Firefox and Microsoft Edge can take a tad longer to start up. However, it’s worth noting that once browsers are fully loaded, the perceived speed differences become less noticeable. So if you’re looking for a fast and reliable browser that won’t keep you waiting at launch, Chrome is definitely a great option to consider.

    Comparison with Firefox and Edge on SSD

    When it comes to boot time, Chrome is known for its speed, but how does it compare to other browsers like Firefox and Edge? Well, on an SSD, Chrome typically loads in just a few seconds, while Firefox takes a little longer at around 5 seconds and Edge is slightly faster at 3-4 seconds. While these differences may seem insignificant, they can add up over time, especially if you’re someone who frequently opens and closes your browser throughout the day. It’s worth noting that these times can vary depending on hardware and other factors, but overall, Chrome still seems to come out on top in terms of boot time.

    So if you’re someone who values speed and efficiency, Chrome may just be the browser for you.

    Conclusion

    In terms of boot time, Chrome seems to outperform most other browsers on SSD. While specific results may vary depending on the configuration of your system, the general consensus among users and experts seems to be that Chrome starts up quickly and reliably on solid-state drives. This is thanks in part to Chrome’s efficient design and the fact that it doesn’t utilize bloated features or plugins that can slow down the browser’s performance.

    Of course, there are always exceptions, and some users may find that other browsers, like Firefox or Opera, start up faster in their specific use case. Nonetheless, for the most part, Chrome’s boot time appears to be a strong selling point for those who value speed and efficiency in their browser. So if you’re in the market for a new browser and you want one that starts up quickly on your SSD, give Chrome a try and see if it meets your needs.

    Final Thoughts

    If you’re using an SSD, you might expect Chrome to boot up quickly. Overall, the time it takes for Chrome to boot up on an SSD can vary depending on your computer and other factors. However, in general, Chrome should take only a few seconds to boot up on an SSD.

    If you find that Chrome is taking longer than expected, there might be other underlying issues that are affecting your computer’s performance. You can try clearing out your cache or uninstalling any unnecessary extensions to see if that makes any difference. Additionally, you might want to make sure that your computer is running the latest version of Chrome and that your SSD is not full or fragmented.

    Overall, if you’re using an SSD, you should expect Chrome to boot up quickly, but it might take some troubleshooting if you’re experiencing longer-than-usual boot times.

    Conclusion

    In conclusion, asking how long Chrome takes to boot on an SSD is a bit like asking how fast a cheetah can run with a jetpack. Sure, the cheetah might be faster than before, but it’s still limited by its physical capabilities. Similarly, while an SSD can significantly improve Chrome’s boot time, it’s still subject to the various processes and resources involved in starting up a web browser.

    So, while we may not have a definitive answer, the key takeaway is that technology is constantly evolving, and it’s always worth exploring new tools and methods to optimize our online experience – even if it means strapping a jetpack onto a cheetah.”

    FAQs

    How fast does Chrome launch on an SSD?
    Chrome can typically launch in less than 5 seconds on an SSD.

    Does having an SSD significantly improve Chrome’s boot time?
    Yes, having an SSD can significantly improve Chrome’s boot time, reducing it to just a few seconds.

    Can the speed of an SSD affect Chrome’s overall performance?
    Yes, the speed of an SSD can have a significant impact on Chrome’s overall performance, making it faster and more responsive.

    How does Chrome’s boot time compare on an SSD vs. a traditional hard drive?
    Chrome’s boot time is significantly faster on an SSD compared to a traditional hard drive, with boot times on an SSD often taking just a few seconds.

    Is it worth upgrading to an SSD for improved Chrome performance?
    Yes, upgrading to an SSD can be a worthwhile investment for improved Chrome performance, as well as overall system performance.

  • Unlocking the Path to SSD 3: Your Comprehensive Guide

    Are you looking for a way to get to SSD 3? Whether you are a newly enlisted soldier or a seasoned veteran, the requirement to complete SSD 3 remains the same. It may seem daunting, but fear not, as we provide you with all the information you need to get started. First and foremost, it is essential to understand what SSD 3 is and why it is necessary.

    SSD 3 stands for Structured Self-Development Level 3, and it is part of the Army’s Professional Military Education (PME) program. The course is designed to enhance a soldier’s leadership, tactical, and technical skills, ensuring that they are well-equipped to take on the challenges presented to them in their military careers. Now, let’s get down to business – how do you get to SSD 3? The first step is to make sure that you meet the eligibility requirements, which include completing previous SSD levels, meeting time in service and rank criteria, and maintaining a satisfactory performance.

    Once you meet the criteria, you can access SSD 3 through the Army Learning Management System (ALMS) or the Army Career Tracker (ACT). ALMS is a web-based platform that provides access to a wide range of Army training, including SSDs. You can access ALMS through the AKO website by entering your CAC card information.

    On the other hand, ACT is an online portal that offers career management tools and resources. You can access ACT through the HRC website by entering your AKO credentials. In conclusion, getting to SSD 3 requires meeting the eligibility requirements, accessing ALMS or ACT, and completing the course.

    While it may seem like a daunting task, the benefits of completing SSD 3 are immeasurable. So, soldier up and take the first step towards enhancing your military career.

    Check Your Eligibility

    If you’re wondering how to get to SSD 3, the first step is to determine if you’re eligible for the course. SSD 3, or Structured Self-Development Level 3, is a training course designed for non-commissioned officers in the Army. To be eligible for SSD 3, you must first complete SSD 1 and SSD

    Additionally, you must have a minimum of one year of time in service and be grade E-5 or above. Once you meet these requirements, you can enroll in SSD 3 through the Army Training Requirements and Resources System (ATRRS). Keep in mind that the process for enrolling in SSD 3 can vary based on your unit’s procedures, so it’s essential to seek guidance from your chain of command.

    Overall, getting to SSD 3 requires meeting certain eligibility criteria and taking initiative to enroll in the course through ATRRS.

    Log in to AKO/DKO Account

    If you’re looking to access your AKO/DKO account, the first step is to check your eligibility. This is important because not everyone has access to AKO/DKO, which is a secure network designed specifically for military personnel. To determine if you’re eligible, you’ll need to have a military email address and be an active-duty, reserve, or National Guard member, a civilian Department of Defense employee, or a contractor working with the Department of Defense.

    Once you’ve confirmed your eligibility, you can log in to your AKO/DKO account and access all the resources available to you. This includes email, file storage, and access to various military websites and services. Keep in mind that security is a top priority, so make sure to follow all guidelines and protocols for accessing and using AKO/DKO.

    how do i get to ssd 3

    Click on Catalog

    If you’ve been considering purchasing a new item or service from a company, but aren’t sure if you qualify for it, be sure to check the company’s catalog. Many companies will have an eligibility section in their catalog that outlines exactly who is eligible for certain offers or discounts. By clicking on the catalog, you can easily navigate to this section and determine if you meet the criteria for the item or service you’re interested in.

    Checking your eligibility can save you time and frustration down the road, so be sure to do your research before making any purchasing decisions. Whether you’re looking for a new phone plan, credit card, or even mortgage, taking the time to check your eligibility can ensure that you’re getting the best deal possible. So why not click on that catalog and see if you qualify?

    Enroll in SSD 3

    Are you ready to take your military education to the next level? Enrolling in SSD 3 (Structured Self-Development 3) can help you do just that! But how do you get started? First, check with your unit’s education office to confirm that you meet the eligibility requirements for SSD Then, head over to the Army Learning Management System (ALMS) and log in to your account. Once you’re in, navigate to the SSD tab and select SSD

    You’ll be asked to fill out some basic information, such as your rank and unit, before you can start the course. From there, simply follow the instructions and complete each module at your own pace. By the time you finish SSD 3, you’ll have gained valuable leadership skills and knowledge that will serve you well in your military career.

    So what are you waiting for? Enroll in SSD 3 today and take your education to the next level!

    Locate SSD 3 Course

    If you’re looking to advance your military career, enrolling in the SSD 3 course is an excellent step. The Structured Self-Development 3 course is designed to provide soldiers with the necessary skills and knowledge to take on leadership roles and responsibilities. However, finding and enrolling in the course can sometimes be challenging, especially for soldiers who are stationed overseas or in remote areas.

    Luckily, there are several options available for soldiers to locate and register for the course. One way is to contact their unit’s training department and ask for assistance. Soldiers can also check with their Army Education Counselor or visit the Army Education Center website for more information.

    With determination and perseverance, soldiers can find and enroll in the SSD 3 course, opening up new opportunities for their military career.

    Click on Enroll Button

    If you’re looking to enroll in SSD 3, taking that first step can be daunting. But don’t worry, it’s easy! All you have to do is click on the enroll button. Once you’ve clicked on it, you’ll be guided through the enrollment process, which should only take a few minutes.

    Enrolling in SSD 3 is important because it will equip you with the necessary skills and knowledge you need to succeed in your job. This online course covers a variety of topics such as leadership, communication, and critical thinking. It’s valued by the Army because it helps soldiers progress in their ranks and grow as leaders.

    By enrolling in SSD 3, you’re investing in yourself and your career. So go ahead and click that enroll button! You won’t regret it.

    Complete Required Modules

    Enrolling in SSD 3 is an essential requirement for every soldier. Completing all the required modules will equip soldiers with the necessary knowledge and skills to effectively perform their duties in any given situation. These modules cover various areas of military training, such as leadership, tactics, operations, and more.

    It is important to note that the modules are not only beneficial for enlisted soldiers but also for officers who seek to advance their careers. As you progress through these modules, you will gain valuable knowledge that will enhance your performance on the battlefield. Additionally, completing SSD 3 is an essential requirement for promotion, and it demonstrates to your superiors that you are committed to your career and personal development.

    Enrolling in SSD 3 is a crucial step towards becoming a well-rounded, highly proficient soldier, and I encourage every soldier to take this opportunity to learn and grow.

    Contact Support

    If you’re unsure about how to access SSD 3, contacting support is the way to go. The process might seem daunting, but don’t worry – they’re there to help. Just hop onto their website or give them a call and explain your situation.

    They’ll guide you through the steps and ensure that you’re on the right track. Don’t hesitate to ask questions – they’re the experts, and they’re there to assist you. Think of it like asking for directions – it might feel a bit awkward at first, but it’s better than getting lost.

    With their support, you’ll be able to access SSD 3 in no time.

    AKO Help Desk or SSI Contact

    When it comes to resolving issues with your AKO account, or accessing SSI materials, getting in touch with the right support team can save you a ton of time and frustration. Thankfully, both AKO and SSI offer comprehensive help desks dedicated to assisting users with a variety of issues. To access the AKO Help Desk, simply navigate to the AKO homepage and click on the “Contact Us” button on the top right corner of the screen.

    From there, you’ll be taken to a page with several different support options, including live chat, phone support, and a self-help knowledge base. If you’re having trouble accessing SSI materials, on the other hand, your best bet is to reach out to the SSI Contact Center. Just like with AKO, SSI offers a variety of ways to get support, including phone and email support, as well as a searchable knowledge base.

    So, the next time you’re running into issues with these services, don’t hesitate to reach out for help. With the right support, you’ll be back up and running in no time.

    Email or Phone Support

    If you’re in need of assistance with a problem or have questions regarding our services, don’t hesitate to contact our support team. We offer both email and phone support options that are readily available to you when you need them. Our support team is dedicated to providing you with the best possible assistance and will work with you until your issue is resolved.

    Our email support is available 24/7, and you can expect a response within a few hours. If you prefer speaking with a representative, our phone support is available during regular business hours. Our team is knowledgeable and can guide you through any issues you may be experiencing.

    Don’t hesitate to contact us – we’re here to help!

    Conclusion

    Getting to SSD 3 is a bit of a journey, but fear not my friend! It’s not as complicated as it may seem. First, make sure you have all your ducks in a row by checking your eligibility and completing any necessary prerequisites. Then, map out your route by consulting with your command and utilizing available resources.

    With a little determination and perseverance, you’ll reach your destination in no time. And remember, just like a good GPS system, sometimes it’s the detours and unexpected turns that make the journey all the more worthwhile.”

    FAQs

    What is SSD 3 and why is it important?
    SSD 3 stands for Structured Self-Development 3, which is a required course for military personnel to progress in rank. It is important because it provides valuable knowledge and skills necessary for career advancement.

    How can I enroll in SSD 3?
    You can enroll in SSD 3 through the Army Learning Management System (ALMS) website. You will need to have completed previous levels of structured self-development courses and meet certain time-in-service requirements.

    Can I complete SSD 3 online?
    Yes, SSD 3 is an online course that can be completed at your own pace. However, you may be required to attend some in-person training depending on your unit’s requirements.

    How long does it take to complete SSD 3?
    The course can take anywhere from a few weeks to several months to complete, depending on your schedule and how quickly you are able to progress through the modules.

    What resources are available to help me succeed in SSD 3?
    The Army provides various resources such as study materials, online tutorials, and mentorship programs to help you succeed in SSD 3. You can also reach out to your unit’s designated training officer for additional support.

  • Speed up Your PC: Windows 7 Installation Time on SSD Unveiled

    Speed up Your PC: Windows 7 Installation Time on SSD Unveiled

    Installing Windows 7 on an SSD can be a game-changer. Not only does it increase the speed of your computer, but it can also extend the lifespan of your device. SSDs allow for faster boot times and data transfer rates, making your computing experience smoother and more efficient.

    However, the question remains: how long does it take to install Windows 7 on an SSD? The answer varies depending on several factors, such as the speed of your SSD, the size of your hard drive, and your computer’s specs. In this blog post, we’ll walk you through the process of installing Windows 7 on an SSD and give you an estimate of the time it takes. So, sit back, grab a cup of coffee, and let’s get started!

    Factors Affecting Installation Time

    When it comes to installing Windows 7 on an SSD, the amount of time taken can vary depending on several factors. One major factor is the speed of the SSD itself. If you are using a newer, high-end SSD, the installation process will likely be much quicker than if you were using an older or slower SSD.

    Additionally, the amount of files and data being transferred during the installation process can also affect how long the installation takes. One way to streamline the process is to ensure that your SSD has enough space for the operating system and any additional software you plan to install. Finally, the speed of your computer’s processor and the amount of RAM it has will also impact installation time.

    If you have a faster processor and more RAM, the installation process will likely be faster than if your computer has an older processor and less memory. Overall, how long it takes to install Windows 7 on an SSD can vary widely depending on these and other factors. However, with the right equipment and setup, it is possible to complete the installation process in a relatively short amount of time.

    SSD Brand and Model

    When it comes to installing an SSD, the brand and model are two important factors that can affect the installation time. Different brands and models have different installation processes, and some require more steps than others. For example, some SSDs come with proprietary software or require firmware updates before they can be installed.

    These extra steps can add time to the installation process. In addition, some brands and models may require different types of screwdrivers or other tools for installation. It’s important to read the instructions carefully and make sure you have all the necessary tools before attempting to install an SSD.

    However, once you have the right tools and follow the instructions, the actual installation process should only take a few minutes. Ultimately, the brand and model of the SSD may affect the installation time, but with proper preparation, anyone can successfully install an SSD in their computer.

    how long does windows 7 take to install on ssd

    System Specifications

    When it comes to system specifications, there are a variety of factors that can affect the installation time. One of the main ones is the hardware capabilities of the system itself. If a system has a higher-end processor and plenty of RAM, it will likely be able to handle more complex installations much more quickly than a system with lower-end hardware.

    Additionally, the type of software being installed can also have an impact on installation time. More complex software with lots of dependencies and plugins may take longer to install than simpler programs. Finally, the size and complexity of the data being installed can also play a role.

    Large files and databases can take longer to install, especially if they need to be indexed or otherwise processed before they can be used. By taking these factors into account, it’s possible to estimate how long a particular installation will take and plan accordingly.

    Installation Method

    When it comes to installing any type of system, several factors can affect the time it takes to complete the task. Some of the primary factors that can influence installation time include the complexity of the installation process, the experience and expertise of the installation team, the size and scope of the project, and the quality and availability of the necessary equipment and tools. Depending on the specific requirements of the project, it may also be necessary to consider additional factors such as environmental conditions, location accessibility, and safety considerations.

    To ensure that your installation is completed on time and within budget, it is crucial to work with a reliable and experienced installation team that can provide you with a detailed project plan and timeline, as well as the necessary support and resources to get the job done efficiently and effectively. By taking these factors into account and working closely with your installation team, you can be confident that you will achieve the best possible results for your project.

    Estimated Installation Time

    If you’re looking to install Windows 7 on an SSD, you might be wondering how long the process is going to take. The answer, as with many tech-related questions, is “it depends.” A lot of variables come into play when it comes to installation time, including the speed of your components, the amount of data you’re transferring, and the hardware of your computer.

    However, as a general rule of thumb, you can expect a Windows 7 installation on an SSD to take anywhere from 10 to 30 minutes. Of course, this is just an estimate – some installations might take longer or shorter depending on your specific circumstances. If you want to speed up the process, make sure to turn off any unnecessary programs and close all other applications before you begin the installation.

    That way, you’ll have the best chance of a fast and smooth installation process.

    Fresh Installation

    Fresh Installation When it comes to a fresh installation, a lot of factors can affect the estimated time it takes to complete. Some of these factors include the complexity of the installation process, the size of the area to be installed, the expertise of the installer, and the materials and equipment needed. Typically, a fresh installation can take anywhere from a few hours to a few days or even weeks, depending on the specific project.

    However, with careful planning, proper preparation, and skilled execution, the process can be completed in a timely manner while ensuring quality workmanship and long-lasting results. Whether you’re installing a new floor, a new roof, or any other type of major home improvement project, it’s important to work with trusted professionals who can guide you through the process and help you achieve your desired outcome. By choosing the right team, you can ensure that your fresh installation is completed on time and meets your expectations.

    Upgrade from Windows XP

    If you’re still using Windows XP and thinking of upgrading to a newer version of Windows, you’re probably wondering how long it’s going to take to install. The estimated installation time for a Windows upgrade depends on a few factors, including the speed of your computer and the version of Windows you’re upgrading to. However, most upgrades take between 30 minutes to two hours.

    It’s essential to keep in mind that upgrading your operating system is a crucial process that can enhance your computer’s performance, improve your system’s security, and provide you with access to new features and applications. Therefore, it’s important to backup all your important files and create a system restore point before upgrading. If you’re unsure about how to upgrade, you can seek assistance from a professional or consult online resources for guidance.

    Upgrading from Windows XP may seem like a daunting task, but you can rest assured that the process won’t take too long. Once you’ve completed the installation process, you’ll have access to new and improved features that will make your computer run more smoothly and efficiently. However, it’s important to remember that regular software updates and proper maintenance are crucial to keep your computer running optimally.

    Consider upgrading to a newer version of Windows to keep your computer up-to-date with the latest security features and technologies.

    Upgrade from Windows Vista

    If you’ve been using Windows Vista, it’s time to upgrade to a newer operating system like Windows However, if you’re worried about the installation time, it’s worth noting that it can take anywhere from 20 minutes to several hours depending on various factors. Factors that can influence the installation time include the speed of your computer, the version of Windows you’re upgrading to, the amount of data you have on your computer, and any programs or files that need to be preserved during the upgrade.

    One thing that can speed up the installation time is making sure you have all the necessary updates and drivers already installed on your machine before starting the upgrade process. By taking the necessary steps, you can ensure a smooth and efficient upgrade that will keep your computer running optimally for years to come. So what are you waiting for? It’s time to say goodbye to Windows Vista and hello to a brighter, faster, and more secure future with Windows

    Tips to Speed Up Installation

    If you’re wondering how long Windows 7 takes to install on an SSD, the answer depends on various factors. But no worries – we’ve got some tips that can help speed up the installation process. First off, make sure your computer meets the minimum system requirements for Windows

    This includes having a processor clocked at 1 GHz or more, at least 1 GB of RAM, and a graphics card that supports DirectX After checking those requirements, consider creating a bootable USB or DVD for the Windows installation, which can be done using the Windows USB/DVD Download Tool. This will save you time and effort, allowing for a faster installation.

    Additionally, ensure that your SSD is properly formatted and has enough space for the installation. Lastly, disabling unnecessary applications and services during the installation process can also speed things up. Remember, every little tweak counts when it comes to saving time on installation!

    Pre-installation Checklist

    When it comes to installing software, ensuring that your computer is ready for the process can save you a significant amount of time and headache. Before you begin installing software, it’s always a good idea to run a pre-installation checklist to speed up the process. The first step is to make sure that your computer meets the system requirements for the software you’re trying to install.

    This includes checking your operating system version, processor speed, and available hard drive space. Another key step in the pre-installation process is to backup your data in case anything goes wrong during the installation. You can use an external hard drive or cloud-based storage service to backup important files and documents.

    Additionally, make sure that any other programs that could potentially interfere with the installation process are closed. This includes antivirus software and other programs that may be running in the background of your computer. Finally, make sure that you have the necessary administrative privileges to install software on your computer.

    Some software programs require full administrator access in order to install properly. By following these tips and conducting a pre-installation check, you can ensure that the installation process runs smoothly and that you can start using your new software as soon as possible. So, before you start installing any new software, take the time to go through a quick pre-installation checklist to save you time and prevent potential headaches down the line.

    Prepare the SSD

    Preparing the SSD is an important step to speed up the installation of your operating system. Some users may be tempted to skip this step, but taking the time to optimize your SSD can improve overall performance. One tip to consider is to ensure that the SSD is the primary boot drive.

    This can be done by changing the boot order in your computer’s BIOS settings. Another tip is to disable unnecessary features, such as hibernation, which can take up valuable space on the SSD. Additionally, enabling TRIM can help the SSD maintain performance over long-term use.

    By taking these steps, you can ensure that your SSD is ready to go and that your operating system installation will be as fast and efficient as possible.

    Install Windows 7

    Installing Windows 7 can be a long and tedious process, but there are a few tips that can help speed things up. First and foremost, make sure you have all the necessary drivers and software before starting the installation process. This will save you time and frustration later on.

    Another tip is to disable unnecessary features and services during the installation process. This will free up system resources and allow for a faster installation. Additionally, it’s important to perform a clean install rather than an upgrade, as this will ensure a faster and more stable system in the long run.

    By following these tips and taking the time to properly prepare for the installation process, you can have a speedy and efficient installation of Windows

    Conclusion

    In the time it takes to make a cup of coffee, Windows 7 can be installed on an SSD. So sit back, relax, and enjoy your java while Windows does the heavy lifting – just be sure not to spill any on your computer!”

    FAQs

    What is the minimum amount of space required to install Windows 7 on an SSD?
    The minimum space required to install Windows 7 on an SSD is 16 GB.

    Does installing Windows 7 on an SSD improve overall system performance?
    Yes, installing Windows 7 on an SSD improves overall system performance by reducing boot time and application load times.

    Can I install Windows 7 on an SSD without the use of external software?
    Yes, Windows 7 provides built-in support for installing on an SSD without the need for additional software.

    How long does it take to install Windows 7 on an SSD?
    The installation time for Windows 7 on an SSD will vary depending on the system specifications, but typically it takes around 20-30 minutes to complete.

  • Maximize Your Windows 10 Performance: Find Out the Optimal Size for Your SSD Boot Drive!

    When it comes to choosing the right SSD size to install Windows 10, it can be a bit overwhelming. There’s a wide range of options depending on your needs and budget, and the decision can affect the overall performance and speed of your computer. But don’t worry, we’ve got you covered.

    In this blog post, we’ll break down the factors you should consider when choosing the SSD size for you and provide some recommendations based on your usage. So, grab a cup of coffee, sit back, and let’s dive into the world of SSDs and Windows 10 boot-up times!

    Understanding SSDs

    When it comes to booting Windows 10 from an SSD, the size of the SSD you need will ultimately depend on your specific needs. If you only plan on using your SSD to store your operating system and a few essential programs, then a smaller SSD with anywhere from 120-256GB of storage should suffice. However, if you plan on using your SSD to store all of your programs and media in addition to your operating system, then you’ll likely need a larger SSD with at least 512GB of storage or more.

    It’s important to keep in mind that the larger the SSD, the more expensive it will be. In addition, if you have a lot of large files that you need to store, then you may want to consider investing in a secondary hard drive as well. Overall, the size of your SSD will depend on your specific needs and budget, but as long as you choose a reputable brand and prioritize reliability, you can rest assured that your Windows 10 boot experience will be fast and seamless.

    What is an SSD?

    If you’re someone who uses a computer, you’ve probably heard the term “SSD” thrown around a lot lately. But what exactly is an SSD? An SSD, or Solid State Drive, is a newer type of storage device that is slowly replacing the traditional hard disk drive. The main difference between the two is that an SSD has no moving parts, whereas a hard drive has a spinning disk inside.

    This makes SSDs much faster and more durable, as they’re less prone to damage from drops or other impacts. In essence, an SSD is like having a high-performance flash drive inside your computer – it can read and write data much faster than a traditional hard drive. So, if you’re looking to upgrade your computer, investing in an SSD may be just the thing to increase its speed and reliability.

    how big ssd to boot windows 10

    Benefits of SSDs over Hard Drives

    SSDs (Solid State Drives) If you’re looking to upgrade your computer’s storage, you’ve probably heard about SSDs. But what are they and how do they differ from the traditional hard drives? Well, SSDs have no moving parts, unlike hard drives that use spinning disks. This makes them faster, more energy-efficient, and less prone to data loss due to mechanical failures.

    SSDs also have a significantly faster data transfer rate, which means that your computer can read and write data much faster. Imagine it like the difference between a car and a bicycle, with the car (SSD) being much faster and efficient than the bike (hard drive). Additionally, SSDs take up less space and generate less heat, making them a great choice for smaller devices like laptops and tablets.

    So, if you’re after speed and efficiency, SSDs are definitely worth considering over traditional hard drives.

    Requirements for Windows 10 Boot Drive

    When it comes to choosing an SSD for a Windows 10 boot drive, the size of the drive is an important consideration. In general, a 128GB SSD should be sufficient for a basic Windows 10 installation, but if you plan on installing additional software and storing media files, you may want to opt for a larger capacity drive. Keep in mind that Windows updates and temporary files can take up a significant amount of space, so it’s always better to err on the side of caution and choose a larger capacity drive.

    Additionally, consider investing in a drive with a high read/write speed to ensure speedy boot times and overall performance. When it comes to selecting an SSD for your Windows 10 boot drive, do your research and choose a drive that meets your specific needs.

    Minimum Size for Windows 10 Installation

    If you’re planning to install Windows 10 on your computer, it’s important to know the minimum size you’ll need for the boot drive. Microsoft states that you’ll need a minimum of 32 GB of storage space for the 64-bit version of Windows 10 and 16 GB for the 32-bit version. However, these numbers only account for the installation of the operating system and do not take into account any other files or programs you may want to store on the same drive.

    It’s always a good idea to opt for a drive with more space than the minimum requirements to ensure you have enough room for all your needs. Keep in mind that installing Windows updates and additional software will also take up space on the drive, so it’s best to err on the side of caution and choose a drive with plenty of available space.

    Recommended Size for Optimal Performance

    If you’re looking to optimize your Windows 10 boot drive for optimal performance, you should consider the recommended size of the drive. Generally, a boot drive should have at least 32GB of space to ensure that there’s enough room for the operating system and any essential programs and files. However, if you’re planning on installing heavier programs or using your computer for gaming, you may need a larger drive.

    Windows 10 also includes a feature called “Storage Sense,” which can help to automatically clear out any unnecessary files and free up space on your drive. Ultimately, the size of your boot drive will depend on your specific needs and usage patterns, but ensuring that you have enough space will help to keep your computer running fast and smoothly.

    Factors to Consider

    If you’re wondering how big of an SSD you need to boot Windows 10, there are a few factors to consider. First, think about how much storage space you will need. If you plan to use your computer for heavy-duty tasks like video editing or gaming, you will likely need a larger SSD.

    However, if you only plan to use your computer for basic functions like web browsing and word processing, a smaller SSD may suffice. Another factor to consider is your budget. SSDs can range in price depending on their size and performance, so you will need to weigh your options carefully.

    Additionally, you should consider the type of SSD you want. Some SSDs come in the form of an M.2 drive, which is smaller and typically faster than a traditional

    5-inch drive. Ultimately, the size of the SSD you need to boot Windows 10 will depend on your specific needs and preferences.

    Type of Usage

    When choosing a type of usage for a product, there are several factors that must be taken into consideration. One major factor to consider is the purpose of the product. Whether it is for personal or professional use, your intended purpose for the product will affect the specific type of usage that will work best for you.

    Another factor to consider is the level of frequency with which you will use the product. If you plan on using the product frequently or for extended periods of time, you may want to choose a usage type that is designed for your specific needs. Additionally, the environment in which the product will be used is also important to consider.

    If you plan on using the product outdoors or in more extreme conditions, you will want to choose a usage type that is designed for rugged use. Ultimately, it is important to carefully evaluate your needs and circumstances in order to choose the type of usage that will best suit your individual situation. Only then can you be confident that you have made the right choice for your specific needs.

    Number of Programs Installed

    When it comes to the number of programs installed on your computer, there are a few factors to consider. Firstly, the type of programs you have installed will affect your computer’s performance. For instance, if you have too many resource-heavy programs like video editors or games, your computer may not run as smoothly as it should.

    On the other hand, having too few programs can limit what you can do with your computer and potentially hinder productivity. Secondly, the size of the programs matters, as more substantial programs take up more storage space, which can affect the overall speed of your computer. It’s also worth considering how often you use a program.

    If it’s something you use regularly, it’s worth keeping it installed, but if it’s only for occasional use, you may want to uninstall it to free up space. Ultimately, the number of programs installed on your computer should be determined by a balance between functionality and performance, taking into account the types of programs, their size, and frequency of use.

    Size of Files Saved on Boot Drive

    When it comes to the size of files saved on your boot drive, there are several factors to consider. First and foremost, the capacity of your boot drive is the most important factor in determining how much you can store. This can range from 128GB to 4TB, depending on the model and configuration of your computer.

    Additionally, the type of data you are saving will also impact the size of the files, as certain types of files such as multimedia files tend to take up more space than text or spreadsheet files. Furthermore, the applications and programs you use on your computer can also affect the size of files saved on your boot drive, as certain programs may create large temporary files or data caches that take up valuable storage space. Ultimately, the best way to manage the size of files on your boot drive is through regular maintenance such as deleting temporary files, uninstalling unnecessary programs, and moving large files to external storage devices.

    By considering these factors and taking steps to optimize your storage usage, you can ensure that your computer remains fast and responsive.

    Choosing the Right SSD Size for You

    If you’re wondering how big of an SSD you need to boot Windows 10, there are a few things to consider. First, think about the capacity you currently use on your current hard drive. If you’re not using a lot of space, then a 256GB SSD should be enough for your needs.

    However, if you’re someone who downloads a lot of games or has a large media library, you may want to consider a larger capacity, such as a 512GB or even a 1TB SSD. It’s also important to note that a larger capacity SSD will often have faster read and write speeds than a smaller one, which can lead to better overall performance. Ultimately, the size of your SSD depends on your specific needs and usage habits.

    General Guidelines for SSD Size

    When it comes to choosing the right SSD size for your needs, there are a few general guidelines to keep in mind. First and foremost, you’ll want to consider what you’ll be using the SSD for. If you’re using it primarily for storing documents, photos, and other personal files, a smaller SSD size such as 128GB or 256GB may be sufficient.

    However, if you’re using it for more demanding applications like gaming or video editing, you’ll likely need a larger SSD size like 512GB or 1TB. It’s also important to keep in mind that you’ll want to leave some space on your SSD for the operating system and other essential software, so you’ll need to factor that into your decision as well. Ultimately, the right SSD size for you will depend on your specific needs and budget.

    By considering how you’ll be using your SSD and choosing a size that fits those needs, you can ensure that you’re getting the most out of your investment.

    Calculating Your Own Needs

    When it comes to choosing the right SSD size, it’s important to calculate your own needs to ensure you’re not overspending or underutilizing your storage space. Start by identifying what you’ll be using your SSD for. Are you a gamer looking to store large game libraries? Or a content creator in need of space for video files? Once you have a clear idea of your usage, you can estimate the amount of storage you need.

    However, it’s also important to consider future needs. Will your usage evolve or expand in the near future? If so, it may be wise to invest in a larger SSD now to avoid having to upgrade too soon. By taking the time to accurately calculate your needs, you can choose the right SSD size for you and ensure you’re getting the most out of your storage investment.

    Conclusion

    When it comes to choosing the perfect size SSD for booting Windows 10, the answer is simple: bigger is better! While you may be tempted to skimp on storage space, a larger SSD will not only improve boot times, but will also provide ample room for additional programs and files. So don’t settle for a small drive that leaves your system feeling cramped – opt for a larger SSD and experience the smooth, lightning-fast performance that Windows 10 was designed to deliver!”

    FAQs

    What is the minimum SSD size required to boot Windows 10?
    The minimum SSD size required to boot Windows 10 is 16GB for the 32-bit version and 20GB for the 64-bit version.

    Can Windows 10 be installed on a 128GB SSD?
    Yes, Windows 10 can be installed on a 128GB SSD, but it is recommended to have at least a 256GB SSD for better performance.

    Is it faster to boot Windows 10 from an SSD or HDD?
    It is much faster to boot Windows 10 from an SSD as compared to an HDD, as the SSD has faster read and write speeds.

    Can a smaller SSD be used to boot Windows 10 if an additional HDD is available for storage?
    Yes, a smaller SSD can be used to boot Windows 10 if an additional HDD is available for storage. Windows can be installed on the SSD and the HDD can be used for storing files.