Category: How to

How to

  • From Noob to Pro: Simplifying SSD Installations – Your Ultimate Guide to Upgrading Your PC

    Do you want to experience faster boot times and improved performance on your computer? Installing an SSD (Solid State Drive) can be the perfect solution for you. An SSD can significantly enhance your computer’s speed and make it run like a dream. But, how do you install an SSD? If you’re unsure about the process, don’t worry – it’s relatively easy to do.

    In this article, we’ll guide you step-by-step through this process, so you can enjoy the benefits of a lightning-fast computer and take advantage of its capabilities. So, let’s get disk-savvy!

    Check Compatibility

    If you’re considering upgrading your computer’s hard drive to an SSD, you may be wondering how hard it is to install one. The good news is, it’s a straightforward process that shouldn’t take too long. However, before you begin, it’s essential to check that your computer is compatible with the SSD you’re planning to install.

    You’ll need to ensure that your computer has an available drive bay for the SSD, and that the SSD is the correct form factor and interface for your computer. Once you’ve determined compatibility, you’ll need to open up your computer’s case and physically install the SSD. This involves connecting it to your computer’s power supply and motherboard, which should be relatively straightforward if you have a basic understanding of computer components.

    Then, you’ll need to transfer your operating system and data to the new SSD, which can be done using cloning software. Overall, while installing an SSD may seem intimidating at first, it’s a manageable process that can significantly improve your computer’s performance and speed.

    Ensure Your System Supports SSDs

    When upgrading your system to include a Solid State Drive (SSD), it’s crucial to check compatibility to ensure a seamless experience. Not all systems support SSDs, and simply purchasing one without ensuring compatibility can lead to various issues. Before buying an SSD, be sure to check your system’s motherboard and ensure it has the necessary ports and connections for installation.

    Additionally, check your system’s BIOS to ensure it supports booting from an SSD. Upgrading to an SSD can bring significant improvements to your system’s speed and performance, but it’s essential to do your research and ensure compatibility before making any purchases. By taking the time to check compatibility, you can avoid any issues and enjoy the full benefits of your new SSD.
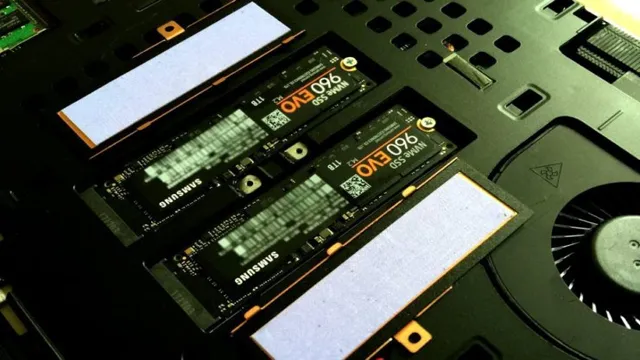
    how hard is it to install an ssd

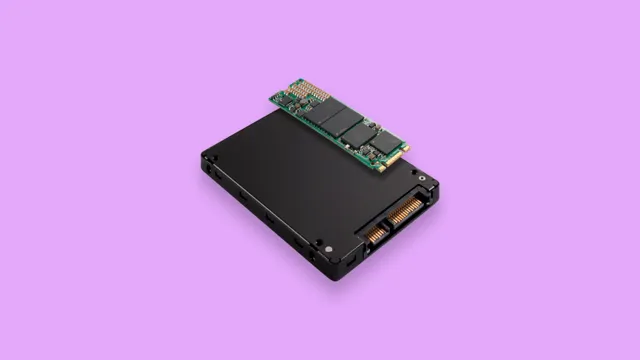
    Get the Right Size (2.5-inch or M.2)

    When it comes to choosing the right SSD, size does matter. And by size, we mean the physical size of the drive – be it a 5-inch or M.

    2 form factor. But before you go ahead and make a purchase, it’s important to check your system’s compatibility. Not all systems support both types of drives, and certain motherboards may only have one or the other type of slot.

    If your system has an M.2 slot, you may want to opt for an M.2 SSD as it offers faster speeds and takes up less space, but if your system only has a

    5-inch slot, then that’s your only option. So, before you buy an SSD, make sure to double-check your system’s compatibility to ensure you’re getting the right size for your needs.

    Gather Your Tools

    When it comes to upgrading your computer’s storage with an SSD, it might seem daunting at first, but it’s actually a fairly straightforward process. First, you’ll need to gather your tools. You’ll want a screwdriver that fits the screws on your computer’s case, as well as any mounting brackets that may have come with your SSD.

    You’ll also need a SATA cable to connect your SSD to your motherboard. If you don’t already have one, you can typically purchase these items at a local electronics store or online retailer. Once you have your tools, it’s just a matter of opening up your computer’s case, locating your hard drive, disconnecting it, and replacing it with the SSD.

    Most SSDs come with instructions or online tutorials that can guide you through the installation process step by step. So while it may sound intimidating, installing an SSD is actually a fairly simple task that can greatly improve your computer’s performance.

    Screwdriver and Screws

    When it comes to assembling furniture or hanging shelves, a screwdriver and some screws are must-have tools. But before you dive into your project, it’s essential to gather the right tools to ensure success. First and foremost, you’ll need a screwdriver.

    There are two types of screwdrivers: flathead and Phillips head. A flathead screwdriver has a single blade that fits into a slot on a screw head, while a Phillips head screwdriver has a four-pronged head that fits into a cross-shaped slot on a screw head. It’s important to use the right size and type of screwdriver to avoid damaging the screw and making it difficult to loosen or tighten.

    You’ll also need screws in the right size and type for your project. Consider the weight and materials of the object you’re attaching and choose screws of appropriate length and thickness. With the right tools in hand, you’re ready to tackle your project with ease and confidence.

    Cloning Software or Windows Installer

    When it comes to cloning software or installing Windows, having the right tools can make all the difference. First and foremost, you’ll need the latest version of the cloning software or Windows installer. This can usually be downloaded directly from the manufacturer’s website.

    You’ll also need a USB drive or CD to store the installer, as well as a spare computer to use as the target device. Depending on the software or installer you’re using, you may need specific cables or adapters to connect the two computers together. It’s important to read the instructions carefully and make sure you have all the necessary tools and equipment before beginning the cloning or installation process.

    With the right tools and a bit of preparation, you can easily clone your hard drive or install Windows without any problems. Just be sure to follow all instructions carefully and double-check everything before starting the process, to avoid any potential complications.

    External Enclosure (optional)

    If you’re planning to build your own external enclosure, there are a few tools you’ll need to have on hand to ensure a successful project. First and foremost, you’ll need a screwdriver (either Phillips or flathead, depending on the type of screws your enclosure uses). Depending on what type of enclosure you’re building, you may also need pliers (for bending metal or working with wires), a drill (for creating holes in the case), or a saw (for cutting pieces of wood or plastic).

    Additionally, it’s a good idea to have a ruler or measuring tape and a pencil on hand so you can make accurate marks on your enclosure components. By gathering up all the necessary tools before you begin your project, you’ll be ready to tackle any challenges that come your way and ensure a successful external enclosure build.

    Choose Installation Method

    When it comes to installing an SSD, the process isn’t necessarily difficult, but it can vary in complexity depending on the method you choose. If you’re familiar with computers and feel comfortable opening up your device, installing an SSD internally may be your best option. This process involves connecting the drive to your motherboard and power supply, and then configuring the BIOS to recognize the new hardware.

    However, if you’re not comfortable with the internal installation process or don’t want to open up your device, there are external options available. External SSDs connect to your computer via a USB port and are essentially plug-and-play. They offer the benefit of not needing to open up your device, but may be slightly slower due to the connection being over USB rather than the faster internal SATA connection.

    Overall, while the installation process of an SSD may seem daunting at first, with the right method and a little bit of patience, it can easily be done.

    Cloning vs Fresh Install

    When it comes to setting up a new computer, you have two options: cloning or fresh install. Cloning involves creating a copy of your entire hard drive, while fresh install means starting from scratch and installing everything from the beginning. Both methods have their pros and cons depending on your situation.

    Cloning can be a great option if you want to transfer all of your data and settings from an old computer to a new one. It’s also faster than starting from scratch since you don’t have to reinstall everything. However, it can also duplicate any errors or issues from your old computer.

    Plus, if you’re upgrading to a new operating system, cloning may not be the best choice since it can carry over incompatible drivers or software. On the other hand, a fresh install ensures that your new computer starts off clean and free from any issues. You’ll know exactly what’s installed and how it was configured.

    Plus, you can take the opportunity to clear out any old files or software that you no longer need. However, it’s a time-consuming process and can take several hours or even days to install and configure everything you need. Ultimately, the choice between cloning or fresh install comes down to your personal preference and needs.

    If you want to quickly transfer everything from an old computer to a new one, cloning is the way to go. But if you want a fresh start and a clean slate, then a fresh install is the better option. So, consider your situation and make the choice that works best for you.

    Using an External Enclosure

    When it comes to using an external enclosure, the first thing you need to decide is how you want to install it. There are generally two choices: the first option is to install it internally on your computer, while the second option is to use it externally. The choice you make will depend on your specific needs and the equipment you have available.

    If you have enough space inside your computer, an internal installation may be best for you. However, if you need more portability and flexibility, an external enclosure might be the better choice. Either way, using an external enclosure can offer an array of benefits, including increased storage capacity, improved backup solutions, and faster data transfer speeds.

    Whether you are using it for personal or professional reasons, an external enclosure can be a great investment for those looking to expand their computer’s capabilities.

    Install SSD

    Are you thinking about upgrading your computer’s hard drive with an SSD, but unsure of how difficult the installation process is? Installing an SSD may seem daunting at first, but it’s actually a straightforward process that can be done with just a few basic tools. The first step is to back up all of your important data before beginning the installation process. Then, simply locate your computer’s hard drive and remove it from the system.

    Afterward, insert the SSD into the hard drive bay and secure it with screws. Finally, connect the SATA cable and power cable to the SSD, and boot up your computer. With the right tools and a bit of patience, the installation process doesn’t have to be complicated or difficult at all.

    Upgrading to an SSD can significantly boost your computer’s performance, making it well worth the effort. So, don’t be afraid to take the plunge!

    Open Your Laptop or Desktop

    Are you tired of your slow and outdated laptop or desktop? Upgrading to an SSD could be the solution for you! Installing an SSD (Solid State Drive) can drastically improve loading times and overall performance, giving your computer a new lease on life. The installation process is fairly simple, but it’s important to make sure you have the right tools and take proper precautions before attempting. First, open up your laptop or desktop and locate the hard drive bay.

    Some computers may require additional screws or clips to be removed before accessing. Once you have access to the hard drive, remove it and disconnect any cables connected to it. Then, carefully insert the SSD, making sure it’s properly secured.

    Connect any necessary cables and reassemble your computer. Don’t forget to transfer any important data from your old hard drive to your new SSD. With just a few steps, you can enjoy faster performance and a smoother computing experience.

    Give it a try today!

    Attach SSD to Mounting Bracket

    One important step in installing a solid-state drive (SSD) is attaching it to a mounting bracket. This is necessary because most cases are not designed to hold an SSD on their own. The good news is that most SSDs come with the necessary brackets and screws needed for installation.

    To attach the SSD to the bracket, simply align the holes on the drive with the holes on the bracket and screw them together. It’s important to tighten the screws just enough to secure the drive to the bracket, but not too tight as to damage the drive. Once the SSD is securely attached to the bracket, it’s ready to be installed in the computer’s drive bay.

    Not only is installing an SSD relatively easy, but it can also greatly improve the overall performance of a computer. So, if you’re looking to speed up your computer’s boot times, reduce program load times, and increase overall system responsiveness, consider installing an SSD today.

    Replace Old HDD with SSD

    If you’re looking to breathe new life into your computer, swapping out your old hard disk drive (HDD) for a solid-state drive (SSD) is a surefire way to see some major improvements. Not only will an SSD speed up boot and load times, but it will also give your computer a noticeable performance boost. To install an SSD, the first step is to purchase the drive itself and a SATA-to-USB cable.

    Once you’ve got those items, it’s time to start cloning your existing HDD to your new SSD. This process can take a bit of time, depending on how much data you need to transfer. But once the cloning is complete, you’ll then need to physically swap out your old HDD for the new SSD.

    This may involve opening up your computer case, so be sure to follow the manufacturer’s instructions carefully. With your new SSD in place, you should notice a near-immediate improvement in your computer’s speed and responsiveness. So what are you waiting for? Upgrade to an SSD today and experience the difference for yourself!

    Transfer Operating System and Data

    Have you been considering upgrading your computer’s hard drive to a faster solid-state drive (SSD)? You might be wondering how hard it is to install an SSD. Well, the good news is that it’s not as difficult as you might think. In fact, most SSDs are designed to be plug-and-play, meaning you can easily remove the old hard drive and replace it with the new SSD without the need for any special tools or technical knowledge.

    However, the process of transferring your operating system and data can be a bit more complicated. You can either clone your old drive onto the new SSD, which is a quick and easy option, or you can do a fresh install of your operating system and manually transfer your files. Whichever method you choose, just make sure to back up your important data before you start and follow the instructions carefully.

    With a bit of patience and attention to detail, you’ll soon be enjoying the lightning-fast speed and improved performance of your new SSD.

    Use Cloning Software or Windows Installer

    When it comes to transferring your operating system and data to a new computer, two popular options are using cloning software or the Windows installer. Cloning software allows you to create an exact copy of your existing system on a new computer, including all your installed programs, applications, and data. This can save you a lot of time and effort as you don’t have to reinstall everything from scratch.

    On the other hand, the Windows installer can also be used to transfer your data and operating system, but it requires a bit more manual work. You’ll need to install the operating system first, then transfer your files and programs, which can be a time-consuming process. Ultimately, the best option depends on your specific situation and level of expertise.

    Cloning software may be more suitable for those who have a lot of applications and data to transfer, while the Windows installer may be a good option if you only need to transfer a few files.

    Reboot and Enjoy Your New SSD

    When it comes to upgrading your computer with a new SSD, one of the most important steps to take is transferring your operating system and data. This can seem like a daunting task, but with the right tools and approach, it can be done easily and efficiently. One useful tool for transferring your operating system is a disk cloning software, which allows you to make an exact copy of your old hard drive and transfer it to your new SSD.

    This ensures that everything on your old hard drive, including your operating system, files, and settings, will be transferred over seamlessly to your new SSD. Once the transfer is complete, all you need to do is reboot your computer and enjoy the lightning-fast speed and performance of your new SSD. Don’t let the transfer process hold you back from upgrading to a better, faster, and more reliable storage option – with the right tools and approach, it can be a breeze.

    Conclusion

    Installing an SSD may seem daunting at first, but with a little patience and guidance, even the least tech-savvy person can do it. Think of it as upgrading your car’s engine – a little effort now can yield a significant performance boost. So, the next time you’re tempted to back out of an SSD installation, remember that it’s not rocket science – it’s just a matter of following a few simple steps to unlock your computer’s full potential.

    The end result? A faster, smoother computing experience that’s sure to put a smile on your face. Now, that wasn’t so hard, was it?”

    FAQs

    What tools are needed to install an SSD in a computer?
    To install an SSD, you’ll need a screwdriver, SATA data cable, and SATA power cable.

    Can I install an SSD on a laptop?
    Yes, you can install an SSD on a laptop if the laptop has a slot to install it. However, some laptops may not have a slot for it.

    How much time does it take to install an SSD?
    Installing an SSD usually takes 30 to 60 minutes, depending on your computer’s make and model, and your experience with computer hardware.

    Is it necessary to reinstall the operating system after installing an SSD?
    It is not necessary to reinstall the operating system, but it is recommended to make the most of the SSD’s performance. You can clone the old hard drive to the SSD, and then change the boot order to the SSD.

    How much faster is an SSD compared to an HDD?
    SSDs are significantly faster than HDDs, as they use flash memory to read and write data faster than spinning disks. With an SSD, your computer will boot faster, applications will load faster, and the overall performance will be snappier.
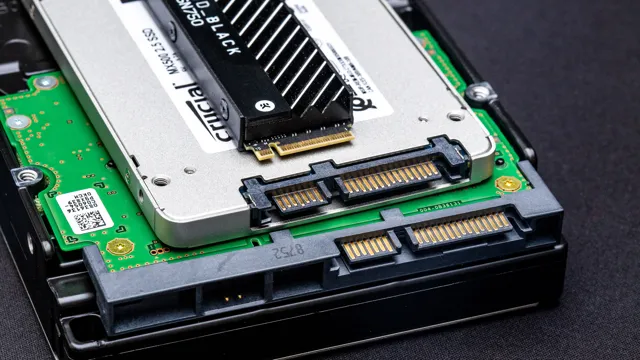
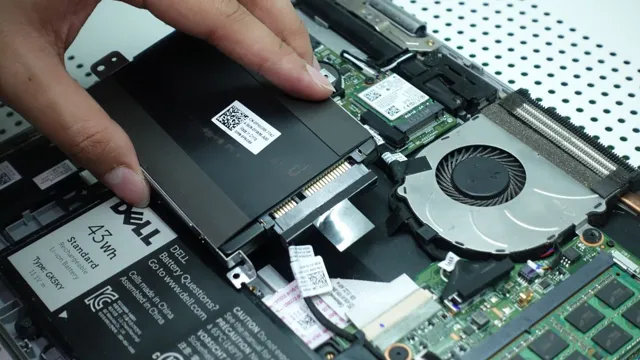
  • Why SSD Drives are Vital for Speed and Performance: A Comprehensive Guide

    Are you still stuck with a traditional hard drive that takes eons to boot up your computer and retrieve files? If so, it’s time to upgrade to a solid-state drive (SSD). SSD drives are quickly becoming the standard in computer storage due to their speed, reliability, and durability. In this blog, we will discuss the importance of SSD drives and how they can revolutionize the way you use your computer.

    Think of it like upgrading from a horse-drawn carriage to a high-speed sports car – the difference is night and day. So, buckle up and let’s dive into the world of SSDs!

    Faster Speeds

    Let’s face it, nobody likes a slow computer. One way to dramatically increase your computer’s speed is to upgrade to an SSD drive. Not only do SSD drives offer faster speeds than traditional hard drives, but they also have no moving parts, making them more reliable and less prone to failure.

    SSD drives use flash memory to store data, which means that files can be accessed and written to faster than with a traditional hard drive. But how important is it to have an SSD drive? Well, if you use your computer for tasks that require a lot of data processing, like video editing or gaming, an SSD drive can make a huge difference in the speed of your computer. It can also lead to faster load times for programs and applications, making your overall computing experience much more enjoyable.

    Overall, if you’re looking for a way to speed up your computer and improve its performance, investing in an SSD drive is definitely worth considering.

    Boots up in seconds

    When it comes to technology, speed is everything. That’s why booting up your computer in seconds rather than minutes can make all the difference in your daily routine. With faster speeds, you don’t have to wait for your computer to catch up, wasting precious time that could be spent on more productive tasks.

    And let’s be real – waiting for your computer to start up can be incredibly frustrating. Imagine being able to simply press the power button and have your computer ready to go in seconds. It’s a game-changer.

    Plus, with faster boot times, you can get to work faster and be more efficient throughout the day. So if you’re tired of waiting for your computer to start up, consider investing in a device with faster speeds. Your productivity and sanity will thank you for it.

    And with the constant advancement of technology, there’s never been a better time to upgrade.

    how important is it to have an ssd drive

    Quick load times

    As technology and internet speeds evolve, website load times have become even more crucial. Visitors want quick access to the content they’re looking for, and if it takes too long to load, they’ll quickly lose interest and move on to other websites. This is where the importance of faster speeds comes into play.

    By improving your website’s speed, you can attract and retain more users, increase engagement, and ultimately boost conversions. There are various ways to achieve faster load times, such as optimizing images, minifying CSS and JavaScript files, and leveraging caching techniques. Focusing on speed is a vital component of website success and can make a significant difference in user experience and website performance.

    So, don’t underestimate the power of faster speeds in maximizing your website’s potential!

    Improved Performance

    When it comes to computer performance, having an SSD (solid-state drive) drive can make a huge difference. Unlike traditional hard drives, SSDs have no moving parts, which means they can access and transfer data faster. This improved speed can lead to a noticeable difference in everything from boot-up times to software load times.

    Because SSDs are also more reliable than hard drives and have a longer lifespan, they may require less maintenance and replacements. In short, when it comes to optimizing computer performance, having an SSD drive is a smart investment that can provide a surprisingly significant boost in speed and efficiency. So if you’re looking to improve the performance of your computer, investing in an SSD drive is definitely worth considering.

    Enhanced multitasking

    When it comes to improved performance, enhanced multitasking is a key feature. With advancements in technology, we expect our devices to support us in a variety of tasks, from sending emails to streaming videos to running multiple apps at once. Multitasking capabilities are essential for many users, especially those who work from their devices or need to stay connected on-the-go.

    Fortunately, many modern smartphones, tablets, and computers have enhanced multitasking features that make it easy to switch between apps, run multiple apps simultaneously, and manage tasks seamlessly. This allows users to be more productive and efficient, without sacrificing performance or speed. With enhanced multitasking, users can easily juggle a wide range of tasks, from browsing social media to streaming music to video conferencing with colleagues.

    Whether you’re a student, busy professional, or casual user, enhanced multitasking is a valuable tool for improving productivity and getting more done.

    Reduced read and write times

    Improved performance is a vital aspect of a computer system, and reduced read and write times can have a significant impact on the overall speed. With the advancement of technology, modern storage systems such as SSDs can provide faster read and write times compared to traditional hard drives. This improved performance is all thanks to their design, which allows them to access data much faster.

    In addition, SSDs have no moving parts, making them less susceptible to physical damage and, therefore, more durable. The use of SSDs in computer systems has resulted in faster boot times, quicker launching of applications, and reduced loading times for files and documents. Ultimately, this translates into increased productivity and efficiency, making them a worthwhile investment for anyone looking to upgrade their system.

    So, if you’re looking to improve the performance of your computer system, reducing read and write times is a great place to start!

    Faster data transfer rates

    Improved Performance When it comes to data transfer rates, faster is always better. Whether you’re transferring large files or streaming high-quality content, improved performance is key in ensuring a smooth experience. This is where faster data transfer rates come in.

    With faster speeds, you can transfer large files in a matter of seconds, stream content without buffering, and use data-intensive applications with ease. It’s like upgrading from a dirt road to a superhighway – you’ll reach your destination much faster and with fewer delays. So if you’re looking to improve your overall performance, upgrading to faster data transfer rates is a must.

    Not only will it save you time, but it will also increase your productivity and give you a better overall experience.

    Durability and Longevity

    When it comes to computer storage, especially for those who are using laptops or notebooks, SSDs (solid-state drives) are often preferred over HDDs (hard disk drives) due to the former’s speed and efficiency. However, it’s not just about speed; durability and longevity are also important factors to consider when choosing an SSD drive. Unlike their HDD counterparts, SSDs have no moving parts, making them more resistant to physical damage caused by shock, vibration or drops.

    In addition, SSDs have a longer lifespan compared to HDDs since they don’t suffer from mechanical wear and tear. This means that you’ll have less chance of losing important data due to a damaged or failing drive, and you’ll be able to use your SSD for many years to come. So, when it comes to purchasing a new drive, it’s important to consider how important durability and longevity are to you and your needs.

    An SSD drive may cost more initially, but the additional lifespan and reliability could potentially save you a lot of money in the long run.

    Less prone to physical damage

    When it comes to choosing a device or gadget, durability and longevity are crucial factors that we all consider. The last thing anyone wants is to spend their hard-earned money on something that will easily break, get damaged, or stop working in a short period. This is where robots come in.

    Compared to other devices or machines, robots are less prone to physical damage. Why? Because robots are built with durable materials that can withstand harsh conditions, such as extreme temperatures, dust, debris, and water. They can work in environments that are unsafe or hazardous for humans.

    Additionally, robots have minimal moving parts or components that could wear out or break over time. They are designed to last longer and require less maintenance. So, if you’re looking for a device that will serve you for an extended period, a robot is an excellent investment that will not disappoint.

    Longer lifespan than HDDs

    One of the significant advantages of solid-state drives (SSDs) over traditional hard disk drives (HDDs) is their durability and longevity. SSDs, with no moving mechanical parts, are designed to withstand the wear and tear of everyday use. Unlike HDDs, which can encounter mechanical failures and data loss due to shock or vibration, SSDs can withstand some of these variables, making them more reliable over time.

    Furthermore, SSDs have a longer lifespan than HDDs since their cells can be written and erased more times before they wear out. Thus, if you’re looking for a storage solution that can stand the test of time, SSDs are the way to go. Plus, with their faster read and write speeds, using an SSD can significantly enhance your system’s overall performance.

    Cost vs. Benefit

    If you’re looking to upgrade your computer’s storage, you might be wondering how important it is to have an SSD drive. The answer is: it depends. SSDs, or solid-state drives, are faster and more reliable than traditional hard disk drives (HDDs).

    They also consume less power and generate less heat. However, they can be more expensive than HDDs, and they don’t always have as much storage capacity. So, if speed and reliability are a top priority for you, investing in an SSD drive is definitely worth it.

    On the other hand, if you need a lot of storage and don’t mind slower load times, an HDD might be a better choice. Ultimately, it comes down to your specific needs and budget.

    Higher initial cost but more cost-effective in the long run

    When it comes to making purchasing decisions, cost is often a major factor. However, it’s important to also consider the long-term benefits and potential cost savings of a product or investment. This is especially true when it comes to items like appliances or vehicles, where a higher initial cost may be offset by lower energy bills or maintenance costs over time.

    In the same way, businesses may need to invest in new technology or equipment in order to improve efficiency or increase productivity. While it may be tempting to opt for a cheaper option, it’s important to consider the potential cost savings in the long run. By thinking beyond the immediate cost and weighing the cost-benefit, businesses can make well-informed decisions that will benefit them in the long term.

    Worth the investment for heavy users and gamers

    When it comes to heavy use and gaming, investing in high-quality technology can make a significant difference in the overall experience. While the initial cost may seem daunting, the long-term benefits make it worth it. Think of it as an investment in your enjoyment and productivity.

    By opting for a top-notch graphics card, fast processing speed, and sufficient storage, you can easily handle complex tasks while maintaining a steady frame rate when playing games. Plus, if you factor in the cost of upgrading a lower-end system in the future, investing in a high-performance device now may save you money in the long run. Of course, not everyone needs to go all-in; it depends on your specific needs.

    That’s why it’s essential to consider the cost versus benefit when evaluating your options. Determine what features you truly need and what you can live without. After all, an expensive machine won’t make much of a difference if you don’t take full advantage of its capabilities.

    However, if you’re a gamer or heavy user, the investment is worth it, allowing you to fully enjoy and optimize your experience.

    Conclusion

    In today’s technology-driven world, having an SSD drive is more than just a luxury or preference. It’s a must-have element for anyone who values speed, productivity, and efficiency. Whether you’re an average user, student, gamer, or professional, upgrading to an SSD drive can drastically improve your daily operations and overall experience.

    With lightning-fast boot and load times, seamless multitasking, and longevity, an SSD drive is a wise investment that can elevate your computing game to the next level. So, don’t be a procrastinator, upgrade your system, and join the league of the speedy and efficient SSD users!”

    FAQs

    What is an SSD drive?
    An SSD (Solid State Drive) is a storage device that uses flash memory to store data instead of a spinning disk found in a traditional hard drive.

    How is an SSD drive different from a traditional hard drive?
    An SSD drive is faster and more reliable than a traditional hard drive because it has no moving parts.

    How important is it to have an SSD drive for gaming?
    An SSD drive can drastically improve gaming performance by reducing load times and increasing the speed at which data is accessed.

    Is it worth upgrading from a traditional hard drive to an SSD drive?
    Yes, an SSD drive can provide a significant improvement in overall system performance and is worth the investment.

    What are the disadvantages of using an SSD drive?
    The main disadvantage of an SSD drive is that it typically has a lower storage capacity compared to a traditional hard drive, and it is also more expensive.

  • Unleashing the Power of Your PC: The Ultimate Guide on Upgrading to an SSD

    Have you ever found yourself staring at a painfully slow computer, waiting for it to load a simple program or file? Have you considered upgrading your hard drive to an SSD but aren’t quite sure where to begin? Well, fear not! Upgrading to an SSD (solid-state drive) can significantly improve your computer’s overall performance and speed, making those frustratingly slow load times a thing of the past. Think of it like upgrading from a bicycle to a sports car – sure, the bicycle will get you where you need to go eventually, but the sports car will get you there much faster and with a smoother ride. In this blog post, we’ll break down the benefits of upgrading to an SSD, what to consider when choosing an SSD, and how to install it into your computer.

    So, buckle up and get ready to speed up your computer like never before!

    Benefits

    Upgrading to a SSD may seem like a daunting task, but the benefits that come with it make it all worthwhile. Not only does an SSD significantly improve your computer’s speed, but it also enhances the overall performance of your computer. With an increased read and write speed, you’ll be able to boot up your computer faster and access files rapidly.

    Additionally, an SSD has no moving parts, which means less wear and tear on the hard drive, resulting in fewer crashes or failures. Upgrading to an SSD is also a great way to breathe new life into an older computer, making it feel like new again. While it may require a little effort and guidance to install, the benefits of a fast and reliable system make upgrading to an SSD a great investment.

    So, don’t worry, upgrading to an SSD isn’t very hard and the benefits are worth it!

    Faster boot and load times

    One of the most significant benefits of having faster boot and load times is the increase in efficiency and productivity they bring. By reducing the time it takes for your computer, applications, and websites to load, you can work faster and get more done in less time. Whether you’re in a high-pressure work environment or just trying to stay productive at home, the speed of your technology can make a big difference.

    Additionally, faster boot and load times can improve your overall user experience, as you’ll be able to access your favorite programs and websites with less waiting time. Ultimately, investing in technology that provides faster boot and load times can help you optimize your workflow and achieve your goals more efficiently. So next time you find yourself frustrated by slow technology, consider upgrading to a solution that prioritizes speed and performance.

    how hard is it to upgrade to a ssd

    Improved overall performance

    Improved overall performance is a key benefit that everyone strives for in both personal and professional settings. It could be in sports, business, or any other field. When it comes to technology, having improved overall performance translates into faster processing speeds, fewer errors, and greater efficiency.

    This, in turn, results in increased productivity, less downtime, and better user experiences. Whether you’re using a computer, a smartphone, or any other device, improved performance means that you can complete tasks quicker and with less stress. In fact, it is sometimes the difference between success and failure.

    With improved performance, you can take on more work, handle larger tasks, and achieve your goals faster than ever before. Therefore, individuals and businesses should always aim to improve overall performance in whatever way possible.

    Hardware requirements

    Upgrading to an SSD can seem like a daunting task, but it’s actually a fairly simple process. The hardware requirements to upgrade to an SSD vary depending on your computer’s make and model, but most modern computers have a SATA connector, which is necessary for connecting an SSD. You’ll also need an SSD bracket or cable if your computer doesn’t come with one.

    If you’re not confident in your ability to install the SSD yourself, many computer repair shops offer installation services. So, how hard is it to upgrade to an SSD? With a little bit of research and some basic hardware knowledge, upgrading to an SSD can be a breeze. Plus, the benefits of an SSD, such as faster boot times and improved overall performance, make it a worthwhile investment for any computer user.

    Ensure compatibility

    When you’re considering purchasing a new piece of hardware for your computer system, one of the most important things to keep in mind is compatibility. You want to make sure that whatever you’re buying will work seamlessly with the rest of your system, without any hiccups or errors. One way to ensure compatibility is to check the hardware requirements for whatever software or games you plan to use.

    This can give you a good idea of what kind of hardware you’ll need to make everything run smoothly. It’s also a good idea to do some research on the specific hardware you’re considering, to see if it’s known to have any compatibility issues with certain operating systems or other pieces of hardware. By taking these steps, you can help ensure that your new hardware will integrate seamlessly with the rest of your system and provide the performance and functionality that you need.

    Choose the right type of SSD

    When it comes to upgrading your computer’s storage with an SSD, it’s essential to choose the right type for your hardware requirements. Not all SSDs are created equally, and there are several factors to consider, such as form factor, interface, and capacity. For instance, if you have a laptop, you’ll need to ensure that your SSD is a standard

    5-inch drive or a smaller M.2 drive, while desktop computers can accommodate larger SSDs such as the 5-inch form factor.

    Additionally, check your motherboard’s documentation to determine the interface type, which can be SATA or NVMe, with the latter offering faster read and write speeds. Finally, consider your storage needs and budget when selecting the capacity, as SSDs can range from as little as 120GB to as much as 4TB. By taking these hardware requirements into account, you can choose the right type of SSD that meets your needs and enhances your computer’s performance.

    Software requirements

    Upgrading to an SSD can greatly improve the performance of your computer, but the process can seem daunting for those who are not tech-savvy. Fortunately, upgrading to an SSD is not as difficult as it may seem. However, it does require some software requirements that need to be met.

    First, you will need to clone your existing hard drive onto the new SSD. This can be done using cloning software, which is usually included with the new SSD. Next, you will need to enter the BIOS of your computer and change the boot order so that the computer boots from the SSD instead of the old hard drive.

    This step is important to ensure that your computer recognizes the new SSD as the primary storage device. Once these steps are completed, you should notice a significant improvement in the speed and performance of your computer. Don’t let worries about the software requirements hold you back from upgrading to an SSD.

    With a little effort, you can easily make the switch and enjoy faster computer performance.

    Migrate your data

    When it comes to migrating your data, having the right software is crucial. There are a variety of tools available to help with the process, but not all are created equal. First, consider what type of data you’ll be migrating and where it will be moving to.

    This will help determine the best software for the job. For example, if you’re moving your data to the cloud, you’ll need software that’s designed for cloud-based environments. Additionally, think about any specific requirements for the data migration, such as security or compatibility with existing systems.

    By taking the time to research and choose the right software, you can ensure a successful and seamless data migration process.

    Update your operating system and drivers

    Updating your operating system and drivers is essential to ensure that your computer runs efficiently and remains secure. Operating system updates often contain critical security patches to protect your computer from malicious attacks. These updates can also address performance issues and bugs, resulting in a better user experience.

    Similarly, updating your drivers is important as they help your computer communicate with various hardware components such as printers, graphics cards, and audio devices. Updated drivers can enhance the performance of these devices and prevent compatibility issues. Neglecting to update your operating system or drivers can result in system crashes, security breaches, and poor performance.

    Take the time to regularly check for updates and keep your computer running smoothly.

    Installation process

    Upgrading to an SSD (Solid-State Drive) is a great way to speed up your computer’s performance and breathe new life into it. But how hard is it to upgrade to an SSD? Well, it depends on your computer and technical skills. If you’re comfortable opening up your computer and using tools, it shouldn’t be too difficult.

    First, you’ll need to clone your existing drive to your new SSD, which can be done using a cloning software. Then, you’ll need to physically replace your existing hard drive with the new SSD. Some SSDs come with their own installation kit, which includes necessary cables and hardware.

    However, if you’re not confident about doing this, it’s always safe to consult a professional technician. In summary, while it might require some technical knowledge and skill, upgrading to an SSD is a relatively straightforward process that is well worth the performance boost it’ll provide.

    Prepare your computer

    Before starting the installation process, you should prepare your computer to ensure it runs smoothly. This includes checking to make sure you have enough storage space, updating your operating system, and disconnecting any external devices. Firstly, you should check the storage space on your computer.

    Most software requires a certain amount of space to install properly. If you don’t have enough space, the installation process may fail or slow down your computer. It’s a good idea to free up some space by deleting any unnecessary files, applications, or temporary downloads.

    Secondly, you should update your operating system to the latest version available. This not only ensures your computer is secure, but it also helps prevent compatibility issues with the software you are installing. Updating your operating system is as simple as going to the settings or preferences menu and selecting the option to check for updates.

    Finally, you should disconnect any external devices from your computer. This includes USB drives, external hard drives, earphones, and any other devices that may cause interference during the installation process. Disconnecting these devices not only reduces the risk of interference but also prevents accidentally corrupting any files or data on the external device.

    By following these preparatory steps, you can ensure a smooth installation process for any software or program you wish to install on your computer. Remember to check your storage space, update your operating system, and disconnect any external devices to prevent possible issues during the installation.

    Install the SSD

    Installing an SSD (Solid State Drive) is an easy process that can significantly enhance your computer’s performance. First, ensure that you have the necessary tools, including a screwdriver and the SSD itself. Before beginning, power off your computer and unplug it from the wall.

    Then, open your computer by removing the screws on the back panel. Locate the hard drive and remove it by unplugging the power and data cables and unscrewing any brackets holding it in place. Next, insert the SSD into the same slot and screw in any brackets.

    Connect the cables to the SSD and ensure that it is securely in place before closing the back panel and powering on your computer. Once your computer is running, you can configure your system to ensure it recognizes the new SSD as your primary boot drive. Overall, installing an SSD is a straightforward process that can provide a significant boost to your computer’s performance.

    Cloning vs Fresh install

    When it comes to installing software or applications on your computer, you may be faced with two options: cloning or a fresh install. Cloning involves making a copy of your existing system and transferring it to another device or storage medium, while a fresh install involves starting from scratch with a new operating system or application. When deciding between these two options, it’s important to consider your goals and preferences.

    Cloning is often faster and less disruptive than a fresh install, as it preserves your existing settings and configurations. However, a fresh install allows you to start with a clean slate and avoid potential issues that may have accumulated over time on your current system. Ultimately, the decision between cloning and a fresh install depends on your specific needs and priorities.

    It’s a personal choice that can greatly impact the performance and efficiency of your system.

    Conclusion

    Upgrading to an SSD might seem daunting at first, but with a little bit of research and determination, it’s actually quite straightforward. Just like with anything in life, the hardest part is often just getting started. But once you take that first step, you’ll be amazed at how swiftly things fall into place.

    And in the end, with an SSD humming along in your machine and enhancing your computing experience, you’ll wonder why you ever hesitated in the first place. It’s as easy as swapping out your old clunker for a new set of wheels – you won’t believe the difference it makes!”

    FAQs

    What are the benefits of upgrading to an SSD?
    Upgrading to an SSD can greatly improve your computer’s speed and performance. It also reduces boot-up and load times for applications.

    Can I upgrade my old computer to an SSD?
    Yes, you can upgrade your old computer to an SSD as long as it has a compatible interface. Some older computers may require an adapter to connect the SSD.

    Is upgrading to an SSD difficult?
    Upgrading to an SSD can be relatively easy or difficult depending on your computer’s design and your technical expertise. Some computers may require disassembly to access the hard drive bay.

    What is the difference between an HDD and an SSD?
    HDDs (Hard Disk Drives) use rotating disks to store and retrieve data, while SSDs (Solid State Drives) use flash memory. SSDs are much faster than HDDs because they do not have any mechanical parts.

  • Step-by-Step Guide: Installing Easy-to-Boot in the Second Partition of Your SSD

    Step-by-Step Guide: Installing Easy-to-Boot in the Second Partition of Your SSD

    Looking for a way to add flexibility to your computer’s booting options? One solution is to install Easy to Boot in the second partition of your SSD. This nifty tool allows you to create a customizable menu of operating systems and tools to boot from, giving you the ability to switch between different setups with ease. With Easy to Boot, you can bring life to an unused partition on your drive, making it a valuable addition to your workflow.

    In this blog, we’ll go over the steps to install Easy to Boot on your second partition and show you how to customize your boot options to suit your needs. Whether you’re a frequent user of different operating systems or just want a more streamlined booting process, this guide will have you up and running in no time. So, let’s dive in and explore the benefits of an Easy to Boot installation.

    Before you Begin

    Before you begin installing Easy2Boot in the second partition of your SSD, there are a few things you should consider. First and foremost, make sure you have a backup of all your important files and data, as the installation process could potentially wipe out everything on your drive. Additionally, it’s important to ensure that your system meets the minimum requirements for running Easy2Boot smoothly.

    These requirements typically include a system with at least 1GB of RAM and a 2GHz processor. Once you’ve taken these precautions, you’re ready to proceed with the installation process. Remember, always read the instructions carefully and don’t rush through the process.

    By following these steps and taking the necessary precautions, you’ll be able to successfully install Easy2Boot in your second partition and enjoy all the benefits it has to offer.

    Check SSD Compatibility

    Before you start upgrading your computer with a new SSD, it’s essential to check its compatibility. SSDs come in different form factors, and not all of them are compatible with every computer. The first thing to consider is whether your computer has an open bay to install an SSD.

    You also need to check the dimensions of the SSD to make sure it fits without any compatibility issues. Generally, most SSDs come in the 5-inch form factor, but you should check the documentation of your computer and SSD to make sure it’s compatible.

    Additionally, check your computer’s BIOS settings and the version of your operating system to ensure that they can recognize and support the SSD. Overall, checking your computer’s compatibility with an SSD before installation can save you from future issues.

    how install easy to boot in seconf partition of ssd

    Backup Data

    Before you begin backing up your data, it’s important to determine what exactly needs to be backed up. This could include important documents, photos, music, videos, and any other files that are essential to you. Once you have a clear idea of what you need to back up, you should also consider how frequently you will need to do so.

    For instance, if you add new files to your computer regularly, it may be necessary to back up your data more frequently to ensure that you don’t lose any crucial information. Additionally, it’s important to choose a reliable backup method that suits your needs – whether it’s an external hard drive, cloud storage, or a physical backup like a USB drive. By taking these factors into consideration, you can protect your valuable data and ensure that you always have access to your most important files.

    Creating a Second Partition

    If you want to install Easy to Boot in a second partition of your SSD, the process is pretty straightforward. First, you’ll need to create a new partition on your SSD using your operating system’s disk management tool. Once you’ve created the partition, you can download Easy to Boot and extract the files to the new partition.

    From there, you can configure the boot order in your BIOS or UEFI settings to prioritize the Easy to Boot partition. This will allow you to boot into the Easy to Boot environment whenever you need to, without interfering with your primary operating system. Just remember to make sure you have enough storage space on your SSD before creating the second partition.

    With these steps, you can easily create a second partition and use Easy to Boot for all your booting needs!

    Open Disk Management

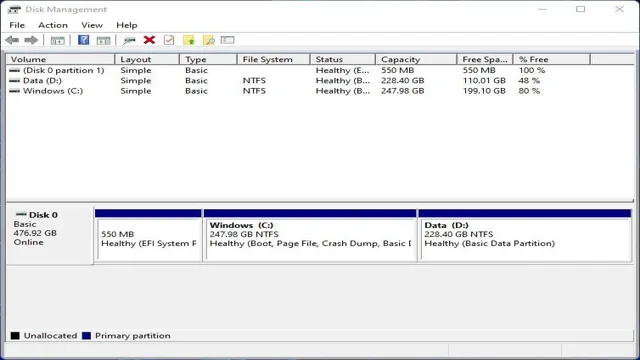
    If you’re looking to create a second partition on your computer’s hard drive, you’ll need to access the Disk Management tool. Disk Management is a built-in Windows utility that allows you to manage disks and partitions. To access it, simply right-click on the Start button and select “Disk Management” from the menu.

    Once you’re in Disk Management, you should see a list of all of your computer’s disks and partitions. To create a new partition, right-click on the disk that you want to create the partition on and select “New Simple Volume.” This will launch a wizard that will guide you through the process of selecting the size and formatting for your new partition.

    Once you’ve completed the wizard, you’ll have a second partition on your computer’s hard drive that you can use for storing files and running programs. Just remember to be careful not to delete or modify any existing partitions, as this could cause data loss. With these simple steps, you can easily create a new partition to help keep your computer organized.

    Shrink Existing Partition

    If you need to create a second partition on your computer, you may need to shrink an existing partition first. This is a common process and can be done using the inbuilt Disk Management tool in Windows. To start, right-click on your computer icon and select “Manage.

    ” From there, select “Disk Management” and find the partition you want to shrink. Right-click on it and select “Shrink Volume.” This will bring up a window that will allow you to choose how much you want to shrink the partition by.

    Keep in mind that you will need to leave enough space for the new partition you plan to create. Once you have selected the amount, click “Shrink” and the partition will be shrunk accordingly. From there, you can create a new partition in the unallocated space using the same Disk Management tool.

    Overall, shrinking an existing partition is a simple process and can help you make the most of your computer’s storage space.

    Create New Partition

    Creating a second partition on your computer’s hard drive can be a great way to organize your files and improve system performance. To create a new partition in Windows, first, open the Disk Management tool by right-clicking on the Start menu and selecting “Disk Management” from the menu. From there, locate the drive you want to partition, then right-click on the unallocated space next to it and select “New Simple Volume.

    ” Follow the prompts in the wizard to set the size of the partition and assign a drive letter, then format the partition with the desired file system. It’s important to note that creating a new partition will erase any data on the drive, so it’s essential to back up any important files before proceeding. So, if you’re looking to optimize your computer’s storage and performance, creating a second partition can be a relatively easy and effective solution.

    Installing Easy to Boot

    If you’re struggling with installing Easy to Boot in the second partition of your SSD, don’t worry – the process is actually quite simple. The first thing you’ll need to do is download the Easy to Boot software and save it to your computer. From there, you should create your second partition on your SSD using a partition manager program.

    Once that’s done, you can copy the Easy to Boot files from your computer to the second partition. You’ll then need to configure your computer’s BIOS settings to allow for booting from the second partition. This should be relatively easy to do, and you can find step-by-step instructions online or in the Easy to Boot documentation.

    Once your BIOS is configured correctly, you should be able to boot your computer into Easy to Boot from the second partition on your SSD. With a little bit of patience and some careful configuration, you’ll be up and running with Easy to Boot in no time!

    Download Easy to Boot

    If you’re looking to install Easy to Boot on your computer, then you’re in luck! This software allows you to create a multi-boot USB drive, which means you can boot different operating systems or tools from a single USB drive. The first step is to download the Easy to Boot software from the official website. Once downloaded, extract the files and open the Easy2Boot USB drive.

    From there, you can start to add ISO files for the operating systems you want to run. You can also customize the boot menu and add additional tools or software to your USB drive. Creating a multi-boot USB drive has never been easier thanks to Easy to Boot.

    With this software, you can easily switch between different operating systems or boot tools with just a few clicks. So what are you waiting for? Start your Easy to Boot installation today and experience the convenience of a multi-boot USB drive!

    Create Bootable USB

    If you are looking for an easy way to create a bootable USB drive, then installing Easy to Boot is a great solution. Easy to Boot is a free tool that can help you create a bootable USB drive for Windows, Ubuntu, Linux Mint, and other operating systems. It’s a user-friendly tool that doesn’t require any technical knowledge.

    All you have to do is download the tool from the official website, and install it on your computer. From there, you can easily create a bootable USB drive by following the step-by-step instructions. Whether you want to upgrade your operating system, or you need to troubleshoot a computer that won’t start, creating a bootable USB drive with Easy to Boot is a convenient and reliable option.

    So don’t hesitate to download and install Easy to Boot today, and create a bootable USB drive for all your needs!

    Boot from USB

    If you’re looking to boot your computer from a USB drive, you may want to consider installing Easy to Boot. This versatile software allows you to create a bootable USB drive that can contain multiple operating systems and other tools, all in one convenient package. One of the great things about Easy to Boot is how easy it is to use.

    Once you’ve downloaded and installed the software, you simply choose the ISO files you want to include on your bootable USB drive. Easy to Boot can even automatically create menus for the various operating systems and tools, making it easy to select the one you want to use. Another benefit of Easy to Boot is its flexibility.

    You can customize your bootable USB drive as much or as little as you want, depending on your needs. This makes it a great option for IT professionals who need a variety of tools at their disposal, or for anyone who wants to experiment with different operating systems without having to install them on their computer. Overall, if you’re looking to boot from a USB drive, Easy to Boot is definitely worth considering.

    It’s easy to use, highly customizable, and can save you a lot of time and hassle in the long run. So why not give it a try and see how it can help you get the most out of your computer?

    Installing Easy to Boot in Second Partition

    If you are looking to install Easy to Boot in the second partition of your SSD, it may seem daunting at first, but it doesn’t have to be. Your first step is to create a new partition on your SSD, using your preferred partitioning tool. Make sure the partition is large enough to hold all the files you will need for Easy to Boot.

    Next, download the Easy to Boot software and save it to your new partition. From there, you can follow the installation instructions provided by the software. It’s important to note that Easy to Boot should be installed to the second partition, not the main one, to avoid conflicts with any other operating systems you may have installed.

    With a bit of patience and following the instructions carefully, you’ll have Easy to Boot up and running in no time. Happy booting!

    Select Second Partition During Installation

    When installing Easy to Boot, it’s important to consider which partition you want to install it in. Selecting the second partition is a popular choice among users. This is because the first partition is typically reserved for the operating system, so installing Easy to Boot in the second partition allows for a clean separation of the boot environments.

    By selecting the second partition, you can ensure that your primary operating system remains untouched and avoid any potential conflicts. This can also make it easier to manage and update your bootable USB drives. To select the second partition during installation, you’ll need to pay close attention to the prompts provided by the installation wizard.

    Make sure to select the correct partition and avoid accidentally overwriting your primary operating system or other important data. Overall, choosing the second partition during installation can help streamline the process and prevent any unnecessary headaches down the road. So, if you’re installing Easy to Boot, consider selecting the second partition for a smooth and hassle-free experience.

    Finish Installation and Test Booting

    Now that we have created a second partition, it’s time to install Easy to Boot on it and test booting. Installing Easy to Boot is simple, but it requires some attention to detail. First, download the latest version of Easy to Boot from the official website.

    Next, extract the files to a folder on your computer. Then, copy the contents of the ISO file to the second partition you created. Ensure that you copy the files to the root of the second partition and not into a subfolder.

    Once the files are copied, run the MAKE_E2B_USB_DRIVE.cmd file and follow the instructions. After that, your USB drive should be ready to boot using Easy to Boot in the second partition.

    To test booting, insert the USB drive into your computer and restart it. Depending on your computer’s settings, you may need to press a key to enter the boot menu. Choose the USB drive and wait for Easy to Boot to load.

    Once it has loaded, test booting several ISO files to ensure that they work correctly. Easy to Boot is a versatile tool that simplifies the process of booting ISO files from a USB drive. With this tool installed on a second partition, you can easily and quickly test new ISO files without interrupting your primary system.

    So, go ahead and install Easy to Boot, and enjoy the convenience it provides!

    Conclusion

    In conclusion, installing Easy2Boot on a second partition of your SSD is easier than a pie that’s been pre-sliced! With just a few simple steps, you’ll have a powerful and versatile tool at your fingertips that can handle just about any bootable ISO file you throw at it. So why settle for a single-boot system when you can have the flexibility and convenience of Easy2Boot? Go ahead, give it a try, and unlock a whole new level of convenience and efficiency!”

    FAQs

    What is Easy2Boot and how does it work?
    Easy2Boot is a bootable USB drive creator that allows you to boot multiple ISO images from a single USB drive. It works by creating a second partition on your drive where you can store all your ISO images, and then uses a boot loader to display a menu of choices for you to select from when you boot your computer from the USB drive.

    Can I install Easy2Boot on the second partition of my SSD?
    Yes, you can install Easy2Boot on any partition of your SSD, and it is recommended to create a second partition specifically for your ISO images. This will ensure that your bootable USB drive remains organized and easy to use.

    How do I create a bootable USB drive using Easy2Boot?
    To create a bootable USB drive using Easy2Boot, you will need to download the Easy2Boot software and run it on your computer. Then, follow the on-screen instructions to select your USB drive and the ISO images you want to include. Once the process is complete, your USB drive will be ready to use.

    How can I add or remove ISO images from my Easy2Boot USB drive?
    To add or remove ISO images from your Easy2Boot USB drive, simply copy or delete the files from the second partition on your USB drive. You can also use the Easy2Boot software to quickly add or remove ISO images from your drive. Just make sure to update the boot loader menu after making any changes.

  • Upgrade Your PC Speed: A Step-by-Step Guide on How to Install Windows 10 to SSD from HDD

    Are you looking to speed up your computer’s performance and boot time? Installing Windows 10 on a solid-state drive (SSD) from a hard disk drive (HDD) could be the solution you’ve been searching for. Upgrading to an SSD can result in much faster boot and load times for your operating system and applications. Plus, the new drive will likely be more reliable than your current one.

    However, the process of migrating Windows 10 from an HDD to an SSD can be intimidating if you’re not familiar with the steps involved. Luckily, we’ve got you covered. In this blog post, we’ll guide you through the process, step by step.

    We’ll cover the tools you’ll need, the steps involved in cloning your HDD to the SSD, and how to change your boot settings to start up from the new drive. By the end of this post, you’ll be able to enjoy the benefits of a faster and more reliable computer. So, let’s get started!

    Prepare Your SSD and HDD

    When it comes to installing Windows 10 to an SSD from an HDD, preparation is key. Before diving in, ensure that you have backed up all important data on your computer. Once you have done so, you’ll need to prepare your SSD and HDD for the installation process.

    First, plug in your SSD to your computer and format it. This will erase any data on the drive, so be sure to back up anything you want to keep beforehand. Next, unplug your HDD to avoid any confusion during the installation process.

    You can reconnect it after the installation is complete. Finally, make sure you have a Windows 10 installation disc or USB drive ready to go. With your SSD and HDD properly prepared, you’re ready to begin the installation process and take advantage of the benefits of a faster, more efficient system.

    Connect and Initialize Your SSD

    If you’re planning to upgrade your PC’s storage with a new SSD, it’s vital to prepare your hard drive and SSD first. Connecting and initializing your SSD will ensure optimal performance and allow you to transfer data smoothly. Before you start, it’s important to back up your drive to avoid losing any important files.

    Once you’ve connected your SSD to your motherboard with a SATA cable, you’ll need to initialize it in Disk Management. This will format the drive and prepare it for use. Once it’s initialized, you can start transferring data from your hard drive to your new SSD.

    With careful preparation and setup, you can enjoy the improved performance and faster boot times that an SSD can offer.

    how install windows 10 to ssd from hdd

    Encrypted HDD? Decrypt it First

    When it comes to transferring data from your old computer to a new one or simply preparing to sell your old hard drive, you need to make sure it is ready for its next owner. One crucial step is to ensure that encrypted HDD has been decrypted before the transfer or sale. This is because encrypted data is nearly impossible to access once put in place.

    You may risk losing all your valuable data should you accidentally transfer an encrypted hard drive to a new computer that doesn’t have the decryption key. With that said, before wiping or selling your hard drive, make sure to decrypt it first. Your data is valuable, and it is crucial to take precautionary measures to protect it.

    Preparing your SSD and HDD also involves the process of backing up your data so that you don’t lose anything important during the transfer or sale. Additionally, organizing your files, uninstalling any programs that you won’t be needing, and defragmenting your drives are all crucial steps in the process of preparing your hard drive for its next user. Once you’ve backed up your data and ensured that your encrypted data is decrypted, you can safely wipe your hard drive and be assured that all of your data is protected and ready for its next use.

    Remember, taking proper care of your hard drive will increase its value and also help to protect your privacy.

    Create a Windows 10 Installation Media

    If you’re looking to install Windows 10 to an SSD from an HDD, the first step is to create a Windows 10 installation media. This can be done either by using Microsoft’s Media Creation Tool or by downloading the Windows 10 ISO file and using a third-party tool like Rufus to create a bootable USB drive. Once you have the installation media ready, connect your SSD to your computer and boot from the installation media.

    Follow the prompts to set up the installation and select your SSD as the destination for the operating system. It’s important to note that you’ll need to back up all important data from your HDD before proceeding, as the installation process will wipe the drive clean. Additionally, make sure that your SSD is properly formatted to avoid any issues during the installation process.

    With some patience and preparation, you can successfully install Windows 10 to your SSD and enjoy improved performance and speed for your computer.

    Download and Create Installation Media

    Creating a Windows 10 installation media can be a lifesaver for those who need to reinstall their operating system or install it on a new device. To create an installation media, you need to have a USB flash drive with at least 8 GB capacity and a Windows 10 ISO file. First, you will need to download the Windows 10 ISO file from the Microsoft website and save it to your computer.

    Next, insert the USB flash drive into your computer and format it to make sure there are no existing files on it. Then, open the Windows USB/DVD Download Tool and follow the instructions to create the installation media. It is essential to ensure that the USB drive is selected as the destination drive before initiating the installation media creation process.

    After the process is complete, you can use the installation media to reinstall or install Windows 10 on your device. Creating a Windows 10 installation media is a simple process that can save you time and effort down the road.

    Boot Your Computer from the Installation Media

    When you need to install Windows 10, it’s important to first create an installation media. This can be done on a USB drive or DVD. A USB drive is recommended, as it’s more convenient and faster.

    To create an installation media, you will need to download the Media Creation Tool from Microsoft’s website. Once you have the tool downloaded and installed, you can run it and choose the option to create a Windows 10 installation media. The tool will then download the necessary files and create the installation media.

    After creating the installation media, you can now boot your computer from it. This is done by inserting the USB drive or DVD into the computer and restarting it. As the computer starts up, you will need to enter the BIOS setup and change the boot order so that the computer boots from the installation media first.

    Once you have done this, simply follow the prompts to install Windows 10 on your computer. It’s important to note that installing Windows 10 will erase all data on your hard drive, so it’s important to make sure you have a backup of any important files before proceeding. To sum up, creating a Windows 10 installation media is a crucial step in installing the operating system, and it’s important to follow the proper steps to ensure a successful installation.

    Configure BIOS Settings

    If you’re looking to install Windows 10 onto an SSD from an HDD, you’ll need to configure your BIOS settings first. Your BIOS is responsible for managing the hardware and software interactions between your computer’s components, so it’s essential to get the right settings in place before beginning the installation process. Start by going into your BIOS and setting the boot order so that your computer boots from your installation media, whether that be a USB drive or a CD/DVD.

    You’ll also want to make sure that your SATA controller is set to AHCI mode, which optimizes performance for SATA-connected storage devices like SSDs. Finally, make sure your SSD is detected by your BIOS by checking the SATA port to which it’s connected. Once these settings are in place, you should be able to begin the process of installing Windows 10 onto your SSD and getting your computer up and running in no time.

    Change Boot Order in BIOS Settings

    Configuring the BIOS settings on your computer can be a daunting task, but it is necessary to ensure optimal performance and proper functioning of your system. One of the crucial settings that you may need to adjust is the boot order. By default, the BIOS is programmed to boot from your computer’s hard drive.

    However, if you want to boot from another device such as a USB drive or CD, you need to change the boot order. To do this, you need to enter the BIOS setup by pressing a specific key when your computer boots up. Once in the BIOS, navigate to the boot option menu and rearrange the boot order.

    Make sure to save your changes before exiting the BIOS setup. Remember that changing the boot order incorrectly may cause your computer to malfunction, so be cautious and double-check before making any changes. With these simple steps, you can configure your BIOS settings to meet your needs and ensure smooth operation of your system.

    Enable AHCI Mode in BIOS Settings

    If you want to speed up your computer’s performance, one way to accomplish this is to enable AHCI mode in your BIOS settings. AHCI (Advanced Host Controller Interface) is a newer technology that allows your hard drive to communicate with your computer’s CPU more quickly and efficiently than older IDE (Integrated Drive Electronics) technology. By enabling AHCI mode in your BIOS settings, you can take advantage of faster data transfer rates and smoother performance.

    The process of enabling AHCI mode will vary depending on your computer’s motherboard, but in general, you will need to access your BIOS settings during startup and navigate to the appropriate menu to select the AHCI option. Once you’ve made the change, save your settings and reboot your computer. With AHCI mode enabled, you should notice a difference in your computer’s performance and responsiveness.

    Install Windows 10 on Your SSD

    If you’re looking to upgrade your computer’s performance, consider installing Windows 10 on your SSD. Here’s how to do it. First, you’ll need to make sure your SSD is properly connected to your computer and recognized by the BIOS.

    Then, insert your Windows 10 installation media (either a USB or DVD) and restart your computer. During the boot process, press a key (usually F12 or Delete) to enter the boot menu and select your installation media. Follow the prompts to begin the installation and select your SSD as the installation destination.

    Once the installation is complete, make sure to update your drivers and settings for optimal performance. By transferring Windows 10 to your SSD from your HDD, you’ll see a significant improvement in boot time and overall system speed.

    Select Your Destination Drive

    When installing Windows 10 on your SSD, the first step is selecting your destination drive. This may seem like a simple task, but it’s important to choose the correct drive to ensure your computer runs smoothly. The destination drive is where the operating system will be installed, and ideally, it should be the SSD as it will provide faster boot-up times and faster overall performance.

    One analogy to consider is that choosing the wrong drive can be compared to trying to fit a square peg in a round hole – it just won’t work. As you go through the installation process, be sure to pay careful attention to which drive you are selecting as your destination drive. Once you’ve selected the SSD as your destination, you can move forward with the installation process knowing that you’ve made the right choice for optimal performance.

    Complete the Installation Process

    Now that your SSD is physically installed, it’s time to install the operating system (OS). As we’re focusing on Windows 10, you’ll need to have a Windows 10 installation disk or USB drive to complete the installation process. Insert the disk or drive into your computer and restart it.

    You’ll be prompted to press a key to boot from the installation media. Choose the language and keyboard layout you prefer, then click on the “Install now” button. Accept the license terms and select the “Custom: Install Windows only (advanced)” option.

    Next, select your SSD drive where you want to install Windows and click “Next”. Windows will begin to install on your SSD. The installation process may take some time, so be patient and don’t interrupt the installation process.

    After the installation is complete, your computer will restart, and you’ll be prompted to set up your user account and preferences. From here on out, your computer will boot from your SSD and you can start enjoying faster load times and computing speeds!

    Transfer Your Files from HDD to SSD

    If you’re looking to upgrade your computer’s performance, switching from an HDD to an SSD is a great way to start. Installing Windows 10 on your new SSD can be intimidating, but it’s fairly straightforward. Before you begin, make sure you have a backup of your important files in case anything goes wrong.

    You’ll need to create a bootable USB drive with the Windows 10 installation media, then insert it into your computer and boot from it. Select the language, time and keyboard, and then select “Install now.” Next, choose the version of Windows 10 you want to install and accept the license terms.

    On the next screen, select “Custom: Install Windows only (advanced).” From there, select your SSD as the destination for the installation, and the setup will begin. Once the installation is complete, your computer will boot up from the SSD, and you can transfer your files from the HDD to the new SSD.

    With your new SSD, you should see significant improvements in performance and speed.

    Copy and Paste Files from HDD to SSD

    If you recently upgraded your computer with an SSD and want to transfer your files from the HDD to the new drive, you can simply copy and paste them. It’s a straightforward process that doesn’t require any special tools or software. All you need is a file explorer, which you can access by clicking on the Windows Start menu and selecting File Explorer.

    Once you’re in File Explorer, locate the files or folders you want to transfer, right-click on them, and select Copy. Then, navigate to the SSD drive in File Explorer and right-click on an empty area. Select Paste, and the files will start transferring to your SSD.

    However, keep in mind that if you’re transferring a large number of files, it may take some time, so be patient and let the process complete. By transferring your files to an SSD, you can enjoy faster boot times and quicker access to your files, which can improve your overall computer experience.

    Update Your Applications and Drivers

    When upgrading to an SSD, it’s important to transfer all your important files from your HDD to your new solid-state drive. This will ensure that you have all your data, documents, programs, and media readily available on your faster and more reliable storage device. One way to do this is to use a cloning software to create a mirror image of your HDD onto your new SSD, making the transition quick and seamless.

    Another method is to manually copy and paste specific files and folders onto your SSD, but this can be time-consuming and may require some technical knowledge. Whichever method you choose, be sure to back up all your important data before transferring it to your new SSD. This will protect you against any potential data loss during the migration process.

    Conclusion

    In summary, installing Windows 10 to an SSD from an HDD is like giving your computer a brand new pair of running shoes. The SSD provides lightning fast boot times and overall improved performance, while the HDD can still be used for additional storage. So don’t let your computer drag its feet anymore, upgrade to an SSD and let it sprint to the finish line!”

    FAQs

    What is the benefit of installing Windows 10 on an SSD instead of an HDD?
    Installing Windows 10 on an SSD can significantly improve the boot time and overall performance of the system due to the faster read and write speeds of the SSD.

    Can I install Windows 10 on my SSD and keep my files on my HDD?
    Yes, you can install Windows 10 on your SSD and keep your files on your HDD. During the installation process, you can choose to install Windows 10 on the SSD and keep your files on the HDD.

    How do I transfer my files from my HDD to my SSD after installing Windows 10?
    You can transfer your files from your HDD to your SSD after installing Windows 10 by using a file transfer tool such as Windows Easy Transfer, manually copying and pasting the files, or using a backup and restore software.

    Is it necessary to format my HDD after installing Windows 10 on my SSD?
    It is not necessary to format your HDD after installing Windows 10 on your SSD. However, it is recommended to format your HDD if you want to use it as a secondary storage device to ensure that it is free of any previous system files and errors.

  • Unlocking the Secrets of SSD Technology: How Data is Written to Solid State Drives

    Have you ever wondered how data is stored in a solid-state drive (SSD)? Unlike its mechanical counterpart, the hard disk drive (HDD), the SSD uses flash memory chips to store data. But how exactly does it work? In this blog post, we’ll explore the inner workings of an SSD and how data is written to it. Think of an SSD like a library, with each file serving as a book.

    But instead of storing these books on shelves, an SSD stores them in individual rooms within a building. How does it do this? Let’s find out.

    SSD Basics

    “How Is Data Written to an SSD?” SSDs use a different mechanism to store data than traditional hard drives. They use a series of interconnected flash memory cells to store data, which are organized into pages and blocks. When new data needs to be written to these cells, the SSD will clear a block of previously stored data and then write the new data to an empty page in that block.

    This process is known as wear leveling, and it ensures that the data is spread evenly across the SSD to reduce the risk of wearing out any particular cells. The data is then written in binary code as a series of ones and zeros, which can be translated back into the original data when it is retrieved from the SSD. Overall, SSDs offer faster read and write speeds than traditional hard drives, making them ideal for use in modern, high-performance computers and devices.

    Understanding NAND Flash Technology

    NAND flash technology is the corner stone of the modern solid state drive (SSD). It enables the storage of data in a way that is reliable, fast and efficient. SSDs are replacing traditional HDDs and are becoming increasingly popular in laptops and desktop computers.

    They provide a much faster boot up time, faster data transfer, and are more durable than HDDs. Understanding NAND flash technology is important for anyone who wants to get the best out of their SSD. NAND flash uses a non-volatile memory that is based on the NAND logic gates.

    This technology enables SSDs to store data even when they are turned off. In addition, NAND flash is able to store multiple bits of data in a single cell, which means that SSDs can provide more storage capacity than traditional HDDs. Furthermore, SSDs are more resistant to damage from vibration or shock than HDDs, which is important if you are looking for a reliable storage solution.

    In conclusion, by understanding NAND flash technology, you can appreciate the benefits SSDs bring to your computing experience.

    how is data written to an ssd

    The Role of the SSD Controller

    The SSD controller plays a crucial role in determining the speed and overall performance of a solid-state drive. It acts as the “brain” of the SSD, managing data flow between the flash memory chips and the host device. The controller determines how data is read from and written to the SSD, as well as how the drive handles wear and tear from frequent use.

    It also manages functions such as error correction, garbage collection, and wear leveling, which are essential for maintaining the longevity and reliability of the drive. In short, without a high-quality controller, an SSD’s performance can suffer, leading to slower read/write speeds and shortened lifespan. It’s important to choose an SSD with a capable controller to ensure maximum speed and longevity.

    Writing Data to an SSD

    When data is written to an SSD, it goes through a multi-step process that eventually stores the information in memory cells. First, the operating system communicates with the SSD controller to determine where the data should go. The controller then performs a process called wear leveling, where it distributes the data evenly across different memory cells to prevent any one area from becoming overused.

    Next, the controller sends the data to be stored in the selected memory cells. Instead of recording the information magnetically like traditional hard drives, SSDs use NAND flash memory to store the data. This means that each memory cell can hold multiple bits of data, and the cells are organized together in a grid-like structure to maximize storage capacity.

    Overall, this process allows for fast and efficient storage of data on an SSD, leading to improved performance and increased longevity.

    The Role of the File System

    When it comes to writing data to an SSD, the file system plays a critical role in ensuring efficient and effective performance. A file system is responsible for organizing data on storage devices, and it does so by dividing the storage into smaller units called clusters or blocks. These clusters manage data written to the SSD, and the file system is responsible for determining where to store each file’s data.

    It also organizes the clusters to minimize fragmentation, helping improve read and write speeds. This is especially important for SSDs, where data is stored on flash memory cells that have limited write-erase cycles. Without proper file system management, an SSD’s performance can degrade quickly.

    Therefore, choosing the right file system, such as NTFS, exFAT, or FAT32, can significantly impact the SSD’s lifespan and performance.

    The Process of Writing Data

    Writing data to an SSD is a crucial part of the process of storing and retrieving information on a computer system. An SSD or Solid State Drive is a type of storage device that is increasingly popular due to its superior speed and durability compared to traditional hard disk drives (HDDs). When writing data to an SSD, the data is first broken into small blocks and then written onto the drive using a process called “wear leveling.

    ” This process ensures that each block is used equally, prolonging the lifespan of the drive. One advantage of SSDs over HDDs is their lack of moving parts, making them resistant to physical shocks and drops. Additionally, SSDs use less power, can transfer data more quickly, and are generally more reliable.

    With the increasing need for speed and efficiency in today’s digital world, the advantages of SSDs make them the ideal storage solution for most computer systems.

    Wear Leveling and Garbage Collection

    When it comes to writing data to an SSD, wear leveling and garbage collection are important concepts to understand. Wear leveling is the process of distributing data evenly across different portions of the SSD. Without wear leveling, certain areas of the SSD may get used more frequently, leading to quicker wear and tear and potentially shortening the lifespan of the drive.

    Garbage collection is the process of consolidating data that is no longer needed and freeing up space for new data to be written. This helps to prevent performance degradation over time and ensures the SSD operates at its optimal level. By understanding these processes and how they work together, you can ensure that your SSD performs at its best and has a long lifespan.

    So, when selecting an SSD, be sure to choose one that has good wear leveling and garbage collection capabilities to get the most out of your investment.

    SSD Performance

    When writing data to an SSD, the process is called NAND Flash programming. It’s important to note that SSDs have no moving parts, unlike traditional hard drives. Instead, they rely on NAND memory chips to store data.

    Each chip contains a grid of transistors that are organized into pages, and each page is composed of sectors. When data is written to an SSD, it begins by erasing any sectors that contain old data, which is called a block erase operation. It’s worth noting that SSDs need to erase and rewrite entire blocks of data at once, which can lead to performance slowdowns if the drive becomes too full.

    Once the block is cleared, the SSD can write the new data to the pages, and the process repeats itself until all the data is written. Overall, understanding how data is written to an SSD is crucial if you want to make the most of your drive’s capabilities.

    Factors Affecting SSD Performance

    SSD performance can vary greatly depending on several factors. One major factor is the type of flash memory used. Single-level cell (SLC) memory is faster than multi-level cell (MLC) memory, but it’s also more expensive.

    Additionally, the interface that connects the SSD to the computer can affect performance. The SATA 3 interface can deliver faster data transfer rates than the older SATA 2 interface. Finally, the controller chip on the SSD is responsible for managing the data flow and can greatly impact performance.

    A high-quality controller chip can optimize write speeds and reduce latency. Overall, investing in a high-quality SSD with SLC memory, a modern interface, and a reputable controller chip can greatly improve performance and enhance the user experience.

    Best Practices for Maintaining SSD Performance

    Keeping your SSD performing at its best is crucial for ensuring fast operating speeds. One of the best practices to maintain SSD performance is to minimize unnecessary writes, which can cause wear and tear on the drive over time. This means regularly cleaning up your drive by uninstalling unused programs, deleting unnecessary files, and regularly emptying the recycle bin.

    Another tip is to avoid filling the drive to capacity, as running low on space can slow down performance. Additionally, keeping the SSD’s firmware and drivers up to date can improve overall performance. Lastly, enabling TRIM support and regular defragmentation can help maintain SSD performance.

    By incorporating these best practices, you can ensure that your SSD will continue to operate at its best for years to come.

    Conclusion

    In conclusion, writing data to an SSD is like playing a game of Tetris. The files are broken down into smaller pieces, or blocks, and are strategically placed in available spaces on the memory cells. This process is repeated until all the blocks are neatly organized, without any gaps or wasted space.

    The result is a lightning-fast storage device that can retrieve data with lightning speed. It’s like having a perfectly organized closet, where everything is easy to find and accessible. So, when it comes to SSDs, the key is not just about having more space, but also about having a smarter and more efficient way of organizing it.

    FAQs

    What is an SSD?
    An SSD (solid-state drive) is a type of storage device that uses flash memory to store data.

    How is data written to an SSD?
    Data is written to an SSD using a process called flash programming, where electrical charges are used to store and retrieve data.

    What are the advantages of using an SSD over a traditional hard drive?
    Some advantages of SSDs include faster read/write speeds, lower power consumption, and greater reliability due to no moving parts.

    Can SSDs be used in older computers or laptops?
    Yes, SSDs can be used in older computers or laptops as long as they have the necessary connection ports (such as SATA or PCIe). However, it’s important to ensure compatibility with the device before purchasing an SSD.

    Is it necessary to defragment an SSD?
    No, defragmenting an SSD is not necessary and can potentially harm the drive. SSDs use a different method of accessing data than traditional hard drives, so defragmentation is not needed.

  • Unlocking the Secrets: Exploring How Data is Written and Read to an SSD

    Have you ever wondered how your computer is able to quickly save and retrieve data? This is where SSDs, or Solid-State Drives, come into play. Unlike traditional hard disk drives (HDDs), SSDs use flash memory to store data. But how does SSD technology work, specifically when it comes to writing and reading data? In this blog, we’ll dive into the inner workings of SSDs and explain the process of data transfer from the computer’s perspective.

    By the end, you’ll have a better understanding of just how crucial SSDs are to your computer’s performance.

    What is an SSD and how it differs from HDDs?

    An SSD, or solid-state drive, is a storage device that uses NAND-based flash memory to store and retrieve data. Unlike HDDs, which use spinning disks to read and write data, SSDs have no moving parts, making them more durable and resistant to physical damage. To write data to an SSD, an electrical charge is applied to the NAND cells, which stores the data in a way that can be retrieved later.

    When reading data, the SSD retrieves this stored data by measuring the level of charge in the NAND cells. This allows for faster read and write speeds, as well as improved overall performance compared to traditional HDDs. So, how is data written and read to an SSD? It’s all about manipulating the electrical charge at the NAND cell level.

    By doing so, SSDs offer faster and more efficient storage options for all kinds of devices, from laptops and desktops to smartphones and game consoles.

    SSD Components and Architecture

    An SSD, or solid-state drive, is a data storage device that uses NAND-based flash memory to store data. SSDs differ from traditional HDDs, or hard disk drives, in several ways. First, an SSD has no moving parts, which makes it more durable and less prone to mechanical failure.

    This also means that SSDs are often faster than HDDs, as they can access data more quickly. Additionally, SSDs are often smaller and lighter than HDDs, making them a popular choice for laptops and other portable devices. However, SSDs are typically more expensive than HDDs and have a shorter lifespan, as the flash memory can only be written to a certain number of times before it wears out.

    Despite these differences, SSDs are becoming increasingly popular due to their speed, reliability, and portability.

    how is data written and read to an ssd

    How SSDs Stores and Accesses Data

    An SSD or Solid State Drive is a storage device that uses flash-based memory to store data, unlike traditional HDDs or Hard Disk Drives that use spinning platters and read/write heads. SSDs store data electronically in blocks and pages, while HDDs store data magnetically in sectors and tracks. The main difference between SSDs and HDDs is the speed – SSDs are much faster than HDDs.

    They can access data at lightning speeds because there is no need for any moving parts to locate data on the drive. An SSD can store and access data simultaneously without any bottleneck, making them ideal for use in laptops, desktops, and servers. They also use less power than HDDs, which means better battery life on laptops and power-saving on servers.

    Therefore, SSDs are becoming more popular, and many people are upgrading their old machines with new SSDs to enhance the performance and speed of their systems.

    Writing Data to an SSD

    Have you ever wondered how data is written and read to an SSD? When you save a file, the data is first stored in the DRAM cache of the SSD controller. The controller then writes the data to the flash memory chips using a technique called page-level programming. Essentially, the controller divides the flash memory into pages, which are groups of memory cells that can be programmed or erased independently.

    When data is written, the controller finds an empty page, erases it, and then stores the data on the page. If a page is already partially filled, the controller must first erase it before writing new data. This process of erasing and programming pages can slow down write speeds and increase wear on the flash memory.

    To mitigate this problem, SSDs use a technique called wear leveling, which evenly distributes write operations across the flash memory chips. When data is read, the controller retrieves it from the flash memory chips and stores it in the DRAM cache for fast access. Overall, SSDs offer faster read and write access than traditional hard drives, due to their use of flash memory and advanced controller technologies.

    Understanding NAND Flash Memory

    When it comes to writing data to an SSD, it’s important to understand the technology behind NAND flash memory. Unlike mechanical hard drives, an SSD doesn’t store data on spinning disks. Instead, it uses a series of interconnected flash memory chips that can be written to and read from at incredibly fast speeds.

    But how does the writing process work exactly? Well, data is written to an SSD by applying a voltage to each of the NAND cells, which can either be charged or discharged depending on the data being stored. This creates a binary code that can be translated by the SSD’s controller to retrieve the stored information. In essence, it’s like flipping a switch on or off to represent a 0 or 1 in a digital environment.

    Because of the way the data is stored and retrieved, SSDs offer lightning-fast speeds and improved performance over traditional hard drives. So if you’re looking for a storage solution that can keep up with your demanding workload, an SSD with NAND flash memory technology might just be the perfect fit.

    The Write Amplification Effect

    When it comes to writing data to an SSD, it is important to understand something known as the write amplification effect. This is a phenomenon that occurs in SSDs that can impact their performance and lifespan. Essentially, when data is written to an SSD, it can sometimes result in additional writes being performed behind the scenes.

    This is because of the way that SSDs manage data, using something called wear leveling to distribute it evenly across the drive. The more data that is written, the greater the amplification effect can become. This can lead to slower write speeds and a shorter lifespan for the drive.

    To combat this, manufacturers have developed various techniques, such as TRIM and garbage collection, that can help to reduce the impact of write amplification. By understanding this effect and how it can impact SSD performance, users can take steps to optimize their drive’s lifespan and ensure that it performs at its best.

    Over-Provisioning and Garbage Collection

    When it comes to writing data to an SSD, over-provisioning and garbage collection play crucial roles in ensuring optimal performance and longevity of the drive. Over-provisioning refers to the percentage of storage space that is reserved for the SSD’s internal use, such as wear leveling and garbage collection. This means that if your SSD has a capacity of 1TB, it may actually have 10-20% more space that is not visible to the user.

    This extra space helps prevent the drive from becoming too full and slowing down as well as reducing the strain on individual memory cells and preventing premature wear. Garbage collection, on the other hand, involves the drive’s ability to identify and remove data that is no longer needed or has been marked for deletion. When data is deleted, it may not be physically erased from the memory cells but instead left in place until it is overwritten with new data.

    Therefore, garbage collection helps prevent these “ghost files” from taking up valuable space and impacting the drive’s performance. Overall, keeping these factors in mind when writing data to your SSD can help improve performance and extend the life of your drive.

    Reading Data from an SSD

    When it comes to reading data from an SSD, the process is different compared to reading from a traditional hard drive. In an SSD, data is stored on NAND flash memory chips. This means that instead of using a spinning disk and read/write head, the SSD uses a controller chip to access the memory cells where the data is stored.

    The controller chip retrieves the data by sending electrical pulses to the appropriate cells in order to activate them. The cells then release the stored electrons which are detected by the controller chip and translated back into data. The entire process is much faster than a traditional hard drive, as there are no moving parts involved and the data can be accessed in a matter of nanoseconds.

    Overall, this technology makes SSDs ideal for tasks that require fast data access such as gaming and media production, making it a popular choice for professional users and enthusiasts alike.

    How Controllers Retrieve Data from NAND Memory

    When it comes to retrieving data from an SSD, controllers play a crucial role. These controllers work by communicating with NAND memory, the technology used to store data in SSDs. Retrieving data from an SSD involves extensive communication between the controller and NAND memory, and this process is quite different from traditional hard drives.

    Rather than spinning disks, SSDs use NAND memory to store data. The controllers work by sending electrical signals to specific blocks of NAND memory, which then release the stored data. The process of retrieving data from an SSD is lightning-fast, thanks to the nearly instantaneous nature of electrical impulses.

    While the process may appear complicated at first glance, it’s fascinating to learn just how much goes into reading data from an SSD, all within a fraction of a second.

    Retrieving Data through TRIM Command

    When an SSD becomes fragmented and disorganized, retrieving data can become difficult and inefficient. Fortunately, the TRIM command can help alleviate these issues. When an SSD receives a TRIM command, it informs the drive which blocks of data are no longer in use.

    This allows the SSD to free up space and be more efficient when writing new data. However, TRIM does not actually read or retrieve data from the drive. To read data, the controller sends a read command to specific blocks on the NAND flash memory.

    The memory cells are then activated and release their stored electrons, which are read by the controller as either a 1 or a 0. This process is similar to how a book is read, with the controller acting as the reader and the NAND flash memory as the pages. By using the TRIM command and understanding how data is read from an SSD, you can improve the performance and longevity of your drive.

    Final Thoughts: The Advantages of SSDs Over HDDs

    When it comes to data storage, SSDs (Solid State Drives) are becoming increasingly popular over traditional HDDs (Hard Disk Drives). One of the main advantages is how data is written and read to an SSD. Rather than using spinning disks and magnetic platters like an HDD, an SSD relies on a series of interconnected flash memory chips.

    This means that data can be accessed instantly, without the need for any moving parts. Additionally, SSDs have much faster transfer speeds, making them ideal for tasks that require large amounts of data to be moved quickly, like video editing or gaming. Overall, the way data is stored and accessed on an SSD provides numerous benefits over HDDs, making them a worthwhile investment for anyone looking to improve their computer’s performance.

    Conclusion

    In conclusion, writing and reading data to an SSD is like a game of hide and seek on steroids. The controller has to locate each byte of data in a maze of memory cells and retrieve it at lightning speed. And just like the best hide and seek players have to be quick and nimble, SSDs rely on advanced algorithms and technology to minimize latency and maximize performance.

    So the next time you store data on your SSD, remember that it’s no child’s play – it’s a high-tech pursuit of data storage excellence!”

    FAQs

    What is an SSD and how does it differ from a traditional hard drive?
    An SSD, or solid-state drive, is a type of storage device that uses flash memory to store data. Unlike traditional hard drives, which use spinning disks to read and write data, an SSD has no moving parts. This makes it faster, more reliable, and less prone to mechanical failure.

    How is data written to an SSD?
    When you save a file to an SSD, the data is split into small blocks and stored in different locations across the drive. This helps to spread out the wear and tear on the drive and prevent any one area from being overused. The SSD uses a controller to manage the data and ensure that it is stored in the most efficient way possible.

    How is data read from an SSD?
    When you access a file on an SSD, the controller retrieves the data from the various blocks where it is stored and combines it into a single file. Because there are no moving parts involved, the data can be accessed almost instantly. This makes SSDs much faster than traditional hard drives, which have to wait for the spinning disks to access the data.

    Can an SSD be used as a boot drive?
    Yes, an SSD can be used as a boot drive to store the operating system and boot files. This can significantly reduce boot times and make your computer feel much faster. However, it’s important to make sure that your SSD has enough storage space to accommodate the operating system and any other software you want to install.

  • Exploring the Best SSDs: Where Does Biwin Stand Against the Competition?

    Have you ever wondered how Biwin SSD compares to other SSDs in the market? With so many SSD options available, it can be overwhelming to choose the right one for your needs. But fear not, as we’ve got you covered! In this blog post, we’ll be exploring the differences between Biwin SSD and other popular brands, and why Biwin SSD might just be the perfect choice for you. Picture this: You’re a gamer who needs lightning-fast speeds for your games to load seamlessly, without any lags.

    Or perhaps you’re an entrepreneur who needs reliable storage for your business files and data. Or maybe you’re just someone who wants to upgrade their computer or laptop to perform better than it currently does. Whatever your needs, an SSD can make a world of difference! But with so many options available, it can be tough to choose.

    Some popular SSD brands in the market include Samsung, Kingston, and Crucial. But how does Biwin SSD hold up against these heavyweights? What sets it apart from the rest? And most importantly, is it the SSD for you? In this blog post, we’ll be diving deep into the features and benefits of Biwin SSD, and comparing it to other popular brands. We’ll cover everything from speed, reliability, durability, and cost-effectiveness.

    So grab a cup of coffee and get ready to learn everything you need to know about Biwin SSD and why it might just be the SSD for you!

    Performance

    When it comes to SSD performance, Biwin is definitely a strong contender in the market. Compared to other SSDs, Biwin has shown impressive read and write speeds, especially in its higher-end models. One of the reasons for its success is its use of cutting-edge technology, such as 3D NAND flash memory and NVMe interfaces.

    This has allowed Biwin to achieve faster data transfer rates and reduced latency, resulting in a more responsive and reliable system. Additionally, Biwin SSDs are rigorously tested for their durability and endurance, making them a popular choice for gamers, content creators, and other high-performance users. Overall, if you’re looking for a high-performance SSD that offers fast speeds and reliable performance, you won’t go wrong with Biwin.

    Read & Write Speeds

    Performance When it comes to purchasing a new storage device, it’s crucial to consider the read and write speeds of the potential device. The read and write speeds determine how quickly the device can retrieve or store data, and faster speeds can greatly enhance the performance of applications and programs. For instance, a computer or gaming system with a high-performance storage device can reduce load times and increase overall responsiveness.

    It’s also important to note that read and write speeds can vary depending on the type of storage, such as solid-state drives (SSDs) or hard disk drives (HDDs). SSDs typically offer faster read and write speeds than HDDs, but they may come at a higher cost. Overall, choosing a storage device with fast read and write speeds can result in a greatly improved overall computing experience.

    how is biwin comparing to other ssd

    Random Access Time

    Random access time is a critical factor in determining the performance of any storage device, be it a hard disk drive or a solid-state drive. It refers to the amount of time it takes for the device to locate and retrieve a specific piece of data from any point on the storage medium. A lower random access time is always better as it ensures faster response times and snappier performance of the overall system.

    The random access time depends on the physical characteristics of the storage medium, such as the rotational speed of a hard drive platter or the read/write speed of the flash memory cells in an SSD. Therefore, it is essential to consider the random access time when choosing the right storage device for a specific use case. For instance, gaming and video editing require faster random access times, while storage for archival purposes doesn’t necessarily need high-performance drives.

    Sequential Access Speeds

    When it comes to accessing large amounts of data, sequential access speeds play a crucial role in determining how quickly we can retrieve information. Sequential access refers to the process of reading data in a linear, sequential manner. This is commonly used in tape drives, where the read/write head needs to physically move along the tape to access data.

    While sequential access can be slower than other methods, like random access, it can be quite effective for large, organized data sets. When dealing with sequential access, it’s important to consider factors like block size and buffer management, as these can greatly impact performance. By optimizing these elements, we can improve sequential access speeds and create a more efficient data retrieval process.

    Reliability

    When it comes to reliability, Biwin SSDs are a top contender compared to other SSDs on the market. One of the major factors contributing to Biwin’s reliability is the use of high quality components during manufacturing. Biwin uses memory chips from trusted brands such as Toshiba, SanDisk, and Micron, which are known for their durability and performance.

    Additionally, Biwin’s SSDs undergo rigorous testing before being sold to ensure that they meet strict performance and quality standards. This level of testing includes temperature and humidity stress tests, as well as performance tests under heavy workloads. In terms of reliability, Biwin SSDs are definitely a good choice for those who are looking for a quality, reliable SSD option.

    MTBF and TBW Ratings

    When it comes to choosing computer components, reliability is key. Two important factors to consider are the MTBF and TBW ratings. MTBF stands for mean time between failures, which measures the reliability of a component by estimating the average time it will function before experiencing a failure.

    A higher MTBF rating indicates a more reliable component. TBW, on the other hand, stands for terabytes written and measures the endurance of solid-state drives (SSDs). This is important because SSDs have a limited lifespan determined by the amount of data that can be written to them before they begin to wear out.

    A higher TBW rating means the SSD can endure more read and write operations. When shopping for computer components, be sure to take these ratings into consideration to ensure the reliability and longevity of your system.

    Warranty Terms & Conditions

    Reliability When purchasing a product, it’s important to know the warranty terms and conditions to ensure that the item is reliable and will last for an appropriate amount of time. Reliability is essential, especially for products that are integral to daily life or work. Companies often offer different levels of coverage for their products, ranging from 90-day warranties to lifetime guarantees.

    It’s important to read the fine print to fully understand what the warranty entails and what actions may void it. Additionally, it’s wise to research the company’s reputation for standing behind their products and resolving any issues that arise. A reliable product is not only functional but also provides peace of mind.

    So, next time you purchase an item, take a few moments to read through the warranty terms and conditions to ensure that it meets your expectations for reliability.

    Price

    When it comes to comparing BiWin SSDs to other SSD brands, one of the major factors to consider is the price. BiWin SSDs are priced very competitively within the market and often come in at a lower cost when compared to other comparable brands. However, just because they have a lower price point, it doesn’t mean they compromise on quality.

    In fact, BiWin SSDs are known for their reliability, durability, and excellent performance. The company prides itself on using high-quality components in their products while also ensuring affordability for their customers. In summary, BiWin SSDs offer fantastic value for money when compared to other SSD brands, especially when looking for a product that performs well without breaking the bank.

    Cost Comparison to Other Brands

    When it comes to comparing the cost of our brand to others, we believe that our prices are competitive and fair. In fact, we take great pride in offering high-quality products at a reasonable cost. While some other brands may offer cheaper alternatives, we believe that our dedication to using only the best materials and manufacturing processes makes our products a better value in the long run.

    When you buy our products, you can feel confident that you’re getting a great deal without sacrificing quality. Ultimately, we believe that the best way to compare the cost of different brands is to consider not just the initial price, but also the overall value and longevity of the product. We believe that our products will always come out ahead in this comparison, and we’re proud to offer them at such an affordable price.

    Value for Money

    When it comes to evaluating the value for money of a product or service, the price is always a crucial factor. Customers want to feel that they are getting a fair deal and not overpaying for something that is easily and readily available at a lower price elsewhere. However, price alone cannot determine the value for money of a product or service.

    What is crucial is the overall quality of the product or service, including its features, performance, durability, and reliability. In other words, a cheaper product may not always be the better value for money, especially if it lacks in quality, reliability, or durability. Ultimately, the true value for money comes from the overall balance between the price and the quality of the product or service, and customers should consider all factors when evaluating a purchase.

    Conclusion

    In the world of SSDs, Biwin stands out as a shining star. With its high-performance drives, innovative manufacturing process, and commitment to quality, Biwin truly sets itself apart from its competitors. So why settle for second-best? Choose Biwin for a drive that truly delivers in every way possible.

    FAQs

    What is Biwin SSD?
    Biwin SSD is a solid-state drive that utilizes Flash memory technology to store and retrieve data.

    How does Biwin SSD compare to other SSDs in terms of performance?
    Biwin SSDs have high speed read and write transfer rates that are competitive with other popular SSD brands on the market.

    What advantages does Biwin SSD offer over traditional hard drives?
    Biwin SSDs use less power, provide faster boot and application load times, make less noise, and are more resistant to physical damage than traditional hard drives.

    What is the warranty offered by Biwin for their SSDs?
    Biwin provides a limited warranty of up to 5 years for their SSD products, giving users peace of mind when it comes to the reliability and longevity of their storage solution.

    How does Biwin ensure the quality of their SSD products?
    Biwin utilizes a rigorous quality control process that includes thorough testing and screening of their SSD products before they are shipped out, helping to ensure their SSDs meet their high standards for performance and reliability.

    Can Biwin SSDs be used as an upgrade for older computers?
    Yes, Biwin SSDs are compatible with most computer systems and can be used as an upgrade for older machines to improve overall performance.

  • Maximizing Your Benefits: Understanding the Calculation of Backpay for SSD to LRD Policy

    If you’re a Social Security Disability (SSD) recipient, you may be wondering how the recent change from the “Last Relevant Date” (LRD) policy to the “Calculating Backpay for SSD to LRD Policy” will affect you. This change has caused quite a stir, with many SSD recipients unsure of how to proceed. But don’t worry, we’ve got you covered.

    In this blog post, we’ll explain everything you need to know about the new policy and how it affects backpay. Whether you’re a seasoned SSD recipient or brand new to the program, this post will provide valuable insights into navigating the new policy and getting the backpay you’re entitled to. So, let’s dive in!

    Understanding Backpay

    Backpay is an important element in Social Security Disability (SSD) to Long-Term Disability (LTD) policy. It refers to the retroactive benefit payment that covers the period from the date of disability to the date of benefits approval. Backpay is typically calculated based on the SSD benefit amount and the length of the waiting period.

    The waiting period is the number of months from the date of the disability onset to the date of the first benefit payment. The duration of the waiting period depends on the specific SSD policy and can be as long as five months. Once the waiting period is over, the backpay is calculated as a lump sum payment and is issued to the beneficiary.

    It is important to note that backpay may also be subject to certain taxes and deductions, such as attorney fees and overpayment recovery.

    Definition of Backpay

    Backpay refers to the payments due to an individual for work that was completed but not compensated for at the appropriate time. It is essentially the amount of money that an employee should have received but did not due to an error or delay in payment. Backpay can occur for a variety of reasons, including wage increases, overtime pay, and missed payments.

    The primary purpose of backpay is to ensure that workers are compensated fairly for the time and effort they put into their jobs. This can be a complex and confusing topic, with various rules and regulations governing when and how backpay should be paid. It is essential for employees to understand their rights and to seek the help of an attorney or union representative if they believe they are owed backpay.

    how is backpay calculated for ssd to a lrd policy

    How Backpay is Calculated

    Backpay is the additional income that an employee receives after the employer has failed to pay the due wages on time, typically due to some calculation errors or miscommunication between the two parties. Understanding backpay can be quite complicated, but in general, the amount of backpay that an employee is entitled to depends on several factors such as their employer’s pay structure, hourly rate, overtime work, and the duration of the unpaid wages. For instance, if an employee is eligible for overtime pay and their employer has not paid them on the regular basis, they would be entitled to receive backpay that would include the unpaid overtime wages.

    Similarly, if the employer has deducted a portion of the employee’s salary, backpay would include the amount that was withheld. Overall, backpay calculation is a complex process that requires a thorough knowledge of labor laws, and it is always recommended to consult with a legal expert to ensure that one receives the correct amount.

    SSD and LRD Policies

    Calculating backpay for SSD to an LRD policy can be a bit confusing, but it’s essential to understand how it works to properly determine what you’re owed. Essentially, your backpay amount will be based on the difference between what you were paid under your SSD policy and what you would have been paid under your LRD policy. This means that you’ll need to know the payment amounts for both policies and the timelines for each.

    It’s worth noting that some policies may have a limit on how far back you can receive backpay, so it’s essential to understand these limitations to avoid any potential issues. Ultimately, getting an accurate backpay calculation will require a bit of research and understanding of your specific policies, so it’s best to consult with a professional to ensure you’re getting the right amount.

    What is SSD and LRD?

    SSD and LRD policies are two types of traffic management policies used by internet service providers (ISPs) to manage network congestion and ensure that all users receive a fair share of the available bandwidth. SSD, or “Static Service Differentiation,” is a policy that prioritizes specific types of traffic, such as video or voice, over other types of traffic, such as email or web browsing. This is done to ensure that high priority traffic is delivered with the lowest possible delay, while low priority traffic may experience some delay during times of high network congestion.

    LRD, or “Least Recently Used,” is a policy that identifies the traffic that has been idle for the longest time and gives it a lower priority for transmission. This means that traffic that has not been actively used recently will be delayed in favor of more active traffic. Overall, these policies help to prevent network congestion and ensure that all users have a fair and consistent internet experience.

    The Difference between SSD and LRD Policies

    When looking for insurance policies, you may come across SSD and LRD policies. So, what do they mean? SSD represents the Short-Term Disability policy, while LRD stands for Long-Term Disability policy. The primary difference between the two is the benefit period and the elimination period.

    In the SSD policy, the elimination period is shorter, and the benefit period is for a limited duration, usually up to 6 months. On the other hand, the LRD policy offers a more extended benefit period, typically for years, and the elimination period is much longer. The length of the benefit period and the elimination period is a crucial factor to consider when choosing between the two policies because it affects the policy’s affordability and the amount of coverage you receive.

    Overall, you should evaluate your situation, budget, and needs to determine which policy is most suitable for you.

    Calculating Backpay for SSD to LRD Policy

    If you are wondering how backpay is calculated for SSD to a LRD policy, it is imperative to understand the specific factors involved in determining the right compensation for employees. In most cases, backpay is calculated based on the number of hours worked and the wage rate. For instance, if an employee was underpaid for a particular period and the wage discrepancy was discovered during a review, the employer would have to pay the difference in wages.

    Keep in mind that backpay calculations can be complex, especially when it involves large sums of money or multiple years of service. Additionally, it is crucial to ensure that all relevant information is considered, such as overtime, bonuses, and benefits. With the right approach and knowledge of the law, calculating backpay for SSD to LRD policies can be done fairly and accurately.

    Factors to Consider

    When calculating backpay for SSD to LRD policy, there are several factors that one needs to consider. First and foremost, it’s important to understand the length of time for which backpay is owed. This can vary depending on the type of policy and the individual circumstances surrounding the employee’s claim.

    Additionally, the reason for the initial denial of SSD benefits must be taken into account. If the denial was due to an error or inconsistency on the part of the employer, this may impact the amount of backpay owed. It’s also important to factor in any potential retroactive benefits that may be available under the policy.

    Finally, the length of time that the employee has been without benefits is a key consideration, as this can impact the overall amount of backpay that is owed. By taking all of these factors into account, employers can ensure that they are providing fair and adequate compensation to employees who have been wrongfully denied SSD benefits under the LRD policy.

    Formula for Computing Backpay

    Calculating backpay for SSD to LRD policy can be a confusing process, but it is essential to ensure that employees receive the proper compensation. The formula for computing backpay involves multiplying the number of hours worked by the employee’s hourly rate and adding any additional compensation owed, such as overtime or holiday pay. For example, if an employee worked 40 hours per week for two weeks and was owed $15 per hour, their backpay would be $1,200.

    However, it is crucial to factor in any changes in pay rate or hours worked, as well as any deductions such as taxes or benefits. By carefully calculating backpay using the proper formula, employers can ensure that employees are paid fairly for their work and avoid any legal repercussions.

    Conclusion

    In the world of Social Security Disability, backpay calculations can be like trying to solve a Rubik’s Cube blindfolded. However, when it comes to transitioning from SSD to LRD policy, the calculation process becomes even more complex. It requires navigating through a web of confusing regulations and policies, all while trying to balance the scales of justice for the disabled person, their family, and their financial well-being.

    But fear not, for those who persevere, the solution can be as satisfying as fitting that final color square into place. So, roll up your sleeves, grab a calculator, and dig in, because figuring out the backpay for SSD to LRD policy is truly a puzzle worth solving.”

    FAQs

    What is backpay and how is it calculated for SSD to LRD policy?
    Backpay refers to the unpaid benefits that a policyholder is entitled to receive from the date of disability, until the date the policy becomes effective. To calculate the backpay, the insurance company determines the weekly or monthly benefit amount and multiplies it by the number of weeks/months the policy was in effect. Any other income or benefits received during that time period are subtracted from the total backpay amount.

    Is backpay taxable for SSD to LRD policy?
    Backpay received as a result of SSD to LRD policy is typically subject to federal income taxes, but not to Social Security taxes. State tax rules may vary.

    How can one claim backpay for SSD to LRD policy?
    To claim backpay for SSD to LRD policy, policyholders must contact their insurance company and submit a written request to receive the unpaid benefits. The request should include the date of disability, the date the policy became effective, and any other relevant information.

    What happens to backpay if the policyholder dies before receiving it?
    If the policyholder dies before receiving the backpay, the unpaid benefits may be paid to the policyholder’s estate or designated beneficiaries, depending on the terms of the policy and applicable state laws.

  • Step-by-Step Guide: Installing Windows Backup to a New SSD Without Hassle

    Are you planning on upgrading your computer’s hard drive to increase the storage space or boost performance? If you’re looking to transfer all your important files to a new solid-state drive (SSD) and worry about going through the tedious process of reinstalling the Windows operating system, the good news is that you don’t have to! With the help of Windows backup and restore utility, you can easily clone your existing drive and move all your data – including the operating system, programs, and settings – to a new SSD without having to reinstall everything from scratch. In this blog, we will guide you through the steps on how to install Windows backup to a new SSD and help you avoid any potential hiccups along the way. So let’s get started!

    Check Hard Drive Formatting

    If you’re looking to install Windows backup onto a new SSD, the first thing you need to do is check the hard drive formatting. You’ll want to ensure that your SSD is properly formatted and ready to receive the Windows backup files. To do this, you can use the Disk Management tool on your computer.

    Simply right-click the Start Menu button and select Disk Management. From there, you can check the format of your SSD and see if it’s in the correct format (most likely NTFS). If it isn’t, you can easily format the SSD by right-clicking it and selecting the format option.

    Just be aware that formatting the SSD will erase any data on it, so make sure you’ve backed up any important files before proceeding. Once your SSD is properly formatted, you can proceed with transferring the Windows backup files onto it and getting your new system up and running.

    Format New SSD to NTFS

    When you buy a new SSD (Solid State Drive), it usually comes unformatted. In order to use it, you need to format it to a readable file system like NTFS. But before you begin the formatting process, it’s important to check whether there is an existing file system on the drive.

    If there is, formatting the drive may erase all the data on it. Therefore, take some precautionary steps to ensure that you are not formatting the wrong drive. Once you have confirmed that it is the right drive, you can proceed to format it to NTFS.

    Formatting the drive is a simple process that can be done through the Windows Disk Management tool. Simply right-click on the drive, select the Format option, choose NTFS as the file system, and click on the Start button. The formatting process may take some time depending on the size of the drive.

    Once it’s done, you can use the SSD for data storage or as the primary drive for your operating system. Remember to always check your drive’s formatting before proceeding with the NTFS format.

    how install windows backup to new ssd

    Initialize SSD within Disk Management

    When setting up a new SSD in your computer, one of the first things you should check is its formatting. Before you can use the drive, you need to make sure it has been initialized and formatted correctly. To do this, you can use Disk Management, which is a built-in utility in Windows.

    Firstly, you’ll need to connect your SSD to your computer and launch Disk Management. Once you’re in Disk Management, you should see your SSD listed under the disk drives section. If your SSD is not listed, you may need to check your connections or refer to the manufacturer’s instructions.

    Assuming your SSD is listed, the next step is to check its formatting. If the drive has not been formatted, you’ll need to initialize it first. To do this, right-click on the unallocated space on the drive and click “Initialize Disk.

    ” Follow the prompts to initialize the disk, and then you can proceed with formatting it. Ensuring your SSD is initialized and formatted correctly will allow you to use the drive to its full potential and ensure you don’t encounter any issues.

    Create/Restore Windows Backup

    If you’re looking to install Windows backup on a new SSD, there are a few steps you need to follow to ensure a successful transfer. Firstly, make sure you have a backup of your current system on an external hard drive or cloud storage service. Next, install your new SSD and make sure it’s properly connected to your system.

    Then, use the Windows Backup and Restore feature to restore your data and system image onto the new SSD. This will ensure that all your personal files, settings, and applications are transferred over to the new drive. Once the restore process is complete, you should be able to boot up your system as usual and start using your new SSD.

    Remember to regularly backup your system to avoid any potential data loss or system failures in the future. With just a few simple steps, you can easily transfer your Windows backup to a new SSD and enjoy faster boot times and improved system performance.

    Plug External Drive into Computer

    Creating a backup of your Windows system is crucial to maintaining the security of your data. To get started, plug an external drive into your computer and ensure it is recognized by your system. The next step is to navigate to the Backup and Restore feature in your Control Panel and click on the option to “Create a system image.

    ” This will create a snapshot of your entire Windows system, including all software, settings, and files. Depending on the size of your system, this process may take several hours to complete. Once the backup process is finished, you can use the same Backup and Restore feature to restore your system to its previous state in the event of a crash or malfunction.

    By regularly creating backups of your Windows system, you can ensure that your important data is safe and secure, no matter what happens.

    Locate Backup and Restore Settings in Control Panel

    If you’re looking to create or restore a Windows backup, the first thing you’ll need to do is locate the backup and restore settings in your computer’s control panel. This can be easily done by typing “backup and restore” into the search bar in the bottom left-hand corner of your screen. Once you’ve opened the backup and restore settings, you’ll be presented with a few different options.

    To create a backup, click on the “set up backup” button and follow the prompts to select the files and folders you want to backup and choose where you want to store the backup. To restore a backup, you’ll need to click on the “restore my files” button and select the backup you want to restore from. From there, the process is fairly straightforward and should only take a few minutes.

    By creating a backup of your important files and documents, you can rest easy knowing that your data is safe and secure in case of a computer crash or other unexpected disaster.

    Select ‘Restore my Files’ Option

    When it comes to creating or restoring a Windows backup, the process may seem daunting at first glance. However, it’s a crucial step to ensure that important files and data are safeguarded against any unexpected loss or damage. Selecting the “Restore my Files” option is a necessary step in this process and can be easily accessed through the Control Panel.

    From there, users will be prompted to select the backup file they wish to restore and choose which files they would like to retrieve. This convenient feature allows for a seamless and efficient recovery of files, ensuring that nothing is lost permanently. By taking the time to create a Windows backup and utilizing the “Restore my Files” option, users can breathe easy knowing that their data is protected and can be easily retrieved in the event of any unforeseen circumstances.

    Clone Internal Drive to New SSD

    Are you looking to upgrade to a new SSD but want to ensure that your Windows operating system and data are preserved? The good news is that you can easily clone your internal drive to your new SSD using backup software. This process involves creating a backup of your current hard drive and restoring it onto the new SSD. There are several backup software options available, but the most popular are Macrium Reflect, Acronis True Image, and EaseUS Todo Backup.

    Once you have created the backup, you will need to install the new SSD, boot from it, and then restore the backup onto it. This process may take some time depending on the size of your internal drive and the speed of your computer, but it is a straightforward way of ensuring that your data and operating system are transferred seamlessly to your new SSD. So, go ahead and upgrade your computer’s performance without worrying about losing any data.

    Use a Disk Cloning Software

    If you’re looking to upgrade your computer’s performance, then cloning your internal drive to a new SSD is a great way to do it. This process involves using a disk cloning software to transfer all your data, including your operating system and applications, from your old hard drive to your new SSD. The benefit of using a cloning software is that it saves you a lot of time and effort compared to manually transferring your files.

    Plus, it ensures that all your files are copied over precisely, without any missing files or data loss. The process of cloning your drive can be straightforward, especially if you use user-friendly software like EaseUS or Clonezilla. Don’t forget to backup your old drive in case of any errors during the cloning process.

    Cloning your drive is an excellent way to breathe new life into your computer and enjoy faster processing speeds and improved performance.

    Attach New SSD via SATA or USB

    When it comes to upgrading your computer’s storage, attaching a new SSD via SATA or USB is a great option. However, it’s important to clone your internal drive to the new SSD first to ensure everything is transferred over smoothly. This process involves making an exact copy of your internal drive’s contents onto your new SSD, including your operating system, applications, and files.

    One of the benefits of cloning your drive is that you won’t have to reinstall any programs or transfer files manually. Simply connect your new SSD, download a cloning software, and follow the prompts to complete the process. Additionally, using a USB connection for your new SSD can make the cloning process faster and more convenient as it eliminates the need to open up your computer and physically install the SSD.

    Overall, cloning your internal drive to your new SSD is a straightforward process that can greatly improve your computer’s performance and storage capacity. By following these steps, you can ensure a seamless transfer of all your important files and applications to your new drive. So why wait? Give your computer a boost today by upgrading to an SSD!

    Configure Boot Order and Reboot PC

    If you’ve recently purchased a new SSD and want to install Windows backup onto it, you’ll need to configure the boot order and reboot your PC. This process can seem a bit daunting, but with the right steps, it can be quite straightforward. First, you’ll want to make sure your new SSD is properly connected to your PC.

    Then, you’ll need to enter the BIOS menu by pressing the appropriate key during startup (usually F2 or Delete). From there, go to the boot tab and set the boot priority to your new SSD. Save the changes and exit the BIOS menu to reboot your PC.

    Once your PC restarts, it should automatically boot from your new SSD, allowing you to install your Windows backup onto it. With these simple steps, you’ll be able to seamlessly upgrade to a new SSD and enjoy faster boot times and improved performance.

    Conclusion

    In conclusion, installing Windows backup to a new SSD can be a daunting task for some, but with the right steps and tools, it can be a breeze. Just remember, if at first, you don’t succeed, don’t give up. Keep pushing forward, and soon enough, your new and improved SSD will be up and running in no time.

    And if you’re feeling overwhelmed or lost in the process, don’t be afraid to reach out for help. After all, even the most skilled techies can use a little assistance every now and then. Now go forth, conquer your new SSD, and may your backups be forever safe and secure!”

    FAQs

    Can I use Windows Backup to transfer my data to a new SSD?
    Yes, you can use Windows Backup to create a system image of your current setup and then restore it to your new SSD.

    How do I create a system image using Windows Backup?
    Go to Control Panel > System and Security > Backup and Restore (Windows 7), then click “Create a system image” and follow the prompts.

    Do I need to format my new SSD before restoring the system image?
    No, you do not need to format your new SSD before restoring the system image as the restore process will overwrite any existing data on the drive.

    Can I use Windows Backup to transfer my operating system to a new computer with a different hardware setup?
    No, you cannot use Windows Backup to transfer your operating system to a new computer with a different hardware setup as the drivers and configurations will not be compatible.