Category: How to

How to

  • Unlock the Mystery: How to Determine if Your SSD is Compatible with Your System

    Unlock the Mystery: How to Determine if Your SSD is Compatible with Your System

    So, you have decided to upgrade your computer’s storage drive to a Solid State Drive or SSD? Great decision! SSDs are faster, efficient and more reliable than traditional HDDs. But have you ever wondered if your computer is compatible with SSDs? It’s crucial to ensure that your system meets the minimum requirements for an SSD installation, otherwise, you may experience slower speeds, frequent crashes or even data loss. In this blog, we’ll explore the factors that determine SSD compatibility and how you can check if your system is compatible.

    You don’t want to spend all that money on an SSD only to realize that it’s not compatible with your computer. Let’s dive in and find out.

    System Requirements

    When looking to upgrade or replace your computer’s hard drive, it’s important to ensure that your chosen SSD is compatible with your system. The first step is to check your motherboard’s specifications to see if it supports the type of SSD you’re considering. Most modern motherboards support NVMe SSDs, but it’s always a good idea to double-check.

    You should also make sure your computer’s BIOS is up to date, as older BIOS versions may not work with newer SSDs. Additionally, check the physical size of the SSD you’re considering to make sure it will fit in your computer’s drive bays. Finally, consider the storage capacity and performance specifications of the SSD to make sure it meets your needs.

    By taking these steps, you can ensure that your SSD upgrade goes smoothly and that your computer runs faster and more efficiently than ever before.

    Check Your Motherboard’s Specifications

    If you’re planning to build a new computer or upgrade an old one, it’s important to check your motherboard’s specifications to ensure compatibility with any new components you plan to install. This includes checking the processor socket type, memory type and speed, and expansion slot availability. Your motherboard manual or manufacturer’s website should have this information readily available.

    Additionally, it’s important to check your power supply’s wattage and make sure it can handle the added components. Knowing your system requirements beforehand can save you time and money by ensuring you don’t buy components that won’t work with your motherboard or power supply. So, take the time to do your research and double-check your motherboard’s specifications before making any purchases.

    Your computer and wallet will thank you!
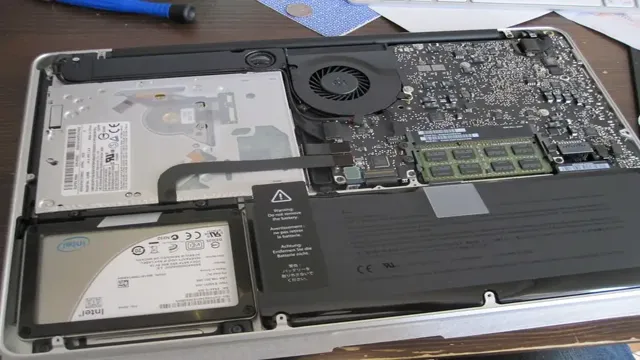
    how to know if your ssd is compatible

    Check Your Computer’s BIOS Version

    If you’re looking to check your computer’s BIOS version, it’s important to know the system requirements before diving in. First off, you’ll need to access the BIOS menu on your PC, which can vary depending on the manufacturer and model. Most commonly, you can access the BIOS menu by pressing a key during boot-up, such as F2, F10, or Delete.

    Once you get to the BIOS menu, you can navigate through various tabs and menus to find the version number. If you’re not sure which version you have, you can easily check online by searching for your computer’s model and make, along with the term “BIOS version.” Knowing your BIOS version can be important for troubleshooting issues with your computer, updating drivers, and ensuring compatibility with certain hardware or software.

    So, take a few minutes to check your BIOS version and stay ahead of any potential problems that may arise.

    SSD Specifications

    Upgrading your computer’s hard drive to a solid-state drive (SSD) can significantly improve its performance and speed. However, before you make the switch, it’s crucial to ensure that your SSD is compatible with your computer. One way to do this is by checking the interface of the current hard drive you have.

    SSDs use SATA interface, so if your computer supports SATA hard drives, then it’s highly likely that it will be compatible with an SSD. Another factor to consider is the form factor of the SSD. Most laptops and desktops support the standard

    5-inch form factor, although some newer ultrabooks may require a smaller M.2 SSD. Additionally, you should check the storage capacity of your current hard drive to ensure that the new SSD offers similar or greater storage.

    By keeping these factors in mind, you can confidently upgrade to an SSD that is compatible with your computer and enjoy faster performance and improved efficiency. So if you’re wondering how to know if your SSD is compatible, just check for the SATA interface, form factor, and storage capacity.

    Check the Interface Type (SATA or NVMe)

    When choosing an SSD, it’s important to pay attention to the interface type. The two most common interface types are SATA and NVMe. SATA is the older and slower interface, while NVMe is the newer and faster interface.

    If your computer supports NVMe, it’s recommended to choose an SSD that uses this interface type. NVMe SSDs can deliver speeds up to six times faster than SATA SSDs, which can make a big difference in terms of overall performance. However, if your computer only supports SATA, that’s okay too.

    You can still upgrade to a SATA SSD and notice a significant improvement in performance compared to a traditional hard drive. Just make sure to check your system’s specifications before purchasing an SSD to ensure compatibility.

    Check the Form Factor (2.5-inch, M.2, etc.)

    When shopping for an SSD, it’s important to check the form factor to ensure compatibility with your system. There are several different form factors to choose from, such as 5-inch drives and M.

    2 drives. The 5-inch form factor is the standard size for traditional hard drives and is compatible with most laptops and desktop computers.

    M.2 drives, on the other hand, are much smaller and are designed specifically for use in ultrabooks and other compact devices. They are faster and more power-efficient than traditional drives and offer superior performance.

    Other factors to consider when choosing an SSD include storage capacity, read and write speeds, and data transfer rates. By understanding the various SSD specifications, you can make an informed decision and choose the best drive for your needs.

    Check the Capacity and Speed

    When it comes to choosing an SSD for your computer or laptop, scanning through the various specifications can be a bit overwhelming. However, there are a few key factors to consider when looking at SSD capacity and speed. Capacity refers to the amount of data that can be stored on the drive, and typically ranges from 128GB to 4TB or higher.

    It’s important to choose a capacity that can accommodate your needs, including current and future storage needs. Speed, on the other hand, is measured in read and write speeds, and is mainly dependent on the type of interface used (SATA, PCIe, etc.) and the type of NAND flash chips used.

    Higher read and write speeds allow for faster data transfer and faster access to files and applications. Overall, it’s important to balance capacity and speed to ensure you have enough storage for your needs while also having fast performance.

    Compatibility Check

    Upgrading your computer’s hardware can be exhilarating, but it’s important to ensure that all new parts are compatible with each other. If you’re upgrading to an SSD, it’s crucial to know whether your system can support it. Firstly, check the SSD form factor you need as there are different sizes to choose from.

    Secondly, you’ll need to check your motherboard to see if it has the correct interface for the SSD, which could be SATA or PCIe. Finally, it’s essential to check whether your OS is compliant with the SSD. Any modern operating system, e.

    g. Windows 8, 1, or 10, should work fine.

    If you’re still running an older operating system, it’s best to do some research on the specific SSD you’re planning to purchase to see if it’s compatible. While compatibility may seem overwhelming, manufacturers often provide guides or compatibility lists on their websites, so check there to make sure your SSD can work with your system.

    Use Compatibility Checking Tools

    When developing software or website applications, it’s crucial to ensure that they work seamlessly across different devices and platforms. This is where compatibility checking tools come in handy. These tools analyze your code and identify potential issues that may arise when running on different browsers, operating systems, and devices.

    By identifying these issues, you can make the necessary adjustments to ensure your application runs perfectly on every device and platform. Compatibility checking tools also help you streamline your development process by reducing the time and resources needed for testing and debugging. Using these tools helps you deliver a better end-product, leading to higher user satisfaction and increased engagement.

    So, whether you’re a seasoned developer or a beginner, a compatibility checking tool is an essential resource to have in your toolkit.

    Check the Manufacturer’s Recommendations

    When it comes to replacing a part or accessory in your vehicle, it’s important to check the manufacturer’s recommendations to ensure compatibility. Even if a product looks similar or claims to have the same functionality, it may not be an exact match for your specific make and model. Using parts that are not recommended by the manufacturer can cause damage to your vehicle or may void your warranty.

    It’s always a good idea to do some research and double-check before making any purchases. Sure, it may take some extra time and effort, but it’s better to be safe than sorry. Take advantage of the resources available to you, such as online forums or contacting the manufacturer directly, to get the information you need to make an informed decision.

    By taking this extra step, you can ensure that your vehicle runs smoothly and avoid any potential issues down the road. So, the next time you need to replace a part, remember to check the manufacturer’s recommendations to ensure compatibility.

    Final Words

    In conclusion, checking whether your SSD is compatible with your system is crucial in ensuring efficient performance and preventing compatibility issues. To start, identify the type of SSD interface your system uses, then cross-reference it with the compatible SSD interface types. You can also consult the system manual or motherboard manufacturer for specific information.

    Additionally, ensure that the SSD’s physical dimensions and power requirements match those of your system to avoid any compatibility issues. Always make sure to choose a reputable SSD brand and model that fits your system’s specifications to guarantee optimal performance. Following these tips will help you determine whether your SSD is compatible with your system, ensuring a seamless and powerful computing experience.

    Conclusion

    In conclusion, when it comes to determining whether or not your SSD is compatible, it’s important to do your homework and ensure that your device not only has the necessary hardware requirements, but that it also supports the necessary protocols. As always, it’s better to be safe than sorry, so if you’re unsure about whether or not your SSD will work with your system, consult the manufacturer’s website or a trusted tech expert. Don’t take any risks when it comes to your precious data and storage needs – compatibility is key! Remember, SSD compatibility isn’t rocket science, but it’s also not something to be taken lightly – stay informed, stay informed, and stay compatible!”

    FAQs

    What is an SSD?
    SSD stands for Solid State Drive, which is a type of storage device used in computers.

    How do I know if my computer is compatible with an SSD?
    You can check your computer specifications to see if it has a compatible interface for an SSD, such as SATA or NVMe. You can also consult with the manufacturer or a computer technician.

    What are the benefits of using an SSD?
    SSDs offer faster boot times, faster application loading times, and increased overall system performance compared to traditional hard disk drives (HDDs).

    Can I use an SSD as a primary drive in my computer?
    Yes, you can use an SSD as a primary drive in your computer to store your operating system, applications, and files.

  • Upgrade Your M.2 SSD in No Time: A Step-by-Step Guide to Avoid Reinstalling Windows

    Upgrade Your M.2 SSD in No Time: A Step-by-Step Guide to Avoid Reinstalling Windows

    Are you looking to upgrade your M.2 SSD without going through the hassle of reinstalling Windows? Well, we’ve got good news for you! Upgrading your M.2 SSD doesn’t necessarily mean you have to reinstall your entire operating system.

    As technology continues to advance rapidly, it’s no surprise that people want faster and larger storage options for their devices. An M.2 solid-state drive is a popular choice, capable of delivering lightning-fast read and write speeds and comes in a small form factor that fits perfectly in most devices.

    However, many people often shy away from upgrading to an M.2 SSD because of the dreaded task of reinstalling their Windows operating system. Fortunately, there is a way to upgrade your M.

    2 SSD without going through the tedious process of reinstalling Windows. It involves a little bit of preparation beforehand, but it’s far more straightforward and less time-consuming than reinstalling your entire operating system. In this blog, we’ll discuss the steps you can take to upgrade your M.

    2 SSD without reinstalling Windows, giving you the freedom to enjoy the benefits of faster and larger storage without the added stress of starting from scratch. So, grab a cup of coffee, sit back, and read on to learn how to upgrade your M.2 SSD without the need to reinstall your operating system.

    Back Up Your Data

    If you’re planning to upgrade your M.2 SSD, don’t worry, as you don’t have to reinstall Windows from scratch. However, it’s crucial to back up your data before proceeding with the upgrade to prevent loss of files and documents.

    When upgrading an M.2 SSD, you’ll need to clone your existing drive onto the new one. This process requires software such as Macrium Reflect, EaseUS Todo, or Clonezilla.

    Using this software, you can create an exact copy of your current M.2 SSD and transfer it to the new drive. It’s important to note that the new drive’s capacity or size should be larger than the current one.

    By following this process, you can easily upgrade your M.2 SSD without losing any data or reinstalling Windows.

    Use a Cloning Tool

    Backing up your data is a crucial step in protecting your valuable information. One effective way to do this is by using a cloning tool. A cloning tool is a software that creates an exact copy of your files, settings, and configurations.

    This helps to ensure that you have a backup that is identical to your original data, in case something unforeseen happens. One advantage of using a cloning tool is that it can save you time and effort, as you don’t have to manually back up each file or program. Instead, you can use the software to create a single backup image that includes everything you need.

    Another advantage is that cloning tools are relatively easy to use, even for those with limited technical skills. With just a few clicks, you can create a backup that is reliable and secure. Overall, using a cloning tool is a smart and efficient way to protect your data, and it’s definitely worth considering if you haven’t done so already.

    how to upgrade m.2 ssd without reinstalling windows

    Open the Computer Case

    Backing up your data is crucial when opening up your computer case. Before you even think about tinkering with the internal components, make sure you have a backup of all important files and documents. This will ensure that in case anything goes wrong during the process, you won’t lose any valuable information.

    There are many ways to back up your data, such as using an external hard drive, cloud storage, or even burning them onto a CD or DVD. Whatever method you choose, make sure it’s reliable and that you have all the necessary files backed up. Don’t rush this step, as it can save you a lot of time and frustration in the long run.

    Remember, it’s always better to be safe than sorry when it comes to your data.

    Install the New M.2 SSD

    If you’re looking to upgrade your PC’s storage by adding a new M.2 SSD, you might be worried about reinstalling Windows and losing all your data. However, the good news is that you can easily upgrade your M.

    2 SSD without reinstalling Windows, as long as you follow a few simple steps. First, make sure your PC supports NVMe M.2 SSDs and purchase a compatible drive.

    Then, before installing the new SSD, clone your existing drive onto the new one using a cloning software like Macrium Reflect or Clonezilla. Once the cloning process is complete, shut down your PC and open it up. Insert the new M.

    2 SSD into an empty slot and secure it with the screw provided. Finally, turn on your PC and make sure everything is working properly before wiping your old drive and using it for storage. By following these steps, you can easily upgrade your M.

    2 SSD without losing any data or having to reinstall Windows from scratch.

    Configure the BIOS

    Installing a new M.2 SSD is a great way to improve the performance of your computer. However, before you install it, you’ll need to configure the BIOS to recognize the new hardware.

    The BIOS is the firmware that controls the basic input/output system of your computer. To access the BIOS, you’ll need to press a specific key, usually F2, F10, or Delete, immediately after turning on your computer. Once you’re in the BIOS, you’ll need to look for the option to enable the M.

    2 slot. This might be located under the “Advanced” or “Storage” menu. Once you’ve enabled the M.

    2 slot, save your changes and exit the BIOS. Now that the BIOS is configured, you can install the new M.2 SSD.

    To do this, you’ll need to open your computer’s case and locate the M.2 slot on your motherboard. This might be located near the CPU socket or in between the PCI-E slots.

    Once you’ve located the M.2 slot, gently insert the new SSD into the slot at an angle and then push it down until it clicks into place. It’s important to note that some motherboards may require a screw to hold the SSD in place.

    Restore Your Data from Backup

    After successfully installing the new M.2 SSD into your computer, it’s time to restore your precious data from backup. It’s a crucial step that ensures you don’t lose any important files or data during the installation process.

    If you have a backup system in place, it’s just a matter of connecting the backup drive and copying the files to the new drive. However, if you don’t have a backup, you can use data recovery software to recover your lost files. It’s best to consult a professional if you are unsure about the restoration process.

    Remember, installing a new drive is only the first step, restoring your data is just as important. With the new SSD, your computer will run smoother and faster, giving you a better overall experience.

    Test Your New M.2 SSD

    So, you’ve decided to upgrade your computer’s storage by installing a new M.2 SSD! Congratulations, you’re in for a noticeable performance boost in terms of reading and writing speeds. But before you can start enjoying the benefits of your new SSD, you need to install it properly.

    Firstly, ensure that the M.2 slot on your motherboard is the right size for your new SSD. Once you’ve confirmed this, insert the drive into the slot with a gentle but firm push, taking care not to damage any of the tiny pins on the drive’s underside.

    Once installed, check that the drive is securely fitted in the M.2 slot by gently pressing down on both ends. Finally, be sure to screw the drive in place with the provided screws to prevent it from becoming loose or dislodged during use.

    With your new drive installed, it’s time to test it out and see how much faster your system responds!

    Conclusion

    Upgrading your M.2 SSD without reinstalling Windows is a simpler task than you might think. With a few simple steps, you can swap out your old M.

    2 SSD for a new and improved one, without worrying about data loss or system instability. Just be sure to backup all your important files before starting the process, and follow the manufacturer’s instructions to ensure a successful upgrade. Trust us, your computer will thank you for it!”

    FAQs

    What is an M.2 SSD and how does it differ from a regular SSD?
    An M.2 SSD is a newer type of solid-state drive that is smaller and faster than a traditional SSD. It connects directly to the motherboard and provides faster speeds and better overall performance.

    Can I upgrade my M.2 SSD without reinstalling Windows?
    Yes, you can upgrade your M.2 SSD without reinstalling Windows. You can clone your existing drive to the new SSD using software such as Acronis True Image or Samsung Data Migration Tool.

    What are the benefits of upgrading to an M.2 SSD?
    Upgrading to an M.2 SSD can provide faster boot and load times, better overall system performance, and a quieter and more energy-efficient system.

    Is it difficult to install an M.2 SSD?
    Installing an M.2 SSD is generally straightforward and involves inserting the drive into a slot on the motherboard. However, it is important to ensure that your motherboard supports M.2 and that you have the necessary tools to install the drive properly.

  • Seamlessly Transfer Your Operating System from One SSD to Another: A Step-by-Step Guide

    Upgrading your computer’s hard drive to a solid-state drive (SSD) is a simple and effective way to give your system a boost in performance. Not only do SSDs have faster read and write speeds, but they’re also more reliable and durable than traditional hard drives. However, having a brand new SSD is only half the battle.

    To truly maximize its potential, you need to transfer your operating system (OS) and all your files to the new drive. But how do you do that without losing any data or causing problems? In this article, we’ll walk you through the process of transferring your OS to a new SSD. We’ll cover different methods and tools to help make the switch as seamless and painless as possible.

    So, get ready to say goodbye to slow boot times and hello to lightning-fast performance with your shiny new SSD.

    Choose your software

    Are you looking to transfer your operating system from one SSD to another? It’s not as complicated as it may seem! There are a few different software options that can help with this, depending on your preferences and level of technical expertise. One popular choice among more experienced users is Clonezilla, a free and open-source tool that can create exact copies of an entire disk or partition. Another option is Macrium Reflect, which offers a user-friendly interface and a range of helpful features such as backup scheduling and differential imaging.

    Both of these programs are compatible with a variety of operating systems and support the transfer of data between SSDs of different sizes and types. Whichever software you choose, make sure to back up any important data first and follow the instructions carefully to ensure a smooth transfer process. With a little bit of patience and the right tools, you’ll have your new SSD up and running in no time!

    EaseUS Todo Backup

    When it comes to backup solutions, EaseUS Todo Backup is definitely one of the top options out there. Whether you’re looking to backup your files, folders, partitions, or even your whole system, EaseUS Todo Backup can handle it all with ease. But with so many backup software options available, why should you choose EaseUS Todo Backup over the others? For starters, it’s incredibly user-friendly and offers a streamlined backup process that even beginners can easily navigate.

    Additionally, it comes packed with features that allow for easy creation, scheduling, and restoration of backup files. And with its affordable pricing options and reliable reputation, EaseUS Todo Backup is a solid choice for anyone in need of a reliable backup solution. So whether you’re a home user looking to backup your personal files or a business looking to protect your valuable data, EaseUS Todo Backup is the right choice for you.

    how to transfer operating system from one ssd to another

    Acronis True Image

    If you’re looking for reliable backup software, Acronis True Image is definitely worth considering. This powerful program offers a wide range of features to help you safeguard your valuable information, including disk imaging and cloning, cloud backup, and data archiving. Whether you’re a home user or a business owner, Acronis True Image makes it easy to protect your files and recover lost data quickly and efficiently.

    Plus, with its intuitive interface and user-friendly design, you won’t have to be a tech expert to get started. So why wait? Choose Acronis True Image today and enjoy peace of mind knowing your data is safe and secure.

    Backup your old SSD

    If you’re planning to transfer your operating system from one SSD to another, you’ll need to backup your old SSD first. There are various ways to do this, but one of the easiest methods is to use a disk cloning software. This software can copy your entire old SSD onto a new one, including the operating system, settings, and files.

    To begin the process, you’ll need to download and install a disk cloning software on your computer. Connect your new SSD to your computer and launch the software. Select the option to clone disk and choose your old SSD as the source and the new SSD as the destination.

    Before proceeding, make sure to double-check that you’ve selected the correct drives and that you have enough space on your new SSD. Once you’ve confirmed everything, you can start the cloning process, which may take a few minutes or longer depending on the amount of data on your old SSD. Once the cloning is complete, you can remove your old SSD and replace it with the new one.

    Your operating system and files should now be successfully transferred to the new SSD, and you can start using it immediately. Overall, transferring your operating system to a new SSD can be a time-consuming process, but it’s definitely worth it for faster and more efficient performance.

    Create a system image

    Creating a system image is an essential step in transferring data from an old SSD to a new one. To do this, you need to back up your old SSD by creating an exact duplicate of its contents. This process ensures that all your important files, applications, and operating system settings are transferred to the new SSD successfully.

    One way to backup your old SSD is to use built-in Windows software- System Image Backup. To do this, you’ll need an external hard drive to store the system image backup. Once you have the drive, go to the Control Panel, then Backup and Restore, and choose the option to create a system image.

    Select the location of your external hard drive and click on the Start Backup button. The process may take a while, depending on the size of your old SSD. Once the backup is complete, you’ll have a complete copy of your old SSD saved on the external hard drive, ready to be transferred to the new SSD.

    By taking the time to create a system image backup, you ensure that none of your data is lost in the transfer process, and the new SSD is set up exactly like your old one.

    Save to external drive

    Backing up your old SSD is essential in preserving your important files and documents. Unexpected situations such as hard drive failure, viruses, or theft can happen at any time, and having a backup can ensure that you won’t lose your important data. One of the easiest ways to backup your files is by saving them to an external drive.

    External drives come in different sizes and forms, including USB drives, external hard drives, and cloud storage. By copying your files to an external drive regularly, you’re ensuring that you have a copy of everything you need in case anything unexpected happens. When choosing an external drive, make sure to choose one that’s reliable and has enough capacity to store all your files.

    It’s also important to keep the drive in a safe location to protect it from being lost or stolen. When backing up your SSD, don’t forget to transfer all your important files, including photos, videos, and documents. You can also use backup software to automate the backup process and make the task even more manageable.

    In conclusion, backing up your SSD is essential, and an external drive is a straightforward and practical solution to store your files. By regularly copying your files to an external drive, you’re ensuring that your data is secure and protected from unexpected situations. With the range of options available, finding an external drive with enough capacity and security features to meet your needs is easier than ever.

    Prepare your new SSD

    If you’re looking to upgrade your computer’s storage capabilities, you’ll need to know how to transfer the operating system from one SSD to another. The process can be a bit daunting, but with the right tools and steps, you can easily prepare your new SSD for use. First, make sure to back up all important files and documents before beginning, just in case there are any issues during the transfer.

    Next, you’ll need to clone your current SSD onto the new one using software like Acronis True Image, Macrium Reflect, or EaseUS Todo Backup. This process creates an exact replica of your current drive, meaning all files, programs, and settings will be transferred over to the new SSD. Once the cloning process is complete, you can install your new SSD and power on your computer to ensure everything transferred correctly.

    With these steps, you’ll be able to seamlessly transfer your operating system to your new SSD and enjoy faster speeds and improved storage capabilities.

    Install in open drive slot

    If you’re looking to upgrade your computer’s storage capacity and speed, installing a new SSD can make a big difference. Before you start, though, it’s important to prepare your new SSD for installation. First, make sure you have an open drive slot in your computer where the SSD can be installed.

    Then, check the specs of your computer to ensure that the SSD is compatible and that you have the necessary cables and screws to secure it in place. Once you have everything you need, it’s time to open up your computer and locate the empty slot. Carefully insert the SSD into the slot, making sure it’s secure.

    Finally, connect the necessary cables and screws to complete the installation. With your new SSD installed, you should see a significant improvement in your computer’s performance and speed. So, take the time to prepare your SSD and install it correctly, and enjoy a faster, more efficient computer.

    Format new SSD

    If you’re upgrading your computer or replacing a broken hard drive, you may need to format your new SSD before you can use it. Formatting prepares your drive for use by wiping any existing data and setting up the file system. Before you begin, make sure you have all the necessary tools, including a screwdriver and any software you need.

    You’ll also want to back up any important files and create a recovery disk just in case something goes wrong. Once you have everything you need, carefully install the SSD in your computer and follow the manufacturer’s instructions to format it. You’ll need to choose the right file system for your needs, but most people will want to use NTFS or exFAT.

    With the right preparation and a bit of patience, you’ll have a brand new SSD ready to use in no time!

    Restore your system image

    If you’re looking to transfer your operating system from one SSD to another, restoring your system image can be an easy and efficient way to do it. First, you’ll need to have a system image backup stored on an external hard drive or cloud storage. Once you have that, you can insert your new SSD and use disk cloning software to transfer everything from your old SSD to the new one.

    After that, follow the instructions for restoring your system image backup onto the new SSD. This will essentially clone your old operating system onto the new drive, allowing you to seamlessly transfer all of your data and programs over. With this method, you won’t have to worry about manually reinstalling everything, saving you time and effort in the process.

    Use chosen software

    If you’re dealing with a system failure, restoring your system image is your best bet for getting back up and running without losing any of your data. Using the chosen software is key in this process, as it will ensure that your image is accurately and efficiently restored. There are plenty of options to choose from, but a reliable and user-friendly software will save you time, stress, and possibly even money in the long run.

    When restoring your system image, it’s important to keep in mind that this process will revert your computer back to the state it was in at the time the image was created, so any changes or updates made to your system afterwards will be lost. However, it’s an excellent way to undo any system issues or damage caused by malware or virus attacks. By choosing a trusted software and following the instructions carefully, you can restore your system image and get back to using your computer with ease.

    Select system image from backup

    When it comes to restoring your system image, selecting the right backup is crucial to getting your device back up and running. Depending on the backup software you used, accessing your backups should be a fairly straightforward process. Once you gain access to your backup, you’ll need to select the system image that you want to restore.

    It’s important to choose the right image since some backups may have multiple versions saved. You’ll want to choose the image that is the most recent and does not contain any errors or issues. Also, make sure that you have enough space on your device before you start the restoration process.

    One thing to keep in mind is that restoring a system image can take a while, so it’s best to be patient and let the process run its course. Remember, restoring your system image can save a lot of time and hassle if done correctly, so it’s important to follow the steps carefully.

    Restore to new SSD

    If you’ve recently upgraded your laptop or desktop computer with a new SSD, you may be wondering how to restore your system image onto the new drive. The process is actually quite simple and can save you a lot of time and effort compared to reinstalling all your software and settings from scratch. First, make sure you have a backup of your system image on an external hard drive or cloud storage service.

    Then, connect the new SSD to your computer and use a software program like Macrium Reflect or Clonezilla to clone your system image onto the new drive. This will copy everything, including your operating system, applications, and personal files, onto the new SSD. Once the cloning process is complete, you can swap out the old drive for the new one and start using your upgraded computer.

    Restoring your system image to a new SSD is a straightforward and efficient way to get your computer up and running with minimal downtime.

    Enjoy your new SSD!

    So you’ve upgraded to a brand new SSD, and now you want to transfer your operating system from your old one to your new one. It may sound like a daunting task, but trust us, it’s not as complicated as it seems. First, you’ll want to download cloning software, such as Acronis True Image or Clonezilla.

    Once you’ve downloaded your chosen software, connect both your old and new SSDs to your computer and launch the cloning software. Follow the instructions provided by the software to clone your old SSD onto your new one. This should transfer your operating system, as well as all your files and settings, to your new SSD.

    After the cloning process is complete, shut down your computer, disconnect your old SSD, and boot up your computer with your new SSD. Congratulations! You’ve successfully transferred your operating system to your new SSD. Enjoy the increased speed and performance!

    Conclusion

    In summary, transferring your operating system from one SSD to another requires a delicate balance of technical expertise, patience, and attention to detail. It’s not just a matter of copying and pasting files; instead, it’s more like performing open-heart surgery on your computer. But fear not! With these step-by-step instructions and a bit of determination, you’ll be able to seamlessly transfer your operating system without skipping a beat.

    So channel your inner computer surgeon and let’s get to work!”

    FAQs

    What are the steps to transfer an operating system from one SSD to another?
    The first step is to back up all important data and files. Then, clone the old SSD onto the new one using software like Clonezilla or EaseUS ToDo Backup. Install the new SSD into your system and ensure it’s recognized. Finally, change the boot order in the BIOS and your operating system should now boot from the new SSD.

    Can I transfer an operating system from a larger SSD to a smaller one?
    Yes, but you will need to make sure the data on the old SSD can fit onto the new one. You can use tools like MiniTool Partition Wizard to resize the partition and ensure it fits onto the new SSD.

    What if my old SSD is failing or corrupted, can I still transfer the operating system?
    In this scenario, it’s best to create a fresh installation of the operating system on the new SSD. You can use a bootable USB with the operating system installer and follow the installation process. Remember to back up your data first.

    Is it possible to transfer an operating system from a hard drive to an SSD?
    Yes, it’s possible. The steps are similar to transferring from one SSD to another, but you will need to ensure the new SSD is properly formatted before cloning the operating system onto it. Again, it’s important to back up your data before attempting any transfers.

  • Effortlessly Transfer Your Files from SSD to HDD with These Simple Steps

    As technology advances, we tend to store more and more digital information, ultimately making our devices run slower due to a lack of storage space on their main hard drives. In an attempt to solve this issue, many people opt to transfer their files from an SSD to an HDD (solid-state drive to a hard disk drive). This process may seem daunting at first, but it can be easily accomplished with the right knowledge and tools.

    This blog will show you the best way to move your files from an SSD to an HDD, focusing on user-friendliness, security, and efficiency. So, if you are looking for some tips on how to free up space on your main drive, and move your data to an external one, keep reading!

    Step 1: Select Files to Transfer

    When it comes to moving files from your SSD to your HDD, the first step is to select the files you want to transfer. This may seem like a no-brainer, but it’s important to be intentional and selective in your choices to avoid cluttering up your HDD with unnecessary files. Start by considering which files are taking up the most space on your SSD and which ones you truly need to have readily accessible on your HDD.

    For example, files like photos, music, and videos may be better suited for your HDD, while essential programs and documents might need to stay on your SSD. You may also want to consider organizing your files into specific folders to make the transfer process smoother. With a bit of planning and consideration, you can efficiently move your files from your SSD to your HDD.

    Locate files on SSD that you want to move to HDD

    When it comes to transferring files from your SSD to your HDD, the first step is to locate the files you want to move. This can be a daunting task if you have a lot of files scattered throughout your computer. A good approach is to start by sorting your files into categories, such as documents, photos, videos, and music.

    This will help you narrow down your search and make it easier to find the files you want to transfer. Once you have identified the files you want to move, you can simply drag and drop them to the new location on your HDD. Keep in mind that transferring large files may take some time, so be patient and let the process run its course.

    It’s also a good idea to make a backup of your files before transferring them to ensure that you don’t lose any data in the process.

    how to move files from ssd to hdd

    Select the files you want to move

    When it comes to transferring files, the first step is to select the files you want to move. This may seem like a simple task, but it’s important to carefully consider which files you need to transfer. Take the time to review your files and determine which ones are essential and which ones can be left behind.

    It’s also a good idea to organize your files into folders to make the selection process easier. Once you’ve determined which files you need to transfer, you can begin the process of selecting them. This can often be done by clicking on individual files while holding down the control key on your keyboard.

    Alternatively, you can select entire folders by clicking on them once. It’s important to double-check your selections before moving to the next step to ensure that you’re transferring the right files. By selecting your files carefully, you’ll ensure that your transfer is as smooth and efficient as possible.

    Step 2: Copy Files to HDD

    If you are looking to move some of your important files from your SSD to your HDD, it’s actually a pretty simple process. The first step is to make sure that your HDD is properly connected to your computer and has enough space to accommodate all the files you want to transfer. Once you’ve done that, you can proceed to copy your files from your SSD to your HDD.

    This can be done either manually by selecting the files one by one and pasting them onto the HDD, or by using specialized software or tools that can easily transfer all your files in one go. Remember to check that everything is transferred correctly and to remove any duplicate files to free up space on both your SSD and HDD. With just a few simple steps, you can easily transfer all your important files from your SSD to your HDD and ensure that they are safely stored and easily accessible whenever you need them.

    Right click on selected files, click copy

    So, you’ve gotten to the point where you’re ready to copy your selected files over to your external hard drive. Great! The next step is to right-click on the files you want to copy, and then click “copy.” Sounds easy enough, right? Well, it is, but it’s also important to make sure that you’re selecting all the files you want to copy before you start the process.

    Otherwise, you might find yourself missing some important files later on. Once you’ve got everything selected, just right-click and copy, and you’re ready to move onto the next step of transferring your files. Don’t forget to double-check that you’ve got everything you need before moving onto the next step!

    Navigate to HDD, right click and select paste

    When it comes to backing up important files and documents, copying them onto an external hard drive is one of the most reliable methods. In order to do this, the first step is to connect the HDD to your computer or laptop. Once this is done, you can simply navigate to the folder or files you want to copy, right-click, and select “copy”.

    Then, navigate to the HDD, right-click, and select “paste”. This will transfer the files over to your external hard drive, ensuring that they are safe and in a separate location from your main computer. It’s important to make sure that your external hard drive is securely connected and functioning properly before transferring any files, in order to avoid any potential data loss.

    By copying your important files to an external HDD, you can have peace of mind knowing that your data is safe and secure, even if something were to happen to your main computer. So, go ahead and give it a try – the process is simple and straightforward.

    Alternatively, drag and drop the files from SSD to HDD

    When it comes to transferring files between an SSD and an HDD, there are two main methods you can use. In the previous step, we explored how to copy files from HDD to SSD, and now we’ll look at the reverse process. This time, we’ll focus on the alternative method – dragging and dropping files from your SSD to your HDD.

    This approach is usually quicker and easier than other methods of file transfer. All you need to do is open the file explorer and select the files you want to copy. Once you have your files selected, simply drag and drop them into the HDD folder of your choice.

    It’s essential to make sure that you have enough empty space on your HDD to accommodate the files you’re planning to transfer. Using this method, you can quickly move large files such as movies, videos, or games between the two drives without any fuss. Remember, the key to success when transferring files is to use a reliable medium and make regular backups of your data.

    Step 3: Verify Transfer

    When moving files from SSD to HDD, it’s crucial to verify the transfer to ensure that all data has been successfully moved. This step will guarantee that no important data has been lost during the process. One easy way to verify transfer is to check the file size and the number of files before and after the transfer process.

    In case of any missing or corrupted files, you can simply redo the transfer and avoid unnecessary headaches. Another way to verify transfer is to browse through the files and folders to check if everything is in the right place. Additionally, you can compare the file formats and properties of files transferred from SSD to HDD.

    By verifying the transfer, you can have the peace of mind that your important files and documents have been moved safely to your HDD.

    Check that files have copied across correctly to HDD

    Once you’ve transferred your files to your HDD, it’s essential to verify that they’ve copied correctly. There’s nothing worse than thinking you’ve successfully saved your important data, only to find out it’s corrupt or missing when you try to access it later. So, how can you ensure that your transfer was successful? Start by comparing the files on your original device to the files on your HDD.

    Go through each folder and document to make sure that they match in both size and content. This step can be time-consuming, especially if you’ve transferred a large amount of data. However, taking the time to verify your transfer can save you major headaches down the line.

    So, grab a coffee, put on some music, and get to comparing. Your future self will thank you for it.

    Delete original files from SSD if desired

    If you are transferring files from your SSD to another device, it is essential to verify the transfer to ensure that all your data has been successfully moved. Once you have completed the transfer, take some time to go through each file to ensure that they are accessible and free from corruption. A corrupted file can be a nightmare, and you don’t want to find out about it when you need the data the most.

    If there are any issues with the transfer, go back to the beginning and start the process again. It may take longer, but it is better to be safe than sorry. Once you are confident that the transfer has been successful, you can consider deleting the original files from your SSD if you no longer need them.

    This will free up valuable space on your device and keep things running smoothly. Just remember to double-check that you have everything you need before hitting delete!

    Conclusion

    In conclusion, moving files from SSD to HDD is a piece of cake! Simply go through your files and decide which ones you don’t need immediate access to and transfer them over to the trusty, reliable HDD. It’s like decluttering your desk; keep the important stuff close by and stash the rest in the filing cabinet. This will not only improve your computer’s speed and performance but also give you more space to store important files.

    Don’t be a digital hoarder, make the move and let your HDD do the heavy lifting!”

    FAQs

    What is the difference between an SSD and an HDD?
    An SSD (solid-state drive) is a type of storage device that uses flash memory to store data, while an HDD (hard disk drive) uses spinning disks to store data. SSDs are faster and more expensive, while HDDs are slower and cheaper.

    Why would someone want to move files from an SSD to an HDD?
    Someone might want to move files from an SSD (which has limited storage capacity) to an HDD (which has more storage capacity) to free up space or to store less frequently accessed files.

    How do I check if I have an SSD and an HDD in my computer?
    You can check if you have an SSD and an HDD by going to the “Disk Management” section in the “Computer Management” utility in Windows. It will show all of the storage devices connected to your computer.

    How do I transfer files from an SSD to an HDD?
    You can transfer files from an SSD to an HDD by copying and pasting them or by using a file transfer software like TeraCopy or FastCopy. Simply select the files you want to transfer, right-click, and choose “Copy”. Then, go to the HDD location where you want to store the files, right-click, and choose “Paste”.