Category: How to

How to

  • Acer: Ultimate Guide to Migrate Data to New SSD in Minutes

    Upgrading to a new SSD can drastically improve the performance of your Acer computer, but transferring your data over can be a daunting task. No one wants to lose their important files or spend hours manually transferring each document one by one. Luckily, there are a few ways to migrate your data to your new SSD in a smooth and efficient manner.

    In this article, we’ll walk you through the different options you have when it comes to transferring your data and guide you on how to do it using Acer’s software. So sit back and relax as we make your transition to a new SSD seamless and stress-free.

    Back Up Your Data

    If you are replacing your Acer laptop’s hard drive with a new solid-state drive (SSD), it’s crucial to migrate your data to the new drive before installing it. This will save you from the hassle of losing your important data and files. To start the migration process, you first need to create a backup of your data.

    You can use Windows built-in backup feature or any third-party backup tool to make a copy of all your important files, including photos, videos, documents, and software. Once the backup is complete, you can use a disk cloning tool, such as Acronis True Image or Macrium Reflect, to transfer the data from your old hard drive to the new SSD. These tools will create a bootable USB drive, allowing you to boot into the cloning tool and perform the transfer.

    This process will ensure that your data remains intact and you won’t have to go through the hassle of reinstalling your operating system, applications, and setting up your preferences from scratch. With the new SSD, your Acer laptop will start up quickly, and you’ll be able to access your files and apps in no time. So, remember to back up your data before replacing your hard drive and make your migration process smooth and seamless.

    How to Back Up Your Data to an External Drive

    Backing up your data is essential to protect yourself from data loss. One of the easiest and most convenient ways to do so is by storing your data on an external hard drive. First, select an external drive that has enough storage capacity for all of your data.

    After that, connect the external drive to your computer. Once connected, your computer should recognize the new drive automatically. You can then drag and drop your files and folders to the external drive manually or use the backup software that came with the drive.

    It is important to remember to update your external hard drive regularly to ensure that your latest data is always backed up. Additionally, keep the drive in a safe place, where it is protected from damage and theft. In summary, backing up your data to an external drive is a simple and effective way to safeguard your data and prevent potential loss.
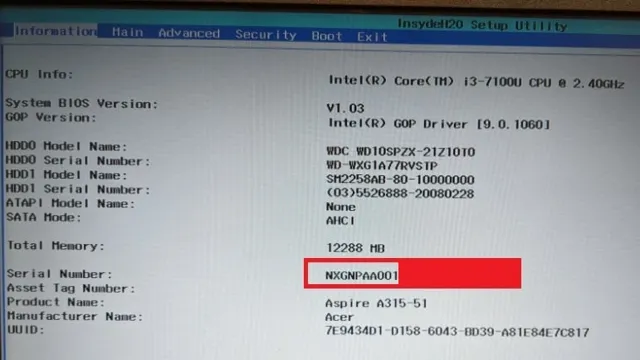
    acer how to migrate data to new ssd

    How to Back Up Your Data to Cloud Storage

    Backing up your data is crucial in ensuring that you don’t lose important files due to system crashes, virus attacks, or accidental deletion. The easiest way to perform a backup is by using cloud storage services. You can choose from a variety of options such as Dropbox, Google Drive, iCloud, and OneDrive.

    These services allow you to upload your files to a remote server, which you can access from any device with an internet connection. Uploading your files to the cloud ensures that they are safe even if your computer’s hard drive or storage device fails. Plus, you can easily share files with colleagues or friends without having to worry about file sizes or email restrictions.

    All you need to do is sign up for a cloud storage service, choose a plan that best fits your needs, and start uploading your files. With cloud storage, you can have peace of mind knowing that your data is always secure and accessible.

    Cloning Your Old Drive

    If you’re looking to upgrade your Acer laptop’s hard drive to an SSD and want to migrate all your data to the new drive without having to manually reinstall everything, then cloning your old drive is the way to go. Cloning involves creating an exact copy of your existing hard drive onto the new SSD, effectively transferring everything over. It’s important to note that not all cloning software supports all drives and that it’s essential to backup your data beforehand.

    You can use free cloning software such as Macrium Reflect or EaseUS Todo Backup Free to make the process easy and straightforward. Once you’ve installed your SSD and have the cloning software running, you simply select your old hard drive as the source and the new SSD as the target and then begin the cloning process. Once the cloning process is complete, you should be able to boot up your Acer laptop from the new SSD and start using all your applications and data like before, but with improved performance thanks to the speed of an SSD.

    How to Clone Your Old Drive Using Acer eRecovery Management

    Cloning your old drive can be a daunting task, but with Acer eRecovery Management, it’s easier than you might think. Cloning your old drive means creating an identical copy of your current hard drive, including all programs, data, and settings, onto a new hard drive. This is a great way to upgrade to a larger or faster hard drive without losing any of your data.

    To begin, make sure you have your new hard drive and a drive cloning software program installed on your computer. Then, open Acer eRecovery Management and select the “Restore” tab. From here, choose the “Restore System to Factory Default” option, and follow the prompts to select your new hard drive as the destination drive for the clone.

    Once you confirm your choice, the cloning process will begin and will take a few minutes to complete. With Acer eRecovery Management, you can clone your old drive hassle-free and ensure that your data is safe and sound.

    How to Clone Your Old Drive Using Third-Party Software

    If you’re looking to replace your old hard drive with a new one or just want to create a backup, cloning your old drive is the way to go. One way to do this is by using third-party software like EaseUS Todo Backup or Acronis True Image. These software programs allow you to clone your old drive to your new one without having to reinstall your operating system or any of your applications.

    Simply install the software, connect your new drive, choose the source and target drives, and start the cloning process. It’s important to note that cloning your old drive can take several hours, depending on its size and the speed of your computer. Once the process is complete, you’ll have an exact copy of your old drive on your new one, including all of your files and settings.

    This can save you both time and effort in the long run. So, if you’re looking for an easy and efficient way to clone your old drive, consider using third-party software to get the job done.

    Installing the New SSD

    Installing a new SSD on your Acer laptop can be intimidating, but with the right steps, it’s a simple process. If you want to migrate data to your new SSD, there are a few things you’ll need to do. First, you’ll need to back up all your important files and documents to an external drive or cloud service.

    Then, you’ll need to install the new SSD into your laptop by removing the old drive and inserting the new one. Once you’ve installed the new drive, you’ll need to install your operating system and all your applications. You can do this by using a backup or installation disc or by downloading them from the internet.

    Finally, you’ll need to transfer your backed-up files to the new drive. With a little patience and attention to detail, you can easily install your new SSD and migrate your data to make your Acer laptop faster and more efficient.

    How to Install the New SSD in Your Acer Laptop

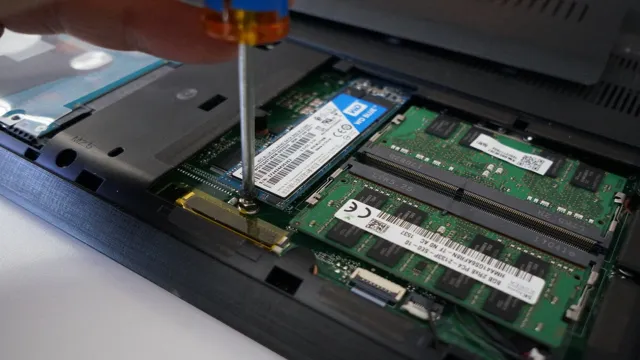
    If you’re looking to improve your Acer laptop’s performance, upgrading to a new solid-state drive (SSD) is a great way to go. The installation process itself is relatively straightforward and can be done in just a few steps. First, you’ll need to open up your laptop and locate the hard drive compartment.

    Depending on your particular model, this may require some gentle prying or the removal of a few screws. Once you have access to the old hard drive, remove it carefully and replace it with your new SSD. Make sure it’s secured properly and reattach any screws or cables you may have removed.

    Finally, close up your laptop and power it back on. You should notice a significant improvement in load times and overall speed. With a bit of know-how and a few tools, installing a new SSD in your Acer laptop is a simple and effective way to boost your computer’s performance.

    Restoring Your Data

    If you’ve recently upgraded your Acer laptop and migrated your operating system to a new SSD, you may be wondering how to transfer your existing data. Fortunately, it’s a relatively straightforward process that can be accomplished in a few simple steps. First, determine what data you need to transfer, such as documents, photos, and music files.

    You can do this by making a list or using a file explorer tool. Next, you’ll need to connect your old hard drive to your Acer laptop, either by using an external enclosure or installing it internally. Once you’ve copied your data to the new SSD, you can disconnect the old hard drive and begin using your upgraded laptop.

    By following these steps, you can ensure that your valuable data is properly transferred and ready to use on your new SSD.

    How to Restore Your Data from the External Drive

    Restoring your data from an external drive can be a daunting task, but with the right tools and know-how, it’s easy to do. The first step is to connect the external drive to your computer, making sure it’s recognized by your operating system. Next, you’ll want to locate the backup file you created on the drive and begin the restoration process.

    Some software programs make this easy, while others may require more manual intervention. Be sure to follow the instructions carefully and back up any files you may have modified since your last backup. With patience and persistence, you can successfully restore your data from an external drive and get back to work in no time.

    How to Restore Your Data from Cloud Storage

    Restoring Your Data from Cloud Storage is not a difficult task. The process involves accessing your cloud storage account and selecting the files you wish to recover. But before you begin, ensure that you have a reliable internet connection, and the device you are using has enough space to download the data.

    Once you have selected the files, you can download them to your device, and they will be restored to their original format. It’s essential to keep in mind that cloud storage platforms usually provide a limited period during which you can recover your data. Therefore, it’s crucial to act fast and retrieve your data as soon as you realize it’s missing.

    Restoring your data from cloud storage is quick and easy, and it’s a great way to ensure that you don’t lose your data in case of unforeseen circumstances.

    Conclusion

    In conclusion, migrating data to a new SSD can seem like a daunting task, but with the right tools and guidance, it can be as smooth as butter. Just like how an acer blooms with proper care and nourishment, your new SSD will run with lightning speed and efficiency, making your computing experience an absolute joy. So let’s put on our gardening gloves and get to work – let’s make sure our acers (and SSDs) grow strong and prosper!”

    FAQs

    What is the process to migrate data to a new SSD on an Acer laptop?
    To migrate data to a new SSD on an Acer laptop, you can use cloning software such as EaseUS Todo Backup or Macrium Reflect. First, connect the new SSD to your Acer laptop via a USB adapter. Then, open the cloning software and select the source and destination drives. Follow the prompts to start the cloning process, and once it’s completed, shut down your laptop, remove the old hard drive, and replace it with the new SSD.

    Can I use a different brand of SSD to upgrade my Acer laptop?
    Yes, you can use a different brand of SSD to upgrade your Acer laptop. However, it’s important to make sure that the new SSD is compatible with your laptop’s interface, such as SATA or NVMe. You can check your laptop’s specifications or user manual for this information before purchasing a new SSD.

    Is it necessary to backup my data before migrating to a new SSD on my Acer laptop?
    It’s highly recommended to backup your data before migrating to a new SSD on your Acer laptop. While cloning software can usually transfer all of your files and settings, there is still a risk of data loss or corruption during the migration process. You can create a backup using external hard drives, cloud storage, or built-in backup tools such as Windows Backup and Restore.

    How do I transfer my Windows license to the new SSD on my Acer laptop?
    If you have a retail copy of Windows on your Acer laptop, you can transfer the license to the new SSD by deactivating it on the old hard drive first. To do this, open the Command Prompt as an administrator and type “slmgr.vbs /upk” to uninstall the current license key. Then, shut down the laptop, install the new SSD, and activate Windows using the product key. If you have an OEM copy of Windows, the license is tied to the motherboard and cannot be transferred.

  • Unlocking the Power of Seagate: Your Guide to Accessing the 8GB SSD on your 1TB HDD

    Have you ever wondered about the mysterious 8GB SSD on your 1TB HDD Seagate drive? It may seem like a small amount of storage compared to the whopping terabyte, but it actually serves an important purpose. The SSD, or solid-state drive, is a type of storage that uses flash memory to access data quickly. In contrast, the traditional hard disk drive (HDD) uses spinning disks to read and write data, which can be slower in comparison.

    So, why does a Seagate drive have both an HDD and an SSD? The SSD is used as a cache, meaning it stores frequently accessed data for quick access. This can improve the overall performance of the drive, especially when opening and closing applications, booting up the computer, and accessing frequently used files. But how do you access the 8GB SSD on your Seagate drive? The process may vary depending on your operating system, but typically you can access it through the disk management settings.

    From there, you can view and manage the two separate partitions on your drive. In conclusion, the 8GB SSD on your 1TB HDD Seagate drive may be small, but it serves an important purpose in improving the performance of your computer. By accessing it through your disk management settings, you can ensure that both the HDD and SSD are functioning properly and optimizing your computer’s speed and efficiency.

    Introduction

    If you have a Seagate 1TB HDD with an 8GB SSD and you want to know how to access the SSD, you’re in the right place. The SSD is designed to work in tandem with the HDD to deliver faster boot-up and load times for the operating system and other frequently used programs. However, depending on the model you have, accessing the SSD may require a bit of technical know-how.

    The best way to get started is to familiarize yourself with the user manual that came with your Seagate HDD. Look for any specific instructions on how to access the SSD, and if you’re still unsure, don’t hesitate to reach out to the Seagate customer support team for assistance. With the right guidance, you can access your SSD and unlock its full potential.

    Understanding the difference between an HDD and an SSD

    If you’re in the market for a new computer or thinking of upgrading your current one, you’ve probably heard the terms HDD and SSD being thrown around. Both of these terms describe types of storage devices, but what sets them apart? Well, an HDD (hard disk drive) is the older, more traditional option, while an SSD (solid-state drive) is a newer, faster alternative. HDDs have mechanical components that spin around to read and write data, while SSDs store data on flash memory chips like those in your phone or camera.

    This difference affects factors like speed, durability, and power consumption, which we’ll get into later. Ultimately, the choice between an HDD and SSD comes down to your needs and budget, but understanding the differences can help you make an informed decision.

    1tb hdd 8gb ssd seagate how to access ssd

    Why use an SSD with an HDD?

    SSD with HDD Introduction: If you’re wondering if you should use an SSD with an HDD, the answer is a resounding yes! Why settle for either fast load times or ample storage when you can have both? By using an SSD (solid-state drive) with an HDD (hard-disk drive), you can have the best of both worlds in terms of storage capacity and speed. In this article, we’ll delve into what an SSD and HDD are, the benefits of using both, and how to set up your computer to take advantage of both drives. So let’s get started! An SSD with an HDD provides faster speed and more storage capacity, but before we dive into the benefits, let’s understand the difference between the two drives.

    A traditional HDD stores data on spinning platters with the help of read/write heads, while an SSD stores data on flash memory chips without any moving parts. The result is that an SSD can access data much faster and more reliably than an HDD. However, an SSD typically has less data storage capacity than an HDD.

    By pairing an SSD with an HDD, you get the speed benefits of an SSD, while still having ample storage space on your HDD. Plus, most modern operating systems allow you to set up your computer to automatically store frequently-used applications and files on the SSD, giving you even more performance gains. So if you’re looking for a way to upgrade your computer’s performance without sacrificing storage space, using an SSD and HDD in tandem is the way to go.

    Locating the SSD on your Seagate Drive

    If you have a Seagate Drive that comes with a 1TB HDD and 8GB SSD, you may be wondering how to access the SSD. The good news is that it’s not difficult to locate the SSD on your Seagate Drive. The SSD is typically located on the motherboard of your drive and can be accessed by removing the housing of your Seagate Drive.

    Once you have removed the housing, you should be able to see the SSD. It’s important to note that accessing the SSD on your Seagate Drive can be tricky, and it may not be a good idea to attempt this if you’re not familiar with the components of your drive. Overall, locating and accessing the SSD on your Seagate Drive is a relatively easy process, but if you’re not comfortable doing it yourself, it may be best to consult a professional.

    Check your computer’s BIOS settings

    If you’re planning to upgrade your computer’s storage by adding an SSD to your Seagate Drive, you’ll need to locate it first. One way to do this is by checking your computer’s BIOS settings. The BIOS, or Basic Input/Output System, is a firmware that your computer loads before the operating system.

    It contains settings that control various hardware components, including storage devices. To access the BIOS settings, you need to restart your computer and press a specific key, usually displayed on the screen during the bootup process, such as F2 or Delete. Once in the BIOS menu, look for a section called “Storage Configuration” or similar.

    Here, you can see all the connected storage devices, including your Seagate Drive and the SSD you want to add. Make a note of the SSD’s location, such as its SATA port number, so that you can install it correctly later. By checking your computer’s BIOS settings, you can ensure that your Seagate Drive is compatible with an SSD and locate the right spot to install it.

    Use Seagate software to locate the SSD

    If you’re having trouble locating the SSD on your Seagate drive, don’t worry – Seagate provides software that can help you out. The Seagate SSD Dashboard software is a free tool available for download on their website. Once downloaded, simply install and open the software, and it will automatically detect and display information about any Seagate SSDs connected to your computer.

    From there, you can easily access important information such as the drive’s health, temperature, and firmware version. You can also quickly perform tasks such as securely erasing the drive or updating its firmware. Using the Seagate SSD Dashboard can save you time and energy when managing your Seagate SSDs, and ensures that you get the most out of your hardware.

    So, if you’re ever unsure about how to locate your Seagate SSD, remember to check out the Seagate SSD Dashboard software – it’s a simple and effective solution.

    Accessing the SSD

    If you have a Seagate 1TB HDD with an 8GB SSD, you may be wondering how to access the SSD portion of your storage device. The SSD is specifically designed for caching frequently-used files, thereby improving the overall performance of your computer system. To access the SSD, you will need to install the Seagate software that comes with the device.

    Once installed, open the software and navigate to the “SSD” section. From there, you should be able to view the available space on the SSD and decide which files, folders, and programs should be cached. Keep in mind that caching can significantly improve your computer’s performance, so it’s certainly worth taking the time to set up your SSD.

    With the help of Seagate’s software, accessing and optimizing your SSD storage should be a breeze.

    Using your operating system’s file explorer to access the SSD

    Accessing the SSD on your computer can be a useful way to manage your files and folders efficiently. If you are using Windows as your operating system, the easiest way to access your SSD is through the file explorer. Simply open the file explorer by clicking on the folder icon on your taskbar, or by pressing the Windows key + E on your keyboard.

    Once the file explorer is open, you should see all the drives connected to your computer, including your SSD. You can then select your SSD and browse through its contents, create new folders, move files around, and perform any other file management tasks you need. If you are using a Mac OS, the process is similar.

    Use the Finder app to access your SSD by clicking on the Finder icon on your dock or by pressing Command + Space and searching for Finder. The Finder app will open, giving you access to all the drives on your computer, including your SSD. By using your operating system’s file explorer, you can quickly and easily access your SSD and manage your files and folders with ease.

    Creating a shortcut for easy access to the SSD

    Accessing the SSD on your computer can be an easy process, but it can sometimes be time-consuming to navigate through multiple folders to find it. Fortunately, there is an easy solution to this problem: creating a shortcut for easy access. By creating a shortcut on your desktop or taskbar, you can quickly access your SSD with just one click.

    To create a shortcut, first, right-click on your desktop or taskbar and select the option to create a new shortcut. Then, follow the prompts to navigate to your SSD and select it as the target for the shortcut. Give the shortcut a name and click “Finish” to complete the process.

    With your new shortcut in place, you can easily access your SSD whenever you need to without navigating through multiple folders. This can be particularly useful if you use your SSD for storage or if you frequently access files stored on it. By using this simple trick, you can save yourself time and frustration and improve your overall computer experience.

    Transferring files to and from the SSD

    If you’re looking to transfer files to or from an SSD, accessing it is the first step. One way to access an SSD is through a USB connection. Simply plug in the USB cable and connect it to your computer.

    Another option is to use an external hard-drive enclosure to connect the SSD to your computer’s USB port. Once you’ve connected the SSD, you can use software such as Windows Explorer or macOS Finder to transfer files. Just drag and drop the files from the source location to the SSD, or vice versa.

    If you’re transferring large files, it may take some time, but the high speed of the SSD will make the process much faster than a conventional hard drive. Remember to safely eject the SSD before disconnecting it to avoid any data loss or corruption. With these simple steps, you can easily transfer files to and from your SSD without any hassle.

    Conclusion

    In a world where storage is everything, the 1TB HDD and 8GB SSD Seagate combo is a force to be reckoned with. But some may ask, how do we access the SSD? Fear not, for the answer lies within the power of technology and a bit of know-how. With a few simple steps, you can easily access the SSD and enjoy lightning-fast data transfer speeds.

    It’s like finding the hidden treasure in a Pirates of the Caribbean movie, but instead of gold, you get the gift of efficient storage. So go forth and explore the wonders of technology with Seagate’s 1TB HDD and 8GB SSD combo!”

    FAQs

    Can I use the 8GB SSD as a boot drive on Seagate 1TB HDD?
    Yes, you can use the 8GB SSD as a boot drive on Seagate 1TB HDD. You need to install the operating system on the SSD.

    What is the benefit of using an SSD along with an HDD?
    The benefit of using an SSD along with an HDD is that it provides faster boot and data access times. The operating system and frequently used applications can be installed on the SSD, while the large files can be stored on the HDD.

    How do I access the SSD on Seagate 1TB HDD?
    To access the SSD on Seagate 1TB HDD, you need to go to the Disk Management tool in Windows. Right-click on the SSD partition and assign a new drive letter. You can then access the SSD from the File Explorer.

    Can I upgrade the SSD on Seagate 1TB HDD?
    Yes, you can upgrade the SSD on Seagate 1TB HDD. You can replace the existing SSD with a new one or add a new SSD as a second drive. Make sure to check the compatibility of the SSD with your system before upgrading.

  • Unlock The Power of Video Playback on Android: Quick Guide to Playing Videos Off Your SSD

    Do you ever find yourself struggling to play videos from your SSD on your Android device? It can be frustrating when you have a collection of movies or TV shows saved on your SSD, but you can’t enjoy them on the go. Thankfully, there are ways to make this process easier. With a few simple steps, you’ll be able to access and play your SSD videos on your Android phone or tablet.

    So, let’s dive in and explore the different methods you can use to play videos from SSD on Android. Whether you’re a movie buff, a TV show addict, or simply want to watch your favorite videos on the go, these solutions will have you covered.

    Use Compatible File Formats

    If you’re hoping to play videos off your SSD on an Android device, the first thing you need to consider is file compatibility. Not all video file formats are supported by all Android devices, so it’s important to make sure that your videos are in a compatible format before trying to play them. Some of the most common video file formats that are supported by Android devices include MP4, AVI, and WMV.

    If your videos are in a different format, you may need to convert them before you can play them on your Android device. There are plenty of free and paid conversion tools available online that can help you convert your videos to a compatible format quickly and easily. Once your videos are in the right format, you should be able to play them off your SSD with ease.

    So, don’t forget to check your video format compatibility before trying to watch your videos on your Android device!

    Avoid Unsupported Codecs

    If you’re working with video content, using compatible file formats is crucial to ensure that your media is accessible and widely usable. It’s important to avoid unsupported codecs that can cause problems when trying to play or share your files. Unsupported codecs are essentially compression methods that aren’t widely supported by major video software or hardware, meaning they can prevent your video from playing correctly or cause issues with playback quality.

    To maintain the highest level of compatibility and avoid these issues, stick to well-known file formats like MP4, MOV, and AVI when exporting your videos. By doing so, you’ll save yourself a headache in the long run and ensure that your media is accessible to a wider audience.

    android how to play videos off my ssd

    Convert to Android-Friendly Extensions

    If you’re an Android developer, you’d want to make sure that your extensions are compatible with the Android platform. One way of doing this is by using compatible file formats. Android has its own set of file types, and using those can help ensure that your app is optimized for the platform.

    For example, Android uses the APK (Android Package) file format for app distribution. So, when developing an app or extension, make sure to package it in an APK format. Additionally, using standard image formats like PNG, JPEG, and GIF can help ensure that your images are optimized for Android devices.

    By using compatible file formats, you’re making sure that your app or extension works seamlessly with Android, resulting in a better user experience.

    Ensure SSD Connection

    If you’re looking to play videos off your SSD on your Android device, the first step is to ensure a solid connection. Make sure your device is compatible with your SSD and that both devices are connected either through a USB cable or adapter. Once your devices are connected, you can use various media player apps like VLC, MX Player, or Kodi to play your videos.

    These apps should recognize your SSD and display your files as long as they support the file format. Additionally, some Android devices may require a third-party file manager app to access your files. By ensuring a secure connection and utilizing the right media player apps, playing videos off your SSD on your Android device can be a breeze.

    Connect SSD via OTG Cable

    Connecting an SSD to your phone or tablet can offer quick and mobile access to your important files, but it’s essential to ensure the connection is secure. Using an OTG cable, connecting your SSD to a mobile device is easy and quick. An OTG (On-The-Go) cable allows for a direct connection between a USB peripheral and a mobile device.

    Before plugging in the SSD, it’s important to make sure that your device supports OTG file transfer. Once you have confirmed this, plug the OTG cable into your mobile device and then connect your SSD or hard drive to the other end of the cable. You may then be prompted to give permission to access your files.

    It’s always recommended to safely eject the device after use, to prevent data loss or corruption. With this simple setup, you can easily carry around your important files on an SSD or HDD, ensuring you never have to go without access to your important data.

    Check Android Device Compatibility

    If you’re developing an Android app that requires the use of an external SSD, it’s important to ensure that the device you’re targeting is compatible with the SSD’s connection. There are a few factors to consider when checking compatibility, such as the type of connection the SSD uses (e.g.

    USB-C, Thunderbolt), the version of the Android operating system on the target device, and any hardware limitations that may prevent the device from supporting certain types of connections. One way to ensure SSD connection on an Android device is to check the device’s specifications and see if it supports the type of connection that your SSD requires. You can usually find this information on the manufacturer’s website or by searching online forums for the device.

    Another option is to test the connection yourself by plugging in the SSD to the device and seeing if it is recognized and accessible. If it’s not, you may need to try a different type of connection or consider using a different SSD that is compatible with the device. Ultimately, ensuring SSD connection on an Android device is crucial for any app that requires external storage.

    By taking the time to check compatibility and test the connection, you can avoid potential issues and ensure a seamless user experience. So, if you’re developing an app that requires external storage on an Android device, be sure to prioritize compatibility and compatibility testing to ensure a successful launch.

    Enable USB Debugging

    When it comes to using an SSD with your Android device, one crucial step is to enable USB debugging. This feature essentially allows your phone to communicate with your computer, giving you greater control over the device and more opportunities for customization. However, before you start configuring USB debugging on your Android, you need to ensure that your SSD is properly connected to it.

    Most devices require a USB-C to USB-A cable or a USB-C to USB-C cable, depending on the port types available on your phone. Although some SSDs may come bundled with their own cables, it is essential to check for compatibility with your Android phone before you make a purchase. Once you have a compatible cable and connect the SSD to your device, you can then proceed with enabling USB debugging.

    This step enables your phone to grant access to your SSD’s files and folders, allowing you to transfer files, back up data, and access other functions that require a direct connection to your computer. Overall, enabling USB debugging is a crucial step that enhances the functionality of your Android device when using an SSD and can bring another level of flexibility to your storage and data management needs.

    Explore Video Player Apps

    If you’re looking to play videos off your SSD on an Android device, there are several video player apps available to explore. One popular option is VLC for Android, which supports a wide range of file formats and has advanced playback options such as subtitles and equalizer controls. Another option is MX Player, which also supports various file types and has features such as hardware acceleration and network streaming.

    Other video player apps to consider include BSPlayer, PlayerXtreme Media Player, and Kodi. It’s important to note that not all video player apps may support playing videos directly from an SSD. In some cases, you may need to transfer the videos to your device’s internal storage or use a file manager app that supports external storage access.

    With the right video player app and setup, you can enjoy your videos on-the-go from your SSD on your Android device.

    VLC Media Player

    VLC Media Player is one of the most popular video players available today. It is a free, open-source software that can play a wide variety of audio and video formats, including DVDs, VCDs, and various streaming protocols. With its user-friendly interface and powerful features, VLC Media Player is a favorite among users around the world.

    The software is compatible with various operating systems, including Windows, Mac, and Linux, and supports customization through add-ons and skins. One of the standout features of VLC is its ability to play broken or incomplete video files, making it ideal for users who often encounter corrupted or unfinished downloads. Overall, VLC Media Player is a reliable and versatile video player that provides an excellent viewing experience for users of all levels.

    MX Player

    If you are looking for a reliable and efficient video player app, then MX Player is definitely worth checking out. This high-quality app offers a range of features that make watching videos a pleasure. With MX Player, you can enjoy high-quality playback, including 4K and HD videos, and a range of subtitles options to choose from.

    The user-friendly interface makes it easy to navigate the app, and the wide range of customization options allows you to personalize your viewing experience. Additionally, MX Player also offers advanced features such as hardware acceleration and supports multiple audio formats. Overall, MX Player is an excellent choice for anyone looking for a top-tier video player app.

    Try it out for yourself and see why it is so highly recommended by users all over the world.

    Conclusion

    Congratulations! You are now officially a tech-savvy individual, able to seamlessly stream videos from your sleek Android device straight from your trusty SSD. With your newfound knowledge, you can carry your favorite movies, TV shows, and viral cat videos with you wherever you go without having to worry about running out of storage space. So sit back, relax, and enjoy your favorite on-the-go entertainment, knowing that you have mastered the art of playing videos off your SSD.

    Happy streaming!”

    FAQs

    What is an SSD and how is it different from a hard drive?
    An SSD (Solid State Drive) is a storage device that uses NAND-based flash memory to store data, while a hard drive uses rotating disks to store data. SSDs are faster and more reliable than hard drives, but are typically more expensive.

    Can I play videos directly from my SSD on my Android device?
    It depends on the file format of the video and the capabilities of your Android device. Many Android devices support popular video formats like MP4, AVI, and MKV, but some devices may not support less common formats. Additionally, some older or lower-end devices may struggle to play high-resolution or high-bitrate videos smoothly.

    What app should I use to play videos from my SSD on my Android device?
    There are many video player apps available for Android, but some popular options include VLC, MX Player, and BSPlayer. These apps are capable of playing a wide range of video formats and have features like subtitle support, playback speed control, and gesture controls.

    How do I transfer videos from my SSD to my Android device?
    There are a few ways to transfer videos from an SSD to an Android device, including using a USB cable, a file transfer app like AirDroid or Xender, or a cloud storage service like Google Drive or Dropbox. If your Android device has a microSD card slot, you can also transfer videos to a microSD card and then insert the card into your device.

  • Easy Guide on Connecting SSD to Your Computer for Lightning Fast Performance

    Upgrading your computer’s storage capacity is a great way to improve its performance. And what better way to do that than by connecting an SSD to your computer? By doing so, you’ll be giving your machine a significant boost in speed and responsiveness. But, it can be a bit overwhelming if you’re a novice to the world of tech.

    Essentially, SSDs or Solid State Drives are alternatives to traditional hard drives (HDDs) and utilize no moving parts. They’re designed to store your data more effectively, so you can run programs and access your files more quickly. In this post, we’ll go over the process of connecting an SSD to your computer, so you can start enjoying the many benefits!

    First Step: Check Compatibility

    If you’re considering upgrading your computer’s storage by adding an SSD, the first step is to check compatibility. Not all computers are equipped to handle SSDs, so it’s important to see if your computer has an available slot for it. You should also consider the type of SSD you want to install – whether it is a SATA, M.

    2, or NVMe SSD. Each type may have different compatibility requirements, so it is crucial to do your research before making the purchase. Keep in mind that some older computers may require a BIOS update to be compatible with the SSD.

    Checking compatibility is a crucial first step in ensuring that your SSD installation is successful and that your computer is running at its full potential.

    Verify Your Computer’s Compatibility with an SSD

    If you’re considering upgrading your computer with an SSD (Solid State Drive), the first thing you need to do is check your computer’s compatibility. Not all computers are compatible with SSDs, so it’s important to do your research before investing in one. One way to check if your computer is compatible is to look at the specs of your current hard drive.

    Most SSDs use the same SATA interface that traditional hard drives use, so if your computer has a SATA interface then you should be good to go. However, it’s important to note that some computers may require a specific type of SSD, so it’s always best to check with the manufacturer or consult a professional before making a purchase. Keyword: SSD compatibility, computer upgrade, SATA interface.

    how do i connect an ssd to my computer

    Choose the Right Type of SSD for Your Computer

    When choosing an SSD for your computer, the first step you need to take is to check compatibility. Not all SSDs are created equal, and you’ll need to ensure that the one you’re eyeing will work seamlessly with your computer. For instance, if you have an older computer, you might need to look for an SSD that’s compatible with SATA II, while newer computers may require NVMe-based SSDs.

    Another thing to consider is whether you need a 5-inch SSD, which is the same size as a traditional hard drive, or an M.2 SSD, which is a smaller form factor that frees up more space inside your computer.

    Ultimately, choosing the right SSD can significantly boost your computer’s performance, so it’s worth doing your research and investing in a quality, compatible SSD that meets your needs.

    Second Step: Open Your Computer

    So, you’ve got yourself a brand-new SSD and you’re ready to give your computer a performance boost. Great! The first thing you need to do is power down your computer and unplug it from the socket. Once that’s done, it’s time to crack open your computer and locate the hard drive bay.

    Typically, this can be found at the bottom of your computer or inside the side panel. Depending on the type of computer you have, the process may vary slightly. If you’re unsure about how to open your computer, a quick Google search should do the trick.

    Once you have the hard drive bay open, you can slot your SSD into place and secure it using the screws provided. Don’t forget to connect the SATA power and data cables to your new drive! Once you’ve done this, close up your computer, plug it back in and power it up. Your new SSD should now be visible in your operating system and ready to use! Connecting an SSD to your computer is a relatively simple process and can be done in just a few easy steps.

    Power Down Your Computer and Disconnect Cables

    After shutting down your computer, the second step to open up your computer. This process begins with ensuring that all cables have been disconnected from your computer. This is an essential safety measure that prevents any electrical damage from occurring during the disassembly process.

    Once you have disconnected all of the cables, it is time to take off the cover of the computer. The way to open your computer depends on the model; some computers may require that you unscrew the back panel, while others may have a sliding panel. Make sure to read the manual or do some research to ensure that you know how to safely open your particular computer model.

    Remember that if you are not comfortable with opening your computer, it is best to consult a professional.

    Remove Your Computer’s Side Panel

    Removing your computer’s side panel is the second step in opening your computer. This may seem like a daunting task, but it’s actually quite simple. First, you’ll need to locate the screws that are holding the side panel in place.

    In most cases, these are located along the back edge of the computer. Use a screwdriver to loosen the screws and then gently pull the panel away from the computer. You may need to apply a bit of force, but be careful not to bend or break the panel.

    Once you have the panel removed, you’ll have access to the inside of your computer. This is where you can make any upgrades or repairs that you need to. Remember to handle the components with care and always discharge any static electricity before touching them.

    By removing your computer’s side panel, you’ll be able to take full advantage of the hardware inside and get the most out of your machine.

    Third Step: Install the SSD

    Now that you have prepared your computer and have your SSD on hand, it’s time to start the installation process. Before anything else, ensure that your computer is shut down and unplugged from any power source. Open up your computer’s casing and locate the hard drive bays.

    Typically, these bays are located at the bottom of the casing and are easily removable. Carefully remove the existing hard drive from its bay and replace it with the SSD. You’ll need to connect the appropriate cables to the SSD, including the data cable and power cable.

    Once properly connected, you can secure the SSD in place using screws or the case’s mechanism. It’s essential to ensure that the SSD is evenly aligned and securely in place to avoid any damage. You should also double-check that the cables are firmly connected to avoid any potential data loss or system errors.

    Finally, replace the casing, plug in your computer, and turn it on to ensure everything is running smoothly. Congratulations, you’ve successfully installed your SSD!

    Locate the SSD Slot and Mounting Bracket

    Now that you know how to prepare your system and acquire the necessary tools, it’s time to finally install your SSD. The third step in this process is to locate the SSD slot and mounting bracket. Depending on your computer’s make and model, this location may vary, so it’s advisable to refer to your instruction manual or online resources.

    Once you’ve identified the location, you can prepare the mounting bracket by taking the screws and attaching them to the SSD. Next, slide the bracket containing the SSD into the designated slot and secure it with the screws provided. It’s important to make sure that the SSD is securely fastened, as any loose components can interfere with your system’s performance.

    With your SSD successfully installed, you’re one step closer to enjoying faster boot times, quicker data transfer, and improved overall system performance.

    Attach the Mounting Bracket to the SSD

    To install an SSD, the third step is attaching the mounting bracket to the SSD. This step is necessary as it secures the SSD in place and prevents it from moving around inside the computer case. To start, check the mounting bracket for compatibility with the SSD and for any screws needed in the process.

    Once you have the mounting bracket and screws, place the SSD on top of it and align the holes on the SSD with the holes on the bracket. Then, screw the SSD onto the mounting bracket, making sure it sits securely in place without any wobbling. Once the SSD is attached to the bracket, it’s ready to be installed into the computer case.

    This step is crucial to ensure that your SSD functions properly and does not come loose. By properly installing your SSD, you can enjoy faster boot times and overall performance on your computer.

    Install the SSD into the Slot and Connect Cables

    Now that you’ve successfully mounted the SSD, it’s time to install it into the slot and connect all the necessary cables. First, locate the slot where you will install the SSD. This is usually located near the hard drive or the existing SSD, depending on your computer’s configuration.

    Once you’ve identified the slot, insert the SSD into the slot, ensuring that it’s mounted securely. Next, connect the power supply cable to the SSD, which should be located near the slot. This is a SATA power cable, which provides power to the SSD.

    Lastly, connect the data cable to the SSD. This cable is also a SATA cable and allows the SSD to communicate with the motherboard. Make sure that both cables are firmly attached, and ensure that the SSD is installed correctly in the slot.

    Once you have done this, you are now ready to format and use your new SSD! Congratulations on completing the third step.

    Fourth Step: Configure Your BIOS Settings

    If you’re wondering how to connect an SSD to your computer, the fourth step is to configure your BIOS settings. This is an important step to ensure that your computer recognizes the new SSD. To access your BIOS settings, restart your computer and press the key indicated on the screen.

    The key may vary depending on your computer’s manufacturer, but it’s usually F2, F10, or DEL. Once you’re in the BIOS settings, look for the option to change the boot order. This will allow you to prioritize the new SSD over the old hard drive.

    You may also need to enable AHCI mode to fully utilize the SSD’s speed. Keep in mind that changing BIOS settings can be a bit tricky, so consult the user manual or online resources if you’re unsure. With the right BIOS settings, your computer should recognize the new SSD and you can start enjoying faster boot times and quicker access to your files.

    Power Up Your Computer and Enter BIOS

    After powering up your computer, the next step to configure your new PC is to enter the BIOS. BIOS stands for Basic Input/Output System, and it is responsible for handling the communication between your computer’s hardware and software. To access the BIOS settings, you need to press a specific key on your keyboard during the startup process.

    The most common keys are F2, F12, Delete, ESC, or the combination of Ctrl+Alt+Delete. Once you enter the BIOS, you’ll see a series of menus that allow you to tweak various system settings, such as the boot order, clock speed, and RAM timings. It’s essential to configure your BIOS correctly to ensure optimal performance, stability, and security of your computer.

    However, it’s important to note that fiddling with the wrong settings can cause serious consequences, so be careful and follow the instructions provided in your motherboard manual or online guides. A well-configured BIOS can significantly improve your computer’s performance and functionality.

    Locate the SSD in the BIOS Settings

    When it comes to configuring your BIOS settings to locate the SSD, the process can be a bit overwhelming, but don’t worry, we’ve got you covered. The first step is to access your BIOS settings by restarting your computer and pressing the appropriate key. Once you’re in, you’ll need to navigate to the “Storage” or “Advanced” settings tab, depending on your BIOS.

    From there, you’ll want to look for the option to enable the SATA mode or AHCI mode, depending on your storage device. Once that is enabled, save and exit your BIOS settings. Your computer will then restart, and the SSD should be recognized in the BIOS.

    If you’re still having trouble locating the SSD, double check all of your connections and ensure that the device is properly installed. With a little patience, you’ll be able to configure your BIOS settings and locate your SSD in no time.

    Set the SSD as the Boot Drive

    When you’re upgrading your computer’s hardware, it’s essential to configure your BIOS settings properly. This ensures that your system recognizes and prioritizes your new hardware correctly. In this case, we’re focusing on configuring your BIOS settings to set the SSD as the boot drive.

    This can help speed up your system’s boot time because the SSD has faster read and write speeds compared to traditional hard drives. When configuring BIOS settings, make sure to enter the BIOS menu during the boot process by pressing the appropriate button, usually displayed on the screen. From there, you’ll need to navigate to the boot options and select the SSD as the primary boot device.

    Once you’ve confirmed your changes, save them and exit the BIOS menu. With these settings configured, your computer should automatically boot from the SSD, giving you faster startup times and faster overall performance. So, take the time to configure your BIOS settings, and you’ll be able to take full advantage of your upgraded hardware.

    Conclusion: Enjoy Faster Speeds with Your New SSD

    In conclusion, connecting an SSD to your computer is a lot like connecting two old friends who have lost touch over the years. It may seem daunting and complex at first, but with the right tools and a bit of patience, the reunion can be a seamless and exciting experience. Whether you opt for a SATA or M.

    2 connection, make sure to double check compatibility and follow the manufacturer’s instructions. And just like rekindling an old friendship, connecting an SSD can breathe new life into your computer, enhancing speed and performance for years to come. Happy connecting!”

    FAQs

    What type of SSD connector do I need for my computer?
    This depends on the age and model of your computer. Most modern computers will use a SATA connector, while some older models may use IDE or SCSI connectors. Check your computer’s specifications or consult with the manufacturer to determine which type of connector you need.

    Can I install an SSD alongside my existing hard drive?
    Yes, you can install an SSD alongside your existing hard drive. This is known as a “dual drive” setup and allows you to use the SSD for your operating system and programs while storing files and data on the hard drive.

    Do I need to enable AHCI in my computer’s BIOS to use an SSD?
    AHCI (Advanced Host Controller Interface) is a feature in some BIOS settings that can improve performance and compatibility with SSDs. While it is not strictly necessary to enable AHCI to use an SSD, it is recommended for optimal performance. Check your computer’s documentation or consult with the manufacturer for more information on enabling AHCI.

    How do I migrate my existing operating system to my new SSD?
    There are several software tools available that can help you clone your existing operating system and files to your new SSD. Some SSD manufacturers also provide their own migration software. Be sure to back up any important data before cloning your drive to avoid data loss.

  • Effortlessly Upgrade Your Mac with our Step-by-Step Guide on How to Clone your Hard Drive to SSD

    Have you ever considered upgrading your Mac’s hard drive to a solid-state drive (SSD)? If so, then you’re probably aware of the numerous benefits an SSD can bring to your computer’s performance and speed. However, the process of cloning your Mac’s hard drive to an SSD can be complicated and daunting, especially if you’re not familiar with the technical aspects of computer hardware. Thankfully, with the right tools and guidance, you can clone your Mac hard drive to an SSD without any major issues.

    Not only will this help you avoid the painstaking task of reinstalling your apps and files, but it can also significantly improve your Mac’s speed and overall performance. In this blog post, we’ll take a closer look at the process of cloning your Mac hard drive to an SSD. We’ll go through the steps and tools you’ll need to get the job done, as well as provide some tips and tricks to ensure a smooth transition.

    Whether you’re a tech-savvy user or a complete beginner, this guide will help you tackle the task of upgrading your Mac’s hard drive with ease. So get ready to make the switch to an SSD and experience a faster, smoother Mac performance.

    Backup Your Mac Hard Drive

    If you’re looking to upgrade your Mac’s hard drive to an SSD, it’s essential to backup your data first. Although the process of cloning your Mac’s hard drive to an SSD may seem daunting, it’s an excellent way to transfer your data quickly and efficiently. First, you’ll need an external hard drive to save your data and an SSD to swap out the old hard drive.

    Next, open up Disk Utility on your Mac and create a bootable backup of your Mac’s hard drive. Once this is done, you can swap out the old hard drive for the new SSD and restore your data from the backup. This process ensures that all of your files, applications, and settings carry over seamlessly to your new SSD.

    Remember to always back up your data before making significant changes to your Mac’s hardware to avoid data loss or corruption. With these simple steps, you can easily clone your Mac’s hard drive to an SSD and enjoy faster performance and enhanced storage capacity on your Mac.

    Use Time Machine

    Backing up your Mac hard drive is essential to keep your valuable data safe and secure. The best and easiest way to do this is by using the built-in Time Machine feature on your Mac. Time Machine continuously creates backups of your entire system, including files, documents, settings, and applications.

    You can store these backups on an external hard drive, Time Capsule, or network-attached storage device. The process is automatic and will keep your data protected in case of a hardware failure or any other unexpected event. You can also use Time Machine to restore your entire system or individual files if needed.

    So, don’t wait until it’s too late, make sure to enable and use Time Machine to keep your Mac safe and secure. Your data and peace of mind are worth it.

    how do i clone my mac hard drive to ssd

    Create a Bootable Clone

    Backing up your Mac hard drive is an essential practice for anyone who wants to ensure the safety of their data. One of the most effective backup methods is creating a bootable clone of your hard drive. This process involves creating a complete, exact copy of your hard drive onto an external drive, allowing you to easily restore all your files in case of an emergency.

    Creating a bootable clone is a straightforward process that can be done using various third-party software programs, such as Carbon Copy Cloner or SuperDuper. These programs will guide you through the process step by step, ensuring that everything is copied over correctly. As a result, you’ll have a safety net that can save you from losing all your data if your hard drive crashes or gets corrupted.

    Overall, backing up your Mac hard drive is a simple yet important process that everyone should consider doing to protect their valuable data.

    Clone Mac Hard Drive

    If you are wondering how to clone your Mac hard drive to an SSD, it is essential to have the necessary tools and know-how to do it right. There are different methods to clone a Mac hard drive, but the most common is using a software program. The first step is identifying an appropriate cloning tool and downloading it to your Mac.

    Ensure that the software is compatible with your Mac version and the destination SSD. You will then need to connect the destination SSD to your Mac using an adapter cable and launch your chosen cloning program. Next, select the source hard drive and destination SSD and then choose the option to clone the hard drive.

    Wait for the cloning process to complete, and your SSD will now contain a copy of the original hard drive. It is crucial to ensure that the cloning process is successful by testing the SSD to determine if it is functioning correctly. Cloning your Mac hard drive to an SSD will significantly improve your computer’s performance, speed, and overall efficiency.

    Connect SSD to Your Mac

    If you’re looking to upgrade your Mac’s storage, then connecting an SSD could be just what you need. Cloning your Mac’s hard drive onto the new SSD means you won’t need to worry about transferring all your files over manually. This can save you a lot of time and hassle, especially if you have a lot of data on your current hard drive.

    To get started, you’ll need to connect the new SSD to your Mac using an adapter or an enclosure. Once you’ve done that, you can use software like Carbon Copy Cloner or SuperDuper to clone your hard drive onto the SSD. This will create an exact copy of your current system, including all your files and applications.

    When the process is complete, you can swap out the old hard drive for the new SSD and enjoy faster boot times and improved performance. Overall, cloning your Mac’s hard drive onto an SSD is a great way to upgrade your storage without having to start from scratch.

    Open Disk Utility

    If you’re looking to clone your Mac hard drive, you’ll need to open Disk Utility first. This built-in app can be found in the “Utilities” folder within your Applications folder. Once you’ve opened it up, you can select the hard drive you want to clone and click on the “Restore” tab.

    From there, you’ll want to choose the hard drive you want to copy to as your destination, and then click on the “Restore” button. This will start the cloning process and replicate your entire hard drive onto the destination drive. It’s a great way to ensure that you have a backup of all your important files and documents, and you can do it all from the comfort of your own home.

    So, if you’re looking to clone your Mac hard drive, open up Disk Utility and get started today!

    Select Mac Hard Drive to Clone

    When it comes to cloning a Mac hard drive, the first step is selecting the drive you want to clone. This is an essential step in the cloning process, and it’s crucial to choose the right hard drive to ensure a smooth cloning experience. In most cases, it’s recommended to clone your Mac’s primary hard drive, which contains your operating system and all your files and applications.

    However, if you have multiple hard drives connected to your Mac, you may want to clone a specific drive. To select the hard drive you want to clone, launch Disk Utility, which you can find in the Utilities folder in your Applications folder. From the sidebar, select the hard drive you want to clone and click on the “Restore” tab.

    Follow the instructions to clone your hard drive and create a backup that will keep your important files and documents safe. By cloning your hard drive, you can avoid data loss and ensure that your Mac runs smoothly even in the event of a catastrophic failure.

    Select SSD as Destination Drive

    If you’re running out of space on your Mac’s hard drive and looking for a way to upgrade it without losing any of your data, cloning your hard drive onto a new solid-state drive (SSD) can be a great option. To get started, you’ll need to select your SSD as the destination drive for the clone. This means that you’ll need to connect your SSD to your Mac and ensure that it’s properly recognized by your system.

    Once it’s recognized, you can use a cloning tool like Carbon Copy Cloner or SuperDuper to copy all of your data from your old hard drive to your new SSD. This process may take some time depending on the size of your existing hard drive, but once it’s complete, you’ll be able to enjoy the benefits of a faster and more reliable SSD without losing any of your important files or programs. So, if you’re looking to upgrade your Mac’s hard drive, consider cloning it onto a new SSD and enjoy all of the benefits of faster and more efficient storage.

    Start Cloning Process

    Cloning a Mac hard drive can be a time-consuming task, but it can save you a lot of trouble in the long run. Whether you’re upgrading your hard drive to a larger one or want to transfer your data to a new machine, cloning can be a straightforward solution. To start the cloning process, you’ll need to have a backup of your current hard drive, ideally stored on an external device.

    Then, you’ll need to use a cloning tool like Carbon Copy Cloner or SuperDuper! to copy the contents of your hard drive onto the new one. Keep in mind that this process can take several hours depending on the amount of data you have, and you’ll need to make sure you don’t use your computer during the process. Once the cloning is complete, you’ll have an exact copy of your old hard drive, including your files, applications, and operating system.

    From there, you can swap out the old hard drive and replace it with the new one, and your computer should start up just as it did before. Cloning your Mac hard drive may seem daunting, but with the right tools and a bit of patience, it can be a straightforward process that pays off in the end.

    Install SSD and Test

    If you’re looking to speed up your Mac’s performance, installing an SSD is a great way to go. However, the process of transferring your data from your old hard drive to the new SSD can be a bit daunting. So, how do you clone your Mac hard drive to an SSD? First, you’ll need to get a cloning tool, such as Carbon Copy Cloner or SuperDuper.

    These tools will help you make an exact replica of your hard drive to transfer over to the SSD. Once you have the tool installed, connect your new SSD to your Mac, and run the cloning software. This process could take a few hours, depending on the size of your hard drive.

    Once the cloning is complete, shut down your Mac and replace the old hard drive with the new SSD. When you power on your Mac, it should boot up just like normal, but with improved speed and performance thanks to the new SSD. Don’t forget to securely erase the old hard drive to protect your data.

    By following these steps, you’ll be able to install and test your new SSD with ease.

    Replace Existing Hard Drive with SSD

    If you’re tired of the slow performance of your computer, it’s time to replace your existing hard drive with an SSD. SSDs are much faster than traditional hard drives, allowing your computer to boot up faster and applications to load much quicker. The installation process is straightforward but takes some time.

    To begin, turn off your computer and unplug it from the power source. Open the computer case and locate the existing hard drive. Remove it and replace it with your new SSD.

    Once you’ve connected the SSD, close the computer case and turn it back on. You’ll need to reinstall your operating system and transfer your files to the new drive. However, the improved performance is worth the effort.

    Your computer will feel like new again, with faster boot times and snappier application performance. Say goodbye to slow load times and hello to improved productivity.

    Boot Your Mac from SSD

    If you’re looking to upgrade your Mac’s performance, installing a solid-state drive (SSD) is an excellent choice. Not only will you experience faster boot times and application launch speeds, but your overall computer experience will be much smoother. To install an SSD, you first need to acquire one that is compatible with your Mac model.

    Once you have the SSD, you can either clone your existing operating system onto it or start with a fresh install. After installation, you can test the SSD by booting your Mac from it. Don’t be surprised if you notice a significant difference in how your computer performs once you start using your new SSD! With this upgrade, you’ll be able to multitask with ease, open large files and applications quickly, and enjoy a snappier user experience.

    So, why not make the switch and give your Mac a performance boost?

    Test Your New SSD

    If you’ve recently installed a new SSD (solid-state drive) into your computer, it’s important to test it out to ensure that it’s working properly. A great way to test your new SSD is to use a benchmarking tool, which measures the performance of your drive. Some popular benchmarking tools include CrystalDiskMark and AS SSD Benchmark.

    These tools will test read and write speeds, input/output operations per second (IOPS), and overall performance. By running a benchmark test, you’ll be able to see how your SSD compares to other drives and determine if there are any issues with the installation or performance. Additionally, it’s a good idea to make sure that your computer recognizes your new SSD and that it’s properly connected.

    You can do this by checking your device manager and disk management settings. Overall, testing your new SSD will ensure that you’re getting the best performance and the most out of your investment.

    Conclusion

    In the world of computing, cloning a Mac hard drive to an SSD may seem like a daunting task, but fear not! With the right tools and a bit of know-how, you too can join the ranks of the tech-savvy and experience the lightning-fast speeds and increased performance of an SSD. Just remember, when in doubt, always consult the tech gods (aka Google) and don’t forget to back up your data first. Clone on, my friend!”

    FAQs

    Can I clone my Mac hard drive to an SSD without losing any data?
    Yes, you can clone your Mac hard drive to an SSD without losing any data using software such as Carbon Copy Cloner or SuperDuper!.

    What is the benefit of cloning my Mac hard drive to an SSD?
    Cloning your Mac hard drive to an SSD can significantly improve the performance of your Mac. An SSD can read and write data much faster than a traditional hard drive, resulting in faster boot times, faster application launches, and improved overall system performance.

    What software do I need to clone my Mac hard drive to an SSD?
    There are several software options available for cloning a Mac hard drive to an SSD, including Carbon Copy Cloner, SuperDuper!, and Disk Utility.

    Do I need to purchase any additional hardware to clone my Mac hard drive to an SSD?
    No, you do not necessarily need to purchase any additional hardware to clone your Mac hard drive to an SSD. However, if your Mac does not have a built-in SSD slot, you may need to purchase an external enclosure for your SSD to connect to your Mac.

  • Unraveling the Mystery: How Many GB is 256GB SSD?

    If you’re in the market for a new laptop or desktop, you’ve probably come across the term “256GB SSD” more than a few times now. But what does it really mean? How much storage does it actually equate to? Don’t worry, you’re not alone in wondering. SSDs have become a popular storage solution for computer manufacturers due to their efficiency and speed.

    However, the storage capacity can be confusing, especially when compared to traditional hard drives. So, let’s break it down and help you understand just how much storage space a 256GB SSD really offers.

    Understanding the Basics of SSDs

    A 256GB SSD is equivalent to 256 gigabytes or 0.256 terabytes of storage space. An SSD, or Solid State Drive, operates similarly to traditional hard disk drives but utilizes flash memory technology that allows for quicker access to data.

    A 256GB SSD is a great option for those seeking a significant upgrade to their computer’s storage capacity without breaking the bank. This amount of storage space is ideal for everyday use, including web browsing, document editing, and storing photos and videos. However, for more demanding tasks such as gaming, video editing, or 3D modeling, a larger SSD with at least 512GB of space may be more suitable.

    It’s important to note that when choosing an SSD, storage capacity is not the only factor to consider. Other important aspects include read and write speeds, durability, and overall performance.

    What is an SSD?

    An SSD, or solid-state drive, is a type of storage device that has increasingly become popular in recent years. Unlike traditional hard disk drives (HDDs) that use spinning disks and magnetic platters to save data, SSDs use flash memory chips that allow for faster read and write times. This means that SSDs can access and transfer data much quicker than HDDs, resulting in faster boot times, faster application launches, and overall faster performance.

    Additionally, SSDs have no moving parts, making them less susceptible to physical damage and more durable. However, SSDs tend to have a higher cost per gigabyte than HDDs, so they may not be the best option for those on a budget or needing massive amounts of storage. Nonetheless, as technology advances and prices continue to drop, SSDs seem to be becoming the norm for those seeking faster and more reliable storage options.

    256gb ssd is equal to how much gb

    How SSDs are Measured?

    SSDs, measured SSDs, or Solid State Drives, are a type of storage device that have become increasingly popular in recent years. Unlike traditional hard drives, SSDs use flash memory to store and retrieve data quickly and efficiently. When it comes to measuring the performance of an SSD, there are several key factors to consider.

    These may include read and write speeds, input/output operations per second (IOPS), and endurance (how many times the drive can be rewritten before it wears out). When shopping for an SSD, it’s important to consider all of these factors in order to ensure that you choose a drive that meets your needs. Whether you’re looking for lightning-fast speeds for gaming or a drive with high endurance for business use, understanding the basics of SSD measurement can help you make an informed decision and get the most out of your storage device.

    Calculating for the Storage Capacity of an SSD

    Are you wondering how much storage capacity a 256GB SSD has? The answer is that it is equal to 256 gigabytes of storage. SSDs have become increasingly popular due to their fast read and write speeds, and their ability to store large amounts of data despite their small size. When it comes to calculating the storage capacity of an SSD, it is important to consider not only the size of the drive, but also the formatting and available space.

    Some SSDs may have less space available due to the formatting and system requirements, so it is important to check the specifications carefully. With a 256GB SSD, you can store a significant amount of data, from your favorite photos and videos to important documents and files. So if you are looking for a compact and reliable storage solution, an SSD with 256GB of storage could be a great option for you.

    Factors Affecting SSD Storage Capacity

    Calculating for the storage capacity of an SSD can be a bit tricky as it is affected by various factors. One of the main factors is the type of memory chips used, such as multi-level cell (MLC), triple-level cell (TLC), or quad-level cell (QLC). MLC chips are the most common and affordable but provide lower storage capacity.

    On the other hand, TLC and QLC chips offer higher storage capacity but come at a higher price point. Another factor is the physical size of the SSD, with larger drives offering higher storage capacity. The way the SSD is formatted and the presence of over-provisioning also affect capacity.

    Over-provisioning is the reserved area on the drive for cache and maintenance functions, which reduces the available storage capacity but prolongs the drive’s lifespan. When calculating for SSD storage capacity, it’s essential to consider these factors to ensure you get the most suitable drive that fits your needs.

    Deducing the Storage Capacity of a 256GB SSD

    If you’ve ever wondered how much data can fit on a 256GB SSD, you’re not alone. It’s a common question that many people have when purchasing a new solid-state drive. Fortunately, it’s easy to calculate the storage capacity of an SSD.

    To determine the amount of storage space on a 256GB SSD, you simply need to multiply the total storage capacity by the number of bytes in a gigabyte. In this case, 256GB multiplied by 1,000,000,000 bytes per gigabyte gives you a total of 256,000,000,000 bytes of storage. Keep in mind, however, that the actual amount of storage space available will be slightly less due to formatting and other overhead factors.

    Overall, a 256GB SSD is a great choice for anyone who needs a high-capacity storage solution that offers lightning-fast performance. Whether you’re storing photos, videos, music, or important documents, a solid-state drive is a great investment that will serve you well for many years to come.

    How Many GB is 256GB SSD?

    When it comes to SSDs, the storage capacity is often measured in gigabytes (GB). So how many GB is a 256GB SSD? The answer is quite simple: 256GB. This means that a 256GB SSD can store up to 256 gigabytes of data.

    However, it’s important to note that the actual amount of available storage may be slightly less due to formatting and system files. Regardless, 256GB is a substantial amount of space that can hold a significant amount of data, including documents, photos, videos, music, and more. It’s worth considering if you need a reliable, high-speed storage solution for your computer or device.

    So why not upgrade to a 256GB SSD today?

    Pros and Cons of Using an SSD

    If you’re wondering, “256GB SSD is equal to how much GB?” – the answer is simply 256GB. SSDs, or solid-state drives, are a popular choice nowadays for their speedy performance and reliability. However, they do come with some pros and cons.

    On the positive side, SSDs are faster than traditional hard drives, allowing for faster boot times and faster file transfers. They’re also more durable since they don’t have any moving parts, making them less prone to physical damage. However, SSDs tend to be more expensive per GB compared to hard drives, so if you’re on a tight budget, you might not be able to afford as much storage space as you would with a hard drive.

    Another issue with SSDs is that they have a limited number of write cycles, which means that they can only be written to a certain number of times before they begin to degrade. Overall, it’s a trade-off between speed and price when it comes to choosing between an SSD and traditional hard drive.

    Advantages of SSDs

    SSD One of the biggest advantages of using an SSD (Solid State Drive) is the speed with which it reads and writes data. Unlike traditional hard drives, which use spinning disks to store information, SSDs rely on flash memory to do so. This means that they can retrieve information much more quickly, resulting in faster boot-up times, faster application load times, and overall snappier performance.

    Another advantage of SSDs is their durability. Because they have no moving parts, they are less prone to physical damage than hard drives. This gives them a longer lifespan, which can result in cost savings over time.

    On the downside, SSDs are generally more expensive than hard drives, and their capacities are typically smaller. However, for those willing to pay a premium for speed and reliability, SSDs can be a great choice.

    Disadvantages of SSDs

    While SSDs have many benefits, there are also some potential downsides to consider. One disadvantage is that SSDs have a limited lifespan, especially if they are constantly being written to. This is because each cell within the SSD can only be written to a certain number of times before it fails, which means that over time an SSD will become slower and less reliable.

    Additionally, SSDs are generally more expensive than traditional hard drives, which can make them less accessible to users on a tight budget. Another potential downside is that since SSDs have no moving parts, they do not offer any audible indication when they are nearing the end of their lifespan or experiencing a failure, which can make it difficult to know when to replace them. Despite these drawbacks, many users still choose to use SSDs for their speed, reliability, and overall performance benefits.

    Final Thoughts

    When it comes to storage sizes, it can be confusing to determine how much storage you actually have. You may be wondering if a 256GB SSD equals to how much GB in traditional HDD terms. Well, the short answer is that it depends.

    A solid-state drive (SSD) and a hard disk drive (HDD) measure storage differently. SSDs use a binary system of counting while HDDs use a decimal system. This means that a 256GB SSD can sometimes be advertised as a 240GB SSD to match the decimal counting of an HDD.

    However, in terms of actual storage space, a 256GB SSD provides you with 256GB of space. This is due to the way SSDs operate and store data. Unlike HDDs, SSDs do not require a separate drive head to read and write data, making them faster and more reliable than HDDs.

    In conclusion, a 256GB SSD is equivalent to 256GB of storage space. It’s important to keep in mind that the advertised storage capacity may sometimes differ due to the different measuring systems used by different manufacturers. Nonetheless, the speed and reliability advantages of SSDs make them a popular choice for storage in modern devices.

    Conclusion

    256GB SSD is like a tiny but mighty superhero. Despite its small size, it packs a punch with lightning-fast data transfer speeds, efficient power usage, and reliability. In terms of traditional hard drive storage, 256GB is equivalent to approximately 320,000 pages of a novel or 64,000 high-resolution photos.

    So, if you’re looking for a storage solution that’s both compact and powerful, 256GB SSD might just be your hero in disguise.”

    FAQs

    What is the difference between a 256GB SSD and a 512GB SSD?
    A 256GB SSD has half the storage capacity of a 512GB SSD.

    Can I upgrade my laptop’s hard drive to a 256GB SSD?
    Yes, as long as your laptop supports the form factor of the 256GB SSD.

    How much data can a 256GB SSD hold?
    A 256GB SSD can hold approximately 200,000 photos (at 1.5MB each) or 40 high-definition movies (at 6GB each).

    Can I use a 256GB SSD as my primary hard drive for gaming?
    Yes, a 256GB SSD can be used as a primary hard drive for gaming, but larger games may take up a significant amount of space. It’s recommended to also have a secondary hard drive for additional storage.

    How much faster is a computer with a 256GB SSD compared to a traditional hard drive?
    A computer with a 256GB SSD can boot up and load programs much faster than a computer with a traditional hard drive. The exact speed improvement will depend on the specific hardware and software being used.

  • Boost Your Gaming Performance: Learn How to Move Your Game to SSD in Simple Steps!

    Do you love playing PC games but notice they’re taking up a considerable amount of space on your hard drive? One way to optimize your gaming experience is by moving your games to an SSD. Solid-State Drives are faster and more reliable than traditional hard drives, and they can enhance gaming performance by reducing load times and providing a smoother experience. However, transferring games to an SSD can be a daunting task, especially if you’re not well-versed in computer technology.

    But fear not, dear gamer, because in this blog post, we will guide you step-by-step on how to move your games to an SSD and reap the benefits of faster load times and improved gameplay. So, grab your controller, and let’s get started.

    Check Your SSD Storage Space

    If you’re a gamer, you know how important storage space is when it comes to running your games smoothly. One way to boost your PC’s performance is by moving games to your SSD. But how do you do that? First, you need to check how much SSD storage space you have available.

    This can easily be done by navigating to “My PC” and right-clicking on your SSD drive. From there, select “Properties” and you’ll be able to see how much space is available. Once you know how much space you have, it’s time to move your game.

    You can do this by going into the game’s settings or options menu and finding the “install location” option. From there, select your SSD drive and click “install.” This will move the game from your old storage drive to your SSD, which should result in faster load times and smoother gameplay.

    Remember, if you don’t have enough space on your SSD, you may need to remove or transfer other files to make room for your game. By taking these steps, you can optimize your PC’s performance for a better gaming experience.

    Step One: Create a Folder on Your SSD

    If you’re planning to utilize your solid-state drive (SSD) more effectively, you need to create a separate folder on it. But before that, you must check the space available on your SSD. You don’t want to end up filling your SSD completely because doing so could result in slower performance.

    One effective way to check your SSD’s storage space is by using the in-built Windows feature. Simply right-click on your SSD drive and select “Properties.” From there, you will be able to see the remaining space on your SSD.

    If you’re running low on space, you can consider deleting large files or programs or transfer them to an external hard drive. Once you’ve freed up enough space, go ahead and create a new folder on your SSD. This folder will help you to organize your files and prevent things from getting cluttered.

    Make sure to give it a descriptive name and move your files into it regularly to keep things tidy.

    how do i move a game to my ssd

    Step Two: Locate the Game on Your Current Hard Drive

    Once you’ve verified that the game is installed on your hard drive, the next crucial step is to check your SSD storage space. Depending on the game size and the current capacity of your SSD, you may need to free up some space or move the game to a larger drive. The simplest way to determine your storage space availability is to go into your computer settings or file explorer and check the properties of your SSD.

    You can also utilize disk management software to analyze the disk space utilization and identify which files are taking up the most space. It’s important to keep in mind that full SSDs can negatively impact system performance, so if your SSD is nearing maximum capacity, moving the game to another drive could improve overall performance. Taking the time to evaluate and manage your SSD storage space can make the process of locating your game much smoother and even improve computer performance in the long run.

    Step Three: Move the Game Files to the SSD Folder

    Before moving your game files to your SSD folder, it’s important to check your SSD storage space to ensure that you have enough room to accommodate the game files. SSDs tend to have smaller storage capacities compared to traditional hard drives, and you don’t want to run out of space mid-transfer. To check your SSD storage space, simply open File Explorer and navigate to your SSD.

    Right-click on it and select Properties. You’ll be able to see the total capacity of your SSD as well as the amount of used and free space. Make sure you have enough free space for the game files you want to move over.

    If not, you’ll need to delete some unnecessary files or consider upgrading to a larger SSD. Once you’ve cleared up enough space, you can proceed with moving the game files to your SSD folder. This will help to improve the game’s loading times and overall performance.

    Update Game Settings to Point to the SSD Folder

    If you’re wondering how to move your game to an SSD, it’s a fairly easy process once you know where to point your game settings. The first step is to make sure your SSD is properly installed and recognized by your computer. Next, locate the folder where your game is currently installed.

    This will be different for each game, but it’s typically found in the Program Files folder in your C drive. Once you’ve found the game folder, copy and paste it into the folder in your SSD where you want it to be moved. Finally, open your game settings and update the file path to point to the new SSD folder location.

    It’s important to note that not all games will have the option to change file paths in the game settings, so you may need to research how to manually change the file paths in those cases. By moving your games to an SSD, you’ll significantly decrease load times and improve overall performance.

    Step One: Open the Game Launcher or Configuration File

    When upgrading your gaming setup, the first step is to ensure that your game settings are pointing to the correct folder on your SSD. This can easily be done by opening the game launcher or configuration file and updating the settings accordingly. By doing so, you’ll be able to take advantage of the superior loading times and performance benefits of your SSD.

    This is especially important for games with long loading times, as it can significantly improve your overall gaming experience. So don’t overlook this crucial step in your gaming setup upgrade, and make sure your game settings are pointing to the right folder on your SSD.

    Step Two: Locate the Game Folder Location Setting

    Once you’ve identified your game folder location, the next step is to update your game settings to point to the SSD folder. This step is crucial in ensuring that your game runs smoothly and is optimized for performance. To do this, simply open up your game settings and look for the “game folder location” option.

    Once you’ve found it, update the path to the new folder location on your SSD. This will ensure that your game is reading and writing data to your SSD instead of your HDD, which can result in faster load times, quicker file transfers, and a smoother overall gaming experience. With this simple step, you can make a significant improvement to your gaming performance and ensure that your games are running at their optimal level.

    So, don’t overlook this important setting and take the time to update your game settings to point to your SSD folder today.

    Step Three: Change the Path to the SSD Folder Location

    Now that you’ve successfully cloned your game files onto your SSD, it’s important to update your game settings to point to the new folder location. This step is crucial for ensuring that your games run smoothly and efficiently on your SSD. To do this, open your game launcher and navigate to the settings menu.

    Look for an option that allows you to change the installation path or folder location. Select this option and browse for the new folder location on your SSD. Once you’ve selected the correct location, save the changes and exit the settings menu.

    It may take a few moments for the changes to take effect, but once they do, you should notice a significant improvement in game performance. By updating your game settings to point to the SSD folder location, you’ll be able to enjoy faster load times, smoother gameplay, and an overall improved gaming experience.

    Start Playing the Game from Your SSD

    If you’re looking to improve your gaming experience, moving a game to your SSD is a great start. SSDs provide faster load times, minimized game stuttering, and shorter level transitions. So, how do you move a game to your SSD? Firstly, make sure your SSD is properly set up and formatted.

    Then, find the game you want to move on your hard drive and create a new folder on your SSD where you want the game to go. Next, copy the game’s files to the new folder on your SSD and delete them from your hard drive. Finally, open the game and update any necessary file paths or settings.

    Congratulations! You can now enjoy faster, smoother gameplay with your SSD. Just make sure to only move games that take up a lot of storage and actually benefit from being on the SSD.

    Step One: Launch the Game

    So, you’ve installed your favorite game on your brand new SSD and can’t wait to launch it. Good news, you’re just a few clicks away from experiencing the lightning-fast loading times and smoother gameplay! To start playing, simply locate the game on your desktop or in your library and click on it. The game should load up quickly due to the SSD’s faster read and write speeds.

    It’s like having your game on a superhighway instead of a congested city street. Plus, with an SSD, you’ll also benefit from reduced loading times between levels and less lag during gameplay, which can make all the difference in competitive games. So, sit back, relax, and get ready to immerse yourself in your gaming experience with quickload times and smoother gameplay, all thanks to your SSD.

    Step Two: Confirm the Game is Running from the SSD

    Once you’ve installed your game onto your SSD, it’s important to make sure that it’s actually running from that drive instead of your old hard drive. This can be done by checking the game’s settings and making sure that the installation path is set to the SSD. Once you’ve confirmed that the game is running from your SSD, you can start playing and enjoy the benefits of improved performance and faster loading times.

    Just remember that using an SSD for gaming is not only faster, but also has a positive impact on your overall computer system. So, whether you’re a casual gamer or an esports enthusiast, upgrading to an SSD is definitely worth considering if you want to optimize your gaming experience.

    Conclusion

    In short, moving a game to your SSD is like giving your car a turbocharger. It enhances the performance and speed, giving you a smoother and faster ride. With just a few simple steps, you can easily transfer your game and get ready for a more exhilarating gaming experience.

    Don’t let slow load times hold you back – upgrade your gaming setup and move that game to your SSD today!”

    FAQs

    What are the benefits of moving a game to an SSD?
    Moving a game to an SSD can significantly reduce loading times and improve overall performance, giving you a smoother gaming experience.

    How do I move a game to my SSD?
    You can move a game to your SSD by first installing the game onto your HDD and then using a game migration tool to transfer it to your SSD.

    What game migration tools are available to use?
    There are many game migration tools available, such as Steam Mover, GameSave Manager, and EaseUS Todo PCTrans.

    Can I move multiple games to my SSD at once?
    Yes, you can use a game migration tool to move multiple games to your SSD at once, saving you time and effort. Just make sure your SSD has enough space to accommodate all the games you want to move.

  • Upgrade Your System in Minutes: Learn How to Clone HDD to SSD

    Upgrading from an HDD to an SSD can significantly improve the speed and performance of your computer. However, starting fresh with a new SSD can be a time-consuming process. That’s where cloning comes in handy! By cloning your HDD to your new SSD, you can transplant all your data, settings, and preferences, and skip the long process of reinstalling everything from scratch.

    In this step-by-step guide, we’ll take you through the process of cloning your HDD to SSD, ensuring a smooth and effortless transition. So, if you’re looking to upgrade your PC’s performance without losing any of your data, keep reading to learn everything you need to know about cloning your HDD to your new SSD.

    Backup Your Data

    If you’re thinking about upgrading your computer’s hard drive to a solid-state drive, it’s important to learn how to clone your HDD to SSD. This process allows you to transfer all your valuable data from the old drive to the new one quickly and easily. Cloning your hard drive helps you avoid the time-consuming process of re-installing operating systems, applications, and documents.

    First, you need to buy an SSD with bigger storage space than your current HDD. Then, you will need to download a free cloning software, like Macrium Reflect or Clonezilla. Once you have installed the software and connected the new SSD to your computer, you can start the cloning process.

    Just follow the instructions on the software. The process may take a few hours, depending on the size of the data being cloned. After the process is finished, test the new SSD to make sure all your files and programs are working correctly.

    Cloning your hard drive can save you a lot of time and hassle, and it’s important to backup your data regularly to ensure you don’t lose any important files.

    Copy Important Files to External Drive

    Backing up your important data is an essential step in avoiding the devastating loss of your valuable files. One way to ensure the safety of your files is to copy them to an external drive. An external drive serves as a physical backup of your data, meaning that in the event of a system crash or malware attack, you can quickly recover your files.

    Furthermore, it is important to remember that external hard drives are not immune to failure, so it is necessary to have multiple backups of your data. When you copy your files to an external drive, make sure to keep it in a secure place, safe from physical damage, theft, or any other risk that might jeopardize your files. Overall, backing up your data is an investment in your peace of mind.

    So, don’t wait until it’s too late to safeguard your valuable files – start backing up today!

    how clone hdd to ssd

    Create System Image with Windows Backup Tool

    Backing up your data is crucial in case of any unforeseen incidents such as hardware failure, theft, or malware attacks that can lead to data loss. One of the best ways to ensure the safety of your data is by creating a system image with Windows Backup tool. A system image is a copy of all the data on your computer, and it includes your operating system, programs, documents, and settings.

    This means that in case of a data loss, you can easily restore your computer to the last state when the system image was created. The process of creating a system image using the Windows Backup tool is quite simple and straightforward. You can access it by going to the Control Panel and selecting “Backup and Restore”.

    From there, you can follow the steps to create a system image on an external hard drive or any other reliable storage media. By doing so, you ensure that your data is always safe and secure.

    Prepare Your SSD

    If you’re looking to upgrade your computer’s speed, you might be wondering how to clone your HDD to an SSD. The first step is to prepare your SSD by connecting it to your computer and formatting it. Once that’s done, you can use a cloning software to copy everything from your old HDD over to your new SSD.

    Keep in mind that an SSD might have a smaller capacity than your original HDD, so you may need to delete unnecessary files or transfer them to an external storage device. It’s important to make sure that your computer can boot from the SSD before you remove the old HDD from your system. With a bit of patience and the right tools, you can enjoy a significant increase in speed and performance with your new SSD.

    So don’t be afraid to take the plunge and make the switch!

    Initialize and Format the SSD

    One of the crucial steps in setting up your brand new SSD is initializing and formatting it. Before you start working with the SSD, you need to prepare it for use. To do so, you can leverage Windows or Mac OS’s built-in functionality to initialize and format the SSD according to your preferences.

    Initializing the SSD prepares it for formatting and configuration. Formatting it makes sure that the new drive is entirely empty and ready to receive data. It is vital to note that formatting an SSD can take several minutes or hours, depending on the size of the SSD and the system’s processing speed.

    In summary, you need to initialize and format your SSD to use it. Without this step, you won’t be able to enjoy all the benefits of the new drive and could risk data loss. So, when setting up your SSD, don’t forget to follow the necessary steps to prepare it before use.

    Partition the SSD to Match HDD

    When preparing to migrate from an HDD to an SSD, it’s essential to partition the SSD to match the HDD’s layout. This step requires careful consideration to ensure that the SSD’s partitions align with the HDD’s partitions, thus making the transition seamless. One of the most effective methods is to use disk cloning software to transfer the data from the HDD to the SSD.

    This software will create a copy of the partitions on the HDD and transfer them to the appropriate partitions on the SSD. However, before cloning the disk, the SSD should be formatted to match the HDD’s file system format, and all data on the SSD should be backed up. Additionally, it’s essential to check for any differences in the sector size between the HDD and SSD to avoid any potential alignment issues.

    Once the SSD is ready, the next step is to transfer the data, which can take some time, depending on the amount of data being transferred. Overall, preparing the SSD before migrating data is critical to the success of the process.

    Clone HDD to SSD

    If you’ve just purchased a new SSD, your first thought is likely “how do I clone my HDD to my new SSD?” Luckily, the process isn’t as daunting as it may seem. First, you’ll want to ensure your SSD has enough space to hold everything on your HDD. Then, you can use a cloning software, such as EaseUS Todo Backup or Macrium Reflect, to transfer all files and settings from your HDD to your SSD.

    This ensures your new drive is an exact replica of your old one, including your operating system and program files. Once the cloning is complete, make sure to set your boot order to prioritize your new SSD, so your computer will automatically boot from it instead of your old HDD. Cloning your HDD to an SSD is a quick and simple way to speed up your computer’s performance and ensure you don’t lose any important files or settings.

    Use Free Software like Macrium Reflect or EaseUS Todo

    When it comes to upgrading your computer’s HDD to an SSD, it’s important to ensure that all of your files, settings, and data are transferred over seamlessly. That’s where free software like Macrium Reflect or EaseUS Todo comes in handy. These powerful tools make it easy to clone your HDD to your new SSD, ensuring that all of your files and programs are fully transferred over without any data loss.

    Not only does this help you avoid the hassle of manually transferring files, but it can also save you a lot of time and effort in the process. Using these software tools is a breeze, too. Simply install the software on your computer, connect your new SSD to your old HDD, and follow the step-by-step instructions to clone your drive.

    Depending on the size of your data, this process may take a few hours to complete, but it’s well worth the wait. Plus, with the added benefit of creating a complete system backup, you’ll have peace of mind knowing that all of your data is safe and secure. So the next time you’re considering an upgrade to your computer’s storage, be sure to take advantage of free software like Macrium Reflect or EaseUS Todo.

    With their powerful drive cloning capabilities, you can rest assured that your data will be transferred quickly and seamlessly, without any risk of data loss. Whether you’re a seasoned computer user or a novice, these user-friendly tools make upgrading to an SSD a breeze, ensuring that you can get back to doing what you do best.

    Connect SSD to PC and open Cloning Software

    If you want your computer to run faster, one solution is to switch to an SSD (solid-state drive). But if you’re worried about losing your data, there’s a simple solution: Clone your current hard drive to the SSD. To do that, the first thing you’ll need to do is connect the SSD to your PC.

    You can do this using a USB adapter or by removing your old hard drive and replacing it with the new SSD. Once you’ve got the SSD connected, you’ll need to use cloning software to copy all your data from the old hard drive to the new one. This software works by making an exact copy of your old hard drive, including your operating system and all your files.

    It’s like making a carbon copy of your old hard drive, but on a faster and more reliable drive. Plus, with an SSD, you’ll enjoy faster boot and load times, and overall better performance. So, what are you waiting for? Download a cloning software, connect your SSD to your PC and clone HDD to SSD today!

    Select HDD as Source and SSD as Destination Drive

    Cloning your hard drive to a solid-state drive (SSD) is a great way to breathe new life into an older computer or upgrade your storage capacity without losing any data. To get started, you’ll need to select your HDD as the source drive and your SSD as the destination drive. This process involves copying all of the data and files from your old hard drive over to the new solid-state drive.

    Once you’ve selected the correct drives, you’ll need to install a disk cloning software and follow the instructions provided. This can take some time, depending on the amount of data you have on your hard drive, so make sure you don’t interrupt the process. After the clone is complete, you’ll need to set your new SSD as the boot device in your BIOS and restart your computer.

    From there, you should notice a significant improvement in your computer’s overall performance and faster load times for your favorite programs and applications. Don’t forget to securely wipe your old hard drive before disposing of it to protect your personal data from prying eyes.

    Start Cloning Process

    If you’re looking to upgrade your computer’s performance, cloning your HDD to an SSD can make a world of difference. Not only does it speed up boot and load times, but it can also increase overall responsiveness. The process of cloning a hard drive involves copying all the data from one drive to another, which is particularly useful if you don’t want to lose any of your files or data during the upgrade process.

    First, you’ll need to select a reliable cloning software that suits your needs and budget. Once you’ve downloaded the software of your choice and connected your new SSD to your computer, you can start the cloning process. The software will guide you through the steps, which typically involves selecting the source and destination drives and choosing any additional options such as partition sizes.

    The process can take anywhere from a few minutes to several hours, depending on the size of your hard drive and the speed of your computer. Once the cloning is complete, you can replace your old hard drive with your new SSD and enjoy a significant boost in performance. It’s important to note that cloning is not recommended if your hard drive has any physical damage or is failing, as this could lead to data loss.

    Overall, cloning your HDD to an SSD can be a cost-effective and efficient way to upgrade your computer’s performance without losing any of your files or data.

    Set SSD as Boot Drive

    If you want to improve the performance of your computer, you should consider upgrading your hard drive to an SSD. But how do you transfer all your data from your old HDD to your new SSD? The answer is to clone your HDD to your SSD. The process involves creating an exact copy of your HDD, including the operating system and applications, and transferring it to your new SSD.

    However, before you can clone your HDD, you need to set your SSD as the boot drive. This means telling your computer to use your SSD as the primary drive to boot up the operating system. Setting up your SSD as a boot drive involves going into your computer’s BIOS and changing the boot order.

    Once your SSD is set as the primary boot drive, you can begin the cloning process. There are several software options available that can help you with the cloning process, such as EaseUS Todo Backup, Macrium Reflect, or Clonezilla. By cloning your HDD to your SSD and setting the SSD as the boot drive, you can enjoy faster boot times and improved performance on your computer.

    Restart PC and access BIOS or UEFI settings

    Possible blog section: Restart PC and access BIOS or UEFI settings If you want to set your SSD as the boot drive for faster startup times and better system performance, you need to access the BIOS or UEFI settings of your computer and change the boot order to prioritize the SSD. Here’s how you can do it: Restart your computer by clicking on the Start menu, selecting Power, and then Restart.

    As soon as your computer starts booting up, press the key or keys indicated on the screen to enter the BIOS or UEFI setup utility. The most common keys are F2, F10, DEL, or ESC, but it may vary depending on your brand and model of the motherboard.

    Once you enter the BIOS or UEFI settings, look for a section called Boot or Boot Order, which lists the devices your computer can boot from in order of priority. Typically, the first device is the hard drive or SSD with the operating system installed, and the second device is the CD/DVD or USB drive, followed by other options.

    Use the arrow keys to navigate to the SSD that you want to be the boot drive, and then move it to the top of the list by pressing the + or – key, or by dragging and dropping it to the top.

    Save the changes and exit the BIOS or UEFI setup utility by pressing the key or keys indicated on the screen. Usually, it’s F10 or ESC.

    Restart your computer again and check if it boots up from the SSD. If it does, congratulations! You have successfully set your SSD as the boot drive. By setting your SSD as the boot drive, you can enjoy faster boot times, faster application load times, and overall snappier performance from your computer.

    Set SSD as Boot Drive and Save Changes

    To set SSD as your boot drive, you need to access your computer’s BIOS settings and change the boot order. Typically, BIOS settings can be accessed by pressing a specific key during startup, such as F2 or Del. Once in BIOS, navigate to the Boot menu and look for the option to change the boot order.

    Select the SSD as the first boot device and save your changes. This will ensure that your computer boots from the SSD instead of the previous boot device, such as a hard drive. By doing so, you can significantly reduce startup times and improve overall system performance.

    So, if you want a faster and more responsive computer, setting your SSD as the primary boot drive is a must-do.

    Conclusion

    In short, cloning your HDD to an SSD is like giving your old, worn-out car a brand new engine. Your computer will run faster and smoother than ever before, just like a sleek sports car. So why settle for a clunky old machine when you can upgrade to a high-performance computer without the hassle of completely starting over? Clone that HDD to an SSD, and drive off into the digital sunset with ease and style.

    FAQs

    What is HDD cloning?
    HDD cloning is the process of copying the contents of one hard disk drive to another.

    Why would I want to clone my HDD to SSD?
    Cloning your HDD to SSD can drastically increase the speed and performance of your computer.

    How do I clone my HDD to SSD?
    You can use software like EaseUS Todo Backup or Acronis True Image to clone your HDD to SSD.

    Can I clone my HDD to SSD without losing any data?
    Yes, you can clone your HDD to SSD without losing any data as long as you have enough space on the SSD to accommodate all the data on your HDD.

    Do I need any additional hardware to clone my HDD to SSD?
    You do not necessarily need any additional hardware, but it is recommended to use a SATA to USB adapter to connect your SSD to your computer during the cloning process.

  • Secure Your Data: Learn How to Set a Password on Your SanDisk SSD

    Do you want to make sure that your data stored in your SanDisk SSD is secure and protected at all times? If yes, then you have come to the right place! In today’s modern world, keeping your data safe is extremely important, and investing in the right security measures is crucial. Your SanDisk SSD is a valuable asset that stores your personal and sensitive data, and therefore it’s important to implement proper security measures. In this blog, we will delve into simple yet effective solutions to ensure your SanDisk SSD remains secure and your information remains protected from any potential threats.

    So, let’s get started and discover the best ways to secure your SanDisk SSD!

    Choose a strong password

    If you’re wondering how to put a password on your SanDisk SSD for added security, it’s actually quite simple. There are a few ways to go about it depending on your specific model, but one common method is to use SanDisk’s SecureAccess software. This program allows you to create a password-protected folder on your SSD where you can store sensitive files and documents.

    When you first install SecureAccess, you’ll be prompted to create a strong password that meets certain complexity requirements. It’s important to choose a password that’s unique, as common words and phrases can be easily guessed by hackers. Some tips for creating a strong password include using a mix of upper and lowercase letters, numbers, and special characters, as well as avoiding personal information like your name or birthdate.

    With a strong password in place, you can rest assured that your valuable data is safe and secure.

    Use a mix of upper and lowercase letters, numbers, and symbols

    Choosing a strong password is crucial in today’s digital age. Cybersecurity is of utmost importance, and weak passwords can make us vulnerable to cyber attacks. A strong password should consist of a mix of upper and lowercase letters, numbers, and symbols.

    This combination creates a complex password that is difficult for hackers to crack. Consider using a passphrase that is meaningful to you but difficult for others to guess. For example, you could use a phrase like “MyD0g8Mycat!” instead of just a single word.

    It’s also essential to avoid using personal information such as your name, birthdate, or address in your password, as this information can be easily discovered by hackers. Instead, try using a combination of unrelated words, which makes it harder for anyone to guess your password. Using a strong password is just one part of protecting yourself online.

    Be cautious of suspicious emails, attachments, and links. Always keep your software and security programs up-to-date, and use two-factor authentication whenever possible. By taking these steps, you can safeguard your personal information, secure your accounts, and prevent cyber attacks.

    how to put password on sandisk ssd

    Enable encryption

    If you’re wondering how to put a password on SanDisk SSD, the answer is quite simple – enable encryption. SanDisk provides users with various encryption options, including hardware encryption and software encryption. Hardware encryption requires the user to use a password or PIN to encrypt and decrypt data, while software encryption utilizes encryption software like BitLocker or VeraCrypt.

    To enable encryption on your SanDisk SSD, you should follow the manufacturer’s instructions or research reputable tutorials online. Once encryption is enabled, only those who have the password or PIN will be able to access the data stored on the SSD, ensuring your sensitive information remains safe and secure. Don’t hesitate to encrypt your SSD to keep your data safe and confidential.

    Visit SanDisk website for instructions on how to enable encryption on your SSD

    If you want to ensure the security of your data on your SSD, enabling encryption is a great way to do so. SanDisk provides detailed instructions on their website on how to enable encryption on their SSDs to keep your confidential data away from prying eyes. Encryption essentially scrambles your data so that only someone with the correct encryption key can access it.

    SanDisk provides several encryption options, including BitLocker for Windows users and FileVault for Mac users. By enabling encryption, you can protect your data from hackers, thieves, and other potential threats. So, head over to SanDisk’s website and follow the instructions to enable encryption on your SSD so that you can have peace of mind knowing that your data is secure.

    Set up a password

    If you want to protect the data saved on your SanDisk SSD, setting up a password is a crucial step. Fortunately, the process is simple. The first thing you need to do is download the SanDisk SecureAccess software, which can be found on the company’s website.

    Once you have the software, plug in your SanDisk SSD and open the SecureAccess application. From there, you can select the option to set up a password. You’ll be prompted to create a strong password, and you’ll also have the option to select a hint in case you forget it.

    After you’ve entered your password, all of the data on your SanDisk SSD will be encrypted and protected. It’s important to remember that if you forget your password, there’s no way to recover your data, so make sure to pick one that you’ll remember. By following these steps, you can ensure that your SanDisk SSD is secure and your data is protected from prying eyes.

    Follow SanDisk instructions to create a unique password for your SSD

    Setting up a password for your SSD is crucial to protect your sensitive data. SanDisk provides easy instructions that guide you through creating a strong and unique password for your SSD. A good password should be a combination of letters, numbers, and characters, and should not be easily guessed or duplicated.

    It’s also essential to avoid using personal information, such as your name or birthday, and to change your password regularly. The process of setting up a password varies depending on the model of your SSD, but SanDisk provides step-by-step instructions in their user manual. With a strong password in place, you can be confident that your data is secure, even if your SSD falls into the wrong hands.

    So, take the time to create a unique password today and give yourself peace of mind knowing that your data is protected.

    Tips for maintaining your password

    If you’re looking to put a password on your Sandisk SSD, the process is relatively straightforward. First, you’ll need to download the SecureAccess software from Sandisk’s website and install it on your computer. Once you’ve done that, you can create a new folder in SecureAccess and transfer any files you want to protect into it.

    When you’re ready to add a password, just click on the lock icon in the top right-hand corner of the SecureAccess window and enter your desired password. It’s a good idea to choose a complex password that includes a mix of upper and lowercase letters, numbers, and special characters, and to avoid using easily guessable information like your name or birthdate. Once you’ve set up your password, you can access your files by entering the correct password whenever you open SecureAccess.

    This is a simple but effective way to protect your files from unauthorized access, so if you want to keep your data secure, it’s definitely worth taking the time to set up a password on your Sandisk SSD.

    Do not share your password with anyone. Update it regularly.

    Maintaining a secure password is crucial. With the increasing number of cyber threats, it is important to keep your password safe and updated regularly. Firstly, do not share your password with anyone.

    Sharing passwords can increase the risk of unauthorized access to your accounts. Secondly, use a unique password that is difficult to guess but easy to remember. Avoid using simple passwords such as your date of birth or common words.

    A strong password should include a mix of upper and lower case letters, numbers, and special characters. Thirdly, update your password regularly. Changing your password frequently can prevent unauthorized access, especially if your password has been stolen.

    Lastly, avoid using the same password for multiple accounts. If one account is compromised, all the other accounts with the same password can be at risk too. By following these tips, you can maintain a secure password and protect yourself from cyber threats.

    Conclusion

    When it comes to putting a password on your SanDisk SSD, there is no need to make it a complicated process. Just like locking the front door of your home, securing your data can be as simple as setting up a password that only you know. With a few clicks of your mouse and a strong password in hand, your SanDisk SSD will become an impenetrable vault of valuable information.

    Remember, the key to keeping your data safe is to always stay one step ahead of potential threats – and in this case, that means putting a password on your SanDisk SSD.”

    FAQs

    What is the procedure for putting a password on a SanDisk SSD?
    To put a password on a SanDisk SSD, you need to first download the SanDisk SecureAccess software from their official website. Once the software is installed on your computer, you can choose the files or folders that you want to password protect and follow the on-screen instructions to set a password.

    Can I change the password on my SanDisk SSD later?
    Yes, you can change your SanDisk SSD password anytime you want. Simply launch the SanDisk SecureAccess software, enter your existing password and choose the option to change the password. Follow the on-screen instructions to set a new password.

    Is it possible to remove the password from a SanDisk SSD?
    Yes, you can remove the password from a SanDisk SSD anytime you want. Launch the SanDisk SecureAccess software, enter your existing password and choose the option to remove the password. Keep in mind that removing the password will give anyone who has access to your SSD unrestricted access to the files or folders stored on it.

    What happens if I forget my SanDisk SSD password?
    If you forget your SanDisk SSD password, you will not be able to access the files or folders that are protected by the password. Unfortunately, SanDisk does not provide a way to recover a lost or forgotten password. The only option you have is to reset the password by formatting the drive, which will delete all the data.

  • Unlocking the Full Potential: A Comprehensive Guide on How to Use Samsung SSD T7

    Unlocking the Full Potential: A Comprehensive Guide on How to Use Samsung SSD T7

    Have you ever struggled with the slow transfer speed of your computer’s traditional hard drive? Want to upgrade to a faster and more reliable storage solution? Look no further than the Samsung SSD T7! This powerful and compact external solid-state drive provides lightning-fast transfer speeds, ample storage space, and a sleek design that’s perfect for on-the-go use. But with so many features and settings to navigate, it can be daunting for beginners to know where to start. That’s why we’ve compiled this comprehensive guide to using the Samsung SSD T7, complete with tips and tricks for maximizing its performance and getting the most out of your investment.

    Whether you’re a student, creative professional, or anyone in between, this beginner’s guide will equip you with the knowledge and confidence to harness the power of this cutting-edge storage device. So what are you waiting for? Let’s dive in!

    Getting Started

    If you’re wondering how to use Samsung SSD T7, don’t worry, it’s easier than you might think! First, plug the T7 into your device using the included USB-C cable. If your device doesn’t have a USB-C port, don’t worry, there’s also a USB-A cable included. Once the T7 is plugged in, it should show up on your device as an external drive.

    From there, you can transfer files, documents, photos, and videos to and from the T The T7 also comes with optional password protection software, so you can safeguard your data against unauthorized access. Overall, the Samsung SSD T7 is an excellent choice if you need fast, reliable storage on the go.

    Unboxing and Setup

    Congratulations on getting your new device! Unboxing and setting up a new gadget can be an exciting but daunting task. First, carefully remove the item from its packaging and make sure all the components are intact. Reading the instruction manual is always a good starting point as it helps you gain a full understanding of the device’s features and functions.

    Next, connect to a power source and charge your new device fully before using it for the first time. Follow the on-screen prompts and enter your username and password to configure the settings to your liking. Remember to update the device to the latest version of its operating system, which will help ensure it runs smoothly and securely.

    Lastly, personalize your device by adding your favorite apps or widgets to the home screen. With these basic steps, you’re well on your way to enjoying your new tech device!

    how to use samsung ssd t7

    Connecting the SSD to Your Device

    When it comes to connecting your SSD to your device, there are a few key steps to keep in mind. First, make sure that your device is turned off and unplugged before beginning. Next, locate the SATA cables in your device and plug one end into the SSD and the other end into the motherboard.

    Some devices may require an adapter, so be sure to check your device’s specs beforehand. Once the SSD is securely connected, you can power your device back on and begin setting up your new storage. Overall, connecting your SSD is a straightforward process that can greatly improve your device’s performance and storage capabilities.

    So, don’t hesitate to upgrade your device today and enjoy faster speeds and more space for all your important files and programs.

    Using the SSD

    If you’re wondering how to use Samsung SSD T7, don’t worry – it’s pretty straightforward! First, make sure your computer has a USB-C or USB-A port, depending on which cable you want to use. Then, connect the SSD to your computer using the cable provided. You should see a notification pop up on your screen that the device has been connected.

    From there, you can simply drag and drop files onto the SSD to transfer them. The T7 also comes with Samsung’s Portable SSD Software, which you can download to manage your files and keep the SSD up to date. Overall, using the Samsung SSD T7 is a simple and efficient way to store and transfer your data, whether you’re a professional or just need some extra space for your personal files.

    Transferring Data

    When it comes to transferring data, using an SSD can drastically improve the process. An SSD, or solid-state drive, is a faster and more efficient type of storage device compared to a traditional hard disk drive. This means that transferring large amounts of data can be done much quicker with an SSD.

    Additionally, SSDs are more reliable and durable than hard disk drives as they have no moving parts. This means that you can transfer your data with peace of mind knowing that it is less likely to be lost or corrupted. So, if you want to save time and ensure that your data is safe during the transfer process, consider using an SSD.

    Managing Your Files

    When it comes to managing your files, using an SSD can be a game-changer. SSDs, or Solid State Drives, use flash memory to store data, which allows them to access and transfer files much faster than traditional hard drives. This means that tasks like opening files, loading programs, and transferring large amounts of data can be accomplished much more quickly with an SSD.

    Plus, because they have no moving parts, SSDs are less likely to fail than traditional hard drives, making them a reliable choice for anyone who wants to keep their files safe and secure. So if you’re looking for a way to streamline your workflow and make file management a breeze, upgrading to an SSD is definitely worth considering.

    Encrypting Your Data

    Encrypting your data is critical, and using an SSD can offer you the protection you need. An SSD (Solid State Drive) is a type of storage device that uses flash memory to store data. Unlike traditional hard drives, SSDs have no moving parts, which means they are less likely to break or get damaged if dropped or bumped.

    This makes them a great option for portable devices like laptops or tablets. But, they also offer excellent encryption features that make them a secure option for storing sensitive data, such as financial or personal records. With an SSD, you can use built-in encryption tools like BitLocker to encrypt your entire drive, ensuring that your data is safe and secure from prying eyes.

    Plus, since encryption is done in real-time, you don’t have to worry about any slowdowns or performance issues. So, if you’re looking for a reliable and secure way to encrypt your data, consider using an SSD.

    Troubleshooting and Maintenance

    If you’re new to using the Samsung SSD T7, there are a few important things to keep in mind to ensure optimal performance and longevity of your device. First and foremost, it’s crucial to make sure that your device is properly connected and recognized by your computer. This can often be achieved simply by using a different USB port or cable, or by updating your operating system’s drivers.

    It’s also important to regularly update the firmware on your SSD to take advantage of the latest security and performance enhancements. Additionally, it’s a good idea to periodically run diagnostic tests on your device to ensure that everything is functioning as expected. Overall, by following a few basic maintenance and troubleshooting practices, you can ensure that your Samsung SSD T7 provides reliable and speedy storage for years to come.

    Checking for Updates

    Checking for updates is a necessary step in troubleshooting and maintaining your devices. Whether you’re using a computer, smartphone, or tablet, updates are essential to keep your devices running smoothly and securely. These updates often include bug fixes and security patches that can prevent potential problems, such as malware attacks or system crashes.

    Checking for updates regularly can also ensure that you have access to the latest features and improvements. It’s important to note that some updates may require a restart or take some time to install, so it’s best to schedule them at a time when you can temporarily disrupt your work. To check for updates on your devices, simply go to your settings and look for the “software update” or “check for updates” option.

    By staying on top of updates, you can help keep your devices in top shape and avoid any unwanted issues.

    Safely Ejecting the SSD

    Safely ejecting your SSD is an important step to ensure your data is protected and prevent any damage to your device. However, sometimes you may encounter issues when trying to safely eject your SSD. One common issue is the “device is currently in use” error message.

    This can occur if there are any open files or programs using the SSD. To resolve this issue, close any active windows or programs and wait a few moments before trying to eject the SSD again. Another issue you may encounter is if the eject button is not working.

    In this case, you can try to eject the SSD through the operating system’s file explorer or by using the command prompt. Additionally, it is important to regularly maintain your SSD by running disk cleanup and disk defragmenter to optimize its performance. By properly troubleshooting and maintaining your SSD, you can ensure it stays in good condition and protect your data.

    Tips for Long-Term Performance

    When it comes to ensuring long-term performance of your devices, troubleshooting and maintenance are the keys. Troubleshooting involves identifying potential problems before they escalate into major issues. Regular inspection and maintenance can help you spot signs of wear and tear, overheating, or any other damage before they cause significant damage.

    With regular maintenance, you can replace the worn-out components and keep your devices in top condition. Additionally, you can upgrade your devices’ components to ensure optimal performance in the long term. For instance, you can swap out old HDDs with SSDs, upgrade your RAM, or replace outdated processors with newer models.

    Keeping your devices properly maintained and upgrading key components will enhance their performance, longevity, and reduce the likelihood of issues. Don’t wait until your device encounters severe problems that could lead to costly repairs or replacements. Be proactive and keep your devices in top condition, and you’ll enjoy better and more reliable performance.

    Conclusion

    Using the Samsung SSD T7 is like having a high-powered jetpack for your data. With lightning-fast transfer speeds and cutting-edge security features, this compact device is the perfect tool for anyone looking to take their digital storage and sharing to the next level. Whether you’re a gaming enthusiast, a content creator, or just someone who wants to keep their important files safe and secure, the Samsung SSD T7 is a must-have addition to your tech arsenal.

    So go ahead and fly high with the T7 – your data will thank you!”

    FAQs

    What is the difference between Samsung SSD T7 and T7 Touch?
    The Samsung SSD T7 Touch comes with an added fingerprint sensor for added security, while the T7 does not have this feature.

    Can the Samsung SSD T7 be used with both Mac and PC?
    Yes, the Samsung SSD T7 is compatible with both Mac and PC with the use of the appropriate cables.

    What is the read and write speed of Samsung SSD T7?
    The Samsung SSD T7 has a read speed of up to 1,050 MB/s and a write speed of up to 1,000 MB/s.

    Is Samsung SSD T7 shock and drop-resistant?
    Yes, Samsung SSD T7 is shock-resistant up to 2 meters and can survive a drop of up to 6 feet.

    Does the Samsung SSD T7 come with any software to manage and secure the device?
    Yes, the Samsung SSD T7 comes with SSD software designed to manage, monitor and secure your data, including password protection and encryption.