Author: David L. Lynn

  • Step-by-Step Guide: Installing Windows 11 on an External SSD Drive for Faster Performance

    Step-by-Step Guide: Installing Windows 11 on an External SSD Drive for Faster Performance

    If you’re looking to install Windows 11 on an external SSD drive, you’ve come to the right place. Whether your laptop or PC doesn’t meet the minimum system requirements for Windows 11, or you simply want to run the operating system on an external drive for convenience, this guide will walk you through the process. But why would you want to run Windows 11 on an external SSD drive, you may ask? Well, there are a few advantages to doing so.

    For one, it allows you to keep your main computer free of clutter and potential software conflicts. Additionally, an external drive can be easily transported between devices, so you can take your Windows 11 setup with you wherever you go. Before we get started, it’s worth noting that installing Windows 11 on an external SSD drive is not the simplest process.

    It requires a bit of technical know-how and patience, but the results are worth it. In this guide, we’ll be covering everything from creating a bootable USB drive to configuring your BIOS settings. So, grab your external SSD drive and let’s get started!

    Check if Your PC Supports Windows 11 and External Booting

    If you are thinking of trying out Windows 11 but don’t want to install it on your main drive, you may be wondering if it’s possible to install it on an external SSD drive. The good news is that you can, but there are a few things you need to consider first. Firstly, you need to ensure that your PC supports Windows 1

    Microsoft has released a PC Health Check app that can quickly determine if your system meets the minimum requirements for Windows 1 Secondly, you need to check if your PC supports external booting. Not all systems can boot from an external drive, so it’s important to confirm this before proceeding.

    Once you have confirmed that your PC meets these requirements, you can proceed with installing Windows 11 on your external SSD drive. This can give you the flexibility to use Windows 11 on any system you choose, without having to worry about modifying your primary system. By following the installation instructions carefully, you can enjoy the benefits of Windows 11 without any risk to your main system.

    System Requirements and BIOS Settings

    Before upgrading or installing Windows 11, it is crucial to ensure that your PC meets the necessary system requirements. This includes having a compatible processor, a minimum of 4GB of RAM, and at least 64GB of internal storage. Additionally, your PC must support TPM version

    0 and have Secure Boot enabled in the BIOS settings. To avoid any installation issues, it is also important to check if your PC supports external booting. If it doesn’t, you may need to update your BIOS settings or consider purchasing a new system that meets the Windows 11 requirements.

    Remember, without meeting the required specifications, your device may not function properly or experience stability issues.
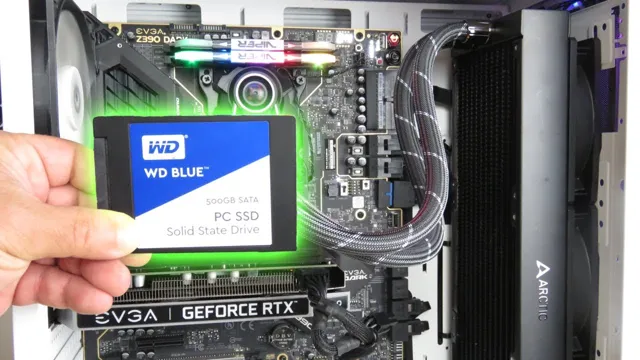
    how to install windows 11 on external ssd drive

    Create Windows 11 Bootable USB Drive

    Are you ready to get your hands on Windows 11 but don’t want to give up valuable storage space on your computer? Luckily, you can install Windows 11 on an external SSD drive! The first step is to create a bootable USB drive with the Windows 11 ISO file. You can use the built-in Windows 10 Media Creation Tool to create the bootable USB drive. Once you have the bootable USB drive, connect your external SSD drive to your computer.

    Then, restart your computer and enter the BIOS settings to change the boot order. Make sure to set the external SSD drive as the primary boot device. Now, simply follow the installation process to install Windows 11 on your external SSD drive.

    With this easy process, you can experience the excitement of Windows 11 without sacrificing your precious storage space.

    Download Windows 11 ISO and Rufus USB Tool

    Are you excited to get your hands on Windows 11? Well, the first thing you need to do is create a bootable USB drive for your installation. To do that, you’ll need two things: the Windows 11 ISO file and Rufus USB tool. Firstly, you need to download the Windows 11 ISO file from the official Microsoft website.

    You’ll need a valid Windows licence key to activate it, so make sure you have that ready too. The ISO file size is around 5GB, so make sure you have enough free space on your computer to download it. Next, you’ll need to download Rufus USB tool.

    This is a free and easy-to-use tool that will help you create your bootable USB drive. Make sure to download the latest version from their official website. Once both downloads are complete, open Rufus and select your USB drive.

    Choose the Windows 11 ISO file you just downloaded as the source. Then, hit the “start” button and let Rufus work its magic. The process usually takes around 15-20 minutes, depending on the speed of your computer and USB drive.

    Once Rufus has finished, you’ll have a bootable USB drive ready to go. Plug it into your computer and reboot. This will bring up the Windows 11 installation process, so just follow the prompts to get started.

    Creating a bootable USB drive can seem daunting, but with the Windows 11 ISO file and Rufus USB tool, the process is simpler than you think. So get downloading and enjoy all the new features that Windows 11 has to offer!

    Create Bootable USB Drive Using Rufus

    If you’re looking to install Windows 11 on a new computer or upgrade your existing one, creating a bootable USB drive is essential. Fortunately, Rufus makes the process easier than ever before. With Rufus, you can create a bootable USB drive for Windows 11 in just a few simple steps.

    First, download and install Rufus on your computer. Next, plug in your USB drive and select it as the target device in Rufus. Choose the Windows 11 ISO file and select “Start” to begin creating your bootable USB drive.

    Rufus will format your USB drive and copy the necessary Windows 11 files to the drive, which may take some time depending on the speed of your computer and USB drive. Once the process is complete, you’ll have a bootable USB drive ready to use for installing Windows 11 on your computer. So what are you waiting for? Give Rufus a try and get started with Windows 11 today!

    Connect External SSD Drive

    If you’re looking to install Windows 11 on an external SSD drive, you’re in luck because it can be done quite easily. First, make sure your external SSD has enough space for the operating system file, which is at least 64 GB. Then, connect your external SSD drive directly to your computer’s USB port.

    Make sure your computer is set to boot from external drives. Go into the BIOS settings and select the external SSD drive as the primary boot device. Also, make sure your external SSD drive is formatted as NTFS.

    You can now proceed to install Windows 11 on your external SSD drive just like you would on your internal hard drive. Once the installation is complete, you can boot up your computer from the external SSD drive and enjoy all the benefits of Windows 11 on the go. It’s that simple!

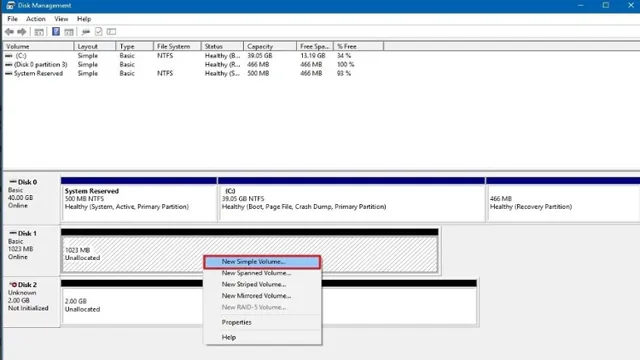
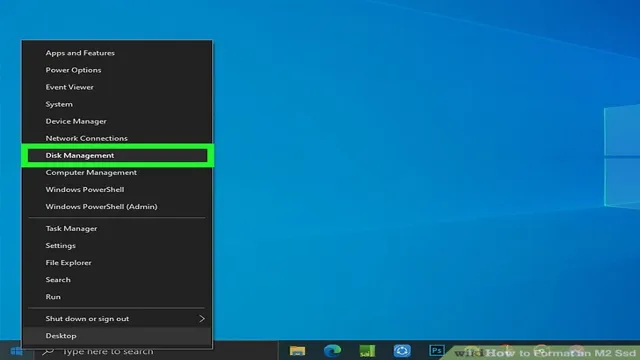
    Format External SSD Drive

    If you just got a new external SSD drive and you’re not sure how to format it, don’t worry, it’s an easy process. First, connect your SSD drive to your computer using a USB cable. Your computer should automatically detect the new drive and show a pop-up message.

    If it doesn’t, go to “This PC” or “My Computer” and look for the new drive. Once you’ve located it, right-click on the drive and select “Format.” Depending on your preferences, you can choose the file system you want, such as FAT32 or NTFS, and select a label for the drive.

    It’s important to note that formatting will erase all data on the drive, so make sure you back up any important files before proceeding. With just a few clicks, you can have your new external SSD drive ready for use.

    Insert and Connect External SSD Drive

    Connecting an external SSD drive to your computer can provide additional storage space and faster data transfer speeds compared to traditional hard drives. To get started, you’ll need to find an available USB port on your computer. Then, connect the external SSD drive to the USB port using the cable provided.

    Once connected, your computer should recognize the external drive and prompt you to install any necessary drivers or software. After installation, you can begin using the drive and transfer files to and from it just like you would with your internal hard drive. Whether you’re looking to store large files or improve your computer’s performance, an external SSD drive can be a valuable addition to your setup.

    So go ahead and insert that SSD drive, and get ready to experience the benefits of faster and more efficient storage.

    Boot PC with Bootable USB Drive

    Are you looking for a way to install Windows 11 on an external SSD drive? Well, the good news is that it’s absolutely possible. All you need is a bootable USB drive and a few simple steps to make it happen. Firstly, make sure your external SSD is connected to your computer and then insert your bootable USB drive into a USB port.

    Next, you’ll need to enter your computer’s BIOS menu and set the boot priority to boot from your USB drive. Once you’ve done that, save your changes, restart your computer, and voila! You can now install Windows 11 on your external SSD drive. Just make sure that you select your external SSD as the installation destination during the installation process, and you’re good to go.

    With this method, you can easily keep your Windows 11 installation separate from your computer’s internal drive, giving you the freedom to take your operating system with you wherever you go. So why not give it a try and see how it works for you?

    Reboot Your PC and Enter Boot Menu

    To boot your PC with a bootable USB drive, you first need to restart your computer and access the boot menu. The boot menu contains a list of devices where you can select to boot from, such as your hard drive or a USB drive. To access the boot menu, press the appropriate key (usually F12 or Esc) during the boot-up process.

    Keep in mind that the key to access the boot menu can vary depending on your computer’s manufacturer. Once you’re in the boot menu, select the USB drive that contains the bootable software you want to use and press Enter. Your PC will now boot from the USB drive, allowing you to install a new operating system or repair your existing one.

    By following these steps, you can easily boot your PC with a bootable USB drive and take full advantage of its capabilities.

    Select Bootable USB Drive to Boot from

    When you need to boot your PC from a bootable USB drive, it’s important to know how to select the drive as the boot device. First, insert the USB drive into your computer’s USB port. Next, restart the PC and enter the BIOS or UEFI settings.

    This may require pressing a specific key during startup, such as F2 or Delete. Once in the settings, look for the boot section and select the option to change the boot order. From there, select the USB drive as the first boot device, save the changes, and exit the settings.

    Your PC will now boot from the bootable USB drive instead of the internal hard drive. It’s important to note that not all computers or devices have the same BIOS or UEFI settings, so the exact process may vary. But with a little bit of research or help from a professional, you should be able to easily select the bootable USB drive and get your PC up and running.

    Install Windows 11 on External SSD Drive

    If you’re looking to install Windows 11 on an external SSD drive, you’re in luck! It’s totally possible to do so, and it can be a great way to have your operating system available on the go. First, you’ll need to make sure your external SSD drive is connected to your computer. Next, download the Windows 11 installation media from the official Microsoft website and create a bootable USB drive.

    Once you’ve done this, restart your computer and boot it from the USB drive. From here, follow the prompts to install Windows 11 as you normally would – just make sure to select your external SSD drive as the installation destination. It’s important to note that while installing the operating system on an external drive can be useful, it may not run as smoothly as it would on an internal drive.

    However, with the right equipment and a bit of patience, you can have a portable Windows 11 solution in no time!

    Follow the Installation Wizard and Choose External SSD Drive

    Installing Windows 11 on an external SSD drive can be a great option for those who want to keep their system running smoothly without having to upgrade their internal storage. To get started, simply follow the installation wizard and choose your external SSD drive as the location for the operating system. This process is straightforward and can be done in just a few easy steps.

    Once your external SSD drive is selected, the installation wizard will begin installing Windows 11 onto the drive. It’s important to note that you’ll need to have a good amount of space available on your external SSD drive in order to complete the installation process. With the installation complete, you’ll be able to boot your system directly from the external SSD drive and experience the performance benefits of running Windows 11 on an external drive.

    So if you’re looking for an easy and effective way to upgrade your system, consider installing Windows 11 on an external SSD drive!

    Complete the Installation Process and Boot into Windows 11

    If you’re looking to install Windows 11 on an external SSD drive, you’ve come to the right place! Once you’ve got the ISO file downloaded and the bootable USB created, it’s time to complete the installation process and boot into Windows 1 First, plug in your external SSD drive and select it as the destination for the Windows 11 installation. Make sure to erase any existing data on the drive before proceeding.

    Next, follow the on-screen prompts to install Windows 11 as you would on any other device. Once the installation is complete, eject the USB and restart your computer. You may need to adjust your BIOS settings to boot from the external SSD drive.

    From there, you should be able to enjoy all of the features and benefits of Windows 11 on your portable SSD. Keep in mind that some older computers may not be compatible with Windows 11, so check your system requirements before attempting the installation. Happy computing!

    Conclusion

    Congratulations! You have successfully learned how to take your love for Windows 11 to the next level by installing it on an external SSD drive. With this new setup, you’ll have the flexibility to take your personalized desktop environment with you on-the-go, bringing a bit of home with you wherever you go. Say goodbye to stationary computing and hello to equipping yourself with the tools to conquer all your technology goals, one portable SSD at a time!”

    FAQs

    Can Windows 11 be installed on an external SSD drive?
    Yes, Windows 11 can be installed on an external SSD drive, as long as the drive is compatible with the system requirements and has enough space for the installation.

    What are the system requirements for installing Windows 11 on an external SSD drive?
    The system requirements for installing Windows 11 on an external SSD drive are the same as those for installing it on an internal drive, which include a compatible processor, RAM, and graphics card. Additionally, the SSD must have at least 64 GB of storage space.

    How do I install Windows 11 on an external SSD drive?
    To install Windows 11 on an external SSD drive, you will need to create a bootable USB drive with the Windows 11 installation files, connect the SSD drive to your computer, and then boot from the USB drive to begin the installation process. You will then be prompted to select the external SSD drive as the destination for the installation.

    Can I use a portable SSD drive to install Windows 11?
    Yes, you can use a portable SSD drive to install Windows 11, as long as it meets the system requirements and has enough space for the installation. Portable SSD drives are convenient for use with laptops and other mobile devices, as they do not require an external power source.

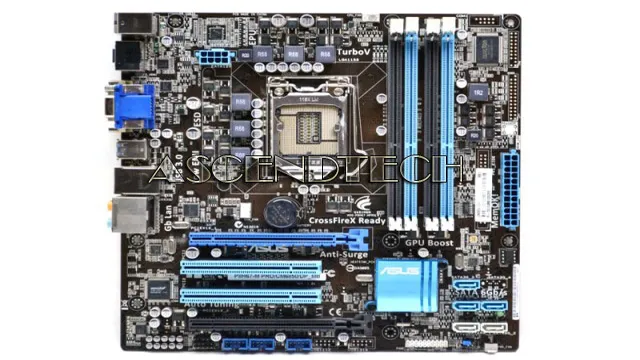
  • Unlock the Mystery: A Quick Guide on How to Determine SSD Compatibility with Your Motherboard

    If you’re planning on upgrading your computer’s storage by swapping out your ancient hard drive for a shiny new SSD, there’s one crucial factor to consider – is your SSD compatible with your motherboard? Installing an incompatible SSD can lead to a range of problems, from non-functional components to system crashes. But fear not, with a little research, you can determine whether your new SSD is good to go, or if you need to upgrade your motherboard or choose a different SSD altogether. So, before you pull the trigger on that SSD purchase, let’s dive into the details of SSD and motherboard compatibility.

    Check your motherboard’s specs

    When it comes to upgrading your computer’s storage, it’s important to make sure that the SSD you’re buying is compatible with your motherboard. The first step in determining compatibility is to check your motherboard’s specifications. Most motherboards will have an M.

    2 slot for SSDs, but the type of M.2 slot can vary. There are two types of M.

    2 slots: SATA and NVMe. SATA M.2 slots are compatible with SATA SSDs, while NVMe M.

    2 slots are compatible with NVMe SSDs. It’s important to note that NVMe SSDs are faster than SATA SSDs, so if your motherboard has an NVMe slot, it’s worth considering upgrading to an NVMe SSD. Another factor to consider is the length of the M.

    2 slot. Some M.2 slots can only accommodate shorter SSDs, so make sure to check the length of your SSD before purchasing.

    Overall, checking your motherboard’s specifications is the best way to ensure that your SSD is compatible and will work well with your system.

    Locate your motherboard model number

    When it comes to upgrading or troubleshooting your computer, it’s important to know the exact model number of your motherboard. This information can help you determine compatibility with new hardware, troubleshoot issues, and upgrade components. To locate your motherboard model number, there are a few different methods you can try.

    One option is to check your computer’s manual or specifications sheet, which should list the model number. Another option is to look at the physical motherboard itself, as the model number is often printed on the board itself. If you’re still unsure, you can also download system information software that will provide you with detailed specs about your computer and motherboard model number.

    By taking the time to locate your motherboard’s model number, you’ll be better equipped to make informed decisions about upgrades and repairs, ultimately improving the performance and longevity of your computer.

    how to know if ssd is compatible with motherboard

    Refer to the manufacturer’s website

    When it comes to checking your motherboard’s specs, one of the best places to start is by referring to the manufacturer’s website. Most reputable motherboard manufacturers will have detailed product information available on their website, including specifications, compatibility, and even user manuals. By taking the time to visit the manufacturer’s website, you can ensure that you have accurate information about your motherboard that can help you troubleshoot any issues or make informed upgrades.

    Plus, you may even find helpful tips and tricks for optimizing your motherboard’s performance or expanding its capabilities. So, if you’re curious about your motherboard’s specs, take a few minutes to visit the manufacturer’s website and explore all the information available. It could be the key to unlocking new possibilities for your computer system.

    Check your SSD’s specs

    If you want to know if your SSD is compatible with your motherboard, the first thing you should do is check your SSD’s specs. Your motherboard’s compatibility with different types of SSDs can vary depending on the chipset, firmware, and other hardware components. To ensure your SSD works with your motherboard, you need to make sure the interface type, form factor, and capacity match up.

    Some commonly used SSD interfaces include SATA, NVMe, and PCIe, so be sure to check your motherboard’s specifications to see which it supports. You also need to consider the form factor, which can be 5-inch, M.

    2, or U. Finally, make sure you choose an SSD with a capacity that’s compatible with your motherboard, and check the read and write speeds to ensure optimal performance.

    By checking your SSD’s specs and your motherboard’s specifications, you can ensure that your SSD and motherboard are compatible and work well together.

    Locate your SSD model number

    SSD model number If you’re looking to upgrade or replace your solid-state drive (SSD), one of the first things you’ll need to do is locate its model number. This information will be crucial in determining whether your new SSD is compatible with your existing hardware or if it needs additional components to function properly. The easiest way to find your SSD’s model number is to check the manufacturer’s website and search for your specific model.

    You can also try checking the device manager in your computer’s settings, or physically opening up your computer and looking for identifying markers on the SSD itself. Once you have your model number, you can then check the specifications for your SSD, including its capacity, read and write speeds, and other important details that will help you choose the right replacement or upgrade for your needs. By taking the time to locate and understand your SSD’s model number, you can save yourself time, money, and frustration in the long run.

    Refer to the manufacturer’s website

    When it comes to checking your SSD’s specs, the best place to start is by referring to the manufacturer’s website. Here, you can find all the important information about your SSD, including its storage capacity, read and write speeds, form factor, and more. The manufacturer’s website will also provide you with details about any software tools or firmware updates that you may need to download to get the most out of your SSD.

    It’s important to keep in mind that not all SSDs are created equal, and by checking your SSD’s specs, you can ensure that you are getting the performance and storage capacity that you need. Don’t forget to also consider factors such as durability and warranty when choosing the perfect SSD for your needs. So take a few minutes to browse through your SSD’s specs on the manufacturer’s website and make an informed decision about which SSD is right for you.

    Alternatively, use a compatibility checker tool

    If you’re thinking of upgrading your SSD, it’s essential to check its specifications to ensure compatibility with your computer system. Alternatively, you can use a compatibility checker tool that matches the specifications of your computer with the SSD’s specs. This tool will determine if the SSD is compatible or not, saving you time and hassle.

    It’s crucial to check the interface, form factor, and capacity of the SSD before purchasing it. If your computer system only supports a specific interface like SATA, buying an SSD with an NVMe interface won’t work. Similarly, the form factor of the SSD should match that of your computer.

    For instance, if your computer can only house a 5-inch drive, buying an SSD with a 5-inch form factor won’t fit.

    Lastly, don’t forget to check the capacity of the SSD. Ensure that it has enough storage space to accommodate your files and applications. By using a compatibility checker tool or manually checking your SSD’s specifications, you’ll get the right SSD and avoid wasting your time and money.

    Make sure the form factor matches

    If you’re planning to upgrade your storage with an SSD, it’s crucial to make sure the form factor matches your motherboard. Most motherboards support 5-inch and M.

    2 SSDs, but it’s important to check your motherboard’s manual or specifications to confirm which form factors it supports. For instance, if your motherboard only supports M.2 SSDs, buying a

    5-inch SSD won’t work. On the other hand, if your motherboard only supports SATA SSDs, buying an NVMe SSD won’t be compatible. Additionally, make sure to check the interface of the SSD and the motherboard.

    For example, SATA III and PCIe are different interfaces, and a SATA III SSD won’t be compatible with a PCIe slot on your motherboard. Overall, it’s important to check the compatibility of the form factor and interface for your SSD and motherboard before making a purchase.

    Check if your SSD and motherboard use the same form factor

    When you’re upgrading or building a PC, it’s important to pay attention to the form factor of both your SSD and motherboard. The form factor refers to the physical size and shape of the component, and it needs to match in order for the two to work together seamlessly. If you try to install an SSD with the wrong form factor, it won’t fit in the motherboard’s SSD slot, and you won’t be able to connect the two.

    This can be a frustrating and costly mistake, so it’s important to take the time to research and ensure that your SSD and motherboard use the same form factor. The main keyword is “form factor.”

    Verify the interface type

    When upgrading your computer’s storage, it’s important to verify that the interface type of your SSD is compatible with your motherboard. You can check this by looking at the specifications of both your motherboard and the SSD you’re interested in purchasing. The most common interface types for SSDs are SATA, PCIe, and M.

    SATA is the oldest and slowest of the three, but it’s still widely used and most motherboards have SATA ports available. PCIe is faster and more expensive, but not all motherboards support it.

    M.2 is the fastest and most expensive, and it requires a specific M.2 slot on your motherboard.

    It’s important to note that even if your motherboard has a compatible interface, it may not support the maximum speeds of the SSD. Therefore, it’s recommended to check your motherboard’s manual or manufacturer’s website for more information on compatibility and maximum speeds before making your purchase.

    Check if your SSD and motherboard use the same interface type

    If you’re planning to upgrade your PC’s storage with an SSD, it’s important to check if your SSD and motherboard use the same interface type. This is because there are different types of interfaces, such as SATA, PCIe, and NVMe, and they are not always compatible with each other. To verify the interface type of your SSD and motherboard, you can check the specifications of each device or consult the manufacturer’s website.

    It’s also possible to physically inspect the connectors on the SSD and motherboard to see if they match. If the interface types do not match, you may need to purchase an adapter or choose a different SSD that is compatible with your motherboard. By verifying the interface type beforehand, you can prevent compatibility issues and ensure a smoother upgrade process.

    Conclusion

    In conclusion, determining if your SSD is compatible with your motherboard isn’t rocket science- just remember the three C’s: Capacity, Connector, and Compatibility. Ensure that your SSD’s capacity is supported by your motherboard, the connector type matches and your motherboard’s specifications, and lastly, check for compatibility issues between your SSD and motherboard. Armed with this knowledge, you’ll be able to upgrade your computer without any hiccups and enjoy faster boot-up times and speedy file transfers.

    Happy upgrading!”

    FAQs

    What are the factors to consider when checking if an SSD is compatible with a motherboard?
    The factors to consider include the socket type, form factor of the SSD, interface protocol, and the motherboard’s BIOS compatibility.

    Can I use an M.2 SSD on a motherboard that only has SATA ports?
    No, M.2 SSDs require an NVMe interface, which is not supported by SATA ports.

    What is the maximum SSD storage capacity that a motherboard can support?
    The maximum SSD storage capacity depends on the motherboard’s chipset and the processor’s memory controller. Modern motherboards support up to 2TB or more.

    Can I install an SSD on a legacy motherboard that doesn’t have any SSD slots?
    Yes, you can use an SSD adapter to convert a PCIe or SATA III slot into an SSD slot. However, you may need to check the BIOS compatibility and power supply requirements.

  • Step-by-Step Guide: How to Apply Thermal Pad on Your SSD for Optimal Performance

    When it comes to maximizing your SSD’s performance, there’s one small yet crucial component that often gets overlooked: the thermal pad. A thermal pad is a small piece of material that sits on top of your SSD and helps to dissipate heat more efficiently. Without it, your SSD can overheat and slow down, causing frustrating performance issues.

    But if you’re not sure how to apply a thermal pad to your SSD, don’t worry! In this step-by-step guide, we’ll walk you through the entire process so you can achieve optimal SSD performance and keep your system running smoothly. So let’s get started!

    What You’ll Need

    If you’re looking for a way to improve the cooling performance of your Solid State Drive (SSD), then using a thermal pad is a perfect solution. Before diving into the process, you need to make sure that you have the necessary materials such as the SSD, thermal pad, and isopropyl alcohol. When choosing the thermal pad, it is crucial to note the thickness, size, and thermal conductivity rate.

    Make sure to get the exact size of your SSD to avoid any fitment issues. Also, the thicker the pad, the better the performance, and the higher the thermal conductivity, the more effective it will be. Lastly, the isopropyl alcohol is very important in removing any dirt or dust on the SSD’s surface before installation.

    Doing so will ensure a stable and long-lasting bond between the SSD and thermal pad.

    Thermal Pad

    A thermal pad is a critical component when it comes to maintaining optimal temperatures in electronic devices. To use a thermal pad, you’ll need a few things. First, make sure you have a clean work environment.

    Dirt and dust particles can reduce the effectiveness of the pad, so you want to avoid any unnecessary buildup. You will need to have an idea of the size of the pad you need. You can find thermal pads in many different sizes, so be sure to do your research before making a purchase.

    Finally, you’ll need to have a little patience. Installing a thermal pad may require you to take apart your device, clean off any old thermal paste, and reapply new paste and the pad. It might feel like a lot of work, but taking the time to ensure proper cooling can save you from more costly repairs down the line.

    Remember, a thermal pad is an essential component that can significantly prolong the lifespan of your electronic devices by preventing overheating, so make sure to invest in a good one.

    how to put thermal pad on ssd

    Isopropyl Alcohol

    Isopropyl alcohol is a versatile substance that is used in various industries and households. To use it effectively, you’ll need a few things. Firstly, you’ll need isopropyl alcohol itself.

    Depending on what you need it for, you can choose from a range of concentrations, with the most commonly used being 70% and 99%. Next, you’ll need something to apply it with. Cotton balls, cotton swabs, or microfiber cloths are great options for cleaning and disinfecting surfaces.

    You might also want to have a spray bottle on hand if you need to cover larger areas quickly. Lastly, if you plan on using isopropyl alcohol on electronics, it’s important to have a soft brush on hand to remove any debris. Overall, with just a few simple tools, you can make the most out of isopropyl alcohol and its many uses.

    Clean Cloth

    For cleaning your cloth, there are a few essential things you’ll need. Firstly, you’ll require a clean cloth, one that’s soft and gentle on the fabric. Using a rough or hard cloth can end up damaging the material.

    Secondly, you’ll need a cleaning solution that’s safe to use on the type of fabric you’re trying to clean. For example, you could use a mild detergent or fabric softener to remove stubborn stains. Ensure that the solution doesn’t contain any harmful chemicals that could end up ruining the fabric.

    Lastly, you’ll require access to running water and a sink or bucket to rinse the cloth. It’s important not to leave any leftover detergent or cleaning solution on the fabric, as it could damage it. By having these items on hand, you’ll be able to effectively clean and maintain the fabric’s quality for years to come.

    So the next time you have a dirty cloth, make sure to have these essential items available!

    Step 1: Prepare the SSD

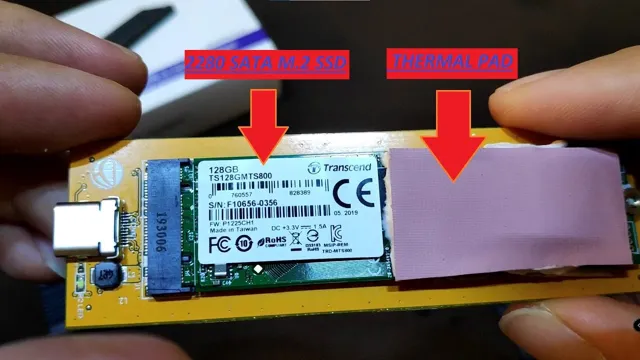
    One of the crucial steps to learn how to put a thermal pad on SSD is to prepare the SSD first. Before applying the thermal pad, make sure to clean the surface of your SSD thoroughly using a microfiber cloth or isopropyl alcohol. A clean surface will help the thermal pad stick better to the SSD.

    Once the surface is clean, you can now proceed to cut the thermal pad to fit the size of your SSD. Make sure to measure the length and width of your SSD and cut the thermal pad accordingly. The thickness of the thermal pad will depend on the brand and model of your SSD, so make sure to read the product specifications before purchasing the thermal pad.

    After cutting the thermal pad, you can now peel off the protective film and apply it to the surface of your SSD. Make sure to align it properly to avoid air bubbles and ensure good thermal conductivity. Additionally, make sure that the thermal pad covers the top surface of your SSD completely for optimal efficiency.

    By adequately preparing your SSD for the thermal pad, you can ensure that your SSD runs smoothly and efficiently while keeping it cool.

    Remove SSD From Computer

    Before removing an SSD from a computer, it’s crucial to prepare the SSD first. This means turning off the computer and disconnecting it from any power sources. You should also ground yourself by touching a metal object like a doorknob or radiator before handling the SSD to avoid any potential damage from static electricity.

    Next, you’ll want to locate the SSD in your computer’s case. If you’re unsure of its location, consult your computer’s manual or look online for guides specific to your computer model. Once you’ve located the SSD, take note of how it’s connected to the computer.

    Most SSDs will be connected using either a SATA cable or an M.2 slot, so make sure you have the appropriate tools and cables to disconnect it properly. Finally, be sure to back up any important data stored on the SSD before removing it from the computer.

    By taking these steps to prepare the SSD, you’ll ensure a safe and efficient removal process.

    Clean SSD with Isopropyl Alcohol and Cloth

    If you want to clean your SSD with isopropyl alcohol and a cloth, the first step is to prepare the SSD for cleaning. You’ll need to turn off your computer and disconnect all cables, including the power cable and any other peripherals. Once you have the SSD out, gently wipe it down with a dry cloth to remove any loose dust or debris.

    This will ensure that the isopropyl alcohol can penetrate deeply and effectively clean the SSD. It’s essential to get the SSD completely clean before using the isopropyl alcohol, as any remaining debris or dust could interfere with the cleaning process. Taking the time to properly prep your SSD will ensure that your cleaning efforts are fruitful and that your SSD stays in top shape for years to come.

    Step 2: Apply the Thermal Pad

    When it comes to installing an SSD, applying the thermal pad is an important step that should not be overlooked. To put a thermal pad on an SSD, the process is relatively simple. First, identify the side of the SSD that needs to be covered by the thermal pad.

    Most SSDs have a metal top cover that needs to be covered to improve heat dissipation. Take the thermal pad and line it up with the metal top cover, making sure it fits perfectly. Peel off the protective backing, and carefully place the thermal pad onto the metal cover, ensuring there are no air bubbles or wrinkles.

    Some thermal pads may come with adhesive on both sides, so make sure to only apply the adhesive side onto the metal cover. Once the thermal pad is applied, you can proceed with attaching the SSD into your device and secure it. This simple step can help improve the performance and longevity of your SSD.

    Cut Thermal Pad to Size of SSD

    Now that we have our thermal pad ready, it’s time to apply it onto the SSD. The first step is to cut it down to the size of the SSD. You want to ensure that it covers the entire surface area of the drive to ensure maximum heat transfer efficiency.

    Don’t worry about being too precise, as the thermal pad is malleable and can conform to the shape of the drive. Once it’s cut, remove the protective film from one side of the pad and carefully align it onto the surface of the SSD. Apply gentle pressure to ensure it adheres properly and covers the entire surface area.

    Now, you can remove the protective film from the other side and align your heatsink on top. Press down lightly to secure it in place. Congratulations, your SSD is now equipped with an efficient thermal solution to keep it running cool and performing optimally!

    Peel Off Protective Film on Both Sides of Pad

    Now that you have your thermal pad ready, it’s time to apply it to your device. The second step in this process is to peel off the protective film on both sides of the pad. Make sure you do this carefully and avoid touching the sticky part of the pad with your fingers.

    It’s important to remove all the protective film as any residue left will affect the performance of the thermal pad. Once you’ve removed the film, align the pad with the component you’re cooling, and gently press it down. Apply enough pressure to ensure that the pad sticks properly, but be careful not to apply too much pressure as this can damage the pad.

    With this step completed, your device should now be ready for improved thermal performance. Remember, the key to success is in the details, so take your time and make sure you follow these steps carefully for the best results.

    Place Pad on Top of SSD

    When it comes to building a gaming PC, one of the most important components to consider is the thermal management system, and that’s where the thermal pad comes into play. Once you’ve got your SSD in place, the next step is to apply the thermal pad on top of it, as this will help to regulate the surface temperature and improve the overall cooling performance of the system. The thermal pad is made of a special material that has good thermal conductivity, and it’s designed to transfer the heat generated by the SSD to the heatsink, which will then dissipate it out of the system.

    Applying the thermal pad is a straightforward process that involves peeling off the adhesive backing, placing it on the top of the SSD, and smoothing it out to ensure good contact between the pad and the heatsink. Remember, proper thermal management is critical to maintaining the longevity and performance of your gaming PC, so don’t skip this important step.

    Step 3: Reinstall the SSD

    Once you’ve added the thermal pad to your SSD, the next step is to reinstall it in your computer. Begin by gently sliding the drive back into its slot, making sure that it properly aligns with the connector pins. Then, use the screws you removed earlier to securely fasten the SSD in place.

    Tighten the screws just enough to prevent the drive from moving around, but be careful not to overtighten them, as this can damage your hardware. Once you’ve reinserted and secured the SSD, you can reattach any cables or connectors you may have removed, and close up your computer case. Congratulations, you’ve successfully installed a thermal pad on your SSD and reinstalled it without any issues! Remember that using a thermal pad can help prevent overheating and prolong the life of your hardware, so make sure to keep your SSD well-maintained and properly cooled.

    Carefully Reinstall SSD in Computer

    Now that you have successfully removed the SSD, it’s time to carefully reinstall it back into your computer. Make sure that the computer is turned off and unplugged before proceeding. Take a close look at the SSD and locate the connectors.

    They should match up with the corresponding connectors inside the computer. Carefully slide the SSD back into the slot, applying gentle pressure until you feel it lock into place. Secure the SSD with the screws you removed earlier, being careful not to overtighten them.

    Once everything is securely in place, reconnect any cables you may have removed and close up the computer case. Turn on your computer and make sure that it recognizes the newly installed SSD. If all goes well, you should be up and running in no time! Remember, it’s important to handle and reinstall your SSD with care to avoid any damage to your computer or data.

    Final Thoughts

    Putting a thermal pad on your SSD can be a bit daunting, but it’s a crucial step to ensure that your system stays cool and running optimally. Firstly, it’s essential to choose the right size of thermal pad for your SSD and cut it accordingly with a pair of scissors. Before applying the thermal pad, clean the back of your SSD with isopropyl alcohol and let it dry.

    Once it’s clean and dry, peel off the protective backing of the thermal pad and attach it to the back of your SSD. Be sure to apply equal pressure to the pad to ensure that it sticks evenly. And that’s it! Your SSD is now ready to be installed in your system.

    Remember, a properly installed thermal pad can help to improve your SSD’s cooling and prevent overheating issues that can lead to data loss and other problems.

    Conclusion

    And that, my friends, is how you give your SSD some extra TLC with a thermal pad. Just remember to take your time, measure twice, cut once, and don’t be afraid to get a little hands-on with your tech. Your SSD will thank you for it with cooler temperatures and more reliable performance.

    Plus, you’ll feel like a total DIY pro. So go forth, slap on those thermal pads, and keep those drives chillin’.”

    FAQs

    What is a thermal pad and what is its importance in an SSD?
    A thermal pad is a material used to transfer heat from a component to a heatsink or another surface. It is important in an SSD because it helps to dissipate the heat generated by the components inside the drive.

    Can I use any thermal pad on my SSD?
    It is recommended to use thermal pads that are specifically designed for SSDs. These pads are usually made of materials that are highly conductive and have the ideal thickness to provide optimum thermal transfer.

    How do I apply a thermal pad on my SSD?
    To apply a thermal pad on your SSD, you need to clean the surface of the SSD and the heatsink where the pad will be placed, remove the protective film from the pad, align the pad with the SSD, and press it down firmly.

    What are the benefits of using a thermal pad on an SSD?
    Some benefits of using a thermal pad on an SSD include improved system stability, reduced risk of data loss, increased lifespan of the SSD, and better overall performance. The thermal pad helps to keep the SSD cool, which prevents data corruption and extends its lifespan.

  • Unlocking the Secret to Data Recovery: Essential Tips for Restoring Data from M 2 SSD

    If you’ve ever experienced a malfunctioning M.2 SSD, you know firsthand how frustrating it can be to lose access to your data. Whether it’s due to physical damage or a technical glitch, losing important files can be detrimental to your work and productivity.

    Thankfully, there are several methods you can try to recover data from your M.2 SSD. In this comprehensive guide, we’ll walk you through the steps you can take to retrieve lost data and preserve your files.

    From utilizing data recovery software to consulting with professional technicians, we’ll cover all the bases to help you get your data back. So, don’t despair if you’re facing a data loss situation with your M.2 SSD; read on and discover how to recover your data and breathe a sigh of relief.

    Understanding M.2 SSDs

    M.2 Solid State Drives (SSDs) are gaining popularity among computer enthusiasts due to their fast read and write speeds and compact size. However, just like any storage device, data loss can occur due to various reasons such as accidental deletion, formatting, or errors in the drive.

    If you have lost data from your M.2 SSD, don’t panic! There are ways to recover your lost data. You can either use data recovery software or contact a professional data recovery service.

    The software can help you recover deleted files, formatted data, or even data lost due to a corrupted file system. On the other hand, data recovery services can recover data from physically damaged drives, which is not possible with software. It is important to note that data recovery from an M.

    2 SSD can be a complex process and requires specialized skills and tools. Therefore, it is advised to seek professional help if you are not confident in your abilities. In conclusion, understanding how to recover data from an M.

    2 SSD can save you from the frustration of losing important files and data.

    What is an M.2 SSD?

    M.2 SSDs If you’re in the market for a new computer or looking to upgrade an existing one, you’ve likely come across the term “M.2 SSD.

    ” But what exactly is it? An M.2 SSD is a small form factor solid-state drive that utilizes the M.2 form factor to connect to a computer’s motherboard.

    Compared to traditional hard disk drives, M.2 SSDs have faster read and write speeds, lower latency, and consume less power. They’re also smaller which allows for more flexibility in terms of design and internal space.

    M.2 SSDs come in different sizes, with the most common being 2280, which measures 22mm wide and 80mm long. They typically use the NVMe protocol, which further improves performance.

    Incorporating an M.2 SSD into your system can provide noticeable improvements in boot times, application load times, and system responsiveness. So, if you’re looking for faster speeds and more storage, consider adding an M.

    2 SSD to your computer setup.

    how to recover data from m 2 ssd

    How M.2 SSDs store data

    M.2 SSDs are a popular choice for gamers and professionals alike due to their speedy performance and compact design. But how does an M.

    2 SSD actually store data? Well, it all comes down to NAND flash memory. Inside the SSD, there are several NAND chips that store information in blocks. These blocks are organized into pages, with each page containing thousands of individual memory cells.

    When data is written to the SSD, it is broken down into individual bits that are stored in these memory cells. To read the data, the SSD’s controller uses a complex system of algorithms to track where each bit is stored and retrieve it when needed. This allows for lightning-fast read and write speeds that make M.

    2 SSDs a must-have for anyone looking to boost their computer’s performance. So next time you’re using an M.2 SSD, remember that it’s all thanks to the intricate workings of NAND flash memory and the SSD’s controller.

    Common causes of data loss in M.2 SSDs

    M.2 SSDs M.2 SSDs are becoming increasingly popular due to their compact size and high speeds.

    However, like any other storage device, M.2 SSDs are prone to data loss. One of the most common causes of data loss in M.

    2 SSDs is physical damage. Due to their small size, M.2 SSDs are more susceptible to physical damage than traditional hard drives.

    Another common cause of data loss in M.2 SSDs is power failure. If an M.

    2 SSD doesn’t have enough power, it can cause data corruption or loss. Additionally, firmware issues can lead to data loss in M.2 SSDs.

    Firmware updates can sometimes cause issues with the drive that result in data loss. It is important to back up important data regularly and ensure that the M.2 SSD has the latest firmware update installed to limit the risk of data loss.

    Preparing for data recovery

    M.2 SSDs are great storage solutions that offer faster data transfer speeds compared to conventional hard drives. However, like any other storage device, they are not immune to data loss or corruption.

    If you are facing a situation where you need to recover data from your M.2 SSD, there are some preparatory steps you should take to safeguard your data. First, ensure that your M.

    2 SSD is safely disconnected from your computer or laptop to avoid any further damage. Then, check if you have a backup of your important data on a different storage device or cloud-based service. If you don’t have a backup, consider making one before you proceed with the data recovery process.

    Additionally, it’s essential to avoid running any recovery software or tools on the affected device, as it may overwrite important data. Instead, seek professional data recovery services to ensure a better chance of successful recovery. By following these tips, you can help protect your data and prepare for a smoother data recovery process.

    Tools and equipment needed

    When it comes to data recovery, proper preparation is key to successful outcomes. Before starting the recovery process, you’ll need to make sure you have the necessary tools and equipment to get the job done. The first thing you’ll need is a reliable external hard drive with enough storage capacity to hold all the recovered data.

    It’s imperative to ensure that your computer or device has enough power and storage space to run the software needed to recover your data. Additionally, you’ll need a recovery software tool that can recover lost or deleted files, as well as hardware like an IDE/SATA to USB adapter, which allows you to connect the hard drive from your target machine directly to your computer’s USB port. Having the right tools and equipment is the first step to speedy and successful data recovery.

    Backing up remaining data

    Preparing for data recovery involves backing up any remaining data on your system. This step is crucial because it ensures that you don’t lose any more important information during the data recovery process. Backing up your remaining data can be done in various ways, including cloud storage or external hard drives.

    It’s essential to choose a reliable backup solution that will keep your data safe and secure. Once you’ve backed up your files, you can move forward with the data recovery process with ease, knowing that you won’t lose any more valuable information. Remember, the key to successful data recovery is being prepared, so take your time and ensure that you have all of your bases covered before starting the process.

    Data recovery methods for M.2 SSDs

    M.2 SSDs have gained popularity as the go-to solution for high-speed storage solutions. However, just like any other storage device, they are prone to data loss.

    Luckily, there are several effective data recovery methods for M.2 SSDs. One of the most common methods is to use data recovery software.

    These tools can recover your lost data by scanning your drive for lost files and then copying them to a new location. Another option is to use a data recovery service that specializes in M.2 SSDs.

    These services have specialized tools and expertise to recover your valuable data. In addition, you can also try using system restore points or a backup to recover your lost data. However, it’s worth noting that prevention is always better than cure, so make sure you back up your important data regularly and avoid deleting important files accidentally.

    With these methods, you can recover your lost data from your M.2 SSD in no time.

    Using data recovery software

    M.2 SSDs Data recovery has become an essential aspect of computing as we store important files and data on our systems. When it comes to M.

    2 SSDs, there are specific data recovery methods that are used. One of the most commonly used methods is using data recovery software. These software programs can be used to recover lost data from M.

    2 SSDs by scanning the drive and retrieving the lost files. However, it is important to note that not all software programs may be compatible with M.2 SSDs and it is crucial to choose software that is specifically designed for this type of solid-state drive.

    Additionally, it is important to consider the cause of the data loss before attempting any data recovery method on an M.2 SSD. In some cases, attempting to recover data using software can further damage the drive and permanent data loss may occur.

    Therefore, it is recommended to seek professional data recovery services for M.2 SSDs that have been physically damaged or have suffered data corruption.

    Contacting a professional data recovery company

    M.2 SSDs are a popular choice for many computer users due to their compact size and impressive speed. However, data loss can still occur, and it is crucial to know about the data recovery methods available for M.

    2 SSDs. One option is to contact a professional data recovery company, who will have the necessary equipment and expertise to recover lost data from an M.2 SSD.

    They will use specialized software and hardware tools to extract the data without further damage to the device. It is essential to choose a reputable company that has experience in recovering data from M.2 SSDs to ensure the best results.

    It is crucial to note that attempting to recover data using DIY methods can cause irreparable damage to the SSD and result in permanent data loss. Contacting a professional data recovery company is the safest option and will give you the best chance of recovering your lost data.

    Tips for preventing future data loss

    If you’ve suffered from the loss of important data due to a failed M.2 SSD, you know how crucial it is to backup your data regularly. One of the best ways to prevent future data loss is to regularly backup all your important files to an external hard drive or cloud storage service.

    Additionally, ensure that you safely eject your M.2 SSD before unplugging it from your computer to avoid any potential damage to the drive, which can lead to data corruption and loss. It’s also a good idea to maintain a clean and organized computer by regularly performing system scans and deleting any unnecessary files or programs, as this can help decrease the risk of file corruption and data loss.

    By implementing these simple tips, you can be proactive in preventing future data loss and avoid the stress and frustration that comes with losing important files. If you do encounter data loss in the future, professional data recovery services can help you recover data from your M.2 SSD.

    Regular backups

    Regular backups are an essential part of preventing future data loss. It’s crucial to backup your important files and documents to ensure that they are safe from accidental deletion, viruses, or hardware malfunctions. Whether you prefer to use an external hard drive, cloud-based storage, or network-attached storage, the key is to make sure that you perform regular backups consistently.

    Backing up your data daily, weekly, or monthly can help you avoid catastrophic data loss. In addition, it’s important to test your backups regularly to make sure that you can restore your data quickly and efficiently in case of an emergency. By prioritizing regular backups, you can protect your valuable information and avoid the frustration of losing important files forever.

    Proper handling and maintenance of M.2 SSDs

    M.2 SSDs M.2 SSDs are an efficient way of storing your data, but it’s important to handle and maintain them properly to prevent data loss.

    Firstly, make sure to firmly secure the M.2 SSD in its slot to avoid any movement or dislodging that may affect its internal components. Also, avoid exposing the M.

    2 SSD to excessive heat or moisture, as these can cause damage. Additionally, regularly perform software updates and run diagnostic tests to identify any potential issues and fix them before they cause permanent damage. Finally, ensure you have proper backups of your data to a separate storage device in the event of failure.

    Following these tips can help prevent future data loss and ensure your M.2 SSD continues to function properly for years to come. So, take proper care of your M.

    2 SSD storage, and it will take proper care of your valuable data.

    Conclusion and next steps

    To recover data from an M.2 SSD, you don’t need a magic wand or a PhD in computer science. All you need is a reliable data recovery software and some patience.

    Remember, M.2 SSDs are like tiny vaults that house your precious data, and you have the key to unlock them. So, don’t panic if you lose data from your M.

    2 SSD. Just follow the steps mentioned above, and you’ll be back in action like nothing ever happened. Just remember that prevention is always better than cure so keep backing up your data regularly.

    Happy recovering!”

    FAQs

    What are the common causes for data loss on M.2 SSD?
    The common causes for data loss on M.2 SSD are system crashes, virus or malware attacks, accidental deletion, and physical damage.

    Is it possible to recover lost data from M.2 SSD on your own?
    It is possible to recover lost data from M.2 SSD on your own using data recovery software, but it is recommended to seek professional help to avoid further damage to the SSD and to increase the chances of successful recovery.

    How long does it take to recover data from M.2 SSD?
    The time required to recover data from M.2 SSD depends on various factors such as the type and severity of damage to the SSD and the amount of data that needs to be recovered. It can take anywhere from a few hours to several days.

    What are the best data recovery software for M.2 SSD?
    Some of the best data recovery software for M.2 SSD are EaseUS Data Recovery Wizard, Stellar Data Recovery, and Disk Drill. However, it is important to research and choose a software that suits your specific needs and requirements.

  • Upgrade Your PS5 Arsenal with WD Black SSD: A Step-by-Step Guide to Installation

    Welcome to the world of fast gaming with your PlayStation 5 console. Now that you have your hands on one of the best gaming consoles in the market, it’s time to upgrade your storage with a WD Black SSD. The WD Black SSD is an excellent choice as it offers impressively fast loading times that will enhance your gaming experience.

    However, if you’re wondering how to install WD Black SSD on PS5, don’t worry, we’ve got you covered. In this blog, we’ll guide you through the installation process of your new WD Black SSD to the PS5 console. So, let’s dive in and get started!

    What You Will Need

    If you’re thinking of installing a WD Black SSD on your PS5, then you will need a few things to get started. First and foremost, you’ll require the SSD itself. Make sure you purchase the correct model that is compatible with the PS

    Next, you will need a small Phillips-head screwdriver to open the back panel of your PS You should also have a USB flash drive with at least 1GB of free space to download the PS5 system software, which you will need to reinstall after installing the SSD. Additionally, you may want to have a microfiber cloth on hand to clean any dust or debris inside your PS

    By having all of these items readily available, you can quickly and easily install the WD Black SSD onto your PS5 and experience faster load times and improved overall performance.

    WD Black SSD Drive

    If you are in the market for lightning-fast data transfer speeds and efficient performance, then the WD Black SSD Drive is the perfect solution for you. To install this cutting-edge storage technology, you will need a few things beforehand. Firstly, make sure that your computer has an available drive bay to accommodate the SSD.

    Secondly, clone your current hard drive data to the new SSD before installation. This will ensure a seamless transition and preserve all of your current data. Additionally, invest in an external hard drive to back up sensitive files in case of a mishap during cloning.

    Lastly, ensure you have a small screwdriver on hand to secure the SSD drive firmly in place. With these preparations in place, you can experience the smooth, uninterrupted performance and lightning-fast data transfer speeds that the WD Black SSD Drive has to offer.

    how to install a wd black ssd ps5

    PS5 Console

    If you’re considering getting the new PS5 console, there are a few things you’ll need to make the most out of your gaming experience. Firstly, you’ll want to have a TV that can accommodate the PS5’s capabilities, preferably one that offers 4K resolution and 120Hz refresh rate. This will allow you to take advantage of the console’s powerful hardware and enjoy gaming in stunning detail and with smooth visuals.

    Additionally, you’ll want to invest in a good pair of headphones or a sound system that can support 3D audio. This feature is a major selling point for the PS5 and creates an immersive, lifelike audio experience for gamers. Finally, make sure you have plenty of space for your new console and accessories.

    The PS5 is a pretty big console, so you’ll want to clear a dedicated area for it and make sure you have enough room to store your controllers, games, and other peripherals. By ensuring you have the right setup for your new PS5 console, you can guarantee yourself the best possible gaming experience.

    SATA Cable / M.2 SSD to SATA Converter

    If you’re looking to upgrade your computer’s storage, you may be wondering what you will need to make the switch from a traditional SATA hard drive to a faster and more efficient M.2 SSD. One important piece of hardware you will need is a SATA cable or M.

    2 SSD to SATA converter. This device will allow you to connect your M.2 SSD to your computer’s motherboard via a SATA port, enabling you to take advantage of the faster read and write speeds of the M.

    2 drive. The converter will typically come with instructions on how to install it into your system, but it’s important to make sure that it’s compatible with your computer’s motherboard. Upgrading your storage is a great way to breathe new life into an older computer and improve overall performance.

    By investing in a SATA cable or M.2 SSD to SATA converter, you can ensure that your new drive will function properly and provide the speed and efficiency you’re looking for.

    Pre-Installation Steps

    If you’re looking to install a WD Black SSD on your PS5, there are a few essential steps you need to follow before you start the process. Firstly, make sure your console is powered off and unplugged from the wall to avoid any damage to the internal components. Next, gather all the necessary tools, including a screwdriver set and an anti-static wristband to protect your new hardware during installation.

    You’ll also need to download the latest system software update from Sony’s website to ensure compatibility with your new SSD. Once you’ve completed these pre-installation steps, you’re ready to proceed with the installation process, taking care to follow the manufacturer’s instructions and guidelines to ensure the best possible performance and longevity for your WD Black SSD. Remember, a successful installation can significantly improve your PS5’s storage capacity and speed, making for a more enjoyable gaming experience.

    Back Up PS5 Data to External Storage

    Backing up your PS5 data to an external storage device is a smart move that can save you a lot of trouble in the future. However, before you do that, there are a few pre-installation steps that you need to follow. First, make sure that you have a compatible external storage device that supports USB

    0 or later. Next, ensure that the storage device has enough free space to accommodate all the data that you want to transfer. You can check the available space on your PS5 by going to Settings > Storage.

    Once you have a suitable storage device, connect it to your PS5 using a USB cable. Then, follow the on-screen instructions to format the storage device as external storage. This will wipe out any existing data on the storage device, so make sure to back up any important files before you proceed.

    Once the formatting is complete, you can start backing up your PS5 data to the external storage device. It’s a simple process that can save you a lot of headaches in case of any system failure or data loss. So, don’t wait any longer and start backing up your data today!

    Power Off and Unplug PS5

    If you’re getting ready to install your new PS5, there are a few important pre-installation steps you should take. First and foremost, make sure the console is powered off and unplugged. This may seem like a no-brainer, but it’s important to emphasize as it can prevent any potential damage or electrical hazards during the installation process.

    Additionally, you may want to clear out any dust or debris from the area where you’ll be setting up your PS5 to ensure optimal airflow and prevent overheating. Overall, taking the time to properly prepare your installation area can help ensure a smooth and hassle-free setup experience. So, before you dive into the exciting world of gaming on your new PS5, take a moment to power it off and unplug it, and get your space clean and ready to go.

    Hardware Installation

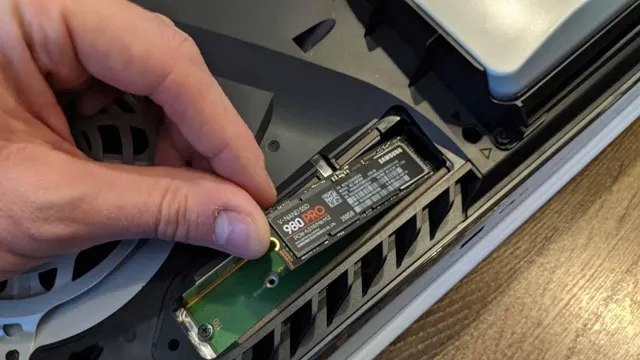
    If you’re wondering how to install a WD Black SSD on your PS5, the process is easier than you might think. First, make sure your console is completely powered off and unplugged from any power source. Next, remove the cover on the bottom of the console by sliding it off.

    You should see a slot specifically designed for an M.2 SSD. Take your WD Black SSD and insert it into the slot, making sure it’s properly aligned.

    Once the SSD is in place, use the included screw to secure it. Finally, replace the cover and plug your PS5 back in. When you turn it on, the console should recognize the new SSD immediately, allowing you to enjoy faster load times and improved overall performance.

    So don’t be intimidated by the prospect of installing new hardware – with a little patience and care, anyone can do it!

    Open PS5 Cover

    Are you looking to upgrade your PS5’s hardware? One simple way is by opening the PS5 cover and installing additional hardware components. Firstly, make sure to turn off your console and unplug it from the power source. Next, place the PS5 on a flat surface and remove the screw covers using a flathead screwdriver.

    Then, using a Phillips screwdriver, remove the screws that hold the cover in place. Slowly slide the cover towards the back of the console and lift it off. You can then access the hardware components and install additional ones such as a solid-state drive (SSD) for extra storage space.

    However, it’s essential to ensure that the hardware is compatible with the PS5 before installation. Don’t forget to put the cover back on, plug in the console, and turn it on to check that everything is working correctly. In conclusion, upgrading your PS5’s hardware can significantly enhance your gaming experience, and opening the cover is an effective way to install additional hardware components.

    Identify the M.2 SSD Slot or 2.5-inch Drive Bay

    When it comes to upgrading your computer’s storage, the first step is to identify the M.2 SSD slot or 5-inch drive bay on your machine.

    The M.2 SSD slot is a smaller and more compact option found on newer motherboards, while the 5-inch drive bay is the more traditional option found on older machines.

    To identify the M.2 SSD slot, you may need to consult your motherboard manual or online documentation to determine its location and compatibility with different sized M.2 drives.

    With the 5-inch drive bay, you simply need to locate the physical bay which is often found on the front, back, or side of the computer case. Once you have identified the storage upgrade option that is compatible with your machine, you can begin the hardware installation process.

    Whether you are upgrading to an M.2 SSD or a 5-inch drive, it is important to handle the hardware with care and follow the manufacturer’s instructions to ensure a successful installation.

    Insert the WD Black SSD into the Slot

    Now that you have your WD Black SSD in hand, the next step is to install it into your system. Firstly, locate the M.2 slot that is usually present on the motherboard.

    It is important to note that M.2 slots can vary in length and width, so make sure to match the SSD with the correct slot type. Once the slot is located, gently insert the SSD and use a screw to secure it in place.

    It is advisable to refer to the user manual of your motherboard to ensure that you are installing it correctly. The WD Black SSD comes equipped with a heat sink that is designed to regulate the temperature and ensure optimal performance. So, you need not worry about overheating issues.

    Once the SSD is securely in place, you can connect the cables as required and power up your system. The speed and performance improvements that you will experience with your new SSD will be worth the installation efforts. So, go ahead and give it a try!

    Attach SATA Cable / M.2 SSD to SATA Converter to SSD and PS5

    If you’re looking to expand your PlayStation 5’s storage, installing an M.2 SSD is a great way to do it. To start, you’ll need to attach a SATA cable and M.

    2 SSD to SATA converter to your chosen SSD. After getting your tools ready, carefully insert the M.2 SSD into the SATA converter and secure it in place.

    Once it’s firmly secured, connect the SATA cable to the converter and the PlayStation Make sure to double-check the connections before screwing everything back together. This installation process can take some time and effort, but the rewards of having extra storage capacity for your games on your PS5 will be worth it.

    Just be sure to use compatible hardware to prevent any issues or complications. With this hardware installation complete, you can now enjoy all of your favorite games without constantly worrying about your storage capacity running low.

    Post-Installation Steps

    If you’re looking to upgrade the storage on your PS5, installing a WD Black SSD is a great choice for boosting performance. However, it’s important to follow a few post-installation steps to ensure everything runs smoothly. First, make sure to download the WD Black Dashboard software to monitor the drive’s health and performance.

    You should also enable Game Boost mode in the PS5 settings, which optimizes the system for faster load times. Additionally, consider transferring over your most frequently played games to the new drive to free up space on the internal storage. By following these simple steps, you can make the most of your WD Black SSD and enjoy faster gaming on your PS

    Power On PS5 and Verify SSD Installation

    Now that you have installed your new SSD into your PS5, it’s time to turn it on and verify that the installation was successful. First, make sure all cables are properly connected and then press the power button on the front of the console. You should see the PS5 logo appear on the screen.

    Once you’re on the home screen, go to the settings and select “Storage” to see if your new SSD is detected. If it is, you’re all set! If not, you may need to double-check that the SSD is installed correctly or try restarting the console. Don’t worry, it’s common to experience some bumps along the way, but with a little patience and troubleshooting, you’ll be enjoying lightning-fast load times and increased storage capacity in no time!

    Restore PS5 Data from External Storage if Necessary

    Once you’ve completed the initial setup of your new PS5, there are a few post-installation steps you should consider to ensure that your gaming experience is seamless and uninterrupted. One important step is restoring any data that you may have stored on an external storage device. If you backed up your data onto an external drive before setting up your new console, you can easily restore that data by connecting the drive to your PS5 and following the prompts.

    This can be particularly useful if you want to transfer saved games, screenshots, or other important information from your old console to your new one. Simply navigate to the Settings menu, select the Storage menu, and choose the External Storage device to view and restore your files. By taking a few minutes to restore your data from an external drive, you can ensure that your PS5 is set up exactly as you like it, with all your game saves and important files available right where you left them.

    Conclusion

    In conclusion, installing a WD Black SSD on your PS5 is about as easy as sneaking past a sleeping dragon. With just a few simple steps, you can unleash the full power of your console and enjoy lightning-fast load times and seamless performance. So don’t wait any longer, grab your screwdriver and get ready to level up your gaming experience.

    Just remember, as with any upgrade, take your time, use caution, and don’t forget to save your progress!”

    FAQs

    What is the compatibility of WD Black SSD with PS5?
    WD Black SSD is compatible with PS5, but you will need to ensure that you have the latest firmware update on your PS5.

    How do I prepare my PS5 for installation of WD Black SSD?
    To prepare your PS5 for installation of WD Black SSD, you need to take a backup of your data and power off your PS5 completely.

    Can I install WD Black SSD in my PS5 myself?
    Yes, you can install WD Black SSD in your PS5 yourself. However, you need to be cautious while installing it and should follow the instructions given in the installation manual.

    What is the difference between WD Black SSD and other SSDs available in the market?
    WD Black SSD is specifically designed to offer high performance and reliability to gamers. It uses the latest NVMe technology and is backed by a 5-year limited warranty.

  • Revive Your Precious Data: Learn How to Recover Data from SSD That Won’t Boot

    Have you ever experienced the frustration of not being able to access your important files and documents from an unbootable SSD drive? It can be a total nightmare, especially if you don’t have a backup of your data. But don’t worry, there are ways to recover your data from an unbootable SSD drive without losing any of your precious information. Think of your unbootable SSD drive like a locked safe that you can’t open – your data is still inside, you just need to find the right key to unlock it.

    With the help of a professional data recovery service or software, you can potentially retrieve all your lost data from your unresponsive SSD drive. But before you dive into the recovery process, it’s essential to understand the reasons why your SSD drive may have become unbootable. From physical damage to software corruption, various factors can contribute to your drive’s failure to boot properly.

    In this blog post, we’ll explore the common causes of SSD drive failure, the best methods for recovering data from an unbootable SSD drive, and how to prevent data loss from happening in the first place. So grab a pen and paper (or bookmark this page), and let’s get started on getting your valuable data back!

    Check Drive Connection

    If you’re experiencing trouble with a SSD that won’t boot, there are several things to consider when trying to recover data. First and foremost, check your drive connection to make sure it’s not loose or damaged. If it’s an external SSD, try unplugging and plugging it back in to ensure it’s connected properly.

    If it’s an internal drive, make sure it’s securely attached to the motherboard. You may also want to try swapping out the cable or port to see if that’s the culprit. If the drive connection seems to be fine, you can try using data recovery software to retrieve your files.

    Keep in mind that if the drive is physically damaged or encrypted, professional help may be necessary for a successful recovery.

    Inspect Cables

    When inspecting the cables of a computer, it’s important to check the drive connection. This connection plays a vital role in ensuring that your computer is functioning properly and that all data is being transmitted without any problems. One of the most common issues that can occur with drive connections is a loose or improperly connected cable.

    A loose or improperly connected cable can cause data transmission to slow down or even stop completely, resulting in a slower computer or even lost data. To check the drive connection, start by unplugging the cable and then re-plugging it back in, making sure to firmly seat the connection. It’s also a good idea to inspect the cable for any signs of wear or damage, as damaged cables can also cause problems with data transmission.

    By regularly checking your drive connection, you can help ensure that your computer is running smoothly and that all your important data is kept safe and secure.

    how to recover data from ssd that won't boot

    Check BIOS Settings

    When troubleshooting a computer, it’s important to check the BIOS settings to ensure that the drive is properly connected. The BIOS is responsible for managing the communication between the computer’s hardware and software, and it can impact the performance and functionality of your computer. To check the BIOS settings, you’ll need to access the BIOS menu during startup by pressing a specific key, usually displayed on the screen.

    Once you’re in the BIOS menu, navigate to the “Storage” or “Advanced” settings and ensure that the drive is recognized and enabled. If the drive isn’t recognized, you may need to check the physical connections or replace the drive altogether. Ensuring proper drive connection is crucial for optimal performance and functionality, and checking the BIOS settings is the first step in troubleshooting any issues.

    So, the next time you encounter a problem with your computer’s drive, don’t forget to check the BIOS settings!

    Access SSD through Another PC

    Recovering data from an SSD that won’t boot can be a daunting task, but there is a way to access your drive through another PC. All you need is an adapter or enclosure that allows you to connect the SSD to a different computer. Once connected, you can try using data recovery software to scan the drive and retrieve your files.

    However, if the SSD is physically damaged, this method may not work and you may need to consult a professional data recovery service. It’s always a good idea to back up your important files regularly to avoid the frustration of losing data. With patience and persistence, you may be able to recover your data and get back to business as usual.

    Remember, prevention is the best cure, so invest in reliable storage solutions and keep regular backups to avoid future data loss.

    Use SATA to USB Adapter

    If you need to access your SSD but your PC is out of commission or you simply want to transfer files to another device, a SATA to USB adapter can be a lifesaver. This little gadget allows you to connect your solid-state drive to another computer via USB, making it easy to retrieve your data or perform any necessary maintenance. Using a SATA to USB adapter is a quick and easy process.

    Simply plug the adapter into the SSD, and then connect the adapter to your PC via USB. From there, your drive should appear just like any other external storage device. One important thing to keep in mind when using a SATA to USB adapter is that transfer speeds may be slower than when using a direct SATA connection.

    That said, it’s still a highly useful tool, particularly when you’re in a pinch and need access to your SSD. Overall, a SATA to USB adapter is a valuable accessory for anyone who regularly works with SSDs. Whether you’re troubleshooting your main PC or simply need to transfer files from one device to another, this adapter can make the process a whole lot easier.

    Access Drive as Secondary Storage

    If you have a spare SSD lying around and want to use it for extra storage on another PC, there is a solution. You can access the drive through another PC by simply making it a secondary storage device. All you need is a SATA-to-USB adapter to connect the drive to the other PC’s USB port.

    Once connected, you can use the drive just like any other external storage device. This is a great way to utilize an old SSD and increase your storage capacity without purchasing a new hard drive. Plus, you’ll be saving some money in the process! Overall, accessing an SSD through another PC can be an easy and cost-effective solution for extra storage.

    Retrieve Data Using Recovery Tool

    If your SSD has failed and you’ve lost your important data, you can still retrieve it using a recovery tool. However, accessing your SSD through another PC is a crucial step towards data recovery. To do this, you need to remove the failed SSD from your computer and connect it to another computer.

    You can do this by using an external USB enclosure or SATA to USB converter. Once you have connected the SSD, you can use a recovery tool to access the drive and recover your lost data. It’s important to note that the recovery process can take several hours depending on the size of your data, so be patient and let the tool work its magic.

    By following these steps, you can retrieve your data and get back to work in no time. Remember, it’s always best to back up your data to avoid any loss in the future.

    Use Bootable Recovery Software

    If you’re facing the daunting task of recovering data from an SSD that won’t boot up, don’t panic. One way to accomplish this is through a bootable recovery software. By creating a bootable disk or USB drive, the software can bypass the need for an operating system and go straight to the source of your SSD, allowing for data recovery.

    There are many available options online, both free and paid, so choose the one that best fits your needs. Once you have the bootable disk in hand, insert it into the computer with the malfunctioning SSD and restart the system. The software should load up, and you’ll be able to recover any necessary data and save it to an external hard drive or another location.

    Just be sure to thoroughly test your disk drive before continuing to use it to avoid future data losses. With the help of a bootable recovery software, recovering data from an unbootable SSD can be a straightforward process.

    Create Bootable Drive

    Creating a bootable drive is a crucial step in data recovery. Bootable recovery software allows you to access your device and retrieve important data even if the operating system refuses to work. It creates a bootable USB or CD/DVD from which you can start the computer and run the recovery programs.

    However, not all software is created equal, and you need to select the right tool for your needs. Look for software that is user-friendly, powerful, and supports the filesystem of the device you want to recover data from. Some good options include EaseUS Todo Backup, AOMEI Backupper, Paragon Backup and Recovery, and Macrium Reflect.

    Once you have chosen the right software, follow the instructions to create a bootable drive. With a bootable recovery drive, you can recover lost files, fix boot issues, and perform other critical maintenance tasks.

    Scan SSD for Lost Data

    If you’re facing a data loss situation on your SSD, fret not, as there is a bootable recovery software available that can scan your drive and recover lost data. This software is designed to work when your operating system is not booting up or when your SSD is not visible to your OS. You can create a bootable USB drive or CD with the recovery software and boot your system using it.

    Once you enter the recovery mode, you can select the drive you want to scan and wait for the software to analyze it for lost data. The software will scan for deleted files, files lost due to corruption or formatting and other data loss scenarios. Once the scan is complete, you can select the files you want to recover, and the software will restore them to a location of your choice.

    If you’ve lost valuable data on your SSD, using a bootable recovery software can help you to recover files and data that you thought was inaccessible.

    Conclusion

    Recovering data from an SSD that won’t boot may seem like a daunting task, but with the right tools and approach, it can be a breeze. Whether you’re dealing with a faulty operating system, corrupted files, or hardware failure, the key is to remain calm and methodical in your approach. Start by trying simple fixes like using a bootable USB drive or connecting the SSD to another computer.

    If those don’t work, consider using data recovery software or seeking professional help. Remember, data loss is never fun, but it doesn’t have to be the end of the world. With a little resourcefulness and persistence, you can get your precious files back and avoid a major headache.

    FAQs

    Can data be recovered from an SSD that won’t boot?
    Yes, it is possible to recover data from an SSD that won’t boot using data recovery software or contacting a professional data recovery service.

    What are some common reasons for an SSD to not boot?
    Some common reasons for an SSD to not boot include corrupted files, firmware issues, physical damage, and power interruptions.

    Is it possible to recover data from a physically damaged SSD?
    Yes, it is possible to recover data from a physically damaged SSD, but it requires the expertise of a professional data recovery service.

    How can I prevent data loss on an SSD?
    To prevent data loss on an SSD, it’s important to regularly backup your data, maintain good SSD health through regular firmware updates and temperature control, and avoid abrupt power interruptions.

  • SSD Woes No More: A Step-by-Step Guide on How to Fix a Broken SSD

    If you’re a computer user, you know how frustrating it can be when your computer slows down or stops working altogether. One of the most common issues is a broken SSD (solid-state drive), which stores your computer’s data. But before you start panicking and thinking about replacing your SSD, there are steps you can take to fix it yourself.

    In this blog post, we’ll explore a step-by-step guide to fixing a broken SSD. Think of it as giving your computer a second chance at life. With a little bit of time, effort, and know-how, you might just be able to revive your computer and get it back to working like new.

    So, let’s get started!

    Identifying the Problem

    If you’re facing problems with your SSD, don’t panic because there could be a solution. A broken SSD can be a result of various factors, such as physical damage, a firmware issue, or a problem with the operating system. The first step in fixing a broken SSD is to identify the exact problem.

    You can start by running a diagnostic tool to check for errors on the drive. This can be done either manually or using software. If you suspect that the issue is with the operating system or firmware, you should try updating or reinstalling the software.

    Other solutions that may work include using the TRIM command to optimize your SSD and enhance its performance, or repairing bad sectors that could be causing issues. In some cases, a replacement might be the only solution. Whatever the case may be, don’t despair, because you might be able to recover your data and fix a broken SSD.

    Performing Diagnostic Tests

    When something goes wrong with your car, it can be frustrating and confusing trying to figure out what the problem is. That’s where diagnostic tests come in. These tests, which are usually performed by a mechanic, can identify the issue and help you avoid costly repairs down the road.

    There are various types of diagnostic tests, depending on what needs to be checked. For example, a mechanic might use a scan tool to check for trouble codes in your car’s computer system, which could indicate issues ranging from a faulty sensor to a major engine problem. Other types of diagnostic tests might involve checking the battery, fuel system, or exhaust emissions.

    By performing these tests, the mechanic can pinpoint exactly what’s causing your car to act up and make the necessary repairs. So if you’re experiencing any issues with your car, don’t hesitate to take it in for a diagnostic test. It could save you a lot of time, money, and headaches in the long run.

    how to fix a broken ssd

    Checking for Physical Damage

    When faced with a malfunctioning device, it’s important to first identify the root of the problem. Checking for physical damage is a crucial step in figuring out what’s wrong, as many issues can arise from cracks, dents, or other forms of wear and tear. Start by giving the device a thorough visual inspection, looking for any signs of damage to the casing, screen, ports, or buttons.

    If you notice anything out of the ordinary, take a closer look or even use a magnifying glass if necessary. Be sure to also check for any loose or broken pieces, as these can cause issues with internal components. Don’t be afraid to use your sense of touch as well – if something feels loose or wobbly, it could indicate physical damage.

    Overall, taking the time to carefully examine your device for any physical problems can help you save time and money in the long run.

    DIY Fixes for Common Issues

    Have you experienced a broken SSD, and are unsure of how to fix it? Don’t worry; there are several DIY fixes for this common issue! Firstly, try connecting your SSD to another computer to see if the issue persists. If your SSD is still malfunctioning, try updating the drivers or firmware. If that doesn’t work, attempt to repair bad sectors on the SSD using your computer’s built-in error-checking tool or a third-party software program.

    Lastly, if none of these fixes work, consider replacing the SSD altogether. Remember to back up your data before attempting any of these fixes. By following these steps, you can save yourself the frustration and cost of taking your SSD to a professional.

    So don’t let a broken SSD ruin your day; give these DIY fixes a try!

    Updating Firmware and Drivers

    If you’re experiencing common issues with your computer or other electronic devices, updating your firmware and drivers may be a DIY fix you can try. Firmware is the software programmed into a device that controls its functions, and drivers are programs that allow your computer to communicate with hardware devices. Outdated firmware and drivers can cause various problems, such as slow performance, hardware malfunctions, and security vulnerabilities.

    By updating them to the latest versions, you may resolve these issues and improve the overall performance and stability of your devices. However, you should be cautious when updating firmware and drivers, as they can sometimes cause more problems or, in rare cases, damage your device. It’s best to consult the device manufacturer’s instructions or a professional technician if you’re not sure how to update them properly.

    Performing Disk Cleanup

    Disk Cleanup Performing a disk cleanup is a great way to keep your computer running smoothly. Over time, your computer can accumulate a lot of unnecessary files and data that can take up valuable space and slow down your system. A disk cleanup can help you delete these files and free up space on your hard drive.

    You can start by opening the Disk Cleanup tool on your Windows computer. This tool will scan your computer for files that are no longer needed, such as temporary files, cache files, and old system files. Once the scan is complete, you can select the files that you want to delete and then click the “OK” button to free up space on your hard drive.

    Regular disk cleanups can help prevent your computer from becoming bogged down with unnecessary files and keep it running at peak performance. So give it a try and see how much space you can free up on your computer today!

    Checking for Bad Sectors

    Checking for bad sectors is an essential task that every computer user should perform. Bad sectors are areas on a hard drive that cannot be read or written, making them unusable. They can occur due to physical damage, software issues, or power outages.

    If left unchecked, bad sectors can cause data loss, system crashes, and other problems. Fortunately, there are several DIY fixes that you can try to check for and fix bad sectors. One method is to run a disk check utility, which can detect and repair errors on the hard drive.

    Another option is to use third-party tools that specialize in scanning and repairing bad sectors. It’s crucial to address bad sectors as soon as possible, as they can worsen over time and cause irreversible damage to your system. By regularly checking for bad sectors and taking corrective action, you can ensure the optimal performance and longevity of your computer.

    Professional Solutions

    Are you worried about a broken Solid State Drive (SSD)? Professional solutions exist that can fix your issue. First, try using a data recovery program to retrieve any lost files. However, if the issue is hardware-related, it needs a professional’s attention.

    Power-off the system and remove the SSD carefully. It would help if you then contacted a data recovery specialist who can diagnose the problem and provide a recovery plan. If the SSD is beyond repair, replacing with a new one may be the only viable alternative.

    In conclusion, fixing a broken SSD can be time-consuming and complex, but experts in data recovery can offer reliable solutions to help get your files back.

    Data Recovery Services

    In today’s digital age, losing data can be catastrophic for individuals and businesses alike. That’s where data recovery services come in. These services offer professional solutions to retrieve lost data from damaged or malfunctioning storage devices.

    Whether it’s a hard drive, a server, or a USB drive, data recovery experts can work their magic to recover important files and documents. These professionals use specialized techniques and software to recover data that would otherwise be lost forever. While there are DIY data recovery solutions out there, they can often lead to further damage to the device and the data inside.

    That’s why it’s best to leave it to the professionals to ensure the best possible outcome. With data recovery services, you can rest assured that your lost data is in good hands, and that professional tools and techniques are being used to retrieve your precious files. So the next time you experience data loss, don’t panic – just call in the professionals!

    Replacing Faulty Components

    If you are experiencing issues with your electronic devices, replacing faulty components is a common solution. While it may be tempting to try and fix the problem yourself, it’s always best to seek professional solutions. Professionals are trained to diagnose and repair complex issues, ensuring that your device is functioning correctly.

    When looking for a professional, be sure to do your research and select a reputable company. Don’t be swayed by low prices, as this could lead to subpar service and even further damage to your device. Think of it like going to the doctor – you want to trust an expert who will take care of you and provide the best service possible.

    By choosing a professional to replace faulty components, you can rest assured that your device will be in good hands and functioning properly in no time.

    Preventive Measures

    If your SSD has failed, there may be some preventive measures you can take to keep it from happening again. First, make sure to keep your SSD cool by not putting it under extreme temperatures or direct sunlight for extended periods of time. You can also enable the TRIM command, which regulates the performance and lifespan of your SSD.

    Another tip is to limit the number of write cycles on your SSD by reducing unnecessary write operations or using applications that reduce write amplification. If you notice any abnormal behavior with your SSD, it’s important to investigate the issue immediately to prevent further damage. By taking these preventive measures, you can help extend the lifespan of your SSD and minimize the risk of experiencing a failure.

    If you do need to fix a broken SSD, there are a few possible solutions such as restoring it from backup or using data recovery software. However, prevention is always the best course of action to keep your SSD running smoothly for years to come.

    Back up Your Data Regularly

    Backing up your data regularly is essential in preventing data loss and keeping your important files safe. It’s important to understand that data loss can happen at any moment and for various reasons such as hardware failure, malware, or accidental deletion. To prevent permanent data loss, consider taking preventive measures such as backing up your data on a regular basis.

    This can be done through external hard drives, cloud storage services, or automated backup software. Organizing your files can also be helpful to determine which files should be prioritized for backup. Remember, not taking any action to back up your data can result in losing priceless memories, important documents, and even money.

    So, be prepared and take preventive measures to keep your data safe and secure.

    Avoiding Physical Damage

    Preventive Measures When it comes to keeping our belongings safe and in good condition, prevention is always better than cure. This rings true for physical damage prevention as well. Preventive measures can go a long way in keeping our possessions in top-notch condition.

    One key step to avoid damage is to invest in good quality protective cases or covers for our gadgets such as phones, laptops, and tablets that we use on a daily basis. Additionally, it’s essential to handle fragile objects carefully and not overload them beyond their capacity. Another crucial aspect that is often overlooked is to ensure that our storage units, such as cupboards, shelves, and drawers, are sturdy and can bear the weight of our possessions.

    This is particularly important for items such as books, fragile decor, and electronic gadgets. Taking these preventive measures can ensure that our belongings remain unscathed and in optimal condition for longer.

    Monitoring Your SSD’s Health

    When it comes to ensuring the longevity of your SSD, prevention is key. Monitoring the health of your SSD is crucial to prevent data loss and avoid unexpected hardware failures. To do this, you can use various software tools like CrystalDiskInfo and SSDLife which allow you to monitor the health and status of your SSD.

    These tools provide an overview of the SSD’s lifespan and wear level to help you optimize its performance and detect potential issues early on. Taking preventive measures such as monitoring your SSD’s health will help you avoid unexpected data loss and ensure a longer lifespan for your valuable data. By staying proactive and taking care of your hardware, you can rest assured that your important files and documents are safe and secure.

    Conclusion

    When it comes to fixing a broken SSD, the solution may not always be simple. However, if you have a basic understanding of the problem and the right tools, it’s certainly possible to breathe new life into your device. Whether it’s using software to diagnose and repair issues, or physically replacing a faulty component, there are a number of different approaches that can help you get your SSD running smoothly again.

    So while it may be frustrating to deal with a broken SSD, don’t give up hope just yet – with a little effort and know-how, you just might be able to fix it!”

    FAQs

    What are the common reasons for SSD failure?
    SSD failure can be caused by a variety of reasons such as physical damage, overheating, power surges, and corrupted firmware or software.

    Can a broken SSD be fixed?
    In most cases, a broken SSD cannot be fixed and needs to be replaced. However, data recovery services may be able to retrieve important data from the broken SSD.

    How can I prevent my SSD from breaking?
    To prevent your SSD from breaking, make sure to regularly back up important data, avoid exposing it to extreme temperatures, protect it from physical damage, and keep the firmware and software up to date.

    Is it possible to recover data from a broken SSD?
    Yes, data recovery services may be able to retrieve important data from a broken SSD. However, this depends on the extent of the damage and the availability of specialized equipment and software.

    How long do SSDs usually last?
    SSDs have a longer lifespan compared to traditional hard drives, with an average lifespan of 5-7 years. However, this can vary depending on usage and maintenance.

  • Streamline Your System: A Step-by-Step Guide to Formatting M.2 SSD in Windows 10

    Have you recently purchased a shiny new M.2 SSD, but you’re not quite sure how to format it in Windows 10? Don’t worry, you’re not alone. Formatting an M.

    2 SSD can be a bit confusing and overwhelming, especially if you’re new to the world of PC upgrades. But fear not, because in this guide, we’ll walk you through everything you need to know about formatting your M.2 SSD in Windows

    It’s like giving your SSD a fresh start, wiping the slate clean and preparing it for all the blazing-fast data transfers and lightning-fast boot times to come. So grab your SSD and let’s get started!

    Step 1: Connect the M.2 SSD to Your Computer

    If you’re wondering how to format M.2 SSD Windows 10, the first step is to connect the M.2 SSD to your computer.

    This can be done by opening up your computer case and plugging the M.2 SSD into the designated slot on the motherboard. Alternatively, if your computer doesn’t have an M.

    2 slot, you can purchase an M.2 to USB adapter and connect the drive via USB. Once connected, you’ll need to make sure the drive is detected by Windows

    You can do this by going to “Disk Management” in the Control Panel, and checking if the drive is listed. If it is, you can proceed with formatting the drive. Formatting a drive erases all data on it and prepares it for use, so make sure any important data is backed up before proceeding.

    Use a SATA to USB Adapter or Connect Directly to Motherboard

    If you’re looking to upgrade your computer’s storage with a high-speed M.2 SSD, you’ll need to connect it to your computer first. One option is to use a SATA to USB adapter, which will allow you to connect the M.

    2 SSD to your computer’s USB port. Alternatively, you can connect the M.2 SSD directly to your motherboard, using a compatible M.

    2 slot. If you opt for the SATA to USB adapter, you’ll need to plug the adapter into an available USB port on your computer, and then connect the M.2 SSD to the adapter.

    A SATA to USB adapter will give you the flexibility of being able to connect the M.2 SSD to any computer with a USB port, but you may experience slower data transfer speeds compared with connecting the SSD directly to your motherboard. To connect the M.

    2 SSD directly to your motherboard, you’ll need to locate the M.2 slot on your motherboard. This will usually be on the back of the motherboard, near the SATA ports or the PCIe slots.

    Once you’ve identified the M.2 slot, you can insert the M.2 SSD into it and secure it in place using the screws provided.

    how to format m.2 ssd windows 10

    Step 2: Launch Disk Management

    If you’re looking to format an m.2 SSD on your Windows 10 system, the second step is launching Disk Management. Disk Management is a utility that can help you manage your computer’s storage devices, including formatting them.

    To launch Disk Management, you can simply follow these steps: first, press the Windows key on your keyboard and type “disk management” in the search bar. Then, select the “Create and format hard disk partitions” option to open Disk Management. From there, you’ll be able to see all of your computer’s storage devices, including the m.

    2 SSD you want to format. Select the SSD, right-click on it, and then choose the “Format” option from the menu. This will bring up a window where you can choose the file system, allocation unit size, and volume label for your newly formatted SSD.

    Once you’re satisfied with your choices, click “OK” to format your m.2 SSD. In just a few simple steps, you can format your m.

    2 SSD and get it ready for use on your Windows 10 system.

    Search and Open Disk Management on Windows 10

    Now that you’ve searched for Disk Management on your Windows 10 machine, it’s time to launch it and start managing your hard drives. To launch Disk Management, you can simply click on the top search result or navigate to the Start menu and locate it under the Windows Administrative Tools folder. Once you’ve found it, click to open it.

    If it is your first time using Disk Management, you may be prompted to initialize or partition your disk. From here, you’ll be able to manage your hard drives, including viewing their status, formatting them, creating partitions, and much more. It’s important to note that Disk Management allows you to manage only internal hard drives, so if you have external hard drives or USB drives that you want to manage, you’ll need to look for alternative software.

    With these tips under your belt, you’ll be well on your way to understanding how to use Disk Management on Windows 10 like a pro!

    Step 3: Locate the M.2 SSD

    When it comes to formatting your M.2 SSD in Windows 10, the first step is to locate where it is. Typically, the M.

    2 SSD is located on the motherboard of your computer. You may need to remove the access panel to access it. Once you have located the M.

    2 SSD, you can proceed with formatting it. However, it’s important to note that formatting your SSD will delete all data on it, so be sure to back up any important files beforehand. To format the M.

    2 SSD, simply right-click on it in the Windows explorer and select the “Format” option. From there, you can choose the file system and allocation unit size before proceeding with the formatting process. While formatting can seem daunting at first, taking the time to properly format your M.

    2 SSD can greatly extend its lifespan and ensure efficient performance in the long run.

    Identify the Disk Number and Capacity of the SSD

    If you’re installing an M.2 SSD into your computer, it’s important to identify the disk number and capacity of the SSD so that you can properly configure it. Follow these steps to locate your M.

    2 SSD: – Step 1: Open your computer case and locate the M.2 slot. It’s usually located beside the RAM slots.

    – Step 2: Check the label on the SSD to identify its capacity. You may also need to check the manufacturer’s website for more information. – Step 3: Once you’ve determined the capacity of your SSD, you can identify its disk number.

    Go to the “Disk Management” tool in Windows to view a list of disks. Your SSD should be listed with its capacity and disk number. Make a note of the disk number.

    By following these steps, you should now know how to locate your M.2 SSD, determine its capacity, and identify its disk number. This information is essential for properly configuring your SSD and optimizing your system’s performance.

    So, go ahead and get started with your M.2 SSD installation!

    Step 4: Format the M.2 SSD

    To format an M.2 SSD in Windows 10, follow these simple steps. First, open “This PC” and locate the M.

    2 SSD drive. Right-click on it and select “Format” from the drop-down menu. Next, select the file system that you want to use for the drive, such as NTFS or exFAT.

    You can also choose to give the drive a new name if desired. Finally, click “Start” to begin the formatting process. This process will erase all data on the drive, so make sure you have backed up any important files beforehand.

    Once the formatting is complete, your M.2 SSD is ready to use. Remember to always safely eject the drive to prevent any data corruption.

    Overall, formatting your M.2 SSD in Windows 10 is a straightforward process that can enhance your drive’s performance and efficiency.

    Right-click the M.2 SSD and Select ‘New Simple Volume’

    When installing an M.2 SSD, it’s important to properly format the drive before you can start using it. Once you have initialized the drive in Disk Management, you can right-click on the M.

    2 SSD and select the “New Simple Volume” option. This will open the New Simple Volume Wizard, which will guide you through the process of formatting the drive. You can set the volume size, assign a drive letter, and choose the file system that best suits your needs.

    The most popular file systems for Windows are NTFS and exFAT. NTFS offers better security, compression, and file size support, while exFAT is ideal for external drives and transferring large files across different operating systems. Remember that formatting the drive will erase all data on it, so make sure to back up any important files before proceeding.

    Once you have completed the formatting process, your M.2 SSD will be ready for use!

    Select File System, Allocation Unit Size and Assign a Drive Letter

    Now that the M.2 SSD is recognized in the system, it’s time to format it. Selecting the appropriate file system, allocation unit size, and assigning a drive letter are critical in ensuring the SSD performs optimally.

    A popular file system for Windows users is NTFS, which is known for its larger clusters and improved security. However, if the SSD is going to be used in a different operating system, a different file system may be better suited. Next, the allocation unit size, or cluster size, should be considered.

    A larger cluster size can improve performance for larger files, while a smaller cluster size can improve performance for smaller files. Finally, it’s important to assign a drive letter to the SSD for easy access in the future. Simply right-click on the SSD, select “Format,” and follow the prompts to complete the process.

    With these simple steps, the M.2 SSD will be ready for use in no time.

    Step 5: Complete the Formatting Process

    Now that you have installed your M.2 SSD on Windows 10, it’s time to format it. The formatting process is vital to ensure that you can start using your new storage device properly.

    To begin, right-click the start menu, and then select “Disk Management.” From there, you can locate your M.2 SSD and right-click to select the “Format” option.

    The format window will appear, asking you to choose the file system you wish to use. For Windows 10, it’s best to use the NTFS file system. You can also choose to assign a drive letter and name your new SSD.

    Once you’ve made your selections, click “OK,” and the formatting process will begin. Be patient as this may take a while, depending on the size of your SSD. Once the process is complete, your M.

    2 SSD will be ready to use. Remember to save all your essential files and data on your new device to experience its faster speed.

    Click ‘Finish’ to format the M.2 SSD

    As you near the end of the M.2 SSD formatting process, you’ll need to click on the “Finish” button to complete the procedure. Once you do this, the application will start to partition the disk according to your preferences, if you have any.

    This step may take a few minutes, depending on the size of your M.2 SSD. You might notice a progress bar that will tell you how much time is left before the partitioning process is complete.

    Once that’s done, the system will notify you that the M.2 SSD has been successfully formatted, and you can now start using it. It’s important to remember that formatting an SSD will erase all data from it, so be sure to back up your files before you start the process.

    Now that your M.2 SSD is ready to use, you can start to transfer files, install games, and enjoy faster speeds compared to traditional HDDs. Remember to keep your SSD clean and well-maintained, so it can run at optimal speeds for years to come.

    Troubleshooting Common M.2 SSD Formatting Issues

    If you’re having trouble formatting your M.2 SSD on Windows 10, don’t despair. There are several common issues that could be preventing your M.

    2 SSD from formatting, but they’re all fixable. One common problem is that your M.2 SSD might not be properly recognized by your computer’s BIOS.

    To fix this, make sure you’re on the latest version of your BIOS and that your M.2 SSD is properly installed and connected. Another issue that could prevent formatting is partitioning.

    If your M.2 SSD has multiple partitions, you won’t be able to format it until you’ve deleted all the partitions from the drive. You can do this through the Disk Management tool in Windows

    Finally, if you’re formatting your M.2 SSD as a boot drive, you’ll need to make sure it’s properly configured in your BIOS settings. By following these troubleshooting steps, you should be able to format your M.

    2 SSD successfully on Windows

    How to Fix ‘Cannot Format the Disk’ Error

    If you’re having trouble formatting an M.2 SSD, you’re not alone. One common issue is the “cannot format the disk” error message.

    This might be caused by the disk being write-protected, corrupted, or not recognized by your system. First, make sure the disk is not write-protected by checking the lock switch or disabling write protection in the disk properties. If that doesn’t work, try using Disk Management or Diskpart in Command Prompt to reformat the disk.

    It’s important to note that formatting a disk will erase all data, so make sure to back up important files before proceeding. Additionally, updating your system’s BIOS or chipset drivers can sometimes fix compatibility issues with M.2 SSDs.

    Don’t let this frustrating error stop you from using your SSD – try these troubleshooting steps and get back to storage bliss.

    How to Fix ‘Disk Management Could Not Start Virtual Disk Service’ Error

    If you’re having trouble formatting your M.2 SSD, you’re not alone. Many users have encountered issues with their SSD’s virtual disk service, resulting in the error message, “Disk Management Could Not Start Virtual Disk Service.

    ” However, don’t worry, as there are several ways to troubleshoot this issue. First, try restarting your computer and checking that your SSD is connected properly. If that doesn’t work, you can try updating your device drivers or running a disk check.

    If all else fails, you may need to seek professional help or replace your SSD. With patience and perseverance, you’ll be able to get your SSD up and running again in no time.

    Conclusion

    So there you have it, formatting your M.2 SSD on Windows 10 is not rocket science! Follow these steps, and you’ll have a speedy and reliable storage solution in no time. Remember, always backup your data before taking any action, and never underestimate the power of a well-formatted SSD to enhance the overall performance of your system.

    Happy formatting!”

    FAQs

    What is an M.2 SSD and why is it important for Windows 10?
    An M.2 SSD is a type of solid-state drive that delivers faster transfer speeds and lower power consumption compared to traditional hard drives. It is important for Windows 10 because it allows for faster boot times and application load times, enhancing overall system performance.

    How do I check if my motherboard supports M.2 SSDs?
    Check your motherboard’s specifications online to see if M.2 connectors are available and compatible. Alternatively, you can look for an M.2 slot on your motherboard itself, located near the PCIe or SATA ports.

    How do I install and format an M.2 SSD in Windows 10?
    To install an M.2 SSD, locate the M.2 slot on your motherboard, insert the SSD, and secure it with the screw provided. To format the drive, right-click on the Windows Start menu, select Disk Management, right-click on the unallocated space on the SSD, select New Simple Volume, and follow the prompts to assign a letter and format the drive.

    Why is my M.2 SSD not showing up in Windows 10?
    This can be caused by a number of issues, such as outdated drivers, BIOS settings, or physical installation problems. Check your motherboard’s manual and online forums for specific troubleshooting steps, or contact the manufacturer for support.

  • Streamline Your PC’s Performance: A Complete Guide to Formatting Your New M.2 SSD

    Are you planning on upgrading your PC’s storage system by adding a new M.2 SSD? Congratulations! You’re in for a significant performance boost. However, before you can start reaping the benefits of a lightning-fast SSD, you need to properly format it.

    Think of it like moving into a new house. Before you can start arranging your furniture and making the space your own, you need to clean, paint, and set up the essentials. The same principle applies to your new M.

    2 SSD. Formatting is a crucial step in preparing your drive for use. In this blog, we will guide you through the steps of formatting your new M.

    2 SSD. Whether you’re a seasoned PC builder or a newbie, our comprehensive guide will make the process easy to follow. By the end of this post, you’ll be ready to set up your new drive and enjoy the blazing-fast speeds it offers.

    So, let’s dive in!

    What is an M.2 SSD?

    If you’re looking to upgrade your computer’s storage performance, one option is to install an M.2 SSD. This type of solid-state drive uses a direct connection to your motherboard through the M.

    2 slot, offering faster read and write speeds than traditional hard drives or even SATA-based SSDs. When setting up a new M.2 SSD, you’ll need to format it first before you can start using it for storage.

    This process involves partitioning the drive and creating a file system, typically using the Windows built-in Disk Management tool. To get started, open Disk Management and locate the new M.2 SSD.

    Right-click and select “New Simple Volume,” then follow the prompts to set up your partition and file system. Once that’s done, your new M.2 SSD will be ready to use, providing faster boot times and improved application performance.

    Discussing the benefits of an M.2 SSD

    M.2 SSD An M.2 SSD is a small solid-state drive that is becoming increasingly popular in modern computers and laptops.

    Unlike traditional hard drives, which use spinning disks to store data, an M.2 SSD uses flash memory to store and retrieve data quickly. This makes it incredibly fast, with read and write speeds that are several times faster than traditional hard drives.

    Additionally, M.2 SSDs are much smaller and more compact, meaning they take up less space in your computer and can be easily fitted into a range of devices. One of the biggest benefits of an M.

    2 SSD is the speed at which it can access and transfer data. This makes it an ideal choice for gamers, graphic designers, and other professionals who need to work with large files quickly and efficiently. It can also help to speed up your computer’s boot time, making it start up much faster than with a traditional hard drive.

    Another advantage of M.2 SSDs is their reliability – they have no moving parts, which means they are less likely to fail and have a longer lifespan than traditional hard drives. In conclusion, an M.

    2 SSD is a great investment for anyone who wants to speed up their computer and improve its overall performance. Its fast read and write speeds, small size, and reliability make it a must-have for gamers and professionals alike, as well as anyone who wants to get the most out of their computer. So, if you’re looking to upgrade your computer’s storage, an M.

    how to format a new m.2 ssd

    Preparing the SSD for Formatting

    If you’ve just purchased a new M.2 SSD, the first thing you’ll need to do is prepare it for formatting. This process includes making sure that the SSD is properly installed, that it has been detected by your system, and that it’s ready to be partitioned and formatted.

    To start, ensure that your computer is powered off and unplugged, then locate the M.2 slot on your motherboard and insert the SSD firmly into it. Once you’ve done so, power up your computer and open your operating system’s disk management tool to make sure that the SSD is recognized.

    From here, you can partition the drive and format it to your liking. It’s important to note that when formatting the new M.2 SSD, you’ll want to make sure that you select the correct file system type (such as NTFS or FAT32) and choose the appropriate allocation unit size to optimize performance.

    With these steps completed, your new M.2 SSD will be ready to use, giving you fast and reliable storage for all your important data.

    Checking if your computer motherboard supports M.2 SSDs

    When you’re preparing an M.2 SSD for formatting, there are a few key steps you’ll need to follow. First, make sure your motherboard supports M.

    2 SSDs. This can usually be determined by looking at your motherboard’s specifications or consulting the manufacturer’s website. Once you’ve confirmed that your motherboard supports M.

    2 SSDs, you can begin to prepare the drive for formatting. Start by installing the SSD into its designated M.2 slot and securing it in place.

    Next, you’ll need to initialize the drive and create a partition using the Disk Management tool in Windows. Once you’ve completed these steps, your M.2 SSD will be ready for formatting and use.

    Remember to always handle your SSD with care and take precautions to avoid damaging it during installation or use. With these steps complete, you can enjoy fast and reliable performance from your brand new M.2 SSD!

    Installing the M.2 SSD in your computer

    Once you have your M.2 SSD, it’s time to prepare it for formatting and installation. The first step is to make sure the SSD is compatible with your computer’s motherboard.

    Check your motherboard manual or online specifications to verify if it supports M.2 SSDs and which type of M.2 slot it has, whether it’s PCIe or SATA.

    Once you confirm compatibility, you can proceed by opening your computer case and finding the M.2 slot on the motherboard. Make sure to ground yourself by touching a metal object or wearing an anti-static wristband to avoid any damage from static electricity.

    Then use the appropriate screwdriver to secure the SSD into the slot, making sure it’s aligned correctly. Congratulations, you’ve successfully installed your new SSD hardware! Now it’s time to format and optimize your drive to ensure peak performance.

    Formatting the M.2 SSD

    If you’ve just purchased a new M.2 SSD for your computer, the first thing you’ll need to do is format it before you can start using it. Fortunately, this is a simple process that you can do on your own.

    First, you’ll need to make sure that your computer recognizes the new drive. You can do this by opening up the Disk Management Tool in Windows and selecting the new SSD. Once you’ve done this, you can format the drive by right-clicking on it and selecting the “Format” option.

    This will open up a window where you can choose various formatting options, such as the file system and allocation unit size. Be sure to choose the appropriate options for your needs, such as NTFS for Windows or exFAT for cross-platform compatibility. Once you’ve selected your options, click “OK” and the formatting process will begin.

    Depending on the size of your SSD, this can take anywhere from a few minutes to an hour or more. Once the formatting is complete, your new M.2 SSD will be ready to use.

    Using Disk Management to format the drive

    When it comes to formatting an M.2 SSD, Disk Management is a great tool to use. Start by opening Disk Management and locating the drive you want to format.

    Right-click on the drive and select “Format”. A new window will appear, and you can choose the file system you want to use. NTFS is the default option, but you can select a different one if desired.

    You can also add a volume label to the drive if you want to. Once you have selected your options, click “OK” to begin the formatting process. Keep in mind that formatting will erase all data on the drive, so make sure to backup any important files before proceeding.

    With Disk Management, formatting an M.2 SSD has never been easier.

    Creating a new partition on the M.2 SSD

    When it comes to setting up a new computer or upgrading an existing one, formatting the M.2 SSD is an essential step. This involves creating a new partition on the SSD to organize your files and ensure optimal performance.

    To get started, you will need to access the Disk Management tool in Windows. From here, you can select the M.2 SSD and choose the option to “New Simple Volume.

    ” This will guide you through the steps to create a new partition with the desired size and format. It’s important to choose the format that best suits your needs, whether it’s the default NTFS or an alternative like exFAT or FAT3 Once the partition is created, you can start transferring your files and enjoying the benefits of a properly formatted M.

    2 SSD, such as faster boot times and smoother application launch speeds. So, don’t overlook this crucial step in setting up your computer, and take full advantage of the power and speed that an M.2 SSD can provide.

    Conclusion and Final Thoughts

    Formatting a new M.2 SSD is like giving it a fresh start – it’s a chance to wipe away the old and make way for the new. Just like cleaning out your closet or decluttering your workspace, formatting a new M.

    2 SSD can provide a sense of catharsis and revitalization. So go ahead, take the plunge and format that SSD with gusto! Your computer (and your mind) will thank you for it.”

    FAQs

    What is an M.2 SSD?
    An M.2 SSD is a type of solid-state drive that uses the M.2 interface to connect to a computer’s motherboard.

    How do I format a new M.2 SSD?
    You can format a new M.2 SSD by opening Disk Management in Windows, selecting the unallocated space on the SSD, and then creating a new partition or volume.

    Do I need any special software to format an M.2 SSD?
    No, you do not need any special software to format an M.2 SSD. Windows includes a built-in Disk Management tool that can be used to format and partition the drive.

    Can I use an M.2 SSD as my primary boot drive?
    Yes, you can use an M.2 SSD as your primary boot drive. In fact, many people choose to use an M.2 SSD as their boot drive because of its fast read and write speeds.

    What are some things to consider when choosing an M.2 SSD?
    When choosing an M.2 SSD, you should consider factors such as its capacity, speed, and price. You should also ensure that your computer’s motherboard supports the M.2 interface.

  • Upgrade Your Windows 11 Experience: A Step-by-Step Guide to Installing a New SSD!

    Are you eager to speed up your Windows 11 computer? Well, one way to accomplish this goal is by upgrading to an SSD. Solid State Drives or SSDs offer blazing-fast boot times, snappier performance, and fast data transfer rates, resulting in a dramatically improved computing experience. However, not everyone knows how to install an SSD in a computer, which could make the prospect daunting.

    Well, fear not, as we will take you through a comprehensive guide on how to install an SSD on your Windows 11 machine. We will explore the steps involved, the tools required, and offer tips to ensure a smooth SSD installation process. Trust us; by the end of this article, you will be ready to upgrade to an SSD with confidence.

    So are you ready to take your Windows 11 machine to the next level? Then, let us embark on this SSD installation journey together.

    Backup Data

    If you’re looking to install a new SSD on your PC running Windows 11, you’ll want to backup your data beforehand to avoid losing anything important. There are a few different backup methods you can use, but one of the easiest is to simply transfer your files to an external hard drive or cloud storage service. Once you’ve transferred your data, you can then install your new SSD.

    Depending on the type of SSD you’re using, you may need to download specific drivers or software in order to properly install it and get it up and running. Be sure to follow the manufacturer’s instructions carefully and take your time during the installation process to avoid any mishaps. With a little patience and careful planning, installing a new SSD can be a great way to improve your computer’s performance and keep your data safe.

    Save data to an external storage device

    Backing up your data is essential to ensure that you don’t lose any important information in case of a system failure or a computer crash. One of the best ways to do this is by saving your data to an external storage device. This can be anything from an external hard drive, a USB drive, or even a cloud-based storage platform.

    By saving your data to an external device, you are essentially creating a backup copy that you can access in case of an emergency. One important thing to keep in mind is to have a backup plan in place and to regularly update your backups. Remember, you never know when disaster may strike, and having a backup copy of your important data is crucial.

    So, take the time to backup your data and ensure that your digital life stays safe and secure.

    how to install a new ssd windows 11

    Locate & Install SSD

    If you’ve recently upgraded to Windows 11 and want to improve your system’s performance, installing a new SSD is an excellent way to start. To install a new SSD, you must locate an available drive slot on your computer’s motherboard. Most desktops and laptops come equipped with an array of drive bays or slots that cater to different storage options such as

    5 inches or 5 inches. Once you’ve identified the drive slot, remove the side panel or back cover of your computer to get access to the motherboard.

    Gently place the SSD in the available slot and secure it with screws if required. Ensure that the SSD is aligned before you push it in all the way. After you’ve installed the SSD, close the back cover and turn on your computer.

    Your computer should detect the new SSD automatically, and you’re ready to install Windows 11 on it. With the new SSD, your computer’s performance will increase significantly, allowing for faster load times, quicker file transfers, and better overall performance. So take the plunge, install a new SSD today, and experience the improved performance yourself!

    Find the correct slot on your motherboard

    If you’re planning to upgrade or install a new SSD, one of the first things you need to consider is the correct slot on your motherboard. Generally, modern SSDs are designed to fit into specific slots on your motherboard, so you’ll need to locate the correct one before you can install it. One of the most common types of slots is the PCIe slot, which is typically found on modern motherboards.

    These slots offer fast data transfer rates, making them ideal for high-speed SSDs. You can identify them by their long, thin design and the clip at the end that helps to keep the SSD securely in place. Another common slot is the SATA III port, which is usually found on older motherboards.

    These ports are ideal for older, slower SSDs, but you’ll need to make sure that your SSD is compatible with this type of port before you install it. Once you’ve identified the correct slot, the next step is to install the SSD. This is a relatively simple process, and it usually involves screwing the SSD into place and then connecting it to the motherboard using a data cable.

    Overall, finding the correct slot on your motherboard is an essential part of installing a new SSD. By taking the time to locate the right slot and following the correct installation process, you can give your PC a significant speed boost and enhance its overall performance.

    Slide it into the slot and screw it in

    To improve the performance of your computer, you can install a solid-state drive (SSD) in addition to your hard disk drive. It’s not that difficult to install an SSD if you know what you’re doing. First, you need to locate the slot where the SSD will be installed.

    Typically, it’s located in the drive bay of your computer’s motherboard. Once you have found the slot, the next step is to slide the SSD into the slot carefully. Make sure it’s seated properly before screwing it in place.

    Don’t overtighten the screws, as this could damage the SSD. It’s suggested to wear an anti-static wristband or ground yourself before touching any computer components to prevent electrostatic discharge. After the installation of the SSD is complete, you may need to enter the BIOS of your computer to set up boot permissions so that your computer can detect and use your SSD.

    With a new SSD installed, your computer will boot faster, applications will load more quickly, and your overall experience will become a lot smoother. So, if you want to improve your computer performance, an SSD installation is a cost-effective and simple solution.

    BIOS Setup

    When upgrading your computer’s storage, whether it be with a new SSD or hybrid drive, it’s important to properly set up the BIOS before installing Windows 1 The BIOS, or Basic Input/Output System, is a crucial component in booting up your system and managing hardware settings. To set up the BIOS for a new SSD installation, start by accessing the BIOS menu during startup.

    Look for the option to change the boot order and make sure the new SSD is listed first. You’ll also need to enable AHCI mode for optimal SSD performance. Once these settings are adjusted, save and exit the BIOS and proceed with the Windows 11 installation process.

    By properly setting up the BIOS for your new SSD, you can ensure a smooth and seamless installation process and get the best performance out of your upgraded storage. So, go ahead and give your computer an upgrade with a new SSD today!

    Restart your computer & go to BIOS settings

    If your computer is not functioning properly, there may be certain issues with your BIOS settings. Restarting your computer and going to the BIOS setup can be quite helpful in such a scenario. The BIOS is a firmware that manages your computer’s hardware and software settings, including the boot order, system date and time, and more.

    By going to the BIOS setup, you can change any necessary configurations to ensure your computer runs correctly. To restart your computer and access the BIOS setup, first, we recommend you save any work you’re currently doing and close all programs. Then, click on the “Start” button and select “Restart.

    ” As the computer reboots, repeatedly press the key or keys necessary to enter the BIOS setup. Depending on the make and model of your computer, this could be one of the F keys or the Delete key. Once you enter the BIOS setup, make the necessary changes, save them, and exit.

    It’s worth noting that changing your BIOS settings can have significant consequences, so it’s important to be careful while making any changes. If you are not sure about what you are doing, it’s best to consult a professional technician. In conclusion, restarting your computer and going to the BIOS setup is a useful solution for solving issues concerning your computer’s hardware and software settings.

    By making the necessary changes, you can ensure that your computer runs correctly and optimally. Don’t forget that changing BIOS settings can have significant consequences, so it’s imperative to be cautious.

    Select SSD as the primary boot device

    If you have recently upgraded to a new SSD or wish to install an operating system on it, it is crucial to set it as your primary boot device. Doing so will allow your computer to boot from the faster SSD instead of the slow conventional hard drive. To set SSD as the primary boot device, you need to access the BIOS setup.

    Usually, you can press the DEL or F2 key while booting to enter the BIOS. Once in the BIOS setup, head to the boot options and choose your SSD as the primary boot device. You may also disable other boot options or rearrange the boot order as per your preference.

    After saving the changes, your computer will automatically boot from the SSD, giving you a lightning-fast experience. However, keep in mind that the steps might vary depending on the BIOS provider and the motherboard model. So, it’s wise to check the motherboard manual or search online for specific instructions.

    Install Windows 11 on SSD

    If you’re looking to install Windows 11 on a new SSD, there are a few steps you’ll need to follow. First, make sure you have the necessary files ready – you’ll need a copy of Windows 11 on a USB drive, as well as any necessary drivers for your computer. Once you have everything you need, shut down your computer and physically install the SSD.

    Then, boot up your computer and enter the BIOS menu to ensure your computer recognizes the new drive. From there, simply follow the prompts to install Windows 11 on the new SSD. This process can vary slightly depending on your hardware and the version of Windows you’re installing, but with a little research and preparation, upgrading your computer’s storage with a new SSD and a fresh installation of Windows 11 can be a relatively simple process.

    Insert Windows 11 USB/CD/DVD

    So, you’re ready to install Windows 11 on your SSD? Great! The first step is to insert your Windows 11 USB/CD/DVD into your computer. Make sure that your system is set up to boot from the device that you have inserted. Once your computer starts up, follow the prompts until you get to the installation screen.

    Now, select the language, time zone, and other preferences. Finally, you’ll arrive at the “Customize settings” screen. Here, you can choose to either upgrade your current operating system, or do a clean install.

    It’s important to note that installing Windows 11 on an SSD can be a bit different than a traditional hard drive. Because SSDs use flash memory instead of spinning disks, it’s important to make sure that your BIOS is set up correctly to take advantage of the faster read and write speeds. To do this, go into your BIOS settings and look for the SATA mode option.

    Make sure that it’s set to AHCI (Advanced Host Controller Interface) mode, which will allow your SSD to perform at its best. Overall, installing Windows 11 on an SSD is a great way to boost your computer’s performance. Just be sure to follow these steps carefully, and your new operating system should be up and running in no time!

    Follow Windows 11 installation process

    If you want to install Windows 11 on your SSD, there are a few things you should keep in mind. First and foremost, you will need to follow the Windows 11 installation process. This involves downloading the Windows 11 installation media, creating a bootable USB drive, and then booting your computer from the USB drive.

    As you go through the installation process, make sure to select your SSD as the installation destination. This will ensure that Windows 11 is installed directly onto your SSD, which will provide faster boot and load times compared to a traditional hard drive. Once the installation is complete, you can start using Windows 11 on your SSD, enjoying faster performance and improved overall functionality.

    It’s important to note that installing any new operating system can be a complex process, so make sure to follow the instructions carefully and seek help if needed. Overall, installing Windows 11 on your SSD is a great choice if you want to optimize your computer’s performance and speed things up.

    Transfer Data

    So, you’ve recently upgraded your computer’s storage with a new SSD and now you’re wondering how to install Windows 11 on it. Fear not, the process is easy and straightforward. Firstly, you need to make sure that your new SSD is properly installed and recognized by your computer’s BIOS.

    You can do this by checking the BIOS settings or by using a system information tool. Once done, you’ll need to create a Windows 11 installation media. You can do this using the Windows Media Creation Tool, which is freely available on Microsoft’s website.

    Once you have your installation media, simply insert it into your computer and restart it. From there, you’ll need to follow the on-screen prompts to select the new SSD and start the installation process. During the installation, Windows will prompt you to transfer data from your old drive to your new one.

    You can choose the files and programs you want to transfer or just transfer everything. Once the transfer is complete, you’ll be able to enjoy all the perks of a new and improved SSD with Windows 1

    Copy data from external storage device to SSD

    When it comes to transferring data from an external storage device to your SSD, there are a few options available to you. The easiest and fastest method is to use a USB cable to connect the two devices and transfer the data directly. However, if your external storage device is formatted for a different file system than your SSD, you may run into issues.

    In this case, you can use specialized software to clone your external drive onto your SSD, ensuring that all of your files and folders are moved over seamlessly. Another option is to use cloud storage or an online file sharing service to transfer your data. This can be a good choice if you have a slow internet connection or if you need to transfer a large amount of data.

    Regardless of which method you choose, be sure to back up your data before you start the transfer process to avoid any loss of data. By taking the time to properly transfer your data, you can ensure that everything is moved over safely and efficiently, minimizing the risk of data loss or corruption.

    Conclusion

    So, there you have it folks, installing a new SSD on your Windows 11 computer is as easy as following a few simple steps. With the right tools and some careful planning, you can supercharge your system’s performance and take it to new heights. Whether you’re a seasoned pro or a complete beginner, just make sure to follow the instructions carefully and always keep safety in mind.

    And who knows, with a little bit of luck and some good karma, maybe your computer will even start making your morning coffee. Happy installing!”

    FAQs

    What are the minimum system requirements for installing a new SSD on Windows 11?
    The minimum system requirements for installing a new SSD on Windows 11 include a compatible motherboard with an available SATA or NVMe port, a screwdriver, and the SSD.

    How do I physically install a new SSD on Windows 11?
    To physically install a new SSD on Windows 11, first, remove the computer case cover, locate an available SATA or NVMe port on the motherboard, align the SSD with the port, and gently insert it. Secure the SSD with a screw to keep it in place.

    How do I clone my existing drive onto the new SSD before installing it on Windows 11?
    To clone your existing drive onto the new SSD before installing it on Windows 11, download a reliable cloning software like Acronis True Image, connect the new SSD to your computer, launch the software, select the clone option, and follow the instructions.

    How do I install Windows 11 on a new SSD?
    To install Windows 11 on a new SSD, connect the SSD to your computer, insert the Windows 11 installation media (USB drive or DVD), boot your computer from the installation media, follow the on-screen instructions to select the language, time zone, and keyboard preferences, enter your license key, select the drive where you want to install Windows 11 (the new SSD), and wait for the installation process to complete.