Author: David L. Lynn

  • Unlocking the Secrets of SSD: Solving the Mystery of Making Space!

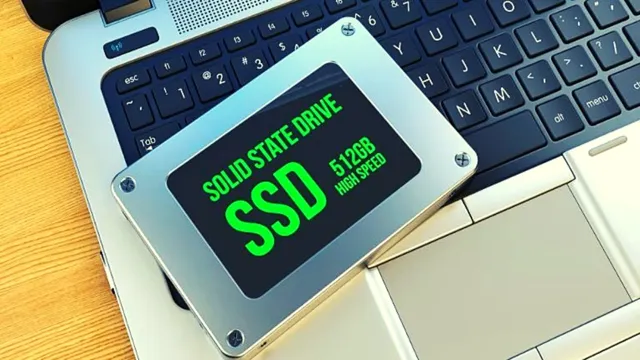
    Managing SSD space can be a daunting task for many computer users. The storage space of Solid State Drives (SSDs) is known to be smaller in comparison to traditional Hard Disk Drives (HDDs). Due to the limited capacity, it becomes crucial to keep a close eye on the storage space utilization of the SSD.

    We all have been there, where we struggle to find space for new files or applications when the drive reaches its capacity limit. The problem gets more frustrating as SSDs become slower when they get full. It’s like packing too much luggage for a trip, eventually, it becomes a burden to carry around.

    In this article, we will discuss some effective ways to manage your SSD space and keep it clutter-free.

    Check SSD Usage

    Are you experiencing difficulties making space in your SSD? It can be a frustrating experience figuring out how to clear storage space on an SSD. One of the best ways to check your SSD usage is by using the built-in Windows Storage app or the third-party app TreeSize. By using these apps, you can find out which files and programs are using the most space on your SSD.

    Once you have identified the files taking up the most space, you can then delete or move them elsewhere to free up space. Another option is to compress files or folders you don’t use frequently, which can save significant space without compromising their functionality. Remember, when using an SSD, it’s best not to fill it up to capacity to ensure optimal performance and to provide room for future updates and installations.

    Locate large files and folders

    If you’re looking to free up space on your SSD, one of the most effective ways to do so is by locating large files and folders. These can take up a significant amount of space on your device and contribute to slower performance. Fortunately, there are several tools and methods you can use to identify these space hogs.

    One of the simplest ways is to use your computer’s built-in search function and specify a file size greater than a certain threshold (such as 500MB or 1GB). You can also use third-party software, such as WinDirStat or TreeSize, which provide comprehensive visual representations of your disk usage. Once you’ve located the largest files and folders, you can decide which ones you want to delete, move to an external storage device, or compress to save space.

    By regularly checking your SSD usage and cleaning out unnecessary files, you can ensure that your device operates at optimal performance and avoid the frustration of running out of space unexpectedly.

    can't figure out how to make space in ssd

    Move or delete unused files

    If you’ve noticed that your computer’s SSD storage is almost full or nearing the limits, it’s time to check your disk usage. One of the best ways to free up space and boost your computer’s performance is to move or delete unused files. Over time, we accumulate a lot of temporary files, downloads, and other backups that we no longer need.

    These files take up precious space on our SSDs and can slow down our computer’s performance. Checking your disk usage will help you identify which files and programs are taking up the most space, so you can decide which ones to remove or transfer to an external drive. By doing this, you’ll have more space and a faster performing SSD.

    Additionally, make sure to use the main keyword “SSD usage” throughout your content to optimize it for search engines.

    Clear Disk Space

    If you are struggling to find space on your SSD, you are not alone. This can be a common issue for many computer users. One of the simplest ways to free up space is to start by deleting any unnecessary files or programs.

    This can include old downloads, unused applications, or duplicate files. Another thing to consider is transferring files to an external hard drive or cloud storage. These days, there are many affordable options available, and this can be a great way to keep your important files while freeing up space on your SSD.

    Finally, you may want to check if there are any temporary files or caches taking up space. These can often be safely deleted without causing any issues. By taking these steps, you should be able to create more space on your SSD and get back to using your computer with ease.

    Remove unneeded apps and programs

    Clearing disk space is an essential maintenance task for any computer user. One easy way to do this is to remove unneeded apps and programs. Often, we download apps or install programs that we rarely use or that are no longer useful to us.

    Over time, these apps and programs can take up a significant amount of space on our hard drive. By removing them, we can free up valuable disk space and enjoy a more efficient, faster computer. Additionally, removing unneeded apps and programs can improve our computer’s performance by reducing the number of processes running in the background.

    So, the next time you’re feeling frustrated by a slow computer, consider removing any apps or programs that you no longer need. Your computer (and your productivity!) will thank you.

    Clear browser cache and history

    Clearing your browser cache and history is a simple yet effective way to clear up disk space on your computer. Your browser cache stores temporary files, images, and other internet data so that websites can load more quickly the next time you visit. However, over time these files accumulate and can take up significant amounts of space on your hard drive.

    Clearing out your cache not only frees up space but also ensures that your browser is up to date and functioning properly. Additionally, clearing your browsing history can also help protect your privacy by removing any potentially sensitive information, such as login credentials or search history, from your computer. So the next time your computer is running a bit slow or running low on space, consider clearing out your browser cache and history to give your machine a boost.

    Clean temporary files

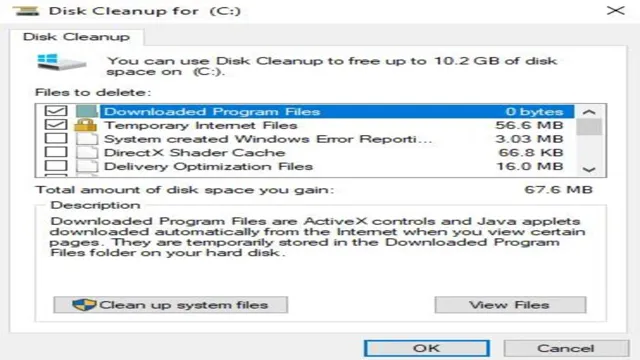
    Clearing temporary files is an essential task to make space on your computer’s hard drive. Temporary files are created when you browse the internet or install software or updates. They are created to help your computer work faster, but over time they can accumulate and take up a lot of disk space.

    By removing these files, you can free up space and make your computer run faster. There are several ways to clear temporary files, including using built-in disk cleanup tools, third-party software, or manually deleting files in specific folders. Using disk cleanup tools is the easiest way, as they automatically identify temporary files and other junk files that can be safely removed.

    However, if you have sensitive information or are unsure about which files to delete, it’s best to use caution or seek help from a professional. So, if your hard drive is running out of space, it’s time to clean temporary files and free up some valuable disk space.

    Optimizing SSD Storage

    Are you struggling to make space in your SSD storage? Don’t worry, you’re not alone. Many people find SSD storage optimization to be a challenging task. The first step is to identify what’s taking up too much space.

    You can do this by checking your disk usage in the task manager or using a disk analyzer tool. Once you identify what’s taking up space, you can start deleting unnecessary files, uninstalling programs you no longer use, and moving large files to an external drive. Another helpful tip is to regularly clear out your temporary files, browser cache, and recycle bin.

    If you’ve done all of this and still need more space, consider using a compression tool to compress large files. By taking these steps and optimizing your SSD storage, you’ll increase its lifespan and improve its overall performance.

    Configure Windows automatic maintenance

    If you want your SSD storage to last longer, one essential thing to do is to optimize it. One way to optimize your SSD is by configuring the Windows automatic maintenance. This feature allows you to schedule regular maintenance tasks, such as disk defragmentation, system updates, and storage optimization.

    By doing so, you’ll minimize the wear and tear on your SSD’s flash memory and ensure that it lasts longer. Additionally, you can use the “Storage Sense” feature on Windows 10, which automatically frees up disk space by getting rid of unnecessary files, such as temporary files and recycle bin items. This feature can help you free up space on your SSD storage without having to worry about doing it manually.

    Don’t forget to regularly check your drive’s health to ensure that it’s working optimally. With these steps, you can keep your SSD storage in good shape and extend its lifespan.

    Disable hibernation and system restore

    Optimizing SSD Storage When it comes to optimizing the storage on your SSD, one simple yet effective step is to disable hibernation and system restore. Hibernation can take up a considerable amount of SSD space as it saves the entire system state to your hard drive, allowing you to resume where you left off when you start your computer again. However, if you’re looking to free up some space on your SSD or simply prefer to shut down your computer completely, disabling hibernation can be a worthwhile option.

    Similarly, system restore can also take up a significant amount of space on your SSD as it keeps multiple restore points of your system. While it can be useful in fixing system issues, it may not be necessary for everyone. By disabling both hibernation and system restore, you can reclaim some precious space on your SSD and ensure smooth and efficient operation.

    Just remember, if you do choose to disable them, make sure to have alternate backup solutions in place to protect your data.

    Expand SSD Storage

    Are you struggling to make space in your SSD? It can be frustrating when you’re running out of storage and you can’t figure out what to delete or how to free up space. One solution to this problem is to expand your SSD storage. This can be done by either upgrading your SSD to a larger capacity or adding an external SSD.

    Upgrading your SSD is a bit more complex, but can be worth it in the long run if you need additional storage. Adding an external SSD is a simpler solution, as you can simply plug it into your computer and start using it. Whichever option you choose, make sure that you back up your data before making any changes to your storage.

    With a larger SSD, you won’t have to worry about running out of space anytime soon.

    Install larger SSD or additional hard drive

    If you’re running low on storage space on your computer, there are a few options available to you. One of the most popular choices is to expand your SSD storage. SSDs are faster and more reliable than traditional hard disk drives, so upgrading your SSD can make a significant difference in your computer’s performance.

    To do so, you’ll need to purchase a larger SSD and replace your existing one. You can also add an additional hard drive to your computer, although this won’t necessarily improve your computer’s overall performance. The main advantage of adding a hard drive is that it provides ample storage space for your files.

    Whichever option you choose, make sure to back up all of your data before making any changes to your computer’s storage. Investing in more storage can be a great way to improve your computer’s performance and keep all of your important files organized and accessible.

    Conclusion

    Seems like your SSD is filling up faster than a newly opened jar of Nutella on a Friday night. But fear not, for there are some simple steps you can follow to create some much needed breathing room. Whether it’s clearing out clutter, uninstalling unnecessary programs, or extending your storage capacity through external drives, there’s always a solution at hand.

    Remember, where there’s a byte, there’s a way!”

    FAQs

    What is the maximum capacity of the SSD you are currently using?
    The maximum capacity of an SSD depends on the make and model, but most SSDs range from 128GB to 2TB.

    How much free space do you currently have on your SSD?
    To check how much free space you have on your SSD, go to the windows search bar and type “Storage”. It will display your storage usage breakdown, along with how much free space you have left on your SSD.

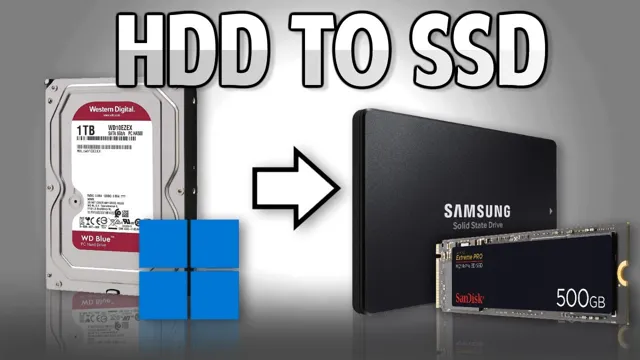
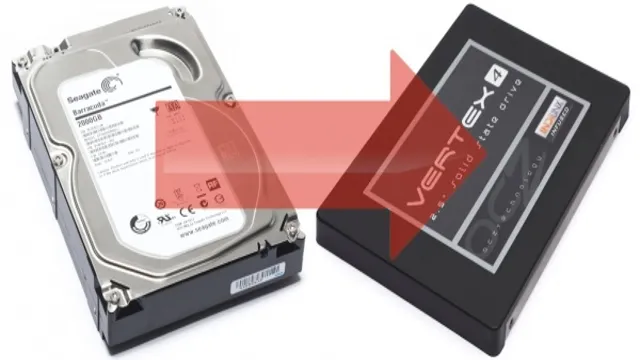
    How do I transfer data from my old hard drive to an SSD?
    You can transfer data between the two drives by using a cloning software like Macrium Reflect, Acronis, or EaseUS Todo Backup.

    How do I manage space on my SSD?
    You can manage space on your SSD by regularly deleting unwanted files and ensuring that your computer is not storing unnecessary temporary files. Also, consider using an SSD optimization software like Samsung Magician or Trim Enabler to improve the performance of your SSD.
  • Seamless Data Migration: Learn How to Transfer Your Startup to Samsung SSD

    If you’re a startup founder or simply someone who wants to improve the storage performance of their computer, you may be wondering how to transfer your operating system and data to a new solid-state drive (SSD). Samsung SSDs are a popular choice for their reliability, speed, and affordability, but the process of migration can seem daunting. After all, you don’t want to lose your files or accidentally damage your computer in the process.

    Fear not, as we’ve gathered all the necessary information and tips for you to smoothly transfer your startup to a Samsung SSD. With our step-by-step instructions and expert advice, you’ll be able to enjoy faster boot times, shorter load times, and overall improved performance. So, get ready to say goodbye to your old hard drive and hello to a more efficient and reliable storage solution!

    Backup Your Data

    If you’re looking to transfer your startup files to a Samsung SSD, the first step is to back up all of your data before proceeding. You can do this in a number of ways, such as using an external hard drive, cloud-based storage, or even a USB stick. Once your data is backed up, it’s time to get started with the transfer process.

    One option is to use the Samsung Data Migration Tool, which will guide you through the transfer process step-by-step. Another option is to manually transfer your files by dragging and dropping them from your old hard drive to your new SSD. Whichever method you choose, it’s important to take your time and make sure all of your data is transferred correctly to avoid any lost files or data.

    With a little patience and some careful planning, you can successfully transfer your startup files to your Samsung SSD and enjoy a faster, more reliable computing experience.

    Connect SSD to Your Computer

    If you want to ensure that your valuable data is safe and secure, backing it up is essential. One way to do this is by connecting an SSD (Solid State Drive) to your computer and transferring your files to it. An SSD is a compact and fast storage device that uses flash memory to store data.

    It is more durable and reliable than a traditional hard drive and provides lightning-fast transfer speeds. To connect an SSD to your computer, you need to have an available USB port or a Thunderbolt port on your device. Once you plug in the SSD, your computer should recognize it automatically, and you can start copying your data to it.

    With an SSD, you can easily backup your important files and keep them safe and accessible whenever you need them. So, the next time you want to protect your data, consider getting an SSD and transferring your files to it.

    how do i tr4ansfer my startip to samsung ssd

    Clone Your Startup Drive

    Backing up your data is an essential step in protecting your business from unexpected data loss. One important way to do this is by cloning your startup drive. This process involves copying the entire contents of your startup drive to another location, such as an external hard drive or cloud storage.

    By doing so, you create an exact replica of your drive, including all of your settings, programs, and files. This ensures that if something were to happen to your main drive, you have a backup that you can quickly restore from. Cloning your startup drive is easy to do with a variety of software options available online, and can provide you with peace of mind knowing that your business data is safe and secure.

    Overall, taking the time to backup your data is crucial for any business, and cloning your startup drive is just one important step in that process.

    Set Your Samsung SSD as the Boot Drive

    So, you’ve just upgraded to a brand new Samsung SSD and now you’re wondering how to transfer your startup files over to it. Don’t worry – it’s not as complicated as it may seem! To set your Samsung SSD as the boot drive, first, you’ll need to connect it to your computer and ensure that it’s recognized in the BIOS. Once that’s done, you can use a program like Samsung’s Data Migration software to transfer your startup files and other important data over to the new drive.

    You also have the option of doing a clean installation of your operating system onto the SSD, which can help ensure optimal performance. Whatever method you choose, be sure to follow the instructions carefully and back up any important files before you begin. With a little patience and attention to detail, you’ll have your new Samsung SSD up and running in no time!

    Access the BIOS

    If you want to set your Samsung SSD as the boot drive, the first step is to access the BIOS. This can be done by restarting your computer and pressing a specific key, usually F2, F10, or Delete, during the startup process. Once you are inside the BIOS, look for the boot order settings and make sure your Samsung SSD is listed as the first boot option.

    This will ensure that your computer will always boot from the SSD instead of the old hard drive. Setting your Samsung SSD as the boot drive can significantly improve your computer’s performance and speed, as SSDs are much faster than traditional hard drives. So, if you’re looking for a quick and easy way to boost your computer’s performance, setting your Samsung SSD as the boot drive is definitely worth considering.

    Change Boot Order

    If your computer has a Samsung SSD installed, you may want to set it as the boot drive. This will ensure faster boot-up times and overall system performance. To change the boot order, the first step is to access the BIOS settings.

    This can usually be done by pressing a key (usually DEL or F2) during the boot-up process. Once you’re in the BIOS, look for the boot options and select the Samsung SSD as the primary boot device. You may also need to disable any other boot devices, such as a CD-ROM or USB drive, to ensure the computer boots from the SSD only.

    Once you’ve made the changes, be sure to save and exit the BIOS settings. Congratulations, you’ve successfully set your Samsung SSD as the boot drive!

    Save Changes and Exit

    After making changes to your Samsung SSD, you need to save them and exit so that they can take effect. Once done, you should set your Samsung SSD as the boot drive if you want your computer to run faster and more efficiently. Setting your SSD as the boot drive means that your computer will prioritize it over other storage devices when starting up.

    It is a straightforward process that involves accessing the BIOS settings and selecting your SSD as the primary boot device. To do this, you need to restart your computer and press the key to open the BIOS settings. The key to press varies depending on your computer’s manufacturer, but it is usually F2 or Del.

    Once in the BIOS settings, navigate to the Boot tab, locate the Boot Order section, and use the arrow keys to move your SSD to the top of the list. Save your changes and exit, and your computer will now boot from your Samsung SSD. Setting your Samsung SSD as the boot drive can significantly improve your computer’s speed and performance, making it a worthwhile investment for anyone looking to upgrade their system.

    It is also essential to ensure that your SSD has enough space to accommodate your operating system and other essential files. You can transfer files from your old hard drive to your new SSD using data migration software or a file transfer tool. With your Samsung SSD as the boot drive, you can enjoy faster boot-up times, quicker loading of applications, and overall improved performance.

    Verify Samsung SSD is the Startup Drive

    If you’ve recently transferred your startup to a Samsung SSD, it’s important to verify that the transfer was successful and that your computer is now booting from the new drive. To do this, you can check your computer’s BIOS settings. First, restart your computer and press the key to enter the BIOS setup (usually F2, F10, or Del).

    Once inside the BIOS, look for the boot options menu and check that the Samsung SSD is listed as the first boot device. If it’s not, you’ll need to change the boot order to prioritize the SSD. Once you’ve made the necessary changes, save and exit the BIOS.

    When your computer restarts, it should boot from the Samsung SSD as the startup drive. This process may vary slightly depending on your computer’s manufacturer and model, so be sure to consult your manual or do some online research if you’re having trouble. Overall, transferring your startup to a Samsung SSD can greatly improve the speed and performance of your computer, so it’s worth verifying that everything is set up correctly.

    Check Boot Drive in System Preferences

    One vital step in ensuring the proper operation of your Samsung SSD is to verify that it’s the startup drive on your Macintosh computer. You can do this easily by checking the Boot Drive in System Preferences. This ensures that your computer boots up using the Samsung SSD and not any other drive connected to the computer.

    This is important since the boot drive contains the operating system and other essential startup files, and if a different drive is set as the startup disk, it can cause issues with the computer’s performance. So, it’s always a good idea to double-check and confirm that the Samsung SSD is, in fact, the boot drive. This simple action can help ensure your computer runs smoothly and efficiently.

    Restart Your Computer to Confirm

    After installing a new Samsung SSD on your computer, it’s important to make sure that it’s set as the startup drive. This will ensure that your computer is booting up quickly and efficiently from the new SSD. To confirm that the Samsung SSD is the startup drive, you need to restart your computer.

    Once it restarts, pay attention to which drive the computer boots from. If it boots from the Samsung SSD, then you know that it’s set as the startup drive and you’re good to go. However, if it doesn’t, you’ll need to go into your computer’s BIOS settings and change the boot order to make sure that the Samsung SSD is set as the primary startup drive.

    It’s always best to double-check these settings to make sure that your computer is running as smoothly as possible with the new hardware. So, take a few minutes to restart your computer and verify that the Samsung SSD is set as the startup drive.

    Enjoy Your Faster Startup Time

    If you’re wondering how to transfer your startup to a Samsung SSD, we’ve got you covered. The process is actually pretty simple and straightforward, and the benefits of doing so are huge. First off, your computer will start up much faster than before, which means you won’t have to wait as long to get to work or play.

    Additionally, an SSD is much more reliable than a traditional hard drive, which means you’ll have fewer issues with data corruption or loss. To get started, you’ll need to make sure that your Samsung SSD is installed and ready to go. Then, you’ll need to clone your existing startup disk onto the new SSD using Samsung’s Data Migration software.

    This can take some time depending on the size of your startup disk, but it’s a one-time process that will pay off in the long run. Once the cloning process is complete, you’ll need to set your computer to boot from the new SSD instead of the old startup disk. After that, you should be good to go! Enjoy your faster startup time and the peace of mind that comes with having a more reliable storage solution.

    Conclusion

    In conclusion, transferring your startup to a Samsung SSD is like giving your business a turbo boost. No longer will you be stuck in the slow lane, with sluggish loading times and outdated equipment. Instead, you’ll be running on high-speed technology that will help your startup thrive and succeed.

    So if you’re ready to take your business to the next level, it’s time to make the switch and watch your startup soar. And remember, with Samsung SSD, the sky’s the limit!”

    FAQs

    What are the steps to transfer my startup files to a Samsung SSD?
    First, connect the Samsung SSD to your computer. Then, open the disk cloning software provided by Samsung and follow the instructions to clone your startup files from the old hard drive to the Samsung SSD.

    Can I transfer my startup files to a Samsung SSD without a disk cloning software?
    Yes, you can manually copy the files from your old hard drive to the Samsung SSD. However, this method requires more technical knowledge and can result in data loss if not done properly.

    How long does it take to transfer startup files to a Samsung SSD?
    The time it takes to transfer startup files depends on the size of the files and the speed of your computer. Generally, it can take anywhere from a few minutes to an hour or more.

    What precautions should I take before transferring my startup files to a Samsung SSD?
    Before transferring your startup files, make sure to back up all important files and check for any viruses or malware in your system. It is also recommended to disconnect any other external drives to avoid any confusion during the transfer process.

  • Clearing the Confusion: Understanding the Equivalence of 256 SSD to GB

    If you’re shopping around for a new laptop, chances are you’ve come across the term “256 SSD” in the specs. But what exactly does that mean? Is 256 SSD equal to GB? Let’s break it down. SSD stands for solid-state drive, which is a type of storage device commonly used in laptops and other electronic devices.

    GB stands for gigabytes, which is a unit of measurement used to quantify digital information. So, is 256 SSD equal to GB? The short answer is no. While SSD refers to the type of storage device, 256 is actually referring to the capacity of that device in gigabytes.

    In this simple guide, we’ll explore what this means for your storage needs and what you should look for when shopping for a laptop. So grab your cup of coffee, sit back, and let’s dive in.

    Understanding SSDs and their Capacities

    If you’re wondering how many GBs a 256 SSD is equivalent to, the answer is 256 GBs. An SSD, or solid-state drive, is a storage device that uses NAND-based flash memory to store data digitally. While traditional hard drives rely on spinning platters and physical read/write heads to access data, SSDs use a series of interconnected flash memory chips to do the same task in a faster and more efficient manner.

    One of the many advantages of SSDs over traditional hard drives is that they come in smaller form factors, making them ideal for laptops and other portable devices where space is limited. In terms of capacity, SSDs can range anywhere from 120 GBs to 4 TBs, with 256 GBs being a popular size that strikes a balance between affordability and ample storage space for most users.

    What is an SSD?

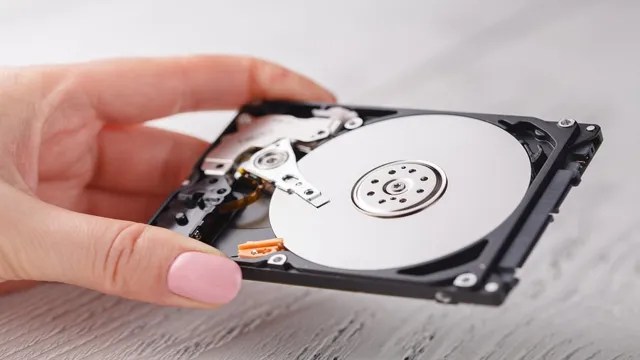
    An SSD, or Solid State Drive, is essentially a high-speed, flash memory-based alternative to the traditional hard drive used for data storage. Unlike the latter, which involves spinning disks and mechanical components, an SSD is entirely electronic, containing no moving parts. This makes it not only faster than a regular hard drive but also more reliable, durable, and energy-efficient.

    SSDs come in various capacities, usually ranging from 128GB to up to 4TB or more, depending on the brand and model. The exact capacity you need will depend mainly on how much data you want to store and what kind of tasks you plan to use your computer for. While a smaller SSD may be sufficient for everyday use, larger capacities may be necessary for professional use or gaming.

    The good news is that SSDs are becoming more affordable and accessible, making them a popular choice among users looking for speedy and reliable storage solutions. So, if you are looking for a fast and efficient solution for storing your data, an SSD might just be the perfect choice for your needs.

    256 ssd is equal to how many gb

    How Do SSDs Compare to HDDs?

    SSDs, HDDs, Capacities When it comes to storage devices, Solid-State Drives (SSDs) have gained immense popularity in recent years, and often in comparison with Hard Disk Drives (HDDs). What sets SSDs apart is their ability to access data quickly using non-volatile NAND-based flash memory, offering faster speeds, greater durability, and lower latency. SSDs are much faster at reading and writing data, resulting in a significant improvement in boot speed and application performance.

    They also consume less power, which makes them more suitable for portable devices such as laptops. However, the downside is that they are more expensive per GB of storage than their HDD counterparts. HDDs offer larger storage capacities for a more affordable price but are slower in accessing data and are susceptible to failure due to their mechanical nature.

    In conclusion, the choice between SSDs and HDDs depends on your storage needs and budget. If you want a faster, more reliable, and durable experience, SSDs are the clear choice. However, if you require more storage space, then HDDs would be a more economical option.

    What Does ‘256 SSD’ Mean?

    Have you ever come across the term ‘256 SSD’ while buying a new laptop or PC and wondered what it really means? Well, let me break it down for you. An SSD, or solid-state drive, is a modern storage device that uses NAND-based flash memory to store data instead of the traditional magnetic hard disk drives. The number ‘256’ refers to the storage capacity of the SSD, which is measured in gigabytes (GB).

    Therefore, a 256 SSD is equal to 256 gigabytes of storage. To put it into perspective, this amount of storage can hold approximately 64,000 songs, 320 hours of high-quality video or 256,000 photos. It’s always important to consider the size of the SSD before making a purchase, as it can significantly affect the performance and storage capacity of your device.

    How SSD Capacity is Measured

    SSD Capacity Have you ever wondered what all the numbers and letters mean when it comes to SSD capacity? Well, let’s break it down. When you see something like “256 SSD,” the number 256 refers to the storage capacity of the SSD, which is measured in gigabytes (GB). Essentially, this means that the SSD can store up to 256GB of data.

    It’s important to note that when it comes to SSD capacity, the available space will be slightly less than the advertised amount. This is due to the way in which SSDs allocate storage space. Additionally, different SSD models and brands may have slightly different capacities, even if they’re labeled with the same number.

    Overall, when it comes to selecting an SSD with the right capacity for your needs, it’s important to consider factors like how much data you plan to store and how frequently you’ll be accessing it.

    How Much Space is Used for System Files?

    If you’re looking to buy a new computer, you may come across different storage options like “256 SSD” or “512 HDD.” But what do these terms really mean? Let’s start with the first one. SSD stands for Solid State Drive, and it’s a type of storage device that uses flash memory to store data.

    The number “256” refers to the amount of storage space you have on the drive, measured in gigabytes (GB). When you purchase a computer with a 256 SSD, the operating system and various system files will take up a portion of that space. Depending on the computer manufacturer and model, these files can take up anywhere from 20 to 60 GB of storage space.

    This means that the amount of usable storage space on a 256 SSD may be slightly less than 256 GB. It’s worth noting that some computer manufacturers may also include recovery partitions or software that take up additional space on the SSD. However, these files can often be deleted or moved to an external drive to free up more space.

    In summary, a 256 SSD refers to a solid state drive with 256 GB of storage space. Depending on the computer manufacturer and model, some of that storage space may be used for system files and recovery partitions. But overall, a 256 SSD is a great storage option for those who want fast boot times and quick access to their files.

    256 SSDs in GB: The Answer

    When it comes to SSDs, the storage capacity is always a point of confusion. If you’re wondering how many GB a 256 SSD has, then the answer is 256GB. It’s important to note that the actual capacity of an SSD is always a bit lower than its advertised capacity due to the way storage is managed.

    But even with this minor difference, a 256 SSD is still a solid choice for most users who need a good amount of storage space for their files and programs. Whether you’re a gamer, a content creator, or just need a reliable drive for everyday use, a 256 SSD can provide the speed and capacity you need. So go ahead and make the most of your storage options without worrying about getting lost in the jargon.

    Calculating GB from SSD Capacity

    When it comes to SSD capacity, it can be confusing to know exactly how many gigabytes (GB) you’re working with. A common SSD size is 256GB, but how does that translate to actual usable storage? The answer is that it depends on the specific SSD and its formatting. However, as a general rule of thumb, a 256GB SSD will have around 238GB of usable storage.

    This is because of the way that SSDs are formatted and the space that the formatting takes up. Additionally, some manufacturers will advertise the size of their SSDs using decimal units (10^9) instead of binary units (2^30), which can further add to the confusion. It’s important to remember that there will always be some level of discrepancy between the advertised size and the actual usable storage, but understanding the general rule of thumb can help you make more informed decisions about the size of SSD you need for your specific needs.

    Real-World Equivalent of 256 SSDs in GB

    Are you wondering what the real-world equivalent of 256 SSDs in GB is? Well, the answer is 32 terabytes. Yes, you heard it right, 32 terabytes! To put it into perspective, this amount of storage is more than enough for the average user. You can store around 6 million high-quality photos or more than 10,000 hours of video.

    This amount of storage is perfect for use in servers, data centers, and even for professionals who work with large amounts of data such as photographers, videographers, and sound engineers. Having 256 SSDs in GB would be incredibly expensive and impractical, but with a 32 terabyte SSD, you can have all the storage you need in a single, reliable, and fast drive. So, if you’re in need of a large amount of storage for your personal or professional needs, look no further than a 32 terabyte SSD.

    Final Thoughts

    If you’re wondering how many GB a 256 SSD is equal to, the answer is 256 GB. SSDs (Solid-State Drives) are storage devices used in computers and other electronic devices, and they offer faster boot times and faster application launch times than traditional hard drives. The storage capacity of an SSD is measured in GB (Gigabytes), and a 256 SSD offers 256 GB of storage space.

    This should be sufficient for most users, but if you need more storage space, you might want to consider getting an external hard drive or upgrading to a larger SSD. It’s important to keep in mind that the actual amount of available storage on an SSD may be slightly less than its advertised capacity due to formatting and other factors. Nonetheless, a 256 GB SSD is a solid choice for those who want a fast and reliable storage solution for their device.

    Conclusion

    256 SSD is equal to 256 gigabytes, but to compute how much data it can hold, you have to factor in the speed of the drive. With its lightning-fast read/write speed, a 256 SSD is like a Hare, fast and nimble, capable of storing a significant amount of data in no time. So, whether you’re a data hoarder or a video editor, a 256 SSD is the perfect choice for you, fast enough to bring your ideas to life, and large enough to store your wildest imaginations.

    FAQs

    What is the storage capacity of a 256 SSD?
    The storage capacity of a 256 SSD is 256 GB.

    Can a 256 SSD be upgraded to have more storage capacity?
    No, the storage capacity of an SSD cannot be upgraded. However, you can replace it with a higher-capacity SSD.

    How many hours of video can a 256 SSD hold?
    A 256 SSD can hold approximately 60-70 hours of 1080p video.

    What is the read and write speed of a 256 SSD?
    The read and write speed of a 256 SSD can vary depending on the manufacturer and model, but it typically ranges from 500 MB/s to 550 MB/s for read speed and 300 MB/s to 520 MB/s for write speed.

  • Step-by-Step Guide: How to Transfer Windows 10 to a New SSD Easily

    Step-by-Step Guide: How to Transfer Windows 10 to a New SSD Easily

    Moving Windows 10 to a new SSD may seem like a daunting task, but it’s actually a fairly simple process. Upgrading to an SSD can greatly improve your computer’s speed and performance, and with the right tools and steps, you can easily transfer your operating system to your new drive. Plus, who doesn’t love the feeling of a snappy computer? It’s like upgrading from a bicycle to a sports car.

    In this guide, we’ll walk you through the process of moving Windows 10 to a new SSD, step by step. Whether you’re upgrading your current computer’s drive or starting fresh with a new build, we’ve got you covered. We’ll cover everything from the tools you’ll need, to the exact steps you’ll need to take to migrate your data, to ensure minimal downtime and a smooth transition.

    So, if you’re looking to upgrade your computer’s performance and take advantage of the benefits of an SSD, keep reading to learn how to migrate Windows 10 to your new drive seamlessly. It’s time to say goodbye to sluggish load times and hello to lightning-fast computing.

    Backup Your Data

    If you are planning to upgrade your computer’s storage by moving your Windows 10 operating system to a new SSD, it is crucial that you backup all of your data beforehand. The process of transferring your Windows 10 operating system can be complicated and may result in the loss of your important files if you are not careful. Backing up your data ensures that you have a copy of everything in a safe location before you begin the transfer process.

    There are several methods to back up your data, including using an external hard drive, cloud storage, or a backup software. Once you have made a backup of your data, you can proceed with the Windows 10 transfer process to your new SSD with confidence, knowing that all of your important files are safely stored away. Remember, it’s always better to be safe than sorry, so take the time to backup your data before attempting any type of computer upgrade or transfer.

    Copy Files to External Drive

    Backing up your data is essential in ensuring that all your important files are safe and secure in case of unforeseen circumstances. One way to do this is by copying files to an external drive. External drives are portable and can store a large amount of data, making it an ideal backup solution.

    To get started, connect your external drive to your computer and wait for it to be recognized. Next, locate the files that you want to backup and drag and drop them to the external drive. You can also use backup software to automate the process and schedule regular backups.

    Remember to always keep your external drive in a safe and secure location to avoid any loss or damage. By regularly backing up your data to your external drive, you can ensure that you will always have a copy of your important files when you need them.

    how do i move windows 10 to a new ssd

    Create a System Image Backup

    Backing up your data is crucial in today’s world where technology is an essential part of our daily lives. One of the ways to create a backup is by creating a system image backup. A system image backup is a copy of the entire operating system including all of your settings, files, and programs.

    This backup is particularly useful in scenarios where you experience hardware failure or malware attacks. Creating a system image backup is a straightforward process on Windows All you need to do is go to the Control Panel, and under the System and Security section, select Backup and Restore.

    From there, select Create a System Image and follow the prompts. It is recommended that you create the system image backup on an external hard drive for safe keeping. By doing so, you can be rest assured that your data is safe in case of any unforeseen circumstances.

    Don’t forget to update the system image backup regularly to reflect changes to your system. Overall, creating a system image backup is a smart move towards ensuring the safety and security of your data.

    Clone Your Existing Drive

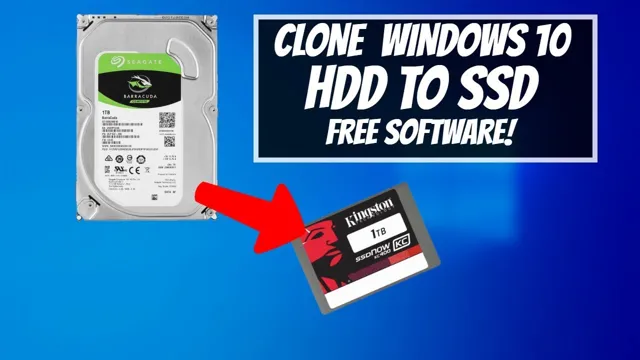
    If you’re looking to upgrade your computer’s hard drive, one of the first steps is to copy the existing drive to the new SSD. This is also a great way to transfer your operating system, software, and data to a new computer. The process of cloning a drive is relatively straightforward and can be done using various cloning software available online.

    Some SSD manufacturers may even provide free cloning software that you can use. You’ll need to connect both drives to your computer, select the source drive and the destination drive, and then initiate the cloning process. Once the cloning process is complete, you’ll need to change the boot order in your BIOS to boot from the new SSD.

    With the right software and a bit of patience, cloning your existing drive can save you time and effort when upgrading to a new SSD or computer.

    Download Cloning Software

    Cloning your existing drive is an essential process when you need to upgrade or replace your hard drive. The process involves copying the entire content of your old hard drive to a new one, ensuring that all your files, programs, and operating system remain intact. You can perform this task efficiently by using cloning software specifically designed for this purpose.

    This software creates an exact duplicate of your old hard drive, including all files and folders, without any data loss. One such software is EaseUS Todo Backup, which is an intuitive and user-friendly clone software that ensures reliable and efficient data backups. Cloning your drive ensures that you don’t have to start from scratch when setting up your new computer, and it saves you the hassle of reinstalling every program you had on your old hard drive.

    So, if you’re planning to replace or upgrade your hard drive, be sure to download cloning software and make the process easy and seamless.

    Attach New SSD through USB

    If you’re looking to upgrade your computer’s storage capacity, adding a new SSD is an excellent option. And, rather than replacing your existing drive, you can attach the new SSD through USB and clone your data over. This ensures that everything remains intact, including your operating system and any software programs you’ve installed.

    Cloning your drive is a simple process that involves using specialized software to create an exact copy of your existing drive and transfer it to the new SSD. Once complete, you’ll be able to boot from the new SSD and enjoy faster load times and improved system performance. So, whether you’re a gamer, content creator, or just need more storage space, attaching a new SSD through USB and cloning your drive is a cost-effective and straightforward way to upgrade your computer.

    Clone old Drive onto New Drive

    Cloning your old drive onto a new one can be a time-saving solution for transferring all the data and settings from your existing hard drive to a new one in a hassle-free way. This process is essential when upgrading your storage device or shifting to a newer version of the operating system. By using cloning software, you can simply copy your existing hard drive to the new one and avoid the slow and tedious process of reinstalling the operating system and other software.

    With the help of a cloning tool, you can have an exact replica of your old drive, including files, folder structures, operating system settings, and personal preferences. Some popular cloning software applications include Macrium Reflect, EaseUS Todo Backup, and Acronis True Image. These tools make the process of transferring data from the old to the new drive a breeze and enable you to get back to work quickly.

    So, if you want to save time and effort in transferring all your data from an old drive to a new one, consider cloning your existing drive using one of these trusted tools.

    Install New SSD and Boot Up

    If you’re looking to upgrade your computer’s speed and performance, installing a new SSD can be a game-changer. However, the thought of moving your Windows 10 operating system to a new drive can be daunting. Thankfully, it’s not as complicated as it seems.

    First, connect the new SSD to your computer and make sure it’s recognized in the BIOS. Next, use a cloning software like Macrium Reflect or Clonezilla to copy your current Windows 10 system to the new SSD. Once the cloning process is complete, shut down your computer, disconnect the old drive, and boot up using the new SSD.

    Your computer should now be running Windows 10 with all your files and programs intact. Just remember to keep your old hard drive handy for backup purposes. By following these steps, you can easily move your Windows 10 operating system to a new SSD and enjoy faster speeds and improved performance.

    Shut Down and Disconnect Power Cord

    If you’re looking to upgrade your computer’s storage capacity and performance, installing a new solid-state drive (SSD) can be a great solution. But before you get started, it’s crucial to shut down your computer and disconnect the power cord to avoid any potential damage to your system. Once you’ve done that, you can begin the process of installing your new SSD and booting up your computer.

    First, you’ll need to locate where your old hard drive is, remove it, and replace it with your new SSD. Once you’ve completed the physical installation, you’ll need to turn your computer back on and ensure that it recognizes your new drive. From there, you can transfer your files and programs over to your new SSD for optimal performance.

    With a little bit of know-how and the right tools, upgrading your computer’s storage capacity and performance can be a breeze.

    Insert New SSD into Drive Slot

    Installing a new SSD into your drive slot is a great way to increase the speed and performance of your computer. First, make sure you have the proper tools for the job, including a screwdriver and an anti-static wristband. Once you’ve gathered your materials, shutdown your computer and unplug all cables.

    Open your computer case and locate the drive bays, which are typically located near the bottom of the case. Slide the new SSD into an empty slot and secure it with screws. After securing the SSD, reconnect all cables and power on your computer.

    Your computer should recognize the new SSD, and you may need to configure it in your system BIOS. With your new SSD installed, you’ll notice faster boot times and quicker application load speeds. So, take the plunge and upgrade your computer’s performance today!

    Boot Up and Check BIOS Settings

    boot up, BIOS settings, SSD installation Before installing a new SSD, it’s essential to boot up your computer and check the BIOS settings. By doing so, you can ensure that your system supports the new SSD and confirm that all the necessary settings are in place. To access the BIOS, restart your computer and press the key to enter the BIOS setup menu.

    Once there, navigate to the boot order settings and ensure that the new SSD is set as the primary boot device. You should also check the SATA mode settings to ensure that they are set to the appropriate mode for your new SSD. Once you’ve confirmed that all the necessary settings are in place, you can proceed with the installation of your new SSD.

    Following these steps will help ensure a smooth installation process and prevent any potential issues that may arise from incorrect BIOS settings.

    Conclusion

    Moving Windows 10 to a new SSD is like giving your computer a brand new pair of shoes. Not only does it improve the overall performance and speed, it also adds a little pep in your system’s step. So, don’t let your computer drag its feet any longer, give it the upgrade it deserves and start strutting into the future with your new and improved SSD.

    FAQs

    Why would I want to move Windows 10 to a new SSD?
    Moving Windows 10 to a new SSD can improve overall system speed and performance, as well as increase storage capacity on your computer.

    What do I need to move Windows 10 to a new SSD?
    You will need a new SSD, a SATA-to-USB cable, cloning software, and a screwdriver to physically install the new SSD.

    Can I move Windows 10 to a new SSD without reinstalling all my programs and files?
    Yes, you can use cloning software to transfer your existing operating system and files to the new SSD without the need for a fresh installation of Windows 10.

    What is the easiest way to move Windows 10 to a new SSD?
    Using a cloning software such as Acronis True Image or EaseUS Todo Backup can simplify the process of moving Windows 10 to a new SSD, as the software guides you through the steps necessary for cloning your existing system to the new SSD.

  • Upgrade Your PC’s Performance: A Step-by-Step Guide on How to Migrate to an SSD

    If you’re tired of your computer running slow and constantly freezing, then it’s time for an upgrade. Migrating to an SSD (Solid State Drive) is the perfect way to breathe new life into your old computer. Not only will it increase your computer’s speed, but it will also improve its performance.

    In this blog, we will dive into the world of SSDs, explore the benefits of upgrading to an SSD, and give you the basics on how to migrate to an SSD. So, sit back, relax, and let’s get started!

    Benefits of an SSD

    If you’re wondering how do I migrate to an SSD, the good news is that it’s not as complicated as it may seem. In fact, there are several benefits to making the switch. An SSD, or solid-state drive, is known to be faster than a traditional hard drive.

    This means your computer will boot up quicker, programs will load faster, and files will transfer more smoothly. Additionally, because an SSD has no moving parts, it is less prone to breaking down. If you’re worried about losing your data during the migration process, don’t be.

    There are software tools available to help you transfer your files and settings seamlessly. With all these advantages, it’s easy to see why so many people are choosing to switch to an SSD.

    Faster boot and load times

    If you’re tired of long load and boot times on your computer, it’s time to consider getting an SSD. Unlike traditional hard drives, an SSD operates without any moving parts, allowing it to access and transfer data at lightning-fast speeds. This means that your computer will start up faster, applications will launch quicker, and files will load without any delays.

    The benefits of an SSD go beyond just speed- it also makes your computer run quieter and cooler, and is less prone to damage from drops or bumps. Overall, upgrading to an SSD can make a noticeable difference in the performance of your computer, and is definitely worth the investment. So why wait? Get an SSD today and enjoy faster boot and load times like never before!

    how do i migrate to an ssd

    Improved system performance overall

    If you’re looking to improve the performance of your computer, one of the most effective upgrades you can make is switching to a solid-state drive (SSD). The benefits of an SSD are numerous, including faster boot times, quicker file transfers, and improved overall system responsiveness. Because SSDs have no moving parts, they are less prone to mechanical failures and can access data much more quickly than traditional hard drives.

    This means that your computer can handle multiple tasks and applications more efficiently, and you’ll experience less lag and slowdowns even when you’re running intensive programs. So if you’re tired of waiting for your computer to catch up to you, upgrading to an SSD could be just what you need to give it a serious speed boost.

    Increased storage capacity

    One of the major benefits of upgrading to an SSD is the increased storage capacity. With traditional HDDs, you might have to compromise on capacity for speed, but SSDs offer both. They come in a variety of sizes, ranging from just a few gigabytes to multiple terabytes.

    You can choose the one that best fits your needs and budget. And did you know that SSDs store data in microchips instead of moving parts, which means not only is it faster and more efficient, but also more reliable? Plus, with no mechanical parts, SSDs are less prone to damage and can withstand a greater number of shocks and vibrations. All these benefits make SSDs a clear winner over HDDs when it comes to increasing your storage capacity and ensuring the safety of your data.

    So why not upgrade your storage to an SSD and experience faster speeds, increased reliability, and more capacity?

    Choosing an SSD

    If you’re looking to migrate to an SSD, there are a few things you need to consider. First and foremost, you’ll want to make sure you have enough space on your SSD to accommodate all your important data. You’ll also want to choose an SSD with a high enough capacity to meet your needs.

    When choosing an SSD, it’s important to consider factors like read and write speeds, as well as the type of NAND flash memory used. There are two main types of NAND flash memory: SLC and TLC. SLC is typically faster and more reliable, but also more expensive.

    TLC is slower and less reliable, but more affordable. Ultimately, you’ll need to weigh the pros and cons of each type of memory to determine which one is best for your needs. Overall, migrating to an SSD can greatly improve your computer’s performance and speed, so it’s definitely worth considering if you’re looking to boost your productivity and efficiency.

    Consider capacity and cost

    When choosing an SSD, it’s important to consider both capacity and cost. If you need a lot of storage space for your files, photos, and videos, then you may want to look for SSDs with higher capacity options. However, it’s important to keep in mind that higher capacity SSDs typically come with a higher cost as well.

    When determining the best choice for your needs, you want to find the right balance between capacity and cost. More expensive SSDs may offer faster speeds and better performance, but it’s also crucial to think about how much you’re willing to spend. Ultimately, the best SSD for you will depend on your budget and storage needs.

    Compatibility with your system

    When it comes to choosing an SSD, compatibility with your system is crucial. You want to ensure that the SSD is compatible with your motherboard and chipset, as well as any other components in your computer. This can save you a lot of hassle and frustration down the line.

    One thing to consider is the form factor of the SSD. There are different sizes of SSDs available, and you want to make sure that you choose one that will fit in your computer. Another consideration is the interface of the SSD.

    There are different types of interfaces, including SATA, PCIe, and NVMe. You’ll want to choose one that is compatible with your computer’s interface. If you’re not sure what you need, do some research or consult with a professional to ensure that you choose an SSD that is compatible with your system.

    Ultimately, choosing the right SSD can improve the overall performance of your computer and make it run more smoothly. So, take the time to consider your options and choose one that fits your needs.

    Read reviews and ratings

    When it comes to choosing an SSD, reading reviews and ratings is crucial. There are so many options on the market, and it can be overwhelming knowing which one to choose. Reading reviews from real people who have purchased and used a particular SSD can give you insight into its performance, reliability, and any potential issues to be aware of.

    Make sure to read a variety of reviews from different sources to get a well-rounded view of the product. Pay attention to any common themes or issues mentioned by multiple reviewers. Ratings can also be helpful in quickly comparing products and narrowing down your options.

    When looking at ratings, remember to consider factors such as price, capacity, and speed to find the SSD that best fits your needs. By using reviews and ratings, you can make a more informed decision when it comes to choosing the right SSD for you.

    Backing up important data

    If you’re planning to switch to an SSD, it’s essential to back up all of your important data first. There are several ways to do this, depending on your preferences and the amount of data you have. You could use an external hard drive or a cloud-based backup service like Google Drive or Dropbox.

    Another option is to create a system image using built-in tools like Windows Backup and Restore or third-party software like Macrium Reflect. Once you’ve backed up your data, you can proceed with the migration process, which involves transferring your operating system, programs, and files to the new SSD. This can also be done using software tools such as Clonezilla or Samsung Data Migration.

    It’s crucial to follow the instructions carefully to ensure a successful migration without losing any data. In summary, backing up your data is a necessary step when migrating to an SSD, and there are various methods to choose from. By taking the time to back up your data, you can ensure a smooth transition to your new SSD without any unexpected hassles.

    Choosing a backup method

    When it comes to backing up important data, there are a number of methods available to choose from. Some people prefer to use an external hard drive, while others opt for cloud-based solutions. Both options have their pros and cons, so it’s important to consider what’s best for your specific needs.

    External hard drives are a great option for those who are looking for a physical backup that they can easily access. They’re also a good choice for those who want to back up large amounts of data, as they tend to offer more storage space than cloud-based solutions. On the other hand, cloud-based solutions offer the convenience of being able to access your data from anywhere with an internet connection.

    They’re also generally more secure than external hard drives, as the data is stored on secure servers rather than on a physical device that could be lost or stolen. Ultimately, the choice of backup method will depend on your personal preferences and needs, as well as the amount and importance of the data that you need to back up.

    Transferring files to the new SSD

    When transferring files to your new SSD, it’s essential to back up important data to ensure nothing is lost during the process. You don’t want to risk losing your critical documents, cherished photos, or treasured music files. Backup options include external hard drives, cloud storage, and file transfer software.

    An external hard drive provides a convenient and reliable option for backing up your data. You can also store your files on cloud-based storage services such as Google Drive, Dropbox, or OneDrive. File transfer software such as EaseUS Todo PCTrans can transfer files directly from your old hard drive to your new SSD.

    Whichever method you choose, it’s crucial to ensure you have a complete backup of all your files. By doing so, you’ll have peace of mind knowing your data is safe during the transfer process and can access your files without any worries.

    Installing the new SSD

    If you’re looking to upgrade your computer’s storage to an SSD, it’s important to know that the process involves more than just swapping out the hardware. Before installing your new SSD, you’ll need to migrate your operating system and other important files from your old hard drive to the new one. Fortunately, there are several options for doing so.

    One option is to use cloning software, which creates an exact copy of your old hard drive on the new SSD. This is a quick and easy option, but it may not work if your old hard drive is larger than your new one. Another option is to manually transfer your files to the new drive using an external hard drive or cloud storage service.

    This method can take longer, but it allows you to pick and choose which files to transfer. Whichever method you choose, make sure to back up your files beforehand and follow proper safety precautions when working with computer hardware. With a little patience and know-how, you’ll be enjoying faster load times and improved performance on your new SSD in no time.

    Opening your computer case

    Opening your computer case is an essential step in installing a new SSD. First, make sure to power off your computer and disconnect all the cables. Then, locate the screws holding the case in place and carefully unscrew them.

    Once you open the case, it’s crucial to be gentle with the internal components, as they can be easily damaged. Before handling anything, ground yourself by touching metal on the case. Next, locate your current hard drive and remove it from its slot.

    Then, carefully insert the new SSD into the same slot and reconnect any cables necessary. Secure the SSD in place with screws, close the case, and reattach all the cables. Power on your computer and check to ensure that the SSD is correctly recognized by the system.

    By following these steps, you can successfully install a new SSD and optimize your computer’s performance.

    Removing the old hard drive

    Now that we’ve removed the old hard drive, it’s time to install the new SSD. First, we need to make sure that the SSD is compatible with our computer. Check the specifications of both the computer and the SSD to ensure they are a match.

    Once we have confirmed that, we can begin the installation process. Before we physically install the SSD, we need to connect it to the computer. Depending on the type of SSD you have, you may need to use a special adapter or cable.

    Once the SSD is connected, boot up the computer and enter the BIOS to ensure that the computer recognizes the new drive. Assuming everything is working as it should, it’s time to physically install the SSD. Open up the computer case and locate the mounting bracket for the SSD.

    Carefully mount the SSD in the bracket, making sure it’s secure. Then, connect the necessary cables and close up the computer case. Congratulations, you have successfully installed a new SSD! Now, all you need to do is install your operating system and other necessary software on the SSD, and you should notice a significant improvement in your computer’s speed and performance.

    Make sure to properly dispose of your old hard drive and backup your data before making any changes to your computer’s hardware.

    Installing the new SSD

    So you’ve decided to upgrade your computer with a brand-new SSD, congratulations! Now that you’ve got your hands on the shiny new drive, it’s time to install it. First things first, shut down your computer and unplug the power cable. You don’t want any electrical surges to damage your new SSD or your computer.

    Once everything is powered down, open up your computer case and find the current hard drive. You’ll want to disconnect it from any cables and remove it from its slot. Then, carefully slide your new SSD drive into the same slot and reconnect all the cables you unplugged earlier.

    Once you’ve done that, secure the SSD with the necessary screws and close up your computer. And, just like that, you’re done! Your computer should now recognize the new SSD as the primary drive. With your new SSD installed, you should enjoy faster boot times, quicker application load times, and better overall performance.

    Finalizing the installation

    If you’re looking for a way to boost your computer’s performance, migrating to an SSD is a great option. But now that you’ve physically installed the SSD, what’s next? The final step is to perform the migration process. One way to do this is to use cloning software that will copy your existing hard drive’s contents to the new SSD.

    Some popular cloning software options include EaseUS ToDo Backup, Acronis True Image, and Clonezilla. Once you’ve selected a cloning software and followed the steps to migrate to your new SSD, you should then remove the old hard drive from your computer and replace it with the SSD. Finally, you’ll need to configure your BIOS to recognize the new SSD as your boot device.

    You can do this by accessing your BIOS settings and changing the boot order to prioritize the SSD over your old hard drive. In summary, migrating to an SSD requires more than just installing the hardware. You’ll need to use cloning software, remove the old hard drive, and configure your BIOS to recognize the new SSD.

    Once these steps are complete, you’ll be set with a faster and more efficient computer.

    Updating drivers and firmware

    The final step in installation is updating drivers and firmware, which ensures that your system is up-to-date and running smoothly. Drivers are essentially software that allow your hardware to communicate with the operating system. Firmware, on the other hand, is software that is embedded in the hardware itself and controls its functionalities.

    Make sure to check for updates on both your drivers and firmware before proceeding. Updating these components can help you avoid bugs and compatibility issues, as well as improve your system’s performance and security. It’s like getting a tune-up for your car – periodic updates keep everything running smoothly and prevent issues down the road.

    So take the time to update your drivers and firmware and enjoy a seamless computing experience.

    Verifying performance and storage capacity

    As we near the end of our installation process, it’s crucial to verify the performance and storage capacity of our system. This step ensures that we have correctly configured all the components and can proceed without any glitches. First, we need to check the performance by running a series of tests that simulate real-world usage scenarios.

    This allows us to identify any bottlenecks or problems that may arise under heavy loads. We also need to verify that the storage capacity is sufficient for our needs. This includes checking the amount of available space on our drives and ensuring all data is being appropriately stored and managed.

    By finalizing these checks and making any necessary adjustments, we can ensure that our system is running smoothly and ready for action.

    Conclusion

    In conclusion, making the switch to an SSD is a fantastic idea for anyone looking to boost their computer’s speed and performance. It may seem daunting at first, but with the right tools and a little bit of patience, anyone can migrate their current system to an SSD in no time. So don’t let sluggish load times and slow boot speeds hold you back any longer – migrate to an SSD and see the difference for yourself!”

    FAQs

    What are the benefits of migrating to an SSD?
    By migrating to an SSD, you can expect faster boot and load times, improved system responsiveness, and the ability to run more resource-intensive applications.

    Is it difficult to migrate to an SSD?
    It depends on your technical skills and the tools you have available. There are many migration tools available that can simplify the process for you, but if you’re not comfortable with technology, it’s recommended to seek professional assistance.

    Can I clone my existing hard drive onto an SSD?
    Yes, you can use a cloning tool to copy your entire existing hard drive onto the SSD. This will ensure that all your existing data and programs are accessible on the new drive without the need to reinstall everything from scratch.

    Do I need to reinstall my operating system when migrating to an SSD?
    It is recommended to do a fresh install of your operating system on the new SSD to ensure optimal performance. However, cloning your existing hard drive is also an option if you need to preserve all your existing data and programs.

  • Ultimate Guide: Safeguarding Your Sensitive Data with SSD Encryption

    Ultimate Guide: Safeguarding Your Sensitive Data with SSD Encryption

    Have you ever stopped to consider the security of the data stored on your SSD? With the increasing amount of sensitive information we store on our devices, adding an extra layer of protection has become more important than ever. One effective way to do this is by adding encryption to your SSD. Not only can encryption protect your data in case of theft or loss, but it can also prevent unauthorized access and ensure your privacy.

    In this blog post, we’ll dive into what exactly SSD encryption is, how it works, and the benefits it can bring to your overall security. So grab a cup of coffee and let’s get started!

    Understanding Encryption

    If you’re wondering how to add encryption to your SSD, it’s not as difficult as it may sound. Most modern SSDs come with built-in encryption capabilities that can easily be enabled in the system settings. Encryption adds an extra layer of security to your data by scrambling the information on your drive so that it can only be accessed with a password or encryption key.

    This makes it almost impossible for hackers or thieves to access your data even if they physically have your drive. Adding encryption to your SSD is a great way to ensure that your sensitive information is kept safe and secure. So, make sure to check your system settings for encryption options and enable them to give yourself peace of mind.

    What is encrypting data?

    Encryption is a critical process that aims to protect digital data from unauthorized access. It involves transforming plain text into cipher text by using complex algorithms and cryptographic keys. Essentially, encryption ensures that only authorized users can read or access sensitive data by making it almost impossible for third parties to intercept or understand the original text.

    Think of encryption as a sort of digital lock, where the key to unlocking the encrypted data is only given to those who are authorized to access it. Just like how a lock on a door can keep belongings safe, encryption of data keeps personal information, sensitive documents, and other precious electronic assets safe from hackers and cybercriminals. In a world where digital information security is increasingly important, understanding encryption enables us to keep our data secure and protected.

    how can i add encryption to my ssd

    Types of encryption available for SSDs

    Encryption is a vital aspect of digital data protection, and it’s no different when it comes to SSDs. There are several types of encryption available for SSDs, each with its own unique strengths and weaknesses. One such form of encryption is Software-Based Encryption, which uses an algorithm to encrypt data before it’s saved onto the SSD.

    This type of encryption is straightforward to implement, but it can sometimes impact performance because it uses system resources to encrypt and decrypt data. Alternatively, Self-Encrypting Drives (SEDs) are hardware-based, and encryption is handled by the drive itself, making it less taxing on system performance. SEDs use encryption keys that are stored on the drive, and if the drive is removed or stolen, the encryption key will become inaccessible, keeping the data secure.

    Another type of encryption is Opal, developed by the Trusted Computing Group, which also uses hardware-based encryption that’s similar to SEDs. Still, it also allows network administrators to manage encrypted data remotely. Ultimately, the type of encryption used should be chosen based on the security needs, performance requirements, and manageability needs of the organization or individual.

    Preparing your SSD for encryption

    If you’re looking to add encryption to your SSD, there are some crucial steps you need to take to prepare your drive first. First and foremost, it’s vital that you back up all essential data before beginning the encryption process. You can either transfer your files to an external hard drive or use cloud storage.

    Once your data is secure, you can begin encrypting your SSD using built-in encryption features such as BitLocker or third-party software. Before encryption, you’ll also need to ensure that your SSD’s firmware is up to date, as outdated firmware can cause compatibility issues during the encryption process. Additionally, make sure your computer is running on the latest operating system version and has no security vulnerabilities.

    Taking these steps will help ensure a successful encryption process and safeguard your data from potential security threats.

    Ensuring your SSD is compatible for encryption

    Before encrypting your SSD, it’s crucial to ensure that it’s compatible with encryption. Not all SSDs are created equal, and some may not be able to handle the data encryption process. To prepare your SSD for encryption, it’s essential to check the specifications of your drive.

    Look for the latest firmware updates for your SSD as these updates often include encryption support. Additionally, check if the advanced encryption standard (AES) hardware encryption is supported by your drive. Most modern SSDs come with AES as standard but make sure to confirm this in the specifications.

    If your SSD doesn’t support AES, consider upgrading to a more recent model that does. Finally, always back up your data before encrypting your SSD as the encryption process may result in data loss if anything goes wrong. By ensuring your SSD is compatible with encryption, you can protect your sensitive data from prying eyes.

    Creating a backup before beginning the encryption process

    When it comes to preparing your SSD for encryption, one of the most important steps is to create a backup of all your data before beginning the process. This backup will be crucial in case anything goes wrong during the encryption process. Losing important data can be a nightmare, so it’s better to be safe than sorry.

    Once you have created a backup of all your data, you can begin the encryption process with greater peace of mind. You can consider encryption as a lock that keeps your data inaccessible to unauthorized users. When an SSD is encrypted, all the data on the drive is transformed into a format that is unreadable without a special key.

    This makes it harder for hackers or anyone who gains unauthorized access to the drive to read your data. However, encryption is not the only step that you need to take to ensure that your data is safe. You also need to create a backup of all your data, which will come in handy in case anything goes wrong during the encryption process.

    This way, even if the encryption process fails, you would still have your data available. Overall, creating a backup of all your data is a crucial step that you cannot afford to skip when preparing your SSD for encryption. It is best to be safe rather than sorry, and this precautionary step will give you peace of mind knowing that your valuable data is safe and secure.

    Encrypting your SSD

    If you’re wondering how you can add encryption to your SSD, there are a few options to consider. One popular method is to use built-in encryption tools that come with your operating system, such as BitLocker for Windows or FileVault for macOS. These tools can encrypt your entire drive, so all of your data will remain safe and secure even if your computer is lost or stolen.

    Another option is to use third-party encryption software, such as VeraCrypt or TrueCrypt. These programs offer additional features and customization options that may be useful for more advanced users. Whichever method you choose, it’s important to remember that encryption is a powerful tool, but it’s only effective if you use it consistently and follow best practices for data security.

    So if you have sensitive data on your SSD, it’s worth taking the time to add encryption to your setup.

    Choosing an encryption software

    When it comes to choosing the right encryption software for your SSD, there are a few key things to keep in mind. First and foremost, you’ll want to pay attention to the software’s level of security. A good encryption program should use strong, uncrackable encryption algorithms to ensure that your files remain safe from prying eyes.

    Additionally, you’ll want to consider factors such as ease of use, compatibility with your operating system, and any additional features offered by the software, such as automatic backups or secure cloud storage options. Ultimately, the right encryption software will depend on your individual needs and preferences, so be sure to do your research and choose a program that you feel comfortable with. With the right software in place, you can rest easy knowing that your confidential data is protected and secure.

    Step-by-step guide to encrypting your SSD

    If you’ve purchased a new SSD for your computer, the first step you should take is to encrypt it to prevent unauthorized access to your data. Fortunately, encrypting your SSD is easier than you might think. This step-by-step guide will walk you through the process of encrypting your SSD.

    First, you’ll need to download and install encryption software such as BitLocker or VeraCrypt. Next, you’ll need to set up a password or passphrase to unlock the SSD. Finally, you can choose the type of encryption you want to use, such as AES-256 or XTS-AES.

    Once you’ve completed these steps, your SSD will be encrypted, and your data will be protected from prying eyes. By encrypting your SSD, you can rest assured that your sensitive data is safe and secure, even if your computer is stolen or hacked.

    Benefits of encrypting your SSD

    If you’re wondering “how can I add encryption to my SSD,” you’re in luck because encrypting your SSD has numerous benefits. First and foremost, encrypting your SSD ensures that in the event that your laptop or computer is stolen, the thief won’t have access to your sensitive data. This is because only someone who has the encryption key will be able to unlock your SSD and access its data.

    Additionally, encrypting your SSD provides protection against malware attacks. Hackers won’t be able to infiltrate your computer and access your data if it’s encrypted. Lastly, encrypting your SSD is often required for compliance with privacy laws and regulations, both in the business world and in certain industries.

    By encrypting your SSD, you can have peace of mind that your data is secure and protected from potential threats.

    Protecting your data from theft and loss

    Encrypting your SSD is one of the best ways to protect your data from theft and loss. By using encryption, you are essentially converting your data into a code that can only be read by someone who has the proper key or password. This adds an extra layer of security to your data that can be especially important if you are storing sensitive information, such as financial records or personal data.

    If your computer or device is lost or stolen, having an encrypted SSD can make it much harder for a thief to access your data. Plus, encryption is relatively easy to implement and doesn’t usually require any additional hardware or software. So if you want to keep your data safe, encrypting your SSD is definitely a step in the right direction.

    Compliance with data protection regulations

    When it comes to protecting your sensitive data, complying with data protection regulations is a must. One way to ensure your compliance and keep your data safe is by encrypting your SSD. By encrypting your SSD, you limit access to your data, making it virtually impossible for unauthorized parties to access your data even if they physically have your device.

    This adds an extra layer of security, especially for businesses that store confidential client information. Encryption also protects your data from accidental deletion or hardware failures, thus reducing the risk of data loss. Overall, encrypting your SSD offers peace of mind knowing that your sensitive data is secure and inaccessible to those who lack the proper authorization.

    Final thoughts and recommendations

    If you’re wondering how you can add encryption to your SSD, there are several options available. One solution is to use software encryption, which encrypts the files on your drive. Another option is to use hardware encryption, which encrypts the entire drive.

    Whichever method you choose, it’s important to ensure that your SSD has built-in encryption features. Some SSDs come with encryption built in, while others may require additional hardware or software to be added. It’s also important to remember that once encryption is activated on your SSD, it cannot be turned off without wiping the drive.

    Overall, adding encryption to your SSD is an important step in protecting your sensitive data and should not be overlooked. So, take the time to research the different options available and choose the method that best fits your needs.

    Conclusion

    In conclusion, adding encryption to your SSD is as crucial as locking the doors of your house before leaving for a vacation. With encryption, you can protect your valuable data from any prying eyes and ensure it stays secure even if your SSD falls into the wrong hands. So, go ahead and encrypt your SSD, and sleep soundly knowing your data is safe and sound.

    Think of it as a digital fortress that only you hold the key to.”

    FAQs

    What is SSD encryption and why is it important for data security?
    SSD encryption is a security feature that protects the data stored on the SSD by encrypting it, making it unreadable without a decryption key. It is important for data security as it helps to prevent unauthorized access to sensitive information in case the SSD falls into the wrong hands.

    What are the different types of SSD encryption?
    There are two types of SSD encryption: software encryption and hardware encryption. Software encryption is performed by the operating system and protects the data at the file level, while hardware encryption is performed by the SSD itself and protects the data at the sector level.

    How can I check if my SSD is encrypted?
    You can check whether your SSD is encrypted by checking the manufacturer’s website, documentation, or product page. Alternatively, you can use a third-party tool like CrystalDiskInfo or Hard Disk Sentinel to check the SSD’s security features.

    How can I add encryption to my SSD?
    You can add encryption to your SSD by using software encryption or hardware encryption. For software encryption, you can use tools like BitLocker for Windows or FileVault for Mac OS. For hardware encryption, you can use an SSD with built-in encryption or a self-encrypting drive that supports security features like OPAL. It is important to note that hardware encryption is generally considered more secure than software encryption.

  • Effortlessly Transfer Windows 7 to SSD: Expert Guide for Quick and Effective Solution

    Effortlessly Transfer Windows 7 to SSD: Expert Guide for Quick and Effective Solution

    If you’re tired of waiting for your computer to start up or load programs, moving Windows 7 to an SSD is a great option. Not only will it significantly speed up your computer, but it will also extend the life of your hard drive. However, for those who haven’t done it before, the process may seem daunting.

    That’s why we’ve created this beginner’s guide to help you along the way. Moving Windows 7 to an SSD involves a few steps, but don’t worry. We’ll break it down for you in a way that’s easy to understand and follow.

    We’ll cover everything from preparing your computer for the switch to cloning your hard drive onto the SSD. By the end of this guide, you’ll have a faster computer that’s ready to handle all of your needs. So, let’s get started!

    Backup Your Files

    If you’re looking to move your Windows 7 operating system to a new SSD, the first step is to backup all your important files and data. This is essential to avoid losing any data during the transfer process. There are a few different ways to backup your files, but the easiest and most effective way is to use an external hard drive.

    Simply plug in the external drive, select which files you want to backup, and let the backup process run. This may take a while depending on how large your files are, so be patient. Once the backup is complete, you can proceed with the transfer process.

    Overall, it’s important to make sure you backup your files before attempting to move your operating system to a new drive to avoid any potential data loss.

    Copy Important Data to External Hard Drive

    Backing up your important files is crucial to ensuring you don’t lose anything precious in the event of a computer crash or other catastrophe. One of the best ways to do this is by copying your important data to an external hard drive. This will serve as an extra layer of protection and allow you to easily transfer your files to a new computer if needed.

    When choosing an external hard drive, make sure you opt for one with enough storage space to accommodate all your files. Whether it’s family photos, important work documents, or sentimental videos, you don’t want to risk losing anything that can’t be replaced. By regularly backing up your files, you can have peace of mind knowing your data is protected and secure.

    how do i move windows 7 to my ssd

    Create a System Image Backup of Your Old Drive

    Creating a system image backup is an essential step in ensuring you don’t lose any of your important files when switching to a new hard drive. To get started, you’ll want to make sure you have an external hard drive with enough storage space to back up your entire old drive. Once you have that, you can use the built-in backup software on your computer to create a system image backup.

    This process will create an exact copy of your old hard drive, including all your files, settings, and applications. This way, when you switch to your new drive, you can easily transfer everything over without any data loss. So, don’t forget to create a system image backup before replacing your old hard drive.

    It’s a simple step that could save you a lot of time and headache in the long run.

    Prepare Your SSD

    So, you’ve decided to upgrade to an SSD and want to move your Windows 7 operating system over. The first step is to prepare your SSD for the transition. You need to ensure that it’s properly formatted, partitioned, and optimized for Windows

    Begin by backing up all of your important data, as you’ll need to wipe your SSD clean. Once that’s done, connect your SSD to your computer and initialize it using the Disk Management tool in Windows. Make sure to format it to NTFS and create a primary partition.

    You can then optimize the SSD by disabling certain Windows 7 features, such as Superfetch and Prefetch, and enabling TRIM support. With your SSD all set up, you’re ready to move your Windows 7 operating system over. This can be done using disk imaging software, such as Clonezilla or Macrium Reflect.

    Simply create a disk image of your Windows 7 system partition and restore it to your newly prepared SSD. Don’t forget to set your SSD as the boot device in your BIOS settings, and you’re good to go!

    Connect Your SSD to Your Computer

    When it comes to connecting your SSD to your computer, the first step is to prepare your device. Start by making sure your computer supports the type of SSD you have. Check if it has a compatible interface and enough space to accommodate the drive.

    You may also need to back up your files and prepare a bootable drive if you plan to install an operating system on your new SSD. Additionally, you need to be cautious when handling your SSD to avoid damaging its components. Always wear an anti-static wrist strap and handle it gently and carefully to prevent electrostatic discharge and physical damage.

    By taking these steps to prepare your SSD correctly, you’ll be ready to connect it to your computer successfully.

    Initialize Your SSD in Disk Management

    To get your SSD up and running, you need to initialize it using Disk Management in Windows. This process involves preparing your SSD by wiping it clean and formatting it to ensure that it’s compatible with your system. First, ensure that your SSD is connected to your computer and then open Disk Management.

    Find the unallocated space on your SSD and right-click on it to select the “New Simple Volume” option. You’ll be prompted to choose the size of your partition, assign a drive letter, and format it. Choose NTFS as your file system and then follow the prompts to complete the process.

    This will initialize your SSD and make it ready for use. It’s important to note that initializing your SSD will erase all the data on it, so make sure to back up any important files before beginning. By taking these initial steps, you’ll be well on your way to unlocking the full potential of your new SSD.

    Clone Your Old Drive to SSD

    If you’re looking to speed up your computer and add some new life to it, upgrading to a solid state drive (SSD) is a smart move. However, if you’re running Windows 7, you might be wondering how to move it to your new SSD. The good news is that you can clone your entire old drive to your new SSD, including your operating system, programs, and files.

    This means that you won’t have to reinstall everything from scratch. Using a disk cloning software like EaseUS Todo Backup or Acronis True Image can help with this process. Simply connect your new SSD to your computer, install the cloning software, and follow the prompts to transfer everything from your old drive to your new SSD.

    Once the process is complete, you can disconnect your old drive and start enjoying the speed and performance of your new SSD. It’s that easy! So, why wait? Move your Windows 7 to your new SSD today and enjoy a faster, smoother computing experience.

    Download and Install a Disk Cloning Software

    When upgrading to a new solid-state drive (SSD), it’s essential to clone your old drive to preserve all of your data and settings. To do this, you’ll need to download and install a disk cloning software. There are many options available online, but make sure to choose a reputable one.

    Some popular choices include Clonezilla, EaseUS Todo Backup, and Macrium Reflect. Once you have the software, connect both your old drive and new SSD to your computer. Then, follow the software’s instructions and select your old drive as the source and the SSD as the destination.

    This process may take some time, but once it’s completed, your new SSD should be an exact replica of your old drive, complete with all your files, programs, and operating system. The primary keyword used organically throughout this paragraph is “clone your old drive to SSD.”

    Follow the Instructions to Clone Your Old Drive to SSD

    To improve your computer’s performance, you may consider cloning your old drive to an SSD. This process involves copying all the data from your old drive to the SSD, including the operating system, files, and programs, so your computer can boot from the new drive. To clone your old drive to SSD, you’ll need a cloning software tool like Acronis True Image or EaseUS Todo Backup, a compatible SSD, and a USB-to-SATA cable to connect the new drive to your computer.

    First, you’ll need to create a clone image of your old drive and save it on an external hard drive or USB flash drive. Then, you can connect the SSD, select the clone image, and start the cloning process. Once the cloning is complete, you can replace the old drive with the new SSD and enjoy a faster computer with more storage space.

    Don’t forget to check if your computer’s BIOS settings are set up to boot from the new SSD. Cloning your old drive to SSD is an affordable way to upgrade your computer’s performance without buying a new one.

    Set the Boot Order and Boot from SSD

    If you’re wondering how to move Windows 7 to your SSD, it’s actually a fairly simple process. The first step involves setting the boot order in your computer’s BIOS. This is important because it ensures that your computer boots from the SSD rather than the old hard drive.

    To do this, you’ll need to restart your computer and enter the BIOS settings by pressing the appropriate key (usually F2 or Delete). Once you’re in the BIOS, locate the boot order settings and move the SSD to the top of the list. Save your changes and exit the BIOS.

    From there, you should be able to boot your computer from the SSD. If you’re having trouble, try disconnecting the old hard drive temporarily to force the computer to boot from the SSD. With these steps, you should be able to successfully move Windows 7 to your SSD and experience the benefits of faster boot-up times and improved performance.

    Enter Your Computer’s BIOS

    If you’ve installed a new SSD in your computer, you’ll need to set the boot order to prioritize it so that your system will boot from it. To do this, you’ll need to enter your computer’s BIOS. The BIOS is a program that runs when your computer starts up, before your operating system takes over.

    To enter the BIOS, you’ll need to hit a key or combination of keys during startup, depending on your computer’s manufacturer. Common keys include F2, F10, Del, and Esc. Check your computer’s manual for specific instructions.

    Once you’re in the BIOS, look for the boot order settings. This will allow you to prioritize your SSD over other drives. Save your changes and exit the BIOS.

    From now on, your computer will boot from your SSD. This will result in faster boot times, and overall increased performance.

    Change the Boot Order to Boot from SSD

    If you’ve recently added an SSD to your computer, you’ll want to make sure that it’s set as the primary boot device in your BIOS settings. This will ensure that your system boots from the SSD instead of the old, slower hard drive. To do this, you’ll need to enter your BIOS settings (usually by pressing Del or F2 during startup), and navigate to the Boot Order menu.

    From there, you can set the SSD as the first boot device, and the HDD (if you’re keeping it installed) as the second boot device. Once you’ve made this change, your computer will automatically boot from the SSD, giving you faster startup times and faster performance overall. Just be sure to save your changes before exiting the BIOS menu!

    Enjoy the Speed Boost of Your New SSD

    If you’re wondering how to move Windows 7 to your new SSD, don’t worry – it’s easier than you might think. First, you need to make sure that your SSD is properly connected to your computer and recognized by your system. Then, you can use Windows built-in backup and recovery tool to create a system image and save it to an external hard drive or another backup device.

    Once you’ve done that, you can restore the system image onto your SSD by booting from the recovery media and selecting the restore option. When you’re finished, your system should be just like it was before, but much faster thanks to the increased speed of your new SSD. With faster boot times, shorter load times, and improved overall performance, you’ll wonder why you didn’t upgrade to an SSD sooner.

    So go ahead, make the switch, and enjoy the speed boost of your new SSD today!

    Conclusion

    In conclusion, moving Windows 7 to your SSD isn’t rocket science, but it does require some technical know-how. It’s like playing a game of Tetris: you have to fit the pieces (files, applications, and operating system) in the most efficient way possible. And just like Tetris, it can be a bit frustrating at times, but the payoff is worth it when you see how much faster your computer runs.

    So grab your hardhat and tool belt, because you’re about to become the DIY master of moving operating systems!”

    FAQs

    What is the benefit of moving Windows 7 to an SSD?
    Moving Windows 7 to an SSD improves overall system performance by decreasing boot and load times.

    Can I clone my current Windows 7 installation onto the SSD?
    Yes, you can use cloning software like EaseUS Todo Backup or Macrium Reflect to clone your current installation onto the SSD.

    Do I need to reinstall Windows 7 on the SSD?
    No, you do not need to reinstall Windows 7 on the SSD if you use cloning software to transfer your current installation.

    How do I physically install the SSD into my computer?
    You will need to open the computer case, locate an available drive bay, and mount the SSD using screws or brackets.

    Do I need to change any settings in the BIOS before moving Windows 7 to the SSD?
    Yes, you may need to change the boot order in the BIOS to ensure that the SSD is the primary boot drive.

  • Unleashing Lightning Speed: Your Ultimate Guide on How to Transfer HDD to SSD with Ease

    If you’re looking to boost your computer’s speed and performance, transferring your hard disk drive (HDD) to a solid-state drive (SSD) is a great option. However, the process of transferring data from one storage device to another can be confusing and overwhelming. But don’t worry, we’ve got you covered! In this comprehensive guide, we’ll walk you through the steps of transferring your HDD to SSD.

    So, say goodbye to slow boot times and hello to lightning-fast performance!

    Understanding HDD and SSD

    So, you’re thinking of upgrading from your HDD to an SSD, but you’re not sure how to transfer your files? No worries, it’s a pretty straightforward process. First things first, make sure you have enough storage on your new SSD for all your files. Next, you can either clone your HDD onto your SSD using software like Macrium Reflect or EaseUS Todo Backup, or you can do a fresh install of your operating system and manually transfer your files over.

    Keep in mind that if you choose to clone your HDD, you’ll need to delete any unnecessary files from it beforehand to ensure it fits on your new SSD. Another important thing to note is that you’ll need to change your boot settings to make sure your computer boots from the SSD instead of the HDD. Overall, transferring your files from your HDD to an SSD is a simple process that can significantly improve your computer’s performance.

    What is HDD?

    HDD stands for Hard Disk Drive and it is a type of internal storage device found in most laptops and desktop computers. This device uses magnetism to store and retrieve data. The HDD consists of circular platters that rotate at high speeds while a magnetic head writes and reads data on the surface of these platters.

    The data is stored on these platters in sectors and tracks which can be accessed by the read head. HDDs have been the traditional storage device found in most computers due to their large storage capacity and lower cost per gigabyte compared to other storage options. However, HDDs are subject to mechanical failures and are slower in performance compared to SSDs.

    As technology advances, SSDs are becoming more and more prevalent due to their faster performance and greater reliability. Nevertheless, HDDs remain a viable option for those who need large storage on a budget.

    how do i transfer my hdd to ssd

    What is SSD?

    SSD (Solid State Drive) If you’re someone who’s not really tech-savvy, terms like HDD and SSD may confuse and overwhelm you. So, let’s break it down. HDD stands for Hard Disk Drive and SSD stands for Solid State Drive.

    Both of them are storage devices that are used in computers to store data, files, and operating systems. The main difference between them lies in the technology they use to store this data. HDDs use spinning disks with magnetic coatings to write and store data, while SSDs use flash memory chips.

    This means that HDDs are slower and less durable compared to SSDs, which are faster and more reliable. Think of it this way: HDDs are like vinyl records that require a needle to read the information, while SSDs are like USB drives that can quickly and easily transfer data. Overall, SSDs are the way to go if you want a faster and more reliable computer.

    Preparing for Transfer

    If you’re upgrading your computer’s storage from an HDD to an SSD, congratulations! Not only will you experience faster boot times and load speeds, but you’ll also enjoy better reliability and durability. To transfer your data, you’ll need to start by backing up your important files, programs, and settings. You can either use an external hard drive or cloud storage to do this.

    Then, you’ll need to use a cloning software to copy your entire HDD onto the new SSD. Some SSDs come with this software included, but you may need to download a free program such as EaseUS Todo Backup or Macrium Reflect. Once the cloning is complete, shut down your computer and remove the HDD.

    Then, install the SSD in its place and turn your computer back on. Voila! You should now have a faster and more efficient storage system. Remember to ensure your data has transferred successfully before completely wiping your old HDD.

    With a little preparation, transferring your HDD to an SSD can be a smooth and easy process.

    Back Up Your Data

    When transferring your data from one device to another, it’s important to prepare by backing up your important files beforehand. It’s never a good idea to rely solely on the transfer process to ensure that your data is safe. Backing up your files can be done in a variety of ways, such as using an external hard drive or cloud storage.

    By doing so, you can ensure that your data is safe and secure, even if something goes wrong during the transfer process. Think of it as a safety net for your important files – just like wearing a seatbelt while driving. It may not seem necessary in the moment, but it can save you a lot of trouble in the long run.

    So take the time to back up your data before transferring and enjoy peace of mind knowing that your precious files are protected.

    Choose the Appropriate SSD

    When it comes to transferring data from an old storage device to a new Solid State Drive (SSD), it’s essential to choose the appropriate SSD that fits your needs. There are many different types of SSDs available in the market, so it’s crucial to understand the specifications of each and choose the one that best suits your demands. Factors such as storage capacity, read and write speeds, and price should be taken into consideration.

    It’s also important to check the interface compatibility with your computer ports. Before transferring data to a new SSD, you must prepare the drive by formatting it to make it compatible with your system files. This step ensures proper functioning of the new SSD.

    It’s advisable to consult with professionals if you are unsure of which SSD would be the best fit for your needs. Choosing the right SSD can significantly enhance your computer’s overall performance by reducing the time taken to load booting files, applications, and transferring data quickly.

    Tools You Need

    When preparing for a domain transfer, there are some essential tools you’ll need to make the process a success. Firstly, you’ll require access to your current domain registrar account, including login credentials and authorization codes. These will be needed to start the domain transfer process, so ensure you have them at hand before you begin.

    You should also have your new registrar account set up and ready to go, complete with the correct information and payment details. Additionally, it’s essential to have a backup of your website and all relevant data in case any mishaps occur during the transfer process. This will also come in handy when testing your website on the new server before making it live.

    By having all these tools ready and prepared for your domain transfer, you can ensure the process runs smoothly and efficiently.

    Transferring Data from HDD to SSD

    If you’re wondering how to transfer your data from an HDD to an SSD, fear not! The process is relatively simple. The first step is to connect your SSD to your computer, either by using an external hard drive enclosure or by connecting it directly to your PC. Once your SSD is connected, you can clone your existing HDD using a free software such as EaseUS Todo Backup or Macrium Reflect.

    These tools will create an exact copy of your HDD, including your operating system, applications, and personal files. Once the cloning process is complete, simply swap out your old HDD with the new SSD and voila! Your computer should now boot up faster and run more smoothly. Just remember to back up your data beforehand and to properly dispose of your old HDD if you don’t plan on using it anymore.

    Happy upgrading!

    Clone Your HDD to SSD

    Transferring data from HDD to SSD can sound daunting, but it’s actually a straightforward process with the right tools. Cloning your HDD to SSD is the best way to transfer all your files, programs, and settings to your new drive without having to start from scratch. Using a cloning software such as Macrium Reflect or Acronis True Image, you can create an exact replica of your HDD and transfer it to your SSD.

    This method saves you time and effort, as you won’t have to reinstall Windows or any of your programs. Your new SSD will have all the data you need in the same configuration as your old HDD, just faster. However, keep in mind that your SSD must be large enough to hold all the data from your HDD.

    With a successful cloning, you’ll have an upgraded system that’s faster and more efficient, ready to take on any task with ease.

    Manual Transfer of Data

    Transferring data from your old hard disk drive (HDD) to a new solid-state drive (SSD) manually can be a bit tricky, but it’s definitely doable. First off, you’ll need to connect both drives to your computer – you can do this by using a USB-to-SATA adapter or by installing the SSD in your computer and leaving the HDD in its original slot. Once both drives are connected, you’ll need to use a data transfer software such as Macrium Reflect or EaseUS Todo Backup to copy everything from the HDD onto the SSD.

    Make sure you have enough storage space on the SSD to accommodate all the data you want to transfer. You can also manually transfer specific files and folders by dragging and dropping them from the HDD onto the SSD, but this can be time-consuming if you have a lot of data to transfer. Overall, manual transfer of data from HDD to SSD requires a bit of technical know-how, but it’s a great way to upgrade your computer’s storage without losing any of your precious files and data.

    Post-Transfer Steps

    So, you’ve successfully transferred your old HDD to a new SSD! Congratulations on making the switch to faster and more reliable storage. But before you call it a day, there are a few post-transfer steps you should take to ensure your new SSD runs smoothly. First, make sure your BIOS settings are correctly configured to recognize your new SSD as the boot drive.

    This will ensure your computer boots up quickly and efficiently. Next, update your drivers and firmware to the latest versions available. This will help you take full advantage of your new SSD’s performance capabilities.

    Lastly, consider enabling TRIM, which is a setting that helps your SSD maintain its optimal performance over time. With these steps taken care of, you can sit back and enjoy the speed and reliability of your new SSD for years to come.

    Install SSD in Your Computer

    Once you’ve successfully installed an SSD in your computer, it’s essential to finalize some post-transfer steps to ensure your system runs smoothly. Firstly, make sure that your SSD is recognized in the BIOS. To do this, simply restart your computer and access the BIOS by pressing the applicable key.

    Once in the BIOS, check that your new SSD appears under the storage devices section. If it doesn’t, try reconnecting the cables or double-checking that you’ve installed it correctly. Secondly, ensure that your operating system is installed and updated on your new SSD – this can be done by cloning the drive or doing a fresh install.

    Lastly, don’t forget to secure erase your old hard drive to ensure all data is removed before disposing of it. Following these steps will make sure that your SSD runs optimized and your computer performs faster and more efficiently.

    Update Drivers and Software

    After transferring your files to a new computer, there are a few important steps you should take to ensure everything runs smoothly. One of the most crucial steps is to update all your drivers and software. Outdated drivers or software can cause problems such as crashes, glitches or even security vulnerabilities.

    Luckily, updating your drivers and software is a relatively simple task. You can use the built-in software update tools in your operating system, or you can download the latest updates from the manufacturer’s website. It’s essential to keep your drivers and software up to date to ensure your computer is running efficiently and that you’re protected from any potential security threats.

    By taking the time to update your drivers and software, you can ensure that you’re getting the most out of your new computer.

    Conclusion

    In conclusion, transferring your HDD to an SSD is like upgrading from a horse and buggy to a Tesla. You’ll experience lightning-fast speeds, increased storage capacity, and improved overall performance. So, don’t hesitate to make the switch and join the modern age of computing!”

    FAQs

    What is the benefit of transferring HDD to SSD?
    Transferring from HDD to SSD can greatly improve the speed and performance of your computer, allowing for faster boot times, improved application speed, and overall better system responsiveness.

    How do I clone my HDD to SSD?
    There are a variety of software options available for cloning your HDD to SSD. Some popular options include EaseUS Todo Backup, Acronis True Image, and Samsung Data Migration.

    Do I need to reinstall my operating system after transferring from HDD to SSD?
    While it is not necessary to reinstall your operating system, it is recommended in order to ensure optimal system performance and to avoid any potential compatibility issues.

    What size SSD should I get for transferring from a larger HDD?
    A good rule of thumb is to get an SSD that is at least the same size as your current HDD, but it is also possible to go with a smaller size if you are willing to clean up and delete unnecessary files and programs.

  • Upgrade your Windows 10 experience: Ultimate guide on how to clone Windows 10 to SSD drive

    Upgrade your Windows 10 experience: Ultimate guide on how to clone Windows 10 to SSD drive

    So you’ve finally decided to upgrade your computer’s hard drive to a speedy, high-performance SSD. Congratulations! Upgrading to an SSD drive can significantly improve your computer’s performance, giving you speedy boot times and faster application launch times. However, migrating your operating system and all your data from your old hard drive to your new SSD can be quite a daunting task.

    But don’t worry; we’re here to help. In this blog post, we’ll be showing you the step-by-step process of how to clone Windows 10 to your new SSD drive. No more reinstalling your operating system or backing up and restoring files.

    With these simple steps, you can have your computer up and running on your new SSD drive in no time. So, let’s dive right in!

    Check SSD Compatibility

    If you’re wondering how to clone Windows 10 to your SSD drive, there are a few things that you should consider before getting started. Firstly, it’s important to make sure that your SSD is compatible with your system. Check the specifications for your computer or motherboard to ensure that it supports NVMe or SATA III.

    Additionally, you’ll want to ensure that your SSD has enough space to accommodate your current operating system and files. Once you’ve confirmed that your SSD is compatible, you can proceed with cloning your Windows 10 operating system. One helpful tool to use is the Windows Migration Assistant, which allows you to transfer your files and settings from your old hard drive to your new SSD in a few simple steps.

    With these considerations in mind, you’ll be on your way to a faster and more efficient computer with your new SSD drive.

    Confirm SSD size and interface match

    When upgrading or replacing your SSD, it’s crucial to make sure the new one is compatible with your system. One of the most important things to check is the size and interface of the SSD. The size should match the slot in your computer where the SSD will be installed.

    For example, if your current SSD is a 5-inch model, then make sure to get another 5-inch SSD.

    The interface is also essential, as there are different types, such as SATA, NVMe, and PCIe. Check which interface your system supports before purchasing a new SSD. If the interface doesn’t match, then the new SSD won’t work properly, and you’ll need to return it and start the search over again.

    Ensuring compatibility beforehand can save you time, money, and hassle in the long run. Remember, always double-check the size and the interface before purchasing a new SSD.

    how do you clone windows 10 to my ssd drive

    Backup Data

    So, you want to know how to clone Windows 10 to your SSD drive? Well, the first thing you need to do is make sure you have a backup of all your important data. It’s always a good idea to have a backup, just in case something goes wrong during the cloning process. There are a few different ways to backup your data, but one of the easiest is to use the built-in Windows Backup and Restore feature.

    Simply go to the Control Panel, click on System and Security, and then Backup and Restore. From there, you can choose to backup your data to an external hard drive or even to a network location. Once you have your backup, you can move on to the cloning process.

    There are a number of free tools available online that can help you clone your Windows 10 installation to your SSD drive. One popular option is Macrium Reflect, which allows you to create a full image of your Windows installation and then restore it to your SSD drive. Just make sure you follow the instructions carefully to ensure a successful cloning process.

    With a little patience and a backup, you’ll have Windows 10 running on your new SSD drive in no time!

    Backup important files before starting clone process

    Backing up your data is always a good idea, especially before starting a clone process. No matter how reliable the cloning software may be, it’s never a guarantee that everything will go smoothly. That’s why it’s essential to have all your important files and documents backed up in a separate location.

    You can never be too careful when it comes to protecting your data from accidental deletion or system failures. When backing up your files, make sure you have enough storage capacity and that you back up everything you need, including your operating system files, personal files, and any installed programs. You can use an external hard drive, cloud storage, or any other method of backup that you feel comfortable with.

    Just remember to keep your backup current and updated regularly to avoid losing any new data. In conclusion, backing up your data is a vital step that shouldn’t be overlooked before starting a clone process. It’s a small investment of time and resources that could save you from potentially devastating consequences.

    Don’t leave the safety and security of your important files to chance. Take the extra step to back up your data, and you can rest assured that you’ve done everything possible to protect it.

    Choose Cloning Software

    If you’re asking, “how do I clone Windows 10 to my SSD drive?” then you’re in luck! Cloning software is the answer to all your problems. But with so many options available, how do you choose the right one? Well, it all depends on what you’re looking for. If you want something simple and easy to use, then go for Macrium Reflect or EaseUS Todo Backup.

    They both have a user-friendly interface and offer step-by-step instructions on how to clone your system. On the other hand, if you want something more advanced, you may want to try Acronis True Image or Norton Ghost. They offer more features and options for customization, but can be a bit more complicated for novice users.

    In either case, make sure to choose a software that is compatible with your operating system and SSD drive. Once you’ve chosen the right cloning software, the process of cloning your Windows 10 system to your SSD drive should be a breeze.

    Select software such as Macrium Reflect or Clonezilla

    When it comes to cloning software, it can be overwhelming to choose the right one for your needs. That’s why it’s important to consider your specific requirements, such as system compatibility and features. Two popular options to consider are Macrium Reflect and Clonezilla.

    Macrium Reflect is a user-friendly cloning software that is compatible with both Windows and Mac operating systems. It offers a wide range of features, including disk imaging and cloning, file shredding, and incremental backups. Macrium Reflect also offers a helpful rescue media feature, which allows for easy system recovery in case of any issues.

    Alternatively, Clonezilla is an open-source cloning software that is compatible with Windows, Linux, and Mac. While it may not be as user-friendly as Macrium Reflect, it offers powerful features such as disk imaging and cloning, supporting multiple filesystems, and server deployment. Clonezilla allows for flexible customization and scalability, making it a great option for IT professionals or power users.

    Ultimately, the decision between Macrium Reflect and Clonezilla will depend on your specific needs and level of expertise. If you are looking for a user-friendly option with a wide range of features, Macrium Reflect is a great choice. If customization and scalability are key factors, Clonezilla may be the better option.

    Regardless of which software you choose, cloning your system is an important task for ensuring data backups and system redundancy.

    Create Bootable Media

    If you want to clone Windows 10 to your SSD drive, the first step is to create bootable media. This can be done using a USB drive or a DVD, depending on your preference. To create a bootable USB drive, you can use tools like Rufus or Microsoft’s Media Creation Tool.

    These tools will help you create a bootable USB drive with the Windows installation files. Make sure you have a valid product key before proceeding, as you will need it during the installation process. Once you have created the bootable USB drive, you can insert it into your PC, boot from it, and begin the installation process.

    During the installation, select your SSD drive as the destination for the cloned Windows 10 installation. Once the installation is complete, you should be able to boot into your new Windows installation on your SSD drive. By cloning Windows 10 to your SSD drive, you can enjoy faster boot times and improved performance.

    USB or CD to use cloning software; backup files on bootable media

    When it comes to creating bootable media for backing up your important files or using cloning software, you have a couple of options: USB or CD. Both are reliable ways to create a bootable drive, depending on your preference and the software you’re using. USB drives are known for their speed and convenience, while CDs are a more traditional option that can be useful for those without a USB drive or who prefer a physical disc.

    Regardless of which one you choose, it’s important to make sure that you have enough storage space on the drive for your backup files and that the drive is properly formatted to work with your computer. Once you have your bootable media created, you’ll have peace of mind knowing that your important files are safely backed up and easily accessible in case of any unforeseen disasters.

    Begin Cloning Process

    If you want to clone windows 10 to your SSD drive, the first step is to download a reliable cloning software like Acronis True Image or EaseUS Todo Backup. Once you have installed and launched the software, connect your SSD drive to your computer and select the option to clone your hard drive. Make sure that you have enough space on your SSD drive to contain all of the data on your old hard drive.

    Next, select your old hard drive as the source and your SSD drive as the destination. The cloning process may take a while to complete depending on the amount of data you are transferring. Once the process is complete, your new SSD drive will be an exact copy of your old hard drive, including your operating system and all of your files and programs.

    Now, all you have to do is replace the old hard drive with the new SSD drive and you’re good to go. Cloning your Windows 10 operating system to an SSD drive can significantly improve the performance and speed of your computer, giving you a more efficient and enjoyable computing experience.

    Follow software instructions to clone Windows 10 onto SSD drive

    To begin the process of cloning Windows 10 onto an SSD drive, you need to carefully follow the instructions provided by the software. Before you start, make sure you have all the necessary tools, including the SSD drive, a SATA cable, and the cloning software. Once you have everything ready, connect the SSD drive to your computer and launch the cloning software.

    The software will guide you through the process, which typically involves selecting the source drive (the drive that currently has your Windows 10 installation) and the destination drive (the new SSD drive). You may also have the option to select which files and folders you want to clone, but in most cases, you should select everything to ensure a complete transfer of your operating system, applications, and data. Depending on the size of your hard drive, the cloning process may take a few hours to complete, so make sure you have enough time to let it run uninterrupted.

    Once the process is finished, you can disconnect the original drive and restart your computer from the new SSD drive. With the cloning process complete, you can now enjoy the improved performance and faster boot times that come with an SSD drive.

    Enable SSD Boot

    If you’re looking to upgrade your computer’s storage capacity by replacing that old hard drive with a speedy and reliable SSD, you might be wondering how to clone your Windows 10 operating system to the new drive. But fear not – the process is simpler than you might think. Start by connecting your new SSD to your computer, then download and install cloning software like AOMEI Partition Assistant Standard.

    Follow the software’s prompts to select your original hard drive as the source and your SSD as the destination, and the software will handle the rest. Once the cloning process is complete, disconnect your old hard drive and set your SSD as the primary boot device in your computer’s BIOS settings. With your new SSD now ready to go, you’ll notice a significant increase in boot time and overall performance.

    So go ahead and give your computer the speed boost it deserves with a new SSD and clone your Windows 10 operating system with ease.

    Change BIOS settings to recognize SSD as boot drive

    If you’ve just installed a new SSD on your computer but it’s not being recognized as the boot drive, don’t worry! You simply need to change a few BIOS settings to enable your computer to boot from the new SSD. First, make sure your computer is turned off and then turn it back on and immediately enter the BIOS setup by pressing the appropriate key – usually Delete, F2, or F10 – during boot. Once in the BIOS settings, navigate to the Boot tab and select the new SSD as the primary boot device.

    Make sure to save your changes before exiting the BIOS setup. With these changes made, your computer should now recognize the SSD as the boot drive and you can enjoy faster boot times and improved overall performance. Remember, always consult your motherboard manual for specific instructions on accessing and navigating BIOS settings.

    Test Cloned SSD

    If you’ve upgraded your computer to a new SSD drive and you’re wondering how to clone your Windows 10 operating system onto it, don’t worry because it’s a straightforward process. The easiest way to do this is to use specialized cloning software, which will make an exact copy of your hard drive and transfer it onto your new SSD. You can find a number of free and paid cloning software options online, including EaseUS Todo Backup, Macrium Reflect, and Acronis True Image.

    Before starting the cloning process, you’ll need to make sure your new SSD is connected and recognized by your computer. Once the software is installed, you’ll need to follow the step-by-step instructions, which will guide you through the cloning process. Once the cloning process is complete, you can reboot your computer and select your new SSD as the boot drive to start using your cloned Windows 10 operating system.

    So, go ahead and make that SSD upgrade with the confidence that you can easily clone your Windows 10 operating system onto it using a cloning software.

    Check if Windows 10 functions properly on SSD drive

    If you have recently cloned your Windows 10 operating system to an SSD drive, it’s important to test it to ensure it functions properly. A good way to test the SSD drive is to check the boot time of your computer. If it boots up significantly faster than before, you can be confident that your SSD drive is functioning properly.

    Another way to test the SSD drive is to check the speed at which data is being transferred. You can do this by copying a large file from one location to another and timing how long it takes. If the transfer time is significantly faster than before, you can be assured that your SSD drive is performing optimally.

    However, if you encounter any issues, it may be a good idea to contact technical support for assistance in troubleshooting the problem. Ensuring that your SSD drive is functioning properly will not only improve the overall performance of your computer, but it will also prolong the life of your hard drive.

    Conclusion

    Cloning Windows 10 to an SSD drive is like giving your computer a brand new lease on life. It’s the ultimate technological makeover, transforming your sluggish machine into a lightning-fast powerhouse. With just a few simple steps, you can copy all your settings, programs, and files onto your new SSD drive, making the transition seamless and hassle-free.

    So if you’re looking to inject some serious speed and efficiency into your computing experience, then cloning Windows 10 to an SSD is the way to go. Your computer will thank you, and so will your productivity.”

    FAQs

    What is cloning in terms of Windows 10?
    Cloning is a process of duplicating the entire content of one hard drive to another, including the operating system, installed programs, and data.

    Why do I need to clone Windows 10 to my SSD drive?
    Cloning Windows 10 to an SSD drive can significantly improve your computer’s performance, significantly reducing boot and load times for applications and files.

    What do I need to clone Windows 10 to my SSD drive?
    To clone Windows 10 to your SSD drive, you need a cloning software and a USB drive or an external hard drive to store the cloned data temporarily.

    Which software should I use to clone Windows 10 to my SSD drive?
    There are many cloning software available, but some of the popular ones include Macrium Reflect, Acronis True Image, Clonezilla, or EaseUS ToDo Backup. Choose the one that best suits your needs and budget.

  • Unlock the Power of Your New SSD: A Step-by-Step Guide to Making Windows Recognize It

    Congratulations on purchasing a new SSD! You are ready to upgrade your computer’s storage and performance. However, before you can start using your new SSD, you will need to get your computer to recognize it. It can be frustrating when your computer fails to detect a new SSD, but this blog can help you overcome this issue.

    Installing an SSD into your computer can provide you with various benefits, including faster boot times and application load times. However, getting your computer ready to use the newly installed SSD can be a daunting task. But don’t worry – we’ve got your back.

    In this blog, we will discuss the process of getting your computer to recognize a new SSD. We’ll provide you with some tips to help overcome any potential issues along the way and also touch on some troubleshooting measures. Whether you’re a seasoned computer user or a beginner, this blog will provide you with valuable information on how to make your new SSD work with your computer.

    With our step-by-step guide, you’ll be up and running in no time, ready to experience the benefits of your new storage device. So let’s dive in and learn how to get Windows to recognize a new SSD!

    Check the BIOS Settings

    If you have recently installed a new SSD on your computer and Windows does not recognize it, you may need to check your BIOS settings. The BIOS, or Basic Input/Output System, is responsible for managing hardware devices connected to your computer. To check the BIOS settings, restart your computer and enter the BIOS setup by pressing a specific key (such as F2 or Del) during the boot process.

    Once in the BIOS setup, navigate to the storage settings and ensure that the new SSD is detected and enabled. If it is not detected, try restarting the computer again or checking the connections of the SSD. Additionally, you should also check if your motherboard supports the type of SSD you have installed, as some older motherboards may not support newer SSD technologies.

    By checking your BIOS settings, you can ensure that your new SSD is properly recognized by your computer and Windows, allowing you to take advantage of its increased speed and storage capacity.

    Access the BIOS

    Accessing the BIOS on your computer is essential if you want to check and potentially modify certain settings. The BIOS, which stands for Basic Input/Output System, is where your computer’s hardware settings are stored. To access the BIOS, you’ll need to restart your computer and press the designated key during the boot-up process, which varies depending on the manufacturer and model of your computer.

    Some common keys to access the BIOS are F2, Del, and F Once you’ve accessed the BIOS, you can check the settings and modify them as needed. These settings might include boot order, time and date, security settings, and more.

    It’s important to use caution when modifying BIOS settings, as changes can have a significant impact on your computer’s performance. Always be sure to save any changes you make before exiting the BIOS.

    how do you get windows to recognize a new ssd

    Enable AHCI Mode

    If you’re struggling with slow performance on your computer, enabling AHCI mode could help speed things up. However, before you do so, it’s important to check your BIOS settings. AHCI mode can only be enabled if your computer’s BIOS supports it.

    To check, go into your computer’s BIOS settings and locate the SATA Controller Mode option. If it’s set to IDE or something similar, AHCI mode may not be supported. If it is supported, you’ll want to reset the SATA Controller Mode to AHCI to enable the mode.

    Once you’ve done this, be sure to save your changes and exit the BIOS. Keep in mind that this process is different for each computer, so you may need to consult your computer’s documentation or manufacturer’s website for specific instructions. Enabling AHCI mode can improve your computer’s performance by allowing it to take advantage of features like NCQ and hot-swapping, so it’s definitely worth considering if you’re having performance issues.

    Initialize the SSD

    If you’ve got a new SSD for your computer, you might be wondering how to get Windows to recognize it. Fear not, because it’s a relatively easy process. The first thing you’ll need to do is initialize the SSD.

    This means that you’ll be preparing the disk to be used by Windows. To begin, go to the start menu and search for “Disk Management.” Once you’ve found it, click on it to open the Disk Management window.

    From here, you’ll see all of the physical drives that are connected to your computer, including the new SSD. Right-click on the unallocated space of the SSD and select “New Simple Volume.” Follow the prompts to create a new volume and give it a drive letter.

    Once this is complete, your computer should recognize the new SSD, and you can start using it as you would any other storage device. By initializing the SSD, you’ve allowed Windows to communicate with it, making it an essential part of your system. So, if you want to take full advantage of your new SSD, make sure to initialize it before using it.

    Disk Management in Windows

    When you’ve installed a new SSD, the first thing you need to do in order to use it is initialize it. Initializing the SSD is a process that allows the drive to be recognized by your computer’s operating system. Windows provides a Disk Management tool that can be used to initialize your SSD.

    To do so, open Disk Management and locate your SSD in the list of drives. Right-click on the SSD and select “Initialize Disk.” You’ll then be prompted to choose between MBR and GPT partition styles.

    MBR is the older partition style and is used for drives smaller than 2TB, while GPT is the newer standard and can support drives up to 4 zettabytes in size. Select the partition style of your choice and click “OK” to initialize the SSD.

    Once the process is complete, your SSD will be ready to use.

    Initialize the SSD

    When it comes to setting up an SSD, initializing it is an essential step in the process. This helps prepare the device for use and ensures that it’s in proper working order. The initialization process involves partitioning the SSD, which means dividing it into one or more sections that can be used separately.

    It’s important to note that if you’re using a new SSD, you’ll want to initialize it before using it. To do this, you’ll need to go to the Disk Management tool on your computer and select the unallocated space on the SSD. From there, you can choose to create a new partition, format it, and assign a drive letter.

    This will ensure that your SSD is properly set up and ready for use. So, whether you’re using it as your primary storage device or as a backup drive, initializing your SSD is an important step in the process.

    Format the SSD

    If you’ve recently installed a new SSD in your computer, you might be wondering how to get Windows to recognize it. The first step is to format the SSD before using it. To do this in Windows, open the Disk Management tool from the Control Panel.

    Locate the new SSD in the list of available disks (it should be labeled as an unallocated space), right-click on it, and select “New Simple Volume”. Follow the wizard to format the SSD and assign a drive letter to it. Once the formatting process is complete, your computer should recognize the SSD and you can start using it to store and access data.

    Keep in mind that formatting the SSD will erase any existing data on it, so be sure to back up any important files before proceeding. With these simple steps, you can easily get Windows to recognize your new SSD and start enjoying faster storage and improved performance.

    Assign a Drive Letter

    When you install a new SSD, one of the essential steps to take is formatting it. This process prepares the drive for use by your computer. Usually, Windows will prompt you to format the SSD when you connect it for the first time.

    However, if that doesn’t happen, you can format the drive manually. Here’s how to do it: First, assign a drive letter to the SSD. This step ensures that the drive is easily recognizable by your computer.

    Once you name the drive, the next step is to format it. Formatting will erase all data on the drive, so ensure you have a backup of any important files. The formatting process takes a few minutes to complete.

    Once done, your SSD is ready for use. Remember to always keep your SSD formatted regularly to maintain optimal performance. Assigning a drive letter to your SSD is important, so it’s easily accessible when you need it.

    This process ensures that your computer can identify the drive and assign it a specific letter. Generally, Windows automatically assigns drive letters to storage devices, but in some cases, they might not appear in the File Explorer window. Renaming your SSD to a particular letter will solve this problem.

    To do this, go to Disk Management and right-click on the SSD. Choose the option to “Change Drive Letter and Path,” then select the “Add” button. Choose a letter that’s not assigned to any other drive on your computer and click “OK.

    Format the SSD

    Formatting the SSD can be a daunting task for some people, but it’s not as complicated as it may seem. Essentially, formatting an SSD means wiping all the data from it and preparing it for new usage. There are different ways to format an SSD, but the most common one is through the built-in utility in your operating system.

    When formatting an SSD, it’s essential to back up any data that you might need as the process will permanently erase all the information on the drive. Once the backup is complete, you can proceed with formatting the drive. This process will also enable you to choose the file system that best suits your needs.

    Popular options include NTFS, FAT32, and exFAT. Choosing the right file system depends on your intended use of the drive. After formatting is complete, your SSD will be ready to use again, and you can start adding data as desired.

    Remember to perform regular maintenance on your drive to ensure optimal performance and longevity.

    Conclusion

    In conclusion, getting your Windows operating system to recognize a new SSD is like introducing a new friend to a clique. You need to make sure that your new friend is compatible with the group, presents themselves well, and is officially introduced to the group. Similarly, ensure that your newly installed SSD is compatible with your system, is properly formatted, and is recognized by the BIOS.

    Once all these steps are followed, your Windows operating system will welcome your new storage friend with open arms and allow you to enjoy faster performance and increased storage capacity.”

    FAQs

    What is an SSD and why is it important for a computer?
    An SSD is a solid-state drive that stores data using flash memory. It is important for a computer because it improves its speed, efficiency, and overall performance.

    How do I physically install a new SSD in my computer?
    First, shut down your computer and unplug it from the power source. Open up the case and locate an available slot for the SSD. Install the SSD using screws or brackets. Finally, reconnect any cables and close the computer case.

    How do I format my new SSD so that it can be recognized by Windows?
    Go to the Start menu and search for “Disk Management.” Open the Disk Management utility and locate your new SSD. Right-click on it and select “Format.” Choose your preferred file system and follow the prompts to complete the formatting process.

    How do I make sure that Windows recognizes my new SSD as the primary boot drive?
    Go to the BIOS settings of your computer and select the Boot menu. Change the boot order so that the SSD is listed first. Save the changes and exit the BIOS. Your computer should now recognize the SSD as the primary boot drive.