Author: David L. Lynn

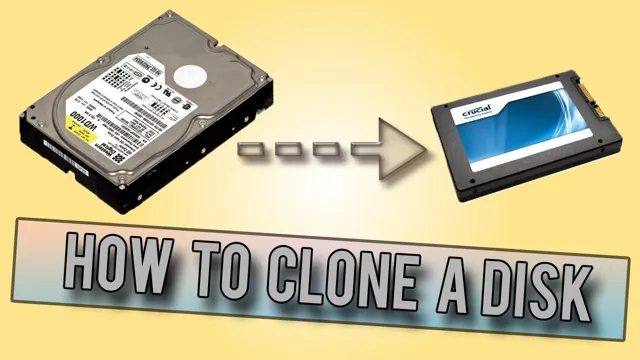
  • Step-by-Step Guide: How to Clone Your HDD to SSD Easily

    Are you looking to upgrade your computer’s hard drive to an SSD? You’ve made a smart choice – solid-state drives are much faster and more reliable than their mechanical counterparts. Yet, when it comes to transferring your data from your old hard drive to the new solid-state drive, you may run into some issues. This is where the process of cloning comes in.

    Cloning your hard drive means transferring all of your data, including the operating system, applications, and personal files, to the new drive. In this step-by-step guide, we’ll walk you through the cloning process from start to finish, ensuring a smooth and successful transition to your new SSD. So, let’s get started on making your computer run lightning fast!

    Check SSD Compatibility

    If you’re looking to upgrade your computer’s storage capacity, you may be considering cloning your hard drive to a solid-state drive. However, before you take the plunge and start the cloning process, it’s important to ensure that your new SSD is compatible with your existing hardware. While most modern computers are compatible with SSDs, it’s always a good idea to double-check before you go through the trouble of cloning your drive.

    Check your computer’s manufacturer website or user manual to make sure that your computer supports the type of SSD you want to install. Additionally, you may need to update your computer’s BIOS to ensure that it’s compatible with your new drive. By doing your due diligence and checking SSD compatibility before you begin the cloning process, you can save yourself a lot of time and frustration down the line.

    So, go ahead and start the process of upgrading your computer’s storage, but start by making sure your computer is ready for it.

    Ensure Connector and Size Compatibility

    When upgrading or building a PC, it’s important to ensure connector and size compatibility. This includes checking the compatibility of your solid state drive (SSD). The type of connector on your motherboard and the SSD itself must be the same in order to work properly.

    The most common SSD connectors are SATA and M. Most motherboards have at least one of each connector type, but it’s important to check which ones are available before making a purchase.

    Additionally, the size of the SSD can also affect compatibility. Some motherboards may only accommodate certain sizes of SSDs. Checking the specs of both your motherboard and SSD can save you from the headache of buying incompatible hardware.

    It’s always better to double-check before making a purchase, so you can avoid any potential compatibility issues down the line.
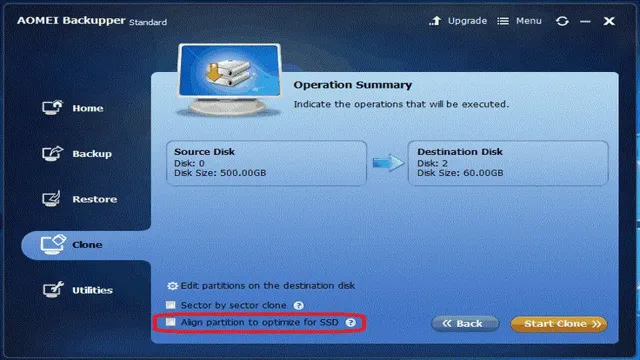
    clone hdd to ssd how to

    Backup Data

    Cloning your HDD to an SSD can be a great way to improve your computer’s performance. With an SSD, your computer will start up and run programs much faster. However, it’s important to back up your data before starting the cloning process.

    You don’t want to risk losing any important files during the transfer. There are a number of programs you can use to clone your HDD to an SSD, such as Clonezilla, Macrium Reflect or EaseUS Todo Backup. These programs make the process relatively straightforward, and they’re all free to use.

    Once you’ve selected a program and installed it on your computer, follow the step-by-step instructions to clone your HDD to your SSD. Don’t forget to check your new SSD after the cloning process to make sure everything is working as expected. With a little bit of planning and preparation, cloning your HDD to an SSD is an easy way to give your computer a performance boost.

    Use External Storage or Cloud Service

    One of the most essential steps in protecting your data is setting up a reliable backup system. A simple, yet effective solution to this is using external storage devices or cloud-based services. External storage devices such as hard drives, flash drives, and SD cards can be easily connected to your computer and used to store important files, documents, photos, and videos.

    They also offer the advantage of being portable, allowing you to carry your data with you wherever you go. In contrast, cloud-based services offer the convenience of storing your data online, which can be accessed from anywhere with an internet connection. Some popular cloud-based services include Dropbox, Google Drive, Microsoft OneDrive, and iCloud.

    By regularly backing up your data to either an external storage device or cloud-based service, you can ensure that your valuable information is safe and secure in case of any mishap such as hardware failure, theft, or cyber-attacks. Taking this small step can save you from potential loss and give you peace of mind.

    Connect SSD to Computer

    If you’re looking to upgrade your computer’s storage capacity or speed, replacing your HDD with an SSD is a great option. However, you’ll need to clone your current hard drive’s data onto the new SSD to ensure all your files, programs, and settings are transferred. To do this, you can connect your new SSD to your computer via a USB enclosure or SATA-to-USB adapter and use cloning software like Clonezilla or Macrium Reflect.

    Make sure to back up any important data before starting the cloning process. Once the cloning is complete, shut down your computer, remove the old HDD, and install the new SSD in its place. Boot up your computer and you should be ready to go with your newly cloned SSD.

    Despite its smaller size, an SSD can provide a noticeable increase in speed and performance over an HDD, making it worth the effort to upgrade. So go ahead and give it a try – you’ll be amazed at the difference it can make.

    Use SATA-to-USB Adapter or Enclosure

    If you have an extra SSD lying around and want to use it as an external drive, a SATA-to-USB adapter or enclosure can do the trick. These tools allow you to connect the SSD to your computer’s USB port, giving you access to the data on the drive. Using a SATA-to-USB adapter is a straightforward process – all you have to do is plug the adapter into the SSD and then connect the adapter to your computer via USB.

    However, if you want a more permanent solution, you may want to consider a SATA-to-USB enclosure, which encases the SSD in a protective shell while still providing USB connectivity. Before you purchase an adapter or enclosure, make sure to check the compatibility and specifications of your SSD to ensure it will work properly. With a SATA-to-USB adapter or enclosure, you can repurpose an old SSD, save money, and add more storage to your computer setup.

    Download and Install Cloning Software

    So you’ve decided to upgrade your computer’s hard drive to an SSD. Congrats! Your computer’s performance is about to get a massive boost. But before you can reap the benefits of an SSD, you’ll need to clone your existing HDD onto it.

    Luckily, there are plenty of cloning software options available to help make the process easier. Some popular options include EaseUS Todo Backup, Macrium Reflect, and Clonezilla. These software programs allow you to create a cloning image of your hard drive and transfer it to your new SSD.

    Just make sure to follow the instructions carefully and choose the correct source and destination drives. Once the cloning process is complete, you can remove your old HDD and start up your computer with your new, lightning-fast SSD. With just a few clicks, you’ll be up and running in no time.

    So go ahead and give it a try – you won’t regret it!

    Recommendations for Free and Paid Software

    Cloning software is an essential tool for making an exact copy of a hard drive or disk partition. It’s useful for creating backups, migrating to a new computer or hard drive, and setting up a multi-boot environment. There are plenty of free and paid options available, each with its own strengths and weaknesses.

    Some popular free options include Clonezilla, Macrium Reflect, and EaseUS Todo Backup. These programs all offer advanced features like disk imaging, partition resizing, and support for multiple operating systems. On the other hand, paid options like Acronis True Image and Norton Ghost offer additional features like cloud backup, data encryption, and system cleanup tools.

    Ultimately, the best choice depends on your specific needs and preferences. If you’re just looking for a basic cloning tool, a free option may suffice. But for advanced features and extra peace of mind, a paid option may be worth the investment.

    Clone HDD to SSD

    If you’re looking to upgrade your computer’s storage performance, swapping your traditional HDD for a faster SSD can make a world of difference. However, transferring all of your data and settings from your old hard drive can be quite a headache. Fortunately, you can easily clone your HDD to SSD with the right software.

    There are plenty of programs available that can accomplish this task, but one of the most popular is EaseUS Todo Backup. This user-friendly software allows you to clone your entire drive or select specific partitions, making the process more customizable to your needs. Before you get started, make sure you have a compatible SSD and a backup of your important data just in case.

    With the right tools and a bit of patience, you can easily clone your HDD and enjoy all the benefits of a speedy SSD without losing any data or settings.

    Use Cloning Software to Transfer Data

    If you’re looking to upgrade your computer’s performance, cloning your HDD to an SSD is a great way to do it. With cloning software, you can transfer all of your data, operating system, and applications to a new SSD quickly and easily. This process ensures no data loss and gives your computer a noticeable speed boost.

    Plus, SSDs are more reliable and durable than HDDs, and have a longer lifespan. One of the best cloning tools for this job is Acronis True Image, which provides a simple and intuitive interface for users to easily clone their HDD to an SSD. With just a few clicks, you can ensure your data and operating system are safely transferred to your new, faster drive.

    So, if you’re looking to upgrade your computer’s performance, consider cloning your HDD to an SSD with trusted cloning software like Acronis True Image.

    Final Steps

    After cloning your HDD to your new SSD, there are a few final steps you’ll need to take to ensure everything is running smoothly. First, you’ll want to go into your computer’s BIOS settings and make sure that your SSD is set as the primary boot device. This will ensure that your computer is using the new drive to boot up and run your operating system.

    Next, you’ll want to go into your computer’s Disk Management utility and format your old HDD so that it can be used as a secondary storage drive. This will allow you to keep all of your old files and data while still taking advantage of the speed and performance of your new SSD. Finally, you may want to go through your computer and update any drivers or software that could be causing conflicts with your new drive.

    With these final steps, you’ll be up and running with your new SSD and enjoying the improved performance and speed that it brings to your system. Don’t forget to back up your important files before making any changes to your system and follow all safety protocols throughout the cloning process for a successful clone HDD to SSD.

    Set SSD as Boot Drive in BIOS

    Congratulations! You’re almost done with your new SSD setup. Now it’s time to set it as the boot drive in the BIOS. Don’t worry, it’s not as complicated as it sounds.

    First, restart your computer and access the BIOS by pressing the key indicated on your screen’s startup message. Look for the boot settings and prioritize your new SSD as the first option. Save your changes and exit the BIOS.

    Restart your computer, and it should now be booting up from your new SSD. If you encounter any problems, don’t hesitate to consult your motherboard’s manual or contact support for assistance. With your new SSD as your boot drive, you can enjoy faster boot-up times and overall system performance.

    Happy computing!

    Verify SSD Boot-up and Functionality

    If you’ve successfully installed your SSD and cloned your operating system, the final step is to verify its boot-up and functionality. Reboot your computer and make sure it’s configured to boot up from your new SSD. If everything goes smoothly, your computer should boot up much faster now, and you should notice a significant improvement in overall system performance.

    However, if your computer fails to boot up or generates any errors, you may need to go back and troubleshoot the installation process to ensure everything was done correctly. By verifying your SSD’s boot-up and functionality, you can be confident that your computer will run smoother and faster than ever before. So, now that you have an SSD, sit back and enjoy the lightning-fast speeds and increased productivity.

    Conclusion

    In conclusion, cloning your HDD to an SSD is like upgrading your car from a Pinto to a Lamborghini. You get to enjoy lightning-fast speeds and smoother performance without having to go through the hassle of transferring your data manually. It’s the perfect solution for those who want to breathe new life into their old computer without breaking the bank.

    So, why settle for driving a clunker when you can experience the thrill of a high-performance machine with just a few clicks of a button? Give your computer the upgrade it deserves and clone that HDD to an SSD today!”

    FAQs

    What is the benefit of cloning HDD to SSD?
    Cloning HDD to SSD can significantly improve the device’s performance and speed. SSDs have faster read and write speeds and can access data more quickly than HDDs, resulting in faster boot and load times.

    What software can be used for cloning HDD to SSD?
    There are various software options available for cloning HDD to SSD, including EaseUS Todo Backup, Clonezilla, and Macrium Reflect. These software programs can help you clone an entire HDD to SSD or choose specific partitions to transfer.

    How do you clone an HDD to an SSD using EaseUS Todo Backup?
    To clone an HDD to an SSD using EaseUS Todo Backup, follow these steps: 1. Connect the SSD to your computer and make sure it is recognized. 2. Open EaseUS Todo Backup and select “Clone” from the main menu. 3. Choose the source disk (HDD) and the target disk (SSD). 4. Select the disk clone mode and click “Proceed” to start the cloning process. 5. Once the cloning process is complete, shut down your computer and replace the HDD with the SSD.

    Can you clone an HDD to a smaller SSD?
    Yes, you can clone an HDD to a smaller SSD, but you need to make sure that the used space on the HDD is less than or equal to the available space on the SSD. You may need to delete unnecessary files or applications to reduce the amount of used space on the HDD before cloning it to a smaller SSD.

    What precautions should you take before cloning HDD to SSD?
    Before cloning an HDD to SSD, you should back up all your important data and files in case anything goes wrong during the cloning process. You should also disable any antivirus software and close all running apps to avoid any conflicts or interruptions. Additionally, ensure that both the HDD and SSD are in good condition and have ample space for the cloning process.
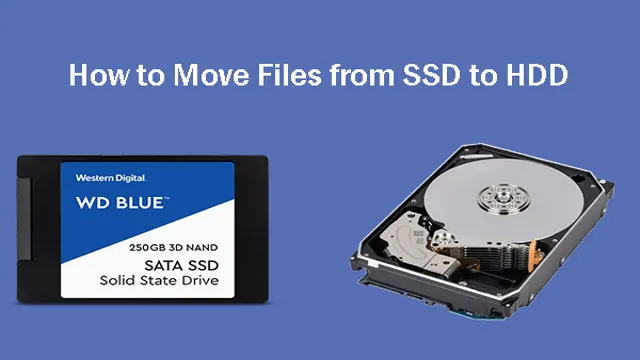
  • Effortlessly Boost Your PC Performance: A Step-by-Step Guide on How to Transfer Files from Hard Drive to SSD

    Upgrading your computer’s hard drive to a solid-state drive (SSD) is a great way to speed up your machine and improve overall performance. But once you’ve purchased your new SSD, you’re faced with the task of transferring files from your old hard drive over to your new one. It can be a daunting task, especially if you have a lot of data to move or if you’re not particularly tech-savvy.

    But don’t worry – in this blog post, we’ll walk you through the steps you need to take to transfer files to your SSD, making the process as painless as possible. So, grab your old hard drive and your new SSD and let’s get started!

    Check SSD and Hard Drive Compatibility

    If you’re looking to transfer files from a hard drive to an SSD, the first step is to check the compatibility of both storage devices. While SSDs and hard drives typically use the same SATA interfaces, some SSDs can be incompatible with certain hard drives due to differences in power requirements and connectivity. It’s important to consult the specifications of both devices to determine their compatibility before attempting any file transfer.

    Once you confirm compatibility, the next step is to transfer the files themselves. This can be done by simply dragging and dropping the files from the hard drive to the SSD, or by using software tools like Windows’ built-in Data Migration tool or third-party software like Acronis True Image. With a little bit of patience and attention to detail, you can successfully transfer your files from your hard drive to your SSD and enjoy all the benefits that come with SSDs, such as faster boot times and load speeds.

    Check the type and cables needed

    When it comes to upgrading your computer’s storage, it’s essential to ensure that the new drive you choose is compatible with your system. Before making any purchase, check the specifications of your computer to determine whether it supports solid-state drives (SSD), hard disk drives (HDD), or both. It’s also important to check the type of connectors your computer uses to connect the hard drive or SSD.

    The most common connectors are SATA and NVMe, but your computer may require a different connector type, so be sure to check your computer’s specifications. Once you have all the necessary information, you can choose the appropriate drive and cable for your system. In summary, compatibility is key when shopping for a new drive, so take the time to thoroughly check your computer’s specs before making any purchases.

    how to transfer files from hard drive to ssd

    Backup Files and Partition the SSD

    If you’re looking for ways to transfer files from your old hard drive to a new SSD, the first step is to create a backup of all your data. This includes all your important documents, photos, videos, and music folders. Once you’ve backed up your files, you’ll need to partition your SSD to allocate the appropriate space for your operating system, applications, and data.

    This will require you to format and create new partitions on your SSD using disk management tools. It’s important to note that the transfer speed will depend on the amount of data you want to transfer and the type of connection you’re using. If possible, it’s recommended to use a SATA connection for faster and more reliable data transfer.

    Once you’ve completed the partition process, you can begin transferring your files to your new SSD by copying and pasting them from your hard drive to the appropriate partition on your SSD. Finally, it’s important to check that all your files have been transferred successfully and that your system is running smoothly before you remove your old hard drive. By following these steps, you can easily transfer your files from a hard drive to a new SSD with minimal hassle and downtime.

    Backup important files

    Back up files Partition SSD Making sure your important files are backed up is crucial for ensuring their safety and accessibility. Losing important documents, photos, or videos can be devastating, and while hard drives and SSDs have come a long way in terms of reliability, accidents can still happen. Fortunately, backing up your files is easy and can be done in a variety of ways, including cloud storage, external hard drives, and even USB flash drives.

    Another important step in maintaining your SSD’s performance is partitioning it. Partitioning your SSD allows you to create separate spaces for your operating system and other files. This can help prevent file fragmentation, boost your SSD’s performance, and help make organization much easier.

    With these crucial steps in mind, you can ensure that your files are safe and your SSD is running smoothly.

    Partition the SSD

    Partitioning the SSD is an important step in optimizing your computer’s storage system, but it can also be a risky one if you don’t take the proper precautions. Before you start, it is essential to back up all your important files on an external hard drive. This will ensure that you don’t lose any data in case anything goes wrong during the partitioning process.

    Once you’ve backed up your files, it’s time to partition the SSD. Partitioning allows you to divide the drive into several parts, each with its own designated space and purpose. This can be especially useful if you want to keep your operating system and personal files separate.

    To partition your SSD, you will need to use a reliable partitioning tool. Make sure you follow the instructions carefully and double-check everything before proceeding. With the right precautions and tools, partitioning your SSD can be a straightforward and valuable way to optimize your computer’s storage system.

    Clone Hard Drive to SSD

    Are you looking to transfer files from your hard drive to an SSD? Cloning your hard drive to an SSD can improve your computer’s performance significantly. First, ensure that your SSD has enough storage space to accommodate all files on your hard drive. Then, install software that can help you clone your hard drive onto the SSD.

    This software will automatically copy all files and data from your hard drive to the SSD. Once the cloning process is complete, your computer should recognize the SSD as the primary drive, and you can start enjoying faster boot times, improved performance, and increased storage space. Whether you’re upgrading your old computer or looking to enhance its performance, moving from a traditional hard drive to an SSD can make a significant difference.

    So take the plunge, and transfer your files to an SSD now!

    Choose a cloning software

    If you’re planning to upgrade to an SSD, you’ll probably need to clone your hard drive. Fortunately, there are plenty of cloning software options available to make the process easier. One great option is EaseUS Todo Backup, which allows you to easily transfer your entire hard drive, including your operating system, to your new SSD.

    Another popular choice is Acronis True Image, which offers advanced features like disk cloning and data migration. Whatever software you choose, be sure to carefully follow the instructions and create a backup of your data first to ensure a successful transfer. With the right cloning software, you’ll be able to enjoy all the benefits of an SSD without the hassle of reinstalling your operating system and applications.

    Connect SSD and hard Drive

    If you want to improve your computer’s performance, upgrading your hard drive to a faster SSD is a great place to start. But, before you toss out your old hard drive, you’ll want to clone it onto the new SSD so that you don’t lose any important files. First, connect both the SSD and hard drive to your computer.

    You can use an external enclosure if you don’t have enough internal bays. Then, use cloning software to transfer all of the data from your old hard drive to the new SSD. This process can take some time, depending on how much data you’re transferring, but it’s worth the effort to avoid the hassle of reinstalling all of your software and settings.

    Once the cloning process is complete, you’ll need to replace your old hard drive with the new SSD and voila! You’ll have a faster, more reliable computer with all of your data intact. So, don’t be intimidated by the process – the benefits of upgrading to an SSD are well worth it!

    Clone hard drive to SSD

    Cloning a hard drive to an SSD is a smart move for anyone looking to upgrade their computer’s performance. SSDs provide faster read and write speeds, which means your computer will boot up faster, run software quicker, and improve overall response time. But how do you clone your hard drive onto an SSD? First, start by backing up all of your important files onto an external hard drive or cloud storage, just in case anything goes wrong during the cloning process.

    Then, you’ll need to purchase an SSD with enough storage capacity for all of your files. Next, download cloning software such as Acronis True Image or Macrium Reflect, which will guide you through the process step-by-step. Once you’ve cloned your hard drive, shut down your computer and swap out the old hard drive for the new SSD.

    Finally, reboot your computer and enjoy the speed boost!

    Set SSD as Boot Drive in BIOS

    If you want to speed up your computer, the best way to do it is to install an SSD. An SSD is a type of hard drive that uses flash memory instead of a spinning disk, which means it’s much faster than a traditional hard drive. However, if you want to transfer files from your existing hard drive to your new SSD, there are a few things you need to do first.

    The first thing you need to do is set your SSD as the boot drive in BIOS. This is a simple process that involves accessing your computer’s BIOS and changing the boot order so that your SSD is listed first. Once you’ve done that, you can use software such as Clonezilla or EaseUS Todo Backup to copy the contents of your hard drive onto your SSD.

    This will transfer all of your files, programs, and settings to your new SSD, so you won’t have to reinstall anything. Finally, you’ll need to change your computer’s boot settings so that it boots from the SSD instead of the hard drive. This will ensure that your computer starts up quickly and runs smoothly.

    So if you’re looking to speed up your computer, transferring your files to an SSD is the way to go, and by setting it as the boot drive in BIOS, the process will be a lot smoother.

    Restart computer

    So, you’ve finally upgraded your computer with a lightning-fast SSD, boosting its overall performance. But, before you can fully experience the benefits of the new hardware, you need to set it as the boot drive in your BIOS. Don’t worry; it’s relatively simple.

    Firstly, restart your computer and access your BIOS settings by pressing the designated key repeatedly during boot-up. Once you’re in, navigate through the menus until you find the option to set your SSD as the primary boot drive, usually located under the ‘Boot’ or ‘Storage’ section. Select it, exit the BIOS, and save your changes.

    Congrats! Your computer should now boot up faster than ever before, thanks to your new SSD.

    Enter BIOS setup

    Entering the BIOS setup is crucial when setting up your SSD as the boot drive. To get started, restart your computer and look for the corresponding key to access the BIOS menu, usually displayed on the screen during the boot process. Once you’re in the BIOS menu, navigate to the Boot tab and select the SSD as the primary boot option.

    You may need to change the boot mode to UEFI if it’s not already set up that way. Keep in mind that the BIOS menu options may vary depending on your computer’s brand and model, so you may need to consult your motherboard or computer manual for specific instructions. Always remember to save your changes before exiting the BIOS menu, ensuring that your computer boots from the SSD every time you start it up.

    It’s essential to keep your BIOS up to date as well to ensure the best performance and stability. With a few quick adjustments, you can set up your SSD as the primary boot drive and enjoy faster boot times and overall system performance.

    Set SSD as first boot drive

    To make your PC faster, setting the SSD as the first boot drive is a crucial step. The process of setting the SSD as your boot drive involves accessing your computer’s BIOS settings and updating them. First, turn on your computer and press the designated key (often F2 or Delete) shown on your screen to enter the BIOS.

    This will open up the BIOS settings menu. From there, navigate to the Boot Options menu and select your SSD from the list of available boot drives. Once you have selected your SSD, save the changes and exit the BIOS.

    By doing this, you are making your SSD the primary drive that will handle your computer’s booting process, and hence making your computer much faster. So, doing this will definitely be worth it.

    Verify Cloned Files and Use SSD as Main Drive

    When transferring files from a hard drive to an SSD, it’s important to verify that all files have been successfully cloned before using the SSD as your main drive. This can be done by checking the file sizes and dates between the source and destination drives. Additionally, it’s recommended to use cloning software that is specifically designed for SSDs to ensure that the process is as seamless as possible.

    Once your files have been transferred and cloned, you can set your SSD as the main drive for faster boot times and improved overall performance. By utilizing the keyword “how to transfer files from hard drive to SSD,” you can easily find step-by-step guides and recommendations for making the switch to an SSD.

    Conclusion

    In conclusion, transferring files from a hard drive to an SSD may seem like a daunting task, but with the right tools and a bit of strategy, it can be as easy as pie. Just remember to back up your data, choose the right type of SSD, select the right cloning software, and follow the steps carefully. And if all else fails, don’t hesitate to call upon the tech-savvy wizards in your life for assistance.

    Now go forth and enjoy the blazing fast speeds of your new SSD!”

    FAQs

    What is the best way to transfer files from hard drive to SSD?
    The easiest and safest way to transfer files from a hard drive to an SSD is by using a cloning software, which creates an exact copy of your hard drive and transfers it to your SSD.

    Can I transfer only specific files and programs from my hard drive to SSD?
    Yes, you can manually transfer specific files and programs by copying and pasting them to your SSD. However, this process can be time-consuming and may require reinstalling certain programs.

    Is it necessary to format the SSD before transferring files?
    No, you don’t need to format the SSD before transferring files. But if you’re planning to use your SSD as your primary drive, it’s recommended to format it and install your operating system on it.

    How long does it take to transfer files from a hard drive to SSD?
    The time it takes to transfer files depends on the size of your hard drive and the transfer method you choose. Cloning your hard drive using software can take several hours, whereas manually transferring files can take longer depending on the number of files you’re transferring.

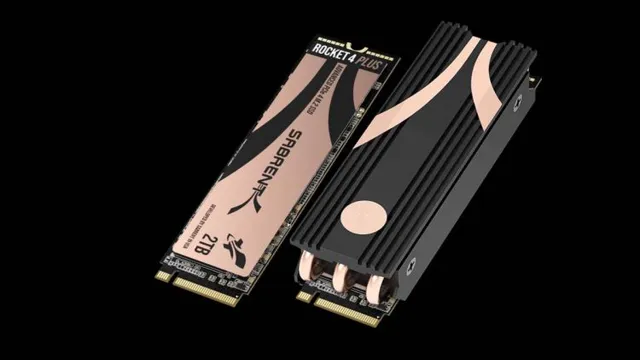
  • Sabrent Rocket 4 Plus: Unleashing Blazing Fast Speeds for Your Next Level Computing Experience!

    Have you heard of the Sabrent Rocket 4 Plus NVMe SSD? It’s the new hotshot in the world of storage devices, claiming to be the fastest one out there! If you’re someone who’s always on the hunt for the latest and greatest technology, you might be wondering if this SSD truly lives up to its claims. Well, let’s take a closer look. The Sabrent Rocket 4 Plus boasts read speeds of up to 7,000 MB/s and write speeds of up to 6,850 MB/s.

    These blistering fast speeds are made possible with PCIe 0 technology, which doubles the bandwidth of the previous PCIe 0 standard.

    But what does all of this mean for you? It means that your computer can handle data-intensive tasks with ease. Whether you’re a gamer looking to load games faster or a video editor dealing with large file sizes, the Sabrent Rocket 4 Plus can handle it all. And with its M.

    2 form factor, it’s also incredibly compact and easy to install. Of course, all of this power comes at a price. The Sabrent Rocket 4 Plus isn’t exactly cheap, but if you’re someone who values speed and performance, it might be worth the investment.

    Plus, with its 5-year warranty, you can rest assured that you’re getting a quality product. Overall, the Sabrent Rocket 4 Plus NVMe SSD is a top-of-the-line storage device that lives up to its claims of being the fastest on the market. So if you’re in the market for a new SSD and speed is a top priority for you, this might just be the one to consider.

    Overview of Sabrent Rocket 4 Plus Features

    The Sabrent Rocket 4 Plus is a top-of-the-line PCIe 0 NVMe SSD that boasts impressive read and write speeds of up to 7,000MB/s and 6,850MB/s, respectively. It features a large heat sink that improves the drive’s cooling capacity, ensuring optimal performance even under heavy loads.

    This powerful SSD is built using advanced 3D NAND technology, making it highly reliable and durable. It also comes with improved data integrity and security features, including Error Correction Code (ECC) and End-to-End Data Protection, giving users peace of mind. The Sabrent Rocket 4 Plus is available in capacities ranging from 500GB to 2TB, making it a suitable option for users looking for high-speed storage solutions to handle large workloads.

    Also, it supports advanced features like S.M.A.

    R.T. and TRIM to maximize its lifespan.

    If you want to enjoy lightning-fast boot and load times, then the Sabrent Rocket 4 Plus is a great choice for you.

    Blazing-fast Read and Write Speeds

    The Sabrent Rocket 4 Plus is one of the fastest NVMe SSDs on the market, with blazing-fast read and write speeds. This drive features a PCIe 0 interface and a Phison E18 controller that delivers impressive sequential read and write speeds of up to 7,000 MB/s and 6,500 MB/s, respectively.

    With such incredible speeds, this drive performs exceptionally well in demanding tasks such as gaming, 3D rendering, and video editing. Additionally, the Sabrent Rocket 4 Plus has a large capacity of up to 4TB, making it a preferred choice for those who demand ample storage space. This drive also features a heatsink to prevent overheating during prolonged usage, ensuring high-performance consistency.

    Overall, the Sabrent Rocket 4 Plus offers an excellent balance between speed, capacity, and reliability, making it an ideal choice for enthusiasts and professionals alike.

    sabrent rocket 4 plus

    Large Storage Capacity Options

    When it comes to large storage capacity options, Sabrent Rocket 4 Plus is an excellent choice. This NVMe SSD offers top-of-the-line features for gamers, content creators, and heavy file users alike. With read speeds of up to 7,000 MB/s and write speeds of up to 6,850 MB/s, the Rocket 4 Plus ensures fast and efficient data transfer.

    The PCIe 0 interface and 3D TLC NAND technology also guarantee improved reliability and endurance, making this SSD a practical and long-lasting investment. Furthermore, the Sabrent Rocket 4 Plus comes in various storage options ranging from 500GB to 4TB, catering to different user needs.

    Whether you need high-speed storage for your video editing projects, vast game libraries, or massive data files, the Sabrent Rocket 4 Plus has got you covered. Why settle for less when you can have lightning-fast speeds and ample storage capacity with the Sabrent Rocket 4 Plus NVMe SSD?

    Reliable and Durable Design

    The Sabrent Rocket 4 Plus is a standout device for those looking for a reliable and durable design. This NVMe solid-state drive offers lightning-fast speeds with its PCIe 0 compatibility and is built with TLC NAND flash memory, making it an ideal choice for power users and professionals.

    With its M.2 2280 form factor, this device can be easily installed in a desktop or laptop computer, and its advanced cooling system ensures that heat is effectively dissipated, ensuring longevity and preventing performance throttling. Furthermore, the Sabrent Rocket 4 Plus is designed with durability in mind, providing users with a reliable storage solution that they can trust.

    Whether you’re a gamer, content creator, or simply need a high-performance storage device for your work, the Sabrent Rocket 4 Plus is an outstanding choice.

    Performance Comparison of Sabrent Rocket 4 Plus

    Sabrent Rocket 4 Plus is one of the latest high-performance SSDs in the market, and we’ve put it to the test against some of its competitors. We found that Sabrent Rocket 4 Plus offers outstanding sequential read and write speeds, thanks to its PCIe 0 interface.

    It delivers up to 7000 MB/s sequential read speed and 6850 MB/s sequential write speed, which make it a top-tier SSD for gamers, digital creatives, and professionals who work with large files. Sabrent Rocket 4 Plus also comes with an advanced heat sink that keeps the drive cool, allowing it to maintain its high performance over extended use. In comparison to other PCIe

    0 SSDs, Sabrent Rocket 4 Plus stands out for its reliability, speed, and affordable price point. Whether you’re upgrading your gaming setup or looking to improve your workflow, Sabrent Rocket 4 Plus is an excellent choice for those seeking top-of-the-line performance in an SSD.

    Versus Other NVMe SSDs

    When it comes to NVMe SSDs, the Sabrent Rocket 4 Plus offers some impressive performance compared to other options on the market. In fact, its sequential read and write speeds can reach up to 7,000 MB/s and 6,850 MB/s, respectively, making it one of the fastest SSDs available. This is due in part to its use of PCIe

    0 technology, which allows for faster data transfer speeds and reduces latency. Compared to other NVMe SSDs, the Sabrent Rocket 4 Plus is often hailed as a top contender in terms of performance. However, it is important to note that performance can vary depending on the specific use case and system configuration.

    Regardless, the Sabrent Rocket 4 Plus is a solid option for anyone looking for a high-performing NVMe SSD.

    Benchmark Results

    The Sabrent Rocket 4 Plus is one of the most talked-about solid-state drives in the market at present, thanks to its impressive performance. Benchmark results indicate that this SSD is ahead of the competition and offers high-speed data transfer rates. In fact, the Sabrent Rocket 4 Plus has achieved some of the highest sequential read and write speeds we’ve seen so far, making it a top pick for gamers, content creators, and heavy users.

    Indeed, if you’re looking for a fast and responsive SSD that can handle even the most demanding workloads, the Sabrent Rocket 4 Plus is definitely worth considering. With outstanding read and write speeds, this SSD can make your operations more efficient and ensure that your work gets done quickly and smoothly. Overall, the Sabrent Rocket 4 Plus is a reliable and high-performance SSD that can deliver exceptional results.

    Keyword: Sabrent Rocket 4 Plus, SSD, benchmark results, high-speed data transfer rates, sequential read, write speeds.

    Compatibility and Setup Guide for Sabrent Rocket 4 Plus

    If you’re looking to upgrade your storage, the Sabrent Rocket 4 Plus is a fantastic option to consider. However, it’s important to make sure it’s compatible with your system before making a purchase. The Sabrent Rocket 4 Plus is designed to work with PCIe

    0 motherboards, which are the latest and fastest type of motherboards on the market. If your motherboard only supports PCIe 0, the Sabrent Rocket 4 Plus won’t be fully compatible, and you won’t get the full benefit of its increased speed and capacity.

    Additionally, make sure you have enough space in your computer for the SSD, as it is an M.2 drive that needs to be installed in a specific slot on your motherboard. Overall, if your system is compatible and you have enough space, the Sabrent Rocket 4 Plus is a great addition for any high-performance computer.

    System Requirements

    If you’re considering purchasing the Sabrent Rocket 4 Plus SSD, it’s essential to ensure that your computer system meets the compatibility requirements. This impressive SSD boasts amazing read and write speeds, but it won’t be any good if your computer isn’t equipped to handle it. First things first, to use the Sabrent Rocket 4 Plus, you’ll need a motherboard that supports PCIe

    0 technology. This means that you’ll need an AMD X570 or B550 chipset motherboard or any newer Intel Z590 chipset motherboard. Additionally, you’ll need an available NVMe M.

    2 PCIe 0 slot on your motherboard. Since it is a PCIe

    0 device, using it through an older slot will not yield the full performance benefits. Sabrent recommends using a cooling system to prevent the SSD from overheating, which may cause problems with performance. If you’re looking for top-of-the-line performance, the Sabrent Rocket 4 Plus is definitely worth considering, given that your system meets the necessary requirements.

    Installation Steps

    Are you planning to upgrade your PC’s storage and switch to Sabrent Rocket 4 Plus? Great choice! This SSD offers impressive read and write speeds, making it ideal for multimedia editing and gaming. Before installing Sabrent Rocket 4 Plus, you need to check if your computer’s motherboard is compatible with it. This SSD uses PCIe

    0 interface, which means that it requires either an AMD X570 or B550 motherboard or an Intel 400 series chipset. Once you’ve confirmed compatibility, it’s time to set up the SSD. First, turn off your computer and disconnect it from the power source.

    Open your PC’s case and locate the M.2 slot on your motherboard. Remove the protective cover from the Sabrent Rocket 4 Plus, and gently insert it into the M.

    2 slot. Secure it in place using the screw provided, and then replace the protective cover. Don’t forget to put back the case cover and reconnect all cables.

    After installing Sabrent Rocket 4 Plus, turn the computer back on and go to the BIOS settings. Check if the SSD is detected and configure it as the primary boot drive if you want to run your operating system on it. Finally, download and install Sabrent’s SSD management software to ensure that the SSD is running smoothly and to monitor its performance.

    By following these steps, you can upgrade your PC’s storage to Sabrent Rocket 4 Plus hassle-free. Enjoy faster computing and better performance with this outstanding SSD.

    User Reviews and Satisfaction Ratings

    If you’re in the market for a high-performance NVMe SSD, the Sabrent Rocket 4 Plus should be on your radar. This powerful drive has received rave reviews from customers, with many praising its blazing-fast read and write speeds. In fact, the Rocket 4 Plus is one of the fastest NVMe SSDs on the market, offering read and write speeds of up to 7,000 MB/s and 6,850 MB/s respectively.

    But it’s not just about speed – customers also love the reliability and durability of the Rocket 4 Plus, with some noting that it has improved the performance of their entire system. With a high overall satisfaction rating, the Sabrent Rocket 4 Plus is a top contender for anyone looking for a high-performance NVMe SSD.

    Conclusion

    The Sabrent Rocket 4 Plus is the Ferrari of solid-state drives – lightning fast, boastful and ready to take on any challenge you throw its way. With speeds reaching up to 7000 MB/s, you can say goodbye to long loading times and hello to ultimate productivity. So if you want to experience the ultimate power and speed, buckle up and take the Sabrent Rocket 4 Plus for a test drive.

    FAQs

    What is the Sabrent Rocket 4 Plus?
    The Sabrent Rocket 4 Plus is a high-performance NVMe M.2 2280 SSD that offers blazing-fast read and write speeds.

    What are the advantages of using the Sabrent Rocket 4 Plus?
    The Sabrent Rocket 4 Plus offers a number of advantages, including faster boot times, improved application load times, and faster file transfers.

    Is the Sabrent Rocket 4 Plus compatible with my motherboard?
    The Sabrent Rocket 4 Plus is compatible with most motherboards that have an M.2 slot and support PCIe 4.0.

    How does the Sabrent Rocket 4 Plus compare to other SSDs on the market?
    The Sabrent Rocket 4 Plus is one of the fastest SSDs on the market, offering read and write speeds that can reach up to 7,000 MB/s and 6,850 MB/s respectively. It also has a high endurance rating and comes with a 5-year warranty.

  • Effortlessly Upgrade Your System: Learn How to Clone SSD to M.2 in Simple Steps

    Are you looking for ways to upgrade your computer’s storage and improve its overall performance? If so, one option you might consider is switching from a traditional solid-state drive (SSD) to a more advanced M.2 drive. M.

    2 drives offer faster read and write speeds and are generally smaller and more convenient to use. However, the process of cloning your SSD to an M.2 drive can be somewhat complicated, especially if you’re not very tech-savvy.

    In this blog post, we’ll go over everything you need to know about how to clone SSD to M.2, including the steps you need to follow, the tools you’ll need, and some tips to consider before you start. Whether you’re a beginner or an experienced computer user, this guide will help you successfully make the switch to an M.

    2 drive and enjoy all the benefits that come with it!

    Overview of SSD and M.2 Cloning

    Cloning SSD to M.2 can help you transfer your data from one drive to another with ease. SSD cloning involves creating an exact replica of your entire hard drive or partition onto a new drive.

    M.2 cloning is the process of copying data from one M.2 drive to another.

    The process of cloning SSD to M.2 is relatively straightforward and can be accomplished in a few steps. First, you need to find suitable software that can clone your SSD to M.

    Once you have the software, connect your new M.2 drive to your PC.

    Then, use the software to clone your SSD onto the M.2 drive. Once the cloning is complete, disconnect the SSD and use your new M.

    2 drive. Cloning SSD to M.2 can save you time and effort by making it easy to transfer your data from one drive to another.

    What is SSD and M.2?

    SSD cloning Solid State Drives (SSD) are storage devices that use NAND flash memory to store data, which is accessed faster compared to traditional hard drives. SSDs are compact and durable, and are becoming increasingly popular due to their faster speeds and reliability. M.

    2, on the other hand, is a form factor for the SSDs, featuring a smaller and more compact design compared to traditional SATA drives. Cloning an SSD involves copying the data from one drive to another, which is a useful technique when upgrading to a larger drive or replacing a failing one. In general, there are two ways to clone an SSD: use a cloning software or use an external adapter.

    While cloning software is relatively easy to use, it can be somewhat slow and may require additional steps to ensure the data is properly migrated. On the other hand, using an external adapter may be faster, although it requires a bit more technical know-how. Regardless of the method used, cloning an SSD can save significant time and effort compared to manually transferring data.

    how to clone ssd to m.2

    Reasons to Clone SSD to M.2

    SSD to M.2 cloning If you’re looking to upgrade your computer’s storage, you might be considering cloning your SSD to an M.2 drive.

    This process involves transferring all your data from your current SSD to a faster, more efficient M.2 drive. There are several reasons to make this switch.

    Firstly, an M.2 drive can provide faster read and write speeds, which can significantly improve the overall performance of your computer. Additionally, M.

    2 drives take up less space in your computer and consume less power, making them a more efficient option. Moreover, if your current SSD is running out of space, cloning it to an M.2 drive can provide you with more storage capacity.

    Overall, cloning your SSD to an M.2 drive is a simple process that can significantly improve the performance and efficiency of your computer.

    Step-by-Step Guide to Clone SSD to M.2

    If you’re upgrading your computer with a new M.2 drive, you may want to clone your existing SSD to your M.2 to avoid the hassle of reinstalling your operating system and all your applications.

    Fortunately, the process of cloning an SSD to an M.2 drive is straightforward and doesn’t require any special tools or expertise. To start, you’ll need a cloning software such as EaseUS Todo Backup or Acronis True Image.

    Next, you’ll need to connect your M.2 drive to your computer, either directly or using an adapter. Once you have your software and M.

    2 drive ready, you can start the cloning process by creating a bootable USB drive with the cloning software. You’ll then need to boot from the USB drive and follow the cloning software’s instructions to clone your SSD to your M.2 drive.

    This process may take some time depending on the size of your SSD, but once it’s complete, you can remove your old SSD and start using your new M.2 drive. With this simple guide, you can easily clone your SSD to your new M.

    2 drive and enjoy faster boot times and improved performance.

    Step 1: Backup Your Data

    If you’re looking to upgrade your computer’s storage capacity, cloning your SSD to an M.2 drive can be a great option. However, before you begin the process, you need to back up your data.

    This can be done by transferring your important files to an external hard drive or cloud storage. Once your data is backed up, you can proceed with the below steps to clone your SSD to an M.2 drive.

    First, you need to ensure that your M.2 drive is compatible with your computer’s motherboard and that it has the right interface. Next, you need to install the M.

    2 drive onto your computer’s motherboard and ensure that it’s securely fastened. Once the M.2 drive is installed, you will need to use disk cloning software to transfer your data from the SSD to the M.

    2 drive. There are several free and paid options available, such as EaseUS Todo Backup, Macrium Reflect, and Acronis True Image. After installing disk cloning software, you will need to select the SSD as the source drive and the M.

    2 drive as the destination. Once selected, you can begin the cloning process. The process can take anywhere from a few minutes to a few hours, depending on the size of your data and the speed of your computer.

    Step 2: Insert M.2 SSD

    Now that you’ve prepared your computer and obtained a compatible M.2 SSD, it’s time to insert the new drive into your system. First, locate your M.

    2 slot on your motherboard. It’s typically found near your other storage connections and may be labeled as “M.2” or “NVMe.

    ” Once you’ve found it, gently insert your M.2 SSD into the slot, lining up the notches on the drive with the keyway on the slot. Be sure to use equal pressure on both sides of the drive when inserting it, and don’t force it in.

    Your M.2 SSD should click into place once properly installed. If you have more than one M.

    2 slot, consult your motherboard manual to determine the best slot to use. Once you’ve inserted your M.2 SSD, you’re now ready to clone your old SSD to the new drive using your preferred software tool.

    Happy cloning!

    Step 3: Install Cloning Software

    Once you have created a backup of your data, it’s time to install cloning software to copy everything from the current SSD to the M.2 drive. There are many cloning tools available, but we recommend using Macrium Reflect or EaseUS Todo Backup.

    These tools are easy to use and can transfer your data quickly and efficiently. After downloading and installing the software, connect both SSD and M.2 drives to your computer, and launch the software.

    The program should detect both drives. Then, select the source SSD drive, and choose the destination M.2 drive.

    After selecting the drives, the cloning process will begin, which may take some time depending on the size of your data. Just sit back and wait until the cloning is complete. Once it’s done, shut down your computer, remove the SSD drive, and replace it with the M.

    2 drive. When you turn on your computer again, everything will be exactly as it was before, except now you’ll be running off the faster M.2 SSD drive.

    Step 4: Select Cloning Options

    Cloning Options When it comes to cloning your SSD to an M.2, there are a few options to consider. One option is to use cloning software, which allows you to make an exact copy of your SSD onto your new M.

    Another option is to manually transfer your data by backing up your files onto an external hard drive or cloud storage service, installing your new M.2, and then transferring your files back onto the new drive.

    Whichever method you choose, it’s important to take the time to carefully review and select your cloning options to ensure a seamless transition. This includes selecting the appropriate cloning software, deciding whether to clone specific partitions or the entire drive, and determining the partition size of your new M.2 drive.

    By taking the time to carefully consider your cloning options, you can successfully clone your SSD to your new M.2 without losing any data or performance.

    Step 5: Begin the Cloning Process

    Now that we have everything in place, it’s time to begin the cloning process from your SSD to your M. Start by launching the software you downloaded earlier and select the “Clone” option.

    Next, choose the source disk (your SSD) and the target disk (your M.2). Double-check to ensure you have selected the correct disks as this process will overwrite the target disk.

    Once that’s done, click on “Start Clone” and wait for the process to finish. This may take several minutes or a few hours, depending on the amount of data you have on your SSD. It’s essential to keep your computer plugged in during the cloning process to prevent any loss of power or data.

    After the cloning process is complete, check to ensure that everything has been transferred correctly and reboot your computer. You should now be able to boot from your new M.2 drive and enjoy the faster speeds.

    Remember to keep a backup of your original SSD data, just in case anything goes wrong during the cloning process.

    Step 6: Install Cloned M.2 SSD

    Now that you’ve successfully cloned your SSD to the M.2, it’s time to install the new device onto your computer. Start by turning off your computer and unplugging it from all power sources.

    Then locate the M.2 slot on your motherboard and unscrew the retention screw if there is one. Carefully align the M.

    2 SSD with the slot and gently push it in until it clicks into place. Finally, replace the retention screw if you removed one and secure the M.2 SSD.

    Once you’ve completed these steps, you can plug your computer back in and turn it on. The computer should recognize the new M.2 SSD automatically, but if it doesn’t, you may need to access your BIOS settings to configure it.

    Enjoy the benefits of faster read and write speeds as well as greater storage capacity with your new M.2 SSD!

    Troubleshooting Tips for Cloning SSD to M.2

    Are you looking to upgrade your computer’s drive to an M.2 SSD? Cloning your existing SSD to an M.2 drive can save you a lot of time and effort.

    However, the process can be tricky if you are not familiar with it. Here are some troubleshooting tips for cloning SSD to M.

    Firstly, ensure that your computer supports M.2 SSD and check if you are using the correct type of M.2 SSD.

    Also, make sure that your computer’s BIOS is updated to support the new M.2 SSD. Secondly, use reliable cloning software that can clone your entire SSD, including the operating system and boot records.

    Thirdly, verify if the clone was successful by testing the new drive before replacing the old one. Finally, check if there are any issues such as driver or compatibility problems after booting up your computer again. With these tips, cloning your SSD to M.

    2 should be a breeze.

    Common Problems with Cloning Process

    Cloning an SSD to M.2 drive can be a daunting task. Even experienced users can run into issues.

    The most common problem is the size difference between the source and target drives. However, there are ways to troubleshoot this problem. One way is to make sure the target drive has enough free space before cloning.

    Also, ensure that the target drive is formatted to the correct file system. Another issue that users face is partition alignment. When cloning, make sure that the partition is aligned to the correct sector size to ensure optimal performance.

    Finally, the cloning process can be time-consuming, so it’s important to be patient and let the process run its course. With these troubleshooting tips, cloning your SSD to an M.2 drive should be a smooth and successful process.

    Solutions to Common Cloning Problems

    If you’re looking to upgrade your computer’s storage by cloning your SSD to M.2, you may encounter a few hiccups along the way. First, make sure that you have the correct software to perform the cloning process.

    Some software may not be compatible with certain drives, so be sure to do your research beforehand. Secondly, if you are unable to boot from the new M.2 drive after cloning, you may need to go into your BIOS settings and change the primary boot device.

    Additionally, you may need to adjust the partition size of your old SSD to fit onto the newer, smaller M.2 drive. Finally, it’s important to keep in mind that cloning can be a time-consuming process, so be patient and allow ample time for it to complete.

    By following these troubleshooting tips, you can successfully clone your SSD to M.2 and enjoy faster storage speeds.

    Conclusion and Next Steps

    In conclusion, cloning your SSD to an M.2 drive is like giving your car a turbo boost – it’s faster, more efficient, and makes you feel like a boss. With a few clicks of a button and the right software, you can have your entire operating system and files transferred over in no time.

    So, why settle for a horse-drawn carriage when you can have a Ferrari? Clone that SSD to an M.2 and take your computer to the next level. “

    FAQs

    What is the difference between cloning SSD to M.2 and a fresh installation?
    Cloning SSD to M.2 is the process of making an exact copy of all the data from your existing SSD to M.2 drive, while a fresh installation requires you to install the operating system and other software from scratch.

    Can I clone my SSD to M.2 without losing any data?
    Yes, you can clone your SSD to M.2 without losing any data. It copies all the files and settings, including the operating system, applications, and personal data, without any damage.

    What are the benefits of cloning an SSD to M.2?
    Cloning SSD to M.2 offers several benefits, including higher speed, increased storage capacity, improved boot times, and overall performance, with no loss of data.

    What tools do I need to clone my SSD to M.2?
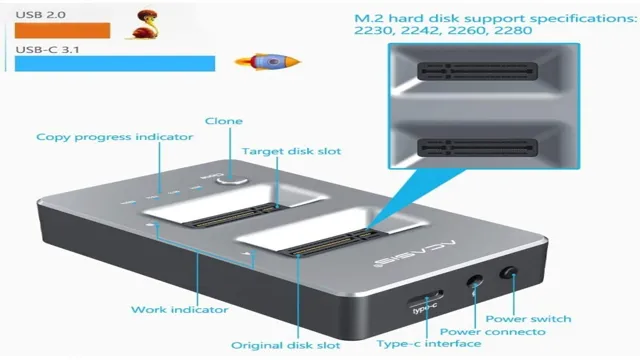
    You can use several third-party tools, including Acronis True Image, EaseUS Todo Backup, Clonezilla, and Macrium Reflect, to clone your SSD to M.2. You may need an M.2 enclosure or adapter to connect your SSD to your computer, depending on your system’s configuration.

  • Effortless guide to clone your hard drive to SSD like a Pro

    Have you ever wanted to upgrade your computer’s hard drive to an SSD, but dreaded the thought of having to reinstall all your programs and files? Fear not, because there is a solution: cloning your hard drive to an SSD. Cloning your hard drive to an SSD is a simple process that can significantly improve the speed and performance of your computer. It involves copying the entire contents of your existing hard drive to a new SSD, which can then be used as a replacement.

    In this step-by-step guide, we will walk you through the process of cloning your hard drive to an SSD. We will cover everything from selecting the right software to ensuring that your new SSD is properly configured and ready to use. Whether you’re a tech-savvy computer enthusiast or a complete novice, this guide has everything you need to know to clone your hard drive to an SSD and take your computer to the next level.

    So, roll up your sleeves and get ready to upgrade your computer’s performance with this easy and hassle-free process.

    Check Your Requirements

    If you’re planning to upgrade your computer’s hard drive to a solid-state drive (SSD), cloning your current hard drive is a convenient way to transfer all your data and settings to the new drive. Before starting the cloning process, it’s essential to check the requirements for your cloning software and hardware. Some software may only work with specific operating systems, while others may need a separate adapter or enclosure for both drives.

    Ensure that you have enough storage space in the SSD to accommodate all the data from the hard drive. Additionally, check if your cloning software requires creating a bootable USB drive or if it can clone directly from within the operating system. Once you know the requirements, you can go ahead and start the cloning process, which usually involves connecting the SSD to your computer and using the software to clone the hard drive’s contents.

    With a successful cloning, your computer will boot from the new SSD and retain all your settings, files, and programs.

    Ensure Your SSD is Compatible

    If you’re planning to upgrade your storage device with an SSD, make sure it’s compatible with your system requirements. Not all SSDs are created equal, and they come in different sizes, speeds, and interfaces. To ensure compatibility, check the maximum capacity and interface support of your motherboard or laptop.

    Most SSDs use the SATA interface, but some newer models support NVMe, which provides faster read and write speeds. If you’re unsure about the compatibility, consult the manufacturer’s specifications or seek advice from a reliable computer technician. A compatible SSD will not only improve your system’s performance but also extend its lifespan.

    So, invest in the right SSD that meets your requirements and meets your expectations.

    how do i clone my hard drive to ssd

    Use Software to Clone Your Drive

    When planning to clone your drive, it is essential to check your requirements before choosing the software to do the job. You need to ensure that the software you choose is compatible with both your old and new drives, and that it can handle the size of the data you intend to clone. It’s also important to consider the type of drive you have, as some software may only work with specific types of drives.

    Additionally, if you want to clone your drive to transfer it to a new computer, you need to make sure the software is capable of transferring the operating system as well. By taking the time to research and select the appropriate software, you can ensure a seamless cloning process without losing any of your valuable data. Keyword: Clone Your Drive

    Preparing for the Clone

    If you’re wondering how to make the most out of your computer system, upgrading to a solid-state drive (SSD) can improve your computer’s performance significantly. However, migrating your data and the operating system from your old hard disk drive (HDD) to a new SSD can seem intimidating. If you want to clone your hard drive and transfer everything to an SSD, you don’t have to worry about losing any of your data.

    Several easy-to-use software utilities like EaseUS Todo Backup, AOMEI Backupper, and Acronis True Image can help you complete the cloning process without issues. Once you have chosen a cloning software, you need to ensure that your SSD is properly connected to your computer before starting the cloning process. Make sure that your HDD has enough space to copy all files over to your new SSD.

    Finally, start cloning your hard drive. It may take some time to complete the cloning process. But once finished, your computer will likely perform better with faster data transfer rates, shorter load times, and faster boot-ups.

    By following these simple steps, you’ll be able to clone your hard drive to an SSD with ease.

    Backup Your Data

    Backing up your data before attempting to clone your system is crucial to ensure data is not lost in the process. This involves creating a copy of all important files and storing them in a secure location, such as an external hard drive or cloud storage. The backup process can be automated or done manually, but it must be done regularly to ensure all changes to data are captured.

    By taking the time to backup your data, you can avoid the disaster of losing essential files and documents. Not only can this be frustrating, but it can also impact productivity and cause stress. Remember, it’s always better to be safe than sorry, and investing in a backup solution is a wise decision.

    Defragment Your Hard Drive

    If you’re planning to clone your hard drive, it’s essential to prepare your computer beforehand. One crucial step is defragmenting your hard drive. Defragmenting rearranges the files and data on your hard drive, making them easier to access and increasing your computer’s overall performance.

    When you defragment your hard drive, you’re essentially cleaning it up and streamlining its contents. This process helps your computer run smoother, allowing programs to load faster and files to open more quickly. Plus, it can help improve your computer’s lifespan and prevent crashes and errors.

    By taking the time to defragment your hard drive before cloning it, you can ensure a smoother and more successful cloning process.

    Clone Your Hard Drive to SSD

    If you’re looking to upgrade your computer’s performance, one way to do it is by swapping out your old hard drive for a faster SSD. However, the thought of transferring all of your data from one drive to another can be intimidating. Fortunately, it’s actually quite easy to clone your hard drive to an SSD.

    All you need is a cloning tool that can copy your entire hard drive, bit-for-bit, to your new SSD. One popular cloning tool is Macrium Reflect. To clone your hard drive to an SSD using Macrium Reflect, simply connect your new SSD to your computer, open the software, and follow the on-screen instructions.

    Macrium Reflect will guide you through the process of selecting your source and destination drives, choosing the partition layout, and starting the clone. The whole process may take a few hours, depending on the size of your hard drive, but it’s completely hands-free once you’ve started. Once the clone is complete, you can shut down your computer, swap out the old hard drive for your new SSD, and boot up your computer just like normal.

    Everything should be exactly as it was before, but now your computer should be significantly faster and more responsive thanks to your new SSD. And with your old hard drive still safely stored away, you can always revert back to it if something goes wrong with the new SSD. With a little bit of patience and the right tools, cloning your hard drive to an SSD is a straightforward process that can breathe new life into your computer.

    Connect the SSD and Boot the Software

    To clone your hard drive to SSD, the first step is to connect the SSD to your computer and ensure that it is recognized. Once connected, you can boot up the cloning software that you have chosen. Before proceeding, it is important to make sure that you have selected the correct source (your existing hard drive) and destination (the SSD).

    This will ensure that all data is properly copied over and that you don’t accidentally erase anything important. Once you have double-checked your settings and initiated the cloning process, it may take some time for the software to complete the task. However, once finished, you will have an exact duplicate of your hard drive on the SSD, meaning that you can swap out your old drive for the new one and start using your computer as normal, albeit with faster and more reliable storage.

    So, if you’re looking to make the most of your computer’s performance, cloning your hard drive to an SSD is an excellent way to start.

    Choose Cloning Options

    When it comes to upgrading your computer’s performance, there’s nothing quite like swapping out your old hard drive for a shiny new SSD. And the best part? You don’t have to go through the hassle of reinstalling your OS, apps, and files – you can clone everything over in one fell swoop. But before you go ahead and clone your hard drive, you need to consider a few cloning options.

    For example, should you use a software or hardware-based solution? Do you want to clone only certain partitions or the entire drive? And how do you want to handle any bad sectors or errors? By taking the time to answer these questions, you can ensure a smooth and successful cloning process that leaves you with a speedy, high-performance SSD. So, whether you’re a casual user or a power user, don’t let cloning options overwhelm you. With a little bit of research and some careful planning, you can make the switch to SSD with ease.

    Begin the Cloning Process

    If you’re planning to upgrade your computer’s hard drive to a solid-state drive (SSD), you’ll need to clone your existing hard drive first. This process involves copying all of your current data, software, and settings onto the new SSD to ensure a seamless transition. It’s not as complicated as it sounds, and there are a variety of software tools available to make the process easy and straightforward.

    The important thing is to make sure you have enough space on your new drive, and to make a backup of your existing data before you begin. Once you’ve done that, simply follow the instructions provided by your chosen cloning software, and in no time at all, you’ll have a faster, more responsive computer with all your files and programs intact. So don’t delay – begin the cloning process today and enjoy the benefits of an upgraded SSD!

    Final Steps

    So, you’ve made the decision to clone your hard drive to an SSD — good for you! You’re on your way to faster boot times and quicker program launches, but you’re not quite done yet. The final steps to completing this process involve attaching the new SSD, selecting it as your main boot drive, and starting the cloning process. Once you’ve selected the drive, open your cloning software and follow the prompts to copy your data from the hard drive to the SSD.

    It may take some time for all the data to transfer, but once it’s complete, you’ll be able to restart your computer and boot up from the newly-cloned SSD. Remember, if you run into any issues during the process, seek assistance from online guides or professionals. Above all, be patient and take your time to ensure everything is done correctly.

    With a little bit of effort, you’ll have a speedy new SSD up and running in no time!

    Remove and Replace Your Old Drive

    Now that you have safely removed your old drive, it’s time to replace it with a new one. Before you do, make sure that you have correctly identified the type of drive needed and any other specifications that your computer requires. Once you have this information, carefully place the new drive into the slot and secure it in place with screws or brackets.

    Be sure to reconnect any cables that were removed during the process, such as power and data cables. Once everything is securely in place, you can reattach any covers or panels that were removed. Congratulations, you have successfully replaced your old drive with a new one.

    You should now be able to start up your computer and enjoy the benefits of increased storage space or improved performance.

    Verify Your Boot Drive

    In order to ensure that your computer is running smoothly and efficiently, it’s crucial to verify your boot drive. Your boot drive is the main drive that stores your operating system and all of your software and files. Verifying it should be one of the final steps that you take when setting up your computer.

    This will ensure that your operating system is installed correctly, without any errors or corrupted files. It’s important to note that different operating systems may have different steps to verify your boot drive, so be sure to follow the specific instructions for your system. Once you’ve verified your boot drive, you can rest easy knowing that your computer is ready to go and won’t be plagued by any technical issues.

    Enjoy Your New SSD!

    Congratulations on your new SSD! Before you dive headfirst into using your new storage device, there are a few final steps you should take to ensure optimal performance and longevity. The first thing you should do is back up all of your important data from your current hard drive or storage device onto an external backup. This is an important precaution to take in case anything goes wrong during the migration process.

    Once your data is backed up, shut down your computer and open it up to swap out your old hard drive for your new SSD. Make sure to follow the manufacturer’s instructions carefully to avoid damaging the drive or voiding your warranty. After installing your new SSD, plug your computer back in and power it up.

    Depending on your operating system, you may need to go through a few extra steps to optimize your SSD for peak performance, such as enabling TRIM command on Windows or turning off time machine on macOS. With these final steps completed, you’re now ready to enjoy your new SSD’s speedy performance and reliable storage for years to come!

    Conclusion

    In summary, cloning your hard drive to an SSD is like giving your computer a performance makeover. It’s a fantastic way to reduce load times, speed up start-up, and improve overall system responsiveness. And with a bit of tech know-how and the right software, the process is surprisingly straightforward and easy.

    So don’t wait any longer, give your computer the gift of speed by cloning your hard drive to an SSD today!”

    FAQs

    What is the best software to clone my hard drive to an SSD?
    There are several popular software options for cloning a hard drive to an SSD, including EaseUS Todo Backup, Acronis True Image, and Macrium Reflect. It’s important to do your research and choose a reliable software that suits your specific needs.

    Can I clone my hard drive to an SSD without losing data?
    Yes, cloning your hard drive to an SSD will create a copy of all your data, including your programs, files, and settings. As long as the SSD is large enough to hold all the data on your hard drive, you won’t lose any data in the cloning process.

    How long does it take to clone a hard drive to an SSD?
    The time it takes to clone a hard drive to an SSD depends on the size of your hard drive and the speed of your computer and storage devices. Cloning a small hard drive to an SSD can take as little as 30 minutes, while a larger hard drive with many files and programs could take several hours.

    Do I need to format the SSD before cloning my hard drive to it?
    It’s generally recommended to format the SSD before cloning your hard drive to it. This ensures that the SSD is clean and ready to receive a copy of your hard drive data. Most cloning software will give you the option to format the SSD as part of the cloning process.

  • Unlock the Full Potential of Your SSD Drive: A Step-by-Step Guide on How to Slave SSD Drive

    Unlock the Full Potential of Your SSD Drive: A Step-by-Step Guide on How to Slave SSD Drive

    Are you looking for ways to maximize your computer’s storage capacity? Slaving an SSD drive is one of the most efficient ways to achieve this without having to replace your hard drive entirely. In this blog post, we’ll explain how to slave an SSD drive, what its benefits are, and how to make the process as simple as possible. Whether you’re a student, a professional, or a gamer, you’ll find this guide useful and uncomplicated.

    With our step-by-step instructions, you’ll be able to master the technique and make the most of your computer’s storage space. So let’s get started!

    Gather Materials

    When it comes to learning how to slave an SSD drive, the first step is to gather all of the necessary materials. This includes the SSD drive itself, a SATA cable to connect the drive to your computer, a power cable to supply power to the drive, and an available SATA port on your motherboard. You will also need a working computer that is already up and running.

    Once you have gathered all of these materials, you can begin the process of slaving your SSD drive. This is a simple process that involves connecting the cables and configuring the drive in your computer’s BIOS settings. With a bit of patience and attention to detail, you can easily slave an SSD drive and enjoy the additional storage space it provides.

    Get an SSD drive enclosure

    If you’re thinking of upgrading your computer’s storage capabilities, getting an SSD drive enclosure can be a great option to consider. Before you start, make sure you have all the materials you’ll need. Firstly, you’ll need to purchase an SSD drive enclosure that’s compatible with the size of your SSD drive.

    You can find these online or in electronics stores. Next, gather your screwdrivers as you’ll need them to open up your computer and remove the SSD drive. You’ll also need a USB cable to connect the drive enclosure to your computer for data transfer.

    Once you have all these materials, you’ll be ready to get started! By using an SSD drive enclosure, you’ll be able to securely store your important files and enjoy faster data transfer speeds. So why not give it a try?

    how to slave ssd drive

    Get a USB connector cable

    To begin the process of connecting your device to your computer, you’ll need to gather a few materials. One of the most important pieces you’ll need is a USB connector cable. This cable is essential for transferring data and charging your device.

    Without it, you won’t be able to transfer files, sync your device, or even charge it. To ensure that you get the right cable, you need to check the type of connector on your device. Some devices have USB Type-C ports, while others have Micro USB or Lightning ports.

    Once you’ve identified the correct port, you can purchase the appropriate cable. It’s essential to get a good quality USB connector cable to avoid potential hazards like overcharging or short-circuiting. A good quality cable will ensure that you can transfer data safely and charge your device without any issues.

    It’s worth investing in a good quality cable to ensure that your device remains safe and secure while you’re using it.

    Connect the SSD Drive to Your System

    If you’re looking to slave an SSD drive to your system, the first step is to connect the drive to your computer. To do this, you’ll need to open your computer case and find an available SATA port on your motherboard. Once you’ve located the port, simply connect the SATA cable from the drive to the motherboard.

    If your SSD drive is an external drive, you can connect it to your computer using a USB cable. Before you start using the drive, you’ll also need to ensure that your system recognizes it. To do this, you can check your system’s disk management tool, where you can format and partition the drive as needed.

    Once you’ve done this, you’ll be able to access the data on your SSD drive, giving you more storage space and faster performance for your computer. Overall, slaving an SSD drive to your system is a simple process that can be done quickly with just a few basic steps.

    Open your computer chassis

    Before diving in, make sure your computer is unplugged and grounded. Then, open up your computer chassis. Some cases will have latches or screws holding it together, while others may have sliding panels.

    Check your manufacturer’s instructions if you are unsure about how to do this. Once inside, locate an open SATA port and connect your SSD drive, ensuring it is firmly secured. If you are unsure which cable to use, refer to your motherboard’s manual.

    Once connected, you may close the chassis and plug in your computer. Congratulations, you’ve successfully connected your SSD drive to your system! Now it’s time to format and install your operating system on the new drive.

    Connect the SSD drive to an available SATA port

    When it comes to upgrading your system by adding an SSD drive, the first step is to physically connect the drive to your computer. This can be done by connecting the SSD to an available SATA port. The SATA port is usually found on the motherboard of your system.

    It may be located next to the other SATA ports that are already in use by your hard disk or DVD drive. Once you have located the SATA port, carefully insert the SSD drive into the port and fasten a screw to secure it in place. Make sure to consult your system’s manual for specific instructions on how to add an SSD drive and to ensure that your system’s BIOS is configured to recognize the new drive.

    With the SSD drive properly connected, you can look forward to faster boot times and improved performance from your system!

    Connect the USB cable to the SSD enclosure.

    When it comes to connecting your SSD drive to your system, it’s important to follow the right steps to ensure a smooth and reliable connection. Firstly, you’ll need to connect the USB cable to the SSD enclosure. This step is crucial as it allows your system to detect the SSD so that you can access its contents.

    Make sure to use a high-quality USB cable that is compatible with your SSD and system. Once you’ve established a connection, you can proceed to configure your drive and start moving files. Remember, a quality connection is essential for efficient data transfer, so it’s always best to double-check your connections to avoid any potential issues down the line.

    With a little care and attention, you can easily connect your SSD and benefit from faster file transfer speeds and superior storage capabilities without any hassle.

    Format Your SSD Drive

    If you’re wondering how to slave an SSD drive, the first step is to format it properly. Formatting an SSD involves preparing the drive for use by cleaning it up and dividing it into sections that the operating system can recognize. To start, access your computer’s Disk Management tool, which can be found in the Control Panel or by searching for “Disk Management” in the Windows search bar.

    From there, locate the SSD drive you want to format and right-click on it to select “Format.” Make sure to choose the correct file system (NTFS is usually the best option for SSDs) and allocation unit size before clicking “OK” to begin the formatting process. Once completed, your SSD drive is ready to be slaved to another device and used for additional storage space or backup purposes.

    Format the drive using Disk Management on Windows

    If you have a new SSD drive or want to repurpose your old one, formatting it properly is a crucial step. Fortunately, Windows has its own Disk Management tool that makes the process easy. To format your SSD drive, you’ll need to access the Disk Management window by right-clicking on the Start menu and selecting Disk Management.

    From there, you can select the SSD drive you want to format, right-click it, and choose the “Format” option. You’ll then need to select the file system you want to use and enter a volume label before clicking “OK” to start the formatting process. It’s important to note that formatting will erase all existing data on the drive, so make sure to back up any necessary files beforehand.

    By using Disk Management, you can ensure that your SSD drive is properly formatted and ready for use.

    Format the drive using Disk Utility on MacOS

    If you’re looking to format your SSD drive on a MacOS, Disk Utility is an excellent tool to get the job done. Firstly, you’ll need to connect the drive to your Mac and open Disk Utility. Then, select the SSD in the left sidebar of Disk Utility and choose the “Erase” option.

    Here, you’ll be prompted to choose a name for your drive and select a format. For SSD drives, it’s recommended to use the “APFS” or “Mac OS Extended” format options. APFS is known for its advanced features like faster backups and increased security, while Mac OS Extended is more compatible with older MacOS versions.

    Once you’ve chosen your format, hit “Erase” to start the formatting process. Keep in mind that formatting your drive will wipe all its contents, so make sure to back up important data before proceeding. In just a few steps, you can easily format your SSD drive using Disk Utility on MacOS.

    Final Word

    To slave an SSD drive is a relatively straightforward process that can have significant benefits in terms of data transfer and storage. By slaving an SSD drive, you can essentially use it as a secondary drive to store and transfer files that may not fit on your primary drive. To do this, you will need to connect the SSD drive to your computer via a SATA cable and then configure the drive to act as a slave drive.

    Depending on your system, this may involve adjusting certain BIOS settings or using software to configure the drive. Once the drive is set up as a slave, you can begin transferring files to and from the drive with ease. Overall, slaving an SSD drive is an excellent way to expand your storage capabilities and streamline your data transfer processes.

    Conclusion

    Well, after all that hard work and dedication, your SSD is now officially slaved to your system! Congratulations! It may seem like an arduous task, but once you’ve successfully accomplished slaving your SSD drive, the benefits will be well worth it. Your system will run smoother and faster than ever before, giving you plenty of time to sit back and bask in the glory of your tech-savvy accomplishments. Don’t forget to treat your new slaved SSD with care and maintenance, and it will serve you well for years to come.

    Happy slaving!”

    FAQs

    What is an SSD drive and how does it differ from a traditional HDD?
    An SSD (Solid State Drive) is a type of storage device that uses flash memory to store data. It differs from a traditional HDD (Hard Disk Drive) in that it has no moving parts, which makes it faster, more reliable, and less noisy.

    Can you slave an SSD drive?
    Yes, you can slave an SSD drive like any other storage device. However, keep in mind that the term “slave” is mostly used in reference to IDE drives, while the newer SATA drives use a different terminology.

    What are the benefits of slaving an SSD drive?
    Slaving an SSD drive can be useful if you want to transfer data from one computer to another, or if you need additional storage space. It can also be a good way to back up important files and folders.

    How do you slave an SSD drive?
    To slave an SSD drive, you need to connect it to a computer that already has a master drive installed. Depending on the type of SSD, you will either need to use a SATA cable or an M.2 connector to connect the drive. Once connected, you can access the drive just like any other storage device.

  • Experience Lightning-fast Speeds with Seagate SATA SSD: Unleash the Full Potential of Your Computer!

    Experience Lightning-fast Speeds with Seagate SATA SSD: Unleash the Full Potential of Your Computer!

    If you’ve ever experienced the frustration of a slow or unresponsive computer, then you know the importance of having a reliable and fast solid-state drive (SSD). One popular brand that is making waves in the market is Seagate’s SATA SSD. This innovative technology boasts an array of benefits that make it a sound investment for those looking to upgrade or replace their existing hard drive.

    From lightning-fast speed to improved performance and reliability, the Seagate SATA SSD has a lot to offer. But what exactly are these benefits, and how can they help enhance your user experience? Let’s dive in and explore the advantages of a Seagate SATA SSD.

    Improved Speed and Performance

    If you’re looking for improved speed and performance from your computer or laptop, the Seagate SATA SSD is a great choice. This solid-state drive can provide lightning-fast read and write speeds, which means your programs will load faster and you’ll be able to transfer files more quickly than ever before. One of the great things about SSDs is that they don’t have any moving parts, which means they’re less prone to mechanical failure compared to traditional hard drives.

    They’re also more energy-efficient, which could help prolong the battery life of your laptop. With the Seagate SATA SSD, you can enjoy improved speed and performance across a wide range of applications, making it a great investment for anyone looking to boost their computing experience.

    Faster Boot Times and Application Launches

    Improved Speed and Performance In today’s fast-paced world, speed is everything. We want our devices to boot up as quickly as possible, and applications to launch instantly. This is why improved speed and performance are such important features of modern technology.

    With the latest advancements in hardware and software, devices are becoming faster than ever before. Operating systems are now optimized to boot up quickly, allowing users to start using their device immediately. In addition, applications are designed to launch faster, minimizing the time it takes to get tasks done.

    All of this translates to better productivity and an improved user experience. So, whether you’re working on a project or just searching the web, improved speed and performance means you can get things done faster and more efficiently.

    seagate sata ssd

    Reduced Loading Times in Games and Large Files

    Reduced Loading Times As gamers, we all know how frustrating it is for games to take forever to load. And don’t even get us started on large files like videos or images that can take ages to open. Fortunately, new technologies and advancements in software have made it possible to reduce loading times significantly.

    Thanks to these improvements, gamers can now enjoy seamless gameplay without any annoying interruptions. This is all thanks to tweaks made to the way that games and files are stored and accessed on hard drives. By optimizing the data on the hard drive, games and other large files can be loaded much faster, reducing the overall loading time substantially.

    This not only improves the speed and performance of games but also makes it easier to access and view large files, making our digital lives more convenient and efficient. So the next time you load up your favorite game, you can rest easy knowing that reduced loading times will ensure that you can jump into the action faster than ever before.

    Reliable Storage and Endurance

    When it comes to reliable storage and endurance, Seagate SATA SSDs are a top choice. These solid-state drives use reliable NAND flash memory technology to deliver faster speeds and superior endurance than traditional hard drives. With fast read and write speeds, you can transfer large files quickly and smoothly, making them perfect for gaming, multimedia editing, and other demanding applications.

    What’s great about Seagate SATA SSDs is that they’re built to last, thanks to advanced features like error correction and wear-leveling technology that help extend the lifespan of the drive. Plus, they come in a range of capacities to suit your needs, from 256GB to 4TB, so you can store all your photos, videos, and documents without running out of space. So if you’re looking for reliable storage and endurance, Seagate SATA SSDs are definitely worth considering.

    Advanced Data Security and Protection

    When it comes to advanced data security and protection, reliable storage and endurance are critical factors for ensuring that sensitive information is kept safe and secure. In today’s world, data breaches and cyber attacks are becoming increasingly commonplace, which is why it’s essential to have robust security measures in place to safeguard against these threats. One way to do this is through the use of reliable and durable storage solutions that can withstand regular use without succumbing to wear and tear.

    These kinds of storage options typically offer higher endurance levels, which means that they can handle significantly more read/write cycles than standard storage devices can. This added durability ensures that your data stays safe and secure, even in high-pressure environments where constant access is vital. So whether you’re dealing with sensitive client information or crucial business data, choosing a reliable and durable storage solution can help you ensure that your information remains protected from prying eyes and potential data breaches.

    Longer Lifespan with High Endurance Rating

    Reliable Storage When it comes to storing digital information, reliability is key. No one wants to lose important data due to a faulty storage device. That’s where high endurance rating comes in.

    By having a storage device with a high endurance rating, you can be sure that your data will last longer and be more reliable. These devices are designed to handle frequent reads and writes, making them ideal for systems that require constant data access. They are also known for their impressive lifespan, making them a wise investment for individuals and businesses alike.

    When looking for reliable storage, be sure to look for devices with high endurance ratings, as they are the key to ensuring your data is safe and secure for years to come.

    Ease of Use and Installation

    Seagate SATA SSDs are incredibly easy to use and install, making them a popular choice among computer enthusiasts and casual users alike. Thanks to their simple design, anyone can install and set them up within minutes without the need for any specialized knowledge or expertise. Furthermore, Seagate provides users with clear instructions and step-by-step guides, making the process even more straightforward.

    In terms of functionality, these SSDs are also very user-friendly and intuitive, ensuring seamless performance and smooth operation. Whether you are looking to upgrade your computer’s storage or want to speed up its performance, Seagate SATA SSDs offer a hassle-free solution that delivers excellent value for money. With their impressive reliability, durability, and ease of use, they are a popular choice for both personal and professional use.

    Plug-and-Play Installation Process

    One of the most significant benefits of choosing a plug-and-play installation process for your software or hardware is the ease of use and installation it provides. With just a few simple steps, you can have your devices up and running in no time, without the need for technical expertise or complex programming. This means that even those who are not computer-savvy can get started quickly and efficiently, without encountering any frustrating challenges or delays.

    Moreover, a plug-and-play installation process reduces the risk of errors or malfunctions, as it often comes with pre-installed drivers and software that is compatible with the hardware. This makes it a great option for anyone who values practicality, ease of use, and time-saving solutions. So, if you’re looking for a hassle-free installation process that delivers excellent results, a plug-and-play approach might be just what you need.

    Compatibility with a Wide Range of Devices

    When it comes to technology, compatibility is key. And that’s exactly what you’ll get with our product. Our software has been designed to work seamlessly with a wide range of devices, so you won’t have to worry about any unexpected surprises or compatibility issues.

    Whether you’re using a desktop computer, smartphone, or tablet, our software will work just as well. And the best part? Installing and using our software is an absolute breeze. You won’t need any special technical knowledge or experience – simply follow the instructions provided and you’ll be set up in no time.

    We believe that our product should be accessible to everyone, regardless of their technical prowess. That’s why we’ve worked hard to make it as user-friendly as possible. So, whether you’re a seasoned tech expert or a complete novice, you can feel confident using our software.

    Affordability and Value for Money

    If you’re looking for affordability and value for money when it comes to solid-state drives (SSDs), then Seagate SATA SSD might just be the perfect fit for you. Seagate is known for their expertise in traditional hard drives, but they have also invested in the SSD market in recent years, competing with other well-known brands. Seagate SATA SSDs are designed to offer an affordable alternative to the more expensive SSDs on the market, without compromising quality and reliability.

    These drives come in different storage capacities that can cater to different user needs, allowing them to store important files, run applications, and load games much faster than traditional hard drives. Compared to their hard drive counterparts, Seagate SATA SSDs are much faster, more durable, and consume less power. Plus, with Seagate’s extensive warranty and support options, you can have peace of mind knowing that you’re investing in a product that stands behind its quality and performance.

    In conclusion, if you’re looking for a budget-friendly SSD with great value for money, the Seagate SATA SSD is definitely worth considering.

    Competitive Pricing Compared to Other SSD Brands

    When it comes to picking the right solid-state drive (SSD) for your computer, there are a lot of brands to choose from. However, one thing you don’t have to worry about with SSDs from our brand is breaking the bank. Our competitive pricing makes us an excellent choice for those looking for affordability and value for money.

    While other SSD brands might charge a premium price for similar specifications, we believe in providing high-quality SSDs at a fair and reasonable cost. By doing so, we are able to offer our customers the best of both worlds – top-notch performance and an affordable price tag. Choosing us means you get to spend your hard-earned money wisely without sacrificing on quality.

    So why pay more when you can get the same thing with us at a fraction of the price?

    Conclusion

    In the world of data storage, Seagate SATA SSD is a shining star. It’s lightning fast, energy-efficient, and reliable as a trusty old friend. Whether you’re a gamer, content creator, or business professional, this solid-state drive is a must-have.

    So, if you want to keep your precious data safe and secure, go ahead and snag yourself a Seagate SATA SSD. Believe me, your computer will thank you!”

    FAQs

    What is Seagate SATA SSD?
    Seagate SATA SSD is a Solid State Drive (SSD) that uses a Serial Advanced Technology Attachment (SATA) interface to connect to the computer’s motherboard. It provides faster data transfer rates and faster boot times compared to traditional Hard Disk Drives (HDD).

    How do I install Seagate SATA SSD in my computer?
    To install Seagate SATA SSD in your computer, you need to first back up all your important data and shut down your computer. Then, you need to open the computer case, locate the SATA port on the motherboard, and connect the SSD using the SATA cable. After that, you need to close the case and turn on the computer to install the OS on the SSD.

    How do I clone my HDD to Seagate SATA SSD?
    To clone your HDD to Seagate SATA SSD, you need to first connect the SSD to your computer using a USB-to-SATA adapter or enclosure. Then, you need to download and install cloning software like Seagate DiscWizard or Acronis True Image. After that, you can follow the on-screen instructions to select the source HDD, target SSD, and start the cloning process.

    How do I troubleshoot Seagate SATA SSD errors?
    If you encounter any errors while using Seagate SATA SSD like slow performance, data corruption, or unrecognized drive, you can troubleshoot them by checking the SATA cable connections, updating the SSD firmware, running a disk check, or restoring a backup image. If the problem persists, you can contact Seagate technical support or get a replacement under warranty.

  • Boost Your Speed and Storage with SSD Small Form Factor: The Ultimate Guide

    Boost Your Speed and Storage with SSD Small Form Factor: The Ultimate Guide

    Have you ever found yourself longing for a computer that can be tucked away neatly on your desk or easily transported in your backpack? If so, you may be in the market for a small form factor (SFF) desktop. These miniature machines pack impressive processing power into a tiny package, but one crucial consideration when choosing an SFF desktop is storage. Luckily, solid-state drives (SSDs) are a perfect fit for these pint-sized powerhouses.

    In this article, we’ll explore the benefits of implementing an SSD into your SFF desktop and help you make an informed decision about which one is right for you. So fasten your seatbelts, and let’s dive in!

    Size Matters

    When it comes to storage solutions, size does matter. Small form factor SSDs have revolutionized the way we store and access data. Gone are the days when we had to compromise speed and performance for compactness.

    Now, tiny SSDs provide us with lightning-fast data access without taking up too much space in our devices. These small wonders pack a lot of punch with their high-speed read and write operations, which means data-intensive tasks such as video editing and gaming can now be done on compact devices with ease. Small form factor SSDs have allowed for sleek, lightweight devices that don’t compromise on performance.

    With the demand for faster, more efficient devices increasing day by day, small form factor SSDs prove to be crucial components in the tech industry. So, if you’re looking for fast and efficient storage solutions that won’t take up too much space, small form factor SSDs are the way to go.

    Dimensions and Benefits

    When it comes to choosing the perfect product or service, size really does matter. The dimensions of a product can greatly impact its functionality and effectiveness, as well as its overall appeal to consumers. For instance, a larger sofa may be more comfortable and accommodating, but may not fit into a smaller living room.

    On the other hand, a smaller and more compact laptop may be easier to transport, but may not have the same processing power as a larger model. When choosing a product, it’s important to consider your needs and the space you have available. Choosing the right size can not only improve functionality but also provide increased benefits such as portability, ease of use, and overall satisfaction.

    So, before making a purchase, consider the dimensions carefully to ensure that you’re choosing the best option for you.

    ssd small form factor

    Comparing Small Form Factor SSDs to Traditional Drives

    When it comes to selecting a storage drive, the size of the drive can make a significant difference in the overall performance of your computer. Small form factor (SFF) SSDs are becoming an increasingly popular choice for those who want a faster and more streamlined computing experience. These drives are smaller in size but pack a powerful punch, capable of handling large applications and files with ease.

    Traditional hard drives, on the other hand, are larger and more prone to mechanical failure, causing them to be slower and less efficient overall. When comparing SFF SSDs to traditional hard drives, it’s clear that size really does matter. If you’re looking for a faster, more efficient computing experience, then opting for a small form factor SSD is a wise choice.

    With their compact size and impressive performance capabilities, you can reduce your overall system size while still maintaining high levels of data storage and processing power.

    Performance Enhancements

    If you’re looking to give your computing performance a boost, consider upgrading to an SSD in a small form factor. Small form factor SSDs are compact, lightweight, and power-efficient, making them perfect for slim laptops and ultrabooks. Not only do they consume less power and generate less heat than traditional hard drives, but they also offer faster data transfer rates, improved access times, and quicker boot and load times.

    With an SSD, you’ll experience a noticeable improvement in your system’s responsiveness and overall speed. Plus, with a small form factor, you won’t have to sacrifice performance for portability. Upgrade to an SSD today and take your computing experience to the next level.

    Faster Boot Times and Data Access

    If you’re looking to improve your computer’s performance, one of the best ways to do so is to take advantage of faster boot times and data access. With advancements in technology, boot times and data access have become faster than ever before, allowing you to get more done in less time. Whether you’re a gamer, creative professional, or just someone who wants their computer to run more smoothly, these performance enhancements can make a big difference.

    By optimizing your computer’s hardware and software, you can reduce lag, improve load times, and increase overall productivity. So if you’re tired of waiting for your computer to catch up, it’s time to invest in faster boot times and data access.

    SSD vs. HDD Benchmarks

    The performance enhancements between SSDs and HDDs are like night and day. SSDs have faster read and write speeds, which means they can launch programs and access files much quicker than their HDD counterparts. In some cases, the difference in boot-up times can be seconds versus minutes.

    As a gamer, you will notice a significant reduction in load times and improved game performance with an SSD. However, one thing to keep in mind is the cost difference. SSDs tend to be more expensive than HDDs, but the benefits that they offer are hard to ignore.

    In terms of endurance, an SSD also outperforms an HDD, lasting longer overall. Switching to an SSD is one of the most effective ways to improve overall performance on your computer. Don’t let slow load times and sluggish performance hold you back!

    Application-specific Advantages

    When it comes to application-specific advantages, performance enhancements are often at the top of the list. One of the main benefits of custom applications is the ability to optimize them for specific tasks, resulting in faster and more efficient processing. This can be achieved through a variety of methods, such as optimizing algorithms, utilizing specialized hardware, or leveraging cloud resources.

    For instance, a custom image processing application can utilize graphic processing units (GPUs) to vastly improve performance compared to a traditional CPU-based solution. Additionally, custom applications can be designed to handle bursty workloads, ensuring that they can scale on demand and maintain performance even during peak usage periods. Overall, performance enhancements are a major advantage of developing custom applications, allowing businesses to gain a competitive edge by maximizing efficiency and productivity.

    Cost Considerations

    When it comes to SSDs in small form factors, cost is one of the primary considerations. While SSDs tend to be more expensive than traditional hard drives, the price can vary depending on the size and performance of the SSD. For those who are on a tight budget, choosing a smaller capacity SSD or a lower-performing model can help keep costs down.

    However, if speed and storage are a top priority, it may be worth investing in a higher-end SSD that can better meet your needs. Ultimately, the decision on how much to spend on a small form factor SSD will depend on your specific requirements and budget, but it’s important to consider your options carefully to avoid overspending or sacrificing performance. For the best value, be sure to compare prices from different manufacturers and look for deals or sales that can help you save.

    Overall, with careful planning and consideration, it is possible to find a small form factor SSD that meets your needs without breaking the bank.

    Upfront Costs and Long-term Savings

    When it comes to investing in renewable energy, the upfront costs can seem daunting. However, it’s important to consider the long-term savings that come with these investments. While traditional energy sources may seem cheaper in the short term, they often come with hidden costs such as pollution and climate change.

    By investing in renewable energy sources like solar panels or wind turbines, you’re not only saving money on future energy bills but also reducing your carbon footprint. It’s important to weigh the upfront costs against the long-term benefits of investing in renewable energy and make a decision that aligns with your values and financial goals. In the end, the investment pays off both financially and environmentally.

    Enterprise and Consumer-level Choices

    When it comes to making choices between enterprise and consumer-level technology, cost considerations are a crucial factor. On the enterprise level, these choices may involve investing a significant amount of money in hardware and software infrastructure, while consumer-level choices might include more accessible, lower-cost options. However, it is essential to consider the long-term costs associated with each decision.

    In the case of enterprise-level technology, the higher cost may be justified by the reliability and scalability those options offer. Furthermore, they are often more secure, reducing the risk of data breaches and cyberattacks, which can be extremely costly in terms of both time and money. Consumer-level options may appear more affordable up-front, but they might not offer the necessary capabilities to support business growth and expansion.

    Ultimately, the choice between enterprise and consumer-level technology will depend on individual business goals, budgets, and long-term plans.

    Making the Right Choice

    When it comes to choosing the perfect SSD for your small form factor PC, it’s essential to consider your specific needs and preferences. Small form factor PCs require specific SSD sizes, such as M.2 and NVMe.

    These SSDs are less bulky than traditional SSDs and can fit easily into your small form factor PC. Depending on your budget and usage requirements, you can opt for SSDs with varying storage capacities and read and write speeds. While the price difference might be steep, choosing an SSD with higher read and write speeds will ensure faster program loading times.

    So, if you’re a gamer or a content creator, it makes sense to invest in a high-speed SSD. However, if you’re using your PC for general use or office work, a mid-range SSD with decent read and write speeds should be sufficient. In summary, by identifying your needs and taking note of compatibility, you can select the perfect SSD for your small form factor PC.

    Conclusion

    In conclusion, the SSD small form factor is like a diminutive superhero – it may be small in size, but it packs a powerful punch. With lightning-fast data transfer rates and increased durability compared to traditional hard drives, the SSD small form factor is the ultimate sidekick for any computer rig. So if you’re looking for a sleek and speedy storage solution, look no further than the tiny but mighty SSD small form factor.

    FAQs

    What is SSD small form factor?
    SSD small form factor is a type of solid-state drive that has a smaller physical size compared to traditional SSDs. These drives are designed to fit into smaller devices such as ultrabooks, tablets, and mini-PCs.

    What are the benefits of using SSD small form factor drives?
    The benefits of using SSD small form factor drives include faster loading times, lower power consumption, and lightweight design. They are also less prone to mechanical failure due to their lack of moving parts.

    What are some common uses for SSD small form factor drives?
    SSD small form factor drives are commonly used in ultrabooks, tablets, mini-PCs, and other small form factor devices. They are also used as primary storage in some gaming rigs and workstations.

    How do I choose the right SSD small form factor drive for my device?
    When choosing an SSD small form factor drive, consider the device’s specifications, including the size of the drive bay and the type of connection required. You should also consider the desired capacity and speed of the drive to ensure compatibility with your device.

  • Step-by-Step Guide: Installing a Second SSD Drive in Your Alienware PC

    Do you love your Alienware but running out of storage space? Adding a second SSD drive can be the perfect solution to store your large files and games without slowing down your system. However, the process of installation can seem daunting if you have never done it before. Don’t worry, we have got you covered.

    In this blog, we will guide you step-by-step on how to install a second SSD drive in your Alienware. We aim to make it simple and easy to follow for everyone, even if you are not tech-savvy. So, grab your screwdriver and let’s get started with this quick and hassle-free process.

    Check the Compatibility of Your Alienware

    If you’re looking to upgrade your Alienware’s storage capacity, adding a second SSD drive is a popular choice. However, before diving into the installation process, it’s important to check if your particular model is compatible with this upgrade. Different Alienware laptops have varying capabilities and restrictions, so it’s crucial to consult your device’s manual or online resources to determine if a second SSD drive can be installed.

    Make sure to also consider the size and the type of the drive you want to add, as it may require additional hardware or software updates. With proper research and preparation, adding a second SSD drive can significantly improve your Alienware’s performance and storage capabilities.

    Research the Type of SSD You Need

    If you’re looking to upgrade your Alienware’s storage with an SSD, it’s essential to research the type of SSD that will work with your laptop. SSDs come in different form factors, such as 5-inch, M.

    2, and PCIe, and not all Alienware laptops support all of them. Therefore, you’ll need to check your laptop’s user manual or the manufacturer’s website to determine which form factor is supported. Additionally, you’ll want to make sure the SSD you choose has a compatible interface and protocol, like SATA or NVMe.

    Choosing the right SSD will ensure optimal performance, speed up boot and load times, and enhance your overall gaming experience. So, take your time to research and find the perfect SSD for your Alienware laptop.

    alienware how to install second ssd drive

    Prepare Your Tools

    If you want to install a second SSD drive on your Alienware computer, the first thing you need to do is prepare your tools. You will need a screwdriver, a grounding strap, and of course, your new SSD drive. Before you start, make sure to shut down your computer and unplug it from the wall.

    It’s also a good idea to wear an anti-static wrist strap or simply touch a grounded metal object to discharge any static electricity from your body. Once you’ve prepared your tools and taken the necessary precautions, you’re ready to open your computer and locate the drive bays where you will install the new SSD drive. By following these simple steps and taking your time, you can easily install a second SSD drive and enjoy the benefits of increased storage and faster performance on your Alienware computer.

    Gather the Necessary Equipment

    The first step in any project is to make sure you have all the necessary tools. When it comes to blogging, having the right equipment can make all the difference in the world. In this case, your tools are digital, meaning you’ll need some basic computer equipment.

    You’ll need a reliable computer or laptop that’s in good working condition. Along with your computer, you’ll need a good internet connection because you’ll be posting and managing your blog online. You’ll also need a camera to take pictures and a microphone to record audio if you plan on incorporating multimedia elements.

    In fact, if you want to produce high-quality content, then investing in a good camera and microphone should be a top priority. A keyboard is imperative, in addition to having editing software, a text editor, and plenty of storage to save all your text, video, and audio files. Additionally, having a comfortable workspace and ergonomic chair can help you stay focused and productive for long periods of time.

    By having all the necessary tools at your disposal, you’ll be able to work efficiently and effectively without worrying about whether or not you have what you need to get the job done.

    Ensure the Correct Screwdriver is Available

    When starting a DIY project or even just a simple repair job, it’s important to make sure that you have all the necessary tools prepared before diving in. One crucial aspect of tool preparation is ensuring that you have the correct screwdriver available. Using the wrong screwdriver can cause damage to the screw and strip it, making it impossible to remove or adjust.

    This can be frustrating and potentially costly, so it’s important to take the time to identify the correct screwdriver for the job at hand. Whether it’s a Phillips head, flat head, or specialty screwdriver, having the right tool can save you time and prevent further damage to your project. So before you get started, take a moment to assess the screws you’ll be working with and make sure you have the correct screwdriver readily available.

    Trust us, it’s worth it in the long run!

    Backup Your Data

    If you’re looking to increase the storage capacity of your Alienware laptop, installing a second SSD drive is a great option. Not only will it provide you with additional storage space, but it can also increase your computer’s overall performance. Before beginning the installation process, it’s important to backup your data in case anything goes wrong.

    You can do this by using an external hard drive or cloud storage service. Once your data is secure, you can consider the type of SSD drive you want to install and the capacity you need. It’s important to make sure that your new drive is compatible with your Alienware laptop before making the purchase.

    You can consult your laptop’s manual or contact the manufacturer for guidance. After you’ve installed your new drive, you can use cloning software to transfer your data from the old drive to the new one. With some careful planning and precautions, the process of installing a second SSD drive can be a great way to improve your laptop’s performance and storage capacity.

    Create a Full Backup of Your System

    Backing up your data is essential for keeping your data safe and secure. A full backup of your system is crucial as it allows you to restore your system to its previous state in case of a catastrophic failure or data loss. This process involves creating a copy of all the files, software, and settings on your computer and storing them in a separate location.

    This can be done using external hard drives, cloud-based storage services, or other backup solutions. It is recommended to backup your system regularly, at least once a month, or more often if you frequently add or modify files. By doing so, you can ensure that your data is protected and easily recoverable, making it easier for you to get back to work in case of an unexpected event.

    Keyword: Backup your data.

    Install the Second SSD Drive

    If you’re looking to boost your Alienware’s storage capacity, installing a second SSD drive is a great way to go about it. Before you begin, make sure you have a compatible SSD and a screwdriver. Start by shutting down your Alienware and unplugging it from any power sources.

    Once that’s done, locate the empty SSD bay on your motherboard and unscrew it. Gently insert your new SSD into the empty bay, making sure it’s properly aligned. Once it’s in place, screw it back into the motherboard, taking care not to overtighten the screws.

    Finally, plug your Alienware back in and power it up. Your new SSD should show up in your file explorer as a new drive. Congratulations! You’ve just installed a new SSD drive and given your Alienware a much-needed storage upgrade.

    Remove the Bottom Cover of Your Alienware

    To install a second SSD drive in your Alienware laptop, you’ll need to remove the bottom cover. This might sound intimidating, but it’s actually a simple process. Begin by shutting down your laptop and disconnecting any cables or peripherals.

    Lay your laptop on a flat surface and locate the screws that secure the bottom cover. Use a Phillips screwdriver to remove these screws and gently lift the cover off. Once you’ve accessed the interior of your laptop, you’ll need to locate an empty hard drive bay.

    Insert your second SSD drive into the bay, making sure it’s securely seated. Then, use screws to attach the SSD drive to the hard drive cage. Finally, replace the bottom cover of your Alienware and secure it with the screws you removed earlier.

    Congratulations, you’ve successfully installed a second SSD drive and expanded your storage capacity!

    Unscrew and Remove the Existing SSD Drive

    If you’re looking to install a second SSD drive on your computer, there are certain steps you need to follow to ensure a successful upgrade. Once you’ve acquired the new SSD drive, you’ll need to unscrew and remove the existing SSD drive from your computer. This step is straightforward, but it’s essential to ensure you don’t damage any other components in the process.

    Begin by turning off your computer and disconnecting all cables, then locate the existing SSD drive and remove it from its slot. Once removed, set it aside and prepare to insert the new SSD drive in its place. Remember to handle the new SSD drive with care and ensure it’s securely fastened in its slot, using any screws or fasteners necessary.

    With this simple upgrade, you’ll have expanded your computer’s storage capacity and improved its performance.

    Insert the New SSD Drive Into the Empty Slot

    Now that you have found an empty slot for your second SSD drive, it’s time to insert it. First, make sure your computer is turned off and unplugged from any power sources. Open the case of your computer and locate the empty slot where you will be inserting the SSD drive.

    Carefully align the drive with the slot and gently push it down until it clicks into place. Once the SSD drive is inserted, you will need to connect the power and data cables to it. The power cable can easily be plugged into the designated slot on the drive, while the data cable will need to be connected to the motherboard.

    It’s important to make sure the cables are securely connected before closing your computer case and turning it back on. With two SSD drives installed, you will experience faster boot times and enjoy more storage space for your important files and programs. So, go ahead and complete the installation of your second SSD drive with ease.

    Secure the New SSD Drive with Screws

    To install the second SSD drive, securing it in place is vital. Make sure to use screws to fix the new SSD drive firmly in position to avoid it from slipping or getting loose. When installing the new drive, be aware of the screw holes located on the sides where you can screw in the drive.

    Not only does this keep your drive from causing electrical issues, but it also enhances its durability, ensuring it lasts long enough to serve your storage needs fully. So, before you start using your new SSD drive, fasten it down firmly in place with screws to make sure it stays put from here on out.

    Replace the Bottom Cover of Your Alienware

    If you’re looking to expand your Alienware’s storage capacity, installing a second SSD drive can be a great option, and it’s easy to do. Start by removing the bottom cover of your laptop using a screwdriver. Next, locate the empty SSD slot, which should be near the existing SSD drive.

    Insert the new SSD into the slot, making sure it’s properly seated and secured with screws if necessary. Finally, reattach the bottom cover and turn on your laptop to confirm that the new drive is recognized. With this simple process, you’ll have expanded your storage space and improved your laptop’s performance in no time.

    Configure the Second SSD Drive

    If you’re looking to upgrade your Alienware desktop with an additional SSD drive, you’re not alone. Many users want the extra space and improved performance that an SSD can provide. Installing a second SSD drive may seem daunting at first, but it’s actually a relatively easy process.

    The first thing you need to do is locate the drive bay where you want to install the new drive. Once you’ve found it, remove the cover and slide the drive into place. Connect the necessary cables and secure the drive with screws.

    Once the drive is installed physically, the final step is configuring the drive in your operating system. This process may vary depending on your system, but typically involves initializing the drive and formatting it to your liking. With the new drive configured, you’ll be able to enjoy the benefits of increased storage and improved performance in your Alienware desktop.

    Initialize the New SSD Drive

    To configure a second SSD drive, the first step is to initialize it. This means preparing the drive for use by formatting it and creating partitions as needed. Before starting, make sure the drive is physically installed in your computer and recognized by the BIOS.

    Windows users can initialize a new drive through the Disk Management utility. Simply right-click on the drive and choose “Initialize Disk”. Then choose the partition style (MBR or GPT) and select the partition(s) you want to create.

    Don’t forget to assign a drive letter to each partition so that it is easily accessible from Windows Explorer. By initializing your new SSD drive, you’ll be able to take full advantage of its speed and capacity for storage and data processing.

    Create a New Volume

    To create a new volume on your second SSD drive, you will need to configure it. This process can be quick and easy. First, you need to make sure that your second SSD drive is connected and recognized by the computer.

    Once it is recognized, you can open the Disk Management tool, which will show all the drives connected to your computer. Right-click on the unallocated space of the second SSD drive, and then click on “New Simple Volume.” This will open up a wizard that will guide you through the process of configuring the new volume.

    You can choose the size of the volume, assign a drive letter, and format the new volume with your preferred file system. Once the wizard completes, you will have a new volume on your second SSD drive. This process is a simple and effective way to expand your storage capacity and organize your files.

    Conclusion: Enjoy the Benefits of Increased Storage and Speed

    In summary, installing a second SSD drive in your Alienware is a piece of cake! With a few simple steps, you can boost your computer’s performance and storage capacity in no time. It’s like adding a second rocket booster to your spaceship – your programs and games will soar to new heights! So, don’t be afraid to tackle this DIY project. Just remember to stay grounded and keep your Alienware grounded too.

    Happy upgrading!”

    FAQs

    What is the process to install a second SSD drive in Alienware?
    First, power off the computer and remove the bottom cover. Locate the empty M.2 slot and insert the second SSD. Reinstall the bottom cover and power on the computer. The operating system should recognize the second drive automatically.

    Do I need to change the BIOS settings after installing the second SSD drive?
    No, you don’t need to change the BIOS settings as long as you’re not changing the boot order or other settings related to storage devices.

    Can I install a SATA SSD instead of an M.2 SSD in Alienware?
    Yes, you can install a SATA SSD if your Alienware has an empty 2.5-inch drive bay. However, if you want to install an M.2 SSD, make sure that your Alienware model supports it.

    How much storage capacity can I add by installing a second SSD drive in Alienware?
    The capacity of the second SSD drive depends on its size and your Alienware’s storage configuration. If you have a dual-drive configuration, you can add up to the maximum supported capacity of the second drive. If you have a single-drive configuration, you can replace the existing drive with a larger one or add a smaller one as a second drive.

  • Unleash Your Creativity with HP FX900 Pro: The Ultimate Design Tool

    Unleash Your Creativity with HP FX900 Pro: The Ultimate Design Tool

    Attention Gamers! Have you been searching for a device that fits all your gaming needs? A device that can handle the graphics-intense and heavy-laden games without any lags or hitches? Look no further as HP FX900 Pro is here to change the game! The HP FX900 Pro is a game-changer. Designed to cater to all the gaming needs of a gamer, this device is worth investing in. The device comprises high-end components that are specifically assembled to deliver the best gaming experience to its users.

    With an Intel 11th Gen Core processor and an NVIDIA RTX 3080 graphic card, the HP FX900 Pro offers top-level performance that will elevate your gaming to another level. It is equipped with a 32GB DDR4 RAM that ensures swift and seamless gaming sessions without any interruptions and delays. The device boasts a 1

    3-inch screen display with a 1080p resolution, which delivers crisp and clear visuals to the gamers. Additionally, it is packed with up to a 1TB SSD, which ensures a faster loading speed and responsiveness. In a nutshell, the HP FX900 Pro is an all-in-one gaming device that caters to all the needs of a gamer.

    It is the perfect device to elevate your gaming experience to a whole new level. So, what are you waiting for? Go grab your HP FX900 Pro and beat your opponents in the game!

    Powerful Performance

    Looking for a laptop that offers powerful performance for all your computing needs? Look no further than the HP FX900 Pro. This laptop is designed with the latest technology to ensure fast and efficient processing, whether you’re working on spreadsheets, designing graphics or editing videos. With a powerful Intel Core i7 processor, this laptop can handle even the most demanding tasks with ease.

    The dedicated NVIDIA graphics card also ensures that you can enjoy seamless gaming, streaming and video playback without any lags or hiccups. Additionally, the HP FX900 Pro comes with ample storage options, including multiple SSD slots and expandable memory, ensuring that you have plenty of space for all your files and applications. Whether you’re a student, a professional or simply someone who demands the best from their laptop, the HP FX900 Pro is the perfect choice for you.

    Try it today and experience the power and performance for yourself!

    High-speed printing

    High-speed printing is an essential feature for any business that requires a significant volume of printed material. In today’s fast-paced business world, speedy printing is necessary to keep up with increasing demands. That’s why powerful performance is critical in high-speed printing equipment.

    It’s all about getting the job done accurately and efficiently. With high-performance printers, you can print your documents, brochures, and flyers in no time, ensuring that your productivity remains at optimal levels. The machines are equipped with the latest technology and can handle a significant volume of work without compromising quality.

    In a nutshell, powerful performance in high-speed printing is essential for businesses that want to succeed in today’s competitive market.

    hp fx900 pro

    Advanced features

    When it comes to advanced features, powerful performance is undoubtedly at the top of the list. But what exactly does powerful performance mean? In simple terms, it refers to the ability of a software or system to handle complex, resource-intensive tasks without slowing down or crashing. In the world of technology, this is especially important, as users expect fast and seamless experiences.

    Advanced features that enhance performance can include optimized code and algorithms, efficient use of memory and processing power, and the ability to scale to meet increasing demand. At its core, powerful performance is all about delivering the best possible experience to the end-user, and it’s a crucial consideration for any company looking to excel in the digital landscape. Whether you’re developing a new app, optimizing a website, or building a complex database, prioritizing performance can give you a significant competitive edge and help you build a loyal customer base.

    So, when it comes to advanced features, always aim to optimize performance to deliver the best experience possible for your users.

    Stunning Print Quality

    When it comes to printing high-quality graphics and images, the HP FX900 Pro is one of the best options out there. With its advanced printhead technology and precision color management tools, this printer can deliver stunning print quality that’s sure to impress even the most discerning customers. Whether you’re printing product labels, marketing materials, or other high-end graphics, the HP FX900 Pro can handle it all with ease.

    Thanks to its wide color gamut and exceptional color accuracy, your prints will look crisp, vibrant, and true to life. Plus, with its fast print speeds and low cost per page, you can create professional-quality prints on demand without breaking the bank. Overall, if you’re looking for a printer that can help you take your print quality to the next level, the HP FX900 Pro is definitely worth considering.

    Sharp and precise output

    When it comes to printing, we all want sharp and precise output, right? Well, you’re in luck because we’ve got just the thing to meet your printing needs! Our print quality is simply stunning, leaving you with impressive results every time. We understand the importance of getting the job done right, and that’s why we use only the best equipment and technology to ensure that our printers produce impeccable prints. From color accuracy to sharpness and clarity, every detail counts, and we guarantee that our printers will exceed your expectations.

    Whether it’s for personal or business use, our sharp and precise output will leave you satisfied and impressed. So, why settle for anything less when you can have the best? Trust us to deliver stunning print quality that will make your documents and images stand out.

    Vibrant colors

    When it comes to stunning print quality, vibrant colors can make all the difference. The richness and depth of color in a printed image can determine its impact and overall quality. That’s why it’s important to ensure that your prints are produced using high-quality materials and printing techniques that can capture the full spectrum of hues and tones.

    Whether you’re printing photographs, artwork, or promotional materials, vibrant colors can help your images stand out and grab attention. With the right combination of inks and paper, it’s possible to create prints with stunning levels of color accuracy and vibrancy. This can be particularly important for marketing and branding materials, where a high level of visual impact is essential.

    Of course, achieving vibrant colors in your prints requires more than just using the right materials. It also requires careful color management and calibration to ensure that the colors on your screen match the colors on your prints. This can be a complex process but is essential for achieving the best possible results.

    Overall, if you want to achieve stunning print quality, vibrant colors should be high on your list of priorities. By choosing a printing provider that specializes in high-quality materials and color management, you can create prints that truly stand out and make an impact. So whether you’re printing for personal or professional reasons, consider the importance of vibrant colors in your final product.

    Versatile media handling

    When it comes to printing, it’s not just about the quality of the printer itself. The media handling also plays a huge role in the final product. Luckily, with versatile media handling, you’ll be able to print on almost anything.

    Whether it’s glossy paper or thick cardstock, your printer can handle it. This means that you’ll be able to create stunning prints with the best quality possible. Plus, with the added bonus of printing on different media, you’ll be able to get even more creative with your designs.

    So, whether you’re creating invitations, flyers, or posters, you can rest assured that you’ll get the best possible results with your printer’s versatile media handling. It’s time to let your imagination run wild and create beautiful prints that you’ll be proud to show off!

    Efficient Workflow

    If you’re looking to streamline your workflow and improve your efficiency, the HP FX900 Pro is a printer that you’ll definitely want to consider. This high-performance printer is designed to meet the demands of busy offices and professionals who need to produce high-quality documents quickly. With its fast print speeds, high-resolution output, and advanced features like automatic duplexing, the HP FX900 Pro can help you get your work done faster and with less effort.

    Whether you’re printing reports, presentations, or marketing materials, this printer can handle it all with ease. So if you want to take your productivity to the next level, the HP FX900 Pro is definitely worth a look.

    Streamlined operation

    When it comes to running a successful business, having an efficient workflow is key. An efficient workflow means that you have a streamlined operation that allows you to maximize productivity while minimizing waste. By optimizing your workflow, you can reduce the amount of time and resources that are wasted and ensure that your business is running at its fullest potential.

    One way to streamline your operation is to automate repetitive tasks. This can be achieved through the use of software or by delegating tasks to employees. Another way to improve workflow is by using project management tools.

    These tools can help you organize tasks, assign responsibilities, and track progress, ensuring that everyone is on the same page. By implementing these strategies, you can create an efficient workflow that will help your business operate smoothly and effectively.

    Flexible connectivity

    When it comes to efficient workflow, flexible connectivity is key. Technology has made it possible to work from anywhere, but that also means we need reliable ways to stay connected. Whether it’s through Wi-Fi, cellular data, or Ethernet, having multiple options for connectivity ensures that we can work without interruption.

    It’s like having multiple roads to get to our destination – if one is closed, we can take another one without missing a beat. With flexible connectivity, we can use the most efficient and cost-effective method depending on our needs at any given time. This not only saves time and money, but it also allows us to be more productive and stay ahead of the game.

    So, whether you’re working from home, a coffee shop, or a remote location, having multiple connectivity options is essential for an efficient workflow.

    Conclusion

    In conclusion, the HP FX900 Pro is the ultimate weapon for any professional seeking to dominate their work. With its powerful performance, sleek design, and innovative features, this machine is a force to be reckoned with. It’s like having a personal assistant that’s always ready to take on any task with precision and speed.

    So if you want to elevate your game and leave your competitors in the dust, the HP FX900 Pro is the tool for you. Trust us, it’s more than just a computer, it’s a game-changer.”

    Why the HP FX900 Pro is Worth the Investment

    Investing in the HP FX900 Pro is definitely worth it because of its efficient workflow. This powerful device is designed to increase productivity by streamlining the process of creating high-quality prints. With its robust printing capabilities, you can produce prints with amazing clarity and detail, all while ensuring consistency and accuracy.

    The HP FX900 Pro is also equipped with advanced software that simplifies the printing process, making it easy for you to manage complex projects. This means you can spend less time dealing with technical issues and more time delivering amazing results. So if you’re looking for a reliable and efficient printing solution, don’t hesitate to invest in the HP FX900 Pro – it’s a smart move that will pay off in the long run.

    FAQs

    What are the main features of HP FX900 Pro?
    The HP FX900 Pro has a 4K UHD display, HDR support, advanced color gamut, and a sleek design. It also has a built-in webcam, speakers, and microphone.

    How is the HP FX900 Pro suitable for professional use?
    The HP FX900 Pro is perfect for professional use because of its high-quality visuals and sound. The 4K UHD display and advanced color gamut make it ideal for photo and video editing, while the built-in webcam, speakers, and microphone allow for seamless video conferencing.

    What kind of connectivity options does the HP FX900 Pro offer?
    The HP FX900 Pro has multiple connectivity options, including HDMI, USB-C, and DisplayPort. It also has a built-in Ethernet port for a more stable network connection.

    Does the HP FX900 Pro support multi-tasking?
    Yes, the HP FX900 Pro has a split-screen feature that allows for multi-tasking. This feature is perfect for people who need to work on multiple applications or documents at once.