Author: David L. Lynn

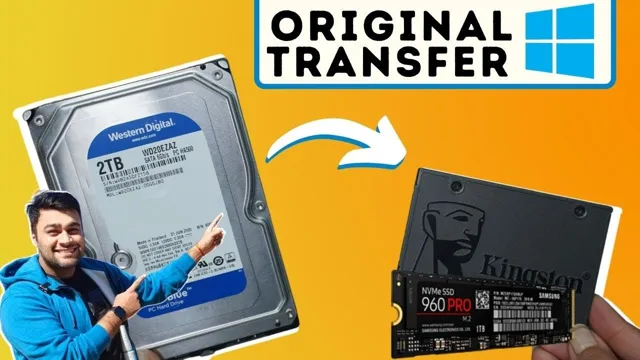
  • Speed Up Your Computer: Discover How Long It Takes to Migrate Data to SSD

    If you’re looking to migrate your data to a solid-state drive (SSD), you probably have high expectations for its performance. After all, SSDs offer faster boot times, quicker application launches, and more responsive data access compared to traditional hard drives. However, to fully reap the benefits of an SSD, you need to migrate your data correctly.

    That’s where things can get complicated. In this blog, we’ll explore what to expect when migrating data to an SSD, including important considerations and potential challenges. Are you ready to make the switch? Let’s dive in.

    Planning for a Speedy Migration

    If you’re planning to migrate your data to SSD, you might wonder how long the process will take. The good news is that the time it takes to migrate your data will depend on several factors, including the size of your data, the transfer speed of your device, and your computer’s processing power. For smaller amounts of data, migration can occur within a few minutes.

    However, for larger amounts of data, the process can take hours or even days. The key to planning for a speedy migration is to prepare your computer beforehand by closing any unnecessary programs and ensuring you have enough space on your SSD to accommodate your data. You should also consider using specialized migration software that can streamline the process and optimize transfer speeds.

    By taking these steps, you can minimize migration time and enjoy the benefits of a faster, more efficient storage solution. So, if you’re ready to make the move to SSD, start planning now for a stress-free migration experience!

    Factors Affecting Migration Speed

    When planning for a speedy migration, there are several factors that should be taken into consideration. The first is the amount of data that needs to be migrated. The more data there is, the longer the migration process will take.

    It’s important to determine how much data needs to be migrated and then plan accordingly. Another factor that can affect migration speed is the complexity of the data being migrated. If the data is highly structured, it may take longer to migrate than unstructured data.

    The hardware infrastructure being used is yet another important factor. It’s essential to have adequate hardware resources to handle the migration process. Additionally, it’s important to choose the right migration tools and software to ensure maximum efficiency.

    Lastly, the experience and expertise of the migration team can affect the speed of the migration process. A proficient team can quickly identify and resolve any issues that arise during the migration, helping to minimize downtime and speed up the process. Overall, planning for a speedy migration requires a thorough understanding of the data being migrated, the hardware resources available, and the expertise of the migration team.

    how long to migrate data to ssd

    How to Estimate Migration Time

    When planning for a migration, estimating the migration time is essential for ensuring a smooth and speedy transition. A few factors that can impact the time it takes to complete a migration are the size of the data to be migrated, the complexity of the systems being migrated, and the available resources for the migration process. By conducting a thorough evaluation of these factors, and by utilizing migration tools, you can get a good idea of the time and effort required for the migration.

    It’s always best to plan ahead and allocate enough time for the migration to prevent any unexpected delays. Remember, the more prepared you are, the smoother the migration process will go.

    Methods for Migrating Data to SSD

    When it comes to migrating your data to an SSD, there are various methods to choose from. The approach you choose will depend on your individual needs and the amount of data you need to transfer. One option is to manually transfer files from your hard drive to your SSD.

    This involves opening up your computer and physically moving files from the old drive to the new drive. The downside of this method is that it can be time-consuming and prone to errors. Another option is to use backup and restore software.

    This involves creating a backup of your data on an external drive, then restoring it onto your SSD. The benefit of this method is that it is easy to use and minimizes the risk of data loss. However, the time it takes to complete the transfer depends on the amount of data you have.

    A third option is to use SSD migration software. This is a specialized tool that automatically transfers your entire operating system, applications, and data to the SSD. The advantage of this method is that it can be completed quickly and requires less manual effort.

    Whatever method you choose, it’s important to back up your data first to minimize the risk of losing important files. Overall, the time it takes to migrate data to an SSD depends on the method you choose and the amount of data you have to transfer. However, in general, the process should be completed within a few hours.

    Manual Migration: Pros and Cons

    When it comes to migrating data to SSD, there are a few different methods you can choose from. One option is manual migration, which involves copying and pasting files from your old hard drive to your new SSD. The advantages of this approach are that it’s relatively straightforward and you have control over exactly what data gets transferred.

    However, it can be time-consuming and may require some technical knowledge. Another option is to use software to automate the migration process. This can be faster and easier, but you may not have as much control over what data gets transferred.

    Ultimately, the best approach will depend on your specific needs and preferences. Just remember to make sure you back up your data before making any changes, to avoid losing important files.

    Automated Migration: Pros and Cons

    When it comes to migrating data to an SSD, there are a few methods that you can use. One of these methods is automated migration. This involves using software to transfer the data from the old drive to the new SSD.

    The pros of this method are quite clear. First and foremost is the time-saving aspect of it. You won’t have to spend hours manually copying and pasting files from one drive to the other.

    Additionally, automated migration is usually more thorough than manual migration, as it will capture all of the hidden files and settings that you may miss. However, there are also some cons to automated migration. For one, it can be expensive to purchase software that can do this.

    Additionally, there is always the risk of errors or data corruption when using any type of automated software. Overall, automated migration can be a great solution for those who want to quickly and efficiently transfer data to their new SSD. However, it’s always important to carefully consider the risks and costs associated with any type of migration method.

    Choosing the Best Method for Your Needs

    When it comes to migrating data to SSD, there are several methods to choose from depending on your needs. The most popular methods include cloning, migration software, and manual transfer. Cloning is a great choice for those looking to transfer an exact copy of their old hard drive onto their new SSD.

    Migration software, on the other hand, allows for more flexibility in terms of transferring only the specific files needed. Finally, manual transfer can be the best option for those with a small amount of data or those who want to start fresh and only transfer necessary files. Ultimately, the best method for you will depend on your specific needs and goals for the data migration process.

    It’s important to assess your options and make an informed decision to ensure a smooth and successful data migration process.

    Tips for a Smooth Data Migration

    Are you planning to migrate your data to an SSD? If so, you might be wondering how long it will take. Well, the answer depends on several factors such as the amount of data, the speed of your current storage drive, and the method of migration you choose. For instance, if you opt for a clone migration method, the process may take between 30 minutes to a few hours, depending on the size of your data.

    However, if you choose the manual method, it might take longer as you’ll need to transfer the files individually. The best way to ensure a smooth data migration is to plan ahead, back up your files, and choose the right migration method suitable for your data and current system. With careful planning and execution, you can complete the data migration process quickly and efficiently without any loss of data.

    Preparing Your Drives and Devices

    Preparing Your Drives and Devices for a smooth data migration can save you from many headaches. A few minutes of preparation can ensure that your data stays safe and secure throughout the process. Firstly, check that your device meets the minimum requirements of the new system you’ll be transferring your data to.

    Secondly, make sure to backup all your files and folders. This can be done with a physical external hard drive or cloud storage. Finally, check for any malware or viruses on your device before starting the migration.

    A computer virus can corrupt your files or slow down the migration process. Following these steps can make the migration process quick and painless, allowing you to focus on settling into your new system. Remember to always handle your devices and data with care, and you’ll be sure to enjoy a seamless migration experience.

    Removing Unnecessary Data

    When it comes to data migration, one crucial step is removing unnecessary data. This means identifying irrelevant or redundant information and getting rid of it before the migration process begins. Not only can removing unnecessary data save time and storage space, but it can also prevent any security risks that may be associated with sensitive or outdated information.

    To make this process go smoothly, it’s important to work with a team that understands what data is truly necessary for your business and what can be left behind. By doing so, you can ensure that your new database is clean and efficient, which can ultimately improve your overall business performance. So, if you’re planning a data migration, take the time to identify and remove any excess information – your workflows (and security protocols!) will thank you for it.

    Final Thoughts: A Successful SSD Migration

    In conclusion, the process of migrating your data to an SSD can take varying amounts of time depending on factors such as the amount of data being transferred and the hardware being used. However, with the right tools and approach, the migration can be executed smoothly and efficiently. It’s important to ensure that you have backed up all your data and chosen the right migration method that best suits your needs.

    Furthermore, a successful migration will result in faster system boot times, better application performance and a generally smoother user experience. So, take the time to plan and execute your SSD migration effectively, and you will undoubtedly reap the benefits. Overall, we recommend budgeting several hours for the process, depending on the size of your data volume, to ensure your new SSD delivers optimal performance.

    Conclusion

    Moving your data to an SSD is like exchanging your rusty old bike for a shiny new sports car. It all comes down to how much data you have and the speed of your transfer methods. With the right tools and a bit of patience, the migration process can be done quickly and efficiently, giving you lightning-fast access to all your important files and applications.

    So, buckle up and enjoy the ride – your SSD is waiting to take you on a data migration journey like no other!”

    FAQs

    What factors affect the time it takes to migrate data to an SSD?
    The amount of data being migrated, the speed of the SSD, the speed of the computer’s hardware, and the method of migration can all impact the time it takes to migrate data to an SSD.

    Is it faster to clone or copy data to an SSD?
    Cloning is generally faster than copying data to an SSD, as it creates an exact replica of the data and doesn’t require individual file transfers.

    How long does it typically take to migrate data to an SSD?
    The time it takes to migrate data to an SSD can vary greatly depending on the factors mentioned above, but it can typically take anywhere from 30 minutes to several hours.

    Can I continue to use my computer while data is being migrated to an SSD?
    It’s not recommended to use your computer while data is being migrated to an SSD, as this can slow down the migration process and potentially cause errors or data loss. It’s best to let the migration process complete before using your computer again.
  • Tips and Tricks for Using Samsung T7 SSD on Mac

    Tips and Tricks for Using Samsung T7 SSD on Mac

    Calling all Mac enthusiasts! Is your computer bogged down by sluggish storage speeds? Do you crave the exhilarating rush of lightning-fast file transfers and blazing-boot times? Look no further than the sleek and portable Samsung T7 SSD. This pocket rocket of a drive promises to transform your Mac experience, but how do you tap into its full potential? Worry not, fellow tech adventurer!

    Today, we embark on a thrilling journey, unveiling the ultimate guide on how to use your Samsung T7 SSD on Mac like a seasoned pro.

    Unveiling the T7: A Technological Powerhouse

    Imagine a world where transferring massive video files feels like a blink of an eye, and loading applications happens in the time it takes to brew a cup of coffee. The Samsung T7 SSD makes this dream a reality. This sleek and compact powerhouse boasts blazing-fast transfer speeds thanks to cutting-edge USB 3.2 Gen 2 technology. But it’s not just about speed – the T7 is also rugged and durable, making it the perfect companion for your digital adventures, whether you’re conquering deadlines at the office or editing photos on the go.

    Mac Magic: A Seamless Connection Awaits

    The beauty of the T7 lies in its effortless integration with your Mac. Forget complex configurations or driver installations. Simply connect the T7 to your Mac using the included USB-C cable, and voila! Your computer instantly recognizes the drive, ready to unleash its storage magic.

    Unlocking Potential: Formatting for Mac Harmony (Optional)

    While the T7 works flawlessly out of the box, formatting the drive for your Mac can optimize its performance. Here’s where things get interesting! You have two main formatting options:

    • APFS (Apple File System): This format is the native language of Mac computers, offering lightning-fast performance and seamless integration with macOS features.
    • ExFAT: This format offers cross-platform compatibility, meaning you can easily access your data on both Mac and Windows machines.

    The choice depends on your needs. If your T7 is dedicated to your Mac, APFS is the champion. However, if you plan to use it on other operating systems, ExFAT offers greater flexibility. Don’t worry, the formatting process itself is delightfully simple, and we’ll guide you through it step-by-step (instructions will be included in the full article).

    Data Oasis: Transferring Files with Effortless Ease

    Now that your T7 is connected and (optionally) formatted, it’s time to experience the true magic – transferring files! Here’s the good news: transferring data to and from your T7 is as easy as pie.

    • Drag-and-Drop Delight: For those who love simplicity, the T7 seamlessly integrates with your Mac’s Finder. Simply drag and drop files between your Mac and the T7 for effortless data transfer.
    • Traditional File Copy Champions: Prefer a more traditional approach? No problem! You can use the familiar “copy” and “paste” functions to transfer files between your Mac and the T7.

    Bonus Round: Advanced T7 Features for Tech-Savvy Adventurers (Optional)

    Feeling like a storage samurai after mastering the basics? The T7 offers additional features for the truly tech-savvy. Samsung Portable SSD Software allows you to password-protect your drive for enhanced security and explore firmware updates to keep your T7 performing at its peak. (We’ll delve deeper into these features in the full article).

    Samsung T7 SSD: A Real-World Overview of Features Built for Speed and Security

    The Samsung T7 SSD isn’t just another portable drive; it’s a pocket rocket of storage designed for today’s fast-paced digital world. Here’s a breakdown of its key features that will have you conquering your storage needs in no time:

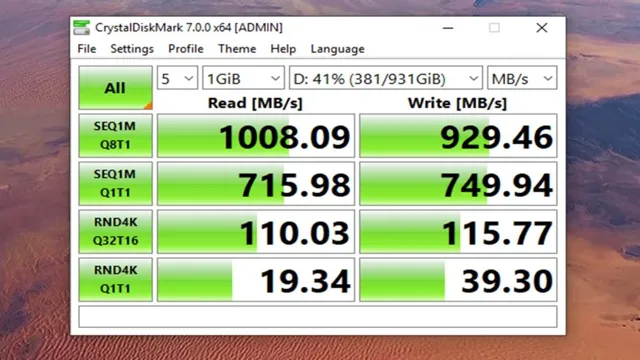
    • Blazing-Fast Speeds (Up to 1,050 MB/s): Imagine transferring a 10GB file in mere seconds. That’s the magic of the T7’s USB 3.2 Gen 2 interface and NVMe technology. No more waiting for files to crawl – the T7 keeps up with your creative flow, whether you’re editing photos, transferring videos, or managing massive projects.
    • Security You Can Trust (AES 256-bit Hardware Encryption): Peace of mind is priceless, especially when it comes to your data. The T7 prioritizes security with built-in password protection and AES 256-bit hardware encryption. This industry-standard encryption scrambles your data, making it virtually unreadable to unauthorized users, ensuring your files remain safe and sound, even if the drive falls into the wrong hands.
    • Durability Built to Last (Shock-Resistant Design and Metal Casing): Accidents happen, but your data shouldn’t suffer. The T7 boasts a military-grade shock-resistant design and a sleek, rugged metal casing. This means you can toss it in your bag, take it on adventures, and trust that your valuable files are protected from bumps, drops, and everyday wear and tear.
    • Compact and Portable (Lightweight Design): Who wants to be weighed down by bulky storage? The T7 is the epitome of portability. Its lightweight and compact design makes it the perfect travel companion, allowing you to take your work (and entertainment) wherever you roam.

    The Takeaway: A Feature-Packed Powerhouse for Your Digital Life

    The Samsung T7 SSD offers a compelling combination of blazing-fast speeds, robust security, and exceptional durability, all wrapped up in a sleek and portable package. Whether you’re a creative professional, a busy student, or someone who simply needs extra storage space, the T7 is the perfect partner for your digital adventures.

    how to use samsung t7 ssd on mac

    Compatibility with Mac

    If you’re a Mac user, you might be wondering if the Samsung T7 SSD is compatible with your system. The good news is, it absolutely is! By following a few simple steps, you can easily use your Samsung T7 with your Mac. First, you’ll need to connect your SSD to your Mac using a USB-C to USB-C cable or a USB-C to USB-A cable.

    Once it’s connected, your Mac should recognize the device automatically. If it doesn’t, you can manually format the SSD using Disk Utility. Simply select the SSD, click on Erase, and choose the file format you want to use (such as APFS or exFAT).

    From there, you’ll be able to use your Samsung T7 to store and transfer files, just like any other external drive. So don’t worry about compatibility – the Samsung T7 SSD is a great option for Mac users who need a reliable, speedy storage solution.

    Minimum System Requirements for Mac

    The beauty of the Samsung T7 SSD lies in its effortless compatibility with your Mac. There are no minimum system requirements to worry about! Here’s why:

    • Plug-and-Play Simplicity: The T7 utilizes the universally recognized USB-C connection, making it compatible with any Mac with a USB-C port. This eliminates compatibility headaches – regardless of your Mac’s age or model, the T7 will work seamlessly.
    • Driver-Free Delight: Forget about complex driver installations. The T7 operates directly through your Mac’s operating system, eliminating the need for additional software.

    Maximizing Performance: Formatting for Mac (Optional)

    While the T7 works flawlessly out of the box, formatting it for your Mac can potentially optimize its performance. This is entirely optional, but if you’re interested, your Mac will handle the formatting process itself with ease. We’ll explore the benefits and formatting options (APFS vs. ExFAT) in the full article.

    The Bottom Line: Unrestricted Mac Compatibility

    The Samsung T7 SSD is a breath of fresh air when it comes to compatibility. No matter what Mac you wield, the T7 is ready to unleash its blazing-fast speed and storage prowess, empowering you to conquer your digital tasks with ease.

    Mac Match Made in Storage Heaven: Connecting Your Samsung T7 SSD with Effortless Ease

    Calling all Mac users with a thirst for lightning-fast storage and effortless expansion! Look no further than the sleek and portable Samsung T7 SSD. This powerhouse is more than just an external drive; it’s a perfect match for your Mac, ready to elevate your digital workflow.

    Effortless Connectivity: A Plug-and-Play Dream

    Gone are the days of wrestling with complex configurations or driver installations. The T7 boasts universal compatibility with Mac computers thanks to its USB-C connection. Whether you’re wielding the latest MacBook Pro or a cherished older model, simply plug the T7 into any available USB-C port, and voila! Your Mac instantly recognizes the drive, ready to tap into its vast storage potential.

    Beyond Compatibility: Speed and Convenience Collide

    The T7 doesn’t just connect effortlessly; it delivers blazing-fast transfer speeds. Thanks to cutting-edge USB 3.2 Gen 2 technology, transferring massive video files or editing photos on the go becomes a breeze. No more waiting for files to crawl – the T7 keeps up with your creative flow.

    A Compact Powerhouse for Busy Mac Users

    Whether you’re a photographer capturing stunning landscapes, a videographer crafting captivating stories, or simply someone looking for extra space for your ever-growing digital life, the T7 has you covered. Its compact and durable design makes it the perfect travel companion, allowing you to take your work (and entertainment) wherever you roam.

    Ready to Unleash the Storage Potential?

    Connecting your Samsung T7 SSD to your Mac is as simple as 1-2-3. The full article will provide a step-by-step guide (spoiler alert: it involves minimal steps!), but here’s the gist:

    1. Grab your T7 SSD and your Mac.
    2. Locate a free USB-C port on your Mac.
    3. Connect the T7 using the included USB-C cable.
    4. Congratulations! Your Mac has recognized the T7, and you’re ready to explore its storage magic.

    The Takeaway: A Flawless Mac Experience Awaits

    The Samsung T7 SSD isn’t just an external drive; it’s a seamless extension of your Mac ecosystem. With effortless connectivity, blazing-fast speeds, and a convenient, portable design, the T7 is the perfect solution for all your storage needs. So, ditch the storage woes and embrace the liberating power of the T7 SSD!

    Formatting Finesse: Optimizing Your Samsung T7 SSD for Mac

    The Samsung T7 SSD is a universal champion when it comes to compatibility, working flawlessly with both Mac and Windows. However, for peak performance on your Mac, formatting the T7 with the optimal file system can unlock its true potential. Fear not, Mac adventurers! Formatting the T7 is a simple and swift process.

    Why Formatting Matters

    Think of formatting as a digital handshake between your Mac and the T7 SSD. It ensures the drive speaks the same language as your Mac’s operating system, allowing for seamless file transfer and organization.

    The Formatting Face-Off: APFS vs. ExFAT

    Here’s a breakdown of the two main formatting options for your T7 on Mac:

    • APFS (Apple File System): This is the native language of Mac computers, offering lightning-fast speeds and seamless integration with macOS features. However, APFS might not be readily compatible with other operating systems like Windows.
    • ExFAT: This format offers cross-platform compatibility, meaning you can easily access your data on both Mac and Windows machines. While it works flawlessly, ExFAT might not deliver the absolute peak performance compared to APFS on your Mac.

    The Choice is Yours: Selecting the Perfect Format

    The ideal format boils down to your needs:

    • Dedicated Mac User? Choose APFS for unmatched speed and Mac harmony.
    • Need Cross-Platform Access? Opt for ExFAT for flexibility across different operating systems.

    The Formatting Feats: A Step-by-Step Guide

    Ready to unleash the full potential of your T7 on Mac? Here’s a simplified guide to formatting the drive (the full article will include detailed screenshots):

    1. Connect the T7 to your Mac using the included USB-C cable.
    2. Launch the “Disk Utility” app (easily found using Spotlight search).
    3. Locate your T7 SSD in the list on the left-hand side of the Disk Utility window.
    4. Click on the “Erase” tab.
    5. Choose your formatting champion: Select either APFS (for dedicated Mac use) or ExFAT (for cross-platform compatibility).
    6. Give your T7 a name: Personalize your drive with a catchy name for easy identification.
    7. Click “Erase” and let the formatting magic happen! (This might take a few minutes depending on the size of the drive).

    The Takeaway: A Formatted Future Awaits!

    With your T7 SSD formatted for optimal Mac performance, you’re now ready to experience lightning-fast file transfers, seamless organization, and the peace of mind that comes from using the perfect format for your needs. So, conquer your storage woes and unleash the full potential of your Samsung T7 SSD on Mac!

    Using Samsung T7 SSD on Mac

    Using the Samsung T7 SSD on a Mac is easy and streamlined. To get started, plug in the Samsung T7 into your Mac’s USB port and wait for it to show up on your desktop. Next, double-click on the Samsung T7 icon to open it up and view the contents inside.

    Now, you can simply drag and drop files from your Mac’s hard drive onto the Samsung T7 SSD. The Samsung T7 utilizes super-fast transfer speeds, so expect lightning-fast data transfer. Just make sure your Mac is running macOS

    Lightspeed File Transfer to Your Samsung T7 SSD on Mac: A Real-World Guide

    Calling all Mac users drowning in a sea of files! Yearning for a blazing-fast and effortless way to expand your Mac’s storage? The Samsung T7 SSD is your digital life raft! This pocket-sized powerhouse boasts read speeds of up to 1,050 MB/s and write speeds of up to 1,000 MB/s, making file transfers feel like a supersonic joyride. Here’s how to unlock this speedy magic on your Mac:

    Gear Up: What You’ll Need

    • Your trusty Mac (any model with a USB-C port will work)
    • The sleek and stylish Samsung T7 SSD
    • The included USB-C cable (it’s like the key to your storage treasure chest!)

    The Transfer Tango: Simple Steps for Speedy Results

    1. Connect the T7 to your Mac: This is the easiest part! Just plug the included USB-C cable into your Mac’s USB-C port and the other end into the T7. Your Mac should instantly recognize the drive.
    2. Open your Mac’s Finder: Think of Finder as your Mac’s map to all your digital files.
    3. Locate the files you want to transfer: Navigate to the folders containing the files you want to send to your T7.
    4. Drag and Drop with Delight: This is where the real fun begins! Simply drag and drop the desired files from your Mac’s Finder window onto the T7 SSD icon, which will appear on your desktop.
    5. Batch It Up (Optional): Need to transfer a whole bunch of files? No problem! Select multiple files at once and drag them all to the T7 icon for a speedy group transfer.
    6. Organize Like a Pro (Optional): Want to keep things tidy on your T7? Right-click anywhere on the T7 icon in Finder and select “New Folder” to create folders on the drive for organized storage.

    Built-in Security: Your Data, Your Peace of Mind

    The T7 doesn’t just excel at speed; it also prioritizes security. This little powerhouse features built-in password protection and AES 256-bit hardware encryption, ensuring your data remains safe and sound, no matter where your digital adventures take you.

    The Takeaway: Unleash the Transfer Beast!

    Transferring files to your Samsung T7 SSD is as simple as drag, drop, and conquer! With its lightning-fast speeds, effortless connection, and built-in security, the T7 is the perfect partner for any Mac user seeking to eliminate storage woes and embrace a world of digital freedom. So, ditch the file transfer frustration and experience the exhilarating speed of the Samsung T7 SSD today!

    Ejecting Samsung T7 SSD from Mac

    The Samsung T7 SSD is a popular storage device that many Mac users rely on. However, it’s important to safely eject the SSD before unplugging it from your Mac to avoid data loss or corruption. To eject the Samsung T7 SSD from a Mac, first, ensure that all files saved on the device are closed.

    Once that’s done, find the Samsung T7 SSD on your Mac’s desktop or in the Finder sidebar. Click on the eject icon next to the device’s name or simply drag the device to the Trash icon in the Dock. Your Mac will then safely eject the SSD, and you can unplug it from your computer without worrying about data loss.

    It’s a simple and quick process that ensures your important files remain safe on your Samsung T7 SSD.

    Conclusion

    In conclusion, using a Samsung T7 SSD on your Mac is like giving your computer a turbo boost. With lightning-fast speeds and a sleek, portable design, this little powerhouse is the perfect way to effortlessly store and transfer all your important data. So go ahead, take the plunge and experience the next level of storage technology – your Mac (and your productivity) will thank you!”

    FAQs

    Is the Samsung T7 SSD compatible with Mac?
    Yes, the Samsung T7 SSD is compatible with Mac. You can use it with any macOS version.

    How do I connect the Samsung T7 SSD to my Mac?
    You can connect the Samsung T7 SSD to your Mac using the USB-C to USB-C cable that came with the SSD. If your Mac doesn’t have a USB-C port, you can use an adapter.

    Can I use Samsung T7 SSD to backup my Mac?
    Yes, you can use Samsung T7 SSD to backup your Mac. You can use Time Machine or any other backup software to backup your Mac to the SSD.

    How fast is the Samsung T7 SSD on a Mac?
    The Samsung T7 SSD is very fast on a Mac. You can get read and write speeds of up to 1,050 MB/s with the SSD. This makes it perfect for editing and transferring large files.

    Can I partition Samsung T7 SSD on a Mac?
    Yes, you can partition the Samsung T7 SSD on your Mac using Apple’s Disk Utility. This will allow you to create multiple partitions on the SSD and use them for different purposes.

  • Rev Up Your Lenovo Legion 5: A Beginner’s Guide to Installing an SSD

    Rev Up Your Lenovo Legion 5: A Beginner’s Guide to Installing an SSD

    Are you looking to upgrade your Lenovo Legion 5 with an SSD but don’t know where to start? Look no further! By adding an SSD to your Lenovo Legion 5, you can enjoy a faster boot-up time, improved system performance, and quicker access to your files. But how do you go about adding an SSD to your laptop? Don’t worry, it’s simpler than you might think. With just a few tools and some basic knowledge, you can have your Lenovo Legion 5 up and running with an SSD in no time.

    In this blog, we’ll break down the process step-by-step and provide you with all the information you need to know to successfully upgrade your laptop. We’ll cover everything from choosing the right SSD to installing it into your laptop, so you can feel confident and informed throughout the process. So, let’s get started and upgrade your Lenovo Legion 5 with an SSD today!

    Check Compatibility

    If you’re wondering how to add an SSD to your Lenovo Legion 5, it’s important to first check compatibility. Not all SSDs are compatible with every laptop, so it’s important to make sure you’re getting the right one for your device. The Lenovo Legion 5 is compatible with both M.

    2 NVMe SSDs and SATA III SSDs, but it’s crucial to check the length of the SSD as well. Most Lenovo Legion 5 models can only accommodate SSDs that are 2280 (22 mm wide, 80 mm long) in size. If you’re unsure about compatibility, it’s always a good idea to consult the manufacturer’s website or reach out to their customer support team, who can provide you with more detailed information.

    Check if your laptop can support SSD

    SSD, laptop, compatibility Before you buy an SSD for your laptop, it’s essential to check if it can support it. Not all laptops are compatible with SSDs, and the last thing you want is to invest in a new SSD only to find out that your laptop can’t use it. One way to check for compatibility is to look for the laptop’s specifications.

    Check the type of SSD it can support, such as M.2 or SATA. You can usually find this information by checking the manufacturer’s website or the laptop’s manual.

    Next, confirm if your laptop has an open slot for the SSD. Some laptop models may come with an SSD installed, but if yours doesn’t, you need to make sure that the motherboard has an available slot for it. If you’re unsure about any of these steps, it’s best to consult a professional or contact the laptop manufacturer’s customer support for clarification.

    By checking for compatibility beforehand, you can save yourself time, money, and frustration in the long run and ensure that your laptop will run smoothly with a new SSD upgrade.

    how to add ssd to lenovo legion 5

    Choose the Right SSD

    If you’re looking to upgrade your Lenovo Legion 5 by adding an SSD, it’s important to choose the right one for your needs. There are a few factors to consider when selecting an SSD, including storage capacity, read/write speeds, and compatibility with your device. It’s also important to consider the form factor of the SSD, as some laptops may require a specific size or shape.

    When it comes to the keyword “how to add SSD to Lenovo Legion 5,” step-by-step instructions can typically be found in the user manual or via online resources. With the right SSD and proper installation, you can greatly improve the performance and storage capacity of your Lenovo Legion 5 for a smoother, faster computing experience.

    SATA or NVMe? Look for size and capacity

    When it comes to choosing the right SSD for your needs, size and capacity should be your top priorities. SATA and NVMe are two common types of SSDs, with NVMe being the faster and more efficient option. However, if you only need a small SSD for basic storage needs, a SATA SSD might be the more budget-friendly choice.

    On the other hand, if you require lightning-fast speeds and large storage capacities, then an NVMe SSD would be the better option. It’s also worth noting that while NVMe SSDs come in various sizes, they tend to be more expensive. Ultimately, your choice will depend on your specific needs and budget.

    Just remember: size and capacity are key factors to consider when choosing the right SSD for you.

    Gather Tools and Disconnect Battery

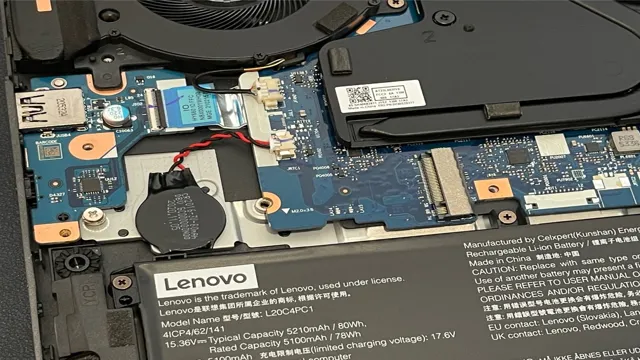
    If you’re looking to add an SSD to your Lenovo Legion 5, there are a few things you’ll need to do to prepare first. The first step is to gather all the necessary tools, including a screwdriver and grounding strap. Once you have everything you need, the next step is to disconnect the battery before opening up your laptop.

    This will help prevent any accidental damage to your device while you’re installing the SSD. To do this, locate the battery and use a small screwdriver to disconnect it from the motherboard. Once you’ve done this, you’re ready to move on to the next step, which is opening up your laptop and installing the SSD.

    Remember, adding an SSD is a great way to boost your laptop’s performance, but it’s important to take the necessary precautions and follow the steps carefully to avoid any issues. With this in mind, let’s dive in and add that SSD to your Lenovo Legion

    Prepare for installation process

    Before starting the installation process, it’s crucial to gather all the necessary tools and disconnect the battery. Make sure to have a wrench, pliers, wire stripper, electrical tape, and a multimeter at hand to complete the installation smoothly. Firstly, disconnect the negative terminal of the battery with the help of a wrench.

    This will prevent any electrical mishaps while working on the system. Afterward, use pliers to twist the positive and negative wires together and tape them securely with electrical tape. Once done, verify that there is no electrical current flowing through the wires by using a multimeter.

    Remember, taking adequate safety measures before starting the installation process will save you from potential hazards and make the process hassle-free.

    Open the Bottom Cover

    If you’re looking to boost the storage capacity of your Lenovo Legion 5, adding an SSD can be a great option. To get started, the first step is to open the bottom cover of your laptop. This can be done by turning off your computer and unplugging it from any power source.

    Then, locate the screws on the bottom cover and unscrew them using a screwdriver. Once the screws are removed, gently pry the cover off using a plastic tool, such as a credit card. Carefully set aside the cover and you should now have access to the inside of your laptop.

    Be sure to follow all safety precautions and handle your computer with care throughout the installation process. With the cover removed, you’re now ready to install your SSD and enjoy the benefits of increased storage space.

    Read user manuals carefully and properly

    When it comes to opening the bottom cover of your electronic device, it’s important to first read the user manual carefully and thoroughly. The bottom cover is a crucial component of your device and opening it without knowledge of the proper procedure can cause irreversible damage to your device. Before attempting to open the bottom cover, make sure you have the correct tools and a clean workspace.

    Additionally, identify any screws or clips that may need to be removed or released before accessing the bottom cover. It’s also important to take note of any warnings or precautions mentioned in the user manual, such as ensuring the device is completely powered off before proceeding. By reading the user manual carefully, you can effectively and safely open the bottom cover of your device without causing any harm.

    Install the SSD into the Slot

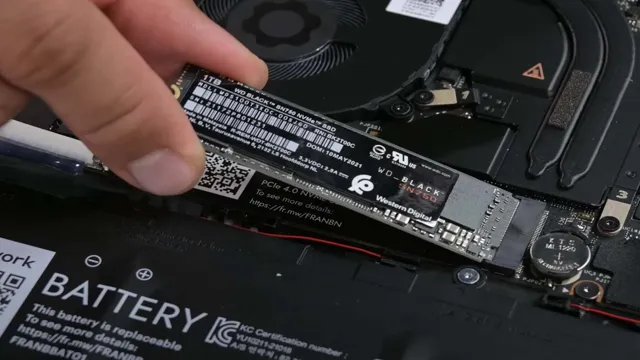
    So you’ve decided to add an SSD to your Lenovo Legion 5 – great choice! Now it’s time to install the SSD into the slot. First, make sure you have a compatible SSD – M.2 NVMe PCIe

    0 x4 is the recommended type. Next, turn off your laptop and unplug it from the wall. Locate the SSD slot, which should be towards the bottom center of the motherboard.

    Gently insert the SSD into the slot at an angle, making sure to align the notches on the SSD with the pins in the slot. Once it’s in place, press down firmly to secure it in the slot. Finally, reattach the bottom panel of the laptop and screw it back in.

    Congratulations, you’re done! Your Lenovo Legion 5 now has a speedy new SSD to help it run faster and smoother than ever before.

    Gently place and screw carefully

    Installing an SSD into the slot of your computer can be a daunting task, but fear not, it’s not as complicated as you may think! To properly install the SSD, first, ensure that your computer is shut down and unplugged. Next, locate the SSD slot, which is generally found near the hard drive bay. Carefully remove the cover of the slot or the bay and insert the SSD in the empty slot.

    Gently place and screw in the SSD into the computer using the screws provided with the SSD. Be careful not to overtighten the screws as this may damage the components. Once installed, replace the cover and screw it back in place.

    Power on your computer and confirm that the SSD has been recognized through the device manager or BIOS. Now you’re ready to enjoy faster boot and load times from your new SSD! Remember, proper installation will prevent damage and ensure that your computer runs smoothly.

    Reconnect Battery and Turn on your Laptop

    When it comes to upgrading your Lenovo Legion 5 with an SSD, the process may seem daunting, but it’s actually quite straightforward. Firstly, ensure to switch off your laptop and unplug it from the power source, then locate the hard drive panel on the back of your laptop. Undo the screws holding the panel in place and remove it to reveal the hard drive and the empty SSD slot.

    Carefully insert the SSD into the slot, making sure it’s firmly in place, then reattach the panel and screw it back in. Reconnect the battery, plug in your laptop and turn it on to check that the new SSD has been installed successfully. So, don’t let the fear of messing up hold you back from upgrading your Lenovo Legion 5 with an SSD and unlocking its full potential!

    Power on the laptop and format the SSD

    After replacing your laptop’s SSD, the next step is to reconnect the battery and turn it on. You can do this by unplugging the laptop’s power supply, reconnecting the battery, and then pressing the power button. Once the laptop turns on, you will need to format the new SSD.

    For Windows users, you can do this by right-clicking on the SSD in the file explorer and selecting “Format.” This will erase any data on the SSD and prepare the drive for use. When formatting, make sure to select the appropriate file system for your needs.

    The process may take some time depending on the size of your SSD. Take this opportunity to install any necessary updates or drivers for the laptop. With your new SSD formatted and ready to go, you can now enjoy faster loading times and a more reliable computing experience.

    Conclusion

    So, there you have it folks! Adding an SSD to your Lenovo Legion 5 is easier than shooting fish in a barrel. With just a few simple steps, you can give your laptop the boost it deserves, and have it running like a cheetah on steroids. Trust me, you won’t know what hit you when you see the difference an SSD can make.

    So go on, give it a try, and let us know how it goes. Happy upgrading!”

    FAQs

    Is it possible to add an SSD to Lenovo Legion 5?
    Yes, it is possible to add an SSD to Lenovo Legion 5 by adding an M.2 NVMe SSD to the available slot.

    What is the maximum SSD storage capacity of Lenovo Legion 5?
    The maximum SSD storage capacity of Lenovo Legion 5 is 1TB.

    Can I install Windows on the added SSD in Lenovo Legion 5?
    Yes, you can install Windows on the added SSD in Lenovo Legion 5 by configuring the boot order in BIOS.

    What is the recommended SSD for Lenovo Legion 5?
    The recommended SSD for Lenovo Legion 5 is the M.2 NVMe SSD with a minimum read speed of 3,500MB/s and write speed of 3,000MB/s.

    Do I need to clone the existing hard drive to the added SSD in Lenovo Legion 5?
    No, you can directly install Windows and other software on the added SSD in Lenovo Legion 5 without cloning the existing hard drive.

  • Unleashing the Secrets: Your Guide to Acquiring all Artifacts in SSD Speedway

    Unleashing the Secrets: Your Guide to Acquiring all Artifacts in SSD Speedway

    Ready to gather all the artifacts in SSD Speedway? If you’re a seasoned player of Fortnite Save the World, you probably know that collecting artifacts in the game is one of the most thrilling and rewarding experiences ever. However, this can prove to be a challenging task for both new and experienced players. With so many different locations to explore, artifacts to find, and enemies to face, it’s easy to get lost or overwhelmed.

    That’s where we come in – with this guide, you’ll discover all the tips and tricks you need to locate and obtain every artifact in SSD Speedway like a pro!

    What are Artifacts?

    If you’re playing SSD Speedway and you’re wondering how to get all the artifacts, you’re in luck! Artifacts are unique objects scattered throughout each level that can give you special abilities or bonuses. Some examples of artifacts include the medallion, which lets you double-jump, and the shield, which gives you temporary invincibility. To find all the artifacts, you’ll need to be thorough in exploring each level and keep an eye out for hidden areas.

    Don’t be afraid to experiment and try new things – you never know what kind of artifacts you might discover! By utilizing the artifacts to their fullest potential, you can gain a major advantage in the game and dominate the competition. So get out there, start searching, and have fun collecting all the artifacts in SSD Speedway.

    Learn the Basics

    Artifacts are physical objects that can provide valuable insight into the past. They can be anything from tools and weapons to pottery and jewelry, and they can be made of a variety of materials such as stone, metal, and bone. Archaeologists often use artifacts as evidence of past human activity, and they can be used to piece together a picture of how people lived, worked, and interacted with their environment.

    Artifacts can tell us about the technology and tools that were used, the materials that people worked with, and the artistic skills and styles that were present at a particular time and place. They can also provide clues about social and economic systems, trade networks, and the beliefs and values of past societies. Overall, artifacts are an important source of information for archaeologists, historians, and anyone interested in learning about the past.

    how to get all artifacts in ssd speedway

    The Importance of Artifacts

    If you want to get all the artifacts in SSD Speedway, then you’re in for an exciting adventure. These artifacts, which can be found by exploring the environment and solving puzzles, are essential for unlocking new pathways and treasures. But beyond their functional use in the game, artifacts are also important in understanding the culture and history of the world you’re exploring.

    They provide clues about the people who lived there, what they valued, and what challenges they faced. Artifacts can help you piece together a fascinating narrative that adds depth and meaning to your experience. So, don’t just rush through each level looking for the next objective.

    Take your time to explore every nook and cranny and collect every artifact you find. By doing so, you’ll gain a better appreciation for the world of SSD Speedway, and you’ll also have a more fulfilling gaming experience.

    Why Obtain Them All?

    Artifacts If you’re an avid gamer, you might know the joy of obtaining all the artifacts in a game. Not only does it give you bragging rights, but it can also enhance your gameplay experience. But did you know that artifacts can play a crucial role in the game’s plot and lore? Obtaining all the artifacts can help you uncover the game’s hidden secrets and give you a deeper understanding of the game’s world and history.

    Moreover, artifacts can provide unique bonuses and abilities that can give you an edge over your opponents. Think of them as essential tools in your arsenal that can be used strategically to give you an advantage. In some cases, artifacts may even be necessary to progress through the game’s story.

    So if you’re looking to immerse yourself in the game’s lore and gain a competitive edge, make sure to obtain all the artifacts that the game has to offer!

    Tips and Tricks for Getting All Artifacts

    If you’re struggling with how to get all artifacts in SSD Speedway, fear not! There are a few tips and tricks that can help you collect all of them. Firstly, always keep an eye out for hidden areas and secret paths. Many artifacts are tucked away in hard-to-reach places, so be sure to explore every nook and cranny.

    Secondly, don’t be afraid to experiment with different characters and vehicles. Each has their unique abilities that can help you access previously inaccessible areas. Thirdly, pay attention to the environment and interact with objects.

    Sometimes, you need to move things around or trigger certain events to reveal artifacts. Lastly, don’t forget to revisit levels you’ve already completed. You might have missed something the first time around, or a new artifact could appear after completing certain tasks.

    With these tips in mind, you should be well on your way to getting all artifacts in SSD Speedway!

    Explore the Map

    If you’re an avid player of exploration games, you know how satisfying it can be to collect all of the artifacts available. In “Explore the Map,” the game does not disappoint in its offerings of these items. Here are a few tips and tricks for getting all artifacts: first, take advantage of the mini-map.

    It’s an excellent tool for locating items that may not be visible from afar. Additionally, make sure to be thorough in your search of each area. Don’t forget to look high and low! Lastly, don’t be afraid to backtrack and revisit previously explored areas.

    You never know what you may have missed the first time around. With these strategies in mind, you’ll quickly become a skilled artifact collector and complete your quest with ease.

    Upgrade Your Vehicle

    Upgrade Your Vehicle Upgrading your vehicle in the game is an essential aspect of ensuring you have the best chance at success. However, getting all the artifacts can be quite tricky. But fear not, as we have some tips and tricks to help you on your way.

    First, make sure you explore every nook and cranny of the map. Many artifacts are hidden away in obscure locations, so being thorough in your questing is vital. Additionally, be sure to check in with all the NPC characters you come across.

    They may have some valuable advice or even direct you to a location you hadn’t considered before. Another tip is to prioritize upgrading your browsing ability. This will allow you to spot items from further away and make finding artifacts a breeze.

    Don’t forget to level up your driving and combat skills too – you never know what challenges you will face out on the road. Finally, keep in mind that some artifacts are only attainable through completing specific quests or challenges. So be sure to check in with all the quest givers and take on any challenges presented to you.

    By following these tips, you’ll be well on your way to collecting all the artifacts and upgrading your vehicle to its maximum potential.

    Challenge Yourself

    If you’re looking for a challenge in your gaming experience, why not try to collect all of the artifacts in your favorite game? It’s no easy feat, but with the right tips and tricks, you can be on your way to completing your collection. First, make sure to explore every inch of the game’s world, as artifacts can often be hidden away in out-of-the-way places. Keep an eye out for clues, such as maps or cryptic messages, which might lead you to the location of an elusive artifact.

    Additionally, don’t hesitate to talk to every character in the game, as they may have valuable information or even be willing to trade artifacts with you. Finally, don’t forget to upgrade your character’s skills and abilities, as this will often unlock new areas of the game and make it easier to collect every last artifact. With these tips in mind, you’ll be well on your way to completing your artifact collection and mastering the game’s challenges.

    Conclusion

    Congratulations, you now possess the knowledge and skills needed to acquire all the artifacts in SSD Speedway! With a bit of patience, perseverance, and a touch of bravery, you can navigate the twists and turns of this tricky track and come out on top. Just remember to stay focused, be prepared for any obstacles that come your way, and never give up! May the wind always be at your back as you race to victory and claim every artifact in sight. Happy hunting!”

    Recap of Strategies

    If you’re looking for tips and tricks on how to get all the artifacts in your favorite game, here’s a quick recap of some of the strategies you can use. First and foremost, make sure you explore every nook and cranny of each level. Many artifacts are hidden away in secret areas that you might miss if you rush through the game too quickly.

    Additionally, try to complete any side quests or challenges that you come across. These often reward you with valuable artifacts that you might not find elsewhere. Another helpful tactic is to use any special abilities or tools at your disposal to uncover hidden artifacts.

    For example, if you have a grappling hook or a special vision mode, these can be great tools for finding hidden treasures. Finally, don’t be afraid to consult online guides or forums if you’re stuck. Other players might have discovered secret strategies or hints that can help you track down elusive artifacts.

    By taking these tips to heart, you’ll be well on your way to collecting all the artifacts in no time.

    Good Luck on Your Quest!

    Are you on a mission to collect all the artifacts? It can be a daunting task, but with the right tips and tricks, you can increase your chances of success. First, make sure to thoroughly explore each area you visit, as artifacts can be hiding in unexpected places. Use your scanner frequently, as it can help detect hidden items.

    It’s also helpful to prioritize areas with higher artifact spawn rates, such as ruins and ancient temples. Another useful strategy is to team up with other players, as they may have knowledge of artifact locations you haven’t discovered yet. And don’t forget to level up your skills, as they can give you an edge on artifact hunting.

    Good luck on your quest, and may you find all the artifacts you seek!

    FAQs

    What are artifacts in SSD Speedway?
    Artifacts are collectibles in the game that are hidden throughout different levels and can be obtained by completing certain tasks or challenges.

    What is the importance of collecting all artifacts in SSD Speedway?
    Collecting all artifacts unlocks special rewards such as concept art, behind-the-scenes footage, and more in the game. It also adds to the overall completion percentage of the game.

    How many artifacts are there in SSD Speedway?
    There are a total of 30 artifacts to collect in the game.

    Where can I find the artifacts in SSD Speedway?
    The artifacts are hidden throughout the different levels and can be found by exploring the areas thoroughly and completing specific challenges.

    Is it necessary to collect all artifacts to complete SSD Speedway?
    No, collecting all artifacts is optional and not required to complete the main storyline of the game. However, it does add to the overall experience and rewards the player with special content.

  • Unlocking the Secret: A Comprehensive Guide on How to Unscrew Your SSD with Ease

    Unlocking the Secret: A Comprehensive Guide on How to Unscrew Your SSD with Ease

    Have you ever come across a stubborn screw while trying to install or remove an SSD from your computer? It can be a frustrating experience, especially if you don’t know how to handle it. SSD screws are often small and tightened very tightly, making it challenging to unscrew them. But don’t worry, we’ve got you covered.

    In this article, we’ll discuss some effective ways to get that stuck SSD screw undone, without causing any damage to your computer. Whether you’re a DIY enthusiast or a computer repair professional, our tips will come in handy and save you from the hassle of a tricky situation. So, let’s get started and learn how to unscrew a stuck SSD screw the right way!

    Preparation

    If you’re planning to upgrade your laptop’s hard drive or simply replacing a faulty SSD, there’s a chance that you may encounter a stubborn screw that just won’t budge. To avoid frustration and possible damage to your hardware, it’s crucial to prepare appropriately before attempting to unscrew an SSD screw. The first step is to find the right tools for the job.

    Usually, you’ll need a screwdriver with a precision tip that fits snugly into the screw’s head to avoid slipping or stripping. It’s also essential to ensure that you’re working in a stable, well-lit area where you can see the screw clearly. Before proceeding, power off your device and remove the battery to prevent any electrical mishaps.

    It’s also a good idea to ground yourself to avoid static discharge that can harm sensitive components. Finally, determine the type of screw you’re dealing with and proceed with caution. With the right tools and preparation, you can successfully unscrew that stubborn SSD screw and get back to enjoying your device’s improved performance.

    Gather the necessary tools

    When it comes to any project or task, preparation is key to success. Gathering the necessary tools is no exception. Whether you’re a professional or a DIY-enthusiast, having the right tools on hand can save you time and frustration.

    First, determine what tools are required for the job. This could involve researching online, consulting with a professional, or referring to a instruction manual. Once you’ve compiled a list of necessary tools, gather them together in one place.

    Check to see if any additional equipment is needed, such as safety gear or replacement parts. Remember, having the right tools can make a huge difference in the outcome of your project. So take the time to properly prepare and acquire everything you need before getting started.

    how to unscrew ssd screw

    Loosening the Screw

    Unscrewing an SSD screw can be tricky, but with the right tools and technique, it can be done without damaging your valuable hardware. The first step is to identify the type of screwdriver needed for the job. Most SSD screws use a standard Phillips head, but some may require a Torx or Allen key driver.

    Once you have the right tools, it’s time to loosen the screw. Apply gentle pressure to the screwdriver and turn it counterclockwise. If the screw is particularly stubborn, try applying some heat to the area using a hairdryer or heat gun.

    This can help to expand the metal and make it easier to turn the screw. Another effective technique is to use a rubber band to grip the screwdriver. Simply stretch the rubber band and wrap it around the screwdriver handle.

    This will provide extra grip and help to prevent the screwdriver from slipping. Be patient and avoid applying too much force, as this can strip the screw and cause irreparable damage. With these tips, you should be able to unscrew an SSD screw safely and easily.

    Try a screwdriver

    If you’re struggling to loosen a screw, sometimes all you need is a trusty screwdriver. First, make sure the screwdriver you’re using is the correct size for the screw. If it’s too small, it won’t have enough grip to turn the screw, and if it’s too big, you risk damaging the screw head.

    Once you have the correct size, place the screwdriver into the screw head and apply pressure in a counterclockwise direction. If the screw is still stuck, try using a bit of lubricant like WD-40 or even a drop of olive oil to help loosen it. Another trick is to tap the screwdriver lightly with a hammer to help break up any rust or corrosion that may be holding it in place.

    With a little bit of patience and some elbow grease, you should be able to loosen that stubborn screw in no time.

    Use a rubber band

    If you’ve ever tried to tighten or loosen a stubborn screw, you know it can be a frustrating experience. But don’t worry, there’s a simple solution to this problem – use a rubber band. This may sound like a strange suggestion, but it actually works surprisingly well.

    Simply place the rubber band over the top of the screw and press down firmly with your screwdriver. The rubber band will provide extra grip and help you turn the screw more easily. This trick works especially well on small screws or screw heads that have been worn down over time.

    So next time you’re struggling with a stubborn screw, give the rubber band trick a try and see if it does the trick. Happy DIY-ing!

    Apply heat

    To loosen a stubborn screw, one effective method is to apply heat. This technique can be helpful when the screw is rusted or stuck due to corrosion. The heat helps to expand the metal on the screw, making it easier to turn.

    Before applying heat, it’s important to ensure that the surrounding area is free of any flammable materials. You can use a heat gun, a soldering iron, or even a lighter to apply heat to the screw. Be sure to wear protective gloves to avoid burns, and hold the heat source a few inches away from the screw.

    Once the screw is hot, use a screwdriver or wrench to try turning it. If it still won’t budge, continue applying heat until it loosens enough to turn. Remember, applying too much heat or holding the heat source in one spot for too long can cause damage to the surrounding material or strip the screw.

    So, use heat with caution and be patient, and you’ll eventually get that stubborn screw to turn!

    Preventing Future Issues

    Are you struggling to unscrew your SSD screw? Don’t worry, you’re not alone. It can be frustrating to encounter a screw that refuses to budge, but there are a few things you can do to prevent this issue in the future. First, make sure you have the right tools for the job.

    A precision screwdriver set can be a lifesaver when it comes to working with small, delicate screws. Additionally, taking your time and being gentle when unscrewing can help prevent damage to the screw head or the surrounding components. If you’re still having trouble unscrewing the SSD screw, try applying some heat to the area with a hairdryer or heat gun.

    This can help loosen any adhesive or other materials that may be causing the screw to stick. Remember, taking care when working with your computer or other electronics can help prevent future problems and save you time and money in the long run.

    Avoid over-tightening the screw

    When it comes to tightening screws, it’s important not to overdo it. Over-tightening screws can lead to a host of problems, including stripped screws and damage to the material being screwed into. To prevent future issues, it’s important to use the right amount of force when tightening screws.

    This means using a torque wrench or screwdriver to ensure that you’re not applying too much pressure. In addition to preventing current issues, this will also help prevent future problems by ensuring that screws are tightened to the correct torque and don’t become loose over time. Remember, it’s better to err on the side of caution when tightening screws.

    By using the right tools and techniques, you can avoid common issues and ensure that your projects are built to last. So, the next time you’re tightening a screw, be sure to use the appropriate amount of force, and avoid over-tightening at all costs!

    Use the correct size screwdriver

    When it comes to DIY projects and repairs, using the correct size screwdriver is essential for preventing future issues. Using the wrong size may not seem like a big deal at first, but it could lead to stripped screws or damage to the screw head, making it difficult to remove or tighten. So, how do you know which size to use? The easiest way is to match the size of the screw head to the screwdriver.

    Don’t force a smaller or larger size screwdriver onto the screw, as this can cause damage. It’s also important to use the right type of screwdriver, whether it’s a flathead or Phillips head. By using the correct size screwdriver, you can ensure a smooth and successful DIY project without any future headaches.

    Conclusion

    In conclusion, unscrewing an SSD screw may seem like a daunting task, but fear not! You can easily conquer this challenge by following a few simple steps. First, ensure you have the right tools (a screwdriver that fits the screw head) and a steady hand. Apply a bit of pressure while turning the screwdriver counterclockwise and voila! The screw will come loose like a magician pulling a rabbit out of a hat.

    Remember, it’s all about technique and finesse; don’t rush and don’t force it. Now you’re ready to swap out your SSD or upgrade your storage with ease. Happy unscrewing!”

    FAQs

    What tool do I need to unscrew an SSD screw?
    You will need a screwdriver that fits the size of the screw. Most SSD screws are either Phillips head or Torx.

    How do I know which screw holds the SSD in place?
    Look for the screw or screws that are located near the SSD. Sometimes the screws may be labeled, but if not, use your best judgment to identify the screws holding the SSD in place.

    What if the SSD screw is stripped or stuck?
    If the screw is stripped, try using a different screwdriver or use pliers to get a better grip on the screw. If it is stuck, try applying some WD-40 or another lubricant to help loosen the screw.

    Can I reuse the SSD screw once I’ve unscrewed it?
    Yes, as long as the screw is in good condition, you can reuse it to secure the SSD back in place. Just make sure to tighten it securely but not too tightly.

  • Secure Your Data: A Step-by-Step Guide on How to Put a Password on Your SanDisk SSD

    Secure Your Data: A Step-by-Step Guide on How to Put a Password on Your SanDisk SSD

    Are you looking for a way to keep your data safe on your SanDisk SSD? Password protecting your SSD is a great step towards securing your information from unauthorized access. If you have sensitive data stored on your SSD, it’s essential to take measures to protect it from cyber threats. In this blog post, we’ll discuss how to password protect your SanDisk SSD.

    We’ll walk you through the steps to enable password protection on your SanDisk SSD and give expert tips on creating strong and secure passwords. We’ll also discuss the benefits of password protection and the potential risks of not securing your data. With the rise of cyber-attacks and data breaches, password protection is a crucial step towards safeguarding your data.

    By adding a layer of protection to your SanDisk SSD, you can rest assured that your information is safe from prying eyes. So, let’s dive into the steps you need to take to password protect your SanDisk SSD.

    What is SanDisk SSD?

    SanDisk SSDs are solid-state drives designed to provide reliable, high-speed storage for digital devices. These drives use flash memory technology, making them faster and more resistant to damage than traditional hard drives. To keep your data secure, you may want to put a password on a SanDisk SSD.

    Fortunately, the process for doing this is fairly simple. First, you will need to install SanDisk’s SecureAccess software, which allows you to create a password-protected vault on your drive. Once you have created the vault, you can transfer any sensitive files into it, which will be protected by your chosen password.

    It’s important to remember that if you forget your password, there is no way to retrieve it, so choose a secure password that you will remember. With these steps, you can ensure that your data stays safe and secure on your SanDisk SSD.

    Explanation of SanDisk SSD

    SanDisk SSD is a solid-state drive that uses flash memory to store data. This type of drive is known for its high speed and reliability, as it has no moving parts that can wear out over time. SanDisk is a popular brand that offers a range of SSDs for different uses, from consumer-level to enterprise-level.

    The SanDisk SSDs are available in various capacities, ranging from 120GB to 4TB. They are designed to be easy to install, with most models using the standard 5-inch form factor used by most laptops and desktops.

    In addition to being fast and reliable, SanDisk SSDs are also known for their low power consumption, making them a popular choice for mobile devices and other battery-powered applications. Whether you’re looking to upgrade your computer’s storage or build a new system from scratch, a SanDisk SSD is a great choice for speed, reliability, and efficiency.

    how to put password on sandisk ssd

    Why Password Protect Your SanDisk SSD?

    If you are concerned about your personal data being accessed without your permission, it’s important to password protect your SanDisk SSD. It’s a simple and effective way to ensure that your files, photos, and videos are kept safe from unauthorized individuals. How to put a password on SanDisk SSD? It’s actually quite easy.

    You can use SanDisk’s own SecureAccess software to set up a password-protected vault for your sensitive information. Once you’ve activated the feature, you can add files to the vault and only access them by entering the correct password. This added security is especially important if you frequently travel or use your SSD on public computers.

    Don’t let your sensitive data fall into the wrong hands – protect it with a password today.

    Reasons for Protecting SanDisk SSD

    SanDisk SSD, password protect There are several reasons why you should consider password protecting your SanDisk SSD. Firstly, it helps to keep your confidential data secure from unauthorized access. If you regularly carry sensitive information such as banking details or business files on your SSD, protecting it with a password can prevent any unauthorized access even if your device is lost or stolen.

    Secondly, password protecting your SanDisk SSD helps you to comply with regulatory requirements. If you handle sensitive information that is subject to compliance requirements such as HIPAA or GDPR, password protection is often mandated. In this instance, not having protection in place can lead to significant legal and financial repercussions.

    Lastly, it is a simple and effective way to ensure your privacy. When you password protect your SSD, you gain complete control over who has access to your data. This allows you to deny access to any unauthorized person or entity, and also ensures peace of mind when using public devices or shared workspaces.

    Overall, protecting your SanDisk SSD with a password is a crucial step in ensuring data security and privacy. It is a simple and effective measure that can prevent data breaches and protect your confidential data.

    How to Password Protect SanDisk SSD?

    If you want to keep your data safe and secure, password protecting your SanDisk SSD is a great way to go. The process is quite simple and can be done in just a few steps. First, connect your SSD to your computer and launch the SanDisk SecureAccess software.

    Next, create a new vault and set a strong password that you will remember. Once you have done this, add your files to the vault and save them. Now, every time you want to access your files, you will need to enter your password.

    This way, even if your SSD is lost or stolen, your data will remain safe and protected from prying eyes. So, if you haven’t already, it’s time to put a password on your SanDisk SSD and enjoy peace of mind knowing your data is safe and secure.

    Step-by-Step Guide on Setting Password on SanDisk SSD

    If you want to keep your sensitive data secure and prevent unauthorized access to your SanDisk SSD, setting a password is crucial. Here is a step-by-step guide on how to password protect SanDisk SSD. First, install the SanDisk SecureAccess software on your computer.

    Once installed, connect your SanDisk SSD and open the SecureAccess software. Create a new vault and choose a strong password. You can also select a hint question to help you remember the password.

    Once done, drag and drop files to the vault to encrypt them. Now, the encrypted files can only be accessed with the correct password. It’s also important to remember the password and hint question you set, as they cannot be recovered or reset.

    Using this simple process, you can confidently secure your data on SanDisk SSD and safeguard your confidential information from prying eyes.

    Overview of Security Software to Password Protect SanDisk SSD

    If you want to keep your confidential information safe, password protecting your SanDisk SSD is a great way to do it. One option is to use the SanDisk SecureAccess software, which is included with every SanDisk SSD purchase. This software allows you to create a password-protected vault to store your sensitive files.

    You can choose the amount of space you want to allocate to the vault and then simply drag and drop files into it. When you’re finished, simply eject the SSD, and the vault will be automatically locked. Another option is to use third-party software like BitLocker or Veracrypt, which is more advanced and allows you to encrypt your entire SanDisk SSD.

    However, it’s essential to remember that if you forget the password, you’ll lose access to your data, so it’s important to choose a password that’s not only secure but also memorable. With these software options, you can secure your SanDisk SSD and enjoy greater peace of mind knowing your information is protected.

    Best Practices for Keeping Your Password Protected SanDiskSSD Safe

    If you want to keep your SanDisk SSD safe, it’s important to put a password on it. This will prevent unauthorized access to your stored information and keep everything secure. To put a password on your SanDisk SSD, first connect the drive to your computer and open the SanDisk SecureAccess software.

    From there, select the “Protect” tab and click on “Set Password”. Enter a strong, unique password that you’ll remember and confirm it. Then, choose the files and folders you want to protect with the password and click on “Add to Vault”.

    Your SanDisk SSD will now be password protected and your sensitive information will be kept secure. Remember to keep your password safe and avoid using the same password for multiple accounts. With these best practices, you can ensure your SanDisk SSD is protected and your information stays private.

    Tips for Keeping Your SanDisk SSD Safe from Security Threats

    SanDisk SSD, Security Threats, Best Practices, Password Protection The SanDisk SSD is a popular choice for those who need reliable storage for their important files. However, security threats can put your data at risk. It’s essential to implement best practices to keep your SanDisk SSD password-protected and safe from potential harm.

    Firstly, set a strong and unique password that uses a combination of uppercase and lowercase letters, numbers, and special characters. Furthermore, avoid using common phrases or personal information as your password. Secondly, always keep your operating system, antivirus software, and firmware updated to prevent vulnerabilities that can lead to security risks.

    Finally, be careful when browsing and downloading files from the internet and only use trusted and verified sources. By following these best practices, you can keep your SanDisk SSD safe from potential security threats and ensure that your data is protected.

    Conclusion

    Just like keeping your sandcastle safe from sea waves, shielding your SSD with a password is a smart move to keep all your data protected from unwanted access. With just a few clicks and taps, you can create a strong and memorable password that will act as your personal fortress. So, let the waves crash, the wind blow, and the internet hackers try their best, because your SSD password will stand strong and impenetrable like a sandcastle built of steel.

    Summary of Steps on How to Password Protect SanDisk SSD

    If you want to keep your data safe and secure, it’s important to password protect your SanDisk SSD. Here are the steps that you need to follow: 1) Plug in your SanDisk SSD and open the encryption software that comes with it. 2) Choose the option to create a new password-protected volume.

    3) Set up your password and choose the size and format of your new volume. 4) Wait for the encryption process to complete. 5) Safely eject your SanDisk SSD and then plug it back in to check that your password protection is working correctly.

    To keep your password protected SanDisk SSD safe, there are a few best practices that you should follow. Firstly, ensure that you choose a strong and unique password that is not easily guessable. Secondly, make regular backups of your data in case something goes wrong or your SSD is lost or stolen.

    Lastly, do not share your password with anyone and try to avoid writing it down or saving it in an unencrypted location. By following these simple steps and best practices, you can ensure that your data remains safe and secure on your password protected SanDisk SSD.

    FAQs

    What are the steps to set a password on a Sandisk SSD?
    To set a password on a Sandisk SSD, you need to first connect the SSD to your computer, open the security software provided by Sandisk, and follow the prompts to create a password.

    Can I change the password I previously set on my Sandisk SSD?
    Yes, you can change the password on your Sandisk SSD. Simply open the security software provided by Sandisk, select the option to change the password, and follow the prompts.

    I have forgotten the password to my Sandisk SSD. What should I do?
    If you have forgotten your password for the Sandisk SSD, you may need to perform a factory reset on the device. However, keep in mind that this will result in the loss of all data stored on the SSD.

    What is the maximum length of the password that I can set on a Sandisk SSD?
    The maximum length of the password you can set on a Sandisk SSD is 16 characters. It is recommended to use a combination of upper and lower case letters, numbers, and special characters to make the password stronger.

  • SSD Storage 101: Understanding The Equivalence of 1 SSD to GB

    Are you confused about SSD and GB? You’re not alone. With so much technical jargon out there, it’s easy to get lost in the complexity of modern technology. But fear not, we’re here to help you understand these terms and how they relate to your devices.

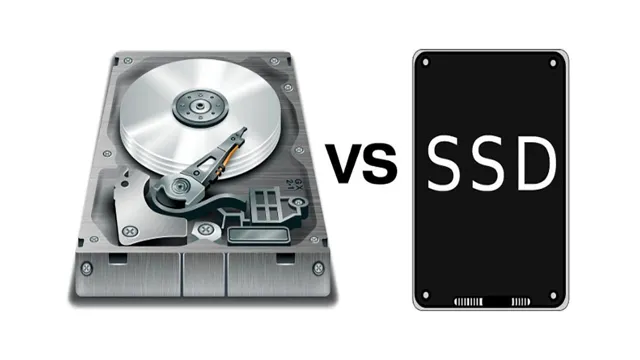
    First, let’s start with SSD. SSD stands for Solid State Drive, and it’s a newer form of storage technology that has taken the tech world by storm. Unlike traditional Hard Disk Drives (HDD), which use physical disk platters to store data, SSDs use flash memory to store information.

    This means they can read and write data much faster, resulting in quicker boot times and faster application loading times. GB, on the other hand, stands for gigabyte. It’s a unit of measurement used to describe how much storage space a device has.

    Think of it like a filing cabinet, where each drawer has a specific amount of space for storing files. The more GB a device has, the more files it can store. So, what does this mean for you? Well, if you’re someone who relies heavily on your devices for work or entertainment, SSDs and larger GB capacities can make a big difference in the speed and efficiency of your tasks.

    Imagine being able to access all your files and applications without waiting ages for them to load. In conclusion, understanding SSD and GB is important when it comes to selecting the right device for your needs. With this knowledge, you can make informed decisions about which technology will work best for you and your lifestyle.

    So, next time someone throws these terms at you, you’ll be able to confidently understand and navigate the world of modern technology.

    What is an SSD?

    When it comes to computer storage, SSDs (solid-state drives) are increasingly becoming a popular choice due to their speed and reliability. But how many GB does a single SSD have? Well, it actually depends on the specific model and capacity you choose. SSDs can range from 120 GB to more than 4 TB, and there are even some high-end options that can offer up to 8 TB of storage.

    So, 1 SSD is not necessarily equal to a specific GB amount, but rather depends on the individual device. That being said, SSDs are generally faster and more efficient than traditional hard drives, making them a great choice for those who need quick access to large amounts of data. Of course, it’s always important to consider your own specific needs when choosing an SSD, as different models will offer different benefits and drawbacks depending on how you plan to use them.

    Explanation of Solid State Drive

    SSD, Solid State Drive Nowadays, Solid State Drives (SSDs) have become increasingly popular as an alternative storage option to the traditional Hard Disk Drives (HDDs). But what exactly is an SSD, and how does it work? Well, to put it simply, an SSD is a type of storage device that uses NAND-based flash memory to store data. Unlike an HDD, an SSD has no moving parts and stores data on interconnected flash memory chips.

    This makes it much faster, more durable, and less prone to failure than an HDD, which relies on spinning disks. Not only do SSDs have faster read and write speeds, but they also use less power, generate less heat, and take up less space. This makes them ideal for laptops, where portability and energy efficiency are critical.

    In comparison to an HDD, an SSD can be more expensive. However, with the increase in demand, prices have been consistently dropping over the years, making them more accessible to the average consumer. In conclusion, an SSD is a powerful storage option that offers faster speeds and greater durability than HDDs.

    Its strength lies in its construction, utilizing flash memory to store and retrieve data quickly and efficiently. With their benefits and decreasing price, it is easy to see why SSDs are a popular choice for consumers.

    1 ssd is equal to how many gb

    What is GB?

    If you’re wondering how many GB are in 1 SSD, the answer is not as straightforward as you might think. SSDs (solid-state drives) come in various sizes, from 128GB up to 4TB and higher. Therefore, 1 SSD is equal to the storage capacity that it was designed to hold.

    GB (gigabytes) is a unit of measurement for digital storage, and the size of an SSD is directly proportional to its capacity. In simpler terms, the larger the SSD, the more GB it has. So if you’re looking for an SSD with a specific storage capacity, be sure to check its GB size.

    One key benefit of SSDs over traditional hard disk drives (HDDs) is that they typically have much faster read and write speeds, making them ideal for those who need quick data access. Hopefully, this clears up any confusion regarding the relationship between SSDs and GB.

    Explanation of Gigabyte Measurement

    Gigabyte (GB) Have you ever wondered what GB means? GB stands for Gigabyte, and it’s a unit of measurement used to measure the amount of storage capacity in digital devices. It’s a representation of the amount of information that can be stored in a device like a hard disk, SSD, or memory card. One gigabyte is equal to 1 billion bytes, which can hold a significant amount of data.

    For example, a single GB can store up to 200 MP3 songs, 300 high-resolution photos, or 60 minutes of video recording. Understanding gigabytes is becoming more important as our dependence on technology and digital devices keeps growing. With the proliferation of high-quality video content, larger files sizes used by modern software, and bigger games, more storage capacity is required.

    So, if you’re looking to get a new device for work or personal use, make sure to consider the different GB options available, and choose one that suits your needs.

    Conversion of SSD to GB

    If you’ve ever wondered how much memory a solid-state drive (SSD) has in terms of gigabytes (GB), the answer may surprise you. One SSD is equivalent to a certain amount of GB capacity, depending on the size of the SSD. For example, a 256GB SSD would be equal to 256 gigabytes of storage space.

    That being said, it’s important to note that there are other factors that can affect the usable space on an SSD. For instance, formatting and partitioning can take up a significant amount of storage space, reducing the capacity of the drive slightly. Additionally, certain SSD models may reserve some memory space for functions like over-provisioning and garbage collection, further reducing the actual storage space that’s available to the user.

    Overall, though, an SSD is an excellent choice for anyone looking for fast and reliable storage. Plus, with the increasing affordability of SSDs, it’s easier than ever to make the switch from a traditional hard drive.

    Formula for Converting SSD to GB

    Converting SSD to GB If you are looking to upgrade your computer’s storage drive to a solid-state drive (SSD), you may be wondering how to determine the storage capacity in gigabytes (GB). The good news is that it’s a simple formula for converting SSD to GB. Here’s how it works: First, you need to know the storage capacity of the SSD in bytes.

    This information is typically listed in the product specifications. Once you have the number of bytes, you can convert it to gigabytes by dividing by 1 billion (1,000,000,000). For example, if you have an SSD with a storage capacity of 256GB, that translates to 256 billion bytes.

    To convert this to GB, you simply divide 256 billion by 1 billion, which gives you 25 So, in this case, the SSD has a capacity of 256GB. It’s important to note that the actual amount of storage space available on the SSD may be slightly less than the advertised capacity due to formatting and other factors.

    Nonetheless, understanding how to convert SSD to GB is essential for accurately determining the storage capacity of your device.

    Example Conversion

    If you’ve ever purchased a solid-state drive (SSD), you likely noticed that its storage capacity is listed in gigabytes (GB) rather than the more common term terabytes (TB). This can cause some confusion, especially if you’re used to measuring the storage capacity of traditional hard drives in TB. So, what do you do if you want to know how many GB your SSD has? The good news is that conversion between TB and GB is straightforward.

    One TB is equivalent to 1,000 GB, so if your SSD has a capacity of 512 GB, for example, it’s equivalent to 0.512 TB. Similarly, if you have a 2 TB SSD, its storage capacity would be 2,000 GB.

    It’s important to note, however, that the usable storage capacity of an SSD is typically slightly lower than its advertised capacity due to formatting and other factors. Nonetheless, understanding how to convert between TB and GB can eliminate confusion and help you better understand the storage capacity of your SSD.

    Application of SSD and GB

    When it comes to storage, two of the most common terms you will hear are SSD and GB. SSD stands for solid-state drive, while GB stands for gigabyte. An SSD is a type of storage device that uses flash memory to store data, while the GB is a unit of measurement for data storage capacity.

    So, to answer the question “1 SSD is equal to how many GB?”, it really depends on the capacity of the SSD. For instance, an SSD with a capacity of 512GB can store up to 512 gigabytes of data. However, it is important to note that not all the space is available for storage as the operating system and other software take up some space.

    Nonetheless, SSDs are generally faster and more reliable than hard disk drives, making them an ideal choice for those looking to improve their computer’s performance. Whatever your storage needs may be, understanding the difference between SSDs and GBs can help you make informed decisions about your computer’s storage solution.

    Common Storage Capacity of SSD in GB

    When it comes to SSDs, the common storage capacity is usually measured in GB (gigabytes). These drives are widely used in modern computers due to their efficiency and speed. One of the main applications of SSDs is in gaming and video editing computers, where large files need to be loaded quickly.

    A higher storage capacity of SSDs, such as 1TB or more, is preferable in this case. For regular computer users, a lower storage capacity of around 256-512GB may suffice. SSDs are also used in laptops because they’re lighter, faster, and more durable than traditional hard disk drives.

    In summary, the storage capacity of SSDs will depend on your specific needs and applications, so it’s essential to evaluate your usage before making a decision.

    Comparison of SSD and HDD in GB

    When it comes to storage capacity, SSDs are becoming increasingly popular because they offer a higher capacity and faster read/write speeds than HDDs. With SSDs, you can store thousands of photos, videos, games, and programs without experiencing any lag or slow loading times. What’s more? SSDs don’t have any moving parts, which means they are less likely to malfunction or break down, making them a more reliable option than HDDs.

    So, if you need high-speed performance and large storage capacity, SSDs are a great choice. However, they are generally more expensive than HDDs when it comes to price per GB. But, if you consider the speed and durability, SSDs are worth the expense.

    Conclusion

    In the world of storage, 1 SSD (solid state drive) is equivalent to a whole lot of GB (gigabytes). It’s like having a tiny magician in your computer that can store all your files, photos, and videos with lightning speed. To put it simply, it’s kind of like having a superhero sidekick in your digital life, always at the ready to save the day when you need it most.

    So, one SSD is equal to a whopping amount of GB, and it’s definitely worth investing in for anyone who needs a reliable, lightning-fast storage solution.”

    FAQs

    What is the meaning of SSD and GB in the context of storage devices?
    SSD stands for Solid-State Drive, which is a type of storage device that uses non-volatile flash memory to store data. GB, on the other hand, stands for Gigabyte, which is a unit of measurement for data storage capacity.

    What is the maximum storage capacity of an SSD in GB?
    The storage capacity of an SSD varies depending on the manufacturer and model. However, the maximum storage capacity of an SSD can currently reach up to 16 Terabytes, which is equivalent to 16,000 GB.

    How does the speed of an SSD compare to a traditional hard disk drive (HDD)?
    SSDs are generally faster than traditional HDDs because they do not have any moving parts. This means that data can be read and written to an SSD much faster than an HDD, resulting in faster boot times, faster application launches, and faster file transfers.

    Can you replace a traditional HDD with an SSD in a laptop or desktop computer?
    Yes, you can replace a traditional HDD with an SSD in a laptop or desktop computer. This can be done by cloning the content of the HDD to the SSD using free software tools or by doing a fresh installation of the operating system and applications. The performance of the computer will improve significantly after upgrading to an SSD.

  • Upgrade Your Performance: Simple Guide on How to Transfer Apps from HDD to SSD

    Upgrade Your Performance: Simple Guide on How to Transfer Apps from HDD to SSD

    If you’re looking to upgrade your system’s performance, one of the most effective ways to do so is by transferring apps from your HDD to SSD. SSDs are known for their faster read and write speeds, which can significantly improve your system’s overall speed and responsiveness. However, moving your apps from one drive to another can be a daunting task, especially for those who are not tech-savvy.

    But fear not, as we’ve got you covered! In this blog post, we’ll discuss everything you need to know about transferring apps from HDD to SSD, including why it’s important, how to do it, and some helpful tips to ensure a smooth transfer. So, let’s dive right in!

    Check Available Space on SSD

    If you have recently upgraded to an SSD from an HDD, you might have noticed a significant improvement in your computer’s overall performance. But as with any new storage device, it’s essential to check the available space on the SSD from time to time. To do this, right-click on the drive icon and select “Properties.

    ” From there, you’ll see the amount of free space available. However, if you’re running out of space on your SSD, you might want to transfer some of your apps from HDD to SSD. One way to do this is to uninstall the applications from the HDD and then reinstall them on the SSD.

    Some applications allow you to choose the installation directory during setup; make sure to select the SSD in that case. Alternatively, you could try using a third-party tool to migrate your apps from HDD to SSD. Regardless of the method, it’s always a good idea to keep an eye on your SSD’s available space to ensure it’s running optimally.

    Remember, a cluttered SSD can slow down your system, so keep it clean and organized for the best performance.

    Open File Explorer and navigate to SSD drive

    When it comes to working with an SSD drive, it’s important to keep an eye on the available space. To check how much free space you have, the first step is to open File Explorer and navigate to your SSD drive. Once there, you can easily see how much space is available by simply right-clicking on the drive and selecting Properties.

    In the General tab, you’ll be able to see the capacity of the drive as well as the amount of free space remaining. It’s always a good idea to keep at least 20% of the drive’s capacity free to ensure optimal performance. By periodically checking the available space on your SSD, you can stay on top of your storage needs and ensure that your system is running smoothly.

    So, take a moment to check your SSD’s available space and make sure you’re not running too low!

    how to transfer apps from hdd to ssd

    Right-click on the drive and choose Properties

    If you want to check the available space on your SSD, simply right-click on the drive and select Properties. This will open a window displaying all the information about your drive’s properties, including the used and available space. This is an important task to do regularly, as it can help you monitor how much space you have left on your SSD and make sure you don’t run out of space unexpectedly.

    Running out of space on your SSD can cause a variety of problems, including slower performance and even data loss. So, it’s important to keep an eye on your available space and take action if you’re running low. By regularly checking your SSD’s properties, you can ensure that your computer runs smoothly and efficiently, and that you have enough space to store all your important files and applications.

    Check free space available

    Checking the available space on your SSD is crucial to maintaining its performance and preventing any potential issues. Thankfully, it’s easy to check the free space available on your SSD. All you need to do is open File Explorer and locate your SSD drive.

    Right-click on it and select Properties. A new window will appear, showing you the total capacity, used space, and free space available on your SSD. It’s recommended to have at least 10-20% of the SSD’s capacity free at all times to ensure optimal performance and longevity.

    If you find that your SSD is running low on space, consider deleting any unnecessary files or transferring them to an external hard drive. By regularly checking the available space on your SSD and keeping it free, you can ensure that it runs smoothly and efficiently for years to come.

    Locate the Apps on HDD

    If you are wondering how to transfer apps from your HDD to SSD, the first step is to locate the apps on your HDD. This can be done by opening the File Explorer and navigating to the folder where your apps are installed. Look for the Program Files or Program Files (x86) folder.

    This contains all the applications that are currently installed on your computer. Once you have located the folder, you can select the apps you want to transfer and simply copy and paste them to your SSD. It is important to note that some apps may not be transferable and may need to be reinstalled on your new drive.

    Additionally, transferring certain system files may lead to issues with your operating system, so be sure to only transfer apps that you are certain will work properly on your SSD. With a little bit of care and attention, transferring your apps from your HDD to your SSD is a relatively simple process that can help to improve the performance of your computer significantly.

    Open File Explorer and navigate to HDD drive

    To locate the Apps on your HDD, the first thing you need to do is open File Explorer. You can do this by clicking on the folder icon on your taskbar or pressing the Windows key + E on your keyboard. Once File Explorer opens, you need to navigate to your HDD drive.

    This can be done by clicking on the “This PC” option in the left sidebar and locating your HDD drive under the “Devices and drives” section. Clicking on your HDD drive will open it up, allowing you to browse through all the files and folders stored on it, including your Apps. You can then locate your Apps by navigating through the folders they are stored in.

    It’s important to keep your files organized on your HDD drive to make it easier to find your Apps and other important files when you need them. So, take some time to create folders for different types of files and group your Apps accordingly. With a little bit of organization, locating your Apps on your HDD will be a breeze.

    Locate the folder containing the Apps

    If you’re looking for the folder containing the apps on your HDD, there are a few places to search. One of the easiest places to start is in the “Program Files” folder. This folder contains all of the software installed on your computer that you’ve installed.

    It usually resides on the “C:” drive by default, but it’s possible that you or someone else has installed it on a different drive. Once you’ve located the “Program Files” folder, simply scroll through the list of names to find the app that you’re looking for. If you still can’t find it, try searching for the app using the Windows search bar in the bottom left-hand corner.

    Simply type in the name of the app and it should appear in the search results. If you’ve downloaded the app from a website rather than installing it through a setup.exe file, check your Downloads folder as well.

    With these tips in mind, you should be able to locate the apps on your HDD easily.

    Copy the Apps to SSD

    If you’ve recently upgraded to a newer and faster SSD, you might be wondering how to transfer your apps from your old HDD. You don’t want to lose all of your data or have to reinstall everything from scratch. Fortunately, it’s relatively easy to copy your apps over to your new SSD.

    First, you’ll want to locate your application folder on your HDD. This is typically found under the “Applications” folder in your main hard drive. Next, simply drag and drop the applications you want to copy over to your new SSD.

    Keep in mind that some apps may have configuration files or libraries that are located in other areas of your computer. In those cases, you may want to copy those files over as well to ensure that everything runs smoothly. Once you’ve finished transferring your apps, be sure to check that they all run as expected.

    With just a few simple steps, you can quickly and easily copy all of your important applications to your new and faster SSD.

    Right-click on the folder containing the Apps on HDD

    If you’re running out of space on your HDD and want to speed up your computer, copying apps to your SSD can be a great solution. To do this, you’ll need to right-click on the folder containing the apps on your HDD and select “copy.” Then, navigate to your SSD and right-click in an open space, selecting “paste.

    ” This will create a copy of the folder and all its contents on your SSD. Having your apps on an SSD can improve their performance significantly, as SSDs have faster read and write speeds than traditional HDDs. This means that your apps will open more quickly and be more responsive when you use them.

    However, keep in mind that your SSD has limited space, so you may not be able to copy all your apps over. Consider prioritizing the apps that you use most frequently or that require the most resources. It’s also important to note that copying apps is different from installing them.

    If you simply copy the app folder from your HDD to your SSD, you may run into issues with file associations or other dependencies. It’s best to reinstall the app on your SSD if possible, or to use a migration tool that can properly transfer all the necessary files. In addition to copying apps to your SSD, you may want to consider moving other frequently accessed files, such as your operating system or frequently used documents, to your SSD as well.

    This can further improve your computer’s speed and performance. Just remember to keep an eye on your storage space to ensure that you don’t run out.

    Choose Copy

    If you’re looking to improve the performance and speed of your computer, copying apps to an SSD can be a great option. Solid-state drives, or SSDs, are faster and more efficient than traditional hard drives. The process of copying apps to an SSD is pretty simple.

    First, you need to have an SSD installed on your computer. Once you have that, you can begin the process of copying apps to the drive. You can do this by finding the app you want to copy, dragging it to the SSD, and dropping it there.

    This will begin the copy process, and your app will be transferred to the SSD. While the process may take some time, the result will be a faster and more efficient computer. So if you’re looking to speed up your computer, consider copying your apps to an SSD today!

    Navigate to the SSD drive and choose Paste

    To speed up our computer’s performance, we can transfer our Apps from the old hard drive to a new Solid State Drive (SSD). This process involves copying the Apps from their current location and pasting them into the SSD. Navigate to the SSD drive and select the Paste option to move the Apps.

    Remember that SSDs are faster, more reliable, and durable than traditional HDDs. Besides, they have no moving parts, so they are less likely to fail. As such, it’s essential to move all your Apps to SSD to get the most out of your computer’s speed and performance.

    By doing so, you’ll notice a significant difference in how quickly your computer boots, opens files, and runs software. Take the time to move your Apps to an SSD, and you’ll be amazed at how much of a boost it gives to your computer’s performance.

    Update App Settings

    If you’re upgrading your storage from an HDD to an SSD, it’s important to transfer your apps properly to take full advantage of your new hardware. First, make sure your SSD is set as the boot drive in your computer’s BIOS settings. Next, you can transfer your apps by updating their settings in either the app itself or through the Windows settings.

    For example, in Windows 10, you can go to Settings, Apps, and then choose the app you want to transfer. From there, you can select “Move” to choose the location on your SSD you want to transfer the app to. Some larger apps or programs may require a full reinstallation, so be sure to check with the app developer’s website for specific instructions.

    By transferring your apps to your new SSD, you’ll be able to enjoy faster load times and improved performance overall.

    Open the Apps on the SSD to make sure they work properly

    Now that you’ve successfully transferred your apps to your SSD, it’s important to ensure they’re working properly. The first step is to open each app and make sure it runs smoothly. If there are any issues, try reinstalling it on your SSD or checking for updates.

    Once your apps are up and running, it’s a good idea to update their settings. This can help you maximize their performance on the SSD. For example, you can adjust the graphics settings of a game to take advantage of the faster loading times and increased storage capacity of your SSD.

    Make sure to explore each app’s settings to see if there are any performance-enhancing options available to you. By taking these steps, you can ensure you’re getting the most out of your SSD and the applications you use on it.Keyword: app settings.

    Check app settings and update as necessary

    Updating app settings is crucial to ensure optimal performance and user satisfaction. Regularly checking your app’s settings and making necessary updates can help you avoid potential issues and improve your app’s functionality. With the constantly evolving technology landscape, not keeping up with updates can lead to major setbacks such as app crashes and security breaches.

    The good news is that updating your app’s settings is an easy process that can be accomplished in a few simple steps. So, take the time to review and update your app’s settings regularly; it will save you time and hassle in the long run and enhance user experience.

    Conclusion

    In conclusion, transferring apps from HDD to SSD is a lot like moving house. You need to carefully pack your belongings, choose the right vehicle to transport them, and unpack everything in your new home. But just like how a new home can bring a sense of rejuvenation and speed up everyday tasks, transferring apps to an SSD can significantly boost your computer’s performance.

    So, whether you’re upgrading your computer or just looking to make your workflow more efficient, taking the time to transfer your apps to an SSD is definitely worth the effort.”

    FAQs

    What is the benefit of transferring apps from HDD to SSD?
    Transferring apps from HDD to SSD can result in improved performance and faster load times due to the faster read and write speeds of SSDs. It can also free up space on your HDD for other files.

    Can all apps be transferred from HDD to SSD?
    Most apps can be transferred from HDD to SSD, but some may require a fresh installation on the SSD to ensure they run smoothly and don’t encounter any compatibility issues.

    How do I transfer apps from HDD to SSD?
    One way to transfer apps is to use a cloning software to copy the entire HDD contents to the SSD. Alternatively, you can manually transfer individual apps by reinstalling them on the SSD and copying over any related files or data.

    Will transferring apps from HDD to SSD affect my data?
    Transferring apps should not affect your data, but it’s always recommended to make a backup of important files and data before making any major changes to your system.

  • Understanding the Conversion: How Many GB is Equal to 128 SSD?

    Understanding the Conversion: How Many GB is Equal to 128 SSD?

    If you’re looking to upgrade your computer’s storage capacity, you may be wondering how much storage is provided by a 128 SSD. While SSDs have become increasingly popular in recent years due to their faster data read and write speeds, they can be confusing to those unfamiliar with the technology. So, how many GB does a 128 SSD provide? Let’s find out.

    In this article, we’ll delve into what an SSD is, how it differs from a traditional hard drive, and provide a clear answer to the question at hand. By the end of the article, you’ll have a better understanding of whether a 128 SSD is sufficient for your needs.

    Definition of SSD

    If you’re looking to upgrade your computer’s storage, you might be wondering how much space a 128 SSD really provides. In reality, a 128 SSD is equal to 128 gigabytes (GB) of storage. This amount of storage should be able to hold a variety of files, including documents, photos, and even large programs.

    Keep in mind, however, that the actual amount of usable space on an SSD may be slightly lower due to formatting and pre-installed software. Additionally, if you’re used to traditional hard drives, it’s important to remember that SSDs don’t have moving parts, which makes them faster and more reliable. While a 128 GB SSD may not sound like a lot of storage space compared to larger options out there, it’s a great choice for those who want a reliable and speedy storage solution that won’t break the bank.

    What is SSD?

    SSD stands for Solid State Drive, which is a popular storage device used in modern computers and other electronic devices. Unlike traditional hard disk drives (HDD), SSDs store information using flash memory chips, making them much faster and reliable. The term “solid state” refers to the fact that SSDs have no moving parts, unlike HDDs that use spinning platters and read/write heads to access data.

    Because SSDs have faster read and write speeds, they can drastically improve the overall performance and speed of a computer, allowing for faster boot times, quicker program launches, and faster file transfers. They also consume less power than HDDs, resulting in longer battery life for portable devices. Overall, SSDs offer a significant improvement in performance and reliability over traditional HDDs, making them an excellent choice for anyone looking to upgrade their computer’s storage.

    128 ssd is equal to how many gb

    How Does an SSD Work?

    An SSD or Solid State Drive is a data storage device that operates using semiconductor technology, without any moving parts. Instead of writing data onto spinning disks with a read/write head, it stores data on interconnected flash-memory chips. Since an SSD doesn’t have to look for data on spinning disks, it works much faster than an HDD or a Hard Disk Drive which can also help your computer perform much better over time.

    An HDD is a mechanical device that uses magnetism to create and read data from magnetic disks. SSDs, on the other hand, use NAND-based flash memory chips, which are much faster than traditional magnetic disks. This means that SSD-users don’t have to worry about physical damage if you accidentally bump your computer, as there are no moving parts that could be damaged.

    Additionally, SSDs consume less energy, making them ideal for mobile devices that rely on battery power. Overall, SSDs provide faster speed and increased durability, which makes them a smart choice for both personal and business use.

    128 SSD Capacity

    If you’re wondering how much storage you can expect from a 128 SSD capacity, the answer is that it’s equivalent to 128 gigabytes (GB). This may sound small when compared to traditional hard drives, but SSDs are designed to provide better performance and faster read-write speeds. They’re perfect for people who prioritize speed over storage space.

    With a 128 SSD, you can store a considerable amount of files such as applications, documents, photos, music, and videos. However, if you work with large files such as high-resolution videos or 3D graphics, a 128 SSD may not be enough. In these cases, you might need a larger SSD, or you might need an external hard drive to supplement your storage needs.

    Nonetheless, a 128 SSD is an excellent option for everyday computing, gaming, and light multimedia work.

    What Does 128 SSD Mean?

    If you’re in the market for a new laptop or desktop computer, the term “128 SSD” might have come up in your research. So, what does it mean? Simply put, SSD stands for solid-state drive and it refers to a type of computer storage that uses flash memory instead of the traditional spinning hard disks. The number 128 in “128 SSD” refers to the capacity of the drive, which means it can store up to 128 gigabytes of data.

    This amount of storage is suitable for everyday use like browsing the internet, streaming shows, and using basic productivity software. However, if you plan on storing large files like photos, videos, or games, you may want to consider a larger SSD capacity or even an external hard drive to supplement your storage needs. Overall, 128 SSD capacity is a decent amount for most casual computer users who prioritize speed and performance over storage capacity.

    How Much Data Can a 128 SSD Hold?

    If you’re planning to get a 128 SSD, you’re probably wondering how much it can hold. The truth is that it depends on the type and size of the files you plan to store. A 128 SSD can generally hold around 25,000 pictures or 1080p videos that are around 5GB each.

    If you’re into gaming, you can store around 30 to 40 modern games that are around 50GB each. For music lovers, a 128 SSD can hold around 32,000 songs that are around 4MB each. However, it’s important to keep in mind that these are estimates and could vary depending on the compression and quality of your files.

    Additionally, remember to leave some space on your 128 SSD, at least 10-20%, to ensure optimal performance and speed. Overall, a 128 SSD can hold a decent amount of data, but it’s always good to keep track of your files and regularly clean up your storage to ensure your SSD runs smoothly.

    How Does the Capacity of an SSD Compare to a Hard Drive?

    When it comes to storage capacity, SSDs (solid-state drives) have come a long way in recent years. A 128GB SSD is a common capacity found in modern laptops and desktops, and it can hold quite a bit of data. To put it into perspective, that’s enough space to store around 32,000 songs or 128,000 photos, assuming each file is around 4MB in size.

    In comparison to a traditional hard drive, a 128GB SSD may seem small, as hard drives can hold several terabytes of data. However, SSDs have several advantages over hard drives, including faster read and write speeds and increased durability. For individuals who don’t need to store large files, a 128GB SSD is an excellent choice for a primary drive.

    It can run your operating system, applications, and basic storage needs without sacrificing speed or performance.

    128 SSD in GB

    If you’re wondering how much storage you can expect from a 128 SSD, the answer is 128 gigabytes (GB). SSDs, or solid-state drives, are a popular choice for modern computers because they offer faster boot and load times than traditional hard drives. They use NAND flash memory to store data and can hold varying amounts depending on the size of the drive.

    A 128 GB SSD is a great option for someone who doesn’t require a lot of storage space but wants the benefits of an SSD. This capacity is suitable for storing essential software and documents, but it might not be sufficient for users who work with large files such as high-resolution images, videos, or complex software. Overall, 128 GB SSDs are excellent for light users and can significantly improve the performance of a computer system.

    Calculating the GB of a 128 SSD

    If you’ve recently purchased a 128 SSD, you might be wondering how much storage space you actually have. The good news is that a 128 SSD has 128 gigabytes (GB) of storage. One thing to keep in mind, however, is that the actual amount of storage space available to you will be slightly less than 128 GB.

    This is because some of the space on the SSD is used up by the system files and operating system. Also, manufacturers typically use decimal rather than binary prefixes when labeling the storage capacity, so 128 GB might actually be labeled as 120 GB. But don’t worry, you’ll still have plenty of space for your documents, photos, videos and games.

    And if you find yourself running low on space, you can always consider adding an external hard drive or upgrading to a larger SSD.

    How Much Storage Can You Expect from a 128 SSD?

    If you’re looking to upgrade your storage, a 128 SSD can offer a decent amount of space. Typically, a 128 SSD will have around 119 GB of usable storage, though this can vary slightly depending on the brand and specific model. Keep in mind that SSDs don’t have as much room for overprovisioning or extra free space as traditional hard drives, so you’ll want to be mindful of how much you’re using and consider upgrading to a larger size if you’re frequently running out of space.

    However, if you primarily use your device for everyday tasks like browsing the web, streaming videos, and working with documents or spreadsheets, 119 GB should be plenty of space to store your files and programs. Just be sure to manage your storage wisely and regularly clear out any unnecessary files to keep your SSD running at its best.

    Conclusion

    In the world of digital storage, 128 SSD may seem like a modest number, but don’t let that fool you. That’s like having a sleek sports car under the hood of your computer, providing lightning-fast access to your files. And just like a sports car, it’s not always about how much you have, but how you use it.

    So, whether you’re a casual user or a tech-savvy pro, a 128 SSD is a powerful tool that packs a punch equivalent to many gigabytes of traditional storage. It’s like having a pocket-sized powerhouse at your fingertips, ready to take on any task you throw its way.”

    FAQs

    What is the storage capacity of a 128 SSD?
    A 128 SSD has a storage capacity of 128 GB.

    Can the storage capacity of a 128 SSD be expanded?
    No, the storage capacity of a SSD cannot be expanded.

    Is a 128 SSD a good choice for a gaming laptop?
    Yes, a 128 SSD is a good choice for a gaming laptop as it provides fast read and write speeds.

    Can a 128 SSD be used as a primary hard drive in a desktop computer?
    Yes, a 128 SSD can be used as a primary hard drive in a desktop computer.

  • SSD vs HDD: Unraveling the Mystery of Storage Capacity – Is 128 SSD Equal to Your HDD?

    SSD vs HDD: Unraveling the Mystery of Storage Capacity – Is 128 SSD Equal to Your HDD?

    If you’re shopping for a new laptop, you’ve probably come across two terms that relate to storage: HDD and SSD. Do you know the difference between them? If not, don’t worry! In this blog, we’ll explain the differences between 128 SSD vs HDD and help you understand which one is best for your needs. When it comes to storage, hard disk drives (HDD) have been the norm for a long time.

    They work by spinning disks or platters, and a read/write head accesses the data on them. However, solid-state drives (SSD) have become more popular in recent years. They use flash memory instead of spinning disks, which makes them faster, more energy-efficient, and more durable than HDDs.

    One of the most significant differences between the two is their speed. HDDs are slower because the read/write heads have to physically move to access the data on the disks. SSDs are faster because they don’t need to move, and they can access data almost instantly.

    This means that using an SSD can make your computer feel snappier and more responsive, especially when it comes to booting up your system or launching programs. Another difference is their durability. HDDs are more prone to failure because they have moving parts that can break down over time.

    SSDs, on the other hand, are more durable because they don’t have any moving parts. They’re less likely to fail due to physical damage and can handle shocks and vibrations better than HDDs. In short, if you’re looking for faster speeds and better durability, an SSD is the way to go.

    However, they are typically more expensive than HDDs and have smaller storage capacities. If you need a lot of storage space and don’t mind sacrificing some speed, an HDD might be a better option for you. Now that you understand the differences between 128 SSD vs HDD, you can make an informed decision when purchasing a new laptop.

    What is an SSD?

    When it comes to storage on your computer, there are two main types of drives: HDD and SSD. But what exactly is an SSD, and how does it compare to an HDD in terms of storage capacity? An SSD (solid-state drive) is a storage device that uses NAND-based flash memory to store data. Unlike an HDD (hard disk drive), which uses spinning disks to write and read data, an SSD has no moving parts and is much faster and more reliable.

    So, how does a 128 SSD compare to an HDD in terms of storage capacity? Well, the answer is that it’s difficult to make an exact comparison because SSDs and HDDs are measured differently. While HDDs are measured in terms of their physical size (e.g.

    500GB, 1TB), SSDs are measured in terms of their storage capacity (e.g. 128GB, 256GB).

    However, as a general rule of thumb, a 128GB SSD is roughly equal to a 320GB HDD in terms of storage capacity. That being said, an SSD is generally much faster and more reliable than an HDD, making it a great choice for anyone looking to boost their computer’s performance.

    Definition and Explanation with Examples

    An SSD, or solid-state drive, is a type of data storage device that is used to store and retrieve digital information. Unlike traditional hard disk drives, which use spinning disks to read and write data, SSDs use a collection of memory chips to store data. SSDs are becoming increasingly popular because they offer several benefits over traditional HDDs, including faster read and write speeds, lower power consumption, and increased reliability.

    For example, when you open a program, an SSD will fetch the data much faster than an HDD, allowing for quicker loading times. Also, an SSD will not produce any noise or vibrations, while the spinning disks of an HDD can create noise and lead to wear and tear over time. SSDs are ideal for use in laptops, desktops, and servers due to their superior performance and durability.

    With the prices of SSDs dropping over time, they have become a more viable option for those that are looking to speed up their computer’s performance. Overall, an SSD is a valuable tool for improving the speed and performance of your computing device.

    128 ssd is equal to how much hdd

    What is an HDD?

    If you’re wondering how much 128 SSD is equal to in HDD, it can be a bit tricky as the two storage types are measured differently. SSDs (Solid State Drives) measure storage in Gigabytes (GB) or Terabytes (TB), while HDDs (Hard Disk Drives) measure in Gigabytes (GB) or Megabytes (MB). To give you an idea, 128 GB is equal to around 0.

    125 TB on an SSD. As for HDDs, it would depend on the specific drive’s capacity, but it’s safe to say that 128 GB is considered a relatively small amount of storage space for an HDD. While SSDs and HDDs may differ in terms of their storage capacity and technology, they both have their advantages and disadvantages.

    SSDs are faster and more durable, but can be more expensive. Meanwhile, HDDs are cheaper and have larger storage capacity, but slower in speed and more prone to damages. Depending on your needs and budget, choosing between the two can be a matter of preference.

    Definition and Explanation with Examples

    An HDD, or a hard disk drive, is an internal storage device that is commonly used in laptops, desktop computers, and other electronic devices to store information. This type of storage device uses magnetic disks to store data and can have higher storage capacities than other types of storage devices, such as solid-state drives. HDDs are known for their reliability and durability, as well as their affordability compared to other storage options.

    For example, someone who works with large amounts of media files, such as photographers or videographers, may choose an HDD with a larger capacity to store their work without having to constantly transfer files to other devices. Additionally, gamers may choose an HDD for their computers to store their game libraries, as games can take up a significant amount of storage space. Overall, an HDD can be a reliable and affordable storage solution for many electronic devices.

    128 SSD = ? HDD

    If you’re wondering how much HDD space a 128 SSD is equivalent to, the answer isn’t a straightforward one. The reason being, SSD storage technology is quite different from HDD storage. In simple terms, an SSD or Solid State Drive works on flash storage, whereas an HDD or Hard Disk Drive uses mechanical parts like a spinning disk to store data.

    Due to this difference in technology, SSDs are much faster and more expensive than HDDs. As a result, to get the equivalent storage space of a 128 SSD, you would need an HDD with a much larger storage capacity, say around 500GB or 1TB. However, it’s worth mentioning that SSDs have several advantages over HDDs, including faster data transfer speeds, smaller form factor, and reduced noise.

    Therefore, despite needing larger storage space, an HDD cannot replace all the benefits that SSDs offer.

    Calculating the Equivalent Storage Capacity

    Calculating the Equivalent Storage Capacity of an SSD and HDD can be a daunting task for some. However, a simple equation can help determine how many HDDs are equivalent to a certain number of SSDs. To start, we need to know the capacities of both drives.

    For example, if we have an SSD with a capacity of 128GB and want to know how many equivalent HDDs we need, we can use the following equation: (SDD capacity * 1,000,000) / (HDD capacity * 1,000) = number of equivalent HDDs Using this equation, we can find that one 128GB SSD is equivalent to roughly 277 6TB HDDs.

    It’s important to note that this calculation is based solely on storage capacity and doesn’t take into account other factors, such as speed and durability. SSDs are known to be faster and more durable than HDDs, making them a popular choice for many users. However, HDDs can still be useful for storing large amounts of data in a cost-effective manner.

    Ultimately, the choice between SSDs and HDDs comes down to personal preference and needs.

    Benefits and Drawbacks of SSDs and HDDs

    Many computer users wonder how much HDD capacity is equal to a 128 SSD. Unfortunately, there isn’t a straightforward answer as the capacity varies depending on several factors. However, it’s safe to say that a 128GB SSD is roughly equivalent to a 250-320GB HDD in terms of storage capacity.

    SSDs are known for their speedy performance and reliability, while HDDs are popular for their affordability and larger storage capacity. SSDs have no moving parts and are less likely to fail due to physical damage, making them ideal for portable devices such as laptops. However, they are typically more expensive and limited in storage capacity compared to HDDs.

    Additionally, HDDs have longer lifespan, and can store more data for less money. In brief, it’s important to choose the storage device that best suits your individual needs and budget.

    Comparison and Contrast of the Two Storage Technologies

    When it comes to choosing between Solid State Drives (SSDs) and Hard Disk Drives (HDDs), there are several benefits and drawbacks to consider. SSDs are known for their faster data access times, lower power consumption, and lack of moving parts, which reduces the risk of mechanical failures. On the other hand, HDDs have larger storage capacities, are more affordable, and have been around longer, making them a more established technology.

    However, they are slower to access data and are more susceptible to damage if dropped or bumped. Ultimately, the choice between SSDs and HDDs comes down to personal preference and specific use cases. For example, if speed and reliability are top priorities, then investing in an SSD may be the way to go.

    But, if storage capacity and affordability are more important, then an HDD may be the better option. It’s essential to weigh the benefits and drawbacks of each technology before making a decision, as both have their unique advantages and disadvantages.

    Which One Should You Choose?

    If you’re in the market for a new computer and are trying to decide between a 128GB SSD or HDD, it’s important to understand the differences between the two. A 128GB SSD is equal to approximately 250GB HDD in terms of storage capacity. SSDs are much faster than HDDs, which can lead to faster boot times and faster file transfers.

    However, SSDs tend to be more expensive than HDDs. If you’re looking for a budget-friendly option, an HDD may be the way to go. Keep in mind that HDDs are more susceptible to physical damage and failure, while SSDs are more durable.

    Ultimately, it comes down to your personal needs and budget. Do you prioritize speed and durability over cost? Or are you willing to sacrifice some speed for a more budget-friendly option? Consider your needs and make the choice that best fits your lifestyle.

    Factors to Consider When Choosing Between SSD and HDD

    When it comes to choosing between SSD (Solid State Drive) and HDD (Hard Disk Drive), there are several factors to consider. First, consider your storage needs. If you need a large amount of storage at an affordable price, an HDD might be the best option for you.

    However, if you’re willing to spend a bit more for faster performance, then an SSD is a better choice. Second, consider the lifespan of the drive. SSDs, as they have no moving parts, tend to last longer than HDDs, which have spinning disks.

    Finally, think about the type of tasks you’ll be using your drive for. For example, HDDs are better for storing large files and backups, while SSDs are better for tasks that demand quick read and write speeds, like gaming or video editing. Ultimately, the choice between SSD and HDD depends on your specific needs and budget.

    Conclusion

    In the world of data storage, the battle between SSD and HDD rages on. But when it comes to comparing the two, it’s important to remember that size isn’t everything. While a 128GB SSD may seem small when compared to a traditional HDD, its lightning fast speeds and superior performance make it a true heavyweight in the world of storage solutions.

    So, while on paper a 128GB SSD may seem like it’s no match for a larger HDD, when it comes to real-world usage, it’s the clear winner in the ring.”

    Final Thoughts on 128 SSD and HDD

    When it comes to choosing between a 128 SSD and HDD, the decision largely depends on your specific needs. If you’re looking to prioritize speed and performance, then a 128 SSD is the way to go. These drives offer faster boot times, quicker application launch times, and overall faster system performance.

    However, if you’re working with large files or need a lot of storage space, then an HDD may be a better option. HDDs offer higher storage capacities at a lower cost per gigabyte, making them a practical option for those who need to store large amounts of data. Ultimately, it all depends on what you value most in a drive.

    If you prioritize speed and performance, then go for an SSD. If you need more storage at a lower cost, then an HDD is the way to go. So, think about your specific needs and make the choice that’s right for you.

    FAQs

    What is the difference between an SSD and HDD?
    SSDs, or solid state drives, store data on flash memory chips, while HDDs, or hard disk drives, store data on spinning disks. SSDs can access data faster, but are more expensive. HDDs have larger capacities and are more affordable, but are slower.

    Can an SSD replace an HDD?
    Yes, an SSD can replace an HDD in a computer or laptop. However, if you need a lot of storage space, you may need to supplement the SSD with an external HDD.

    How much storage space does a 128 SSD provide?
    A 128 SSD provides 128 gigabytes of storage space.

    How much storage space does an equivalent 128 HDD provide?
    There is no equivalent 128 HDD, as HDDs are measured in terabytes. However, a typical 128 GB SSD is roughly equivalent to a 500 GB HDD in terms of storage capacity.

    Is it worth upgrading from an HDD to an SSD?
    Yes, upgrading from an HDD to an SSD can significantly improve the speed and performance of your computer. However, it may be more expensive to do so.