Author: David L. Lynn

  • Heatsink or Not? A Definitive Guide to M.2 SSD Cooling

    Are you looking for ways to improve the performance of your computer? If you’re considering upgrading your storage, you may have heard about M.2 SSDs. These tiny solid-state drives are faster and more efficient than traditional hard drives, allowing your system to boot up and load applications at lightning speed.

    But with great power comes great heat, and that’s where the debate over M.2 SSD heatsinks comes in. Should you invest in a heatsink to keep your M.

    2 SSD cool, or is it an unnecessary expense? In this blog, we’ll take a closer look at M.2 SSDs, the benefits of using a heatsink, and whether or not it’s worth it for your specific needs.

    What is an M.2 SSD?

    M.2 SSDs have been growing in popularity lately because of their compact size, high speed performance, and compatibility with modern motherboards. However, when it comes to using an M.

    2 SSD, one question that often arises is whether a heatsink is necessary to keep it cool. The answer is that it depends on your specific usage and setup. If you’re a heavy user who works with large files or you’re running applications that demand high performance constantly, then a heatsink could help to lower temperatures and improve overall performance.

    On the other hand, if you’re a casual user who only uses the computer for browsing, emails, and light word processing, then a heatsink may not be absolutely necessary. So, do you need a heatsink for your M.2 SSD? It’s up to you to evaluate your usage and decide what’s best for your system.

    Explanation of M.2 SSD technology and operation

    If you’re in the market for a new computer or looking to boost the performance of your existing one, you may have heard of M.2 SSDs. So, what exactly is an M.

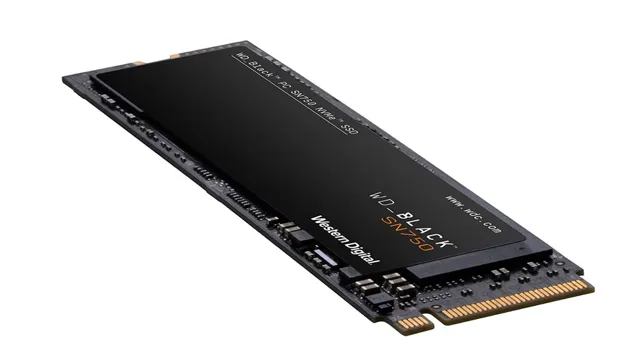
    2 SSD? M.2 is a form factor for solid-state drives. It’s a relatively new standard that’s become increasingly popular in recent years because of its compact size and high-speed data transfer rates.

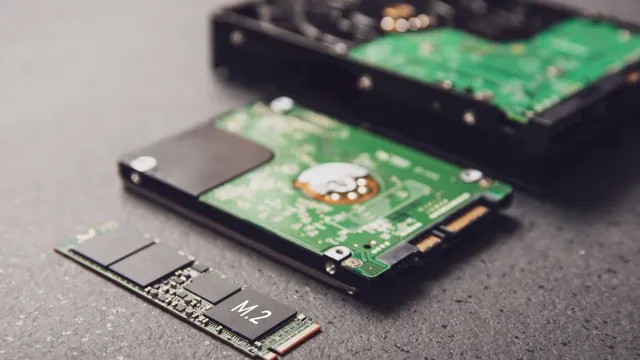
    M.2 SSDs come in several different lengths and widths, allowing them to fit into various types of devices, from laptops and desktops to tablets and gaming consoles. They operate by using PCIe or SATA interfaces, which enable high-speed data transfer rates.

    M.2 SSDs provide faster boot times, faster application launches, and overall improved system performance. Additionally, they can store a large amount of data in a more compact space, making them an ideal choice for those who need both speed and storage capacity.
    do i need heatsink for m.2 ssd

    What is a heatsink?

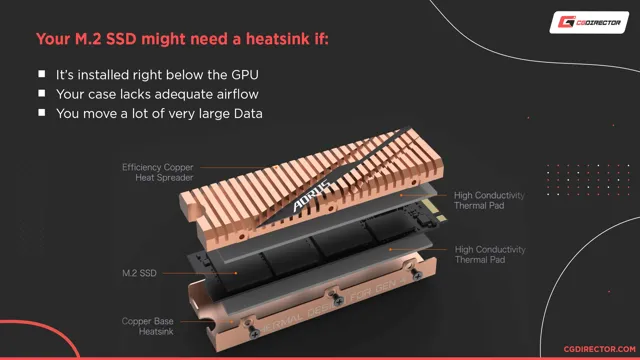
    If you’re wondering whether or not you need a heatsink for your M.2 SSD, the answer is dependent on several factors. A heatsink is essentially a passive cooling solution that helps dissipate heat from components such as CPUs and graphics cards.

    M.2 SSDs generate a significant amount of heat during operation, especially under heavy workloads, and a heatsink can help regulate the temperature and prevent thermal throttling, which can impact performance. However, not all M.

    2 SSDs require a heatsink, especially if they come with built-in cooling solutions. Additionally, if your motherboard has a built-in heatsink for the M.2 slot, you may not need a separate heatsink.

    Ultimately, it is best to check the manufacturer’s recommendations to determine if a heatsink is necessary or if it would provide any benefits for your specific setup.

    Explanation of a heatsink and its purpose in a computer system

    A heatsink is a vital component in a computer system that helps to dissipate heat, preventing the CPU from overheating. It is typically made of copper or aluminum and is designed with a large surface area to maximize heat transfer. The heatsink works by absorbing the heat produced by the CPU and transferring it away from the source.

    This is done through convection, which is the process of transferring heat energy through the movement of air or liquids. In essence, a heatsink acts as a heat exchanger, absorbing heat and then transferring it to the surrounding air or liquid. Without a heatsink, a CPU would quickly overheat and stop functioning.

    Therefore, it is essential to have a well-designed and properly installed heatsink in a computer system to maintain optimal performance and prevent damage to the components.

    Do you need a heatsink for your M.2 SSD?

    If you’re wondering whether you need a heatsink for your M.2 SSD, the answer is, it depends. While it’s true that SSDs generate heat, especially during heavy read and write operations, not all M.

    2 SSDs necessarily require a heatsink. For starters, it depends on the usage and workload of your system. If you’re running intensive applications, such as gaming or video editing, or if you’re regularly transferring large files, then a heatsink may be necessary to maintain optimal performance.

    Additionally, it may depend on the type of M.2 SSD you have. Some manufacturers include built-in heatsinks or offer M.

    2 SSDs with pre-installed heatsinks. Ultimately, the decision to use a heatsink for your M.2 SSD comes down to personal preference and system requirements.

    Keep in mind that adding a heatsink can also increase the physical size of your M.2 SSD, so be sure to check the compatibility of your system before making any modifications. So, while a heatsink isn’t always necessary for your M.

    2 SSD, it can certainly be a worthwhile investment for those seeking optimal performance and longevity.

    Factors to consider such as usage, system specs, and cooling solution

    When it comes to deciding if you need a heatsink for your M.2 SSD, there are a few factors to consider. First, think about how you plan to use your SSD.

    If you’re using it for heavy workloads, such as video editing or gaming, it may generate more heat than if you’re using it for basic computing tasks. Next, consider the specs of your system. If you have a powerful CPU and GPU, they may already generate a lot of heat, and adding an M.

    2 SSD without a heatsink could increase that heat even more. Finally, think about your cooling solution. If your system has good airflow and cooling, you might not need a heatsink.

    However, if your system runs hot or has limited airflow, adding a heatsink to your M.2 SSD could help dissipate the heat and improve overall performance. Ultimately, whether or not you need a heatsink for your M.

    2 SSD depends on your specific usage, system specs, and cooling solution.

    Benefits of Using a Heatsink for your M.2 SSD

    If you’re wondering whether you need a heatsink for your M.2 SSD, the answer is it depends. While not all M.

    2 SSDs require a heatsink, there are many benefits to using one. A heatsink can help to dissipate heat, which can increase the longevity and performance of your M.2 SSD.

    If you’re someone who runs intensive programs or plays a lot of games, then having a heatsink in place can ensure that your SSD doesn’t overheat and slow down. Additionally, if you have a high-end computer build, then adding a heatsink can enhance its overall aesthetic and give it a more professional look. So, while it may not be necessary for every user, if you want to ensure that your M.

    2 SSD is running at its absolute best, then investing in a heatsink can be a wise choice.

    Preventing thermal throttling, extending SSD lifespan, improving overall system performance

    If you’re looking to upgrade your computer’s performance, consider adding a heatsink to your M.2 SSD. Not only will a heatsink prevent thermal throttling, but it will also help to extend the lifespan of your SSD and improve overall system performance.

    Thermal throttling can cause your SSD to slow down or shut down completely, which can be frustrating and detrimental to your overall computing experience. With a heatsink, the heat generated by your SSD will be dissipated more efficiently, preventing overclocking and prolonging the lifespan of your drive. Plus, a cooler SSD means faster read and write speeds, resulting in a smoother computing experience.

    So, if you’re looking for a simple and effective way to boost your computer’s performance, consider investing in a heatsink for your M.2 SSD.

    Types of M.2 SSD Heatsinks

    If you’re wondering whether you need a heatsink for your M.2 SSD, the answer is: it depends. M.

    2 SSD heatsinks come in different types, and each type offers different benefits. One type is the passive heatsink, which is a simple metal plate that attaches to your M.2 SSD and dissipates heat through conduction.

    Another type is the active heatsink, which includes a fan that blows air directly onto your M.2 SSD to cool it down. Whether you need a heatsink for your M.

    2 SSD depends on several factors such as the environment in which your computer operates and how often you use it. For example, if you use your computer for long hours, you might notice that your M.2 SSD gets hot and slows down.

    In this case, an active heatsink might help keep your SSD running at optimal speeds. On the other hand, if you don’t use your computer for sustained periods, a passive heatsink might be sufficient to dissipate any heat generated by your M.2 SSD.

    Additionally, if you use your computer in a cool environment, you might not need a heatsink at all. In sum, the question of whether you need a heatsink for your M.2 SSD depends on various factors.

    Passive vs active, copper vs aluminum, compatibility with different M.2 SSD form factors

    When it comes to M.2 SSD heatsinks, there are different types and factors to consider. One of the first things to consider is whether you want a passive or active heatsink.

    Passive heatsinks simply dissipate heat away from the SSD without using any additional power, while active heatsinks use fans or other cooling methods to actively regulate the temperature. Another important factor is the material of the heatsink – copper and aluminum are the most common options. Copper is generally more efficient at conducting heat but also more expensive, while aluminum is lighter and more affordable but typically less efficient.

    Finally, it’s important to ensure compatibility with your specific M.2 SSD form factor. Some heatsinks may only work with certain lengths or widths, so be sure to double-check before purchasing.

    When selecting a heatsink, consider your individual needs and the type of performance you want from your M.2 SSD. By carefully choosing the right heatsink, you can unlock the full potential of your SSD and enjoy faster speeds and improved durability.

    Conclusion

    In conclusion, whether or not you need a heatsink for your M.2 SSD depends on a few factors. If your computer usage involves heavy file transfer or video editing, then a heatsink might provide added protection from overheating.

    However, if you’re only using your computer for basic tasks like browsing the internet or working on documents, then a heatsink might not be necessary. Ultimately, it’s important to consider your usage and needs before deciding whether or not to invest in a heatsink for your M.2 SSD.

    Just remember, cool minds need cool storage!”

    Summary of the discussion and recommendations based on the user’s specific needs

    If you’re a gamer, content creator or simply a heavy user of the computer, an M.2 SSD heatsink may be an essential investment for you. M.

    2 SSD heatsinks come in a variety of types that cater to various preferences and specific needs. One type is the passive heatsink, which efficiently dissipates heat through convection to surrounding air without the use of a fan. These work well for those who prioritize silent operation or have a lower heat output.

    Active heatsinks, on the other hand, use a fan to blow air over the M.2 drive, effectively reducing heat. These are great for higher-temperature environments or for those who have a higher heat output.

    Another type is the water-cooled heatsink, which uses liquid to transfer heat away from the M.2 drive. This type is pricey but provides the best cooling results, making it ideal for extreme users.

    When choosing the right M.2 SSD heatsink, it’s important to consider the specific needs of your computer setup to maximize its performance.

    FAQs

    What is an M.2 SSD?
    M.2 SSD is a type of solid-state drive that uses the M.2 interface to connect to the motherboard.

    Is a heatsink necessary for an M.2 SSD?
    It depends on the usage. If you are using your M.2 SSD for heavy workloads like video editing or gaming, a heatsink is recommended to prevent thermal throttling. However, for general usage like web browsing and office work, it may not be necessary.

    Can a heatsink be added to an existing M.2 SSD?
    Yes, there are aftermarket heatsinks available that can be added to an existing M.2 SSD to improve cooling performance.

    What are the benefits of using a heatsink with an M.2 SSD?
    A heatsink helps dissipate heat, thereby improving the performance and lifespan of the SSD. It also helps prevent thermal throttling, which can cause performance issues during heavy workloads.
  • Unlocking Acer’s Ultimate Potential: A Guide to Effortlessly Changing Your SSD

    Changing SSD on Acer laptops can be a daunting task for those who haven’t done it before. However, upgrading your storage device is an excellent way to boost performance and speed up your computer. If you’re tired of waiting for your computer to start up, load programs, or transfer files, then it’s time to replace your current SSD with a faster and more robust one.

    In this article, we’ll walk you through the steps you need to know to get the job done. Whether you’re a tech novice or an experienced user, we’ll provide the guidance and tips you’ll need to successfully replace your SSD. So let’s get started!

    Step 1: Gather necessary tools

    If you’re looking to change the SSD on your Acer laptop, the first step is to gather the necessary tools. Depending on your specific model, you may need a screwdriver, a plastic pry tool, and an external enclosure for your old SSD. It’s important to have the correct tools to avoid damaging your device during the process.

    It’s also a good idea to back up any important data before beginning. Once you have everything you need, you can move on to the next steps of the process. By taking the time to gather the right tools, you’ll ensure a smoother and more successful SSD replacement.

    So, grab your tools and get ready to give your Acer laptop a boost!

    Locate and purchase SSD and screwdriver set

    If you’re planning to upgrade your computer’s storage system by installing an SSD, the first step is to gather the necessary tools before you begin. You’ll need to locate and purchase an SSD and a screwdriver set. Finding an SSD shouldn’t be too difficult, as they’re readily available online and in most tech stores.

    You’ll want to make sure to choose an SSD that’s compatible with your computer and has enough storage capacity to suit your needs. Look for high-quality SSDs from reputable brands with good reviews to ensure you’re getting a reliable product. When it comes to screwdrivers, you’ll want to make sure you have both a Phillips head and a flathead screwdriver in your set.

    This will allow you to remove and install screws of different types and sizes during the installation process. Once you’ve gathered your tools, you’ll be ready to get started on the installation process. Properly preparing beforehand can save you time and frustration in the long run, so be sure to take the time to gather everything you need before beginning the installation process.

    acer how to change ssd

    Step 2: Shut down and unplug Acer

    If you’re ready to upgrade your Acer laptop’s storage to an SSD, the first step is to shut down and unplug the device. This is an essential safety measure that prevents any damage to both the computer and the new component. Shutting down the Acer correctly will preserve the integrity of the data and the operating system while reducing the risk of data loss.

    Unplugging the Acer eliminates the risk of electrical shock and ensures you have an unobstructed view of the laptop’s components. After unplugging, keep the Acer on a flat surface and wait for a few minutes to let it cool down properly. Changing a laptop’s storage is an involved process that could take some time, so it’s best to have patience and follow the instructions diligently.

    By following these steps, you can get started on the process of changing your Acer laptop’s storage to an SSD and experience better performance.

    Ensure all data is backed up

    When it comes to keeping your Acer computer safe and secure, backing up all your data should be a top priority. You never know when your device may crash or experience a technical issue that could potentially erase all your important files and information. That’s why step 2 in ensuring your Acer’s safety is to shut down and unplug the device before backing up all data to an external hard drive or cloud storage service.

    This will not only protect your data but also give you peace of mind knowing that you have a backup copy in case anything goes wrong. Remember, it’s always better to be safe than sorry when it comes to safeguarding your personal and professional information, so take this step seriously and make sure all your data is backed up before moving on to the next step of securing your Acer.

    Step 3: Remove bottom panel

    Now that you have successfully removed the back cover, it’s time to take the next step in changing your Acer SSD. The third step is to remove the bottom panel of your Acer laptop carefully. You will need to unscrew all the screws that are holding the panel in place.

    Make sure you keep the screws safe so that you don’t lose them. Keep in mind that some models may have clips holding the panel in place, so you will need to use a flat tool to carefully remove the panel. Once you have removed the panel, you will have access to the inside of your laptop, where the SSD is located.

    Before removing the old SSD, make sure you follow the manufacturer’s instructions carefully to avoid causing any damage to other components. Once you have replaced the SSD with a new one, you can reassemble your Acer laptop by following the reverse order of these instructions. Overall, changing your Acer SSD isn’t a very complex process, but it does require some caution and attention to detail to avoid damaging other components.

    Locate and unscrew bottom panel

    Removing the bottom panel is the third step in fixing your appliance. To do this, locate the screws that secure the panel to the machine’s base. These screws are usually located towards the back of the appliance and are either Phillips or Torx.

    Once you have determined the type of screws, use the appropriate tool to unscrew them. Take caution as some appliances may have clips or other fasteners designed to keep the panel in place and these clips may require additional pressure to release. After all the screws and fasteners have been removed, gently lift the panel off to expose the machine’s interior.

    It is essential to remember that the panel’s placement may vary from one appliance model to another, and you should consult your owner’s manual for precise instructions. With this step complete, you are ready to proceed with the next step towards fixing your appliance. The key to success in this step is to pay close attention to the fasteners’ placement while unscrewing them to prevent damaging the panel or the appliance’s interior.

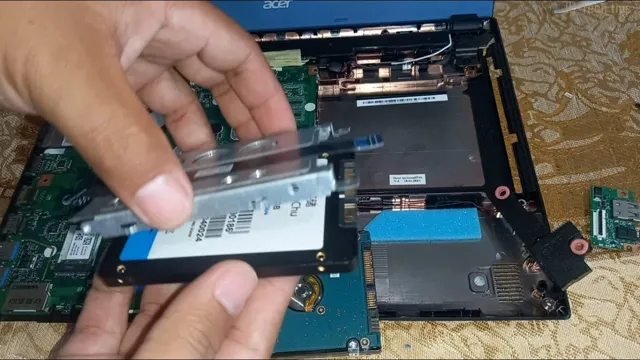
    Step 4: Remove old SSD

    Now that you’ve successfully cloned your current SSD onto the new one, it’s time to remove the old SSD. First, shut down your Acer laptop and unplug it from the power source. Then, carefully remove the back cover of your laptop using a screwdriver.

    Locate the old SSD and gently remove it by pulling the connector away from the socket. You may need to unscrew any brackets or clips holding the SSD in place. Be sure to handle the old SSD with care and avoid touching the gold connectors.

    Once removed, you can either keep it as a backup or recycle it appropriately. With the old SSD removed, you can now proceed to install the new one. Don’t forget to secure it properly in place before reattaching the back cover.

    Congratulations, you’ve successfully upgraded your Acer laptop’s storage!

    Locate and unscrew old SSD

    Removing the old SSD is an important step in replacing it with a new one. Before you start with the replacement process, make sure to locate and unscrew the old SSD carefully. It is usually placed in a cage or a slot, and you might need to remove any bays or covers that are in the way.

    When locating the old SSD, be mindful of the cables that are connected to it. Gently disconnect any cables or connectors from the old SSD, and then unscrew it from its place. Once you have successfully removed the old SSD, gently place it aside.

    It is essential to exercising caution while unscrewing the old SSD to prevent any damage to the SSD or the cables. By following this process carefully, you can easily remove the old SSD and move on to installing the new one.

    Step 5: Insert new SSD

    Once you have removed the old SSD, it’s time to insert the new one. Make sure that you line up the connectors on the new SSD properly with the slot on your Acer laptop. Once lined up, gently slide the new SSD into place and secure it using the screws that you had removed previously.

    Be careful not to overtighten the screws as this can cause damage to the new SSD. Once the new SSD is secured in place, you can reattach the back panel of your Acer laptop by reversing the previous steps. Congratulations, you have successfully changed your old SSD to a new one and your Acer laptop is now ready to perform at its best.

    Insert new SSD into slot and screw it in

    One of the final steps in upgrading your computer’s storage capacity is inserting the new SSD into the appropriate slot. First, locate your computer’s SSD slot and ensure it’s compatible with your new SSD. Then, carefully insert the SSD into the slot, making sure it’s properly aligned.

    Next, use the screws provided with your new SSD to secure it in place. Don’t overtighten the screws, just ensure they’re snug enough to keep the SSD firmly in its slot. Once the SSD is securely installed, you can move on to installing your operating system and transferring your files.

    By following these steps, you can easily upgrade your computer’s storage capacity and increase its performance.

    Step 6: Replace bottom panel and power on Acer

    Now that we’ve successfully installed our new SSD into our Acer laptop, we can start wrapping things up. The next step is to carefully replace the bottom panel of the laptop. Remember to tighten all the screws to ensure a secure fit.

    And finally, it’s time to power on our Acer and see if everything’s working as it should. If you did everything correctly, your Acer should boot up faster than ever before, and you’ll be able to enjoy a faster and more responsive computing experience. Congratulations, you’ve successfully changed the SSD on your Acer!

    Conclusion

    In conclusion, swapping out your existing SSD with a new one from Acer is a wise move if you’re looking to boost your computer’s performance and storage. With just a few simple steps, you can easily upgrade your laptop or desktop and enjoy lightning-fast processing speeds and ample storage space to store all of your important files and applications. So go ahead and give your computer a little TLC – after all, a happy Acer means a happy you!”

    FAQs

    What are the minimum system requirements for changing the SSD on an Acer laptop?
    The minimum system requirements for changing the SSD on an Acer laptop are a screwdriver, an SSD compatible with the laptop model, and basic knowledge of computer hardware.

    How do I know if my Acer laptop’s warranty will be affected by changing the SSD?
    Changing the SSD on an Acer laptop may or may not affect the laptop’s warranty depending on the terms and conditions set by the manufacturer. It is recommended to check with Acer customer support for clarification.

    Is it possible to clone the existing data on my Acer laptop to the new SSD after installation?
    Yes, it is possible to clone the existing data on your Acer laptop to the new SSD after installation. There are several third-party software tools available for this purpose.

    Do I need to reinstall the operating system after changing the SSD on my Acer laptop?
    It is not necessary to reinstall the operating system after changing the SSD on an Acer laptop if you cloned the old data on the new SSD. However, a fresh installation is recommended for optimal performance.

  • Experience Unmatched Speed and Reliability with Transcend SSD370: The Ultimate Storage Solution for Your Needs!

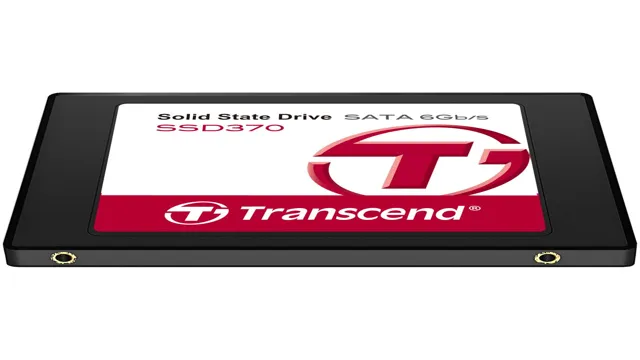
    Welcome to our blog, where we will be discussing the ultimate storage solution: the Transcend SSD370. If you’re someone who runs out of storage space on your computer frequently or struggles with slow loading times, this is the blog for you. We understand how frustrating dealing with a lack of storage space can be, and that’s where the Transcend SSD370 comes in to save the day.

    What makes the Transcend SSD370 the ultimate storage solution? For starters, it boasts lightning-fast transfer speeds that can greatly improve your computer’s performance. This means you’ll be able to run programs more smoothly, load files faster, and spend less time waiting for your computer to catch up with you. Additionally, the Transcend SSD370 offers high-level security features that keep your confidential information safe from prying eyes.

    Whether you’re storing sensitive business documents or personal files, you can rest easy knowing that your data is fully protected. But the benefits of the Transcend SSD370 don’t stop there. This sleek storage solution is also incredibly compact and lightweight, making it the perfect choice for people on-the-go.

    It’s easy to carry with you wherever you go, keeping your important files at your fingertips. In conclusion, if you’re someone who values speed, security, and portability, the Transcend SSD370 is the ultimate storage solution for you. Keep your files safe, secure and accessible with this amazing product that will revolutionize the way you use your computer.

    Reliable and High-Quality Performance

    The Transcend SSD370 solid-state drive is a reliable and high-quality performer for those in need of fast and efficient storage solutions. With its cutting-edge technology, the SSD370 offers lightning-fast read and write speeds that allow for quick and seamless data transfers, making it an excellent choice for those who need to work with large files or run multiple applications simultaneously. Additionally, the SSD370 is designed to withstand heavy usage, ensuring that it provides reliable performance for an extended period.

    With its sleek and durable build, this drive is an excellent choice for users who need a combination of efficiency and longevity. So, if you’re looking for a high-quality storage device that can handle even the most demanding tasks, the Transcend SSD370 is a top choice that won’t disappoint.

    The SSD370 outperforms traditional hard drives

    If you’re looking for reliable and high-quality performance, look no further than the SSD370. This solid state drive outperforms traditional hard drives in both speed and durability, making it the perfect choice for anyone looking to upgrade their computer’s storage. With faster read and write speeds, you’ll be able to access your files and applications more quickly than ever before.

    And with no moving parts, the SSD370 is less likely to suffer from crashes or data loss, providing peace of mind that your important files are safe and secure. Whether you’re a gamer, a creative professional, or just an everyday user, the SSD370’s reliable and high-quality performance is sure to impress. So why wait? Upgrade your storage today and experience the power of the SSD370 for yourself!

    transcend ssd370

    Boots quickly and transfers files seamlessly

    If you’re looking for reliable and high-quality performance when it comes to your computer’s operating system, then look no further than boots that start quickly and file transfers that seamlessly flow. These are two crucial elements that ensure your daily interaction with your computer is hassle-free and efficient. Slow boot-up and clunky file transfers can slow down productivity, but with a fast and responsive system, you can get your work done in no time.

    Investing in a computer that offers quick boot times and smooth file transfers is a wise choice, as it will save you time while improving your overall experience. By doing so, you’ll be able to accomplish more tasks and achieve your goals easily. There’s nothing more satisfying than having a computer that works with you rather than against you.

    Capacity Options to Fit Your Needs

    If you’re in need of a reliable and high-performing SSD, look no further than the Transcend SSD370. With a range of capacity options to suit your needs, this SSD is perfect for both personal and professional use. Options include 128GB, 256GB, 512GB, and a whopping 1TB.

    Not only does the SSD370 offer ample storage space, but it also boasts fast read and write speeds, allowing for quick startup times and speedy file transfers. Plus, with advanced features like DevSleep and the Transcend SSD Scope software, you can optimize power consumption and monitor performance with ease. Trust in the durability and performance of the Transcend SSD370 to take your computing experience to the next level.

    Available in 64GB, 128GB, 256GB, and 512GB sizes

    If you’re in the market for a new storage device, then you’ll be happy to know that the available capacities of the options out there are extensive. Whether you’re a casual user who only needs a modest amount of storage or a power user who requires ample storage space, there’s a capacity that caters to your needs. You can opt for the 64GB, 128GB, 256GB, and 512GB options available, depending on the amount of storage you require.

    Owning a storage device with ample capacity means you’ll have more room to store files such as photos, music, and documents without worrying about running out of space. So, whether you’re a student who needs storage for classwork or a creative professional who requires storage for work-related materials, you can find a capacity to fit your needs.

    Plenty of space for all your important files and documents

    When it comes to storing important files and documents, having enough space and capacity is crucial. That’s why our storage solutions offer a range of capacity options to fit your needs. Whether you’re a casual user with minimal storage needs or a business professional who requires ample space for large files and projects, we’ve got you covered.

    Our capacity options range from a few gigabytes to terabytes of storage, ensuring that you always have enough space for your important data. Think of it like a closet – you want to make sure you have enough room to store all your belongings, without having to worry about cramming everything together. With our storage solutions, you can rest easy knowing that there’s plenty of space for all your important files and documents.

    Plus, having enough storage capacity means that you can easily access and manipulate your data without any lag or delay. So, whether you’re storing photos, videos, or important documents, our capacity options have got you covered.

    User-Friendly Features

    When it comes to user-friendly features, the Transcend SSD370 is definitely a top contender. One of its standout features is the quick and easy installation process. It comes with everything you need to migrate your data from your old hard drive to your new SSD, including a handy cloning software.

    Another great feature is the dynamic thermal throttling mechanism, which helps regulate the temperature of the drive and prevent it from overheating. This is especially helpful for those who use their computers for extended periods of time or for demanding tasks like gaming and graphic design. Additionally, the SSD370 has a sleek and durable design, with a shock-resistant rubber outer case and a metal frame that helps dissipate heat.

    Overall, the Transcend SSD370 is a fantastic option for anyone looking for a reliable and user-friendly SSD.

    Easy to install and use

    If you’re looking for a user-friendly software solution that’s easy to install and use, look no further than our product. We designed it with ease of use in mind, so even those who are not tech-savvy can easily navigate through the setup process and start using all its features right away. Our intuitive interface makes it simple to access all the tools you need, and our comprehensive documentation will guide you every step of the way.

    Whether you need to monitor your network traffic, manage your devices remotely, or perform any other task, our system is designed to make your job easier. Our software is a perfect choice for anyone looking for an affordable, easy-to-use solution that delivers all the functionality they need. Don’t waste any more time on complicated, hard-to-use tools – try ours today and see the difference for yourself!

    Built-in Sleep Mode reduces power consumption

    One of the user-friendly features of modern electronic devices is the built-in Sleep Mode. This feature is especially useful for reducing power consumption. When a device enters Sleep Mode, it essentially shuts off all non-essential functions and conserves energy.

    This can be a huge advantage for those who want to reduce their carbon footprint or save on their electricity bill. And the best part? Sleep Mode can be easily activated and deactivated with a simple touch. It’s like putting a device to bed; it rests and recovers until you need it again.

    So the next time you’re not using your laptop or phone, consider putting it to sleep instead of leaving it on standby. You’ll be amazed at the difference it can make in your energy usage.

    Affordable Prices

    When it comes to finding affordable and reliable storage solutions, the Transcend SSD370 is a popular choice for many. This high-performance solid-state drive offers quick loading times, improved power efficiency, and increased durability over traditional hard drives. Plus, with prices that won’t break the bank, the SSD370 allows users to take advantage of the benefits of SSD technology without having to spend a fortune.

    Whether you’re looking to upgrade your gaming rig or boost the performance of your laptop, the Transcend SSD370 is a great option that won’t leave you feeling the pinch in your wallet. So if you’re in the market for a new solid-state drive, consider the Transcend SSD370 for an affordable and reliable storage solution that won’t disappoint.

    Competitive pricing for high-quality performance

    When it comes to choosing a product or service, affordability is always a major factor. At our company, we understand that customers want quality but don’t want to break the bank to get it. We offer competitive pricing for high-quality performance so that you can have the best of both worlds.

    Our prices are affordable, yet we don’t compromise on the quality of our products or services. We believe that everyone should have access to top-notch options that fit within their budget. That’s why we strive to offer our customers the most competitive prices in the market.

    You won’t have to sacrifice quality for cost when you choose us. We provide excellent value for every penny spent. So why settle for less when you can have it all with our affordable pricing?

    Save money without sacrificing performance

    As consumers, we always want the best possible product at the most reasonable price. However, this is often easier said than done. Fortunately, when it comes to high-quality performance, you can find affordable prices without sacrificing performance.

    It’s about finding the right balance between cost and functionality. You should research your options, comparing the features offered by different brands and models. Utilizing review sites is an excellent way to get an idea of the performance of a particular product.

    Furthermore, you should also consider buying last year’s models, which are often sold at a discount. Many people tend to overlook older models, even though their functionality may be almost the same as the current ones. In conclusion, with a bit of research and patience, finding high-performance products at an affordable price is not a far-fetched dream.

    Conclusion

    In short, the Transcend SSD370 is the superhero of storage solutions. With its lightning-fast speeds and reliable durability, it’s the perfect sidekick for anyone looking to conquer the digital world. So if you want to transcend ordinary storage and take your computing to the next level, look no further than the Transcend SSD370.

    It’s the hero you deserve, and the one you need right now.”

    FAQs

    What is Transcend SSD370?
    Transcend SSD370 is a solid-state drive (SSD) from Transcend, a Taiwan-based company that specializes in memory and storage products. SSD370 is designed to provide faster boot-up times, faster data access, and better overall performance compared to traditional hard drives.

    What are the benefits of using Transcend SSD370?
    There are several benefits of using Transcend SSD370, including: – Faster boot-up and shut down times – Improved overall system performance – Improved application loading times – Better system responsiveness – Lower power consumption – More durable and reliable compared to traditional hard drives

    Is Transcend SSD370 compatible with my computer?
    Transcend SSD370 is compatible with most modern computers that have a Serial ATA (SATA) interface. Before purchasing, it is recommended to check your computer’s specifications to ensure compatibility.

    How do I install Transcend SSD370 into my computer?
    Installation of Transcend SSD370 is relatively simple and can be done by following these steps: 1. Turn off your computer and unplug all cables. 2. Open your computer case and locate the hard drive slot. 3. Remove the old hard drive (if present) and detach all cables. 4. Mount the Transcend SSD370 into the slot and attach the necessary SATA and power cables. 5. Close your computer case and plug in all cables. 6. Turn on your computer and follow the on-screen instructions to configure the SSD.

  • Top 10 Best NVMe SSDs for Lightning Fast Performance in 2021

    If you’re a PC enthusiast or a gamer, you know how important it is to have a fast and reliable storage device to run your system. This is where NVMe SSDs come in. Unlike traditional SSDs, these drives utilize the faster NVMe interface to deliver quick read and write speeds.

    The latest NVMe SSDs are faster than ever before, allowing you to launch apps and games in seconds, reducing boot-up times to mere seconds, and improving overall system performance. In this blog post, we’ll take a look at the top NVMe SSDs available in the market that deliver blazing-fast performance. So, fasten your seatbelts and let’s dive in!

    1. Samsung 970 Pro

    If you’re looking for the best NVMe SSD, then the Samsung 970 Pro is definitely worth considering. This SSD is designed with high-end performance in mind and is ideal for those who demand the highest speeds and reliability. The Samsung 970 Pro offers lightning-fast read and write times, making it an excellent choice for gamers, video editors, and professionals who need to work with large files.

    It also comes with a 5-year warranty, giving you peace of mind knowing that your investment is protected. Although it may be a bit more expensive than other options on the market, the Samsung 970 Pro’s performance and reliability make it well worth the investment. So if you need a high-performance SSD that won’t let you down, then the Samsung 970 Pro is the best NVMe SSD to go for.

    Unmatched speed and reliability

    When it comes to blazing-fast storage, the Samsung 970 Pro is the clear winner. This NVMe SSD is the epitome of speed and reliability with its MLC NAND and 3D V-NAND technology, capable of handling even the most demanding workloads with ease. With a read speed of up to 3,500 MB/s and a write speed of up to 2,700 MB/s, opening large files, copying data, and booting up your system will never be a problem again.

    Its outstanding durability leads to a total byte written of up to 1,200 TBW, which means it can stand the test of time and heavy usage. The Samsung 970 Pro is the perfect choice for gamers, professionals, and anyone who desires nothing but the best performance and reliability from their storage device. With it, you can enjoy lightning-fast load times and unmatched processing speed, making all of your computing tasks feel effortless.

    So if you’re looking for an SSD that can keep up with your work and play, the Samsung 970 Pro is the ultimate solution.

    best nvme ssd

    Up to 1TB of storage capacity

    The Samsung 970 Pro is a high-capacity solid-state drive (SSD) that offers up to 1 terabyte of storage capacity. This powerful SSD delivers lightning-fast speeds and is designed to accommodate the needs of gamers, content creators, and professionals who need reliable, high-capacity storage. With read and write speeds of up to 3500 MB/s and 2700 MB/s, respectively, the Samsung 970 Pro is an excellent choice for users who need blazing-fast performance.

    Additionally, the Samsung 970 Pro uses V-NAND technology to offer enhanced endurance, making it ideal for heavy workloads and demanding applications. Whether you need to store large files, run complex software, or play the latest games, the Samsung 970 Pro is an excellent choice that offers both performance and durability. So why settle for less when you can get the best with the Samsung 970 Pro?

    2. Western Digital Black SN850

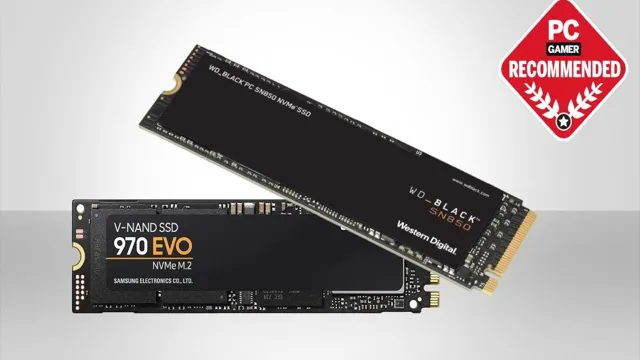
    If you’re looking for the best NVMe SSD, you should definitely check out the Western Digital Black SN850. This SSD comes in various capacities ranging from 500GB up to 2TB, making it a great option for anyone in need of fast storage. With its PCIe Gen 4 x4 interface, it offers lightning-fast sequential read and write speeds reaching up to 7,000 MB/s and 5,300 MB/s respectively, which is more than enough for even the most demanding tasks such as gaming, 3D rendering, and video editing.

    One of the standout features of this SSD is its custom-designed heatsink, which helps keep temperatures down and ensures consistent performance. Additionally, the SSD includes a dashboard software that provides detailed information on its usage, health, and temperature. Another great thing about the Western Digital Black SN850 is its durability, lasting for years without experiencing any performance degradation.

    In conclusion, if you’re in the market for fast storage with great features, go for the Western Digital Black SN850.

    Incredibly fast sequential read and write speeds

    When it comes to high-performing solid-state drives (SSDs), the Western Digital Black SN850 is one that deserves attention. This SSD comes equipped with incredibly fast sequential read and write speeds, making it an excellent choice for tasks that require high-speed data transfer and processing. The Black SN850 can reach speeds of up to 7000 MB/s for sequential reads and 5300 MB/s for sequential writes, giving it a significant edge over other SSDs on the market.

    This type of drive architecture is made possible through the use of PCIe 0 technology, which enables faster data transfer rates and reduces data bottlenecks. Additionally, the Black SN850 has excellent durability and a high endurance rating, making it a reliable option for long-term use.

    Overall, if you’re looking for an SSD that can handle demanding workloads and provide incredibly fast read and write speeds, the Western Digital Black SN850 is an excellent choice.

    Ideal for high-end gaming and content creation

    The Western Digital Black SN850 is an excellent choice for those looking for high-end gaming and content creation. This SSD comes with a PCIe Gen4 interface, which is faster than the previous generation. The sequential read and write speeds are also impressive, making it perfect for running demanding applications and games.

    Additionally, the SSD comes in varying storage sizes, with the largest being 2TB, providing ample space for storing large files and applications. The heatsink design helps to dissipate heat, resulting in a cooler operating temperature, which is fantastic for extended gaming sessions or running resource-intensive tasks. Overall, the Western Digital Black SN850 is an excellent choice for anyone looking to build a high-performance gaming or workstation PC.

    3. Corsair MP600

    When it comes to finding the best NVMe SSD, the Corsair MP600 is a top contender. This high-performance SSD can reach read speeds of up to 5,000MB/s, making it ideal for gamers and professionals who rely on fast data transfer rates. Not only is the MP600 fast, but it is also reliable.

    With a 7 million hour MTBF rating and a five-year warranty, you can trust that this SSD will perform well for years to come. Additionally, the MP600 features AES 256-bit encryption, ensuring the security of your data.

    It is available in a range of sizes, from 500GB to 2TB, making it a flexible choice for a variety of needs. All in all, the Corsair MP600 is an excellent NVMe SSD that offers both speed and reliability, making it well worth considering for anyone in the market for a new SSD.

    Top-rated SSD with PCIe gen 4.0 support

    If you’re looking for the top-rated SSD with PCIe gen 0 support, look no further than the Corsair MP600. This SSD boasts impressive read and write speeds that make it a great choice for any user.

    With its NVMe interface, the Corsair MP600 can provide up to 10 times faster data transfer speeds than traditional SATA SSDs. Additionally, it features a large heatsink that ensures the drive remains cool even under heavy load. This makes it a great option for gamers and content creators who demand high performance from their systems.

    When it comes to storage solutions, you simply can’t go wrong with the Corsair MP600. Don’t settle for less when you can have the best.

    Up to 2TB of storage capacity

    Corsair MP600 If you’re looking for a high-capacity storage solution, the Corsair MP600 is an excellent option, offering up to 2TB of storage capacity. This M.2 SSD uses PCIe

    0 technology, which means it can deliver extremely fast read and write speeds. In fact, it’s one of the fastest SSDs on the market, with sequential read/write speeds of up to 4,950/4,250 MB/s. This makes it perfect for demanding applications like gaming, video editing, and data analysis, where speed and responsiveness are key.

    The Corsair MP600 also uses a large aluminum heatsink to keep temperatures low and maintain performance over long periods of use. With its impressive storage capacity and blazing-fast performance, the Corsair MP600 is a great choice for anyone looking for a high-end M.2 SSD.

    4. Sabrent Rocket Q4

    When it comes to the best NVMe SSD out there, the Sabrent Rocket Q4 is definitely a contender to consider. This SSD boasts impressive read and write speeds, making it a great option for those who need quick access to large files or run data-intensive applications. The Sabrent Rocket Q4 has a capacity of up to 8TB, which is great for those who need a lot of storage space.

    It also has a built-in heatsink to help dissipate heat, ensuring that it performs at its best over time. Additionally, this SSD is backed by a 5-year warranty, giving you peace of mind that your investment is protected. Overall, the Sabrent Rocket Q4 is a solid choice if you’re in the market for a reliable and fast NVMe SSD.

    Fast sequential read and write speeds

    When it comes to fast sequential read and write speeds, the Sabrent Rocket Q4 is an impressive option to consider. This SSD boasts some impressive numbers, with read speeds of up to 4,800 MB/s and write speeds of up to 4,000 MB/s. That means you’ll be able to transfer large files and data sets in a matter of seconds, making it an ideal choice for anyone who needs fast and efficient performance.

    Whether you’re a gamer, content creator, or professional who needs to work with large files and programs, the Sabrent Rocket Q4 will provide the speed and reliability you need to get the job done. Plus, its compact design and easy installation make it a convenient choice for anyone looking to upgrade their storage solutions. With the Sabrent Rocket Q4, you can expect high performance and reliable storage, all in one impressive package.

    Affordable pricing for high-end performance

    Looking for affordability while not compromising on the performance of your storage device? Look no further than the Sabrent Rocket Q This solid-state drive offers high-end performance at a price point that won’t break the bank. With read speeds of up to 4,900 MB/s and write speeds of up to 4,400 MB/s, you’ll be able to transfer large files in seconds.

    The Sabrent Rocket Q4 also boasts a capacity range of up to 8TB, making it a great option for content creators and gamers alike. If you’re looking for a powerful storage device that won’t cost you a fortune, the Sabrent Rocket Q4 is definitely worth considering.

    Conclusion

    In the end, the best NVMe SSD is like a speed demon on steroids – it’s lightning-fast, incredibly efficient, and sure to fuel your computing needs to the next level. With blazing-fast read and write speeds, you’ll be amazed at how quickly your files load and how zippy your system performs. So if you’re looking for an upgrade that will leave the competition in the dust, then NVMe is the way to go.

    Buckle up and get ready to take your PC to the next level!”

    FAQs

    What is an NVMe SSD?
    An NVMe SSD is a type of solid-state drive that uses the NVMe (Non-Volatile Memory Express) protocol to access data faster than traditional SATA SSDs.

    What makes NVMe SSDs the best choice for gaming?
    NVMe SSDs offer faster read and write speeds, reducing loading times in games and increasing overall performance.

    How do I know if my computer is compatible with an NVMe SSD?
    Check your motherboard’s specifications to see if it has an M.2 slot, which is the type of slot NVMe SSDs use. You can also check your BIOS settings to make sure NVMe is supported.

    Can NVMe SSDs be used as boot drives?
    Yes, NVMe SSDs can be used as boot drives, and they can significantly reduce boot times compared to traditional hard drives.

  • SSD vs HD – Unveiling the Truth About Gigabytes and Performance

    Are you in the market for a new computer or laptop but unsure about the difference between an SSD and an HD? Don’t worry, you’re not alone. With so many options and technical jargon, it can be overwhelming to choose the right device for your needs. In this blog post, we’ll compare SSDs and HDs from Gigabyte, a well-respected brand in the industry.

    We’ll explore the advantages and disadvantages of each storage device, helping you make an informed decision for your next purchase. So, let’s dive in and discover which one is best for you!

    What is an SSD?

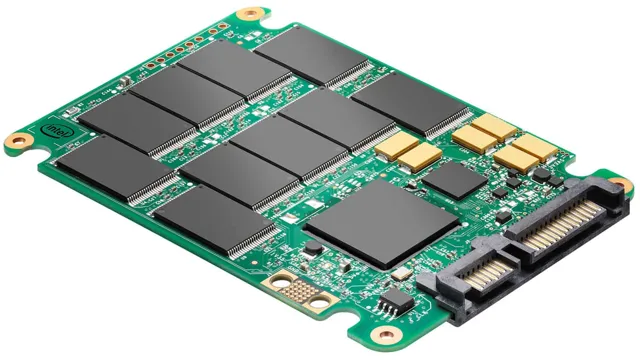
    When it comes to comparing the gigabytes of an SSD to an HD, it’s important to understand what an SSD is in the first place. An SSD stands for Solid State Drive, which is essentially a faster, more efficient replacement for the traditional hard drive (HD). Whereas an HD uses spinning disks and a read/write head to access data, an SSD uses flash memory to store and retrieve information quickly.

    This means that while HDs can provide larger capacities (often up to several terabytes), SSDs offer faster read and write speeds, making them ideal for tasks like booting up your computer quickly, launching applications instantly, and transferring files more efficiently. So when it comes to comparing gigabytes, it’s important to consider your specific needs. If you need a lot of storage space, an HD may be the way to go, but if you want speed and efficiency, an SSD is likely the better choice.

    Explanation of Solid State Drives

    An SSD or a solid-state drive is a storage device that uses flash memory to store data. Unlike traditional hard disk drives (HDD), SSDs do not have any moving parts and operate silently. Not only are SSDs faster and more reliable than HDDs, but they also consume less power, making them more environmentally friendly.

    With SSDs, data can be accessed almost instantly, allowing for faster boot-up times and quicker application load times. Think of an SSD as a high-speed train that can transport data much faster than a traditional car, which represents an HDD. The popularity of SSDs has risen rapidly in recent years, and they are now commonly used in laptops, desktops, and even in gaming consoles.

    SSDs are undoubtedly the future of computer storage, and with their speed, reliability, and efficiency, it’s not hard to see why.

    how gigabytes from ssd compare to hd

    What is a HD?

    When comparing the gigabytes (GB) of storage on a solid-state drive (SSD) versus a hard drive (HD), it’s important to understand what exactly an HD is. Essentially, an HD is a mechanical device that uses magnetism to store data on a rotating platter. The platter spins while a read/write head accesses the data, similar to a record player.

    In contrast, an SSD is an electronic device that uses flash memory to store data. This means that an SSD has no moving parts, making it faster and more durable than an HD. However, the downside is that SSDs tend to be more expensive per GB than HDs.

    So, when deciding which storage option to choose, it comes down to balancing speed, durability, and cost. Ultimately, the decision depends on how much storage you need and what kind of work you’ll be doing on your device. But in terms of raw numbers, SSDs generally offer higher GB capacities than HDs, making them a better option for those who need more storage space.

    Explanation of Hard Drives

    A hard drive, or HD for short, is a device that stores digital data for long-term use. You can think of it as a massive digital filing cabinet that houses all of the files and programs on your computer. These drives come in different shapes and sizes, but the most common types are the traditional spinning hard disk drives (HDD) and the newer solid-state drives (SSD).

    HDDs work by using spinning disks that read and write data to a magnetic surface, while SSDs use a series of interconnected memory chips to store data. HDDs may be slower and noisier, but they offer higher storage capacity at an affordable price. Meanwhile, SSDs are faster, quieter, and more durable than HDDs, but they are also more expensive and have a smaller storage capacity.

    Overall, HDs are an essential component of any computer or digital device. Knowing the differences between the types of HDs can help you choose the best one for your needs, whether you want a high-performance drive for gaming or a high-capacity drive for storing media files.

    Gigabytes on SSD vs HD

    When it comes to comparing the storage capacity of SSDs and HDs, there are a few things you need to keep in mind. First, SSDs come in smaller sizes than HDs, typically ranging from 128 GB to 2 TB, while HDs can offer as much as 14 TB of storage capacity. However, SSDs are much faster and more reliable than HDs, making them a better choice for many people.

    Plus, with the high prices of SSDs coming down, it’s becoming more cost-effective to choose an SSD with a larger capacity. So, how many gigabytes can you fit on an SSD compared to an HD? It really depends on the specific models you’re comparing, but in general, you’ll likely be able to fit more gigabytes onto an HD than an SSD of the same size. That being said, the speed and reliability of SSDs make them a great choice for those who want fast, efficient storage.

    Comparison of Storage Space

    When comparing the storage space on a solid-state drive (SSD) versus a traditional hard disk drive (HDD), it’s important to consider the amount of gigabytes each can hold. While HDDs have traditionally had higher storage capacity, SSDs are quickly catching up. The latest SSDs are available with up to 4TB of storage space, which is more than enough for most users.

    However, if you are someone who needs even more space, hard disk drives can still offer up to 16TB of storage. Ultimately, the choice between an SSD and an HDD will depend on your specific needs and budget. But it’s clear that SSDs are becoming more competitive in terms of storage space, and offer many other benefits like faster read/write speeds and improved durability.

    Speed and Performance

    Are you wondering just how much faster a solid-state drive (SSD) is compared to a traditional hard drive (HD)? Well, the answer is, a lot! In terms of gigabytes, SSDs and HDs can both offer the same amount of storage space, but SSDs offer much faster read and write speeds. This means that your computer will be able to start up quicker, your applications will open faster, and your files will copy and save much more quickly. SSDs also have no moving parts, which means they are less susceptible to damage and wear-and-tear.

    Overall, if you’re looking for a storage solution that offers both speed and reliability, you may want to consider upgrading to an SSD.

    Comparison of Read/Write Speeds

    When it comes to data storage, one of the most important factors to consider is speed and performance. The read and write speeds of a device can greatly impact its usability and efficiency. Generally speaking, faster read/write speeds mean that data can be retrieved and stored more quickly, allowing for faster transfer rates and improved overall performance.

    When comparing different storage options, it’s important to consider the specific needs of your organization or project to determine which option will provide the most optimal speed and performance. Solid-state drives (SSDs) are known for their fast read and write speeds, making them an excellent choice for tasks that require quick and reliable access to large files. In contrast, hard disk drives (HDDs) typically have slower read and write speeds, but may be preferable for certain applications where cost is a primary concern.

    Ultimately, it’s important to weigh the pros and cons of each option before making a decision on what type of storage solution to use.

    Which is Best for You?

    If you’re in the market for a new computer, one of the important decisions you’ll have to make is whether you want a traditional hard drive (HD) or a solid-state drive (SSD). While HDs have been the standard for decades, SSDs have gained popularity in recent years due to their faster speeds and greater reliability. But when it comes to gigabyte capacity, how do the two compare? Generally, SSDs tend to have a lower storage capacity than HDs, especially in terms of the amount of storage you get per dollar.

    However, as SSD technology continues to improve and become more popular, prices are starting to come down and you can now find drives that offer several terabytes of storage. Ultimately, the choice between an HD and an SSD depends on your individual needs and budget. If you need more space for storing large files or documents and have a limited budget, an HD might be the better choice for you.

    On the other hand, if speed and reliability are more important to you and you’re willing to pay a little more for it, an SSD might be the way to go.

    Factors to Consider

    When it comes to choosing between a laptop and a desktop computer, there is no one-size-fits-all answer. The decision ultimately depends on your specific needs and preferences. Laptops offer the convenience of portability, which is great for people who travel often or need to work on-the-go.

    Desktops, on the other hand, tend to be more powerful and offer more upgradability options, making them ideal for heavy-duty tasks such as gaming or video editing. Additionally, laptops tend to be more expensive than desktops of similar specifications, so budget is an important factor to consider. Finally, consider your space constraints.

    Desktops are larger and require more desk space, while laptops can be used virtually anywhere. Ultimately, it’s important to weigh the pros and cons of each option and determine which one best fits your individual needs.

    Conclusion

    In the battle of gigabytes, SSD reigns supreme over HD. With lightning-fast read and write speeds, an SSD is the sports car of storage devices while an HD is more akin to a bicycle. With an SSD, you can zip through files and programs in the blink of an eye, while an HD will leave you twiddling your thumbs waiting for it to catch up.

    So, if you’re tired of waiting for your computer to keep up, trade in your HD for an SSD and enjoy the speed and efficiency of modern computing.”

    FAQs

    What is the storage capacity difference between an SSD and an HD in terms of gigabytes?
    SSDs generally have smaller storage capacities compared to HDs, with top-tier SSDs offering up to 4TB of storage while HDs can offer up to 18TB.

    Which is faster in terms of read and write speed: SSD or HD?
    SSDs are faster than HDs in terms of read and write speed. They can read and write data far more quickly because they have no moving parts, unlike HDs.

    Are SSDs more expensive than HDs?
    Yes, SSDs are more expensive compared to HDs. However, their price has been gradually decreasing over the past few years, making them more affordable to consumers.

    Can an SSD be used as a replacement for an HD?
    Yes, an SSD can be used as a replacement for an HD in a computer. In fact, many modern computers and laptops are now equipped with SSDs instead of HDs for faster boot and load times.

  • Boost Your Gaming Speed: Step-by-Step Guide on Transferring Games to an SSD

    Do you constantly find yourself struggling with slow loading times and lagging games? It’s a frustrating feeling, especially when you’ve invested in a high-end gaming setup. But fear not, transferring your games to an SSD can make all the difference. An SSD, or solid-state drive, is a much faster storage option than a traditional hard drive, meaning that your games will load quicker and run smoother.

    In this blog post, we’ll give you a step-by-step guide on how to transfer your games to an SSD, so you can start enjoying faster gaming experiences right away. So sit back, grab a cup of coffee, and let’s get started!

    What You Need

    Transferring games to an SSD can significantly improve your gaming experience by reducing load times and increasing overall system speed. To transfer games to an SSD, you’ll need to first ensure that your SSD has enough storage space for the games you want to transfer. You’ll then need to create a partition on your SSD and assign it a drive letter.

    Next, you can use a file transfer program such as Robocopy or Teracopy to move your games from your existing hard drive to the new SSD partition. Once the transfer is complete, you can create a shortcut to the game on your desktop or start menu to access it quickly. It’s important to note that not all games are transferrable, so it’s crucial to check with the game’s publisher or read the game’s system requirements before attempting to transfer it.

    With a little effort, transferring games to an SSD will undoubtedly improve your gaming experience.

    SSD and Game Files

    SSD When it comes to gaming, having a fast and reliable storage solution is crucial. This is where SSDs come in. SSD stands for solid-state drive and it’s a type of storage device that doesn’t use moving parts like traditional hard drives, which means they can access data much faster.

    If you want to improve your game performance, an SSD is a must-have accessory. Not only will it speed up the booting and loading times of your games or software, but it will also make sure that important game files are accessed quickly and efficiently. With an SSD, you’ll be able to quickly access your game files and load maps faster, resulting in improved game performance and reduced load times.

    So, if you’re looking to take your gaming experience to the next level, an SSD is the way to go!

    how do you transfer games to an ssd

    SATA to USB Adapter

    If you want to connect a SATA hard drive to your computer or laptop using a USB port, you’ll need an SATA to USB adapter. These adapters are a great way to extract data from an old hard drive or to recover important files that are no longer accessible through a computer’s internal hard drive. They’re also handy when you need to test a new hard drive before installing it internally.

    To use an SATA to USB adapter, you’ll need a few things. First, you’ll need the adapter itself, which can be purchased at most computer stores or online. You’ll also need a SATA hard drive, a USB cable, and a power supply or AC adapter, depending on the type of adapter you’re using.

    With these items, you’ll be able to easily connect your SATA hard drive to your computer or laptop and access all of your important files. Plus, you won’t have to worry about purchasing an expensive external hard drive to store your data.

    Step 1: Connect SSD to Computer

    So, you’ve finally decided to speed up your games by transferring them to your new SSD, but you’re not sure where to start? Don’t worry. It’s pretty simple. The first step is to connect the SSD to your computer.

    You need to make sure that your computer has a compatible port to fit the SSD, and you also need a SATA cable to connect it. Once the SSD is properly connected, you’ll need to install the appropriate software to prepare it for game transfers. One important point to keep in mind is that you should check the capacity of your SSD before transferring games.

    If it doesn’t have enough space, you’ll need to consider upgrading to a larger SSD or making space by deleting any unwanted data. Once you have ensured enough space, follow the prompts provided by the software to transfer your games to the SSD. With these simple steps, you’ll be able to enjoy faster game loading times and improved overall gaming experience.

    Using SATA to USB Adapter

    To use a SATA to USB adapter, the first step is to connect your SSD to your computer. This process is pretty straightforward; simply plug one end of the adapter into the SSD drive and the other end into your computer’s USB port. Once you’ve connected the adapter, you should see the drive appear on your computer, just like any other external drive.

    From here, you can format and partition the drive, transfer files to and from it, or use it as a backup storage solution. Keep in mind to use the proper cables and ensure your computer’s operating system supports the adapter for optimal performance. By following these steps, you can easily transform your internal SSD into an external drive and reap the benefits of increased storage space.

    Formatting SSD

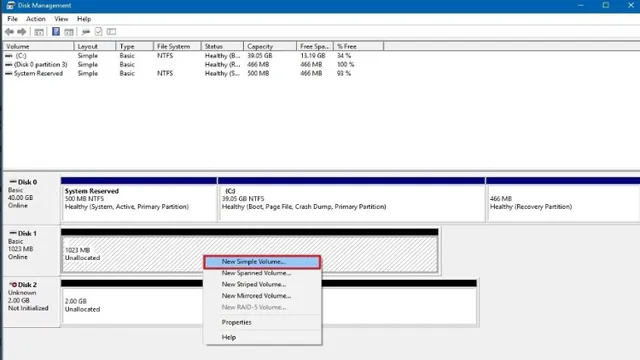
    When it comes to formatting an SSD, the first step is to connect it to your computer. This can be done via SATA or USB, depending on the type of SSD you have. Once connected, your computer should recognize the new device and prompt you to initialize it.

    This involves selecting the type of partition scheme you want to use and formatting the drive. It’s important to note that formatting an SSD will erase all data on the drive, so be sure to back up any important files before starting the process. Some common partition schemes include MBR and GPT, and your choice will depend on the operating system you’re using and the size of your SSD.

    Overall, connecting your SSD to your computer is the first step in formatting it and getting it ready for use.

    Step 2: Moving Game Files to SSD

    When it comes to transferring games to an SSD, there are a few simple steps you can take to streamline the process. First, you’ll want to make sure that your SSD is properly installed and recognized by your system. Once you’ve confirmed that your setup is working correctly, you can begin the transfer process by locating the game files you want to move.

    Depending on the game, these files may be located in different folders on your system. Once you’ve found the files you want to transfer, simply copy and paste them onto your SSD. You may need to create a new folder on the SSD specifically for your games.

    Keep in mind that the transfer speed may vary depending on the size of the files and the speed of your system. Overall, transferring games to an SSD can speed up load times and improve overall game performance, so it’s definitely worth the effort!

    Locate Game Files

    Once you have identified the game files that you want to move to your SSD, it’s time to actually transfer them over. This is a relatively simple process that can be done manually, but it does require a bit of technical know-how. The first step is to locate the game files within your computer’s file system.

    This can vary depending on the game and where you initially installed it, but typically the game files will be located in the “Program Files” or “Program Files (x86)” folder in the C: drive. Once you’ve located the game files, simply copy and paste them to the desired location on your SSD. It’s important to note that some games may require additional files or folders to be moved in order for them to work properly, so be sure to do your research beforehand to avoid any complications.

    With that said, moving your game files over to an SSD can be a game-changer, greatly reducing load times and improving overall performance.

    Copy and Paste

    Moving game files to SSD can greatly improve the speed and performance of your gaming experience. If you’ve already installed your games on your computer’s HDD, transferring them to your SSD is a simple process. The first step is to locate the game folder on your HDD, which will typically be under the “Program Files” folder.

    Copy the entire folder and paste it onto your SSD, either directly onto the drive or in a new folder created for your games. It’s important to note that copying large game files may take some time, so be patient during the process. Once the files have transferred over, you may need to adjust the game’s settings to ensure it is using the SSD for storage rather than the HDD.

    Overall, moving game files to SSD is a simple and effective way to improve your gaming experience, and can make a noticeable difference in load times and performance.

    Step 3: Launch Game from SSD

    If you’re wondering how to transfer games to an SSD, you’re in luck because it’s a simple process. Once you’ve installed your SSD into your computer and cloned your operating system onto it, the next step is to move your games over. The easiest way to do this is to locate the game’s folder on your current hard drive and copy and paste it onto your SSD.

    Once the transfer is complete, simply launch the game from your SSD, and you’ll notice a significant increase in speed and performance. Remember to change the installation directory in your game settings to ensure that all future downloads and updates go straight to your SSD. With your games now running off an SSD, you’ll experience faster loading times and snappier performance, making for an all-around better gaming experience.

    Creating Desktop Shortcut

    Now that you have successfully installed your game onto your SSD and created a desktop shortcut, it’s time to launch the game and enjoy the benefits of faster load times and improved performance. Simply double-click on the desktop shortcut icon to open the game and start playing. Depending on the game, you may need to adjust the game settings to ensure it is using the SSD as its primary storage device.

    This can typically be done in the game’s settings menu. With your game now running and loading faster than ever, you can sit back, relax, and enjoy an enhanced gaming experience. Happy gaming!

    Changing Game Settings

    If you want to enjoy a smooth gaming experience, it’s essential to optimize your game settings. One simple step you can take is launching your game from your SSD. This process can significantly reduce your game’s loading time, allowing you to jump right into gameplay without any delay.

    By launching your games from SSD, you can also expect to experience less stuttering and frame drops in-game. This is because SSDs are much faster in data transfer than traditional hard drives, which means they can handle more intense gaming requirements. So, if you’re looking to level up your gaming experience, consider changing your game’s launch location to your SSD and enjoy faster loading times and smoother gameplay.

    In Conclusion

    In conclusion, transferring games to an SSD is like upgrading from a bicycle to a Ferrari. It takes some initial effort to get everything set up, but once you’re sailing down the road at lightning speeds, you’ll wonder how you ever managed without it. So go ahead, take the plunge and transfer those games over.

    Your load times (and possibly your overall quality of life) will thank you.”

    FAQs

    What are the benefits of transferring games to an SSD?
    Transferring games to an SSD can significantly improve loading times and overall game performance. It also frees up space on your hard drive for other files.

    Can all games be transferred to an SSD?
    Yes, all games can be transferred to an SSD as long as you have enough storage space on the SSD and your operating system supports it.

    How do you transfer games to an SSD?
    First, you need to make sure the SSD is properly installed and initialized. Then, you can either use built-in features like Steam’s “Move Install Folder” option or manually move game files from your hard drive to the SSD.

    Do you need to reinstall games after transferring them to an SSD?
    No, you do not need to reinstall games after transferring them to an SSD. However, you may need to update the game’s settings to reflect the new storage location.

    Can transferring games to an SSD cause any issues or data loss?
    If done correctly, transferring games to an SSD should not cause any issues or data loss. However, it is always recommended to backup your data before making any changes to your system.

  • SSD Formatting: How Long Does It Take To Get Your Drive Up To Speed?

    Ready to upgrade your PC with a new SSD or simply want to wipe out all your old data? Formatting an SSD might seem like a daunting task, especially if you’ve never done it before. However, it’s an essential process that ensures your drive is optimized for smooth performance and serves as a preventive measure against potential data corruption and cyber threats. If you’re wondering how long it takes to format an SSD, the answer is, it depends.

    But don’t worry, we’ve got you covered. In this blog post, we’ll explore everything you need to know about formatting an SSD, including the factors that influence the process’s duration and tips to help you do it quickly and efficiently. By the end of this post, you’ll be confident in your ability to format an SSD like a pro and optimize your storage device for optimal performance.

    So, let’s dig in!

    Understanding SSD Formatting Time

    SSD formatting time can vary depending on several factors such as the size of the drive, the type of formatting being used, and the speed of the computer. Generally, it takes anywhere from a few minutes to several hours to format an SSD. However, it’s important to note that a quick format takes less time than a full format.

    A quick format only erases the file system, while a full format not only erases the file system but also checks for bad sectors on the drive. The time it takes to format an SSD can also be affected by the speed of the computer’s processor and the amount of RAM available. It’s important to be patient and allow the formatting process to finish before using the drive.

    In summary, how long to format SSD depends on several factors, but it is worth the wait to ensure that the drive is clean and ready for use.

    Factors Affecting Formatting Time

    Formatting time is an important consideration when using solid-state drives (SSDs). Several factors can affect the time it takes to format an SSD, including the capacity of the drive, the type of file system being used, the speed of the SSD, and the overall health of the drive. When formatting a larger SSD, it may take longer due to the increased amount of data being processed.

    Using a more complex file system, such as NTFS, may also increase formatting time. Additionally, if an SSD is near its full capacity, formatting time may take longer as more data needs to be processed. It’s important to keep in mind the health of the drive when formatting, as an SSD with more used space or a larger number of bad sectors may take longer to format.

    Overall, understanding the various factors that can affect SSD formatting time can help users manage their storage more effectively.

    how long to format ssd

    Average Time Taken for SSD Formatting

    SSD formatting time When it comes to formatting an SSD, the duration can vary, depending on different factors. The average time taken for SSD formatting could range from several minutes to an hour. The process is quicker than traditional hard drives because there’s no need to low-level format, and SSDs don’t require time to check for bad sectors.

    However, the time taken still depends on the size, speed, and health of the SSD. If your SSD already has data on it, the time required for formatting could be considerably longer because the drive needs to erase the existing data first. Therefore, it’s important to back up all essential data before beginning the formatting process.

    Nevertheless, once the formatting is complete, your SSD will be ready to use – and it’ll deliver faster performance than a traditional hard drive.

    Quick vs Full Format

    When it comes to formatting an SSD, you have two options: quick format or full format. Quick formatting can be completed in a matter of seconds, but it only erases the file system, not the entire drive. This means that some files may still remain on the SSD, which can cause performance issues in the future.

    On the other hand, a full format erases everything on the drive and checks for any bad sectors. This takes significantly longer, depending on the size of the SSD, but ensures that the drive is free of any data or malware. So, how long does a full format take? It really depends on the size of the SSD and the speed of your hardware.

    On average, a full format of a 1TB SSD can take anywhere from an hour to several hours to complete. It may seem like a long time, but it’s worth it to ensure the best performance and security for your SSD.

    Pros and Cons of Quick Format

    When it comes to formatting storage devices such as hard drives or USB flash drives, the two options that come to mind are Quick Format and Full Format. A Quick Format takes significantly less time than a Full Format but simply deletes the files on the device and prepares it for new data storage. On the other hand, a Full Format not only deletes the files but also checks the storage device for bad sectors and marks them so that they are not utilized in the future.

    The main advantage of Quick Format is that it is faster and takes only a few seconds to complete, making it convenient for users who want to erase data from a drive quickly. However, Quick Format does not completely erase the data and leaves traces behind. Therefore, a possible disadvantage of Quick Format is that sensitive data can be recovered using data recovery software.

    In contrast, Full Format is a more thorough option and ensures complete data erasure, making it a better choice for those who require a higher level of security. Moreover, Full Format checks for bad sectors and repairs them, resulting in improved disk performance. However, Full Format takes significantly more time to complete than Quick Format, and may not be practical when time is a concern.

    In summary, the decision to use Quick Format or Full Format depends on the user’s requirements. While Quick Format is convenient, if you want to ensure complete data erasure, or if you encounter any disk errors, Full Format may be the better option for you.

    Pros and Cons of Full Format

    When it comes to formatting a storage device, two common options are quick format and full format. A quick format is faster and simply deletes the file directory, while a full format takes longer as it overwrites the entire drive with zeroes. The main advantage of a full format is that it will identify and mark bad sectors in the drive, preventing data loss in the future.

    However, it can take several hours to complete and is not necessary for routine maintenance. On the other hand, a quick format is suitable for erasing data or preparing a new drive for use. However, it does not check for bad sectors and can leave sensitive data vulnerable to recovery.

    Ultimately, it depends on your needs and the condition of your storage device, but it is recommended to perform a full format at least once a year to ensure optimal performance and data safety.

    Formatting Time Comparison

    Formatting time can be a pain, but it’s an important step to ensure your computer is running smoothly. There are two types of formatting methods – Quick and Full format. Quick format is the faster option as it only erases the file system and doesn’t scan the entire disk for bad sectors.

    This type of formatting can be useful if you’re in a hurry or need to erase personal data quickly. On the other hand, full format takes much longer as it checks the entire disk for bad sectors and marks them as unusable. This is a more thorough method and is recommended if you’re having issues with your computer or changing the file system.

    However, keep in mind that full formatting will erase all data on your disk, so make sure to back up any important files before starting the process. So, whether you choose quick or full formatting depends on your specific needs and time constraints.

    How to Speed Up SSD Formatting

    Formatting an SSD can take longer than expected but there are ways to speed up the process. One way to do this is by using a quick format option which cuts down on the time it takes to prepare the drive for use. Keep in mind that this option doesn’t fully erase the data on the drive but it does make it available for future data writing.

    Another way to speed up the formatting process is by connecting the SSD directly to your device instead of using a USB hub which can slow down the data transfer rate. Additionally, closing any unnecessary programs and applications can also free up processing power which can help speed up the formatting process. By taking these steps you can significantly reduce the time it takes to format your SSD and get back to using it for your data storage needs.

    Tips to Reduce Formatting Time

    If you want to speed up SSD formatting, there are a few tips that can save you time and effort. The first step is to make sure you have the latest firmware updates for your SSD. This can improve performance and reduce formatting time.

    You should also make sure your SSD is properly connected and configured in your system. Another way to speed up formatting is to use the “Quick Format” option instead of the “Full Format” option. This will only erase the file allocation table (FAT) and not the entire disk, which can save you a lot of time.

    Lastly, you can also try using a formatting tool specifically designed for SSDs. These tools can optimize the formatting process for better performance and efficiency. By following these tips, you can quickly and easily format your SSD without spending too much time on the process.

    So why wait? Give it a go and see how much time you can save!

    Tools to Speed Up SSD Formatting

    SSD formatting can be a time-consuming task, especially when dealing with large drives. Luckily, there are several tools available that can speed up the process. One such tool is the HP USB Disk Storage Format tool, which can format USB drives and SD cards quickly and efficiently.

    Another useful tool is the Windows Disk Management utility, which allows you to format your SSDs and manage partitions. Additionally, third-party programs such as MiniTool Partition Wizard and EaseUS Partition Master can help to expedite the formatting process. These programs offer advanced features such as resizing partitions, converting file systems, and cloning disks.

    By utilizing these tools, you can save plenty of time and ensure that your SSDs are formatted correctly for optimal performance.

    Conclusion

    In the search for the answer to the age-old question of “how long does it take to format an SSD?” we discover that, like many things in life, the answer is not black and white. It depends on a variety of factors, including the size and speed of the SSD, the method of formatting chosen, and the overall performance of the computer. So the next time someone asks you how long it takes to format an SSD, you can simply tell them, “It’s like asking how long is a piece of string – it all depends on the context!”

    FAQs

    What is SSD?
    SSD stands for Solid State Drive. It is a type of storage device that uses NAND-based flash memory to store data.

    How long does it take to format an SSD?
    The time it takes to format an SSD depends on the size and type of the SSD, as well as the hardware and software used for the format. In general, formatting an SSD can take anywhere from a few minutes to several hours.

    Do I need to format my SSD?
    If you are installing a new SSD, you will need to format it before you can use it. If you are reusing an existing SSD, you may not need to format it unless you want to erase all the data on it.

    Can I format my SSD using Windows?
    Yes, you can format your SSD using Windows built-in formatting tool. To do so, open the Disk Management tool, select your SSD, right-click on it, and click on Format.

  • Lightning-Fast Storage Delivered: Unleash Unmatched Performance with M.2 SSD 1TB!

    Are you feeling tired of your computer’s lagging, slow load-up times and limited storage capacity? Upgrading to a 1TB M.2 SSD might be just what you need to breathe new life into your trusted machine. An SSD, or solid-state drive, is a type of storage device that uses flash-based memory to read and write data quickly and efficiently.

    M.2 refers to the form factor of the drive, which is a small, rectangular module that fits directly onto the motherboard of the computer. If you’re someone who uses their computer for heavy-duty tasks, such as gaming, video editing, or running multiple programs at once, you’ll definitely want to consider upgrading to an SSD.

    The increase in speed and performance will be noticeable right away, and you’ll be able to enjoy seamless multitasking and smooth gameplay without any frustrating lag or delay. Think of it like upgrading from a bicycle to a sports car – your experience will be faster, smoother, and more enjoyable all around. Plus, with 1TB of storage space, you’ll have plenty of room for all of your files, photos, and games.

    So, what are you waiting for? Take the leap and upgrade to a 1TB M.2 SSD today – your computer (and your sanity) will thank you for it.

    Benefits of a 1TB M.2 SSD

    If you’re looking to upgrade your computer’s storage capacity, a 1TB M.2 SSD is an excellent choice. Not only does it provide ample space for installing programs, storing files, and running games, but it also has some inherent advantages over traditional hard drives.

    For one, it’s much faster, with read and write speeds that can be several times faster than a standard HDD. This means files open faster, programs boot up faster, and games run smoother. Additionally, M.

    2 SSDs are much thinner and lighter than standard hard drives, making them perfect for slim laptops and ultrabooks. And since they don’t have any moving parts, they’re also much more durable and less prone to failure. Overall, if you want to take your computer’s performance and storage to the next level, a 1TB M.

    2 SSD is definitely worth considering.

    Fast Boot and Load Times

    If you’re wondering how to improve the boot and load times of your PC, a 1TB M.2 SSD might be your solution. One key benefit of using this type of SSD is the lightning-fast speeds it can achieve.

    This is because M.2 SSDs connect directly to the motherboard, allowing for quicker data transfer rates than hard drives connected through a SATA port. The result? You’ll be able to boot up your computer in seconds and launch applications much faster.

    Additionally, a 1TB M.2 SSD will give you plenty of storage space for all your files, meaning you won’t have to worry about running out of room anytime soon. With faster speeds and ample storage, a 1TB M.

    2 SSD is a great investment for anyone looking to improve their PC’s performance.

    m.2 ssd 1tb

    Efficient Power Consumption

    Efficient Power Consumption When it comes to computer hardware, power usage can be a big concern. We all want high performance, but nobody wants to pay a fortune in electricity bills. That’s where an efficient 1TB M.

    2 SSD comes in handy. By using less power than traditional hard drives, M.2 SSDs allow for increased performance without the added costs of high power consumption.

    Additionally, the smaller form factor of M.2 SSDs means that they produce less heat, reducing the need for complex cooling systems and further contributing to energy efficiency. So not only can you enjoy faster load times and data transfer rates with an M.

    2 SSD, but you’ll also be doing your wallet and the environment a favor by using less power. It’s a win-win situation that any computer user can appreciate.

    Reduced File Transfer Times

    If you are looking to upgrade your computer’s storage, a 1TB M.2 SSD is definitely a great investment. One of the main benefits of having an M.

    2 SSD is the reduced file transfer times. Compared to a regular hard drive, an M.2 SSD has much faster read and write speeds, allowing you to transfer large files in a fraction of the time.

    This is especially helpful for those who work with large media files or need to transfer large amounts of data frequently. Furthermore, with an M.2 SSD, your operating system and applications will load much faster, resulting in a more responsive and efficient system overall.

    So if you’re after a storage solution that will increase performance and save you time, consider upgrading to a 1TB M.2 SSD. Your computer will thank you for it!

    Factors to Consider Before Buying

    Looking to upgrade your PC’s storage with an M.2 SSD 1TB? Before you make a purchase, there are a few factors to consider. First and foremost, check if your motherboard supports M.

    2 SSDs and if it has an available slot for it. If your motherboard doesn’t support M.2 SSDs, you may need to look into getting an adapter or consider a traditional SSD instead.

    Another aspect to consider is the speed of the M.2 SSD. Look for models with high sequential read and write speeds for faster boot times and application loading.

    Additionally, make sure the endurance rating of the SSD is suitable for your needs. Higher endurance ratings are recommended for those who regularly use their SSD for intense tasks such as video editing or gaming. Lastly, consider the price and your budget for the SSD.

    While the cost of M.2 SSDs has decreased in recent years, they still tend to be pricier than traditional SSDs. By considering these factors, you can make an informed decision and choose the best M.

    2 SSD 1TB for your PC.

    Compatibility with Your System

    Before making a purchase, it’s essential to ensure that the product you’re considering buying is compatible with your system. Various factors come into play when considering compatibility, including hardware requirements, operating system versions, and software compatibility. Checking the product’s requirements against your system specifications will help you avoid buying something that will not work on your machine.

    It’s essential to note that some products require additional software or components to function correctly. One key factor to consider when checking compatibility is the hardware requirements. Always check the product’s specifications and ensure that your computer meets or exceeds the recommended hardware requirements.

    For software compatibility, ensure that the product supports the operating system version installed on your machine. In situations where your machine does not meet the requirements, consider whether upgrading your system or purchasing another product that can operate on your system is feasible. In conclusion, compatibility is crucial when making a purchase because it impacts product performance and functionality.

    It’s essential to always verify whether a product is compatible with your system before purchasing. In doing so, you’ll save yourself time and money by avoiding the frustration and inconvenience caused by non-functional products.

    Read and Write Speeds

    If you’re in the market for a new storage drive, one of the most crucial factors to consider is its read and write speeds. These speeds determine how quickly you can transfer data to and from the drive, so it’s essential to choose a drive that can keep up with your needs. When looking at read and write speeds, it’s important to understand that they can vary depending on the type of storage drive you’re looking at.

    SSDs typically offer faster read and write speeds than traditional HDDs, but they also tend to be more expensive. Additionally, the interface of the drive can impact its read and write speeds, as well as the way the drive is formatted. It’s essential to research the specifications of the drive you’re interested in to ensure it meets your specific needs.

    Overall, it’s crucial to keep in mind that read and write speeds are just one aspect to consider when purchasing a storage drive, but they can have a significant impact on its overall performance and usability.

    Brand and Quality

    When it comes to making a purchase, brand and quality are two important factors that should be considered. The brand of a product can often give insight into the reliability and reputation of the company that stands behind it. A well-known brand that has been in business for a long time is often associated with quality and trust.

    In addition, the quality of a product should also be taken into account. Factors such as durability, materials, and workmanship can all impact the overall quality of a product. It’s important to do research on the products you’re interested in and read reviews from other customers who have purchased them.

    By taking these factors into consideration, you can make an informed decision about the products you purchase and ensure that they meet your expectations.

    Top 1TB M.2 SSDs in the Market

    If you’re in the market for an M.2 SSD with a massive 1TB capacity, you’re in luck! There are many top-quality options available for you to choose from. One great choice is the Samsung 970 EVO Plus.

    With its impressive read/write speeds and reliable performance, this SSD is perfect for gamers and professionals alike. Another top contender is the Western Digital Black SN850. It boasts lightning-fast speeds and comes with a five-year warranty for added peace of mind.

    The Sabrent Rocket Gen4 is another popular option, offering blazing-fast transfer speeds and a sleek, low-profile design. When it comes down to it, you can’t go wrong with any of these fantastic M.2 SSDs.

    Just be sure to choose one with a capacity that fits your needs, and you’ll be off to the races in no time!

    Samsung 970 EVO Plus

    When it comes to high-speed storage solutions, the Samsung 970 EVO Plus M.2 SSD is one of the best options on the market, especially for those in need of a 1TB capacity. With its impressive read and write speeds of up to 3,500 MB/s and 3,300 MB/s respectively, it’s perfect for users who demand fast and reliable performance for their applications and files.

    Plus, it comes equipped with advanced features like improved thermal management and Dynamic Thermal Guard technology, which help to maintain optimal temperatures during heavy usage. Another notable feature is the Samsung Magician software suite, which allows users to monitor and manage various aspects of the SSD’s performance. Whether you use it for intensive gaming, video editing, or productivity tasks, the Samsung 970 EVO Plus is definitely a top contender for the best 1TB M.

    2 SSD available.

    WD Blue SN550

    If you’re in the market for a high-performing 1TB M.2 SSD, then the WD Blue SN550 has got you covered. This top-of-the-line SSD boasts incredible read and write speeds, making it an excellent option for gamers, content creators, and anyone who needs reliable and fast storage.

    With a capacity of 1TB, you’ll have plenty of space to store all your files, digital art, and games. Plus, the WD Blue SN550 uses NVMe technology, which means that it can access your files faster than other SSDs on the market. This translates to faster boot-up times, quicker application launches, and seamless gaming experiences.

    Overall, the WD Blue SN550 is a top-notch choice for anyone looking for a high-performing and reliable M.2 SSD.

    Installation Guide for Your New M.2 SSD

    If you’re looking to upgrade your computer’s storage capacity, an M.2 SSD 1TB is an excellent choice. These drives are small, fast, and efficient, making them perfect for modern applications.

    However, installing one of these drives can be a bit tricky if you’ve never done it before. Fortunately, it’s not too difficult if you follow a few simple steps. First, make sure your computer supports M.

    2 SSD drives; some older systems may not be compatible. Next, locate the M.2 slot on your motherboard; it’s usually near the CPU socket.

    Insert the M.2 drive into the slot at a slight angle, then push it down until it clicks into place. Finally, secure the drive with the screw provided, and you’re done! With your new M.

    2 SSD installed, you can enjoy lightning-fast boot times and speedy program launches in no time.

    Conclusion

    In conclusion, the m.2 SSD 1TB is like a speed demon with a storage capacity of Hercules. It’s tiny form factor belies its vast capabilities, and it’s the perfect solution for anyone requiring massive storage in a compact device.

    It’s like having a miniaturized data monster that can handle everything you throw at it without breaking a sweat. So, if you want lightning-fast speeds and ample storage space, the m.2 SSD 1TB is the arrow you should add to your IT quiver.

    FAQs

    What is an M.2 SSD and how does it differ from a regular SSD?
    An M.2 SSD is a solid-state drive that connects to your computer’s motherboard via the M.2 slot. It’s smaller, faster, and more power-efficient than the traditional 2.5-inch SATA SSDs.

    Can I use an M.2 SSD as a boot drive?
    Yes, you can use an M.2 SSD as a boot drive. Many newer motherboards support booting from M.2 drives.

    What is the maximum storage capacity available for M.2 SSDs?
    The maximum storage capacity available for M.2 SSDs is currently 4TB. However, 1TB is a popular option for most users.

    Are M.2 SSDs compatible with all motherboards?
    No, M.2 SSDs may not be compatible with all motherboards. You need to check the specification of your motherboard to see if it supports the M.2 slot and what kind of M.2 SSD it supports.

  • Unlocking Lightning-Fast Storage: A Step-by-Step Guide on How to Use Two SSDs Simultaneously

    Unlocking Lightning-Fast Storage: A Step-by-Step Guide on How to Use Two SSDs Simultaneously

    Are you looking to boost your computer’s performance using 2 SSDs at once? If yes, then you have come to the right place! Using multiple SSDs is a great way to supercharge your device and increase its speed, storage capacity, and overall performance. But wait, how do you actually use 2 SSDs at the same time on your device? Well, it’s not as complicated as it sounds. You can use a RAID (Redundant Array of Inexpensive Disks) configuration that allows you to combine both SSDs into a single logical unit for maximum performance.

    There are also other options like moving specific files to the second SSD like games and large media files. By using multiple SSDs, you can get faster boot times, speedy file transfers, and an overall better computing experience. Another advantage of using SSDs is that they’re less prone to hardware malfunction and data loss, so it’s a reliable solution.

    So, whether you’re a gamer, a creative professional, or anyone who requires high performance from their device, incorporating multiple SSDs into your setup is an excellent way to enhance your computing experience. Keep reading to find out how it’s done!

    What You Need

    If you want to know how to use 2 SSDs at the same time, you may think it’s a complicated process, but it’s actually quite simple. The first thing you need is a motherboard that has two M.2 slots or two SATA ports.

    Next, make sure you have a power supply unit that has enough power to support two SSDs. Once you have these components in place, you can connect the SSDs to the appropriate ports on your motherboard. Then, you’ll need to go into your computer’s BIOS and make sure that both SSDs are recognized.

    Finally, you can format and partition the drives to suit your needs and start using them. Overall, using 2 SSDs at the same time can significantly improve your computer’s performance and make it easier for you to manage and store your data.

    Two SSDs

    If you’re considering using two SSDs in your system, there are a few things you need to keep in mind. First and foremost, you need to make sure that your motherboard has two available M.2 slots or SATA ports.

    It’s also important to consider the overall capacity you’ll need. If you’re planning on using two smaller SSDs, you’ll need to set up the system to combine their capacities, which is known as RAID. However, if you’re using two larger SSDs, you can simply use them as separate drives.

    Another consideration is the type of SSD you choose. There are several different types of SSDs, including SATA, PCIe, and NVMe. SATA is the most common and affordable option, while PCIe provides faster transfer speeds.

    NVMe is the fastest type of SSD and is ideal for high-performance applications. However, it’s also the most expensive option. When it comes to setting up your system, you’ll need to make sure that you have the necessary cables and mounting hardware.

    Installing an SSD is relatively simple, but it’s important to ensure that it’s properly mounted and connected to the motherboard. Overall, using two SSDs can provide several benefits, including increased storage capacity and faster read/write speeds. However, it’s important to consider your system’s requirements and choose the right type of SSD to meet your needs.

    With the right setup and configuration, using two SSDs can help you achieve optimal performance and efficiency in your system.

    how to use 2 ssd at the same time

    A device with two M.2 slots or a SATA SSD slot

    If you’re looking to build a powerful computer, you might be wondering whether to choose a device with two M.2 slots or a SATA SSD slot. The answer depends on your specific needs, but both options have their advantages.

    A device with two M.2 slots will allow you to install two high-speed NVMe SSDs, which can significantly boost your system’s performance. On the other hand, if you have an existing SATA SSD, a device with a SATA SSD slot will allow you to transfer its data to your new computer and continue using it.

    When deciding between the two options, consider your budget and the type of storage you need. M.2 SSDs tend to be more expensive than SATA SSDs, but they offer faster read and write speeds.

    SATA SSDs are more affordable and still provide fast performance, but they might not be as speedy as M.2 SSDs. Another aspect to consider is the number of PCIe lanes available in your system.

    M.2 SSDs require PCIe lanes to function at their maximum speeds. If your system has limited PCIe lanes, it might be better to choose a device with a SATA SSD slot.

    In conclusion, a device with two M.2 slots or a SATA SSD slot can both be excellent options, depending on what you need. M.

    Step by Step Guide

    If you’re looking to use two SSDs at the same time, you’ll need to make sure your computer is equipped to handle it. One option is to use RAID (Redundant Array of Independent Disks) technology, which allows you to combine the two SSDs into one logical drive. To begin, make sure your computer has multiple drive bays and supports RAID configuration.

    Then, physically install the two SSDs into the appropriate bays. Next, access your computer’s BIOS and set up your RAID configuration, selecting the appropriate RAID level. Once your configuration is set, you’ll need to initialize your new logical drive, and then format it so it’s ready to use.

    With that complete, you can then start saving data to your new, larger storage space. With the right equipment and configuration, using two SSDs at once can give you a significant boost in both speed and storage capacity.

    Step 1: Insert the first SSD into the first M.2 slot or the SATA SSD slot

    When it comes to upgrading or building your PC, adding an SSD can significantly improve your system’s performance. If you’re looking for a step-by-step guide on how to install your SSD, you’re in the right place. To start, ensure your PC is turned off and disconnected from any power source.

    Then locate either the first M.2 slot or the SATA SSD slot, depending on the type of SSD you have. Carefully insert the SSD into the designated slot, while being cautious not to touch the connectors on the bottom.

    Make sure the SSD is properly secured to avoid any potential damage. Now, you’re ready to move onto the next step in the installation process. Remember to take your time and be patient, as installing components in your PC requires precision to ensure everything runs smoothly.

    Step 2: Go to the Device Manager and check if the SSD is detected

    After installing your new SSD, the next step is to check if your device recognizes it. The easiest way to do this is by going to the Device Manager. To access this feature, right-click on the Windows logo on your taskbar, and select “Device Manager.

    ” Once you’re in the Device Manager, scroll down the list until you find “Disk Drives.” Click the arrow to expand the category and look for your SSD. If your SSD is recognized, it will be listed here.

    However, if it’s not, you may need to troubleshoot further to determine why your computer is not recognizing the SSD. This can involve making sure all cables are securely connected, updating drivers, or checking the BIOS settings. By ensuring your SSD is detected, you can begin the process of transferring data and improving your device’s performance.

    So go ahead and check now to see if your new SSD is up and running!

    Step 3: Insert the second SSD into the second M.2 slot

    Now that you have successfully installed the first SSD into your computer’s M.2 slot, it’s time to move on to the second SSD. Don’t worry; the process is similar to the first one and just as easy! Firstly, locate the second M.

    2 slot on your motherboard. Each motherboard is unique, so refer to your motherboard manual if you are unsure where to find it. Once you have located the second M.

    2 slot, carefully insert the second SSD into it. Make sure that the pins on the SSD are aligned with the slot before you push it down. Don’t apply too much pressure; it should slide in smoothly.

    Once you hear the click sound, it means that the SSD is firmly secured in place. Now you have two SSDs in your computer, and you’re ready to enjoy faster operating speeds, smoother multitasking and more capacity for your files!

    Step 4: Open the BIOS and confirm that both SSDs are detected

    After physically installing the second SSD in your computer, the next step is to confirm that both SSDs are detected by the BIOS. To do this, restart your computer and press the key that appears in the screen to access the BIOS setup utility. The key to access BIOS may vary depending on your computer’s manufacturer.

    Once you’re in the BIOS, navigate to the section that shows the list of connected drives. If both SSDs are detected, you should see them listed as separate entries. If you can’t find the second SSD on the list, there might be an issue with either the installation or the configuration.

    In this case, you may need to double-check the connections and settings or consult a technician for assistance. Checking the BIOS is an important step in ensuring that your computer recognizes both SSDs and that they’re ready for use. Overall, this step is crucial in the journey towards having a faster, more efficient computer.

    Step 5: Configure the SSDs in RAID, if desired

    After installing the SSDs and initializing them, you may want to consider configuring them in RAID. RAID, or Redundant Array of Independent Disks, is a storage technology that combines multiple drives into one logical unit. This enables better performance, reliability, and fault tolerance.

    To do this, you need to access the BIOS or UEFI firmware on your computer and enable the RAID mode. Then, you need to select the type of RAID you want to use, such as RAID 0, RAID 1, or RAID 5, depending on your needs and preferences. RAID 0, for example, stripes the data across the drives for faster read and write speeds, but has no redundancy or data protection.

    RAID 1, on the other hand, mirrors the data across the drives for higher reliability and backup, but sacrifices storage capacity. RAID 5, meanwhile, combines striping and parity for both speed and protection, but requires at least 3 SSDs and more configuration. Keep in mind that configuring RAID may require you to reinstall the operating system and all applications on the new logical drive.

    Therefore, make sure you have a backup of all your important data before proceeding.

    Step 6: Install your operating system or clone your current one to the SSDs

    Once you have your SSDs installed and connected properly, it’s time to install your operating system or clone your current one to the SSDs. This step can vastly improve the overall speed and performance of your computer. If you’re starting fresh with a new operating system installation, you’ll need to have the installation media on a USB drive or DVD.

    Insert the media into your computer and boot from it. Follow the installation prompts and make sure to select your SSD as the installation destination. On the other hand, if you want to clone your current operating system, you can do so using cloning software such as Acronis True Image or Macrium Reflect.

    Cloning your current operating system will transfer all of your programs, files, and settings to the SSD, creating an exact copy of your existing system but with better performance thanks to the SSDs. Whichever method you choose, make sure to backup your important files and data before proceeding. Once the installation or cloning process is complete, you’ll be able to enjoy a much faster and smoother computing experience on your newly upgraded SSD-run system.

    Benefits of Using Two SSDs

    If you are wondering how to use 2 SSD at the same time, there are several benefits to doing so. One major advantage is increased storage capacity. By using two SSDs, you can effectively double your storage space and easily store large files such as videos, music, and high-resolution images.

    Another benefit is improved performance. With two SSDs, you can set them up in a RAID configuration to improve read and write speeds, making your computer run faster overall. Additionally, using two SSDs can provide better system reliability and protection against data loss in case one drive fails.

    By installing your operating system, applications, and frequently accessed files on one SSD while using the other for backups, you can ensure that your data is always protected and easily retrievable. Overall, using two SSDs can significantly enhance your computer’s storage capacity, speed, and reliability, making it a smart investment for any computer user.

    Increased speed and performance

    Using two SSDs in your computer not only increases the storage capacity but also provides significant speed and performance benefits. One of the most significant advantages of having two SSDs is the reduction in load times. With two SSDs, all your applications and files can store on different drives, allowing the system to access them faster.

    You will notice a considerable improvement in the boot-up time and application launch time. Not only this but if you are into gaming, then loading times are one of the most significant things that come in the way of an immersive gaming experience. Two SSDs can allow you to store the game files separately from the system files, resulting in faster load times, reduced game stutter, and improved frame rates.

    In summary, using two SSDs can provide a massive improvement in the performance of your computer and make all your computing tasks snappier and more efficient.

    Redundancy and data protection

    When it comes to data protection and redundancy, using two SSDs can offer numerous benefits. By having two SSDs in a redundant configuration, you can ensure that if one drive fails, you have a backup in place. This means that your data will be safe and you won’t suffer any data loss.

    Additionally, using two SSDs can provide faster read and write speeds, which is especially useful if you’re working with large files and need to access them quickly. Another benefit of using two SSDs is the increased capacity. By combining the storage capacities of two SSDs, you can have a larger storage solution that can meet your needs.

    Overall, using two SSDs in a redundant configuration can provide better data protection and faster performance, making it a smart choice for individuals and businesses alike.

    Conclusion:

    In conclusion, using two SSDs at the same time can be a game-changer for your computer’s performance. It’s like having two superheroes teaming up to save the day. With the right setup and configuration, you can enjoy faster boot times, smoother multitasking, and seamless storage management.

    Just remember, while it might take a little extra effort to set up, the rewards are well worth it. So, don’t be afraid to harness the power of two SSDs and take your computer to the next level!”

    Using two SSDs at the same time on your device is a simple process that can significantly elevate the performance and data storage capacity of your device.

    Using two SSDs on a device can be a game-changer. The benefits are numerous, with the most significant being the increase in performance and storage capacity. One SSD can handle the operating system and applications, while the other can store personal files and media.

    This allows for faster boot and load times, making the user experience smoother and more efficient. Additionally, having two SSDs can safeguard your data. If one drive fails, the other still has all of your valuable files and information.

    It’s like having a backup in place without the added hassle. Overall, using two SSDs is a simple yet effective way to take your device’s performance and storage capabilities to the next level.

    FAQs

    Can I connect 2 SSDs to my motherboard at the same time?
    Yes, most modern motherboards support multiple PCIe or SATA ports, allowing you to connect and use 2 SSDs simultaneously.

    How do I set up RAID with 2 SSDs?
    You can set up RAID (Redundant Array of Independent Disks) with 2 SSDs by using your motherboard’s RAID controller or a software RAID tool. This will allow you to combine the capacity and performance of both SSDs for improved speed and data redundancy.

    What’s the advantage of using 2 SSDs instead of 1?
    Using 2 SSDs can offer several benefits, including faster read/write speeds (especially if set up in RAID), increased storage capacity, improved data redundancy, and better multitasking performance.

    How do I transfer data from one SSD to another?
    You can transfer data between 2 SSDs by using a cloning tool like Clonezilla or Macrium Reflect. Alternatively, you can manually copy and paste files between the drives. Just make sure to format or erase the destination SSD beforehand to avoid conflicts.

  • Upgrade Your Mac’s Performance with Ease: A Step-by-Step Guide to Replacing Fusion Drive with SSD

    Upgrade Your Mac’s Performance with Ease: A Step-by-Step Guide to Replacing Fusion Drive with SSD

    If you’re tired of your Mac’s slow performance, there’s a solution – replacing your Fusion Drive with an SSD. This upgrade can greatly improve your computer’s speed and responsiveness, making your daily tasks a breeze. But what exactly is a Fusion Drive, and why should you consider swapping it out? A Fusion Drive is a combination of a traditional hard drive and an SSD, designed to give you the best of both worlds.

    However, its performance can still lag behind a dedicated SSD. In this blog post, we’ll explore the benefits of replacing your Fusion Drive with an SSD and take you through each step of the process. So grab a cup of coffee and let’s dive in!

    Introduction to Fusion Drive and SSD

    If you’re looking to boost the performance of your Apple computer, you may be wondering about the process of replacing a Fusion Drive with an SSD. The good news is that it’s relatively easy to do so, even if you don’t have extensive technical skills. First, you’ll need to obtain the appropriate SSD for your computer model and backup your data.

    Next, you’ll need to open up your computer and locate the Fusion Drive’s flash storage, as well as the hard drive. You can then disconnect the hard drive and replace it with the SSD, making sure to securely attach it in place. Once everything is reconnected, you can restore your data and enjoy the significantly faster performance and storage capacity of your new SSD.

    By taking this simple step, you can transform your computer into a high-performing machine that’s capable of handling even the most demanding applications.

    What is a Fusion Drive?

    If you’re looking to upgrade your computer’s performance, a Fusion Drive might be just what you need. A Fusion Drive is a hybrid storage solution that combines a traditional hard drive and a solid-state drive (SSD) into one cohesive system. The SSD acts as a cache for frequently accessed files, while the hard drive provides more space for less frequently accessed files.

    This combination provides the best of both worlds, giving a computer the speed of an SSD with the storage capacity of a traditional hard drive. Think of it like having a fast car that can also carry a lot of cargo. The best part is that you don’t need to manage the Fusion Drive yourself – the operating system automatically manages the data between the SSD and hard drive.

    So if you’re looking for a faster and more efficient computing experience, consider upgrading to a Fusion Drive.

    how easy to replace fusion drive with ssd

    What is an SSD?

    An SSD, or Solid-State Drive, is a storage device that utilizes flash memory to store data digitally. Unlike traditional hard disk drives (HDDs) that use spinning platters to read and write data, SSDs have no moving parts, which makes them faster, more durable, and energy-efficient. Fusion Drive, on the other hand, is a hybrid storage solution that combines both SSD and HDD technologies for better performance and storage capacity.

    By using SSD as a cache to frequently accessed files, Fusion Drive provides a faster boot-up time, smoother application launches, and improved overall system performance. The keyword for this topic is “SSD,” which is crucial to understand the difference between SSDs and HDDs, as well as hybrid storage solutions like Fusion Drive. Choosing the right type of drive can improve your computer’s performance, speed, and reliability, which makes it worth considering when purchasing or upgrading your system.

    9 Simple Steps to Replace Fusion Drive with SSD

    Replacing a Fusion Drive with an SSD may seem daunting, but it’s actually quite simple if you follow these nine steps. First, back up all your important data to an external drive or cloud storage. Then, shut down your Mac and unplug all cables.

    Next, remove the screws on the back cover and carefully lift it off. Locate the Fusion Drive and unscrew it from the logic board. Replace the Fusion Drive with the SSD and secure it in place.

    Reattach the back cover and screws, plug in all cables, and boot up your Mac. Finally, use a cloning tool or a fresh install of macOS to transfer your data onto the new SSD. With these steps, you can enjoy faster performance and storage on your Mac in no time!

    Step 1: Back up Your Data

    Replacing a fusion drive with an SSD can enhance your Mac’s performance significantly. Before beginning the replacement process, it is crucial to back up your important data first. You can use Time Machine or any other backup software to create a copy of all your files, images, and documents.

    The backup will eliminate any risk of losing data during the replacement process. Additionally, disconnect the Mac from any external devices such as printers, scanners, and hard drives to avoid any potential damage. Make sure the backup process is complete, and the files are readily accessible before proceeding with the replacement process.

    The initial step is vital for safeguarding your data and ensuring smooth replacement of the fusion drive with an SSD.

    Step 2: Shut Down Your Mac

    When it comes to upgrading your Mac’s storage from a fusion drive to an SSD, the first step is to back up all your important data. Once you’ve ensured that your data is safe, the next step is to shut down your Mac completely. This is essential as it allows you to disconnect all cables and peripherals from your Mac and ensures that no electrical power is flowing through it.

    Shutting down your Mac can be a bit tricky, especially if you’re not used to it. But it’s straightforward – you can either use the “Shut Down” option from the Apple menu or hold down the power button until your Mac turns off completely. Once shut down, it’s important not to rush into the next step.

    Allow your Mac to sit for a few minutes to cool down before you start removing hardware. This will help prevent any damage to your Mac’s internal components. With your Mac safely shut down, you’re now ready to move on to the next step in upgrading your Mac’s storage from fusion drive to SSD.

    Step 3: Open the Mac Case

    In step 3 of replacing a Fusion Drive with an SSD in a Mac, it’s time to crack open the case. Before attempting any further steps, ensure you have all the necessary tools and precautions in place. First of all, shut down your Mac and unplug it from the power source.

    Then, detach all the external connections such as keyboard, mouse, and monitor. Once you’re certain no power is running through the system, use a T6 Torx driver to unscrew the ten screws from the back of the case. Carefully remove the back cover and put it aside.

    You’ll see the fans, logic board, and other components immediately. As you begin working on your Mac, take note of any standalone screws that may be holding the drive down, remove them gently. Keep your screws and components organized, so you know where they fit once the job is completed.

    Now that the drive is exposed, it’s time to move to the next step.

    Step 4: Remove the Fusion Drive

    After backing up your data and removing the logic board, it’s finally time to remove the Fusion Drive. This process involves unscrewing four screws on the drive bracket and unplugging the drive cable from the logic board. Once the Fusion Drive is removed, set it aside and replace it with your new SSD.

    Make sure the SSD is properly seated in the drive bracket and connected securely to the logic board. We recommend double-checking all connections before reassembling your Mac. Installing an SSD in place of a Fusion Drive is an excellent way to significantly boost the speed and performance of your Mac.

    So make sure you take your time with this process and enjoy the benefits of a faster, more efficient computer.

    Step 5: Prepare the SSD

    Now that we have removed the Fusion Drive and installed the new SSD, it’s time to prepare it for use. Follow these simple steps to ensure a smooth transition: Connect your SSD to your Mac using an enclosure or adapter.

    Open Disk Utility from the Applications folder.

    Locate your SSD in the left-hand sidebar and select it. Click on the Erase tab at the top of the window.

    Choose APFS or macOS Extended (Journaled) as the format.

    Name your SSD whatever you’d like, but avoid using special characters or spaces in the name. Check that the scheme is GUID Partition Map.

    Press Erase to format the drive.

    Step 6: Connect the SSD to the Mac

    Once you have removed the old Fusion Drive and installed the new SSD in your Mac, it’s time to connect everything. The first step is to locate the SATA data cable and connect it to the SSD. Then, you need to connect the power cable to the SSD, making sure it’s firmly in place.

    Once you’ve done that, it’s time to secure the SSD to the Mac using the screws provided in the kit. Before you close up your Mac, make sure everything is connected securely and stored in the appropriate place. Once you’re sure everything is in place and secure, you can close up your Mac and power it on.

    Congratulations, you’ve successfully replaced your Fusion Drive with a powerful new SSD! Sit back, relax, and enjoy the improved speed and performance of your Mac.

    Step 7: Install MacOS on the SSD

    Once you’ve successfully partitioned and formatted your SSD, the final step is to install MacOS onto it. To do this, restart your Mac and hold down the Command and R keys until the Apple logo appears. This will start your Mac in Recovery mode, which will allow you to download and install a fresh copy of MacOS onto your SSD.

    Once you’ve connected to a stable internet connection, select “Reinstall MacOS” and follow the on-screen instructions. Be sure to select your SSD as the destination for the installation, and sit back while your Mac does its thing. Depending on the speed of your internet connection, this process can take anywhere from 30 minutes to an hour or more.

    Once the installation is complete, your Mac will restart automatically and you’ll be ready to enjoy lightning-fast performance on your newly-installed SSD!

    Step 8: Transfer Data from Backup

    As we reach step 8 of replacing your Fusion Drive with an SSD, it’s time to transfer your data from your backup onto the new drive. This is where all the preparation work you’ve done up until now comes into play. First, ensure that your backup is fully updated and includes all relevant files and programs.

    Then, connect your backup drive to your computer and navigate to the migration tool. This tool will guide you through the process of copying your data from the backup onto your new SSD. The transfer may take some time, depending on the amount of data you have, but once it’s done, you can disconnect your backup and start using your new SSD.

    Remember, always have a backup of your important data, just in case. With this step complete, you’re almost ready to enjoy the increased speed and performance of your new SSD.

    Step 9: Enjoy Your New SSD!

    Congratulations, you have successfully completed all the essential steps to replace your Fusion Drive with an SSD! Now it’s time to sit back and enjoy the benefits of a faster, more responsive computer. The speed improvements and increased performance will be noticeable from the moment you boot up your system. In addition to faster load times, you’ll also experience smoother multitasking capabilities and improved overall efficiency.

    Whether you use your computer for work or play, you’ll find that the upgrade to an SSD was well worth the investment. So go ahead, enjoy the perks of your new SSD, and get ready to take your computing experience to the next level!

    Why You Should Replace Fusion Drive with SSD

    Replacing your Mac’s Fusion Drive with an SSD can greatly enhance its overall performance. Though it may sound intimidating, the process is actually fairly straightforward and can be done with the right tools and a bit of patience. SSDs are quicker, more efficient and reliable than traditional hard drives, meaning you can boot faster, launch apps in seconds and access files in the blink of an eye.

    Furthermore, SSDs generate less heat, consume less power, and produce less noise than fusion drives, all while lasting much longer. If you are looking to boost the speed and efficiency of your Mac, replacing its Fusion Drive with an SSD is a smart move to make. All you need is an SSD, a set of screwdrivers, and a guide to help you along the way.

    Faster Performance

    If you want faster performance from your Mac, it’s time to ditch your Fusion Drive and replace it with an SSD. While Apple’s fusion drive technology combines a traditional hard drive with a small amount of flash storage, an SSD offers faster access speeds and much-improved performance. With an SSD, you’ll enjoy snappier boot times, faster app launches, and lightning-fast file transfers.

    Plus, an SSD is more reliable, since it doesn’t have moving parts that can wear out over time. Upgrading to an SSD is an investment in your Mac’s performance – and your productivity. So why settle for slow performance when you can get the speed you need? Upgrade your Mac with an SSD today.

    Improved Reliability

    If you’re still using a Fusion Drive in your Mac, it might be time to upgrade to an SSD. While Fusion Drives combine a traditional hard drive with a smaller solid-state drive to improve performance, they can be prone to reliability issues. SSDs, on the other hand, are known for their durability and speed.

    By replacing your Fusion Drive with an SSD, you’ll experience faster boot times, improved application loading, and better overall performance. Plus, you’ll have the peace of mind that comes with using a reliable storage solution. So, if you’re looking for a more stable and efficient storage option, consider upgrading to an SSD.

    Better Energy Efficiency

    Are you looking to improve your computer’s energy efficiency? If so, one simple change you can make is switching out your traditional hard drive for a solid-state drive (SSD). Unlike traditional hard drives with spinning disks, SSDs use flash memory to store information. This means that they consume significantly less power than their older counterparts.

    In fact, studies have shown that SSDs can reduce energy consumption by up to 80%. Not only will this save you money on your electricity bill, but it will also help reduce your carbon footprint. So if you’re looking for a quick and easy way to make your computer more eco-friendly, consider upgrading to an SSD today.

    Conclusion

    In conclusion, replacing a fusion drive with an SSD is easier than convincing your cat to use the litter box. With the right tools and a little bit of know-how, swapping out your hard drive for a solid-state drive can be as simple as a walk in the park. So if you’re looking to speed up your computer and enjoy lightning-fast performance, don’t be afraid to give it a try – your tech-savvy friends will be impressed, and your computer will thank you for it!”

    FAQs

    What are the benefits of replacing a fusion drive with an SSD?
    Replacing a fusion drive with an SSD can significantly improve the speed and performance of your computer. It allows for faster boot-up times, quicker application launches, and smoother overall experience.

    Is it difficult to replace a fusion drive with an SSD?
    The difficulty level varies depending on your computer model, but it can be done relatively easily with the right tools and some technical knowledge. It’s recommended to seek professional help if you’re unsure about the process.

    Can you keep your data when replacing a fusion drive with an SSD?
    Yes, you can transfer your data from the fusion drive to the new SSD. However, it’s important to back up your data before starting the replacement process to avoid the risk of data loss.

    How much does it cost to replace a fusion drive with an SSD?
    The cost of replacing a fusion drive with an SSD varies depending on the type of SSD you choose and if you do it yourself or hire a professional. On average, it can cost anywhere from $150-$500.