Author: David L. Lynn

  • Upgrade Your System’s Speed with Ease: The Ultimate Guide to Changing Your HDD to SSD

    Upgrading your HDD to an SSD is a smart move for anyone looking to improve their computer’s speed and overall performance. With so many options and technical details to consider, it can be overwhelming to navigate the upgrade process on your own. But fear not, because this guide has got you covered.

    Think of upgrading from an HDD to an SSD like trading in your clunky old bicycle for a sleek new sports car. The difference in speed and efficiency is astounding. SSDs (solid-state drives) are faster, quieter, and more reliable than traditional HDDs (hard disk drives).

    They use flash technology instead of mechanical spinning disks, resulting in lightning-fast read and write speeds. But before diving into the upgrade process, it’s important to do your research and choose the right SSD for your needs. Consider factors such as capacity, speed, and compatibility with your computer.

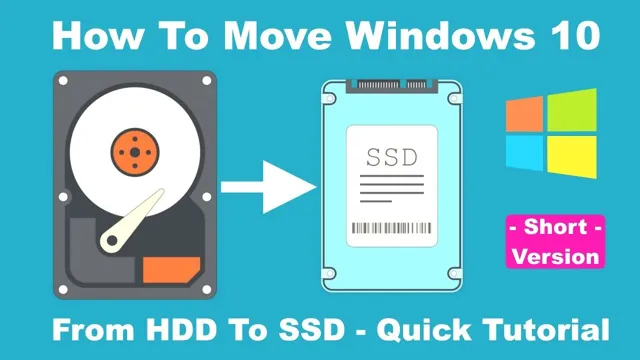
    Once you have your new SSD, the upgrade process involves transferring your operating system and files from your old HDD to the new drive. This can be done through a variety of methods, such as cloning or a fresh install of your operating system. Overall, upgrading to an SSD is a worthwhile investment that can greatly improve your computer’s performance.

    So buckle up and get ready to revamp your system with this complete guide to upgrading your HDD to an SSD.

    Backup Important Data

    When it comes to upgrading your computer’s hard drive to a faster and more efficient SSD, it is important to start with backing up your important data. This can include your documents, photos, music, videos, and any other important files that you don’t want to lose. One of the easiest ways to do this is by connecting an external hard drive and copying all the important data onto it.

    Alternatively, you can use cloud storage services like Dropbox, Google Drive, or OneDrive to backup your data online. Once you have backed up all your important data, you can now proceed with installing your new SSD. You can either clone your existing HDD to the new SSD or install a fresh copy of your operating system.

    Either way, by upgrading to an SSD, you will notice a significant improvement in the overall performance and speed of your computer.

    Use External Hard Drive or Cloud Services

    Backing up important data is crucial, and there are several ways to do it. One of the most common methods is to use an external hard drive. This is an excellent choice for those who want to keep their data safe and secure in a physical location.

    Simply plug your hard drive into your computer and transfer your files. Another option is to use cloud services. These services allow you to store your data on remote servers, which are maintained by the service provider.

    That way, even if your computer crashes, you can still access your data from another device. It’s important to remember to regularly back up your data to avoid losing important files. Whether you choose an external hard drive or cloud services, make sure to keep your data safe in case of an unforeseen event.
    how change hdd to ssd

    Select Right SSD

    If you’re considering upgrading your computer’s hard drive, switching to a solid-state drive (SSD) is a great option. Unlike a traditional hard drive, an SSD uses flash memory instead of spinning disks, making it faster and more reliable. To change your HDD to an SSD, you’ll need to select the right SSD for your needs.

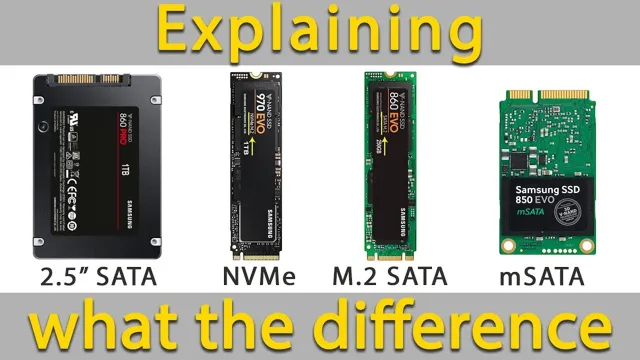
    Consider the storage capacity, connection type, and performance specifications when choosing an SSD. The capacity should be big enough to hold all your data, while the connection type should be compatible with your computer’s interface. SATA III is the most common, but newer computers may support PCIe connections for even faster speeds.

    Look for an SSD with high read and write speeds, measured in MB/s, to ensure speedy data transfer. With the right SSD, you can enjoy faster boot times, improved system responsiveness, and better overall performance from your computer. So, choose wisely and enjoy the benefits of upgrading your hard drive to an SSD.

    Determine Compatibility & Form Factor

    When selecting the right SSD for your computer, it’s crucial to determine compatibility and form factor. The last thing you want is to purchase an SSD that won’t work with your system or is physically too large to fit. Firstly, consider the interface of your computer as it may require a specific type of SSD.

    For example, a system that utilizes a PCIe interface will require an SSD that is PCIe-compliant. Secondly, take note of the form factor of the current storage drive, as the SSD you intend to purchase will need to be the same size to fit snugly into the designated storage slot. Most commonly, desktops use a

    5-inch form factor and laptops use a 5-inch form factor. By ensuring compatibility and form factor, you can rest easy knowing that your new SSD will work effortlessly with your computer.

    Consider Storage Capacity & Speed

    When it comes to selecting the right SSD for your needs, storage capacity and speed are two critical factors to consider. This is especially true if you plan on using your SSD for applications that require a lot of data transfer, such as video editing or gaming. To get the most out of your SSD, you want to look for one that offers high read and write speeds, as well as a large storage capacity.

    One of the most important things to consider when selecting an SSD is the type of storage technology it uses. For instance, NAND flash is the most common type of storage technology found in SSDs, but there are different grades of NAND that can affect read and write speeds. Choosing an SSD with higher-grade NAND can help ensure faster data transfer rates and better overall performance.

    Another consideration when selecting an SSD is the overall storage capacity. SSDs typically come in a range of storage capacities, from 128GB up to 2TB or more. It’s important to choose a capacity that matches your needs, but keep in mind that larger capacities typically come with a higher price point.

    Ultimately, selecting the right SSD comes down to choosing one that offers the right balance of speed and storage capacity for your needs. Whether you’re looking to upgrade your gaming rig or speed up your professional video editing workflow, taking the time to do your research and find the right SSD can make all the difference in your overall computing experience.

    Cloning HDD to SSD

    If you’re looking to upgrade your computer’s storage and speed, switching from an HDD (hard drive) to an SSD (solid-state drive) is an excellent choice. However, many people are nervous about how to go about making the switch. Fortunately, cloning your HDD to your new SSD is a relatively simple process.

    Cloning is essentially copying the entire contents of your HDD onto your new SSD, so you don’t lose any files or data. There are a few programs available that can help with this process, such as EaseUS Todo Backup or Acronis True Image. Once you’ve downloaded the software, connect your SSD to your computer and follow the prompts to start the cloning process.

    The process can take a few hours, but once it’s complete, your new SSD will have everything you had on your old HDD, but with faster speed and storage. By using this method, you can easily change your HDD to SSD and enjoy the higher performance.

    Use Cloning Software

    Cloning your HDD to SSD can be a great way to boost your computer’s performance. With cloning software, you can easily transfer all of your data from your old HDD to your new SSD without needing to reinstall any programs or start from scratch. This is especially useful if you have a lot of files and programs that you want to keep, but you also want the speed and performance benefits of an SSD.

    By simply cloning your HDD, you can enjoy faster boot times, quicker application launch times, and overall improved system responsiveness. While there are many cloning software options available, it’s important to choose one that is reliable and trusted by other users. With the right software and a little bit of patience, cloning your HDD to SSD can be an easy and effective way to upgrade your computer’s performance.

    Install SSD into Laptop or Desktop

    Installing an SSD into your laptop or desktop can greatly improve its performance. Cloning your existing HDD to your new SSD ensures that you don’t lose any data or programs during the transition. To do this, you’ll need cloning software such as Acronis True Image or EaseUS Todo Backup.

    First, connect your SSD to your computer and ensure that it is recognized by your system. Then, launch your cloning software and select the “clone” option, choosing your HDD as the source and your SSD as the destination. Ensure that all partitions on the HDD are selected and clone your data.

    Once the cloning process is complete and your SSD is bootable, restart your computer and enter your BIOS to set your SSD as the primary boot device. Voila, you’ve successfully cloned your HDD onto your new SSD, and now your computer is operating faster and smoother than ever before.

    Install Operating System on SSD

    If you’re looking to upgrade your computer’s performance, swapping out your HDD for an SSD can be one of the most effective ways to do it. Making this switch on your own is easier than you might think – with a little bit of know-how, you can install a new operating system on your shiny new SSD in no time. First, you’ll need to physically remove your old hard drive from the computer and replace it with the new SSD.

    Then, you’ll need to use a bootable USB drive to install the operating system of your choice onto the SSD. Once the installation is complete and your computer is up and running on the fresh, fast new drive, you’ll be able to enjoy noticeable improvements in performance, boot times, and more. So next time you’re wondering how to change HDD to SSD, just remember that it’s a simple process that can have a big impact on your computing experience.

    Create Bootable USB with Operating System

    Installing an operating system on SSD can be a daunting task, but it doesn’t have to be. First, you need to create a bootable USB with the operating system you want to install. The process for creating a bootable USB can vary depending on the operating system you are using, but there are plenty of tutorials available online.

    Once you have your bootable USB ready, insert it into your computer and restart. Make sure your computer is set to boot from the USB drive before your hard drive. The installation process will then begin, and you will be prompted to choose where you want to install the operating system.

    Select your SSD as the destination and follow the prompts to complete the installation. It is crucial to ensure that your SSD is properly formatted before installing the operating system, as this can affect performance. By following these steps, you can easily install an operating system on your SSD and enjoy better performance and faster boot times.

    Replace HDD with SSD and Boot from USB

    If you’re looking to give your laptop or computer a boost, upgrading from an HDD to an SSD is a great way to speed things up. But, to get the full benefits of the upgrade, you’ll also want to make sure you’re booting from a USB instead of your old HDD. To begin, you’ll need to install the operating system onto your new SSD.

    This process will take a bit longer than a standard operating system installation, but it’s worth it for the speed boost you’ll get in return. Once the OS is installed, be sure to update all drivers and activate any necessary features to ensure your computer is running at its fullest potential. From there, set your computer to boot from USB and enjoy the new, faster speeds of your upgraded computer system.

    Conclusion

    In summary, changing your HDD to an SSD is like upgrading from a bicycle to a Ferrari – it’s a significant boost in speed and efficiency. It’s worth the investment because with an SSD, you’ll experience faster application launches, boot-up times, and file transfers. You might even wonder how you functioned with an HDD for so long! So, don’t be afraid to take the leap and switch to an SSD – your computer (and your patience) will thank you!”

    FAQs

    What are the advantages of changing from an HDD to an SSD?
    There are several advantages, including faster boot and load times, improved system performance, and increased durability and reliability.

    Can I switch from an HDD to an SSD on my own?
    Yes, it is possible to switch from an HDD to an SSD on your own, but it requires specific tools and knowledge of how to remove and replace computer components.

    Will I lose my data if I switch from an HDD to an SSD?
    Yes, switching from an HDD to an SSD involves transferring all of your data from the old drive to the new one. You need to back up your data to an external storage device before making the switch.

    Do I need to buy a new operating system if I upgrade from an HDD to an SSD?
    No, you do not need to buy a new operating system if you upgrade from an HDD to an SSD. You can clone your existing system onto the new drive and use it as normal. However, it is recommended to perform a fresh installation of your operating system to ensure optimal performance.
  • Revolutionize Your Storage Game with NVMe M.2 SSD: The Lightning Fast Solution You Need!

    Have you ever experienced the frustration of waiting for your computer to start up or load a large file? Those moments of impatience seem never-ending, and it makes you wonder if you’re using the latest technology. Fortunately, the solution to this problem is called NVMe M.2 SSDs, the game-changer in computer storage.

    These solid-state drives utilize the latest technology to accelerate the speed of data transfer, delivering unrivaled speed and reliability compared to traditional hard disk drives (HDDs) and even SATA SSDs. Think of it this way; if traditional storage devices were bicycles, then the NVMe M.2 SSD would be a sports car.

    It’s that much difference in speed. These drives use the Non-Volatile Memory Express (NVMe) interface, which boosts the data transfer rates of M.2 SSDs to lightning-fast levels, making them perfect for intensive workloads that require the highest I/O (input/output) performance.

    Tasks like rendering videos, heavy gaming, and database processing become significantly faster and smoother with NVMe M.2 SSDs. What sets NVMe M.

    2 SSDs apart is their compact size and high durability. Measuring just a few centimeters, these drives can easily fit into laptops, Ultrabooks and small form factor PCs. They also consume less power, generate less heat, and are more reliable than traditional HDDs and SATA SSDs.

    The differences are noticeable and make a huge difference when it comes to everyday use. In conclusion, NVMe M.2 SSDs are the way to go if you want lightning-fast data transfer speeds, smooth computing, and reliability.

    What is an NVMe M.2 SSD?

    An NVMe M.2 SSD is a solid-state drive that uses Non-Volatile Memory Express (NVMe) protocol and is designed to fit into M.2 slots on motherboards and laptops.

    These SSD drives are faster, smaller, and use less power than traditional SATA SSDs, making them an excellent option for gaming enthusiasts and high-performance workstations. The NVMe protocol allows the SSD to communicate with the CPU more efficiently, reducing latency and increasing the SSD’s throughput. The M.

    2 form factor also allows for easy installation, as it does not require cables or mounting brackets. Overall, an NVMe M.2 SSD is a great choice for anyone looking to improve their system’s overall speed and performance, especially if they want to optimize their gaming experience.

    Understanding the Technology

    An NVMe M.2 SSD is a type of solid-state drive that uses the Non-Volatile Memory Express (NVMe) interface and the M.2 form factor.

    This technology improves the speed and performance of traditional SSDs, making it a popular choice for gamers, content creators, and professionals who demand fast and efficient storage. An NVMe M.2 SSD can typically achieve sequential read and write speeds of up to 3,500 MB/s and 3,300 MB/s, respectively, which is several times faster than a traditional hard disk drive or even a SATA-based SSD.

    With its compact size and high speed, an NVMe M.2 SSD is a great choice for those who want to improve their computer’s speed and boot time or for those who need to transfer large files quickly. So if you want to elevate your computing experience to the next level, consider upgrading to an NVMe M.

    2 SSD.

    nvme m.2 ssd

    Key Benefits and Advantages

    NVMe M.2 SSD is a modern piece of computer hardware that packs plenty of punch. It is an advanced type of solid-state drive that uses Non-Volatile Memory Express (NVMe) interface to communicate with the computer.

    This enables faster read and write speeds, making your computer perform tasks much quicker than before. With the M.2 format, it is smaller, sleeker, and more efficient, making it perfect for laptops, Ultrabooks, and other compact devices.

    NVMe M.2 SSDs also have significant benefits like quicker boot times, faster file transfers, and better reliability than traditional hard drives, as they don’t have any moving parts that could break down over time. If you’re a gamer or creative professional, an NVMe M.

    2 SSD can also dramatically reduce load times, allowing you to get back to what you love doing faster. With all these advantages, it’s hard to deny that investing in an NVMe M.2 SSD is the way to go for those looking to take their computer’s performance to the next level.

    Choosing the Best NVMe M.2 SSD for Your Needs

    When it comes to choosing an NVMe M.2 SSD, it’s important to consider your needs and budget. NVMe M.

    2 SSDs offer faster read and write speeds compared to traditional SATA SSDs. Depending on your usage, you may need a higher capacity for storage space or prioritize speed for faster load times and boot-ups. Look for options with a high sequential read and write speed, as well as a high random read and write speed for improved performance.

    Additionally, ensure your motherboard is compatible with NVMe M.2 SSDs as some older models may not support this type of storage. Don’t forget to also consider the warranty and customer support provided by the manufacturer.

    Ultimately, selecting the best NVMe M.2 SSD for your needs will greatly improve the overall performance and speed of your computer.

    Considerations for Speed and Capacity

    When it comes to choosing the best NVMe M.2 SSD for your needs, there are a few important considerations to keep in mind. One of the most crucial factors is speed, as the faster the drive, the quicker your system will be able to operate.

    Look for SSDs with high read and write speeds, as well as low latency, to ensure speedy performance. Another factor to consider is capacity – how much storage space do you need? Think about your usage habits and whether you need a lot of space for large files or if you can get by with less. Remember: a larger capacity SSD may not necessarily mean better, as there are other factors that come into play, such as price and performance.

    Ultimately, the best NVMe M.2 SSD for your needs will depend on your unique situation and usage. Take the time to research and compare options to find the perfect fit for you!

    Top Brands and Models to Look Out For

    When it comes to choosing the best NVMe M.2 SSD, there are a few top brands and models that stand out from the rest. One popular brand is Samsung, known for their high-quality SSDs with fast read and write speeds.

    Their 970 EVO Plus and 970 PRO models are both excellent options for gamers, content creators, and professionals who need speedy performance. Another top brand is Western Digital, with their WD Blue SN550 and SN850 models offering impressive speeds and reliable performance. Other notable options include the Kingston A2000 and the Corsair MP600, both favored by tech enthusiasts for their impressive burst speeds and advanced features.

    Ultimately, the best NVMe M.2 SSD for your needs will depend on your specific use case and budget. Consider factors like storage capacity, durability, and compatibility with your system before making your purchase.

    With so many great options on the market, you’re sure to find the perfect SSD to suit your needs and take your computer’s performance to the next level.

    How to Install Your NVMe M.2 SSD

    When it comes to choosing an NVMe M.2 SSD, there are a few factors to consider based on your needs. First and foremost, you’ll want to identify the type of work you’ll be doing and the level of performance you require.

    If you’re a gamer or video editor, you’ll be looking for fast read and write speeds. If you’re a casual user, a smaller drive with moderate performance should suffice. Capacity is also a crucial factor, as you’ll want to have enough storage space for your files and applications.

    Once you’ve identified your needs, it’s time to compare different brands and models and find the best option for you. Investing in a high-quality NVMe M.2 SSD will enhance your system’s performance and give you lightning-fast data transfer speeds.

    Maximizing the Performance of Your NVMe M.2 SSD

    An NVMe M.2 SSD is an excellent choice for those who want to maximize their computer’s performance. To improve its speed, you can follow several steps.

    Firstly, ensure that your NVMe M.2 SSD is running on the latest firmware. Firmware upgrades often solve software issues and bugs, improving the drive’s performance.

    Secondly, use a reliable benchmarking tool to test the SSD’s speed and check if it’s performing as expected. Thirdly, disable any unwanted or unneeded services in your operating system. This can improve your SSD’s read and write speeds.

    You can also ensure that your NVMe M.2 SSD is getting sufficient cooling, as overheating can cause performance degradation. Lastly, ensure that you have sufficient free space on your SSD, as keeping it near capacity can lower its performance.

    By following these steps, you can optimize your NVMe M.2 SSD’s performance, providing you with a seamless experience while using your computer.

    Optimizing Your Operating System and Applications

    One of the best ways to maximize the performance of your NVMe M.2 SSD is by optimizing your operating system and applications. This involves a few simple steps that can make a significant difference in the speed and efficiency of your system.

    First, make sure that you have the latest software updates for your operating system and applications. These updates often include bug fixes and performance enhancements that can improve the overall performance of your system. Additionally, consider disabling any unnecessary programs and services that may be running in the background, as these can take up valuable system resources and slow down your computer.

    Finally, consider using optimization software, such as CCleaner or Advanced SystemCare, to clean up your system and optimize its performance. By following these steps, you can ensure that your NVMe M.2 SSD is working at its full potential and that you are getting the most out of your system.

    Tips for Maintenance and Longevity

    If you want to maximize the performance of your NVMe M.2 SSD, there are a few tips and tricks to keep in mind. First and foremost, make sure that you keep your drive free of any unnecessary files or programs.

    This will not only increase your storage capacity but also help improve the overall speed and responsiveness of your device. Regularly defragmenting your SSD can also help enhance its performance by optimizing data storage on the drive. Additionally, keeping your SSD’s firmware and drivers up to date is crucial to ensuring maximum performance and longevity.

    Finally, be cautious when it comes to your SSD’s temperature and avoid exposing it to excessive heat or cold conditions. By following these tips, you can help your NVMe M.2 SSD stay in tip-top shape for years to come.

    Upgrade Your System Today with NVMe M.2 SSDs

    Upgrading your system with an NVMe M.2 SSD is an excellent way to boost your computer’s performance. These high-speed storage solutions offer faster boot times, quicker application launches, and improved overall responsiveness.

    Unlike traditional hard drives, NVMe M.2 SSDs use flash memory to store data, resulting in significantly faster read and write speeds. Many NVMe M.

    2 SSDs also offer larger storage capacities, making them ideal for storing large files and programs. Plus, they’re incredibly easy to install, typically requiring only a single screwdriver. If you’re looking to improve your computer’s speed and performance, an NVMe M.

    2 SSD is an upgrade worth considering. So why wait? Upgrade your system today and experience the benefits of NVMe M.2 SSDs!

    Conclusion

    In conclusion, the NVMe M.2 SSD is truly a game-changer in the world of storage. With lightning-fast speeds, compact designs, and impressive performance, this solid-state drive is a must-have for anyone who wants top-notch storage capabilities.

    It’s like having a Ferrari in your computer – sleek, fast, and incredibly powerful. So, whether you’re a gamer, a content creator, or a regular user, don’t hesitate to upgrade to the NVMe M.2 SSD.

    Your computer (and your productivity) will thank you for it!”

    FAQs

    What is an NVMe M.2 SSD?
    An NVMe M.2 SSD is a type of high-speed solid-state drive that utilizes the Non-Volatile Memory Express (NVMe) protocol and has a small form factor called M.2. It provides faster data transfer rates, lower latency, and improved performance, especially for demanding workloads like gaming, video editing, and virtual reality.

    What are the benefits of using an NVMe M.2 SSD?
    Some of the benefits of using an NVMe M.2 SSD are faster boot and load times, smoother and more responsive system performance, higher throughput, lower power consumption, and support for more advanced features like hardware encryption and error correction.

    How do I install an NVMe M.2 SSD in my system?
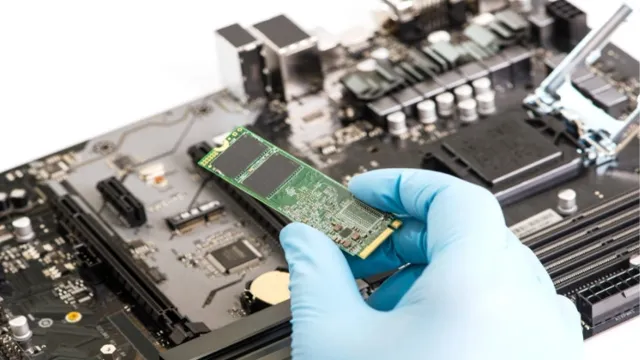
    To install an NVMe M.2 SSD, you need to check if your motherboard supports it, locate the M.2 slot, remove the protective cover, insert the SSD carefully, secure it with a screw, and connect the thermal pad (if available). You may also need to configure the BIOS settings and install the appropriate drivers or firmware.

    Can I use an NVMe M.2 SSD as a boot drive?
    Yes, you can use an NVMe M.2 SSD as a boot drive, but you need to make sure that your motherboard and operating system support it. You also need to check if your BIOS is set to boot from the NVMe drive, and if necessary, clone your existing system or install a fresh copy of the OS on the SSD.

  • Upgrade Your Windows 10 PC: A Step-by-Step Guide on How to Switch from HDD to SSD

    Are you tired of your old and sluggish hard drive? Do you wish to switch to a faster and more reliable solid-state drive (SSD) in your Windows 10 PC? Well, fret not, because we’ve got you covered! In this blog post, we will walk you through the step-by-step process of replacing your old HDD with a brand new SSD in your Windows 10 computer. Upgrading your hard drive to an SSD is one of the best ways to give your PC a new lease of life. SSDs offer lightning-fast boot and load times and improve overall system performance.

    However, the process of switching from an HDD to an SSD may seem daunting, especially if you’re not a tech-savvy user. But fear not, as we’ll be breaking down the process into simple steps that anyone can follow. You don’t need to be an expert or have any technical knowledge to carry out this upgrade.

    In fact, it’s as easy as swapping out the old drive and replacing it with a new one. Think of it as upgrading from a bicycle to a sports car. Your old HDD is like a bicycle that can only go so fast and handle so much weight.

    On the other hand, an SSD is like a sports car that can go faster, handle more weight and faster in speed. Upgrading your old HDD to an SSD will give you faster and better experience when using your computer system. So, sit back, relax and get ready to learn how to switch from an HDD to an SSD in windows

    By the end of this post, you will have all the information you need to carry out this upgrade and enjoy the benefits of a faster and more reliable computer system.

    Why Upgrade to an SSD?

    If you’re looking to get a performance boost on your Windows 10 device, upgrading to an SSD can be a game-changer. The process of switching from an HDD to an SSD on Windows 10 is not as complicated as it may seem. You can start by cloning your existing drive or performing a clean install of Windows 10 on the new SSD.

    Cloning ensures that your files, applications, and settings are transferred over to the new drive. However, a clean install can give you a fresh start and eliminate any potential issues or conflicts. Overall, the benefits of upgrading to an SSD are extensive, including faster boot times, improved load times for applications, and overall improved system responsiveness.

    It’s a worthwhile investment that will make your computing experience a lot more enjoyable.

    Faster Performance and Response Times

    Solid State Drives or SSDs are the go-to option for anyone looking to upgrade the performance of their computer. With faster speeds, lesser boot times and quicker response times, SSDs have become extremely popular in recent times. Unlike Hard Disk Drives (HDDs), SSDs have no physical moving parts that can slow down the data transfer and access speeds.

    The data is stored digitally, and SSDs work by accessing these digital blocks of data instantly. Hence, the data transfer and access speeds are several times faster than that of traditional HDDs. Furthermore, SSDs also consume lesser power, generate lesser heat and noise, and are more durable than HDDs.

    Overall, upgrading to an SSD can provide a noticeable boost in performance to your computer, making it an investment worth considering for anyone who needs a faster machine.

    how do i switch hdd to ssd windows 10

    Increased Reliability and Durability

    Upgrading to an SSD can significantly increase the reliability and durability of your computer. SSDs have no moving parts, unlike traditional hard disk drives, making them less prone to physical damage and failure. They are also less susceptible to data corruption caused by power outages, which means your data is safer.

    Additionally, SSDs have a much faster read and write speed, which means your computer will run faster and smoother overall. By upgrading to an SSD, you can improve the performance of your computer and extend its lifespan, making it a worthwhile investment for any computer user. So, why not give your computer a much-needed boost and upgrade to an SSD today?

    Less Power Consumption and Longer Battery Life

    If you’re looking to upgrade your computer’s hard drive, an SSD is a great option for a number of reasons. One of the biggest advantages of SSDs is their lower power consumption. Because they have no moving parts, SSDs require less power than a traditional hard drive.

    This means that not only are SSDs more environmentally friendly, but they can also help you save money on your monthly energy bill. Additionally, SSDs typically have a longer lifespan than traditional hard drives, which means that your laptop battery will last longer between charges. So if you’re tired of constantly having to plug in your laptop to charge, upgrading to an SSD could give you the longer battery life you’ve been looking for.

    Overall, the benefits of upgrading to an SSD are clear: less power consumption, longer battery life, and a more efficient system overall. So why not make the switch today?

    Choosing the Right SSD

    If you’re looking to switch from a traditional hard drive to a solid-state drive (SSD) on a Windows 10 computer, there are a few steps you’ll need to take to ensure the process runs smoothly. First, you’ll need to choose the right SSD for your needs. Consider factors like capacity, speed, and price when shopping around.

    Once you have your new SSD, you’ll need to back up all your data from your old hard drive and transfer it over to your new drive. You can do this using a cloning tool or by manually copying over your files. Before installing your new SSD, make sure your computer is turned off and unplugged.

    Then, open up your computer’s case and locate the hard drive bay. Remove your old hard drive and install your new SSD. Finally, you’ll need to configure your computer’s BIOS settings to recognize your new drive, and then you should be good to go! By following these steps, you can enjoy faster boot times, shorter load times, and increased overall performance on your Windows 10 computer with your new SSD.

    Consider Capacity and Form Factor

    When it comes to choosing the right SSD, there are a few factors you need to consider. First and foremost, you need to think about capacity and form factor. Capacity refers to the amount of data you can store on the drive, whereas form factor refers to the physical size and shape of the drive.

    You’ll want to choose a capacity that meets your needs – if you plan on storing a lot of large files, such as videos or high-resolution images, you’ll probably want a larger capacity drive. Additionally, you’ll need to consider the form factor of your drive to ensure that it will fit in your device. SSDs come in a variety of form factors, including M.

    2, 5-inch, and PCIe. Each form factor has its own benefits and drawbacks, so it’s important to choose the right one for your needs.

    By taking these factors into consideration, you can choose an SSD that meets your needs and helps you get the most out of your device.

    Look for High Read/Write Speeds

    Choosing the right SSD can be a daunting task, considering the numerous options available. One crucial factor to consider is the read/write speed of the SSD. High read/write speeds ensure that the drive can quickly access and transfer data, which is essential in improving the overall performance of your computer.

    Therefore, when selecting an SSD, look for models with faster speeds, such as NVMe SSDs. NVMe SSDs are the latest models in the market, and they offer remarkable speeds, making them an excellent option for both gamers and professionals who require high data transfer rates. So, when you’re deciding on which SSD to purchase, ensure that you opt for models with high read and write speeds, such as the NVMe models, to enhance your computer’s overall performance.

    Select a Reputable Brand

    When it comes to selecting a reputable brand for your SSD, there are a few key factors to keep in mind. First and foremost, you want to choose a brand that has a proven track record of reliability and quality. After all, an SSD is a long-term investment, and you want to make sure you’re choosing a product that is going to perform well over time.

    Some key players in the SSD market include Samsung, Kingston, and Crucial, all of which have strong reputations and a loyal customer base. It’s also important to consider factors such as capacity, speed, and compatibility with your existing hardware. Ultimately, the right SSD for you will depend on your individual needs and preferences, but by starting with a reputable brand, you can feel confident that you’re making a wise investment in your computer’s performance.

    Preparing for Installation

    If you’re looking to upgrade your computer’s hard drive by switching your HDD to SSD on Windows 10, there are a few steps to take before installation. Firstly, it’s important to determine what type of SSD is compatible with your computer and ensure that you have the necessary installation tools, such as a screwdriver and SATA cable. Next, you’ll need to back up all of your important files and data to an external source, such as a USB drive or cloud storage.

    Once you’ve done this, you can proceed with physically installing the SSD into your computer by opening up the case, locating the hard drive bay, and mounting the SSD into place. Before turning your computer back on, you’ll need to change the boot order in your BIOS settings so that the computer boots from the new SSD instead of the old HDD. Finally, you can reinstall Windows 10 onto your new SSD and transfer your backed-up files back onto your computer.

    With a little know-how and preparation, switching your HDD to SSD can significantly improve your computer’s speed and performance.

    Backup Your Data

    Backing up your data is an integral part of any software installation process. Before you begin installing new software, it’s crucial to save copies of all your essential files, documents, and data to avoid losing critical information in case something goes wrong. You never know when a power outage, system crash, or unexpected error might occur, which can result in the loss of all your data.

    That’s why it’s always better to be safe than sorry and make a habit of backing up your data on a regular basis. Think of it as insurance to protect your files from unforeseen disasters. With a reliable backup system in place, you can rest assured that even if the installation fails, you can still have access to all your important data.

    So, always make sure to back up your data before installing any software on your computer, and you’ll have peace of mind that your files are safe and secure.

    Gather Necessary Tools and Materials

    When it comes to installing anything, gathering the necessary tools and materials is a must. For any installation project, it is important to have a solid plan in place before diving in. This means taking inventory of the tools and materials needed and making sure you have everything on hand.

    There’s nothing more frustrating than getting halfway through a project only to realize you don’t have a required tool or material. Not only can this slow down the installation process, but it can also lead to mistakes or even safety hazards. So take the time to plan ahead and make a list of everything you need.

    Double check it before starting your installation to avoid any surprises. Once you have everything in hand, you’ll be one step closer to a successful installation.

    Create a Windows 10 Installation Media

    Preparing a Windows 10 installation media is an important step before upgrading or reinstalling your operating system. This media will serve as a bootable device where you can install the Windows 10 operating system. It is essential to download and install the Media Creation tool from the Microsoft website, which will help you create a bootable USB drive or a DVD.

    Once you have the Media Creation tool installed, you need to select the language, architecture, and edition of the operating system you want to install. The tool will then create an ISO file, which can be burned to a DVD or copied to a USB flash drive. This process may take some time, depending on the speed of your internet connection and the size of the ISO file.

    By preparing a Windows 10 installation media beforehand, you can ensure that the installation process goes smoothly, and you have all the necessary files at your disposal.

    Installation Process

    Switching from an HDD to an SSD on your Windows 10 device can significantly improve its performance, allowing for faster boot times and application launch speeds. Before installing your new SSD, make sure to back up all your files and data, as cloning your old drive onto the new one can cause issues. You will also need to purchase a mounting bracket or adapter to fit the SSD into your device properly.

    Once you have removed the old HDD and inserted the SSD, you will need to install Windows 10 on the new drive. To do this, you can use either a Windows installation disk or a USB drive with the Windows 10 operating system installed on it. Boot your device from the drive and follow the on-screen prompts to complete the installation process.

    Once finished, make sure to update your drivers to ensure optimal performance and enable TRIM support for your SSD to maintain its lifespan. Overall, switching from an HDD to an SSD on your Windows 10 device is a worthwhile investment for increased speed and performance.

    Remove Old HDD and Install SSD

    When it comes to upgrading your computer’s performance, switching out your old hard disk drive (HDD) for a solid-state drive (SSD) can make a world of difference. Not only will you enjoy faster boot-up and load times, but you’ll also have more storage space and greater durability. Before you begin, make sure to back up all your important data and create a recovery disk.

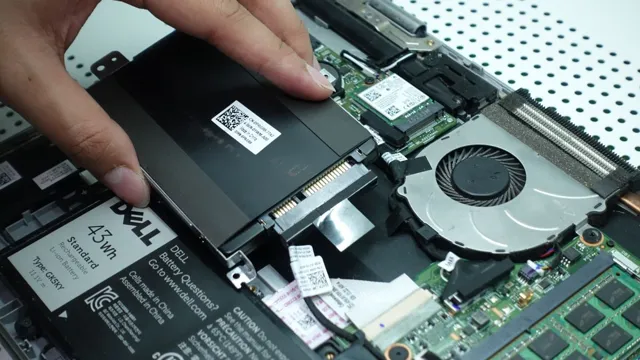
    To remove your old HDD, you’ll need to open up your computer and locate the drive. Depending on your computer case and design, this may involve unscrewing and removing panels. Once you’ve removed the HDD, install your new SSD in its place.

    You may need to use an adapter or mounting bracket, which you can purchase separately if needed. Once your SSD is securely in place, connect the necessary cables and screws. Finally, reinstall your operating system and other software onto your new SSD and enjoy the improved speed and efficiency of your computer.

    Don’t forget to securely dispose of your old HDD to protect your personal information and the environment.

    Boot from Installation Media and Install Windows 10

    Once you have your installation media ready, it is time to begin the installation process for Windows Insert the installation media into your computer’s disk drive and restart your system. Make sure to set your boot device priority settings in the BIOS to prioritize your installation media.

    Once your computer has booted from the installation media, you will see the Windows 10 setup interface. Follow the on-screen prompts and select your language and preferences. You will then be asked to enter your product key or select the option to activate later.

    Next, you will be prompted to select your installation type, such as a clean install or an upgrade. Choose your preferred type and select the hard drive partition on which to install Windows. Remember to backup any important data before formatting your hard drive.

    Finally, wait for the installation to complete and enter your account information when prompted. Congratulations, you have successfully installed Windows 10!

    Update Drivers and Transfer Data

    When it comes to setting up a new device, one of the essential steps to take is updating your drivers and transferring any necessary data. Updating your drivers ensures that your device is operating at its full potential and fixing any bugs or issues that may arise. Transferring data such as documents, photos, and music can preserve the files you’ve previously saved.

    Both processes are easy to do but may require some time to complete. Think of drivers and data as the gears and fuel to your vehicle, both necessary to make it run smoothly. Without them, your device would be unable to function correctly, which is why it’s important to prioritize these steps when setting up your new device or performing maintenance on an older one.

    Conclusion – Enjoy Your New SSD!

    In conclusion, making the switch from an HDD to an SSD on your Windows 10 machine is like upgrading from a horse and carriage to a sports car. It’s a game-changer in terms of speed and performance. Whether you’re a gamer, designer or casual user, the benefits are undeniable.

    So don’t be afraid to take the plunge, grab an SSD and bid farewell to those slow load times and frustrating freezes. You’ll wonder how you ever managed without it!”

    FAQs

    Can I switch my HDD to SSD on Windows 10 without losing my data?
    Yes, you can clone your HDD to SSD using software like Clonezilla or EaseUS Todo Backup. This will transfer all your data and applications from your HDD to SSD without any loss.

    Do I need to reinstall Windows 10 after switching from HDD to SSD?
    It is not required to reinstall Windows 10 after switching from HDD to SSD if you clone your HDD to SSD as mentioned in the earlier answer. However, it is recommended to perform a fresh installation of Windows 10 on your newly installed SSD to ensure optimal performance.
    How do I physically replace my HDD with SSD on Windows 10?
    To physically replace your HDD with an SSD, you need to first shut down your laptop or desktop computer, unplug the power cord, remove the battery (if it is a laptop), and open the case/matting. Locate your HDD, remove it, and replace it with SSD. Remember to screw the SSD securely in place and reconnect everything before turning on the computer.

    Will switching to an SSD on Windows 10 make my computer faster?
    Yes, switching to an SSD on Windows 10 will significantly increase the speed of your computer. SSDs are faster, more reliable, and have less latency than traditional HDDs. This results in faster boot times, faster application launch times, and overall smoother system performance.

    What are the advantages of switching to an SSD on Windows 10?
    Switching to an SSD on Windows 10 has various advantages, including faster boot and load times, overall faster system performance, improved battery life (for laptops), less noise due to the absence of moving parts, and improved durability and reliability.

  • Discover the Top-Rated Thermal Pads: Your Ultimate Guide to Finding the Best Buy!

    If you’re building a high-performance PC, you know that every component matters. From the processor to the graphics card, everything needs to be top-notch if you want the best performance possible. One thing that often gets overlooked, however, is the thermal pads.

    These little pieces of material help transfer heat away from your system’s components, preventing them from overheating and causing damage. But with so many options on the market, which ones are the best for high performance? In this article, we’re going to take a close look at some of the best thermal pads available today. We’ll examine their features, benefits, and drawbacks, so you can make an informed decision when it comes time to purchase.

    Whether you’re a serious gamer or a content creator who needs the best hardware available, these thermal pads will help ensure your system stays cool and runs smoothly. So, let’s dive in and see what options are out there!

    Top Buying Options

    Looking for the best thermal pad to buy can be overwhelming, especially with so many options available in the market. However, don’t fret, as we’ve got your back! One of the top buying options for thermal pads is the Arctic Silver 5 Thermal Compound. Its high-density thermal conductivity ensures maximum heat transfer and allows the heat sink and fan to work together in keeping your device cool.

    Another great option is the Cooler Master MasterGel Maker. With its non-curing and non-electrical conductive properties, it’s one of the most reliable thermal pads in the market. Lastly, the Thermal Grizzly Kryonaut Thermal Grease is another worthy contender.

    It’s compatible with a wide range of processors and has an exceptional temperature reduction performance. Remember to consider your device’s specific requirements and compatibility when selecting your thermal pad, and you’ll be sure to find the best one to suit your needs.

    1. Arctic Silver 5 High-Density Thermal Pad

    If you’re in the market for a top-quality thermal pad, the Arctic Silver 5 High-Density Thermal Pad is an excellent option. This thermal pad features a high-density design that allows it to provide superior thermal conductivity, making it an ideal choice for anyone looking to keep their system cool under heavy loads or overclocking. One of the great things about this pad is that it’s easy to apply, so even if you’re a novice when it comes to PC building, installing it should be a breeze.

    Additionally, the Arctic Silver 5 High-Density Thermal Pad is compatible with a variety of CPU and GPU models, so whether you’re looking to upgrade your gaming rig or need a thermal pad for a work computer, it’s a versatile choice. When it comes to thermal pads, the Arctic Silver 5 High-Density Thermal Pad is one of the top options on the market today.

    thermal pad best buy

    2. Noctua NT-H2 Thermal Compound

    When it comes to thermal compounds, the Noctua NT-H2 is an excellent choice for those looking for a high-quality, long-lasting solution. This thermal paste is easy to apply, thanks to its smooth consistency, and it works well for both CPU and GPU applications. Its impressive heat transfer capacity helps to keep temperatures low, thus boosting performance.

    The Noctua NT-H2 is also non-conductive, making it safe to use with sensitive components. Moreover, it is easy to clean and remove, making reapplication a breeze. If you’re in the market for a reliable and efficient thermal compound, the Noctua NT-H2 is definitely worth considering.

    With this thermal paste, you can rest assured that your PC components will be in good hands and running at optimal temperatures.

    3. Thermal Grizzly Kryonaut Thermal Grease Paste

    When it comes to thermal grease paste, Thermal Grizzly Kryonaut is an excellent choice for anyone looking for a top-of-the-line product. Not only is it known for its high thermal conductivity, but it also has a long-lasting and durable formula that can withstand high temperatures for extended periods. Trying to find the best buying options can be overwhelming, but some top choices include Amazon, Newegg, and Micro Center.

    Each of these retailers offers competitive pricing and fast shipping, ensuring you receive your Kryonaut thermal paste as quickly and cost-effectively as possible. With the Thermal Grizzly Kryonaut, you can rest assured that your computer’s thermal management system is well taken care of. So, whether you’re a gamer or a professional who needs reliable and efficient thermal paste, trust Kryonaut, and you won’t be disappointed!

    How Do Thermal Pads Work?

    Looking for the best thermal pad is essential for high-performance computer rigs or gaming laptops to extend their lifespan. But have you ever wondered how thermal pads work? It’s a fact that processors generate heat while running, and when the temperature exceeds a certain level, it can damage the hardware. That’s where thermal pads come in handy.

    These pads are made of silicone or polymer materials that conduct heat and are designed to absorb heat from the processor chips and transfer it to the heatsinks. This transfer ensures that the heat is distributed evenly, keeping the processor temperature at an optimal level to prevent hardware damage. It’s important to note that not all thermal pads are created equal, and choosing the right one for your hardware is crucial.

    So, investing in the best thermal pad to match the specs of your hardware can save you money by prolonging its lifespan and preventing any processor damage.

    1. Conductivity and Dissipation

    Thermal pads are an essential component in any high-performance computing setup. These pads work by providing a conductive bridge between two components to diffuse the heat produced. Conductivity and dissipation are the two main ways in which thermal pads work.

    Conductivity refers to a pad’s ability to conduct heat, and dissipation refers to the process of releasing that heat into the environment. Thermal pads are made of different materials such as silicon, graphite, or ceramic fibers that have a high thermal conductivity. The material allows for the heat to be conducted across the pad and dissipate through the other side of the pad into the environment.

    Thermal pads were designed to provide better heat transfer than traditional thermal pastes. Unlike pastes, thermal pads produce less mess, are easy to handle and apply, and do not require replacement as often as thermal paste. Ultimately, thermal pads serve as useful tools in maintaining stable and optimal temperatures in your personal computer or other electronic devices.

    2. Size and Thickness

    When it comes to thermal pads, size and thickness are important factors to consider in how they work. Essentially, thermal pads work by transferring heat away from components to a heatsink or other cooling solution. The thicker and larger the thermal pad, the more heat it can absorb and transfer.

    However, it’s important to note that using a thermal pad that’s too thick can actually hinder its effectiveness by creating gaps between components and the heatsink. It’s important to choose a thermal pad that’s the appropriate size and thickness for the application to ensure optimal heat transfer. In other words, the key to getting the job done right is finding the sweet spot between thickness and size.

    3. Application and Installation

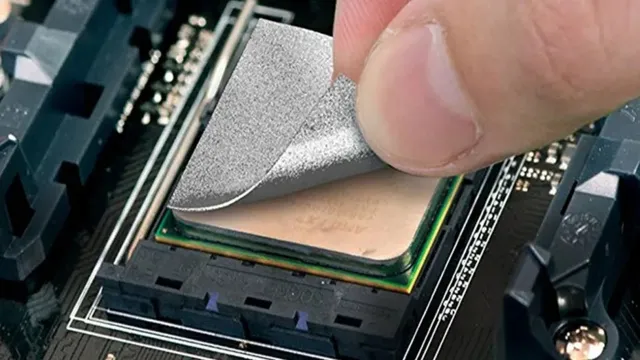
    Thermal pads are an essential component in computer building, ensuring efficient heat dissipation and preventing components from overheating. But how exactly do they work? Thermal pads are made from non-conductive materials such as silicone or ceramic, designed to transfer heat from the component to the heat sink. They work by filling any gaps between the component and the heat sink, reducing air pockets that can trap heat and degrade performance.

    When the computer is switched on, the heat generated from the component is absorbed by the thermal pad and transferred to the heat sink, where it can then be dissipated through convection or radiation. This process helps to keep the component cool, reducing the risk of damage or failure. Installing thermal pads is a straightforward and hassle-free process; simply place the pad between the component and heat sink, ensuring it is aligned correctly, and then tighten the screws.

    Overall, thermal pads play a crucial role in maintaining the longevity and reliability of your computer, so it’s essential to choose the right one for your needs.

    Why Do You Need a Thermal Pad?

    If you’re looking for the best thermal pad to keep your computer’s hardware cool, then you’ve come to the right place. A thermal pad is a simple yet effective solution for reducing heat buildup in your computer. It’s a thin layer of thermally conductive material that sits between your computer’s components and heatsinks, helping to transfer heat away from them and dissipate it into the air.

    The benefits of using a thermal pad are clear: it can help prolong the lifespan of your hardware by preventing overheating, improve performance by reducing thermal throttling, and reduce fan noise by allowing your cooling system to work more efficiently. When it comes to choosing the best thermal pad for your needs, factors like thickness, size, and thermal conductivity are important to consider. You can find a thermal pad that fits your specific needs on the market, with top brands like Arctic Silver, Cooler Master, and Thermal Grizzly offering great products that deliver excellent results.

    So, if you’re looking for a thermal pad best buy, start by understanding your needs and choosing a reputable brand that fits your budget.

    1. Increased Cooling Performance

    If you’re looking to increase the cooling performance of your computer, then you may be asking yourself, “Why do you need a thermal pad?” Well, a thermal pad is an essential component for those who want to dissipate heat more effectively within their system. Thermal pads are made from highly conductive materials that transfer heat away from components such as graphic cards, CPUs, and heat sinks. When applied correctly, a thermal pad can reduce the temperature of your system, increasing its efficiency, lifespan, and performance.

    Additionally, using a thermal pad can prevent thermal throttling, which can cause your computer to slow down or crash due to high temperatures. So, if you’re a gamer, content creator, or just someone who wants a better-cooled computer, adding a thermal pad to your setup is a must.

    2. Improved System Stability

    Thermal Pad If you’re looking to improve the stability of your system, you might want to consider a thermal pad. A thermal pad is a small piece of material that helps to transfer heat away from your components and into the heatsink. This not only helps to keep your system running cooler, but it also helps to prolong the life of your components by reducing the risk of overheating.

    So why do you need a thermal pad? Well, the simple answer is that it can help to improve the overall performance and lifespan of your system. When your components run hot for extended periods of time, it can cause damage and reduce their ability to operate at peak efficiency. A thermal pad helps to mitigate this risk by effectively dissipating heat away from your components.

    Plus, thermal pads are incredibly easy to install. You simply place them between your component and the heatsink and they’re ready to go. They also don’t require any maintenance or additional installation steps, so you can set it and forget it.

    In the end, a thermal pad might just be the key to unlocking the full potential of your system. By keeping your components running cool and reducing the risk of damage, you’ll be able to enjoy improved stability and performance for years to come.

    Conclusion: Invest in the Best Thermal Pad for Your System

    In the world of computer components, one could say that thermal pads are the unsung heroes. They may not be the flashiest or most exciting purchase, but they have a crucial job to do in keeping your system cool and running smoothly. When searching for the best thermal pad, look no further than your friendly neighborhood Best Buy.

    With a variety of options and expert advice at your fingertips, it’s the best place to find the perfect match for your system and ensure that your computer stays cool under pressure. So, don’t overlook the importance of a good thermal pad – it may just be the key ingredient in unlocking your computer’s full potential.”

    FAQs

    What are thermal pads used for?
    Thermal pads are used to provide a heat conducting interface between a heat source (such as a CPU or GPU) and a heatsink. They help to transfer heat away from the source and dissipate it more effectively.

    How do I choose the right thermal pad for my system?
    There are several factors to consider when choosing a thermal pad, including thermal conductivity, thickness, and material type. It is best to consult with a professional or do research to determine which pad is most appropriate for your specific system.

    Can thermal pads be reused?
    In general, thermal pads are not reusable. Once they have been compressed and formed to a specific shape, they may not be as effective if reused. It is recommended to replace thermal pads with each system maintenance or upgrade.

    What is the best brand of thermal pads to buy?
    There are several high-quality brands of thermal pads, including Arctic, Cooler Master, and Thermal Grizzly. It is important to research and compare brands to find the one that best meets your needs and budget. Factors to consider include thermal conductivity, durability, and price.

  • Upgrade Your Storage Game with the Best SSD Cases – Our Top Picks

    If you’re using a solid-state drive (SSD) to store your valuable data, then you probably already know how fast and efficient they can be. However, many people forget that SSDs are also delicate and susceptible to damage if not handled with care. That’s why protecting your SSD with a high-quality case is so important.

    Think of it this way: would you go out in the rain without an umbrella or sit in the sun without sunscreen? Of course not. Just like you protect yourself from the elements, you should also take steps to safeguard your SSD from scratches, dings, and other potential hazards. Investing in a good SSD case doesn’t have to be expensive, but it can save you a lot of headaches and heartaches in the long run.

    Not only will it protect your data, but it will also make transporting your drive more convenient and secure. Plus, a good case can be a stylish accessory that complements your personal aesthetic. So if you haven’t already, consider purchasing a high-quality case for your SSD.

    It’s a small step that can make a big difference in the longevity and reliability of your valuable data.

    Why You Need an SSD Case

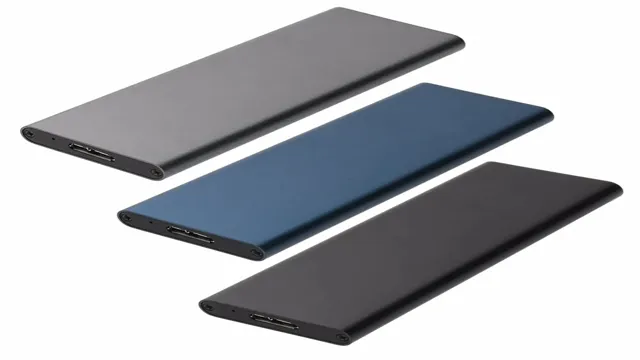
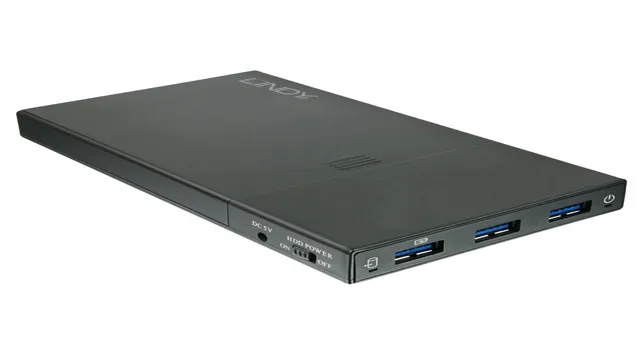
    If you have upgraded your computer’s storage system and installed an SSD, then you need an SSD case to protect it. An SSD case not only offers protection but also helps enhance the life of your SSD. An SSD (solid-state drive) case usually has a compact design that allows easy portability and protection when you’re not using your SSD.

    It protects against damage and potential disconnection from your computer. Additionally, an SSD case also helps prevent your SSD from overheating. An SSD case with cooling vents ensures proper airflow around your drive, preventing it from getting too hot and causing it to malfunction.

    Therefore, investing in an SSD case is worth it to ensure protection and longevity for your SSD. So, take your time to choose the right SSD case for your drive and enjoy the peace of mind knowing that your valuable data is safe.

    Prevent Damage from Impact

    An SSD case is a must-have for anyone who wants to prevent damage from impact. These innovative cases are designed specifically for solid-state drives, offering excellent protection against drops, bumps, and other forms of impact that can damage your valuable data. They feature a shock-absorbing design that helps to distribute the force of impact, reducing the risk of damage to your drive.

    In addition, SSD cases are made from lightweight yet durable materials, making them easy to carry around and providing long-lasting protection for your sensitive data. Don’t wait until it’s too late – invest in an SSD case today and protect your valuable information from physical damage!

    ssd case

    Shield Against Dust and Debris

    If you want your SSD to be protected from dust and debris, you need an SSD case. It’s an essential shield for your precious device that not only helps to keep it clean but also reduces the risk of damage caused by dirt and other particles. An SSD case is typically made of hard plastic or aluminum and can come in different shapes and sizes to fit various SSD models.

    Additionally, it provides an extra layer of protection from accidental drops or impacts that can occur during transport or use. Think of the SSD case as a protective shell or armor that keeps your SSD safe from harm. So, if you’re looking to make an investment in the longevity and durability of your SSD, consider getting an SSD case.

    Your SSD will thank you for it!

    Factors to Consider When Choosing an SSD Case

    When it comes to choosing an SSD case, there are several factors to consider to ensure that your hard drive is protected and operates efficiently. Firstly, it’s important to look for compatibility. Not all SSD cases will fit every hard drive, so ensure that the case you choose is compatible with your specific SSD.

    Secondly, think about the material of the case. A durable and sturdy material, such as aluminum, will better protect your SSD from physical damage. Another factor to consider is ventilation.

    Without proper ventilation, an SSD can overheat and cause performance issues. Look for cases with ventilation holes or fans to ensure your SSD stays cool. Finally, consider the size and shape of the case.

    Depending on your needs, you may want a compact case for portability or a larger case for extra protection. By taking these factors into account, you can choose an SSD case that suits your needs best.

    Size and Compatibility

    When it comes to choosing an SSD case, there are a few important factors to consider. The first thing you need to think about is the size of the case. You want to make sure that your SSD will fit properly inside the case without any issues.

    Look for cases that have a snug fit and provide ample protection for your SSD. Another important factor to consider is compatibility. Not all cases are compatible with every type of SSD, so make sure you check the compatibility before making your purchase.

    Check to see if the case is compatible with your specific model and brand of SSD. By considering these factors, you can ensure that you choose the right case for your SSD, providing protection and compatibility for your valuable data.

    Protection Level

    When it comes to choosing an SSD case, one of the most important factors to consider is the protection level it offers. After all, the whole point of an SSD case is to protect your valuable data from damage or loss. So, what should you be looking for when evaluating the protection level of an SSD case? Firstly, consider the materials used in its construction.

    Look for SSD cases made with sturdy materials like aluminum or high-quality plastic. Secondly, check for features like shock resistance and water resistance. These can greatly enhance the protection offered by the case by reducing the risk of damage from accidental drops or spills.

    Finally, make sure the case fits your SSD snugly. A loose or ill-fitting case can lead to unwanted movement and damage to your drive. Overall, taking the time to evaluate the protection level of an SSD case can help ensure your data stays safe and secure.

    Material and Durability

    When it comes to choosing the right SSD case, there are several important factors to consider. One of the most critical is the material and durability of the case. You want to choose a case that not only protects your SSD from damage but also enhances its performance.

    Most SSD cases are made from materials such as aluminum or plastic, which provide excellent protection and durability while still being lightweight. However, it’s important to choose a case that is made from high-quality materials to ensure that it can withstand everyday use and abuse. Additionally, you should consider whether the case has any special features that help to protect your SSD from damage, such as shock-absorbing materials or ventilation ports to prevent overheating.

    By taking the time to consider these factors, you can choose an SSD case that provides optimal protection and performance for your valuable data.

    Portability and Convenience

    If you are planning to get an SSD case for your portable hard drive, there are several factors to consider. Portability and convenience are two of the most important things to think about. First, you need to choose a case that is small and light so that you can easily carry it with you.

    Second, you need to consider the convenience of the case. Does it have enough pockets or compartments to store your cables and accessories? Does it have a handle or strap for easy carrying? These are important questions to ask when choosing an SSD case. Another thing to consider is the durability of the case.

    You want to make sure that it can withstand shocks, bumps, and falls, especially if you plan to use it while you are on the go. Additionally, the case should have good ventilation and provide adequate protection against dust and moisture. By keeping all of these factors in mind, you will be able to choose the best SSD case for your needs and enjoy the portability and convenience of your portable hard drive.

    Top SSD Cases for Ultimate Protection

    When it comes to protecting your SSD, a good case is crucial. Not only does it shield your drive from damage, but it also helps keep it organized and easy to transport. There are plenty of options out there, but some stand out above the rest.

    The first on the list is the Pelican 091 This case is incredibly durable and waterproof, ensuring your SSD stays safe and dry no matter what. Another great option is the Inateck Hard Drive Case.

    It’s shockproof and has a soft interior to prevent scratching. For those on a budget, the AmazonBasics External Hard Drive Case is a great option. It’s affordable but still provides solid protection from drops and other bumps.

    And last but not least, the ProCase Portable Hard Drive Case is a great all-around option. It’s compact, sturdy, and has plenty of compartments for cables and other accessories. No matter which option you choose, a good SSD case is an investment that you won’t regret.

    Brand A’s Shockproof Case

    Looking for the ultimate protection for your SSD? Look no further than Brand A’s Shockproof Case. With its rugged construction and shock-absorbing materials, this case is designed to keep your SSD safe from all the bumps and bruises of everyday life. Whether you’re a student on the go or a professional photographer out in the field, this case will provide the peace of mind you need to know that your valuable data is safe and secure.

    So why settle for a flimsy, cheap case? Upgrade to the Brand A Shockproof Case today and protect your SSD from anything life can throw at it!

    Brand B’s Water-resistant Case

    Brand B’s water-resistant case is one of the top SSD cases for ultimate protection against water damage. This case is perfect for people who work in damp or humid environments, where their electronic devices are prone to water damage. With this case, you don’t have to worry about your SSD getting wet as it is made of high-quality materials that withstand water.

    Its unique design ensures that water stays out, keeping your SSD secure and safe. The case is also shock-resistant, so you don’t have to worry about sudden drops damaging your device. In addition, the case is easy to use, and you can easily access your SSD without having to remove it from the case.

    If you want to protect your electronic SSD device from water and shock damage, then Brand B’s water-resistant case is the perfect solution for you.

    Brand C’s Anti-static Case

    If you’re looking for an SSD case that provides ultimate protection, then look no further than Brand C’s Anti-static Case. This case is perfect for those who want to keep their SSD safe from potential damage caused by static electricity. It comes with a special anti-static lining that prevents electrical charges from building up and potentially damaging your SSD.

    The case is also made with a durable exterior that can withstand bumps and scratches from everyday use. This makes it the perfect travel companion for those who want to keep their SSD with them at all times. So if you’re in the market for an SSD case that offers superior protection, then Brand C’s Anti-static Case is the way to go.

    Conclusion: Invest in an SSD Case for Long-term Protection

    In conclusion, the SSD case is proof that not all storage solutions are created equal. With its sleek design and lightning-fast read and write speeds, it’s the perfect match for anyone looking to boost their computer’s performance while keeping their data safe. Gone are the days of clunky hard drives and slow transfer speeds – the SSD case is here to revolutionize the world of data storage with its wit, charm, and unparalleled capabilities.

    So if you’re ready to experience the future of computing, say goodbye to your old storage devices and hello to the SSD case. Trust us, you won’t regret it.”

    FAQs

    What is an SSD case?
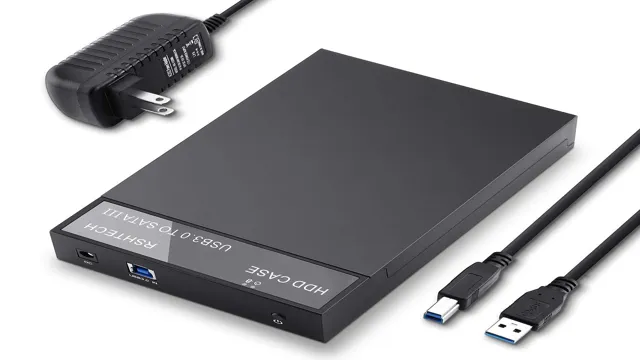
    An SSD case is an enclosure that allows you to mount your Solid State Drive (SSD) in an external enclosure, protecting your drive from external damage and providing easy access to your data.

    Can I install my SSD into an SSD case?
    Yes, you can install your SSD into an SSD case, as long as the case is compatible with your specific SSD model and size.

    What are the benefits of using an SSD case?
    SSD cases offer several benefits, including protecting your SSD from damage, providing an easy way to transfer data, and allowing you to use your SSD as an external drive.

    Can SSD cases improve the performance of my SSD?
    No, SSD cases do not improve the performance of your SSD, but they can provide better protection and convenience for storing, transporting, or accessing your data.

  • The Ultimate Guide: Do NVMe Drives Really Need Heatsinks? Find Out Now!

    If you’re an avid gamer or someone who frequently performs intense tasks on your computer, you may have considered adding an NVMe SSD heatsink to your setup. But the question remains, is it necessary or not? An NVMe SSD heatsink is designed to dissipate heat from your SSD, preventing it from overheating and potentially damaging your system. However, not all SSDs require a heatsink, and in some cases, adding one may even do more harm than good.

    So how do you know if your SSD needs a heatsink? The answer varies depending on the make and model of your SSD and your computer usage. If you frequently engage in tasks that put a heavy load on your SSD, such as gaming or video editing, a heatsink may help improve performance and enhance your overall experience. On the other hand, if your SSD rarely reaches high temperatures or is already equipped with its own thermal solution, adding an NVMe SSD heatsink would be unnecessary.

    In fact, it may even hinder the performance of your SSD by trapping heat and creating hot spots. As with any computer upgrade, it’s essential to do your research and understand your specific needs before making a decision. Whether you decide to add an NVMe SSD heatsink or not, the goal is to prolong the lifespan of your SSD and ensure peak performance for years to come.

    What is an NVMe SSD?

    Many people wonder if NVMe SSDs need a heatsink. The answer depends on a few factors. Generally, NVMe SSDs generate more heat than traditional SATA SSDs due to their faster processing speed and higher transfer rates.

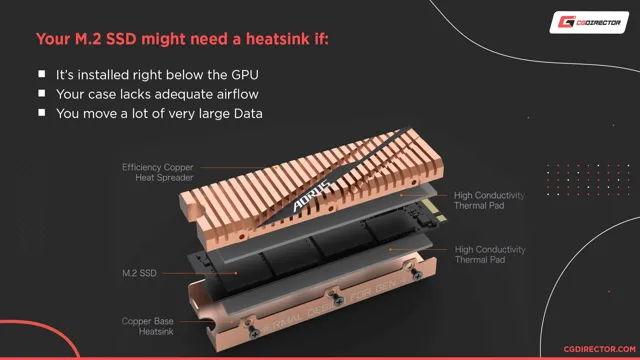
    In addition, if you plan on using your NVMe SSD for intensive tasks such as gaming or video editing, it may generate even more heat. To prevent overheating, it is recommended that you use a heatsink with your NVMe SSD. A heatsink can absorb some of the heat generated by the SSD and dissipate it more efficiently, helping to keep your system running smoothly.

    However, if you are using your NVMe SSD for basic tasks such as browsing the internet or word processing, a heatsink may not be necessary. Ultimately, the decision to use a heatsink with your NVMe SSD will depend on your specific use case and the overall build of your system.

    Key facts about NVMe SSDs

    An NVMe SSD (Non-Volatile Memory Express Solid-State Drive) is a type of storage device that uses the PCIe (Peripheral Component Interconnect Express) interface to transfer data between the SSD storage and the computer’s processor. Compared to the traditional HDDs, an NVMe SSD provides faster data transfer speeds, lower latency, and more reliable performance. It also has a higher endurance rate, which means it can handle more read/write cycles before needing to be replaced.

    An NVMe SSD is an excellent investment for those who require high-performance computing, such as gamers, graphic designers, and multimedia professionals. The technology behind NVMe SSDs is continually evolving, and there are several factors to consider when choosing one, including capacity, speed, pricing, and compatibility with your computer’s motherboard. As the technology continues to advance, the NVMe SSDs will continue to become faster, larger, and more capable of handling demanding tasks.

    do nvme need heatsink

    Do NVMe SSDs Need Heatsinks?

    NVMe SSDs are a popular choice for many users, thanks to their fast speeds and efficient performance. However, one question that often arises is whether these SSDs require heatsinks to maintain optimal temperatures. The short answer is that it depends on the individual SSD and your use case.

    Some high-end NVMe SSDs include built-in heatsinks, while others do not. If you plan on using your NVMe SSD for heavy workloads like video editing or gaming, then a heatsink may be beneficial to prevent thermal throttling. However, if you plan on using it for more general tasks, then a heatsink may not be necessary.

    Ultimately, it’s important to consider the specific SSD you’re using and how you plan on using it before deciding whether to invest in a heatsink.

    Benefits of NVMe SSD Heatsinks

    As more and more computer enthusiasts seek to improve the performance of their systems, the question of whether or not NVMe SSDs need heatsinks arises. While it is true that NVMe SSDs already have built-in temperature management systems, adding a heatsink can still be beneficial. A heatsink can dissipate heat more effectively, preventing the SSD from overheating and therefore prolonging its lifespan.

    It can also improve overall system performance by reducing the risk of thermal throttling. Additionally, a high-quality NVMe SSD heatsink can also enhance the aesthetics of your build, adding a sleek and stylish look to your computer setup. So, while it may not be necessary, adding an NVMe SSD heatsink can provide a range of benefits that can improve the overall performance and lifespan of your system.

    Cases when NVMe SSD Heatsinks are not necessary

    NVMe SSD Heatsinks NVMe SSDs do not always require heatsinks. Factors such as the system’s environmental conditions, how the NVMe is being used, and the type of NVMe drive you have will determine if a heatsink is necessary or not. If your NVMe drive is not being pushed to its full capacity, then it will not produce enough heat to cause any problems.

    Additionally, some NVMe drives are designed with efficient thermal management systems, so heatsinks are not necessary to keep the drive operating optimally. However, if your system is using heavy workloads, or if you have a lower performing NVMe drive without an efficient thermal management system in place, then installing a heatsink may be necessary to prevent overheating and potential data loss. It’s important to ensure that any heatsinks you do install are compatible with your system and that they don’t create clearance issues with other components.

    Factors to Consider When Deciding on NVMe SSD Heatsinks

    If you’re considering investing in an NVMe SSD, it’s worth taking the time to determine whether or not you need a heatsink. While not all NVMe drives require one, it can help ensure optimal performance in high-intensity applications that generate a lot of heat. Factors to consider when deciding whether to install a heatsink include the type and size of the NVMe drive, the load capacity of your computer, and the ambient temperature in your workspace.

    If you’re frequently working with large files or running multiple applications simultaneously, a heatsink can help limit the risk of throttling and ensure your drive operates at peak performance. Additionally, if you’re using your NVMe SSD in a high-temperature environment, such as a server room, a heatsink may be necessary to prevent damage to the drive. Ultimately, whether or not you need a heatsink for your NVMe SSD will depend on your individual needs and usage patterns.

    Size of NVMe SSD and Compatibility of Heatsink

    When choosing an NVMe SSD heatsink, it’s important to consider the size of your SSD as well as its compatibility with the heatsink. The size of your SSD will determine the size of heatsink you need. Ideally, the heatsink should cover the entire length of the SSD to ensure even heat distribution.

    Additionally, it’s crucial to check the compatibility of the heatsink with your specific SSD model. Some heatsinks may only be compatible with certain SSD brands or models, so it’s essential to do your research beforehand. Investing in a proper heatsink can greatly improve the performance and longevity of your NVMe SSD by keeping it from overheating during heavy usage.

    Remember, a well-cooled SSD is a happy SSD!

    Airflow in the System

    When it comes to NVMe SSD heatsinks, airflow in the system is an important factor to consider. The design of the heatsink should allow for efficient airflow to prevent overheating and maintain optimal performance. One aspect to consider is the placement of the NVMe SSD within the system.

    If it’s placed in an area with limited airflow, a heatsink with a larger surface area might be necessary to dissipate the heat generated. Additionally, the orientation of the heatsink can impact airflow. Placing the heatsink parallel to the direction of airflow can help increase cooling effectiveness.

    It’s important to choose a heatsink that strikes a balance between surface area and airflow to ensure optimal cooling performance and prevent overheating of the NVMe SSD.

    Intended Use of the NVMe SSD

    An NVMe SSD is an excellent storage option for gamers, professionals, and everyday PC users, as it provides faster data transfer rates and improved performance than traditional hard drives. However, when deciding on an NVMe SSD heatsink, several factors need to be considered. Firstly, the size of the heatsink should be compatible with your NVMe SSD.

    A heatsink that is too small may not cover the entire NVMe SSD, while a heatsink that is too large may hinder other components’ functionality. Secondly, the NVMe SSD’s location on your motherboard plays a role, as some motherboards may have tightly packed components that impede airflow, which may require a larger heatsink to dissipate heat effectively. Lastly, the type of workload you intend to use your NVMe SSD for determines how much heat it generates and subsequently, the heatsink required.

    For example, a gamer’s NVMe SSD may require a higher-performing heatsink than a professional’s NVMe SSD that’s used for basic office tasks. Ultimately, selecting a compatible heatsink for your NVMe SSD enhances its performance and lifespan, ensuring a more optimal computing experience.

    Conclusion

    In conclusion, the debate over whether NVME drives need heatsinks is ongoing. While some argue that the extra cooling can lead to improved performance and longevity, others believe that the benefits may be marginal at best. Ultimately, the decision to use a heatsink on your NVME drive may come down to personal preference and the specific demands of your system.

    But one thing is for sure, if you do opt for a heatsink, just make sure it looks really cool – because what’s the point of having cutting-edge technology if it doesn’t look the part?”

    FAQs

    What is NVMe?
    NVMe stands for Non-Volatile Memory Express. It is the latest interface protocol for solid-state drives (SSDs).

    What are the benefits of NVMe?
    NVMe offers faster data transfer rates, lower latency, and better IOPS (Input/Output Operations Per Second) than previous storage interface protocols like SATA.

    Do NVMe SSDs need a heatsink?
    It depends on the SSD model and the system in which it is used. Although NVMe SSDs generate less heat than their SATA counterparts, high-end SSDs with high storage capacities may require a heatsink to dissipate the heat.

    Can I add a heatsink to my NVMe SSD?
    Yes, you can add a heatsink to your NVMe SSD for additional cooling. There are many aftermarket heatsink options available that can be easily installed on your SSD. However, make sure to check the compatibility of heatsink with your SSD before making a purchase.

  • Blast Your Gaming Experience with Lightning-Fast SSD: A Guide to the Best Gaming SSDs of 2021

    Do you love gaming and want to get ahead of the competition? Then investing in a gaming SSD may be just what you need. A gaming SSD, or solid-state drive, is a faster and more reliable storage solution for your gaming needs. Unlike traditional hard drives, SSDs don’t have moving parts, which means they can read and write data much faster.

    And when it comes to gaming, every millisecond counts. With an SSD, you’ll experience faster load times and smoother gameplay. It’s like having a high-performance sports car under the hood of your gaming setup! So, if you want to take your gaming to the next level, consider upgrading to a gaming SSD.

    Why an SSD is Essential for Gaming

    If you’re a hardcore gamer, then you know how important speed and performance are during gameplay. That’s why having an SSD (Solid State Drive) is essential for gaming. Unlike traditional hard drives, an SSD operates without any moving parts, making it faster and more efficient.

    With an SSD installed in your gaming PC or laptop, you’ll experience faster load times, smoother gameplay, and reduced lag. SSDs are specifically designed to handle the high demands of gaming, which require continuous data access and storage. Plus, an SSD also helps to reduce noise and heat, which is an added bonus for those who like to game for extended periods.

    So if you’re serious about gaming, investing in a gaming SSD is definitely worth it. It will not only enhance your gaming experience but also improve the overall performance of your machine.

    Faster Loading and Boot Times

    If you’re a gamer, you know how important speed and performance are when it comes to your gaming experience. That’s why an SSD, or solid-state drive, is essential for gaming. Unlike a traditional hard drive, which uses spinning disks to store data, an SSD uses flash memory to retrieve and store data quickly.

    This means faster loading times for games, as well as quicker boot times for your computer overall. With an SSD, you can say goodbye to frustrating lag and buffering during gameplay. It’s like upgrading from a bicycle to a rocket ship – the difference is that significant.

    Plus, with its high durability and reliability, an SSD can handle all the wear and tear that comes with hours of gaming. So if you’re serious about gaming, investing in an SSD is a no-brainer.

    gaming ssd

    Reduced Lag and Stuttering

    SSD, gaming When it comes to gaming, it’s crucial to have the best possible system to ensure a seamless and enjoyable experience. One of the most important components of a gaming system is an SSD or solid-state drive. Unlike a traditional hard drive, an SSD uses flash memory to store data for faster access times.

    This not only speeds up load times but also reduces lag and stuttering during gameplay. Since an SSD doesn’t have moving parts like a hard drive, there’s also less chance of data loss or damage. With an SSD, you’ll be able to run your games faster and smoother, giving you a competitive edge against your opponents.

    So if you’re serious about gaming, investing in an SSD is essential.

    Improved Gaming Performance

    When it comes to gaming, speed is everything. From loading screens to in-game performance, every second counts in the virtual world. That’s why an SSD, or solid-state drive, is essential for optimized gaming performance.

    Unlike a traditional hard drive, an SSD uses flash memory to store and access data quickly, making it the clear choice for gamers looking to improve their setup. With faster load times and improved system responsiveness, an SSD can make all the difference in competitive gaming scenarios. Think of it like the difference between driving a sports car and a slow-moving van – the sports car (SSD) has the speed and agility to make sharp turns and accelerate quickly, while the van (hard drive) struggles to keep up.

    So, if you’re serious about gaming, investing in an SSD is a must.

    Choosing the Right SSD for Gaming

    When it comes to gaming, choosing the right SSD can greatly impact your experience. SSDs, or solid-state drives, are known for faster load times and faster in-game performance compared to traditional hard disk drives (HDDs). When selecting an SSD for gaming, it’s important to consider factors such as capacity, speed, and compatibility with your system.

    A minimum capacity of 500GB is recommended so you can store multiple games without worrying about running out of space. As for speed, look for an SSD with a high read and write speed, ideally more than 500MB/s. Additionally, making sure your SSD is compatible with your system’s motherboard and connector interface will ensure optimal performance.

    With the right gaming SSD, you can expect lightning-fast response times, reduced lag, and an overall improved gaming experience.

    Considerations for Capacity and Price

    When it comes to choosing the right SSD for gaming, there are a few important factors to consider. Capacity and price are two important considerations that can have a big impact on your gaming experience. First, you’ll need to consider how much storage space you need for your games and other files.

    While larger capacity SSDs can be more expensive, you don’t want to end up running out of space and having to constantly delete and reinstall games. On the other hand, you don’t necessarily need the most expensive SSD on the market to get a great gaming experience. Look for SSDs that offer high performance and fast read/write speeds, but don’t break the bank.

    Another consideration is the warranty and support offered by different SSD manufacturers. Make sure you choose a reputable brand with a solid warranty to ensure your investment is protected. Ultimately, the key to choosing the right SSD for gaming is finding the right balance between capacity, price, and performance.

    Whether you go for a high-end SSD or a more budget-friendly option, be sure to do your research and choose a reputable brand that will provide you with the speed and reliability you need to take your gaming experience to the next level.

    NVMe vs SATA SSDs

    When it comes to choosing the right SSD for gaming, you might be wondering which one is better: NVMe or SATA. While both these SSDs offer faster speeds compared to a traditional HDD, they do have some differences. NVMe SSDs, also known as PCIe SSDs, offer faster read and write speeds, making them ideal for gamers who need high-performance systems for gaming and other intense applications.

    On the other hand, SATA SSDs, also known as Solid State Drives, are cheaper and offer more capacity, making them a better choice for those on a budget. Ultimately, the choice between NVMe and SATA comes down to your specific needs and budget. If you have the budget and need for speed, go for NVMe; however, if you’re on a budget and prefer more storage space, stick to SATA.

    At the end of the day, both are excellent options for gamers looking to improve their system’s overall performance.

    Reliability and Endurance

    When it comes to gaming, the right SSD can make all the difference. The two main factors to consider are reliability and endurance. Reliability ensures that your SSD won’t fail on you during a crucial moment in your game, while endurance determines how long the SSD will last before needing to be replaced.

    One great option for gaming is the Samsung 970 EVO Plus SSD. It has a high level of endurance, with up to 600 terabytes written, and it also features a five-year warranty for extra peace of mind. Plus, its NVMe interface provides fast read and write speeds, allowing for quick load times in demanding games.

    Overall, the Samsung 970 EVO Plus is a reliable and durable choice for gamers who want to have a seamless gaming experience without having to worry about their equipment failing on them.

    Top Gaming SSDs to Consider

    Looking for the best SSDs to level up your gaming experience? Look no further than the top gaming SSDs on the market. These high-performance drives can deliver blazing fast read and write speeds, making them perfect for gamers who demand the best performance from their machines. Some of the top gaming SSDs to consider include the Samsung 970 EVO Plus, Crucial MX500, and Seagate FireCuda Gaming SSD.

    These drives boast exceptional durability and outstanding capacity, ensuring that your games load up lightning fast while also providing plenty of space for all your files and media. With their outstanding speed and capacity, any of these gaming SSDs will help you stay ahead of the competition and maximize your gaming performance. So what are you waiting for? Upgrade to one of these top gaming SSDs today and experience the speed and power that your games deserve!

    Samsung 970 EVO Plus

    If you’re an avid gamer, you know how much the right equipment can enhance your overall gaming experience. One of the essential components that can make a huge difference is your SSD. A Solid State Drive (SSD) speeds up the loading process of games, improves loading times of levels, and boosts the computer’s overall performance.

    The Samsung 970 EVO Plus is an excellent choice for gaming enthusiasts, providing top-level performance and speed. With a massive 2TB storage capacity and read/write speeds of up to 3500/3300 MB/s, this SSD can handle even the most demanding games without breaking a sweat. Plus, its advanced heat sink and dynamic thermal guard ensure the device doesn’t overheat during extended gaming sessions.

    Overall, this SSD is a fantastic investment if you’re looking to upgrade your gaming setup and take your gaming experience to the next level.

    WD BLack SN850

    If you are looking for an SSD specifically for gaming, there are a few options that you might consider. One of the top SSDs for gaming is the WD Black SN850. This drive offers impressive read and write speeds, making loading times virtually non-existent.

    It also features a sleek design and can handle heavy workloads without any issues. Another noteworthy option is the Samsung 980 Pro, which also offers impressive speeds and is known for its reliability. However, both of these options come with a higher price tag, so it is important to weigh the cost against the benefits.

    Overall, if you are a serious gamer and want a top-of-the-line SSD that can keep up with your gameplay, the WD Black SN850 is definitely worth considering.

    Crucial MX500

    Looking for a top gaming SSD? Look no further than the Crucial MX500! This high-performance SSD is a fantastic choice for gamers who want lightning-fast load times and quick boot-ups. With read speeds of up to 560 MB/s and write speeds of up to 510 MB/s, the MX500 delivers some serious speed, ensuring you can spend more time playing and less time waiting for your games to load. Plus, with up to 2TB of storage capacity, you’ll have plenty of room for all your favorite games and files.

    Whether you’re a casual gamer or a hardcore enthusiast, the Crucial MX500 is an excellent choice for any gaming system. So why wait? Upgrade your gaming performance today and experience the ultimate in speed and reliability with the Crucial MX500 SSD!

    Conclusion: Upgrade Your Gaming Experience with an SSD

    In the world of gaming, speed is everything. And that’s where the gaming SSD comes in, providing lightning-fast loading times and seamless gameplay. With a gaming SSD, you can say goodbye to frustrating lag and hello to a smoother, more immersive gaming experience.

    So, whether you’re a pro gamer or a casual player, a gaming SSD is a must-have addition to your setup. Trust me, it’s the upgrade you won’t regret.”

    FAQs

    What is a gaming SSD?
    A gaming SSD, also known as a gaming solid-state drive, is a type of storage device specifically designed for gamers. It offers faster data transfer speeds, quicker load times, and improved overall system performance compared to traditional hard drives.

    Is a gaming SSD better than a traditional hard drive for gaming?
    Yes, a gaming SSD is significantly better than a traditional hard drive when it comes to gaming. It provides faster load times, allowing games to start up and run more quickly, and reduces lag during gameplay by enabling faster access to game files.

    How much storage space do I need for a gaming SSD?
    The amount of storage you need for a gaming SSD depends on how many games and other files you want to store on it. We recommend at least 500GB of storage, but if you have multiple games with large file sizes, you may want to consider a 1TB or larger gaming SSD.

    Can I use a gaming SSD as my primary drive for my operating system?
    Yes, you can use a gaming SSD as your primary drive for your operating system. Doing so will significantly improve your system’s overall performance and startup time. However, you may need to reinstall your operating system on the new SSD to take full advantage of its benefits.

  • Unlock Your Computer’s Potential with the Best SATA Enclosures: A Comprehensive Guide

    Unlock Your Computer’s Potential with the Best SATA Enclosures: A Comprehensive Guide

    Looking for a way to store and access your data with ease? Look no further than a SATA enclosure! These handy devices are perfect for anyone who needs to store and transport large amounts of data, whether for work, school, or personal use. But what exactly are SATA enclosures, and how can you find the right one for your needs? In this ultimate guide, we’ll explore everything you need to know about SATA enclosures, from what they are and how they work to the different types available and how to choose the perfect one for your needs. So whether you’re a tech-savvy pro or a newbie to data storage, read on to learn everything you need to know about SATA enclosures and how they can make your life easier!

    What is a SATA Enclosure?

    If you’re looking to increase your storage capacity or access data from an old hard drive, you might have come across the term SATA enclosure. So what is it exactly? A SATA (Serial Advanced Technology Attachment) enclosure is a device that allows you to turn any internal hard drive into an external hard drive. It provides a sturdy enclosure to protect your hard drive and a SATA interface to connect it to your computer.

    SATA enclosures come in a variety of sizes and form factors, including 5-inch and 5-inch enclosures, and they can support different SATA generation speeds, such as SATA II or SATA III.

    With a SATA enclosure, you can easily transfer, store, or backup data, whether you’re on-the-go or using it as a desktop storage solution. Overall, a SATA enclosure is a simple yet effective way to expand your storage options and access your data more conveniently.

    Explaining the Basics

    If you are someone who upgrades their computer hardware quite often, then chances are you might have come across the term SATA Enclosure. Simply put, a SATA Enclosure is an external device that allows you to connect a hard drive or Solid State Drive (SSD) to your computer or laptop through a USB port. This means you can easily transfer data, backup important files, or even use your old hard drive as an additional storage device.

    SATA Enclosure comes in various sizes and shapes and supports different storage sizes too. If you have an old hard drive lying around that you’re not using, a SATA Enclosure is a great way to repurpose it and use it as a secondary storage device. All you need to do is insert the hard drive into the enclosure, plug it into a USB port, and you’re good to go.

    No need for any fancy tools or software installation. Overall, a SATA Enclosure is a simple and efficient way to boost your computer’s storage capacity.

    sata enclosure

    Benefits of using a SATA Enclosure

    If you’re not familiar with a SATA enclosure, it’s a device that allows you to connect an internal hard drive to your computer externally. This means you can quickly and easily transfer files between multiple devices or store large amounts of data without worrying about your computer’s storage capacity. Using a SATA enclosure also provides benefits such as added flexibility, convenience, and organization.

    With a SATA enclosure, you can easily swap out hard drives without having to open up your computer, making it a perfect solution for upgrading and quickly accessing files from different drives. Plus, it keeps your workspace clean and organized by eliminating the need for additional hard drives cluttering your desk. Overall, a SATA enclosure offers a cost-effective way to extend your computer’s storage capacity and simplify your workflow.

    Choosing the Right SATA Enclosure

    When it comes to choosing the right SATA enclosure, there are a few things you need to consider. First, you’ll want to think about the size of the enclosure. If you’re using a

    5-inch hard drive, you’ll want an enclosure that is specifically designed for that size. The same goes for 5-inch hard drives.

    You’ll also want to consider the interface of the enclosure. SATA is the most common interface, but there are other options out there, such as USB and Thunderbolt. It’s important to make sure your enclosure is compatible with your computer’s interface.

    Additionally, you’ll want to consider the material the enclosure is made from. Aluminum enclosures are sturdy and provide good heat dissipation, while plastic enclosures are lightweight but may not be as durable. By taking these factors into account, you’ll be able to choose the right SATA enclosure for your needs.

    Factors to Consider

    When it comes to choosing the right SATA enclosure, there are a few factors to consider. First, you’ll want to make sure the enclosure is compatible with your hard drive’s size and type. Additionally, consider the data transfer speed and whether you need a enclosure with USB

    0 or 1 capabilities for faster transfer rates. Another factor to think about is the enclosure’s durability and build quality, especially if you plan on using it frequently or for transport.

    You might also want to look for enclosures with additional features, such as LED indicators or fans for cooling. Ultimately, choosing the right SATA enclosure depends on your specific needs and preferences. Whether you’re a casual user or a professional, finding the right enclosure can make a big difference in your data storage and transfer capabilities.

    Types of SATA Enclosures

    When it comes to choosing the right SATA enclosure, there are a few types to consider. The first type is an internal enclosure which is great for desktop computers and allows you to easily add more hard drives for storage. Another option is an external enclosure which is perfect for laptops or computers that are limited on space.

    These enclosures come in various sizes and can hold one or more hard drives. If you plan on using your SATA enclosure for backup purposes, a single drive enclosure may be sufficient. However, if you need more storage space or plan on using it for data sharing, a multi-bay enclosure is a better fit.

    These enclosures can hold several drives and offer better data management options. Ultimately, the type of SATA enclosure you choose will depend on your specific needs and usage.

    Top Brands in the Market

    When it comes to choosing the right SATA enclosure, it’s important to consider the top brands in the market. Some of the most popular and reputable brands include Orico, Inateck, and Sabrent. Orico is known for its sleek and stylish designs, while Inateck offers a range of options for different purposes and storage capacities.

    Sabrent is another reliable brand that offers enclosures with fast data transfer speeds and easy installation. Ultimately, the right brand choice will depend on personal needs and preferences. When searching for a SATA enclosure, it’s important to keep in mind factors such as compatibility, ease of use, and durability.

    By selecting a top brand, one can ensure that their data is stored securely and efficiently.

    How to Set Up a SATA Enclosure

    Setting up a SATA enclosure is a great way to increase your computer’s storage capacity or backup important files. First, make sure you have an available SATA port on your motherboard. Then, insert the hard drive into the enclosure and connect the SATA and power cables.

    Finally, plug the enclosure into your computer’s USB port and you’re ready to go. Remember to safely eject the enclosure before unplugging it to avoid data loss. With a SATA enclosure, you can easily switch between different hard drives and keep your important files safe.

    So don’t be afraid to give it a try!

    Step-by-Step Guide

    Setting up a SATA enclosure can seem daunting at first, but with this step-by-step guide, you’ll have your hard drive up and running in no time. Firstly, make sure you have all the necessary components, including the enclosure, hard drive, SATA cable, and power adapter. Next, plug the hard drive into the SATA connector on the enclosure and secure it into place.

    Connect one end of the SATA cable to the enclosure and the other end to your computer’s SATA port. Finally, connect the power adapter to the enclosure and plug it into a power source. Once everything is connected, your computer should recognize the new drive and you’re ready to start using it.

    Don’t forget to format the drive before using it to ensure it’s functioning properly. With these simple steps, you’ll be able to set up a SATA enclosure in no time and expand your storage capabilities.

    Troubleshooting Common Issues

    If you have a spare internal hard drive laying around and want to repurpose it as external storage, setting up a SATA enclosure is the perfect solution. Firstly, make sure that the enclosure is compatible with your hard drive size. Now, take your hard drive and slide it into the enclosure, making sure it fits snugly.

    Then connect the SATA data cable and power cable to the enclosure and attach the other end of the cables to your computer. Once connected, power on your computer and the hard drive should appear in the computer menu. If it doesn’t, double-check your connections and make sure everything is properly plugged in.

    SATA enclosures are an excellent way to repurpose old internal hard drives and provide temporary or permanent external storage solutions. Just remember to safely eject the device before unplugging it from your computer.

    Conclusion: Why a SATA Enclosure is Worth Your Investment?

    In conclusion, a SATA enclosure is like a cozy home for your hard drive – it protects it, keeps it safe and organized, and gives it a stylish upgrade. It’s basically the architectural equivalent of a hoodie for your data. So don’t let your hard drive roam free and unprotected – give it the royal treatment it deserves with a SATA enclosure.

    FAQs

    What is a SATA enclosure?
    A SATA enclosure is a device that allows you to connect a SATA hard drive to your computer via a USB or another interface.

    Can I use a SATA enclosure with my laptop?
    Yes, you can use a SATA enclosure with your laptop as long as your laptop has a USB or another compatible interface.

    What are the benefits of using a SATA enclosure?
    SATA enclosures allow you to easily access data from a hard drive without having to install it inside your computer. They are also portable, making it easy to transfer data from one computer to another.

    Can I use a SATA enclosure to recover data from a failed hard drive?
    Yes, a SATA enclosure can be used to recover data from a failed hard drive. Simply remove the failed hard drive from your computer and place it in the enclosure to access the data.

  • Battle of the Speed Demons: Samsung 980 Pro vs FireCuda 530 PS5 – Which One Reigns Supreme?

    Gamers are always on the hunt for the best and fastest storage solutions to enhance their gaming experience. The Samsung 980 Pro and Seagate Firecuda 530 are two SSDs that have recently caught the eye of many PS5 players. While both offer high speeds and impressive performance, there are some key differences that set them apart.

    So, which one should you go for? In this blog, we will breakdown the Samsung 980 Pro vs Firecuda 530 PS5 debate to help you make an informed decision. Get ready to dive into the world of solid-state drives and discover which one reigns supreme.

    Performance

    If you’re looking to upgrade the storage on your PS5, you may have come across two popular options: the Samsung 980 Pro and the FireCuda 530. Both of these M.2 NVMe SSDs offer lightning-fast read and write speeds, but how do they compare? Let’s start with the Samsung 980 Pro.

    It boasts read speeds of up to 7,000MB/s and write speeds of up to 5,000MB/s, making it one of the fastest SSDs on the market. The FireCuda 530, on the other hand, has read speeds of up to 7,300MB/s and write speeds of up to 6,900MB/s, making it slightly faster than the 980 Pro. However, when it comes to real-world performance, the difference between the two may not be noticeable.

    Both SSDs are great options for boosting your PS5’s speed and performance, but if you want the absolute fastest speeds, the FireCuda 530 may be worth the investment.

    Read/Write speed, IOPS, sequential performance

    Performance When it comes to measuring the performance of a storage solution, there are a few key metrics to consider. The read/write speed, which is essentially how quickly data can be accessed or written to the storage device, is a critical factor. Higher read/write speeds mean faster boot times, faster application loading times, and overall speedier performance.

    IOPS, or input/output operations per second, is also an important metric. It measures the number of input/output operations a storage device can handle in a second and reflects its ability to handle multiple requests simultaneously. Finally, sequential performance, which measures the speed of streaming data, is crucial for large file transfers, such as video or data backups.

    These three metrics work together to give an overall performance picture, so it’s important to consider them all when selecting the right storage solution for your needs.

    samsung 980 pro vs firecuda 530 ps5

    Compatibility

    When it comes to choosing between the Samsung 980 Pro and the Firecuda 530 for a PS5, compatibility is a crucial factor to consider. Both NVMe SSDs offer lightning-fast read and write speeds, making them ideal for improving the performance of the PS However, you’ll want to ensure that the SSD you choose is compatible with the PS5’s internal SSD slot.

    Fortunately, both the Samsung 980 Pro and the Firecuda 530 have been tested and approved by Sony for use with the PS That said, you’ll also want to make sure that your PS5 is running the latest firmware update to ensure optimal compatibility with these NVMe SSDs. Ultimately, choosing between the Samsung 980 Pro and the Firecuda 530 comes down to personal preference and budget, as both are reliable options for upgrading the performance of your PS

    PS5 compatibility, installation process, form factor

    PS5 compatibility with previous generation games has been a hot topic for gamers eagerly waiting to get their hands on the console. The good news is that the PS5 is backward compatible with most PS4 games, so you can enjoy your favorite titles on the new console. However, it’s important to note that not all games are compatible, especially ones with specialized hardware such as VR.

    Additionally, there may be some performance differences between the PS4 and the PS5 versions of a game, depending on how developers optimize it. But overall, players can expect to enjoy a vast library of games on the PS5, both physically and digitally, including some titles that will have improved performance on the new console. So, if you’re worried about losing access to your beloved PS4 games, you can relax – the PS5 has got your back.

    Durability

    When it comes to choosing between the Samsung 980 Pro and the FireCuda 530 for your PS5, one important factor to consider is durability. Both SSDs have solid designs that will withstand wear and tear, but the Samsung 980 Pro takes it a step further with its MTBF rating of 5 million hours compared to the FireCuda 530’s

    8 million hours. Additionally, the Samsung 980 Pro has a shorter warranty period of 5 years compared to the FireCuda’s 5 years. While both drives are built to last, the FireCuda 530 offers a slight advantage in terms of overall longevity.

    It’s important to keep in mind that no drive is completely immune to failure, so investing in a high-quality SSD for your PS5 is crucial in order to avoid potential data loss. Ultimately, the choice between the two drives will depend on your specific needs and budget.

    Endurance, TBW, warranty

    When it comes to choosing a new computer or upgrading your current one, durability is an essential factor that you should consider. Endurance refers to the ability of the computer’s components to withstand continuous usage without wear or tear, while TBW (Terabytes Written) is a measurement of how much data can be written onto a solid-state drive (SSD) before it fails. Both are crucial in determining the lifespan of your computer and its parts, and it’s essential to opt for a computer with high endurance and TBW.

    Additionally, the warranty offered by the manufacturer also plays a vital role in ensuring the durability of your computer. A more extended warranty means that the manufacturer trusts the quality of their products and is willing to take responsibility for any defects that may arise. It gives you peace of mind knowing that you’re covered if anything goes wrong with your computer.

    So, when shopping for a new computer, do not overlook the endurance, TBW, and warranty, as they are essential factors that can help you make a well-informed decision and get the most out of your investment.

    Price

    When it comes to price, the Samsung 980 Pro and FireCuda 530 PS5 vary quite a bit. The Samsung 980 Pro is generally more expensive than the FireCuda 530 PS5, but that’s not to say that the FireCuda 530 PS5 isn’t worth considering. It really depends on your budget and what you’re looking for in a solid state drive.

    If you want higher storage capacities at a more affordable price, the FireCuda 530 PS5 might be the way to go. On the other hand, if you want faster speeds and the latest technology, the Samsung 980 Pro may be worth the extra investment. At the end of the day, it’s all about finding a balance between what you can afford and what you need for your personal or gaming needs.

    Comparison of prices, value for money

    When it comes to making a purchase, price is often a determining factor in our decision-making process. We want to know that we’re getting the best value for our money and that we’re not overspending on a product or service. When comparing prices, it’s important to consider not only the upfront cost but also any long-term expenses that may come with it.

    For example, if you’re comparing the cost of two laptops, you’ll want to look at not only the initial price but also the expected lifespan of each device and the cost of any necessary upgrades or repairs over time. It’s also worth considering the reputation of the brand or provider, as a higher price may be justified if it comes with a better warranty or customer service experience. Ultimately, the key is to find a balance between affordability and quality, ensuring that you’re getting good value for your money.

    Conclusion

    In the battle of Samsung 980 Pro vs FireCuda 530 on the PS5, it’s like a match between a Formula One car and a high-performance sports car. Both are incredibly fast and powerful, but the Samsung 980 Pro takes the checkered flag for its superior speed and efficiency. Its lightning-fast load times and impressive data transfer speeds make it the clear winner for gamers who demand nothing but the best.

    So if you’re looking to take your gaming experience to the next level, buckle up and get ready to race with the Samsung 980 Pro!”

    FAQs

    What is the difference between Samsung 980 Pro and Firecuda 530 on PS5?
    Both Samsung 980 Pro and Firecuda 530 are high-performance NVMe SSDs that can deliver fast read/write speeds on PS5. However, Samsung 980 Pro uses PCIe 4.0 technology and offers up to 7,000 MB/s sequential read speed, while Firecuda 530 uses PCIe 4.0 x4 and offers up to 7,300 MB/s sequential read speed. Additionally, Samsung 980 Pro comes with a longer warranty period of 5 years compared to Firecuda 530’s 5-year limited warranty.

    Which NVMe SSD is better for PS5, Samsung 980 Pro or Firecuda 530?
    It depends on your needs and budget. If you want a high-performance NVMe SSD that can deliver fast read/write speeds and larger storage capacity, Firecuda 530 might be a better choice. However, if you prioritize reliability, durability, and longer warranty, Samsung 980 Pro might be a better option.

    Can Samsung 980 Pro or Firecuda 530 improve PS5 loading times and game performance?
    Yes, both Samsung 980 Pro and Firecuda 530 can significantly improve PS5 loading times and game performance compared to the stock hard drive. With their fast read/write speeds and low latency, these NVMe SSDs can reduce loading times, increase game responsiveness and smoother gameplay.

    Do I need to upgrade my PS5 stock hard drive to Samsung 980 Pro or Firecuda 530?
    It depends on your storage needs and performance expectations. If you have a lot of games or media files that take up space on your PS5 and you find the loading times to be slow, upgrading to Samsung 980 Pro or Firecuda 530 can be a good option. However, if you have a limited budget or don’t mind longer loading times, you can stick with the stock hard drive for now.

  • Uncovering the Truth: Do M.2 SSDs Really Need Heatsinks for Optimal Performance?

    Are you on the fence about getting an M.2 SSD heatsink? It’s a question many computer enthusiasts ask themselves when considering buying or upgrading their computer’s storage setup. After all, a heatsink may sound like an additional expense and installation hassle.

    But the truth is, an M.2 SSD heatsink can significantly improve the performance, lifespan, and reliability of your system. Think of it this way: just like how sweating cools down a human body during strenuous activities, every electronic component in your computer generates heat.

    M.2 NVMe SSDs, in particular, tend to run hot because of their high-speed data transfer and storage capacity. Without proper cooling, overheating can lead to drive throttling, reduced read/write speeds, data corruption, and even system crashes.

    Sure, you can opt for an M.2 SSD without a heatsink and save a few bucks, but you risk running into performance issues down the line. On the other hand, investing in an M.

    2 SSD heatsink dissipates heat more efficiently, which enhances your drive’s reliability and longevity. Not only that, but it can also improve your entire system’s temperatures, which can lead to better CPU and GPU performance. In conclusion, an M.

    2 SSD heatsink is not just a fancy add-on for aesthetics or bragging rights. It’s a practical investment that ensures your system runs optimally and lasts longer. Before you shop for a heatsink, make sure to check your motherboard’s compatibility and dimensions to avoid any fitting issues.

    What Is an M.2 SSD?

    Yes, an M.2 SSD does need a heatsink. Although M.

    2 SSDs are known for their small and compact size, they tend to generate a lot of heat during operation, especially when under heavy load. A heatsink helps to dissipate the heat generated by the SSD, preventing it from overheating and causing damage to the system. Without a heatsink, the temperature of the M.

    2 SSD can rise quickly, leading to a decrease in performance and the lifespan of the SSD. A heatsink can also improve the overall performance of the system by allowing the M.2 SSD to operate at cooler temperatures, thereby reducing the risk of thermal throttling.

    To ensure that your system runs smoothly, it’s recommended to invest in a high-quality heatsink, specifically designed for M.2 SSDs, to keep your SSD running optimally.

    Explaining the Basics of M.2 SSDs

    An M.2 SSD or solid-state drive is a newer form of storage that is becoming more and more prevalent in modern computers. Essentially, it is a small circuit board that is typically only a few centimeters long and wide.

    It connects directly to the motherboard of the computer and stores data on NAND flash memory chips. One advantage of using an M.2 SSD is that it is faster than a traditional hard drive, allowing for faster boot up times and quicker access to frequently used files.

    Another advantage is that they take up less space, which is especially valuable in smaller laptops or compact desktop computers. They also consume less power and generate less heat, making them a more energy-efficient option. Overall, M.

    2 SSDs are a great choice for those who want faster storage and more compact design options.

    does m.2 need heatsink

    Does an M.2 SSD Need a Heatsink?

    If you’re wondering whether or not an M.2 SSD needs a heatsink, the answer is not a straightforward “yes” or “no.” M.

    2 SSDs, unlike traditional drives, use NAND flash memory chips which generates heat rapidly. Even though M.2 SSDs have a small form factor, they can in certain situations run hotter than other larger drives.

    Hence, the short answer is that if your M.2 SSD is generating a lot of heat, installing a heatsink will help keep it cool. But if you’re not running any intensive applications or pushing your drive to its limits, you probably won’t need one.

    The bottom line is that if your M.2 SSD is suffering from thermal throttling, which means it slows down due to high temperature, or your system does not have sufficient ventilation, installing a heatsink is a good decision. Otherwise, you can choose to prioritize other upgrades.

    Examining the Heating Issues Affecting M.2 SSDs

    M.2 SSD M.2 SSDs have become increasingly popular among computer enthusiasts, gamers, and professionals, thanks to their fast read/write speeds and compact form factor.

    However, the heating issues affecting M.2 SSDs have raised some concerns among users, prompting the need for a heatsink. While it’s not necessary to install a heatsink on your M.

    2 SSD, it can be beneficial if you use your computer for extended periods or run intensive tasks that put a strain on your SSD. A heatsink helps dissipate heat from your M.2 SSD, ensuring that it operates at optimal temperatures.

    The heat generated by an M.2 SSD can reduce its performance and lifespan, making a heatsink all the more crucial. Plus, the heatsink can enhance the overall aesthetics of your system, adding a touch of style to your build.

    Ultimately, whether you need a heatsink for your M.2 SSD depends on your usage, but it’s always better to err on the side of caution.

    The Effect of Heatsinks on M.2 SSD Performance

    M.2 SSD, heatsink, performance People often wonder if an M.2 SSD needs a heatsink due to its compact size and limited airflow.

    The answer is not a straightforward one. A heatsink can help improve an M.2 SSD’s performance, but it also depends on various factors like workload and system specifications.

    For instance, if you’re using a high-performance M.2 SSD to perform intensive tasks like gaming or video editing, a heatsink can assist in controlling the temperature and preventing thermal throttling, which could ultimately affect the drive’s performance. On the other hand, if you have a low-end M.

    2 SSD and aren’t putting it through intense workloads, adding a heatsink might not make a significant difference. An analogy would be like adding a radiator to a high-performance car versus a regular family car, where a performance car would benefit from a radiator, but a regular car wouldn’t need an upgraded cooling system. Therefore, whether an M.

    2 SSD needs a heatsink or not depends on the workload and the system specifications.

    Should You Install a Heatsink on Your M.2 SSD?

    If you’re wondering whether your M.2 SSD needs a heatsink, the short answer is that it depends. While not all M.

    2 SSDs require a heatsink, certain models can benefit from having one. If you’re a gamer or power user who frequently pushes your system to its limits, adding a heatsink can help to dissipate heat generated by the SSD and keep it running optimally. Additionally, if your motherboard has a metal cover over the M.

    2 slot, a heatsink may be necessary to make adequate contact with the SSD and cool it properly. Ultimately, the decision to install a heatsink on your M.2 SSD comes down to your usage needs and personal preference.

    Factors to Consider Before Installing an M.2 SSD Heatsink

    If you’re considering installing an M.2 SSD heatsink, there are several factors to consider before making your decision. First and foremost, it’s important to understand the purpose of a heatsink.

    Essentially, a heatsink is a component that helps to dissipate heat from your SSD to prevent overheating and performance throttling. If you’re using your SSD for tasks that generate a lot of heat, such as gaming or video editing, then a heatsink might be beneficial. On the other hand, if you’re using your SSD for basic tasks like web browsing or document editing, then a heatsink might not be necessary.

    Another factor to consider is compatibility. Not all M.2 SSDs come with built-in heat spreaders, so you’ll need to ensure that the heatsink you choose is compatible with your specific model.

    Additionally, you’ll want to ensure that your motherboard has enough clearance to accommodate the heatsink. If your M.2 slot is located underneath a graphics card, for example, a heatsink might not fit.

    Finally, it’s worth considering the aesthetics of your build. M.2 heatsinks come in a range of styles, from minimalist to flashy RGB designs.

    If you’re building a high-end gaming rig, then a flashy heatsink might be a worthwhile addition. If you’re building a more understated PC, however, a simple black or silver heatsink might be a better fit. In summary, there are several factors to consider before installing an M.

    When Installing a Heatsink Makes Sense for Your M.2 SSD

    If you’re considering installing a heatsink on your M.2 SSD, there are a few things to keep in mind. First, it’s important to note that not all M.

    2 SSDs require a heatsink. If you’re using your SSD for everyday tasks such as browsing the web or word processing, you’ll likely be fine without one. However, if you plan on using your SSD for more demanding tasks such as gaming or video editing, a heatsink can be a worthwhile investment.

    A heatsink can help dissipate heat from your SSD, which in turn can improve performance and extend the lifespan of your hardware. Additionally, some M.2 SSDs come with their own built-in heatsinks, so be sure to check whether your SSD already has one before making any additional purchases.

    Overall, while installing a heatsink on your M.2 SSD isn’t always necessary, it can be a wise choice for those who use their SSD for intense tasks or want to prolong the life of their hardware.

    How to Install an M.2 SSD Heatsink

    If you’re wondering whether an M.2 SSD needs a heatsink, the answer is that it depends on your usage. M.

    2 SSDs can get hot under heavy workloads, and a heatsink can help dissipate that heat, prolonging the life of your drive and maintaining its performance. Fortunately, installing a heatsink on an M.2 SSD is easy and affordable.

    Start by choosing the right size of heatsink for your drive, then remove any existing thermal pads from the back of the drive. Attach the heatsink to the drive with screws, and replace the thermal pad with a new one. Finally, reattach the drive to your motherboard, and you’re good to go.

    With a heatsink installed, your M.2 SSD can handle even the most demanding applications with ease.

    Step-by-Step Guide to Installing an M.2 SSD Heatsink

    Installing an M.2 SSD heatsink is a simple and effective way to keep your SSD operating at optimal temperatures. This will not only prolong its lifespan but also improve performance.

    To begin, you’ll need to gather your materials, including an M.2 SSD heatsink, a screwdriver, thermal compound, and a cleaning cloth. First, make sure your computer is turned off and unplugged.

    Then, locate the M.2 SSD on your motherboard and remove any screws holding it in place. Clean the surface of the M.

    2 SSD with the cleaning cloth to remove any dust or debris. Apply a small amount of thermal compound on top of the M.2 SSD.

    Then, carefully place the heatsink on top, making sure it aligns with the screw holes. Secure the heatsink with screws and plug in your computer. With these simple steps, you can easily install your M.

    2 SSD heatsink and keep your SSD running at optimal temperatures.

    Conclusion

    In conclusion, does M.2 need a heatsink? Well, that depends on a variety of factors including the type of M.2 drive, the temperature of your system, and whether or not you want to add a bit of extra flair to your build.

    While a heatsink isn’t always necessary, it certainly doesn’t hurt to have one – especially if you’re looking to maximize your storage’s potential and keep your system as cool as a cucumber. So, whether you’re a hardcore gamer or just looking for a reliable computing experience, consider adding a heatsink to your M.2 setup and enjoy smoother performance and a cooler experience (literally!).

    FAQs

    What is an M.2 heatsink?
    An M.2 heatsink is a small, metal object that attaches to an M.2 SSD to dissipate heat and prevent overheating.

    Do I need an M.2 heatsink?
    It depends on your usage and the temperature of your system. If you use your M.2 SSD heavily or notice high temperatures, it may be beneficial to add a heatsink.

    Will an M.2 heatsink improve my SSD’s performance?
    While an M.2 heatsink does not directly improve performance, it can prevent thermal throttling and ensure your SSD sustains optimal performance.

    How do I install an M.2 heatsink?
    Installation methods vary by brand and model, but most heatsinks attach via screws or adhesive. Check your specific heatsink’s instructions for installation guidance.

    Can I use any M.2 heatsink with any SSD?
    Heatsinks come in different sizes and shapes, so it’s important to check compatibility between the heatsink and your SSD before purchasing.