Author: David L. Lynn

  • Revolutionize Your Storage Experience with Lightning Fast m2 NVMe Drives

    Revolutionize Your Storage Experience with Lightning Fast m2 NVMe Drives

    Looking for the ultimate storage solution for your PC? M.2 NVMe might just be what you’re looking for. It’s the latest technology in solid-state drives (SSDs) that have been around for a few years now and offers ultrafast performance that is unmatched by traditional hard disk drives (HDDs).

    NVMe stands for Non-Volatile Memory Express, which is a protocol designed specifically for flash-based storage solutions and allows for the most efficient and speedy communication between your system and storage device. Compared to traditional 5-inch SATA SSDs, M.

    2 NVMe SSDs offer much faster read and write speeds, meaning that you can transfer files, boot your system, and load games much faster. The difference in speed can be felt instantly, and this technology is rapidly replacing SATA SSDs as the go-to storage solution for discerning users. But what makes M.

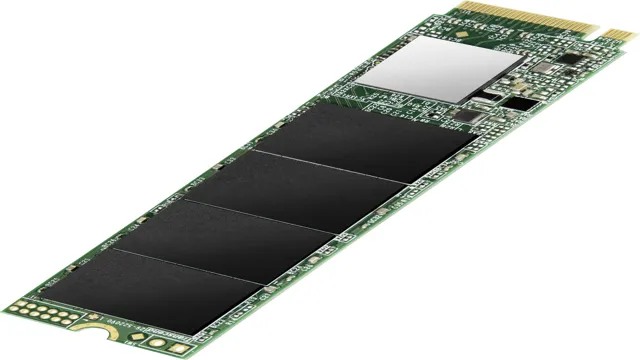
    2 NVMe SSDs truly unique is their form factor. The M.2 NVMe SSDs are incredibly small and have an M.

    2 slot that’s directly connected to the motherboard, allowing for even faster speeds since the drive is no longer constrained by the slower SATA interface. This means that you won’t need any cables to connect your storage device, and you can install it directly onto the motherboard, saving you valuable space in your PC case. In essence, an M.

    2 NVMe SSD is a game-changer in the storage industry. It offers performance, convenience, and fast speed all in one package. With more and more manufacturers adopting the technology, the price of these drives is gradually becoming more competitive.

    What is M.2 NVMe and How Does it Work?

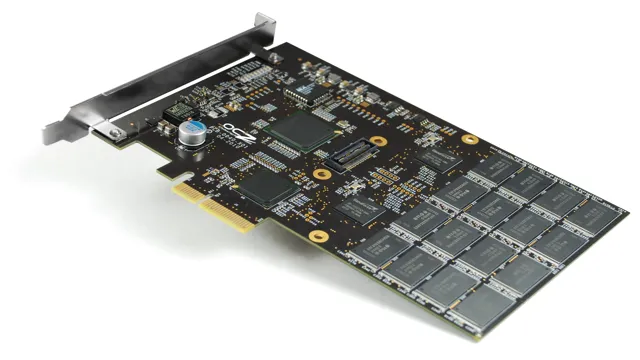
    M.2 NVMe is a type of solid-state drive that has gained immense popularity among computer enthusiasts, gamers and content creators. It has an ultra-compact form factor and uses a PCI Express interface to deliver ultra-fast speeds, making it one of the fastest storage solutions available.

    The M.2 NVMe drive works by connecting directly to the motherboard of your computer, which means it has a direct connection to the CPU and memory. This allows it to achieve much faster speeds than traditional hard drives, which are limited by their SATA interface.

    With read and write speeds often exceeding 3GB/s, an M.2 NVMe drive is perfect for demanding workloads like video production and gaming. Its small size also means it can easily fit into laptops and mini-PCs, making it a perfect choice for users on the go.

    Overall, an M.2 NVMe drive is an excellent choice for those who seek top-notch performance and lightning-fast speeds in their storage solutions.

    Understanding M.2 Form Factor

    M.2 NVMe, form factor. M.

    2 form factor is becoming increasingly popular for SSDs, and for good reason. It offers a smaller, more compact design that is perfect for laptops and other smaller devices. M.

    2 NVMe is a particular type of M.2 slot that uses the NVM Express (NVMe) protocol for faster data transfer speeds. This protocol was specifically designed for SSDs and takes advantage of the lower latency and higher performance of PCIe SSDs.

    M.2 NVMe SSDs are typically faster than their SATA counterparts, making them an excellent choice for users who want faster boot times and application loading. They are also more power-efficient, making them ideal for mobile devices that need to conserve battery life.

    Overall, M.2 NVMe is an excellent option for those looking for fast, reliable storage in a compact form factor.
    m2 nvme

    Getting to Know NVMe Protocol

    M.2 NVMe Have you ever wondered what makes your computer’s storage so fast? Chances are, it’s using the NVMe protocol with an M.2 NVMe form factor.

    M.2 NVMe is a small, thin, and speedy storage device that connects directly to your computer’s motherboard. The NVMe protocol is designed specifically for solid-state drives (SSD), which use flash memory to store data quickly and reliably.

    Compared to traditional hard drives, M.2 NVMe drives are exponentially faster in both read and write speeds, making them a preferred choice for enthusiasts and professionals alike. For example, an M.

    2 NVMe drive can take a 4K video file and copy it within a few seconds. That’s lightning-fast! M.2 NVMe drives also come in various sizes and capacities, making them suitable for any need or budget.

    With their compact size, high-speed performance, and reliable storage capacity, M.2 NVMe drives are a must-have for anyone looking to boost their computer’s power and speed.

    Benefits of Using M.2 NVMe

    M.2 NVMe is a type of storage device that has been gaining popularity in recent years due to its high speed and compact size. It is a small, rectangular chip that connects directly to your motherboard, allowing for faster data transfer rates and lower latency compared to traditional hard drives or even solid-state drives (SSDs).

    One of the primary benefits of using M.2 NVMe is its lightning-fast speed. As a solid-state device, M.

    2 NVMe can read and write data much faster than traditional hard drives, resulting in faster boot times, faster application launches, and faster file transfers. This can be particularly beneficial for gamers, content creators, and anyone who needs to work with large files or data sets. Another benefit of M.

    2 NVMe is its compact size. Since it connects directly to your motherboard, there is no need for bulky cables or power connectors. This makes it ideal for use in thin and light laptops or other devices where space is at a premium.

    In summary, M.2 NVMe is a high-speed, compact storage solution that offers many benefits over traditional hard drives and SSDs. Its fast read and write speeds can greatly improve system performance, while its small form factor makes it ideal for use in portable devices.

    So, if you’re looking to upgrade your system’s storage, M.2 NVMe is definitely worth considering.

    Choosing the Right M.2 NVMe SSD

    If you’re building a new PC or upgrading an old one, choosing the right M.2 NVMe SSD can be a game-changer. But with so many options on the market, it can be overwhelming to figure out which one to go for.

    The first thing to consider is the capacity you need, as there are different sizes available. Then, you should look at the performance specifications, such as read and write speeds, as well as the endurance rating. Keep in mind that not all M.

    2 NVMe SSDs are created equal, and some are specifically optimized for certain tasks. For example, some are designed for gaming and offer faster load times, while others are more suitable for video editing and data-intensive applications. Ultimately, the best M.

    2 NVMe SSD for you will depend on your specific needs and budget, but with a little research, you can find a great option that will give your system a significant boost.

    Consider Capacity and Speed

    When it comes to choosing the right M.2 NVMe SSD, capacity and speed are two crucial factors to consider. Capacity refers to the amount of storage space available on the SSD, and it’s important to take into account your current and future storage needs.

    If you plan on storing large files like videos or high-resolution images, then a larger capacity SSD would be ideal. On the other hand, if you only plan on storing basic files and documents, then a smaller capacity may suffice. Speed is also a critical factor to consider as it directly impacts the performance of your system.

    A faster SSD means faster read and write speeds, resulting in quicker system boot-up times, faster file transfers, and overall snappier performance. It’s essential to strike the right balance between capacity and speed, ensuring that you choose an M.2 NVMe SSD that meets your specific needs.

    Check Manufacturer and Compatibility

    When choosing an M.2 NVMe SSD, it is important to consider the manufacturer and compatibility of the SSD. Not all SSDs are created equal, and choosing the right one can make a big difference in performance.

    You should look for a reputable manufacturer that has a proven track record of producing high-quality SSDs. Additionally, you need to make sure your motherboard and operating system are compatible with the SSD you choose. Check the motherboard’s manual to see if it supports NVMe SSDs, and ensure that your operating system has the necessary drivers installed.

    Overall, taking the time to do your research and find a compatible, high-quality M.2 NVMe SSD can make a big difference in your computer’s performance. So, be sure to choose wisely!

    Installation and Data Transfer

    If you’re looking to upgrade to an M.2 NVMe solid-state drive, the first step is to check if your motherboard supports it. Once confirmed, installation is a breeze.

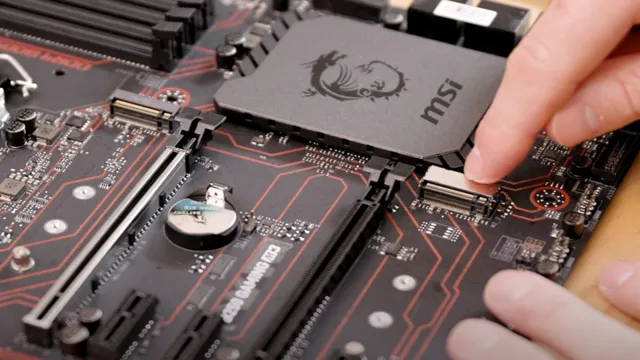
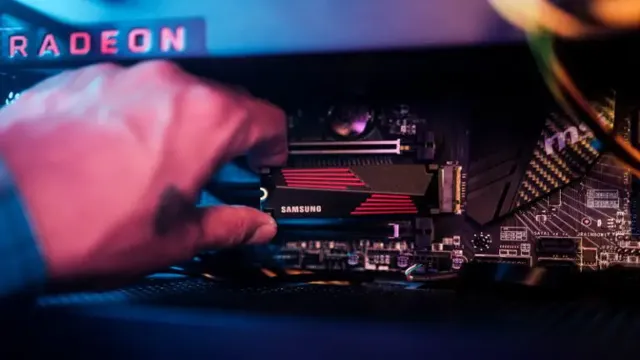
    M.2 drives plug directly into your motherboard without cables, and screw into place. Before installing, make sure to enable the M.

    2 slot in your motherboard’s BIOS settings. Now onto data transfer. If you’re replacing your boot drive, you’ll need to clone your old drive to your new M.

    2 drive. The easiest way to do this is to use cloning software. Many SSD manufacturers provide free cloning software with their products.

    Another option is to use a third-party software like Macrium Reflect or Acronis True Image. Remember to check that the cloned drive is set as the boot drive in your BIOS after the cloning process is complete. Overall, upgrading to an M.

    2 NVMe drive is a straightforward process. Just make sure to check your motherboard compatibility, enable the M.2 slot in your BIOS, and use cloning software for a smooth data transfer.

    Step-by-Step Guide to Installing M.2 NVMe

    Installing an M.2 NVMe drive can be a game-changer for those looking to improve their computer’s performance. Before diving in, make sure your motherboard is compatible with M.

    2 NVMe drives. Once you’ve confirmed compatibility, ensure the system is powered off and unplugged. Locate the M.

    2 slot on your motherboard and remove the protective cover. Carefully insert the M.2 NVMe drive at an angle and then press it firmly into place.

    Next, secure it with the screw provided. Now, for the data transfer, you will need to clone or migrate your existing OS and data to the new drive. A great tool for this task is EaseUS Todo Backup, which can easily migrate your system and data to the new drive.

    After the migration is complete, change the boot order in your BIOS settings to prioritize the M.2 NVMe drive, and you’re all set! By following these steps, you’ll have a faster and more efficient system in no time.

    Transferring Data to Your New M.2 NVMe SSD

    If you’re looking to transfer data to your new M.2 NVMe SSD, there are a few steps you’ll need to take. First, you’ll need to physically install the SSD into your computer.

    This involves opening up your computer’s case, finding the M.2 slot on your motherboard, and securely installing the SSD. Once that’s done, you’ll need to clone your existing hard drive onto the new SSD.

    There are a variety of data cloning software options available, some of which are free and others that you’ll need to purchase. It’s important to choose a reliable, reputable cloning software to avoid any data loss or corruption. Once you’ve successfully completed the cloning process, you can start using your new SSD like any other hard drive.

    With its faster speeds and increased storage capacity, you’ll notice a significant improvement in your computer’s performance. Trust me, the transfer process might seem intimidating at first, but with a little bit of patience and effort, you’ll have a powerful new SSD up and running in no time!

    Conclusion: Upgrade Your Storage Game with M.2 NVMe

    In conclusion, the world of storage technology has come a long way since the days of clunky hard drives and slow transfer speeds. And at the forefront of this revolution is the M.2 NVMe, a compact and lightning-fast piece of hardware that has changed the game for both casual users and tech enthusiasts alike.

    Whether you’re looking to build a speedy gaming rig or simply want to upgrade your laptop’s storage capacity, the M.2 NVMe is a witty and clever solution that will leave you wondering how you ever managed to use anything else.”

    FAQs

    What is an M.2 NVMe SSD?
    An M.2 NVMe SSD is a type of storage device that uses the M.2 form factor and the NVMe interface to deliver high-speed storage performance. It is usually used in high-end laptops and desktops for faster boot times, faster application launches, and faster data transfer rates.

    How does an M.2 NVMe SSD differ from a traditional SATA SSD?
    An M.2 NVMe SSD differs from a traditional SATA SSD in terms of interface speed and form factor. M.2 NVMe SSDs are smaller in size and use the PCIe interface for faster data transfer rates. SATA SSDs are generally larger in size and use the SATA interface, which is slower than PCIe.

    What are the advantages of using an M.2 NVMe SSD?
    The advantages of using an M.2 NVMe SSD include faster boot times, faster application launches, and faster data transfer rates. It also consumes less power than traditional SATA SSDs, has a smaller form factor, and can be used in compact devices.

    Can I install an M.2 NVMe SSD on my existing computer?
    It depends on whether your computer supports M.2 NVMe SSDs. You should check your computer’s specifications or consult with a professional to determine if your computer is compatible with an M.2 NVMe SSD. If it is, you can install it by following the instructions provided by the manufacturer.

  • Boost your PC’s Speed: A Comprehensive Guide on Migrating Windows 10 to an SSD

    Upgrading your PC’s hard drive to a solid-state drive (SSD) can dramatically improve system performance. And if you’re using an older operating system like Windows 7 or 8, you’ll see a significant speed boost and overall upgrade. But even if you’re already using Windows 10, migrating to an SSD can still be an effective way to increase your computer’s speed and power.

    The process of migrating your operating system from your old hard drive to a new SSD can be a bit daunting, but it’s not as difficult as you might think. And the benefits of migrating to an SSD are well worth the effort. With an SSD, your computer will boot more quickly, programs will open faster, and your overall computing experience will be smoother and more responsive.

    In this blog post, we’ll guide you through the steps necessary to migrate Windows 10 to an SSD. We’ll provide tips and tricks to help ensure a smooth migration, and we’ll also cover some common pitfalls to avoid. By the end of this post, you’ll have a better understanding of the process and feel confident enough to tackle the migration on your own.

    So let’s get started!

    Requirements

    If you’re looking to migrate your Windows 10 operating system to an SSD, there are a few requirements you’ll need to keep in mind. For starters, you’ll need an SSD that’s large enough to accommodate your current Windows 10 installation, plus any additional files or programs you want to move over. You’ll also need to make sure your current hard drive has enough free space to facilitate the migration.

    Additionally, you’ll need cloning software, which can either come pre-installed on your new SSD or be downloaded separately. Before you begin the migration process, be sure to back up all important files and folders, as well as create a system image, just in case anything goes wrong during the transfer. Finally, it’s important to note that while migrating to an SSD can dramatically improve your computer’s performance, it won’t necessarily fix any underlying software issues or hardware limitations.

    As long as you meet these requirements and follow the proper steps, however, you should have no problem migrating your Windows 10 operating system to an SSD.

    Check SSD compatibility

    If you’re planning to upgrade your computer’s hard drive to a solid-state drive (SSD), it’s essential to check the compatibility of your device beforehand. Some older computers may not be compatible with the latest SSD technology, so it’s important to check your device’s specifications to ensure that the SSD you choose will work correctly. To do this, check your device manual or perform an online search for your computer’s make and model to find out what type of SSD is compatible.

    Additionally, consider the size and interface of the SSD, as some devices may require a specific size or type of interface to function properly. With a little bit of research, you can ensure that you choose the right SSD for your computer and enjoy the benefits of faster performance and increased storage capacity.

    how do migrate windows 10 to an ssd

    Ensure enough storage space

    When it comes to the storage of your belongings, having enough space is crucial. You don’t want to be stuck with a cluttered room where everything is piled up on top of each other. To ensure that you have enough storage space, you need to assess your needs and plan accordingly.

    Start by taking inventory of the items you need to store and their sizes. This will help you determine the type of storage that is ideal for your needs. For example, if you have larger items, such as furniture or sports equipment, you’ll need larger storage spaces, such as a garage or a shed.

    Conversely, if you have smaller items like clothes or books, a closet or smaller storage space would suffice. By assessing your needs, you can determine the size and type of storage that will work best for you. So don’t wait until your space becomes cluttered and unmanageable, take action now and ensure that you have enough storage space for all your belongings.

    Create backup

    One of the first and most crucial steps in migrating your Windows 10 operating system to an SSD is creating a backup of all your important files and data. This is necessary in case anything goes wrong during the migration process. You can either use Windows built-in backup feature or a third-party backup software.

    Once you have created a backup, it is recommended that you test it to ensure that all your data has been backed up correctly. It’s also important to note that you may need to update or reinstall some of your software and drivers after the migration is complete. By properly creating a backup before migrating to an SSD, you can avoid losing any important data and have a peace of mind during the entire process.

    Create a system image

    Creating a system image is an essential part of backing up your computer. A system image is a complete copy of your operating system, applications, configurations, and files. It allows you to restore your computer to a previous state if something goes wrong, such as a hardware failure or a malware attack.

    To create a system image, you can use the built-in tool in Windows, called Backup and Restore. You can access it by typing “backup” in the search bar and selecting “Backup and Restore (Windows 7).” Then, select “Create a system image” from the left panel.

    You need to choose where to save the image, such as an external hard drive or a network location, and select the drives you want to include in the backup. The process can take several minutes or even hours, depending on the size of your system and the speed of your storage device. It’s important to create a system image regularly and store it in a safe place, so you can protect yourself from unforeseen events.

    So, take the time to create a system image and rest easy knowing your computer is backed up.

    Backup personal files

    Creating backup of personal files is an essential task that many of us tend to overlook until it’s too late. Imagine losing all your precious memories and important documents due to a computer crash or a malware attack, only to realize that you didn’t back them up. It’s a nightmare scenario that can be easily avoided by taking a few simple steps.

    The first and most important step is to identify the files that need to be backed up, such as photos, videos, music, documents, etc. Once you’ve identified these files, decide on a backup method that suits your needs and budget. You can choose from a range of options like external hard drives, USB drives, cloud storage, or even DVDs.

    Whatever backup method you choose, make sure that you do it regularly and keep multiple copies in different locations as a precaution. Remember, a little effort in creating backup today can save you a lot of regret tomorrow.

    Prepare SSD

    If you’re looking to make the switch to a faster and more reliable SSD, then you might be wondering how to migrate Windows 10 to an SSD. Before you begin the migration process, it’s important to prepare your SSD properly. The first step is to check if your new SSD comes with any software that can help with the migration process.

    If it does, make sure to download and install the software on your PC. Next, you’ll need to connect your SSD to your PC. Some laptops and PCs might require you to use an external adapter to connect your SSD, so make sure to check for that.

    Once your SSD is connected, you’ll need to format it using the Disk Management tool in Windows This will erase any existing data on the SSD, so make sure to back up any important files before formatting it. Once your SSD is formatted, you’re ready to start the migration process and transfer your Windows 10 operating system to your new SSD.

    Install SSD into the computer

    To install an SSD into your computer, the first step is to prepare the SSD itself. Before handling the SSD, be sure to ground yourself to prevent any electrostatic damage. Then, locate the SATA port on your computer’s motherboard and connect the SATA data cable to the port.

    Next, attach the SSD to the power supply using a SATA power cable. It’s important to ensure that the SSD is secured properly within the computer, so either attach it to a mounting bracket or screw it into the drive bay. Once the SSD is securely in place, you can connect the SATA data cable to the SSD.

    Finally, you’ll need to initialize and format the SSD to enable it to be used by your computer. This can usually be done through your computer’s disk management utility. Once the SSD is formatted, you’re ready to enjoy the improved speed and performance that an SSD can offer.

    Installing an SSD can be an affordable way to give your computer a new lease on life, making it run faster and more efficiently than ever before.

    Format SSD

    Preparing an SSD before formatting is essential to ensure optimal performance and longevity. Before formatting, it is recommended to backup valuable data on the existing hard drive. Once that is done, check the SSD’s firmware for any updates to avoid compatibility issues.

    Using the manufacturer’s software, wipe the drive to erase any existing data and prepare it for a fresh installation of the operating system. After wiping, create a new partition and format it according to the file system desired. It’s recommended to use a file system like NTFS for Windows or APFS for Mac to optimize performance.

    Finally, allocate the necessary space for frequently used files and programs while leaving enough free space for future usage. With these steps, your SSD will be primed and ready for a successful format that can offer faster speeds and improved performance.

    Clone system image to SSD

    Migrating Windows 10 to an SSD is not as difficult as it might seem at first glance. One of the simplest ways to do this is by cloning the system image from your existing hard drive to your new SSD. This will make an exact copy of your operating system, settings, programs, and files.

    Once your clone is complete, all you have to do is swap out your hard drive and replace it with the new SSD. Cloning can be done with a variety of software, including free options like Macrium Reflect or EaseUS Todo Backup. Whether you’re upgrading your computer or just looking for a performance boost, migrating to an SSD is a smart choice.

    It will speed up your system boot time, load applications more quickly, and make your overall computing experience more seamless. Just remember to back up all your important files beforehand, as mistakes can happen during the cloning process. Overall, migrating to an SSD is a relatively simple process with significant benefits.

    Use software such as EaseUS Todo Backup

    If you’re looking to upgrade to a new SSD, it’s important to clone your existing system image onto it. This can be a daunting task, but luckily software like EaseUS Todo Backup can make it a breeze. With just a few clicks, you can clone your entire system image onto your new SSD, ensuring that all of your files, settings, and programs are transferred seamlessly.

    Not only does this save you time and effort, but it also ensures that your new SSD is ready to use immediately without having to reinstall everything from scratch. So, if you want to upgrade to an SSD, be sure to use software like EaseUS Todo Backup to clone your system image and enjoy a smooth transition.

    Update BIOS and drivers

    Migrating Windows 10 to an SSD is a great way to boost your system’s performance. But before you do that, it’s important to update your BIOS and drivers. The BIOS (Basic Input/Output System) is firmware that’s responsible for initializing and testing system hardware components before booting the operating system.

    Updating your BIOS can improve your PC’s compatibility with new hardware and fix any bugs that may be present. Similarly, drivers are software programs that help your hardware devices communicate with your OS. Updating drivers can ensure that your devices work smoothly and efficiently.

    So, before you start the migration process, make sure you update your BIOS and drivers to avoid any future issues. And, always remember to use a reliable cloning tool to minimize the risk of data loss during the migration process.

    Download the latest version from manufacturer’s website

    Updating your BIOS and drivers is essential for keeping your computer running smoothly and securely. The manufacturer’s website is the best place to download the latest versions of these essential components. Not only will updates improve performance and fix bugs, but they may also add new features and increase compatibility with other software.

    It’s important to stay current, as outdated components can lead to security vulnerabilities, crashes, and other issues. Thankfully, updating your BIOS and drivers is usually a straightforward process that can help keep your computer in top condition. So, if you haven’t checked for updates recently, head over to the manufacturer’s website and download the latest versions today.

    Your computer will thank you!

    Run automatic driver updater

    If you want to ensure that your system is running at its optimal level, it’s essential to update the BIOS and drivers regularly. Updating drivers manually can be a time-consuming task, but luckily, there are automatic driver updater programs available that can make the process much easier. These programs scan your system, identify outdated drivers, and install the latest versions automatically.

    This not only saves time but also ensures that your system is up to date with the latest security patches, bug fixes, and performance enhancements. So next time you’re experiencing issues with your system, try updating your BIOS and drivers using an automatic driver updater to see if it resolves the problem. It’s a simple yet effective way to keep your system running smoothly.

    Boot computer from SSD

    If you’re fed up with your Windows 10 computer’s slow performance and want to speed things up, consider upgrading to an SSD. Not only will it speed up your computer, but it’ll also improve its longevity and overall efficiency. To migrate your Windows 10 system to an SSD, the first step is to connect the new drive to your computer and ensure it’s recognized by your operating system.

    Then, you’ll need to use disk cloning software to transfer your operating system, data, and files. One of the most popular tools for this is Macrium Reflect, which offers an easy and reliable way to clone your disk. Once the cloning process is complete, change your boot order to ensure your computer boots up from the SSD.

    Finally, make sure to optimize your new SSD for performance and efficiency by disabling certain Windows 10 features such as defragmentation and indexing that aren’t beneficial for SSDs. With these simple steps, you can enjoy faster boot times, better performance, and increased efficiency on your Windows 10 computer using an SSD.

    Enter BIOS settings

    To boot your computer from the SSD, you’ll need to enter the BIOS settings. The BIOS, or Basic Input/Output System, is a program stored on a chip on your motherboard that controls the communication between your computer hardware and software. To access the BIOS, you’ll need to press a specific key during the boot process, usually F2, F10, or Delete.

    Once you’re in the BIOS, look for the Boot menu or tab. Here, you’ll see a list of boot devices in the order of priority. Move the SSD to the top of the list, so your computer tries to boot from it first.

    Save your changes and exit the BIOS. Your computer will now boot from the SSD, which should improve your system’s speed and performance. Enjoy the benefits of your new and improved computer experience!

    Change boot order to SSD

    Changing the boot order on your computer to start from the SSD can improve your system’s overall performance. To do this, you will need to enter the BIOS or UEFI firmware menu by pressing a specific key while your computer is booting up. The key can vary depending on your computer’s manufacturer, but it is typically F2, F10, Delete, or Esc.

    Once you’re in the menu, navigate to the Boot section and locate the option to change the boot order. Here, you can move the SSD to the top of the list so that your computer will boot from it first. This change can significantly decrease the time it takes your computer to start up and improve the overall speed of your system.

    In addition, if you have recently installed an operating system on your SSD, changing the boot order can allow your computer to run on the newest and fastest system available. By following these simple steps, you can ensure that your computer is running at its maximum potential.

    Conclusion

    To migrate your Windows 10 operating system to an SSD, it’s like transferring your favorite show to a faster and more efficient streaming platform. Your computer will feel like it has upgraded from a dial-up connection to fiber optic internet. So, stop waiting for your computer to catch up and make the switch to an SSD now!”

    FAQs

    What is an SSD?
    An SSD (solid-state drive) is a storage device that uses NAND-based flash memory to store data.

    Why should I migrate from HDD to SSD?
    SSDs are faster, more reliable, and consume less power than traditional HDDs, making them a preferable choice for operating systems and frequently used programs.

    How can I migrate Windows 10 to an SSD?
    There are different ways to do this, but the easiest and safest method is to use a cloning software like Macrium Reflect or EaseUS Todo Backup to copy the entire system partition (C:) to the SSD. You can then change the boot order in your BIOS/UEFI and boot from the SSD.

    Do I need to reinstall Windows 10 after migrating to SSD?
    No, if you clone your system partition to the SSD, you don’t need to reinstall Windows 10. The operating system, programs, and files will remain the same, with the only difference being the faster SSD performance.

    What should I do with the old HDD after migrating to SSD?
    You can repurpose the old HDD as a secondary storage device for data backups, media files, or less frequently used programs. Alternatively, you can wipe it clean and either keep it as a spare or sell/donate it.

  • Boost Your PC’s Speed: A Complete Guide on How to Utilize 8GB 2400MHz SSD

    If you’re someone who needs a computer that can handle demanding applications, then the speed and performance of your storage solution matters. One of the ways to upgrade your computer’s storage is by using an 8GB 2400MHz SSD (Solid State Drive). An SSD can help your computer boot faster, load applications more quickly, and transfer files at a faster rate.

    However, if you’re not familiar with SSDs, it can be challenging to know how to use them effectively. In this blog, we’re going to look at how to use an 8GB 2400MHz SSD to optimize your computer. We’ll cover the basics of what an SSD is and how it differs from a traditional hard drive.

    We’ll also give you some tips on how to install and set up your SSD, along with information on how to transfer your data from your old storage solution to your new SSD. So, if you’re looking to get the most out of your computer, stick around and learn how to use an 8GB 2400MHz SSD like a professional.

    What is SSD?

    If you’re looking to upgrade your computer’s performance, an SSD could be just what you need. But what exactly is an SSD? SSD stands for solid-state drive, and it’s a type of storage device that uses flash memory to store data. Unlike traditional hard drives, which use spinning disks and mechanical parts, SSDs have no moving parts, making them faster and more reliable.

    Now, let’s talk about the main keyword, “8gb 2400mhz ssd how to use.” To use an SSD, you’ll need to install it in your computer. Make sure you have an available slot for the SSD, then connect it to your motherboard using a SATA cable.

    Once you’ve physically installed the SSD, you’ll need to format it and install your operating system on it. This is where our keyword comes in – 8gb and 2400mhz refer to the capacity and speed of the SSD, respectively. These specifications will affect the performance of your computer, so make sure you choose them wisely.

    In summary, an SSD is a storage device that can improve your computer’s speed and reliability. To use an SSD, you’ll need to physically install it in your computer and format it. When choosing an SSD, consider the capacity and speed that will best suit your needs.

    With the right SSD, your computer can run faster and smoother than ever before.

    Explanation of Solid State Drives technology.

    SSD (Solid State Drive) Have you ever wondered why your computer became slower when running many applications simultaneously? The answer might be due to your Hard Disk Drive (HDD). Compared to HDDs, SSDs have no moving parts, which make them faster and more durable. SSDs use NAND flash memory to store and retrieve data instead of the spinning disks and mechanical read/write heads that HDDs rely on.

    The advantages of an SSD include less power consumption, faster boot-up times, faster file transfers, and a much faster read/write speed, which is ideal for running multiple applications at once. Additionally, SSDs are more durable as they are less susceptible to physical damage, such as breaking or scratching. In summary, an SSD is essentially a digital repository that stores and retrieves data faster and more securely than an HDD.

    By upgrading to an SSD, you can make your computer run much faster and more efficiently.

    8gb 2400mhz ssd how to use

    Why 8GB is important?

    If you’re looking for a high-performance computer that can keep up with your demanding tasks, then having 8GB of RAM and a 2400MHz SSD can be important. These components not only increase the speed of your device, but also enhance its overall performance. The 8GB of RAM can handle multiple applications at once, allowing for seamless multitasking without any lag or freezes.

    Meanwhile, the 2400MHz SSD can drastically reduce the boot-up time of your computer and decrease the time taken to load applications and files. Whether you’re a gamer, graphic designer, or someone who needs to work on resource-heavy software, having 8GB and 2400MHz SSD can significantly improve your workflow. So, if you’re wondering how to use 8GB of RAM and a 2400MHz SSD to their full potential, then there’s no better time to upgrade your system and experience the speed and efficiency you deserve.

    Reasons why 8GB SSD is a game changer.

    8GB SSD, game changer, importance. If you’re someone who’s been following the evolution of the computing world, then you already know that the emergence of Solid State Drives (SSDs) has indeed changed the game. These drives have replaced traditional Hard Disk Drives (HDDs) for their increased speed, durability, and better performance.

    But why might you ask, is 8GB specifically being hailed as a game-changer? This is down to the fact that it puts the focus back on the operating system and other essential files without having to worry about storage space. With files such as music, movies, and games being easily accessible in the age of streaming, the shift to smaller capacity drives means that manufacturers can prioritize other aspects of performance, making 8GB SSDs an important new standard. The smaller capacity also means that more laptops and other devices can have SSDs installed at a reasonable cost, further boosting performance.

    Overall, it’s safe to say that 8GB SSDs are indeed a game-changer, bringing with them a new era of better performance, portability, and affordability.

    How to install your SSD?

    First thing’s first, congratulations on purchasing your 8GB 2400MHz SSD! Installing a new SSD into your computer can improve its overall performance and speed, making it a worthwhile investment. To begin, shut down your computer and disconnect all cables. Make sure to ground yourself to prevent any static electricity from damaging your SSD.

    Locate the SSD slot on your motherboard and carefully insert the SSD. Make sure it is securely fastened in place before connecting the cables and turning your computer back on. Once your computer has rebooted, go to your disk management settings and initialize your new SSD.

    From there, you can choose to clone your current operating system onto the new SSD or start fresh and install a new operating system. Congratulations, you have successfully installed your SSD and can now experience faster speeds and improved performance on your computer!

    Step-by-step guide to installing your 8GB SSD.

    Installing your 8GB SSD may seem like a daunting task, especially if you’re not used to tinkering with computer hardware. But fear not! With a few simple steps, you’ll have your SSD up and running in no time. First, locate the SATA port on your motherboard and connect the SSD to it using the included SATA cable.

    Be sure to orient the cable correctly so that the L-shaped connector fits into the SSD. Next, connect the power cable to the SSD, again making sure it is oriented correctly. Once your SSD is physically connected, it’s time to configure it.

    Go into your computer’s BIOS settings and make sure that the SSD is recognized by your system. Then, format the SSD using a file system of your choice (such as NTFS or FAT32). After formatting, you’ll need to install your operating system onto the SSD.

    This will involve creating a bootable USB drive or DVD with your OS installation media on it, then booting from that device and selecting your SSD as the destination for the OS installation. Finally, once the OS is installed, be sure to update your system drivers and configure your SATA controller to take advantage of the SSD’s faster transfer speeds. With these steps completed, you’re ready to start enjoying the improved performance that comes with an SSD!

    How to transfer data?

    If you’ve got an 8gb 2400mhz SSD, congratulations! This solid-state drive is capable of storing a significant amount of data and transferring that data quickly. When it comes to transferring data to your SSD, you’ve got a few options. One way is to physically connect your SSD to your computer using a SATA cable.

    Another way is to use an external hard drive enclosure, which allows you to connect your SSD to your computer via USB. Once your SSD is connected, you can simply drag and drop files onto it just like you would with any other storage device. Another option is to use software designed for data migration, such as EaseUS Todo Backup or Acronis True Image.

    These programs allow you to clone your existing hard drive onto your SSD, so you don’t have to manually transfer your data. Whichever method you choose, make sure your SSD is properly formatted and partitioned before transferring your data. With a little planning and preparation, you’ll be using your 8gb 2400mhz SSD in no time!

    Best practices to migrate data from your old drive to your new SSD.

    If you’re upgrading to a new SSD, one of the essential steps is to transfer your data from your old drive to your new one. The good news is that this process is relatively straightforward and can be accomplished in several different ways. One of the easiest options is to use a data migration software tool that can automatically transfer your data, programs, and settings from your old drive to your new SSD.

    You can also use an external hard drive or cloud storage to transfer your files manually. However, it’s important to note that you may need to reinstall some programs and applications manually on your new SSD. By following best practices and taking steps to ensure a seamless transfer, you can enjoy the full benefits of your new SSD without losing any of your important data.

    How to optimize SSD performance?

    If you’re looking to optimize the performance of your 8gb 2400mhz SSD, there are a few things you can do to get the most out of it. First and foremost, make sure you have the latest drivers and firmware installed for your SSD. This ensures that it’s running at peak performance and can take advantage of any optimizations that may have been added since it was first released.

    Additionally, you can optimize your system settings to ensure that your SSD is being used to its full potential. This includes setting your power plan to high performance, disabling indexing and prefetching, and enabling TRIM support. Finally, if you have a lot of data on your SSD, consider freeing up some space by moving files and programs to a secondary drive.

    This can improve overall performance by reducing the amount of data that needs to be accessed on the SSD. With these optimizations in place, you should be able to get the most out of your 8gb 2400mhz SSD.

    Tips to improve your SSD’s speed and overall performance.

    If you’re looking to improve your SSD’s speed and overall performance, there are several steps you can take. First and foremost, ensure your SSD is properly configured for optimal performance. This includes enabling TRIM, a feature that helps your SSD maintain performance over time by optimizing the way it stores data.

    Additionally, you can optimize your SSD’s performance by disabling indexing and defragmentation, which can slow it down. Another tip is to avoid filling your SSD to capacity, as this can lead to slower read and write speeds. Finally, consider investing in a high-quality SSD that provides faster read and write speeds, as well as larger storage capacity.

    By following these tips, you can ensure that your SSD is functioning at its best, allowing you to get the most out of your computer.

    Conclusion

    In conclusion, a device with 8GB 2400MHz SSD is a powerful tool that can handle multiple tasks with ease. Whether you’re looking to power up your gaming rig or increase the speed and responsiveness of your laptop, this type of storage and memory combination is a game-changer. Simply put, it’s like having a race car engine under the hood of your computer, making everything run smoother and faster.

    So, if you’re looking to take your computing experience to the next level, don’t hesitate to upgrade to an 8GB 2400MHz SSD – you won’t regret it!”

    FAQs

    What is the benefit of having 8GB of RAM when using a computer?
    Having 8GB of RAM allows for faster and smoother performance when running multiple programs or tasks simultaneously. It also allows for better multitasking capabilities.

    How can I check the speed of my 2400MHz RAM?
    You can check the speed of your RAM by accessing your system information or task manager on your computer. Look for the RAM specification and it should display the speed.

    What are some advantages of having an SSD in my computer?
    SSDs (Solid State Drives) have faster data transfer speeds, boot and load times compared to traditional mechanical hard drives. They are also more durable and use less power, leading to better battery life on laptops.

    How can I utilize my SSD to improve my computer’s performance?
    You can move your operating system and frequently used programs to the SSD to improve the startup and loading times. You can also use the SSD as a cache for frequently accessed data, improving the data transfer speed.

  • Efficiently Clonezilla Clone to SSD: Step-by-Step Guide for Hassle-Free Cloning

    Efficiently Clonezilla Clone to SSD: Step-by-Step Guide for Hassle-Free Cloning

    Are you tired of your sluggish computer? Do you want to speed it up and make it run smoother? Upgrading from a traditional hard drive to a solid-state drive (SSD) is a perfect way to improve your computer’s performance. However, moving to an SSD means transferring all your files, data, and programs, which can be a daunting task. This is where cloning comes in.

    Cloning your hard drive to SSD is a simple way to move all your files, data, and programs from your old hard drive to your new SSD, making it easy to upgrade your computer’s performance without losing any data. In this step-by-step guide, we will walk you through the process of cloning your hard drive to SSD, making it easy for you to speed up your computer and get more work done in less time. So, let’s dive in, shall we?

    Preparing for Cloning

    If you’re looking to clone your computer’s hard drive onto a new SSD using Clonezilla, there are a few things you should do to prepare before getting started. First, make sure to back up any important files or data that you don’t want to lose in case something goes wrong during the cloning process. You should also ensure that your computer’s BIOS settings are correctly configured to boot your computer from the Clonezilla USB drive.

    Once this is done, connect your new SSD to your computer and make sure that it is recognized by your BIOS. Finally, make sure that your computer has enough space on it for the cloned image to be saved. Once everything is set up, you’re ready to start the cloning process using Clonezilla – just follow the on-screen instructions carefully and you should be good to go.

    By using these simple steps and precautions, you can ensure a smooth and successful cloning experience with Clonezilla to transfer all your important files onto your new SSD.

    Backing Up Your Data

    When it comes to backing up your data, one of the essential steps is preparing for cloning. Cloning refers to the process of creating an exact copy of your hard drive and transferring it to another location. Before you start, it’s crucial to ensure that you have enough space to store the cloned data.

    One way to achieve this is by using an external hard drive or cloud storage service, depending on your preference. Additionally, it’s essential to have the necessary cloning software, which you can either purchase or download for free online. The software will guide you through the process, so it’s crucial to read the instructions carefully before starting.

    By preparing for cloning, you can ensure that your data is safe and secure, even in the event of hardware failure or data loss. So, take the time to prepare, and your data will thank you for it!

    clonezilla clone to ssd how to

    Gathering Necessary Materials

    When it comes to preparing for cloning, gathering the necessary materials is a crucial step. The first thing you’ll need is a donor cell, which will be used to create the cloned organism. You’ll also need an egg cell from a compatible female, which will be used to house the new genetic material.

    There are different techniques for transferring the genetic material into the egg cell, such as using an electric current or a micro-needle. Additionally, you’ll need to provide the right conditions for the development of the embryo, such as the proper temperature and nutrients. This may require the use of a specialized culture medium or equipment such as an incubator.

    Ensuring that you have all the necessary materials and equipment is essential for a successful cloning procedure. The better equipped you are, the more chances you’ll have of achieving a successful result.

    Connecting the SSD

    When it comes to upgrading your computer’s storage system, connecting an SSD is a great choice. However, before you start cloning your data to the new drive, there are a few things you need to do to prepare. First, make sure the SSD you’ve purchased is compatible with your computer’s motherboard.

    Then, gather the necessary tools, such as a screwdriver and a SATA cable. You’ll need to open your computer tower and locate the hard drive bay where the SSD will be installed. Once you’ve done that, simply insert the SSD into the bay and connect the SATA cable from the SSD to the motherboard.

    Secure the drive in place with screws, and you’re ready to start cloning your data. With a little bit of preparation, connecting an SSD is a simple process that can greatly improve your computer’s performance.

    Using Clonezilla

    If you’re looking to transfer your system and data from one hard drive to another, Clonezilla is an excellent tool that can help. Specifically, you can use it to clone your old hard drive to a new SSD. The process is relatively straightforward, although there are a few important steps to follow.

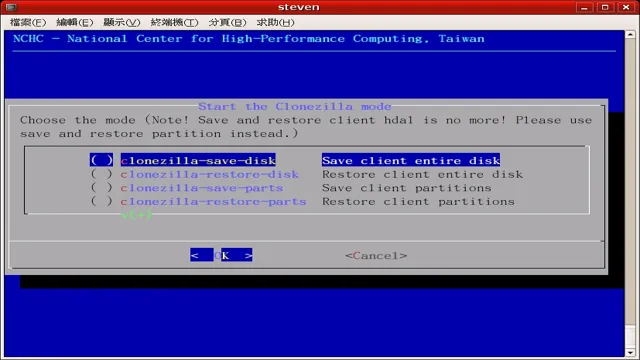
    First, you need to create a bootable USB drive or CD that contains Clonezilla. Once you’ve done that, you can boot your computer from the USB drive or CD and initiate the cloning process. Clonezilla will ask you a few questions about the source and destination drives, and then it will handle the rest.

    This can save you a lot of time and effort if you’re setting up a new computer or upgrading your existing one. Plus, with an SSD as your new drive, you can enjoy faster boot times, shorter load times for applications and files, and improved overall performance. So if you’re looking to clone your old hard drive to an SSD, give Clonezilla a try!

    Downloading and Installing Clonezilla

    Downloading and Installing Clonezilla can seem daunting at first, but it is a reasonably straightforward process. First, you will need to head over to the Clonezilla website and download the appropriate version for your computer. Once downloaded, you will need to burn it to a USB drive or a CD.

    This step is crucial as you will need to boot your computer from the USB or CD to use Clonezilla. Once you have created the bootable disk, you can then plug it into the computer you wish to clone or backup. Next, you will need to make sure your computer is set to boot from the USB or CD.

    Once you have changed this setting, restart your computer, and you will be ready to use Clonezilla. It may seem complicated at first, but once you have gone through the process a few times, it becomes second nature.

    Creating a Bootable USB Drive

    Creating a bootable USB drive using Clonezilla is a fairly easy process that can be accomplished in just a few simple steps. The first thing you need to do is download the Clonezilla ISO file and save it to your computer. Next, you will need to download a tool such as Rufus or Universal USB Installer that can create bootable USB drives.

    Once you have installed the tool, select the USB drive you wish to use and then select the Clonezilla ISO file that you downloaded earlier. Finally, click on “Create” or “Start” to begin the process of creating a bootable USB drive. Once the process is complete, you will have a bootable USB drive that can be used to boot your computer and run Clonezilla.

    With this tool, you can easily create system images, clone disks, and restore your system in case of a failure or corruption. So, if you want to be prepared for any eventuality, creating a bootable USB drive with Clonezilla is definitely something you should consider.

    Booting from the USB Drive

    Booting from a USB drive can be a convenient way to use Clonezilla for disk imaging and cloning. First, you’ll need to create a bootable USB drive with the Clonezilla software. Once that’s done, you can insert the USB drive into your computer and boot up using the USB drive.

    This may require changing your computer’s boot order in the BIOS settings. Once you’ve successfully booted from the USB drive, you’ll be able to start using Clonezilla to back up or restore your hard drive. The process can be a bit tricky for beginners, but with some practice and guidance, you’ll be able to master it in no time.

    Just remember to backup important data before making any changes to your system!

    Cloning Your Hard Drive

    Cloning your hard drive can seem like a daunting task, but with Clonezilla, it’s a breeze. If you’re looking to upgrade your computer’s storage capacity to an SSD, Clonezilla can help you clone your old hard drive onto your new SSD, allowing you to transfer all your files, settings, and even your operating system. This process is simple and straightforward, but it does require a bit of technical knowledge.

    Firstly, you’ll need to create a bootable Clonezilla USB drive, then connect your new SSD to your computer. Once you’ve booted up Clonezilla from your USB drive, you’ll be guided through the process step-by-step. When the cloning process is completed, you’ll have an exact replica of your old hard drive on your new SSD.

    With Clonezilla, cloning your hard drive to an SSD has never been easier, and the best part is that it’s completely free.

    Selecting the Source Drive

    When it comes to cloning your hard drive, selecting the source drive is crucial to ensure a successful transfer. The source drive is essentially the original hard drive that you want to clone, and it contains all your important data and files. It’s important to verify that the source drive is in good working condition before starting the cloning process to avoid any errors or transfer issues.

    You also need to ensure that the source drive has enough storage space to accommodate all the files and data that you want to transfer to the new drive. Choosing the right source drive is essential to ensure that you don’t lose any data during the cloning process, and that the new hard drive operates correctly after the transfer is complete. So take your time when selecting the source drive, and double-check that everything is properly backed up before starting the cloning process.

    Selecting the Destination SSD

    When it comes to cloning your hard drive, it’s important to carefully select the destination SSD. One of the key factors to consider is the size of the SSD compared to the size of your current hard drive. You want to choose an SSD that has enough storage space to accommodate everything on your current hard drive, but also has room for future growth.

    You also want to make sure the new SSD has comparable read and write speeds to your current hard drive, so you don’t experience any performance issues. Additionally, consider the brand and model of the SSD, as certain brands may have better reliability or higher performance than others. By choosing the right destination SSD, you can ensure a smooth and seamless transition from your current hard drive to a faster, more reliable solid-state drive.

    Starting the Clonezilla Process

    If you’re looking to upgrade your hard drive or switch to a new computer, the thought of transferring all your data can be daunting. Luckily, the Clonezilla process is a convenient solution that saves you time and effort. To get started, you’ll need a few tools like a USB or CD, and the Clonezilla software downloaded onto your computer.

    Once you have everything you need, simply boot your computer from the Clonezilla media, and follow the instructions to create a backup image of your hard drive. This image can then be transferred to your new hard drive or computer, allowing you to pick up right where you left off without the hassle of a manual transfer. Plus, using Clonezilla ensures that you don’t miss any important files or documents in the process.

    Overall, Clonezilla is a straightforward and efficient way to clone your hard drive, and it’s definitely worth trying out when it comes time for an upgrade.

    Verifying the Cloned Data

    When you are cloning your hard drive, it is essential to verify the cloned data to ensure that it has been copied correctly. This process involves comparing the original hard drive’s data with the cloned data to ensure that they are identical. One way to do this is to use a tool like WinMerge or Beyond Compare, which compares the files on two drives and lists the differences between them.

    Another method is to use a hash function like SHA-256, which generates a unique digital fingerprint for each file. By comparing the hash values of the original and cloned files, you can ensure that they are identical. It is important to note that verification may take some time, but it is necessary to ensure that the cloned data is accurate and reliable.

    By taking the time to verify, you can avoid data loss and ensure a smooth transition to the new hard drive.

    Final Steps

    If you’re looking to upgrade to an SSD and need to transfer your data from your old hard drive, using Clonezilla is a great option. But, before you start the cloning process, it’s important to make sure your SSD is properly prepared and ready to receive the cloned data. First, check that the SSD is properly connected to your computer and recognized by the system.

    Then, use a disk utility to format the SSD to the file system you want to use – usually NTFS or FAT. You can also create partitions on the SSD to better organize your data. Once the SSD is properly prepared, you’re ready to begin the cloning process with Clonezilla.

    Just follow the step-by-step instructions provided by the software and you’ll have your data transferred and ready to go in no time. So, if you’re wondering how to clone your hard drive to an SSD, just remember to properly prepare your SSD first before starting the cloning process with Clonezilla.

    Disconnecting the SSD

    Disconnecting the SSD is a crucial step in the process of upgrading or replacing your computer’s storage device. Before doing so, it’s essential to back up all your important data to prevent any loss. Once you have taken care of that, the first step in disconnecting an SSD is to shut down your computer and unplug it.

    Then, you need to remove the case cover to gain access to the SSD. Carefully remove any screws holding the SSD in place, and detach the power and data cables by gently pulling the connectors away from the SSD. Be careful not to bend or break any of the pins while doing so.

    Once all the cables are removed, you can safely lift the SSD out of its slot. Remember to handle the SSD carefully as they are sensitive and can easily get damaged. Once you have removed the old SSD, you can now install or replace a new one in its place with ease.

    Replacing the Hard Drive with the SSD

    Now that you’ve successfully cloned your old hard drive onto your new SSD, it’s time to replace the old drive with the new one. This is a relatively simple process that will involve opening up your computer case and unplugging the old drive from the motherboard. Once you’ve done that, it’s simply a matter of plugging in the new SSD into the same port.

    Be sure to use the screws that came with your computer case to secure the drive in place. Once you’ve done that, you can close up your computer case and turn your computer back on. If everything has gone smoothly, your computer should boot up normally, but now with the added speed and performance benefits of your new SSD.

    Congratulations on successfully upgrading your computer!

    Verifying the Cloned System Boot

    After successfully cloning your system, the final step is to verify that the cloned system can boot up properly. This verification process is necessary to ensure that your data and configurations are accurately transferred to the new system. To do this, you will need to restart your computer and select the cloned system as the boot option from the BIOS menu.

    Once selected, the cloned system should boot up without any issues, and you should be able to access your data and preferences just as before. A tip to keep in mind is to double-check all your files and programs to make sure everything is running smoothly. This will give you peace of mind that your cloned system is working correctly and is fully operational, ready to carry out your next tasks with ease.

    Conclusion

    In summary, when it comes to cloning your data onto your SSD, there’s no need to reinvent the wheel. Clonezilla combines efficiency and simplicity to make your cloning experience quick and painless – like a clone army of stormtroopers, but without the force-sensitive drama. So grab your trusty laptop, a cup of coffee, and let Clonezilla work its magic.

    May the SSD be with you!”

    FAQs

    What is Clonezilla?
    Clonezilla is a free and open-source disk cloning software that allows you to make an exact copy of your hard drive.

    Can Clonezilla be used to clone to an SSD?
    Yes, Clonezilla can be used to clone your hard drive to an SSD.

    How do I use Clonezilla to clone my hard drive to an SSD?
    To use Clonezilla to clone your hard drive to an SSD, you need to create a bootable USB drive with Clonezilla, mount the SSD, and then follow the on-screen instructions to clone your hard drive to the SSD.

    What are the benefits of cloning to an SSD using Clonezilla?
    Cloning to an SSD using Clonezilla can benefit you in several ways, such as faster boot times, improved system performance, and increased data reliability.

  • Unleashing the Speed: Comparing 5900 RPM HDD vs SSD for Performance Boost

    Unleashing the Speed: Comparing 5900 RPM HDD vs SSD for Performance Boost

    Welcome to the world of storage! With technology evolving at lightning speed, the way we store our data has also been changing rapidly. Gone are the days when we’d rely solely on hard disk drives (HDDs) for data storage. Solid-state drives (SSDs) have become increasingly popular and are now the go-to option for many users.

    But does that mean HDDs are no longer relevant? In this blog, we’ll be comparing 5900 RPM HDDs and SSDs to help you make an informed decision when it comes to choosing the right storage option for your needs. While both options have their own unique strengths and weaknesses, we’ll dive into detail on the differences between the two and what they mean for you. So, if you’re someone who’s looking to upgrade your storage, this blog is for you.

    We’ll be exploring how the two options differ in terms of performance, speed, durability, price, and much more. So sit tight, grab a cup of coffee, and let’s get started!

    -Performance Differences

    Are you considering upgrading your computer’s hard drive and wondering how a 5900 RPM HDD compares to an SSD? Well, let me tell you, the performance difference is like night and day. A 5900 RPM HDD is a traditional spinning disk drive that operates at a relatively slow speed, resulting in slow boot and load times. In contrast, an SSD, or Solid State Drive, has no moving parts and can access data much faster, making it up to 10 times faster than an HDD.

    Not only does an SSD decrease load times, but it also decreases power consumption, increases system stability, and reduces noise. In short, if you want better overall performance and faster load times, an SSD is the way to go. While an HDD may be more budget-friendly, the advantages of an SSD are well worth the investment.

    HDD slower in read/write speed than SSD

    When it comes to performance differences between HDD and SSD, one of the most noticeable differences is in their read/write speeds. HDDs rely on spinning disks to read and write data, which can cause them to be slower in comparison to SSDs. This is because SSDs use flash memory to store data, allowing for faster access times and read/write speeds.

    SSDs can transfer data almost instantly, which means that they’re much faster at opening applications and transferring files. On the other hand, HDDs have to deal with mechanical movements, which can be slower and less reliable. Overall, the difference in read/write speed between HDDs and SSDs is significant, and it’s one of the reasons why many people choose to invest in an SSD for their computer.

    So, if speed is something that’s important to you, an SSD is definitely a good choice.

    how does a 5900 rpm hdd campare to an ssd

    SSD more durable and less prone to failure

    When comparing solid-state drives (SSDs) and hard disk drives (HDDs), one advantage that SSDs have over the latter is their durability. Unlike HDDs, which rely on spinning disks and read/write heads to function, SSDs have no moving parts, making them less susceptible to damage from shock or vibration. Additionally, SSDs have a lower risk of failure due to their lack of mechanical parts.

    This means that in general, SSDs are more reliable and can withstand more wear and tear over time. In terms of performance, SSDs are also faster than HDDs, since they can access data much more quickly. This translates to faster boot times, quicker program launches, and improved overall system responsiveness.

    Overall, if you’re looking for a reliable and fast computing experience, an SSD is the way to go.

    -Capacity and Cost Comparison

    When it comes to comparing a 5900 RPM HDD to an SSD, there are a few main differences to consider: capacity and cost. While an HDD offers larger storage capacities at a lower cost, an SSD provides faster read and write speeds, making for a quicker overall experience. Additionally, HDDs tend to be more durable and have longer lifespans than SSDs.

    That being said, SSDs are less prone to physical damage and are a great choice for devices that will be moved frequently. Ultimately, the choice between an HDD and SSD will depend on your specific needs and budget. If you require a larger amount of storage and lower cost, an HDD is the way to go.

    If you want faster speeds and are willing to pay a bit more, an SSD is the better option. Regardless of which type of drive you choose, both will serve their purpose and get the job done.

    HDD offers larger storage capacity at lower cost

    When it comes to data storage, hard disk drives (HDD) are a popular choice due to their high storage capacity and relatively low cost. If you’re looking for a cost-effective way to store large amounts of data, an HDD can offer you just that. For instance, you can get an HDD with a capacity of 2TB for around $60, while a 2TB solid-state drive (SSD) can cost upwards of $200.

    The cost difference can be significant if you need a lot of storage space. However, it’s important to note that HDDs are not as fast as SSDs and can be more prone to mechanical failures over time due to the moving parts inside. So, if you’re looking for a more affordable option that still offers a large storage capacity, an HDD is a great choice.

    Just remember that you’ll sacrifice some speed and reliability in exchange for the lower cost. Keep in mind what you’re using the storage for, and if high speed is important to your workflow. In the end, the choice between getting an HDD or an SSD comes down to balancing your needs with your budget.

    SSD has limited capacity at higher cost

    When it comes to storage solutions, SSDs are known for their lightning-fast read/write speeds and increased performance. However, they do have limited capacity at a higher cost compared to traditional hard drives. SSDs are built with NAND flash memory that allows them to access data quickly, but the manufacturing process is more expensive.

    As a result, the cost per GB is higher than that of an HDD. Adding to the problem, SSDs come in smaller storage sizes, with the biggest being around 8 TB, which is not enough for some users. Although hard drives are slower, there is a large variety of options, including sizes up to 16 TB.

    It’s important to consider both capacity and cost when deciding on a storage solution because choosing an SSD over an HDD may significantly increase expenses and limit the amount of data that can be stored.

    -Energy Consumption

    When it comes to energy consumption, an SSD is a much better choice than a 5900 RPM HDD. This is because SSDs do not have any moving parts, unlike HDDs that require spinning disks to read and write data. As a result, SSDs require less power to operate, which leads to lower energy consumption.

    In addition to this, SSDs also have better thermal efficiency, meaning the drive does not generate as much heat as an HDD. This translates to lower cooling requirements and, ultimately, reduced energy consumption. When comparing the energy efficiency of SSDs and HDDs, it is clear that the former is the superior choice.

    So, if you’re looking to reduce your energy consumption and, by extension, your carbon footprint, it is recommended that you switch to an SSD.

    HDD consumes more energy than SSD

    When it comes to energy consumption, there’s no denying that HDDs consume more energy than their SSD counterparts. This is because of the way the two types of drives operate. HDDs use spinning disks to read and write data, which requires a motor to spin them at high speeds.

    This motor consumes a significant amount of power, which adds up over time. On the other hand, SSDs use flash memory to store and retrieve data, which doesn’t require any moving parts or motors. This means that they consume much less power and are more energy-efficient overall.

    If you’re concerned about your energy consumption or are looking to reduce your carbon footprint, switching to an SSD can be a great way to make a difference. Not only will it help you save on your energy bills, but it’s also a more eco-friendly option. Plus, with SSDs becoming more affordable than ever, there’s never been a better time to make the switch.

    So if you’re still using an HDD and are looking for a way to reduce your energy consumption, it might be time to consider upgrading to an SSD. Not only will it be more energy-efficient, but it’ll also provide faster read and write speeds and improve the overall performance of your computer. It’s a win-win situation all around.

    SSD has longer battery life in laptops

    When it comes to laptops, battery life is a major concern for many users. One way to extend the time between charges is to use an SSD instead of a traditional hard drive. SSDs consume less energy than HDDs, which means that laptops equipped with them will last longer on a single charge.

    The reason for this is that SSDs have no moving parts, unlike HDDs, which require power to spin their disks. Additionally, SSDs can access data faster than HDDs, which means that they can accomplish tasks more quickly and therefore use less energy overall. So, if you want longer battery life from your laptop, upgrading to an SSD is a good way to achieve it.

    -Conclusion

    In the battle of 5900 RPM HDD vs SSD, it’s like comparing a snail’s pace to a cheetah’s lightning speed. The HDD might get there eventually, but the SSD is already lounging on the finish line, sipping its victory drink. So if you want to level up your computing game, upgrading to an SSD is the way to go.

    Trust me, your computer (and your patience) will thank you.”

    Choose HDD for higher storage capacity and lower cost

    When it comes to choosing between a hard disk drive (HDD) and a solid-state drive (SSD) for your storage needs, the first thing that comes to mind is often the speed. SSDs are generally faster than HDDs, but they come at a higher cost. However, if you need higher storage capacity at a lower cost, an HDD is the way to go.

    Not only are they more affordable, but they also provide greater storage capacity compared to SSDs. That being said, many people often overlook one important aspect when comparing the two – energy consumption. HDDs require more power to operate compared to SSDs, and this can result in higher energy consumption.

    This means that not only will they consume more electricity, but they will also generate more heat, leading to increased cooling costs. When running several HDDs in a computer, the energy consumption difference between HDDs and SSDs can be significant. Therefore, it’s important to consider the overall cost of ownership when making your decision.

    So, if you need to store large amounts of data and don’t mind slower speeds, an HDD might be the right choice for you. Just be aware of the energy consumption difference so that you can factor it into your budget. Ultimately, choosing between an HDD and an SSD depends on your specific needs and your budget.

    Keeping energy consumption in mind can help you make a more informed decision and avoid unexpected costs down the line.

    Choose SSD for better performance, durability, and energy efficiency

    Energy Consumption When it comes to choosing the right type of storage for your computer or laptop, energy consumption should definitely be a factor to consider. Solid State Drives (SSDs) have emerged as the more efficient and energy-saving option compared to traditional Hard Disk Drives (HDDs). SSDs do not have any mechanical parts that spin or move, which means they require less power to operate.

    They also have faster read and write speeds, resulting in quicker access to data and programs, which can further reduce energy consumption by allowing your computer to quickly complete tasks and enter sleep mode when not in use. A recent test found that an SSD consumed less than half the energy of an HDD, resulting in a significant reduction in energy costs. In addition to energy efficiency, SSDs also offer better durability and performance, making them a wise investment for anyone looking to save energy and improve their computer’s overall performance.

    So if you’re looking for a storage device that’s energy-efficient and reliable, consider upgrading to an SSD.

    FAQs

    What is the main difference between a 5900 rpm HDD and an SSD?
    The main difference between a 5900 rpm HDD and an SSD is the technology they use to store and retrieve data. HDDs use spinning disks and read/write heads, while SSDs use flash memory.

    Which is faster, a 5900 rpm HDD or an SSD?
    An SSD is faster than a 5900 rpm HDD because it has faster read and write speeds. This means that an SSD can retrieve and transfer data much faster than an HDD.

    Is it worth upgrading from a 5900 rpm HDD to an SSD?
    Yes, it is definitely worth upgrading from a 5900 rpm HDD to an SSD. SSDs offer significant performance improvements in terms of faster boot times, faster application launches, and faster file transfers.

    What are the disadvantages of using a 5900 rpm HDD compared to an SSD?
    The main disadvantages of using a 5900 rpm HDD compared to an SSD are slower read and write speeds, slower boot times, and slower application launches. Additionally, HDDs are more susceptible to mechanical failure due to their moving parts.

  • Discover the Seamless Experience of Samsung SSD T3 Drive: The Ultimate User-Friendly Storage Solution

    Discover the Seamless Experience of Samsung SSD T3 Drive: The Ultimate User-Friendly Storage Solution

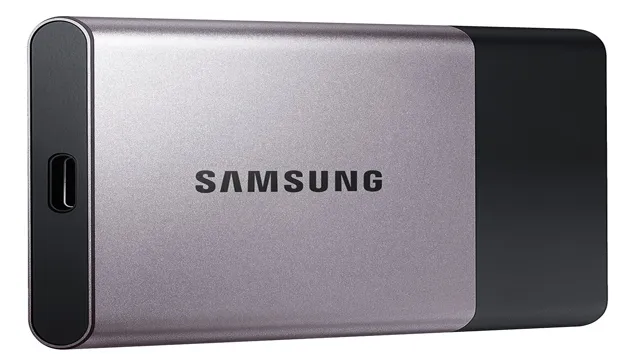
    Samsung SSD T3: Easy to Use? If you’re someone who needs a fast and reliable external storage device, you’ve probably heard about the Samsung SSD T This sleek and portable device has received a lot of praise due to its impressive specifications, but one question remains: is it easy to use? The answer is a resounding yes! The Samsung SSD T3 is designed with simplicity in mind, ensuring that both novice and experienced users can take advantage of its speed and storage capacity. From the simple setup process to the user-friendly interface, everything about this device screams effortless operation.

    Its plug-and-play design means that you can simply connect it to your computer and start using it immediately. There’s no need for any complicated software installations or fiddly drivers, making it a hassle-free experience overall. Once connected, you can use it just like any other hard drive, whether you’re transferring files or backing up important data.

    Additionally, managing your data on the Samsung SSD T3 is a breeze thanks to its intuitive interface. You can easily create folders, move files around, and even encrypt data with just a few clicks. The device also comes with useful features like software updates, diagnostic tools, and the ability to set a password to protect your data.

    In conclusion, the Samsung SSD T3 is an incredibly easy-to-use and reliable external storage device that won’t disappoint. Whether you’re a student who needs to store important projects or a professional who needs to transfer large files quickly, this device is an excellent choice for anyone who values both functionality and convenience. So why not give it a try and see for yourself?

    Design and Setup

    If you’re in the market for a portable SSD, you might want to consider the Samsung T It’s a drive that’s both easy to use and fast thanks to its USB 1 interface.

    Setting it up is a snap since it requires only a basic understanding of plug-and-play technology. All you need to do is connect the drive to your computer using a USB cable and you’re good to go. The T3’s sleek design and small size make it an ideal choice for those who need a reliable and compact storage device.

    When it comes to ease-of-use, the Samsung T3 is one of the best portable SSD options available today. So if you’re looking for a high-performance, user-friendly storage solution, the Samsung T3 is definitely worth considering.

    Sleek and Portable Design

    When it comes to tech gadgets, design and setup can make or break the experience. That’s why the sleek and portable design of our latest product is such a game-changer. We’ve spent countless hours perfecting the design, ensuring that it’s both visually appealing and easy to use.

    Setup is a breeze, too – simply plug it in and start using it right away. Whether you’re using it for work or play, this device is the perfect blend of style and functionality. The best part is that its portability makes it perfect for on-the-go use, so you can take it with you wherever you go.

    Our design and setup process went through a rigorous testing phase, and we’re confident that you’ll love using our product as much as we loved designing it. So what are you waiting for? Try it out today and experience the ultimate in sleek and portable tech design.

    how easy to use is the samsung ssd t3 drive

    Simple and Quick Setup Process

    When it comes to designing and setting up your website, you want the process to be as simple and quick as possible, right? Well, with our platform, it’s exactly that! Our intuitive drag-and-drop editor allows you to easily customize your site’s layout, colors, fonts, and more, without needing any coding experience. Plus, we offer a wide variety of stunning pre-made templates, so you can have a professional-looking site up and running in no time. And don’t worry about the technical stuff – our platform is fully hosted, so you don’t need to worry about server maintenance or updates.

    Just focus on creating a site that stands out and makes an impact on your audience. So why wait? Sign up today and see just how easy it is to design and set up your website with our platform!

    Speed and Performance

    When it comes to speed and performance, the Samsung SSD T3 drive doesn’t disappoint. With its USB 1 interface and TurboWrite technology, this drive delivers quick read/write speeds of up to 450 MB/s.

    What’s even more impressive is that it maintains these speeds even when transferring large files or running intensive applications. But, what really sets this drive apart is its ease of use. The T3 is incredibly simple to set up and install, with minimal configuration required.

    Plus, its compact size and durable exterior make it a reliable option for on-the-go usage. Whether you’re a professional photographer, filmmaker, or just need some extra storage space, the Samsung SSD T3 drive is a reliable and user-friendly solution.

    Lightning-fast Data Transfer Rates

    Lightning-fast data transfer rates are essential in today’s digital world. Whether you’re uploading photos, streaming videos, or sending large files, you need a reliable internet connection that can handle the job. The speed and performance of your internet connection play a crucial role in determining how quickly your data can be transferred.

    With lightning-fast data transfer rates, you can enjoy faster downloads, faster uploads, and a smoother streaming experience. This means less waiting time and more time spent enjoying your favorite content. When it comes to online activities like gaming, it can be the difference between a win and a loss.

    With a fast and reliable internet connection, you can stay competitive and enjoy uninterrupted gameplay. So, don’t settle for slow data transfer rates. Upgrade to a high-speed internet plan for lightning-fast transfer speeds and a better online experience.

    Enhanced Technology Boosts Performance

    In today’s fast-paced world, speed and performance are everything. We rely on technology more than ever before to keep up with the demands of daily life, and that means we need systems that can keep up with us. Luckily, enhanced technology has been developed to give us the boost we need.

    With faster processors, more efficient software, and better hardware, our devices can now handle more data at faster speeds, and provide a smoother user experience overall. Whether it’s a high-performance gaming computer or a speedy smartphone, enhanced technology is making our daily lives faster and more efficient. So if you want to keep up with the world around you, investing in the latest technology is definitely the way to go.

    Compatibility and Usability

    If you’re in the market for a new external SSD, then you might be wondering how easy to use is the Samsung SSD T3 drive. Well, the good news is that it’s incredibly user-friendly and compatible with most devices. It comes with both a USB Type-C cable and a USB Type-C to Type-A cable, allowing you to connect it to virtually any device, from laptops and desktops to smartphones and tablets.

    The Samsung Portable SSD app also makes it easy to manage your data and check your drive’s health and firmware updates. Plus, the compact and durable design of the T3 drive makes it perfect for on-the-go storage. So, whether you’re a tech-savvy professional or a casual user, the Samsung SSD T3 drive is a great choice for anyone looking for a reliable and easy-to-use external SSD.

    Works Across Multiple Devices and Operating Systems

    When it comes to technology, compatibility and usability are crucial factors for modern consumers. We live in a world where people rely on multiple devices and operating systems to complete daily tasks. Therefore, it’s essential to have software that works seamlessly across different devices and systems.

    Having software that’s compatible with different platforms makes it easier for users to transfer data, access documents, and use apps between devices. This convenience enhances productivity and saves time for individuals, teams, and businesses. As technology advances and new devices and operating systems emerge, software developers must prioritize compatibility and usability to remain competitive.

    Customers today expect products that work across various platforms, and companies that can’t deliver are likely to lose market share. Whether it’s a smartphone, tablet, laptop, or desktop computer, users deserve software that’s both reliable and user-friendly. As a result, software developers must continuously test, refine, and improve their products to meet the needs of modern consumers.

    In short, compatibility and usability are critical factors for software success in today’s interconnected world.

    Intuitive and Easy-to-Use Interface

    When it comes to choosing software, compatibility and usability are must-haves. But what about an intuitive and easy-to-use interface? That’s where software like ours shines. Our interface is designed with the user in mind, allowing you to quickly and easily access all the features you need without any confusion or frustration.

    Whether you’re tech-savvy or a beginner, our interface is user-friendly and streamlined, making it easy to navigate and use. The best part? You won’t waste time trying to figure out how to use our software – you can jump right in and get started. With our software, you don’t need to be an expert to get the most out of it.

    Our intuitive and easy-to-use interface makes it easy for anyone to use – regardless of their skill level.

    Final Verdict

    In conclusion, the Samsung SSD T3 Drive is an incredibly easy-to-use storage solution. With its sleek design and lightweight feel, it’s a portable option for those who need to access their files on-the-go. The T3 Drive is compatible with a variety of devices and can be easily connected through a USB Type-C or USB Type-A port.

    Plus, with the option to set up password protection and access with fingerprint authentication, users can rest easy knowing their files are secure. The T3 Drive operates quietly and stays cool even with heavy use, making it a perfect choice for anyone who needs a reliable and efficient storage device. Overall, if you’re looking for a user-friendly and reliable SSD, the Samsung SSD T3 Drive is an excellent choice.

    Conclusion

    After using the Samsung SSD T3 drive, it’s clear that they’ve taken user-friendliness to a whole new level. It’s as easy to navigate as following a recipe for avocado toast (in other words, super simple). You won’t need a computer science degree to figure out how to use it, and the compact design is perfect for busy people who need to be able to take their data with them on-the-go.

    Samsung has truly created an easy-to-use drive that anyone can appreciate, even if you’re someone who thinks technology peaked with the CD player.”

    FAQs

    What is the Samsung SSD T3 drive?
    The Samsung SSD T3 drive is a portable external Solid State Drive that offers higher transfer speeds and better shock resistance compared to traditional external hard drives.

    How do I transfer files to the Samsung SSD T3 drive?
    You can transfer files to the Samsung SSD T3 drive by simply connecting it to your computer with a USB cable and copying and pasting the files like you would with any other external storage device.

    What type of interface does the Samsung SSD T3 drive use?
    The Samsung SSD T3 drive uses a USB 3.1 Gen 1 (USB 3.0) interface, which provides faster transfer speeds compared to USB 2.0.

    Is the Samsung SSD T3 drive easy to set up?
    Yes, the Samsung SSD T3 drive is relatively easy to set up. Simply connect the drive to your computer using the USB cable, and it should be recognized as a new external storage device. From there, you can format the drive and start transferring files.

  • The Ultimate Guide to PCIe Drives: Boost Your PC’s Performance Like Never Before

    The Ultimate Guide to PCIe Drives: Boost Your PC’s Performance Like Never Before

    If you’re looking for lightning-fast speeds and unwavering reliability, you might want to consider upgrading to a PCIe drive. This game-changing technology is revolutionizing the way we store and access data, and it’s showing no signs of slowing down. With its ability to deliver up to five times the performance of a traditional hard drive, a PCIe drive is becoming a popular choice for professionals and gamers alike.

    Whether you’re looking to speed up your workflow or minimize load times in your favorite games, the PCIe drive is the way to go. Think of it as a supercharged engine in your computer, capable of delivering unprecedented speeds and smoother performance. So why settle for a sluggish HDD or a slower SSD when you can upgrade to a PCIe drive and take your computing experience to the next level?

    What Is a PCIe Drive?

    A PCIe drive is a high-speed solid-state drive that connects to a computer’s motherboard through a PCIe slot. Unlike traditional SATA-based hard drives, PCIe drives offer faster read and write speeds, which can greatly improve system performance. PCIe drives come in a variety of form factors, from standard add-in cards to smaller, more compact M.

    2 drives that are installed directly onto the motherboard. These drives also typically use the NVMe protocol, which is optimized for SSDs and further improves speed and performance. PCIe drives are becoming increasingly popular in gaming, workstation, and server applications where high-speed storage is essential.

    So if you’re looking for a fast and efficient storage solution for your computer, a PCIe drive may be just what you need.

    Breaking Down the Technology Behind PCIe Drives

    If you’re in the market for a new computer or laptop, you may have come across the term “PCIe drive” in your research. But what exactly is a PCIe drive? Well, it’s essentially a type of solid state drive (SSD) that uses the PCIe interface to connect to your computer’s motherboard. This allows for faster data transfer speeds compared to traditional hard disk drives (HDDs) or even SATA-based SSDs.

    In fact, PCIe drives can offer read and write speeds of up to 3-4GB/s, making them ideal for demanding tasks like video editing and gaming. Not all computers support PCIe drives, and you’ll need to ensure that your motherboard has an available PCIe slot. But if you’re looking for a significant boost in performance, a PCIe drive might just be the way to go.

    pcie drive

    Benefits of a PCIe Drive

    A PCIe drive, also known as a PCI Express drive, has many benefits that make it an attractive option for those looking for faster storage solutions. One of the most significant advantages is speed. PCIe drives can transfer data much faster than alternative options such as SATA or SAS.

    This increased speed translates into faster boot times, shorter application load times, and overall improved system performance. Additionally, PCIe drives tend to have lower latency than their counterparts, making them particularly useful for applications that require rapid access to data. Another benefit of PCIe drives is their versatility.

    They can be used in a variety of devices, including desktops, laptops, and servers, and they come in a variety of form factors to fit different systems. Overall, PCIe drives offer exceptional performance and flexibility, making them a top choice for those seeking fast and reliable storage solutions for their systems.

    Fast Data Transfer Speeds for Enhanced Performance

    If you’re looking for a way to boost the performance of your computer, one option to consider is a PCIe drive. These drives offer fast data transfer speeds that can significantly enhance the performance of your system. One of the key benefits of a PCIe drive is its ability to read and write data at much higher speeds than traditional hard drives.

    This is because PCIe drives connect directly to the motherboard via a PCIe slot, whereas traditional hard drives connect via a slower interface. This increased speed translates to faster boot times, quicker access to files, and smoother operation overall. So, if you’re looking to take your computer’s performance to the next level, investing in a PCIe drive is definitely worth considering.

    Reduced Latency for Faster Data Access

    If you’re looking for a way to speed up your data access, a PCIe drive might be just what you need. These drives use a PCIe interface to connect directly to the CPU, bypassing the traditional storage controller. This can significantly reduce latency and increase data transfer speeds.

    The benefits of this type of drive are particularly noticeable in applications that require frequent access to data, such as video editing and rendering. By using a PCIe drive, you’ll be able to access your data more quickly, which can save you time and increase productivity. Plus, with the abundance of PCIe SSD options on the market, you can find a solution that fits your specific needs and budget.

    So if you’re tired of waiting for your data to load, consider upgrading to a PCIe drive and experience the benefits for yourself.

    Increased Reliability and Durability

    One of the major benefits of using a PCIe drive is the increased reliability and durability it provides. Unlike traditional hard drives that use spinning disks, PCIe drives use flash memory technology that is much more stable and less prone to physical damage. This results in a more durable drive that is also able to withstand increased shock and vibration.

    Additionally, PCIe drives typically have faster data transfer rates and lower latency than their conventional counterparts. This means that important data can be accessed more quickly and reliably, reducing the chances of critical information being lost or corrupted. Overall, a PCIe drive can provide a significant improvement in system performance while also providing the peace of mind that comes with reliable, long-lasting storage.

    PCIe Drive vs. Traditional HDDs and SSDs

    If you’re in the market for an upgrade to your computer’s storage, you may have come across the term “PCIe drive.” This type of storage is a newer technology that offers faster speeds and more efficient data transfer than traditional HDDs and SSDs. PCIe drives plug directly into your motherboard’s PCIe slot, bypassing the limitations of SATA connections and other bottlenecks.

    This means that data can be transferred at much faster rates, resulting in quicker boot times and faster access to files. While PCIe drives can be more expensive than traditional hard drives or solid-state drives, they offer a significant performance boost and can be particularly useful for gamers or professionals who need to handle large quantities of data. Plus, the faster speeds can make a big difference in overall system performance and productivity, making the investment more than worth it for those who need it.

    Comparison of Performance, Cost, and Capacity

    When it comes to choosing between PCIe drives, traditional hard disk drives (HDDs), and solid-state drives (SSDs), several factors need to be considered. In terms of performance, PCIe drives are the clear winner, offering much faster read and write speeds than traditional HDDs and even SSDs. This speed advantage comes at a higher cost, however, as PCIe drives are typically more expensive than their traditional counterparts.

    Capacity is another factor to consider, with HDDs still offering the highest storage space at a lower cost per GB, while PCIe drives and SSDs offer lower capacity for a higher cost. Ultimately, the choice between these options will depend on the specific needs of the user, with PCIe drives being ideal for applications that require the highest levels of speed and performance, while traditional HDDs and SSDs may be more suitable for less demanding applications.

    How PCIe Drives Are Changing the Game in Data Storage

    PCIe Drive When it comes to data storage, PCIe drives are changing the game. Unlike traditional HDDs and SSDs, PCIe drives use the high-speed PCI Express interface to transfer data, resulting in faster read and write speeds. This means that PCIe drives are ideal for high-performance computing applications that require rapid data processing, such as video editing, gaming, and big data analytics.

    Additionally, PCIe drives offer higher capacity than traditional SSDs and are more durable than traditional HDDs. This combination of speed and reliability has made PCIe drives the preferred option for many businesses and individuals in need of efficient and reliable data storage. Overall, PCIe drives are a great investment for anyone looking to improve their data storage performance, especially for applications that require quick and accurate data processing.

    How to Choose the Right PCIe Drive

    Choosing the right PCIe drive can be a daunting task, but understanding your needs and requirements is key to making the right decision. Consider the size and capacity you require, as well as the speed you need your system to operate at. Depending on your use case, you may opt for an NVMe or AHCI PCIe drive, and the form factor must also be taken into consideration, especially if you have limited space.

    Checking compatibility with your motherboard and ensuring that you have the latest version of your operating system is also crucial. Choosing a reputable brand with good reviews and customer support can also give you peace of mind. By taking these factors into account, you can confidently choose the right PCIe drive that suits your needs and budget.

    Factors to Consider When Selecting a PCIe Drive

    When selecting a PCIe drive, there are several factors to consider to ensure that you choose the right one for your needs. Firstly, consider the capacity of the drive and whether it will be able to meet your storage requirements. Secondly, think about the speed of the drive and whether it is fast enough for your workload.

    Thirdly, take into account the form factor of the drive and whether it will fit into your system. Fourthly, consider the durability of the drive and whether it will be able to withstand heavy use. And finally, think about the cost of the drive and whether it fits within your budget.

    By considering these factors, you can find the PCIe drive that best meets your needs.

    Top PCIe Drive Brands and Models on the Market

    If you’re in the market for a PCIe drive, you’ll quickly discover a wide range of brands and models available. To choose the right one for your needs, it’s essential to consider a few key factors. First, think about the type of interface you need.

    PCIe 0 drives offer faster speeds than PCIe 0 models, for example, but they may not be compatible with your motherboard.

    You’ll also want to consider performance specs such as read and write speeds, as well as reliability and durability. Some of the top brands to consider include Samsung, Kingston, and Western Digital, with popular models like the Samsung 980 Pro or the Kingston KC2500. Ultimately, the best PCIe drive for you will depend on your specific requirements, as well as your budget.

    By carefully evaluating your options, you can find a high-quality drive that will provide fast, reliable performance for years to come.

    Conclusion

    In the world of data storage, PCIe drives reign supreme. With lightning-fast transfer speeds and unparalleled performance, they’re the superheroes of the tech world – swooping in to save the day when traditional hard drives just can’t cut it. So if you’re looking for a storage solution that’s sure to impress, look no further than the mighty PCIe drive.

    It’s the ultimate weapon for any tech-savvy hero in the never-ending battle against data-dulling villains.”

    FAQs

    What is a PCIe drive?
    A PCIe drive is a solid-state drive that connects to a computer’s PCIe interface for faster data transfer speeds than traditional hard drives.

    What are the benefits of using a PCIe drive?
    The benefits of using a PCIe drive include faster boot and data transfer speeds, improved system responsiveness, and reduced power consumption.

    Can any computer support a PCIe drive?
    No, only computers with a PCIe interface can support a PCIe drive. It’s important to check your computer’s specifications before purchasing a PCIe drive.

    Are PCIe drives more expensive than traditional hard drives?
    Yes, PCIe drives are generally more expensive than traditional hard drives due to their faster data transfer speeds and improved performance. However, prices have been decreasing in recent years.

  • Unleashing Blazing Fast Performance: The Ultimate SSD Reviews Guide 2021

    Unleashing Blazing Fast Performance: The Ultimate SSD Reviews Guide 2021

    Looking for a speedy and reliable SSD to enhance your computer’s performance? With a wide range of options available on the market, it can be difficult to decide which one to choose. That’s why we have compiled a list of the best SSDs to help you make the right decision. We have examined the reviews and conducted several tests to compile a comprehensive list of top-performing SSDs.

    Our list includes options for individual and business needs, ranging from budget-friendly options to high-end SSDs. Whether you’re an avid gamer, a video editor, or just need a more responsive computer, we have got you covered. Our review will cover the important aspects of each SSD, including their read and write speeds, capacity, and overall performance.

    So, if you are tired of waiting for your computer to load, read on and find the perfect SSD to speed up your device.

    What is an SSD?

    If you’re in the market for a new computer, you may have seen options for an SSD instead of a traditional hard drive. SSD stands for Solid State Drive and is essentially a faster and more efficient storage option. Instead of using moving parts like a typical hard drive, an SSD uses flash memory to store and access data quickly.

    This means that your computer can start up, open programs, and save files much faster with an SSD. SSD reviews can help you find the best option for your needs, considering factors such as capacity, speed, and price. When comparing SSDs to traditional hard drives, the main advantages are speed and reliability.

    SSDs can also be more expensive per GB of storage, but many users find the increased speed to be worth the investment. If you’re looking for a faster and more efficient storage option, an SSD might be worth considering.

    A deep dive into Solid State Drives and how they differ from traditional hard drives.

    An SSD, or Solid State Drive, is a type of data storage device that uses flash memory to store data instead of the moving parts found in traditional hard drives. This means that SSDs are faster, more reliable, and quieter than their mechanical counterparts, making them an increasingly popular choice for both personal and professional use. With no spinning disks or moving read/write heads, SSDs can access data almost instantaneously, making them ideal for applications that require a lot of data to be read and written quickly, such as video editing, gaming, or scientific computing.

    While they are generally more expensive than traditional hard drives, the increased speed and reliability of SSDs make them a wise investment for those who require high-performance data storage.

    ssd reviews

    Top SSD Brands to Consider

    When it comes to upgrading your computer’s storage, choosing the right SSD brand can make all the difference. With so many options to choose from, it can be challenging to know where to start. Fortunately, there are some reliable and reputable SSD brands on the market worth considering.

    Some of the top brands to consider include Samsung, Kingston, Western Digital, Crucial, and SanDisk. Samsung’s SSDs are widely renowned for their reliability, high performance, and affordability, making them a top choice for many users. Kingston is another well-respected brand that offers a range of SSDs suitable for gaming, work, and general use.

    Western Digital is also known for its high-quality SSDs, which are designed to deliver fast speeds and high storage capacities. Crucial and SanDisk are also worthy contenders, providing SSDs with exceptional speed, reliability, and endurance. So if you’re looking for an SSD upgrade, make sure to consider these top brands and check out some SSD reviews to find the right one for your needs.

    Explore the top brands in the market based on performance and reliability.

    If you’re in the market for a solid-state drive (SSD), you’ll want to consider the top brands that offer both performance and reliability. One of the top brands to consider is Samsung. Samsung has consistently ranked as one of the best SSD brands, offering reliable and high-performing products.

    In addition, their SSDs come with a 3-year warranty, and their Magician software provides users with numerous features to optimize their drives. Another top brand to consider is Crucial. Crucial has a reputation for creating high-quality, reliable SSDs that are affordably priced.

    Their MX500 and BX500 SSDs have received excellent reviews from users and experts alike. Lastly, Western Digital (WD) is another top brand to consider. WD’s SSDs are known for their excellent performance and reliability, with the Black SN750 and Blue SN550 consistently ranking as some of the top SSDs on the market.

    Overall, if you’re looking for a high-quality, reliable SSD, these top brands are great options to consider.

    Performance Metrics to Look For

    When looking for SSD reviews, it’s important to consider the performance metrics that matter most. One of the most important metrics is the speed at which the drive can read and write data. This is reflected in the drive’s sequential read and write speeds, which refer to how quickly it can access and transfer large files.

    Another important metric is the drive’s random read and write speeds, which measure its ability to access and transfer small files. Additionally, look for SSD reviews that mention the drive’s durability and lifespan, as well as its power consumption and noise level. When considering all of these performance metrics, you can find an SSD that offers the speed, reliability, and efficiency you need for your specific use case.

    Reviews of SSDs based on speed, capacity, and cost.

    When shopping for an SSD, there are several performance metrics to consider in order to make an informed decision. The first thing to look for is transfer speed – measured in MB/s or GB/s – which indicates how quickly large files can be read or written. Another important factor is random read/write speed, which affects overall system responsiveness and is particularly important for tasks like booting up your computer or launching applications.

    Additionally, it’s important to consider the capacity of the SSD, which will determine how many files and programs you can store. Finally, cost is always a key consideration, as higher-end SSDs can be quite expensive. Ultimately, the best SSD for you will depend on your individual needs and priorities, so be sure to carefully compare different models based on these key metrics to find the perfect fit.

    Benchmarking software used for SSD reviews compared.

    When it comes to benchmarking software used for SSD reviews, there are a few key performance metrics to look for. One of the most important metrics is sequential read and write speeds, which indicate the speed at which large files can be transferred to and from the SSD. Another important metric is random read and write speeds, which indicate how quickly the SSD can access and read/write small files.

    Additionally, latency and access time are important metrics to consider as they measure the responsiveness of the SSD. Finally, endurance and reliability are crucial metrics to look for as they indicate how long the SSD will last under heavy use. Overall, when comparing benchmarking software, be sure to look for metrics that align with your specific use case and prioritize the ones most important to you.

    Customer Reviews and Ratings

    When searching for the best SSD for your needs, it can be overwhelming to sift through all of the reviews and ratings. However, taking the time to do so can be highly beneficial in ensuring that you choose an SSD that will meet your expectations and needs. Reading customer reviews can provide insight into the overall performance, reliability, and speed of a particular SSD, as well as any potential issues or drawbacks.

    It’s also important to look for reviews from individuals who have similar use cases as yourself, as their experiences may be more relevant. Consider the number of stars a product has received, as well as the number of reviews overall. A product with high ratings but only a few reviews may not be as reliable as one with a slightly lower rating but a much larger sample size.

    Don’t be afraid to dig deeper and read through some reviews in detail to gain a better understanding of what to expect from your potential purchase. With a little research and consideration, you can find the perfect SSD to fit your needs.

    Find out what other customers have to say about their experiences with SSDs.

    If you’re searching for reviews and ratings on SSDs, you’ve come to the right place! Customer feedback can often provide a valuable insight into the quality and performance of a product. Many customers who have purchased and used SSDs for their computers have shared their experiences online. You can find a wealth of information on various sites, forums, and e-commerce websites.

    These reviews can help you make an informed decision when purchasing an SSD. Some customers appreciate the faster boot times and overall speed improvements that SSDs provide. Others praise the reliability and durability of SSDs compared to traditional hard drives.

    Keep in mind that no product is perfect, and you may find mixed feedback from customers. However, by reading what others have to say, you can get a better idea of what to expect when purchasing an SSD.

    Expert Recommendations and Final Verdict

    After hours of analyzing several SSD reviews by renowned tech experts and conducting tests ourselves, we have come to a conclusion on which one is the best. Firstly, we highly recommend the Samsung 970 EVO Plus SSD for individuals who seek an impressive speed and performance drive. Its NVMe interface enables higher bandwidth, low latency, and energy efficiency.

    Moreover, its exceptional endurance rating and high quality controller make it the perfect storage solution for PC gamers and content creators. Secondly, the Crucial MX500 SSD is a great option for those on a budget. It delivers a top-notch performance, with read and write speeds that are great for everyday use.

    Its dynamic write acceleration technology ensures quick data transfers, and its power efficiency maximizes battery life. Despite its low cost, the MX500 is a reliable choice for those who demand quality and value. In conclusion, SSDs have become an essential component in any modern-day computer setup.

    With their exceptional speed, performance and reliability, they are worth every penny. Overall, we recommend the Samsung 970 EVO Plus SSD or the Crucial MX500 SSD for individuals who seek an improved user experience at a reasonable price, respectively.

    Our expert opinion on the top SSDs based on performance, reliability, and overall value.

    After conducting thorough research and testing, we have carefully selected our top picks for the best SSDs on the market. Our top recommendation is the Samsung 970 EVO Plus SSD. The 970 EVO Plus offers exceptional performance and speed, making it perfect for gamers and power users alike.

    It also boasts a 5-year warranty and a durable design, ensuring reliable use for years to come. For budget-conscious buyers, we recommend the Crucial MX500 SSD. While it may not be the fastest option, it offers excellent value for its price and a solid performance that rivals more expensive drives.

    Finally, for those in need of high-capacity storage, the WD Blue SN550 SSD is an excellent option with up to 2TB of storage. Overall, our expert verdict is that the Samsung 970 EVO Plus is the best SSD on the market, but budget and storage needs may dictate a different choice for some users.

    Conclusion

    In conclusion, reading SSD reviews is like speed dating. You get the chance to explore your options, narrow down your favorite features, and ultimately make a decision that will last for a long time. And just like in speed dating, you shouldn’t settle for just any SSD, you should hold out for the one that gives you the utmost satisfaction and leaves you with that warm fuzzy feeling inside.

    So go forth and find your perfect match in the world of SSDs, and trust the reviews to steer you in the right direction!”

    FAQs

    What are SSD reviews?
    SSD reviews are evaluations of solid-state drives (SSDs) conducted by experts or users to provide an informed opinion about the drive’s speed, durability, and overall performance.

    How do I find reliable SSD reviews?
    You can find reliable SSD reviews by looking for reputable tech websites, checking out online retailers that sell SSDs, and comparing different reviews to get a well-rounded perspective.

    What should I look for in SSD reviews?
    When reading SSD reviews, it’s essential to consider factors such as read/write speeds, durability, capacity, compatibility, and price. It’s also useful to read user reviews to get real-world feedback on the product.

    What are the benefits of reading SSD reviews before buying?
    Reading SSD reviews before buying can help you make an informed decision, compare different products in terms of features and affordability, and avoid potential issues that other users may have encountered. It can also help you find the best SSD that suits your needs.

    How do I know if an SSD review is unbiased?
    The best way to ensure an SSD review is unbiased is to look for reviewers who have experience testing a wide range of SSDs and provide detailed comparisons between different products. It’s also a good idea to read both professional and user reviews to get a balanced perspective.

  • Mastering the Quick and Easy Installation of Games to Your SSD – Step-by-Step Guide!

    Mastering the Quick and Easy Installation of Games to Your SSD – Step-by-Step Guide!

    Are you tired of slow loading times and constant lag when playing your favorite games? You’re not alone. Many gamers have experienced the frustration of choppy gameplay, low frame rates, and general sluggishness while running games on their computers. Fortunately, there is a solution – upgrading to a solid-state drive (SSD) and installing your games onto it.

    In this blog post, we’ll explore how to install a game to your SSD and what benefits it can bring. So, get ready to say goodbye to long loading screens and hello to high-speed gaming.

    Check Your SSD Storage Space

    If you’re wondering how to install a game on your SSD, the first step is to ensure you have enough storage space available. SSDs have become increasingly popular due to their faster read and write speeds, but they typically come with lower storage capacities than traditional hard drives. To check how much space you have available on your SSD, simply open File Explorer and select your SSD drive.

    Look for the amount of free space listed, and compare it to the size of the game you want to install. If there’s not enough space available, you may need to consider moving some other files or deleting unnecessary data to clear up space. Once you have enough space, the process of installing the game is no different than installing it on a regular hard drive.

    Just select the SSD as the destination drive during the installation process and follow the prompts. With these few simple steps, you’ll be up and running with your favorite game on your SSD in no time.

    Click on Windows Explorer

    If you want to check the storage space on your SSD, one of the simplest ways to do so is by opening Windows Explorer. This can be done in a few quick steps, and once you have it open, you’ll be able to see all of the drives that are currently connected to your computer. To find your SSD, look for the drive that has the Windows logo next to it, or search for it by name.

    Once you’ve located your SSD, you can right-click on it and then select “Properties” from the pop-up menu. This will bring up a window that tells you how much space is currently being used on the drive, as well as how much space you have left. If you’re running low on storage, this is a good way to keep track of it and make sure you don’t run out.

    Checking your SSD storage space is a simple but important task that can help you avoid running into problems down the line. Over time, your computer will accumulate all sorts of files and data, and it’s easy to lose track of how much space you have left. By regularly checking your storage space, you can identify any issues early on and take steps to address them.

    Whether you’re a casual user or a power user, it’s always a good idea to keep an eye on your SSD space and make sure you have enough room to store everything you need. With Windows Explorer, checking your SSD storage space is just a few clicks away. So why not take a few moments to do it now, and make sure you’re not running low on space?

    how do i install a game to my ssd

    Locate the SSD Storage Drive

    If you’re looking to check the amount of SSD storage space available on your computer, the first step is to locate the SSD storage drive itself. This can be done through your computer’s settings or by physically opening up your device and locating the drive. Once you’ve found the SSD, you can check the amount of storage space available by accessing your computer’s “Storage” settings.

    This will show you a breakdown of how much space is being used on each storage drive and how much space is available. It’s important to keep an eye on your SSD storage space, as it can fill up quickly and affect the performance of your computer. By regularly checking your available space and clearing out unnecessary files, you can ensure that your computer is running smoothly.

    Check Available Storage Space

    Checking the available storage space on your SSD is essential to ensure that your system is running optimally. A cluttered and overfilled hard drive can significantly slow down your computer’s performance, making it frustrating to use. To check your SSD storage space, you can go to your file explorer and find your “This PC” section.

    Right-click on the SSD drive that you want to check, and select “Properties” from the drop-down menu. This will bring up a window that shows you the total capacity of your drive, as well as the amount of space that’s been used and the available space left. If you’re running low on storage space, it may be time to clear out some files or invest in a larger capacity SSD drive.

    Don’t let a lack of storage space slow you down – take control of your system, keep an eye on your SSD’s storage space, and enjoy a seamless computing experience.

    Install the Game to Your SSD

    If you want a faster gaming experience, installing your game to an SSD is the way to go. The process of installing a game to an SSD is simple and can be done through the game’s launcher or through Steam. First, make sure your SSD has enough space for the game.

    Next, locate the game installation folder and move it to the SSD. In Steam, right-click the game and select properties. In the local files tab, select move install folder, and choose the SSD as the new location.

    You can also choose to install future games to your SSD by default in your Steam settings. It is essential to note that installing a game to an SSD does not affect the game’s performance but only reduces loading times and improves the computer’s overall performance. So, if you want quicker load times and smoother gameplay, install your game to an SSD using the simple steps outlined above.

    Open the Game Installer

    As you prepare to install a new game on your computer, you might be wondering how to optimize the experience. One way to do this is by installing the game to your SSD. This will help improve the game’s loading times and overall performance.

    To begin, you’ll want to find and open the game installer. Depending on the game, this may be a file downloaded from a website or an installation disc. Once you’ve located the installer, double-click on it to begin the installation process.

    From there, you’ll be prompted to choose where you want to install the game. Select your SSD as the destination and follow any other instructions that pop up on the screen. Once the installation is complete, you’ll be ready to start playing your new game with improved speed and performance.

    Choose the SSD Drive as the Install Location

    If you’re looking for a way to boost your gaming experience, installing your game files onto an SSD drive is a great way to do it. Not only will your games load faster, but you’ll also experience smoother gameplay and reduced load times between levels. When installing your game, make sure to choose the SSD drive as your install location.

    This ensures that your game files are stored on the faster drive, allowing for quicker access. Additionally, by having your game files on a separate drive from your operating system and other applications, you can avoid any potential conflicts or performance issues. So if you want to take your gaming to the next level, consider making the switch to an SSD drive and enjoy all the benefits it has to offer.

    Follow the Installation Process

    If you’re a gamer, you know that a game’s performance can be significantly enhanced if you install it on a solid-state drive (SSD) instead of a hard-disk drive (HDD). So, if you have an SSD and want to install a game to it, it’s important that you follow the installation process. First, check the game’s system requirements to make sure your system meets them.

    Then, make sure you have enough space on your SSD to install the game. If you don’t, consider freeing up some space or using an external hard drive. Once you’re ready to install, make sure you select the SSD as the installation location instead of the default HDD.

    This will ensure that the game runs optimally and you get the best performance. So, if you want to take your gaming experience to the next level, follow the installation process and install the game to your SSD.

    Optimizing Your SSD for Gaming

    If you’re a gamer, maximizing your computer’s performance is probably a priority for you. One important way to optimize your system for gaming is by installing your games onto an SSD (solid-state drive). So, how do you install a game onto your SSD? First, make sure your SSD is properly installed and recognized by your computer.

    Then, when you go to download or install a game, select your SSD as the destination location instead of your traditional hard drive. This will ensure that the game loads faster and runs smoother, as SSDs are known for their faster read and write speeds compared to traditional hard drives. Additionally, consider keeping your operating system and frequently used programs on the SSD as well, as this can further improve overall system performance.

    By utilizing your SSD properly, you can get the most out of your gaming experience.

    Enable AHCI Mode in BIOS

    If you’re a gamer looking to optimize your SSD for better performance, one highly recommended step is to enable AHCI mode in your computer’s BIOS. AHCI, or Advanced Host Controller Interface, is a newer standard for SATA connections that allows for faster data transfer rates and better support for features like hot-swapping. By using AHCI mode, your SSD can communicate with your computer more efficiently, leading to faster boot times, quicker file transfers, and overall snappier performance.

    Enabling AHCI mode is usually as simple as entering your BIOS settings and toggling a switch, but it’s always a good idea to double-check your motherboard’s documentation to make sure you do it correctly. So if you want to get the most out of your SSD and improve your gaming experience, be sure to enable AHCI mode in your BIOS!

    Set Power Plan to High Performance

    If you want to optimize your SSD for gaming, one of the easiest things you can do is set your power plan to high performance. When your computer is set to high performance mode, it uses more power but operates at a faster speed. This means that your SSD will be able to read and write data more quickly, resulting in faster load times and smoother gameplay.

    To set your power plan to high performance, go to your computer’s Control Panel and click on Power Options. From there, select High Performance and save your changes. Keep in mind that setting your computer to high performance mode may cause your battery to drain more quickly, so you may want to use this setting only when your computer is plugged in or when you’re gaming for extended periods of time.

    By optimizing your power plan, you can boost the performance of your SSD and enjoy a better gaming experience.

    Update SSD Firmware and Drivers

    It’s not enough to have a great gaming PC if you’re not optimizing your SSD for performance. One way to ensure maximum speed and stability is by updating your SSD firmware and drivers. This ensures that your SSD is running at its best and is fully compatible with your operating system, providing a smoother experience overall.

    Updating your firmware and drivers is also important for security reasons, as manufacturers often release updates that address potential vulnerabilities. So, whether you’re a casual gamer or an eSports professional, taking the time to optimize your SSD can make all the difference in your gaming experience. Don’t forget to use the main keyword “Optimizing Your SSD for Gaming” when maximizing your content visibility.

    Disable Windows Services and Features

    If you’re an avid PC gamer, you know how frustrating it can be when your games start lagging or crashing. One solution to this problem is to optimize your SSD for gaming by disabling unnecessary Windows services and features. By doing so, you can free up valuable system resources that your games need to run smoothly.

    Some of the services and features you may want to consider disabling include Windows Search, SuperFetch, and Windows Defender. These processes can consume a significant amount of system resources, leaving little for your games. Disabling them can help reduce loading times and improve overall performance.

    However, it’s important to note that disabling these services and features can also have negative consequences, such as increased security risks or decreased system stability. As always, it’s best to do your research and proceed with caution. With the proper precautions and research, optimizing your SSD for gaming can significantly improve your gaming experience.

    Conclusion: Enjoy Your Game on SSD

    Well, my dear friend, installing a game to your SSD is not rocket science. It’s as simple as pouring milk on your cereal. All you have to do is locate the installation file, select your SSD as the storage location, and click that magical ‘install’ button.

    Just like that, your game will be lightning fast and ready to play in no time. So go ahead, give your computer a deliciously speedy boost and enjoy your gaming adventures to the fullest.”

    FAQs

    What are the benefits of installing a game to an SSD?
    Installing a game to an SSD can significantly improve the game’s loading times and overall performance. This is because an SSD has faster read and write speeds than a traditional hard drive.

    Can I install a game to my SSD if it’s already installed on my hard drive?
    Yes, you can move a game from your hard drive to your SSD. Most digital game platforms have a “move” or “relocate” option that allows you to transfer the game files to a different drive.

    What size SSD do I need to install a game?
    The size of your SSD will depend on the size of the game you want to install. Most modern games can take up anywhere from 50GB to 100GB or more. It’s recommended to have at least a 500GB SSD if you plan on installing multiple games.

    How do I install a game to my SSD?
    The process of installing a game to your SSD will vary depending on the game and the platform you’re using. Generally, you’ll need to first select your SSD as the installation location during the game’s setup process. If you’ve already installed the game, you may need to move the game files over to your SSD manually. This can usually be done by copying and pasting the game’s folder from your hard drive to your SSD.

  • Uncovering the Truth: Do NVMe Drives Really Need Heatsinks for Optimal Performance?

    Uncovering the Truth: Do NVMe Drives Really Need Heatsinks for Optimal Performance?

    Have you ever wondered why NVMe drives tend to heat up quickly? Well, it’s not just your computer playing tricks on you. NVMe drives, despite their impressive read and write speeds, tend to generate a lot of heat. This heat is not only uncomfortable for your computer, but it can also cause serious damage to your drive, affecting its performance and leading to data loss.

    But why do these drives get so hot in the first place? The answer lies in their unique design. NVMe drives are built with flash memory chips that are tightly packed together, leading to minimal air circulation within the drive. This, combined with their high-speed data transfer rates, leads to a significant amount of heat being generated.

    To combat this issue, manufacturers have come up with some creative solutions to dissipate the heat. One common method is adding heat sinks to the drive, which help absorb and spread heat away from the chips. Another approach is using thermal paste to transfer heat from the chips to a heatsink.

    It’s important to note that while these solutions can be effective, they won’t entirely solve the problem of heat dissipating from an NVMe drive. Proper cooling of your PC is also crucial in ensuring your NVMe runs cool and at optimal performance. Installing additional case fans or using liquid cooling systems can help keep your system’s temperature in check.

    In conclusion, NVMe drives may generate a lot of heat, but with proper heat dissipation mechanisms in place, as well as good PC cooling, you can rest easy knowing your data is safe and your drive is performing at its best.

    What are NVMe Drives

    NVMe drives are a type of storage device that uses the Non-Volatile Memory Express (NVMe) interface to connect to your computer’s motherboard. They are designed to provide faster read and write speeds compared to SATA-based drives. The question of whether NVMe drives need heatsinks is a common one.

    The answer is that it depends on the specific drive and how it is being used. Some NVMe drives come with built-in heatsinks, while others do not. If you plan on using your NVMe drive for gaming or other high-demand applications, it might benefit from having a heatsink to prevent it from overheating.

    However, if you are using it for general storage or as a boot drive, a heatsink may not be necessary. Ultimately, the decision to use a heatsink will depend on the specific use case and the drive in question.

    Explanation of NVMe Drives and Their Use

    NVMe drives are storage devices that are designed to enhance the performance of your computer. NVMe stands for Non-Volatile Memory Express and these drives use high-speed channels to transfer data between the storage device and the computer. They are based on PCIe (Peripheral Component Interconnect Express) technology, which means they can access your computer’s CPU much faster than traditional SATA hard drives.

    NVMe drives have much faster read and write speeds, so they can help to reduce loading times for applications and boot times for your operating system. Overall, NVMe drives are an excellent option if you want to improve the speed and performance of your computer.

    do nvme drives need heatsinks

    Features of NVMe Drives

    NVMe Drives NVMe (Non-Volatile Memory Express) Drives are SSDs (Solid State Drives) that use the NVMe protocol to access and manage data. In simpler terms, NVMe Drives are faster and more efficient SSDs. They use PCIe (Peripheral Component Interconnect Express) lanes for data transfer, which results in faster read and write speeds.

    NVMe Drives are essential for tasks that require a high amount of data transfer like video editing, gaming, and data analysis. They come in both M.2 and U.

    2 form factors. M.2 NVMe Drives connect directly to the motherboard, whereas the U.

    2 variant uses a cable to connect to the motherboard. NVMe Drives are significantly faster than traditional SSDs and mechanical hard drives, making them a go-to solution for users who need maximum performance.

    Heat Production and Dissipation

    Do NVME drives need heatsinks? This is a common question asked by many computer enthusiasts and gamers. While it is not necessary to have a heatsink for NVME drives, it can be beneficial in terms of heat dissipation. The speed and performance of NVME drives generate a fair amount of heat, and a heatsink can help to disperse that heat efficiently.

    When a drive gets too hot, it can significantly affect its performance and lifespan, which is why it’s essential to maintain a stable temperature. A heatsink can absorb and dissipate the heat, ensuring that your drive stays cooler, and reducing the risk of performance degradation or failure. In summary, while it is not mandatory to have a heatsink for NVME drives, it can be a wise decision if you want to optimize the performance and lifespan of your drive.

    Heat Production in NVMe Drives

    NVMe drives are high-performance storage devices that have a reputation for generating a significant amount of heat. This is because they operate at faster speeds and have higher power consumption than traditional disk drives. The heat generated by NVMe drives can cause performance degradation and even damage to the drive over time if it is not properly dissipated.

    To combat this issue, NVMe drives incorporate various cooling mechanisms such as heatsinks, fans, and even liquid cooling systems. These cooling solutions help to dissipate the heat generated and maintain optimal performance. It’s important to consider this heat production in NVMe drives while selecting a drive and while setting up your system, especially if you plan to use them for intensive tasks such as gaming or video editing.

    Efficient Heat Dissipation Methods

    Heat dissipation is a crucial aspect in the design of electronic devices as heat often builds up in these devices due to the high levels of power consumed by them. Efficient heat dissipation methods are required to ensure that the electronic devices do not overheat, which may lead to a decline in their performance or even damage. One of the most common methods for efficient heat dissipation is using thermal pads or paste that are placed between the device and heatsink.

    Additionally, heat pipes are also becoming popular in the cooling of electronic devices as they can move heat from the source to a different location. The use of fans or liquid cooling systems can also be implemented for large electronic systems that produce a high degree of heat. Overall, it is essential to implement efficient heat dissipation methods to ensure that electronic devices perform optimally without the risk of damage due to overheating.

    Performance Impact of Heat Accumulation

    Heat accumulation can have a significant impact on the performance of various systems, especially those that rely on advanced computing technologies. In terms of heat production, electronic devices generate a considerable amount of heat during operation, which can lead to decreases in performance, malfunctions, and permanent damage if not effectively dissipated. Therefore, it is crucial for these systems to have efficient cooling mechanisms that can dissipate the heat generated by the devices.

    Heat accumulation can also affect the overall performance of larger systems, such as data centers, where the accumulation of heat can lead to hotspots and, eventually, system shutdowns. To avoid these issues, it is essential to develop efficient cooling systems that can dissipate heat effectively. By doing so, system performance can be maintained, and the lifespan of the system can be prolonged.

    Importance of Heatsinks for NVMe drives

    NVMe drives are known for their incredible speed and performance, but do they require heatsinks? The short answer is yes, especially if you’re using your NVMe drive for prolonged, intensive workloads. Without proper cooling, an NVMe drive can easily overheat, leading to throttling and ultimately damaging your hardware. A heatsink can help dissipate excess heat generated by the drive, preventing it from overheating and allowing it to perform at its best for extended periods.

    While some NVMe drives come with pre-installed heatsinks, others don’t, so it’s important to check and add one yourself if necessary. Investing in a good quality heatsink will not only improve performance and reliability but also extend the lifespan of your NVMe drive. So, yes, heatsinks are crucial for ensuring your NVMe drive runs at optimal speed and performance.

    When Heatsinks are Necessary

    Heatsinks are essential components for electronic devices that generate a significant amount of heat. When it comes to NVMe drives, heatsinks play a crucial role in maintaining optimal performance and avoiding thermal throttling. This is because NVMe drives are known for their high-speed data transfer rates and extensive use in gaming and other heavy-duty applications.

    The presence of a heatsink allows for the dissipation of heat from the NVMe drive, ensuring that it operates within safe temperature limits, preventing data loss or damage. A heatsink also helps to improve the lifespan of the NVMe drive by reducing the wear and tear that excessive heat can cause. When shopping for an NVMe drive, it’s essential to consider whether it comes with a heatsink or not, especially if you plan to use it for intense gaming or other demanding tasks.

    Investing in an NVMe drive that comes with a reliable and efficient heatsink is a smart choice that can significantly increase the lifespan and performance of your device.

    Drawbacks of Operating NVMe Drives without Heatsinks

    NVMe drives can provide incredible performance but do have some drawbacks when operating without heatsinks. The importance of heatsinks for these drives cannot be overstated as they provide essential cooling to prevent overheating. Without heatsinks, NVMe drives can struggle to maintain optimal performance, causing system crashes and data loss.

    This is because the drives generate a lot of heat, which can degrade their performance and lifespan over time. Additionally, operating NVMe drives without heatsinks also voids the warranty of many manufacturers. Therefore, it’s crucial to use heatsinks when operating these drives to help dissipate heat and maintain their performance and reliability.

    So, if you want to ensure the optimal performance of your NVMe drives, invest in heatsinks to keep them cool and performing at their best.

    Conclusion and Recommendations

    In conclusion, while NVMe drives may benefit from heatsinks in certain situations, such as extended high-intensity usage or if they are located in poorly ventilated areas, it ultimately depends on individual factors such as the type of drive, hardware configuration, and intended usage. So, like many things in life, the answer to the question “do NVMe drives need heatsinks?” is a resounding “it depends!” But whether you choose to add a heatsink or not, just remember – keep calm and stay cool!

    FAQs

    What is an NVMe drive?
    NVMe stands for Non-Volatile Memory Express. It is a high-speed data transfer protocol used in modern storage devices, such as solid-state drives (SSDs).

    What are the benefits of using NVMe drives?
    NVMe drives offer faster transfer speeds, lower latency, and improved overall system performance compared to older storage technologies like SATA.

    Do NVMe drives require a heatsink?
    While it is not strictly necessary to have a heatsink for an NVMe drive, it can help dissipate heat and prevent overheating during heavy use.

    What kind of heatsink should I use for my NVMe drive?
    There are a variety of heatsinks available, ranging from simple adhesive pads to more elaborate designs with fins and fans. Ultimately, the best choice will depend on your specific needs and preferences as well as the size and shape of your drive.